Dieser Inhalt ist in der von Ihnen ausgewählten Sprache nicht verfügbar.
Chapter 2. Setting up your environment
This tutorial walks you through the process of creating a Fuse Integration project. The project includes an initial route and a default CamelContext. A route is a chain of processors through which a message travels. A CamelContext is a single routing rule base that defines the context for configuring routes, and specifies the policies to use during message exchanges between endpoints (message sources and targets).
You must complete this tutorial before you follow any of the other tutorials.
Goals
In this tutorial you complete the following tasks:
- Create a Fuse Integration project
- Download test messages (XML files) for your project
- View the test messages
Before your begin
Before you can set up a Fuse Integration project, you must install Red Hat CodeReady Studio with Fuse Tooling. For information on how to install CodeReady Studio, go to the Red Hat customer portal for the installation guide for your platform.
Before you can follow the steps in the Chapter 10, Publishing your project to Red Hat Fuse tutorial, you must install Java 8.
Creating a Fuse Integration project
Open Red Hat CodeReady Studio.
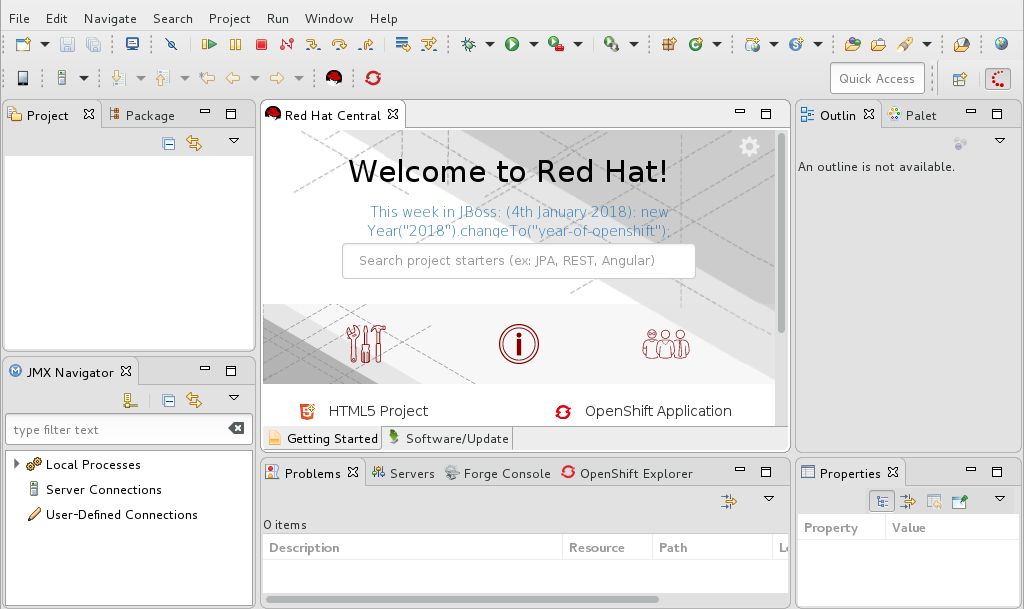
When you start CodeReady Studio for the first time, it opens in the JBoss perspective:
Otherwise, it opens in the perspective that you were using in your previous CodeReady Studio session.
From the menu , select File
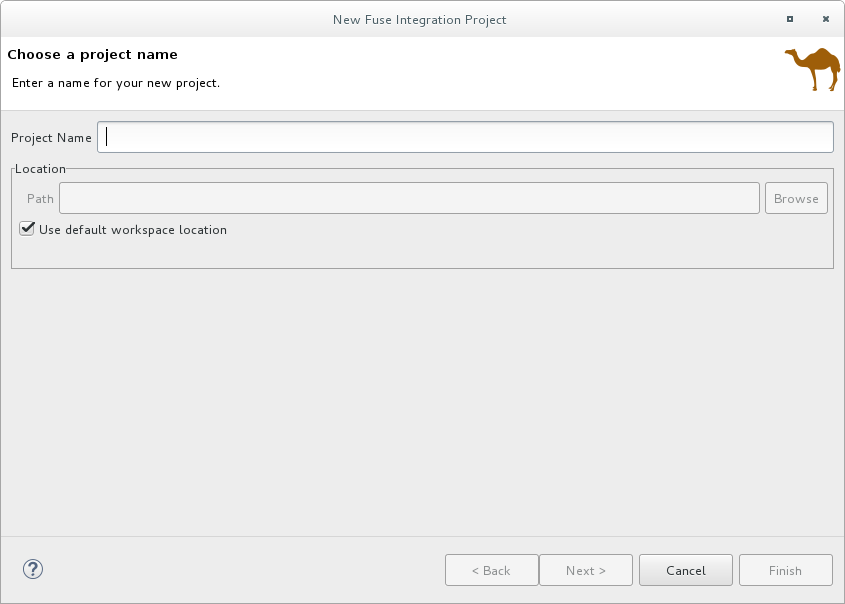
New Fuse Integration Project to open the New Fuse Integration Project wizard: In the Project Name field, enter
ZooOrderApp.Leave the Use default workspace location option checked.
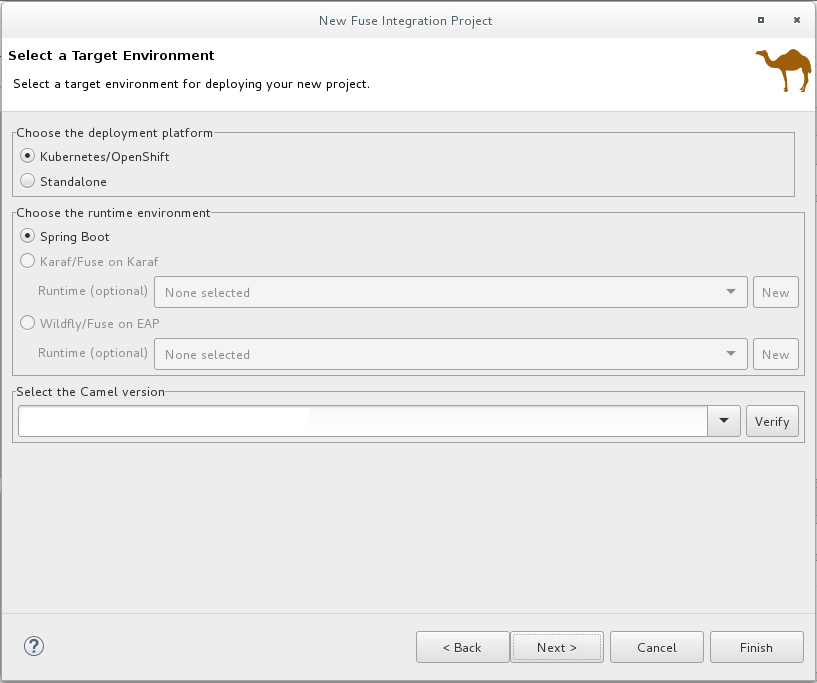
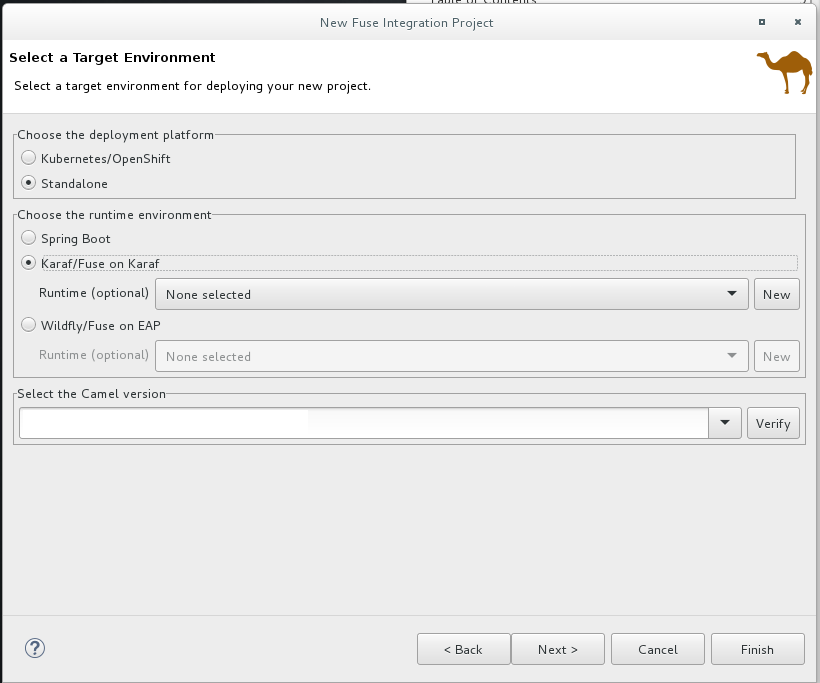
Click Next to open the Select a Target Runtime page:
- Select Standalone for the deployment platform.
Choose Karaf/Fuse on Karaf and accept None selected for the runtime.
NoteYou add the runtime later in the Chapter 10, Publishing your project to Red Hat Fuse tutorial .
Accept the default Apache Camel version.
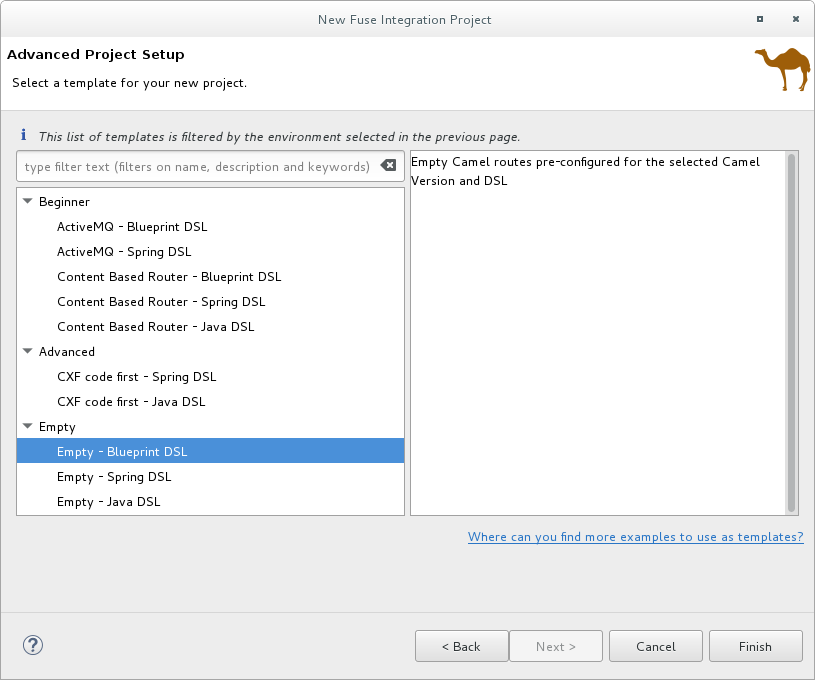
Click Next to open the Advanced Project Setup page, and then select the Empty - Blueprint DSL template:
Click Finish.
Fuse Tooling starts downloading-from the Maven repository-all of the files that it needs to build the project, and then it adds the new project to the Project Explorer view.
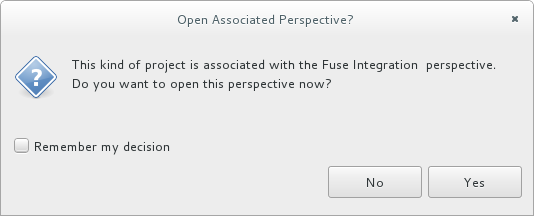
If CodeReady Studio is not already showing the Fuse Integration perspective, it asks whether you want to switch to it now:
Click Yes.
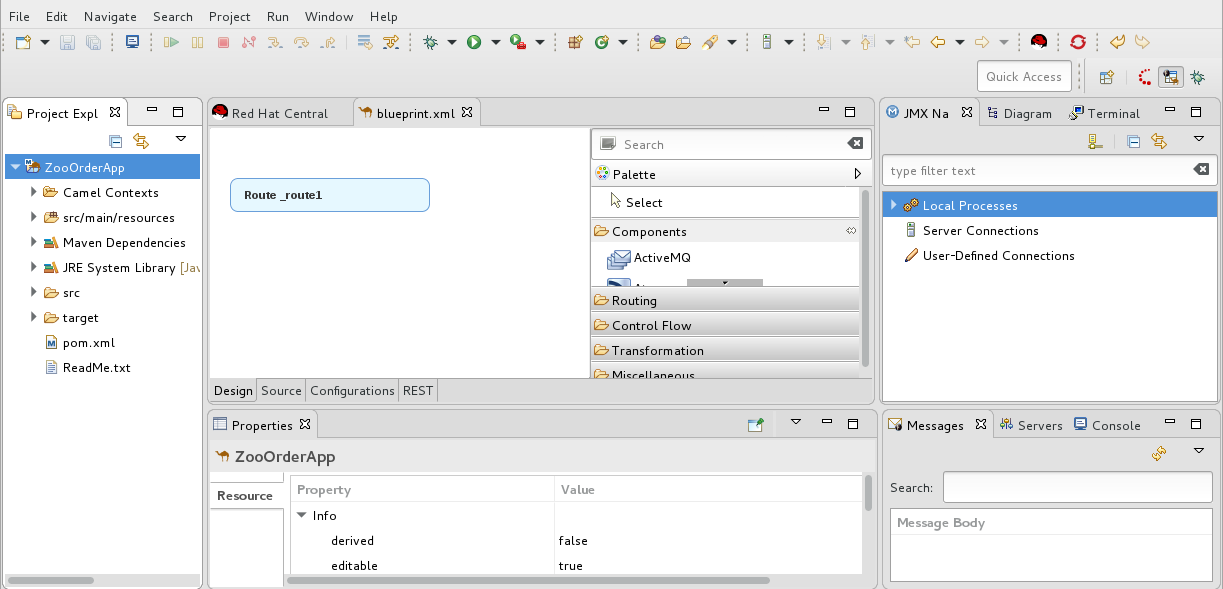
The new ZooOrderApp project opens in the Fuse Integration perspective:
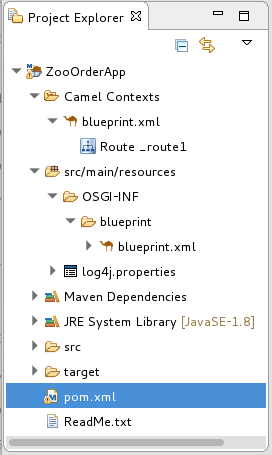
The ZooOrderApp project contains all of the files that you need to create and run routes, including:
ZooOrderApp/pom.xml— A Maven project file.-
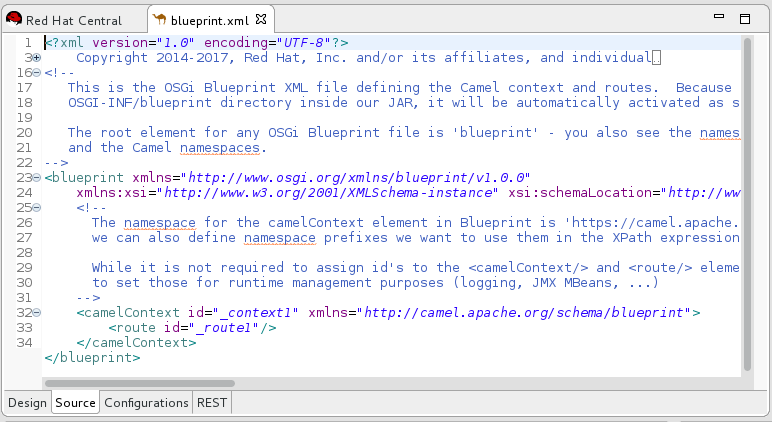
ZooOrderApp/src/main/resources/OSGI-INF/blueprint/blueprint.xml— A Blueprint XML file that contains a Camel routing context and an initial empty route.
To view the preliminary routing context, open the
blueprint.xmlfile in the Editor view, and then click the Source tab.
Setting component labels to display ID values
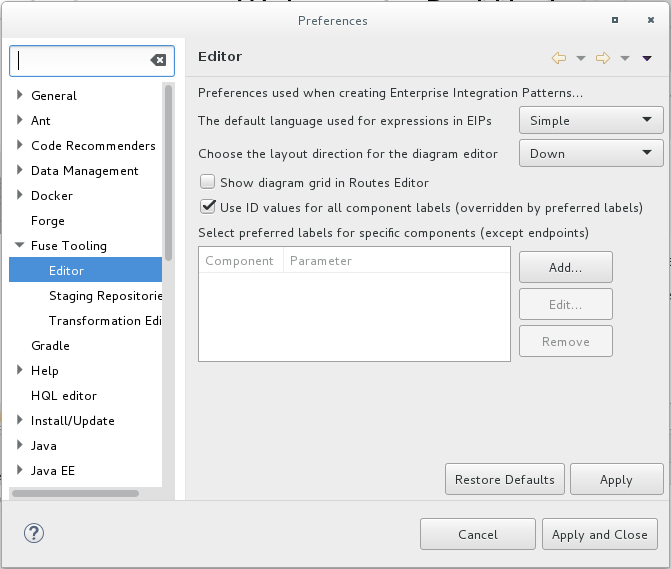
To ensure that the labels of the patterns and components that you place on the Design canvas are the same as the labels shown in the Tooling Tutorials:
Open the Editor preferences page:
-
On Linux and Windows machines, select Windows
Preferences Fuse Tooling Editor. -
On OS X, select CodeReady Studio
Preferences Fuse Tooling Editor.
-
On Linux and Windows machines, select Windows
Check the Use ID values for all component labels option.
- Click Apply and Close.
Downloading test messages for your project
Sample XML message files are provided so that you can test your ZooOrderApp project as you work through the Tooling Tutorials. The messages contain order information for zoo animals. For example, an order of five wombats for the Chicago zoo.
To download and copy the provided test messages (XML files) to your project:
In the CodeReady Studio Project Explorer view, create a folder to contain the test messages:
-
Right-click the
ZooOrderApp/srcfolder and then select NewFolder. The New Folder wizard opens. -
For Folder name, type
data. - Click Finish.
-
Right-click the
Click here to open a web browser to the location of the provided Tooling Tutorial resource
Fuse-tooling-tutorials-jbds-10.3.zipfile.Download the
Fuse-tooling-tutorials-jbds-10.3.zipfile to a convenient location that is external to the ZooOrderApp project’s workspace, and then unzip it. It contains two folders as described in Chapter 1, About the Fuse Tooling Tutorials.From the messages folder, copy the six XML files to your ZooOrderApp project’s
src/datafolder.NoteYou can safely ignore the
 on the XML files.
Viewing the test messages
Each XML message file contains an order from a zoo (a customer) for a quantity of animals. For example, the 'message1.xml' file contains an order from the Brooklyn Zoo for 12 wombats.
You can open any of the message XML files in the Editor view to examine the contents.
- In the Project Explorer view, right-click a message file.
- From the popup menu, select Open.
Click the Source tab.
The XML file opens in the Editor view.
For example, the contents of the
message1.xmlfile shows an order from the Bronx Zoo for 12 wombats:Copy to Clipboard Copied! Toggle word wrap Toggle overflow
You can safely ignore the
 on the first line of the newly created
 message1.xml file, which advises you that there are no grammar constraints (DTD or XML Schema) referenced by the document.
The following table provides a summary of the contents of all six message files:
| msg# | <name> | <city> | <country> | <animal> | <quantity> |
|---|---|---|---|---|---|
| 1 | Bronx Zoo | Bronx NY | USA | wombat | 12 |
| 2 | San Diego Zoo | San Diego CA | USA | giraffe | 3 |
| 3 | Sea Life Centre | Munich | Germany | penguin | 15 |
| 4 | Berlin Zoo | Berlin | Germany | emu | 6 |
| 5 | Philadelphia Zoo | Philapelphia PA | USA | giraffe | 2 |
| 6 | St Louis Zoo | St Loius MO | USA | penguin | 10 |
Next steps
Now that you have set up your CodeReady Studio project, you can continue to the Chapter 3, Defining a Route tutorial in which you define the route that processes the XML messages.
