Customizing
Customizing Red Hat Developer Hub
Abstract
Preface
Learn to customize Red Hat Developer Hub, such as templates, learning paths, tech docs, tech radar, home page, quick access cards, and appearance.
Chapter 1. Customizing your Red Hat Developer Hub title
You can change the default Red Hat Developer Hub display name.
Prerequisites
Procedure
In your custom
app-config.yamlfile, enter your Developer Hub instance display name, such as <Red Hat Developer Hub>.app-config.yamlexcerptapp: title: My custom Red Hat Developer Hub title
Chapter 2. Customizing your Red Hat Developer Hub base URL
You can change the default Red Hat Developer Hub base URL.
Prerequisites
- You know your desired Developer Hub external URL: https://<my_developer_hub_url>, and have configured DNS to point to your Red Hat OpenShift Container Platform cluster.
- Custom Developer Hub configuration.
Procedure
In your custom
app-config.yamlfile, enter your Developer Hub external URL, such as https://<my_developer_hub_url>.app-config.yamlexcerptapp: baseUrl: https://<my_developer_hub_url> backend: baseUrl: https://<my_developer_hub_url> cors: origin: https://<my_developer_hub_url>
Chapter 3. Customizing Red Hat Developer Hub backend secret
The default Red Hat Developer Hub configuration defines the Developer Hub backend secret for service to service authentication.
You can define your custom Developer Hub backend secret.
Prerequisites
- You added a custom Developer Hub application configuration, and have sufficient permissions to modify it.
Procedure
To define the Developer Hub backend secret, add to your custom
<my_product_secrets>.txtfile theBACKEND_SECRETenvironment variable with a base64 encoded string. Use a unique value for each Developer Hub instance.$ echo > <my_product_secrets>.txt "BACKEND_SECRET=$(node -p 'require("crypto").randomBytes(24).toString("base64")')"<my_product_secrets>.txtexampleBACKEND_SECRET=3E2/rIPuZNFCtYHoxVP8wjriffnN1q/zAdd your backend secret to your custom
app-config.yamlfile.app-config.yamlexcerpt defining the backend secretbackend: auth: externalAccess: - type: legacy options: subject: legacy-default-config secret: "${BACKEND_SECRET}"
Chapter 4. Configuring templates
Configure templates to create software components, and publish these components to different locations, such as the Red Hat Developer Hub software catalog, or Git repositories.
A template is a form composed of different UI fields that is defined in a YAML file. Templates include actions, which are steps that are executed in sequential order and can be executed conditionally.
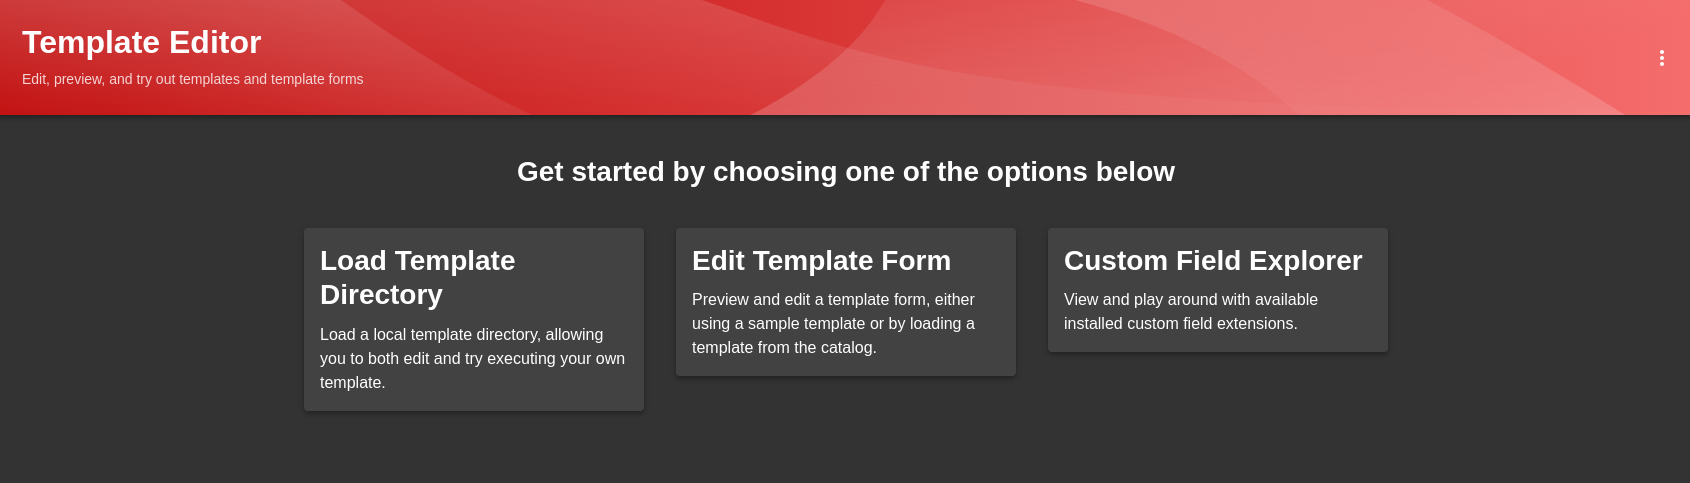
4.1. Creating a template by using the Template Editor
You can create a template by using the Template Editor.
Procedure
Access the Template Editor by using one of the following options:
-
Open the URL
https://<rhdh_url>/create/editfor your Red Hat Developer Hub instance. - Click Create… in the navigation menu of the Red Hat Developer Hub console, then click the overflow menu button and select Template editor.
-
Open the URL
- Click Edit Template Form.
- Optional: Modify the YAML definition for the parameters of your template. For more information about these parameters, see Section 4.2, “Creating a template as a YAML file”.
- In the Name * field, enter a unique name for your template.
- From the Owner drop-down menu, choose an owner for the template.
- Click Next.
In the Repository Location view, enter the following information about the hosted repository that you want to publish the template to:
Select an available Host from the drop-down menu.
NoteAvailable hosts are defined in the YAML parameters by the
allowedHostsfield:Example YAML
# ... ui:options: allowedHosts: - github.com # ...- In the Owner * field, enter an organization, user or project that the hosted repository belongs to.
- In the Repository * field, enter the name of the hosted repository.
- Click Review.
- Review the information for accuracy, then click Create.
Verification
- Click the Catalog tab in the navigation panel.
- In the Kind drop-down menu, select Template.
- Confirm that your template is shown in the list of existing templates.
4.2. Creating a template as a YAML file
You can create a template by defining a Template object as a YAML file.
The Template object describes the template and its metadata. It also contains required input variables and a list of actions that are executed by the scaffolding service.
Template object example
apiVersion: scaffolder.backstage.io/v1beta3
kind: Template
metadata:
  name: template-name
title: Example template
description: An example template for v1beta3 scaffolder.
spec:
  owner: backstage/techdocs-core
type: service
parameters:
    - title: Fill in some steps
      required:
        - name
      properties:
        name:
          title: Name
          type: string
          description: Unique name of the component
        owner:
          title: Owner
          type: string
          description: Owner of the component
    - title: Choose a location
      required:
        - repoUrl
      properties:
        repoUrl:
          title: Repository Location
          type: string
  steps:
    - id: fetch-base
      name: Fetch Base
      action: fetch:template
      # ...
  output:
    links:
      - title: Repository
        url: ${{ steps['publish'].output.remoteUrl }}
      - title: Open in catalog
        icon: catalog
        entityRef: ${{ steps['register'].output.entityRef }}
# ...- 1
- Specify a name for the template.
- 2
- Specify a title for the template. This is the title that is visible on the template tile in the Create… view.
- 3
- Specify a description for the template. This is the description that is visible on the template tile in the Create… view.
- 4
- Specify the ownership of the template. The
ownerfield provides information about who is responsible for maintaining or overseeing the template within the system or organization. In the provided example, theownerfield is set tobackstage/techdocs-core. This means that this template belongs to thetechdocs-coreproject in thebackstagenamespace. - 5
- Specify the component type. Any string value is accepted for this required field, but your organization should establish a proper taxonomy for these. Red Hat Developer Hub instances may read this field and behave differently depending on its value. For example, a
websitetype component may present tooling in the Red Hat Developer Hub interface that is specific to just websites.The following values are common for this field:
service- A backend service, typically exposing an API.
website- A website.
library- A software library, such as an npm module or a Java library.
- 6
- Use the
parameterssection to specify parameters for user input that are shown in a form view when a user creates a component by using the template in the Red Hat Developer Hub console. Eachparameterssubsection, defined by a title and properties, creates a new form page with that definition. - 7
- Use the
stepssection to specify steps that are executed in the backend. These steps must be defined by using a unique step ID, a name, and an action. You can view actions that are available on your Red Hat Developer Hub instance by visiting the URLhttps://<rhdh_url>/create/actions. - 8
- Use the
outputsection to specify the structure of output data that is created when the template is used. Theoutputsection, particularly thelinkssubsection, provides valuable references and URLs that users can utilize to access and interact with components that are created from the template. - 9
- Provides a reference or URL to the repository associated with the generated component.
- 10
- Provides a reference or URL that allows users to open the generated component in a catalog or directory where various components are listed.
4.3. Importing an existing template to Red Hat Developer Hub
You can add an existing template to your Red Hat Developer Hub instance by using the Catalog Processor.
Prerequisites
- You have created a directory or repository that contains at least one template YAML file.
- If you want to use a template that is stored in a repository such as GitHub or GitLab, you must configure a Red Hat Developer Hub integration for your provider.
Procedure
In the
app-config.yamlconfiguration file, modify thecatalog.rulessection to include a rule for templates, and configure thecatalog.locationssection to point to the template that you want to add, as shown in the following example:# ... catalog: rules: - allow: [Template]1 locations: - type: url2 target: https://<repository_url>/example-template.yaml3 # ...
Verification
- Click the Catalog tab in the navigation panel.
- In the Kind drop-down menu, select Template.
- Confirm that your template is shown in the list of existing templates.
Chapter 5. Customizing the Learning Paths in Red Hat Developer Hub
In Red Hat Developer Hub, you can configure Learning Paths by passing the data into the app-config.yaml file as a proxy. The base URL must include the /developer-hub/learning-paths proxy.
Due to the use of overlapping pathRewrites for both the learning-path and homepage quick access proxies, you must create the learning-paths configuration (^api/proxy/developer-hub/learning-paths) before you create the homepage configuration (^/api/proxy/developer-hub).
For more information about customizing the Home page in Red Hat Developer Hub, see Customizing the Home page in Red Hat Developer Hub.
You can provide data to the Learning Path from the following sources:
- JSON files hosted on GitHub or GitLab.
- A dedicated service that provides the Learning Path data in JSON format using an API.
5.1. Using hosted JSON files to provide data to the Learning Paths
Prerequisites
You have installed Red Hat Developer Hub by using either the Operator or Helm chart. For more information, see Installing Red Hat Developer Hub on OpenShift Container Platform.
Procedure
To access the data from the JSON files, complete the following step:
Add the following code to the
app-config.yamlfile:proxy: endpoints: '/developer-hub': target: https://raw.githubusercontent.com/ pathRewrite: '^/api/proxy/developer-hub/learning-paths': '/redhat-developer/rhdh/main/packages/app/public/learning-paths/data.json' '^/api/proxy/developer-hub/tech-radar': '/redhat-developer/rhdh/main/packages/app/public/tech-radar/data-default.json' '^/api/proxy/developer-hub': '/redhat-developer/rhdh/main/packages/app/public/homepage/data.json' changeOrigin: true secure: true
5.2. Using a dedicated service to provide data to the Learning Paths
When using a dedicated service, you can do the following:
- Use the same service to provide the data to all configurable Developer Hub pages or use a different service for each page.
-
Use the
red-hat-developer-hub-customization-provideras an example service, which provides data for both the Home and Tech Radar pages. Thered-hat-developer-hub-customization-providerservice provides the same data as default Developer Hub data. You can fork thered-hat-developer-hub-customization-providerservice repository from GitHub and modify it with your own data, if required. -
Deploy the
red-hat-developer-hub-customization-providerservice and the Developer Hub Helm chart on the same cluster.
Prerequisites
- You have installed the Red Hat Developer Hub using Helm chart. For more information, see Installing Red Hat Developer Hub on OpenShift Container Platform.
Procedure
To use a dedicated service to provide the Learning Path data, complete the following steps:
Add the following code to the
app-config.yamlfile:proxy: endpoints: # Other Proxies '/developer-hub/learning-paths': target: ${LEARNING_PATH_DATA_URL} changeOrigin: true # Change to "false" in case of using self hosted cluster with a self-signed certificate secure: truewhere the
LEARNING_PATH_DATA_URLis defined ashttp://<SERVICE_NAME>/learning-paths, for example,http://rhdh-customization-provider/learning-paths.NoteYou can define the
LEARNING_PATH_DATA_URLby adding it torhdh-secretsor by directly replacing it with its value in your custom ConfigMap.- Delete the Developer Hub pod to ensure that the new configurations are loaded correctly.
Chapter 6. Configuring TechDocs
Configure the Red Hat Developer Hub TechDocs plugin to create, find, and use documentation in a central location and in a standardized way. For example:
- Docs-like-code approach
- Write your technical documentation in Markdown files that are stored inside your project repository along with your code.
- Documentation site generation
- Use MkDocs to create a full-featured, Markdown-based, static HTML site for your documentation that is rendered centrally in Developer Hub.
- Documentation site metadata and integrations
- See additional metadata about the documentation site alongside the static documentation, such as the date of the last update, the site owner, top contributors, open GitHub issues, Slack support channels, and Stack Overflow Enterprise tags.
- Built-in navigation and search
- Find the information that you want from a document more quickly and easily.
- Add-ons
- Customize your TechDocs experience with Add-ons to address higher-order documentation needs.
The TechDocs plugin is preinstalled and enabled on a Developer Hub instance by default. You can disable or enable the TechDocs plugin, and change other parameters, by configuring the Red Hat Developer Hub Helm chart or the Red Hat Developer Hub Operator config map.
Red Hat Developer Hub includes a built-in TechDocs builder that generates static HTML documentation from your codebase. However, the default basic setup of the local builder is not intended for production.
You can use a CI/CD pipeline with the repository that has a dedicated job to generate docs for TechDocs. The generated static files are stored in OpenShift Data Foundation or in a cloud storage solution of your choice and published to a static HTML documentation site.
After you configure OpenShift Data Foundation to store the files that TechDocs generates, you can configure the TechDocs plugin to use the OpenShift Data Foundation for cloud storage.
6.1. Configuring storage for TechDocs files
The TechDocs publisher stores generated files in local storage or in cloud storage, such as OpenShift Data Foundation, Google GCS, AWS S3, or Azure Blob Storage.
6.1.1. Using OpenShift Data Foundation for file storage
You can configure OpenShift Data Foundation to store the files that TechDocs generates instead of relying on other cloud storage solutions.
OpenShift Data Foundation provides an ObjectBucketClaim custom resource (CR) that you can use to request an S3 compatible bucket backend. You must install the OpenShift Data Foundation Operator to use this feature.
Prerequisites
- An OpenShift Container Platform administrator has installed the OpenShift Data Foundation Operator in Red Hat OpenShift Container Platform. For more information, see OpenShift Container Platform - Installing Red Hat OpenShift Data Foundation Operator.
-
An OpenShift Container Platform administrator has created an OpenShift Data Foundation cluster and configured the
StorageSystemschema. For more information, see OpenShift Container Platform - Creating an OpenShift Data Foundation cluster.
Procedure
Create an
ObjectBucketClaimCR where the generated TechDocs files are stored. For example:apiVersion: objectbucket.io/v1alpha1 kind: ObjectBucketClaim metadata: name: <rhdh_bucket_claim_name> spec: generateBucketName: <rhdh_bucket_claim_name> storageClassName: openshift-storage.noobaa.ioNoteCreating the Developer Hub
ObjectBucketClaimCR automatically creates both the Developer HubObjectBucketClaimconfig map and secret. The config map and secret have the same name as theObjectBucketClaimCR.
After you create the ObjectBucketClaim CR, you can use the information stored in the config map and secret to make the information accessible to the Developer Hub container as environment variables. Depending on the method that you used to install Developer Hub, you add the access information to either the Red Hat Developer Hub Helm chart or Operator configuration.
6.1.2. Making object storage accessible to containers by using the Helm chart
Creating a ObjectBucketClaim custom resource (CR) automatically generates both the Developer Hub ObjectBucketClaim config map and secret. The config map and secret contain ObjectBucket access information. Adding the access information to the Helm chart configuration makes it accessible to the Developer Hub container by adding the following environment variables to the container:
-
BUCKET_NAME -
BUCKET_HOST -
BUCKET_PORT -
BUCKET_REGION -
BUCKET_SUBREGION -
AWS_ACCESS_KEY_ID -
AWS_SECRET_ACCESS_KEY
These variables are then used in the TechDocs plugin configuration.
Prerequisites
- You have installed Red Hat Developer Hub on OpenShift Container Platform using the Helm chart.
-
You have created an
ObjectBucketClaimCR for storing files generated by TechDocs. For more information see Using OpenShift Data Foundation for file storage
Procedure
In the
upstream.backstagekey in the Helm chart values, enter the name of the Developer HubObjectBucketClaimsecret as the value for theextraEnvVarsSecretsfield and theextraEnvVarsCMfield. For example:upstream: backstage: extraEnvVarsSecrets: - <rhdh_bucket_claim_name> extraEnvVarsCM: - <rhdh_bucket_claim_name>
6.1.2.1. Example TechDocs Plugin configuration for the Helm chart
The following example shows a Developer Hub Helm chart configuration for the TechDocs plugin:
global:
  dynamic:
    includes:
      - 'dynamic-plugins.default.yaml'
  plugins:
    - disabled: false
      package: ./dynamic-plugins/dist/backstage-plugin-techdocs-backend-dynamic
      pluginConfig:
        techdocs:
          builder: external
          generator:
            runIn: local
          publisher:
            awsS3:
              bucketName: '${BUCKET_NAME}'
              credentials:
                accessKeyId: '${AWS_ACCESS_KEY_ID}'
                secretAccessKey: '${AWS_SECRET_ACCESS_KEY}'
              endpoint: 'https://${BUCKET_HOST}'
              region: '${BUCKET_REGION}'
              s3ForcePathStyle: true
            type: awsS3
6.1.3. Making object storage accessible to containers by using the Operator
Creating a ObjectBucketClaim custom resource (CR) automatically generates both the Developer Hub ObjectBucketClaim config map and secret. The config map and secret contain ObjectBucket access information. Adding the access information to the Operator configuration makes it accessible to the Developer Hub container by adding the following environment variables to the container:
-
BUCKET_NAME -
BUCKET_HOST -
BUCKET_PORT -
BUCKET_REGION -
BUCKET_SUBREGION -
AWS_ACCESS_KEY_ID -
AWS_SECRET_ACCESS_KEY
These variables are then used in the TechDocs plugin configuration.
Prerequisites
- You have installed Red Hat Developer Hub on OpenShift Container Platform using the Operator.
-
You have created an
ObjectBucketClaimCR for storing files generated by TechDocs.
Procedure
In your
BackstageCR, enter the name of the Developer HubObjectBucketClaimconfig map as the value for thespec.application.extraEnvs.configMapsfield and enter the Developer HubObjectBucketClaimsecret name as the value for thespec.application.extraEnvs.secretsfield. For example:apiVersion: objectbucket.io/v1alpha1 kind: Backstage metadata: name: <name> spec: application: extraEnvs: configMaps: - name: <rhdh_bucket_claim_name> secrets: - name: <rhdh_bucket_claim_name>
6.1.3.1. Example TechDocs Plugin configuration for the Operator
The following example shows a Red Hat Developer Hub Operator config map configuration for the TechDocs plugin:
kind: ConfigMap
apiVersion: v1
metadata:
  name: dynamic-plugins-rhdh
data:
  dynamic-plugins.yaml: |
    includes:
      - dynamic-plugins.default.yaml
    plugins:
      - disabled: false
        package: ./dynamic-plugins/dist/backstage-plugin-techdocs-backend-dynamic
        pluginConfig:
          techdocs:
            builder: external
            generator:
              runIn: local
            publisher:
              awsS3:
                bucketName: '${BUCKET_NAME}'
                credentials:
                  accessKeyId: '${AWS_ACCESS_KEY_ID}'
                  secretAccessKey: '${AWS_SECRET_ACCESS_KEY}'
                endpoint: 'https://${BUCKET_HOST}'
                region: '${BUCKET_REGION}'
                s3ForcePathStyle: true
              type: awsS3
6.2. Configuring CI/CD to generate and publish TechDocs sites
TechDocs reads the static generated documentation files from a cloud storage bucket, such as OpenShift Data Foundation. The documentation site is generated on the CI/CD workflow associated with the repository containing the documentation files. You can generate docs on CI and publish to a cloud storage using the techdocs-cli CLI tool.
You can use the following example to create a script for TechDocs publication:
# Prepare
REPOSITORY_URL='https://github.com/org/repo'
git clone $REPOSITORY_URL
cd repo

# Install @techdocs/cli, mkdocs and mkdocs plugins
npm install -g @techdocs/cli
pip install "mkdocs-techdocs-core==1.*"

# Generate
techdocs-cli generate --no-docker

# Publish
techdocs-cli publish --publisher-type awsS3 --storage-name <bucket/container> --entity <Namespace/Kind/Name>
The TechDocs workflow starts the CI when a user makes changes in the repository containing the documentation files. You can configure the workflow to start only when files inside the docs/ directory or mkdocs.yml are changed.
6.2.1. Preparing your repository for CI
The first step on the CI is to clone your documentation source repository in a working directory.
Procedure
To clone your documentation source repository in a working directory, enter the following command:
git clone <https://path/to/docs-repository/>
6.2.2. Generating the TechDocs site
Procedure
To configure CI/CD to generate your techdocs, complete the following steps:
Install the
npxpackage to runtechdocs-cliusing the following command:npm install -g npxInstall the
techdocs-clitool using the following command:npm install -g @techdocs/cliInstall the
mkdocsplugins using the following command:pip install "mkdocs-techdocs-core==1.*"Generate your techdocs site using the following command:
npx @techdocs/cli generate --no-docker --source-dir <path_to_repo> --output-dir ./siteWhere
<path_to_repo>is the location in the file path that you used to clone your repository.
6.2.3. Publishing the TechDocs site
Procedure
To publish your techdocs site, complete the following steps:
- Set the necessary authentication environment variables for your cloud storage provider.
Publish your techdocs using the following command:
npx @techdocs/cli publish --publisher-type <awsS3|googleGcs> --storage-name <bucket/container> --entity <namespace/kind/name> --directory ./siteAdd a
.github/workflows/techdocs.ymlfile in your Software Template(s). For example:name: Publish TechDocs Site on: push: branches: [main] # You can even set it to run only when TechDocs related files are updated. # paths: # - "docs/**" # - "mkdocs.yml" jobs: publish-techdocs-site: runs-on: ubuntu-latest # The following secrets are required in your CI environment for publishing files to AWS S3. # e.g. You can use GitHub Organization secrets to set them for all existing and new repositories. env: TECHDOCS_S3_BUCKET_NAME: ${{ secrets.TECHDOCS_S3_BUCKET_NAME }} AWS_ACCESS_KEY_ID: ${{ secrets.AWS_ACCESS_KEY_ID }} AWS_SECRET_ACCESS_KEY: ${{ secrets.AWS_SECRET_ACCESS_KEY }} AWS_REGION: ${{ secrets.AWS_REGION }} ENTITY_NAMESPACE: 'default' ENTITY_KIND: 'Component' ENTITY_NAME: 'my-doc-entity' # In a Software template, Scaffolder will replace {{cookiecutter.component_id | jsonify}} # with the correct entity name. This is same as metadata.name in the entity's catalog-info.yaml # ENTITY_NAME: '{{ cookiecutter.component_id | jsonify }}' steps: - name: Checkout code uses: actions/checkout@v3 - uses: actions/setup-node@v3 - uses: actions/setup-python@v4 with: python-version: '3.9' - name: Install techdocs-cli run: sudo npm install -g @techdocs/cli - name: Install mkdocs and mkdocs plugins run: python -m pip install mkdocs-techdocs-core==1.* - name: Generate docs site run: techdocs-cli generate --no-docker --verbose - name: Publish docs site run: techdocs-cli publish --publisher-type awsS3 --storage-name $TECHDOCS_S3_BUCKET_NAME --entity $ENTITY_NAMESPACE/$ENTITY_KIND/$ENTITY_NAME
Chapter 7. Customizing the Tech Radar page in Red Hat Developer Hub
In Red Hat Developer Hub, the Tech Radar page is provided by the tech-radar dynamic plugin, which is disabled by default. For information about enabling dynamic plugins in Red Hat Developer Hub see Configuring plugins in Red Hat Developer Hub.
In Red Hat Developer Hub, you can configure Learning Paths by passing the data into the app-config.yaml file as a proxy. The base Tech Radar URL must include the /developer-hub/tech-radar proxy.
Due to the use of overlapping pathRewrites for both the tech-radar and homepage quick access proxies, you must create the tech-radar configuration (^api/proxy/developer-hub/tech-radar) before you create the homepage configuration (^/api/proxy/developer-hub).
For more information about customizing the Home page in Red Hat Developer Hub, see Customizing the Home page in Red Hat Developer Hub.
You can provide data to the Tech Radar page from the following sources:
- JSON files hosted on GitHub or GitLab.
- A dedicated service that provides the Tech Radar data in JSON format using an API.
7.1. Using hosted JSON files to provide data to the Tech Radar page
Prerequisites
- You have installed Red Hat Developer Hub by using either the Operator or Helm chart. For more information, see Installing Red Hat Developer Hub on OpenShift Container Platform.
-
You have specified the data sources for the Tech Radar plugin in the
integrationssection of theapp-config.yamlfile. For example, to configure GitHub as an integration, see Authenticating with GitHub.
Procedure
To access the data from the JSON files, complete the following step:
-
Enable the
./dynamic-plugins/dist/backstage-community-plugin-tech-radarand/dynamic-plugins/dist/backstage-community-plugin-tech-radar-backend-dynamicplugins. Add the following code to the
app-config.yamlfile:techRadar: url: ${TECH_RADAR_DATA_URL}1 - 1
TECH_RADAR_DATA_URLis the URL from which the JSON data is loaded.
7.2. Using a dedicated service to provide data to the Tech Radar page
When using a dedicated service, you can do the following:
- Use the same service to provide the data to all configurable Developer Hub pages or use a different service for each page.
-
Use the
red-hat-developer-hub-customization-provideras an example service, which provides data for both the Home and Tech Radar pages. Thered-hat-developer-hub-customization-providerservice provides the same data as default Developer Hub data. You can fork thered-hat-developer-hub-customization-providerservice repository from GitHub and modify it with your own data, if required. -
Deploy the
red-hat-developer-hub-customization-providerservice and the Developer Hub Helm chart on the same cluster.
Prerequisites
- You have installed the Red Hat Developer Hub using Helm chart. For more information, see Installing Red Hat Developer Hub on OpenShift Container Platform with the Helm chart.
Procedure
To use a separate service to provide the Tech Radar data, complete the following steps:
Add the dedicated service as an allowed host by adding the following code to the
app-config.yamlfile:backend: reading: allow: - host: 'hostname'Add the following to the
app-config.yamlfile:techRadar: url: ${TECH_RADAR_DATA_URL}1 - 1
TECH_RADAR_DATA_URLis the URL from which the JSON data is loaded.
Chapter 8. Customizing Red Hat Developer Hub appearance
The following default theme configurations are available for Red Hat Developer Hub:
- The Red Hat Developer Hub theme
- Default theme configurations to make your developer portal look like a standard Red Hat Developer Hub instance. For more information, see Section 8.7, “Default Red Hat Developer Hub theme”
- The Backstage theme
- Default theme configurations to make your developer portal look like a standard Backstage instance. For more information, see Section 8.8, “Default Backstage theme”
You can change or disable particular parameters in a default theme or create a fully customized theme by modifying the app-config-rhdh.yaml file. From the app-config-rhdh.yaml file, you can customize common theme components, including the following:
- Company name and logo
- Font color, size, and style of text in paragraphs, headings, headers, and buttons
- Header color, gradient, and shape
- Button color
- Navigation indicator color
You can also customize some components from the Developer Hub GUI, such as the theme mode (Light Theme, Dark Theme, or Auto).
8.1. Customizing the theme mode for your Developer Hub instance
In Developer Hub, theme configurations are used to change the look and feel of different UI components. So, you might notice changes in different UI components, such as buttons, tabs, sidebars, cards, and tables along with some changes in background color and font used on the RHDH pages.
You can choose one of the following theme modes for your Developer Hub instance:
- Light theme
- Dark theme
- Auto
The default theme mode is Auto, which automatically sets the light or dark theme based on your system preferences.
Prerequisites
- You are logged in to the Developer Hub web console.
Procedure
- From the Developer Hub web console, click Settings.
From the Appearance panel, click LIGHT THEME, DARK THEME, or AUTO to change the theme mode.

8.2. Customizing the branding logo of your Developer Hub instance
You can customize the branding logo of your Developer Hub instance by configuring the branding section in the app-config.yaml file, as shown in the following example:
app:
  branding:
    fullLogo: ${BASE64_EMBEDDED_FULL_LOGO}
iconLogo: ${BASE64_EMBEDDED_ICON_LOGO} where:
- 1
fullLogois the logo on the expanded (pinned) sidebar and expects a base64 encoded image.- 2
iconLogois the logo on the collapsed (unpinned) sidebar and expects a base64 encoded image.You can format the
BASE64_EMBEDDED_FULL_LOGOenvironment variable as follows:BASE64_EMBEDDED_FULL_LOGO: "data:_<media_type>_;base64,<base64_data>"The following example demonstrates how to customize the
BASE64_EMBEDDED_FULL_LOGOusing thedata:_<media_type>_;base64,<base64_data>format:SVGLOGOBASE64=$(base64 -i logo.svg) BASE64_EMBEDDED_FULL_LOGO="data:image/svg+xml;base64,$SVGLOGOBASE64"Replace
image/svg+xmlwith the correct media type for your image (for example,image/pngandimage/jpeg), and adjust the file extension accordingly. As a result, you can embed the logo directly without referencing an external file.
You can also customize the width of the branding logo by setting a value for the fullLogoWidth field in the branding section, as shown in the following example:
app:
  branding:
    fullLogoWidth: 110px
# ...- 1
- The default value for the logo width is
110px. The following units are supported:integer,px,em,rem, percentage.
8.4. Customizing the theme mode color palettes for your Developer Hub instance
You can customize the color palettes of the light and dark theme modes in your Developer Hub instance by configuring the light.palette and dark.palette parameters in the branding.theme section of the app-config.yaml file, as shown in the following example:
app:
  branding:
    theme:
      light:
        palette:
          primary:
            main: <light_primary_color>
          navigation:
            indicator: <light_indicator_color>
        pageTheme:
          default:
            backgroundColor: [<light_background_color_1>, <light_background_color_2>]
      dark:
        palette:
          primary:
            main: <dark_primary_color>
          navigation:
            indicator: <dark_indicator_color>
        pageTheme:
          default:
            backgroundColor: [<dark_background_color_1>, <dark_background_color_2>]
# ...- 1
- The main primary color for the light color palette, for example,
#fffffforwhite - 2
- The color of the navigation indicator for the light color palette, which is a vertical bar that indicates the selected tab in the navigation panel, for example,
#FF0000orred - 3
- The background color for the default page theme for the light color palette, for example,
#fffffforwhite - 4
- The main primary color for the dark color palette, for example,
#000000orblack - 5
- The color of the navigation indicator for the dark color palette, which is a vertical bar that indicates the selected tab in the navigation panel, for example,
#FF0000orred - 6
- The background color for the default page theme for the dark color palette, for example,
#000000orblack
Additional resources
8.5. Customizing the page theme header for your Developer Hub instance
You can customize the header color for the light and dark theme modes in your Developer Hub instance by modifying the branding.theme section of the app-config.yaml file. You can also customize the page headers for additional Developer Hub pages, such as the Home, Catalog, and APIs pages.
app:
  branding:
    theme:
      light:
        palette: {}
        pageTheme:
          default:
backgroundColor: "<default_light_background_color>"
fontColor: "<default_light_font_color>"
shape: none
apis:
            backgroundColor: "<apis_light_background_color>"
            fontColor: "<apis_light_font_color>"
            shape: none
      dark:
        palette: {}
        pageTheme:
          default:
            backgroundColor: "<default_dark_background_color>"
            fontColor: "<default_dark_font_color>"
            shape: none
# ...- 1
- The theme mode, for example,
lightordark - 2
- The
yamlheader for the default page theme configuration - 3
- The color of the page header background, for example,
#fffffforwhite - 4
- The color of the text in the page header, for example,
#000000orblack - 5
- The pattern on the page header, for example,
wave,round, ornone - 6
- The
yamlheader for a specific page theme configuration, for example,apis,home
8.6. Customizing the font for your Developer Hub instance
You can configure the typography section of the app-config.yaml file to change the default font family and size of the page text, as well as the font family and size of each heading level, as shown in the following example:
app:
  branding:
    theme:
      light:
        typography:
          fontFamily: "Times New Roman"
          htmlFontSize: 11 # smaller is bigger
          h1:
            fontFamily: "Times New Roman"
            fontSize: 40
          h2:
            fontFamily: "Times New Roman"
            fontSize: 30
          h3:
            fontFamily: "Times New Roman"
            fontSize: 30
          h4:
            fontFamily: "Times New Roman"
            fontSize: 30
          h5:
            fontFamily: "Times New Roman"
            fontSize: 30
          h6:
            fontFamily: "Times New Roman"
            fontSize: 30
      dark:
        typography:
          fontFamily: "Times New Roman"
          htmlFontSize: 11 # smaller is bigger
          h1:
            fontFamily: "Times New Roman"
            fontSize: 40
          h2:
            fontFamily: "Times New Roman"
            fontSize: 30
          h3:
            fontFamily: "Times New Roman"
            fontSize: 30
          h4:
            fontFamily: "Times New Roman"
            fontSize: 30
          h5:
            fontFamily: "Times New Roman"
            fontSize: 30
          h6:
            fontFamily: "Times New Roman"
            fontSize: 30
# ...
8.7. Default Red Hat Developer Hub theme
You can use the default Red Hat Developer Hub theme configurations to make your Developer Hub instance look like a standard Red Hat Developer Hub instance. You can also modify the app-config.yaml file to customize or disable particular parameters.
8.7.1. Default Red Hat Developer Hub theme color palette
The app-config.yaml file uses the following configurations for the default Red Hat Developer Hub color palette:
app:
  branding:
    theme:
      light:
        variant: "rhdh"
        mode: "light"
        palette:
          background:
            default: "#F8F8F8"
            paper: "#FFFFFF"
          banner:
            closeButtonColor: "#FFFFFF"
            error: "#E22134"
            info: "#2E77D0"
            link: "#000000"
            text: "#FFFFFF"
            warning: "#FF9800"
          border: "#E6E6E6"
          bursts:
            backgroundColor:
              default: "#7C3699"
            fontColor: "#FEFEFE"
            gradient:
              linear: "linear-gradient(-137deg, #4BB8A5 0%, #187656 100%)"
            slackChannelText: "#ddd"
          errorBackground: "#FFEBEE"
          errorText: "#CA001B"
          gold: "#FFD600"
          highlight: "#FFFBCC"
          infoBackground: "#ebf5ff"
          infoText: "#004e8a"
          link: "#0A6EBE"
          linkHover: "#2196F3"
          mode: "light"
          navigation:
            background: "#222427"
            indicator: "#0066CC"
            color: "#ffffff"
            selectedColor: "#ffffff"
            navItem:
              hoverBackground: "#3c3f42"
            submenu:
              background: "#222427"
          pinSidebarButton:
            background: "#BDBDBD"
            icon: "#181818"
          primary:
            main: "#0066CC"
          secondary:
            main: "#8476D1"
          status:
            aborted: "#757575"
            error: "#E22134"
            ok: "#1DB954"
            pending: "#FFED51"
            running: "#1F5493"
            warning: "#FF9800"
          tabbar:
            indicator: "#9BF0E1"
          textContrast: "#000000"
          textSubtle: "#6E6E6E"
          textVerySubtle: "#DDD"
          warningBackground: "#F59B23"
          warningText: "#000000"
          text:
            primary: "#151515"
            secondary: "#757575"
          rhdh:
            general:
              disabledBackground: "#D2D2D2"
              disabled: "#6A6E73"
              searchBarBorderColor: "#E4E4E4"
              formControlBackgroundColor: "#FFF"
              mainSectionBackgroundColor: "#FFF"
              headerBottomBorderColor: "#C7C7C7"
              cardBackgroundColor: "#FFF"
              sidebarBackgroundColor: "#212427"
              cardBorderColor: "#C7C7C7"
              tableTitleColor: "#181818"
              tableSubtitleColor: "#616161"
              tableColumnTitleColor: "#151515"
              tableRowHover: "#F5F5F5"
              tableBorderColor: "#E0E0E0"
              tableBackgroundColor: "#FFF"
              tabsBottomBorderColor: "#D2D2D2"
              contrastText: "#FFF"
            primary:
              main: "#0066CC"
              focusVisibleBorder: "#0066CC"
            secondary:
              main: "#8476D1"
              focusVisibleBorder: "#8476D1"
            cards:
              headerTextColor: "#151515"
              headerBackgroundColor: "#FFF"
              headerBackgroundImage: "none"

      dark:
        variant: "rhdh"
        mode: "dark"
        palette:
          background:
            default: "#333333"
            paper: "#424242"
          banner:
            closeButtonColor: "#FFFFFF"
            error: "#E22134"
            info: "#2E77D0"
            link: "#000000"
            text: "#FFFFFF"
            warning: "#FF9800"
          border: "#E6E6E6"
          bursts:
            backgroundColor:
              default: "#7C3699"
            fontColor: "#FEFEFE"
            gradient:
              linear: "linear-gradient(-137deg, #4BB8A5 0%, #187656 100%)"
            slackChannelText: "#ddd"
          errorBackground: "#FFEBEE"
          errorText: "#CA001B"
          gold: "#FFD600"
          highlight: "#FFFBCC"
          infoBackground: "#ebf5ff"
          infoText: "#004e8a"
          link: "#9CC9FF"
          linkHover: "#82BAFD"
          mode: "dark"
          navigation:
            background: "#0f1214"
            indicator: "#0066CC"
            color: "#ffffff"
            selectedColor: "#ffffff"
            navItem:
              hoverBackground: "#3c3f42"
            submenu:
              background: "#0f1214"
          pinSidebarButton:
            background: "#BDBDBD"
            icon: "#404040"
          primary:
            main: "#1FA7F8"
          secondary:
            main: "#B2A3FF"
          status:
            aborted: "#9E9E9E"
            error: "#F84C55"
            ok: "#71CF88"
            pending: "#FEF071"
            running: "#3488E3"
            warning: "#FFB84D"
          tabbar:
            indicator: "#9BF0E1"
          textContrast: "#FFFFFF"
          textSubtle: "#CCCCCC"
          textVerySubtle: "#727272"
          warningBackground: "#F59B23"
          warningText: "#000000"

          rhdh:
            general:
              disabledBackground: "#444548"
              disabled: "#AAABAC"
              searchBarBorderColor: "#57585a"
              formControlBackgroundColor: "#36373A"
              mainSectionBackgroundColor: "#0f1214"
              headerBottomBorderColor: "#A3A3A3"
              cardBackgroundColor: "#292929"
              sidebarBackgroundColor: "#1b1d21"
              cardBorderColor: "#A3A3A3"
              tableTitleColor: "#E0E0E0"
              tableSubtitleColor: "#E0E0E0"
              tableColumnTitleColor: "#E0E0E0"
              tableRowHover: "#0f1214"
              tableBorderColor: "#515151"
              tableBackgroundColor: "#1b1d21"
              tabsBottomBorderColor: "#444548"
              contrastText: "#FFF"
            primary:
              main: "#1FA7F8"
              focusVisibleBorder: "#ADD6FF"
            secondary:
              main: "#B2A3FF"
              focusVisibleBorder: "#D0C7FF"
            cards:
              headerTextColor: "#FFF"
              headerBackgroundColor: "#0f1214"
              headerBackgroundImage: "none"
Alternatively, you can use the following variant and mode values in the app-config.yaml file to apply the previous default configuration:
app:
  branding:
    theme:
      light:
        variant: "rhdh"
        mode: "light"
      dark:
        variant: "rhdh"
        mode: "dark"
8.7.2. Default Red Hat Developer Hub page themes
The default Developer Hub header color is white in light mode and black in dark mode, as shown in the following app-config.yaml file configuration:
app:
  branding:
    theme:
      light:
        palette: {}
        defaultPageTheme: default
        pageTheme:
          default:
            backgroundColor: "#ffffff"
      dark:
        palette: {}
        defaultPageTheme: default
        pageTheme:
          default:
            backgroundColor: "#0f1214"
8.8. Default Backstage theme
You can use the default Backstage theme configurations to make your Developer Hub instance look like a standard Backstage instance. You can also modify the app-config.yaml file to customize or disable particular parameters.
8.8.1. Default Backstage theme color palette
The app-config.yaml file uses the following configurations for the default Backstage color palette:
app:
  branding:
    theme:
      light:
        variant: "backstage"
        mode: "light"
        palette:
          background:
            default: "#F8F8F8"
            paper: "#FFFFFF"
          banner:
            closeButtonColor: "#FFFFFF"
            error: "#E22134"
            info: "#2E77D0"
            link: "#000000"
            text: "#FFFFFF"
            warning: "#FF9800"
          border: "#E6E6E6"
          bursts:
            backgroundColor:
              default: "#7C3699"
            fontColor: "#FEFEFE"
            gradient:
              linear: "linear-gradient(-137deg, #4BB8A5 0%, #187656 100%)"
            slackChannelText: "#ddd"
          errorBackground: "#FFEBEE"
          errorText: "#CA001B"
          gold: "#FFD600"
          highlight: "#FFFBCC"
          infoBackground: "#ebf5ff"
          infoText: "#004e8a"
          link: "#0A6EBE"
          linkHover: "#2196F3"
          navigation:
            background: "#171717"
            color: "#b5b5b5"
            indicator: "#9BF0E1"
            navItem:
              hoverBackground: "#404040"
            selectedColor: "#FFF"
            submenu:
              background: "#404040"
          pinSidebarButton:
            background: "#BDBDBD"
            icon: "#181818"
          primary:
            main: "#1F5493"
          status:
            aborted: "#757575"
            error: "#E22134"
            ok: "#1DB954"
            pending: "#FFED51"
            running: "#1F5493"
            warning: "#FF9800"
          tabbar:
            indicator: "#9BF0E1"
          textContrast: "#000000"
          textSubtle: "#6E6E6E"
          textVerySubtle: "#DDD"
          warningBackground: "#F59B23"
          warningText: "#000000"

      dark:
        variant: "backstage"
        mode: "dark"
        palette:
          background:
            default: "#333333"
            paper: "#424242"
          banner:
            closeButtonColor: "#FFFFFF"
            error: "#E22134"
            info: "#2E77D0"
            link: "#000000"
            text: "#FFFFFF"
            warning: "#FF9800"
          border: "#E6E6E6"
          bursts:
            backgroundColor:
              default: "#7C3699"
            fontColor: "#FEFEFE"
            gradient:
              linear: "linear-gradient(-137deg, #4BB8A5 0%, #187656 100%)"
            slackChannelText: "#ddd"
          errorBackground: "#FFEBEE"
          errorText: "#CA001B"
          gold: "#FFD600"
          highlight: "#FFFBCC"
          infoBackground: "#ebf5ff"
          infoText: "#004e8a"
          link: "#9CC9FF"
          linkHover: "#82BAFD"
          mode: "dark"
          navigation:
            background: "#424242"
            color: "#b5b5b5"
            indicator: "#9BF0E1"
            navItem:
              hoverBackground: "#404040"
            selectedColor: "#FFF"
            submenu:
              background: "#404040"
          pinSidebarButton:
            background: "#BDBDBD"
            icon: "#404040"
          primary:
            dark: "#82BAFD"
            main: "#9CC9FF"
          secondary:
            main: "#FF88B2"
          status:
            aborted: "#9E9E9E"
            error: "#F84C55"
            ok: "#71CF88"
            pending: "#FEF071"
            running: "#3488E3"
            warning: "#FFB84D"
          tabbar:
            indicator: "#9BF0E1"
          textContrast: "#FFFFFF"
          textSubtle: "#CCCCCC"
          textVerySubtle: "#727272"
          warningBackground: "#F59B23"
          warningText: "#000000"
Alternatively, you can use the following variant and mode values in the app-config.yaml file to apply the previous default configuration:
app:
  branding:
    theme:
      light:
        variant: "backstage"
        mode: "light"
      dark:
        variant: "backstage"
        mode: "dark"
8.8.2. Default Backstage page themes
The default Backstage header color is white in light mode and black in dark mode, as shown in the following app-config.yaml file configuration:
app:
  branding:
    theme:
      light:
        palette: {}
        defaultPageTheme: default
        pageTheme:
          default:
            backgroundColor: ['#005B4B'] # teal
            fontColor: '#ffffff'
            shape: wave
          documentation:
            backgroundColor: ['#C8077A', '#C2297D'] # pinkSea
            fontColor: '#ffffff'
            shape: wave2
          tool:
            backgroundColor: ['#8912CA', '#3E00EA'] # purpleSky
            fontColor: '#ffffff'
            shape: round
          service:
            backgroundColor: ['#006D8F', '#0049A1'] # marineBlue
            fontColor: '#ffffff'
            shape: wave
          website:
            backgroundColor: ['#0027AF', '#270094'] # veryBlue
            fontColor: '#ffffff'
            shape: wave
          library:
            backgroundColor: ['#98002B', '#8D1134'] # rubyRed
            fontColor: '#ffffff'
            shape: wave
          other:
            backgroundColor: ['#171717', '#383838'] # darkGrey
            fontColor: '#ffffff'
            shape: wave
          app:
            backgroundColor: ['#BE2200', '#A41D00'] # toastyOrange
            fontColor: '#ffffff'
            shape: shapes.wave
          apis:
            backgroundColor: ['#005B4B'] # teal
            fontColor: '#ffffff'
            shape: wave2
          card:
            backgroundColor: ['#4BB8A5', '#187656'] # greens
            fontColor: '#ffffff'
            shape: wave

      dark:
        palette: {}
        defaultPageTheme: default
        pageTheme:
          default:
            backgroundColor: ['#005B4B'] # teal
            fontColor: '#ffffff'
            shape: wave
          documentation:
            backgroundColor: ['#C8077A', '#C2297D'] # pinkSea
            fontColor: '#ffffff'
            shape: wave2
          tool:
            backgroundColor: ['#8912CA', '#3E00EA'] # purpleSky
            fontColor: '#ffffff'
            shape: round
          service:
            backgroundColor: ['#006D8F', '#0049A1'] # marineBlue
            fontColor: '#ffffff'
            shape: wave
          website:
            backgroundColor: ['#0027AF', '#270094'] # veryBlue
            fontColor: '#ffffff'
            shape: wave
          library:
            backgroundColor: ['#98002B', '#8D1134'] # rubyRed
            fontColor: '#ffffff'
            shape: wave
          other:
            backgroundColor: ['#171717', '#383838'] # darkGrey
            fontColor: '#ffffff'
            shape: wave
          app:
            backgroundColor: ['#BE2200', '#A41D00'] # toastyOrange
            fontColor: '#ffffff'
            shape: shapes.wave
          apis:
            backgroundColor: ['#005B4B'] # teal
            fontColor: '#ffffff'
            shape: wave2
          card:
            backgroundColor: ['#4BB8A5', '#187656'] # greens
            fontColor: '#ffffff'
            shape: wave
8.9. Loading a custom Developer Hub theme by using a dynamic plugin
You can load a custom Developer Hub theme from a dynamic plugin.
Procedure
Export a theme provider function in your dynamic plugin, for example:
Sample
myTheme.tsfragmentimport { lightTheme } from './lightTheme'; // some custom theme import { UnifiedThemeProvider } from '@backstage/theme'; export const lightThemeProvider = ({ children }: { children: ReactNode }) => ( <UnifiedThemeProvider theme={lightTheme} children={children} /> );For more information about creating a custom theme, see Backstage documentation - Creating a Custom Theme.
Configure Developer Hub to load the theme in the UI by using the
themesconfiguration field:app-config.yamlfragmentdynamicPlugins: frontend: example.my-custom-theme-plugin: themes: - id: light1 title: Light variant: light icon: someIconReference importName: lightThemeProvider- 1
- Set your theme ID by specifying the desired value. Optionally, override the default Developer Hub themes by using the following ID values:
lightto replace the default light theme, ordarkto replace the default dark theme.
Verification
- The theme is available in the Developer Hub Settings page.
8.10. Custom component options for your Developer Hub instance
There are two component variants that you can use to customize various components of your Developer Hub theme:
- Patternfly
- MUI
In addition to assigning a component variant to each parameter in the light or dark theme mode configurations, you can toggle the rippleEffect on or off.
The following code shows the options that you can use in the app-config.yaml file to configure the theme components for your Developer Hub instance:
app:
  branding:
    theme:
      light:
        options:
          rippleEffect: off / on
          paper: patternfly / mui
          buttons: patternfly / mui
          inputs: patternfly / mui
          accordions: patternfly / mui
          sidebars: patternfly / mui
          pages: patternfly / mui
          headers: patternfly / mui
          toolbars: patternfly / mui
          dialogs: patternfly / mui
          cards: patternfly / mui
          tables: patternfly / mui
          tabs: patternfly / mui
      dark:
        options:
          rippleEffect: off / on
          paper: patternfly / mui
          buttons: patternfly / mui
          inputs: patternfly / mui
          accordions: patternfly / mui
          sidebars: patternfly / mui
          pages: patternfly / mui
          headers: patternfly / mui
          toolbars: patternfly / mui
          dialogs: patternfly / mui
          cards: patternfly / mui
          tables: patternfly / mui
          tabs: patternfly / mui
Chapter 9. Customizing the Home page
When using the app-config, you can do the following:
- Customize and extend the default Home page layout with additional cards that appear based on the plugins you have installed and enabled.
- Change quick access links.
Add, reorganize, and remove the following available cards:
- Search bar
- Quick access
- Headline
- Markdown
- Placeholder
- Catalog starred entities
- Featured docs
9.1. Customizing the Home page cards
Administrators can change the fixed height of cards that are in a 12-column grid.
The default Home page is as shown in the following app-config.yaml file configuration:
dynamicPlugins:
  frontend:
    red-hat-developer-hub.backstage-plugin-dynamic-home-page:
      dynamicRoutes:
        - path: /
          importName: DynamicHomePage
      mountPoints:
        - mountPoint: home.page/cards
          importName: SearchBar
          config:
            layouts:
              xl: { w: 10, h: 1, x: 1 }
              lg: { w: 10, h: 1, x: 1 }
              md: { w: 10, h: 1, x: 1 }
              sm: { w: 10, h: 1, x: 1 }
              xs: { w: 12, h: 1 }
              xxs: { w: 12, h: 1 }
        - mountPoint: home.page/cards
          importName: QuickAccessCard
          config:
            layouts:
              xl: { w: 7, h: 8 }
              lg: { w: 7, h: 8 }
              md: { w: 7, h: 8 }
              sm: { w: 12, h: 8 }
              xs: { w: 12, h: 8 }
              xxs: { w: 12, h: 8 }
        - mountPoint: home.page/cards
          importName: CatalogStarredEntitiesCard
          config:
            layouts:
              xl: { w: 5, h: 4, x: 7 }
              lg: { w: 5, h: 4, x: 7 }
              md: { w: 5, h: 4, x: 7 }
              sm: { w: 12, h: 4 }
              xs: { w: 12, h: 4 }
              xxs: { w: 12, h: 4 }
Prerequisites
-
You have administrative access and can modify the
app-config.yamlfile for dynamic plugin configurations.
Procedure
Configure different cards for your Home page in Red Hat Developer Hub as follows:
- Search
dynamicPlugins:
  frontend:
    red-hat-developer-hub.backstage-plugin-dynamic-home-page:
      mountPoints:
        - mountPoint: home.page/cards
          importName: SearchBar
          config:
            layouts:
              xl: { w: 10, h: 1, x: 1 }
              lg: { w: 10, h: 1, x: 1 }
              md: { w: 10, h: 1, x: 1 }
              sm: { w: 10, h: 1, x: 1 }
              xs: { w: 12, h: 1 }
              xxs: { w: 12, h: 1 }
Expand Table 9.1. Available props Prop Default Description path/searchOverride the linked search path if needed
queryParamqueryOverride the search query parameter name if needed
- Quick access
dynamicPlugins:
  frontend:
    red-hat-developer-hub.backstage-plugin-dynamic-home-page:
      mountPoints:
        - mountPoint: home.page/cards
          importName: QuickAccessCard
          config:
            layouts:
              xl: { h: 8 }
              lg: { h: 8 }
              md: { h: 8 }
              sm: { h: 8 }
              xs: { h: 8 }
              xxs: { h: 8 }
Expand Table 9.2. Available props Prop Default Description titleQuick AccessOverride the linked search path if needed
pathnone
Override the search query parameter name if needed
- Headline
dynamicPlugins:
  frontend:
    red-hat-developer-hub.backstage-plugin-dynamic-home-page:
      mountPoints:
        - mountPoint: home.page/cards
          importName: Headline
          config:
            layouts:
              xl: { h: 1 }
              lg: { h: 1 }
              md: { h: 1 }
              sm: { h: 1 }
              xs: { h: 1 }
              xxs: { h: 1 }
            props:
              title: Important info
Expand Table 9.3. Available props Prop Default Description titlenone
Title
- Markdown
dynamicPlugins: frontend: red-hat-developer-hub.backstage-plugin-dynamic-home-page: mountPoints: - mountPoint: home.page/cards importName: MarkdownCard config: layouts: xl: { w: 6, h: 4 } lg: { w: 6, h: 4 } md: { w: 6, h: 4 } sm: { w: 6, h: 4 } xs: { w: 6, h: 4 } xxs: { w: 6, h: 4 } props: title: Company links content: | ### RHDH * [Website](https://developers.redhat.com/rhdh/overview) * [Documentation](https://docs.redhat.com/en/documentation/red_hat_developer_hub/) * [Janus Plugins](https://github.com/janus-idp/backstage-plugins) * [Backstage Community Plugins](https://github.com/backstage/community-plugins) * [RHDH Plugins](https://github.com/redhat-developer/rhdh-plugins) * [RHDH Showcase](https://github.com/redhat-developer/rhdh) - mountPoint: home.page/cards importName: Markdown config: layouts: xl: { w: 6, h: 4, x: 6 } lg: { w: 6, h: 4, x: 6 } md: { w: 6, h: 4, x: 6 } sm: { w: 6, h: 4, x: 6 } xs: { w: 6, h: 4, x: 6 } xxs: { w: 6, h: 4, x: 6 } props: title: Important company links content: | ### RHDH * [Website](https://developers.redhat.com/rhdh/overview) * [Documentation](https://docs.redhat.com/en/documentation/red_hat_developer_hub/) * [Documentation](https://docs.redhat.com/en/documentation/red_hat_developer_hub/) * [Janus Plugins](https://github.com/janus-idp/backstage-plugins) * [Backstage Community Plugins](https://github.com/backstage/community-plugins) * [RHDH Plugins](https://github.com/redhat-developer/rhdh-plugins) * [RHDH Showcase](https://github.com/redhat-developer/rhdh)- Placeholder
dynamicPlugins: frontend: red-hat-developer-hub.backstage-plugin-dynamic-home-page: mountPoints: - mountPoint: home.page/cards importName: Placeholder config: layouts: xl: { w: 1, h: 1 } lg: { w: 1, h: 1 } md: { w: 1, h: 1 } sm: { w: 1, h: 1 } xs: { w: 1, h: 1 } xxs: { w: 1, h: 1 } props: showBorder: true debugContent: '1'- Catalog starred entities
dynamicPlugins: frontend: red-hat-developer-hub.backstage-plugin-dynamic-home-page: mountPoints: - mountPoint: home.page/cards importName: CatalogStarredEntitiesCard- Featured docs
dynamicPlugins:
  frontend:
    red-hat-developer-hub.backstage-plugin-dynamic-home-page:
      mountPoints:
        - mountPoint: home.page/cards
          importName: FeaturedDocsCard
9.2. Defining the layout of the Red Hat Developer Hub Home page
The Home page uses a 12-column grid to position your cards. You can use the optimal parameters to define the layout of your Developer Hub Home page.
Prerequisites
Include the following optimal parameters in each of your breakpoints:
- width (w)
- height (h)
- position (x and y)
Procedure
Configure your Developer Hub
app-config.yamlconfiguration file by choosing one of the following options:- Use the full space on smaller windows and half of the space on larger windows as follows:
dynamicPlugins:
  frontend:
    red-hat-developer-hub.backstage-plugin-dynamic-home-page:
      mountPoints:
        - mountPoint: home.page/cards
          importName: Placeholder
          config:
            layouts:
              xl: { w: 6, h: 2 }
              lg: { w: 6, h: 2 }
              md: { w: 6, h: 2 }
              sm: { w: 12, h: 2 }
              xs: { w: 12, h: 2 }
              xxs: { w: 12, h: 2 }
            props:
              showBorder: true
debugContent: a placeholder-
Show the cards side by side by defining the
xparameter as shown in the following example:
dynamicPlugins:
  frontend:
    red-hat-developer-hub.backstage-plugin-dynamic-home-page:
      mountPoints:
        - mountPoint: home.page/cards
          importName: Placeholder
          config:
            layouts:
              xl: { w: 6, h: 2 }
              lg: { w: 6, h: 2 }
              md: { w: 6, h: 2 }
              sm: { w: 12, h: 2 }
              xs: { w: 12, h: 2 }
              xxs: { w: 12, h: 2 }
            props:
              showBorder: true
              debugContent: left
        - mountPoint: home.page/cards
          importName: Placeholder
          config:
            layouts:
              xl: { w: 6, h: 2, x: 6 }
              lg: { w: 6, h: 2, x: 6 }
              md: { w: 6, h: 2, x: 6 }
              sm: { w: 12, h: 2, x: 0 }
              xs: { w: 12, h: 2, x: 0 }
              xxs: { w: 12, h: 2, x: 0 }
            props:
              showBorder: true
              debugContent: right
However, you can see a second card below this card by default.
-
Show the cards in three columns by defining the
xparameter as shown in the following example:
dynamicPlugins:
  frontend:
    red-hat-developer-hub.backstage-plugin-dynamic-home-page:
      mountPoints:
        - mountPoint: home.page/cards
          importName: Placeholder
          config:
            layouts:
              xl: { w: 4, h: 2 }
              lg: { w: 4, h: 2 }
              md: { w: 4, h: 2 }
              sm: { w: 6, h: 2 }
              xs: { w: 12, h: 2 }
              xxs: { w: 12, h: 2 }
            props:
              showBorder: true
              debugContent: left
        - mountPoint: home.page/cards
          importName: Placeholder
          config:
            layouts:
              xl: { w: 4, h: 2, x: 4 }
              lg: { w: 4, h: 2, x: 4 }
              md: { w: 4, h: 2, x: 4 }
              sm: { w: 6, h: 2, x: 6 }
              xs: { w: 12, h: 2 }
              xxs: { w: 12, h: 2 }
            props:
              showBorder: true
              debugContent: center
        - mountPoint: home.page/cards
          importName: Placeholder
          config:
            layouts:
              xl: { w: 4, h: 2, x: 8 }
              lg: { w: 4, h: 2, x: 8 }
              md: { w: 4, h: 2, x: 8 }
              sm: { w: 6, h: 2 }
              xs: { w: 12, h: 2 }
              xxs: { w: 12, h: 2 }
            props:
              showBorder: true
              debugContent: right
Chapter 10. Customizing the Quick access card
To access the Home page in Red Hat Developer Hub, the base URL must include the /developer-hub proxy. You can configure the Home page by passing the data into the app-config.yaml file as a proxy. You can provide data to the Home page from the following sources:
- JSON files hosted on GitHub or GitLab.
- A dedicated service that provides the Home page data in JSON format using an API.
10.1. Using hosted JSON files to provide data to the Quick access card
Prerequisites
- You have installed Red Hat Developer Hub by using either the Operator or Helm chart. See Installing Red Hat Developer Hub on OpenShift Container Platform.
Procedure
-
To access the data from the JSON files, add the following code to the
app-config.yamlDeveloper Hub configuration file: Add the following code to the
app-config.yamlfile:proxy: endpoints: # Other Proxies # customize developer hub instance '/developer-hub': target: <DOMAIN_URL> # i.e https://raw.githubusercontent.com/ pathRewrite: '^/api/proxy/developer-hub': <path to json file> # i.e /redhat-developer/rhdh/main/packages/app/public/homepage/data.json changeOrigin: true secure: true # Change to "false" in case of using self hosted cluster with a self-signed certificate headers: <HEADER_KEY>: <HEADER_VALUE> # optional and can be passed as needed i.e Authorization can be passed for private GitHub repo and PRIVATE-TOKEN can be passed for private GitLab repo
10.2. Using a dedicated service to provide data to the Quick access card
When using a dedicated service, you can do the following tasks:
- Use the same service to provide the data to all configurable Developer Hub pages or use a different service for each page.
-
Use the
red-hat-developer-hub-customization-provideras an example service, which provides data for both the Home and Tech Radar pages. Thered-hat-developer-hub-customization-providerservice provides the same data as default Developer Hub data. You can fork thered-hat-developer-hub-customization-providerservice repository from GitHub and modify it with your own data, if required. -
Deploy the
red-hat-developer-hub-customization-providerservice and the Developer Hub Helm chart on the same cluster.
Prerequisites
- You have installed the Red Hat Developer Hub using Helm chart. For more information, see Installing Red Hat Developer Hub on OpenShift Container Platform with the Helm chart.
Procedure
To use a separate service to provide the Home page data, complete the following steps:
- From the Developer perspective in the Red Hat OpenShift Container Platform web console, click +Add > Import from Git.
Enter the URL of your Git repository into the Git Repo URL field.
To use the
red-hat-developer-hub-customization-providerservice, add the URL for the red-hat-developer-hub-customization-provider repository or your fork of the repository containing your customizations.-
On the General tab, enter
red-hat-developer-hub-customization-providerin the Name field and click Create. On the Advanced Options tab, copy the value from Target Port.
NoteTarget Port automatically generates a Kubernetes or OpenShift Container Platform service to communicate with.
Add the following code to the
app-config.yamlfile:proxy: endpoints: # Other Proxies # customize developer hub instance '/developer-hub': target: ${HOMEPAGE_DATA_URL}1 changeOrigin: true # Change to "false" in case of using self-hosted cluster with a self-signed certificate secure: true- 1
http://<SERVICE_NAME>:8080, for example,http://rhdh-customization-provider:8080.
NoteThe
red-hat-developer-hub-customization-providerservice contains the 8080 port by default. If you are using a custom port, you can specify it with the 'PORT' environmental variable in theapp-config.yamlfile.-
Replace the
HOMEPAGE_DATA_URLby adding the URL torhdh-secretsor by directly replacing it in your custom ConfigMap. - Delete the Developer Hub pod to ensure that the new configurations are loaded correctly.
Verification
To view the service, go to the Administrator perspective in the OpenShift Container Platform web console and click Networking > Service.
NoteYou can also view Service Resources in the Topology view.
Ensure that the provided API URL for the Home page returns the data in JSON format as shown in the following example:
[ { "title": "Dropdown 1", "isExpanded": false, "links": [ { "iconUrl": "https://imagehost.com/image.png", "label": "Dropdown 1 Item 1", "url": "https://example.com/" }, { "iconUrl": "https://imagehost2.org/icon.png", "label": "Dropdown 1 Item 2", "url": "" } ] }, { "title": "Dropdown 2", "isExpanded": true, "links": [ { "iconUrl": "http://imagehost3.edu/img.jpg", "label": "Dropdown 2 Item 1", "url": "http://example.com" } ] } ]NoteIf the request call fails or is not configured, the Developer Hub instance falls back to the default local data.
-
If the images or icons do not load, then allowlist them by adding your image or icon host URLs to the content security policy (csp)
img-srcin your custom ConfigMap as shown in the following example:
kind: ConfigMap
apiVersion: v1
metadata:
  name: app-config.yaml
data:
  app-config.yaml: |
    app:
      title: Red Hat Developer Hub
    backend:
      csp:
        connect-src:
          - "'self'"
          - 'http:'
          - 'https:'
        img-src:
          - "'self'"
          - 'data:'
          - <image host url 1>
          - <image host url 2>
          - <image host url 3>
    # Other Configurations