Installing RHEL 8 for Real Time
Installing the RHEL for Real Time kernel on Red Hat Enterprise Linux
Abstract
Providing feedback on Red Hat documentation
We appreciate your feedback on our documentation. Let us know how we can improve it.
Submitting feedback through Jira (account required)
- Log in to the Jira website.
- Click Create in the top navigation bar.
- Enter a descriptive title in the Summary field.
- Enter your suggestion for improvement in the Description field. Include links to the relevant parts of the documentation.
- Click Create at the bottom of the dialogue.
Chapter 1. Installing RHEL for Real Time
Many industries and organizations need extremely high performance computing and may require low and predictable latency, especially in the financial and telecommunications industries. Latency, or response time, is defined as the time between an event and system response and is generally measured in microseconds (μs).
For most applications running under a Linux environment, basic performance tuning can improve latency sufficiently. For those industries where latency not only needs to be low, but also accountable and predictable, Red Hat developed a 'drop-in' kernel replacement that provides this. RHEL for Real Time is distributed as part of RHEL 8 and provides seamless integration with RHEL 8. RHEL for Real Time offers clients the opportunity to measure, configure, and record latency times within their organization.
Before installing RHEL for Real Time, ensure that the base platform is properly tuned and the system BIOS parameters are adjusted. Failure to perform these tasks may prevent getting consistent performance from a RHEL Real Time deployment.
1.1. RHEL for Real Time for optimizing latency
RHEL for Real Time is designed to be used on well-tuned systems for applications with extremely high determinism requirements. Kernel system tuning offers the vast majority of the improvement in determinism.
For example, in many workloads, thorough system tuning improves consistency of results by around 90%. This is why, before using RHEL for Real Time, we recommend that customers first perform system tuning of standard RHEL to see if it meets their objectives.
System tuning is just as important when using the Real Time kernel as it is for the standard kernel. Installing the Real Time kernel on an untuned system running the standard kernel supplied as part of RHEL is not likely to result in any noticeable benefit. Tuning the standard kernel will yield 90% of the possible latency gains. The Real Time kernel provides the last 10% of latency reduction required by the most demanding workloads.
Before tuning Real Time kernel systems, ensure that the base platform is properly tuned and the system BIOS parameters are adjusted. Failure to perform these tasks may prevent getting consistent performance from a RHEL Real Time deployment.
The objective of the Real Time kernel consistent, low-latency determinism offering predictable response times. There is some additional kernel overhead associated with the real time kernel. This is due primarily to handling hardware interrupts in separately scheduled threads. The increased overhead in some workloads results in some degradation in overall throughput. The exact amount is very workload dependent, ranging from 0% to 30%.
1.2. Installing RHEL for Real Time using YUM
In addition to installing the real-time kernel with dnf, you can download it along with all other downloadable components of Red Hat Enterprise Linux from the Download Red Hat Enterprise Linux portal. Select the appropriate version from the Version menu.
Prerequisites
- The latest version of RHEL 8 is installed on an AMD64 or Intel64 system. The real-time kernel runs on AMD64 and Intel 64 (also known as x86_64) server platforms that are certified to run Red Hat Enterprise Linux.
- Your machine is registered and RHEL is attached to a RHEL for Real Time subscription.
Ensure that the base platform is properly tuned and the system BIOS parameters are adjusted.
WarningFailure to perform the prerequisite tasks before installing the real-time kernel might prevent a consistent performance from a RHEL for Real Time kernel deployment.
Procedure
Enable the RHEL for Real Time repository.
# subscription-manager repos --enable rhel-8-for-x86_64-rt-rpmsInstall the RHEL for Real Time package group.
# yum groupinstall RTThis group installs several packages:
-
kernel-rtincludes the RHEL for Real Time kernel package. -
kernel-rt-coreincludes the core RHEL for Real Time kernel package. -
kernel-rt-develincludes the RHEL for Real Time kernel development package. -
kernel-rt-modulesincludes the RHEL for Real Time kernel modules package. -
kernel-rt-modules-extraincludes the RHEL for Real Time kernel extra modules package. -
rt-setupsets up the basic environment required by RHEL for Real Time. -
rtevalevaluates system suitability for RHEL for Real Time. -
rteval-loadsprovides source code forrtevalloads. -
tuned-profiles-realtimeincludes the additionalTuneDprofiles targeted to real-time.
-
Optional: Additionally, the
tunapackage contains a tool that helps tune the real-time kernel workload, greatly automating CPU isolation and thread affinity operations from the command line or the GUI. This package is available in the base RHEL 8 repository.# yum install tuna
When the RHEL for Real Time kernel is installed, it is automatically set to be the default kernel and is used on the next boot. You can also configure other existing kernels variants, such as, kernel, kernel-debug, or kernel-rt-debug as the default boot kernel. For more information, see Configuring kernel-rt as the default boot kernel.
Verification
Check the installation location and verify that the components have been installed successfully.
# rpm -ql rt-setup
/etc/security/limits.d/realtime.conf
/etc/sysconfig/rt-setup
/etc/udev/rules.d/99-rhel-rt.rules
/usr/bin/rt-setup
/usr/bin/rt-setup-kdump
/usr/bin/slub_cpu_partial_off
/usr/lib/.build-id
/usr/lib/.build-id/a4
/usr/lib/.build-id/a4/da77908aa4c6f048939f3267f1c552c456d117
/usr/lib/systemd/system/rt-entsk.service
/usr/lib/systemd/system/rt-setup.service
/usr/sbin/kernel-is-rt
/usr/sbin/rt-entsk
1.3. Available RPM packages in the RHEL for Real Time repository
The Red Hat Package Manager (RPM) for RHEL for Real Time repository includes the following packages:
-
kernel-rtpackage, which is the RHEL for Real Time kernel package. - RHEL for Real Time kernel test packages, which contains test programs for the real-time kernel.
- RHEL for Real Time debugging packages, which are for debugging and code tracing.
| RPM package name | Description | RT-specific | Required |
|---|---|---|---|
|
| Low latency and preemption functionality | Yes | Yes |
| RPM package name | Description | RT-specific | Required |
|---|---|---|---|
|
| Headers and libraries for kernel development | Yes | No |
|
| RHEL for Real Time kernel with debugging functions compiled in (slow) | Yes | No |
|
| Headers and libraries for development on debug kernel | Yes | No |
|
| Utilities for measuring system latencies and for proving that priority-inheritance mutex functions properly | No | No |
The debugging packages are provided to use with the perf, trace-cmd, and crash utilities for analyzing kernel crash dumps. The debugging packages include symbol tables and are quite large. For this reason, the debugging packages are separately delivered from the other RHEL for Real Time packages. You can download the debugging packages from RHEL for Real Time - Debug RPMs repository.
| RPM package name | Description | RT-specific | Required |
|---|---|---|---|
|
|
Symbols for profiling and debugging use, such as | Yes | No |
|
| Symbols for profiling and tracing | Yes | No |
1.4. Post installation instructions
After you install the real-time kernel ensure that:
- To achieve optimal low-latency determinism, you perform RHEL for Real Time specific system tuning.
- You know about the module compatibility of the real-time kernel and the standard kernel.
-
To enable
kdump, you must configure RHEL for Real Time to provide crash dump information by enablingkexec/kdump. - Verify that the Real Time kernel is the default kernel.
Module compatibility of the real-time kernel and the standard kernel
The real-time kernel differs substantially from the standard Red Hat Enterprise Linux 8 kernel. As a consequence, third-party kernel modules are incompatible with RHEL for Real Time.
Kernel modules are inherently specific to the kernel they are built for. The real time kernel is substantially different from the standard kernel, and so are the modules. Therefore, you cannot take third-party modules from Red Hat Enterprise Linux 8 and use them as-is on the real-time kernel.
If you must use a third-party module, you must recompile it with the RHEL for Real Time header files, which are available in the RHEL for Real Time development and test packages.
The third-party drivers for the standard Red Hat Enterprise Linux 8 but do not currently have a custom build for RHEL for Real Time are:
- EMC Powerpath
- NVidia graphics
- Advanced storage adapter configuration utilities from Qlogic
The user space syscall interface is compatible with RHEL for Real Time.
Chapter 2. Specifying the RHEL kernel to run
You can boot any installed kernel, standard or Real Time by selecting the required kernel manually in the GRUB menu during booting. You can also configure the kernel to boot by default.
When the RHEL for Real Time kernel is installed, it is automatically set to be the default kernel and is used on the next boot.
2.1. Displaying the default kernel
You can display the kernel configured to boot by default.
Procedure
To view the default kernel:
# grubby --default-kernel

/boot/vmlinuz-4.18.0-80.rt9.138.el8.x86_64
The
rtin the output of the command shows that the default kernel is a real time kernel.
2.2. Displaying the running kernel
You can display the currently running kernel
Procedure
To show which kernel the system is currently running.
~]# uname -a Linux rt-server.example.com 4.18.0-80.rt9.138.el8.x86_64 …NoteWhen the system receives a minor update, for example, from 8.3 to 8.4, the default kernel might automatically change from the Real Time kernel back to the standard kernel.
2.3. Configuring kernel-rt as the default boot kernel
On a newly installed system, the stock RHEL kernel is set as the default boot kernel and is used as the default kernel on the next boot and subsequent system updates. You can change this configuration and set kernel-rt as the default kernel to boot with and also make this configuration persistent across the system updates. Configuring kernel-rt is a one-time procedure, which you can change or revert to another kernel if necessary. You can also configure other existing kernels variants, such as, kernel, kernel-debug, or kernel-rt-debug, as the default boot kernel.
Procedure
To configure
kernel-rtas the default boot kernel, enter the following command:# grubby --set-default=<RT_VMLINUZ>RT_VMLINUZis the name of thevmlinuxfile that is associated with thekernel-rtkernel. For example:# grubby --set-default=/boot/vmlinuz-5.14.0-284.11.1.rt14.296.el9_2.x86_64+rtTo configure
kernel-rtas default boot kernel on system updates, enter the following command:# sed -i ‘s/UPDATEDEFAULT=.*/UPDATEDEFAULT=yes/g’/etc/sysconfig/kernel # sed -i 's/DEFAULTKERNEL=.*/DEFAULTKERNEL=kernel-rt-core/g'/etc/sysconfig/kernelThe
UPDATEDEFAULTvariable when specified asyes, sets the default kernel to change with system updates.In the example output, the path for the default kernel is specific to the
kernel-rt-corepackage installed. You can determine the path to the kernel from a package by using therpm -q kernel-rt-corecommand.Optional: If you need to determine the path to the kernel from a package, first list the installed packages:
# rpm -q kernel-rt-core
  kernel-rt-core-5.14.0-284.11.1.rt14.296.el9_2.x86_64
  kernel-rt-core-5.14.0-284.10.1.rt14.295.el9_2.x86_64
  kernel-rt-core-5.14.0-284.9.1.rt14.294.el9_2.x86_64
To use the latest installed package as the default, enter the following command to find the path to the boot image from that package:
# rpm -ql kernel-rt-core-5.14.0-284.11.1.rt14.296.el9_2.x86_64|grep‘^/boot/vmlinu’
/boot/vmlinuz-5.14.0-284.11.1.rt14.296.el9_2.x86_64.x86_64+rt
To configure
kernel-rtas the default boot kernel, enter the following command:# grubby --set-default=/boot/vmlinuz-5.14.0-284.11.1.rt14.296.el9_2.x86_64.x86_64+rt
Verification
To verify
kernel-rtis the default kernel, enter the following command:# grubby --default-kernel /boot/vmlinuz-5.14.0-284.11.1.rt14.296.el9_2.x86_64.x86_64+rt
Chapter 3. Installing kdump
The kdump service is installed and activated by default on the new versions of RHEL 8 installations.
3.1. What is kdump
kdump is a service that provides a crash dumping mechanism and generates a crash dump or a vmcore dump file. vmcore includes the contents of the system memory for analysis and troubleshooting. kdump uses the kexec system call to boot into the second kernel, capture kernel, without a reboot. This kernel captures the contents of the crashed kernel’s memory and saves it into a file. The second kernel is available in a reserved part of the system memory.
A kernel crash dump can be the only information available if a system failure occur. Therefore, operational kdump is important in mission-critical environments. Red Hat advises to regularly update and test kexec-tools in your normal kernel update cycle. This is important when you install new kernel features.
If you have multiple kernels on a machine, you can enable kdump for all installed kernels or for specified kernels only. When you install kdump, the system creates a default /etc/kdump.conf file. /etc/kdump.conf includes the default minimum kdump configuration, which you can edit to customize the kdump configuration.
3.2. Installing kdump using Anaconda
The Anaconda installer provides a graphical interface screen for kdump configuration during an interactive installation. You can enable kdump and reserve the required amount of memory.
Procedure
On the Anaconda installer, click KDUMP and enable
kdump: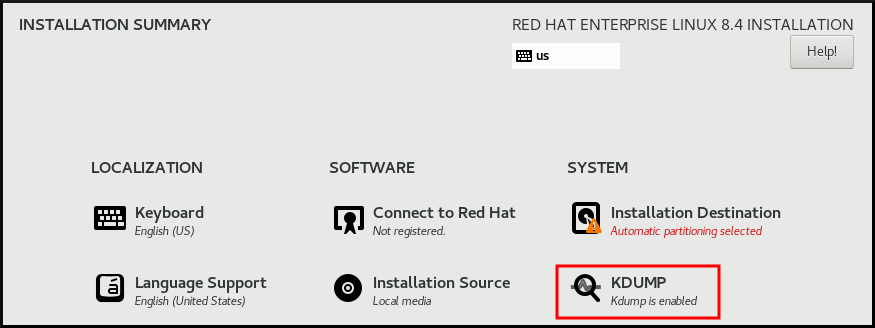
- In Kdump Memory Reservation, select Manual` if you must customize the memory reserve.
In KDUMP > Memory To Be Reserved (MB), set the required memory reserve for
kdump.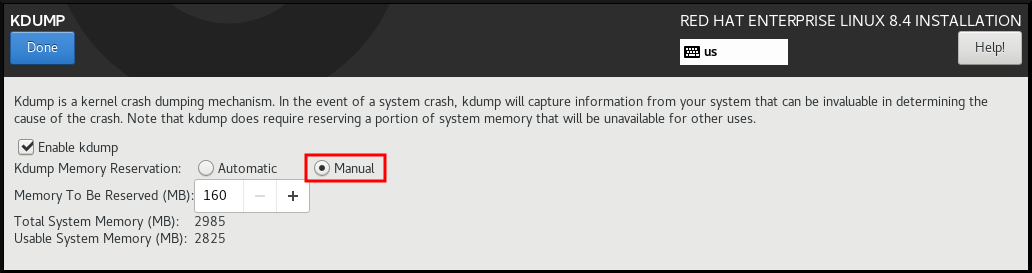
3.3. Installing kdump on the command line
Installation options such as custom Kickstart installations, in some cases does not install or enable kdump by default. The following procedure helps you enable kdump in this case.
Prerequisites
- An active RHEL subscription.
-
A repository containing the
kexec-toolspackage for your system CPU architecture. -
Fulfilled requirements for
kdumpconfigurations and targets. For details, see Supported kdump configurations and targets.
Procedure
Check if
kdumpis installed on your system:# rpm -q kexec-toolsOutput if the package is installed:
kexec-tools-2.0.17-11.el8.x86_64Output if the package is not installed:
package kexec-tools is not installedInstall
kdumpand other necessary packages:# dnf install kexec-tools
From kernel-3.10.0-693.el7 onwards, the Intel IOMMU driver is supported for kdump. For kernel-3.10.0-514[.XYZ].el7 and early versions, you must ensure that Intel IOMMU is disabled to prevent an unresponsive capture kernel.
Chapter 4. Configuring kdump on the command line
The memory for kdump is reserved during the system boot. You can configure the memory size in the system’s Grand Unified Bootloader (GRUB) configuration file. The memory size depends on the crashkernel= value specified in the configuration file and the size of the physical memory of system.
4.1. Estimating the kdump size
When planning and building your kdump environment, it is important to know the space required by the crash dump file.
The makedumpfile --mem-usage command estimates the space required by the crash dump file. It generates a memory usage report. The report helps you decide the dump level and the pages that are safe to exclude.
Procedure
Enter the following command to generate a memory usage report:
# makedumpfile --mem-usage /proc/kcore


TYPE        PAGES    EXCLUDABLE    DESCRIPTION
-------------------------------------------------------------
ZERO          501635      yes        Pages filled with zero
CACHE         51657       yes        Cache pages
CACHE_PRIVATE 5442        yes        Cache pages + private
USER          16301       yes        User process pages
FREE          77738211    yes        Free pages
KERN_DATA     1333192     no         Dumpable kernel data
The makedumpfile --mem-usage command reports required memory in pages. This means that you must calculate the size of memory in use against the kernel page size.
4.2. Configuring kdump memory usage
The memory reservation for kdump occurs during the system boot. The memory size is set in the system’s Grand Unified Bootloader (GRUB) configuration. The memory size depends on the value of the crashkernel= option specified in the configuration file and the size of the system physical memory.
You can define the crashkernel= option in many ways. You can specify the crashkernel= value or configure the auto option. The crashkernel=auto parameter reserves memory automatically, based on the total amount of physical memory in the system. When configured, the kernel automatically reserves an appropriate amount of required memory for the capture kernel. This helps to prevent Out-of-Memory (OOM) errors.
The automatic memory allocation for kdump varies based on system hardware architecture and available memory size.
If the system has less than the minimum memory threshold for automatic allocation, you can configure the amount of reserved memory manually.
Prerequisites
- You have root permissions on the system.
-
Fulfilled requirements for
kdumpconfigurations and targets. For details, see Supported kdump configurations and targets.
Procedure
Prepare the
crashkernel=option.For example, to reserve 128 MB of memory, use the following:
crashkernel=128MAlternatively, you can set the amount of reserved memory to a variable depending on the total amount of installed memory. The syntax for memory reservation into a variable is
crashkernel=<range1>:<size1>,<range2>:<size2>. For example:crashkernel=512M-2G:64M,2G-:128MThe command reserves 64 MB of memory if the total amount of system memory is in the range of 512 MB and 2 GB. If the total amount of memory is more than 2 GB, the memory reserve is 128 MB.
Offset the reserved memory.
Some systems require to reserve memory with a certain fixed offset because the
crashkernelreservation happens early, and you may need to reserve more memory for special usage. When you define an offset, the reserved memory begins there. To offset the reserved memory, use the following syntax:crashkernel=128M@16MIn this example,
kdumpreserves 128 MB of memory starting at 16 MB (physical address0x01000000). If you set the offset parameter to 0 or omit entirely,kdumpoffsets the reserved memory automatically. You can also use this syntax when setting a variable memory reservation. In that case, the offset is always specified last. For example:crashkernel=512M-2G:64M,2G-:128M@16M
Apply the
crashkernel=option to your boot loader configuration:# grubby --update-kernel=ALL --args="crashkernel=<value>"Replace
<value>with the value of thecrashkernel=option that you prepared in the previous step.
4.3. Configuring the kdump target
The crash dump is usually stored as a file in a local file system, written directly to a device. Optionally, you can send crash dump over a network by using the NFS or SSH protocols. Only one of these options to preserve a crash dump file can be set at a time. The default behavior is to store it in the /var/crash/ directory of the local file system.
Prerequisites
- You have root permissions on the system.
-
Fulfilled requirements for
kdumpconfigurations and targets. For details, see Supported kdump configurations and targets.
Procedure
To store the crash dump file in
/var/crash/directory of the local file system, edit the/etc/kdump.conffile and specify the path:path /var/crashThe option
path /var/crashrepresents the path to the file system in whichkdumpsaves the crash dump file.Note-
When you specify a dump target in the
/etc/kdump.conffile, then the path is relative to the specified dump target. -
When you do not specify a dump target in the
/etc/kdump.conffile, then the path represents the absolute path from the root directory.
Depending on the file system mounted in the current system, the dump target and the adjusted dump path are configured automatically.
-
When you specify a dump target in the
To secure the crash dump file and the accompanying files produced by
kdump, you should set up proper attributes for the target destination directory, such as user permissions and SELinux contexts. Additionally, you can define a script, for examplekdump_post.shin thekdump.conffile as follows:kdump_post <path_to_kdump_post.sh>The
kdump_postdirective specifies a shell script or a command that executes afterkdumphas completed capturing and saving a crash dump to the specified destination. You can use this mechanism to extend the functionality ofkdumpto perform actions including the adjustments in file permissions.-
The
kdumptarget configuration
# *grep -v ^# /etc/kdump.conf | grep -v ^$*
ext4 /dev/mapper/vg00-varcrashvol
path /var/crash
core_collector makedumpfile -c --message-level 1 -d 31
The dump target is specified (ext4 /dev/mapper/vg00-varcrashvol), and, therefore, it is mounted at /var/crash. The path option is also set to /var/crash. Therefore, the kdump saves the vmcore file in the /var/crash/var/crash directory.
To change the local directory for saving the crash dump, edit the
/etc/kdump.confconfiguration file as arootuser:-
Remove the hash sign (
#) from the beginning of the#path /var/crashline. Replace the value with the intended directory path. For example:
path /usr/local/coresImportantIn RHEL 8, the directory defined as the
kdumptarget using thepathdirective must exist when thekdumpsystemdservice starts to avoid failures. Unlike in earlier versions of RHEL, the directory is no longer created automatically if it does not exist when the service starts.
-
Remove the hash sign (
To write the file to a different partition, edit the
/etc/kdump.confconfiguration file:Remove the hash sign (
#) from the beginning of the#ext4line, depending on your choice.-
device name (the
#ext4 /dev/vg/lv_kdumpline) -
file system label (the
#ext4 LABEL=/bootline) -
UUID (the
#ext4 UUID=03138356-5e61-4ab3-b58e-27507ac41937line)
-
device name (the
Change the file system type and the device name, label or UUID, to the required values. The correct syntax for specifying UUID values is both
UUID="correct-uuid"andUUID=correct-uuid. For example:ext4 UUID=03138356-5e61-4ab3-b58e-27507ac41937ImportantIt is recommended to specify storage devices by using a
LABEL=orUUID=. Disk device names such as/dev/sda3are not guaranteed to be consistent across reboot.When you use Direct Access Storage Device (DASD) on IBM Z hardware, ensure the dump devices are correctly specified in
/etc/dasd.confbefore proceeding withkdump.
To write the crash dump directly to a device, edit the
/etc/kdump.confconfiguration file:-
Remove the hash sign (
#) from the beginning of the#raw /dev/vg/lv_kdumpline. Replace the value with the intended device name. For example:
raw /dev/sdb1
-
Remove the hash sign (
To store the crash dump to a remote machine by using the
NFSprotocol:-
Remove the hash sign (
#) from the beginning of the#nfs my.server.com:/export/tmpline. Replace the value with a valid hostname and directory path. For example:
nfs penguin.example.com:/export/coresRestart the
kdumpservice for the changes to take effect:sudo systemctl restart kdump.serviceNoteWhile using the NFS directive to specify the NFS target,
kdump.serviceautomatically attempts to mount the NFS target to check the disk space. There is no need to mount the NFS target in advance. To preventkdump.servicefrom mounting the target, use thedracut_args --mountdirective inkdump.conf. This will enablekdump.serviceto call thedracututility with the--mountargument to specify the NFS target.
-
Remove the hash sign (
To store the crash dump to a remote machine by using the SSH protocol:
-
Remove the hash sign (
#) from the beginning of the#ssh user@my.server.comline. - Replace the value with a valid username and hostname.
Include your SSH key in the configuration.
-
Remove the hash sign from the beginning of the
#sshkey /root/.ssh/kdump_id_rsaline. Change the value to the location of a key valid on the server you are trying to dump to. For example:
ssh john@penguin.example.com
sshkey /root/.ssh/mykey
-
Remove the hash sign from the beginning of the
-
Remove the hash sign (
4.4. Configuring the kdump core collector
The kdump service uses a core_collector program to capture the crash dump image. In RHEL, the makedumpfile utility is the default core collector. It helps shrink the dump file by:
- Compressing the size of a crash dump file and copying only necessary pages by using various dump levels.
- Excluding unnecessary crash dump pages.
- Filtering the page types to be included in the crash dump.
Crash dump file compression is enabled by default in the RHEL 7 and above.
If you need to customize the crash dump file compression, follow this procedure.
Syntax
core_collector makedumpfile -l --message-level 1 -d 31Options
-
-c,-lor-p: specify compress dump file format by each page using either,zlibfor-coption,lzofor-loption orsnappyfor-poption. -
-d(dump_level): excludes pages so that they are not copied to the dump file. -
--message-level: specify the message types. You can restrict outputs printed by specifyingmessage_levelwith this option. For example, specifying 7 asmessage_levelprints common messages and error messages. The maximum value ofmessage_levelis 31.
Prerequisites
- You have root permissions on the system.
-
Fulfilled requirements for
kdumpconfigurations and targets. For details, see Supported kdump configurations and targets.
Procedure
-
As a
root, edit the/etc/kdump.confconfiguration file and remove the hash sign ("#") from the beginning of the#core_collector makedumpfile -l --message-level 1 -d 31. - Enter the following command to enable crash dump file compression:
core_collector makedumpfile -l --message-level 1 -d 31
The -l option specifies the dump compressed file format. The -d option specifies dump level as 31. The --message-level option specifies message level as 1.
Also, consider following examples with the -c and -p options:
To compress a crash dump file by using
-c:core_collector makedumpfile -c -d 31 --message-level 1To compress a crash dump file by using
-p:core_collector makedumpfile -p -d 31 --message-level 1
4.5. Configuring the kdump default failure responses
By default, when kdump fails to create a crash dump file at the configured target location, the system reboots and the dump is lost in the process. You can change the default failure response and configure kdump to perform a different operation when it fails to save the core dump to the primary target. The additional actions are:
dump_to_rootfs-
Saves the core dump to the
rootfile system. reboot- Reboots the system, losing the core dump in the process.
halt- Stops the system, losing the core dump in the process.
poweroff- Power the system off, losing the core dump in the process.
shell-
Runs a shell session from within the
initramfs, you can record the core dump manually. final_action-
Enables additional operations such as
reboot,halt, andpoweroffafter a successfulkdumpor when shell ordump_to_rootfsfailure action completes. The default isreboot. failure_action-
Specifies the action to perform when a dump might fail in a kernel crash. The default is
reboot.
Prerequisites
- Root permissions.
-
Fulfilled requirements for
kdumpconfigurations and targets. For details, see Supported kdump configurations and targets.
Procedure
-
As a
rootuser, remove the hash sign (#) from the beginning of the#failure_actionline in the/etc/kdump.confconfiguration file. Replace the value with a required action.
failure_action poweroff
4.6. Configuration file for kdump
The configuration file for kdump kernel is /etc/sysconfig/kdump. This file controls the kdump kernel command line parameters. For most configurations, use the default options. However, in some scenarios you might need to modify certain parameters to control the kdump kernel behavior. For example, modifying the KDUMP_COMMANDLINE_APPEND option to append the kdump kernel command-line to obtain a detailed debugging output or the KDUMP_COMMANDLINE_REMOVE option to remove arguments from the kdump command line.
KDUMP_COMMANDLINE_REMOVEThis option removes arguments from the current
kdumpcommand line. It removes parameters that can causekdumperrors orkdumpkernel boot failures. These parameters might have been parsed from the previousKDUMP_COMMANDLINEprocess or inherited from the/proc/cmdlinefile.When this variable is not configured, it inherits all values from the
/proc/cmdlinefile. Configuring this option also provides information that is helpful in debugging an issue.To remove certain arguments, add them to
KDUMP_COMMANDLINE_REMOVEas follows:
# KDUMP_COMMANDLINE_REMOVE="hugepages hugepagesz slub_debug quiet log_buf_len swiotlb"KDUMP_COMMANDLINE_APPENDThis option appends arguments to the current command line. These arguments might have been parsed by the previous
KDUMP_COMMANDLINE_REMOVEvariable.For the
kdumpkernel, disabling certain modules such asmce,cgroup,numa,hest_disablecan help prevent kernel errors. These modules can consume a significant part of the kernel memory reserved forkdumpor causekdumpkernel boot failures.To disable memory
cgroupson thekdumpkernel command line, run the command as follows:
KDUMP_COMMANDLINE_APPEND="cgroup_disable=memory"4.7. Testing the kdump configuration
After configuring kdump, you must manually test a system crash and ensure that the vmcore file is generated in the defined kdump target. The vmcore file is captured from the context of the freshly booted kernel. Therefore, vmcore has critical information for debugging a kernel crash.
Do not test kdump on active production systems. The commands to test kdump will cause the kernel to crash with loss of data. Depending on your system architecture, ensure that you schedule significant maintenance time because kdump testing might require several reboots with a long boot time.
If the vmcore file is not generated during the kdump test, identify and fix issues before you run the test again for a successful kdump testing.
If you make any manual system modifications, you must test the kdump configuration at the end of any system modification. For example, if you make any of the following changes, ensure that you test the kdump configuration for an optimal kdump performances for:
- Package upgrades.
- Hardware level changes, for example, storage or networking changes.
- Firmware upgrades.
- New installation and application upgrades that include third party modules.
- If you use the hot-plugging mechanism to add more memory on hardware that support this mechanism.
-
After you make changes in the
/etc/kdump.confor/etc/sysconfig/kdumpfile.
Prerequisites
- You have root permissions on the system.
-
You have saved all important data. The commands to test
kdumpcause the kernel to crash with loss of data. - You have scheduled significant machine maintenance time depending on the system architecture.
Procedure
Enable the
kdumpservice:# kdumpctl restartCheck the status of the
kdumpservice with thekdumpctl:# kdumpctl status kdump:Kdump is operationalOptionally, if you use the
systemctlcommand, the output prints in thesystemdjournal.Start a kernel crash to test the
kdumpconfiguration. Thesysrq-triggerkey combination causes the kernel to crash and might reboot the system if required.# echo c > /proc/sysrq-triggerOn a kernel reboot, the
address-YYYY-MM-DD-HH:MM:SS/vmcorefile is created at the location you have specified in the/etc/kdump.conffile. The default is/var/crash/.
4.8. Files produced by kdump after system crash
After your system crashes, the kdump service captures the kernel memory in a dump file (vmcore) and it also generates additional diagnostic files to aid in troubleshooting and postmortem analysis.
Files produced by kdump:
-
vmcore- main kernel memory dump file containing system memory at the time of the crash. It includes data as per the configuration of thecore_collectorprogram specified inkdumpconfiguration. By default the kernel data structures, process information, stack traces, and other diagnostic information. -
vmcore-dmesg.txt- contents of the kernel ring buffer log (dmesg) from the primary kernel that panicked. -
kexec-dmesg.log- has kernel and system log messages from the execution of the secondarykexeckernel that collects thevmcoredata.
4.9. Enabling and disabling the kdump service
You can configure to enable or disable the kdump functionality on a specific kernel or on all installed kernels. You must routinely test the kdump functionality and validate its operates correctly.
Prerequisites
- You have root permissions on the system.
-
You have completed
kdumprequirements for configurations and targets. See Supported kdump configurations and targets. -
All configurations for installing
kdumpare set up as required.
Procedure
Enable the
kdumpservice formulti-user.target:# systemctl enable kdump.serviceStart the service in the current session:
# systemctl start kdump.serviceStop the
kdumpservice:# systemctl stop kdump.serviceDisable the
kdumpservice:# systemctl disable kdump.service
It is recommended to set kptr_restrict=1 as default. When kptr_restrict is set to (1) as default, the kdumpctl service loads the crash kernel regardless of whether the Kernel Address Space Layout (KASLR) is enabled.
If kptr_restrict is not set to 1 and KASLR is enabled, the contents of /proc/kore file are generated as all zeros. The kdumpctl service fails to access the /proc/kcore file and load the crash kernel. The kexec-kdump-howto.txt file displays a warning message, which recommends you to set kptr_restrict=1. Verify for the following in the sysctl.conf file to ensure that kdumpctl service loads the crash kernel:
-
Kernel
kptr_restrict=1in thesysctl.conffile.
4.10. Preventing kernel drivers from loading for kdump
You can control the capture kernel from loading certain kernel drivers by adding the KDUMP_COMMANDLINE_APPEND= variable in the /etc/sysconfig/kdump configuration file. By using this method, you can prevent the kdump initial RAM disk image initramfs from loading the specified kernel module. This helps to prevent the out-of-memory (OOM) killer errors or other crash kernel failures.
You can append the KDUMP_COMMANDLINE_APPEND= variable by using one of the following configuration options:
-
rd.driver.blacklist=<modules> -
modprobe.blacklist=<modules>
Prerequisites
- You have root permissions on the system.
Procedure
Display the list of modules that are loaded to the currently running kernel. Select the kernel module that you intend to block from loading:
$ lsmod

Module                  Size  Used by
fuse                  126976  3
xt_CHECKSUM            16384  1
ipt_MASQUERADE         16384  1
uinput                 20480  1
xt_conntrack           16384  1
Update the
KDUMP_COMMANDLINE_APPEND=variable in the/etc/sysconfig/kdumpfile. For example:KDUMP_COMMANDLINE_APPEND="rd.driver.blacklist=hv_vmbus,hv_storvsc,hv_utils,hv_netvsc,hid-hyperv"Also, consider the following example by using the
modprobe.blacklist=<modules>configuration option:KDUMP_COMMANDLINE_APPEND="modprobe.blacklist=emcp modprobe.blacklist=bnx2fc modprobe.blacklist=libfcoe modprobe.blacklist=fcoe"Restart the
kdumpservice:# systemctl restart kdump
4.11. Running kdump on systems with encrypted disk
When you run a LUKS encrypted partition, systems require certain amount of available memory. If the system has less than the required amount of available memory, the cryptsetup utility fails to mount the partition. As a result, capturing the vmcore file to an encrypted target location fails in the second kernel (capture kernel).
The kdumpctl estimate command helps you estimate the amount of memory you need for kdump. kdumpctl estimate prints the recommended crashkernel value, which is the most suitable memory size required for kdump.
The recommended crashkernel value is calculated based on the current kernel size, kernel module, initramfs, and the LUKS encrypted target memory requirement.
If you are using the custom crashkernel= option, kdumpctl estimate prints the LUKS required size value. The value is the memory size required for LUKS encrypted target.
Procedure
Print the estimate
crashkernel=value:# *kdumpctl estimate* Encrypted kdump target requires extra memory, assuming using the keyslot with minimum memory requirement Reserved crashkernel: 256M Recommended crashkernel: 652M Kernel image size: 47M Kernel modules size: 8M Initramfs size: 20M Runtime reservation: 64M LUKS required size: 512M Large modules: <none> WARNING: Current crashkernel size is lower than recommended size 652M.-
Configure the amount of required memory by increasing the
crashkernel=value. - Reboot the system.
If the kdump service still fails to save the dump file to the encrypted target, increase the crashkernel= value as required.
Chapter 5. Enabling kdump
For your RHEL 8 systems, you can configure enabling or disabling the kdump functionality on a specific kernel or on all installed kernels. However, you must routinely test the kdump functionality and validate its working status.
5.1. Enabling kdump for all installed kernels
The kdump service starts by enabling kdump.service after the kexec tool is installed. You can enable and start the kdump service for all kernels installed on the machine.
Prerequisites
- You have administrator privileges.
Procedure
Add the
crashkernel=command-line parameter to all installed kernels:# grubby --update-kernel=ALL --args="crashkernel=xxM"xxMis the required memory in megabytes.Reboot the system:
# rebootEnable the
kdumpservice:# systemctl enable --now kdump.service
Verification
Check that the
kdumpservice is running:# systemctl status kdump.service ○ kdump.service - Crash recovery kernel arming Loaded: loaded (/usr/lib/systemd/system/kdump.service; enabled; vendor preset: disabled) Active: active (live)
5.2. Enabling kdump for a specific installed kernel
You can enable the kdump service for a specific kernel on the machine.
Prerequisites
- You have administrator privileges.
Procedure
List the kernels installed on the machine.
# ls -a /boot/vmlinuz-*
/boot/vmlinuz-0-rescue-2930657cd0dc43c2b75db480e5e5b4a9
/boot/vmlinuz-4.18.0-330.el8.x86_64
/boot/vmlinuz-4.18.0-330.rt7.111.el8.x86_64
Add a specific
kdumpkernel to the system’s Grand Unified Bootloader (GRUB) configuration.For example:
# grubby --update-kernel=vmlinuz-4.18.0-330.el8.x86_64 --args="crashkernel=xxM"xxMis the required memory reserve in megabytes.Enable the
kdumpservice.# systemctl enable --now kdump.service
Verification
Check that the
kdumpservice is running.# systemctl status kdump.service ○ kdump.service - Crash recovery kernel arming Loaded: loaded (/usr/lib/systemd/system/kdump.service; enabled; vendor preset: disabled) Active: active (live)
5.3. Disabling the kdump service
You can stop the kdump.service and disable the service from starting on your RHEL 8 systems.
Prerequisites
-
Fulfilled requirements for
kdumpconfigurations and targets. For details, see Supported kdump configurations and targets. -
All configurations for installing
kdumpare set up according to your needs. For details, see Installing kdump.
Procedure
To stop the
kdumpservice in the current session:# systemctl stop kdump.serviceTo disable the
kdumpservice:# systemctl disable kdump.service
It is recommended to set kptr_restrict=1 as default. When kptr_restrict is set to (1) as default, the kdumpctl service loads the crash kernel regardless of whether the Kernel Address Space Layout (KASLR) is enabled.
If kptr_restrict is not set to 1 and KASLR is enabled, the contents of /proc/kore file are generated as all zeros. The kdumpctl service fails to access the /proc/kcore file and load the crash kernel. The kexec-kdump-howto.txt file displays a warning message, which recommends you to set kptr_restrict=1. Verify for the following in the sysctl.conf file to ensure that kdumpctl service loads the crash kernel:
-
Kernel
kptr_restrict=1in thesysctl.conffile.
Chapter 6. Reporting RHEL for Real Time bugs
The preferred method for reporting a RHEL for Real Time bug is to submit a bug report on the Red Hat Bugzilla. Before filing a bug, it is useful to identify the source where the problem occurred, such as the standard kernel or the RHEL for Real Time kernel.
6.1. Diagnosing RHEL for Real Time bugs
Identifying which kernel, the RHEL for Real Time or the standard kernel, is the source of the problem can increase the chances of having your bug fixed faster. By following the procedure steps, you can diagnose the source of the problem before submitting a bug report.
Prerequisites
- The latest version of RHEL for Real Time kernel is installed.
Procedure
- Verify that you have the latest version of the RHEL for Real Time kernel.
-
Boot into RHEL for Real Time kernel using the
GRUBmenu. - If the problem occurs, report a bug against RHEL for Real Time.
Try to reproduce the problem with the standard kernel.
This troubleshooting step assists in identifying the problem location.
If the problem does not occur with the standard kernel, then the bug is probably the result of changes introduced in the RHEL for Real Time specific enhancements, which Red Hat has applied on top of the baseline (4.18.0) kernel.
6.2. Submitting a bug report with Bugzilla
After identifying the bug specific to RHEL for Real Time, use the following procedure steps to submit a bug report with Bugzilla.
Prerequisite:
- You have a Red Hat Bugzilla account.
Procedure
- Log into your Bugzilla account.
-
Click
Enter A New Bug Report. -
Select
Red Hat classification. -
Select the
Red Hat Enterprise Linuxproduct. -
Enter
Component.
For example, usekernel-rtif it is a kernel issue or the name of the affected user space component, such asrteval. Provide a detailed description of the bug issue for RHEL for Real Time kernel.
When entering the problem description you can also state if you were able to reproduce the problem on the standard RHEL 8 kernel.