このコンテンツは選択した言語では利用できません。
Client Tools Installation Guide
Installing and Configuring the Openshift Enterprise Client Tools
Abstract
Chapter 1. Introduction to OpenShift Enterprise
Chapter 2. OpenShift Client Tools
2.1. About OpenShift Client Tools
- Setting up, administering and managing accounts
- Launching new applications
- Managing and monitoring applications
- Coding
- Debugging
- Advanced application management
2.2. Installing Client Tools
2.2.1. Installing on Windows
- Windows 7
- Windows Vista
- Windows XP
- Windows 2000
2.2.1.1. Prerequisites
2.2.1.2. Installing Required Software
- RubyInstaller
Git: software version control system.
2.2.1.2.1. Installing RubyInstaller
- From rubyinstaller.org, download and save the latest RubyInstaller package for Windows to your desired directory.
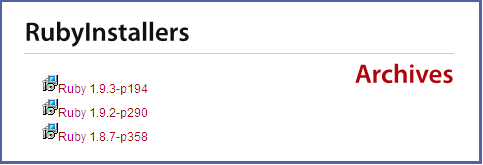
Figure 2.1. Select RubyInstaller Package
- Double-click the executable RubyInstaller file downloaded in the previos step to launch the RubyInstaller installation wizard. Accept the Ruby License Agreement and click Next.
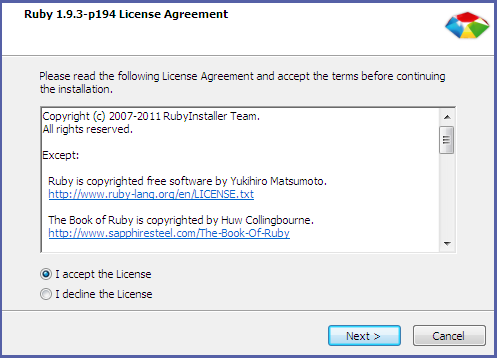
Figure 2.2. Accept License Agreement
- Select the Add Ruby executables to your PATH check box, and click Install to begin the installation.
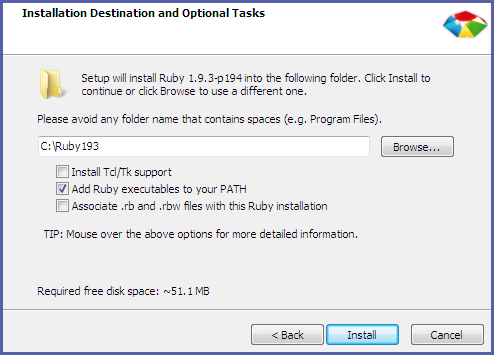
Figure 2.3. Select PATH
- Click Finish when the install completes.
2.2.1.2.2. Installing Git Version Control
- From http://msysgit.github.com/, download and save the latest version of Git for Windows to your desired directory.
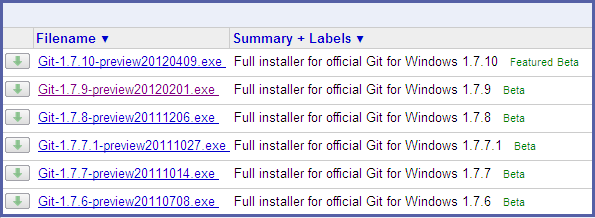
Figure 2.4. Select Git Package
- Double-click the executable Git file downloaded in the previous step to launch the Git installation wizard. Click Next until you are prompted to adjust the PATH environment.
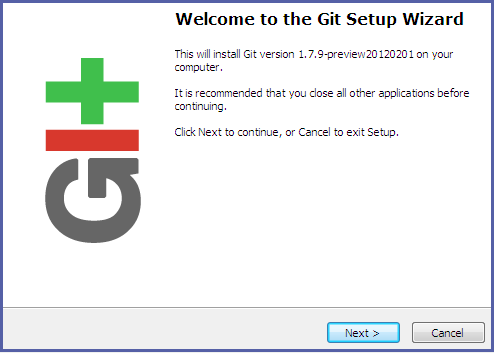
Figure 2.5. Git Setup Wizard
- Select the Run Git and included UNIX tools from the Windows Command Prompt check box and click Next. This is so that you can use the default Windows command prompt for Git and SSH operations.
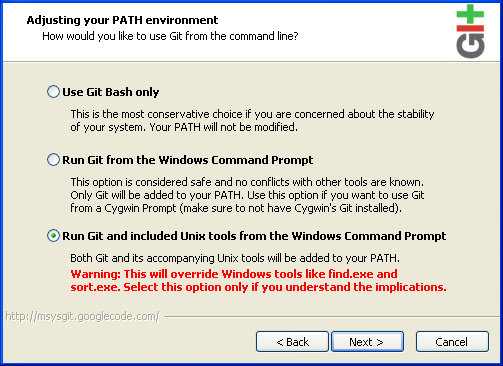
Figure 2.6. Select Git PATH
- Select the Checkout Windows-style, commit Unix-style line endings check box, and click Next.
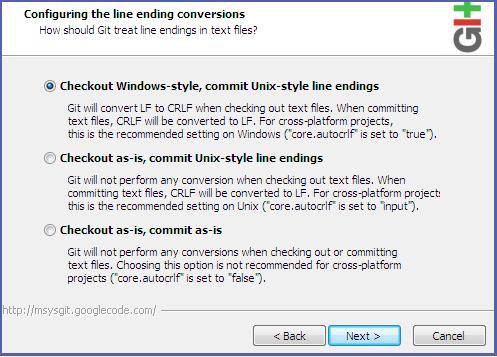
Figure 2.7. Select Line Ending
- Click Finish when the install completes.
2.2.1.3. Installing Client Tools
RubyInstaller and Git have been successfully installed, use the following instructions to install the client tools.
- Open Windows Command Prompt.
- Click
Start, typecmdin the Start Search text box, and then clickcmd.
- Run the following command to install the client tools:
$ gem install rhcWhen the installation completes, proceed to Section 2.3, “Configuring Client Tools” to configure the client tools using the interactive setup wizard.
2.2.2. Installing on Mac OS X
2.2.2.1. Prerequisites
- Mac OS X 10.5 or later
- Sudo access
2.2.2.2. Installing Required Software
Ruby: interpreted object-oriented scripting language.Git: software version control system.
Mac OS X Lion ships with Ruby 1.8.7 preinstalled. Previous versions of OS X included Ruby as part of the Xcode integrated development environment. If you are installing the client tools on a version of OS X that did not ship with Ruby preinstalled, you can install it one of two ways:
- Use the OS X installation CD
- Download and install the Xcode integrated development environment from the Apple website
- Download and install
Rubyfrom the MacRuby website, or - Visit http://www.ruby-lang.org/en/downloads/ for help installing
Rubywith homebrew
Ruby is installed, run the following command to verify that it has installed correctly:
$ ruby -e 'puts "Welcome to Ruby"'
Welcome to Ruby
Although there are a number of options available to install Git version control on Mac OS X, Red Hat
recommends to download and install the latest version from here: http://code.google.com/p/git-osx-installer/.
Git has installed correctly:
$ git --version
git version 1.7.11.1
2.2.2.3. Installing Client Tools
Ruby and Git have been successfully installed, run the following command to install the client tools:
$ sudo gem install rhc2.2.3. Installing on Ubuntu and Debian
2.2.3.1. Prerequisites
- Sudoer or root access
Note
sudo command only works if the particular user is listed in the sudoers file. As an alternative to sudo access, you can activate a root terminal with the su command and the root password. If you activate a root terminal, omit sudo from the commands shown in the examples. Be sure to close the root terminal after the installation completes.
2.2.3.2. Installing Required Software
Ruby: interpreted object-oriented scripting language.RubyGems: Ruby standard for publishing and managing third party libraries.Git: software version control system.
From terminal, run the following command to install Ruby:
$ sudo apt-get install ruby-fullRuby has installed correctly:
$ ruby -e 'puts "Welcome to Ruby"'
Welcome to Ruby
Run the following command to install RubyGems:
$ sudo apt-get install rubygems
Run the following command to install Git version control:
$ sudo apt-get install git-coreGit has installed correctly:
$ git --version
git version 1.7.11.1
2.2.3.3. Installing Client Tools
$ sudo gem install rhc2.2.3.4. Installation Issues and Tips
On Ubuntu and other Debian based distributions, the OpenShift Enterprise client tools by default are stored in the /var/lib/gems/1.8/bin directory. Therefore, all client tool commands must be executed from this directory, and you must append ./ to each command.
$ sudo export PATH=/var/lib/gems/1.8/bin:$PATHexport PATH=/var/lib/gems/1.8/bin:$PATH command to your .bashrc file. Therefore, each time a new Terminal session is started, the client tools are automatically added to the PATH environment variable. You can then run all client tool commands from any directory in Terminal.
Initially the OpenShift Enterprise client tools are only available to the user installed them. Run the following command to make the client tools available for all users on an Ubuntu system:
$ sudo ln -s /var/lib/gems/1.8/bin/rhc* /usr/bin/2.2.4. Installing on openSUSE
2.2.4.1. Prerequisites
- Sudoer or root access
Note
sudo command only works if the particular user is listed in the sudoers file. As an alternative to sudo access, you can activate a root terminal with the su command and the root password. If you activate a root terminal, omit sudo from the commands shown in the examples. Be sure to close the root terminal after the installation completes.
2.2.4.2. Installing Required Software
Ruby: interpreted object-oriented scripting language.RubyGems: Ruby standard for publishing and managing third party libraries.Git: software version control system.
From terminal, run the following command to install Ruby:
$ sudo zypper install rubyRuby has installed correctly:
$ ruby -e 'puts "Welcome to Ruby"'
Welcome to Ruby
Run the following command to install RubyGems:
$ sudo zypper install rubygems
Run the following command to install Git version control:
$ sudo zypper install git-coreGit has installed correctly:
$ git --version
git version 1.7.11.1
2.2.4.3. Installing Client Tools
$ sudo gem install rhc2.2.5. Installing on Fedora
2.2.5.1. Prerequisites
- Fedora 16 or later
- Sudoer or root access
Note
sudo command only works if the particular user is listed in the sudoers file. As an alternative to sudo access, you can activate a root terminal with the su command and the root password. If you activate a root terminal, omit sudo from the commands shown in the examples. Be sure to close the root terminal when the installation process is complete.
2.2.5.2. Installing the Client Tools
- Install the RPM using YUM package manager
- Install the gem using
gem install
Note
Run the following command to install the client tools and all other required dependencies:
$ sudo yum install rubygem-rhc
Run the following command to install Ruby and RubyGems if they are not already installed:
$ sudo yum install rubygems$ sudo gem install rhc2.2.5.3. Installation Issues and Tips for Fedora
The OpenShift Enterprise client tools for Fedora support the automatic completion feature of the bash shell. Run the rhc setup --autocomplete command and follow the instructions to enable automatic completion.
$ rhc setup --autocomplete.bashrc file in your home directory. Do this by adding source /etc/bash_completion.d/rhc to your .bashrc file.
2.2.6. Installing on Red Hat Enterprise Linux
Note
rhc package found in the OpenShift Enterprise 2.0 Client Tools channel is updated less frequently than the Ruby gem version of the client tools. This may lead to some features temporarily only being available in the Ruby gem version. To ensure use of the latest version and all available features, see Section 2.2.6.3, “Installing Using the Red Hat Enterprise Linux Optional Channel” for the Ruby gem installation method.
2.2.6.1. Prerequisites
- Red Hat Enterprise Linux 6 or later
- Sudoer or root access
Note
sudo command only works if the particular user is listed in the sudoers file. As an alternative to sudo access, you can activate a root terminal with the su command and the root password. If you activate a root terminal, omit sudo from the commands shown in the examples. Be sure to close the root terminal after the installation completes.
2.2.6.2. Installing from the OpenShift Enterprise 2.0 Client Tools Channel
Important
If you are using Red Hat Subscription Management, use the following steps. For additional information on managing your subscription entitlements with RHSM, see the Red Hat Subscription Management Guide at https://access.redhat.com/site/documentation.
Procedure 2.1. To Configure OpenShift Enterprise Entitlements with RHSM on Red Hat Enterprise Linux
- If your Red Hat Enterprise Linux instance is not already registered, run the following command to do so:
$ sudo subscription-manager register Username: Password: The system has been registered with id: 3tghj35d1-7c19-4734-b638-f24tw8eh6246 - Run the following command and locate the desired OpenShift Enterprise subscription pool ID in the list of the available subscriptions for that account:
$ sudo subscription-manager list --available +-------------------------------------------+ Available Subscriptions +-------------------------------------------+ Subscription Name: OpenShift Enterprise SKU: MCT#### Pool Id: Example_3cf49557013d418c52992690 Quantity: 1 Service Level: Standard Service Type: L1-L3 Multi-Entitlement: No Ends: 01/01/2020 System Type: Physical - Subscribe to the desired pool ID identified in the previous step with the following command:
$ sudo subscription-manager subscribe --pool Example_3cf49557013d418c52992690 Successfully attached a subscription for: OpenShift Enterprise - Confirm that the pertinent repository is now listed on your system:
$ sudo yum repolist

repo id                           repo name

rhel-server-ose-2.0-rhc-6-rpms        Red Hat OpenShift Enterprise 2.0 Client Tools (RPMs)
If you do not see the correct repos enabled, check and edit your/etc/yum.repos.d/redhat.repoto modify your enabled repos as needed.
If you are using RHN Classic, use the following steps. For more detailed information on using RHN Classic, see the appendix in the Red Hat Subscription Management Guide at https://access.redhat.com/site/documentation.
Note
Procedure 2.2. To Configure OpenShift Enterprise Entitlements with RHN Classic on Red Hat Enterprise Linux
- If your Red Hat Enterprise Linux instance is not already registered, run the following command and follow the on-screen instructions:
$ sudo rhn_register - Log on to the Red Hat Customer Portal at http://access.redhat.com, choose under RHN CLASSIC from the tab, then locate and click on the hostname of the system.
- From the system profile's tab, click Alter Channel Subscriptions and check mark the Red Hat OpenShift Enterprise 2.0 Client Tools child channel. The channel will be located within the expandable Additional Services Channels for Red Hat Enterprise Linux 6 for x86_64 section. Apply your changes by clicking the button.
- Confirm that the pertinent repositories are now listed on your system:
$ sudo yum repolist

repo id                                repo name

rhel-x86_64-server-6-ose-2.0-rhc      Red Hat OpenShift Enterprise 2.0 Client Tools (RPMs)
After using either of the above methods to subscribe to the OpenShift Enterprise channel, run the following command to install the client tools:
$ sudo yum install rhc2.2.6.3. Installing Using the Red Hat Enterprise Linux Optional Channel
RubyGems already installed, you must enable the Red Hat Enterprise Linux Optional channel. The following assumes that the client system is already registered and subscribed to a Red Hat Enterprise Linux base channel.
Important
If you are using Red Hat Subscription Management, use the following command to enable the Optional channel:
$ sudo yum-config-manager --enable rhel-6-[operating_system]-optional-rpms$ sudo rhn-channel --add --channel rhel-[architecture]-[operating_system]-optional-6- operating_system: type of operating system installed. Enter either
workstation,clientorserver. - architecture: your system architecture. Enter either
i386orx86_64.
$ sudo rhn-channel --add --channel=rhel-x86_64-workstation-optional-6
After the Optional channel has been enabled, use the following procedure to install the rhc gem which provides the client tools:
Procedure 2.3. To Install the rhc gem on Red Hat Enterprise Linux
- Make sure
RubyGemsis installed:$ sudo yum install rubygems - Then run the following command to install the
rhcgem:$ sudo gem install rhc
2.2.6.4. Installation Issues and Tips for Red Hat Enterprise Linux
The OpenShift Enterprise client tools for Red Hat Enterprise Linux support the automatic completion feature of the bash shell. Run the rhc setup --autocomplete command and follow the instructions to enable automatic completion.
$ rhc setup --autocomplete.bashrc file in your home directory. Do this by adding source /etc/bash_completion.d/rhc to your .bashrc file.
2.3. Configuring Client Tools
Important
rhc --version to verify the installed version, or see Section 2.4, “Updating Client Tools” for instructions on how to update the client tools.
Note
Run the rhc setup command to launch the setup wizard, and specify the broker with the --server option. The following example assumes the OpenShift Enterprise broker is located at broker.example.com:
$ rhc setup --server=broker.example.com
OpenShift Client Tools (RHC) Setup Wizard

This wizard will help you upload your SSH keys, set your application namespace, and check that other programs like Git are properly installed.
The server's certificate is self-signed, which means that a secure connection cannot be established to 'broker.example.com'.

You may bypass this check, but any data you send to the server could be intercepted by others.

Connect without checking the certificate? (yes|no):
The setup wizard next prompts you for the login credentials. If you are unsure of the credentials to use, contact your system administrator.
Login to broker.example.com: user@myemail.com
Password: passwordYou are then prompted to generate an authorization token. Answering yes will store a token in your home directory to be used on subsequent requests. When it expires, you are prompted for your password again.
OpenShift

	 can create and store a token on disk which allows to you to access the server without using your password. The key is stored in your home directory and should be kept secret. You can delete the key at any time by running 'rhc logout'.
Generate a token now? (yes|no) yes
Generating an authorization token for this client ... lasts about 1 day
With your login credentials, the setup wizard creates the express.conf configuration file in your home directory. In the following example, the express.conf file is created in the C:\Users\User1\.openshift directory.
Saving configuration to C:\Users\User1\.openshift\express.conf ... done
Next, the setup wizard configures the SSH keys so that your system can authenticate with the remote server. Because this is the initial configuration, it is assumed no existing SSH keys are found on your system. Therefore, the setup wizard generates a new pair of SSH keys, named id_rsa and id_rsa.pub, and saves them in your home directory. In the following example the SSH keys are generated and saved in the C:\Users\User1\.ssh directory.
No SSH keys were found. We will generate a pair of keys for you.
	Created: C:\Users\User1\.ssh\id_rsa.pub
id_rsa.pub, must be uploaded to the OpenShift server to authenticate your system to the remote server. Enter a name to use for your key, or leave it blank to use the default name. In the following example the default name is used.
Your public ssh key must be uploaded to the OpenShift server to access code.
Upload now? (yes|no) yes

Since you do not have any keys associated with your OpenShift account, your new key will be uploaded as the 'default' key

Uploading key 'default' from C:\Users\User1\.ssh\id_rsa.pub ... done
The setup wizard verifies if Git version control software is installed on your system. Git is required to create and deploy applications to the OpenShift Enterprise cloud environment. It is assumed that all the required software for your operating system is already installed as described in the earlier sections of this document. In the example below, the setup wizard verifies that Git for Windows is installed correctly.
In order to fully interact with OpenShift you will need to install and configure a git client if you have not already done so.
Documentation for installing other tools you will need for OpenShift can be found at https://openshift.redhat.com/community/developers/install-the-client-tools

We recommend these free applications:

  * Git for Windows - a basic git command line and GUI client https://github.com
/msysgit/msysgit/wiki/InstallMSysGit
  * TortoiseGit - git client that integrates into the file explorer http://code.
google.com/p/tortoisegit/
The setup wizard next verifies whether a domain already exists for your cloud environment. The example below assumes that a domain does not exist, and one must be created. To create a domain at this time, enter the desired name when prompted. Alternatively, you can create a domain using the OpenShift Enterprise Management Console, or using the rhc domain create command later. The domain named MyDomain is created in the following example.
Checking for a domain ... none

Your domain is unique to your account and is the suffix of the public URLs we assign to your applications. You may configure your domain here or leave it blank and use 'rhc domain create' to create a domain later. You will not be able to create applications without first creating a domain.

Please enter a domain (letters and numbers only) |<none>|: MyDomain
Your domain name 'MyDomain' has been successfully created
Important
Finally, the setup wizard verifies whether any applications exist under your domain. Any applications created with the Management Console are displayed here. In the example below, no applications have been created. In this case the setup wizard shows the types of applications that can be created with the associated commands. The setup wizard then completes by displaying the current gear consumption along with the gear sizes available to the given user.
Checking for applications ... none

Run 'rhc app create' to create your first application.

  Do-It-Yourself                            rhc app create <app name> diy-0.1
  JBoss Enterprise Application Platform 6.0 rhc app create <app name> jbosseap-6.0
  Jenkins Server 1.4                        rhc app create <app name> jenkins-1.4
  PHP 5.4                                   rhc app create <app name> php-5.4
  Perl 5.10                                 rhc app create <app name> perl-5.10
  Python 2.6                                rhc app create <app name> python-2.6
  Ruby 1.8                                  rhc app create <app name> ruby-1.8
  Ruby 1.9                                  rhc app create <app name> ruby-1.9
  Tomcat (JBoss Enterprise Web Server 1.0)  rhc app create <app name> jbossews-1.0

  You are using 0 of 100 total gears
  The following gear sizes are available to you: small

Your client tools are now configured.
2.4. Updating Client Tools
gem install method, run the gem update command to update the client tools:
$ gem update rhcyum install method, run the yum update command to update the client tools, and replace packagename with rubygem-rhc for Fedora or rhc for Red Hat Enterprise Linux:
$ yum update packagename2.5. Where To Go From Here
Appendix A. Revision History
| Revision History | ||||
|---|---|---|---|---|
| Revision 2.1-1 | Mon 15 Sep 2014 | |||
| ||||
| Revision 2.1-0 | Fri 07 Mar 2014 | |||
| ||||
| Revision 2.0-0 | Mon Dec 9 2013 | |||
| ||||
Legal Notice
Copyright © Red Hat
OpenShift documentation is licensed under the Apache License 2.0 (https://www.apache.org/licenses/LICENSE-2.0).
Modified versions must remove all Red Hat trademarks.
Portions adapted from https://github.com/kubernetes-incubator/service-catalog/ with modifications by Red Hat.
Red Hat, Red Hat Enterprise Linux, the Red Hat logo, the Shadowman logo, JBoss, OpenShift, Fedora, the Infinity logo, and RHCE are trademarks of Red Hat, Inc., registered in the United States and other countries.
Linux® is the registered trademark of Linus Torvalds in the United States and other countries.
Java® is a registered trademark of Oracle and/or its affiliates.
XFS® is a trademark of Silicon Graphics International Corp. or its subsidiaries in the United States and/or other countries.
MySQL® is a registered trademark of MySQL AB in the United States, the European Union and other countries.
Node.js® is an official trademark of the OpenJS Foundation.
The OpenStack® Word Mark and OpenStack logo are either registered trademarks/service marks or trademarks/service marks of the OpenStack Foundation, in the United States and other countries and are used with the OpenStack Foundation’s permission. We are not affiliated with, endorsed or sponsored by the OpenStack Foundation, or the OpenStack community.
All other trademarks are the property of their respective owners.