Deployment Guide
Deployment, configuration and administration of Red Hat Enterprise Linux 5
Edition 11
Abstract
Introduction
- Setting up a network interface card (NIC)
- Configuring a Virtual Private Network (VPN)
- Configuring Samba shares
- Managing your software with RPM
- Determining information about your system
- Upgrading your kernel
- File systems
- Package management
- Network-related configuration
- System configuration
- System monitoring
- Kernel and Driver Configuration
- Security and Authentication
- Red Hat Training and Certification
1. Document Conventions
command- Linux commands (and other operating system commands, when used) are represented this way. This style should indicate to you that you can type the word or phrase on the command line and press Enter to invoke a command. Sometimes a command contains words that would be displayed in a different style on their own (such as file names). In these cases, they are considered to be part of the command, so the entire phrase is displayed as a command. For example:Use the
cat testfilecommand to view the contents of a file, namedtestfile, in the current working directory. file name- File names, directory names, paths, and RPM package names are represented this way. This style indicates that a particular file or directory exists with that name on your system. Examples:The
.bashrcfile in your home directory contains bash shell definitions and aliases for your own use.The/etc/fstabfile contains information about different system devices and file systems.Install thewebalizerRPM if you want to use a Web server log file analysis program. - application
- This style indicates that the program is an end-user application (as opposed to system software). For example:Use Mozilla to browse the Web.
- key
- A key on the keyboard is shown in this style. For example:To use Tab completion to list particular files in a directory, type
ls, then a character, and finally the Tab key. Your terminal displays the list of files in the working directory that begin with that character. - key+combination
- A combination of keystrokes is represented in this way. For example:The Ctrl+Alt+Backspace key combination exits your graphical session and returns you to the graphical login screen or the console.
- text found on a GUI interface
- A title, word, or phrase found on a GUI interface screen or window is shown in this style. Text shown in this style indicates a particular GUI screen or an element on a GUI screen (such as text associated with a checkbox or field). Example:Select the Require Password checkbox if you would like your screensaver to require a password before stopping.
- A word in this style indicates that the word is the top level of a pulldown menu. If you click on the word on the GUI screen, the rest of the menu should appear. For example:Under on a GNOME terminal, the option allows you to open multiple shell prompts in the same window.Instructions to type in a sequence of commands from a GUI menu look like the following example:Go to (the main menu on the panel) > > to start the Emacs text editor.
- This style indicates that the text can be found on a clickable button on a GUI screen. For example:Click on the button to return to the webpage you last viewed.
computer output- Text in this style indicates text displayed to a shell prompt such as error messages and responses to commands. For example:The
lscommand displays the contents of a directory. For example:Desktop about.html logs paulwesterberg.png Mail backupfiles mail reports
The output returned in response to the command (in this case, the contents of the directory) is shown in this style. prompt- A prompt, which is a computer's way of signifying that it is ready for you to input something, is shown in this style. Examples:
$#[stephen@maturin stephen]$leopard login: user input- Text that the user types, either on the command line or into a text box on a GUI screen, is displayed in this style. In the following example,
textis displayed in this style:To boot your system into the text based installation program, you must type in thetextcommand at theboot:prompt. - <replaceable>
- Text used in examples that is meant to be replaced with data provided by the user is displayed in this style. In the following example, <version-number> is displayed in this style:The directory for the kernel source is
/usr/src/kernels/<version-number>/, where <version-number> is the version and type of kernel installed on this system.
Note
Note
/usr/share/doc/ contains additional documentation for packages installed on your system.
Important
Warning
Warning
2. Send in Your Feedback
http://bugzilla.redhat.com/bugzilla/) against the component Deployment_Guide.
Part I. File Systems
parted utility to manage partitions and access control lists (ACLs) to customize file permissions.
Chapter 1. File System Structure
1.1. Why Share a Common Structure?
- Shareable vs. unshareable files
- Variable vs. static files
1.2. Overview of File System Hierarchy Standard (FHS)
/usr/ partition as read-only. This second point is important because the directory contains common executables and should not be changed by users. Also, since the /usr/ directory is mounted as read-only, it can be mounted from the CD-ROM or from another machine via a read-only NFS mount.
1.2.1. FHS Organization
1.2.1.1. The /boot/ Directory
/boot/ directory contains static files required to boot the system, such as the Linux kernel. These files are essential for the system to boot properly.
Warning
/boot/ directory. Doing so renders the system unbootable.
1.2.1.2. The /dev/ Directory
/dev/ directory contains device nodes that either represent devices that are attached to the system or virtual devices that are provided by the kernel. These device nodes are essential for the system to function properly. The udev daemon takes care of creating and removing all these device nodes in /dev/.
/dev directory and subdirectories are either character (providing only a serial stream of input/output) or block (accessible randomly). Character devices include mouse, keyboard, modem while block devices include hard disk, floppy drive etc. If you have GNOME or KDE installed in your system, devices such as external drives or cds are automatically detected when connected (e.g via usb) or inserted (e.g via CD or DVD drive) and a popup window displaying the contents is automatically displayed. Files in the /dev directory are essential for the system to function properly.
| File | Description |
|---|---|
| /dev/hda | The master device on primary IDE channel. |
| /dev/hdb | The slave device on primary IDE channel. |
| /dev/tty0 | The first virtual console. |
| /dev/tty1 | The second virtual console. |
| /dev/sda | The first device on primary SCSI or SATA channel. |
| /dev/lp0 | The first parallel port. |
1.2.1.3. The /etc/ Directory
/etc/ directory is reserved for configuration files that are local to the machine. No binaries are to be placed in /etc/. Any binaries that were once located in /etc/ should be placed into /sbin/ or /bin/.
/etc are the X11/ and skel/:
/etc |- X11/ |- skel/
/etc/X11/ directory is for X Window System configuration files, such as xorg.conf. The /etc/skel/ directory is for "skeleton" user files, which are used to populate a home directory when a user is first created. Applications also store their configuration files in this directory and may reference them when they are executed.
1.2.1.4. The /lib/ Directory
/lib/ directory should contain only those libraries needed to execute the binaries in /bin/ and /sbin/. These shared library images are particularly important for booting the system and executing commands within the root file system.
1.2.1.5. The /media/ Directory
/media/ directory contains subdirectories used as mount points for removable media such as usb storage media, DVDs, CD-ROMs, and Zip disks.
1.2.1.6. The /mnt/ Directory
/mnt/ directory is reserved for temporarily mounted file systems, such as NFS file system mounts. For all removable media, please use the /media/ directory. Automatically detected removable media will be mounted in the /media directory.
Note
/mnt directory must not be used by installation programs.
1.2.1.7. The /opt/ Directory
/opt/ directory provides storage for most application software packages.
/opt/ directory creates a directory bearing the same name as the package. This directory, in turn, holds files that otherwise would be scattered throughout the file system, giving the system administrator an easy way to determine the role of each file within a particular package.
sample is the name of a particular software package located within the /opt/ directory, then all of its files are placed in directories inside the /opt/sample/ directory, such as /opt/sample/bin/ for binaries and /opt/sample/man/ for manual pages.
/opt/ directory, giving that large package a way to organize itself. In this way, our sample package may have different tools that each go in their own sub-directories, such as /opt/sample/tool1/ and /opt/sample/tool2/, each of which can have their own bin/, man/, and other similar directories.
1.2.1.8. The /proc/ Directory
/proc/ directory contains special files that either extract information from or send information to the kernel. Examples include system memory, cpu information, hardware configuration etc.
/proc/ and the many ways this directory can be used to communicate with the kernel, an entire chapter has been devoted to the subject. For more information, refer to Chapter 5, The proc File System.
1.2.1.9. The /sbin/ Directory
/sbin/ directory stores executables used by the root user. The executables in /sbin/ are used at boot time, for system administration and to perform system recovery operations. Of this directory, the FHS says:
/sbincontains binaries essential for booting, restoring, recovering, and/or repairing the system in addition to the binaries in/bin. Programs executed after/usr/is known to be mounted (when there are no problems) are generally placed into/usr/sbin. Locally-installed system administration programs should be placed into/usr/local/sbin.
/sbin/:
arp,clock,halt,init,fsck.*,grub,ifconfig,mingetty,mkfs.*,mkswap,reboot,route,shutdown,swapoff,swapon
1.2.1.10. The /srv/ Directory
/srv/ directory contains site-specific data served by your system running Red Hat Enterprise Linux. This directory gives users the location of data files for a particular service, such as FTP, WWW, or CVS. Data that only pertains to a specific user should go in the /home/ directory.
1.2.1.11. The /sys/ Directory
/sys/ directory utilizes the new sysfs virtual file system specific to the 2.6 kernel. With the increased support for hot plug hardware devices in the 2.6 kernel, the /sys/ directory contains information similarly held in /proc/, but displays a hierarchical view of specific device information in regards to hot plug devices.
1.2.1.12. The /usr/ Directory
/usr/ directory is for files that can be shared across multiple machines. The /usr/ directory is often on its own partition and is mounted read-only. At a minimum, the following directories should be subdirectories of /usr/:
/usr |- bin/ |- etc/ |- games/ |- include/ |- kerberos/ |- lib/ |- libexec/ |- local/ |- sbin/ |- share/ |- src/ |- tmp -> ../var/tmp/
/usr/ directory, the bin/ subdirectory contains executables, etc/ contains system-wide configuration files, games is for games, include/ contains C header files, kerberos/ contains binaries and other Kerberos-related files, and lib/ contains object files and libraries that are not designed to be directly utilized by users or shell scripts. The libexec/ directory contains small helper programs called by other programs, sbin/ is for system administration binaries (those that do not belong in the /sbin/ directory), share/ contains files that are not architecture-specific, src/ is for source code.
1.2.1.13. The /usr/local/ Directory
The/usr/localhierarchy is for use by the system administrator when installing software locally. It needs to be safe from being overwritten when the system software is updated. It may be used for programs and data that are shareable among a group of hosts, but not found in/usr.
/usr/local/ directory is similar in structure to the /usr/ directory. It has the following subdirectories, which are similar in purpose to those in the /usr/ directory:
/usr/local |- bin/ |- etc/ |- games/ |- include/ |- lib/ |- libexec/ |- sbin/ |- share/ |- src/
/usr/local/ directory is slightly different from that specified by the FHS. The FHS says that /usr/local/ should be where software that is to remain safe from system software upgrades is stored. Since software upgrades can be performed safely with RPM Package Manager (RPM), it is not necessary to protect files by putting them in /usr/local/. Instead, the /usr/local/ directory is used for software that is local to the machine.
/usr/ directory is mounted as a read-only NFS share from a remote host, it is still possible to install a package or program under the /usr/local/ directory.
1.2.1.14. The /var/ Directory
/usr/ as read-only, any programs that write log files or need spool/ or lock/ directories should write them to the /var/ directory. The FHS states /var/ is for:
...variable data files. This includes spool directories and files, administrative and logging data, and transient and temporary files.
/var/ directory:
/var
|- account/
|- arpwatch/
|- cache/
|- crash/
|- db/
|- empty/
|- ftp/
|- gdm/
|- kerberos/
|- lib/
|- local/
|- lock/
|- log/
|- mail -> spool/mail/
|- mailman/
|- named/
|- nis/
|- opt/
|- preserve/
|- run/
+- spool/
|- at/
|- clientmqueue/
|- cron/
|- cups/
|- exim/
|- lpd/
|- mail/
|- mailman/
|- mqueue/
|- news/
|- postfix/
|- repackage/
|- rwho/
|- samba/
|- squid/
|- squirrelmail/
|- up2date/
|- uucp
|- uucppublic/
|- vbox/
|- tmp/
|- tux/
|- www/
|- yp/messages and lastlog, go in the /var/log/ directory. The /var/lib/rpm/ directory contains RPM system databases. Lock files go in the /var/lock/ directory, usually in directories for the program using the file. The /var/spool/ directory has subdirectories for programs in which data files are stored.
1.3. Special File Locations Under Red Hat Enterprise Linux
/var/lib/rpm/ directory. For more information on RPM, refer to the chapter Chapter 12, Package Management with RPM.
/var/cache/yum/ directory contains files used by the Package Updater, including RPM header information for the system. This location may also be used to temporarily store RPMs downloaded while updating the system. For more information about Red Hat Network, refer to Chapter 15, Registering a System and Managing Subscriptions.
/etc/sysconfig/ directory. This directory stores a variety of configuration information. Many scripts that run at boot time use the files in this directory. Refer to Chapter 32, The sysconfig Directory for more information about what is within this directory and the role these files play in the boot process.
Chapter 2. Using the mount Command
mount or umount command respectively. This chapter describes the basic usage of these commands, and covers some advanced topics such as moving a mount point or creating shared subtrees.
2.1. Listing Currently Mounted File Systems
mount command with no additional arguments:
mountdevice on directory type type (options)
sysfs, tmpfs, and others. To display only the devices with a certain file system type, supply the -t option on the command line:
mount-ttype
mount command to list the mounted file systems, see Example 2.1, “Listing Currently Mounted ext3 File Systems”.
Example 2.1. Listing Currently Mounted ext3 File Systems
/ and /boot partitions are formatted to use ext3. To display only the mount points that use this file system, type the following at a shell prompt:
~]$ mount -t ext3
/dev/mapper/VolGroup00-LogVol00 on / type ext3 (rw)
/dev/vda1 on /boot type ext3 (rw)2.2. Mounting a File System
mount command in the following form:
mount [option…] device directorymount command is run, it reads the content of the /etc/fstab configuration file to see if the given file system is listed. This file contains a list of device names and the directory in which the selected file systems should be mounted, as well as the file system type and mount options. Because of this, when you are mounting a file system that is specified in this file, you can use one of the following variants of the command:
mount[option…] directorymount[option…] device
root, you must have permissions to mount the file system (see Section 2.2.2, “Specifying the Mount Options”).
2.2.1. Specifying the File System Type
mount detects the file system automatically. However, there are certain file systems, such as NFS (Network File System) or CIFS (Common Internet File System), that are not recognized, and need to be specified manually. To specify the file system type, use the mount command in the following form:
mount-ttype device directory
mount command. For a complete list of all available file system types, consult the relevant manual page as referred to in Section 2.4.1, “Installed Documentation”.
| Type | Description |
|---|---|
ext2 | The ext2 file system. |
ext3 | The ext3 file system. |
ext4 | The ext4 file system. |
iso9660 | The ISO 9660 file system. It is commonly used by optical media, typically CDs. |
jfs | The JFS file system created by IBM. |
nfs | The NFS file system. It is commonly used to access files over the network. |
nfs4 | The NFSv4 file system. It is commonly used to access files over the network. |
ntfs | The NTFS file system. It is commonly used on machines that are running the Windows operating system. |
udf | The UDF file system. It is commonly used by optical media, typically DVDs. |
vfat | The FAT file system. It is commonly used on machines that are running the Windows operating system, and on certain digital media such as USB flash drives or floppy disks. |
Example 2.2. Mounting a USB Flash Drive
/dev/sdc1 device and that the /media/flashdisk/ directory exists, you can mount it to this directory by typing the following at a shell prompt as root:
~]# mount -t vfat /dev/sdc1 /media/flashdisk2.2.2. Specifying the Mount Options
mount-ooptions
mount will incorrectly interpret the values following spaces as additional parameters.
| Option | Description |
|---|---|
async | Allows the asynchronous input/output operations on the file system. |
auto | Allows the file system to be mounted automatically using the mount -a command. |
defaults | Provides an alias for async,auto,dev,exec,nouser,rw,suid. |
exec | Allows the execution of binary files on the particular file system. |
loop | Mounts an image as a loop device. |
noauto | Disallows the automatic mount of the file system using the mount -a command. |
noexec | Disallows the execution of binary files on the particular file system. |
nouser | Disallows an ordinary user (that is, other than root) to mount and unmount the file system. |
remount | Remounts the file system in case it is already mounted. |
ro | Mounts the file system for reading only. |
rw | Mounts the file system for both reading and writing. |
user | Allows an ordinary user (that is, other than root) to mount and unmount the file system. |
Example 2.3. Mounting an ISO Image
/media/cdrom/ directory exists, you can mount the image to this directory by running the following command as root:
~]# mount -o ro,loop Fedora-14-x86_64-Live-Desktop.iso /media/cdrom2.2.3. Sharing Mounts
mount command implements the --bind option that provides a means for duplicating certain mounts. Its usage is as follows:
mount--bindold_directory new_directory
mount--rbindold_directory new_directory
- Shared Mount
- A shared mount allows you to create an exact replica of a given mount point. When a shared mount is created, any mount within the original mount point is reflected in it, and vice versa. To create a shared mount, type the following at a shell prompt:
mount--make-sharedmount_pointAlternatively, you can change the mount type for the selected mount point and all mount points under it:mount--make-rsharedmount_pointSee Example 2.4, “Creating a Shared Mount Point” for an example usage. - Slave Mount
- A slave mount allows you to create a limited duplicate of a given mount point. When a slave mount is created, any mount within the original mount point is reflected in it, but no mount within a slave mount is reflected in its original. To create a slave mount, type the following at a shell prompt:
mount--make-slavemount_pointAlternatively, you can change the mount type for the selected mount point and all mount points under it:mount--make-rslavemount_pointSee Example 2.5, “Creating a Slave Mount Point” for an example usage.Example 2.5. Creating a Slave Mount Point
Imagine you want the content of the/mediadirectory to appear in/mntas well, but you do not want any mounts in the/mntdirectory to be reflected in/media. To do so, asroot, first mark the/mediadirectory as “shared”:~]#
mount --bind /media /media~]#mount --make-shared /mediaThen create its duplicate in/mnt, but mark it as “slave”:~]#
mount --bind /media /mnt~]#mount --make-slave /mntYou can now verify that a mount within/mediaalso appears in/mnt. For example, if you have non-empty media in your CD-ROM drive and the/media/cdrom/directory exists, run the following commands:~]#
mount /dev/cdrom /media/cdrom~]#ls /media/cdromEFI GPL isolinux LiveOS ~]#ls /mnt/cdromEFI GPL isolinux LiveOSYou can also verify that file systems mounted in the/mntdirectory are not reflected in/media. For instance, if you have a non-empty USB flash drive that uses the/dev/sdc1device plugged in and the/mnt/flashdisk/directory is present, type: :~]#
mount /dev/sdc1 /mnt/flashdisk~]#ls /media/flashdisk~]#ls /mnt/flashdisken-US publican.cfg - Private Mount
- A private mount allows you to create an ordinary mount. When a private mount is created, no subsequent mounts within the original mount point are reflected in it, and no mount within a private mount is reflected in its original. To create a private mount, type the following at a shell prompt:
mount--make-privatemount_pointAlternatively, you can change the mount type for the selected mount point and all mount points under it:mount--make-rprivatemount_pointSee Example 2.6, “Creating a Private Mount Point” for an example usage.Example 2.6. Creating a Private Mount Point
Taking into account the scenario in Example 2.4, “Creating a Shared Mount Point”, assume that you have previously created a shared mount point by using the following commands asroot:~]#
mount --bind /media /media~]#mount --make-shared /media~]#mount --bind /media /mntTo mark the/mntdirectory as “private”, type:~]#
mount --make-private /mntYou can now verify that none of the mounts within/mediaappears in/mnt. For example, if you have non-empty media in your CD-ROM drive and the/media/cdrom/directory exists, run the following commands:~]#
mount /dev/cdrom /media/cdrom~]#ls /media/cdromEFI GPL isolinux LiveOS ~]#ls /mnt/cdrom~]#You can also verify that file systems mounted in the/mntdirectory are not reflected in/media. For instance, if you have a non-empty USB flash drive that uses the/dev/sdc1device plugged in and the/mnt/flashdisk/directory is present, type:~]#
mount /dev/sdc1 /mnt/flashdisk~]#ls /media/flashdisk~]#ls /mnt/flashdisken-US publican.cfg - Unbindable Mount
- An unbindable mount allows you to prevent a given mount point from being duplicated whatsoever. To create an unbindable mount, type the following at a shell prompt:
mount--make-unbindablemount_pointAlternatively, you can change the mount type for the selected mount point and all mount points under it:mount--make-runbindablemount_pointSee Example 2.7, “Creating an Unbindable Mount Point” for an example usage.Example 2.7. Creating an Unbindable Mount Point
To prevent the/mediadirectory from being shared, asroot, type the following at a shell prompt:~]#
mount --bind /media /media~]#mount --make-unbindable /mediaThis way, any subsequent attempt to make a duplicate of this mount will fail with an error:~]#
mount --bind /media /mntmount: wrong fs type, bad option, bad superblock on /media/, missing code page or other error In some cases useful info is found in syslog - try dmesg | tail or so
2.2.4. Moving a Mount Point
mount--moveold_directory new_directory
Example 2.8. Moving an Existing NFS Mount Point
/mnt/userdirs/, as root, you can move this mount point to /home by using the following command:
~]# mount --move /mnt/userdirs /home~]#ls /mnt/userdirs~]#ls /homejill joe
2.3. Unmounting a File System
umount command:
umountdirectoryumountdevice
root, you must have permissions to unmount the file system (see Section 2.2.2, “Specifying the Mount Options”). See Example 2.9, “Unmounting a CD” for an example usage.
Important
umount command will fail with an error. To determine which processes are accessing the file system, use the fuser command in the following form:
fuser-mdirectory
/media/cdrom/ directory, type:
~]$ fuser -m /media/cdrom
/media/cdrom: 1793 2013 2022 2435 10532c 10672cExample 2.9. Unmounting a CD
/media/cdrom/ directory, type the following at a shell prompt:
~]$ umount /media/cdrom2.4. Additional Resources
2.4.1. Installed Documentation
man 8 mount— The manual page for themountcommand that provides a full documentation on its usage.man 8 umount— The manual page for theumountcommand that provides a full documentation on its usage.man 5 fstab— The manual page providing a thorough description of the/etc/fstabfile format.
2.4.2. Useful Websites
- Shared subtrees — An LWN article covering the concept of shared subtrees.
- sharedsubtree.txt — Extensive documentation that is shipped with the shared subtrees patches.
Chapter 3. The ext3 File System
3.1. Features of ext3
- Availability
- After an unexpected power failure or system crash (also called an unclean system shutdown), each mounted ext2 file system on the machine must be checked for consistency by the
e2fsckprogram. This is a time-consuming process that can delay system boot time significantly, especially with large volumes containing a large number of files. During this time, any data on the volumes is unreachable.The journaling provided by the ext3 file system means that this sort of file system check is no longer necessary after an unclean system shutdown. The only time a consistency check occurs using ext3 is in certain rare hardware failure cases, such as hard drive failures. The time to recover an ext3 file system after an unclean system shutdown does not depend on the size of the file system or the number of files; rather, it depends on the size of the journal used to maintain consistency. The default journal size takes about a second to recover, depending on the speed of the hardware. - Data Integrity
- The ext3 file system prevents loss of data integrity in the event that an unclean system shutdown occurs. The ext3 file system allows you to choose the type and level of protection that your data receives. By default, the ext3 volumes are configured to keep a high level of data consistency with regard to the state of the file system.
- Speed
- Despite writing some data more than once, ext3 has a higher throughput in most cases than ext2 because ext3's journaling optimizes hard drive head motion. You can choose from three journaling modes to optimize speed, but doing so means trade-offs in regards to data integrity if the system was to fail.
- Easy Transition
- It is easy to migrate from ext2 to ext3 and gain the benefits of a robust journaling file system without reformatting. Refer to Section 3.3, “Converting to an ext3 File System” for more on how to perform this task.
3.2. Creating an ext3 File System
- Format the partition with the ext3 file system using
mkfs. - Label the partition using
e2label.
3.3. Converting to an ext3 File System
tune2fs allows you to convert an ext2 filesystem to ext3.
Note
e2fsck utility to check your filesystem before and after using tune2fs. A default installation of Red Hat Enterprise Linux uses ext3 for all file systems.
ext2 filesystem to ext3, log in as root and type the following command in a terminal:
tune2fs -j <block_device>- A mapped device — A logical volume in a volume group, for example,
/dev/mapper/VolGroup00-LogVol02. - A static device — A traditional storage volume, for example,
/dev/hdbX, where hdb is a storage device name and X is the partition number.
df command to display mounted file systems.
/dev/mapper/VolGroup00-LogVol02
mkinitrd program. For information on using the mkinitrd command, type man mkinitrd. Also, make sure your GRUB configuration loads the initrd.
3.4. Reverting to an ext2 File System
umount /dev/mapper/VolGroup00-LogVol02tune2fs -O ^has_journal /dev/mapper/VolGroup00-LogVol02e2fsck -y /dev/mapper/VolGroup00-LogVol02mount -t ext2 /dev/mapper/VolGroup00-LogVol02 /mount/point.journal file at the root level of the partition by changing to the directory where it is mounted and typing:
rm -f .journal/etc/fstab file.
Chapter 4. The ext4 File System
4.1. Features of ext4
- Main Features
- The ext4 file system uses extents (as opposed to the traditional block mapping scheme used by ext2 and ext3), which improves performance when using large files and reduces metadata overhead for large files. In addition, ext4 also labels unallocated block groups and inode table sections accordingly, which allows them to be skipped during a file system check. This makes for quicker file system checks, which becomes more beneficial as the file system grows in size.
- Allocation Features
- The ext4 file system features the following allocation schemes:
- Persistent pre-allocation
- Delayed allocation
- Multi-block allocation
- Stripe-aware allocation
Because of delayed allocation and other performance optimizations, ext4's behavior of writing files to disk is different from ext3. In ext4, a program's writes to the file system are not guaranteed to be on-disk unless the program issues anfsync()call afterwards.By default, ext3 automatically forces newly created files to disk almost immediately even withoutfsync(). This behavior hid bugs in programs that did not usefsync()to ensure that written data was on-disk. The ext4 file system, on the other hand, often waits several seconds to write out changes to disk, allowing it to combine and reorder writes for better disk performance than ext3.Warning
Unlike ext3, the ext4 file system does not force data to disk on transaction commit. As such, it takes longer for buffered writes to be flushed to disk. As with any file system, use data integrity calls such asfsync()to ensure that data is written to permanent storage. - Other ext4 Features
- The ext4 file system also supports the following:
- Extended attributes (
xattr), which allows the system to associate several additional name/value pairs per file. - Quota journaling, which avoids the need for lengthy quota consistency checks after a crash.
Note
The only supported journaling mode in ext4 isdata=ordered(default). - Subsecond timestamps, which allow to specify inode timestamp fields in nanosecond resolution.
4.2. Managing an ext4 File System
~]# yum install e4fsprogsmke4fs— A utility used to create an ext4 file system.mkfs.ext4— Another command used to create an ext4 file system.e4fsck— A utility used to repair inconsistencies of an ext4 file system.tune4fs— A utility used to modify ext4 file system attributes.resize4fs— A utility used to resize an ext4 file system.e4label— A utility used to display or modify the label of the ext4 file system.dumpe4fs— A utility used to display the super block and blocks group information for the ext4 file system.debuge4fs— An interactive file system debugger, used to examine ext4 file systems, manually repair corrupted file systems and create test cases fore4fsck.
4.3. Creating an ext4 File System
mke4fs and mkfs.ext4 commands for available options. Also, you may want to examine and modify the configuration file of mke4fs, /etc/mke4fs.conf, if you plan to create ext4 file systems more often.
- Format the partition with the ext4 file system using the
mkfs.ext4ormke4fscommand:~]#
mkfs.ext4 block_device~]#
mke4fs -t ext4 block_devicewhere block_device is a partition which will contain the ext4 filesystem you wish to create. - Label the partition using the
e4labelcommand.~]#
e4label <block_device> new-label - Create a mount point and mount the new file system to that mount point:
~]#
mkdir /mount/point~]#mount block_device /mount/point
- A mapped device — A logical volume in a volume group, for example,
/dev/mapper/VolGroup00-LogVol02. - A static device — A traditional storage volume, for example,
/dev/hdbX, where hdb is a storage device name and X is the partition number.
mkfs.ext4 chooses an optimal geometry. This may also be true on some hardware RAIDs which export geometry information to the operating system.
-E option of mkfs.ext4 (that is, extended file system options) with the following sub-options:
- stride=value
- Specifies the RAID chunk size.
- stripe-width=value
- Specifies the number of data disks in a RAID device, or the number of stripe units in the stripe.
value must be specified in file system block units. For example, to create a file system with a 64k stride (that is, 16 x 4096) on a 4k-block file system, use the following command:
~]# mkfs.ext4 -E stride=16,stripe-width=64 block_deviceman mkfs.ext4.
4.4. Mounting an ext4 File System
~]# mount block_device /mount/pointacl, noacl, data, quota, noquota, user_xattr, nouser_xattr, and many others that were already used with the ext2 and ext3 file systems, are backward compatible and have the same usage and functionality. Also, with the ext4 file system, several new ext4-specific mount options have been added, for example:
- barrier / nobarrier
- By default, ext4 uses write barriers to ensure file system integrity even when power is lost to a device with write caches enabled. For devices without write caches, or with battery-backed write caches, you disable barriers using the
nobarrieroption:~]#
mount -o nobarrier block_device /mount/point - stripe=value
- This option allows you to specify the number of file system blocks allocated for a single file operation. For RAID5 this number should be equal the RAID chunk size multiplied by the number of disks.
- journal_ioprio=value
- This option allows you to set priority of I/O operations submitted during a commit operation. The option can have a value from 7 to 0 (0 is the highest priority), and is set to 3 by default, which is slightly higher priority than the default I/O priority.
tune4fs utility. For example, the following command sets the file system on the /dev/mapper/VolGroup00-LogVol02 device to be mounted by default with debugging disabled and user-specified extended attributes and Posix access control lists enabled:
~]# tune4fs -o ^debug,user_xattr,acl /dev/mapper/VolGroup00-LogVol02tune4fs(8) manual page.
~]# mount -t ext4 block_device /mount/pointdelayed allocation and multi-block allocation, and exclude features such as extent mapping.
Warning
mount(8) manual page.
Note
/etc/fstab file accordingly. For example:
/dev/mapper/VolGroup00-LogVol02 /test ext4 defaults 0 0
4.5. Resizing an ext4 File System
resize4fs command:
~]# resize4fs block_devicenew_sizeresize2fs utility reads the size in units of file system block size, unless a suffix indicating a specific unit is used. The following suffixes indicate specific units:
s— 512 byte sectorsK— kilobytesM— megabytesG— gigabytes
size parameter is optional (and often redundant) when expanding. The resize4fs automatically expands to fill all available space of the container, usually a logical volume or partition. For more information about resizing an ext4 file system, refer to the resize4fs(8) manual page.
Chapter 5. The proc File System
/proc/ directory — also called the proc file system — contains a hierarchy of special files which represent the current state of the kernel — allowing applications and users to peer into the kernel's view of the system.
/proc/ directory, one can find a wealth of information detailing the system hardware and any processes currently running. In addition, some of the files within the /proc/ directory tree can be manipulated by users and applications to communicate configuration changes to the kernel.
5.1. A Virtual File System
/proc/ directory contains another type of file called a virtual file. It is for this reason that /proc/ is often referred to as a virtual file system.
/proc/interrupts, /proc/meminfo, /proc/mounts, and /proc/partitions provide an up-to-the-moment glimpse of the system's hardware. Others, like the /proc/filesystems file and the /proc/sys/ directory provide system configuration information and interfaces.
/proc/ide/ contains information for all physical IDE devices. Likewise, process directories contain information about each running process on the system.
5.1.1. Viewing Virtual Files
cat, more, or less commands on files within the /proc/ directory, users can immediately access enormous amounts of information about the system. For example, to display the type of CPU a computer has, type cat /proc/cpuinfo to receive output similar to the following:
processor : 0 vendor_id : AuthenticAMD cpu family : 5 model : 9 model name : AMD-K6(tm) 3D+ Processor stepping : 1 cpu MHz : 400.919 cache size : 256 KB fdiv_bug : no hlt_bug : no f00f_bug : no coma_bug : no fpu : yes fpu_exception : yes cpuid level : 1 wp : yes flags : fpu vme de pse tsc msr mce cx8 pge mmx syscall 3dnow k6_mtrr bogomips : 799.53
/proc/ file system, some of the information is easily understandable while some is not human-readable. This is in part why utilities exist to pull data from virtual files and display it in a useful way. Examples of these utilities include lspci, apm, free, and top.
Note
/proc/ directory are readable only by the root user.
5.1.2. Changing Virtual Files
/proc/ directory are read-only. However, some can be used to adjust settings in the kernel. This is especially true for files in the /proc/sys/ subdirectory.
echo command and a greater than symbol (>) to redirect the new value to the file. For example, to change the hostname on the fly, type:
echo www.example.com > /proc/sys/kernel/hostname cat /proc/sys/net/ipv4/ip_forward returns either a 0 or a 1. A 0 indicates that the kernel is not forwarding network packets. Using the echo command to change the value of the ip_forward file to 1 immediately turns packet forwarding on.
Note
/proc/sys/ subdirectory is /sbin/sysctl. For more information on this command, refer to Section 5.4, “Using the sysctl Command”
/proc/sys/ subdirectory, refer to Section 5.3.9, “ /proc/sys/ ”.
5.1.3. Restricting Access to Process Directories
/proc/ so that they can be viewed only by the root user. You can restrict the access to these directories with the use of the hidepid option.
mount command with the -o remount option. As root, type:
mount-o remount,hidepid=value/proc
hidepid is one of:
0(default) — every user can read all world-readable files stored in a process directory.1— users can access only their own process directories. This protects the sensitive files likecmdline,sched, orstatusfrom access by non-root users. This setting does not affect the actual file permissions.2— process files are invisible to non-root users. The existence of a process can be learned by other means, but its effective UID and GID is hidden. Hiding these IDs complicates an intruder's task of gathering information about running processes.
Example 5.1. Restricting access to process directories
root user, type:
~]#mount-o remount,hidepid=1/proc
hidepid=1, a non-root user cannot access the contents of process directories. An attempt to do so fails with the following message:
~]$ls/proc/1/ls: /proc/1/: Operation not permitted
hidepid=2 enabled, process directories are made invisible to non-root users:
~]$ls/proc/1/ls: /proc/1/: No such file or directory
hidepid is set to 1 or 2. To do this, use the gid option. As root, type:
mount-o remount,hidepid=value,gid=gid/proc
hidepid was set to 0. However, users which are not supposed to monitor the tasks in the whole system should not be added to the group. For more information on managing users and groups see Chapter 37, Users and Groups.
5.2. Top-level Files within the proc File System
/proc/ directory.
Note
5.2.1. /proc/apm
apm command. If a system with no battery is connected to an AC power source, this virtual file would look similar to the following:
1.16 1.2 0x07 0x01 0xff 0x80 -1% -1 ?
apm -v command on such a system results in output similar to the following:
APM BIOS 1.2 (kernel driver 1.16ac) AC on-line, no system battery
apm is able do little more than put the machine in standby mode. The apm command is much more useful on laptops. For example, the following output is from the command cat /proc/apm on a laptop while plugged into a power outlet:
1.16 1.2 0x03 0x01 0x03 0x09 100% -1 ?
apm file changes to something like the following:
1.16 1.2 0x03 0x00 0x00 0x01 99% 1792 min
apm -v command now yields more useful data, such as the following:
APM BIOS 1.2 (kernel driver 1.16) AC off-line, battery status high: 99% (1 day, 5:52)
5.2.2. /proc/buddyinfo
DMA row references the first 16 MB on a system, the HighMem row references all memory greater than 4 GB on a system, and the Normal row references all memory in between.
/proc/buddyinfo:
Node 0, zone DMA 90 6 2 1 1 ... Node 0, zone Normal 1650 310 5 0 0 ... Node 0, zone HighMem 2 0 0 1 1 ...
5.2.3. /proc/cmdline
/proc/cmdline file looks like the following:
ro root=/dev/VolGroup00/LogVol00 rhgb quiet 3
- ro
- The root device is mounted read-only at boot time. The presence of
roon the kernel boot line overrides any instances ofrw. - root=/dev/VolGroup00/LogVol00
- This tells us on which disk device or, in this case, on which logical volume, the root filesystem image is located. With our sample
/proc/cmdlineoutput, the root filesystem image is located on the first logical volume (LogVol00) of the first LVM volume group (VolGroup00). On a system not using Logical Volume Management, the root file system might be located on/dev/sda1or/dev/sda2, meaning on either the first or second partition of the first SCSI or SATA disk drive, depending on whether we have a separate (preceding) boot or swap partition on that drive.For more information on LVM used in Red Hat Enterprise Linux, refer to http://www.tldp.org/HOWTO/LVM-HOWTO/index.html. - rhgb
- A short lowercase acronym that stands for Red Hat Graphical Boot, providing "rhgb" on the kernel command line signals that graphical booting is supported, assuming that
/etc/inittabshows that the default runlevel is set to 5 with a line like this:id:5:initdefault:
- quiet
- Indicates that all verbose kernel messages except those which are extremely serious should be suppressed at boot time.
5.2.4. /proc/cpuinfo
/proc/cpuinfo:
processor : 0 vendor_id : GenuineIntel cpu family : 15 model : 2 model name : Intel(R) Xeon(TM) CPU 2.40GHz stepping : 7 cpu MHz : 2392.371 cache size : 512 KB physical id : 0 siblings : 2 runqueue : 0 fdiv_bug : no hlt_bug : no f00f_bug : no coma_bug : no fpu : yes fpu_exception : yes cpuid level : 2 wp : yes flags : fpu vme de pse tsc msr pae mce cx8 apic sep mtrr pge mca cmov pat pse36 clflush dts acpi mmx fxsr sse sse2 ss ht tm bogomips : 4771.02
processor— Provides each processor with an identifying number. On systems that have one processor, only a0is present.cpu family— Authoritatively identifies the type of processor in the system. For an Intel-based system, place the number in front of "86" to determine the value. This is particularly helpful for those attempting to identify the architecture of an older system such as a 586, 486, or 386. Because some RPM packages are compiled for each of these particular architectures, this value also helps users determine which packages to install.model name— Displays the common name of the processor, including its project name.cpu MHz— Shows the precise speed in megahertz for the processor to the thousandths decimal place.cache size— Displays the amount of level 2 memory cache available to the processor.siblings— Displays the number of sibling CPUs on the same physical CPU for architectures which use hyper-threading.flags— Defines a number of different qualities about the processor, such as the presence of a floating point unit (FPU) and the ability to process MMX instructions.
5.2.5. /proc/crypto
/proc/crypto file looks like the following:
name : sha1 module : kernel type : digest blocksize : 64 digestsize : 20 name : md5 module : md5 type : digest blocksize : 64 digestsize : 16
5.2.6. /proc/devices
Character devices: 1 mem 4 /dev/vc/0 4 tty 4 ttyS 5 /dev/tty 5 /dev/console 5 /dev/ptmx 7 vcs 10 misc 13 input 29 fb 36 netlink 128 ptm 136 pts 180 usb Block devices: 1 ramdisk 3 ide0 9 md 22 ide1 253 device-mapper 254 mdp
/proc/devices includes the major number and name of the device, and is broken into two major sections: Character devices and Block devices.
- Character devices do not require buffering. Block devices have a buffer available, allowing them to order requests before addressing them. This is important for devices designed to store information — such as hard drives — because the ability to order the information before writing it to the device allows it to be placed in a more efficient order.
- Character devices send data with no preconfigured size. Block devices can send and receive information in blocks of a size configured per device.
/usr/share/doc/kernel-doc-<version>/Documentation/devices.txt
5.2.7. /proc/dma
/proc/dma files looks like the following:
4: cascade
5.2.8. /proc/execdomains
0-0 Linux [kernel]
PER_LINUX execution domain, different personalities can be implemented as dynamically loadable modules.
5.2.9. /proc/fb
/proc/fb for systems which contain frame buffer devices looks similar to the following:
0 VESA VGA
5.2.10. /proc/filesystems
/proc/filesystems file looks similar to the following:
nodev sysfs nodev rootfs nodev bdev nodev proc nodev sockfs nodev binfmt_misc nodev usbfs nodev usbdevfs nodev futexfs nodev tmpfs nodev pipefs nodev eventpollfs nodev devpts ext2 nodev ramfs nodev hugetlbfs iso9660 nodev mqueue ext3 nodev rpc_pipefs nodev autofs
nodev are not mounted on a device. The second column lists the names of the file systems supported.
mount command cycles through the file systems listed here when one is not specified as an argument.
5.2.11. /proc/interrupts
/proc/interrupts looks similar to the following:
CPU0 0: 80448940 XT-PIC timer 1: 174412 XT-PIC keyboard 2: 0 XT-PIC cascade 8: 1 XT-PIC rtc 10: 410964 XT-PIC eth0 12: 60330 XT-PIC PS/2 Mouse 14: 1314121 XT-PIC ide0 15: 5195422 XT-PIC ide1 NMI: 0 ERR: 0
CPU0 CPU1 0: 1366814704 0 XT-PIC timer 1: 128 340 IO-APIC-edge keyboard 2: 0 0 XT-PIC cascade 8: 0 1 IO-APIC-edge rtc 12: 5323 5793 IO-APIC-edge PS/2 Mouse 13: 1 0 XT-PIC fpu 16: 11184294 15940594 IO-APIC-level Intel EtherExpress Pro 10/100 Ethernet 20: 8450043 11120093 IO-APIC-level megaraid 30: 10432 10722 IO-APIC-level aic7xxx 31: 23 22 IO-APIC-level aic7xxx NMI: 0 ERR: 0
XT-PIC— This is the old AT computer interrupts.IO-APIC-edge— The voltage signal on this interrupt transitions from low to high, creating an edge, where the interrupt occurs and is only signaled once. This kind of interrupt, as well as theIO-APIC-levelinterrupt, are only seen on systems with processors from the 586 family and higher.IO-APIC-level— Generates interrupts when its voltage signal is high until the signal is low again.
5.2.12. /proc/iomem
00000000-0009fbff : System RAM 0009fc00-0009ffff : reserved 000a0000-000bffff : Video RAM area 000c0000-000c7fff : Video ROM 000f0000-000fffff : System ROM 00100000-07ffffff : System RAM 00100000-00291ba8 : Kernel code 00291ba9-002e09cb : Kernel data e0000000-e3ffffff : VIA Technologies, Inc. VT82C597 [Apollo VP3] e4000000-e7ffffff : PCI Bus #01 e4000000-e4003fff : Matrox Graphics, Inc. MGA G200 AGP e5000000-e57fffff : Matrox Graphics, Inc. MGA G200 AGP e8000000-e8ffffff : PCI Bus #01 e8000000-e8ffffff : Matrox Graphics, Inc. MGA G200 AGP ea000000-ea00007f : Digital Equipment Corporation DECchip 21140 [FasterNet] ea000000-ea00007f : tulip ffff0000-ffffffff : reserved
5.2.13. /proc/ioports
/proc/ioports provides a list of currently registered port regions used for input or output communication with a device. This file can be quite long. The following is a partial listing:
0000-001f : dma1 0020-003f : pic1 0040-005f : timer 0060-006f : keyboard 0070-007f : rtc 0080-008f : dma page reg 00a0-00bf : pic2 00c0-00df : dma2 00f0-00ff : fpu 0170-0177 : ide1 01f0-01f7 : ide0 02f8-02ff : serial(auto) 0376-0376 : ide1 03c0-03df : vga+ 03f6-03f6 : ide0 03f8-03ff : serial(auto) 0cf8-0cff : PCI conf1 d000-dfff : PCI Bus #01 e000-e00f : VIA Technologies, Inc. Bus Master IDE e000-e007 : ide0 e008-e00f : ide1 e800-e87f : Digital Equipment Corporation DECchip 21140 [FasterNet] e800-e87f : tulip
5.2.14. /proc/kcore
/proc/ files, kcore displays a size. This value is given in bytes and is equal to the size of the physical memory (RAM) used plus 4 KB.
gdb, and is not human readable.
Warning
/proc/kcore virtual file. The contents of the file scramble text output on the terminal. If this file is accidentally viewed, press Ctrl+C to stop the process and then type reset to bring back the command line prompt.
5.2.15. /proc/kmsg
/sbin/klogd or /bin/dmesg.
5.2.16. /proc/loadavg
uptime and other commands. A sample /proc/loadavg file looks similar to the following:
0.20 0.18 0.12 1/80 11206
5.2.17. /proc/locks
/proc/locks file for a lightly loaded system looks similar to the following:
1: POSIX ADVISORY WRITE 3568 fd:00:2531452 0 EOF 2: FLOCK ADVISORY WRITE 3517 fd:00:2531448 0 EOF 3: POSIX ADVISORY WRITE 3452 fd:00:2531442 0 EOF 4: POSIX ADVISORY WRITE 3443 fd:00:2531440 0 EOF 5: POSIX ADVISORY WRITE 3326 fd:00:2531430 0 EOF 6: POSIX ADVISORY WRITE 3175 fd:00:2531425 0 EOF 7: POSIX ADVISORY WRITE 3056 fd:00:2548663 0 EOF
FLOCK signifying the older-style UNIX file locks from a flock system call and POSIX representing the newer POSIX locks from the lockf system call.
ADVISORY or MANDATORY. ADVISORY means that the lock does not prevent other people from accessing the data; it only prevents other attempts to lock it. MANDATORY means that no other access to the data is permitted while the lock is held. The fourth column reveals whether the lock is allowing the holder READ or WRITE access to the file. The fifth column shows the ID of the process holding the lock. The sixth column shows the ID of the file being locked, in the format of MAJOR-DEVICE:MINOR-DEVICE:INODE-NUMBER . The seventh and eighth column shows the start and end of the file's locked region.
5.2.18. /proc/mdstat
/proc/mdstat looks similar to the following:
Personalities : read_ahead not set unused devices: <none>
md device is present. In that case, view /proc/mdstat to find the current status of mdX RAID devices.
/proc/mdstat file below shows a system with its md0 configured as a RAID 1 device, while it is currently re-syncing the disks:
Personalities : [linear] [raid1] read_ahead 1024 sectors md0: active raid1 sda2[1] sdb2[0] 9940 blocks [2/2] [UU] resync=1% finish=12.3min algorithm 2 [3/3] [UUU] unused devices: <none>
5.2.19. /proc/meminfo
/proc/ directory, as it reports a large amount of valuable information about the systems RAM usage.
/proc/meminfo virtual file is from a system with 256 MB of RAM and 512 MB of swap space:
MemTotal: 255908 kB MemFree: 69936 kB Buffers: 15812 kB Cached: 115124 kB SwapCached: 0 kB Active: 92700 kB Inactive: 63792 kB HighTotal: 0 kB HighFree: 0 kB LowTotal: 255908 kB LowFree: 69936 kB SwapTotal: 524280 kB SwapFree: 524280 kB Dirty: 4 kB Writeback: 0 kB Mapped: 42236 kB Slab: 25912 kB Committed_AS: 118680 kB PageTables: 1236 kB VmallocTotal: 3874808 kB VmallocUsed: 1416 kB VmallocChunk: 3872908 kB HugePages_Total: 0 HugePages_Free: 0 Hugepagesize: 4096 kB
free, top, and ps commands. In fact, the output of the free command is similar in appearance to the contents and structure of /proc/meminfo. But by looking directly at /proc/meminfo, more details are revealed:
MemTotal— Total amount of physical RAM, in kilobytes.MemFree— The amount of physical RAM, in kilobytes, left unused by the system.Buffers— The amount of physical RAM, in kilobytes, used for file buffers.Cached— The amount of physical RAM, in kilobytes, used as cache memory.SwapCached— The amount of swap, in kilobytes, used as cache memory.Active— The total amount of buffer or page cache memory, in kilobytes, that is in active use. This is memory that has been recently used and is usually not reclaimed for other purposes.Inactive— The total amount of buffer or page cache memory, in kilobytes, that are free and available. This is memory that has not been recently used and can be reclaimed for other purposes.HighTotalandHighFree— The total and free amount of memory, in kilobytes, that is not directly mapped into kernel space. TheHighTotalvalue can vary based on the type of kernel used.LowTotalandLowFree— The total and free amount of memory, in kilobytes, that is directly mapped into kernel space. TheLowTotalvalue can vary based on the type of kernel used.SwapTotal— The total amount of swap available, in kilobytes.SwapFree— The total amount of swap free, in kilobytes.Dirty— The total amount of memory, in kilobytes, waiting to be written back to the disk.Writeback— The total amount of memory, in kilobytes, actively being written back to the disk.Mapped— The total amount of memory, in kilobytes, which have been used to map devices, files, or libraries using themmapcommand.Slab— The total amount of memory, in kilobytes, used by the kernel to cache data structures for its own use.Committed_AS— The total amount of memory, in kilobytes, estimated to complete the workload. This value represents the worst case scenario value, and also includes swap memory.PageTables— The total amount of memory, in kilobytes, dedicated to the lowest page table level.VMallocTotal— The total amount of memory, in kilobytes, of total allocated virtual address space.VMallocUsed— The total amount of memory, in kilobytes, of used virtual address space.VMallocChunk— The largest contiguous block of memory, in kilobytes, of available virtual address space.HugePages_Total— The total number of hugepages for the system. The number is derived by dividingHugepagesizeby the megabytes set aside for hugepages specified in/proc/sys/vm/hugetlb_pool. This statistic only appears on the x86, Itanium, and AMD64 architectures.HugePages_Free— The total number of hugepages available for the system. This statistic only appears on the x86, Itanium, and AMD64 architectures.Hugepagesize— The size for each hugepages unit in kilobytes. By default, the value is 4096 KB on uniprocessor kernels for 32 bit architectures. For SMP, hugemem kernels, and AMD64, the default is 2048 KB. For Itanium architectures, the default is 262144 KB. This statistic only appears on the x86, Itanium, and AMD64 architectures.
5.2.20. /proc/misc
63 device-mapper 175 agpgart 135 rtc 134 apm_bios
5.2.21. /proc/modules
/proc/modules file output:
Note
/sbin/lsmod command.
nfs 170109 0 - Live 0x129b0000 lockd 51593 1 nfs, Live 0x128b0000 nls_utf8 1729 0 - Live 0x12830000 vfat 12097 0 - Live 0x12823000 fat 38881 1 vfat, Live 0x1287b000 autofs4 20293 2 - Live 0x1284f000 sunrpc 140453 3 nfs,lockd, Live 0x12954000 3c59x 33257 0 - Live 0x12871000 uhci_hcd 28377 0 - Live 0x12869000 md5 3777 1 - Live 0x1282c000 ipv6 211845 16 - Live 0x128de000 ext3 92585 2 - Live 0x12886000 jbd 65625 1 ext3, Live 0x12857000 dm_mod 46677 3 - Live 0x12833000
Live, Loading, or Unloading are the only possible values.
oprofile.
5.2.22. /proc/mounts
rootfs / rootfs rw 0 0 /proc /proc proc rw,nodiratime 0 0 none /dev ramfs rw 0 0 /dev/mapper/VolGroup00-LogVol00 / ext3 rw 0 0 none /dev ramfs rw 0 0 /proc /proc proc rw,nodiratime 0 0 /sys /sys sysfs rw 0 0 none /dev/pts devpts rw 0 0 usbdevfs /proc/bus/usb usbdevfs rw 0 0 /dev/hda1 /boot ext3 rw 0 0 none /dev/shm tmpfs rw 0 0 none /proc/sys/fs/binfmt_misc binfmt_misc rw 0 0 sunrpc /var/lib/nfs/rpc_pipefs rpc_pipefs rw 0 0
/etc/mtab, except that /proc/mount is more up-to-date.
ro) or read-write (rw). The fifth and sixth columns are dummy values designed to match the format used in /etc/mtab.
5.2.23. /proc/mtrr
/proc/mtrr file may look similar to the following:
reg00: base=0x00000000 ( 0MB), size= 256MB: write-back, count=1 reg01: base=0xe8000000 (3712MB), size= 32MB: write-combining, count=1
/proc/mtrr file can increase performance more than 150%.
/usr/share/doc/kernel-doc-<version>/Documentation/mtrr.txt
5.2.24. /proc/partitions
major minor #blocks name 3 0 19531250 hda 3 1 104391 hda1 3 2 19422585 hda2 253 0 22708224 dm-0 253 1 524288 dm-1
major— The major number of the device with this partition. The major number in the/proc/partitions, (3), corresponds with the block deviceide0, in/proc/devices.minor— The minor number of the device with this partition. This serves to separate the partitions into different physical devices and relates to the number at the end of the name of the partition.#blocks— Lists the number of physical disk blocks contained in a particular partition.name— The name of the partition.
5.2.25. /proc/pci
/proc/pci can be rather long. A sampling of this file from a basic system looks similar to the following:
Bus 0, device 0, function 0: Host bridge: Intel Corporation 440BX/ZX - 82443BX/ZX Host bridge (rev 3). Master Capable. Latency=64. Prefetchable 32 bit memory at 0xe4000000 [0xe7ffffff]. Bus 0, device 1, function 0: PCI bridge: Intel Corporation 440BX/ZX - 82443BX/ZX AGP bridge (rev 3). Master Capable. Latency=64. Min Gnt=128. Bus 0, device 4, function 0: ISA bridge: Intel Corporation 82371AB PIIX4 ISA (rev 2). Bus 0, device 4, function 1: IDE interface: Intel Corporation 82371AB PIIX4 IDE (rev 1). Master Capable. Latency=32. I/O at 0xd800 [0xd80f]. Bus 0, device 4, function 2: USB Controller: Intel Corporation 82371AB PIIX4 USB (rev 1). IRQ 5. Master Capable. Latency=32. I/O at 0xd400 [0xd41f]. Bus 0, device 4, function 3: Bridge: Intel Corporation 82371AB PIIX4 ACPI (rev 2). IRQ 9. Bus 0, device 9, function 0: Ethernet controller: Lite-On Communications Inc LNE100TX (rev 33). IRQ 5. Master Capable. Latency=32. I/O at 0xd000 [0xd0ff]. Bus 0, device 12, function 0: VGA compatible controller: S3 Inc. ViRGE/DX or /GX (rev 1). IRQ 11. Master Capable. Latency=32. Min Gnt=4.Max Lat=255.
Note
lspci -vb5.2.26. /proc/slabinfo
/proc/slabinfo file manually, the /usr/bin/slabtop program displays kernel slab cache information in real time. This program allows for custom configurations, including column sorting and screen refreshing.
/usr/bin/slabtop usually looks like the following example:
Active / Total Objects (% used) : 133629 / 147300 (90.7%) Active / Total Slabs (% used) : 11492 / 11493 (100.0%) Active / Total Caches (% used) : 77 / 121 (63.6%) Active / Total Size (% used) : 41739.83K / 44081.89K (94.7%) Minimum / Average / Maximum Object : 0.01K / 0.30K / 128.00K OBJS ACTIVE USE OBJ SIZE SLABS OBJ/SLAB CACHE SIZE NAME 44814 43159 96% 0.62K 7469 6 29876K ext3_inode_cache 36900 34614 93% 0.05K 492 75 1968K buffer_head 35213 33124 94% 0.16K 1531 23 6124K dentry_cache 7364 6463 87% 0.27K 526 14 2104K radix_tree_node 2585 1781 68% 0.08K 55 47 220K vm_area_struct 2263 2116 93% 0.12K 73 31 292K size-128 1904 1125 59% 0.03K 16 119 64K size-32 1666 768 46% 0.03K 14 119 56K anon_vma 1512 1482 98% 0.44K 168 9 672K inode_cache 1464 1040 71% 0.06K 24 61 96K size-64 1320 820 62% 0.19K 66 20 264K filp 678 587 86% 0.02K 3 226 12K dm_io 678 587 86% 0.02K 3 226 12K dm_tio 576 574 99% 0.47K 72 8 288K proc_inode_cache 528 514 97% 0.50K 66 8 264K size-512 492 372 75% 0.09K 12 41 48K bio 465 314 67% 0.25K 31 15 124K size-256 452 331 73% 0.02K 2 226 8K biovec-1 420 420 100% 0.19K 21 20 84K skbuff_head_cache 305 256 83% 0.06K 5 61 20K biovec-4 290 4 1% 0.01K 1 290 4K revoke_table 264 264 100% 4.00K 264 1 1056K size-4096 260 256 98% 0.19K 13 20 52K biovec-16 260 256 98% 0.75K 52 5 208K biovec-64
/proc/slabinfo that are included into /usr/bin/slabtop include:
OBJS— The total number of objects (memory blocks), including those in use (allocated), and some spares not in use.ACTIVE— The number of objects (memory blocks) that are in use (allocated).USE— Percentage of total objects that are active. ((ACTIVE/OBJS)(100))OBJ SIZE— The size of the objects.SLABS— The total number of slabs.OBJ/SLAB— The number of objects that fit into a slab.CACHE SIZE— The cache size of the slab.NAME— The name of the slab.
/usr/bin/slabtop program, refer to the slabtop man page.
5.2.27. /proc/stat
/proc/stat, which can be quite long, usually begins like the following example:
cpu 259246 7001 60190 34250993 137517 772 0 cpu0 259246 7001 60190 34250993 137517 772 0 intr 354133732 347209999 2272 0 4 4 0 0 3 1 1249247 0 0 80143 0 422626 5169433 ctxt 12547729 btime 1093631447 processes 130523 procs_running 1 procs_blocked 0 preempt 5651840 cpu 209841 1554 21720 118519346 72939 154 27168 cpu0 42536 798 4841 14790880 14778 124 3117 cpu1 24184 569 3875 14794524 30209 29 3130 cpu2 28616 11 2182 14818198 4020 1 3493 cpu3 35350 6 2942 14811519 3045 0 3659 cpu4 18209 135 2263 14820076 12465 0 3373 cpu5 20795 35 1866 14825701 4508 0 3615 cpu6 21607 0 2201 14827053 2325 0 3334 cpu7 18544 0 1550 14831395 1589 0 3447 intr 15239682 14857833 6 0 6 6 0 5 0 1 0 0 0 29 0 2 0 0 0 0 0 0 0 94982 0 286812 ctxt 4209609 btime 1078711415 processes 21905 procs_running 1 procs_blocked 0
cpu— Measures the number of jiffies (1/100 of a second for x86 systems) that the system has been in user mode, user mode with low priority (nice), system mode, idle task, I/O wait, IRQ (hardirq), and softirq respectively. The IRQ (hardirq) is the direct response to a hardware event. The IRQ takes minimal work for queuing the "heavy" work up for the softirq to execute. The softirq runs at a lower priority than the IRQ and therefore may be interrupted more frequently. The total for all CPUs is given at the top, while each individual CPU is listed below with its own statistics. The following example is a 4-way Intel Pentium Xeon configuration with multi-threading enabled, therefore showing four physical processors and four virtual processors totaling eight processors.page— The number of memory pages the system has written in and out to disk.swap— The number of swap pages the system has brought in and out.intr— The number of interrupts the system has experienced.btime— The boot time, measured in the number of seconds since January 1, 1970, otherwise known as the epoch.
5.2.28. /proc/swaps
/proc/swaps may look similar to the following:
Filename Type Size Used Priority /dev/mapper/VolGroup00-LogVol01 partition 524280 0 -1
/proc/ directory, /proc/swaps provides a snapshot of every swap file name, the type of swap space, the total size, and the amount of space in use (in kilobytes). The priority column is useful when multiple swap files are in use. The lower the priority, the more likely the swap file is to be used.
5.2.29. /proc/sysrq-trigger
echo command to write to this file, a remote root user can execute most System Request Key commands remotely as if at the local terminal. To echo values to this file, the /proc/sys/kernel/sysrq must be set to a value other than 0. For more information about the System Request Key, refer to Section 5.3.9.3, “ /proc/sys/kernel/ ”.
5.2.30. /proc/uptime
/proc/uptime is quite minimal:
350735.47 234388.90
5.2.31. /proc/version
gcc in use, as well as the version of Red Hat Enterprise Linux installed on the system:
Linux version 2.6.8-1.523 (user@foo.redhat.com) (gcc version 3.4.1 20040714 \ (Red Hat Enterprise Linux 3.4.1-7)) #1 Mon Aug 16 13:27:03 EDT 2004
5.3. Directories within /proc/
/proc/ directory.
5.3.1. Process Directories
/proc/ directory contains a number of directories with numerical names. A listing of them may be similar to the following:
dr-xr-xr-x 3 root root 0 Feb 13 01:28 1 dr-xr-xr-x 3 root root 0 Feb 13 01:28 1010 dr-xr-xr-x 3 xfs xfs 0 Feb 13 01:28 1087 dr-xr-xr-x 3 daemon daemon 0 Feb 13 01:28 1123 dr-xr-xr-x 3 root root 0 Feb 13 01:28 11307 dr-xr-xr-x 3 apache apache 0 Feb 13 01:28 13660 dr-xr-xr-x 3 rpc rpc 0 Feb 13 01:28 637 dr-xr-xr-x 3 rpcuser rpcuser 0 Feb 13 01:28 666
/proc/ process directory vanishes.
cmdline— Contains the command issued when starting the process.cwd— A symbolic link to the current working directory for the process.environ— A list of the environment variables for the process. The environment variable is given in all upper-case characters, and the value is in lower-case characters.exe— A symbolic link to the executable of this process.fd— A directory containing all of the file descriptors for a particular process. These are given in numbered links:total 0 lrwx------ 1 root root 64 May 8 11:31 0 -> /dev/null lrwx------ 1 root root 64 May 8 11:31 1 -> /dev/null lrwx------ 1 root root 64 May 8 11:31 2 -> /dev/null lrwx------ 1 root root 64 May 8 11:31 3 -> /dev/ptmx lrwx------ 1 root root 64 May 8 11:31 4 -> socket:[7774817] lrwx------ 1 root root 64 May 8 11:31 5 -> /dev/ptmx lrwx------ 1 root root 64 May 8 11:31 6 -> socket:[7774829] lrwx------ 1 root root 64 May 8 11:31 7 -> /dev/ptmx
maps— A list of memory maps to the various executables and library files associated with this process. This file can be rather long, depending upon the complexity of the process, but sample output from thesshdprocess begins like the following:08048000-08086000 r-xp 00000000 03:03 391479 /usr/sbin/sshd 08086000-08088000 rw-p 0003e000 03:03 391479 /usr/sbin/sshd 08088000-08095000 rwxp 00000000 00:00 0 40000000-40013000 r-xp 0000000 03:03 293205 /lib/ld-2.2.5.so 40013000-40014000 rw-p 00013000 03:03 293205 /lib/ld-2.2.5.so 40031000-40038000 r-xp 00000000 03:03 293282 /lib/libpam.so.0.75 40038000-40039000 rw-p 00006000 03:03 293282 /lib/libpam.so.0.75 40039000-4003a000 rw-p 00000000 00:00 0 4003a000-4003c000 r-xp 00000000 03:03 293218 /lib/libdl-2.2.5.so 4003c000-4003d000 rw-p 00001000 03:03 293218 /lib/libdl-2.2.5.so
mem— The memory held by the process. This file cannot be read by the user.root— A link to the root directory of the process.stat— The status of the process.statm— The status of the memory in use by the process. Below is a sample/proc/statmfile:263 210 210 5 0 205 0
The seven columns relate to different memory statistics for the process. From left to right, they report the following aspects of the memory used:- Total program size, in kilobytes.
- Size of memory portions, in kilobytes.
- Number of pages that are shared.
- Number of pages that are code.
- Number of pages of data/stack.
- Number of library pages.
- Number of dirty pages.
status— The status of the process in a more readable form thanstatorstatm. Sample output forsshdlooks similar to the following:Name: sshd State: S (sleeping) Tgid: 797 Pid: 797 PPid: 1 TracerPid: 0 Uid: 0 0 0 0 Gid: 0 0 0 0 FDSize: 32 Groups: VmSize: 3072 kB VmLck: 0 kB VmRSS: 840 kB VmData: 104 kB VmStk: 12 kB VmExe: 300 kB VmLib: 2528 kB SigPnd: 0000000000000000 SigBlk: 0000000000000000 SigIgn: 8000000000001000 SigCgt: 0000000000014005 CapInh: 0000000000000000 CapPrm: 00000000fffffeff CapEff: 00000000fffffeff
The information in this output includes the process name and ID, the state (such asS (sleeping)orR (running)), user/group ID running the process, and detailed data regarding memory usage.
5.3.1.1. /proc/self/
/proc/self/ directory is a link to the currently running process. This allows a process to look at itself without having to know its process ID.
/proc/self/ directory produces the same contents as listing the process directory for that process.
5.3.2. /proc/bus/
/proc/bus/ by the same name, such as /proc/bus/pci/.
/proc/bus/ vary depending on the devices connected to the system. However, each bus type has at least one directory. Within these bus directories are normally at least one subdirectory with a numerical name, such as 001, which contain binary files.
/proc/bus/usb/ subdirectory contains files that track the various devices on any USB buses, as well as the drivers required for them. The following is a sample listing of a /proc/bus/usb/ directory:
total 0 dr-xr-xr-x 1 root root 0 May 3 16:25 001 -r--r--r-- 1 root root 0 May 3 16:25 devices -r--r--r-- 1 root root 0 May 3 16:25 drivers
/proc/bus/usb/001/ directory contains all devices on the first USB bus and the devices file identifies the USB root hub on the motherboard.
/proc/bus/usb/devices file:
T: Bus=01 Lev=00 Prnt=00 Port=00 Cnt=00 Dev#= 1 Spd=12 MxCh= 2 B: Alloc= 0/900 us ( 0%), #Int= 0, #Iso= 0 D: Ver= 1.00 Cls=09(hub ) Sub=00 Prot=00 MxPS= 8 #Cfgs= 1 P: Vendor=0000 ProdID=0000 Rev= 0.00 S: Product=USB UHCI Root Hub S: SerialNumber=d400 C:* #Ifs= 1 Cfg#= 1 Atr=40 MxPwr= 0mA I: If#= 0 Alt= 0 #EPs= 1 Cls=09(hub ) Sub=00 Prot=00 Driver=hub E: Ad=81(I) Atr=03(Int.) MxPS= 8 Ivl=255ms
5.3.3. /proc/driver/
rtc which provides output from the driver for the system's Real Time Clock (RTC), the device that keeps the time while the system is switched off. Sample output from /proc/driver/rtc looks like the following:
rtc_time : 16:21:00 rtc_date : 2004-08-31 rtc_epoch : 1900 alarm : 21:16:27 DST_enable : no BCD : yes 24hr : yes square_wave : no alarm_IRQ : no update_IRQ : no periodic_IRQ : no periodic_freq : 1024 batt_status : okay
/usr/share/doc/kernel-doc-<version>/Documentation/rtc.txt.
5.3.4. /proc/fs
cat /proc/fs/nfsd/exports displays the file systems being shared and the permissions granted for those file systems. For more on file system sharing with NFS, refer to Chapter 21, Network File System (NFS).
5.3.5. /proc/ide/
/proc/ide/ide0 and /proc/ide/ide1. In addition, a drivers file is available, providing the version number of the various drivers used on the IDE channels:
ide-floppy version 0.99. newide ide-cdrom version 4.61 ide-disk version 1.18
/proc/ide/piix file which reveals whether DMA or UDMA is enabled for the devices on the IDE channels:
Intel PIIX4 Ultra 33 Chipset. ------------- Primary Channel ---------------- Secondary Channel ------------- enabled enabled ------------- drive0 --------- drive1 -------- drive0 ---------- drive1 ------ DMA enabled: yes no yes no UDMA enabled: yes no no no UDMA enabled: 2 X X X UDMA DMA PIO
ide0, provides additional information. The channel file provides the channel number, while the model identifies the bus type for the channel (such as pci).
5.3.5.1. Device Directories
/dev/ directory. For instance, the first IDE drive on ide0 would be hda.
Note
/proc/ide/ directory.
cache— The device cache.capacity— The capacity of the device, in 512 byte blocks.driver— The driver and version used to control the device.geometry— The physical and logical geometry of the device.media— The type of device, such as adisk.model— The model name or number of the device.settings— A collection of current device parameters. This file usually contains quite a bit of useful, technical information. A samplesettingsfile for a standard IDE hard disk looks similar to the following:name value min max mode ---- ----- --- --- ---- acoustic 0 0 254 rw address 0 0 2 rw bios_cyl 38752 0 65535 rw bios_head 16 0 255 rw bios_sect 63 0 63 rw bswap 0 0 1 r current_speed 68 0 70 rw failures 0 0 65535 rw init_speed 68 0 70 rw io_32bit 0 0 3 rw keepsettings 0 0 1 rw lun 0 0 7 rw max_failures 1 0 65535 rw multcount 16 0 16 rw nice1 1 0 1 rw nowerr 0 0 1 rw number 0 0 3 rw pio_mode write-only 0 255 w unmaskirq 0 0 1 rw using_dma 1 0 1 rw wcache 1 0 1 rw
5.3.6. /proc/irq/
/proc/irq/prof_cpu_mask file is a bitmask that contains the default values for the smp_affinity file in the IRQ directory. The values in smp_affinity specify which CPUs handle that particular IRQ.
/proc/irq/ directory, refer to the following installed documentation:
/usr/share/doc/kernel-doc-<version>/Documentation/filesystems/proc.txt
5.3.7. /proc/net/
/proc/net/ directory:
arp— Lists the kernel's ARP table. This file is particularly useful for connecting a hardware address to an IP address on a system.atm/directory — The files within this directory contain Asynchronous Transfer Mode (ATM) settings and statistics. This directory is primarily used with ATM networking and ADSL cards.dev— Lists the various network devices configured on the system, complete with transmit and receive statistics. This file displays the number of bytes each interface has sent and received, the number of packets inbound and outbound, the number of errors seen, the number of packets dropped, and more.dev_mcast— Lists Layer2 multicast groups on which each device is listening.igmp— Lists the IP multicast addresses which this system joined.ip_conntrack— Lists tracked network connections for machines that are forwarding IP connections.ip_tables_names— Lists the types ofiptablesin use. This file is only present ifiptablesis active on the system and contains one or more of the following values:filter,mangle, ornat.ip_mr_cache— Lists the multicast routing cache.ip_mr_vif— Lists multicast virtual interfaces.netstat— Contains a broad yet detailed collection of networking statistics, including TCP timeouts, SYN cookies sent and received, and much more.psched— Lists global packet scheduler parameters.raw— Lists raw device statistics.route— Lists the kernel's routing table.rt_cache— Contains the current routing cache.snmp— List of Simple Network Management Protocol (SNMP) data for various networking protocols in use.sockstat— Provides socket statistics.tcp— Contains detailed TCP socket information.tr_rif— Lists the token ring RIF routing table.udp— Contains detailed UDP socket information.unix— Lists UNIX domain sockets currently in use.wireless— Lists wireless interface data.
5.3.8. /proc/scsi/
/proc/ide/ directory, but it is for connected SCSI devices.
/proc/scsi/scsi, which contains a list of every recognized SCSI device. From this listing, the type of device, as well as the model name, vendor, SCSI channel and ID data is available.
Attached devices: Host: scsi1 Channel: 00 Id: 05 Lun: 00 Vendor: NEC Model: CD-ROM DRIVE:466 Rev: 1.06 Type: CD-ROM ANSI SCSI revision: 02 Host: scsi1 Channel: 00 Id: 06 Lun: 00 Vendor: ARCHIVE Model: Python 04106-XXX Rev: 7350 Type: Sequential-Access ANSI SCSI revision: 02 Host: scsi2 Channel: 00 Id: 06 Lun: 00 Vendor: DELL Model: 1x6 U2W SCSI BP Rev: 5.35 Type: Processor ANSI SCSI revision: 02 Host: scsi2 Channel: 02 Id: 00 Lun: 00 Vendor: MegaRAID Model: LD0 RAID5 34556R Rev: 1.01 Type: Direct-Access ANSI SCSI revision: 02
/proc/scsi/, which contains files specific to each SCSI controller using that driver. From the previous example, aic7xxx/ and megaraid/ directories are present, since two drivers are in use. The files in each of the directories typically contain an I/O address range, IRQ information, and statistics for the SCSI controller using that driver. Each controller can report a different type and amount of information. The Adaptec AIC-7880 Ultra SCSI host adapter's file in this example system produces the following output:
Adaptec AIC7xxx driver version: 5.1.20/3.2.4
Compile Options:
TCQ Enabled By Default : Disabled
AIC7XXX_PROC_STATS : Enabled
AIC7XXX_RESET_DELAY : 5
Adapter Configuration:
SCSI Adapter: Adaptec AIC-7880 Ultra SCSI host adapter
Ultra Narrow Controller PCI MMAPed
I/O Base: 0xfcffe000
Adapter SEEPROM Config: SEEPROM found and used.
Adaptec SCSI BIOS: Enabled
IRQ: 30
SCBs: Active 0, Max Active 1, Allocated 15, HW 16, Page 255
Interrupts: 33726
BIOS Control Word: 0x18a6
Adapter Control Word: 0x1c5f
Extended Translation: Enabled
Disconnect Enable Flags: 0x00ff
Ultra Enable Flags: 0x0020
Tag Queue Enable Flags: 0x0000
Ordered Queue Tag Flags: 0x0000
Default Tag Queue Depth: 8
Tagged Queue By Device array for aic7xxx
host instance 1: {255,255,255,255,255,255,255,255,255,255,255,255,255,255,255,255}
Actual queue depth per device for aic7xxx host instance 1: {1,1,1,1,1,1,1,1,1,1,1,1,1,1,1,1}
Statistics:
(scsi1:0:5:0) Device using Narrow/Sync transfers at 20.0 MByte/sec, offset 15
Transinfo settings: current(12/15/0/0), goal(12/15/0/0), user(12/15/0/0)
Total transfers 0 (0 reads and 0 writes)
< 2K 2K+ 4K+ 8K+ 16K+ 32K+ 64K+ 128K+
Reads: 0 0 0 0 0 0 0 0
Writes: 0 0 0 0 0 0 0 0
(scsi1:0:6:0) Device using Narrow/Sync transfers at 10.0 MByte/sec, offset 15
Transinfo settings: current(25/15/0/0), goal(12/15/0/0), user(12/15/0/0)
Total transfers 132 (0 reads and 132 writes)
< 2K 2K+ 4K+ 8K+ 16K+ 32K+ 64K+ 128K+
Reads: 0 0 0 0 0 0 0 0
Writes: 0 0 0 1 131 0 0 05.3.9. /proc/sys/
/proc/sys/ directory is different from others in /proc/ because it not only provides information about the system but also allows the system administrator to immediately enable and disable kernel features.
Warning
/proc/sys/ directory. Changing the wrong setting may render the kernel unstable, requiring a system reboot.
/proc/sys/.
-l option at the shell prompt. If the file is writable, it may be used to configure the kernel. For example, a partial listing of /proc/sys/fs looks like the following:
-r--r--r-- 1 root root 0 May 10 16:14 dentry-state -rw-r--r-- 1 root root 0 May 10 16:14 dir-notify-enable -r--r--r-- 1 root root 0 May 10 16:14 dquot-nr -rw-r--r-- 1 root root 0 May 10 16:14 file-max -r--r--r-- 1 root root 0 May 10 16:14 file-nr
dir-notify-enable and file-max can be written to and, therefore, can be used to configure the kernel. The other files only provide feedback on current settings.
/proc/sys/ file is done by echoing the new value into the file. For example, to enable the System Request Key on a running kernel, type the command:
echo 1 > /proc/sys/kernel/sysrqsysrq from 0 (off) to 1 (on).
/proc/sys/ configuration files contain more than one value. To correctly send new values to them, place a space character between each value passed with the echo command, such as is done in this example:
echo 4 2 45 > /proc/sys/kernel/acctNote
echo command disappear when the system is restarted. To make configuration changes take effect after the system is rebooted, refer to Section 5.4, “Using the sysctl Command”.
/proc/sys/ directory contains several subdirectories controlling different aspects of a running kernel.
5.3.9.1. /proc/sys/dev/
cdrom/ and raid/. Customized kernels can have other directories, such as parport/, which provides the ability to share one parallel port between multiple device drivers.
cdrom/ directory contains a file called info, which reveals a number of important CD-ROM parameters:
CD-ROM information, Id: cdrom.c 3.20 2003/12/17 drive name: hdc drive speed: 48 drive # of slots: 1 Can close tray: 1 Can open tray: 1 Can lock tray: 1 Can change speed: 1 Can select disk: 0 Can read multisession: 1 Can read MCN: 1 Reports media changed: 1 Can play audio: 1 Can write CD-R: 0 Can write CD-RW: 0 Can read DVD: 0 Can write DVD-R: 0 Can write DVD-RAM: 0 Can read MRW: 0 Can write MRW: 0 Can write RAM: 0
/proc/sys/dev/cdrom, such as autoclose and checkmedia, can be used to control the system's CD-ROM. Use the echo command to enable or disable these features.
/proc/sys/dev/raid/ directory becomes available with at least two files in it: speed_limit_min and speed_limit_max. These settings determine the acceleration of RAID devices for I/O intensive tasks, such as resyncing the disks.
5.3.9.2. /proc/sys/fs/
binfmt_misc/ directory is used to provide kernel support for miscellaneous binary formats.
/proc/sys/fs/ include:
dentry-state— Provides the status of the directory cache. The file looks similar to the following:57411 52939 45 0 0 0
The first number reveals the total number of directory cache entries, while the second number displays the number of unused entries. The third number tells the number of seconds between when a directory has been freed and when it can be reclaimed, and the fourth measures the pages currently requested by the system. The last two numbers are not used and display only zeros.dquot-nr— Lists the maximum number of cached disk quota entries.file-max— Lists the maximum number of file handles that the kernel allocates. Raising the value in this file can resolve errors caused by a lack of available file handles.file-nr— Lists the number of allocated file handles, used file handles, and the maximum number of file handles.overflowgidandoverflowuid— Defines the fixed group ID and user ID, respectively, for use with file systems that only support 16-bit group and user IDs.super-max— Controls the maximum number of superblocks available.super-nr— Displays the current number of superblocks in use.
5.3.9.3. /proc/sys/kernel/
acct— Controls the suspension of process accounting based on the percentage of free space available on the file system containing the log. By default, the file looks like the following:4 2 30
The first value dictates the percentage of free space required for logging to resume, while the second value sets the threshold percentage of free space when logging is suspended. The third value sets the interval, in seconds, that the kernel polls the file system to see if logging should be suspended or resumed.cap-bound— Controls the capability bounding settings, which provides a list of capabilities for any process on the system. If a capability is not listed here, then no process, no matter how privileged, can do it. The idea is to make the system more secure by ensuring that certain things cannot happen, at least beyond a certain point in the boot process.For a valid list of values for this virtual file, refer to the following installed documentation:/lib/modules/<kernel-version>/build/include/linux/capability.h.ctrl-alt-del— Controls whether Ctrl+Alt+Delete gracefully restarts the computer usinginit(0) or forces an immediate reboot without syncing the dirty buffers to disk (1).domainname— Configures the system domain name, such asexample.com.exec-shield— Configures the Exec Shield feature of the kernel. Exec Shield provides protection against certain types of buffer overflow attacks.There are two possible values for this virtual file:0— Disables Exec Shield.1— Enables Exec Shield. This is the default value.
Important
If a system is running security-sensitive applications that were started while Exec Shield was disabled, these applications must be restarted when Exec Shield is enabled in order for Exec Shield to take effect.exec-shield-randomize— Enables location randomization of various items in memory. This helps deter potential attackers from locating programs and daemons in memory. Each time a program or daemon starts, it is put into a different memory location each time, never in a static or absolute memory address.There are two possible values for this virtual file:0— Disables randomization of Exec Shield. This may be useful for application debugging purposes.1— Enables randomization of Exec Shield. This is the default value. Note: Theexec-shieldfile must also be set to1forexec-shield-randomizeto be effective.
hostname— Configures the system hostname, such aswww.example.com.hotplug— Configures the utility to be used when a configuration change is detected by the system. This is primarily used with USB and Cardbus PCI. The default value of/sbin/hotplugshould not be changed unless testing a new program to fulfill this role.modprobe— Sets the location of the program used to load kernel modules. The default value is/sbin/modprobewhich meanskmodcalls it to load the module when a kernel thread callskmod.msgmax— Sets the maximum size of any message sent from one process to another and is set to8192bytes by default. Be careful when raising this value, as queued messages between processes are stored in non-swappable kernel memory. Any increase inmsgmaxwould increase RAM requirements for the system.msgmnb— Sets the maximum number of bytes in a single message queue. The default is16384.msgmni— Sets the maximum number of message queue identifiers. The default is16.osrelease— Lists the Linux kernel release number. This file can only be altered by changing the kernel source and recompiling.ostype— Displays the type of operating system. By default, this file is set toLinux, and this value can only be changed by changing the kernel source and recompiling.overflowgidandoverflowuid— Defines the fixed group ID and user ID, respectively, for use with system calls on architectures that only support 16-bit group and user IDs.panic— Defines the number of seconds the kernel postpones rebooting when the system experiences a kernel panic. By default, the value is set to0, which disables automatic rebooting after a panic.printk— This file controls a variety of settings related to printing or logging error messages. Each error message reported by the kernel has a loglevel associated with it that defines the importance of the message. The loglevel values break down in this order:0— Kernel emergency. The system is unusable.1— Kernel alert. Action must be taken immediately.2— Condition of the kernel is considered critical.3— General kernel error condition.4— General kernel warning condition.5— Kernel notice of a normal but significant condition.6— Kernel informational message.7— Kernel debug-level messages.
Four values are found in theprintkfile:6 4 1 7
Each of these values defines a different rule for dealing with error messages. The first value, called the console loglevel, defines the lowest priority of messages printed to the console. (Note that, the lower the priority, the higher the loglevel number.) The second value sets the default loglevel for messages without an explicit loglevel attached to them. The third value sets the lowest possible loglevel configuration for the console loglevel. The last value sets the default value for the console loglevel.random/directory — Lists a number of values related to generating random numbers for the kernel.rtsig-max— Configures the maximum number of POSIX real-time signals that the system may have queued at any one time. The default value is1024.rtsig-nr— Lists the current number of POSIX real-time signals queued by the kernel.sem— Configures semaphore settings within the kernel. A semaphore is a System V IPC object that is used to control utilization of a particular process.shmall— Sets the total amount of shared memory pages that can be used at one time, system-wide. By default, this value is2097152.shmmax— Sets the largest shared memory segment size allowed by the kernel. By default, this value is33554432. However, the kernel supports much larger values than this.shmmni— Sets the maximum number of shared memory segments for the whole system. By default, this value is4096.sysrq— Activates the System Request Key, if this value is set to anything other than zero (0), the default.The System Request Key allows immediate input to the kernel through simple key combinations. For example, the System Request Key can be used to immediately shut down or restart a system, sync all mounted file systems, or dump important information to the console. To initiate a System Request Key, type Alt+SysRq+ <system request code> . Replace <system request code> with one of the following system request codes:r— Disables raw mode for the keyboard and sets it to XLATE (a limited keyboard mode which does not recognize modifiers such as Alt, Ctrl, or Shift for all keys).k— Kills all processes active in a virtual console. Also called Secure Access Key (SAK), it is often used to verify that the login prompt is spawned frominitand not a Trojan copy designed to capture usernames and passwords.b— Reboots the kernel without first unmounting file systems or syncing disks attached to the system.c— Crashes the system without first unmounting file systems or syncing disks attached to the system.o— Shuts off the system.s— Attempts to sync disks attached to the system.u— Attempts to unmount and remount all file systems as read-only.p— Outputs all flags and registers to the console.t— Outputs a list of processes to the console.m— Outputs memory statistics to the console.0through9— Sets the log level for the console.e— Kills all processes exceptinitusing SIGTERM.i— Kills all processes exceptinitusing SIGKILL.l— Kills all processes using SIGKILL (includinginit). The system is unusable after issuing this System Request Key code.h— Displays help text.
This feature is most beneficial when using a development kernel or when experiencing system freezes.Warning
The System Request Key feature is considered a security risk because an unattended console provides an attacker with access to the system. For this reason, it is turned off by default.Refer to/usr/share/doc/kernel-doc-<version>/Documentation/sysrq.txtfor more information about the System Request Key.sysrq-key— Defines the key code for the System Request Key (84is the default).sysrq-sticky— Defines whether the System Request Key is a chorded key combination. The accepted values are as follows:0— Alt+SysRq and the system request code must be pressed simultaneously. This is the default value.1— Alt+SysRq must be pressed simultaneously, but the system request code can be pressed anytime before the number of seconds specified in/proc/sys/kernel/sysrq-timerelapses.
sysrq-timer— Specifies the number of seconds allowed to pass before the system request code must be pressed. The default value is10.tainted— Indicates whether a non-GPL module is loaded.0— No non-GPL modules are loaded.1— At least one module without a GPL license (including modules with no license) is loaded.2— At least one module was force-loaded with the commandinsmod -f.
threads-max— Sets the maximum number of threads to be used by the kernel, with a default value of2048.version— Displays the date and time the kernel was last compiled. The first field in this file, such as#3, relates to the number of times a kernel was built from the source base.
5.3.9.4. /proc/sys/net/
ethernet/, ipv4/, ipx/, and ipv6/. By altering the files within these directories, system administrators are able to adjust the network configuration on a running system.
/proc/sys/net/ directories are discussed.
/proc/sys/net/core/ directory contains a variety of settings that control the interaction between the kernel and networking layers. The most important of these files are:
message_burst— Sets the amount of time in tenths of a second required to write a new warning message. This setting is used to mitigate Denial of Service (DoS) attacks. The default setting is50.message_cost— Sets a cost on every warning message. The higher the value of this file (default of5), the more likely the warning message is ignored. This setting is used to mitigate DoS attacks.The idea of a DoS attack is to bombard the targeted system with requests that generate errors and fill up disk partitions with log files or require all of the system's resources to handle the error logging. The settings inmessage_burstandmessage_costare designed to be modified based on the system's acceptable risk versus the need for comprehensive logging.netdev_max_backlog— Sets the maximum number of packets allowed to queue when a particular interface receives packets faster than the kernel can process them. The default value for this file is300.optmem_max— Configures the maximum ancillary buffer size allowed per socket.rmem_default— Sets the receive socket buffer default size in bytes.rmem_max— Sets the receive socket buffer maximum size in bytes.wmem_default— Sets the send socket buffer default size in bytes.wmem_max— Sets the send socket buffer maximum size in bytes.
/proc/sys/net/ipv4/ directory contains additional networking settings. Many of these settings, used in conjunction with one another, are useful in preventing attacks on the system or when using the system to act as a router.
Warning
/proc/sys/net/ipv4/ directory:
icmp_destunreach_rate,icmp_echoreply_rate,icmp_paramprob_rate, andicmp_timeexeed_rate— Set the maximum ICMP send packet rate, in 1/100 of a second, to hosts under certain conditions. A setting of0removes any delay and is not a good idea.icmp_echo_ignore_allandicmp_echo_ignore_broadcasts— Allows the kernel to ignore ICMP ECHO packets from every host or only those originating from broadcast and multicast addresses, respectively. A value of0allows the kernel to respond, while a value of1ignores the packets.ip_default_ttl— Sets the default Time To Live (TTL), which limits the number of hops a packet may make before reaching its destination. Increasing this value can diminish system performance.ip_forward— Permits interfaces on the system to forward packets to one other. By default, this file is set to0. Setting this file to1enables network packet forwarding.ip_local_port_range— Specifies the range of ports to be used by TCP or UDP when a local port is needed. The first number is the lowest port to be used and the second number specifies the highest port. Any systems that expect to require more ports than the default 1024 to 4999 should use a range from 32768 to 61000.tcp_syn_retries— Provides a limit on the number of times the system re-transmits a SYN packet when attempting to make a connection.tcp_retries1— Sets the number of permitted re-transmissions attempting to answer an incoming connection. Default of3.tcp_retries2— Sets the number of permitted re-transmissions of TCP packets. Default of15.
/usr/share/doc/kernel-doc-<version>/Documentation/networking/ ip-sysctl.txt/proc/sys/net/ipv4/ directory.
/proc/sys/net/ipv4/ directory and each covers a different aspect of the network stack. The /proc/sys/net/ipv4/conf/ directory allows each system interface to be configured in different ways, including the use of default settings for unconfigured devices (in the /proc/sys/net/ipv4/conf/default/ subdirectory) and settings that override all special configurations (in the /proc/sys/net/ipv4/conf/all/ subdirectory).
/proc/sys/net/ipv4/neigh/ directory contains settings for communicating with a host directly connected to the system (called a network neighbor) and also contains different settings for systems more than one hop away.
/proc/sys/net/ipv4/route/. Unlike conf/ and neigh/, the /proc/sys/net/ipv4/route/ directory contains specifications that apply to routing with any interfaces on the system. Many of these settings, such as max_size, max_delay, and min_delay, relate to controlling the size of the routing cache. To clear the routing cache, write any value to the flush file.
/usr/share/doc/kernel-doc-<version>/Documentation/filesystems/proc.txt
5.3.9.5. /proc/sys/vm/
/proc/sys/vm/ directory:
block_dump— Configures block I/O debugging when enabled. All read/write and block dirtying operations done to files are logged accordingly. This can be useful if diagnosing disk spin up and spin downs for laptop battery conservation. All output whenblock_dumpis enabled can be retrieved viadmesg. The default value is0.Note
Ifblock_dumpis enabled at the same time as kernel debugging, it is prudent to stop theklogddaemon, as it generates erroneous disk activity caused byblock_dump.dirty_background_ratio— Starts background writeback of dirty data at this percentage of total memory, via a pdflush daemon. The default value is10.dirty_expire_centisecs— Defines when dirty in-memory data is old enough to be eligible for writeout. Data which has been dirty in-memory for longer than this interval is written out next time a pdflush daemon wakes up. The default value is3000, expressed in hundredths of a second.dirty_ratio— Starts active writeback of dirty data at this percentage of total memory for the generator of dirty data, via pdflush. The default value is40.dirty_writeback_centisecs— Defines the interval between pdflush daemon wakeups, which periodically writes dirty in-memory data out to disk. The default value is500, expressed in hundredths of a second.laptop_mode— Minimizes the number of times that a hard disk needs to spin up by keeping the disk spun down for as long as possible, therefore conserving battery power on laptops. This increases efficiency by combining all future I/O processes together, reducing the frequency of spin ups. The default value is0, but is automatically enabled in case a battery on a laptop is used.This value is controlled automatically by the acpid daemon once a user is notified battery power is enabled. No user modifications or interactions are necessary if the laptop supports the ACPI (Advanced Configuration and Power Interface) specification.For more information, refer to the following installed documentation:/usr/share/doc/kernel-doc-<version>/Documentation/laptop-mode.txtlower_zone_protection— Determines how aggressive the kernel is in defending lower memory allocation zones. This is effective when utilized with machines configured withhighmemmemory space enabled. The default value is0, no protection at all. All other integer values are in megabytes, andlowmemmemory is therefore protected from being allocated by users.For more information, refer to the following installed documentation:/usr/share/doc/kernel-doc-<version>/Documentation/filesystems/proc.txtmax_map_count— Configures the maximum number of memory map areas a process may have. In most cases, the default value of65536is appropriate.min_free_kbytes— Forces the Linux VM (virtual memory manager) to keep a minimum number of kilobytes free. The VM uses this number to compute apages_minvalue for eachlowmemzone in the system. The default value is in respect to the total memory on the machine.nr_hugepages— Indicates the current number of configuredhugetlbpages in the kernel.For more information, refer to the following installed documentation:/usr/share/doc/kernel-doc-<version>/Documentation/vm/hugetlbpage.txtnr_pdflush_threads— Indicates the number of pdflush daemons that are currently running. This file is read-only, and should not be changed by the user. Under heavy I/O loads, the default value of two is increased by the kernel.overcommit_memory— Configures the conditions under which a large memory request is accepted or denied. The following three modes are available:0— The kernel performs heuristic memory over commit handling by estimating the amount of memory available and failing requests that are blatantly invalid. Unfortunately, since memory is allocated using a heuristic rather than a precise algorithm, this setting can sometimes allow available memory on the system to be overloaded. This is the default setting.1— The kernel performs no memory over commit handling. Under this setting, the potential for memory overload is increased, but so is performance for memory intensive tasks (such as those executed by some scientific software).2— The kernel fails requests for memory that add up to all of swap plus the percent of physical RAM specified in/proc/sys/vm/overcommit_ratio. This setting is best for those who desire less risk of memory overcommitment.Note
This setting is only recommended for systems with swap areas larger than physical memory.
overcommit_ratio— Specifies the percentage of physical RAM considered when/proc/sys/vm/overcommit_memoryis set to2. The default value is50.page-cluster— Sets the number of pages read in a single attempt. The default value of3, which actually relates to 16 pages, is appropriate for most systems.swappiness— Determines how much a machine should swap. The higher the value, the more swapping occurs. The default value, as a percentage, is set to60.
/usr/share/doc/kernel-doc-<version>/Documentation/, which contains additional information.
5.3.10. /proc/sysvipc/
msg), semaphores (sem), and shared memory (shm).
5.3.11. /proc/tty/
drivers file is a list of the current tty devices in use, as in the following example:
serial /dev/cua 5 64-127 serial:callout serial /dev/ttyS 4 64-127 serial pty_slave /dev/pts 136 0-255 pty:slave pty_master /dev/ptm 128 0-255 pty:master pty_slave /dev/ttyp 3 0-255 pty:slave pty_master /dev/pty 2 0-255 pty:master /dev/vc/0 /dev/vc/0 4 0 system:vtmaster /dev/ptmx /dev/ptmx 5 2 system /dev/console /dev/console 5 1 system:console /dev/tty /dev/tty 5 0 system:/dev/tty unknown /dev/vc/%d 4 1-63 console
/proc/tty/driver/serial file lists the usage statistics and status of each of the serial tty lines.
ldiscs file, and more detailed information is available within the ldisc/ directory.
5.3.12. /proc/<PID>/
/proc/sys/vm/panic_on_oom. When set to 1 the kernel will panic on OOM. A setting of 0 instructs the kernel to call a function named oom_killer on an OOM. Usually, oom_killer can kill rogue processes and the system will survive.
/proc/sys/vm/panic_on_oom.
~]#cat /proc/sys/vm/panic_on_oom1 ~]#echo 0 > /proc/sys/vm/panic_on_oom~]#cat /proc/sys/vm/panic_on_oom0
oom_killer score. In /proc/<PID>/ there are two tools labelled oom_adj and oom_score. Valid scores for oom_adj are in the range -16 to +15. To see the current oom_killer score, view the oom_score for the process. oom_killer will kill processes with the highest scores first.
oom_killer will kill it.
~]#cat /proc/12465/oom_score79872 ~]#echo -5 > /proc/12465/oom_adj~]#cat /proc/12465/oom_score78
oom_killer for that process. In the example below, oom_score returns a value of 0, indicating that this process would not be killed.
~]#cat /proc/12465/oom_score78 ~]#echo -17 > /proc/12465/oom_adj~]#cat /proc/12465/oom_score0
badness() is used to determine the actual score for each process. This is done by adding up 'points' for each examined process. The process scoring is done in the following way:
- The basis of each process's score is its memory size.
- The memory size of any of the process's children (not including a kernel thread) is also added to the score
- The process's score is increased for 'niced' processes and decreased for long running processes.
- Processes with the
CAP_SYS_ADMINandCAP_SYS_RAWIOcapabilities have their scores reduced. - The final score is then bitshifted by the value saved in the
oom_adjfile.
oom_score value will most probably be a non-privileged, recently started process that, along with its children, uses a large amount of memory, has been 'niced', and handles no raw I/O.
5.4. Using the sysctl Command
/sbin/sysctl command is used to view, set, and automate kernel settings in the /proc/sys/ directory.
/proc/sys/ directory, type the /sbin/sysctl -a command as root. This creates a large, comprehensive list, a small portion of which looks something like the following:
net.ipv4.route.min_delay = 2 kernel.sysrq = 0 kernel.sem = 250 32000 32 128
/proc/sys/net/ipv4/route/min_delay file is listed as net.ipv4.route.min_delay, with the directory slashes replaced by dots and the proc.sys portion assumed.
sysctl command can be used in place of echo to assign values to writable files in the /proc/sys/ directory. For example, instead of using the command
echo 1 > /proc/sys/kernel/sysrqsysctl command as follows:
~]# sysctl -w kernel.sysrq="1"
kernel.sysrq = 1/proc/sys/ is helpful during testing, this method does not work as well on a production system as special settings within /proc/sys/ are lost when the machine is rebooted. To preserve custom settings, add them to the /etc/sysctl.conf file.
init program runs the /etc/rc.d/rc.sysinit script. This script contains a command to execute sysctl using /etc/sysctl.conf to determine the values passed to the kernel. Any values added to /etc/sysctl.conf therefore take effect each time the system boots.
5.5. Additional Resources
proc file system.
5.5.1. Installed Documentation
proc file system is installed on the system by default.
/usr/share/doc/kernel-doc-<version>/Documentation/filesystems/proc.txt— Contains assorted, but limited, information about all aspects of the/proc/directory./usr/share/doc/kernel-doc-<version>/Documentation/sysrq.txt— An overview of System Request Key options./usr/share/doc/kernel-doc-<version>/Documentation/sysctl/— A directory containing a variety ofsysctltips, including modifying values that concern the kernel (kernel.txt), accessing file systems (fs.txt), and virtual memory use (vm.txt)./usr/share/doc/kernel-doc-<version>/Documentation/networking/ip-sysctl.txt— A detailed overview of IP networking options.
5.5.2. Useful Websites
- http://www.linuxhq.com/ — This website maintains a complete database of source, patches, and documentation for various versions of the Linux kernel.
Chapter 6. Redundant Array of Independent Disks (RAID)
6.1. What is RAID?
6.1.1. Who Should Use RAID?
- Enhances speed
- Increases storage capacity using a single virtual disk
- Minimizes disk failure
6.1.2. Hardware RAID versus Software RAID
- Hardware RAID
- The hardware-based array manages the RAID subsystem independently from the host. It presents a single disk per RAID array to the host.A hardware RAID device connects to the SCSI controller and presents the RAID arrays as a single SCSI drive. An external RAID system moves all RAID handling “intelligence” into a controller located in the external disk subsystem. The whole subsystem is connected to the host via a normal SCSI controller and appears to the host as a single disk.RAID controller cards function like a SCSI controller to the operating system, and handle all the actual drive communications. The user plugs the drives into the RAID controller (just like a normal SCSI controller) and then adds them to the RAID controllers configuration, and the operating system won't know the difference.
- Software RAID
- Software RAID implements the various RAID levels in the kernel disk (block device) code. It offers the cheapest possible solution, as expensive disk controller cards or hot-swap chassis[1] are not required. Software RAID also works with cheaper IDE disks as well as SCSI disks. With today's faster CPUs, software RAID outperforms hardware RAID.The Linux kernel contains an MD driver that allows the RAID solution to be completely hardware independent. The performance of a software-based array depends on the server CPU performance and load.To learn more about software RAID, here are the key features:
- Threaded rebuild process
- Kernel-based configuration
- Portability of arrays between Linux machines without reconstruction
- Backgrounded array reconstruction using idle system resources
- Hot-swappable drive support
- Automatic CPU detection to take advantage of certain CPU optimizations
6.1.3. RAID Levels and Linear Support
- Level 0
- RAID level 0, often called “striping”, is a performance-oriented striped data mapping technique. This means the data being written to the array is broken down into strips and written across the member disks of the array, allowing high I/O performance at low inherent cost but provides no redundancy. The storage capacity of a level 0 array is equal to the total capacity of the member disks in a hardware RAID or the total capacity of member partitions in a software RAID.
- Level 1
- RAID level 1, or “mirroring”, has been used longer than any other form of RAID. Level 1 provides redundancy by writing identical data to each member disk of the array, leaving a “mirrored” copy on each disk. Mirroring remains popular due to its simplicity and high level of data availability. Level 1 operates with two or more disks that may use parallel access for high data-transfer rates when reading but more commonly operate independently to provide high I/O transaction rates. Level 1 provides very good data reliability and improves performance for read-intensive applications but at a relatively high cost. The storage capacity of the level 1 array is equal to the capacity of one of the mirrored hard disks in a hardware RAID or one of the mirrored partitions in a software RAID.
Note
RAID level 1 comes at a high cost because you write the same information to all of the disks in the array, which wastes drive space. For example, if you have RAID level 1 set up so that your root (/) partition exists on two 40G drives, you have 80G total but are only able to access 40G of that 80G. The other 40G acts like a mirror of the first 40G. - Level 4
- RAID level 4 uses parity[2] concentrated on a single disk drive to protect data. It is better suited to transaction I/O rather than large file transfers. Because the dedicated parity disk represents an inherent bottleneck, level 4 is seldom used without accompanying technologies such as write-back caching. Although RAID level 4 is an option in some RAID partitioning schemes, it is not an option allowed in Red Hat Enterprise Linux RAID installations. The storage capacity of hardware RAID level 4 is equal to the capacity of member disks, minus the capacity of one member disk. The storage capacity of software RAID level 4 is equal to the capacity of the member partitions, minus the size of one of the partitions if they are of equal size.
Note
RAID level 4 takes up the same amount of space as RAID level 5, but level 5 has more advantages. For this reason, level 4 is not supported. - Level 5
- RAID level 5 is the most common type of RAID. By distributing parity across some or all of an array's member disk drives, RAID level 5 eliminates the write bottleneck inherent in level 4. The only performance bottleneck is the parity calculation process. With modern CPUs and software RAID, that usually is not a very big problem. As with level 4, the result is asymmetrical performance, with reads substantially outperforming writes. Level 5 is often used with write-back caching to reduce the asymmetry. The storage capacity of hardware RAID level 5 is equal to the capacity of member disks, minus the capacity of one member disk. The storage capacity of software RAID level 5 is equal to the capacity of the member partitions, minus the size of one of the partitions if they are of equal size.
- Linear RAID
- Linear RAID is a simple grouping of drives to create a larger virtual drive. In linear RAID, the chunks are allocated sequentially from one member drive, going to the next drive only when the first is completely filled. This grouping provides no performance benefit, as it is unlikely that any I/O operations will be split between member drives. Linear RAID also offers no redundancy and, in fact, decreases reliability — if any one member drive fails, the entire array cannot be used. The capacity is the total of all member disks.
6.2. Configuring Software RAID
- Creating software RAID partitions on physical hard drives.
- Creating RAID devices from the software RAID partitions.
- (Optional) Configuring LVM from the RAID devices.
- Creating file systems from the RAID devices.
/dev/hda and /dev/hdb) to illustrate the creation of simple RAID 1 and RAID 0 configurations, and detail how to create a simple RAID configuration by implementing multiple RAID devices.
6.2.1. Creating the RAID Partitions
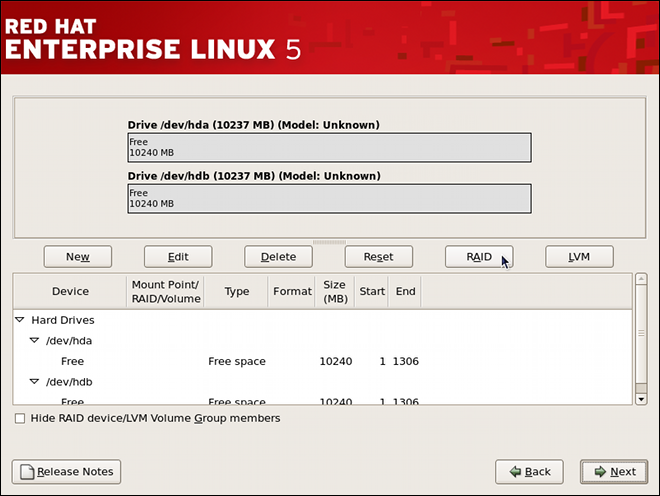
Figure 6.1. Two Blank Drives, Ready For Configuration
- In Disk Druid, click the button to enter the software RAID creation screen.
- Choose to create a RAID partition as shown in Figure 6.2, “RAID Partition Options”. Note that no other RAID options (such as entering a mount point) are available until RAID partitions, as well as RAID devices, are created. Click to confirm the choice.
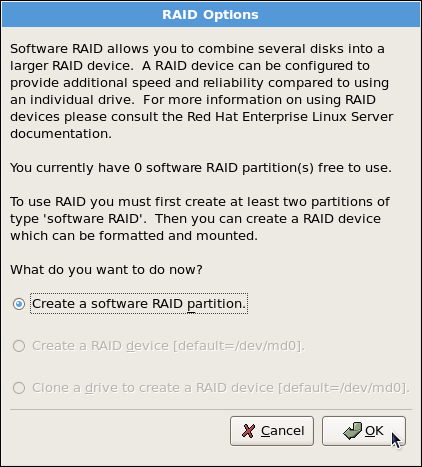
Figure 6.2. RAID Partition Options
- A software RAID partition must be constrained to one drive. For , select the drive to use for RAID. If you have multiple drives, by default all drives are selected and you must deselect the drives you do not want.

Figure 6.3. Adding a RAID Partition
- Edit the Size (MB) field, and enter the size that you want the partition to be (in MB).
- Select Fixed Size to specify partition size. Select Fill all space up to (MB) and enter a value (in MB) to specify partition size range. Select Fill to maximum allowable size to allow maximum available space of the hard disk. Note that if you make more than one space growable, they share the available free space on the disk.
- Select Force to be a primary partition if you want the partition to be a primary partition. A primary partition is one of the first four partitions on the hard drive. If unselected, the partition is created as a logical partition. If other operating systems are already on the system, unselecting this option should be considered. For more information on primary versus logical/extended partitions, refer to the appendix section of the Red Hat Enterprise Linux Installation Guide.
/boot partition as a software RAID device, leaving the root partition (/), /home, and swap as regular file systems. Figure 6.4, “RAID 1 Partitions Ready, Pre-Device and Mount Point Creation” shows successfully allocated space for the RAID 1 configuration (for /boot), which is now ready for RAID device and mount point creation:
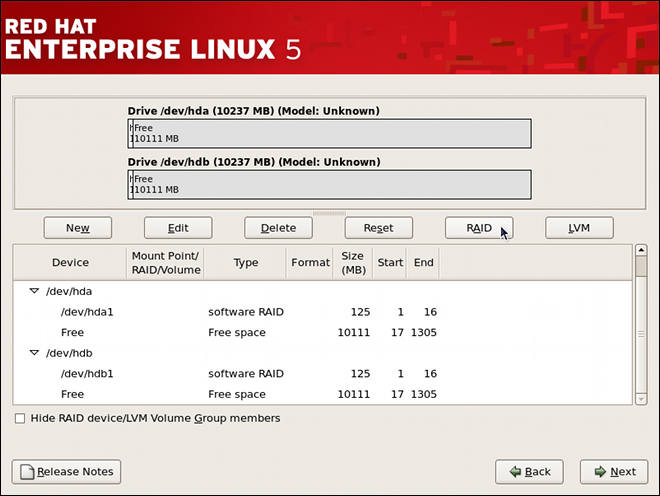
Figure 6.4. RAID 1 Partitions Ready, Pre-Device and Mount Point Creation
6.2.2. Creating the RAID Devices and Mount Points
- On the main partitioning screen, click the button. The RAID Options dialog appears as shown in Figure 6.5, “RAID Options”.

Figure 6.5. RAID Options
- Select the Create a RAID device option, and click . As shown in Figure 6.6, “Making a RAID Device and Assigning a Mount Point”, the Make RAID Device dialog appears, allowing you to make a RAID device and assign a mount point.

Figure 6.6. Making a RAID Device and Assigning a Mount Point
- Select a mount point from the Mount Point pulldown list.
- Choose the file system type for the partition from the File System Type pulldown list. At this point you can either configure a dynamic LVM file system or a traditional static ext2/ext3 file system. For more information on LVM and its configuration during the installation process, refer to Chapter 11, LVM (Logical Volume Manager). If LVM is not required, continue on with the following instructions.
- From the RAID Device pulldown list, select a device name such as md0.
- From the RAID Level, choose the required RAID level.
Note
If you are making a RAID partition of/boot, you must choose RAID level 1, and it must use one of the first two drives (IDE first, SCSI second). If you are not creating a separate RAID partition of/boot, and you are making a RAID partition for the root file system (that is,/), it must be RAID level 1 and must use one of the first two drives (IDE first, SCSI second). - The RAID partitions created appear in the RAID Members list. Select which of these partitions should be used to create the RAID device.
- If configuring RAID 1 or RAID 5, specify the number of spare partitions in the Number of spares field. If a software RAID partition fails, the spare is automatically used as a replacement. For each spare you want to specify, you must create an additional software RAID partition (in addition to the partitions for the RAID device). Select the partitions for the RAID device and the partition(s) for the spare(s).
- Click to confirm the setup. The RAID device appears in the Drive Summary list.
- Repeat this chapter's entire process for configuring additional partitions, devices, and mount points, such as the root partition (
/), home partition (/home), orswap.
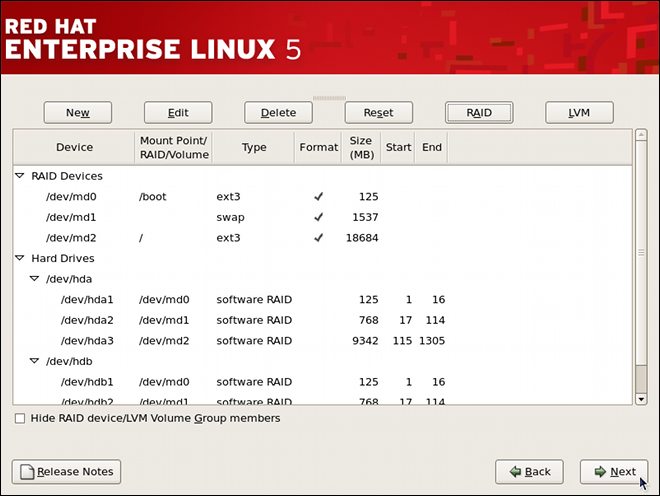
Figure 6.7. Sample RAID Configuration
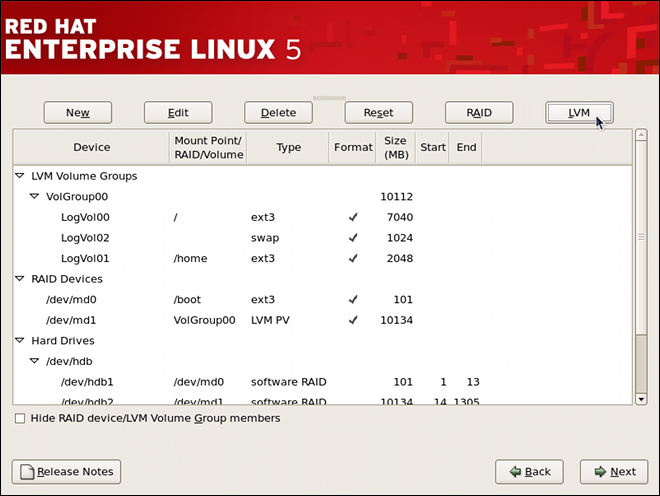
Figure 6.8. Sample RAID With LVM Configuration
6.3. Managing Software RAID
- Reviewing existing software RAID configuration.
- Creating a new RAID device.
- Replacing a faulty device in an array.
- Adding a new device to an existing array.
- Deactivating and removing an existing RAID device.
- Saving the configuration.
6.3.1. Reviewing RAID Configuration
/proc/mdstat special file. To list these devices, display the content of this file by typing the following at a shell prompt:
cat/proc/mdstat
root:
mdadm--querydevice…
mdadm--detailraid_device…
mdadm--examinecomponent_device…
mdadm --detail command displays information about a RAID device, mdadm --examine only relays information about a RAID device as it relates to a given component device. This distinction is particularly important when working with a RAID device that itself is a component of another RAID device.
mdadm --query command, as well as both mdadm --detail and mdadm --examine commands allow you to specify multiple devices at once.
Example 6.1. Reviewing RAID configuration
/dev/md0 is a RAID device by typing the following at a shell prompt:
~]# mdadm --query /dev/md0
/dev/md0: 125.38MiB raid1 2 devices, 0 spares. Use mdadm --detail for more detail.
/dev/md0: No md super block found, not an md component.~]# mdadm --detail /dev/md0
/dev/md0:
Version : 0.90
Creation Time : Tue Jun 28 16:05:49 2011
Raid Level : raid1
Array Size : 128384 (125.40 MiB 131.47 MB)
Used Dev Size : 128384 (125.40 MiB 131.47 MB)
Raid Devices : 2
Total Devices : 2
Preferred Minor : 0
Persistence : Superblock is persistent
Update Time : Thu Jun 30 17:06:34 2011
State : clean
Active Devices : 2
Working Devices : 2
Failed Devices : 0
Spare Devices : 0
UUID : 49c5ac74:c2b79501:5c28cb9c:16a6dd9f
Events : 0.6
Number Major Minor RaidDevice State
0 3 1 0 active sync /dev/hda1
1 3 65 1 active sync /dev/hdb1~]$ cat /proc/mdstat
Personalities : [raid0] [raid1]
md0 : active raid1 hdb1[1] hda1[0]
128384 blocks [2/2] [UU]
md1 : active raid0 hdb2[1] hda2[0]
1573888 blocks 256k chunks
md2 : active raid0 hdb3[1] hda3[0]
19132928 blocks 256k chunks
unused devices: <none>6.3.2. Creating a New RAID Device
root:
mdadm--createraid_device--level=level--raid-devices=number component_device…
mdadm(8) manual page.
Example 6.2. Creating a new RAID device
~]# ls /dev/sd*
/dev/sda /dev/sda1 /dev/sdb /dev/sdb1/dev/md3 as a new RAID level 1 array from /dev/sda1 and /dev/sdb1, run the following command:
~]# mdadm --create /dev/md3 --level=1 --raid-devices=2 /dev/sda1 /dev/sdb1
mdadm: array /dev/md3 started.6.3.3. Replacing a Faulty Device
root:
mdadmraid_device--failcomponent_device
mdadmraid_device--removecomponent_device
mdadmraid_device--addcomponent_device
Example 6.3. Replacing a faulty device
/dev/md3, with the following layout (that is, the RAID device created in Example 6.2, “Creating a new RAID device”):
~]# mdadm --detail /dev/md3 | tail -n 3
Number Major Minor RaidDevice State
0 8 1 0 active sync /dev/sda1
1 8 17 1 active sync /dev/sdb1/dev/sdb1 device as faulty:
~]# mdadm /dev/md3 --fail /dev/sdb1
mdadm: set /dev/sdb1 faulty in /dev/md3~]# mdadm /dev/md3 --remove /dev/sdb1
mdadm: hot removed /dev/sdb1~]# mdadm /dev/md3 --add /dev/sdb1
mdadm: added /dev/sdb16.3.4. Extending a RAID Device
root:
mdadmraid_device--addcomponent_device
mdadm--growraid_device--raid-devices=number
Example 6.4. Extending a RAID device
/dev/md3, with the following layout (that is, the RAID device created in Example 6.2, “Creating a new RAID device”):
~]# mdadm --detail /dev/md3 | tail -n 3
Number Major Minor RaidDevice State
0 8 1 0 active sync /dev/sda1
1 8 17 1 active sync /dev/sdb1/dev/sdc, has been added and has exactly one partition. To add it to the /dev/md3 array, type the following at a shell prompt:
~]# mdadm /dev/md3 --add /dev/sdc1
mdadm: added /dev/sdc1/dev/sdc1 as a spare device. To change the size of the array to actually use it, type:
~]# mdadm --grow /dev/md3 --raid-devices=36.3.5. Removing a RAID Device
root:
mdadm--stopraid_device
mdadm--removeraid_device
mdadm--zero-superblockcomponent_device…
Example 6.5. Removing a RAID device
/dev/md3, with the following layout (that is, the RAID device created in Example 6.4, “Extending a RAID device”):
~]# mdadm --detail /dev/md3 | tail -n 4
Number Major Minor RaidDevice State
0 8 1 0 active sync /dev/sda1
1 8 17 1 active sync /dev/sdb1
2 8 33 2 active sync /dev/sdc1~]# mdadm --stop /dev/md3
mdadm: stopped /dev/md3/dev/md3 device by running the following command:
~]# mdadm --remove /dev/md3~]# mdadm --zero-superblock /dev/sda1 /dev/sdb1 /dev/sdc16.3.6. Preserving the Configuration
mdadm command only apply to the current session, and will not survive a system restart. At boot time, the mdmonitor service reads the content of the /etc/mdadm.conf configuration file to see which RAID devices to start. If the software RAID was configured during the graphical installation process, this file contains directives listed in Table 6.1, “Common mdadm.conf directives” by default.
| Option | Description |
|---|---|
ARRAY |
Allows you to identify a particular array.
|
DEVICE |
Allows you to specify a list of devices to scan for a RAID component (for example, “/dev/hda1”). You can also use the keyword
partitions to use all partitions listed in /proc/partitions, or containers to specify an array container.
|
MAILADDR | Allows you to specify an email address to use in case of an alert. |
ARRAY lines are presently in use regardless of the configuration, run the following command as root:
mdadm--detail--scan
/etc/mdadm.conf file. You can also display the ARRAY line for a particular device:
mdadm--detail--briefraid_device
mdadm--detail--briefraid_device >>/etc/mdadm.conf
Example 6.6. Preserving the configuration
/etc/mdadm.conf contains the software RAID configuration created during the system installation:
# mdadm.conf written out by anaconda DEVICE partitions MAILADDR root ARRAY /dev/md0 level=raid1 num-devices=2 UUID=49c5ac74:c2b79501:5c28cb9c:16a6dd9f ARRAY /dev/md1 level=raid0 num-devices=2 UUID=76914c11:5bfa2c00:dc6097d1:a1f4506d ARRAY /dev/md2 level=raid0 num-devices=2 UUID=2b5d38d0:aea898bf:92be20e2:f9d893c5
/dev/md3 device as shown in Example 6.2, “Creating a new RAID device”, you can make it persistent by running the following command:
~]# mdadm --detail --brief /dev/md3 >> /etc/mdadm.conf6.4. Additional Resources
6.4.1. Installed Documentation
mdadmman page — A manual page for themdadmutility.mdadm.confman page — A manual page that provides a comprehensive list of available/etc/mdadm.confconfiguration options.
Chapter 7. Swap Space
7.1. What is Swap Space?
| Amount of RAM in the System | Recommended Amount of Swap Space |
|---|---|
| 4GB of RAM or less | a minimum of 2GB of swap space |
| 4GB to 16GB of RAM | a minimum of 4GB of swap space |
| 16GB to 64GB of RAM | a minimum of 8GB of swap space |
| 64GB to 256GB of RAM | a minimum of 16GB of swap space |
| 256GB to 512GB of RAM | a minimum of 32GB of swap space |
Important
free and cat /proc/swaps commands to verify how much and where swap is in use.
7.2. Adding Swap Space
7.2.1. Extending Swap on an LVM2 Logical Volume
/dev/VolGroup00/LogVol01 is the volume you want to extend):
- Disable swapping for the associated logical volume:
swapoff -v /dev/VolGroup00/LogVol01 - Resize the LVM2 logical volume by 256 MB:
lvm lvresize /dev/VolGroup00/LogVol01 -L +256M - Format the new swap space:
mkswap /dev/VolGroup00/LogVol01 - Enable the extended logical volume:
swapon -va - Test that the logical volume has been extended properly:
cat /proc/swapsfree
7.2.2. Creating an LVM2 Logical Volume for Swap
/dev/VolGroup00/LogVol02 is the swap volume you want to add):
- Create the LVM2 logical volume of size 256 MB:
lvm lvcreate VolGroup00 -n LogVol02 -L 256M - Format the new swap space:
mkswap /dev/VolGroup00/LogVol02 - Add the following entry to the
/etc/fstabfile:/dev/VolGroup00/LogVol02 swap swap defaults 0 0
- Enable the extended logical volume:
swapon -va - Test that the logical volume has been extended properly:
cat /proc/swapsfree
7.2.3. Creating a Swap File
- Determine the size of the new swap file in megabytes and multiply by 1024 to determine the number of blocks. For example, the block size of a 64 MB swap file is 65536.
- At a shell prompt as root, type the following command with
countbeing equal to the desired block size:dd if=/dev/zero of=/swapfile bs=1024 count=65536 - Change the persmissions of the newly created file:
chmod 0600 /swapfile - Setup the swap file with the command:
mkswap /swapfile - To enable the swap file immediately but not automatically at boot time:
swapon /swapfile - To enable it at boot time, edit
/etc/fstabto include the following entry:/swapfile swap swap defaults 0 0
The next time the system boots, it enables the new swap file. - After adding the new swap file and enabling it, verify it is enabled by viewing the output of the command
cat /proc/swapsorfree.
7.3. Removing Swap Space
7.3.1. Reducing Swap on an LVM2 Logical Volume
/dev/VolGroup00/LogVol01 is the volume you want to reduce):
- Disable swapping for the associated logical volume:
swapoff -v /dev/VolGroup00/LogVol01 - Reduce the LVM2 logical volume by 512 MB:
lvm lvreduce /dev/VolGroup00/LogVol01 -L -512M - Format the new swap space:
mkswap /dev/VolGroup00/LogVol01 - Enable the extended logical volume:
swapon -va - Test that the logical volume has been reduced properly:
cat /proc/swapsfree
7.3.2. Removing an LVM2 Logical Volume for Swap
/dev/VolGroup00/LogVol02 is the swap volume you want to remove):
- Disable swapping for the associated logical volume:
swapoff -v /dev/VolGroup00/LogVol02 - Remove the LVM2 logical volume of size 512 MB:
lvm lvremove /dev/VolGroup00/LogVol02 - Remove the following entry from the
/etc/fstabfile:/dev/VolGroup00/LogVol02 swap swap defaults 0 0
- Test that the logical volume has been removed:
cat /proc/swapsfree
Chapter 8. Managing Disk Storage
8.1. Standard Partitions using parted
parted allows users to:
- View the existing partition table
- Change the size of existing partitions
- Add partitions from free space or additional hard drives
parted package is included when installing Red Hat Enterprise Linux. To start parted, log in as root and type the command parted /dev/sda at a shell prompt (where /dev/sda is the device name for the drive you want to configure).
umount command and turn off all the swap space on the hard drive with the swapoff command.
parted commands” contains a list of commonly used parted commands. The sections that follow explain some of these commands and arguments in more detail.
| Command | Description |
|---|---|
check minor-num | Perform a simple check of the file system |
cp from to | Copy file system from one partition to another; from and to are the minor numbers of the partitions |
help | Display list of available commands |
mklabel label | Create a disk label for the partition table |
mkfs minor-num file-system-type | Create a file system of type file-system-type |
mkpart part-type fs-type start-mb end-mb | Make a partition without creating a new file system |
mkpartfs part-type fs-type start-mb end-mb | Make a partition and create the specified file system |
move minor-num start-mb end-mb | Move the partition |
name minor-num name | Name the partition for Mac and PC98 disklabels only |
print | Display the partition table |
quit | Quit parted |
rescue start-mb end-mb | Rescue a lost partition from start-mb to end-mb |
resize minor-num start-mb end-mb | Resize the partition from start-mb to end-mb |
rm minor-num | Remove the partition |
select device | Select a different device to configure |
set minor-num flag state | Set the flag on a partition; state is either on or off |
toggle [NUMBER [FLAG] | Toggle the state of FLAG on partition NUMBER |
unit UNIT | Set the default unit to UNIT |
8.1.1. Viewing the Partition Table
parted, use the command print to view the partition table. A table similar to the following appears:
Model: ATA ST3160812AS (scsi) Disk /dev/sda: 160GB Sector size (logical/physical): 512B/512B Partition Table: msdos Number Start End Size Type File system Flags 1 32.3kB 107MB 107MB primary ext3 boot 2 107MB 105GB 105GB primary ext3 3 105GB 107GB 2147MB primary linux-swap 4 107GB 160GB 52.9GB extended root 5 107GB 133GB 26.2GB logical ext3 6 133GB 133GB 107MB logical ext3 7 133GB 160GB 26.6GB logical lvm
number. For example, the partition with minor number 1 corresponds to /dev/sda1. The Start and End values are in megabytes. Valid Type are metadata, free, primary, extended, or logical. The Filesystem is the file system type, which can be any of the following:
- ext2
- ext3
- fat16
- fat32
- hfs
- jfs
- linux-swap
- ntfs
- reiserfs
- hp-ufs
- sun-ufs
- xfs
Filesystem of a device shows no value, this means that its file system type is unknown.
8.1.2. Creating a Partition
Warning
parted, where /dev/sda is the device on which to create the partition:
parted /dev/sdaprint8.1.2.1. Making the Partition
mkpart primary ext3 1024 2048Note
mkpartfs command instead, the file system is created after the partition is created. However, parted does not support creating an ext3 file system. Thus, if you wish to create an ext3 file system, use mkpart and create the file system with the mkfs command as described later.
print command to confirm that it is in the partition table with the correct partition type, file system type, and size. Also remember the minor number of the new partition so that you can label it. You should also view the output of
cat /proc/partitions8.1.2.2. Formatting the Partition
mkfs -t ext3 /dev/sda6Warning
8.1.2.3. Labeling the Partition
/dev/sda6 and you want to label it /work:
e2label /dev/sda6 /work8.1.2.4. Creating the Mount Point
mkdir /work8.1.2.5. Add to /etc/fstab
/etc/fstab file to include the new partition. The new line should look similar to the following:
LABEL=/work /work ext3 defaults 1 2
LABEL= followed by the label you gave the partition. The second column should contain the mount point for the new partition, and the next column should be the file system type (for example, ext3 or swap). If you need more information about the format, read the man page with the command man fstab.
defaults, the partition is mounted at boot time. To mount the partition without rebooting, as root, type the command:
mount /work8.1.3. Removing a Partition
Warning
parted, where /dev/sda is the device on which to remove the partition:
parted /dev/sdaprintrm. For example, to remove the partition with minor number 3:
rm 3print command to confirm that it is removed from the partition table. You should also view the output of
cat /proc/partitions/etc/fstab file. Find the line that declares the removed partition, and remove it from the file.
8.1.4. Resizing a Partition
Warning
parted, where /dev/sda is the device on which to resize the partition:
parted /dev/sdaprintresize command followed by the minor number for the partition, the starting place in megabytes, and the end place in megabytes. For example:
resize 3 1024 2048Warning
print command to confirm that the partition has been resized correctly, is the correct partition type, and is the correct file system type.
df to make sure the partition was mounted and is recognized with the new size.
8.2. LVM Partition Management
lvm help at a command prompt.
| Command | Description |
|---|---|
dumpconfig | Dump the active configuration |
formats | List the available metadata formats |
help | Display the help commands |
lvchange | Change the attributes of logical volume(s) |
lvcreate | Create a logical volume |
lvdisplay | Display information about a logical volume |
lvextend | Add space to a logical volume |
lvmchange | Due to use of the device mapper, this command has been deprecated |
lvmdiskscan | List devices that may be used as physical volumes |
lvmsadc | Collect activity data |
lvmsar | Create activity report |
lvreduce | Reduce the size of a logical volume |
lvremove | Remove logical volume(s) from the system |
lvrename | Rename a logical volume |
lvresize | Resize a logical volume |
lvs | Display information about logical volumes |
lvscan | List all logical volumes in all volume groups |
pvchange | Change attributes of physical volume(s) |
pvcreate | Initialize physical volume(s) for use by LVM |
pvdata | Display the on-disk metadata for physical volume(s) |
pvdisplay | Display various attributes of physical volume(s) |
pvmove | Move extents from one physical volume to another |
pvremove | Remove LVM label(s) from physical volume(s) |
pvresize | Resize a physical volume in use by a volume group |
pvs | Display information about physical volumes |
pvscan | List all physical volumes |
segtypes | List available segment types |
vgcfgbackup | Backup volume group configuration |
vgcfgrestore | Restore volume group configuration |
vgchange | Change volume group attributes |
vgck | Check the consistency of a volume group |
vgconvert | Change volume group metadata format |
vgcreate | Create a volume group |
vgdisplay | Display volume group information |
vgexport | Unregister a volume group from the system |
vgextend | Add physical volumes to a volume group |
vgimport | Register exported volume group with system |
vgmerge | Merge volume groups |
vgmknodes | Create the special files for volume group devices in /dev/ |
vgreduce | Remove a physical volume from a volume group |
vgremove | Remove a volume group |
vgrename | Rename a volume group |
vgs | Display information about volume groups |
vgscan | Search for all volume groups |
vgsplit | Move physical volumes into a new volume group |
version | Display software and driver version information |
Chapter 9. Implementing Disk Quotas
quota RPM must be installed to implement disk quotas. Note
9.1. Configuring Disk Quotas
- Enable quotas per file system by modifying the
/etc/fstabfile. - Remount the file system(s).
- Create the quota database files and generate the disk usage table.
- Assign quota policies.
9.1.1. Enabling Quotas
/etc/fstab file. Add the usrquota and/or grpquota options to the file systems that require quotas:
/dev/VolGroup00/LogVol00 / ext3 defaults 1 1 LABEL=/boot /boot ext3 defaults 1 2 none /dev/pts devpts gid=5,mode=620 0 0 none /dev/shm tmpfs defaults 0 0 none /proc proc defaults 0 0 none /sys sysfs defaults 0 0 /dev/VolGroup00/LogVol02 /home ext3 defaults,usrquota,grpquota 1 2 /dev/VolGroup00/LogVol01 swap swap defaults 0 0 . . .
/home file system has both user and group quotas enabled.
Note
/home partition was created during the installation of Red Hat Enterprise Linux. The root (/) partition can be used for setting quota policies in the /etc/fstab file.
9.1.2. Remounting the File Systems
usrquota and/or grpquota options, remount each file system whose fstab entry has been modified. If the file system is not in use by any process, use one of the following methods:
- Issue the
umountcommand followed by themountcommand to remount the file system.(See themanpage for bothumountandmountfor the specific syntax for mounting and unmounting various filesystem types.) - Issue the
mount -o remount <file-system>command (where<file-system>is the name of the file system) to remount the file system. For example, to remount the/homefile system, the command to issue ismount -o remount /home.
9.1.3. Creating the Quota Database Files
quotacheck command.
quotacheck command examines quota-enabled file systems and builds a table of the current disk usage per file system. The table is then used to update the operating system's copy of disk usage. In addition, the file system's disk quota files are updated.
aquota.user and aquota.group) on the file system, use the -c option of the quotacheck command. For example, if user and group quotas are enabled for the /home file system, create the files in the /home directory:
quotacheck -cug /home-c option specifies that the quota files should be created for each file system with quotas enabled, the -u option specifies to check for user quotas, and the -g option specifies to check for group quotas.
-u or -g options are specified, only the user quota file is created. If only -g is specified, only the group quota file is created.
quotacheck -avuga— Check all quota-enabled, locally-mounted file systemsv— Display verbose status information as the quota check proceedsu— Check user disk quota informationg— Check group disk quota information
quotacheck has finished running, the quota files corresponding to the enabled quotas (user and/or group) are populated with data for each quota-enabled locally-mounted file system such as /home.
9.1.4. Assigning Quotas per User
edquota command.
edquota username/etc/fstab for the /home partition (/dev/VolGroup00/LogVol02 in the example below) and the command edquota testuser is executed, the following is shown in the editor configured as the default for the system:
Disk quotas for user testuser (uid 501): Filesystem blocks soft hard inodes soft hard /dev/VolGroup00/LogVol02 440436 0 0 37418 0 0
Note
EDITOR environment variable is used by edquota. To change the editor, set the EDITOR environment variable in your ~/.bash_profile file to the full path of the editor of your choice.
inodes column shows how many inodes the user is currently using. The last two columns are used to set the soft and hard inode limits for the user on the file system.
Disk quotas for user testuser (uid 501): Filesystem blocks soft hard inodes soft hard /dev/VolGroup00/LogVol02 440436 500000 550000 37418 0 0
quota testuser9.1.5. Assigning Quotas per Group
devel group (the group must exist prior to setting the group quota), use the command:
edquota -g develDisk quotas for group devel (gid 505): Filesystem blocks soft hard inodes soft hard /dev/VolGroup00/LogVol02 440400 0 0 37418 0 0
quota -g devel9.1.6. Setting the Grace Period for Soft Limits
edquota -tedquota commands operate on a particular user's or group's quota, the -t option operates on every filesystem with quotas enabled.
9.2. Managing Disk Quotas
9.2.1. Enabling and Disabling
quotaoff -vaug-u or -g options are specified, only the user quotas are disabled. If only -g is specified, only group quotas are disabled. The -v switch causes verbose status information to display as the command executes.
quotaon command with the same options.
quotaon -vaug/home, use the following command:
quotaon -vug /home-u or -g options are specified, only the user quotas are enabled. If only -g is specified, only group quotas are enabled.
9.2.2. Reporting on Disk Quotas
repquota utility. For example, the command repquota /home produces this output:
*** Report for user quotas on device /dev/mapper/VolGroup00-LogVol02
Block grace time: 7days; Inode grace time: 7days
Block limits File limits
User used soft hard grace used soft hard grace
----------------------------------------------------------------------
root -- 36 0 0 4 0 0
kristin -- 540 0 0 125 0 0
testuser -- 440400 500000 550000 37418 0 0-a) quota-enabled file systems, use the command:
repquota -a-- displayed after each user is a quick way to determine whether the block or inode limits have been exceeded. If either soft limit is exceeded, a + appears in place of the corresponding -; the first - represents the block limit, and the second represents the inode limit.
grace columns are normally blank. If a soft limit has been exceeded, the column contains a time specification equal to the amount of time remaining on the grace period. If the grace period has expired, none appears in its place.
9.2.3. Keeping Quotas Accurate
quotacheck include:
- Ensuring quotacheck runs on next reboot
Note
This method works best for (busy) multiuser systems which are periodically rebooted.As root, place a shell script into the/etc/cron.daily/or/etc/cron.weekly/directory—or schedule one using thecrontab -ecommand—that contains thetouch /forcequotacheckcommand. This creates an emptyforcequotacheckfile in the root directory, which the system init script looks for at boot time. If it is found, the init script runsquotacheck. Afterward, the init script removes the/forcequotacheckfile; thus, scheduling this file to be created periodically withcronensures thatquotacheckis run during the next reboot.Refer to Chapter 39, Automated Tasks for more information about configuringcron.- Running quotacheck in single user mode
- An alternative way to safely run
quotacheckis to (re-)boot the system into single-user mode to prevent the possibility of data corruption in quota files and run:~]# quotaoff -vaug /<file_system> ~]# quotacheck -vaug /<file_system> ~]# quotaon -vaug /<file_system>
- Running quotacheck on a running system
- If necessary, it is possible to run
quotacheckon a machine during a time when no users are logged in, and thus have no open files on the file system being checked. Run the commandquotacheck -vaug <file_system>; this command will fail ifquotacheckcannot remount the given <file_system> as read-only. Note that, following the check, the file system will be remounted read-write.Important
Runningquotacheckon a live file system mounted read-write is not recommended due to the possibility of quota file corruption.
cron.
Chapter 10. Access Control Lists
acl package is required to implement ACLs. It contains the utilities used to add, modify, remove, and retrieve ACL information.
cp and mv commands copy or move any ACLs associated with files and directories.
10.1. Mounting File Systems
mount -t ext3 -o acl <device-name> <partition>mount -t ext3 -o acl /dev/VolGroup00/LogVol02 /work/etc/fstab file, the entry for the partition can include the acl option:
LABEL=/work /work ext3 acl 1 2
--with-acl-support option. No special flags are required when accessing or mounting a Samba share.
10.1.1. NFS
no_acl option in the /etc/exports file. To disable ACLs on an NFS share when mounting it on a client, mount it with the no_acl option via the command line or the /etc/fstab file.
10.2. Setting Access ACLs
- Per user
- Per group
- Via the effective rights mask
- For users not in the user group for the file
setfacl utility sets ACLs for files and directories. Use the -m option to add or modify the ACL of a file or directory:
setfacl -m <rules> <files>u:<uid>:<perms>- Sets the access ACL for a user. The user name or UID may be specified. The user may be any valid user on the system.
g:<gid>:<perms>- Sets the access ACL for a group. The group name or GID may be specified. The group may be any valid group on the system.
m:<perms>- Sets the effective rights mask. The mask is the union of all permissions of the owning group and all of the user and group entries.
o:<perms>- Sets the access ACL for users other than the ones in the group for the file.
r, w, and x for read, write, and execute.
setfacl command is used, the additional rules are added to the existing ACL or the existing rule is modified.
setfacl -m u:andrius:rw /project/somefile-x option and do not specify any permissions:
setfacl -x <rules> <files>setfacl -x u:500 /project/somefile10.3. Setting Default ACLs
d: before the rule and specify a directory instead of a file name.
/share/ directory to read and execute for users not in the user group (an access ACL for an individual file can override it):
setfacl -m d:o:rx /share10.4. Retrieving ACLs
getfacl command. In the example below, the getfacl is used to determine the existing ACLs for a file.
getfacl home/john/picture.png# file: home/john/picture.png # owner: john # group: john user::rw- group::r-- other::r--
[john@main /]$ getfacl home/sales/
# file: home/sales/
# owner: john
# group: john
user::rw-
user:barryg:r--
group::r--
mask::r--
other::r--
default:user::rwx
default:user:john:rwx
default:group::r-x
default:mask::rwx
default:other::r-x10.5. Archiving File Systems With ACLs
Warning
tar and dump commands do not backup ACLs.
star utility is similar to the tar utility in that it can be used to generate archives of files; however, some of its options are different. Refer to Table 10.1, “Command Line Options for star” for a listing of more commonly used options. For all available options, refer to the star man page. The star package is required to use this utility.
| Option | Description |
|---|---|
-c | Creates an archive file. |
-n | Do not extract the files; use in conjunction with -x to show what extracting the files does. |
-r | Replaces files in the archive. The files are written to the end of the archive file, replacing any files with the same path and file name. |
-t | Displays the contents of the archive file. |
-u | Updates the archive file. The files are written to the end of the archive if they do not exist in the archive or if the files are newer than the files of the same name in the archive. This option only work if the archive is a file or an unblocked tape that may backspace. |
-x | Extracts the files from the archive. If used with -U and a file in the archive is older than the corresponding file on the file system, the file is not extracted. |
-help | Displays the most important options. |
-xhelp | Displays the least important options. |
-/ | Do not strip leading slashes from file names when extracting the files from an archive. By default, they are striped when files are extracted. |
-acl | When creating or extracting, archive or restore any ACLs associated with the files and directories. |
10.6. Compatibility with Older Systems
ext_attr attribute. This attribute can be seen using the following command:
tune2fs -l <filesystem-device>ext_attr attribute can be mounted with older kernels, but those kernels do not enforce any ACLs which have been set.
e2fsck utility included in version 1.22 and higher of the e2fsprogs package (including the versions in Red Hat Enterprise Linux 2.1 and 4) can check a file system with the ext_attr attribute. Older versions refuse to check it.
10.7. Additional Resources
10.7.1. Installed Documentation
aclman page — Description of ACLsgetfaclman page — Discusses how to get file access control listssetfaclman page — Explains how to set file access control listsstarman page — Explains more about thestarutility and its many options
10.7.2. Useful Websites
- http://acl.bestbits.at/ — Website for ACLs
Chapter 11. LVM (Logical Volume Manager)
11.1. What is LVM?
/boot partition. The /boot partition cannot be on a logical volume group because the boot loader cannot read it. If the root (/) partition is on a logical volume, create a separate /boot partition which is not a part of a volume group.
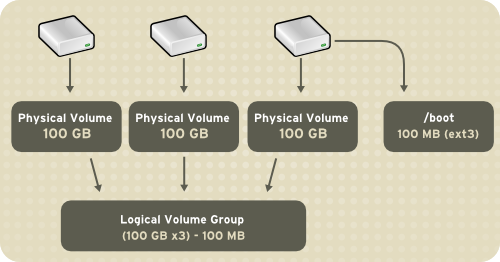
Figure 11.1. Logical Volumes
/home and / and file system types, such as ext2 or ext3. When "partitions" reach their full capacity, free space from the volume group can be added to the logical volume to increase the size of the partition. When a new hard drive is added to the system, it can be added to the volume group, and partitions that are logical volumes can be increased in size.
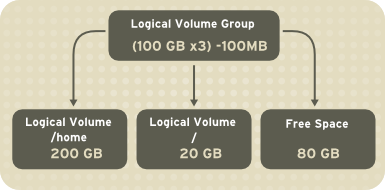
Figure 11.2. Logical Volumes
11.2. LVM Configuration
system-config-lvm utility to create your own LVM configuration post-installation. The next two sections focus on using Disk Druid during installation to complete this task. The third section introduces the LVM utility (system-config-lvm) which allows you to manage your LVM volumes in X windows or graphically.
- Creating physical volumes from the hard drives.
- Creating volume groups from the physical volumes.
- Creating logical volumes from the volume groups and assign the logical volumes mount points.
/dev/sda and /dev/sdb) are used in the following examples. They detail how to create a simple configuration using a single LVM volume group with associated logical volumes during installation.
11.3. Automatic Partitioning
- The
/bootpartition resides on its own non-LVM partition. In the following example, it is the first partition on the first drive (/dev/sda1). Bootable partitions cannot reside on LVM logical volumes. - A single LVM volume group (
VolGroup00) is created, which spans all selected drives and all remaining space available. In the following example, the remainder of the first drive (/dev/sda2), and the entire second drive (/dev/sdb1) are allocated to the volume group. - Two LVM logical volumes (
LogVol00andLogVol01) are created from the newly created spanned volume group. In the following example, the recommended swap space is automatically calculated and assigned toLogVol01, and the remainder is allocated to the root file system,LogVol00.
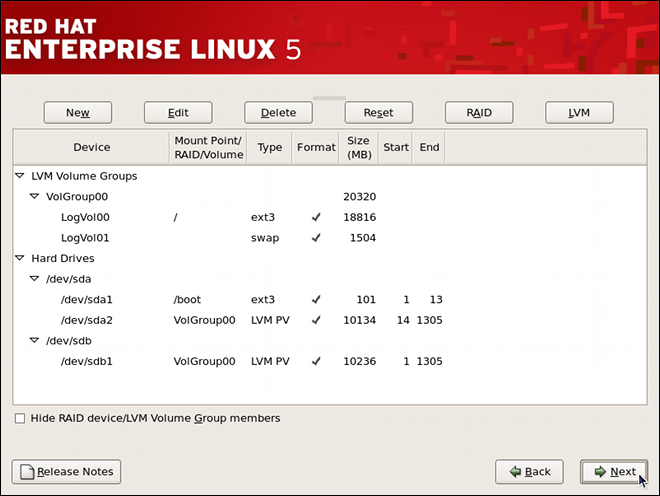
Figure 11.3. Automatic LVM Configuration With Two SCSI Drives
Note
/home or /var, so that each file system has its own independent quota configuration limits.
Note
11.4. Manual LVM Partitioning
11.4.1. Creating the /boot Partition
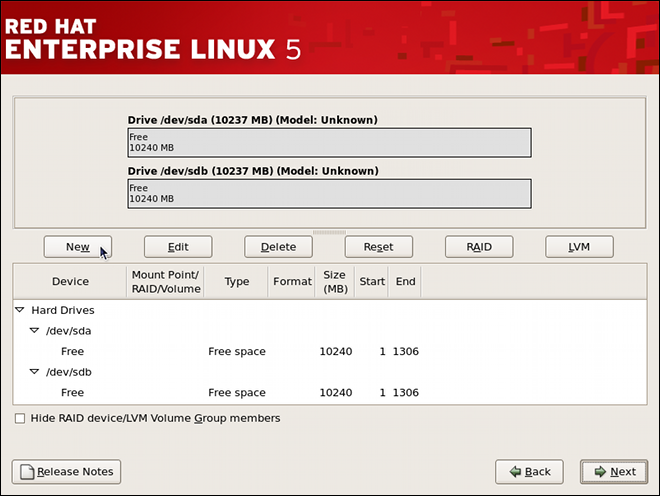
Figure 11.4. Two Blank Drives, Ready for Configuration
Warning
/boot partition cannot reside on an LVM volume because the GRUB boot loader cannot read it.
- Select .
- Select /boot from the Mount Point pulldown menu.
- Select ext3 from the File System Type pulldown menu.
- Select only the sda checkbox from the Allowable Drives area.
- Leave 100 (the default) in the Size (MB) menu.
- Leave the Fixed size (the default) radio button selected in the Additional Size Options area.
- Select Force to be a primary partition to make the partition be a primary partition. A primary partition is one of the first four partitions on the hard drive. If unselected, the partition is created as a logical partition. If other operating systems are already on the system, unselecting this option should be considered. For more information on primary versus logical/extended partitions, refer to the appendix section of the Red Hat Enterprise Linux Installation Guide.
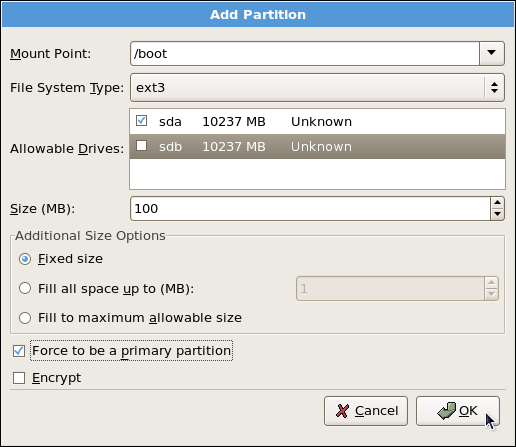
Figure 11.5. Creation of the Boot Partition
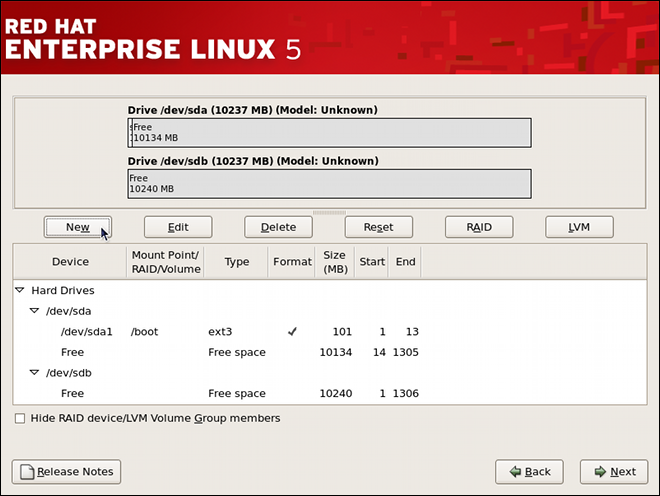
Figure 11.6. The /boot Partition Displayed
11.4.2. Creating the LVM Physical Volumes
- Select .
- Select physical volume (LVM) from the File System Type pulldown menu as shown in Figure 11.7, “Creating a Physical Volume”.
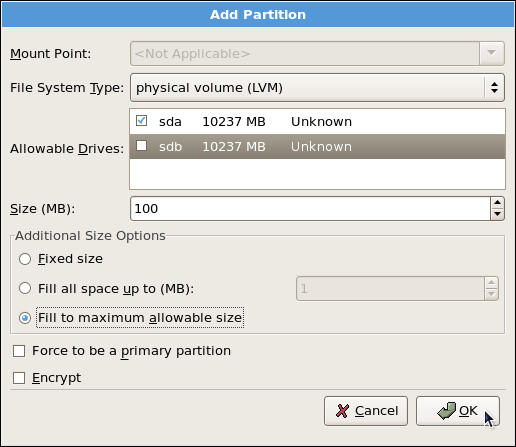
Figure 11.7. Creating a Physical Volume
- You cannot enter a mount point yet (you can once you have created all your physical volumes and then all volume groups).
- A physical volume must be constrained to one drive. For , select the drive on which the physical volume are created. If you have multiple drives, all drives are selected, and you must deselect all but one drive.
- Enter the size that you want the physical volume to be.
- Select Fixed size to make the physical volume the specified size, select Fill all space up to (MB) and enter a size in MBs to give range for the physical volume size, or select Fill to maximum allowable size to make it grow to fill all available space on the hard disk. If you make more than one growable, they share the available free space on the disk.
- Select Force to be a primary partition if you want the partition to be a primary partition.
- Click to return to the main screen.
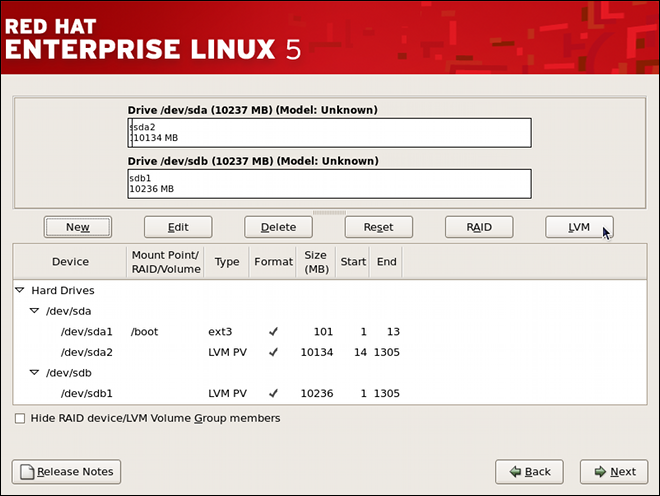
Figure 11.8. Two Physical Volumes Created
11.4.3. Creating the LVM Volume Groups
- Click the button to collect the physical volumes into volume groups. A volume group is basically a collection of physical volumes. You can have multiple logical volumes, but a physical volume can only be in one volume group.
Note
There is overhead disk space reserved in the volume group. The volume group size is slightly less than the total of physical volume sizes.
Figure 11.9. Creating an LVM Volume Group
- Change the Volume Group Name if desired.
- Select which physical volumes to use for the volume group.
11.4.4. Creating the LVM Logical Volumes
/, /home, and swap space. Remember that /boot cannot be a logical volume. To add a logical volume, click the button in the Logical Volumes section. A dialog window as shown in Figure 11.10, “Creating a Logical Volume” appears.
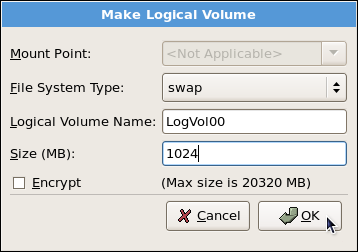
Figure 11.10. Creating a Logical Volume
Note
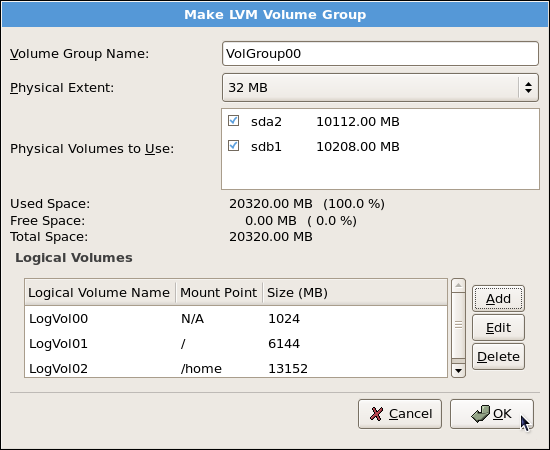
Figure 11.11. Pending Logical Volumes
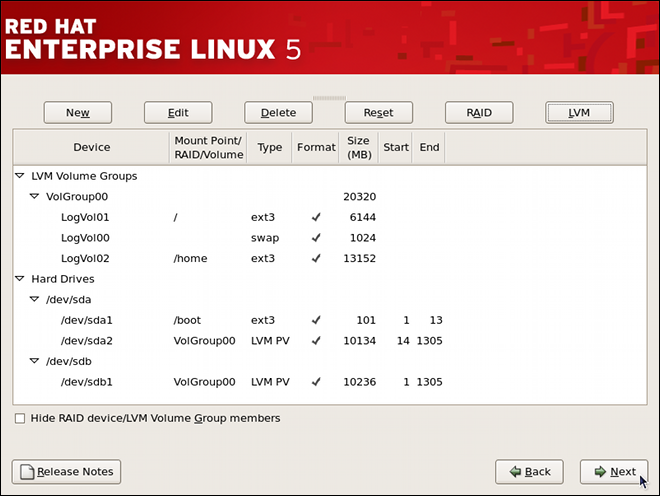
Figure 11.12. Final Manual Configuration
11.5. Using the LVM utility system-config-lvm
system-config-lvm from a terminal.
/boot - (Ext3) file system. Displayed under 'Uninitialized Entities'. (DO NOT initialize this partition). LogVol00 - (LVM) contains the (/) directory (312 extents). LogVol02 - (LVM) contains the (/home) directory (128 extents). LogVol03 - (LVM) swap (28 extents).
/dev/hda2 while /boot was created in /dev/hda1. The system also consists of 'Uninitialized Entities' which are illustrated in Figure 11.17, “Uninitialized Entities”. The figure below illustrates the main window in the LVM utility. The logical and the physical views of the above configuration are illustrated below. The three logical volumes exist on the same physical volume (hda2).
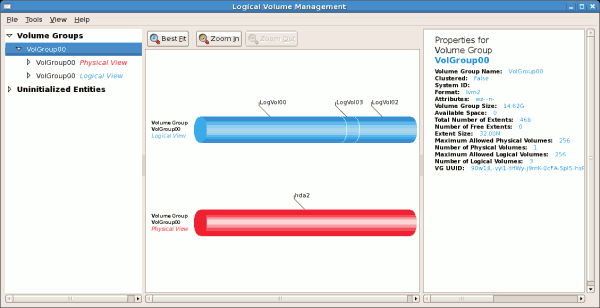
Figure 11.13. Main LVM Window
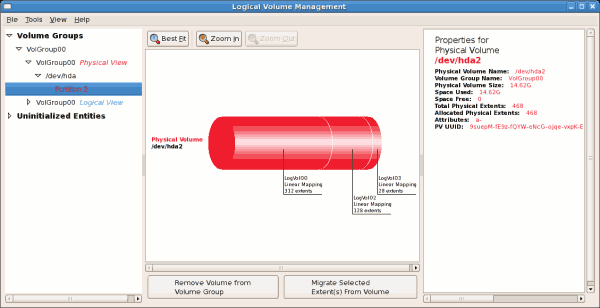
Figure 11.14. Physical View Window
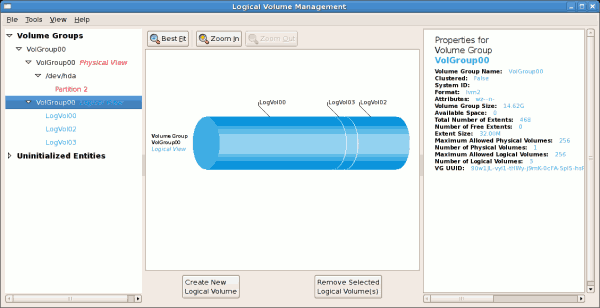
Figure 11.15. Logical View Window
/ (root) directory, this task will not be successful as the volume cannot be unmounted.
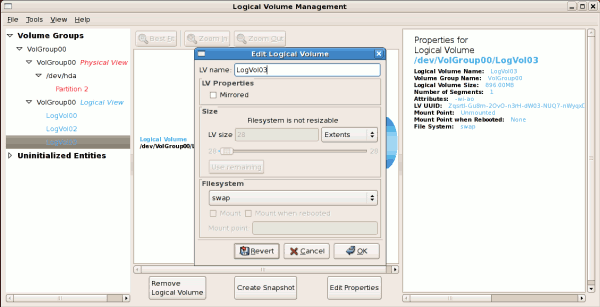
Figure 11.16. Edit Logical Volume
11.5.1. Utilizing uninitialized entities
/boot. Uninitialized entities are illustrated below.
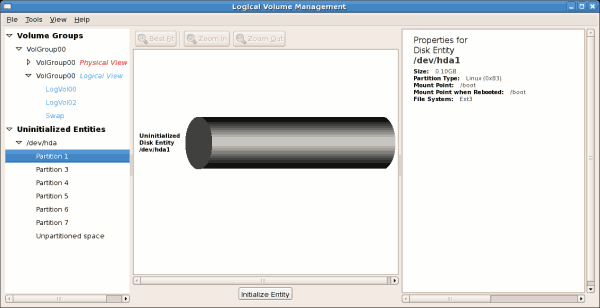
Figure 11.17. Uninitialized Entities
11.5.2. Adding Unallocated Volumes to a volume group
- create a new volume group,
- add the unallocated volume to an existing volume group,
- remove the volume from LVM.
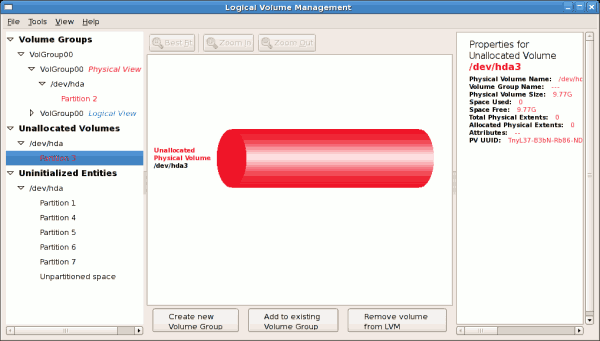
Figure 11.18. Unallocated Volumes
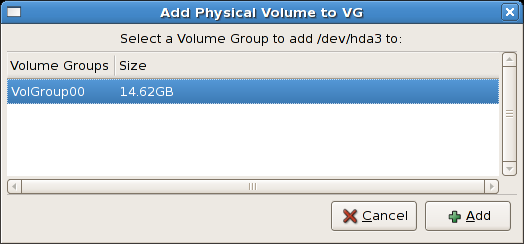
Figure 11.19. Add physical volume to volume group
- create a new logical volume (click on the button,
- select one of the existing logical volumes and increase the extents (see Section 11.5.6, “Extending a volume group”),
- select an existing logical volume and remove it from the volume group by clicking on the button. Please note that you cannot select unused space to perform this operation.
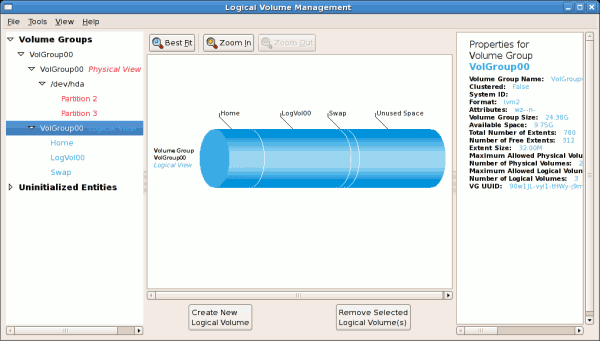
Figure 11.20. Logical view of volume group
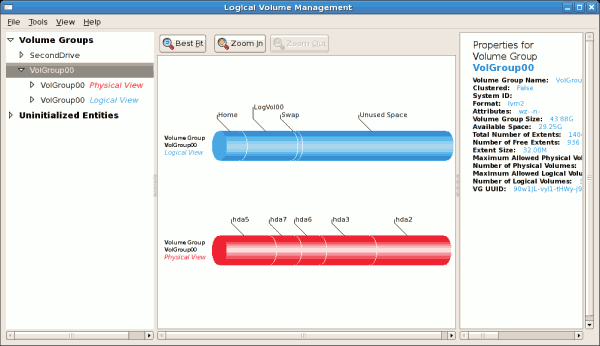
Figure 11.21. Logical view of volume group
11.5.3. Migrating extents
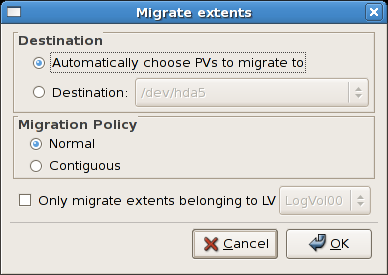
Figure 11.22. Migrate Extents
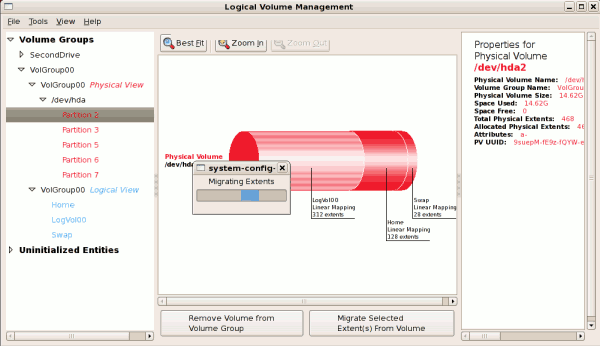
Figure 11.23. Migrating extents in progress
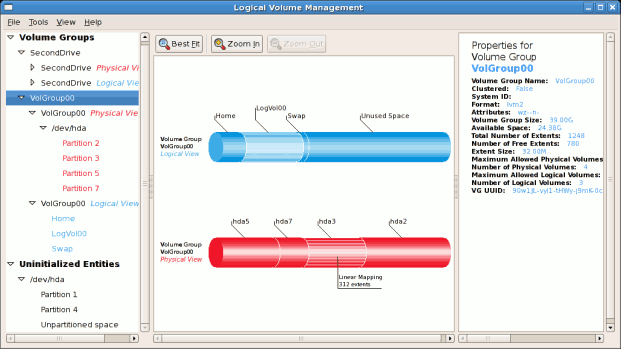
Figure 11.24. Logical and physical view of volume group
11.5.4. Adding a new hard disk using LVM
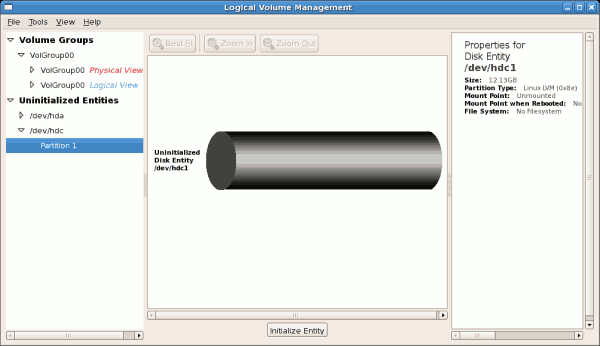
Figure 11.25. Uninitialized hard disk
11.5.5. Adding a new volume group
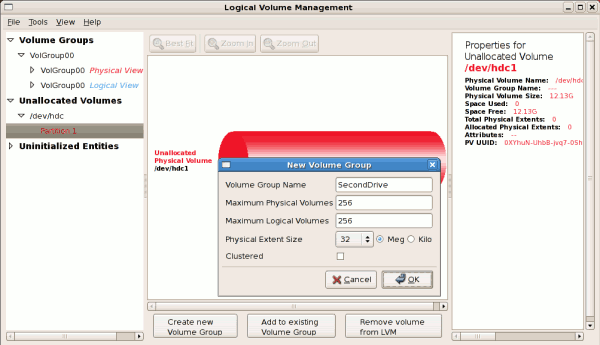
Figure 11.26. Create new volume group
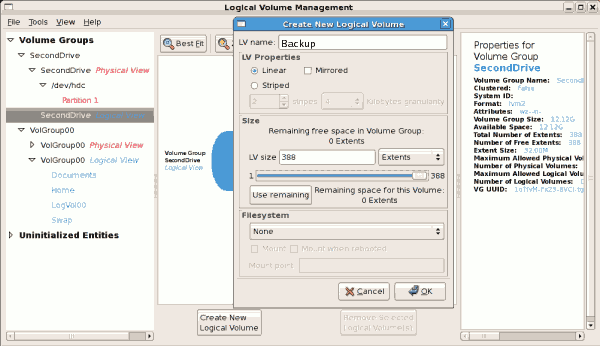
Figure 11.27. Create new logical volume
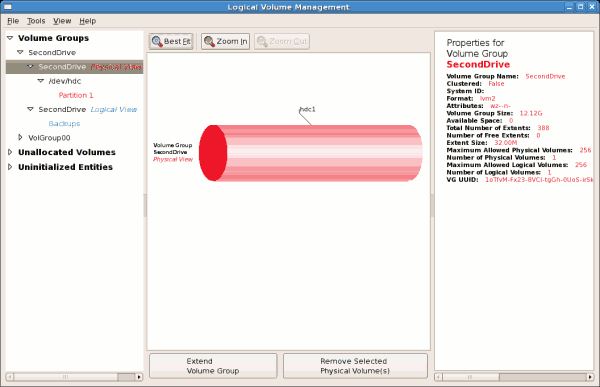
Figure 11.28. Physical view of new volume group
11.5.6. Extending a volume group
/dev/hda6 was selected as illustrated below.
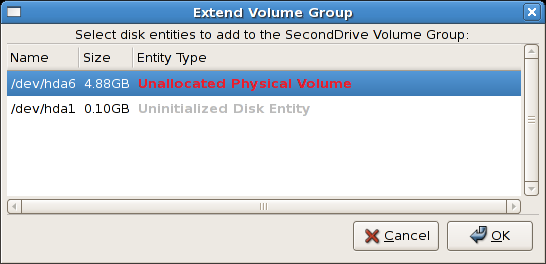
Figure 11.29. Select disk entities
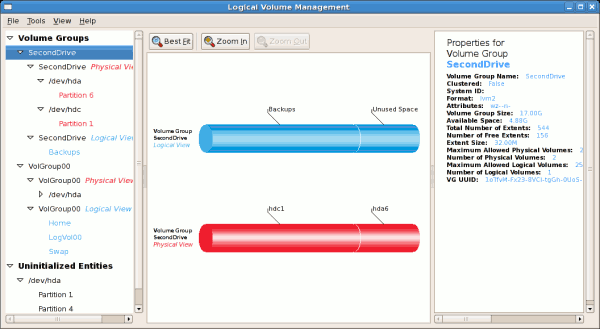
Figure 11.30. Logical and physical view of an extended volume group
11.5.7. Editing a Logical Volume
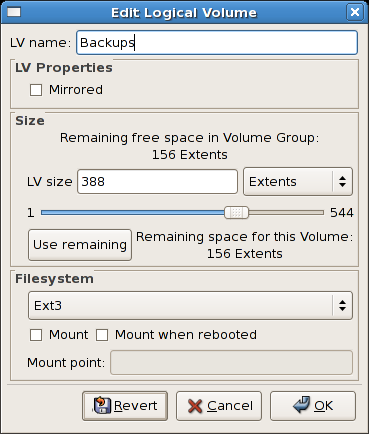
Figure 11.31. Edit logical volume
/mnt/backups. This is illustrated in the figure below.
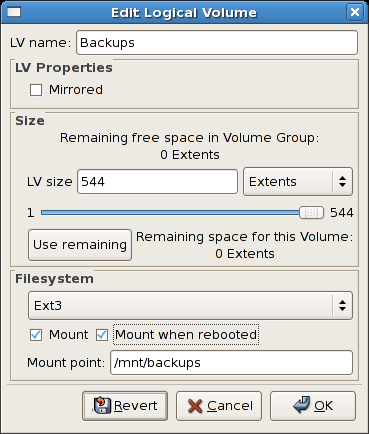
Figure 11.32. Edit logical volume - specifying mount options
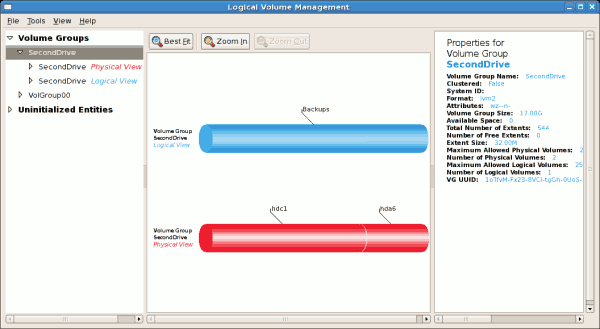
Figure 11.33. Edit logical volume
11.6. Additional Resources
11.6.1. Installed Documentation
rpm -qd lvm2— This command shows all the documentation available from thelvmpackage, including man pages.lvm help— This command shows all LVM commands available.
11.6.2. Useful Websites
- http://sources.redhat.com/lvm2 — LVM2 webpage, which contains an overview, link to the mailing lists, and more.
- http://tldp.org/HOWTO/LVM-HOWTO/ — LVM HOWTO from the Linux Documentation Project.
Part II. Package Management
Chapter 12. Package Management with RPM
rpm package. For the end user, RPM makes system updates easy. Installing, uninstalling, and upgrading RPM packages can be accomplished with short commands. RPM maintains a database of installed packages and their files, so you can invoke powerful queries and verifications on your system. If you prefer a graphical interface, you can use the Package Management Tool to perform many RPM commands. Refer to Chapter 13, Package Management Tool for details.
Important
.tar.gz files.
Note
12.1. RPM Design Goals
- Upgradability
- With RPM, you can upgrade individual components of your system without completely reinstalling. When you get a new release of an operating system based on RPM (such as Red Hat Enterprise Linux), you do not need to reinstall on your machine (as you do with operating systems based on other packaging systems). RPM allows intelligent, fully-automated, in-place upgrades of your system. Configuration files in packages are preserved across upgrades, so you do not lose your customizations. There are no special upgrade files needed to upgrade a package because the same RPM file is used to install and upgrade the package on your system.
- Powerful Querying
- RPM is designed to provide powerful querying options. You can do searches through your entire database for packages or just for certain files. You can also easily find out what package a file belongs to and from where the package came. The files an RPM package contains are in a compressed archive, with a custom binary header containing useful information about the package and its contents, allowing you to query individual packages quickly and easily.
- System Verification
- Another powerful RPM feature is the ability to verify packages. If you are worried that you deleted an important file for some package, you can verify the package. You are then notified of any anomalies, if any — at which point, you can reinstall the package if necessary. Any configuration files that you modified are preserved during reinstallation.
- Pristine Sources
- A crucial design goal was to allow the use of pristine software sources, as distributed by the original authors of the software. With RPM, you have the pristine sources along with any patches that were used, plus complete build instructions. This is an important advantage for several reasons. For instance, if a new version of a program is released, you do not necessarily have to start from scratch to get it to compile. You can look at the patch to see what you might need to do. All the compiled-in defaults, and all of the changes that were made to get the software to build properly, are easily visible using this technique.The goal of keeping sources pristine may seem important only for developers, but it results in higher quality software for end users, too.
12.2. Using RPM
rpm --help or man rpm. You can also refer to Section 12.5, “Additional Resources” for more information on RPM.
12.2.1. Finding RPM Packages
- The Red Hat Enterprise Linux CD-ROMs
- The Red Hat Errata Page available at http://www.redhat.com/apps/support/errata/
- Red Hat Network — Refer to Chapter 15, Registering a System and Managing Subscriptions for more details on Red Hat Network.
12.2.2. Installing
foo-1.0-1.i386.rpm. The file name includes the package name (foo), version (1.0), release (1), and architecture (i386). To install a package, log in as root and type the following command at a shell prompt:
rpm -ivh foo-1.0-1.i386.rpmrpm -Uvh foo-1.0-1.i386.rpmPreparing... ########################################### [100%] 1:foo ########################################### [100%]
error: V3 DSA signature: BAD, key ID 0352860f
error: Header V3 DSA signature: BAD, key ID 0352860f
NOKEY such as:
warning: V3 DSA signature: NOKEY, key ID 0352860f
Warning
rpm -ivh instead. Refer to Chapter 44, Manually Upgrading the Kernel for details.
12.2.2.1. Package Already Installed
Preparing... ########################################### [100%] package foo-1.0-1 is already installed
--replacepkgs option, which tells RPM to ignore the error:
rpm -ivh --replacepkgs foo-1.0-1.i386.rpm12.2.2.2. Conflicting Files
Preparing... ########################################### [100%] file /usr/bin/foo from install of foo-1.0-1 conflicts with file from package bar-2.0.20
--replacefiles option:
rpm -ivh --replacefiles foo-1.0-1.i386.rpm12.2.2.3. Unresolved Dependency
error: Failed dependencies:
bar.so.2 is needed by foo-1.0-1
Suggested resolutions:
bar-2.0.20-3.i386.rpmrpm -ivh foo-1.0-1.i386.rpm bar-2.0.20-3.i386.rpmPreparing... ########################################### [100%] 1:foo ########################################### [ 50%] 2:bar ########################################### [100%]
-q --whatprovides option combination to determine which package contains the required file.
rpm -q --whatprovides bar.so.2--nodeps option.
12.2.3. Uninstalling
rpm -e fooNote
foo, not the name of the original package file foo-1.0-1.i386.rpm. To uninstall a package, replace foo with the actual package name of the original package.
error: Failed dependencies: foo is needed by (installed) bar-2.0.20-3.i386.rpm
--nodeps option.
12.2.4. Upgrading
rpm -Uvh foo-2.0-1.i386.rpmfoo package. Note that -U will also install a package even when there are no previous versions of the package installed.
Note
-U option for installing kernel packages, because RPM replaces the previous kernel package. This does not affect a running system, but if the new kernel is unable to boot during your next restart, there would be no other kernel to boot instead.
-i option adds the kernel to your GRUB boot menu (/etc/grub.conf). Similarly, removing an old, unneeded kernel removes the kernel from GRUB.
saving /etc/foo.conf as /etc/foo.conf.rpmsave
package foo-2.0-1 (which is newer than foo-1.0-1) is already installed
--oldpackage option:
rpm -Uvh --oldpackage foo-1.0-1.i386.rpm12.2.5. Freshening
rpm -Fvh foo-1.2-1.i386.rpmrpm -Fvh *.rpm12.2.6. Querying
/var/lib/rpm/, and is used to query what packages are installed, what versions each package is, and any changes to any files in the package since installation, among others.
-q option. The rpm -q package name command displays the package name, version, and release number of the installed package package name . For example, using rpm -q foo to query installed package foo might generate the following output:
foo-2.0-1
-q to further refine or qualify your query:
-a— queries all currently installed packages.-f— queries the RPM database for which package owns<filename>f<filename>. When specifying a file, specify the absolute path of the file (for example,rpm -qf)./bin/ls-p— queries the uninstalled package<packagefile><packagefile>.
-idisplays package information including name, description, release, size, build date, install date, vendor, and other miscellaneous information.-ldisplays the list of files that the package contains.-sdisplays the state of all the files in the package.-ddisplays a list of files marked as documentation (man pages, info pages, READMEs, etc.).-cdisplays a list of files marked as configuration files. These are the files you edit after installation to adapt and customize the package to your system (for example,sendmail.cf,passwd,inittab, etc.).
-v to the command to display the lists in a familiar ls -l format.
12.2.7. Verifying
rpm -V verifies a package. You can use any of the Verify Options listed for querying to specify the packages you wish to verify. A simple use of verifying is rpm -V foo, which verifies that all the files in the foo package are as they were when they were originally installed. For example:
- To verify a package containing a particular file:
rpm -Vf /usr/bin/fooIn this example,/usr/bin/foois the absolute path to the file used to query a package. - To verify ALL installed packages throughout the system:
rpm -Va - To verify an installed package against an RPM package file:
rpm -Vp foo-1.0-1.i386.rpmThis command can be useful if you suspect that your RPM databases are corrupt.
c denotes a configuration file) and then the file name. Each of the eight characters denotes the result of a comparison of one attribute of the file to the value of that attribute recorded in the RPM database. A single period (.) means the test passed. The following characters denote specific discrepancies:
5— MD5 checksumS— file sizeL— symbolic linkT— file modification timeD— deviceU— userG— groupM— mode (includes permissions and file type)?— unreadable file
12.3. Checking a Package's Signature
rpm -K --nosignature <rpm-file><rpm-file>: md5 OK is displayed. This brief message means that the file was not corrupted by the download. To see a more verbose message, replace -K with -Kvv in the command.
12.3.1. Importing Keys
rpm --import /etc/pki/rpm-gpg/RPM-GPG-KEY-redhat-releaserpm -qa gpg-pubkey*gpg-pubkey-37017186-45761324
rpm -qi followed by the output from the previous command:
rpm -qi gpg-pubkey-37017186-4576132412.3.2. Verifying Signature of Packages
rpm -K <rpm-file>md5 gpg OK. This means that the signature of the package has been verified, and that it is not corrupt.
12.4. Practical and Common Examples of RPM Usage
- Perhaps you have deleted some files by accident, but you are not sure what you deleted. To verify your entire system and see what might be missing, you could try the following command:
rpm -VaIf some files are missing or appear to have been corrupted, you should probably either re-install the package or uninstall and then re-install the package. - At some point, you might see a file that you do not recognize. To find out which package owns it, enter:
rpm -qf /usr/bin/ggvThe output would look like the following:ggv-2.6.0-2
- We can combine the above two examples in the following scenario. Say you are having problems with
/usr/bin/paste. You would like to verify the package that owns that program, but you do not know which package ownspaste. Enter the following command,rpm -Vf /usr/bin/pasteand the appropriate package is verified. - Do you want to find out more information about a particular program? You can try the following command to locate the documentation which came with the package that owns that program:
rpm -qdf /usr/bin/freeThe output would be similar to the following:/usr/share/doc/procps-3.2.3/BUGS /usr/share/doc/procps-3.2.3/FAQ /usr/share/doc/procps-3.2.3/NEWS /usr/share/doc/procps-3.2.3/TODO /usr/share/man/man1/free.1.gz /usr/share/man/man1/pgrep.1.gz /usr/share/man/man1/pkill.1.gz /usr/share/man/man1/pmap.1.gz /usr/share/man/man1/ps.1.gz /usr/share/man/man1/skill.1.gz /usr/share/man/man1/slabtop.1.gz /usr/share/man/man1/snice.1.gz /usr/share/man/man1/tload.1.gz /usr/share/man/man1/top.1.gz /usr/share/man/man1/uptime.1.gz /usr/share/man/man1/w.1.gz /usr/share/man/man1/watch.1.gz /usr/share/man/man5/sysctl.conf.5.gz /usr/share/man/man8/sysctl.8.gz /usr/share/man/man8/vmstat.8.gz
- You may find a new RPM, but you do not know what it does. To find information about it, use the following command:
rpm -qip crontabs-1.10-7.noarch.rpmThe output would be similar to the following:Name : crontabs Relocations: (not relocatable) Version : 1.10 Vendor: Red Hat, Inc. Release : 7 Build Date: Mon 20 Sep 2004 05:58:10 PM EDT Install Date: (not installed) Build Host: tweety.build.redhat.com Group : System Environment/Base Source RPM: crontabs-1.10-7.src.rpm Size : 1004 License: Public Domain Signature : DSA/SHA1, Wed 05 Jan 2005 06:05:25 PM EST, Key ID 219180cddb42a60e Packager : Red Hat, Inc. <http://bugzilla.redhat.com/bugzilla> Summary : Root crontab files used to schedule the execution of programs. Description : The crontabs package contains root crontab files. Crontab is the program used to install, uninstall, or list the tables used to drive the cron daemon. The cron daemon checks the crontab files to see when particular commands are scheduled to be executed. If commands are scheduled, then it executes them.
- Perhaps you now want to see what files the
crontabsRPM installs. You would enter the following:rpm -qlp crontabs-1.10-5.noarch.rpmThe output is similar to the following:/etc/cron.daily /etc/cron.hourly /etc/cron.monthly /etc/cron.weekly /etc/crontab /usr/bin/run-parts
12.5. Additional Resources
12.5.1. Installed Documentation
rpm --help— This command displays a quick reference of RPM parameters.man rpm— The RPM man page gives more detail about RPM parameters than therpm --helpcommand.
12.5.2. Useful Websites
- http://www.rpm.org/ — The RPM website.
- https://lists.rpm.org/mailman/listinfo/rpm-list — Visit this link to subscribe to the RPM mailing list, which is archived there.
Chapter 13. Package Management Tool
rpm command does.
Note
rpm -e --nodeps or rpm -U --nodeps can.
system-config-packages or pirut at shell prompt.
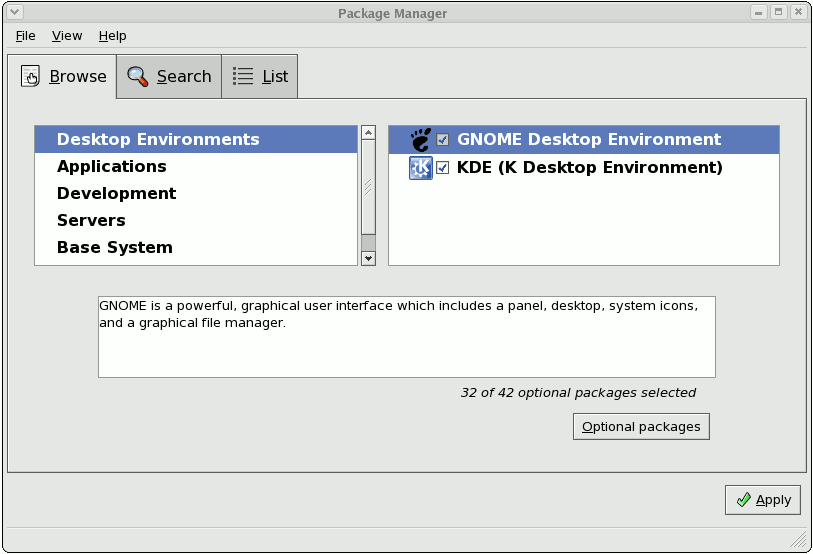
Figure 13.1. Package Management Tool
13.1. Listing and Analyzing Packages
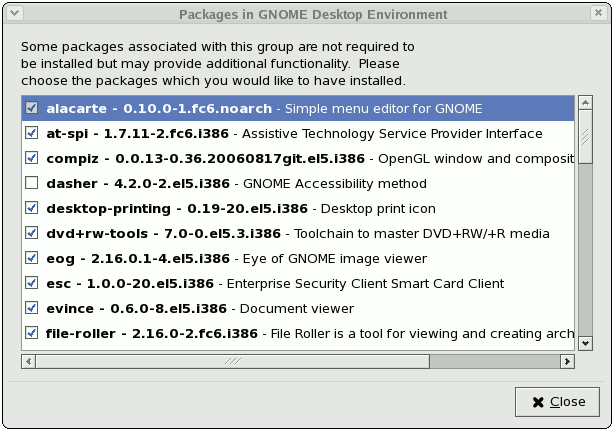
Figure 13.2. Optional Packages
13.2. Installing and Removing Packages
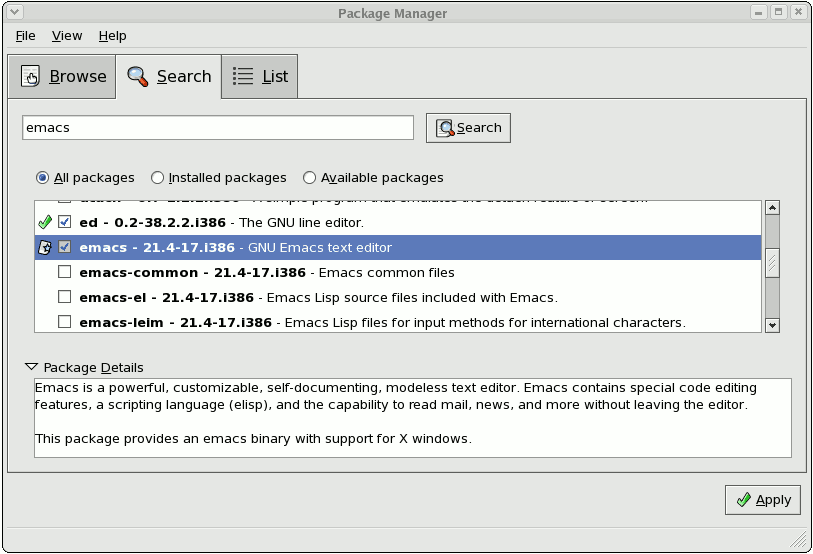
Figure 13.3. Package installation
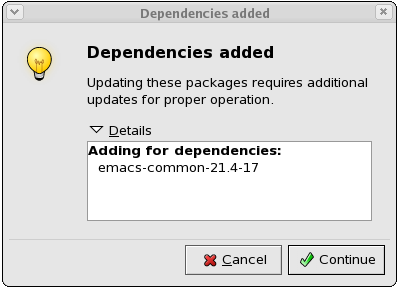
Figure 13.4. Package dependencies: installation
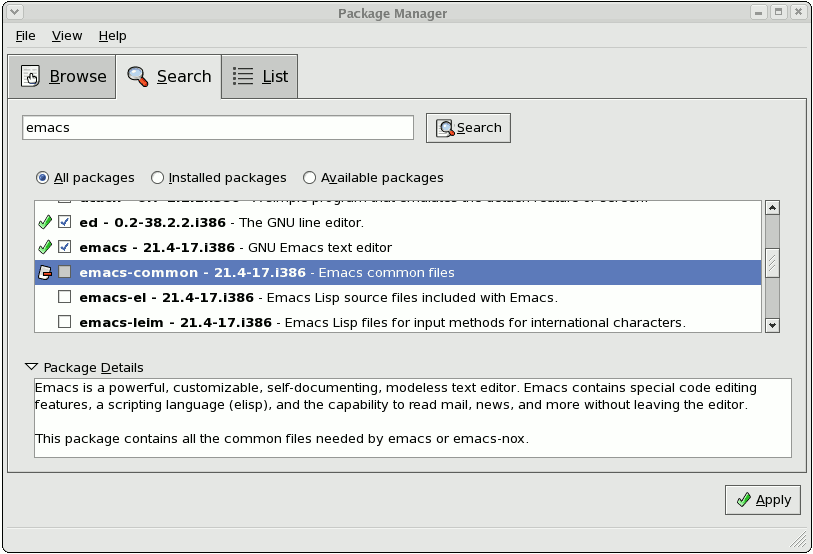
Figure 13.5. Package removal
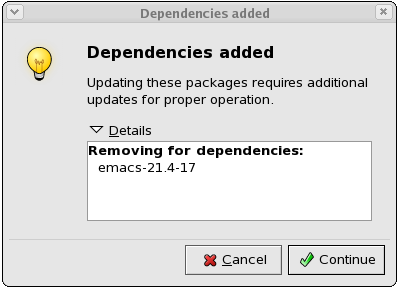
Figure 13.6. Package dependencies: removal
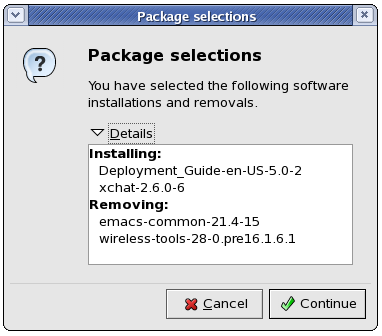
Figure 13.7. Installing and removing packages simultaneously
Chapter 14. YUM (Yellowdog Updater Modified)
yum searches numerous repositories for packages and their dependencies so they may be installed together in an effort to alleviate dependency issues. Red Hat Enterprise Linux 5.10 uses yum to fetch packages and install RPMs.
up2date is now deprecated in favor of yum (Yellowdog Updater Modified). The entire stack of tools which installs and updates software in Red Hat Enterprise Linux 5.10 is now based on yum. This includes everything, from the initial installation via Anaconda to host software management tools like pirut.
yum also allows system administrators to configure a local (i.e. available over a local network) repository to supplement packages provided by Red Hat. This is useful for user groups that use applications and packages that are not officially supported by Red Hat.
yum repository also saves bandwidth for the entire network. Further, clients that use local yum repositories do not need to be registered individually to install or update the latest packages from Red Hat Network.
14.1. Setting Up a Yum Repository
- Install the
createrepopackage:~]#
yum install createrepo - Copy all the packages you want to provide in the repository into one directory (
/mnt/local_repofor example). - Run
createrepoon that directory (for example,createrepo /mnt/local_repo). This will create the necessary metadata for your Yum repository.
14.2. yum Commands
yum commands are typically run as yum <command> <package name/s> . By default, yum will automatically attempt to check all configured repositories to resolve all package dependencies during an installation/upgrade.
yum commands. For a complete list of available yum commands, refer to man yum.
-
yum install <package name/s> - Used to install the latest version of a package or group of packages. If no package matches the specified package name(s), they are assumed to be a shell glob, and any matches are then installed.
-
yum update <package name/s> - Used to update the specified packages to the latest available version. If no package name/s are specified, then
yumwill attempt to update all installed packages.If the--obsoletesoption is used (i.e.yum --obsoletes <package name/s>,yumwill process obsolete packages. As such, packages that are obsoleted across updates will be removed and replaced accordingly. -
yum check-update - This command allows you to determine whether any updates are available for your installed packages.
yumreturns a list of all package updates from all repositories if any are available. -
yum remove <package name/s> - Used to remove specified packages, along with any other packages dependent on the packages being removed.
-
yum provides <file name> - Used to determine which packages provide a specific file or feature.
-
yum search <keyword> - This command is used to find any packages containing the specified keyword in the description, summary, packager and package name fields of RPMs in all repositories.
-
yum localinstall <absolute path to package name/s> - Used when using
yumto install a package located locally in the machine.
14.3. yum Options
yum options are typically stated before specific yum commands; i.e. yum <options> <command> <package name/s> . Most of these options can be set as default using the configuration file.
yum options. For a complete list of available yum options, refer to man yum.
-
-y - Answer "yes" to every question in the transaction.
-
-t - Sets
yumto be "tolerant" of errors with regard to packages specified in the transaction. For example, if you runyum update package1 package2andpackage2is already installed,yumwill continue to installpackage1. -
--exclude=<package name> - Excludes a specific package by name or glob in a specific transaction.
14.4. Configuring yum
yum is configured through /etc/yum.conf. The following is an example of a typical /etc/yum.conf file:
[main] cachedir=/var/cache/yum keepcache=0 debuglevel=2 logfile=/var/log/yum.log distroverpkg=redhat-release tolerant=1 exactarch=1 obsoletes=1 gpgcheck=1 plugins=1 metadata_expire=1800 [myrepo] name=RHEL 5 $releasever - $basearch baseurl=http://local/path/to/yum/repository/ enabled=1
/etc/yum.conf file is made up of two types of sections: a [main] section, and a repository section. There can only be one [main] section, but you can specify multiple repositories in a single /etc/yum.conf.
14.4.1. [main] Options
[main] section is mandatory, and there must only be one. For a complete list of options you can use in the [main] section, refer to man yum.conf.
[main] section.
-
cachedir - This option specifies the directory where
yumshould store its cache and database files. By default, the cache directory ofyumis/var/cache/yum. -
keepcache=<1 or 0> - Setting
keepcache=1instructsyumto keep the cache of headers and packages after a successful installation.keepcache=1is the default. -
reposdir=<absolute path to directory of .repo files> - This option allows you to specify a directory where
.repofiles are located..repofiles contain repository information (similar to the[repository]section of/etc/yum.conf).yumcollects all repository information from.repofiles and the[repository]section of the/etc/yum.conffile to create a master list of repositories to use for each transaction. Refer to Section 14.4.2, “[repository]Options” for more information about options you can use for both the[repository]section and.repofiles.Ifreposdiris not set,yumuses the default directory/etc/yum.repos.d. -
gpgcheck=<1 or 0> - This disables/enables GPG signature checking on packages on all repositories, including local package installation. The default is
gpgcheck=0, which disables GPG checking.If this option is set in the[main]section of the/etc/yum.conffile, it sets the GPG checking rule for all repositories. However, you can also set this on individual repositories instead; i.e., you can enable GPG checking on one repository while disabling it on another. -
assumeyes=<1 or 0> - This determines whether or not
yumshould prompt for confirmation of critical actions. The default ifassumeyes=0, which meansyumwill prompt you for confirmation.Ifassumeyes=1is set,yumbehaves in the same way that the command line option-ydoes. -
tolerant=<1 or 0> - When enabled (
tolerant=1),yumwill be tolerant of errors on the command line with regard to packages. This is similar to theyumcommand line option-t.The default value for this istolerant=0(not tolerant). -
exclude=<package name/s> - This option allows you to exclude packages by keyword during installation/updates. If you are specifying multiple packages, this is a space-delimited list. Shell globs using wildcards (for example, * and ?) are allowed.
-
retries=<number of retries> - This sets the number of times
yumshould attempt to retrieve a file before returning an error. Setting this to 0 makesyumretry forever. The default value is 6.
14.4.2. [repository] Options
[repository] section of the /etc/yum.conf file contains information about a repository yum can use to find packages during package installation, updating and dependency resolution. A repository entry takes the following form:
[repository ID] name=repository name baseurl=url, file or ftp://path to repository
.repo files (for example, rhel5.repo). The format of repository information placed in .repo files is identical with the [repository] of /etc/yum.conf.
.repo files are typically placed in /etc/yum.repos.d, unless you specify a different repository path in the [main] section of /etc/yum.conf with reposdir=. .repo files and the /etc/yum.conf file can contain multiple repository entries.
- [repository ID]
- The repository ID is a unique, one-word string that serves as a repository identifier.
-
name=repository name - This is a human-readable string describing the repository.
-
baseurl=http, file or ftp://path - This is a URL to the directory where the
repodatadirectory of a repository is located. If the repository is local to the machine, usebaseurl=file://path to local repository. If the repository is located online using HTTP, usebaseurl=http://link. If the repository is online and uses FTP, usebaseurl=ftp://link.If a specific online repository requires basic HTTP authentication, you can specify your username and password in thebaseurlline by prepending it as username:password@link. For example, if a repository on http://www.example.com/repo/ requires a username of "user" and a password os "password", then thebaseurllink can be specified asbaseurl=http://user:password@www.example.com/repo/.
man yum.conf.
-
gpgcheck=<1 or 0> - This disables/enables GPG signature checking a specific repository. The default is
gpgcheck=0, which disables GPG checking. -
gpgkey=URL - This option allows you to point to a URL of the ASCII-armoured GPG key file for a repository. This option is normally used if
yumneeds a public key to verify a package and the required key was not imported into the RPM database.If this option is set,yumwill automatically import the key from the specified URL. You will be prompted before the key is installed unless you setassumeyes=1(in the[main]section of/etc/yum.conf) or-y(in ayumtransaction). -
exclude=<package name/s> - This option is similar to the
excludeoption in the[main]section of/etc/yum.conf. However, it only applies to the repository in which it is specified. -
includepkgs=<package name/s> - This option is the opposite of
exclude. When this option is set on a repository,yumwill only be able to see the specified packages in that repository. By default, all packages in a repository are visible toyum.
14.5. Upgrading the System Off-line with ISO and Yum
yum update command with the Red Hat Enterprise Linux installation ISO image is an easy and quick way to upgrade systems to the latest minor version. The following steps illustrate the upgrading process:
- Create a target directory to mount your ISO image. This directory is not automatically created when mounting, so create it before proceeding to the next step, as
root, type:mkdirmount_dirReplace mount_dir with a path to the mount directory. Typicaly, users create it as a subdirectory in the/media/directory. - Mount the Red Hat Enterprise Linux 5 installation ISO image to the previously created target directory. As
root, type:mount-oloopiso_name mount_dirReplace iso_name with a path to your ISO image and mount_dir with a path to the target directory. Here, the-oloopoption is required to mount the file as a block device. - Check the numeric value found on the first line of the
.discinfofile from the mount directory:head-n1mount_dir/.discinfoThe output of this command is an identification number of the ISO image, you need to know it to perform the following step. - Create a new file in the
/etc/yum.repos.d/directory, named for instance new.repo, and add a content in the following form. Note that configuration files in this directory must have the .repo extension to function properly.[repository] mediaid=media_id name=repository_name baseurl=repository_url gpgkey=gpg_key enabled=1 gpgcheck=1
Replace media_id with the numeric value found inmount_dir/.discinfo. Set the repository name instead of repository_name, replace repository_url with a path to a repository directory in the mount point and gpg_key with a path to the GPG key.For example, the repository settings for Red Hat Enterprise Linux 5 Server ISO can look as follows:[rhel5-Server] mediaid=1354216429.587870 name=RHEL5-Server baseurl=file:///media/rhel5/Server gpgkey=file:///etc/pki/rpm-gpg/RPM-GPG-KEY-redhat-release enabled=1 gpgcheck=1
- Update all yum repositories including
/etc/yum.repos.d/new.repocreated in previous steps. Asroot, type:yumupdateThis upgrades your system to the version provided by the mounted ISO image. - After successful upgrade, you can unmount the ISO image, with the
rootprivileges:umountmount_dirwhere mount_dir is a path to your mount directory. Also, you can remove the mount directory created in the first step. Asroot, type:rmdirmount_dir - If you will not use the previously created configuration file for another installation or update, you can remove it. As
root, type:rm/etc/yum.repos.d/new.repo
Example 14.1. Upgrading from Red Hat Enterprise Linux 5.8 to 5.9
RHEL5.9-Server-20121129.0-x86_64-DVD1.iso. You have crated a target directory /media/rhel5/. As root, change into the directory with your ISO image and type:
~]#mount-oloopRHEL5.9-Server-20121129.0-x86_64-DVD1.iso/media/rhel5/
~]#head-n1/media/rhel5/.discinfo1354216429.587870
/etc/yum.repos.d/rhel5.repo file and insert the following text into it:
[rhel5-Server] mediaid=1354216429.587870 name=RHEL5-Server baseurl=file:///media/rhel5/Server gpgkey=file:///etc/pki/rpm-gpg/RPM-GPG-KEY-redhat-release enabled=1 gpgcheck=1
RHEL5.9-Server-20121129.0-x86_64-DVD1.iso. As root, execute:
~]#yumupdate
~]#umount/media/rhel5/
~]#rmdir/media/rhel5/
~]#rm/etc/yum.repos.d/rhel5.repo
14.6. Useful yum Variables
yum commands and yum configuration files (i.e. /etc/yum.conf and .repo files).
-
$releasever - This is replaced with the package's version, as listed in
distroverpkg. This defaults to the version of theredhat-releasepackage. -
$arch - This is replaced with your system's architecture, as listed by
os.uname()in Python. -
$basearch - This is replaced with your base architecture. For example, if
$arch=i686 then$basearch=i386. -
$YUM0-9 - This is replaced with the value of the shell environment variable of the same name. If the shell environment variable does not exist, then the configuration file variable will not be replaced.
Chapter 15. Registering a System and Managing Subscriptions
yum to unite content delivery with subscription management. The Subscription Manager handles only the subscription-system associations. yum or other package management tools handle the actual content delivery. Chapter 14, YUM (Yellowdog Updater Modified) describes how to use yum.
15.1. Using Red Hat Subscription Manager Tools
Note
root because of the nature of the changes to the system. However, Red Hat Subscription Manager connects to the subscription service as a user account for the subscription service.
15.1.1. Launching the Red Hat Subscription Manager GUI
[root@server1 ~]# subscription-manager-gui
15.1.2. Running the subscription-manager Command-Line Tool
subscription-manager tool. This tool has the following format:
[root@server1 ~]# subscription-manager command [options]
subscription-manager help and manpage have more information.
| Command | Description |
|---|---|
| register | Registers or identifies a new system to the subscription service. |
| unregister | Unregisters a machine, which strips its subscriptions and removes the machine from the subscription service. |
| subscribe | Attaches a specific subscription to the machine. |
| redeem | Auto-attaches a machine to a pre-specified subscription that was purchased from a vendor, based on its hardware and BIOS information. |
| unsubscribe | Removes a specific subscription or all subscriptions from the machine. |
| list | Lists all of the subscriptions that are compatible with a machine, either subscriptions that are actually attached to the machine or unused subscriptions that are available to the machine. |
15.2. Registering and Unregistering a System
15.2.1. Registering from the GUI
- Launch Subscription Manager. For example:
[root@server ~]# subscription-manager-gui
- If the system is not already registered, then there will be a button at the top of the window in the top right corner of the My Installed Products tab.

- To identify which subscription server to use for registration, enter the hostname of the service. The default service is Customer Portal Subscription Management, with the hostname subscription.rhn.redhat.com. To use a different subscription service, such as Subscription Asset Manager, enter the hostname of the local server.
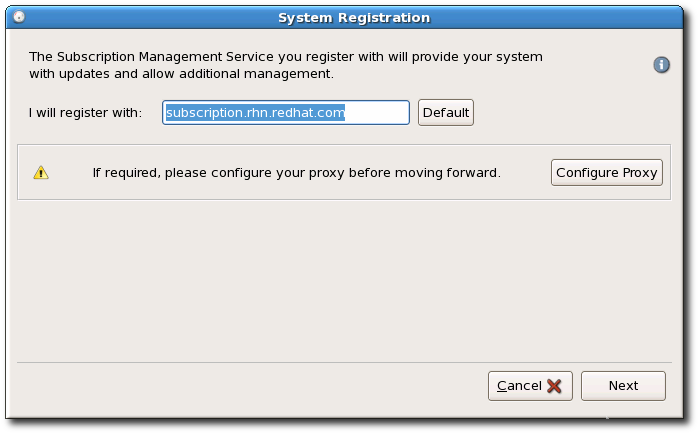 There are seveal different subscription services which use and recognize certificate-based subscriptions, and a system can be registered with any of them in firstboot:
- Customer Portal Subscription Management, hosted services from Red Hat (the default)
- Subscription Asset Manager, an on-premise subscription server which proxies content delivery back to the Customer Portal's services
- CloudForms System Engine, an on-premise service which handles both subscription services and content delivery
- Enter the user credentials for the given subscription service to log in.
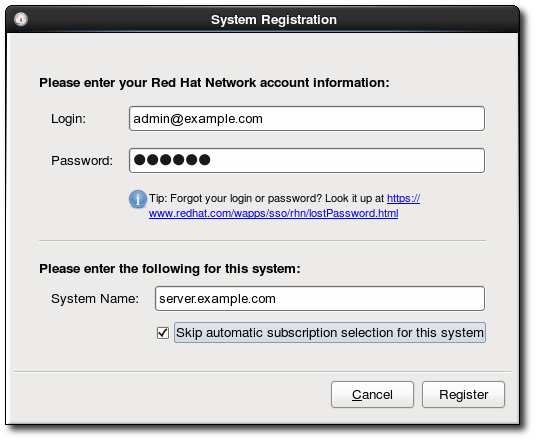 The user credentials to use depend on the subscription service. When registering with the Customer Portal, use the Red Hat Network credentials for the administrator or company account.However, for Subscription Asset Manager or CloudForms System engine, the user account to use is created within the on-premise service and probably is not the same as the Customer Portal user account.
 - Optionally, select the Manually assign subscriptions after registration checkbox.By default, the registration process automatically attaches the best-matched subscription to the system. This can be turned off so that the subscriptions can be selected manually, as in Section 15.3, “Attaching and Removing Subscriptions”.
- When registration begins, Subscription Manager scans for organizations and environments (sub-domains within the organization) to which to register the system.
 IT environments that use Customer Portal Subscription Management have only a single organization, so no further configuration is necessary. IT infrastructures that use a local subscription service like Subscription Asset Manager might have multiple organizations configured, and those organizations may have multiple environments configured within them.If multiple organizations are detected, Subscription Manager prompts to select the one to join.
- With the default setting, subscriptions are automatically selected and attached to the system. Review and confirm the subscriptions to attach to the system.
- If prompted, select the service level to use for the discovered subscriptions.
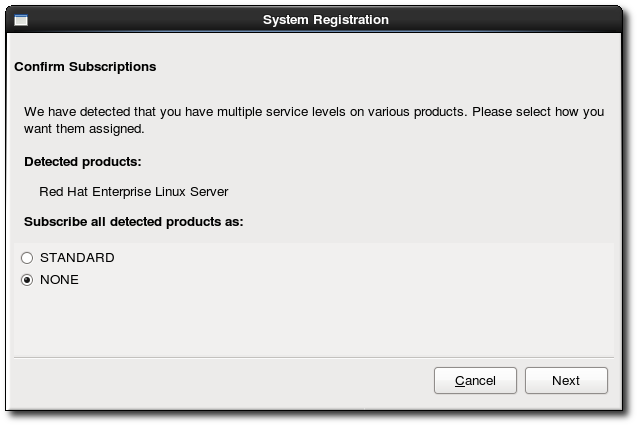
- Subscription Manager lists the selected subscription. This subscription selection must be confirmed by clicking the button for the wizard to complete.

15.2.2. Registering from the Command Line
register command with the user account information required to authenticate to Customer Portal Subscription Management. When the system is successfully authenticated, it echoes back the newly-assigned system inventory ID and the user account name which registered it.
register options are listed in Table 15.2, “register Options”.
Example 15.1. Registering a System to the Customer Portal
[root@server1 ~]# subscription-manager register --username admin-example --password secret The system has been registered with id: 7d133d55-876f-4f47-83eb-0ee931cb0a97
Example 15.2. Automatically Subscribing While Registering
register command has an option, --autosubscribe, which allows the system to be registered to the subscription service and immediately attaches the subscription which best matches the system's architecture, in a single step.
[root@server1 ~]# subscription-manager register --username admin-example --password secret --autosubscribeExample 15.3. Registering a System with Subscription Asset Manager
--org option in addition to the username and password. The given user must also have the access permissions to add systems to that organization.
- The username and password for the user account withint the subscription service itself
--serverurlto give the hostname of the subscription service--baseurlto give the hostname of the content delivery service (for CloudForms System Engine only)--orgto give the name of the organization under which to register the system--environmentto give the name of an environment (group) within the organization to which to add the system; this is optional, since a default environment is set for any organizationA system can only be added to an environment during registration.
[root@server1 ~]# subscription-manager register --username=admin-example --password=secret --org="IT Department" --environment="dev" --serverurl=sam-server.example.com
The system has been registered with id: 7d133d55-876f-4f47-83eb-0ee931cb0a97Note
register command returns a Remote Server error.
| Options | Description | Required |
|---|---|---|
| --username=name | Gives the content server user account name. | Required |
| --password=password | Gives the password for the user account. | Required |
| --serverurl=hostname | Gives the hostname of the subscription service to use. The default is for Customer Portal Subcription Management, subscription.rhn.redhat.com. If this option is not used, the system is registered with Customer Portal Subscription Management. | Required for Subscription Asset Manager or CloudForms System Engine |
| --baseurl=URL | Gives the hostname of the content delivery server to use to receive updates. Both Customer Portal Subscription Management and Subscription Asset Manager use Red Hat's hosted content delivery services, with the URL https://cdn.redhat.com. Since CloudForms System Engine hosts its own content, the URL must be used for systems registered with System Engine. | Required for CloudForms System Engine |
| --org=name | Gives the organization to which to join the system. | Required, except for hosted environments |
| --environment=name | Registers the system to an environment within an organization. | Optional |
| --name=machine_name | Sets the name of the system to register. This defaults to be the same as the hostname. | Optional |
| --autosubscribe | Automatically ataches the best-matched compatible subscription. This is good for automated setup operations, since the system can be configured in a single step. | Optional |
| --activationkey=key | Attaches existing subscriptions as part of the registration process. The subscriptions are pre-assigned by a vendor or by a systems administrator using Subscription Asset Manager. | Optional |
| --servicelevel=None|Standard|Premium | Sets the service level to use for subscriptions on that machine. This is only used with the --autosubscribe option. | Optional |
| --release=NUMBER | Sets the operating system minor release to use for subscriptions for the system. Products and updates are limited to that specific minor release version. This is used only used with the --autosubscribe option. | Optional |
| --force | Registers the system even if it is already registered. Normally, any register operations will fail if the machine is already registered. | Optional |
15.2.3. Unregistering
unregister command. This removes the system's entry from the subscription service, removes any subscriptions, and, locally, deletes its identity and subscription certificates.
unregister command.
Example 15.4. Unregistering a System
[root@server1 ~]# subscription-manager unregister
- Open the Subscription Manager UI.
[root@server ~]# subscription-manager-gui
- Open the System menu, and select the item.
- Confirm that the system should be unregistered.
15.3. Attaching and Removing Subscriptions
15.3.1. Attaching and Removing Subscriptions through the GUI
15.3.1.1. Attaching a Subscription
- Launch Subscription Manager. For example:
[root@server ~]# subscription-manager-gui
- Open the All Available Subscriptions tab.
- Optionally, set the date range and click the button to set the filters to use to search for available subscriptions.
 Subscriptions can be filtered by their active date and by their name. The checkboxes provide more fine-grained filtering:
- match my system shows only subscriptions which match the system architecture.
- match my installed products shows subscriptions which work with currently installed products on the system.
- have no overlap with existing subscriptions excludes subscriptions with duplicate products. If a subscription is already attached to the system for a specific product or if multiple subscriptions supply the same product, then the subscription service filters those subscriptions and shows only the best fit.
- contain the text searches for strings, such as the product name, within the subscription or pool.
 After setting the date and filters, click the button to apply them.
 - Select one of the available subscriptions.

- Click the button.
15.3.1.2. Removing Subscriptions
- Launch Subscription Manager. For example:
[root@server ~]# subscription-manager-gui
- Open the My Subscriptions tab.All of the active subscriptions to which the system is currently attached are listed. (The products available through the subscription may or may not be installed.)
- Select the subscription to remove.
- Click the button in the bottom right of the window.
15.3.2. Attaching and Removing Subscriptions through the Command Line
15.3.2.1. Attaching Subscriptions
--pool option.
[root@server1 ~]# subscription-manager subscribe --pool=XYZ01234567
subscribe command are listed in Table 15.3, “subscribe Options”.
list command:
[root@server1 ~]# subscription-manager list --available
+-------------------------------------------+
Available Subscriptions
+-------------------------------------------+
ProductName: RHEL for Physical Servers
ProductId: MKT-rhel-server
PoolId: ff8080812bc382e3012bc3845ca000cb
Quantity: 10
Expires: 2011-09-20--auto option (which is analogous to the --autosubscribe option with the register command).
[root@server1 ~]# subscription-manager subscribe --auto
| Options | Description | Required |
|---|---|---|
| --pool=pool-id | Gives the ID for the subscription to attach to the system. | Required, unless --auto is used |
| --auto | Automatically attaches the system to the best-match subscription or subscriptions. | Optional |
| --quantity=number | Attaches multiple counts of a subscription to the system. This is used to cover subscriptions that define a count limit, like using two 2-socket server subscriptions to cover a 4-socket machine. | Optional |
| --servicelevel=None|Standard|Premium | Sets the service level to use for subscriptions on that machine. This is only used with the --auto option. | Optional |
15.3.2.2. Removing Subscriptions from the Command Line
unsubscribe command with the --all option removes every product subscription and subscription pool that is currently attached to the system.
[root@server1 ~]# subscription-manager unsubscribe --all
unsubscribe command by referencing the ID number of that X.509 certificate.
- Get the serial number for the product certificate, if you are removing a single product subscription. The serial number can be obtained from the subscription#
.pemfile (for example,392729555585697907.pem) or by using thelistcommand. For example:[root@server1 ~]# subscription-manager list --consumed +-------------------------------------------+ Consumed Product Subscriptions +-------------------------------------------+ ProductName: High availability (cluster suite) ContractNumber: 0 SerialNumber: 11287514358600162 Active: True Begins: 2010-09-18 Expires: 2011-11-18 - Run the subscription-manager tool with the
--serialoption to specify the certificate.[root@server1 ~]# subscription-manager unsubscribe --serial=11287514358600162
15.4. Redeeming Vendor Subscriptions
15.4.1. Redeeming Subscriptions through the GUI
Note
- Launch Subscription Manager. For example:
[root@server ~]# subscription-manager-gui
- If necessary, register the system, as described in Section 15.2.1, “Registering from the GUI”.
- Open the menu in the top left of the window, and click the item.
- In the dialog window, enter the email address to send the notification to when the redemption is complete. Because the redemption process can take several minutes to contact the vendor and receive information about the pre-configured subscriptions, the notification message is sent through email rather than through the Subscription Manager dialog window.
- Click the button.
15.4.2. Redeeming Subscriptions through the Command Line
Note
redeem command, with an email address to send the redemption email to when the process is complete.
# subscription-manager redeem --email=jsmith@example.com
15.5. Attaching Subscriptions from a Subscription Asset Manager Activation Key
# subscription-manager register --username=jsmith --password=secret --org="IT Dept" --activationkey=abcd1234
15.6. Setting Preferences for Systems
- Service levels for subscriptions
- The operating system minor version (X.Y) to use
15.6.1. Setting Preferences in the UI
- Open the Subscription Manager.
- Open the System menu.
- Select the System Preferences menu item.

- Select the desired service level agreement preference from the drop-down menu. Only service levels available to the Red Hat account, based on all of its active subscriptions, are listed.
- Select the operating system release preference in the Release version drop-down menu. The only versions listed are Red Hat Enterprise Linux versions for which the account has an active subscription.
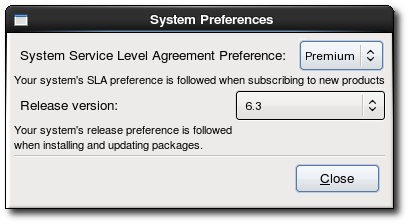
- The preferences are saved and applied to future subscription operations when they are set. To close the dialog, click .
15.6.2. Setting Service Levels Through the Command Line
service-level --set command.
Example 15.5. Setting a Service Level Preference
--list option with the service-level command.
[root@server ~]# subscription-manager service-level --list
+-------------------------------------------+
Available Service Levels
+-------------------------------------------+
Standard
None
Premium
Self-Support[root@server ~]# subscription-manager service-level --set=self-support Service level set to: self-support
--show option:
[root#server ~]# subscription-manager service-level --show Current service level: self-support
register and subscribe commands have the --servicelevel option to set a preference for that action.
Example 15.6. Autoattaching Subscriptions with a Premium Service Level
[root#server ~]# subscription-manager subscribe --auto --servicelevel Premium Service level set to: Premium Installed Product Current Status: ProductName: Red Hat Enterprise Linux 5 Server Status: Subscribed
Note
--servicelevel option requires the --autosubscribe option (for register) or --auto option (for subscribe). It cannot be used when attaching a specified pool or when importing a subscription.
15.6.3. Setting a Preferred Operating System Release Version in the Command Line
yum update and move from version to version.
Example 15.7. Setting an Operating System Release During Registration
--release option with the register. This applies the release preference to any subscriptions selected and auto-attached to the system at registration time.
--autosubscribe option, because it is one of the criteria used to select subscriptions to auto-attach.
[root#server ~]# subscription-manager register --autosubscribe --release=5.9 --username=admin@example.com...Note
subscribe command.
Example 15.8. Setting an Operating System Release Preference
release command can display the available operating system releases, based on the available, purchased (not only attached) subscriptions for the organization.
[root#server ~]# subscription-manager release --list
+-------------------------------------------+
Available Releases
+-------------------------------------------+
5.8
5.9
5Server--set then sets the preference to one of the available release versions:
[root#server ~]# subscription-manager release --set=5.9 Release version set to: 5.9
15.6.4. Removing a Preference
--unset with the appropriate command. For example, to unset a release version preference:
[root#server ~]# subscription-manager release --unset Release version set to:
- Open the Subscription Manager.
- Open the System menu.
- Select the System Preferences menu item.

- Set the service level or release version value to the blank line in the corresponding drop-down menu.

- Click .
15.7. Managing Subscription Expiration and Notifications
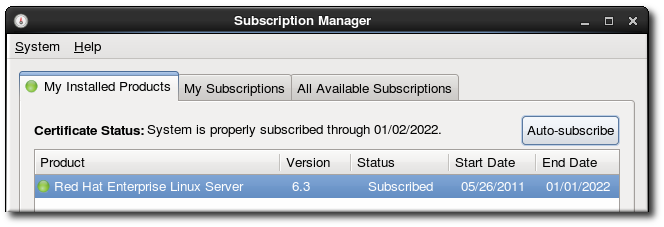
Figure 15.2. Valid Until...
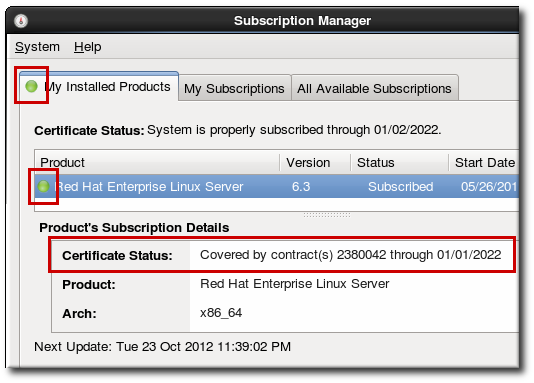
Figure 15.3. Color-Coded Status Views
[root@server ~]# subscription-manager list
+-------------------------------------------+
Installed Product Status
+-------------------------------------------+
ProductName: Red Hat Enterprise Linux Server
Status: Not Subscribed
Expires:
SerialNumber:
ContractNumber:
AccountNumber:
Figure 15.4. Subscription Notification Icon
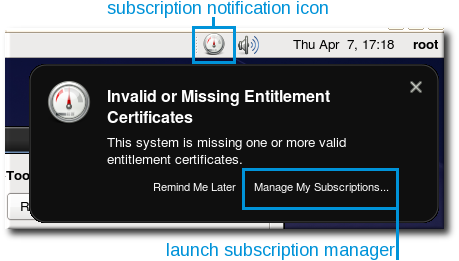
Figure 15.5. Subscription Warning Message

Figure 15.6. Autosubscribe Button
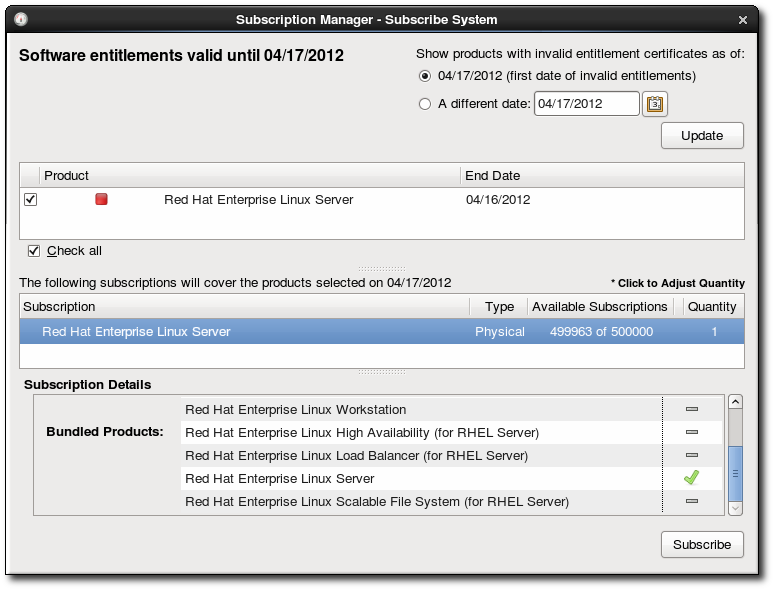
Figure 15.7. Subscribe System
Part IV. System Configuration
Chapter 31. Console Access
- They can run certain programs that they would otherwise be unable to run.
- They can access certain files (normally special device files used to access diskettes, CD-ROMs, and so on) that they would otherwise be unable to access.
halt, poweroff, and reboot.
31.1. Disabling Shutdown Via Ctrl+Alt+Del
/etc/inittab specifies that your system is set to shutdown and reboot in response to a Ctrl+Alt+Del key combination used at the console. To completely disable this ability, comment out the following line in /etc/inittab by putting a hash mark (#) in front of it:
ca::ctrlaltdel:/sbin/shutdown -t3 -r now
- Add the
-aoption to the/etc/inittabline shown above, so that it reads:ca::ctrlaltdel:/sbin/shutdown -a -t3 -r now
The-aflag tellsshutdownto look for the/etc/shutdown.allowfile. - Create a file named
shutdown.allowin/etc. Theshutdown.allowfile should list the usernames of any users who are allowed to shutdown the system using Ctrl+Alt+Del . The format of theshutdown.allowfile is a list of usernames, one per line, like the following:stephen jack sophie
shutdown.allow file, the users stephen, jack, and sophie are allowed to shutdown the system from the console using Ctrl+Alt+Del . When that key combination is used, the shutdown -a command in /etc/inittab checks to see if any of the users in /etc/shutdown.allow (or root) are logged in on a virtual console. If one of them is, the shutdown of the system continues; if not, an error message is written to the system console instead.
shutdown.allow, refer to the shutdown man page.
31.2. Disabling Console Program Access
rm -f /etc/security/console.apps/*poweroff, halt, and reboot, which are accessible from the console by default.
rm -f /etc/security/console.apps/poweroffrm -f /etc/security/console.apps/haltrm -f /etc/security/console.apps/reboot
31.3. Defining the Console
pam_console.so module uses the /etc/security/console.perms file to determine the permissions for users at the system console. The syntax of the file is very flexible; you can edit the file so that these instructions no longer apply. However, the default file has a line that looks like this:
<console>=tty[0-9][0-9]* vc/[0-9][0-9]* :[0-9]\.[0-9] :[0-9]
:0 or mymachine.example.com:1.0, or a device like /dev/ttyS0 or /dev/pts/2. The default is to define that local virtual consoles and local X servers are considered local, but if you want to consider the serial terminal next to you on port /dev/ttyS1 to also be local, you can change that line to read:
<console>=tty[0-9][0-9]* vc/[0-9][0-9]* :[0-9]\.[0-9] :[0-9] /dev/ttyS1
31.4. Making Files Accessible From the Console
/etc/security/console.perms.d/50-default.perms. To edit file and device permissions, it is advisable to create a new default file in /etc/security/console.perms.d/ containing your preferred settings for a specified set of files or devices. The name of the new default file must begin with a number higher than 50 (for example, 51-default.perms) in order to override 50-default.perms.
51-default.perms in /etc/security/console.perms.d/:
touch /etc/security/console.perms.d/51-default.permsperms file, 50-default.perms. The first section defines device classes, with lines similar to the following:
<floppy>=/dev/fd[0-1]* \
/dev/floppy/* /mnt/floppy*
<sound>=/dev/dsp* /dev/audio* /dev/midi* \
/dev/mixer* /dev/sequencer \
/dev/sound/* /dev/beep \
/dev/snd/*
<cdrom>=/dev/cdrom* /dev/cdroms/* /dev/cdwriter* /mnt/cdrom*<cdrom> refers to the CD-ROM drive. To add a new device, do not define it in the default 50-default.perms file; instead, define it in 51-default.perms. For example, to define a scanner, add the following line to 51-default.perms:
<scanner>=/dev/scanner /dev/usb/scanner*
/dev/scanner is really your scanner and not some other device, such as your hard drive.
/etc/security/console.perms.d/50-default.perms defines this, with lines similar to the following:
<console> 0660 <floppy> 0660 root.floppy <console> 0600 <sound> 0640 root <console> 0600 <cdrom> 0600 root.disk
51-default.perms:
<console> 0600 <scanner> 0600 root
/dev/scanner device with the permissions of 0600 (readable and writable by you only). When you log out, the device is owned by root, and still has the permissions 0600 (now readable and writable by root only).
Warning
50-default.perms file. To edit permissions for a device already defined in 50-default.perms, add the desired permission definition for that device in 51-default.perms. This will override whatever permissions are defined in 50-default.perms.
31.5. Enabling Console Access for Other Applications
/sbin/ or /usr/sbin/, so the application that you wish to run must be there. After verifying that, perform the following steps:
- Create a link from the name of your application, such as our sample
fooprogram, to the/usr/bin/consolehelperapplication:cd /usr/binln -s consolehelper foo - Create the file
/etc/security/console.apps/foo:touch /etc/security/console.apps/foo - Create a PAM configuration file for the
fooservice in/etc/pam.d/. An easy way to do this is to copy the PAM configuration file of thehaltservice, and then modify the copy if you want to change the behavior:cp /etc/pam.d/halt /etc/pam.d/foo
/usr/bin/foo is executed, consolehelper is called, which authenticates the user with the help of /usr/sbin/userhelper. To authenticate the user, consolehelper asks for the user's password if /etc/pam.d/foo is a copy of /etc/pam.d/halt (otherwise, it does precisely what is specified in /etc/pam.d/foo) and then runs /usr/sbin/foo with root permissions.
pam_timestamp and run from the same session is automatically authenticated for the user — the user does not have to enter the root password again.
pam package. To enable this feature, add the following lines to your PAM configuration file in etc/pam.d/:
auth include config-util account include config-util session include config-util
/etc/pam.d/system-config-* configuration files. Note that these lines must be added below any other auth sufficient session optional lines in your PAM configuration file.
pam_timestamp is successfully authenticated from the Applications (the main menu on the panel), the
31.6. The floppy Group
floppy group. Add the user(s) to the floppy group using the tool of your choice. For example, the gpasswd command can be used to add user fred to the floppy group:
gpasswd -a fred floppyfred is able to access the system's diskette drive from the console.
Chapter 32. The sysconfig Directory
/etc/sysconfig/ directory contains a variety of system configuration files for Red Hat Enterprise Linux.
/etc/sysconfig/ directory, their function, and their contents. The information in this chapter is not intended to be complete, as many of these files have a variety of options that are only used in very specific or rare circumstances.
32.1. Files in the /etc/sysconfig/ Directory
/etc/sysconfig/ directory. Files not listed here, as well as extra file options, are found in the /usr/share/doc/initscripts-<version-number>/sysconfig.txt file (replace <version-number> with the version of the initscripts package). Alternatively, looking through the initscripts in the /etc/rc.d/ directory can prove helpful.
Note
/etc/sysconfig/ directory, then the corresponding program may not be installed.
32.1.1. /etc/sysconfig/amd
/etc/sysconfig/amd file contains various parameters used by amd; these parameters allow for the automatic mounting and unmounting of file systems.
32.1.2. /etc/sysconfig/apmd
/etc/sysconfig/apmd file is used by apmd to configure what power settings to start/stop/change on suspend or resume. This file configures how apmd functions at boot time, depending on whether the hardware supports Advanced Power Management (APM) or whether the user has configured the system to use it. The apm daemon is a monitoring program that works with power management code within the Linux kernel. It is capable of alerting users to low battery power on laptops and other power-related settings.
32.1.3. /etc/sysconfig/arpwatch
/etc/sysconfig/arpwatch file is used to pass arguments to the arpwatch daemon at boot time. The arpwatch daemon maintains a table of Ethernet MAC addresses and their IP address pairings. By default, this file sets the owner of the arpwatch process to the user pcap and sends any messages to the root mail queue. For more information regarding available parameters for this file, refer to the arpwatch man page.
32.1.4. /etc/sysconfig/authconfig
/etc/sysconfig/authconfig file sets the authorization to be used on the host. It contains one or more of the following lines:
USEMD5=<value>, where<value>is one of the following:yes— MD5 is used for authentication.no— MD5 is not used for authentication.
USEKERBEROS=<value>, where<value>is one of the following:yes— Kerberos is used for authentication.no— Kerberos is not used for authentication.
USELDAPAUTH=<value>, where<value>is one of the following:yes— LDAP is used for authentication.no— LDAP is not used for authentication.
32.1.5. /etc/sysconfig/autofs
/etc/sysconfig/autofs file defines custom options for the automatic mounting of devices. This file controls the operation of the automount daemons, which automatically mount file systems when you use them and unmount them after a period of inactivity. File systems can include network file systems, CD-ROMs, diskettes, and other media.
/etc/sysconfig/autofs file may contain the following:
LOCALOPTIONS="<value>", where <value> is a string for defining machine-specific automount rules. The default value is an empty string ("").DAEMONOPTIONS="<value>", where <value> is the timeout length in seconds before unmounting the device. The default value is 60 seconds ("--timeout=60").UNDERSCORETODOT=<value>, where <value> is a binary value that controls whether to convert underscores in file names into dots. For example,auto_hometoauto.homeandauto_mnttoauto.mnt. The default value is 1 (true).DISABLE_DIRECT=<value>, where <value> is a binary value that controls whether to disable direct mount support, as the Linux implementation does not conform to the Sun Microsystems' automounter behavior. The default value is 1 (true), and allows for compatibility with the Sun automounter options specification syntax.
32.1.6. /etc/sysconfig/clock
/etc/sysconfig/clock file controls the interpretation of values read from the system hardware clock.
UTC=<value>, where<value>is one of the following boolean values:trueoryes— The hardware clock is set to Universal Time.falseorno— The hardware clock is set to local time.
ARC=<value>, where<value>is the following:falseorno— This value indicates that the normal UNIX epoch is in use. Other values are used by systems not supported by Red Hat Enterprise Linux.
SRM=<value>, where<value>is the following:falseorno— This value indicates that the normal UNIX epoch is in use. Other values are used by systems not supported by Red Hat Enterprise Linux.
ZONE=— The time zone file under<filename>/usr/share/zoneinfothat/etc/localtimeis a copy of. The file contains information such as:ZONE="America/New York"
Note that theZONEparameter is read by the Time and Date Properties Tool (system-config-date), and manually editing it does not change the system timezone.
CLOCKMODE=<value>, where<value>is one of the following:GMT— The clock is set to Universal Time (Greenwich Mean Time).ARC— The ARC console's 42-year time offset is in effect (for Alpha-based systems only).
32.1.7. /etc/sysconfig/desktop
/etc/sysconfig/desktop file specifies the desktop for new users and the display manager to run when entering runlevel 5.
DESKTOP="<value>", where"<value>"is one of the following:GNOME— Selects the GNOME desktop environment.KDE— Selects the KDE desktop environment.
DISPLAYMANAGER="<value>", where"<value>"is one of the following:GNOME— Selects the GNOME Display Manager.KDE— Selects the KDE Display Manager.XDM— Selects the X Display Manager.
32.1.8. /etc/sysconfig/dhcpd
/etc/sysconfig/dhcpd file is used to pass arguments to the dhcpd daemon at boot time. The dhcpd daemon implements the Dynamic Host Configuration Protocol (DHCP) and the Internet Bootstrap Protocol (BOOTP). DHCP and BOOTP assign hostnames to machines on the network. For more information about what parameters are available in this file, refer to the dhcpd man page.
32.1.9. /etc/sysconfig/exim
/etc/sysconfig/exim file allows messages to be sent to one or more clients, routing the messages over whatever networks are necessary. The file sets the default values for exim to run. Its default values are set to run as a background daemon and to check its queue each hour in case something has backed up.
DAEMON=<value>, where<value>is one of the following:yes—eximshould be configured to listen to port 25 for incoming mail.yesimplies the use of the Exim's-bdoptions.no—eximshould not be configured to listen to port 25 for incoming mail.
QUEUE=1hwhich is given toeximas-q$QUEUE. The-qoption is not given toeximif/etc/sysconfig/eximexists andQUEUEis empty or undefined.
32.1.10. /etc/sysconfig/firstboot
/sbin/init program calls the etc/rc.d/init.d/firstboot script, which in turn launches the Setup Agent. This application allows the user to install the latest updates as well as additional applications and documentation.
/etc/sysconfig/firstboot file tells the Setup Agent application not to run on subsequent reboots. To run it the next time the system boots, remove /etc/sysconfig/firstboot and execute chkconfig --level 5 firstboot on.
32.1.11. /etc/sysconfig/gpm
/etc/sysconfig/gpm file is used to pass arguments to the gpm daemon at boot time. The gpm daemon is the mouse server which allows mouse acceleration and middle-click pasting. For more information about what parameters are available for this file, refer to the gpm man page. By default, the DEVICE directive is set to /dev/input/mice.
32.1.12. /etc/sysconfig/hwconf
/etc/sysconfig/hwconf file lists all the hardware that kudzu detected on the system, as well as the drivers used, vendor ID, and device ID information. The kudzu program detects and configures new and/or changed hardware on a system. The /etc/sysconfig/hwconf file is not meant to be manually edited. If edited, devices could suddenly show up as being added or removed.
32.1.13. /etc/sysconfig/i18n
/etc/sysconfig/i18n file sets the default language, any supported languages, and the default system font. For example:
LANG="en_US.UTF-8" SUPPORTED="en_US.UTF-8:en_US:en" SYSFONT="latarcyrheb-sun16"
32.1.14. /etc/sysconfig/init
/etc/sysconfig/init file controls how the system appears and functions during the boot process.
BOOTUP=<value>, where<value>is one of the following:color— The standard color boot display, where the success or failure of devices and services starting up is shown in different colors.verbose— An old style display which provides more information than purely a message of success or failure.- Anything else means a new display, but without ANSI-formatting.
RES_COL=<value>, where<value>is the number of the column of the screen to start status labels. The default is set to 60.MOVE_TO_COL=<value>, where<value>moves the cursor to the value in theRES_COLline via theecho -encommand.SETCOLOR_SUCCESS=<value>, where<value>sets the success color via theecho -encommand. The default color is set to green.SETCOLOR_FAILURE=<value>, where<value>sets the failure color via theecho -encommand. The default color is set to red.SETCOLOR_WARNING=<value>, where<value>sets the warning color via theecho -encommand. The default color is set to yellow.SETCOLOR_NORMAL=<value>, where<value>resets the color to "normal" via theecho -en.LOGLEVEL=<value>, where<value>sets the initial console logging level for the kernel. The default is 3; 8 means everything (including debugging), while 1 means only kernel panics. Thesyslogddaemon overrides this setting once started.PROMPT=<value>, where<value>is one of the following boolean values:yes— Enables the key check for interactive mode.no— Disables the key check for interactive mode.
32.1.15. /etc/sysconfig/ip6tables-config
/etc/sysconfig/ip6tables-config file stores information used by the kernel to set up IPv6 packet filtering at boot time or whenever the ip6tables service is started.
ip6tables rules. Rules also can be created manually using the /sbin/ip6tables command. Once created, add the rules to the /etc/sysconfig/ip6tables file by typing the following command:
service ip6tables saveip6tables, refer to Section 48.9, “IPTables”.
32.1.16. /etc/sysconfig/iptables-config
/etc/sysconfig/iptables-config file stores information used by the kernel to set up packet filtering services at boot time or whenever the service is started.
iptables rules. The easiest way to add rules is to use the Security Level Configuration Tool (system-config-securitylevel) application to create a firewall. These applications automatically edit this file at the end of the process.
/sbin/iptables command. Once created, add the rule(s) to the /etc/sysconfig/iptables file by typing the following command:
service iptables saveiptables, refer to Section 48.9, “IPTables”.
32.1.17. /etc/sysconfig/irda
/etc/sysconfig/irda file controls how infrared devices on the system are configured at startup.
IRDA=<value>, where<value>is one of the following boolean values:yes—irattachruns and periodically checks to see if anything is trying to connect to the infrared port, such as another notebook computer trying to make a network connection. For infrared devices to work on the system, this line must be set toyes.no—irattachdoes not run, preventing infrared device communication.
DEVICE=<value>, where<value>is the device (usually a serial port) that handles infrared connections. A sample serial device entry could be/dev/ttyS2.DONGLE=<value>, where<value>specifies the type of dongle being used for infrared communication. This setting exists for people who use serial dongles rather than real infrared ports. A dongle is a device that is attached to a traditional serial port to communicate via infrared. This line is commented out by default because notebooks with real infrared ports are far more common than computers with add-on dongles. A sample dongle entry could beactisys+.DISCOVERY=<value>, where<value>is one of the following boolean values:yes— Startsirattachin discovery mode, meaning it actively checks for other infrared devices. This must be turned on for the machine to actively look for an infrared connection (meaning the peer that does not initiate the connection).no— Does not startirattachin discovery mode.
32.1.18. /etc/sysconfig/kernel
/etc/sysconfig/kernel configuration file controls the kernel selection at boot. It has two options with the following default values:
UPDATEDEFAULT=yes- This option makes a newly installed kernel as the default in the boot entry selection.
DEFAULTKERNEL=kernel- This option specifies what package type will be used as the default.
32.1.18.1. Keeping an old kernel version as the default
- Comment out the UPDATEDEFAULT option in /etc/sysconfig/kernel as follows:
# UPDATEDEFAULT=yes
32.1.18.2. Setting a kernel debugger as the default kernel
- Edit the /etc/sysconfig/kernel configuration file as follows:
DEFAULTKERNEL=kernel-debug
32.1.19. /etc/sysconfig/keyboard
/etc/sysconfig/keyboard file controls the behavior of the keyboard. The following values may be used:
KEYBOARDTYPE="sun|pc"wheresunmeans a Sun keyboard is attached on/dev/kbd, orpcmeans a PS/2 keyboard connected to a PS/2 port.KEYTABLE="<file>", where<file>is the name of a keytable file.For example:KEYTABLE="us". The files that can be used as keytables start in/lib/kbd/keymaps/i386and branch into different keyboard layouts from there, all labeled<file>.kmap.gz. The first file found beneath/lib/kbd/keymaps/i386that matches theKEYTABLEsetting is used.
32.1.20. /etc/sysconfig/kudzu
/etc/sysconfig/kuzdu file triggers a safe probe of the system hardware by kudzu at boot time. A safe probe is one that disables serial port probing.
SAFE=<value>, where<value>is one of the following:yes—kuzdudoes a safe probe.no—kuzdudoes a normal probe.
32.1.21. /etc/sysconfig/named
/etc/sysconfig/named file is used to pass arguments to the named daemon at boot time. The named daemon is a Domain Name System (DNS) server which implements the Berkeley Internet Name Domain (BIND) version 9 distribution. This server maintains a table of which hostnames are associated with IP addresses on the network.
ROOTDIR="</some/where>", where</some/where>refers to the full directory path of a configured chroot environment under whichnamedruns. This chroot environment must first be configured. Typeinfo chrootfor more information.OPTIONS="<value>", where<value>is any option listed in the man page fornamedexcept-t. In place of-t, use theROOTDIRline above.
named man page. For detailed information on how to configure a BIND DNS server, refer to Chapter 19, Berkeley Internet Name Domain (BIND). By default, the file contains no parameters.
32.1.22. /etc/sysconfig/network
/etc/sysconfig/network file is used to specify information about the desired network configuration. The following values may be used:
NETWORKING=<value>, where<value>is one of the following boolean values:yes— Networking should be configured.no— Networking should not be configured.
HOSTNAME=<value>, where<value>should be the Fully Qualified Domain Name (FQDN), such ashostname.expample.com, but can be whatever hostname is necessary.GATEWAY=<value>, where<value>is the IP address of the network's gateway.GATEWAYDEV=<value>, where<value>is the gateway device, such aseth0. Configure this option if you have multiple interfaces on the same subnet, and require one of those interfaces to be the preferred route to the default gateway.NISDOMAIN=<value>, where<value>is the NIS domain name.NOZEROCONF=<value>, where setting<value>totruedisables the zeroconf route.By default, the zeroconf route (169.254.0.0) is enabled when the system boots. For more information about zeroconf, refer to http://www.zeroconf.org/.
Warning
32.1.23. /etc/sysconfig/nfs
/etc/sysconfig/nfs file to control which ports the required RPC services run on.
/etc/sysconfig/nfs may not exist by default on all systems. If it does not exist, create it and add the following variables (alternatively, if the file exists, un-comment and change the default entries as required):
MOUNTD_PORT=x- control which TCP and UDP port mountd (rpc.mountd) uses. Replace x with an unused port number.
STATD_PORT=x- control which TCP and UDP port status (rpc.statd) uses. Replace x with an unused port number.
LOCKD_TCPPORT=x- control which TCP port nlockmgr (rpc.lockd) uses. Replace x with an unused port number.
LOCKD_UDPPORT=x- control which UDP port nlockmgr (rpc.lockd) uses. Replace x with an unused port number.
/var/log/messages. Normally, NFS will fail to start if you specify a port number that is already in use. After editing /etc/sysconfig/nfs restart the NFS service by running the service nfs restart command. Run the rpcinfo -p command to confirm the changes.
- Allow TCP and UDP port 2049 for NFS.
- Allow TCP and UDP port 111 (portmap/sunrpc).
- Allow the TCP and UDP port specified with
MOUNTD_PORT="x" - Allow the TCP and UDP port specified with
STATD_PORT="x" - Allow the TCP port specified with
LOCKD_TCPPORT="x" - Allow the UDP port specified with
LOCKD_UDPPORT="x"
32.1.24. /etc/sysconfig/ntpd
/etc/sysconfig/ntpd file is used to pass arguments to the ntpd daemon at boot time. The ntpd daemon sets and maintains the system clock to synchronize with an Internet standard time server. It implements version 4 of the Network Time Protocol (NTP). For more information about what parameters are available for this file, use a Web browser to view the following file: /usr/share/doc/ntp-<version>/ntpd.htm (where <version> is the version number of ntpd). By default, this file sets the owner of the ntpd process to the user ntp.
32.1.25. /etc/sysconfig/radvd
/etc/sysconfig/radvd file is used to pass arguments to the radvd daemon at boot time. The radvd daemon listens for router requests and sends router advertisements for the IP version 6 protocol. This service allows hosts on a network to dynamically change their default routers based on these router advertisements. For more information about available parameters for this file, refer to the radvd man page. By default, this file sets the owner of the radvd process to the user radvd.
32.1.26. /etc/sysconfig/samba
/etc/sysconfig/samba file is used to pass arguments to the smbd and the nmbd daemons at boot time. The smbd daemon offers file sharing connectivity for Windows clients on the network. The nmbd daemon offers NetBIOS over IP naming services. For more information about what parameters are available for this file, refer to the smbd man page. By default, this file sets smbd and nmbd to run in daemon mode.
32.1.27. /etc/sysconfig/selinux
/etc/sysconfig/selinux file contains the basic configuration options for SELinux. This file is a symbolic link to /etc/selinux/config.
32.1.28. /etc/sysconfig/sendmail
/etc/sysconfig/sendmail file allows messages to be sent to one or more clients, routing the messages over whatever networks are necessary. The file sets the default values for the Sendmail application to run. Its default values are set to run as a background daemon and to check its queue each hour in case something has backed up.
DAEMON=<value>, where<value>is one of the following:yes— Sendmail should be configured to listen to port 25 for incoming mail.yesimplies the use of Sendmail's-bdoptions.no— Sendmail should not be configured to listen to port 25 for incoming mail.
QUEUE=1hwhich is given to Sendmail as-q$QUEUE. The-qoption is not given to Sendmail if/etc/sysconfig/sendmailexists andQUEUEis empty or undefined.
32.1.29. /etc/sysconfig/spamassassin
/etc/sysconfig/spamassassin file is used to pass arguments to the spamd daemon (a daemonized version of Spamassassin) at boot time. Spamassassin is an email spam filter application. For a list of available options, refer to the spamd man page. By default, it configures spamd to run in daemon mode, create user preferences, and auto-create whitelists (allowed bulk senders).
32.1.30. /etc/sysconfig/squid
/etc/sysconfig/squid file is used to pass arguments to the squid daemon at boot time. The squid daemon is a proxy caching server for Web client applications. For more information on configuring a squid proxy server, use a Web browser to open the /usr/share/doc/squid-<version>/ directory (replace <version> with the squid version number installed on the system). By default, this file sets squid to start in daemon mode and sets the amount of time before it shuts itself down.
32.1.31. /etc/sysconfig/system-config-securitylevel
/etc/sysconfig/system-config-securitylevel file contains all options chosen by the user the last time the Security Level Configuration Tool (system-config-securitylevel) was run. Users should not modify this file by hand. For more information about the Security Level Configuration Tool, refer to Section 48.8.2, “Basic Firewall Configuration”.
32.1.32. /etc/sysconfig/system-config-selinux
/etc/sysconfig/system-config-selinux file contains all options chosen by the user the last time the SELinux Administration Tool (system-config-selinux) was run. Users should not modify this file by hand. For more information about the SELinux Administration Tool and SELinux in general, refer to Section 49.2, “Introduction to SELinux”.
32.1.33. /etc/sysconfig/system-config-users
/etc/sysconfig/system-config-users file is the configuration file for the graphical application, User Manager. This file is used to filter out system users such as root, daemon, or lp. This file is edited by the > pull-down menu in the User Manager application and should never be edited by hand. For more information on using this application, refer to Section 37.1, “User and Group Configuration”.
32.1.34. /etc/sysconfig/system-logviewer
/etc/sysconfig/system-logviewer file is the configuration file for the graphical, interactive log viewing application, Log Viewer. This file is edited by the > pull-down menu in the Log Viewer application and should not be edited by hand. For more information on using this application, refer to Chapter 40, Log Files.
32.1.35. /etc/sysconfig/tux
/etc/sysconfig/tux file is the configuration file for the Red Hat Content Accelerator (formerly known as TUX), the kernel-based Web server. For more information on configuring the Red Hat Content Accelerator, use a Web browser to open the /usr/share/doc/tux-<version>/tux/index.html file (replace <version> with the version number of TUX installed on the system). The parameters available for this file are listed in /usr/share/doc/tux-<version>/tux/parameters.html.
32.1.36. /etc/sysconfig/vncservers
/etc/sysconfig/vncservers file configures the way the Virtual Network Computing (VNC) server starts up.
VNCSERVERS=<value>, where<value>is set to something like"1:fred", to indicate that a VNC server should be started for user fred on display :1. User fred must have set a VNC password using thevncpasswdcommand before attempting to connect to the remote VNC server.
32.1.37. /etc/sysconfig/xinetd
/etc/sysconfig/xinetd file is used to pass arguments to the xinetd daemon at boot time. The xinetd daemon starts programs that provide Internet services when a request to the port for that service is received. For more information about available parameters for this file, refer to the xinetd man page. For more information on the xinetd service, refer to Section 48.5.3, “xinetd”.
32.2. Directories in the /etc/sysconfig/ Directory
/etc/sysconfig/.
apm-scripts/- This directory contains the APM suspend/resume script. Do not edit the files directly. If customization is necessary, create a file called
/etc/sysconfig/apm-scripts/apmcontinuewhich is called at the end of the script. It is also possible to control the script by editing/etc/sysconfig/apmd. cbq/networking/- This directory is used by the Network Administration Tool (
system-config-network), and its contents should not be edited manually. For more information about configuring network interfaces using the Network Administration Tool, refer to Chapter 17, Network Configuration. network-scripts/- Network configuration files for each configured network interface, such as
ifcfg-eth0for theeth0Ethernet interface. - Scripts used to bring network interfaces up and down, such as
ifupandifdown. - Scripts used to bring ISDN interfaces up and down, such as
ifup-isdnandifdown-isdn. - Various shared network function scripts which should not be edited directly.
For more information on thenetwork-scriptsdirectory, refer to Chapter 16, Network Interfaces.rhn/- Deprecated. This directory contains the configuration files and GPG keys used by the RHN Classic content service. No files in this directory should be edited by hand.This directory is available for legacy systems which are still managed by RHN Classic. Systems which are registered against the Certificate-Based Red Hat Network do not use this directory.
32.3. Additional Resources
/etc/sysconfig/ directory. The following source contains more comprehensive information.
32.3.1. Installed Documentation
/usr/share/doc/initscripts-<version-number>/sysconfig.txt— This file contains a more authoritative listing of the files found in the/etc/sysconfig/directory and the configuration options available for them. The <version-number> in the path to this file corresponds to the version of theinitscriptspackage installed.
Chapter 33. Date and Time Configuration
- From the desktop, go to Applications (the main menu on the panel) > >
- From the desktop, right-click on the time in the toolbar and select .
- Type the command
system-config-date,system-config-time, ordateconfigat a shell prompt (for example, in an XTerm or a GNOME terminal).
33.1. Time and Date Properties
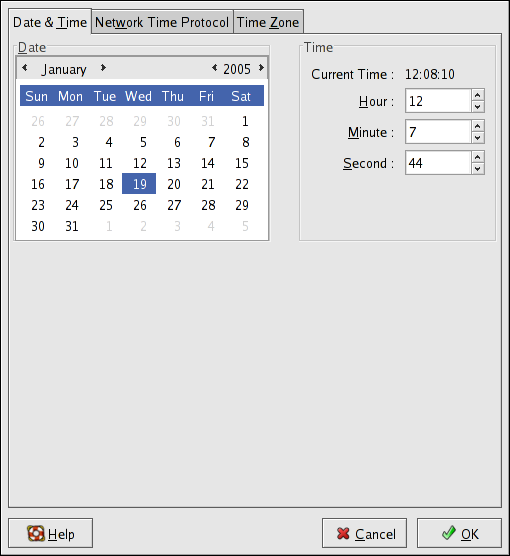
Figure 33.1. Time and Date Properties
33.2. Network Time Protocol (NTP) Properties
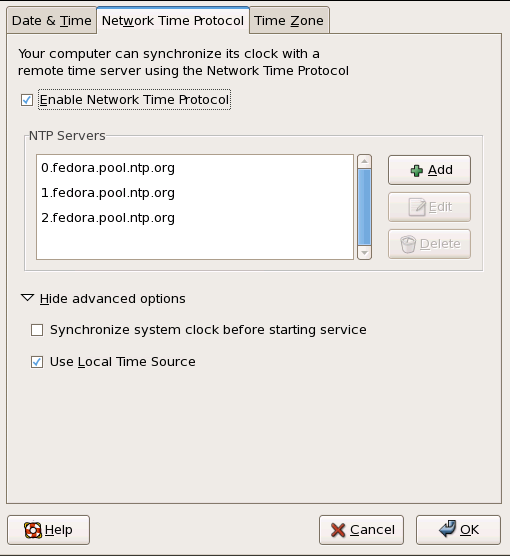
Figure 33.2. NTP Properties
33.3. Time Zone Configuration
Chapter 34. Keyboard Configuration
system-config-keyboard at a shell prompt.
Figure 34.1. Keyboard Configuration Tool
Chapter 35. The X Window System
Xorg binary) listens for connections from X client applications via a network or local loopback interface. The server communicates with the hardware, such as the video card, monitor, keyboard, and mouse. X client applications exist in the user-space, creating a graphical user interface (GUI) for the user and passing user requests to the X server.
35.1. The X11R7.1 Release
Important
/usr/ instead of /usr/X11R6. The /etc/X11/ directory contains configuration files for X client and server applications. This includes configuration files for the X server itself, the xfs font server, the X display managers, and many other base components.
/etc/fonts/fonts.conf. For more on configuring and adding fonts, refer to Section 35.4, “Fonts”.
system-config-display), particularly for devices that are not detected manually.
/etc/X11/xorg.conf. For information about the structure of this file, refer to Section 35.3, “X Server Configuration Files”.
35.2. Desktop Environments and Window Managers
35.2.1. Desktop Environments
- GNOME — The default desktop environment for Red Hat Enterprise Linux based on the GTK+ 2 graphical toolkit.
- KDE — An alternative desktop environment based on the Qt 3 graphical toolkit.
35.2.2. Window Managers
kwin- The KWin window manager is the default window manager for KDE. It is an efficient window manager which supports custom themes.
metacity- The Metacity window manager is the default window manager for GNOME. It is a simple and efficient window manager which also supports custom themes. To run this window manager, you need to install the
metacitypackage. mwm- The Motif Window Manager (
mwm) is a basic, stand-alone window manager. Since it is designed to be a stand-alone window manager, it should not be used in conjunction with GNOME or KDE. To run this window manager, you need to install theopenmotifpackage. twm- The minimalist Tab Window Manager (
twm, which provides the most basic tool set of any of the window managers, can be used either as a stand-alone or with a desktop environment. It is installed as part of the X11R7.1 release.
xinit -e <path-to-window-manager> at the prompt.
<path-to-window-manager> is the location of the window manager binary file. The binary file can be located by typing which window-manager-name, where window-manager-name is the name of the window manager you want to run.
~]#which twm/usr/bin/twm ~]#xinit -e /usr/bin/twm
twm window manager, the second command starts twm.
startx at the prompt.
35.3. X Server Configuration Files
/usr/bin/Xorg). Associated configuration files are stored in the /etc/X11/ directory (as is a symbolic link — X — which points to /usr/bin/Xorg). The configuration file for the X server is /etc/X11/xorg.conf.
/usr/lib/xorg/modules/ contains X server modules that can be loaded dynamically at runtime. By default, only some modules in /usr/lib/xorg/modules/ are automatically loaded by the X server.
/etc/X11/xorg.conf. For more information about loading modules, refer to Section 35.3.1.5, “Module”.
35.3.1. xorg.conf
/etc/X11/xorg.conf file, it is useful to understand the various sections and optional parameters available, especially when troubleshooting.
35.3.1.1. The Structure
/etc/X11/xorg.conf file is comprised of many different sections which address specific aspects of the system hardware.
Section "<section-name>" line (where <section-name> is the title for the section) and ends with an EndSection line. Each section contains lines that include option names and one or more option values. These are sometimes enclosed in double quotes (").
#) are not read by the X server and are used for human-readable comments.
/etc/X11/xorg.conf file accept a boolean switch which turns the feature on or off. Acceptable boolean values are:
1,on,true, oryes— Turns the option on.0,off,false, orno— Turns the option off.
/etc/X11/xorg.conf file. More detailed information about the X server configuration file can be found in the xorg.conf man page.
35.3.1.2. ServerFlags
ServerFlags section contains miscellaneous global X server settings. Any settings in this section may be overridden by options placed in the ServerLayout section (refer to Section 35.3.1.3, “ServerLayout” for details).
ServerFlags section is on its own line and begins with the term Option followed by an option enclosed in double quotation marks (").
ServerFlags section:
Section "ServerFlags" Option "DontZap" "true" EndSection
"DontZap" "<boolean>"— When the value of <boolean> is set to true, this setting prevents the use of the Ctrl+Alt+Backspace key combination to immediately terminate the X server."DontZoom" "<boolean>"— When the value of <boolean> is set to true, this setting prevents cycling through configured video resolutions using the Ctrl+Alt+Keypad-Plus and Ctrl+Alt+Keypad-Minus key combinations.
35.3.1.3. ServerLayout
ServerLayout section binds together the input and output devices controlled by the X server. At a minimum, this section must specify one output device and one input device. By default, a monitor (output device) and keyboard (input device) are specified.
ServerLayout section:
Section "ServerLayout" Identifier "Default Layout" Screen 0 "Screen0" 0 0 InputDevice "Mouse0" "CorePointer" InputDevice "Keyboard0" "CoreKeyboard" EndSection
ServerLayout section:
Identifier— Specifies a unique name for thisServerLayoutsection.Screen— Specifies the name of aScreensection to be used with the X server. More than oneScreenoption may be present.The following is an example of a typicalScreenentry:Screen 0 "Screen0" 0 0
The first number in this exampleScreenentry (0) indicates that the first monitor connector or head on the video card uses the configuration specified in theScreensection with the identifier"Screen0".An example of aScreensection with the identifier"Screen0"can be found in Section 35.3.1.9, “Screen”.If the video card has more than one head, anotherScreenentry with a different number and a differentScreensection identifier is necessary .The numbers to the right of"Screen0"give the absolute X and Y coordinates for the upper-left corner of the screen (0 0by default).InputDevice— Specifies the name of anInputDevicesection to be used with the X server.It is advisable that there be at least twoInputDeviceentries: one for the default mouse and one for the default keyboard. The optionsCorePointerandCoreKeyboardindicate that these are the primary mouse and keyboard.Option "<option-name>"— An optional entry which specifies extra parameters for the section. Any options listed here override those listed in theServerFlagssection.Replace <option-name> with a valid option listed for this section in thexorg.confman page.
ServerLayout section in the /etc/X11/xorg.conf file. By default, the server only reads the first one it encounters, however.
ServerLayout section, it can be specified as a command line argument when starting an X session.
35.3.1.4. Files
Files section sets paths for services vital to the X server, such as the font path. This is an optional section, these paths are normally detected automatically. This section may be used to override any automatically detected defaults.
Files section:
Section "Files" RgbPath "/usr/share/X11/rgb.txt" FontPath "unix/:7100" EndSection
Files section:
RgbPath— Specifies the location of the RGB color database. This database defines all valid color names in X and ties them to specific RGB values.FontPath— Specifies where the X server must connect to obtain fonts from thexfsfont server.By default, theFontPathisunix/:7100. This tells the X server to obtain font information using UNIX-domain sockets for inter-process communication (IPC) on port 7100.Refer to Section 35.4, “Fonts” for more information concerning X and fonts.ModulePath— An optional parameter which specifies alternate directories which store X server modules.
35.3.1.5. Module
/usr/lib/xorg/modules/ directory:
extmoddbeglxfreetypetype1recorddri
ModulePath parameter in the Files section. Refer to Section 35.3.1.4, “Files” for more information on this section.
Module section to /etc/X11/xorg.conf instructs the X server to load the modules listed in this section instead of the default modules.
Module section:
Section "Module" Load "fbdevhw" EndSectioninstructs the X server to load the
fbdevhw instead of the default modules.
Module section to /etc/X11/xorg.conf, you will need to specify any default modules you want to load as well as any extra modules.
35.3.1.6. InputDevice
InputDevice section configures one input device for the X server. Systems typically have at least one InputDevice section for the keyboard. It is perfectly normal to have no entry for a mouse, as most mouse settings are automatically detected.
InputDevice section for a keyboard:
Section "InputDevice"
Identifier "Keyboard0"
Driver "kbd"
Option "XkbModel" "pc105"
Option "XkbLayout" "us"
EndSectionInputDevice section:
Identifier— Specifies a unique name for thisInputDevicesection. This is a required entry.Driver— Specifies the name of the device driver X must load for the device.Option— Specifies necessary options pertaining to the device.A mouse may also be specified to override any autodetected defaults for the device. The following options are typically included when adding a mouse in thexorg.conf:Protocol— Specifies the protocol used by the mouse, such asIMPS/2.Device— Specifies the location of the physical device.Emulate3Buttons— Specifies whether to allow a two-button mouse to act like a three-button mouse when both mouse buttons are pressed simultaneously.
Consult thexorg.confman page for a list of valid options for this section.
35.3.1.7. Monitor
Monitor section configures one type of monitor used by the system. This is an optional entry as well, as most monitors are now automatically detected.
Monitor section for a monitor:
Section "Monitor" Identifier "Monitor0" VendorName "Monitor Vendor" ModelName "DDC Probed Monitor - ViewSonic G773-2" DisplaySize 320 240 HorizSync 30.0 - 70.0 VertRefresh 50.0 - 180.0 EndSection
Warning
Monitor section of /etc/X11/xorg.conf. Inappropriate values can damage or destroy a monitor. Consult the monitor's documentation for a listing of safe operating parameters.
Monitor section:
Identifier— Specifies a unique name for thisMonitorsection. This is a required entry.VendorName— An optional parameter which specifies the vendor of the monitor.ModelName— An optional parameter which specifies the monitor's model name.DisplaySize— An optional parameter which specifies, in millimeters, the physical size of the monitor's picture area.HorizSync— Specifies the range of horizontal sync frequencies compatible with the monitor in kHz. These values help the X server determine the validity of built-in or specifiedModelineentries for the monitor.VertRefresh— Specifies the range of vertical refresh frequencies supported by the monitor, in kHz. These values help the X server determine the validity of built in or specifiedModelineentries for the monitor.Modeline— An optional parameter which specifies additional video modes for the monitor at particular resolutions, with certain horizontal sync and vertical refresh resolutions. Refer to thexorg.confman page for a more detailed explanation ofModelineentries.Option "<option-name>"— An optional entry which specifies extra parameters for the section. Replace <option-name> with a valid option listed for this section in thexorg.confman page.
35.3.1.8. Device
Device section configures one video card on the system. While one Device section is the minimum, additional instances may occur for each video card installed on the machine.
Device section for a video card:
Section "Device" Identifier "Videocard0" Driver "mga" VendorName "Videocard vendor" BoardName "Matrox Millennium G200" VideoRam 8192 Option "dpms" EndSection
Device section:
Identifier— Specifies a unique name for thisDevicesection. This is a required entry.Driver— Specifies which driver the X server must load to utilize the video card. A list of drivers can be found in/usr/share/hwdata/videodrivers, which is installed with thehwdatapackage.VendorName— An optional parameter which specifies the vendor of the video card.BoardName— An optional parameter which specifies the name of the video card.VideoRam— An optional parameter which specifies the amount of RAM available on the video card in kilobytes. This setting is only necessary for video cards the X server cannot probe to detect the amount of video RAM.BusID— An entry which specifies the bus location of the video card. On systems with only one video card aBusIDentry is optional and may not even be present in the default/etc/X11/xorg.conffile. On systems with more than one video card, however, aBusIDentry must be present.Screen— An optional entry which specifies which monitor connector or head on the video card theDevicesection configures. This option is only useful for video cards with multiple heads.If multiple monitors are connected to different heads on the same video card, separateDevicesections must exist and each of these sections must have a differentScreenvalue.Values for theScreenentry must be an integer. The first head on the video card has a value of0. The value for each additional head increments this value by one.Option "<option-name>"— An optional entry which specifies extra parameters for the section. Replace <option-name> with a valid option listed for this section in thexorg.confman page.One of the more common options is"dpms"(for Display Power Management Signaling, a VESA standard), which activates the Service Star energy compliance setting for the monitor.
35.3.1.9. Screen
Screen section binds one video card (or video card head) to one monitor by referencing the Device section and the Monitor section for each. While one Screen section is the minimum, additional instances may occur for each video card and monitor combination present on the machine.
Screen section:
Section "Screen" Identifier "Screen0" Device "Videocard0" Monitor "Monitor0" DefaultDepth 16 SubSection "Display" Depth 24 Modes "1280x1024" "1280x960" "1152x864" "1024x768" "800x600" "640x480" EndSubSection SubSection "Display" Depth 16 Modes "1152x864" "1024x768" "800x600" "640x480" EndSubSection EndSection
Screen section:
Identifier— Specifies a unique name for thisScreensection. This is a required entry.Device— Specifies the unique name of aDevicesection. This is a required entry.Monitor— Specifies the unique name of aMonitorsection. This is only required if a specificMonitorsection is defined in thexorg.conffile. Normally, monitors are automatically detected.DefaultDepth— Specifies the default color depth in bits. In the previous example,16(which provides thousands of colors) is the default. Only oneDefaultDepthis permitted, although this can be overridden with the Xorg command line option-depth <n>,where<n>is any additional depth specified.SubSection "Display"— Specifies the screen modes available at a particular color depth. TheScreensection can have multipleDisplaysubsections, which are entirely optional since screen modes are automatically detected.This subsection is normally used to override autodetected modes.Option "<option-name>"— An optional entry which specifies extra parameters for the section. Replace <option-name> with a valid option listed for this section in thexorg.confman page.
35.3.1.10. DRI
DRI section specifies parameters for the Direct Rendering Infrastructure (DRI). DRI is an interface which allows 3D software applications to take advantage of 3D hardware acceleration capabilities built into most modern video hardware. In addition, DRI can improve 2D performance via hardware acceleration, if supported by the video card driver.
xorg.conf file will override those defaults.
DRI section:
Section "DRI" Group 0 Mode 0666 EndSection
35.4. Fonts
xfs.
35.4.1. Fontconfig
Important
/etc/fonts/fonts.conf configuration file, which should not be edited by hand.
Note
~/.gtkrc.mine:
style "user-font" {
fontset = "<font-specification>"
}
widget_class "*" style "user-font"-adobe-helvetica-medium-r-normal--*-120-*-*-*-*-*-*. A full list of core fonts can be obtained by running xlsfonts or created interactively using the xfontsel command.
35.4.1.1. Adding Fonts to Fontconfig
- To add fonts system-wide, copy the new fonts into the
/usr/share/fonts/directory. It is a good idea to create a new subdirectory, such aslocal/or similar, to help distinguish between user-installed and default fonts.To add fonts for an individual user, copy the new fonts into the.fonts/directory in the user's home directory. - Use the
fc-cachecommand to update the font information cache, as in the following example:fc-cache <path-to-font-directory>In this command, replace <path-to-font-directory> with the directory containing the new fonts (either/usr/share/fonts/local/or/home/<user>/.fonts/).
Note
fonts:/// into the Nautilus address bar, and dragging the new font files there.
Important
.gz extension, it is compressed and cannot be used until uncompressed. To do this, use the gunzip command or double-click the file and drag the font to a directory in Nautilus.
35.4.2. Core X Font System
xfs) to provide fonts to X client applications.
FontPath directive within the Files section of the /etc/X11/xorg.conf configuration file. Refer to Section 35.3.1.4, “Files” for more information about the FontPath entry.
xfs server on a specified port to acquire font information. For this reason, the xfs service must be running for X to start. For more about configuring services for a particular runlevel, refer to Chapter 18, Controlling Access to Services.
35.4.2.1. xfs Configuration
/etc/rc.d/init.d/xfs script starts the xfs server. Several options can be configured within its configuration file, /etc/X11/fs/config.
alternate-servers— Specifies a list of alternate font servers to be used if this font server is not available. A comma must separate each font server in a list.catalogue— Specifies an ordered list of font paths to use. A comma must separate each font path in a list.Use the string:unscaledimmediately after the font path to make the unscaled fonts in that path load first. Then specify the entire path again, so that other scaled fonts are also loaded.client-limit— Specifies the maximum number of clients the font server services. The default is10.clone-self— Allows the font server to clone a new version of itself when theclient-limitis hit. By default, this option ison.default-point-size— Specifies the default point size for any font that does not specify this value. The value for this option is set in decipoints. The default of120corresponds to a 12 point font.default-resolutions— Specifies a list of resolutions supported by the X server. Each resolution in the list must be separated by a comma.deferglyphs— Specifies whether to defer loading glyphs (the graphic used to visually represent a font). To disable this feature usenone, to enable this feature for all fonts useall, or to turn this feature on only for 16-bit fonts use16.error-file— Specifies the path and file name of a location wherexfserrors are logged.no-listen— Preventsxfsfrom listening to particular protocols. By default, this option is set totcpto preventxfsfrom listening on TCP ports for security reasons.Note
Ifxfsis used to serve fonts over the network, remove this line.port— Specifies the TCP port thatxfslistens on ifno-listendoes not exist or is commented out.use-syslog— Specifies whether to use the system error log.
35.4.2.2. Adding Fonts to xfs
xfs), follow these steps:
- If it does not already exist, create a directory called
/usr/share/fonts/local/using the following command as root:mkdir /usr/share/fonts/local/If creating the/usr/share/fonts/local/directory is necessary, it must be added to thexfspath using the following command as root:chkfontpath --add /usr/share/fonts/local/ - Copy the new font file into the
/usr/share/fonts/local/directory - Update the font information by issuing the following command as root:
ttmkfdir -d /usr/share/fonts/local/ -o /usr/share/fonts/local/fonts.scale - Reload the
xfsfont server configuration file by issuing the following command as root:service xfs reload
35.5. Runlevels and X
35.5.1. Runlevel 3
startx. The startx command is a front-end to the xinit command, which launches the X server (Xorg) and connects X client applications to it. Because the user is already logged into the system at runlevel 3, startx does not launch a display manager or authenticate users. Refer to Section 35.5.2, “Runlevel 5” for more information about display managers.
startx command is executed, it searches for the .xinitrc file in the user's home directory to define the desktop environment and possibly other X client applications to run. If no .xinitrc file is present, it uses the system default /etc/X11/xinit/xinitrc file instead.
xinitrc script then searches for user-defined files and default system files, including .Xresources, .Xmodmap, and .Xkbmap in the user's home directory, and Xresources, Xmodmap, and Xkbmap in the /etc/X11/ directory. The Xmodmap and Xkbmap files, if they exist, are used by the xmodmap utility to configure the keyboard. The Xresources file is read to assign specific preference values to applications.
xinitrc script executes all scripts located in the /etc/X11/xinit/xinitrc.d/ directory. One important script in this directory is xinput.sh, which configures settings such as the default language.
xinitrc script attempts to execute .Xclients in the user's home directory and turns to /etc/X11/xinit/Xclients if it cannot be found. The purpose of the Xclients file is to start the desktop environment or, possibly, just a basic window manager. The .Xclients script in the user's home directory starts the user-specified desktop environment in the .Xclients-default file. If .Xclients does not exist in the user's home directory, the standard /etc/X11/xinit/Xclients script attempts to start another desktop environment, trying GNOME first and then KDE followed by twm.
35.5.2. Runlevel 5
GNOME— The default display manager for Red Hat Enterprise Linux,GNOMEallows the user to configure language settings, shutdown, restart or log in to the system.KDE— KDE's display manager which allows the user to shutdown, restart or log in to the system.xdm— A very basic display manager which only lets the user log in to the system.
prefdm script determines the preferred display manager by referencing the /etc/sysconfig/desktop file. A list of options for this file is available in this file:
/usr/share/doc/initscripts-<version-number>/sysconfig.txtinitscripts package.
/etc/X11/xdm/Xsetup_0 file to set up the login screen. Once the user logs into the system, the /etc/X11/xdm/GiveConsole script runs to assign ownership of the console to the user. Then, the /etc/X11/xdm/Xsession script runs to accomplish many of the tasks normally performed by the xinitrc script when starting X from runlevel 3, including setting system and user resources, as well as running the scripts in the /etc/X11/xinit/xinitrc.d/ directory.
GNOME or KDE display managers by selecting it from the menu item (accessed by selecting System (on the panel) > > > ). If the desktop environment is not specified in the display manager, the /etc/X11/xdm/Xsession script checks the .xsession and .Xclients files in the user's home directory to decide which desktop environment to load. As a last resort, the /etc/X11/xinit/Xclients file is used to select a desktop environment or window manager to use in the same way as runlevel 3.
:0) and logs out, the /etc/X11/xdm/TakeConsole script runs and reassigns ownership of the console to the root user. The original display manager, which continues running after the user logged in, takes control by spawning a new display manager. This restarts the X server, displays a new login window, and starts the entire process over again.
/usr/share/doc/gdm-<version-number>/README (where <version-number> is the version number for the gdm package installed) and the xdm man page.
35.6. Additional Resources
35.6.1. Installed Documentation
/usr/share/X11/doc/— contains detailed documentation on the X Window System architecture, as well as how to get additional information about the Xorg project as a new user.man xorg.conf— Contains information about thexorg.confconfiguration files, including the meaning and syntax for the different sections within the files.man Xorg— Describes theXorgdisplay server.
35.6.2. Useful Websites
- http://www.X.org/ — Home page of the X.Org Foundation, which produces the X11R7.1 release of the X Window System. The X11R7.1 release is bundled with Red Hat Enterprise Linux to control the necessary hardware and provide a GUI environment.
- http://dri.sourceforge.net/ — Home page of the DRI (Direct Rendering Infrastructure) project. The DRI is the core hardware 3D acceleration component of X.
- http://www.gnome.org/ — Home of the GNOME project.
- http://www.kde.org/ — Home of the KDE desktop environment.
Chapter 36. X Window System Configuration
system-config-display at a shell prompt (for example, in an XTerm or GNOME terminal). If the X Window System is not running, a small version of X is started to run the program.
36.1. Display Settings
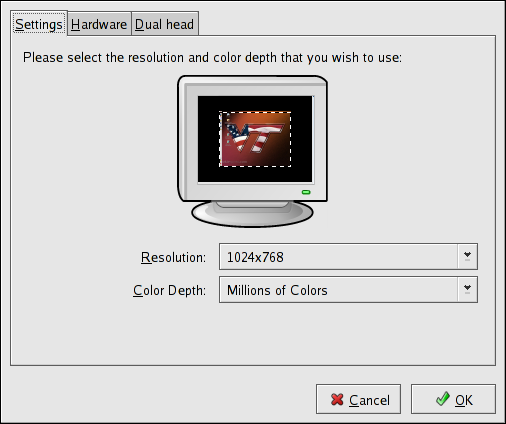
Figure 36.1. Display Settings
36.2. Display Hardware Settings
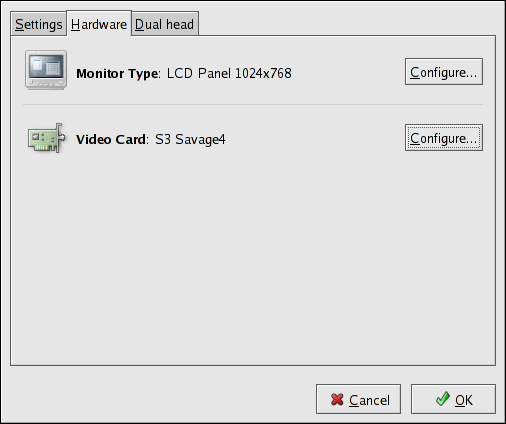
Figure 36.2. Display Hardware Settings
36.3. Dual Head Display Settings
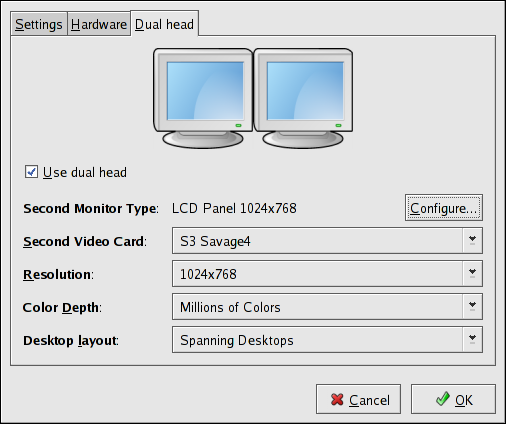
Figure 36.3. Dual Head Display Settings
Chapter 37. Users and Groups
37.1. User and Group Configuration
system-config-users RPM package installed. To start the User Manager from the desktop, go to System (on the panel) > > . You can also type the command system-config-users at a shell prompt (for example, in an XTerm or a GNOME terminal).
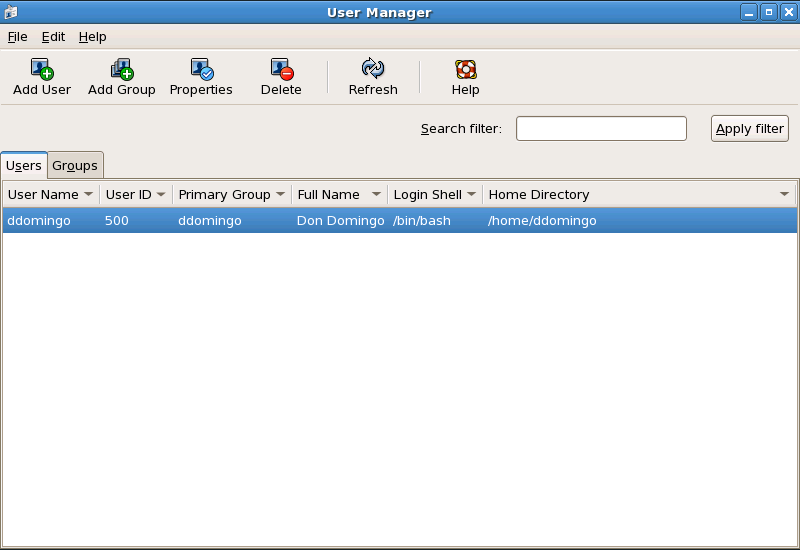
Figure 37.1. User Manager
37.1.1. Adding a New User
Note
/bin/bash. The default home directory is /home/<username>/. You can change the home directory that is created for the user, or you can choose not to create the home directory by unselecting Create home directory.
/etc/skel/ directory into the new home directory.
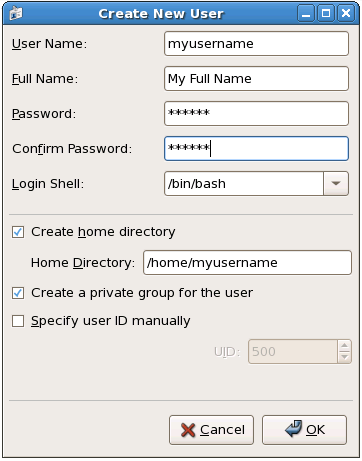
Figure 37.2. New User
37.1.2. Modifying User Properties
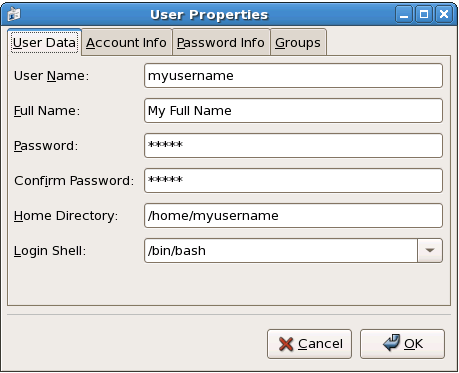
Figure 37.3. User Properties
- User Data — Shows the basic user information configured when you added the user. Use this tab to change the user's full name, password, home directory, or login shell.
- Password Info — Displays the date that the user's password last changed. To force the user to change passwords after a certain number of days, select Enable password expiration and enter a desired value in the Days before change required: field. The number of days before the user's password expires, the number of days before the user is warned to change passwords, and days before the account becomes inactive can also be changed.
37.1.3. Adding a New Group
Figure 37.4. New Group
37.1.4. Modifying Group Properties
Figure 37.5. Group Properties
37.2. User and Group Management Tools
system-config-users). For more information on User Manager, refer to Section 37.1, “User and Group Configuration”.
useradd,usermod, anduserdel— Industry-standard methods of adding, deleting and modifying user accountsgroupadd,groupmod, andgroupdel— Industry-standard methods of adding, deleting, and modifying user groupsgpasswd— Industry-standard method of administering the/etc/groupfilepwck,grpck— Tools used for the verification of the password, group, and associated shadow filespwconv,pwunconv— Tools used for the conversion of passwords to shadow passwords and back to standard passwords
37.2.1. Command Line Configuration
37.2.2. Adding a User
useradd are detailed in Table 37.1, “useradd Command Line Options”.
| Option | Description |
|---|---|
-c '<comment>' | <comment> can be replaced with any string. This option is generally used to specify the full name of a user. |
-d <home-dir> | Home directory to be used instead of default /home/<username>/ |
-e <date> | Date for the account to be disabled in the format YYYY-MM-DD |
-f <days> | Number of days after the password expires until the account is disabled. If 0 is specified, the account is disabled immediately after the password expires. If -1 is specified, the account is not be disabled after the password expires. |
-g <group-name> | Group name or group number for the user's default group. The group must exist prior to being specified here. |
-G <group-list> | List of additional (other than default) group names or group numbers, separated by commas, of which the user is a member. The groups must exist prior to being specified here. |
-m | Create the home directory if it does not exist. |
-M | Do not create the home directory. |
-n | Do not create a user private group for the user. |
-r | Create a system account with a UID less than 500 and without a home directory |
-p <password> | The password encrypted with crypt |
-s | User's login shell, which defaults to /bin/bash |
-u <uid> | User ID for the user, which must be unique and greater than 499 |
37.2.3. Adding a Group
groupadd:
groupadd <group-name>groupadd are detailed in Table 37.2, “groupadd Command Line Options”.
| Option | Description |
|---|---|
-g <gid> | Group ID for the group, which must be unique and greater than 499 |
-r | Create a system group with a GID less than 500 |
-f | When used with -g <gid> and <gid> already exists, groupadd will choose another unique <gid> for the group. |
37.2.4. Password Aging
chage command with an option from Table 37.3, “chage Command Line Options”, followed by the username.
Important
chage command. For more information, see Section 37.6, “Shadow Passwords”.
| Option | Description |
|---|---|
-m <days> | Specifies the minimum number of days between which the user must change passwords. If the value is 0, the password does not expire. |
-M <days> | Specifies the maximum number of days for which the password is valid. When the number of days specified by this option plus the number of days specified with the -d option is less than the current day, the user must change passwords before using the account. |
-d <days> | Specifies the number of days since January 1, 1970 the password was changed |
-I <days> | Specifies the number of inactive days after the password expiration before locking the account. If the value is 0, the account is not locked after the password expires. |
-E <date> | Specifies the date on which the account is locked, in the format YYYY-MM-DD. Instead of the date, the number of days since January 1, 1970 can also be used. |
-W <days> | Specifies the number of days before the password expiration date to warn the user. |
-l | Lists current account aging settings. |
Note
chage command is followed directly by a username (with no options), it displays the current password aging values and allows them to be changed interactively.
- Set up an initial password — There are two common approaches to this step. The administrator can assign a default password or assign a null password.To assign a default password, use the following steps:
- Start the command line Python interpreter with the
pythoncommand. It displays the following:Python 2.4.3 (#1, Jul 21 2006, 08:46:09) [GCC 4.1.1 20060718 (Red Hat 4.1.1-9)] on linux2 Type "help", "copyright", "credits" or "license" for more information. >>>
- At the prompt, type the following commands. Replace <password> with the password to encrypt and <salt> with a random combination of at least 2 of the following: any alphanumeric character, the slash (/) character or a dot (.):
import cryptprint crypt.crypt("<password>","<salt>")The output is the encrypted password, similar to'12CsGd8FRcMSM'. - Press Ctrl-D to exit the Python interpreter.
- At the shell, enter the following command (replacing <encrypted-password> with the encrypted output of the Python interpreter):
usermod -p "<encrypted-password>" <username>
Alternatively, you can assign a null password instead of an initial password. To do this, use the following command:usermod -p "" usernameWarning
Using a null password, while convenient, is a highly unsecure practice, as any third party can log in first an access the system using the unsecure username. Always make sure that the user is ready to log in before unlocking an account with a null password. - Force immediate password expiration — Type the following command:
chage -d 0 usernameThis command sets the value for the date the password was last changed to the epoch (January 1, 1970). This value forces immediate password expiration no matter what password aging policy, if any, is in place.
37.2.5. Explaining the Process
useradd juan is issued on a system that has shadow passwords enabled:
- A new line for
juanis created in/etc/passwd. The line has the following characteristics:- It begins with the username
juan. - There is an
xfor the password field indicating that the system is using shadow passwords. - A UID greater than 499 is created. (Under Red Hat Enterprise Linux, UIDs and GIDs below 500 are reserved for system use.)
- A GID greater than 499 is created.
- The optional GECOS information is left blank.
- The home directory for
juanis set to/home/juan/. - The default shell is set to
/bin/bash.
- A new line for
juanis created in/etc/shadow. The line has the following characteristics:- It begins with the username
juan. - Two exclamation points (
!!) appear in the password field of the/etc/shadowfile, which locks the account.Note
If an encrypted password is passed using the-pflag, it is placed in the/etc/shadowfile on the new line for the user. - The password is set to never expire.
- A new line for a group named
juanis created in/etc/group. A group with the same name as a user is called a user private group. For more information on user private groups, refer to Section 37.1.1, “Adding a New User”.The line created in/etc/grouphas the following characteristics:- It begins with the group name
juan. - An
xappears in the password field indicating that the system is using shadow group passwords. - The GID matches the one listed for user
juanin/etc/passwd.
- A new line for a group named
juanis created in/etc/gshadow. The line has the following characteristics:- It begins with the group name
juan. - An exclamation point (
!) appears in the password field of the/etc/gshadowfile, which locks the group. - All other fields are blank.
- A directory for user
juanis created in the/home/directory. This directory is owned by userjuanand groupjuan. However, it has read, write, and execute privileges only for the userjuan. All other permissions are denied. - The files within the
/etc/skel/directory (which contain default user settings) are copied into the new/home/juan/directory.
juan exists on the system. To activate it, the administrator must next assign a password to the account using the passwd command and, optionally, set password aging guidelines.
37.3. Standard Users
/etc/passwd file by an Everything installation. The groupid (GID) in this table is the primary group for the user. See Section 37.4, “Standard Groups” for a listing of standard groups.
| User | UID | GID | Home Directory | Shell |
|---|---|---|---|---|
| root | 0 | 0 | /root | /bin/bash |
| bin | 1 | 1 | /bin | /sbin/nologin |
| daemon | 2 | 2 | /sbin | /sbin/nologin |
| adm | 3 | 4 | /var/adm | /sbin/nologin |
| lp | 4 | 7 | /var/spool/lpd | /sbin/nologin |
| sync | 5 | 0 | /sbin | /bin/sync |
| shutdown | 6 | 0 | /sbin | /sbin/shutdown |
| halt | 7 | 0 | /sbin | /sbin/halt |
| 8 | 12 | /var/spool/mail | /sbin/nologin | |
| news | 9 | 13 | /etc/news | |
| uucp | 10 | 14 | /var/spool/uucp | /sbin/nologin |
| operator | 11 | 0 | /root | /sbin/nologin |
| games | 12 | 100 | /usr/games | /sbin/nologin |
| gopher | 13 | 30 | /var/gopher | /sbin/nologin |
| ftp | 14 | 50 | /var/ftp | /sbin/nologin |
| nobody | 99 | 99 | / | /sbin/nologin |
| rpm | 37 | 37 | /var/lib/rpm | /sbin/nologin |
| vcsa | 69 | 69 | /dev | /sbin/nologin |
| dbus | 81 | 81 | / | /sbin/nologin |
| ntp | 38 | 38 | /etc/ntp | /sbin/nologin |
| canna | 39 | 39 | /var/lib/canna | /sbin/nologin |
| nscd | 28 | 28 | / | /sbin/nologin |
| rpc | 32 | 32 | / | /sbin/nologin |
| postfix | 89 | 89 | /var/spool/postfix | /sbin/nologin |
| mailman | 41 | 41 | /var/mailman | /sbin/nologin |
| named | 25 | 25 | /var/named | /bin/false |
| amanda | 33 | 6 | var/lib/amanda/ | /bin/bash |
| postgres | 26 | 26 | /var/lib/pgsql | /bin/bash |
| exim | 93 | 93 | /var/spool/exim | /sbin/nologin |
| sshd | 74 | 74 | /var/empty/sshd | /sbin/nologin |
| rpcuser | 29 | 29 | /var/lib/nfs | /sbin/nologin |
| nsfnobody | 65534 | 65534 | /var/lib/nfs | /sbin/nologin |
| pvm | 24 | 24 | /usr/share/pvm3 | /bin/bash |
| apache | 48 | 48 | /var/www | /sbin/nologin |
| xfs | 43 | 43 | /etc/X11/fs | /sbin/nologin |
| gdm | 42 | 42 | /var/gdm | /sbin/nologin |
| htt | 100 | 101 | /usr/lib/im | /sbin/nologin |
| mysql | 27 | 27 | /var/lib/mysql | /bin/bash |
| webalizer | 67 | 67 | /var/www/usage | /sbin/nologin |
| mailnull | 47 | 47 | /var/spool/mqueue | /sbin/nologin |
| smmsp | 51 | 51 | /var/spool/mqueue | /sbin/nologin |
| squid | 23 | 23 | /var/spool/squid | /sbin/nologin |
| ldap | 55 | 55 | /var/lib/ldap | /bin/false |
| netdump | 34 | 34 | /var/crash | /bin/bash |
| pcap | 77 | 77 | /var/arpwatch | /sbin/nologin |
| radiusd | 95 | 95 | / | /bin/false |
| radvd | 75 | 75 | / | /sbin/nologin |
| quagga | 92 | 92 | /var/run/quagga | /sbin/login |
| wnn | 49 | 49 | /var/lib/wnn | /sbin/nologin |
| dovecot | 97 | 97 | /usr/libexec/dovecot | /sbin/nologin |
37.4. Standard Groups
/etc/group file.
| Group | GID | Members |
|---|---|---|
| root | 0 | root |
| bin | 1 | root, bin, daemon |
| daemon | 2 | root, bin, daemon |
| sys | 3 | root, bin, adm |
| adm | 4 | root, adm, daemon |
| tty | 5 | |
| disk | 6 | root |
| lp | 7 | daemon, lp |
| mem | 8 | |
| kmem | 9 | |
| wheel | 10 | root |
| 12 | mail, postfix, exim | |
| news | 13 | news |
| uucp | 14 | uucp |
| man | 15 | |
| games | 20 | |
| gopher | 30 | |
| dip | 40 | |
| ftp | 50 | |
| lock | 54 | |
| nobody | 99 | |
| users | 100 | |
| rpm | 37 | |
| utmp | 22 | |
| floppy | 19 | |
| vcsa | 69 | |
| dbus | 81 | |
| ntp | 38 | |
| canna | 39 | |
| nscd | 28 | |
| rpc | 32 | |
| postdrop | 90 | |
| postfix | 89 | |
| mailman | 41 | |
| exim | 93 | |
| named | 25 | |
| postgres | 26 | |
| sshd | 74 | |
| rpcuser | 29 | |
| nfsnobody | 65534 | |
| pvm | 24 | |
| apache | 48 | |
| xfs | 43 | |
| gdm | 42 | |
| htt | 101 | |
| mysql | 27 | |
| webalizer | 67 | |
| mailnull | 47 | |
| smmsp | 51 | |
| squid | 23 | |
| ldap | 55 | |
| netdump | 34 | |
| pcap | 77 | |
| quaggavt | 102 | |
| quagga | 92 | |
| radvd | 75 | |
| slocate | 21 | |
| wnn | 49 | |
| dovecot | 97 | |
| radiusd | 95 |
37.5. User Private Groups
/etc/bashrc file. Traditionally on UNIX systems, the umask is set to 022, which allows only the user who created the file or directory to make modifications. Under this scheme, all other users, including members of the creator's group, are not allowed to make any modifications. However, under the UPG scheme, this "group protection" is not necessary since every user has their own private group.
37.5.1. Group Directories
/usr/share/emacs/site-lisp/ directory. Some people are trusted to modify the directory, but certainly not everyone is trusted. First create an emacs group, as in the following command:
groupadd emacsemacs group, type:
chown -R root.emacs /usr/share/emacs/site-lispgpasswd command:
gpasswd -a <username> emacschmod 775 /usr/share/emacs/site-lispemacs). Use the following command:
chmod 2775 /usr/share/emacs/site-lispemacs group can create and edit files in the /usr/share/emacs/site-lisp/ directory without the administrator having to change file permissions every time users write new files.
37.6. Shadow Passwords
shadow-utils package). Doing so enhances the security of system authentication files. For this reason, the installation program enables shadow passwords by default.
- Improves system security by moving encrypted password hashes from the world-readable
/etc/passwdfile to/etc/shadow, which is readable only by the root user. - Stores information about password aging.
- Allows the use the
/etc/login.defsfile to enforce security policies.
shadow-utils package work properly whether or not shadow passwords are enabled. However, since password aging information is stored exclusively in the /etc/shadow file, any commands which create or modify password aging information do not work.
chagegpasswd/usr/sbin/usermod-eor-foptions/usr/sbin/useradd-eor-foptions
37.7. Additional Resources
37.7.1. Installed Documentation
- Related man pages — There are a number of man pages for the various applications and configuration files involved with managing users and groups. Some of the more important man pages have been listed here:
- User and Group Administrative Applications
man chage— A command to modify password aging policies and account expiration.man gpasswd— A command to administer the/etc/groupfile.man groupadd— A command to add groups.man grpck— A command to verify the/etc/groupfile.man groupdel— A command to remove groups.man groupmod— A command to modify group membership.man pwck— A command to verify the/etc/passwdand/etc/shadowfiles.man pwconv— A tool to convert standard passwords to shadow passwords.man pwunconv— A tool to convert shadow passwords to standard passwords.man useradd— A command to add users.man userdel— A command to remove users.man usermod— A command to modify users.
- Configuration Files
man 5 group— The file containing group information for the system.man 5 passwd— The file containing user information for the system.man 5 shadow— The file containing passwords and account expiration information for the system.
Chapter 38. Printer Configuration
Important
cupsd.conf man page documents configuration of a CUPS server. It includes directives for enabling SSL support. However, CUPS does not allow control of the protocol versions used. Due to the vulnerability described in Resolution for POODLE SSLv3.0 vulnerability (CVE-2014-3566) for components that do not allow SSLv3 to be disabled via configuration settings, Red Hat recommends that you do not rely on this for security. It is recommend that you use stunnel to provide a secure tunnel and disable SSLv3.
SSH as described in Section 20.7.1, “X11 Forwarding”.
system-config-printer at a shell prompt.
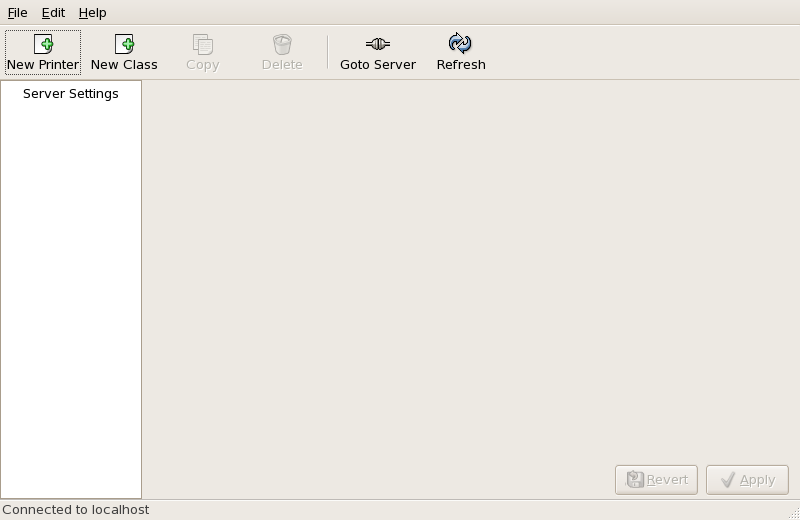
Figure 38.1. Printer Configuration Tool
- — a printer connected directly to the network through HP JetDirect or Appsocket interface instead of a computer.
- — a printer that can be accessed over a TCP/IP network via the Internet Printing Protocol (for example, a printer attached to another Red Hat Enterprise Linux system running CUPS on the network).
- — a printer attached to a different UNIX system that can be accessed over a TCP/IP network (for example, a printer attached to another Red Hat Enterprise Linux system running LPD on the network).
- — a printer attached to a different system which is sharing a printer over an SMB network (for example, a printer attached to a Microsoft Windows™ machine).
- — a printer connected directly to the network through HP JetDirect instead of a computer.
Important
38.1. Adding a Local Printer
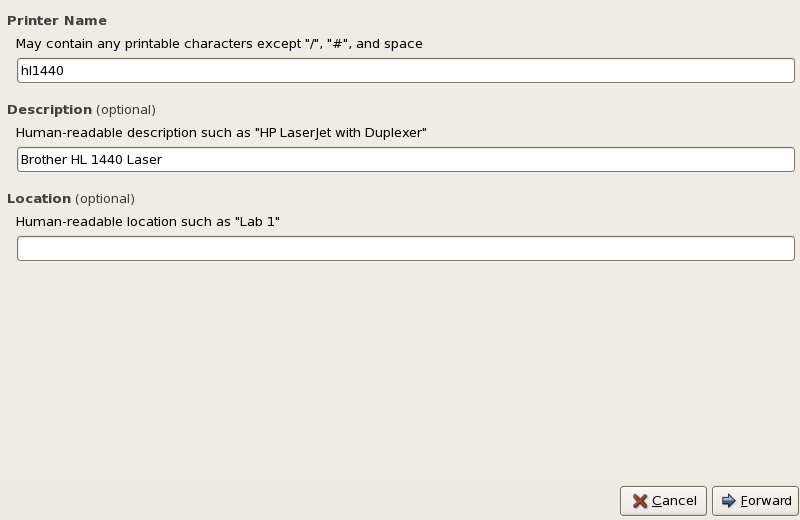
Figure 38.2. Adding a Printer
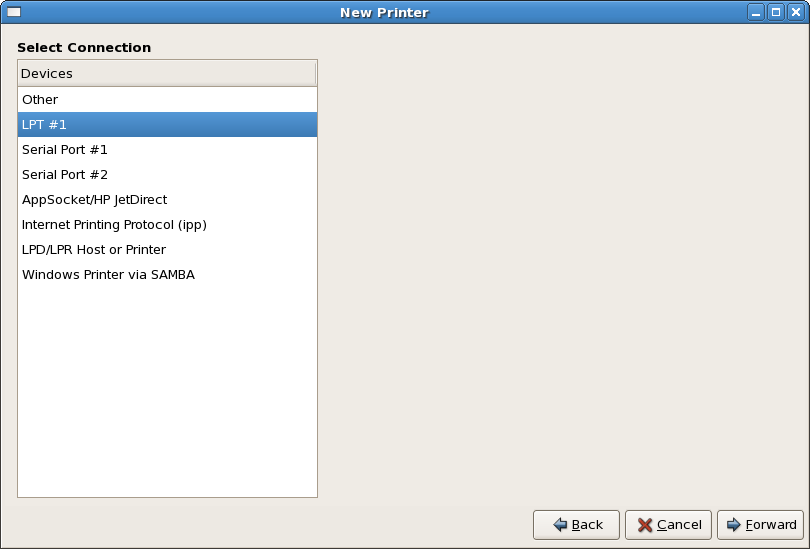
Figure 38.3. Adding a Local Printer
38.2. Adding an IPP Printer
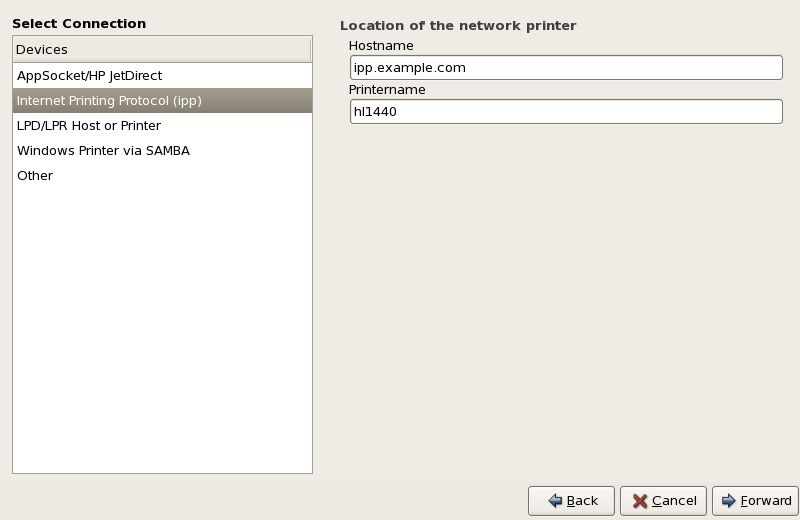
Figure 38.4. Adding an IPP Printer
38.3. Adding a Samba (SMB) Printer
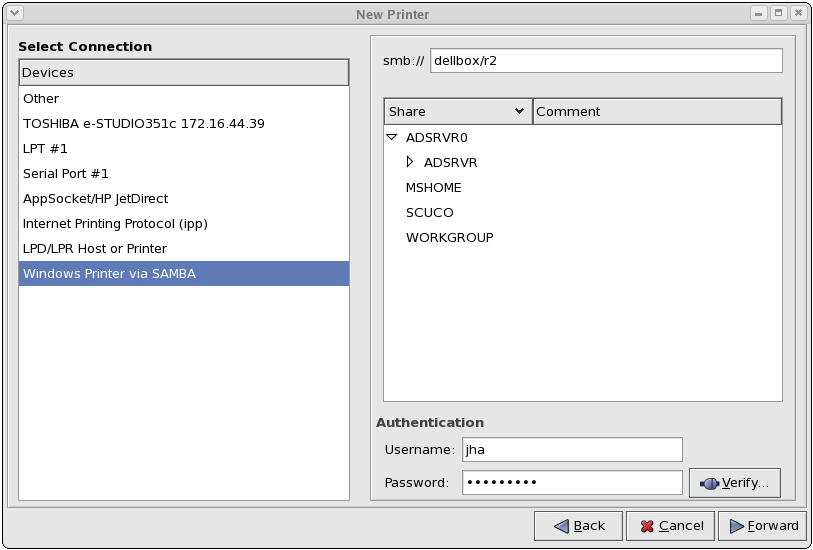
Figure 38.5. Adding a SMB Printer
 ) beside a Workgroup to expand it. From the expanded list, select a printer.
dellbox, while the printer share is r2.
guest for Windows servers, or nobody for Samba servers.
Warning
38.4. Adding a JetDirect Printer
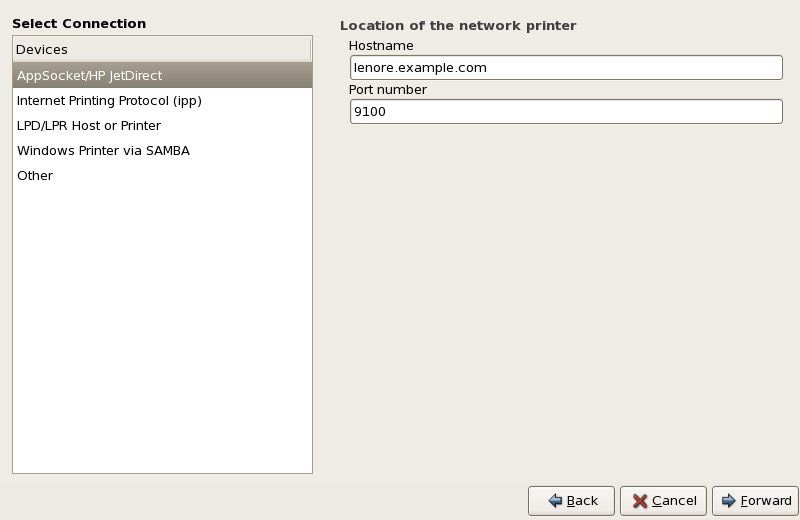
Figure 38.6. Adding a JetDirect Printer
- Hostname — The hostname or IP address of the JetDirect printer.
- Port Number — The port on the JetDirect printer that is listening for print jobs. The default port is 9100.
38.5. Selecting the Printer Model and Finishing
- Select a Printer from database - If you select this option, choose the make of your printer from the list of Makes. If your printer make is not listed, choose Generic.
- Provide PPD file - A PostScript Printer Description (PPD) file may also be provided with your printer. This file is normally provided by the manufacturer. If you are provided with a PPD file, you can choose this option and use the browser bar below the option description to select the PPD file.
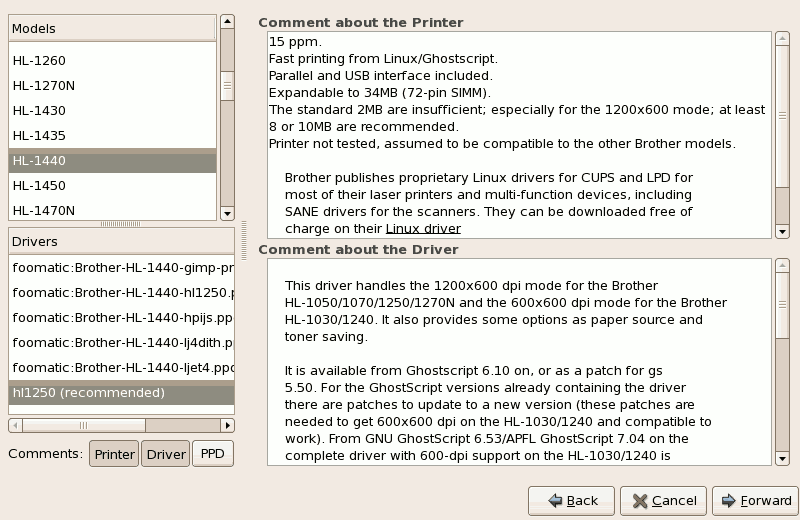
Figure 38.7. Selecting a Printer Model
38.5.1. Confirming Printer Configuration
38.6. Printing a Test Page
38.7. Modifying Existing Printers
38.7.1. The Settings Tab
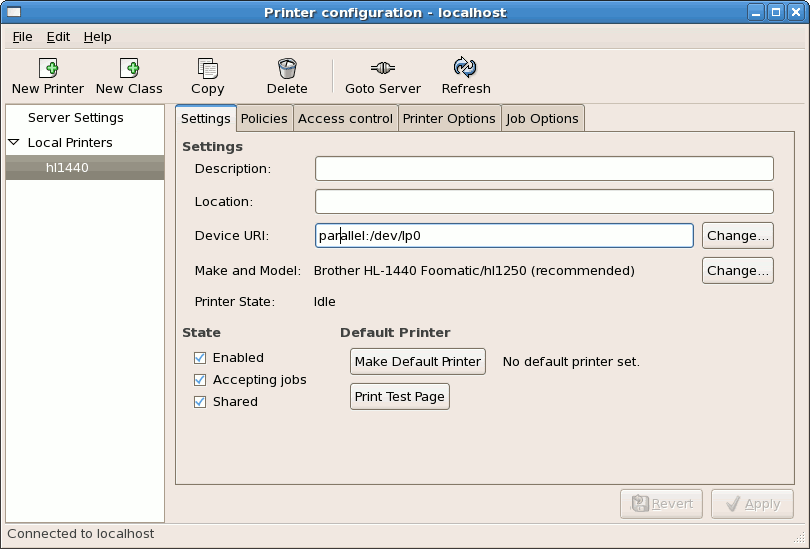
Figure 38.8. Settings Tab
38.7.2. The Policies Tab
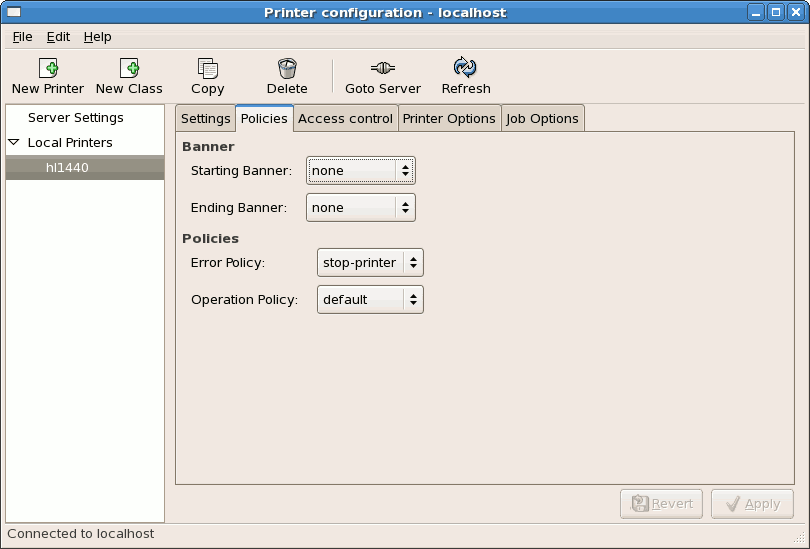
Figure 38.9. Policies Tab
38.7.3. The Access Control Tab
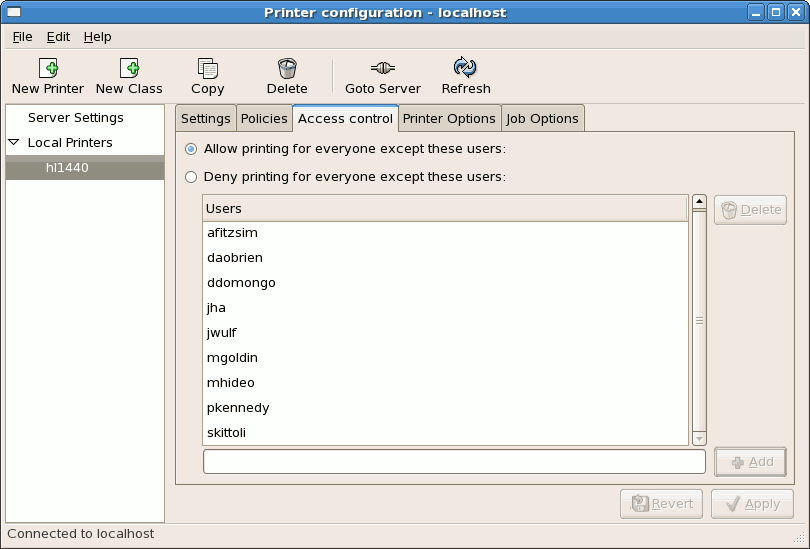
Figure 38.10. Access Control Tab
38.7.4. The Printer and Job OptionsTab
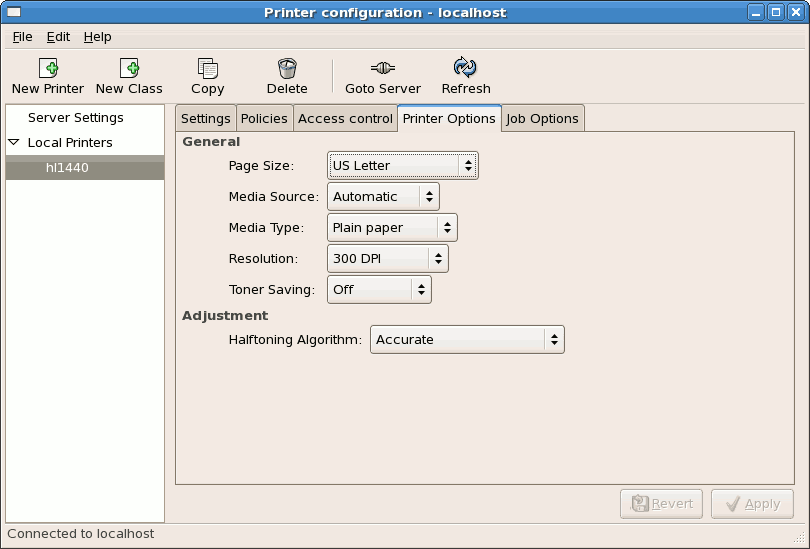
Figure 38.11. Printer Options Tab
- Page Size — Allows the paper size to be selected. The options include US Letter, US Legal, A3, and A4
- Media Source — set to Automatic by default. Change this option to use paper from a different tray.
- Media Type — Allows you to change paper type. Options include: Plain, thick, bond, and transparency.
- Resolution — Configure the quality and detail of the printout. Default is 300 dots per inch (dpi).
- Toner Saving — Choose whether the printer uses less toner to conserve resources.
38.8. Managing Print Jobs
Figure 38.12. GNOME Print Status
lpq. The last few lines look similar to the following:
Example 38.1. Example of lpq output
Rank Owner/ID Class Job Files Size Time active user@localhost+902 A 902 sample.txt 2050 01:20:46
lpq and then use the command lprm job number. For example, lprm 902 would cancel the print job in Example 38.1, “Example of lpq output”. You must have proper permissions to cancel a print job. You can not cancel print jobs that were started by other users unless you are logged in as root on the machine to which the printer is attached.
lpr sample.txt prints the text file sample.txt. The print filter determines what type of file it is and converts it into a format the printer can understand.
38.9. Additional Resources
38.9.1. Installed Documentation
map lpr— The manual page for thelprcommand that allows you to print files from the command line.man lprm— The manual page for the command line utility to remove print jobs from the print queue.man mpage— The manual page for the command line utility to print multiple pages on one sheet of paper.man cupsd— The manual page for the CUPS printer daemon.man cupsd.conf— The manual page for the CUPS printer daemon configuration file.man classes.conf— The manual page for the class configuration file for CUPS.
38.9.2. Useful Websites
- http://www.linuxprinting.org — GNU/Linux Printing contains a large amount of information about printing in Linux.
- http://www.cups.org/ — Documentation, FAQs, and newsgroups about CUPS.
Chapter 39. Automated Tasks
locate command is updated daily. A system administrator can use automated tasks to perform periodic backups, monitor the system, run custom scripts, and more.
cron, at, and batch.
39.1. Cron
vixie-cron RPM package must be installed and the crond service must be running. To determine if the package is installed, use the rpm -q vixie-cron command. To determine if the service is running, use the command /sbin/service crond status.
39.1.1. Configuring Cron Jobs
/etc/crontab, contains the following lines:
SHELL=/bin/bash PATH=/sbin:/bin:/usr/sbin:/usr/bin MAILTO=root HOME=/ # run-parts 01 * * * * root run-parts /etc/cron.hourly 02 4 * * * root run-parts /etc/cron.daily 22 4 * * 0 root run-parts /etc/cron.weekly 42 4 1 * * root run-parts /etc/cron.monthly
SHELL variable tells the system which shell environment to use (in this example the bash shell), while the PATH variable defines the path used to execute commands. The output of the cron jobs are emailed to the username defined with the MAILTO variable. If the MAILTO variable is defined as an empty string (MAILTO=""), email is not sent. The HOME variable can be used to set the home directory to use when executing commands or scripts.
/etc/crontab file represents a job and has the following format:
minute hour day month dayofweek command
minute— any integer from 0 to 59hour— any integer from 0 to 23day— any integer from 1 to 31 (must be a valid day if a month is specified)month— any integer from 1 to 12 (or the short name of the month such as jan or feb)dayofweek— any integer from 0 to 7, where 0 or 7 represents Sunday (or the short name of the week such as sun or mon)command— the command to execute (the command can either be a command such asls /proc >> /tmp/procor the command to execute a custom script)
1-4 means the integers 1, 2, 3, and 4.
3, 4, 6, 8 indicates those four specific integers.
/<integer>. For example, 0-59/2 can be used to define every other minute in the minute field. Step values can also be used with an asterisk. For instance, the value */3 can be used in the month field to run the job every third month.
/etc/crontab file, the run-parts script executes the scripts in the /etc/cron.hourly/, /etc/cron.daily/, /etc/cron.weekly/, and /etc/cron.monthly/ directories on an hourly, daily, weekly, or monthly basis respectively. The files in these directories should be shell scripts.
/etc/cron.d/ directory. All files in this directory use the same syntax as /etc/crontab. Refer to Example 39.1, “Sample of /etc/crontab” for examples.
Example 39.1. Sample of /etc/crontab
# record the memory usage of the system every monday # at 3:30AM in the file /tmp/meminfo 30 3 * * mon cat /proc/meminfo >> /tmp/meminfo # run custom script the first day of every month at 4:10AM 10 4 1 * * /root/scripts/backup.sh
crontab utility. All user-defined crontabs are stored in the /var/spool/cron/ directory and are executed using the usernames of the users that created them. To create a crontab as a user, login as that user and type the command crontab -e to edit the user's crontab using the editor specified by the VISUAL or EDITOR environment variable. The file uses the same format as /etc/crontab. When the changes to the crontab are saved, the crontab is stored according to username and written to the file /var/spool/cron/username.
/etc/crontab file, the /etc/cron.d/ directory, and the /var/spool/cron/ directory every minute for any changes. If any changes are found, they are loaded into memory. Thus, the daemon does not need to be restarted if a crontab file is changed.
/etc/sysconfig/run-parts file by specifying the following parameters:
RANDOMIZE— When set to1, it enables randomize functionality. When set to0, cron job randomization is disabled.RANDOM— Specifies the initial random seed. It has to be set to an integer value greater than or equal to1.RANDOMTIME— When set to an integer value greater than or equal to1, it provides an additional level of randomization.
Example 39.2. Sample of /etc/sysconfig/run-parts - Job Randomization Setting
RANDOMIZE=1 RANDOM=4 RANDOMTIME=8
39.1.2. Controlling Access to Cron
/etc/cron.allow and /etc/cron.deny files are used to restrict access to cron. The format of both access control files is one username on each line. Whitespace is not permitted in either file. The cron daemon (crond) does not have to be restarted if the access control files are modified. The access control files are read each time a user tries to add or delete a cron job.
cron.allow exists, only users listed in it are allowed to use cron, and the cron.deny file is ignored.
cron.allow does not exist, users listed in cron.deny are not allowed to use cron.
39.1.3. Starting and Stopping the Service
/sbin/service crond start. To stop the service, use the command /sbin/service crond stop. It is recommended that you start the service at boot time. Refer to Chapter 18, Controlling Access to Services for details on starting the cron service automatically at boot time.
39.2. At and Batch
at command is used to schedule a one-time job at a specific time and the batch command is used to schedule a one-time job to be executed when the systems load average drops below 0.8.
at or batch, the at RPM package must be installed, and the atd service must be running. To determine if the package is installed, use the rpm -q at command. To determine if the service is running, use the command /sbin/service atd status.
39.2.1. Configuring At Jobs
at time, where time is the time to execute the command.
- HH:MM format — For example, 04:00 specifies 4:00 a.m. If the time is already past, it is executed at the specified time the next day.
- midnight — Specifies 12:00 a.m.
- noon — Specifies 12:00 p.m.
- teatime — Specifies 4:00 p.m.
- month-name day year format — For example, January 15 2002 specifies the 15th day of January in the year 2002. The year is optional.
- MMDDYY, MM/DD/YY, or MM.DD.YY formats — For example, 011502 for the 15th day of January in the year 2002.
- now + time — time is in minutes, hours, days, or weeks. For example, now + 5 days specifies that the command should be executed at the same time five days from now.
/usr/share/doc/at-<version>/timespec text file.
at command with the time argument, the at> prompt is displayed. Type the command to execute, press Enter, and type Ctrl+D . Multiple commands can be specified by typing each command followed by the Enter key. After typing all the commands, press Enter to go to a blank line and type Ctrl+D . Alternatively, a shell script can be entered at the prompt, pressing Enter after each line in the script, and typing Ctrl+D on a blank line to exit. If a script is entered, the shell used is the shell set in the user's SHELL environment, the user's login shell, or /bin/sh (whichever is found first).
atq to view pending jobs. Refer to Section 39.2.3, “Viewing Pending Jobs” for more information.
at command can be restricted. For more information, refer to Section 39.2.5, “Controlling Access to At and Batch” for details.
39.2.2. Configuring Batch Jobs
batch command.
batch command, the at> prompt is displayed. Type the command to execute, press Enter, and type Ctrl+D . Multiple commands can be specified by typing each command followed by the Enter key. After typing all the commands, press Enter to go to a blank line and type Ctrl+D . Alternatively, a shell script can be entered at the prompt, pressing Enter after each line in the script, and typing Ctrl+D on a blank line to exit. If a script is entered, the shell used is the shell set in the user's SHELL environment, the user's login shell, or /bin/sh (whichever is found first). As soon as the load average is below 0.8, the set of commands or script is executed.
atq to view pending jobs. Refer to Section 39.2.3, “Viewing Pending Jobs” for more information.
batch command can be restricted. For more information, refer to Section 39.2.5, “Controlling Access to At and Batch” for details.
39.2.3. Viewing Pending Jobs
at and batch jobs, use the atq command. The atq command displays a list of pending jobs, with each job on a line. Each line follows the job number, date, hour, job class, and username format. Users can only view their own jobs. If the root user executes the atq command, all jobs for all users are displayed.
39.2.4. Additional Command Line Options
at and batch include:
| Option | Description |
|---|---|
-f | Read the commands or shell script from a file instead of specifying them at the prompt. |
-m | Send email to the user when the job has been completed. |
-v | Display the time that the job is executed. |
39.2.5. Controlling Access to At and Batch
/etc/at.allow and /etc/at.deny files can be used to restrict access to the at and batch commands. The format of both access control files is one username on each line. Whitespace is not permitted in either file. The at daemon (atd) does not have to be restarted if the access control files are modified. The access control files are read each time a user tries to execute the at or batch commands.
at and batch commands, regardless of the access control files.
at.allow exists, only users listed in it are allowed to use at or batch, and the at.deny file is ignored.
at.allow does not exist, users listed in at.deny are not allowed to use at or batch.
39.2.6. Starting and Stopping the Service
at service, use the command /sbin/service atd start. To stop the service, use the command /sbin/service atd stop. It is recommended that you start the service at boot time. Refer to Chapter 18, Controlling Access to Services for details on starting the cron service automatically at boot time.
39.3. Additional Resources
39.3.1. Installed Documentation
cronman page — overview of cron.crontabman pages in sections 1 and 5 — The man page in section 1 contains an overview of thecrontabfile. The man page in section 5 contains the format for the file and some example entries./usr/share/doc/at-<version>/timespeccontains more detailed information about the times that can be specified for cron jobs.atman page — description ofatandbatchand their command line options.
Chapter 40. Log Files
syslogd. A list of log messages maintained by syslogd can be found in the /etc/syslog.conf configuration file.
40.1. Locating Log Files
/var/log/ directory. Some applications such as httpd and samba have a directory within /var/log/ for their log files.
logrotate package contains a cron task that automatically rotates log files according to the /etc/logrotate.conf configuration file and the configuration files in the /etc/logrotate.d/ directory. By default, it is configured to rotate every week and keep four weeks worth of previous log files.
40.2. Viewing Log Files
Vi or Emacs. Some log files are readable by all users on the system; however, root privileges are required to read most log files.
gnome-system-log at a shell prompt.
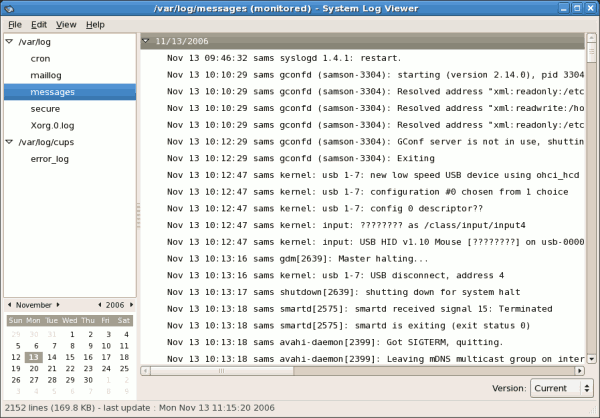
Figure 40.1. System Log Viewer
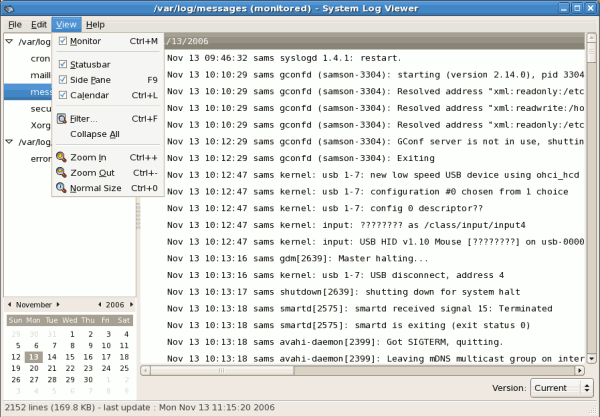
Figure 40.2. System Log Viewer - View Menu
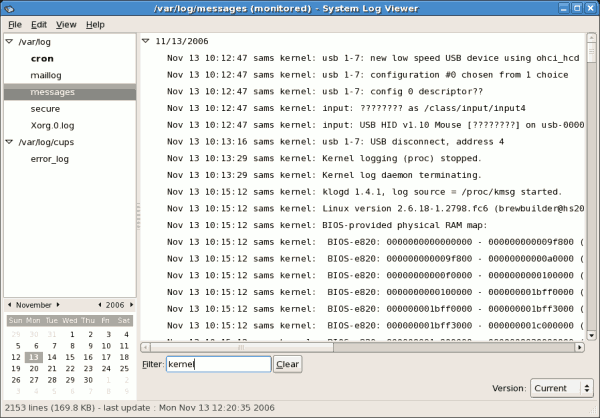
Figure 40.3. System Log Viewer - Filter
40.3. Adding a Log File
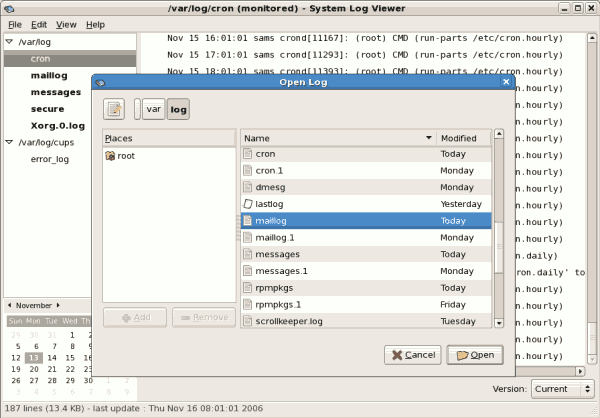
Figure 40.4. Adding a Log File
40.4. Monitoring Log Files
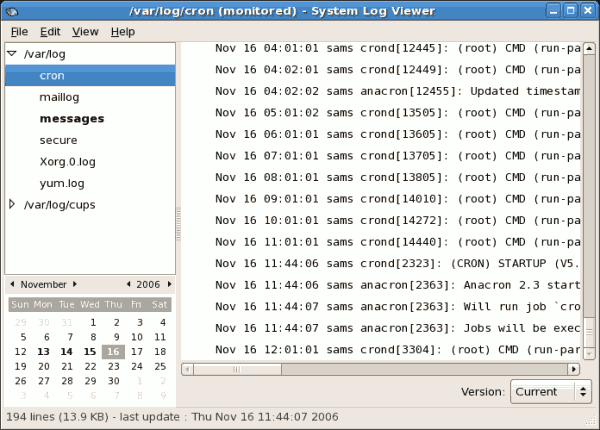
Figure 40.5. Log File Alert
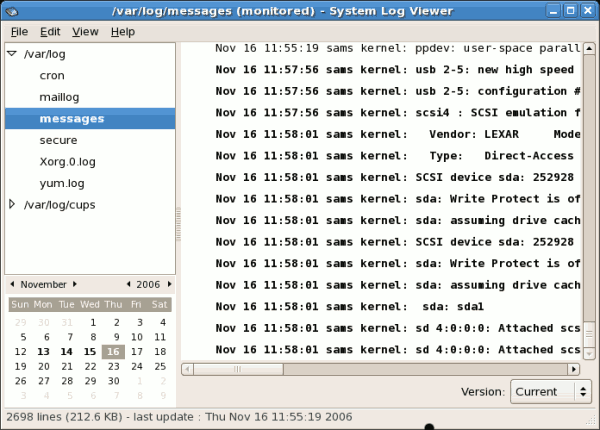
Figure 40.6. Log file contents
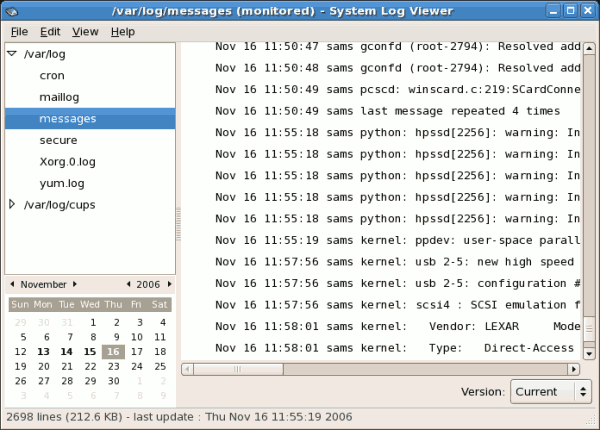
Figure 40.7. Log file contents after five seconds
Part V. System Monitoring
Chapter 41. SystemTap
41.1. Introduction
41.2. Implementation
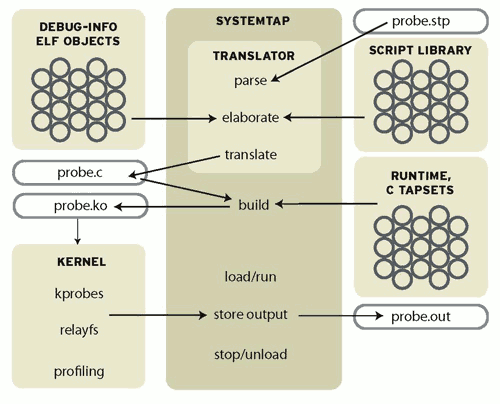
Figure 41.1. Flow of Data in SystemTap
41.3. Using SystemTap
stap.
41.3.1. Tracing
41.3.1.1. Where to Probe
stapprobes man page for details. All these events are named using a unified syntax that looks like dot-separated parameterized identifiers:
| Event | Description |
|---|---|
begin | The startup of the systemtap session. |
end | The end of the systemtap session. |
kernel.function("sys_open") | The entry to the function named sys_open in the kernel. |
syscall.close.return | The return from the close system call.. |
module("ext3").statement(0xdeadbeef) | The addressed instruction in the ext3 filesystem driver. |
timer.ms(200) | A timer that fires every 200 milliseconds. |
net/socket.c in the kernel. The kernel.function probe point lets you express that easily, since systemtap examines the kernel's debugging information to relate object code to source code. It works like a debugger: if you can name or place it, you can probe it. Use kernel.function("*@net/socket.c") for the function entries, and kernel.function("*@net/socket.c").return for the exits. Note the use of wildcards in the function name part, and the subsequent @FILENAME part. You can also put wildcards into the file name, and even add a colon (:) and a line number, if you want to restrict the search that precisely. Since systemtap will put a separate probe in every place that matches a probe point, a few wildcards can expand to hundreds or thousands of probes, so be careful what you ask for.
probe keyword introduces a probe point, or a comma-separated list of them. The following { and } braces enclose the handler for all listed probe points.
stap -v FILE. Terminate it any time with ^C. (The -v option tells systemtap to print more verbose messages during its processing. Try the -h option to see more options.)
41.3.1.2. What to Print
Chapter 42. Gathering System Information
42.1. System Processes
ps ax command displays a list of current system processes, including processes owned by other users. To display the owner alongside each process, use the ps aux command. This list is a static list; in other words, it is a snapshot of what was running when you invoked the command. If you want a constantly updated list of running processes, use top as described below.
ps output can be long. To prevent it from scrolling off the screen, you can pipe it through less:
ps aux | lessps command in combination with the grep command to see if a process is running. For example, to determine if Emacs is running, use the following command:
ps ax | grep emacstop command displays currently running processes and important information about them including their memory and CPU usage. The list is both real-time and interactive. An example of output from the top command is provided as follows:
top - 15:02:46 up 35 min, 4 users, load average: 0.17, 0.65, 1.00
Tasks: 110 total, 1 running, 107 sleeping, 0 stopped, 2 zombie
Cpu(s): 41.1% us, 2.0% sy, 0.0% ni, 56.6% id, 0.0% wa, 0.3% hi, 0.0% si
Mem: 775024k total, 772028k used, 2996k free, 68468k buffers
Swap: 1048568k total, 176k used, 1048392k free, 441172k cached
PID USER PR NI VIRT RES SHR S %CPU %MEM TIME+ COMMAND
4624 root 15 0 40192 18m 7228 S 28.4 2.4 1:23.21 X
4926 mhideo 15 0 55564 33m 9784 S 13.5 4.4 0:25.96 gnome-terminal
6475 mhideo 16 0 3612 968 760 R 0.7 0.1 0:00.11 top
4920 mhideo 15 0 20872 10m 7808 S 0.3 1.4 0:01.61 wnck-applet
1 root 16 0 1732 548 472 S 0.0 0.1 0:00.23 init
2 root 34 19 0 0 0 S 0.0 0.0 0:00.00 ksoftirqd/0
3 root 5 -10 0 0 0 S 0.0 0.0 0:00.03 events/0
4 root 6 -10 0 0 0 S 0.0 0.0 0:00.02 khelper
5 root 5 -10 0 0 0 S 0.0 0.0 0:00.00 kacpid
29 root 5 -10 0 0 0 S 0.0 0.0 0:00.00 kblockd/0
47 root 16 0 0 0 0 S 0.0 0.0 0:01.74 pdflush
50 root 11 -10 0 0 0 S 0.0 0.0 0:00.00 aio/0
30 root 15 0 0 0 0 S 0.0 0.0 0:00.05 khubd
49 root 16 0 0 0 0 S 0.0 0.0 0:01.44 kswapd0top, press the q key.
top commands” contains useful interactive commands that you can use with top. For more information, refer to the top(1) manual page.
| Command | Description |
|---|---|
| Space | Immediately refresh the display |
| h | Display a help screen |
| k | Kill a process. You are prompted for the process ID and the signal to send to it. |
| n | Change the number of processes displayed. You are prompted to enter the number. |
| u | Sort by user. |
| M | Sort by memory usage. |
| P | Sort by CPU usage. |
top, you can use the GNOME System Monitor. To start it from the desktop, select > > or type gnome-system-monitor at a shell prompt (such as an XTerm). Select the Process Listing tab.
- Stop a process.
- Continue or start a process.
- End a processes.
- Kill a process.
- Change the priority of a selected process.
- Edit the System Monitor preferences. These include changing the interval seconds to refresh the list and selecting process fields to display in the System Monitor window.
- View only active processes.
- View all processes.
- View my processes.
- View process dependencies.
- Hide a process.
- View hidden processes.
- View memory maps.
- View the files opened by the selected process.
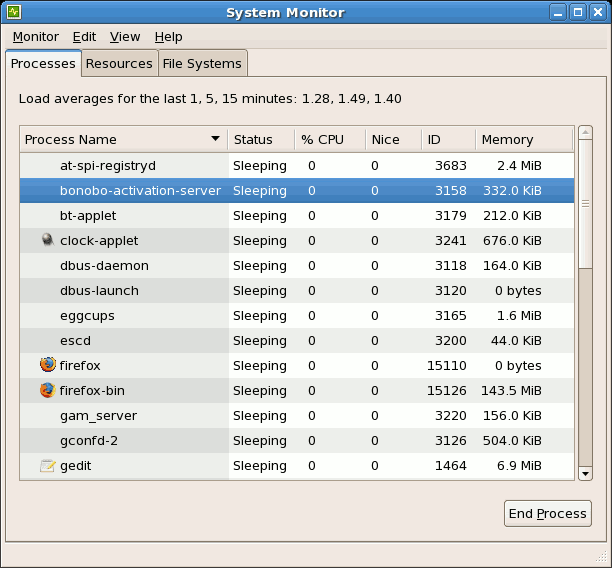
Figure 42.1. GNOME System Monitor
42.2. Memory Usage
free command displays the total amount of physical memory and swap space for the system as well as the amount of memory that is used, free, shared, in kernel buffers, and cached.
total used free shared buffers cached Mem: 645712 549720 95992 0 176248 224452 -/+ buffers/cache: 149020 496692 Swap: 1310712 0 1310712
free -m shows the same information in megabytes, which are easier to read.
total used free shared buffers cached Mem: 630 536 93 0 172 219 -/+ buffers/cache: 145 485 Swap: 1279 0 1279
free, you can use the GNOME System Monitor. To start it from the desktop, go to > > or type gnome-system-monitor at a shell prompt (such as an XTerm). Click on the Resources tab.
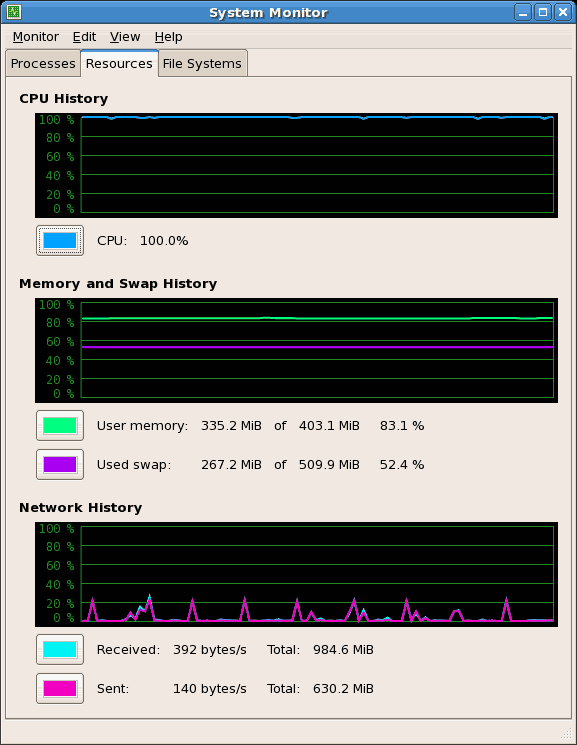
Figure 42.2. GNOME System Monitor - Resources tab
42.3. File Systems
df command reports the system's disk space usage. If you type the command df at a shell prompt, the output looks similar to the following:
Filesystem 1K-blocks Used Available Use% Mounted on
/dev/mapper/VolGroup00-LogVol00
11675568 6272120 4810348 57% / /dev/sda1
100691 9281 86211 10% /boot
none 322856 0 322856 0% /dev/shmdf -h. The -h argument stands for human-readable format. The output looks similar to the following:
Filesystem Size Used Avail Use% Mounted on
/dev/mapper/VolGroup00-LogVol00
12G 6.0G 4.6G 57% / /dev/sda1
99M 9.1M 85M 10% /boot
none 316M 0 316M 0% /dev/shm/dev/shm. This entry represents the system's virtual memory file system.
du command displays the estimated amount of space being used by files in a directory. If you type du at a shell prompt, the disk usage for each of the subdirectories is displayed in a list. The grand total for the current directory and subdirectories are also shown as the last line in the list. If you do not want to see the totals for all the subdirectories, use the command du -hs to see only the grand total for the directory in human-readable format. Use the du --help command to see more options.
gnome-system-monitor at a shell prompt (such as an XTerm). Select the File Systems tab to view the system's partitions. The figure below illustrates the File Systems tab.
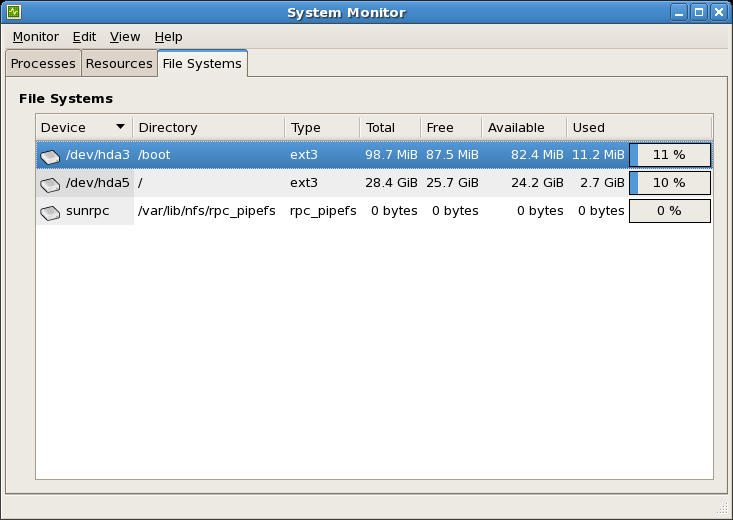
Figure 42.3. GNOME System Monitor - File Systems
42.4. Hardware
hwbrowser at a shell prompt. As shown in Figure 42.4, “Hardware Browser”, it displays your CD-ROM devices, diskette drives, hard drives and their partitions, network devices, pointing devices, system devices, and video cards. Click on the category name in the left menu, and the information is displayed.
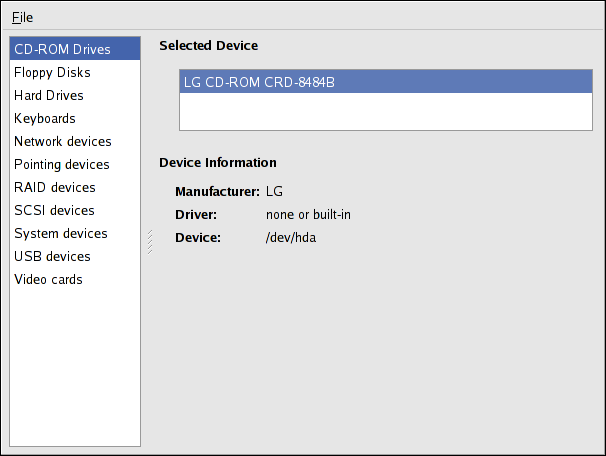
Figure 42.4. Hardware Browser
hal-device-manager. Depending on your installation preferences, the graphical menu above may start this application or the Hardware Browser when clicked. The figure below illustrates the Device Manager window.
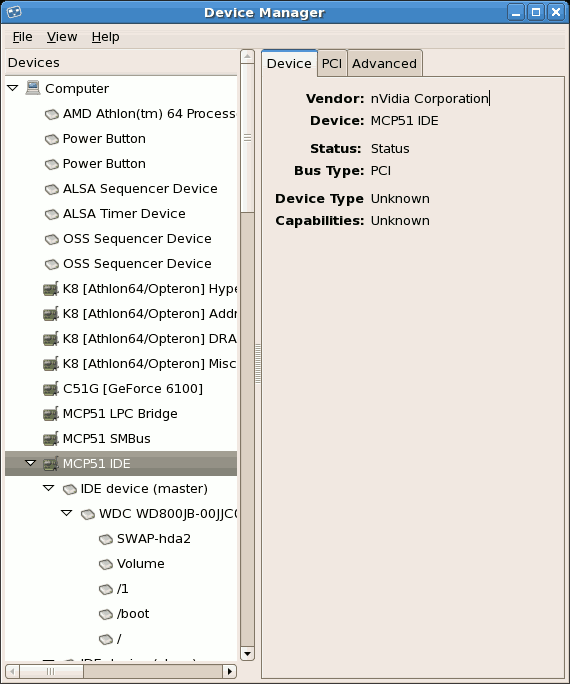
Figure 42.5. Device Manager
lspci command to list all PCI devices. Use the command lspci -v for more verbose information or lspci -vv for very verbose output.
lspci can be used to determine the manufacturer, model, and memory size of a system's video card:
00:00.0 Host bridge: ServerWorks CNB20LE Host Bridge (rev 06) 00:00.1 Host bridge: ServerWorks CNB20LE Host Bridge (rev 06) 00:01.0 VGA compatible controller: S3 Inc. Savage 4 (rev 04) 00:02.0 Ethernet controller: Intel Corp. 82557/8/9 [Ethernet Pro 100] (rev 08) 00:0f.0 ISA bridge: ServerWorks OSB4 South Bridge (rev 50) 00:0f.1 IDE interface: ServerWorks OSB4 IDE Controller 00:0f.2 USB Controller: ServerWorks OSB4/CSB5 OHCI USB Controller (rev 04) 01:03.0 SCSI storage controller: Adaptec AIC-7892P U160/m (rev 02) 01:05.0 RAID bus controller: IBM ServeRAID Controller
lspci is also useful to determine the network card in your system if you do not know the manufacturer or model number.
42.5. Additional Resources
42.5.1. Installed Documentation
ps --help— Displays a list of options that can be used withps.topmanual page — Typeman topto learn more abouttopand its many options.freemanual page — typeman freeto learn more aboutfreeand its many options.dfmanual page — Typeman dfto learn more about thedfcommand and its many options.dumanual page — Typeman duto learn more about theducommand and its many options.lspcimanual page — Typeman lspcito learn more about thelspcicommand and its many options.
Chapter 43. OProfile
oprofile RPM package must be installed to use this tool.
- Use of shared libraries — Samples for code in shared libraries are not attributed to the particular application unless the
--separate=libraryoption is used. - Performance monitoring samples are inexact — When a performance monitoring register triggers a sample, the interrupt handling is not precise like a divide by zero exception. Due to the out-of-order execution of instructions by the processor, the sample may be recorded on a nearby instruction.
opreportdoes not associate samples for inline functions' properly —opreportuses a simple address range mechanism to determine which function an address is in. Inline function samples are not attributed to the inline function but rather to the function the inline function was inserted into.- OProfile accumulates data from multiple runs — OProfile is a system-wide profiler and expects processes to start up and shut down multiple times. Thus, samples from multiple runs accumulate. Use the command
opcontrol --resetto clear out the samples from previous runs. - Non-CPU-limited performance problems — OProfile is oriented to finding problems with CPU-limited processes. OProfile does not identify processes that are asleep because they are waiting on locks or for some other event to occur (for example an I/O device to finish an operation).
43.1. Overview of Tools
oprofile package.
| Command | Description |
|---|---|
ophelp |
Displays available events for the system's processor along with a brief description of each.
|
opimport |
Converts sample database files from a foreign binary format to the native format for the system. Only use this option when analyzing a sample database from a different architecture.
|
opannotate | Creates annotated source for an executable if the application was compiled with debugging symbols. Refer to Section 43.5.4, “Using opannotate” for details. |
opcontrol |
Configures what data is collected. Refer to Section 43.2, “Configuring OProfile” for details.
|
opreport |
Retrieves profile data. Refer to Section 43.5.1, “Using
opreport” for details.
|
oprofiled |
Runs as a daemon to periodically write sample data to disk.
|
43.2. Configuring OProfile
opcontrol utility to configure OProfile. As the opcontrol commands are executed, the setup options are saved to the /root/.oprofile/daemonrc file.
43.2.1. Specifying the Kernel
opcontrol --setup --vmlinux=/usr/lib/debug/lib/modules/`uname -r`/vmlinuxNote
debuginfo package must be installed (which contains the uncompressed kernel) in order to monitor the kernel.
opcontrol --setup --no-vmlinuxoprofile kernel module, if it is not already loaded, and creates the /dev/oprofile/ directory, if it does not already exist. Refer to Section 43.6, “Understanding /dev/oprofile/” for details about this directory.
Note
oprofile module can be loaded from it.
43.2.2. Setting Events to Monitor
| Processor | cpu_type | Number of Counters |
|---|---|---|
| Pentium Pro | i386/ppro | 2 |
| Pentium II | i386/pii | 2 |
| Pentium III | i386/piii | 2 |
| Pentium 4 (non-hyper-threaded) | i386/p4 | 8 |
| Pentium 4 (hyper-threaded) | i386/p4-ht | 4 |
| Athlon | i386/athlon | 4 |
| AMD64 | x86-64/hammer | 4 |
| Itanium | ia64/itanium | 4 |
| Itanium 2 | ia64/itanium2 | 4 |
| TIMER_INT | timer | 1 |
| IBM eServer iSeries and pSeries | timer | 1 |
| ppc64/power4 | 8 | |
| ppc64/power5 | 6 | |
| ppc64/970 | 8 | |
| IBM eServer S/390 and S/390x | timer | 1 |
| IBM eServer zSeries | timer | 1 |
timer is used as the processor type if the processor does not have supported performance monitoring hardware.
timer is used, events cannot be set for any processor because the hardware does not have support for hardware performance counters. Instead, the timer interrupt is used for profiling.
timer is not used as the processor type, the events monitored can be changed, and counter 0 for the processor is set to a time-based event by default. If more than one counter exists on the processor, the counters other than counter 0 are not set to an event by default. The default events monitored are shown in Table 43.3, “Default Events”.
| Processor | Default Event for Counter | Description |
|---|---|---|
| Pentium Pro, Pentium II, Pentium III, Athlon, AMD64 | CPU_CLK_UNHALTED | The processor's clock is not halted |
| Pentium 4 (HT and non-HT) | GLOBAL_POWER_EVENTS | The time during which the processor is not stopped |
| Itanium 2 | CPU_CYCLES | CPU Cycles |
| TIMER_INT | (none) | Sample for each timer interrupt |
| ppc64/power4 | CYCLES | Processor Cycles |
| ppc64/power5 | CYCLES | Processor Cycles |
| ppc64/970 | CYCLES | Processor Cycles |
ls -d /dev/oprofile/[0-9]*ophelpopcontrol:
opcontrol --event=<event-name>:<sample-rate>ophelp, and replace <sample-rate> with the number of events between samples.
43.2.2.1. Sampling Rate
cpu_type is not timer, each event can have a sampling rate set for it. The sampling rate is the number of events between each sample snapshot.
opcontrol --event=<event-name>:<sample-rate>Warning
43.2.2.2. Unit Masks
ophelp command. The values for each unit mask are listed in hexadecimal format. To specify more than one unit mask, the hexadecimal values must be combined using a bitwise or operation.
opcontrol --event=<event-name>:<sample-rate>:<unit-mask>43.2.3. Separating Kernel and User-space Profiles
opcontrol --event=<event-name>:<sample-rate>:<unit-mask>:0opcontrol --event=<event-name>:<sample-rate>:<unit-mask>:1opcontrol --event=<event-name>:<sample-rate>:<unit-mask>:<kernel>:0opcontrol --event=<event-name>:<sample-rate>:<unit-mask>:<kernel>:1opcontrol --separate=<choice>none— do not separate the profiles (default)library— generate per-application profiles for librarieskernel— generate per-application profiles for the kernel and kernel modulesall— generate per-application profiles for libraries and per-application profiles for the kernel and kernel modules
--separate=library is used, the sample file name includes the name of the executable as well as the name of the library.
Note
oprofile is restarted.
43.3. Starting and Stopping OProfile
opcontrol --startUsing log file /var/lib/oprofile/oprofiled.log Daemon started. Profiler running.
/root/.oprofile/daemonrc are used.
oprofiled, is started; it periodically writes the sample data to the /var/lib/oprofile/samples/ directory. The log file for the daemon is located at /var/lib/oprofile/oprofiled.log.
opcontrol --shutdown43.4. Saving Data
opcontrol --save=<name>/var/lib/oprofile/samples/name/ is created and the current sample files are copied to it.
43.5. Analyzing the Data
oprofiled, collects the samples and writes them to the /var/lib/oprofile/samples/ directory. Before reading the data, make sure all data has been written to this directory by executing the following command as root:
opcontrol --dump/bin/bash becomes:
\{root\}/bin/bash/\{dep\}/\{root\}/bin/bash/CPU_CLK_UNHALTED.100000opreportopannotate
Warning
oparchive can be used to address this problem.
43.5.1. Using opreport
opreport tool provides an overview of all the executables being profiled.
Profiling through timer interrupt TIMER:0| samples| %| ------------------ 25926 97.5212 no-vmlinux 359 1.3504 pi 65 0.2445 Xorg 62 0.2332 libvte.so.4.4.0 56 0.2106 libc-2.3.4.so 34 0.1279 libglib-2.0.so.0.400.7 19 0.0715 libXft.so.2.1.2 17 0.0639 bash 8 0.0301 ld-2.3.4.so 8 0.0301 libgdk-x11-2.0.so.0.400.13 6 0.0226 libgobject-2.0.so.0.400.7 5 0.0188 oprofiled 4 0.0150 libpthread-2.3.4.so 4 0.0150 libgtk-x11-2.0.so.0.400.13 3 0.0113 libXrender.so.1.2.2 3 0.0113 du 1 0.0038 libcrypto.so.0.9.7a 1 0.0038 libpam.so.0.77 1 0.0038 libtermcap.so.2.0.8 1 0.0038 libX11.so.6.2 1 0.0038 libgthread-2.0.so.0.400.7 1 0.0038 libwnck-1.so.4.9.0
opreport man page for a list of available command line options, such as the -r option used to sort the output from the executable with the smallest number of samples to the one with the largest number of samples.
43.5.2. Using opreport on a Single Executable
opreport:
opreport <mode> <executable>-l- List sample data by symbols. For example, the following is part of the output from running the command
opreport -l /lib/tls/libc-<version>.so:samples % symbol name 12 21.4286 __gconv_transform_utf8_internal 5 8.9286 _int_malloc 4 7.1429 malloc 3 5.3571 __i686.get_pc_thunk.bx 3 5.3571 _dl_mcount_wrapper_check 3 5.3571 mbrtowc 3 5.3571 memcpy 2 3.5714 _int_realloc 2 3.5714 _nl_intern_locale_data 2 3.5714 free 2 3.5714 strcmp 1 1.7857 __ctype_get_mb_cur_max 1 1.7857 __unregister_atfork 1 1.7857 __write_nocancel 1 1.7857 _dl_addr 1 1.7857 _int_free 1 1.7857 _itoa_word 1 1.7857 calc_eclosure_iter 1 1.7857 fopen@@GLIBC_2.1 1 1.7857 getpid 1 1.7857 memmove 1 1.7857 msort_with_tmp 1 1.7857 strcpy 1 1.7857 strlen 1 1.7857 vfprintf 1 1.7857 write
The first column is the number of samples for the symbol, the second column is the percentage of samples for this symbol relative to the overall samples for the executable, and the third column is the symbol name.To sort the output from the largest number of samples to the smallest (reverse order), use-rin conjunction with the-loption. -i <symbol-name>- List sample data specific to a symbol name. For example, the following output is from the command
opreport -l -i __gconv_transform_utf8_internal /lib/tls/libc-<version>.so:samples % symbol name 12 100.000 __gconv_transform_utf8_internal
The first line is a summary for the symbol/executable combination.The first column is the number of samples for the memory symbol. The second column is the percentage of samples for the memory address relative to the total number of samples for the symbol. The third column is the symbol name. -d- List sample data by symbols with more detail than
-l. For example, the following output is from the commandopreport -l -d __gconv_transform_utf8_internal /lib/tls/libc-<version>.so:vma samples % symbol name 00a98640 12 100.000 __gconv_transform_utf8_internal 00a98640 1 8.3333 00a9868c 2 16.6667 00a9869a 1 8.3333 00a986c1 1 8.3333 00a98720 1 8.3333 00a98749 1 8.3333 00a98753 1 8.3333 00a98789 1 8.3333 00a98864 1 8.3333 00a98869 1 8.3333 00a98b08 1 8.3333
The data is the same as the-loption except that for each symbol, each virtual memory address used is shown. For each virtual memory address, the number of samples and percentage of samples relative to the number of samples for the symbol is displayed. -x<symbol-name>- Exclude the comma-separated list of symbols from the output.
session:<name>- Specify the full path to the session or a directory relative to the
/var/lib/oprofile/samples/directory.
43.5.3. Getting more detailed output on the modules
~]$ opreport /ext3
CPU: AMD64 processors, speed 797.948 MHz (estimated)
Counted DATA_CACHE_ACCESSES events (Data cache accesses) with a unit mask of 0x00 (No unit mask) count 500000
Counted DATA_CACHE_MISSES events (Data cache misses) with a unit mask of 0x00 (No unit mask) count 500000
DATA_CACHE_ACC...|DATA_CACHE_MIS...|
samples| %| samples| %|
------------------------------------
148721 100.000 1493 100.000 ext3~]# ln -s /lib/modules/`uname -r`/kernel/fs/ext3/ext3.ko /ext3
Then the detailed information can be obtained with:
~]# opreport image:/ext3 -l|more
warning: could not check that the binary file /ext3 has not been modified since the profile was taken. Results may be inaccurate.
CPU: AMD64 processors, speed 797.948 MHz (estimated)
Counted DATA_CACHE_ACCESSES events (Data cache accesses) with a unit mask of 0x00 (No unit mask) count 500000
Counted DATA_CACHE_MISSES events (Data cache misses) with a unit mask of 0x00 (No unit mask) count 500000
samples % samples % symbol name
16728 11.2479 7 0.4689 ext3_group_sparse
16454 11.0637 4 0.2679 ext3_count_free_blocks
14583 9.8056 51 3.4159 ext3_fill_super
8281 5.5681 129 8.6403 ext3_ioctl
7810 5.2514 62 4.1527 ext3_write_info
7286 4.8991 67 4.4876 ext3_ordered_writepage
6509 4.3767 130 8.7073 ext3_new_inode
6378 4.2886 156 10.4488 ext3_new_block
5932 3.9887 87 5.8272 ext3_xattr_block_list
...43.5.4. Using opannotate
opannotate tool tries to match the samples for particular instructions to the corresponding lines in the source code. The resulting files generated should have the samples for the lines at the left. It also puts in a comment at the beginning of each function listing the total samples for the function.
-g option. By default, Red Hat Enterprise Linux packages are not compiled with this option.
opannotate is as follows:
opannotate --search-dirs <src-dir> --source <executable>opannotate man page for a list of additional command line options.
43.6. Understanding /dev/oprofile/
/dev/oprofile/ directory contains the file system for OProfile. Use the cat command to display the values of the virtual files in this file system. For example, the following command displays the type of processor OProfile detected:
cat /dev/oprofile/cpu_type/dev/oprofile/ for each counter. For example, if there are 2 counters, the directories /dev/oprofile/0/ and dev/oprofile/1/ exist.
count— The interval between samples.enabled— If 0, the counter is off and no samples are collected for it; if 1, the counter is on and samples are being collected for it.event— The event to monitor.kernel— If 0, samples are not collected for this counter event when the processor is in kernel-space; if 1, samples are collected even if the processor is in kernel-space.unit_mask— Defines which unit masks are enabled for the counter.user— If 0, samples are not collected for the counter event when the processor is in user-space; if 1, samples are collected even if the processor is in user-space.
cat command. For example:
cat /dev/oprofile/0/count43.7. Example Usage
- Determine which applications and services are used the most on a system —
opreportcan be used to determine how much processor time an application or service uses. If the system is used for multiple services but is under performing, the services consuming the most processor time can be moved to dedicated systems. - Determine processor usage — The
CPU_CLK_UNHALTEDevent can be monitored to determine the processor load over a given period of time. This data can then be used to determine if additional processors or a faster processor might improve system performance.
43.8. Graphical Interface
oprof_start command as root at a shell prompt. To use the graphical interface, you will need to have the oprofile-gui package installed.
/root/.oprofile/daemonrc, and the application exits. Exiting the application does not stop OProfile from sampling.
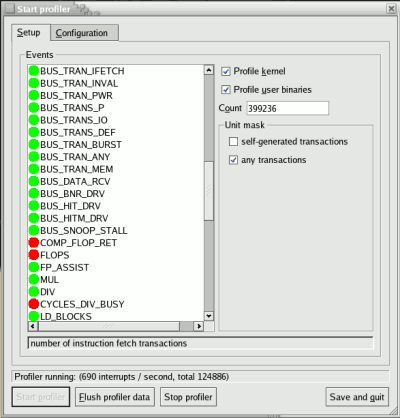
Figure 43.1. OProfile Setup
vmlinux file for the kernel to monitor in the Kernel image file text field. To configure OProfile not to monitor the kernel, select No kernel image.
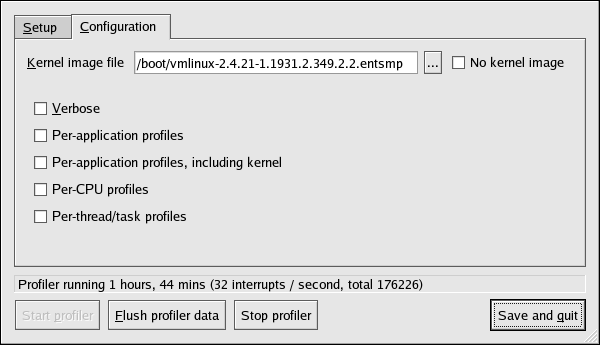
Figure 43.2. OProfile Configuration
oprofiled daemon log includes more information.
opcontrol --separate=kernel command. If Per-application shared libs samples files is selected, OProfile generates per-application profiles for libraries. This is equivalent to the opcontrol --separate=library command.
opcontrol --dump command.
43.9. Additional Resources
43.9.1. Installed Docs
/usr/share/doc/oprofile-<version>/oprofile.html— OProfile Manualoprofileman page — Discussesopcontrol,opreport,opannotate, andophelp
43.9.2. Useful Websites
- http://oprofile.sourceforge.net/ — Contains the latest documentation, mailing lists, IRC channels, and more.
Part VI. Kernel and Driver Configuration
Chapter 44. Manually Upgrading the Kernel
yum command. The Package Management Tool automatically queries the Red Hat Enterprise Linux servers and determines which packages need to be updated on your machine, including the kernel. This chapter is only useful for those individuals that require manual updating of kernel packages, without using the yum command.
Warning
Note
yum is highly recommended by Red Hat for installing upgraded kernels.
yum, refer to Chapter 15, Registering a System and Managing Subscriptions.
44.1. Overview of Kernel Packages
kernel— Contains the kernel for multi-processor systems. For x86 system, only the first 4GB of RAM is used. As such, x86 systems with over 4GB of RAM should use thekernel-PAE.kernel-devel— Contains the kernel headers and makefiles sufficient to build modules against thekernelpackage.kernel-PAE(only for i686 systems) — This package offers the following key configuration option (in addition to the options already enabled for thekernelpackage):- PAE (Physical Address Extension) support for systems with more than 4GB of RAM, and reliably up to 16GB.
Important
Physical Address Extension allows x86 processors to address up to 64GB of physical RAM, but due to differences between the Red Hat Enterprise Linux 4 and 5 kernels, only Red Hat Enterprise Linux 4 (with thekernel-hugemempackage) is able to reliably address all 64GB of memory. Additionally, the Red Hat Enterprise Linux 5 PAE variant does not allow 4GB of addressable memory per-process like the Red Hat Enterprise Linux 4kernel-hugememvariant does. However, the x86_64 kernel does not suffer from any of these limitations, and is the suggested Red Hat Enterprise Linux 5 architecture to use with large-memory systems.
kernel-PAE-devel— Contains the kernel headers and makefiles required to build modules against thekernel-PAEpackage.kernel-doc— Contains documentation files from the kernel source. Various portions of the Linux kernel and the device drivers shipped with it are documented in these files. Installation of this package provides a reference to the options that can be passed to Linux kernel modules at load time.By default, these files are placed in the/usr/share/doc/kernel-doc-<version>/directory.kernel-headers— Includes the C header files that specify the interface between the Linux kernel and userspace libraries and programs. The header files define structures and constants that are needed for building most standard programs.kernel-xen— Includes a version of the Linux kernel which is needed to run Virtualization.kernel-xen-devel— Contains the kernel headers and makefiles required to build modules against thekernel-xenpackage
Note
kernel-source package has been removed and replaced with an RPM that can only be retrieved from Red Hat Network. This *.src.rpm package must then be rebuilt locally using the rpmbuild command. For more information on obtaining and installing the kernel source package, refer to the latest updated Release Notes (including all updates) at http://www.redhat.com/docs/manuals/enterprise/
44.2. Preparing to Upgrade
/sbin/mkbootdisk `uname -r` at a shell prompt.
Note
mkbootdisk man page for more options. You can create bootable media via CD-Rs, CD-RWs, and USB flash drives, provided that your system BIOS also supports it.
rpm -qa | grep kernel at a shell prompt:
kernel-2.6.9-5.EL kernel-devel-2.6.9-5.EL kernel-utils-2.6.9-5.EL kernel-doc-2.6.9-5.EL kernel-smp-2.6.9-5.EL kernel-smp-devel-2.6.9-5.EL kernel-hugemem-devel-2.6.9-5.EL
kernel package. Refer to Section 44.1, “Overview of Kernel Packages” for descriptions of the different packages.
PAE, xen, and so forth. The <arch> is one of the following:
x86_64for the AMD64 and Intel EM64T architecturesia64for the Intel® Itanium™ architectureppc64for the IBM® eServer™ pSeries™ architectures390for the IBM® S/390® architectures390xfor the IBM® eServer™ System z® architecturei686for Intel® Pentium® II, Intel® Pentium® III, Intel® Pentium® 4, AMD Athlon®, and AMD Duron® systems
44.3. Downloading the Upgraded Kernel
- Security Errata — Refer to http://www.redhat.com/security/updates/ for information on security errata, including kernel upgrades that fix security issues.
- Via Red Hat Network — Download and install the kernel RPM packages. Red Hat Network can download the latest kernel, upgrade the kernel on the system, create an initial RAM disk image if needed, and configure the boot loader to boot the new kernel. For more information, refer to http://www.redhat.com/docs/manuals/RHNetwork/.
44.4. Performing the Upgrade
Important
-i argument with the rpm command to keep the old kernel. Do not use the -U option, since it overwrites the currently installed kernel, which creates boot loader problems. For example:
rpm -ivh kernel-<kernel version>.<arch>.rpm
44.5. Verifying the Initial RAM Disk Image
/etc/fstab, an initial RAM disk is needed. The initial RAM disk allows a modular kernel to have access to modules that it might need to boot from before the kernel has access to the device where the modules normally reside.
mkinitrd command. However, this step is performed automatically if the kernel and its associated packages are installed or upgraded from the RPM packages distributed by Red Hat; in such cases, you do not need to create the initial RAM disk manually. To verify that an initial RAM disk already exists, use the command ls -l /boot to make sure the initrd-<version>.img file was created (the version should match the version of the kernel just installed).
vmlinux file are combined into one file, which is created with the addRamDisk command. This step is performed automatically if the kernel and its associated packages are installed or upgraded from the RPM packages distributed by Red Hat, Inc.; thus, it does not need to be executed manually. To verify that it was created, use the command ls -l /boot to make sure the /boot/vmlinitrd-<kernel-version> file already exists (the <kernel-version> should match the version of the kernel just installed).
44.6. Verifying the Boot Loader
kernel RPM package configures the boot loader to boot the newly installed kernel (except for IBM eServer iSeries systems). However, it does not configure the boot loader to boot the new kernel by default.
44.6.1. x86 Systems
44.6.1.1. GRUB
/boot/grub/grub.conf contains a title section with the same version as the kernel package just installed
# Note that you do not have to rerun grub after making changes to this file
# NOTICE: You have a /boot partition. This means that
# all kernel and initrd paths are relative to /boot/, eg.
# root (hd0,0)
# kernel /vmlinuz-version ro root=/dev/hda2
# initrd /initrd-version.img
#boot=/dev/hda
default=1 timeout=10
splashimage=(hd0,0)/grub/splash.xpm.gz
title Red Hat Enterprise Linux (2.6.9-5.EL)
root (hd0,0)
kernel /vmlinuz-2.6.9-5.EL ro root=LABEL=/
initrd /initrd-2.6.9-5.EL.img
title Red Hat Enterprise Linux (2.6.9-1.906_EL)
root (hd0,0)
kernel /vmlinuz-2.6.9-1.906_EL ro root=LABEL=/
initrd /initrd-2.6.9-1.906_EL.img/boot/ partition was created, the paths to the kernel and initrd image are relative to /boot/.
default variable to the title section number for the title section that contains the new kernel. The count starts with 0. For example, if the new kernel is the first title section, set default to 0.
44.6.2. Itanium Systems
/boot/efi/EFI/redhat/elilo.conf as the configuration file. Confirm that this file contains an image section with the same version as the kernel package just installed:
prompt timeout=50 default=old image=vmlinuz-2.6.9-5.EL
label=linux
initrd=initrd-2.6.9-5.EL.img read-only
append="root=LABEL=/" image=vmlinuz-2.6.9-1.906_EL
label=old
initrd=initrd-2.6.9-1.906.img read-only
append="root=LABEL=/"default variable to the value of the label for the image section that contains the new kernel.
44.6.3. IBM S/390 and IBM System z Systems
/etc/zipl.conf as the configuration file. Confirm that the file contains a section with the same version as the kernel package just installed:
[defaultboot] default=old target=/boot/
[linux]
image=/boot/vmlinuz-2.6.9-5.EL
ramdisk=/boot/initrd-2.6.9-5.EL.img
parameters="root=LABEL=/"
[old]
image=/boot/vmlinuz-2.6.9-1.906_EL
ramdisk=/boot/initrd-2.6.9-1.906_EL.img
parameters="root=LABEL=/"default variable to the name of the section that contains the new kernel. The first line of each section contains the name in brackets.
/sbin/zipl as root to enable the changes.
44.6.4. IBM eServer iSeries Systems
/boot/vmlinitrd-<kernel-version> file is installed when you upgrade the kernel. However, you must use the dd command to configure the system to boot the new kernel:
- As root, issue the command
cat /proc/iSeries/mf/sideto determine the default side (either A, B, or C). - As root, issue the following command, where <kernel-version> is the version of the new kernel and <side> is the side from the previous command:
dd if=/boot/vmlinitrd-<kernel-version> of=/proc/iSeries/mf/<side>/vmlinux bs=8k
44.6.5. IBM eServer pSeries Systems
/etc/aboot.conf as the configuration file. Confirm that the file contains an image section with the same version as the kernel package just installed:
boot=/dev/sda1 init-message=Welcome to Red Hat Enterprise Linux! Hit <TAB> for boot options
partition=2 timeout=30 install=/usr/lib/yaboot/yaboot delay=10 nonvram
image=/vmlinux--2.6.9-5.EL
label=old
read-only
initrd=/initrd--2.6.9-5.EL.img
append="root=LABEL=/"
image=/vmlinux-2.6.9-5.EL
label=linux
read-only
initrd=/initrd-2.6.9-5.EL.img
append="root=LABEL=/"default and set it to the label of the image stanza that contains the new kernel.
Chapter 45. General Parameters and Modules
Important
kernel-smp-unsupported-<kernel-version> and kernel-hugemem-unsupported-<kernel-version> . Replace <kernel-version> with the version of the kernel installed on the system. These packages are not installed by the Red Hat Enterprise Linux installation program, and the modules provided are not supported by Red Hat, Inc.
45.1. Kernel Module Utilities
module-init-tools package is installed. Use these commands to determine if a module has been loaded successfully or when trying different modules for a piece of new hardware.
/sbin/lsmod displays a list of currently loaded modules. For example:
Module Size Used by tun 11585 1 autofs4 21573 1 hidp 16193 2 rfcomm 37849 0 l2cap 23873 10 hidp,rfcomm bluetooth 50085 5 hidp,rfcomm,l2cap sunrpc 153725 1 dm_mirror 29073 0 dm_mod 57433 1 dm_mirror video 17221 0 sbs 16257 0 i2c_ec 5569 1 sbs container 4801 0 button 7249 0 battery 10565 0 asus_acpi 16857 0 ac 5701 0 ipv6 246113 12 lp 13065 0 parport_pc 27493 1 parport 37001 2 lp,parport_pc uhci_hcd 23885 0 floppy 57317 1 sg 34653 0 snd_ens1371 26721 1 gameport 16073 1 snd_ens1371 snd_rawmidi 24897 1 snd_ens1371 snd_ac97_codec 91360 1 snd_ens1371 snd_ac97_bus 2753 1 snd_ac97_codec snd_seq_dummy 4293 0 snd_seq_oss 32705 0 serio_raw 7493 0 snd_seq_midi_event 8001 1 snd_seq_oss snd_seq 51633 5 snd_seq_dummy,snd_seq_oss,snd_seq_midi_event snd_seq_device 8781 4 snd_rawmidi,snd_seq_dummy,snd_seq_oss,snd_seq snd_pcm_oss 42849 0 snd_mixer_oss 16833 1 snd_pcm_oss snd_pcm 76485 3 snd_ens1371,snd_ac97_codec,snd_pcm_oss snd_timer 23237 2 snd_seq,snd_pcm snd 52933 12 snd_ens1371,snd_rawmidi,snd_ac97_codec,snd_seq_oss,snd_seq,snd_seq_device,snd_pcm_oss,snd_mixer_oss,snd_pcm,snd_timer soundcore 10145 1 snd i2c_piix4 8909 0 ide_cd 38625 3 snd_page_alloc 10569 1 snd_pcm i2c_core 21697 2 i2c_ec,i2c_piix4 pcnet32 34117 0 cdrom 34913 1 ide_cd mii 5825 1 pcnet32 pcspkr 3521 0 ext3 129737 2 jbd 58473 1 ext3 mptspi 17353 3 scsi_transport_spi 25025 1 mptspi mptscsih 23361 1 mptspi sd_mod 20929 16 scsi_mod 134121 5 sg,mptspi,scsi_transport_spi,mptscsih,sd_mod mptbase 52193 2 mptspi,mptscsih
/sbin/lsmod output is less verbose and easier to read than the output from viewing /proc/modules.
/sbin/modprobe command followed by the kernel module name. By default, modprobe attempts to load the module from the /lib/modules/<kernel-version>/kernel/drivers/ subdirectories. There is a subdirectory for each type of module, such as the net/ subdirectory for network interface drivers. Some kernel modules have module dependencies, meaning that other modules must be loaded first for it to load. The /sbin/modprobe command checks for these dependencies and loads the module dependencies before loading the specified module.
modprobe e100e100 module.
/sbin/modprobe executes them, use the -v option. For example:
modprobe -v e100insmod /lib/modules/2.6.9-5.EL/kernel/drivers/net/e100.ko Using /lib/modules/2.6.9-5.EL/kernel/drivers/net/e100.ko Symbol version prefix 'smp_'
/sbin/insmod command also exists to load kernel modules; however, it does not resolve dependencies. Thus, it is recommended that the /sbin/modprobe command be used.
/sbin/rmmod command followed by the module name. The rmmod utility only unloads modules that are not in use and that are not a dependency of other modules in use.
rmmod e100e100 kernel module.
modinfo. Use the command /sbin/modinfo to display information about a kernel module. The general syntax is:
modinfo [options] <module>-d, which displays a brief description of the module, and -p, which lists the parameters the module supports. For a complete list of options, refer to the modinfo man page (man modinfo).
45.2. Persistent Module Loading
/etc/modprobe.conf file. However, it is sometimes necessary to explicitly force the loading of a module at boot time.
/etc/rc.modules file at boot time, which contains various commands to load modules. The rc.modules should be used, and not rc.local because rc.modules is executed earlier in the boot process.
foo module at boot time (as root):
echo modprobe foo >> /etc/rc.moduleschmod +x /etc/rc.modules
Note
45.3. Specifying Module Parameters
e100 driver with the e100_speed_duplex=4 option.
Warning
Note
modinfo command is also useful for listing various information about a kernel module, such as version, dependencies, parameter options, and aliases.
45.4. Storage parameters
| Hardware | Module | Parameters |
|---|---|---|
| 3ware Storage Controller and 9000 series | 3w-xxxx.ko, 3w-9xxx.ko | |
| Adaptec Advanced Raid Products, Dell PERC2, 2/Si, 3/Si, 3/Di, HP NetRAID-4M, IBM ServeRAID, and ICP SCSI driver | aacraid.ko | nondasd — Control scanning of hba for nondasd devices. 0=off, 1=on
dacmode — Control whether dma addressing is using 64 bit DAC. 0=off, 1=on
commit — Control whether a COMMIT_CONFIG is issued to the adapter for foreign arrays. This is typically needed in systems that do not have a BIOS. 0=off, 1=on
startup_timeout — The duration of time in seconds to wait for adapter to have it's kernel up and running. This is typically adjusted for large systems that do not have a BIOS
aif_timeout — The duration of time in seconds to wait for applications to pick up AIFs before deregistering them. This is typically adjusted for heavily burdened systems.
numacb — Request a limit to the number of adapter control blocks (FIB) allocated. Valid values are 512 and down. Default is to use suggestion from Firmware.
acbsize — Request a specific adapter control block (FIB) size. Valid values are 512, 2048, 4096 and 8192. Default is to use suggestion from Firmware.
|
| Adaptec 28xx, R9xx, 39xx AHA-284x, AHA-29xx, AHA-394x, AHA-398x, AHA-274x, AHA-274xT, AHA-2842, AHA-2910B, AHA-2920C, AHA-2930/U/U2, AHA-2940/W/U/UW/AU/, U2W/U2/U2B/, U2BOEM, AHA-2944D/WD/UD/UWD, AHA-2950U2/W/B, AHA-3940/U/W/UW/, AUW/U2W/U2B, AHA-3950U2D, AHA-3985/U/W/UW, AIC-777x, AIC-785x, AIC-786x, AIC-787x, AIC-788x , AIC-789x, AIC-3860 | aic7xxx.ko | verbose — Enable verbose/diagnostic logging
allow_memio — Allow device registers to be memory mapped
debug — Bitmask of debug values to enable
no_probe — Toggle EISA/VLB controller probing
probe_eisa_vl — Toggle EISA/VLB controller probing
no_reset — Supress initial bus resets
extended — Enable extended geometry on all controllers
periodic_otag — Send an ordered tagged transaction periodically to prevent tag starvation. This may be required by some older disk drives or RAID arrays.
tag_info:<tag_str> — Set per-target tag depth
global_tag_depth:<int> — Global tag depth for every target on every bus
seltime:<int> — Selection Timeout (0/256ms,1/128ms,2/64ms,3/32ms)
|
| IBM ServeRAID | ips.ko | |
| LSI Logic MegaRAID Mailbox Driver | megaraid_mbox.ko | unconf_disks — Set to expose unconfigured disks to kernel (default=0)
busy_wait — Max wait for mailbox in microseconds if busy (default=10)
max_sectors — Maximum number of sectors per IO command (default=128)
cmd_per_lun — Maximum number of commands per logical unit (default=64)
fast_load — Faster loading of the driver, skips physical devices! (default=0)
debug_level — Debug level for driver (default=0)
|
| Emulex LightPulse Fibre Channel SCSI driver | lpfc.ko | lpfc_poll — FCP ring polling mode control: 0 - none, 1 - poll with interrupts enabled 3 - poll and disable FCP ring interrupts
lpfc_log_verbose — Verbose logging bit-mask
lpfc_lun_queue_depth — Max number of FCP commands we can queue to a specific LUN
lpfc_hba_queue_depth — Max number of FCP commands we can queue to a lpfc HBA
lpfc_scan_down — Start scanning for devices from highest ALPA to lowest
lpfc_nodev_tmo — Seconds driver will hold I/O waiting for a device to come back
lpfc_topology — Select Fibre Channel topology
lpfc_link_speed — Select link speed
lpfc_fcp_class — Select Fibre Channel class of service for FCP sequences
lpfc_use_adisc — Use ADISC on rediscovery to authenticate FCP devices
lpfc_ack0 — Enable ACK0 support
lpfc_cr_delay — A count of milliseconds after which an interrupt response is generated
lpfc_cr_count — A count of I/O completions after which an interrupt response is generated
lpfc_multi_ring_support — Determines number of primary SLI rings to spread IOCB entries across
lpfc_fdmi_on — Enable FDMI support
lpfc_discovery_threads — Maximum number of ELS commands during discovery
lpfc_max_luns — Maximum allowed LUN
lpfc_poll_tmo — Milliseconds driver will wait between polling FCP ring
|
| HP Smart Array | cciss.ko | |
| LSI Logic MPT Fusion | mptbase.ko mptctl.ko mptfc.ko mptlan.ko mptsas.ko mptscsih.ko mptspi.ko | mpt_msi_enable — MSI Support Enable
mptfc_dev_loss_tmo — Initial time the driver programs the transport to wait for an rport to return following a device loss event.
mpt_pt_clear — Clear persistency table
mpt_saf_te — Force enabling SEP Processor
|
| QLogic Fibre Channel Driver | qla2xxx.ko | ql2xlogintimeout — Login timeout value in seconds.
qlport_down_retry — Maximum number of command retries to a port that returns a PORT-DOWN status
ql2xplogiabsentdevice — Option to enable PLOGI to devices that are not present after a Fabric scan.
ql2xloginretrycount — Specify an alternate value for the NVRAM login retry count.
ql2xallocfwdump — Option to enable allocation of memory for a firmware dump during HBA initialization. Default is 1 - allocate memory.
extended_error_logging — Option to enable extended error logging.
ql2xfdmienable — Enables FDMI registrations.
|
| NCR, Symbios and LSI 8xx and 1010 | sym53c8xx | cmd_per_lun — The maximum number of tags to use by default
tag_ctrl — More detailed control over tags per LUN
burst — Maximum burst. 0 to disable, 255 to read from registers
led — Set to 1 to enable LED support
diff — 0 for no differential mode, 1 for BIOS, 2 for always, 3 for not GPIO3
irqm — 0 for open drain, 1 to leave alone, 2 for totem pole
buschk — 0 to not check, 1 for detach on error, 2 for warn on error
hostid — The SCSI ID to use for the host adapters
verb — 0 for minimal verbosity, 1 for normal, 2 for excessive
debug — Set bits to enable debugging
settle — Settle delay in seconds. Default 3
nvram — Option currently not used
excl — List ioport addresses here to prevent controllers from being attached
safe — Set other settings to a "safe mode"
|
45.5. Ethernet Parameters
Important
ethtool or mii-tool. Only after these tools fail to work should module parameters be adjusted. Module parameters can be viewed using the modinfo command.
Note
ethtool, mii-tool, and modinfo.
| Hardware | Module | Parameters |
|---|---|---|
| 3Com EtherLink PCI III/XL Vortex (3c590, 3c592, 3c595, 3c597) Boomerang (3c900, 3c905, 3c595) | 3c59x.ko | debug — 3c59x debug level (0-6)
options — 3c59x: Bits 0-3: media type, bit 4: bus mastering, bit 9: full duplex
global_options — 3c59x: same as options, but applies to all NICs if options is unset
full_duplex — 3c59x full duplex setting(s) (1)
global_full_duplex — 3c59x: same as full_duplex, but applies to all NICs if full_duplex is unset
hw_checksums — 3c59x Hardware checksum checking by adapter(s) (0-1)
flow_ctrl — 3c59x 802.3x flow control usage (PAUSE only) (0-1)
enable_wol — 3c59x: Turn on Wake-on-LAN for adapter(s) (0-1)
global_enable_wol — 3c59x: same as enable_wol, but applies to all NICs if enable_wol is unset
rx_copybreak — 3c59x copy breakpoint for copy-only-tiny-frames
max_interrupt_work — 3c59x maximum events handled per interrupt
compaq_ioaddr — 3c59x PCI I/O base address (Compaq BIOS problem workaround)
compaq_irq — 3c59x PCI IRQ number (Compaq BIOS problem workaround)
compaq_device_id — 3c59x PCI device ID (Compaq BIOS problem workaround)
watchdog — 3c59x transmit timeout in milliseconds
global_use_mmio — 3c59x: same as use_mmio, but applies to all NICs if options is unset
use_mmio — 3c59x: use memory-mapped PCI I/O resource (0-1)
|
| RTL8139, SMC EZ Card Fast Ethernet, RealTek cards using RTL8129, or RTL8139 Fast Ethernet chipsets | 8139too.ko | |
| Broadcom 4400 10/100 PCI ethernet driver | b44.ko | b44_debug — B44 bitmapped debugging message enable value
|
| Broadcom NetXtreme II BCM5706/5708 Driver | bnx2.ko | disable_msi — Disable Message Signaled Interrupt (MSI)
|
| Intel Ether Express/100 driver | e100.ko | debug — Debug level (0=none,...,16=all)
eeprom_bad_csum_allow — Allow bad eeprom checksums
|
| Intel EtherExpress/1000 Gigabit | e1000.ko | TxDescriptors — Number of transmit descriptors
RxDescriptors — Number of receive descriptors
Speed — Speed setting
Duplex — Duplex setting
AutoNeg — Advertised auto-negotiation setting
FlowControl — Flow Control setting
XsumRX — Disable or enable Receive Checksum offload
TxIntDelay — Transmit Interrupt Delay
TxAbsIntDelay — Transmit Absolute Interrupt Delay
RxIntDelay — Receive Interrupt Delay
RxAbsIntDelay — Receive Absolute Interrupt Delay
InterruptThrottleRate — Interrupt Throttling Rate
SmartPowerDownEnable — Enable PHY smart power down
KumeranLockLoss — Enable Kumeran lock loss workaround
|
| Myricom 10G driver (10GbE) | myri10ge.ko | myri10ge_fw_name — Firmware image name
myri10ge_ecrc_enable — Enable Extended CRC on PCI-E
myri10ge_max_intr_slots — Interrupt queue slots
myri10ge_small_bytes — Threshold of small packets
myri10ge_msi — Enable Message Signalled Interrupts
myri10ge_intr_coal_delay — Interrupt coalescing delay
myri10ge_flow_control — Pause parameter
myri10ge_deassert_wait — Wait when deasserting legacy interrupts
myri10ge_force_firmware — Force firmware to assume aligned completions
myri10ge_skb_cross_4k — Can a small skb cross a 4KB boundary?
myri10ge_initial_mtu — Initial MTU
myri10ge_napi_weight — Set NAPI weight
myri10ge_watchdog_timeout — Set watchdog timeout
myri10ge_max_irq_loops — Set stuck legacy IRQ detection threshold
|
| NatSemi DP83815 Fast Ethernet | natsemi.ko | mtu — DP8381x MTU (all boards)
debug — DP8381x default debug level
rx_copybreak — DP8381x copy breakpoint for copy-only-tiny-frames
options — DP8381x: Bits 0-3: media type, bit 17: full duplex
full_duplex — DP8381x full duplex setting(s) (1)
|
| AMD PCnet32 and AMD PCnetPCI | pcnet32.ko | |
| PCnet32 and PCnetPCI | pcnet32.ko | debug — pcnet32 debug level
max_interrupt_work — pcnet32 maximum events handled per interrupt
rx_copybreak — pcnet32 copy breakpoint for copy-only-tiny-frames
tx_start_pt — pcnet32 transmit start point (0-3)
pcnet32vlb — pcnet32 Vesa local bus (VLB) support (0/1)
options — pcnet32 initial option setting(s) (0-15)
full_duplex — pcnet32 full duplex setting(s) (1)
homepna — pcnet32 mode for 79C978 cards (1 for HomePNA, 0 for Ethernet, default Ethernet
|
| RealTek RTL-8169 Gigabit Ethernet driver | r8169.ko | media — force phy operation. Deprecated by ethtool (8).
rx_copybreak — Copy breakpoint for copy-only-tiny-frames
use_dac — Enable PCI DAC. Unsafe on 32 bit PCI slot.
debug — Debug verbosity level (0=none, ..., 16=all)
|
| Neterion Xframe 10GbE Server Adapter | s2io.ko | |
| SIS 900/701G PCI Fast Ethernet | sis900.ko | multicast_filter_limit — SiS 900/7016 maximum number of filtered multicast addresses
max_interrupt_work — SiS 900/7016 maximum events handled per interrupt
sis900_debug — SiS 900/7016 bitmapped debugging message level
|
| Adaptec Starfire Ethernet driver | starfire.ko | max_interrupt_work — Maximum events handled per interrupt
mtu — MTU (all boards)
debug — Debug level (0-6)
rx_copybreak — Copy breakpoint for copy-only-tiny-frames
intr_latency — Maximum interrupt latency, in microseconds
small_frames — Maximum size of receive frames that bypass interrupt latency (0,64,128,256,512)
options — Deprecated: Bits 0-3: media type, bit 17: full duplex
full_duplex — Deprecated: Forced full-duplex setting (0/1)
enable_hw_cksum — Enable/disable hardware cksum support (0/1)
|
| Broadcom Tigon3 | tg3.ko | tg3_debug — Tigon3 bitmapped debugging message enable value
|
| ThunderLAN PCI | tlan.ko | aui — ThunderLAN use AUI port(s) (0-1)
duplex — ThunderLAN duplex setting(s) (0-default, 1-half, 2-full)
speed — ThunderLAN port speen setting(s) (0,10,100)
debug — ThunderLAN debug mask
bbuf — ThunderLAN use big buffer (0-1)
|
| Digital 21x4x Tulip PCI Ethernet cards SMC EtherPower 10 PCI(8432T/8432BT) SMC EtherPower 10/100 PCI(9332DST) DEC EtherWorks 100/10 PCI(DE500-XA) DEC EtherWorks 10 PCI(DE450) DEC QSILVER's, Znyx 312 etherarray Allied Telesis LA100PCI-T Danpex EN-9400, Cogent EM110 | tulip.ko | io io_port |
| VIA Rhine PCI Fast Ethernet cards with either the VIA VT86c100A Rhine-II PCI or 3043 Rhine-I D-Link DFE-930-TX PCI 10/100 | via-rhine.ko | max_interrupt_work — VIA Rhine maximum events handled per interrupt
debug — VIA Rhine debug level (0-7)
rx_copybreak — VIA Rhine copy breakpoint for copy-only-tiny-frames
avoid_D3 — Avoid power state D3 (work-around for broken BIOSes)
|
45.5.1. The Channel Bonding Module
bonding kernel module and a special network interface, called a channel bonding interface. Channel bonding enables two or more network interfaces to act as one, simultaneously increasing the bandwidth and providing redundancy.
- Add the following line to
/etc/modprobe.conf:alias bond<N> bonding
Replace <N> with the interface number, such as0. For each configured channel bonding interface, there must be a corresponding entry in/etc/modprobe.conf. - Configure a channel bonding interface as outlined in Section 16.2.3, “Channel Bonding Interfaces”.
- To enhance performance, adjust available module options to ascertain what combination works best. Pay particular attention to the
miimonorarp_intervaland thearp_ip_targetparameters. Refer to Section 45.5.1.1, “bonding Module Directives” for a list of available options and how to quickly determine the best ones for your bonded interface.
45.5.1.1. bonding Module Directives
BONDING_OPTS="<bonding parameters>" directive in your bonding interface configuration file (ifcfg-bond0 for example). Parameters to bonded interfaces can be configured without unloading (and reloading) the bonding module by manipulating files in the sysfs file system.
sysfs is a virtual file system that represents kernel objects as directories, files and symbolic links. sysfs can be used to query for information about kernel objects, and can also manipulate those objects through the use of normal file system commands. The sysfs virtual file system has a line in /etc/fstab, and is mounted under /sys. All bonded interfaces can be configured dynamically by interacting with and manipulating files under the /sys/class/net/ directory.
ifcfg-bond0 and inserted SLAVE=yes and MASTER=bond0 directives in the bonded interfaces following the instructions in Section 16.2.3, “Channel Bonding Interfaces”, you can proceed to testing and determining the best parameters for your bonded interface.
ifconfig bond<N> up as root:
ifconfig bond0 upifcfg-bond0 bonding interface file, you will be able to see bond0 listed in the output of running ifconfig (without any options):
~]# ifconfig
bond0 Link encap:Ethernet HWaddr 00:00:00:00:00:00
UP BROADCAST RUNNING MASTER MULTICAST MTU:1500 Metric:1
RX packets:0 errors:0 dropped:0 overruns:0 frame:0
TX packets:0 errors:0 dropped:0 overruns:0 carrier:0
collisions:0 txqueuelen:0
RX bytes:0 (0.0 b) TX bytes:0 (0.0 b)
eth0 Link encap:Ethernet HWaddr 52:54:00:26:9E:F1
inet addr:192.168.122.251 Bcast:192.168.122.255 Mask:255.255.255.0
inet6 addr: fe80::5054:ff:fe26:9ef1/64 Scope:Link
UP BROADCAST RUNNING MULTICAST MTU:1500 Metric:1
RX packets:207 errors:0 dropped:0 overruns:0 frame:0
TX packets:205 errors:0 dropped:0 overruns:0 carrier:0
collisions:0 txqueuelen:1000
RX bytes:70374 (68.7 KiB) TX bytes:25298 (24.7 KiB)
[output truncated]~]# cat /sys/class/net/bonding_masters
bond0/sys/class/net/bond<N>/bonding/ directory. First, the bond you are configuring must be taken down:
ifconfig bond0 downecho 1000 > /sys/class/net/bond0/bonding/miimonbalance-alb mode, you could run either:
echo 6 > /sys/class/net/bond0/bonding/modeecho balance-alb > /sys/class/net/bond0/bonding/modeifconfig bond<N> up . If you decide to change the options, take the interface down, modify its parameters using sysfs, bring it back up, and re-test.
BONDING_OPTS= directive of the /etc/sysconfig/network-scripts/ifcfg-bond<N> file for the bonded interface you are configuring. Whenever that bond is brought up (for example, by the system during the boot sequence if the ONBOOT=yes directive is set), the bonding options specified in the BONDING_OPTS will take effect for that bond. For more information on configuring bonded interfaces (and BONDING_OPTS), refer to Section 16.2.3, “Channel Bonding Interfaces”.
bonding module. For more in-depth information on configuring channel bonding and the exhaustive list of bonding module parameters, install the kernel-doc package and then locating and opening the included bonding.txt file:
yum -y install kernel-docnano -w $(rpm -ql kernel-doc | grep bonding.txt)
Bonding Interface Parameters
-
arp_interval=<time_in_milliseconds> - Specifies (in milliseconds) how often ARP monitoring occurs.
Important
It is essential that botharp_intervalandarp_ip_targetparameters are specified, or, alternatively, themiimonparameter is specified. Failure to do so can cause degradation of network performance in the event that a link fails.If using this setting while inmode=0ormode=1(the two load-balancing modes), the network switch must be configured to distribute packets evenly across the NICs. For more information on how to accomplish this, refer to/usr/share/doc/kernel-doc-<kernel_version>/Documentation/networking/bonding.txtThe value is set to0by default, which disables it. -
arp_ip_target=<ip_address> [,<ip_address_2>,...<ip_address_16> ] - Specifies the target IP address of ARP requests when the
arp_intervalparameter is enabled. Up to 16 IP addresses can be specified in a comma separated list. -
arp_validate=<value> - Validate source/distribution of ARP probes; default is
none. Other valid values areactive,backup, andall. -
debug=<number> - Enables debug messages. Possible values are:
0— Debug messages are disabled. This is the default.1— Debug messages are enabled.
-
downdelay=<time_in_milliseconds> - Specifies (in milliseconds) how long to wait after link failure before disabling the link. The value must be a multiple of the value specified in the
miimonparameter. The value is set to0by default, which disables it. - lacp_rate=<value>
- Specifies the rate at which link partners should transmit LACPDU packets in 802.3ad mode. Possible values are:
slowor0— Default setting. This specifies that partners should transmit LACPDUs every 30 seconds.fastor1— Specifies that partners should transmit LACPDUs every 1 second.
-
miimon=<time_in_milliseconds> - Specifies (in milliseconds) how often MII link monitoring occurs. This is useful if high availability is required because MII is used to verify that the NIC is active. To verify that the driver for a particular NIC supports the MII tool, type the following command as root:
ethtool <interface_name> | grep "Link detected:"In this command, replace <interface_name> with the name of the device interface, such aseth0, not the bond interface. If MII is supported, the command returns:Link detected: yes
If using a bonded interface for high availability, the module for each NIC must support MII. Setting the value to0(the default), turns this feature off. When configuring this setting, a good starting point for this parameter is100.Important
It is essential that botharp_intervalandarp_ip_targetparameters are specified, or, alternatively, themiimonparameter is specified. Failure to do so can cause degradation of network performance in the event that a link fails. -
mode=<value> - ...where <value> is one of:
balance-rror0— Sets a round-robin policy for fault tolerance and load balancing. Transmissions are received and sent out sequentially on each bonded slave interface beginning with the first one available.active-backupor1— Sets an active-backup policy for fault tolerance. Transmissions are received and sent out via the first available bonded slave interface. Another bonded slave interface is only used if the active bonded slave interface fails.balance-xoror2— Sets an XOR (exclusive-or) policy for fault tolerance and load balancing. Using this method, the interface matches up the incoming request's MAC address with the MAC address for one of the slave NICs. Once this link is established, transmissions are sent out sequentially beginning with the first available interface.broadcastor3— Sets a broadcast policy for fault tolerance. All transmissions are sent on all slave interfaces.802.3ador4— Sets an IEEE 802.3ad dynamic link aggregation policy. Creates aggregation groups that share the same speed and duplex settings. Transmits and receives on all slaves in the active aggregator. Requires a switch that is 802.3ad compliant.balance-tlbor5— Sets a Transmit Load Balancing (TLB) policy for fault tolerance and load balancing. The outgoing traffic is distributed according to the current load on each slave interface. Incoming traffic is received by the current slave. If the receiving slave fails, another slave takes over the MAC address of the failed slave.balance-albor6— Sets an Active Load Balancing (ALB) policy for fault tolerance and load balancing. Includes transmit and receive load balancing for IPV4 traffic. Receive load balancing is achieved through ARP negotiation.
-
num_unsol_na=<number> - Specifies the number of unsolicited IPv6 Neighbor Advertisements to be issued after a failover event. One unsolicited NA is issued immediately after the failover.The valid range is
0 - 255; the default value is1. This option affects only the active-backup mode. -
primary=<interface_name> - Specifies the interface name, such as
eth0, of the primary device. Theprimarydevice is the first of the bonding interfaces to be used and is not abandoned unless it fails. This setting is particularly useful when one NIC in the bonding interface is faster and, therefore, able to handle a bigger load.This setting is only valid when the bonding interface is inactive-backupmode. Refer to/usr/share/doc/kernel-doc-<kernel-version>/Documentation/networking/bonding.txtfor more information. -
primary_reselect=<value> - Specifies the reselection policy for the primary slave. This affects how the primary slave is chosen to become the active slave when failure of the active slave or recovery of the primary slave occurs. This option is designed to prevent flip-flopping between the primary slave and other slaves. Possible values are:
alwaysor0(default) — The primary slave becomes the active slave whenever it comes back up.betteror1— The primary slave becomes the active slave when it comes back up, if the speed and duplex of the primary slave is better than the speed and duplex of the current active slave.failureor2— The primary slave becomes the active slave only if the current active slave fails and the primary slave is up.
Theprimary_reselectsetting is ignored in two cases:- If no slaves are active, the first slave to recover is made the active slave.
- When initially enslaved, the primary slave is always made the active slave.
Changing theprimary_reselectpolicy viasysfswill cause an immediate selection of the best active slave according to the new policy. This may or may not result in a change of the active slave, depending upon the circumstances -
updelay=<time_in_milliseconds> - Specifies (in milliseconds) how long to wait before enabling a link. The value must be a multiple of the value specified in the
miimonparameter. The value is set to0by default, which disables it. -
use_carrier=<number> - Specifies whether or not
miimonshould use MII/ETHTOOL ioctls ornetif_carrier_ok()to determine the link state. Thenetif_carrier_ok()function relies on the device driver to maintains its state withnetif_carrier_on/off; most device drivers support this function.The MII/ETHROOL ioctls tools utilize a deprecated calling sequence within the kernel. However, this is still configurable in case your device driver does not supportnetif_carrier_on/off.Valid values are:1— Default setting. Enables the use ofnetif_carrier_ok().0— Enables the use of MII/ETHTOOL ioctls.
Note
If the bonding interface insists that the link is up when it should not be, it is possible that your network device driver does not supportnetif_carrier_on/off. -
xmit_hash_policy=<value> - Selects the transmit hash policy used for slave selection in
balance-xorand802.3admodes. Possible values are:0orlayer2— Default setting. This option uses the XOR of hardware MAC addresses to generate the hash. The formula used is:(<source_MAC_address> XOR <destination_MAC>) MODULO <slave_count>
This algorithm will place all traffic to a particular network peer on the same slave, and is 802.3ad compliant.1orlayer3+4— Uses upper layer protocol information (when available) to generate the hash. This allows for traffic to a particular network peer to span multiple slaves, although a single connection will not span multiple slaves.The formula for unfragmented TCP and UDP packets used is:((<source_port> XOR <dest_port>) XOR ((<source_IP> XOR <dest_IP>) AND
0xffff) MODULO <slave_count>For fragmented TCP or UDP packets and all other IP protocol traffic, the source and destination port information is omitted. For non-IP traffic, the formula is the same as thelayer2transmit hash policy.This policy intends to mimic the behavior of certain switches; particularly, Cisco switches with PFC2 as well as some Foundry and IBM products.The algorithm used by this policy is not 802.3ad compliant.2orlayer2+3— Uses a combination of layer2 and layer3 protocol information to generate the hash.Uses XOR of hardware MAC addresses and IP addresses to generate the hash. The formula is:(((<source_IP> XOR <dest_IP>) AND
0xffff) XOR ( <source_MAC> XOR <destination_MAC> )) MODULO <slave_count>This algorithm will place all traffic to a particular network peer on the same slave. For non-IP traffic, the formula is the same as for the layer2 transmit hash policy.This policy is intended to provide a more balanced distribution of traffic than layer2 alone, especially in environments where a layer3 gateway device is required to reach most destinations.This algorithm is 802.3ad compliant.
45.6. Additional Resources
45.6.1. Installed Documentation
lsmodman page — description and explanation of its output.insmodman page — description and list of command line options.modprobeman page — description and list of command line options.rmmodman page — description and list of command line options.modinfoman page — description and list of command line options./usr/share/doc/kernel-doc-<version>/Documentation/kbuild/modules.txt— how to compile and use kernel modules. Note you must have thekernel-docpackage installed to read this file.
45.6.2. Useful Websites
- http://tldp.org/HOWTO/Module-HOWTO/ — Linux Loadable Kernel Module HOWTO from the Linux Documentation Project.
Chapter 46. The kdump Crash Recovery Service
kdump is an advanced crash dumping mechanism. When enabled, the system is booted from the context of another kernel. This second kernel reserves a small amount of memory and its only purpose is to capture the core dump image in case the system crashes. The ability to analyze the core dump significantly helps to determine the exact cause of the system failure, and as a consequence, it is strongly recommended to have this feature enabled.
kdump service in Red Hat Enterprise Linux, and provides a brief overview of how to analyze the resulting core dump using the crash debugging utility.
46.1. Installing the kdump Service
kdump service on your system, make sure you have the kexec-tools package installed. To do so, type the following at a shell prompt as root:
~]# yum install kexec-tools46.2. Configuring the kdump Service
kdump service: you can enable and configure it at the first boot, use the Kernel Dump Configuration utility for the graphical user interface, or do so manually on the command line.
Important
Intel IOMMU driver can occasionally prevent the kdump service from capturing the core dump image. To use kdump on Intel architectures reliably, it is advised that the IOMMU support is disabled.
Warning
kdump service does not work reliably on certain combinations of HP Smart Array devices and system boards from the same vendor. Consequent to this, users are strongly advised to test the configuration before using it in production environment, and if necessary, configure kdump to store the kernel crash dump to a remote machine over a network. For more information on how to test the kdump configuration, refer to Section 46.2.4, “Testing the Configuration”.
46.2.1. Configuring kdump at First Boot
firstboot application is launched to guide the user through the initial configuration of the freshly installed system. To configure kdump, navigate to the Kdump page and follow the instructions below.
Important
kdump crash recovery is enabled, the minimum memory requirements increase by the amount of memory reserved for it. This value is determined by the user and on x86, AMD64, and Intel 64 architectures, it defaults to 128 MB plus 64 MB for each TB of physical memory (that is, a total of 192 MB for a system with 1 TB of physical memory).
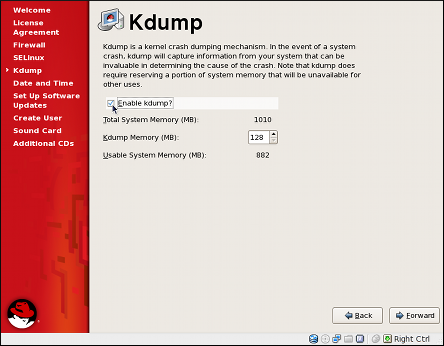
Figure 46.1. The kdump configuration screen
46.2.1.1. Enabling the Service
kdump daemon at boot time, select the Enable kdump? checkbox. This will enable the service for runlevels 2, 3, 4, and 5, and start it for the current session. Similarly, clearing the checkbox will disable it for all runlevels and stop the service immediately.
46.2.1.2. Configuring the Memory Usage
kdump kernel, click the up and down arrow buttons next to the Kdump Memory field to increase or decrease the value. Notice that the Usable System Memory field changes accordingly showing you the remaining memory that will be available to the system.
46.2.2. Using the Kernel Dump Configuration Utility
system-config-kdump at a shell prompt. Unless you are already authenticated, you will be prompted to enter the root password.
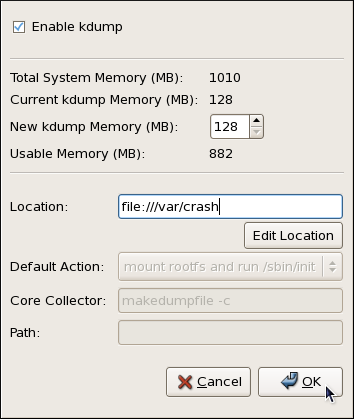
Figure 46.2. The Kernel Dump Configuration utility
kdump as well as to enable or disable starting the service at boot time. When you are done, click to save the changes. The system reboot will be requested.
Important
kdump crash recovery is enabled, the minimum memory requirements increase by the amount of memory reserved for it. This value is determined by the user and on x86, AMD64, and Intel 64 architectures, it defaults to 128 MB plus 64 MB for each TB of physical memory (that is, a total of 192 MB for a system with 1 TB of physical memory).
46.2.2.1. Enabling the Service
kdump daemon at boot time, select the Enable kdump checkbox. This will enable the service for runlevels 2, 3, 4, and 5, and start it for the current session. Similarly, clearing the checkbox will disable it for all runlevels and stop the service immediately.
46.2.2.2. Configuring the Memory Usage
kdump kernel, click the up and down arrow buttons next to the New kdump Memory field to increase or decrease the value. Notice that the Usable Memory field changes accordingly showing you the remaining memory that will be available to the system.
46.2.2.3. Configuring the Target Type
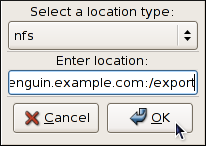
Figure 46.3. The Edit Location dialog
/dev/sdb1). When you are done, click to confirm your choice.
penguin.example.com:/export). Clicking the button will confirm your changes. Finally, edit the value of the Path field to customize the destination directory (for instance, cores).
john@penguin.example.com). Clicking the button will confirm your changes. Finally, edit the value of the Path field to customize the destination directory (for instance, /export/cores).
46.2.2.4. Configuring the Core Collector
vmcore dump file, kdump allows you to specify an external application (that is, a core collector) to compress the data, and optionally leave out all irrelevant information. Currently, the only fully supported core collector is makedumpfile.
-c parameter is listed after the makedumpfile command in the Core Collector field (for example, makedumpfile -c).
-d value parameter after the makedumpfile command in the Core Collector field. The value is a sum of values of pages you want to omit as described in Table 46.1, “Supported filtering levels”. For example, to remove both zero and free pages, use makedumpfile -d 17.
makedumpfile for a complete list of available options.
46.2.2.5. Changing the Default Action
kdump fails to create a core dump, select the appropriate option from the Default Action pulldown list. Available options are (the default action), (to reboot the system), (to present a user with an interactive shell prompt), and (to halt the system).
46.2.3. Configuring kdump on the Command Line
46.2.3.1. Configuring the Memory Usage
kdump kernel on x86, AMD64, and Intel 64 architectures, open the /boot/grub/grub.conf file as root and add the crashkernel=<size>M@16M parameter to the list of kernel options as shown in Example 46.1, “Sample /boot/grub/grub.conf file”.
Important
kdump crash recovery service will not be operational. For information on minimum memory requirements, refer to the Red Hat Enterprise Linux comparison chart. When kdump is enabled, the minimum memory requirements increase by the amount of memory reserved for it. This value is determined by the user and on x86, AMD64, and Intel 64 architectures, it defaults to 128 MB plus 64 MB for each TB of physical memory (that is, a total of 192 MB for a system with 1 TB of physical memory).
Example 46.1. Sample /boot/grub/grub.conf file
# grub.conf generated by anaconda
#
# Note that you do not have to rerun grub after making changes to this file
# NOTICE: You have a /boot partition. This means that
# all kernel and initrd paths are relative to /boot/, eg.
# root (hd0,0)
# kernel /vmlinuz-version ro root=/dev/sda3
# initrd /initrd-version.img
#boot=/dev/sda
default=0
timeout=5
splashimage=(hd0,0)/grub/splash.xpm.gz
hiddenmenu
title Red Hat Enterprise Linux Server (2.6.18-274.3.1.el5)
root (hd0,0)
kernel /vmlinuz-2.6.18-274.3.1.el5 ro root=/dev/sda3 crashkernel=128M@16M
initrd /initrd-2.6.18-274.3.1.el5.img46.2.3.2. Configuring the Target Type
vmcore file in the /var/crash/ directory of the local file system. To change this, open the /etc/kdump.conf configuration file as root and edit the options as described below.
#path /var/crash line, and replace the value with a desired directory path. Optionally, if you wish to write the file to a different partition, follow the same procedure with the #ext3 /dev/sda3 line as well, and change both the file system type and the device (a device name, a file system label, and UUID are all supported) accordingly. For example:
ext3 /dev/sda4 path /usr/local/cores
#raw /dev/sda5 line, and replace the value with a desired device name. For example:
raw /dev/sdb1
#net my.server.com:/export/tmp line, and replace the value with a valid hostname and directory path. For example:
net penguin.example.com:/export/cores
#net user@my.server.com line, and replace the value with a valid username and hostname. For example:
net john@penguin.example.com
46.2.3.3. Configuring the Core Collector
vmcore dump file, kdump allows you to specify an external application (that is, a core collector) to compress the data, and optionally leave out all irrelevant information. Currently, the only fully supported core collector is makedumpfile.
/etc/kdump.conf configuration file as root, remove the hash sign (“#”) from the beginning of the #core_collector makedumpfile -c --message-level 1 line, and edit the command line options as described below.
-c parameter. For example:
core_collector makedumpfile -c
-d value parameter, where value is a sum of values of pages you want to omit as described in Table 46.1, “Supported filtering levels”. For example, to remove both zero and free pages, use the following:
core_collector makedumpfile -d 17 -c
makedumpfile for a complete list of available options.
| Option | Description |
|---|---|
1 | Zero pages |
2 | Cache pages |
4 | Cache private |
8 | User pages |
16 | Free pages |
46.2.3.4. Changing the Default Action
kdump fails to create a core dump, the root file system is mounted and /sbin/init is run. To change this behavior, open the /etc/kdump.conf configuration file as root, remove the hash sign (“#”) from the beginning of the #default shell line, and replace the value with a desired action as described in Table 46.2, “Supported actions”. For example:
default halt
| Option | Action |
|---|---|
reboot | Reboot the system, losing the core in the process. |
halt | After failing to capture a core, halt the system. |
shell | Run the msh session from within the initramfs, allowing a user to record the core manually. |
46.2.3.5. Enabling the Service
kdump daemon at boot time, type the following at a shell prompt as root:
~]# chkconfig kdump on2, 3, 4, and 5. Similarly, typing chkconfig kdump off will disable it for all runlevels. To start the service in the current session, use the following command as root:
~]# service kdump start
No kdump initial ramdisk found. [WARNING]
Rebuilding /boot/initrd-2.6.18-194.8.1.el5kdump.img
Starting kdump: [ OK ]46.2.4. Testing the Configuration
Warning
kdump enabled, and as root, make sure that the service is running:
~]# service kdump status
Kdump is operationalroot:
~]#echo 1 > /proc/sys/kernel/sysrq~]#echo c > /proc/sysrq-trigger
YYYY-MM-DD-HH:MM/vmcore file will be copied to the location you have selected in the configuration (that is, to /var/crash/ by default).
46.3. Analyzing the Core Dump
Note
vmcore dump file, you must have the crash and kernel-debuginfo packages installed. To do so, type the following at a shell prompt as root:
~]# yum install --enablerepo=rhel-debuginfo crash kernel-debuginfocrash utility. This utility allows you to interactively analyze a running Linux system as well as a core dump created by netdump, diskdump, xendump, or kdump. When started, it presents you with an interactive prompt very similar to the GNU Debugger (GDB).
crash /var/crash/timestamp/vmcore /usr/lib/debug/lib/modules/kernel/vmlinuxkdump. To find out which kernel you are currently running, use the uname -r command.
Example 46.2. Running the crash utility
~]#crash /var/crash/2010-08-04-17\:55/vmcore \/usr/lib/debug/lib/modules/2.6.18-194.8.1.el5/vmlinuxcrash 4.1.2-4.el5_5.1 Copyright (C) 2002, 2003, 2004, 2005, 2006, 2007, 2008, 2009 Red Hat, Inc. Copyright (C) 2004, 2005, 2006 IBM Corporation Copyright (C) 1999-2006 Hewlett-Packard Co Copyright (C) 2005, 2006 Fujitsu Limited Copyright (C) 2006, 2007 VA Linux Systems Japan K.K. Copyright (C) 2005 NEC Corporation Copyright (C) 1999, 2002, 2007 Silicon Graphics, Inc. Copyright (C) 1999, 2000, 2001, 2002 Mission Critical Linux, Inc. This program is free software, covered by the GNU General Public License, and you are welcome to change it and/or distribute copies of it under certain conditions. Enter "help copying" to see the conditions. This program has absolutely no warranty. Enter "help warranty" for details. GNU gdb 6.1 Copyright 2004 Free Software Foundation, Inc. GDB is free software, covered by the GNU General Public License, and you are welcome to change it and/or distribute copies of it under certain conditions. Type "show copying" to see the conditions. There is absolutely no warranty for GDB. Type "show warranty" for details. This GDB was configured as "i686-pc-linux-gnu"... KERNEL: /usr/lib/debug/lib/modules/2.6.18-194.8.1.el5/vmlinux DUMPFILE: /var/crash/2010-08-04-17:55/vmcore CPUS: 1 DATE: Wed Aug 4 17:50:41 2010 UPTIME: 00:56:53 LOAD AVERAGE: 0.47, 0.47, 0.55 TASKS: 128 NODENAME: localhost.localdomain RELEASE: 2.6.18-194.el5 VERSION: #1 SMP Tue Mar 16 21:52:43 EDT 2010 MACHINE: i686 (2702 Mhz) MEMORY: 1 GB PANIC: "SysRq : Trigger a crashdump" PID: 6042 COMMAND: "bash" TASK: f09c7000 [THREAD_INFO: e1ba9000] CPU: 0 STATE: TASK_RUNNING (SYSRQ) crash>
crash, type exit.
46.3.1. Displaying the Message Buffer
log command at the interactive prompt.
Example 46.3. Displaying the kernel message buffer
crash> log
Linux version 2.6.18-194.el5 (mockbuild@x86-007.build.bos.redhat.com) (gcc version 4.1.2 20080704 (Red Hat 4.1.2-48)) #1 SMP Tue Mar 16 21:52:43 EDT 2010
BIOS-provided physical RAM map:
BIOS-e820: 0000000000010000 - 000000000009fc00 (usable)
BIOS-e820: 000000000009fc00 - 00000000000a0000 (reserved)
BIOS-e820: 00000000000f0000 - 0000000000100000 (reserved)
BIOS-e820: 0000000000100000 - 000000003fff0000 (usable)
BIOS-e820: 000000003fff0000 - 0000000040000000 (ACPI data)
BIOS-e820: 00000000fffc0000 - 0000000100000000 (reserved)
127MB HIGHMEM available.
896MB LOWMEM available.
Using x86 segment limits to approximate NX protection
On node 0 totalpages: 262128
DMA zone: 4096 pages, LIFO batch:0
Normal zone: 225280 pages, LIFO batch:31
HighMem zone: 32752 pages, LIFO batch:7
DMI 2.5 present.
Using APIC driver default
... several lines omitted ...
SysRq : Trigger a crashdumphelp log for more information on the command usage.
46.3.2. Displaying a Backtrace
bt command at the interactive prompt. You can use bt pid to display the backtrace of the selected process.
Example 46.4. Displaying the kernel stack trace
crash> bt
PID: 6042 TASK: f09c7000 CPU: 0 COMMAND: "bash"
#0 [e1ba9d10] schedule at c061c738
#1 [e1ba9d28] netlink_getsockopt at c05d50bb
#2 [e1ba9d34] netlink_queue_skip at c05d40d5
#3 [e1ba9d40] netlink_sock_destruct at c05d506d
#4 [e1ba9d84] sock_recvmsg at c05b6cc8
#5 [e1ba9dd4] enqueue_task at c041eed5
#6 [e1ba9dec] try_to_wake_up at c041f798
#7 [e1ba9e10] vsnprintf at c04efef2
#8 [e1ba9ec0] machine_kexec at c0419bf0
#9 [e1ba9f04] sys_kexec_load at c04448a1
#10 [e1ba9f4c] tty_audit_exit at c0549f06
#11 [e1ba9f50] tty_audit_add_data at c0549d5d
#12 [e1ba9f84] do_readv_writev at c0476055
#13 [e1ba9fb8] system_call at c0404f10
EAX: ffffffda EBX: 00000001 ECX: b7f7f000 EDX: 00000002
DS: 007b ESI: 00000002 ES: 007b EDI: b7f7f000
SS: 007b ESP: bf83f478 EBP: bf83f498
CS: 0073 EIP: 009ac402 ERR: 00000004 EFLAGS: 00000246help bt for more information on the command usage.
46.3.3. Displaying a Process Status
ps command at the interactive prompt. You can use ps pid to display the status of the selected process.
Example 46.5. Displaying status of processes in the system
crash> ps
PID PPID CPU TASK ST %MEM VSZ RSS COMM
0 0 0 c068a3c0 RU 0.0 0 0 [swapper]
1 0 0 f7c81aa0 IN 0.1 2152 616 init
... several lines omitted ...
6017 1 0 e39f6550 IN 1.2 40200 13000 gnome-terminal
6019 6017 0 e39f6000 IN 0.1 2568 708 gnome-pty-helpe
6020 6017 0 f0421550 IN 0.1 4620 1480 bash
6021 1 0 f7f69aa0 ?? 1.2 40200 13000 gnome-terminal
6039 6020 0 e7e84aa0 IN 0.1 5004 1300 su
> 6042 6039 0 f09c7000 RU 0.1 4620 1464 bashhelp ps for more information on the command usage.
46.3.4. Displaying Virtual Memory Information
vm command at the interactive prompt. You can use vm pid to display information on the selected process.
Example 46.6. Displaying virtual memory information of the current context
crash> vm
PID: 6042 TASK: f09c7000 CPU: 0 COMMAND: "bash"
MM PGD RSS TOTAL_VM
e275ee40 e2b08000 1464k 4620k
VMA START END FLAGS FILE
e315d764 1fe000 201000 75 /lib/libtermcap.so.2.0.8
e315de9c 201000 202000 100073 /lib/libtermcap.so.2.0.8
c9b040d4 318000 46a000 75 /lib/libc-2.5.so
e315da04 46a000 46c000 100071 /lib/libc-2.5.so
e315d7b8 46c000 46d000 100073 /lib/libc-2.5.so
e315de48 46d000 470000 100073
e315dba8 9ac000 9ad000 8040075
c9b04a04 a2f000 a4a000 875 /lib/ld-2.5.so
c9b04374 a4a000 a4b000 100871 /lib/ld-2.5.so
e315d6bc a4b000 a4c000 100873 /lib/ld-2.5.so
e315d908 fa1000 fa4000 75 /lib/libdl-2.5.so
e315db00 fa4000 fa5000 100071 /lib/libdl-2.5.so
e315df44 fa5000 fa6000 100073 /lib/libdl-2.5.so
e315d320 ff0000 ffa000 75 /lib/libnss_files-2.5.so
e315d668 ffa000 ffb000 100071 /lib/libnss_files-2.5.so
e315def0 ffb000 ffc000 100073 /lib/libnss_files-2.5.so
e315d374 8048000 80f5000 1875 /bin/bash
c9b045c0 80f5000 80fa000 101873 /bin/bash
... several lines omitted ...help vm for more information on the command usage.
46.3.5. Displaying Open Files
files command at the interactive prompt. You can use files pid to display files opened by the selected process.
Example 46.7. Displaying information about open files of the current context
crash> files
PID: 6042 TASK: f09c7000 CPU: 0 COMMAND: "bash"
ROOT: / CWD: /root
FD FILE DENTRY INODE TYPE PATH
0 e33be480 e609bf70 f0e1d880 CHR /dev/pts/1
1 e424d8c0 d637add8 f7809b78 REG /proc/sysrq-trigger
2 e33be480 e609bf70 f0e1d880 CHR /dev/pts/1
10 e33be480 e609bf70 f0e1d880 CHR /dev/pts/1
255 e33be480 e609bf70 f0e1d880 CHR /dev/pts/1help files for more information on the command usage.
46.4. Additional Resources
46.4.1. Installed Documentation
man kdump.conf- The manual page for the
/etc/kdump.confconfiguration file containing the full documentation of available options. man kexec- The manual page for
kexeccontaining the full documentation on its usage. man crash- The manual page for the
crashutility containing the full documentation on its usage. /usr/share/doc/kexec-tools-version/kexec-kdump-howto.txt- An overview of the
kdumpandkexecinstallation and usage.
46.4.2. Useful Websites
- https://access.redhat.com/kb/docs/DOC-6039
- The Red Hat Knowledgebase article about the
kexecandkdumpconfiguration. - http://people.redhat.com/anderson/
- The
crashutility homepage.
Part VII. Security And Authentication
Chapter 47. Security Overview
47.1. Introduction to Security
47.1.1. What is Computer Security?
47.1.1.1. How did Computer Security Come about?
47.1.1.2. Security Today
- On any given day, there are approximately 225 major incidences of security breach reported to the CERT Coordination Center at Carnegie Mellon University.[10]
- In 2003, the number of CERT reported incidences jumped to 137,529 from 82,094 in 2002 and from 52,658 in 2001.[11]
- The worldwide economic impact of the three most dangerous Internet Viruses of the last three years was estimated at US$13.2 Billion.[12]
47.1.1.3. Standardizing Security
- Confidentiality — Sensitive information must be available only to a set of pre-defined individuals. Unauthorized transmission and usage of information should be restricted. For example, confidentiality of information ensures that a customer's personal or financial information is not obtained by an unauthorized individual for malicious purposes such as identity theft or credit fraud.
- Integrity — Information should not be altered in ways that render it incomplete or incorrect. Unauthorized users should be restricted from the ability to modify or destroy sensitive information.
- Availability — Information should be accessible to authorized users any time that it is needed. Availability is a warranty that information can be obtained with an agreed-upon frequency and timeliness. This is often measured in terms of percentages and agreed to formally in Service Level Agreements (SLAs) used by network service providers and their enterprise clients.
47.1.2. Security Controls
- Physical
- Technical
- Administrative
47.1.2.1. Physical Controls
- Closed-circuit surveillance cameras
- Motion or thermal alarm systems
- Security guards
- Picture IDs
- Locked and dead-bolted steel doors
- Biometrics (includes fingerprint, voice, face, iris, handwriting, and other automated methods used to recognize individuals)
47.1.2.2. Technical Controls
- Encryption
- Smart cards
- Network authentication
- Access control lists (ACLs)
- File integrity auditing software
47.1.2.3. Administrative Controls
- Training and awareness
- Disaster preparedness and recovery plans
- Personnel recruitment and separation strategies
- Personnel registration and accounting
47.1.3. Conclusion
47.2. Vulnerability Assessment
- The expertise of the staff responsible for configuring, monitoring, and maintaining the technologies.
- The ability to patch and update services and kernels quickly and efficiently.
- The ability of those responsible to keep constant vigilance over the network.
47.2.1. Thinking Like the Enemy
47.2.2. Defining Assessment and Testing
Warning
- Creates proactive focus on information security
- Finds potential exploits before crackers find them
- Results in systems being kept up to date and patched
- Promotes growth and aids in developing staff expertise
- Abates Financial loss and negative publicity
47.2.2.1. Establishing a Methodology
- http://www.isecom.org/projects/osstmm.htm The Open Source Security Testing Methodology Manual (OSSTMM)
- http://www.owasp.org/ The Open Web Application Security Project
47.2.3. Evaluating the Tools
47.2.3.1. Scanning Hosts with Nmap
47.2.3.1.1. Using Nmap
nmap command followed by the hostname or IP address of the machine to scan.
nmap foo.example.comStarting nmap V. 3.50 ( www.insecure.org/nmap/ ) Interesting ports on localhost.localdomain (127.0.0.1): (The 1591 ports scanned but not shown below are in state: closed) Port State Service 22/tcp open ssh 25/tcp open smtp 111/tcp open sunrpc 443/tcp open https 515/tcp open printer 950/tcp open oftep-rpc 6000/tcp open X11 Nmap run completed -- 1 IP address (1 host up) scanned in 71.825 seconds
47.2.3.2. Nessus
Note
47.2.3.3. Nikto
Note
47.2.3.4. VLAD the Scanner
Note
47.2.3.5. Anticipating Your Future Needs
47.3. Attackers and Vulnerabilities
47.3.1. A Quick History of Hackers
47.3.1.1. Shades of Gray
47.3.2. Threats to Network Security
47.3.2.1. Insecure Architectures
47.3.2.1.1. Broadcast Networks
47.3.2.1.2. Centralized Servers
47.3.3. Threats to Server Security
47.3.3.1. Unused Services and Open Ports
47.3.3.2. Unpatched Services
47.3.3.3. Inattentive Administration
47.3.3.4. Inherently Insecure Services
47.3.4. Threats to Workstation and Home PC Security
47.3.4.1. Bad Passwords
47.3.4.2. Vulnerable Client Applications
47.4. Common Exploits and Attacks
| Exploit | Description | Notes | |||
|---|---|---|---|---|---|
| Null or Default Passwords | Leaving administrative passwords blank or using a default password set by the product vendor. This is most common in hardware such as routers and firewalls, though some services that run on Linux can contain default administrator passwords (though Red Hat Enterprise Linux 5 does not ship with them). |
| |||
| Default Shared Keys | Secure services sometimes package default security keys for development or evaluation testing purposes. If these keys are left unchanged and are placed in a production environment on the Internet, all users with the same default keys have access to that shared-key resource, and any sensitive information that it contains. |
| |||
| IP Spoofing | A remote machine acts as a node on your local network, finds vulnerabilities with your servers, and installs a backdoor program or Trojan horse to gain control over your network resources. |
| |||
| Eavesdropping | Collecting data that passes between two active nodes on a network by eavesdropping on the connection between the two nodes. |
| |||
| Service Vulnerabilities | An attacker finds a flaw or loophole in a service run over the Internet; through this vulnerability, the attacker compromises the entire system and any data that it may hold, and could possibly compromise other systems on the network. |
| |||
| Application Vulnerabilities | Attackers find faults in desktop and workstation applications (such as e-mail clients) and execute arbitrary code, implant Trojan horses for future compromise, or crash systems. Further exploitation can occur if the compromised workstation has administrative privileges on the rest of the network. |
| |||
| Denial of Service (DoS) Attacks | Attacker or group of attackers coordinate against an organization's network or server resources by sending unauthorized packets to the target host (either server, router, or workstation). This forces the resource to become unavailable to legitimate users. |
|
47.5. Security Updates
47.5.1. Updating Packages
- Listed and available for download on Red Hat Network
- Listed and unlinked on the Red Hat Errata website
Note
47.5.1.1. Using Automatic Updates with RHN Classic
Warning
Important
47.5.1.2. Using the Red Hat Errata Website
/tmp/updates, and save all the downloaded packages to it.
47.5.1.3. Verifying Signed Packages
/mnt/cdrom, use the following command to import it into the keyring (a database of trusted keys on the system):
rpm --import /mnt/cdrom/RPM-GPG-KEY-redhat-releaserpm -qa gpg-pubkey*gpg-pubkey-37017186-45761324
rpm -qi command followed by the output from the previous command, as in this example:
rpm -qi gpg-pubkey-37017186-45761324rpm -K /tmp/updates/*.rpmgpg OK. If it doesn't, make sure you are using the correct Red Hat public key, as well as verifying the source of the content. Packages that do not pass GPG verifications should not be installed, as they may have been altered by a third party.
47.5.1.4. Installing Signed Packages
rpm -Uvh /tmp/updates/*.rpmrpm -ivh /tmp/updates/<kernel-package>rpm -e <old-kernel-package>Note
Important
47.5.1.5. Applying the Changes
Note
- Applications
- User-space applications are any programs that can be initiated by a system user. Typically, such applications are used only when a user, script, or automated task utility launches them and they do not persist for long periods of time.Once such a user-space application is updated, halt any instances of the application on the system and launch the program again to use the updated version.
- Kernel
- The kernel is the core software component for the Red Hat Enterprise Linux operating system. It manages access to memory, the processor, and peripherals as well as schedules all tasks.Because of its central role, the kernel cannot be restarted without also stopping the computer. Therefore, an updated version of the kernel cannot be used until the system is rebooted.
- Shared Libraries
- Shared libraries are units of code, such as
glibc, which are used by a number of applications and services. Applications utilizing a shared library typically load the shared code when the application is initialized, so any applications using the updated library must be halted and relaunched.To determine which running applications link against a particular library, use thelsofcommand as in the following example:lsof /usr/lib/libwrap.so*This command returns a list of all the running programs which use TCP wrappers for host access control. Therefore, any program listed must be halted and relaunched if thetcp_wrapperspackage is updated. - SysV Services
- SysV services are persistent server programs launched during the boot process. Examples of SysV services include
sshd,vsftpd, andxinetd.Because these programs usually persist in memory as long as the machine is booted, each updated SysV service must be halted and relaunched after the package is upgraded. This can be done using the Services Configuration Tool or by logging into a root shell prompt and issuing the/sbin/servicecommand as in the following example:service <service-name> restartIn the previous example, replace <service-name> with the name of the service, such assshd.Refer to Chapter 17, Network Configuration for more information on the Services Configuration Tool. xinetdServices- Services controlled by the
xinetdsuper service only run when a there is an active connection. Examples of services controlled byxinetdinclude Telnet, IMAP, and POP3.Because new instances of these services are launched byxinetdeach time a new request is received, connections that occur after an upgrade are handled by the updated software. However, if there are active connections at the time thexinetdcontrolled service is upgraded, they are serviced by the older version of the software.To kill off older instances of a particularxinetdcontrolled service, upgrade the package for the service then halt all processes currently running. To determine if the process is running, use thepscommand and then use thekillorkillallcommand to halt current instances of the service.For example, if security errataimappackages are released, upgrade the packages, then type the following command as root into a shell prompt:ps -aux | grep imapThis command returns all active IMAP sessions. Individual sessions can then be terminated by issuing the following command:kill <PID>If this fails to terminate the session, use the following command instead:kill -9 <PID>In the previous examples, replace <PID> with the process identification number (found in the second column of thepscommand) for an IMAP session.To kill all active IMAP sessions, issue the following command:killall imapd
Chapter 48. Securing Your Network
48.1. Workstation Security
48.1.1. Evaluating Workstation Security
- BIOS and Boot Loader Security — Can an unauthorized user physically access the machine and boot into single user or rescue mode without a password?
- Password Security — How secure are the user account passwords on the machine?
- Administrative Controls — Who has an account on the system and how much administrative control do they have?
- Available Network Services — What services are listening for requests from the network and should they be running at all?
- Personal Firewalls — What type of firewall, if any, is necessary?
- Security Enhanced Communication Tools — Which tools should be used to communicate between workstations and which should be avoided?
48.1.2. BIOS and Boot Loader Security
48.1.2.1. BIOS Passwords
- Preventing Changes to BIOS Settings — If an intruder has access to the BIOS, they can set it to boot from a diskette or CD-ROM. This makes it possible for them to enter rescue mode or single user mode, which in turn allows them to start arbitrary processes on the system or copy sensitive data.
- Preventing System Booting — Some BIOSes allow password protection of the boot process. When activated, an attacker is forced to enter a password before the BIOS launches the boot loader.
48.1.2.1.1. Securing Non-x86 Platforms
48.1.2.2. Boot Loader Passwords
- Preventing Access to Single User Mode — If attackers can boot the system into single user mode, they are logged in automatically as root without being prompted for the root password.
- Preventing Access to the GRUB Console — If the machine uses GRUB as its boot loader, an attacker can use the GRUB editor interface to change its configuration or to gather information using the
catcommand. - Preventing Access to Insecure Operating Systems — If it is a dual-boot system, an attacker can select an operating system at boot time (for example, DOS), which ignores access controls and file permissions.
48.1.2.2.1. Password Protecting GRUB
grub-md5-crypt/boot/grub/grub.conf. Open the file and below the timeout line in the main section of the document, add the following line:
password --md5 <password-hash>/sbin/grub-md5-crypt[15].
/boot/grub/grub.conf file must be edited.
title line of the operating system that you want to secure, and add a line with the lock directive immediately beneath it.
title DOS lock
Warning
password line must be present in the main section of the /boot/grub/grub.conf file for this method to work properly. Otherwise, an attacker can access the GRUB editor interface and remove the lock line.
lock line to the stanza, followed by a password line.
title DOS lock password --md5 <password-hash>
48.1.3. Password Security
/etc/passwd file, which makes the system vulnerable to offline password cracking attacks. If an intruder can gain access to the machine as a regular user, they can copy the /etc/passwd file to their own machine and run any number of password cracking programs against it. If there is an insecure password in the file, it is only a matter of time before the password cracker discovers it.
/etc/shadow, which is readable only by the root user.
48.1.3.1. Creating Strong Passwords
- Do Not Use Only Words or Numbers — Never use only numbers or words in a password.Some insecure examples include the following:
- 8675309
- juan
- hackme
- Do Not Use Recognizable Words — Words such as proper names, dictionary words, or even terms from television shows or novels should be avoided, even if they are bookended with numbers.Some insecure examples include the following:
- john1
- DS-9
- mentat123
- Do Not Use Words in Foreign Languages — Password cracking programs often check against word lists that encompass dictionaries of many languages. Relying on foreign languages for secure passwords is not secure.Some insecure examples include the following:
- cheguevara
- bienvenido1
- 1dumbKopf
- Do Not Use Hacker Terminology — If you think you are elite because you use hacker terminology — also called l337 (LEET) speak — in your password, think again. Many word lists include LEET speak.Some insecure examples include the following:
- H4X0R
- 1337
- Do Not Use Personal Information — Avoid using any personal information in your passwords. If the attacker knows your identity, the task of deducing your password becomes easier. The following is a list of the types of information to avoid when creating a password:Some insecure examples include the following:
- Your name
- The names of pets
- The names of family members
- Any birth dates
- Your phone number or zip code
- Do Not Invert Recognizable Words — Good password checkers always reverse common words, so inverting a bad password does not make it any more secure.Some insecure examples include the following:
- R0X4H
- nauj
- 9-DS
- Do Not Write Down Your Password — Never store a password on paper. It is much safer to memorize it.
- Do Not Use the Same Password For All Machines — It is important to make separate passwords for each machine. This way if one system is compromised, all of your machines are not immediately at risk.
- Make the Password at Least Eight Characters Long — The longer the password, the better. If using MD5 passwords, it should be 15 characters or longer. With DES passwords, use the maximum length (eight characters).
- Mix Upper and Lower Case Letters — Red Hat Enterprise Linux is case sensitive, so mix cases to enhance the strength of the password.
- Mix Letters and Numbers — Adding numbers to passwords, especially when added to the middle (not just at the beginning or the end), can enhance password strength.
- Include Non-Alphanumeric Characters — Special characters such as &, $, and > can greatly improve the strength of a password (this is not possible if using DES passwords).
- Pick a Password You Can Remember — The best password in the world does little good if you cannot remember it; use acronyms or other mnemonic devices to aid in memorizing passwords.
48.1.3.1.1. Secure Password Creation Methodology
- Think of an easily-remembered phrase, such as:"over the river and through the woods, to grandmother's house we go."
- Next, turn it into an acronym (including the punctuation).
otrattw,tghwg. - Add complexity by substituting numbers and symbols for letters in the acronym. For example, substitute
7fortand the at symbol (@) fora:o7r@77w,7ghwg. - Add more complexity by capitalizing at least one letter, such as
H.o7r@77w,7gHwg. - Finally, do not use the example password above for any systems, ever.
48.1.3.2. Creating User Passwords Within an Organization
48.1.3.2.1. Forcing Strong Passwords
passwd, which is Pluggable Authentication Manager (PAM) aware and therefore checks to see if the password is too short or otherwise easy to crack. This check is performed using the pam_cracklib.so PAM module. Since PAM is customizable, it is possible to add more password integrity checkers, such as pam_passwdqc (available from http://www.openwall.com/passwdqc/) or to write a new module. For a list of available PAM modules, refer to http://www.kernel.org/pub/linux/libs/pam/modules.html. For more information about PAM, refer to Section 48.4, “Pluggable Authentication Modules (PAM)”.
Note
- John The Ripper — A fast and flexible password cracking program. It allows the use of multiple word lists and is capable of brute-force password cracking. It is available online at http://www.openwall.com/john/.
- Crack — Perhaps the most well known password cracking software, Crack is also very fast, though not as easy to use as John The Ripper. It can be found online at http://www.openwall.com/john/.
- Slurpie — Slurpie is similar to John The Ripper and Crack, but it is designed to run on multiple computers simultaneously, creating a distributed password cracking attack. It can be found along with a number of other distributed attack security evaluation tools online at http://www.ussrback.com/distributed.htm.
Warning
48.1.3.2.2. Password Aging
chage command or the graphical User Manager (system-config-users) application.
-M option of the chage command specifies the maximum number of days the password is valid. For example, to set a user's password to expire in 90 days, use the following command:
chage -M 90 <username>99999 after the -M option (this equates to a little over 273 years).
chage command in interactive mode to modify multiple password aging and account details. Use the following command to enter interactive mode:
chage <username>~]# chage davido
Changing the aging information for davido
Enter the new value, or press ENTER for the default
Minimum Password Age [0]: 10
Maximum Password Age [99999]: 90
Last Password Change (YYYY-MM-DD) [2006-08-18]:
Password Expiration Warning [7]:
Password Inactive [-1]:
Account Expiration Date (YYYY-MM-DD) [1969-12-31]:
~]#- Click the menu on the Panel, point to and then click to display the User Manager. Alternatively, type the command
system-config-usersat a shell prompt. - Click the Users tab, and select the required user in the list of users.
- Click on the toolbar to display the User Properties dialog box (or choose on the menu).
- Click the Password Info tab, and select the check box for Enable password expiration.
- Enter the required value in the Days before change required field, and click .
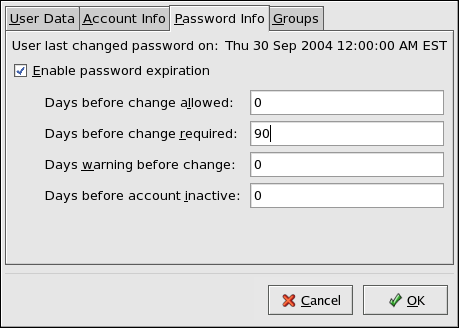
Figure 48.1. Specifying password aging options
48.1.4. Administrative Controls
sudo or su. A setuid program is one that operates with the user ID (UID) of the program's owner rather than the user operating the program. Such programs are denoted by an s in the owner section of a long format listing, as in the following example:
-rwsr-xr-x 1 root root 47324 May 1 08:09 /bin/su
Note
s may be upper case or lower case. If it appears as upper case, it means that the underlying permission bit has not been set.
pam_console.so, some activities normally reserved only for the root user, such as rebooting and mounting removable media are allowed for the first user that logs in at the physical console (refer to Section 48.4, “Pluggable Authentication Modules (PAM)” for more information about the pam_console.so module.) However, other important system administration tasks, such as altering network settings, configuring a new mouse, or mounting network devices, are not possible without administrative privileges. As a result, system administrators must decide how much access the users on their network should receive.
48.1.4.1. Allowing Root Access
- Machine Misconfiguration — Users with root access can misconfigure their machines and require assistance to resolve issues. Even worse, they might open up security holes without knowing it.
- Running Insecure Services — Users with root access might run insecure servers on their machine, such as FTP or Telnet, potentially putting usernames and passwords at risk. These services transmit this information over the network in plain text.
- Running Email Attachments As Root — Although rare, email viruses that affect Linux do exist. The only time they are a threat, however, is when they are run by the root user.
48.1.4.2. Disallowing Root Access
- Changing the root shell
- To prevent users from logging in directly as root, the system administrator can set the root account's shell to
/sbin/nologinin the/etc/passwdfile.Table 48.1. Disabling the Root Shell Effects Does Not Affect Prevents access to the root shell and logs any such attempts. The following programs are prevented from accessing the root account:logingdmkdmxdmsusshscpsftp
Programs that do not require a shell, such as FTP clients, mail clients, and many setuid programs. The following programs are not prevented from accessing the root account:sudo- FTP clients
- Email clients
- Disabling root access via any console device (tty)
- To further limit access to the root account, administrators can disable root logins at the console by editing the
/etc/securettyfile. This file lists all devices the root user is allowed to log into. If the file does not exist at all, the root user can log in through any communication device on the system, whether via the console or a raw network interface. This is dangerous, because a user can log in to their machine as root via Telnet, which transmits the password in plain text over the network.By default, Red Hat Enterprise Linux's/etc/securettyfile only allows the root user to log in at the console physically attached to the machine. To prevent the root user from logging in, remove the contents of this file by typing the following command at a shell prompt as root:echo > /etc/securettyTo enablesecurettysupport in the KDM, GDM, and XDM login managers, add the following line:auth [user_unknown=ignore success=ok ignore=ignore default=bad] pam_securetty.so
to the files listed below:/etc/pam.d/gdm/etc/pam.d/gdm-autologin/etc/pam.d/gdm-fingerprint/etc/pam.d/gdm-password/etc/pam.d/gdm-smartcard/etc/pam.d/kdm/etc/pam.d/kdm-np/etc/pam.d/xdm
Warning
A blank/etc/securettyfile does not prevent the root user from logging in remotely using the OpenSSH suite of tools because the console is not opened until after authentication.Table 48.2. Disabling Root Logins Effects Does Not Affect Prevents access to the root account via the console or the network. The following programs are prevented from accessing the root account:logingdmkdmxdm- Other network services that open a tty
Programs that do not log in as root, but perform administrative tasks through setuid or other mechanisms. The following programs are not prevented from accessing the root account:susudosshscpsftp
- Disabling root SSH logins
- To prevent root logins via the SSH protocol, edit the SSH daemon's configuration file,
/etc/ssh/sshd_config, and change the line that reads:#PermitRootLogin yes
to read as follows:PermitRootLogin no
Table 48.3. Disabling Root SSH Logins Effects Does Not Affect Prevents root access via the OpenSSH suite of tools. The following programs are prevented from accessing the root account:sshscpsftp
Programs that are not part of the OpenSSH suite of tools. - Using PAM to limit root access to services
- PAM, through the
/lib/security/pam_listfile.somodule, allows great flexibility in denying specific accounts. The administrator can use this module to reference a list of users who are not allowed to log in. To limit root access to a system service, edit the file for the target service in the/etc/pam.d/directory and make sure thepam_listfile.somodule is required for authentication.The following is an example of how the module is used for thevsftpdFTP server in the/etc/pam.d/vsftpdPAM configuration file (the\character at the end of the first line is not necessary if the directive is on a single line):auth required /lib/security/pam_listfile.so item=user \ sense=deny file=/etc/vsftpd.ftpusers onerr=succeed
This instructs PAM to consult the/etc/vsftpd.ftpusersfile and deny access to the service for any listed user. The administrator can change the name of this file, and can keep separate lists for each service or use one central list to deny access to multiple services.If the administrator wants to deny access to multiple services, a similar line can be added to the PAM configuration files, such as/etc/pam.d/popand/etc/pam.d/imapfor mail clients, or/etc/pam.d/sshfor SSH clients.For more information about PAM, refer to Section 48.4, “Pluggable Authentication Modules (PAM)”.Table 48.4. Disabling Root Using PAM Effects Does Not Affect Prevents root access to network services that are PAM aware. The following services are prevented from accessing the root account:logingdmkdmxdmsshscpsftp- FTP clients
- Email clients
- Any PAM aware services
Programs and services that are not PAM aware.
48.1.4.3. Limiting Root Access
su or sudo.
48.1.4.3.1. The su Command
su command, they are prompted for the root password and, after authentication, is given a root shell prompt.
su command, the user is the root user and has absolute administrative access to the system[16]. In addition, once a user has become root, it is possible for them to use the su command to change to any other user on the system without being prompted for a password.
usermod -G wheel <username>wheel group.
- Click the menu on the Panel, point to and then click to display the User Manager. Alternatively, type the command
system-config-usersat a shell prompt. - Click the Users tab, and select the required user in the list of users.
- Click on the toolbar to display the User Properties dialog box (or choose on the menu).
- Click the Groups tab, select the check box for the wheel group, and then click . Refer to Figure 48.2, “Adding users to the "wheel" group.”.
- Open the PAM configuration file for
su(/etc/pam.d/su) in a text editor and remove the comment # from the following line:auth required pam_wheel.so use_uid
This change means that only members of the administrative groupwheelcan switch to another user using the su command.
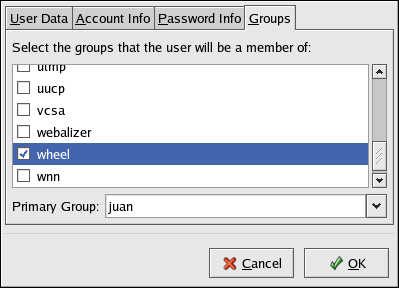
Figure 48.2. Adding users to the "wheel" group.
Note
wheel group by default.
48.1.4.3.2. The sudo Command
sudo command offers another approach to giving users administrative access. When trusted users precede an administrative command with sudo, they are prompted for their own password. Then, when they have been authenticated and assuming that the command is permitted, the administrative command is executed as if they were the root user.
sudo command is as follows:
sudo <command>mount.
Important
sudo command should take extra care to log out before walking away from their machines since sudoers can use the command again without being asked for a password within a five minute period. This setting can be altered via the configuration file, /etc/sudoers.
sudo command allows for a high degree of flexibility. For instance, only users listed in the /etc/sudoers configuration file are allowed to use the sudo command and the command is executed in the user's shell, not a root shell. This means the root shell can be completely disabled, as shown in Section 48.1.4.2, “Disallowing Root Access”.
sudo command also provides a comprehensive audit trail. Each successful authentication is logged to the file /var/log/messages and the command issued along with the issuer's user name is logged to the file /var/log/secure.
sudo command is that an administrator can allow different users access to specific commands based on their needs.
sudo configuration file, /etc/sudoers, should use the visudo command.
visudo and add a line similar to the following in the user privilege specification section:
juan ALL=(ALL) ALL
juan, can use sudo from any host and execute any command.
sudo:
%users localhost=/sbin/shutdown -h now
/sbin/shutdown -h now as long as it is issued from the console.
sudoers has a detailed listing of options for this file.
48.1.5. Available Network Services
48.1.5.1. Risks To Services
- Denial of Service Attacks (DoS) — By flooding a service with requests, a denial of service attack can render a system unusable as it tries to log and answer each request.
- Script Vulnerability Attacks — If a server is using scripts to execute server-side actions, as Web servers commonly do, a cracker can attack improperly written scripts. These script vulnerability attacks can lead to a buffer overflow condition or allow the attacker to alter files on the system.
- Buffer Overflow Attacks — Services that connect to ports numbered 0 through 1023 must run as an administrative user. If the application has an exploitable buffer overflow, an attacker could gain access to the system as the user running the daemon. Because exploitable buffer overflows exist, crackers use automated tools to identify systems with vulnerabilities, and once they have gained access, they use automated rootkits to maintain their access to the system.
Note
Note
48.1.5.2. Identifying and Configuring Services
cupsd— The default print server for Red Hat Enterprise Linux.lpd— An alternative print server.xinetd— A super server that controls connections to a range of subordinate servers, such asgssftpandtelnet.sendmail— The Sendmail Mail Transport Agent (MTA) is enabled by default, but only listens for connections from the localhost.sshd— The OpenSSH server, which is a secure replacement for Telnet.
cupsd running. The same is true for portmap. If you do not mount NFSv3 volumes or use NIS (the ypbind service), then portmap should be disabled.
system-config-services), ntsysv, and chkconfig. For information on using these tools, refer to Chapter 18, Controlling Access to Services.
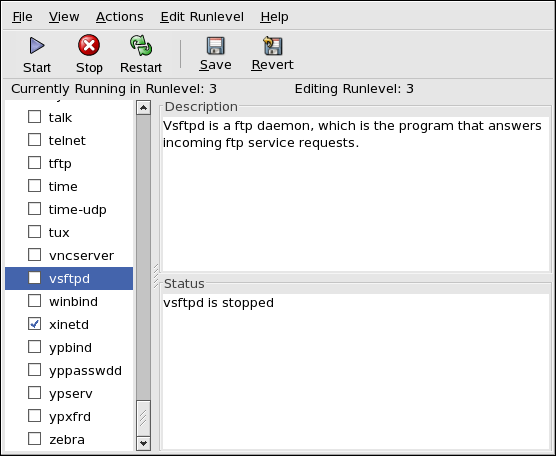
Figure 48.3. Services Configuration Tool
48.1.5.3. Insecure Services
- Transmit Usernames and Passwords Over a Network Unencrypted — Many older protocols, such as Telnet and FTP, do not encrypt the authentication session and should be avoided whenever possible.
- Transmit Sensitive Data Over a Network Unencrypted — Many protocols transmit data over the network unencrypted. These protocols include Telnet, FTP, HTTP, and SMTP. Many network file systems, such as NFS and SMB, also transmit information over the network unencrypted. It is the user's responsibility when using these protocols to limit what type of data is transmitted.Remote memory dump services, like
netdump, transmit the contents of memory over the network unencrypted. Memory dumps can contain passwords or, even worse, database entries and other sensitive information.Other services likefingerandrwhodreveal information about users of the system.
rlogin, rsh, telnet, and vsftpd.
rlogin, rsh, and telnet) should be avoided in favor of SSH. Refer to Section 48.1.7, “Security Enhanced Communication Tools” for more information about sshd.
fingerauthd(this was calledidentdin previous Red Hat Enterprise Linux releases.)netdumpnetdump-servernfsrwhodsendmailsmb(Samba)yppasswddypservypxfrd
48.1.6. Personal Firewalls
Important
system-config-securitylevel). This tool creates broad iptables rules for a general-purpose firewall using a control panel interface.
iptables is probably a better option. Refer to Section 48.8, “Firewalls” for more information. Refer to Section 48.9, “IPTables” for a comprehensive guide to the iptables command.
48.1.7. Security Enhanced Communication Tools
- OpenSSH — A free implementation of the SSH protocol for encrypting network communication.
- Gnu Privacy Guard (GPG) — A free implementation of the PGP (Pretty Good Privacy) encryption application for encrypting data.
telnet and rsh. OpenSSH includes a network service called sshd and three command line client applications:
ssh— A secure remote console access client.scp— A secure remote copy command.sftp— A secure pseudo-ftp client that allows interactive file transfer sessions.
Important
sshd service is inherently secure, the service must be kept up-to-date to prevent security threats. Refer to Section 47.5, “Security Updates” for more information.
48.2. Server Security
- Keep all services current, to protect against the latest threats.
- Use secure protocols whenever possible.
- Serve only one type of network service per machine whenever possible.
- Monitor all servers carefully for suspicious activity.
48.2.1. Securing Services With TCP Wrappers and xinetd
xinetd, a super server that provides additional access, logging, binding, redirection, and resource utilization control.
Note
xinetd to create redundancy within service access controls. Refer to Section 48.8, “Firewalls” for more information about implementing firewalls with iptables commands.
xinetd.
48.2.1.1. Enhancing Security With TCP Wrappers
hosts_options man page for information about the TCP Wrapper functionality and control language.
48.2.1.1.1. TCP Wrappers and Connection Banners
banner option.
vsftpd. To begin, create a banner file. It can be anywhere on the system, but it must have same name as the daemon. For this example, the file is called /etc/banners/vsftpd and contains the following line:
220-Hello, %c 220-All activity on ftp.example.com is logged. 220-Inappropriate use will result in your access privileges being removed.
%c token supplies a variety of client information, such as the username and hostname, or the username and IP address to make the connection even more intimidating.
/etc/hosts.allow file:
vsftpd : ALL : banners /etc/banners/
48.2.1.1.2. TCP Wrappers and Attack Warnings
spawn directive.
/etc/hosts.deny file to deny any connection attempts from that network, and to log the attempts to a special file:
ALL : 206.182.68.0 : spawn /bin/ 'date' %c %d >> /var/log/intruder_alert
%d token supplies the name of the service that the attacker was trying to access.
spawn directive in the /etc/hosts.allow file.
Note
spawn directive executes any shell command, create a special script to notify the administrator or execute a chain of commands in the event that a particular client attempts to connect to the server.
48.2.1.1.3. TCP Wrappers and Enhanced Logging
severity option.
emerg flag in the log files instead of the default flag, info, and deny the connection.
/etc/hosts.deny:
in.telnetd : ALL : severity emerg
authpriv logging facility, but elevates the priority from the default value of info to emerg, which posts log messages directly to the console.
48.2.1.2. Enhancing Security With xinetd
xinetd to set a trap service and using it to control resource levels available to any given xinetd service. Setting resource limits for services can help thwart Denial of Service (DoS) attacks. Refer to the man pages for xinetd and xinetd.conf for a list of available options.
48.2.1.2.1. Setting a Trap
xinetd is its ability to add hosts to a global no_access list. Hosts on this list are denied subsequent connections to services managed by xinetd for a specified period or until xinetd is restarted. You can do this using the SENSOR attribute. This is an easy way to block hosts attempting to scan the ports on the server.
SENSOR is to choose a service you do not plan on using. For this example, Telnet is used.
/etc/xinetd.d/telnet and change the flags line to read:
flags = SENSOR
deny_time = 30
deny_time attribute are FOREVER, which keeps the ban in effect until xinetd is restarted, and NEVER, which allows the connection and logs it.
disable = no
SENSOR is a good way to detect and stop connections from undesirable hosts, it has two drawbacks:
- It does not work against stealth scans.
- An attacker who knows that a
SENSORis running can mount a Denial of Service attack against particular hosts by forging their IP addresses and connecting to the forbidden port.
48.2.1.2.2. Controlling Server Resources
xinetd is its ability to set resource limits for services under its control.
cps = <number_of_connections> <wait_period>— Limits the rate of incoming connections. This directive takes two arguments:<number_of_connections>— The number of connections per second to handle. If the rate of incoming connections is higher than this, the service is temporarily disabled. The default value is fifty (50).<wait_period>— The number of seconds to wait before re-enabling the service after it has been disabled. The default interval is ten (10) seconds.
instances = <number_of_connections>— Specifies the total number of connections allowed to a service. This directive accepts either an integer value orUNLIMITED.per_source = <number_of_connections>— Specifies the number of connections allowed to a service by each host. This directive accepts either an integer value orUNLIMITED.rlimit_as = <number[K|M]>— Specifies the amount of memory address space the service can occupy in kilobytes or megabytes. This directive accepts either an integer value orUNLIMITED.rlimit_cpu = <number_of_seconds>— Specifies the amount of time in seconds that a service may occupy the CPU. This directive accepts either an integer value orUNLIMITED.
xinetd service from overwhelming the system, resulting in a denial of service.
48.2.2. Securing Portmap
portmap service is a dynamic port assignment daemon for RPC services such as NIS and NFS. It has weak authentication mechanisms and has the ability to assign a wide range of ports for the services it controls. For these reasons, it is difficult to secure.
Note
portmap only affects NFSv2 and NFSv3 implementations, since NFSv4 no longer requires it. If you plan to implement an NFSv2 or NFSv3 server, then portmap is required, and the following section applies.
48.2.2.1. Protect portmap With TCP Wrappers
portmap service since it has no built-in form of authentication.
48.2.2.2. Protect portmap With iptables
portmap service, it is a good idea to add iptables rules to the server and restrict access to specific networks.
portmap service) from the 192.168.0.0/24 network. The second allows TCP connections to the same port from the localhost. This is necessary for the sgi_fam service used by Nautilus. All other packets are dropped.
iptables -A INPUT -p tcp -s! 192.168.0.0/24 --dport 111 -j DROPiptables -A INPUT -p tcp -s 127.0.0.1 --dport 111 -j ACCEPT
iptables -A INPUT -p udp -s! 192.168.0.0/24 --dport 111 -j DROPNote
48.2.3. Securing NIS
ypserv,--> which is used in conjunction with portmap and other related services to distribute maps of usernames, passwords, and other sensitive information to any computer claiming to be within its domain.
/usr/sbin/rpc.yppasswdd— Also called theyppasswddservice, this daemon allows users to change their NIS passwords./usr/sbin/rpc.ypxfrd— Also called theypxfrdservice, this daemon is responsible for NIS map transfers over the network./usr/sbin/yppush— This application propagates changed NIS databases to multiple NIS servers./usr/sbin/ypserv— This is the NIS server daemon.
portmap service as outlined in Section 48.2.2, “Securing Portmap”, then address the following issues, such as network planning.
48.2.3.1. Carefully Plan the Network
48.2.3.2. Use a Password-like NIS Domain Name and Hostname
/etc/passwd map:
ypcat -d <NIS_domain> -h <DNS_hostname> passwd/etc/shadow file by typing the following command:
ypcat -d <NIS_domain> -h <DNS_hostname> shadowNote
/etc/shadow file is not stored within an NIS map.
o7hfawtgmhwg.domain.com. Similarly, create a different randomized NIS domain name. This makes it much more difficult for an attacker to access the NIS server.
48.2.3.3. Edit the /var/yp/securenets File
/var/yp/securenets file is blank or does not exist (as is the case after a default installation), NIS listens to all networks. One of the first things to do is to put netmask/network pairs in the file so that ypserv only responds to requests from the appropriate network.
/var/yp/securenets file:
255.255.255.0 192.168.0.0
Warning
/var/yp/securenets file.
48.2.3.4. Assign Static Ports and Use iptables Rules
rpc.yppasswdd — the daemon that allows users to change their login passwords. Assigning ports to the other two NIS server daemons, rpc.ypxfrd and ypserv, allows for the creation of firewall rules to further protect the NIS server daemons from intruders.
/etc/sysconfig/network:
YPSERV_ARGS="-p 834" YPXFRD_ARGS="-p 835"
iptables -A INPUT -p tcp -s! 192.168.0.0/24 --dport 834 -j DROPiptables -A INPUT -p tcp -s! 192.168.0.0/24 --dport 835 -j DROPiptables -A INPUT -p udp -s! 192.168.0.0/24 --dport 834 -j DROPiptables -A INPUT -p udp -s! 192.168.0.0/24 --dport 835 -j DROP
Note
48.2.3.5. Use Kerberos Authentication
/etc/shadow map is sent over the network. If an intruder gains access to an NIS domain and sniffs network traffic, they can collect usernames and password hashes. With enough time, a password cracking program can guess weak passwords, and an attacker can gain access to a valid account on the network.
48.2.4. Securing NFS
Important
portmap service as outlined in Section 48.2.2, “Securing Portmap”. NFS traffic now utilizes TCP in all versions, rather than UDP, and requires it when using NFSv4. NFSv4 now includes Kerberos user and group authentication, as part of the RPCSEC_GSS kernel module. Information on portmap is still included, since Red Hat Enterprise Linux supports NFSv2 and NFSv3, both of which utilize portmap.
48.2.4.1. Carefully Plan the Network
48.2.4.2. Beware of Syntax Errors
/etc/exports file. Be careful not to add extraneous spaces when editing this file.
/etc/exports file shares the directory /tmp/nfs/ to the host bob.example.com with read/write permissions.
/tmp/nfs/ bob.example.com(rw)
/etc/exports file, on the other hand, shares the same directory to the host bob.example.com with read-only permissions and shares it to the world with read/write permissions due to a single space character after the hostname.
/tmp/nfs/ bob.example.com (rw)
showmount command to verify what is being shared:
showmount -e <hostname>48.2.4.3. Do Not Use the no_root_squash Option
nfsnobody user, an unprivileged user account. This changes the owner of all root-created files to nfsnobody, which prevents uploading of programs with the setuid bit set.
no_root_squash is used, remote root users are able to change any file on the shared file system and leave applications infected by Trojans for other users to inadvertently execute.
48.2.5. Securing the Apache HTTP Server
48.2.5.1. FollowSymLinks
/.
48.2.5.2. The Indexes Directive
48.2.5.3. The UserDir Directive
UserDir directive is disabled by default because it can confirm the presence of a user account on the system. To enable user directory browsing on the server, use the following directives:
UserDir enabled UserDir disabled root
/root/. To add users to the list of disabled accounts, add a space-delimited list of users on the UserDir disabled line.
48.2.5.4. Do Not Remove the IncludesNoExec Directive
48.2.5.5. Restrict Permissions for Executable Directories
chown root <directory_name>chmod 755 <directory_name>
Important
48.2.6. Securing FTP
gssftpd— A Kerberos-awarexinetd-based FTP daemon that does not transmit authentication information over the network.- Red Hat Content Accelerator (
tux) — A kernel-space Web server with FTP capabilities. vsftpd— A standalone, security oriented implementation of the FTP service.
vsftpd FTP service.
48.2.6.1. FTP Greeting Banner
vsftpd, add the following directive to the /etc/vsftpd/vsftpd.conf file:
ftpd_banner=<insert_greeting_here>
/etc/banners/. The banner file for FTP connections in this example is /etc/banners/ftp.msg. Below is an example of what such a file may look like:
######### # Hello, all activity on ftp.example.com is logged. #########
Note
220 as specified in Section 48.2.1.1.1, “TCP Wrappers and Connection Banners”.
vsftpd, add the following directive to the /etc/vsftpd/vsftpd.conf file:
banner_file=/etc/banners/ftp.msg
Important
/etc/vsftpd/vsftpd.conf, or else every attempt to connect to vsftpd will result in the connection being closed immediately and a 500 OOPS: cannot open banner <path_to_banner_file> error message.
banner_file directive in /etc/vsftpd/vfsftpd.conf takes precedence over any ftpd_banner directives in the configuration file: if banner_file is specified, then ftpd_banner is ignored.
48.2.6.2. Anonymous Access
/var/ftp/ directory activates the anonymous account.
vsftpd package. This package establishes a directory tree for anonymous users and configures the permissions on directories to read-only for anonymous users.
Warning
48.2.6.2.1. Anonymous Upload
/var/ftp/pub/.
mkdir /var/ftp/pub/uploadchmod 730 /var/ftp/pub/uploaddrwx-wx--- 2 root ftp 4096 Feb 13 20:05 upload
Warning
vsftpd, add the following line to the /etc/vsftpd/vsftpd.conf file:
anon_upload_enable=YES
48.2.6.3. User Accounts
vsftpd, add the following directive to /etc/vsftpd/vsftpd.conf:
local_enable=NO
48.2.6.3.1. Restricting User Accounts
sudo privileges, the easiest way is to use a PAM list file as described in Section 48.1.4.2, “Disallowing Root Access”. The PAM configuration file for vsftpd is /etc/pam.d/vsftpd.
vsftpd, add the username to /etc/vsftpd.ftpusers
48.2.6.4. Use TCP Wrappers To Control Access
48.2.7. Securing Sendmail
/etc/mail/sendmail.cf by editing the /etc/mail/sendmail.mc and using the m4 command.
48.2.7.1. Limiting a Denial of Service Attack
/etc/mail/sendmail.mc, the effectiveness of such attacks is limited.
confCONNECTION_RATE_THROTTLE— The number of connections the server can receive per second. By default, Sendmail does not limit the number of connections. If a limit is set and reached, further connections are delayed.confMAX_DAEMON_CHILDREN— The maximum number of child processes that can be spawned by the server. By default, Sendmail does not assign a limit to the number of child processes. If a limit is set and reached, further connections are delayed.confMIN_FREE_BLOCKS— The minimum number of free blocks which must be available for the server to accept mail. The default is 100 blocks.confMAX_HEADERS_LENGTH— The maximum acceptable size (in bytes) for a message header.confMAX_MESSAGE_SIZE— The maximum acceptable size (in bytes) for a single message.
48.2.7.2. NFS and Sendmail
/var/spool/mail/, on an NFS shared volume.
Note
SECRPC_GSS kernel module does not utilize UID-based authentication. However, it is considered good practice not to put the mail spool directory on NFS shared volumes.
48.2.7.3. Mail-only Users
/etc/passwd file should be set to /sbin/nologin (with the possible exception of the root user).
48.2.8. Verifying Which Ports Are Listening
netstat -an or lsof -i. This method is less reliable since these programs do not connect to the machine from the network, but rather check to see what is running on the system. For this reason, these applications are frequent targets for replacement by attackers. Crackers attempt to cover their tracks if they open unauthorized network ports by replacing netstat and lsof with their own, modified versions.
nmap.
nmap -sT -O localhostStarting nmap 3.55 ( http://www.insecure.org/nmap/ ) at 2004-09-24 13:49 EDT Interesting ports on localhost.localdomain (127.0.0.1): (The 1653 ports scanned but not shown below are in state: closed) PORT STATE SERVICE 22/tcp open ssh 25/tcp open smtp 111/tcp open rpcbind 113/tcp open auth 631/tcp open ipp 834/tcp open unknown 2601/tcp open zebra 32774/tcp open sometimes-rpc11 Device type: general purpose Running: Linux 2.4.X|2.5.X|2.6.X OS details: Linux 2.5.25 - 2.6.3 or Gentoo 1.2 Linux 2.4.19 rc1-rc7) Uptime 12.857 days (since Sat Sep 11 17:16:20 2004) Nmap run completed -- 1 IP address (1 host up) scanned in 5.190 seconds
portmap due to the presence of the sunrpc service. However, there is also a mystery service on port 834. To check if the port is associated with the official list of known services, type:
cat /etc/services | grep 834netstat or lsof. To check for port 834 using netstat, use the following command:
netstat -anp | grep 834tcp 0 0 0.0.0.0:834 0.0.0.0:* LISTEN 653/ypbind
netstat is reassuring because a cracker opening a port surreptitiously on a hacked system is not likely to allow it to be revealed through this command. Also, the [p] option reveals the process ID (PID) of the service that opened the port. In this case, the open port belongs to ypbind (NIS), which is an RPC service handled in conjunction with the portmap service.
lsof command reveals similar information to netstat since it is also capable of linking open ports to services:
lsof -i | grep 834ypbind 653 0 7u IPv4 1319 TCP *:834 (LISTEN) ypbind 655 0 7u IPv4 1319 TCP *:834 (LISTEN) ypbind 656 0 7u IPv4 1319 TCP *:834 (LISTEN) ypbind 657 0 7u IPv4 1319 TCP *:834 (LISTEN)
lsof, netstat, nmap, and services for more information.
48.3. Single Sign-on (SSO)
48.3.1. Introduction
48.3.1.1. Supported Applications
- Login
- Screensaver
- Firefox and Thunderbird
48.3.1.2. Supported Authentication Mechanisms
- Kerberos name/password login
- Smart card/PIN login
48.3.1.3. Supported Smart Cards
48.3.1.4. Advantages of Red Hat Enterprise Linux Single Sign-on
- Provides a single, shared instance of the NSS crypto libraries on each operating system.
- Ships the Certificate System's Enterprise Security Client (ESC) with the base operating system. The ESC application monitors smart card insertion events. If it detects that the user has inserted a smart card that was designed to be used with the Red Hat Enterprise Linux Certificate System server product, it displays a user interface instructing the user how to enroll that smart card.
- Unifies Kerberos and NSS so that users who log in to the operating system using a smart card also obtain a Kerberos credential (which allows them to log in to file servers, etc.)
48.3.2. Getting Started with your new Smart Card
Note
- Log in with your Kerberos name and password
- Make sure you have the
nss-toolspackage loaded. - Download and install your corporate-specific root certificates. Use the following command to install the root CA certificate:
certutil -A -d /etc/pki/nssdb -n "root ca cert" -t "CT,C,C" \-i ./ca_cert_in_base64_format.crt - Verify that you have the following RPMs installed on your system: esc, pam_pkcs11, coolkey, ifd-egate, ccid, gdm, authconfig, and authconfig-gtk.
- Enable Smart Card Login Support
- On the Gnome Title Bar, select System->Administration->Authentication.
- Type your machine's root password if necessary.
- In the Authentication Configuration dialog, click the Authentication tab.
- Select the Enable Smart Card Support check box.
- Click the button to display the Smartcard Settings dialog, and specify the required settings:
- Require smart card for login — Clear this check box. After you have successfully logged in with the smart card you can select this option to prevent users from logging in without a smart card.
- Card Removal Action — This controls what happens when you remove the smart card after you have logged in. The available options are:
- Lock — Removing the smart card locks the X screen.
- Ignore — Removing the smart card has no effect.
- If you need to enable the Online Certificate Status Protocol (OCSP), open the
/etc/pam_pkcs11/pam_pkcs11.conffile, and locate the following line:enable_ocsp = false;Change this value to true, as follows:enable_ocsp = true; - Enroll your smart card
- If you are using a CAC card, you also need to perform the following steps:
- Change to the root account and create a file called
/etc/pam_pkcs11/cn_map. - Add the following entry to the
cn_mapfile:MY.CAC_CN.123454 -> myloginidwhere MY.CAC_CN.123454 is the Common Name on your CAC and myloginid is your UNIX login ID.
- Logout
48.3.2.1. Troubleshooting
pklogin_finder debugpklogin_finder tool in debug mode while an enrolled smart card is plugged in, it attempts to output information about the validity of certificates, and if it is successful in attempting to map a login ID from the certificates that are on the card.
48.3.3. How Smart Card Enrollment Works
- The user inserts their smart card into the smart card reader on their workstation. This event is recognized by the Enterprise Security Client (ESC).
- The enrollment page is displayed on the user's desktop. The user completes the required details and the user's system then connects to the Token Processing System (TPS) and the CA.
- The TPS enrolls the smart card using a certificate signed by the CA.
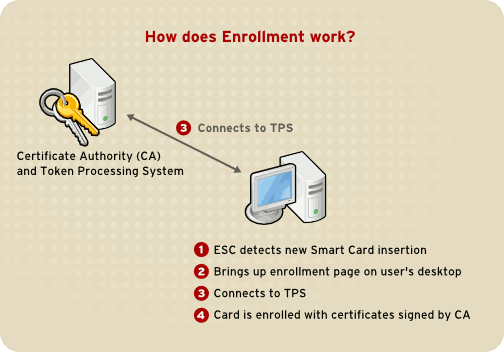
Figure 48.4. How Smart Card Enrollment Works
48.3.4. How Smart Card Login Works
- When the user inserts their smart card into the smart card reader, this event is recognized by the PAM facility, which prompts for the user's PIN.
- The system then looks up the user's current certificates and verifies their validity. The certificate is then mapped to the user's UID.
- This is validated against the KDC and login granted.
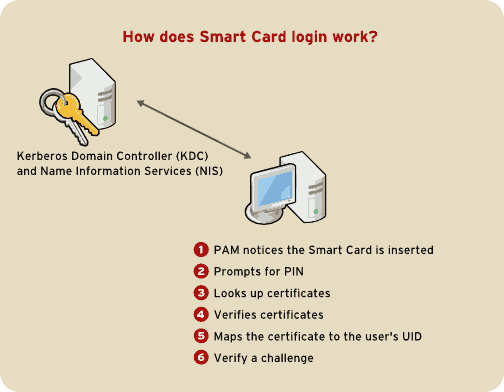
Figure 48.5. How Smart Card Login Works
Note
48.3.5. Configuring Firefox to use Kerberos for SSO
- In the address bar of Firefox, type
about:configto display the list of current configuration options. - In the Filter field, type
negotiateto restrict the list of options. - Double-click the network.negotiate-auth.trusted-uris entry to display the Enter string value dialog box.
- Enter the name of the domain against which you want to authenticate, for example, .example.com.
- Repeat the above procedure for the network.negotiate-auth.delegation-uris entry, using the same domain.
Note
You can leave this value blank, as it allows Kerberos ticket passing, which is not required.If you do not see these two configuration options listed, your version of Firefox may be too old to support Negotiate authentication, and you should consider upgrading.
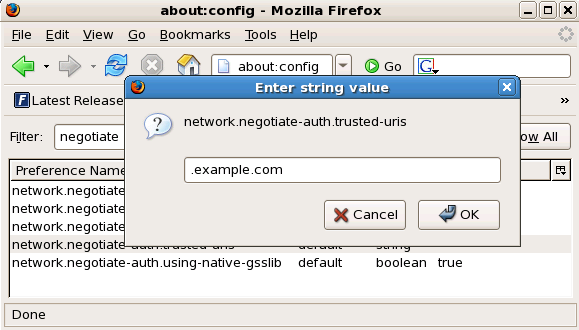
Figure 48.6. Configuring Firefox for SSO with Kerberos
kinit to retrieve Kerberos tickets. To display the list of available tickets, type klist. The following shows an example output from these commands:
~]$kinitPassword for user@EXAMPLE.COM: ~]$klistTicket cache: FILE:/tmp/krb5cc_10920 Default principal: user@EXAMPLE.COM Valid starting Expires Service principal 10/26/06 23:47:54 10/27/06 09:47:54 krbtgt/USER.COM@USER.COM renew until 10/26/06 23:47:54 Kerberos 4 ticket cache: /tmp/tkt10920 klist: You have no tickets cached
48.3.5.1. Troubleshooting
- Close all instances of Firefox.
- Open a command shell, and enter the following commands:
export NSPR_LOG_MODULES=negotiateauth:5export NSPR_LOG_FILE=/tmp/moz.log - Restart Firefox from that shell, and visit the website you were unable to authenticate to earlier. Information will be logged to
/tmp/moz.log, and may give a clue to the problem. For example:-1208550944[90039d0]: entering nsNegotiateAuth::GetNextToken() -1208550944[90039d0]: gss_init_sec_context() failed: Miscellaneous failure No credentials cache found
This indicates that you do not have Kerberos tickets, and need to runkinit.
kinit successfully from your machine but you are unable to authenticate, you might see something like this in the log file:
-1208994096[8d683d8]: entering nsAuthGSSAPI::GetNextToken() -1208994096[8d683d8]: gss_init_sec_context() failed: Miscellaneous failure Server not found in Kerberos database
/etc/krb5.conf file. For example:
.example.com = EXAMPLE.COM example.com = EXAMPLE.COM
48.4. Pluggable Authentication Modules (PAM)
48.4.1. Advantages of PAM
- a common authentication scheme that can be used with a wide variety of applications.
- significant flexibility and control over authentication for both system administrators and application developers.
- a single, fully-documented library which allows developers to write programs without having to create their own authentication schemes.
48.4.2. PAM Configuration Files
/etc/pam.d/ directory contains the PAM configuration files for each PAM-aware application. In earlier versions of PAM, the /etc/pam.conf file was used, but this file is now deprecated and is only used if the /etc/pam.d/ directory does not exist.
48.4.2.1. PAM Service Files
/etc/pam.d/ directory. Each file in this directory has the same name as the service to which it controls access.
/etc/pam.d/ directory. For example, the login program defines its service name as login and installs the /etc/pam.d/login PAM configuration file.
48.4.3. PAM Configuration File Format
<module interface> <control flag> <module name> <module arguments>
48.4.3.1. Module Interface
auth— This module interface authenticates use. For example, it requests and verifies the validity of a password. Modules with this interface can also set credentials, such as group memberships or Kerberos tickets.account— This module interface verifies that access is allowed. For example, it may check if a user account has expired or if a user is allowed to log in at a particular time of day.password— This module interface is used for changing user passwords.session— This module interface configures and manages user sessions. Modules with this interface can also perform additional tasks that are needed to allow access, like mounting a user's home directory and making the user's mailbox available.
Note
pam_unix.so provides all four module interfaces.
auth required pam_unix.so
pam_unix.so module's auth interface.
48.4.3.1.1. Stacking Module Interfaces
reboot command normally uses several stacked modules, as seen in its PAM configuration file:
~]# cat /etc/pam.d/reboot
#%PAM-1.0
auth sufficient pam_rootok.so
auth required pam_console.so
#auth include system-auth
account required pam_permit.so- The first line is a comment and is not processed.
auth sufficient pam_rootok.so— This line uses thepam_rootok.somodule to check whether the current user is root, by verifying that their UID is 0. If this test succeeds, no other modules are consulted and the command is executed. If this test fails, the next module is consulted.auth required pam_console.so— This line uses thepam_console.somodule to attempt to authenticate the user. If this user is already logged in at the console,pam_console.sochecks whether there is a file in the/etc/security/console.apps/directory with the same name as the service name (reboot). If such a file exists, authentication succeeds and control is passed to the next module.#auth include system-auth— This line is commented and is not processed.account required pam_permit.so— This line uses thepam_permit.somodule to allow the root user or anyone logged in at the console to reboot the system.
48.4.3.2. Control Flag
required— The module result must be successful for authentication to continue. If the test fails at this point, the user is not notified until the results of all module tests that reference that interface are complete.requisite— The module result must be successful for authentication to continue. However, if a test fails at this point, the user is notified immediately with a message reflecting the first failedrequiredorrequisitemodule test.sufficient— The module result is ignored if it fails. However, if the result of a module flaggedsufficientis successful and no previous modules flaggedrequiredhave failed, then no other results are required and the user is authenticated to the service.optional— The module result is ignored. A module flagged asoptionalonly becomes necessary for successful authentication when no other modules reference the interface.
Important
required modules are called is not critical. Only the sufficient and requisite control flags cause order to become important.
pam.d man page, and the PAM documentation, located in the /usr/share/doc/pam-<version-number>/ directory, where <version-number> is the version number for PAM on your system, describe this newer syntax in detail.
48.4.3.3. Module Name
/lib64/security/ directory, the directory name is omitted because the application is linked to the appropriate version of libpam, which can locate the correct version of the module.
48.4.3.4. Module Arguments
pam_userdb.so module uses information stored in a Berkeley DB file to authenticate the user. Berkeley DB is an open source database system embedded in many applications. The module takes a db argument so that Berkeley DB knows which database to use for the requested service.
pam_userdb.so line in a PAM configuration. The <path-to-file> is the full path to the Berkeley DB database file:
auth required pam_userdb.so db=<path-to-file>
/var/log/secure file.
48.4.4. Sample PAM Configuration Files
#%PAM-1.0 auth required pam_securetty.so auth required pam_unix.so nullok auth required pam_nologin.so account required pam_unix.so password required pam_cracklib.so retry=3 password required pam_unix.so shadow nullok use_authtok session required pam_unix.so
- The first line is a comment, indicated by the hash mark (
#) at the beginning of the line. - Lines two through four stack three modules for login authentication.
auth required pam_securetty.so— This module ensures that if the user is trying to log in as root, the tty on which the user is logging in is listed in the/etc/securettyfile, if that file exists.If the tty is not listed in the file, any attempt to log in as root fails with aLogin incorrectmessage.auth required pam_unix.so nullok— This module prompts the user for a password and then checks the password using the information stored in/etc/passwdand, if it exists,/etc/shadow.In the authentication phase, thepam_unix.somodule automatically detects whether the user's password is in thepasswdfile or theshadowfile. Refer to Section 37.6, “Shadow Passwords” for more information. auth required pam_nologin.so— This is the final authentication step. It checks whether the/etc/nologinfile exists. If it exists and the user is not root, authentication fails.Note
In this example, all threeauthmodules are checked, even if the firstauthmodule fails. This prevents the user from knowing at what stage their authentication failed. Such knowledge in the hands of an attacker could allow them to more easily deduce how to crack the system.account required pam_unix.so— This module performs any necessary account verification. For example, if shadow passwords have been enabled, the account interface of thepam_unix.somodule checks to see if the account has expired or if the user has not changed the password within the allowed grace period.password required pam_cracklib.so retry=3— If a password has expired, the password component of thepam_cracklib.somodule prompts for a new password. It then tests the newly created password to see whether it can easily be determined by a dictionary-based password cracking program.- The argument
retry=3specifies that if the test fails the first time, the user has two more chances to create a strong password.
password required pam_unix.so shadow nullok use_authtok— This line specifies that if the program changes the user's password, it should use thepasswordinterface of thepam_unix.somodule to do so.- The argument
shadowinstructs the module to create shadow passwords when updating a user's password. - The argument
nullokinstructs the module to allow the user to change their password from a blank password, otherwise a null password is treated as an account lock. - The final argument on this line,
use_authtok, provides a good example of the importance of order when stacking PAM modules. This argument instructs the module not to prompt the user for a new password. Instead, it accepts any password that was recorded by a previous password module. In this way, all new passwords must pass thepam_cracklib.sotest for secure passwords before being accepted.
session required pam_unix.so— The final line instructs the session interface of thepam_unix.somodule to manage the session. This module logs the user name and the service type to/var/log/secureat the beginning and end of each session. This module can be supplemented by stacking it with other session modules for additional functionality.
48.4.5. Creating PAM Modules
/usr/share/doc/pam-<version-number>/ directory, where <version-number> is the version number for PAM on your system.
48.4.6. PAM and Administrative Credential Caching
pam_timestamp.so module. It is important to understand how this mechanism works, because a user who walks away from a terminal while pam_timestamp.so is in effect leaves the machine open to manipulation by anyone with physical access to the console.
pam_timestamp.so module creates a timestamp file. By default, this is created in the /var/run/sudo/ directory. If the timestamp file already exists, graphical administrative programs do not prompt for a password. Instead, the pam_timestamp.so module freshens the timestamp file, reserving an extra five minutes of unchallenged administrative access for the user.
/var/run/sudo/<user> file. For the desktop, the relevant file is unknown:root. If it is present and its timestamp is less than five minutes old, the credentials are valid.
Figure 48.7. The Authentication Icon
48.4.6.1. Removing the Timestamp File

Figure 48.8. Dismiss Authentication Dialog
- If logged in to the system remotely using
ssh, use the/sbin/pam_timestamp_check -k rootcommand to destroy the timestamp file. - You need to run the
/sbin/pam_timestamp_check -k rootcommand from the same terminal window from which you launched the privileged application. - You must be logged in as the user who originally invoked the
pam_timestamp.somodule in order to use the/sbin/pam_timestamp_check -kcommand. Do not log in as root to use this command. - If you want to kill the credentials on the desktop (without using the action on the icon), use the following command:
pam_timestamp_check -k root </dev/null >/dev/null 2>/dev/nullFailure to use this command will only remove the credentials (if any) from the pty where you run the command.
pam_timestamp_check man page for more information about destroying the timestamp file using pam_timestamp_check.
48.4.6.2. Common pam_timestamp Directives
pam_timestamp.so module accepts several directives. The following are the two most commonly used options:
timestamp_timeout— Specifies the period (in seconds) for which the timestamp file is valid. The default value is 300 (five minutes).timestampdir— Specifies the directory in which the timestamp file is stored. The default value is/var/run/sudo/.
pam_timestamp.so module.
48.4.7. PAM and Device Ownership
pam_console.so.
48.4.7.1. Device Ownership
pam_console.so module is called by login or the graphical login programs, gdm, kdm, and xdm. If this user is the first user to log in at the physical console — referred to as the console user — the module grants the user ownership of a variety of devices normally owned by root. The console user owns these devices until the last local session for that user ends. After this user has logged out, ownership of the devices reverts back to the root user.
pam_console.so by editing the following files:
/etc/security/console.perms/etc/security/console.perms.d/50-default.perms
50-default.perms file, you should create a new file (for example, xx-name.perms) and enter the required modifications. The name of the new default file must begin with a number higher than 50 (for example, 51-default.perms). This will override the defaults in the 50-default.perms file.
Warning
<console> and <xconsole> directives in the /etc/security/console.perms to the following values:
<console>=tty[0-9][0-9]* vc/[0-9][0-9]* :0\.[0-9] :0 <xconsole>=:0\.[0-9] :0
<xconsole> directive entirely and change the <console> directive to the following value:
<console>=tty[0-9][0-9]* vc/[0-9][0-9]*
48.4.7.2. Application Access
/etc/security/console.apps/ directory.
/sbin and /usr/sbin.
/sbin/halt/sbin/reboot/sbin/poweroff
pam_console.so module as a requirement for use.
48.4.8. Additional Resources
48.4.8.1. Installed Documentation
- PAM-related man pages — Several man pages exist for the various applications and configuration files involved with PAM. The following is a list of some of the more important man pages.
- Configuration Files
pam— Good introductory information on PAM, including the structure and purpose of the PAM configuration files.Note that this man page discusses both/etc/pam.confand individual configuration files in the/etc/pam.d/directory. By default, Red Hat Enterprise Linux uses the individual configuration files in the/etc/pam.d/directory, ignoring/etc/pam.confeven if it exists.pam_console— Describes the purpose of thepam_console.somodule. It also describes the appropriate syntax for an entry within a PAM configuration file.console.apps— Describes the format and options available in the/etc/security/console.appsconfiguration file, which defines which applications are accessible by the console user assigned by PAM.console.perms— Describes the format and options available in the/etc/security/console.permsconfiguration file, which specifies the console user permissions assigned by PAM.pam_timestamp— Describes thepam_timestamp.somodule.
/usr/share/doc/pam-<version-number>— Contains a System Administrators' Guide, a Module Writers' Manual, and the Application Developers' Manual, as well as a copy of the PAM standard, DCE-RFC 86.0, where <version-number> is the version number of PAM./usr/share/doc/pam-<version-number>/txts/README.pam_timestamp— Contains information about thepam_timestamp.soPAM module, where <version-number> is the version number of PAM.
48.4.8.2. Useful Websites
- http://www.kernel.org/pub/linux/libs/pam/ — The primary distribution website for the Linux-PAM project, containing information on various PAM modules, a FAQ, and additional PAM documentation.
Note
The documentation in the above website is for the last released upstream version of PAM and might not be 100% accurate for the PAM version included in Red Hat Enterprise Linux.
48.5. TCP Wrappers and xinetd
iptables-based firewall filters out unwelcome network packets within the kernel's network stack. For network services that utilize it, TCP Wrappers add an additional layer of protection by defining which hosts are or are not allowed to connect to "wrapped" network services. One such wrapped network service is the xinetd super server. This service is called a super server because it controls connections to a subset of network services and further refines access control.
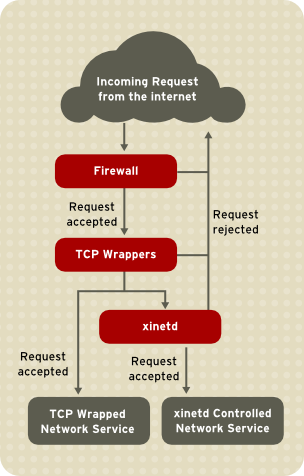
Figure 48.9. Access Control to Network Services
xinetd in controlling access to network services and reviews how these tools can be used to enhance both logging and utilization management. Refer to Section 48.9, “IPTables” for information about using firewalls with iptables.
48.5.1. TCP Wrappers
tcp_wrappers) is installed by default and provides host-based access control to network services. The most important component within the package is the /usr/lib/libwrap.a library. In general terms, a TCP-wrapped service is one that has been compiled against the libwrap.a library.
/etc/hosts.allow and /etc/hosts.deny) to determine whether or not the client is allowed to connect. In most cases, it then uses the syslog daemon (syslogd) to write the name of the requesting client and the requested service to /var/log/secure or /var/log/messages.
libwrap.a library. Some such applications include /usr/sbin/sshd, /usr/sbin/sendmail, and /usr/sbin/xinetd.
Note
libwrap.a, type the following command as the root user:
ldd <binary-name> | grep libwraplibwrap.a.
/usr/sbin/sshd is linked to libwrap.a:
~]# ldd /usr/sbin/sshd | grep libwrap
libwrap.so.0 => /usr/lib/libwrap.so.0 (0x00655000)
~]#48.5.1.1. Advantages of TCP Wrappers
- Transparency to both the client and the wrapped network service — Both the connecting client and the wrapped network service are unaware that TCP Wrappers are in use. Legitimate users are logged and connected to the requested service while connections from banned clients fail.
- Centralized management of multiple protocols — TCP Wrappers operate separately from the network services they protect, allowing many server applications to share a common set of access control configuration files, making for simpler management.
48.5.2. TCP Wrappers Configuration Files
/etc/hosts.allow/etc/hosts.deny
- It references
/etc/hosts.allow. — The TCP-wrapped service sequentially parses the/etc/hosts.allowfile and applies the first rule specified for that service. If it finds a matching rule, it allows the connection. If not, it moves on to the next step. - It references
/etc/hosts.deny. — The TCP-wrapped service sequentially parses the/etc/hosts.denyfile. If it finds a matching rule, it denies the connection. If not, it grants access to the service.
- Because access rules in
hosts.alloware applied first, they take precedence over rules specified inhosts.deny. Therefore, if access to a service is allowed inhosts.allow, a rule denying access to that same service inhosts.denyis ignored. - The rules in each file are read from the top down and the first matching rule for a given service is the only one applied. The order of the rules is extremely important.
- If no rules for the service are found in either file, or if neither file exists, access to the service is granted.
- TCP-wrapped services do not cache the rules from the hosts access files, so any changes to
hosts.alloworhosts.denytake effect immediately, without restarting network services.
Warning
/var/log/messages or /var/log/secure. This is also the case for a rule that spans multiple lines without using the backslash character. The following example illustrates the relevant portion of a log message for a rule failure due to either of these circumstances:
warning: /etc/hosts.allow, line 20: missing newline or line too long
48.5.2.1. Formatting Access Rules
/etc/hosts.allow and /etc/hosts.deny is identical. Each rule must be on its own line. Blank lines or lines that start with a hash (#) are ignored.
<daemon list>: <client list> [: <option>: <option>: ...]
- <daemon list> — A comma-separated list of process names (not service names) or the
ALLwildcard. The daemon list also accepts operators (refer to Section 48.5.2.1.4, “Operators”) to allow greater flexibility. - <client list> — A comma-separated list of hostnames, host IP addresses, special patterns, or wildcards which identify the hosts affected by the rule. The client list also accepts operators listed in Section 48.5.2.1.4, “Operators” to allow greater flexibility.
- <option> — An optional action or colon-separated list of actions performed when the rule is triggered. Option fields support expansions, launch shell commands, allow or deny access, and alter logging behavior.
Note
vsftpd : .example.com
vsftpd) from any host in the example.com domain. If this rule appears in hosts.allow, the connection is accepted. If this rule appears in hosts.deny, the connection is rejected.
sshd : .example.com \ : spawn /bin/echo `/bin/date` access denied>>/var/log/sshd.log \ : deny
sshd) is attempted from a host in the example.com domain, execute the echo command to append the attempt to a special log file, and deny the connection. Because the optional deny directive is used, this line denies access even if it appears in the hosts.allow file. Refer to Section 48.5.2.2, “Option Fields” for a more detailed look at available options.
48.5.2.1.1. Wildcards
ALL— Matches everything. It can be used for both the daemon list and the client list.LOCAL— Matches any host that does not contain a period (.), such as localhost.KNOWN— Matches any host where the hostname and host address are known or where the user is known.UNKNOWN— Matches any host where the hostname or host address are unknown or where the user is unknown.PARANOID— Matches any host where the hostname does not match the host address.
Warning
KNOWN, UNKNOWN, and PARANOID wildcards should be used with care, because they rely on functioning DNS server for correct operation. Any disruption to name resolution may prevent legitimate users from gaining access to a service.
48.5.2.1.2. Patterns
- Hostname beginning with a period (.) — Placing a period at the beginning of a hostname matches all hosts sharing the listed components of the name. The following example applies to any host within the
example.comdomain:ALL : .example.com
- IP address ending with a period (.) — Placing a period at the end of an IP address matches all hosts sharing the initial numeric groups of an IP address. The following example applies to any host within the
192.168.x.xnetwork:ALL : 192.168.
- IP address/netmask pair — Netmask expressions can also be used as a pattern to control access to a particular group of IP addresses. The following example applies to any host with an address range of
192.168.0.0through192.168.1.255:ALL : 192.168.0.0/255.255.254.0
Important
When working in the IPv4 address space, the address/prefix length (prefixlen) pair declarations (CIDR notation) are not supported. Only IPv6 rules can use this format. - [IPv6 address]/prefixlen pair — [net]/prefixlen pairs can also be used as a pattern to control access to a particular group of IPv6 addresses. The following example would apply to any host with an address range of
3ffe:505:2:1::through3ffe:505:2:1:ffff:ffff:ffff:ffff:ALL : [3ffe:505:2:1::]/64
- The asterisk (*) — Asterisks can be used to match entire groups of hostnames or IP addresses, as long as they are not mixed in a client list containing other types of patterns. The following example would apply to any host within the
example.comdomain:ALL : *.example.com
- The slash (/) — If a client list begins with a slash, it is treated as a file name. This is useful if rules specifying large numbers of hosts are necessary. The following example refers TCP Wrappers to the
/etc/telnet.hostsfile for all Telnet connections:in.telnetd : /etc/telnet.hosts
hosts_access man 5 page for more information.
Warning
48.5.2.1.3. Portmap and TCP Wrappers
Portmap's implementation of TCP Wrappers does not support host look-ups, which means portmap can not use hostnames to identify hosts. Consequently, access control rules for portmap in hosts.allow or hosts.deny must use IP addresses, or the keyword ALL, for specifying hosts.
portmap access control rules may not take effect immediately. You may need to restart the portmap service.
portmap to operate, so be aware of these limitations.
48.5.2.1.4. Operators
EXCEPT. It can be used in both the daemon list and the client list of a rule.
EXCEPT operator allows specific exceptions to broader matches within the same rule.
hosts.allow file, all example.com hosts are allowed to connect to all services except cracker.example.com:
ALL: .example.com EXCEPT cracker.example.com
hosts.allow file, clients from the 192.168.0.x network can use all services except for FTP:
ALL EXCEPT vsftpd: 192.168.0.
Note
EXCEPT operators. This allows other administrators to quickly scan the appropriate files to see what hosts are allowed or denied access to services, without having to sort through EXCEPT operators.
48.5.2.2. Option Fields
48.5.2.2.1. Logging
severity directive.
example.com domain are logged to the default authpriv syslog facility (because no facility value is specified) with a priority of emerg:
sshd : .example.com : severity emerg
severity option. The following example logs any SSH connection attempts by hosts from the example.com domain to the local0 facility with a priority of alert:
sshd : .example.com : severity local0.alert
Note
syslogd) is configured to log to the local0 facility. Refer to the syslog.conf man page for information about configuring custom log facilities.
48.5.2.2.2. Access Control
allow or deny directive as the final option.
client-1.example.com, but deny connections from client-2.example.com:
sshd : client-1.example.com : allow sshd : client-2.example.com : deny
hosts.allow or hosts.deny. Some administrators consider this an easier way of organizing access rules.
48.5.2.2.3. Shell Commands
spawn— Launches a shell command as a child process. This directive can perform tasks like using/usr/sbin/safe_fingerto get more information about the requesting client or create special log files using theechocommand.In the following example, clients attempting to access Telnet services from theexample.comdomain are quietly logged to a special file:in.telnetd : .example.com \ : spawn /bin/echo `/bin/date` from %h>>/var/log/telnet.log \ : allow
twist— Replaces the requested service with the specified command. This directive is often used to set up traps for intruders (also called "honey pots"). It can also be used to send messages to connecting clients. Thetwistdirective must occur at the end of the rule line.In the following example, clients attempting to access FTP services from theexample.comdomain are sent a message using theechocommand:vsftpd : .example.com \ : twist /bin/echo "421 This domain has been black-listed. Access denied!"
hosts_options man page.
48.5.2.2.4. Expansions
spawn and twist directives, provide information about the client, server, and processes involved.
%a— Returns the client's IP address.%A— Returns the server's IP address.%c— Returns a variety of client information, such as the username and hostname, or the username and IP address.%d— Returns the daemon process name.%h— Returns the client's hostname (or IP address, if the hostname is unavailable).%H— Returns the server's hostname (or IP address, if the hostname is unavailable).%n— Returns the client's hostname. If unavailable,unknownis printed. If the client's hostname and host address do not match,paranoidis printed.%N— Returns the server's hostname. If unavailable,unknownis printed. If the server's hostname and host address do not match,paranoidis printed.%p— Returns the daemon's process ID.%s—Returns various types of server information, such as the daemon process and the host or IP address of the server.%u— Returns the client's username. If unavailable,unknownis printed.
spawn command to identify the client host in a customized log file.
sshd) are attempted from a host in the example.com domain, execute the echo command to log the attempt, including the client hostname (by using the %h expansion), to a special file:
sshd : .example.com \ : spawn /bin/echo `/bin/date` access denied to %h>>/var/log/sshd.log \ : deny
example.com domain are informed that they have been banned from the server:
vsftpd : .example.com \ : twist /bin/echo "421 %h has been banned from this server!"
hosts_access (man 5 hosts_access) and the man page for hosts_options.
48.5.3. xinetd
xinetd daemon is a TCP-wrapped super service which controls access to a subset of popular network services, including FTP, IMAP, and Telnet. It also provides service-specific configuration options for access control, enhanced logging, binding, redirection, and resource utilization control.
xinetd, the super service receives the request and checks for any TCP Wrappers access control rules.
xinetd verifies that the connection is allowed under its own access rules for that service. It also checks that the service can have more resources allotted to it and that it is not in breach of any defined rules.
xinetd then starts an instance of the requested service and passes control of the connection to it. After the connection has been established, xinetd takes no further part in the communication between the client and the server.
48.5.4. xinetd Configuration Files
xinetd are as follows:
/etc/xinetd.conf— The globalxinetdconfiguration file./etc/xinetd.d/— The directory containing all service-specific files.
48.5.4.1. The /etc/xinetd.conf File
/etc/xinetd.conf file contains general configuration settings which affect every service under xinetd's control. It is read when the xinetd service is first started, so for configuration changes to take effect, you need to restart the xinetd service. The following is a sample /etc/xinetd.conf file:
defaults
{
instances = 60
log_type = SYSLOG authpriv
log_on_success = HOST PID
log_on_failure = HOST
cps = 25 30
}
includedir /etc/xinetd.dxinetd:
instances— Specifies the maximum number of simultaneous requests thatxinetdcan process.log_type— Configuresxinetdto use theauthprivlog facility, which writes log entries to the/var/log/securefile. Adding a directive such asFILE /var/log/xinetdlogwould create a custom log file calledxinetdlogin the/var/log/directory.log_on_success— Configuresxinetdto log successful connection attempts. By default, the remote host's IP address and the process ID of the server processing the request are recorded.log_on_failure— Configuresxinetdto log failed connection attempts or if the connection was denied.cps— Configuresxinetdto allow no more than 25 connections per second to any given service. If this limit is exceeded, the service is retired for 30 seconds.includedir/etc/xinetd.d/— Includes options declared in the service-specific configuration files located in the/etc/xinetd.d/directory. Refer to Section 48.5.4.2, “The /etc/xinetd.d/ Directory” for more information.
Note
log_on_success and log_on_failure settings in /etc/xinetd.conf are further modified in the service-specific configuration files. More information may therefore appear in a given service's log file than the /etc/xinetd.conf file may indicate. Refer to Section 48.5.4.3.1, “Logging Options” for further information.
48.5.4.2. The /etc/xinetd.d/ Directory
/etc/xinetd.d/ directory contains the configuration files for each service managed by xinetd and the names of the files correlate to the service. As with xinetd.conf, this directory is read only when the xinetd service is started. For any changes to take effect, the administrator must restart the xinetd service.
/etc/xinetd.d/ directory use the same conventions as /etc/xinetd.conf. The primary reason the configuration for each service is stored in a separate file is to make customization easier and less likely to affect other services.
/etc/xinetd.d/krb5-telnet file:
service telnet
{
flags = REUSE
socket_type = stream
wait = no
user = root
server = /usr/kerberos/sbin/telnetd
log_on_failure += USERID
disable = yes
}telnet service:
service— Specifies the service name, usually one of those listed in the/etc/servicesfile.flags— Sets any of a number of attributes for the connection.REUSEinstructsxinetdto reuse the socket for a Telnet connection.Note
TheREUSEflag is deprecated. All services now implicitly use theREUSEflag.socket_type— Sets the network socket type tostream.wait— Specifies whether the service is single-threaded (yes) or multi-threaded (no).user— Specifies which user ID the process runs under.server— Specifies which binary executable to launch.log_on_failure— Specifies logging parameters forlog_on_failurein addition to those already defined inxinetd.conf.disable— Specifies whether the service is disabled (yes) or enabled (no).
xinetd.conf man page for more information about these options and their usage.
48.5.4.3. Altering xinetd Configuration Files
xinetd. This section highlights some of the more commonly used options.
48.5.4.3.1. Logging Options
/etc/xinetd.conf and the service-specific configuration files within the /etc/xinetd.d/ directory.
ATTEMPT— Logs the fact that a failed attempt was made (log_on_failure).DURATION— Logs the length of time the service is used by a remote system (log_on_success).EXIT— Logs the exit status or termination signal of the service (log_on_success).HOST— Logs the remote host's IP address (log_on_failureandlog_on_success).PID— Logs the process ID of the server receiving the request (log_on_success).USERID— Logs the remote user using the method defined in RFC 1413 for all multi-threaded stream services (log_on_failureandlog_on_success).
xinetd.conf man page.
48.5.4.3.2. Access Control Options
xinetd services can choose to use the TCP Wrappers hosts access rules, provide access control via the xinetd configuration files, or a mixture of both. Refer to Section 48.5.2, “TCP Wrappers Configuration Files” for more information about TCP Wrappers hosts access control files.
xinetd to control access to services.
Note
xinetd administrator restarts the xinetd service.
xinetd only affects services controlled by xinetd.
xinetd hosts access control differs from the method used by TCP Wrappers. While TCP Wrappers places all of the access configuration within two files, /etc/hosts.allow and /etc/hosts.deny, xinetd's access control is found in each service's configuration file in the /etc/xinetd.d/ directory.
xinetd:
only_from— Allows only the specified hosts to use the service.no_access— Blocks listed hosts from using the service.access_times— Specifies the time range when a particular service may be used. The time range must be stated in 24-hour format notation, HH:MM-HH:MM.
only_from and no_access options can use a list of IP addresses or host names, or can specify an entire network. Like TCP Wrappers, combining xinetd access control with the enhanced logging configuration can increase security by blocking requests from banned hosts while verbosely recording each connection attempt.
/etc/xinetd.d/telnet file can be used to block Telnet access from a particular network group and restrict the overall time range that even allowed users can log in:
service telnet
{
disable = no
flags = REUSE
socket_type = stream
wait = no
user = root
server = /usr/kerberos/sbin/telnetd
log_on_failure += USERID
no_access = 172.16.45.0/24
log_on_success += PID HOST EXIT
access_times = 09:45-16:15
}10.0.1.0/24 network, such as 10.0.1.2, tries to access the Telnet service, it receives the following message:
Connection closed by foreign host.
/var/log/messages as follows:
Sep 7 14:58:33 localhost xinetd[5285]: FAIL: telnet address from=172.16.45.107 Sep 7 14:58:33 localhost xinetd[5283]: START: telnet pid=5285 from=172.16.45.107 Sep 7 14:58:33 localhost xinetd[5283]: EXIT: telnet status=0 pid=5285 duration=0(sec)
xinetd access controls, it is important to understand the relationship between the two access control mechanisms.
xinetd when a client requests a connection:
- The
xinetddaemon accesses the TCP Wrappers hosts access rules using alibwrap.alibrary call. If a deny rule matches the client, the connection is dropped. If an allow rule matches the client, the connection is passed toxinetd. - The
xinetddaemon checks its own access control rules both for thexinetdservice and the requested service. If a deny rule matches the client, the connection is dropped. Otherwise,xinetdstarts an instance of the requested service and passes control of the connection to that service.
Important
xinetd access controls. Misconfiguration can cause undesirable effects.
48.5.4.3.3. Binding and Redirection Options
xinetd support binding the service to an IP address and redirecting incoming requests for that service to another IP address, hostname, or port.
bind option in the service-specific configuration files and links the service to one IP address on the system. When this is configured, the bind option only allows requests to the correct IP address to access the service. You can use this method to bind different services to different network interfaces based on requirements.
redirect option accepts an IP address or hostname followed by a port number. It configures the service to redirect any requests for this service to the specified host and port number. This feature can be used to point to another port number on the same system, redirect the request to a different IP address on the same machine, shift the request to a totally different system and port number, or any combination of these options. A user connecting to a certain service on a system may therefore be rerouted to another system without disruption.
xinetd daemon is able to accomplish this redirection by spawning a process that stays alive for the duration of the connection between the requesting client machine and the host actually providing the service, transferring data between the two systems.
bind and redirect options are most clearly evident when they are used together. By binding a service to a particular IP address on a system and then redirecting requests for this service to a second machine that only the first machine can see, an internal system can be used to provide services for a totally different network. Alternatively, these options can be used to limit the exposure of a particular service on a multi-homed machine to a known IP address, as well as redirect any requests for that service to another machine especially configured for that purpose.
service telnet
{
socket_type = stream
wait = no
server = /usr/kerberos/sbin/telnetd
log_on_success += DURATION USERID
log_on_failure += USERID
bind = 123.123.123.123
redirect = 10.0.1.13 23
}bind and redirect options in this file ensure that the Telnet service on the machine is bound to the external IP address (123.123.123.123), the one facing the Internet. In addition, any requests for Telnet service sent to 123.123.123.123 are redirected via a second network adapter to an internal IP address (10.0.1.13) that only the firewall and internal systems can access. The firewall then sends the communication between the two systems, and the connecting system thinks it is connected to 123.123.123.123 when it is actually connected to a different machine.
xinetd are configured with the bind and redirect options, the gateway machine can act as a proxy between outside systems and a particular internal machine configured to provide the service. In addition, the various xinetd access control and logging options are also available for additional protection.
48.5.4.3.4. Resource Management Options
xinetd daemon can add a basic level of protection from Denial of Service (DoS) attacks. The following is a list of directives which can aid in limiting the effectiveness of such attacks:
per_source— Defines the maximum number of instances for a service per source IP address. It accepts only integers as an argument and can be used in bothxinetd.confand in the service-specific configuration files in thexinetd.d/directory.cps— Defines the maximum number of connections per second. This directive takes two integer arguments separated by white space. The first argument is the maximum number of connections allowed to the service per second. The second argument is the number of seconds thatxinetdmust wait before re-enabling the service. It accepts only integers as arguments and can be used in either thexinetd.conffile or the service-specific configuration files in thexinetd.d/directory.max_load— Defines the CPU usage or load average threshold for a service. It accepts a floating point number argument.The load average is a rough measure of how many processes are active at a given time. See theuptime,who, andprocinfocommands for more information about load average.
xinetd. Refer to the xinetd.conf man page for more information.
48.5.5. Additional Resources
xinetd is available from system documentation and on the Internet.
48.5.5.1. Installed Documentation
xinetd, and access control.
/usr/share/doc/tcp_wrappers-<version>/— This directory contains aREADMEfile that discusses how TCP Wrappers work and the various hostname and host address spoofing risks that exist./usr/share/doc/xinetd-<version>/— This directory contains aREADMEfile that discusses aspects of access control and asample.conffile with various ideas for modifying service-specific configuration files in the/etc/xinetd.d/directory.- TCP Wrappers and
xinetd-related man pages — A number of man pages exist for the various applications and configuration files involved with TCP Wrappers andxinetd. The following are some of the more important man pages:- Server Applications
man xinetd— The man page forxinetd.
- Configuration Files
man 5 hosts_access— The man page for the TCP Wrappers hosts access control files.man hosts_options— The man page for the TCP Wrappers options fields.man xinetd.conf— The man page listingxinetdconfiguration options.
48.5.5.2. Useful Websites
- http://www.xinetd.org/ — The home of
xinetd, containing sample configuration files, a full listing of features, and an informative FAQ. - http://www.macsecurity.org/resources/xinetd/tutorial.shtml — A thorough tutorial that discusses many different ways to optimize default
xinetdconfiguration files to meet specific security goals.
48.6. Kerberos
48.6.1. What is Kerberos?
48.6.1.1. Advantages of Kerberos
48.6.1.2. Disadvantages of Kerberos
- Migrating user passwords from a standard UNIX password database, such as
/etc/passwdor/etc/shadow, to a Kerberos password database can be tedious, as there is no automated mechanism to perform this task. Refer to Question 2.23 in the online Kerberos FAQ: - Kerberos has only partial compatibility with the Pluggable Authentication Modules (PAM) system used by most Red Hat Enterprise Linux servers. Refer to Section 48.6.4, “Kerberos and PAM” for more information about this issue.
- Kerberos assumes that each user is trusted but is using an untrusted host on an untrusted network. Its primary goal is to prevent unencrypted passwords from being transmitted across that network. However, if anyone other than the proper user has access to the one host that issues tickets used for authentication — called the key distribution center (KDC) — the entire Kerberos authentication system is at risk.
- For an application to use Kerberos, its source must be modified to make the appropriate calls into the Kerberos libraries. Applications modified in this way are considered to be Kerberos-aware, or kerberized. For some applications, this can be quite problematic due to the size of the application or its design. For other incompatible applications, changes must be made to the way in which the server and client communicate. Again, this may require extensive programming. Closed-source applications that do not have Kerberos support by default are often the most problematic.
- Kerberos is an all-or-nothing solution. If Kerberos is used on the network, any unencrypted passwords transferred to a non-Kerberos aware service is at risk. Thus, the network gains no benefit from the use of Kerberos. To secure a network with Kerberos, one must either use Kerberos-aware versions of all client/server applications that transmit passwords unencrypted, or not use any such client/server applications at all.
48.6.2. Kerberos Terminology
- authentication server (AS)
- A server that issues tickets for a desired service which are in turn given to users for access to the service. The AS responds to requests from clients who do not have or do not send credentials with a request. It is usually used to gain access to the ticket-granting server (TGS) service by issuing a ticket-granting ticket (TGT). The AS usually runs on the same host as the key distribution center (KDC).
- ciphertext
- Encrypted data.
- client
- An entity on the network (a user, a host, or an application) that can receive a ticket from Kerberos.
- credentials
- A temporary set of electronic credentials that verify the identity of a client for a particular service. Also called a ticket.
- credential cache or ticket file
- A file which contains the keys for encrypting communications between a user and various network services. Kerberos 5 supports a framework for using other cache types, such as shared memory, but files are more thoroughly supported.
- crypt hash
- A one-way hash used to authenticate users. These are more secure than using unencrypted data, but they are still relatively easy to decrypt for an experienced cracker.
- GSS-API
- The Generic Security Service Application Program Interface (defined in RFC-2743 published by The Internet Engineering Task Force) is a set of functions which provide security services. This API is used by clients and services to authenticate to each other without either program having specific knowledge of the underlying mechanism. If a network service (such as cyrus-IMAP) uses GSS-API, it can authenticate using Kerberos.
- hash
- Also known as a hash value. A value generated by passing a string through a hash function. These values are typically used to ensure that transmitted data has not been tampered with.
- hash function
- A way of generating a digital "fingerprint" from input data. These functions rearrange, transpose or otherwise alter data to produce a hash value.
- key
- Data used when encrypting or decrypting other data. Encrypted data cannot be decrypted without the proper key or extremely good fortune on the part of the cracker.
- key distribution center (KDC)
- A service that issues Kerberos tickets, and which usually run on the same host as the ticket-granting server (TGS).
- keytab (or key table)
- A file that includes an unencrypted list of principals and their keys. Servers retrieve the keys they need from keytab files instead of using
kinit. The default keytab file is/etc/krb5.keytab. The KDC administration server,/usr/kerberos/sbin/kadmind, is the only service that uses any other file (it uses/var/kerberos/krb5kdc/kadm5.keytab). - kinit
- The
kinitcommand allows a principal who has already logged in to obtain and cache the initial ticket-granting ticket (TGT). Refer to thekinitman page for more information. - principal (or principal name)
- The principal is the unique name of a user or service allowed to authenticate using Kerberos. A principal follows the form
root[/instance]@REALM. For a typical user, the root is the same as their login ID. Theinstanceis optional. If the principal has an instance, it is separated from the root with a forward slash ("/"). An empty string ("") is considered a valid instance (which differs from the defaultNULLinstance), but using it can be confusing. All principals in a realm have their own key, which for users is derived from a password or is randomly set for services. - realm
- A network that uses Kerberos, composed of one or more servers called KDCs and a potentially large number of clients.
- service
- A program accessed over the network.
- ticket
- A temporary set of electronic credentials that verify the identity of a client for a particular service. Also called credentials.
- ticket-granting server (TGS)
- A server that issues tickets for a desired service which are in turn given to users for access to the service. The TGS usually runs on the same host as the KDC.
- ticket-granting ticket (TGT)
- A special ticket that allows the client to obtain additional tickets without applying for them from the KDC.
- unencrypted password
- A plain text, human-readable password.
48.6.3. How Kerberos Works
kinit program after the user logs in.
kinit program on the client then decrypts the TGT using the user's key, which it computes from the user's password. The user's key is used only on the client machine and is not transmitted over the network.
Warning
Note
- Approximate clock synchronization between the machines on the network.A clock synchronization program should be set up for the network, such as
ntpd. Refer to/usr/share/doc/ntp-<version-number>/index.htmlfor details on setting up Network Time Protocol servers (where <version-number> is the version number of thentppackage installed on your system). - Domain Name Service (DNS).You should ensure that the DNS entries and hosts on the network are all properly configured. Refer to the Kerberos V5 System Administrator's Guide in
/usr/share/doc/krb5-server-<version-number>for more information (where <version-number> is the version number of thekrb5-serverpackage installed on your system).
48.6.4. Kerberos and PAM
pam_krb5 module (provided in the pam_krb5 package) is installed. The pam_krb5 package contains sample configuration files that allow services such as login and gdm to authenticate users as well as obtain initial credentials using their passwords. If access to network servers is always performed using Kerberos-aware services or services that use GSS-API, such as IMAP, the network can be considered reasonably safe.
Note
48.6.5. Configuring a Kerberos 5 Server
- Ensure that time synchronization and DNS are functioning correctly on all client and server machines before configuring Kerberos. Pay particular attention to time synchronization between the Kerberos server and its clients. If the time difference between the server and client is greater than five minutes (this is configurable in Kerberos 5), Kerberos clients can not authenticate to the server. This time synchronization is necessary to prevent an attacker from using an old Kerberos ticket to masquerade as a valid user.It is advisable to set up a Network Time Protocol (NTP) compatible client/server network even if Kerberos is not being used. Red Hat Enterprise Linux includes the
ntppackage for this purpose. Refer to/usr/share/doc/ntp-<version-number>/index.html(where <version-number> is the version number of thentppackage installed on your system) for details about how to set up Network Time Protocol servers, and http://www.ntp.org for more information about NTP. - Install the
krb5-libs,krb5-server, andkrb5-workstationpackages on the dedicated machine which runs the KDC. This machine needs to be very secure — if possible, it should not run any services other than the KDC. - Edit the
/etc/krb5.confand/var/kerberos/krb5kdc/kdc.confconfiguration files to reflect the realm name and domain-to-realm mappings. A simple realm can be constructed by replacing instances of EXAMPLE.COM and example.com with the correct domain name — being certain to keep uppercase and lowercase names in the correct format — and by changing the KDC from kerberos.example.com to the name of the Kerberos server. By convention, all realm names are uppercase and all DNS hostnames and domain names are lowercase. For full details about the formats of these configuration files, refer to their respective man pages. - Create the database using the
kdb5_utilutility from a shell prompt:/usr/kerberos/sbin/kdb5_util create -sThecreatecommand creates the database that stores keys for the Kerberos realm. The-sswitch forces creation of a stash file in which the master server key is stored. If no stash file is present from which to read the key, the Kerberos server (krb5kdc) prompts the user for the master server password (which can be used to regenerate the key) every time it starts. - Edit the
/var/kerberos/krb5kdc/kadm5.aclfile. This file is used bykadmindto determine which principals have administrative access to the Kerberos database and their level of access. Most organizations can get by with a single line:*/admin@EXAMPLE.COM *
Most users are represented in the database by a single principal (with a NULL, or empty, instance, such as joe@EXAMPLE.COM). In this configuration, users with a second principal with an instance of admin (for example, joe/admin@EXAMPLE.COM) are able to wield full power over the realm's Kerberos database.Afterkadmindhas been started on the server, any user can access its services by runningkadminon any of the clients or servers in the realm. However, only users listed in thekadm5.aclfile can modify the database in any way, except for changing their own passwords.Note
Thekadminutility communicates with thekadmindserver over the network, and uses Kerberos to handle authentication. Consequently, the first principal must already exist before connecting to the server over the network to administer it. Create the first principal with thekadmin.localcommand, which is specifically designed to be used on the same host as the KDC and does not use Kerberos for authentication.Type the followingkadmin.localcommand at the KDC terminal to create the first principal:/usr/kerberos/sbin/kadmin.local -q "addprinc username/admin" - Start Kerberos using the following commands:
service krb5kdc startservice kadmin startservice krb524 start - Add principals for the users using the
addprinccommand withinkadmin.kadminandkadmin.localare command line interfaces to the KDC. As such, many commands — such asaddprinc— are available after launching thekadminprogram. Refer to thekadminman page for more information. - Verify that the KDC is issuing tickets. First, run
kinitto obtain a ticket and store it in a credential cache file. Next, useklistto view the list of credentials in the cache and usekdestroyto destroy the cache and the credentials it contains.Note
By default,kinitattempts to authenticate using the same system login username (not the Kerberos server). If that username does not correspond to a principal in the Kerberos database,kinitissues an error message. If that happens, supplykinitwith the name of the correct principal as an argument on the command line (kinit <principal>).
48.6.6. Configuring a Kerberos 5 Client
krb5.conf configuration file. While ssh and slogin are the preferred method of remotely logging in to client systems, Kerberized versions of rsh and rlogin are still available, though deploying them requires that a few more configuration changes be made.
- Be sure that time synchronization is in place between the Kerberos client and the KDC. Refer to Section 48.6.5, “Configuring a Kerberos 5 Server” for more information. In addition, verify that DNS is working properly on the Kerberos client before configuring the Kerberos client programs.
- Install the
krb5-libsandkrb5-workstationpackages on all of the client machines. Supply a valid/etc/krb5.conffile for each client (usually this can be the samekrb5.conffile used by the KDC). - Before a workstation in the realm can use Kerberos to authenticate users who connect using
sshor Kerberizedrshorrlogin, it must have its own host principal in the Kerberos database. Thesshd,kshd, andklogindserver programs all need access to the keys for the host service's principal. Additionally, in order to use the kerberizedrshandrloginservices, that workstation must have thexinetdpackage installed.Usingkadmin, add a host principal for the workstation on the KDC. The instance in this case is the hostname of the workstation. Use the-randkeyoption for thekadmin'saddprinccommand to create the principal and assign it a random key:addprinc -randkey host/blah.example.comNow that the principal has been created, keys can be extracted for the workstation by runningkadminon the workstation itself, and using thektaddcommand withinkadmin:ktadd -k /etc/krb5.keytab host/blah.example.com - To use other kerberized network services, they must first be started. Below is a list of some common kerberized services and instructions about enabling them:
ssh— OpenSSH uses GSS-API to authenticate users to servers if the client's and server's configuration both haveGSSAPIAuthenticationenabled. If the client also hasGSSAPIDelegateCredentialsenabled, the user's credentials are made available on the remote system.rshandrlogin— To use the kerberized versions ofrshandrlogin, enableklogin,eklogin, andkshell.- Telnet — To use kerberized Telnet,
krb5-telnetmust be enabled. - FTP — To provide FTP access, create and extract a key for the principal with a root of
ftp. Be certain to set the instance to the fully qualified hostname of the FTP server, then enablegssftp. - IMAP — To use a kerberized IMAP server, the
cyrus-imappackage uses Kerberos 5 if it also has thecyrus-sasl-gssapipackage installed. Thecyrus-sasl-gssapipackage contains the Cyrus SASL plugins which support GSS-API authentication. Cyrus IMAP should function properly with Kerberos as long as thecyrususer is able to find the proper key in/etc/krb5.keytab, and the root for the principal is set toimap(created withkadmin).An alternative tocyrus-imapcan be found in thedovecotpackage, which is also included in Red Hat Enterprise Linux. This package contains an IMAP server but does not, to date, support GSS-API and Kerberos. - CVS — To use a kerberized CVS server,
gserveruses a principal with a root ofcvsand is otherwise identical to the CVSpserver.
Refer to Chapter 18, Controlling Access to Services for details about how to enable services.
48.6.7. Domain-to-Realm Mapping
foo.example.org → EXAMPLE.ORG
foo.example.com → EXAMPLE.COM
foo.hq.example.com → HQ.EXAMPLE.COM
krb5.conf. For example:
[domain_realm] .example.com = EXAMPLE.COM example.com = EXAMPLE.COM
48.6.8. Setting Up Secondary KDCs
kadmind (it is also your realm's admin server), and one or more KDCs (slave KDCs) keep read-only copies of the database and run kpropd.
krb5.conf and kdc.conf files are copied to the slave KDC.
kadmin.local from a root shell on the master KDC and use its add_principal command to create a new entry for the master KDC's host service, and then use its ktadd command to simultaneously set a random key for the service and store the random key in the master's default keytab file. This key will be used by the kprop command to authenticate to the slave servers. You will only need to do this once, regardless of how many slave servers you install.
~]#kadmin.local -r EXAMPLE.COMAuthenticating as principal root/admin@EXAMPLE.COM with password. kadmin:add_principal -randkey host/masterkdc.example.comPrincipal "host/host/masterkdc.example.com@EXAMPLE.COM" created. kadmin:ktadd host/masterkdc.example.comEntry for principal host/masterkdc.example.com with kvno 3, encryption type Triple DES cbc mode with \ HMAC/sha1 added to keytab WRFILE:/etc/krb5.keytab. Entry for principal host/masterkdc.example.com with kvno 3, encryption type ArcFour with HMAC/md5 \ added to keytab WRFILE:/etc/krb5.keytab. Entry for principal host/masterkdc.example.com with kvno 3, encryption type DES with HMAC/sha1 added \ to keytab WRFILE:/etc/krb5.keytab. Entry for principal host/masterkdc.example.com with kvno 3, encryption type DES cbc mode with RSA-MD5 \ added to keytab WRFILE:/etc/krb5.keytab. kadmin:quit
kadmin from a root shell on the slave KDC and use its add_principal command to create a new entry for the slave KDC's host service, and then use kadmin's ktadd command to simultaneously set a random key for the service and store the random key in the slave's default keytab file. This key is used by the kpropd service when authenticating clients.
~]#kadmin -p jimbo/admin@EXAMPLE.COM -r EXAMPLE.COMAuthenticating as principal jimbo/admin@EXAMPLE.COM with password. Password for jimbo/admin@EXAMPLE.COM: kadmin:add_principal -randkey host/slavekdc.example.comPrincipal "host/slavekdc.example.com@EXAMPLE.COM" created. kadmin:ktadd host/slavekdc.example.com@EXAMPLE.COMEntry for principal host/slavekdc.example.com with kvno 3, encryption type Triple DES cbc mode with \ HMAC/sha1 added to keytab WRFILE:/etc/krb5.keytab. Entry for principal host/slavekdc.example.com with kvno 3, encryption type ArcFour with HMAC/md5 added \ to keytab WRFILE:/etc/krb5.keytab. Entry for principal host/slavekdc.example.com with kvno 3, encryption type DES with HMAC/sha1 added \ to keytab WRFILE:/etc/krb5.keytab. Entry for principal host/slavekdc.example.com with kvno 3, encryption type DES cbc mode with RSA-MD5 added \ to keytab WRFILE:/etc/krb5.keytab. kadmin:quit
kprop service with a new realm database. To restrict access, the kprop service on the slave KDC will only accept updates from clients whose principal names are listed in /var/kerberos/krb5kdc/kpropd.acl. Add the master KDC's host service's name to that file.
~]# echo host/masterkdc.example.com@EXAMPLE.COM > /var/kerberos/krb5kdc/kpropd.acl/var/kerberos/krb5kdc/.k5.REALM, either copy it to the slave KDC using any available secure method, or create a dummy database and identical stash file on the slave KDC by running kdb5_util create -s (the dummy database will be overwritten by the first successful database propagation) and supplying the same password.
kprop service. Then, double-check that the kadmin service is disabled.
kprop command will read (/var/kerberos/krb5kdc/slave_datatrans), and then use the kprop command to transmit its contents to the slave KDC.
~]#/usr/kerberos/sbin/kdb5_util dump /var/kerberos/krb5kdc/slave_datatrans~]#kprop slavekdc.example.com
kinit, verify that a client system whose krb5.conf lists only the slave KDC in its list of KDCs for your realm is now correctly able to obtain initial credentials from the slave KDC.
kprop command to transmit the database to each slave KDC in turn, and configure the cron service to run the script periodically.
48.6.9. Setting Up Cross Realm Authentication
A.EXAMPLE.COM to access a service in the B.EXAMPLE.COM realm, both realms must share a key for a principal named krbtgt/B.EXAMPLE.COM@A.EXAMPLE.COM, and both keys must have the same key version number associated with them.
~]#kadmin -r A.EXAMPLE.COMkadmin:add_principal krbtgt/B.EXAMPLE.COM@A.EXAMPLE.COMEnter password for principal "krbtgt/B.EXAMPLE.COM@A.EXAMPLE.COM": Re-enter password for principal "krbtgt/B.EXAMPLE.COM@A.EXAMPLE.COM": Principal "krbtgt/B.EXAMPLE.COM@A.EXAMPLE.COM" created. kadmin:quit~]#kadmin -r B.EXAMPLE.COMkadmin:add_principal krbtgt/B.EXAMPLE.COM@A.EXAMPLE.COMEnter password for principal "krbtgt/B.EXAMPLE.COM@A.EXAMPLE.COM": Re-enter password for principal "krbtgt/B.EXAMPLE.COM@A.EXAMPLE.COM": Principal "krbtgt/B.EXAMPLE.COM@A.EXAMPLE.COM" created. kadmin:quit
get_principal command to verify that both entries have matching key version numbers (kvno values) and encryption types.
Warning
add_principal command's -randkey option to assign a random key instead of a password, dump the new entry from the database of the first realm, and import it into the second. This will not work unless the master keys for the realm databases are identical, as the keys contained in a database dump are themselves encrypted using the master key.
A.EXAMPLE.COM realm are now able to authenticate to services in the B.EXAMPLE.COM realm. Put another way, the B.EXAMPLE.COM realm now trusts the A.EXAMPLE.COM realm, or phrased even more simply, B.EXAMPLE.COM now trusts A.EXAMPLE.COM.
B.EXAMPLE.COM realm may trust clients from the A.EXAMPLE.COM to authenticate to services in the B.EXAMPLE.COM realm, but the fact that it does has no effect on whether or not clients in the B.EXAMPLE.COM realm are trusted to authenticate to services in the A.EXAMPLE.COM realm. To establish trust in the other direction, both realms would need to share keys for the krbtgt/A.EXAMPLE.COM@B.EXAMPLE.COM service (take note of the reversed in order of the two realms compared to the example above).
A.EXAMPLE.COM can authenticate to services in B.EXAMPLE.COM, and clients from B.EXAMPLE.COM can authenticate to services in C.EXAMPLE.COM, then clients in A.EXAMPLE.COM can also authenticate to services in C.EXAMPLE.COM, even if C.EXAMPLE.COM doesn't directly trust A.EXAMPLE.COM. This means that, on a network with multiple realms which all need to trust each other, making good choices about which trust relationships to set up can greatly reduce the amount of effort required.
service/server.example.com@EXAMPLE.COM
EXAMPLE.COM is the name of the realm.
domain_realm section of /etc/krb5.conf to map either a hostname (server.example.com) or a DNS domain name (.example.com) to the name of a realm (EXAMPLE.COM).
A.EXAMPLE.COM, B.EXAMPLE.COM, and EXAMPLE.COM. When a client in the A.EXAMPLE.COM realm attempts to authenticate to a service in B.EXAMPLE.COM, it will, by default, first attempt to get credentials for the EXAMPLE.COM realm, and then to use those credentials to obtain credentials for use in the B.EXAMPLE.COM realm.
A.EXAMPLE.COM, authenticating to a service in B.EXAMPLE.COM:
A.EXAMPLE.COM → EXAMPLE.COM → B.EXAMPLE.COM
A.EXAMPLE.COMandEXAMPLE.COMshare a key forkrbtgt/EXAMPLE.COM@A.EXAMPLE.COMEXAMPLE.COMandB.EXAMPLE.COMshare a key forkrbtgt/B.EXAMPLE.COM@EXAMPLE.COM
SITE1.SALES.EXAMPLE.COM, authenticating to a service in EVERYWHERE.EXAMPLE.COM:
SITE1.SALES.EXAMPLE.COM → SALES.EXAMPLE.COM → EXAMPLE.COM → EVERYWHERE.EXAMPLE.COM
SITE1.SALES.EXAMPLE.COMandSALES.EXAMPLE.COMshare a key forkrbtgt/SALES.EXAMPLE.COM@SITE1.SALES.EXAMPLE.COMSALES.EXAMPLE.COMandEXAMPLE.COMshare a key forkrbtgt/EXAMPLE.COM@SALES.EXAMPLE.COMEXAMPLE.COMandEVERYWHERE.EXAMPLE.COMshare a key forkrbtgt/EVERYWHERE.EXAMPLE.COM@EXAMPLE.COM
DEVEL.EXAMPLE.COM and PROD.EXAMPLE.ORG):
DEVEL.EXAMPLE.COM → EXAMPLE.COM → COM → ORG → EXAMPLE.ORG → PROD.EXAMPLE.ORG
DEVEL.EXAMPLE.COMandEXAMPLE.COMshare a key forkrbtgt/EXAMPLE.COM@DEVEL.EXAMPLE.COMEXAMPLE.COMandCOMshare a key forkrbtgt/COM@EXAMPLE.COMCOMandORGshare a key forkrbtgt/ORG@COMORGandEXAMPLE.ORGshare a key forkrbtgt/EXAMPLE.ORG@ORGEXAMPLE.ORGandPROD.EXAMPLE.ORGshare a key forkrbtgt/PROD.EXAMPLE.ORG@EXAMPLE.ORG
capaths section of /etc/krb5.conf, so that clients which have credentials for one realm will be able to look up which realm is next in the chain which will eventually lead to the being able to authenticate to servers.
capaths section is relatively straightforward: each entry in the section is named after a realm in which a client might exist. Inside of that subsection, the set of intermediate realms from which the client must obtain credentials is listed as values of the key which corresponds to the realm in which a service might reside. If there are no intermediate realms, the value "." is used.
[capaths]
A.EXAMPLE.COM = {
B.EXAMPLE.COM = .
C.EXAMPLE.COM = B.EXAMPLE.COM
D.EXAMPLE.COM = B.EXAMPLE.COM
D.EXAMPLE.COM = C.EXAMPLE.COM
}A.EXAMPLE.COM realm can obtain cross-realm credentials for B.EXAMPLE.COM directly from the A.EXAMPLE.COM KDC.
C.EXAMPLE.COM realm, they will first need to obtain necessary credentials from the B.EXAMPLE.COM realm (this requires that krbtgt/B.EXAMPLE.COM@A.EXAMPLE.COM exist), and then use those credentials to obtain credentials for use in the C.EXAMPLE.COM realm (using krbtgt/C.EXAMPLE.COM@B.EXAMPLE.COM).
D.EXAMPLE.COM realm, they will first need to obtain necessary credentials from the B.EXAMPLE.COM realm, and then credentials from the C.EXAMPLE.COM realm, before finally obtaining credentials for use with the D.EXAMPLE.COM realm.
Note
A.EXAMPLE.COM realm can obtain cross-realm credentials from B.EXAMPLE.COM realm directly. Without the "." indicating this, the client would instead attempt to use a hierarchical path, in this case:
A.EXAMPLE.COM → EXAMPLE.COM → B.EXAMPLE.COM
48.6.10. Additional Resources
48.6.10.1. Installed Documentation
- The Kerberos V5 Installation Guide and the Kerberos V5 System Administrator's Guide in PostScript and HTML formats. These can be found in the
/usr/share/doc/krb5-server-<version-number>/directory (where <version-number> is the version number of thekrb5-serverpackage installed on your system). - The Kerberos V5 UNIX User's Guide in PostScript and HTML formats. These can be found in the
/usr/share/doc/krb5-workstation-<version-number>/directory (where <version-number> is the version number of thekrb5-workstationpackage installed on your system). - Kerberos man pages — There are a number of man pages for the various applications and configuration files involved with a Kerberos implementation. The following is a list of some of the more important man pages.
- Client Applications
man kerberos— An introduction to the Kerberos system which describes how credentials work and provides recommendations for obtaining and destroying Kerberos tickets. The bottom of the man page references a number of related man pages.man kinit— Describes how to use this command to obtain and cache a ticket-granting ticket.man kdestroy— Describes how to use this command to destroy Kerberos credentials.man klist— Describes how to use this command to list cached Kerberos credentials.
- Administrative Applications
man kadmin— Describes how to use this command to administer the Kerberos V5 database.man kdb5_util— Describes how to use this command to create and perform low-level administrative functions on the Kerberos V5 database.
- Server Applications
man krb5kdc— Describes available command line options for the Kerberos V5 KDC.man kadmind— Describes available command line options for the Kerberos V5 administration server.
- Configuration Files
man krb5.conf— Describes the format and options available within the configuration file for the Kerberos V5 library.man kdc.conf— Describes the format and options available within the configuration file for the Kerberos V5 AS and KDC.
48.6.10.2. Useful Websites
- http://web.mit.edu/kerberos/www/ — Kerberos: The Network Authentication Protocol webpage from MIT.
- http://www.nrl.navy.mil/CCS/people/kenh/kerberos-faq.html — The Kerberos Frequently Asked Questions (FAQ).
- ftp://athena-dist.mit.edu/pub/kerberos/doc/usenix.PS — The PostScript version of Kerberos: An Authentication Service for Open Network Systems by Jennifer G. Steiner, Clifford Neuman, and Jeffrey I. Schiller. This document is the original paper describing Kerberos.
- http://web.mit.edu/kerberos/www/dialogue.html — Designing an Authentication System: a Dialogue in Four Scenes originally by Bill Bryant in 1988, modified by Theodore Ts'o in 1997. This document is a conversation between two developers who are thinking through the creation of a Kerberos-style authentication system. The conversational style of the discussion make this a good starting place for people who are completely unfamiliar with Kerberos.
- http://www.ornl.gov/~jar/HowToKerb.html — How to Kerberize your site is a good reference for kerberizing a network.
- http://www.networkcomputing.com/netdesign/kerb1.html — Kerberos Network Design Manual is a thorough overview of the Kerberos system.
48.7. Virtual Private Networks (VPNs)
48.7.1. How Does a VPN Work?
48.7.2. VPNs and Red Hat Enterprise Linux
48.7.3. IPsec
48.7.4. Creating an IPsec Connection
racoon keying daemon handles the IKE key distribution and exchange. Refer to the racoon man page for more information about this daemon.
48.7.5. IPsec Installation
ipsec-tools RPM package be installed on all IPsec hosts (if using a host-to-host configuration) or routers (if using a network-to-network configuration). The RPM package contains essential libraries, daemons, and configuration files for setting up the IPsec connection, including:
/sbin/setkey— manipulates the key management and security attributes of IPsec in the kernel. This executable is controlled by theracoonkey management daemon. Refer to thesetkey(8) man page for more information./usr/sbin/racoon— the IKE key management daemon, used to manage and control security associations and key sharing between IPsec-connected systems./etc/racoon/racoon.conf— theracoondaemon configuration file used to configure various aspects of the IPsec connection, including authentication methods and encryption algorithms used in the connection. Refer to theracoon.conf(5) man page for a complete listing of available directives.
- To connect two network-connected hosts via IPsec, refer to Section 48.7.6, “IPsec Host-to-Host Configuration”.
- To connect one LAN/WAN to another via IPsec, refer to Section 48.7.7, “IPsec Network-to-Network Configuration”.
48.7.6. IPsec Host-to-Host Configuration
48.7.6.1. Host-to-Host Connection
Note
- In a command shell, type
system-config-networkto start the Network Administration Tool. - On the IPsec tab, click to start the IPsec configuration wizard.
- Click to start configuring a host-to-host IPsec connection.
- Enter a unique name for the connection, for example,
ipsec0. If required, select the check box to automatically activate the connection when the computer starts. Click to continue. - Select Host to Host encryption as the connection type, and then click .
- Select the type of encryption to use: manual or automatic.If you select manual encryption, an encryption key must be provided later in the process. If you select automatic encryption, the
racoondaemon manages the encryption key. Theipsec-toolspackage must be installed if you want to use automatic encryption.Click to continue. - Enter the IP address of the remote host.To determine the IP address of the remote host, use the following command on the remote host:
ifconfig <device>where <device> is the Ethernet device that you want to use for the VPN connection.If only one Ethernet card exists in the system, the device name is typically eth0. The following example shows the relevant information from this command (note that this is an example output only):eth0 Link encap:Ethernet HWaddr 00:0C:6E:E8:98:1D inet addr:172.16.44.192 Bcast:172.16.45.255 Mask:255.255.254.0The IP address is the number following theinet addr:label.Note
For host-to-host connections, both hosts should have a public, routable address. Alternatively, both hosts can have a private, non-routable address (for example, from the 10.x.x.x or 192.168.x.x ranges) as long as they are on the sam LAN.If the hosts are on different LANs, or one has a public address while the other has a private address, refer to Section 48.7.7, “IPsec Network-to-Network Configuration”.Click to continue. - If manual encryption was selected in step 6, specify the encryption key to use, or click to create one.
- Specify an authentication key or click to generate one. It can be any combination of numbers and letters.
- Click to continue.
- Verify the information on the IPsec — Summary page, and then click .
- Click > to save the configuration.You may need to restart the network for the changes to take effect. To restart the network, use the following command:
service network restart - Select the IPsec connection from the list and click the button.
- Repeat the entire procedure for the other host. It is essential that the same keys from step 8 be used on the other hosts. Otherwise, IPsec will not work.
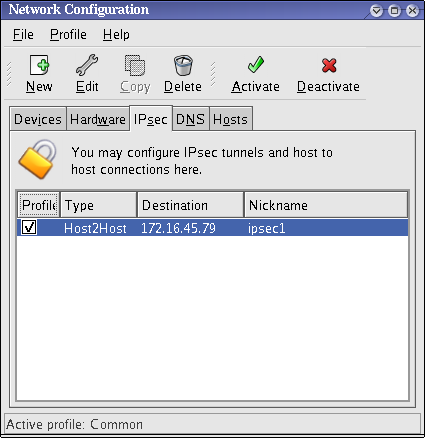
Figure 48.10. IPsec Connection
/etc/sysconfig/network-scripts/ifcfg-<nickname>/etc/sysconfig/network-scripts/keys-<nickname>/etc/racoon/<remote-ip>.conf/etc/racoon/psk.txt
/etc/racoon/racoon.conf is also created.
/etc/racoon/racoon.conf is modified to include <remote-ip>.conf.
48.7.6.2. Manual IPsec Host-to-Host Configuration
- The IP address of each host
- A unique name, for example,
ipsec1. This is used to identify the IPsec connection and to distinguish it from other devices or connections. - A fixed encryption key or one automatically generated by
racoon. - A pre-shared authentication key that is used during the initial stage of the connection and to exchange encryption keys during the session.
Key_Value01, and the users agree to let racoon automatically generate and share an authentication key between each host. Both host users decide to name their connections ipsec1.
Note
/etc/sysconfig/network-scripts/ifcfg-ipsec1.
DST=X.X.X.X TYPE=IPSEC ONBOOT=no IKE_METHOD=PSK
ONBOOT=no) and it uses the pre-shared key method of authentication (IKE_METHOD=PSK).
/etc/sysconfig/network-scripts/keys-ipsec1) that both workstations need to authenticate each other. The contents of this file should be identical on both workstations, and only the root user should be able to read or write this file.
IKE_PSK=Key_Value01
Important
keys-ipsec1 file so that only the root user can read or edit the file, use the following command after creating the file:
chmod 600 /etc/sysconfig/network-scripts/keys-ipsec1keys-ipsec1 file on both workstations. Both authentication keys must be identical for proper connectivity.
X.X.X.X.conf, where X.X.X.X is the IP address of the remote IPsec host. Note that this file is automatically generated when the IPsec tunnel is activated and should not be edited directly.
remote X.X.X.X
{
exchange_mode aggressive, main;
my_identifier address;
proposal {
encryption_algorithm 3des;
hash_algorithm sha1;
authentication_method pre_shared_key;
dh_group 2 ;
}
}- remote X.X.X.X
- Specifies that the subsequent stanzas of this configuration file apply only to the remote node identified by the X.X.X.X IP address.
- exchange_mode aggressive
- The default configuration for IPsec on Red Hat Enterprise Linux uses an aggressive authentication mode, which lowers the connection overhead while allowing configuration of several IPsec connections with multiple hosts.
- my_identifier address
- Specifies the identification method to use when authenticating nodes. Red Hat Enterprise Linux uses IP addresses to identify nodes.
- encryption_algorithm 3des
- Specifies the encryption cipher used during authentication. By default, Triple Data Encryption Standard (3DES) is used.
- hash_algorithm sha1;
- Specifies the hash algorithm used during phase 1 negotiation between nodes. By default, Secure Hash Algorithm version 1 is used.
- authentication_method pre_shared_key
- Specifies the authentication method used during node negotiation. By default, Red Hat Enterprise Linux uses pre-shared keys for authentication.
- dh_group 2
- Specifies the Diffie-Hellman group number for establishing dynamically-generated session keys. By default, modp1024 (group 2) is used.
48.7.6.2.1. The Racoon Configuration File
/etc/racoon/racoon.conf files should be identical on all IPsec nodes except for the include "/etc/racoon/X.X.X.X.conf" statement. This statement (and the file it references) is generated when the IPsec tunnel is activated. For Workstation A, the X.X.X.X in the include statement is Workstation B's IP address. The opposite is true of Workstation B. The following shows a typical racoon.conf file when the IPsec connection is activated.
# Racoon IKE daemon configuration file.
# See 'man racoon.conf' for a description of the format and entries.
path include "/etc/racoon";
path pre_shared_key "/etc/racoon/psk.txt";
path certificate "/etc/racoon/certs";
sainfo anonymous
{
pfs_group 2;
lifetime time 1 hour ;
encryption_algorithm 3des, blowfish 448, rijndael ;
authentication_algorithm hmac_sha1, hmac_md5 ;
compression_algorithm deflate ;
}
include "/etc/racoon/X.X.X.X.conf";racoon.conf file includes defined paths for IPsec configuration, pre-shared key files, and certificates. The fields in sainfo anonymous describe the phase 2 SA between the IPsec nodes — the nature of the IPsec connection (including the supported encryption algorithms used) and the method of exchanging keys. The following list defines the fields of phase 2:
- sainfo anonymous
- Denotes that SA can anonymously initialize with any peer provided that the IPsec credentials match.
- pfs_group 2
- Defines the Diffie-Hellman key exchange protocol, which determines the method by which the IPsec nodes establish a mutual temporary session key for the second phase of IPsec connectivity. By default, the Red Hat Enterprise Linux implementation of IPsec uses group 2 (or
modp1024) of the Diffie-Hellman cryptographic key exchange groups. Group 2 uses a 1024-bit modular exponentiation that prevents attackers from decrypting previous IPsec transmissions even if a private key is compromised. - lifetime time 1 hour
- This parameter specifies the lifetime of an SA and can be quantified either by time or by bytes of data. The default Red Hat Enterprise Linux implementation of IPsec specifies a one hour lifetime.
- encryption_algorithm 3des, blowfish 448, rijndael
- Specifies the supported encryption ciphers for phase 2. Red Hat Enterprise Linux supports 3DES, 448-bit Blowfish, and Rijndael (the cipher used in the Advanced Encryption Standard, or AES).
- authentication_algorithm hmac_sha1, hmac_md5
- Lists the supported hash algorithms for authentication. Supported modes are sha1 and md5 hashed message authentication codes (HMAC).
- compression_algorithm deflate
- Defines the Deflate compression algorithm for IP Payload Compression (IPCOMP) support, which allows for potentially faster transmission of IP datagrams over slow connections.
ifup <nickname>tcpdump utility to view the network packets being transferred between the hosts and verify that they are encrypted via IPsec. The packet should include an AH header and should be shown as ESP packets. ESP means it is encrypted. For example:
~]# tcpdump -n -i eth0 host <targetSystem>
IP 172.16.45.107 > 172.16.44.192: AH(spi=0x0954ccb6,seq=0xbb): ESP(spi=0x0c9f2164,seq=0xbb)48.7.7. IPsec Network-to-Network Configuration

Figure 48.11. A network-to-network IPsec tunneled connection
- The externally-accessible IP addresses of the dedicated IPsec routers
- The network address ranges of the LAN/WAN served by the IPsec routers (such as 192.168.1.0/24 or 10.0.1.0/24)
- The IP addresses of the gateway devices that route the data from the network nodes to the Internet
- A unique name, for example,
ipsec1. This is used to identify the IPsec connection and to distinguish it from other devices or connections. - A fixed encryption key or one automatically generated by
racoon - A pre-shared authentication key that is used during the initial stage of the connection and to exchange encryption keys during the session.
48.7.7.1. Network-to-Network (VPN) Connection

Figure 48.12. Network-to-Network IPsec
- In a command shell, type
system-config-networkto start the Network Administration Tool. - On the IPsec tab, click to start the IPsec configuration wizard.
- Click to start configuring a network-to-network IPsec connection.
- Enter a unique nickname for the connection, for example,
ipsec0. If required, select the check box to automatically activate the connection when the computer starts. Click to continue. - Select Network to Network encryption (VPN) as the connection type, and then click .
- Select the type of encryption to use: manual or automatic.If you select manual encryption, an encryption key must be provided later in the process. If you select automatic encryption, the
racoondaemon manages the encryption key. Theipsec-toolspackage must be installed if you want to use automatic encryption.Click to continue. - On the Local Network page, enter the following information:
- Local Network Address — The IP address of the device on the IPsec router connected to the private network.
- Local Subnet Mask — The subnet mask of the local network IP address.
- Local Network Gateway — The gateway for the private subnet.
Click to continue.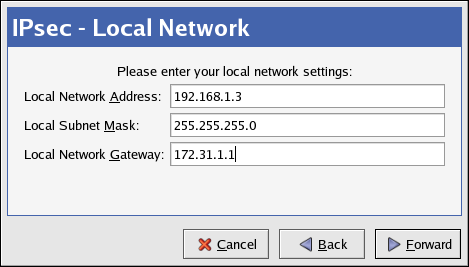
Figure 48.13. Local Network Information
- On the Remote Network page, enter the following information:
- Remote IP Address — The publicly addressable IP address of the IPsec router for the other private network. In our example, for ipsec0, enter the publicly addressable IP address of ipsec1, and vice versa.
- Remote Network Address — The network address of the private subnet behind the other IPsec router. In our example, enter
192.168.1.0if configuring ipsec1, and enter192.168.2.0if configuring ipsec0. - Remote Subnet Mask — The subnet mask of the remote IP address.
- Remote Network Gateway — The IP address of the gateway for the remote network address.
- If manual encryption was selected in step 6, specify the encryption key to use or click to create one.Specify an authentication key or click to generate one. This key can be any combination of numbers and letters.
Click to continue.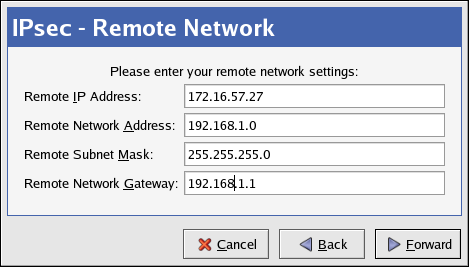
Figure 48.14. Remote Network Information
- Verify the information on the IPsec — Summary page, and then click .
- Select > to save the configuration.
- Select the IPsec connection from the list, and then click to activate the connection.
- Enable IP forwarding:
- Edit
/etc/sysctl.confand setnet.ipv4.ip_forwardto1. - Use the following command to enable the change:
sysctl -p /etc/sysctl.conf
48.7.7.2. Manual IPsec Network-to-Network Configuration
r3dh4tl1nux, and the administrators of A and B agree to let racoon automatically generate and share an authentication key between each IPsec router. The administrator of LAN A decides to name the IPsec connection ipsec0, while the administrator of LAN B names the IPsec connection ipsec1.
ifcfg file for a network-to-network IPsec connection for LAN A. The unique name to identify the connection in this example is ipsec0, so the resulting file is called /etc/sysconfig/network-scripts/ifcfg-ipsec0.
TYPE=IPSEC ONBOOT=yes IKE_METHOD=PSK SRCGW=192.168.1.254 DSTGW=192.168.2.254 SRCNET=192.168.1.0/24 DSTNET=192.168.2.0/24 DST=X.X.X.X
- TYPE=IPSEC
- Specifies the type of connection.
- ONBOOT=yes
- Specifies that the connection should initiate on boot-up.
- IKE_METHOD=PSK
- Specifies that the connection uses the pre-shared key method of authentication.
- SRCGW=192.168.1.254
- The IP address of the source gateway. For LAN A, this is the LAN A gateway, and for LAN B, the LAN B gateway.
- DSTGW=192.168.2.254
- The IP address of the destination gateway. For LAN A, this is the LAN B gateway, and for LAN B, the LAN A gateway.
- SRCNET=192.168.1.0/24
- Specifies the source network for the IPsec connection, which in this example is the network range for LAN A.
- DSTNET=192.168.2.0/24
- Specifies the destination network for the IPsec connection, which in this example is the network range for LAN B.
- DST=X.X.X.X
- The externally-accessible IP address of LAN B.
/etc/sysconfig/network-scripts/keys-ipsecX (where X is 0 for LAN A and 1 for LAN B) that both networks use to authenticate each other. The contents of this file should be identical and only the root user should be able to read or write this file.
IKE_PSK=r3dh4tl1nux
Important
keys-ipsecX file so that only the root user can read or edit the file, use the following command after creating the file:
chmod 600 /etc/sysconfig/network-scripts/keys-ipsec1keys-ipsecX file on both IPsec routers. Both keys must be identical for proper connectivity.
/etc/racoon/racoon.conf configuration file for the IPsec connection. Note that the include line at the bottom of the file is automatically generated and only appears if the IPsec tunnel is running.
# Racoon IKE daemon configuration file.
# See 'man racoon.conf' for a description of the format and entries.
path include "/etc/racoon";
path pre_shared_key "/etc/racoon/psk.txt";
path certificate "/etc/racoon/certs";
sainfo anonymous
{
pfs_group 2;
lifetime time 1 hour ;
encryption_algorithm 3des, blowfish 448, rijndael ;
authentication_algorithm hmac_sha1, hmac_md5 ;
compression_algorithm deflate ;
}
include "/etc/racoon/X.X.X.X.conf"X.X.X.X.conf (where X.X.X.X is the IP address of the remote IPsec router). Note that this file is automatically generated when the IPsec tunnel is activated and should not be edited directly.
remote X.X.X.X
{
exchange_mode aggressive, main;
my_identifier address;
proposal {
encryption_algorithm 3des;
hash_algorithm sha1;
authentication_method pre_shared_key;
dh_group 2 ;
}
}- Edit
/etc/sysctl.confand setnet.ipv4.ip_forwardto1. - Use the following command to enable the change:
sysctl -p /etc/sysctl.conf
ifup ipsec0ifup on the IPsec connection. To show a list of routes for the network, use the following command:
ip route listtcpdump utility on the externally-routable device (eth0 in this example) to view the network packets being transferred between the hosts (or networks), and verify that they are encrypted via IPsec. For example, to check the IPsec connectivity of LAN A, use the following command:
tcpdump -n -i eth0 host lana.example.com12:24:26.155529 lanb.example.com > lana.example.com: AH(spi=0x021c9834,seq=0x358): \ lanb.example.com > lana.example.com: ESP(spi=0x00c887ad,seq=0x358) (DF) \ (ipip-proto-4)
48.7.8. Starting and Stopping an IPsec Connection
ifup <nickname>ipsec0.
ifdown <nickname>48.8. Firewalls
| Method | Description | Advantages | Disadvantages | ||||||
|---|---|---|---|---|---|---|---|---|---|
| NAT | Network Address Translation (NAT) places private IP subnetworks behind one or a small pool of public IP addresses, masquerading all requests to one source rather than several. The Linux kernel has built-in NAT functionality through the Netfilter kernel subsystem. |
|
| ||||||
| Packet Filter | A packet filtering firewall reads each data packet that passes through a LAN. It can read and process packets by header information and filters the packet based on sets of programmable rules implemented by the firewall administrator. The Linux kernel has built-in packet filtering functionality through the Netfilter kernel subsystem. |
|
| ||||||
| Proxy | Proxy firewalls filter all requests of a certain protocol or type from LAN clients to a proxy machine, which then makes those requests to the Internet on behalf of the local client. A proxy machine acts as a buffer between malicious remote users and the internal network client machines. |
|
|
48.8.1. Netfilter and IPTables
iptables tool.
48.8.1.1. IPTables Overview
iptables administration tool, a command line tool similar in syntax to its predecessor, ipchains.
ipchains requires intricate rule sets for: filtering source paths; filtering destination paths; and filtering both source and destination connection ports.
iptables uses the Netfilter subsystem to enhance network connection, inspection, and processing. iptables features advanced logging, pre- and post-routing actions, network address translation, and port forwarding, all in one command line interface.
iptables. For more detailed information, refer to Section 48.9, “IPTables”.
48.8.2. Basic Firewall Configuration
48.8.2.1. Security Level Configuration Tool
system-config-securitylevel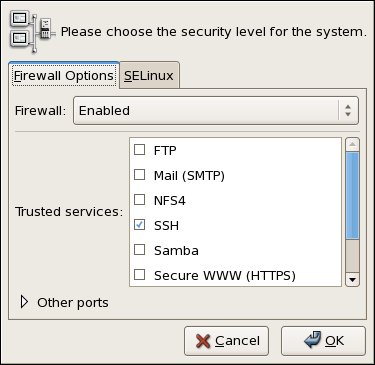
Figure 48.15. Security Level Configuration Tool
Note
iptables rules.
48.8.2.2. Enabling and Disabling the Firewall
- Disabled — Disabling the firewall provides complete access to your system and does no security checking. This should only be selected if you are running on a trusted network (not the Internet) or need to configure a custom firewall using the iptables command line tool.
Warning
Firewall configurations and any customized firewall rules are stored in the/etc/sysconfig/iptablesfile. If you choose Disabled and click , these configurations and firewall rules will be lost. - Enabled — This option configures the system to reject incoming connections that are not in response to outbound requests, such as DNS replies or DHCP requests. If access to services running on this machine is needed, you can choose to allow specific services through the firewall.If you are connecting your system to the Internet, but do not plan to run a server, this is the safest choice.
48.8.2.3. Trusted Services
- WWW (HTTP)
- The HTTP protocol is used by Apache (and by other Web servers) to serve web pages. If you plan on making your Web server publicly available, select this check box. This option is not required for viewing pages locally or for developing web pages. This service requires that the
httpdpackage be installed.Enabling WWW (HTTP) will not open a port for HTTPS, the SSL version of HTTP. If this service is required, select the Secure WWW (HTTPS) check box. - FTP
- The FTP protocol is used to transfer files between machines on a network. If you plan on making your FTP server publicly available, select this check box. This service requires that the
vsftpdpackage be installed. - SSH
- Secure Shell (SSH) is a suite of tools for logging into and executing commands on a remote machine. To allow remote access to the machine via ssh, select this check box. This service requires that the
openssh-serverpackage be installed. - Telnet
- Telnet is a protocol for logging into remote machines. Telnet communications are unencrypted and provide no security from network snooping. Allowing incoming Telnet access is not recommended. To allow remote access to the machine via telnet, select this check box. This service requires that the
telnet-serverpackage be installed. - Mail (SMTP)
- SMTP is a protocol that allows remote hosts to connect directly to your machine to deliver mail. You do not need to enable this service if you collect your mail from your ISP's server using POP3 or IMAP, or if you use a tool such as
fetchmail. To allow delivery of mail to your machine, select this check box. Note that an improperly configured SMTP server can allow remote machines to use your server to send spam. - NFS4
- The Network File System (NFS) is a file sharing protocol commonly used on *NIX systems. Version 4 of this protocol is more secure than its predecessors. If you want to share files or directories on your system with other network users, select this check box.
- Samba
- Samba is an implementation of Microsoft's proprietary SMB networking protocol. If you need to share files, directories, or locally-connected printers with Microsoft Windows machines, select this check box.
48.8.2.4. Other Ports
iptables. For example, to allow IRC and Internet printing protocol (IPP) to pass through the firewall, add the following to the Other ports section:
194:tcp,631:tcp
48.8.2.5. Saving the Settings
iptables commands and written to the /etc/sysconfig/iptables file. The iptables service is also started so that the firewall is activated immediately after saving the selected options. If Disable firewall was selected, the /etc/sysconfig/iptables file is removed and the iptables service is stopped immediately.
/etc/sysconfig/system-config-securitylevel file so that the settings can be restored the next time the application is started. Do not edit this file by hand.
iptables service is not configured to start automatically at boot time. Refer to Section 48.8.2.6, “Activating the IPTables Service” for more information.
48.8.2.6. Activating the IPTables Service
iptables service is running. To manually start the service, use the following command:
service iptables restartiptables starts when the system is booted, use the following command:
chkconfig --level 345 iptables onipchains service is not included in Red Hat Enterprise Linux. However, if ipchains is installed (for example, an upgrade was performed and the system had ipchains previously installed), the ipchains and iptables services should not be activated simultaneously. To make sure the ipchains service is disabled and configured not to start at boot time, use the following two commands:
service ipchains stopchkconfig --level 345 ipchains off
48.8.3. Using IPTables
iptables is to start the iptables service. Use the following command to start the iptables service:
service iptables startNote
ip6tables service can be turned off if you intend to use the iptables service only. If you deactivate the ip6tables service, remember to deactivate the IPv6 network also. Never leave a network device active without the matching firewall.
iptables to start by default when the system is booted, use the following command:
chkconfig --level 345 iptables oniptables to start whenever the system is booted into runlevel 3, 4, or 5.
48.8.3.1. IPTables Command Syntax
iptables command illustrates the basic command syntax:
iptables -A <chain> -j <target>-A option specifies that the rule be appended to <chain>. Each chain is comprised of one or more rules, and is therefore also known as a ruleset.
-j <target> option specifies the target of the rule; i.e., what to do if the packet matches the rule. Examples of built-in targets are ACCEPT, DROP, and REJECT.
iptables man page for more information on the available chains, options, and targets.
48.8.3.2. Basic Firewall Policies
iptables chain is comprised of a default policy, and zero or more rules which work in concert with the default policy to define the overall ruleset for the firewall.
iptables -P INPUT DROPiptables -P OUTPUT DROP
iptables -P FORWARD DROP48.8.3.3. Saving and Restoring IPTables Rules
iptables are transitory; if the system is rebooted or if the iptables service is restarted, the rules are automatically flushed and reset. To save the rules so that they are loaded when the iptables service is started, use the following command:
service iptables save/etc/sysconfig/iptables and are applied whenever the service is started or the machine is rebooted.
48.8.4. Common IPTables Filtering
iptables -A INPUT -p tcp -m tcp --dport 80 -j ACCEPTiptables -A INPUT -p tcp -m tcp --dport 443 -j ACCEPTImportant
iptables ruleset, order is important.
-I option. For example:
iptables -I INPUT 1 -i lo -p all -j ACCEPTiptables to accept connections from remote SSH clients. For example, the following rules allow remote SSH access:
iptables -A INPUT -p tcp --dport 22 -j ACCEPTiptables -A OUTPUT -p tcp --sport 22 -j ACCEPT
iptables filtering rules.
48.8.5. FORWARD and NAT Rules
iptables provides routing and forwarding policies that can be implemented to prevent abnormal usage of network resources.
FORWARD chain allows an administrator to control where packets can be routed within a LAN. For example, to allow forwarding for the entire LAN (assuming the firewall/gateway is assigned an internal IP address on eth1), use the following rules:
iptables -A FORWARD -i eth1 -j ACCEPTiptables -A FORWARD -o eth1 -j ACCEPT
eth1 device.
Note
sysctl -w net.ipv4.ip_forward=1/etc/sysctl.conf file as follows:
net.ipv4.ip_forward = 0
net.ipv4.ip_forward = 1
sysctl.conf file:
sysctl -p /etc/sysctl.conf48.8.5.1. Postrouting and IP Masquerading
iptables -t nat -A POSTROUTING -o eth0 -j MASQUERADE-t nat) and specifies the built-in POSTROUTING chain for NAT (-A POSTROUTING) on the firewall's external networking device (-o eth0).
-j MASQUERADE target is specified to mask the private IP address of a node with the external IP address of the firewall/gateway.
48.8.5.2. Prerouting
-j DNAT target of the PREROUTING chain in NAT to specify a destination IP address and port where incoming packets requesting a connection to your internal service can be forwarded.
iptables -t nat -A PREROUTING -i eth0 -p tcp --dport 80 -j DNAT --to 172.31.0.23:80Note
iptables -A FORWARD -i eth0 -p tcp --dport 80 -d 172.31.0.23 -j ACCEPT48.8.5.3. DMZs and IPTables
iptables rules to route traffic to certain machines, such as a dedicated HTTP or FTP server, in a demilitarized zone (DMZ). A DMZ is a special local subnetwork dedicated to providing services on a public carrier, such as the Internet.
PREROUTING table to forward the packets to the appropriate destination:
iptables -t nat -A PREROUTING -i eth0 -p tcp --dport 80 -j DNAT --to-destination 10.0.4.2:8048.8.6. Malicious Software and Spoofed IP Addresses
iptables -A OUTPUT -o eth0 -p tcp --dport 31337 --sport 31337 -j DROPiptables -A FORWARD -o eth0 -p tcp --dport 31337 --sport 31337 -j DROP
iptables -A FORWARD -s 192.168.1.0/24 -i eth0 -j DROPNote
DROP and REJECT targets when dealing with appended rules.
REJECT target denies access and returns a connection refused error to users who attempt to connect to the service. The DROP target, as the name implies, drops the packet without any warning.
REJECT target is recommended.
48.8.7. IPTables and Connection Tracking
iptables uses a method called connection tracking to store information about incoming connections. You can allow or deny access based on the following connection states:
NEW— A packet requesting a new connection, such as an HTTP request.ESTABLISHED— A packet that is part of an existing connection.RELATED— A packet that is requesting a new connection but is part of an existing connection. For example, FTP uses port 21 to establish a connection, but data is transferred on a different port (typically port 20).INVALID— A packet that is not part of any connections in the connection tracking table.
iptables connection tracking with any network protocol, even if the protocol itself is stateless (such as UDP). The following example shows a rule that uses connection tracking to forward only the packets that are associated with an established connection:
iptables -A FORWARD -m state --state ESTABLISHED,RELATED -j ACCEPT48.8.8. IPv6
ip6tables command. In Red Hat Enterprise Linux 5, both IPv4 and IPv6 services are enabled by default.
ip6tables command syntax is identical to iptables in every aspect except that it supports 128-bit addresses. For example, use the following command to enable SSH connections on an IPv6-aware network server:
ip6tables -A INPUT -i eth0 -p tcp -s 3ffe:ffff:100::1/128 --dport 22 -j ACCEPT48.8.9. Additional Resources
48.8.9.1. Installed Documentation
- Refer to Section 48.9, “IPTables” for more detailed information on the
iptablescommand, including definitions for many command options. - The
iptablesman page contains a brief summary of the various options.
48.8.9.2. Useful Websites
- http://www.netfilter.org/ — The official homepage of the Netfilter and
iptablesproject. - http://www.tldp.org/ — The Linux Documentation Project contains several useful guides relating to firewall creation and administration.
- http://www.iana.org/assignments/port-numbers — The official list of registered and common service ports as assigned by the Internet Assigned Numbers Authority.
48.8.9.3. Related Documentation
- Red Hat Linux Firewalls, by Bill McCarty; Red Hat Press — a comprehensive reference to building network and server firewalls using open source packet filtering technology such as Netfilter and
iptables. It includes topics that cover analyzing firewall logs, developing firewall rules, and customizing your firewall using various graphical tools. - Linux Firewalls, by Robert Ziegler; New Riders Press — contains a wealth of information on building firewalls using both 2.2 kernel
ipchainsas well as Netfilter andiptables. Additional security topics such as remote access issues and intrusion detection systems are also covered.
48.9. IPTables
ipchains for packet filtering and used lists of rules applied to packets at each step of the filtering process. The 2.4 kernel introduced iptables (also called netfilter), which is similar to ipchains but greatly expands the scope and control available for filtering network packets.
ipchains and iptables, explains various options available with iptables commands, and explains how filtering rules can be preserved between system reboots.
iptables rules and setting up a firewall based on these rules.
Warning
iptables, but iptables cannot be used if ipchains is already running. If ipchains is present at boot time, the kernel issues an error and fails to start iptables.
ipchains is not affected by these errors.
48.9.1. Packet Filtering
filter— The default table for handling network packets.nat— Used to alter packets that create a new connection and used for Network Address Translation (NAT).mangle— Used for specific types of packet alteration.
netfilter.
filter table are as follows:
- INPUT — Applies to network packets that are targeted for the host.
- OUTPUT — Applies to locally-generated network packets.
- FORWARD — Applies to network packets routed through the host.
nat table are as follows:
- PREROUTING — Alters network packets when they arrive.
- OUTPUT — Alters locally-generated network packets before they are sent out.
- POSTROUTING — Alters network packets before they are sent out.
mangle table are as follows:
- INPUT — Alters network packets targeted for the host.
- OUTPUT — Alters locally-generated network packets before they are sent out.
- FORWARD — Alters network packets routed through the host.
- PREROUTING — Alters incoming network packets before they are routed.
- POSTROUTING — Alters network packets before they are sent out.
Note
/etc/sysconfig/iptables or /etc/sysconfig/ip6tables files.
iptables service starts before any DNS-related services when a Linux system is booted. This means that firewall rules can only reference numeric IP addresses (for example, 192.168.0.1). Domain names (for example, host.example.com) in such rules produce errors.
ACCEPT target for a matching packet, the packet skips the rest of the rule checks and is allowed to continue to its destination. If a rule specifies a DROP target, that packet is refused access to the system and nothing is sent back to the host that sent the packet. If a rule specifies a QUEUE target, the packet is passed to user-space. If a rule specifies the optional REJECT target, the packet is dropped, but an error packet is sent to the packet's originator.
ACCEPT, DROP, REJECT, or QUEUE. If none of the rules in the chain apply to the packet, then the packet is dealt with in accordance with the default policy.
iptables command configures these tables, as well as sets up new tables if necessary.
48.9.2. Differences Between IPTables and IPChains
ipchains and iptables use chains of rules that operate within the Linux kernel to filter packets based on matches with specified rules or rule sets. However, iptables offers a more extensible way of filtering packets, giving the administrator greater control without building undue complexity into the system.
ipchains and iptables:
- Using
iptables, each filtered packet is processed using rules from only one chain rather than multiple chains. - For example, a FORWARD packet coming into a system using
ipchainswould have to go through the INPUT, FORWARD, and OUTPUT chains to continue to its destination. However,iptablesonly sends packets to the INPUT chain if they are destined for the local system, and only sends them to the OUTPUT chain if the local system generated the packets. It is therefore important to place the rule designed to catch a particular packet within the chain that actually handles the packet. - The DENY target has been changed to DROP.
- In
ipchains, packets that matched a rule in a chain could be directed to the DENY target. This target must be changed to DROP iniptables. - Order matters when placing options in a rule.
- In
ipchains, the order of the rule options does not matter.Theiptablescommand has a stricter syntax. Theiptablescommand requires that the protocol (ICMP, TCP, or UDP) be specified before the source or destination ports. - Network interfaces must be associated with the correct chains in firewall rules.
- For example, incoming interfaces (
-ioption) can only be used in INPUT or FORWARD chains. Similarly, outgoing interfaces (-ooption) can only be used in FORWARD or OUTPUT chains.In other words, INPUT chains and incoming interfaces work together; OUTPUT chains and outgoing interfaces work together. FORWARD chains work with both incoming and outgoing interfaces.OUTPUT chains are no longer used by incoming interfaces, and INPUT chains are not seen by packets moving through outgoing interfaces.
48.9.3. Command Options for IPTables
iptables command. The following aspects of the packet are most often used as criteria:
- Packet Type — Specifies the type of packets the command filters.
- Packet Source/Destination — Specifies which packets the command filters based on the source or destination of the packet.
- Target — Specifies what action is taken on packets matching the above criteria.
iptables rules must be grouped logically, based on the purpose and conditions of the overall rule, for the rule to be valid. The remainder of this section explains commonly-used options for the iptables command.
48.9.3.1. Structure of IPTables Command Options
iptables commands have the following structure:
iptables [-t <table-name>] <command> <chain-name> \ <parameter-1> <option-1> \ <parameter-n> <option-n>
filter table is used.
iptables command can change significantly, based on its purpose.
iptables -D <chain-name> <line-number>
iptables commands, it is important to remember that some parameters and options require further parameters and options to construct a valid rule. This can produce a cascading effect, with the further parameters requiring yet more parameters. Until every parameter and option that requires another set of options is satisfied, the rule is not valid.
iptables -h to view a comprehensive list of iptables command structures.
48.9.3.2. Command Options
iptables to perform a specific action. Only one command option is allowed per iptables command. With the exception of the help command, all commands are written in upper-case characters.
iptables commands are as follows:
-A— Appends the rule to the end of the specified chain. Unlike the-Ioption described below, it does not take an integer argument. It always appends the rule to the end of the specified chain.-C— Checks a particular rule before adding it to the user-specified chain. This command can help you construct complexiptablesrules by prompting you for additional parameters and options.-D <integer> | <rule>— Deletes a rule in a particular chain by number (such as5for the fifth rule in a chain), or by rule specification. The rule specification must exactly match an existing rule.-E— Renames a user-defined chain. A user-defined chain is any chain other than the default, pre-existing chains. (Refer to the-Noption, below, for information on creating user-defined chains.) This is a cosmetic change and does not affect the structure of the table.Note
If you attempt to rename one of the default chains, the system reports aMatch not founderror. You cannot rename the default chains.-F— Flushes the selected chain, which effectively deletes every rule in the chain. If no chain is specified, this command flushes every rule from every chain.-h— Provides a list of command structures, as well as a quick summary of command parameters and options.-I [<integer>]— Inserts the rule in the specified chain at a point specified by a user-defined integer argument. If no argument is specified, the rule is inserted at the top of the chain.Warning
As noted above, the order of rules in a chain determines which rules apply to which packets. This is important to remember when adding rules using either the-Aor-Ioption.This is especially important when adding rules using the-Iwith an integer argument. If you specify an existing number when adding a rule to a chain,iptablesadds the new rule before (or above) the existing rule.-L— Lists all of the rules in the chain specified after the command. To list all rules in all chains in the defaultfiltertable, do not specify a chain or table. Otherwise, the following syntax should be used to list the rules in a specific chain in a particular table:iptables -L <chain-name> -t <table-name>Additional options for the-Lcommand option, which provide rule numbers and allow more verbose rule descriptions, are described in Section 48.9.3.6, “Listing Options”.-N— Creates a new chain with a user-specified name. The chain name must be unique, otherwise an error message is displayed.-P— Sets the default policy for the specified chain, so that when packets traverse an entire chain without matching a rule, they are sent to the specified target, such as ACCEPT or DROP.-R— Replaces a rule in the specified chain. The rule's number must be specified after the chain's name. The first rule in a chain corresponds to rule number one.-X— Deletes a user-specified chain. You cannot delete a built-in chain.-Z— Sets the byte and packet counters in all chains for a table to zero.
48.9.3.3. IPTables Parameter Options
iptables commands, including those used to add, append, delete, insert, or replace rules within a particular chain, require various parameters to construct a packet filtering rule.
-c— Resets the counters for a particular rule. This parameter accepts thePKTSandBYTESoptions to specify which counter to reset.-d— Sets the destination hostname, IP address, or network of a packet that matches the rule. When matching a network, the following IP address/netmask formats are supported:N.N.N.N/M.M.M.M— Where N.N.N.N is the IP address range and M.M.M.M is the netmask.N.N.N.N/M— Where N.N.N.N is the IP address range and M is the bitmask.
-f— Applies this rule only to fragmented packets.You can use the exclamation point character (!) option after this parameter to specify that only unfragmented packets are matched.Note
Distinguishing between fragmented and unfragmented packets is desirable, despite fragmented packets being a standard part of the IP protocol.Originally designed to allow IP packets to travel over networks with differing frame sizes, these days fragmentation is more commonly used to generate DoS attacks using mal-formed packets. It's also worth noting that IPv6 disallows fragmentation entirely.-i— Sets the incoming network interface, such aseth0orppp0. Withiptables, this optional parameter may only be used with the INPUT and FORWARD chains when used with thefiltertable and the PREROUTING chain with thenatandmangletables.This parameter also supports the following special options:- Exclamation point character (
!) — Reverses the directive, meaning any specified interfaces are excluded from this rule. - Plus character (
+) — A wildcard character used to match all interfaces that match the specified string. For example, the parameter-i eth+would apply this rule to any Ethernet interfaces but exclude any other interfaces, such asppp0.
If the-iparameter is used but no interface is specified, then every interface is affected by the rule.-j— Jumps to the specified target when a packet matches a particular rule.The standard targets areACCEPT,DROP,QUEUE, andRETURN.Extended options are also available through modules loaded by default with the Red Hat Enterprise LinuxiptablesRPM package. Valid targets in these modules includeLOG,MARK, andREJECT, among others. Refer to theiptablesman page for more information about these and other targets.This option can also be used to direct a packet matching a particular rule to a user-defined chain outside of the current chain so that other rules can be applied to the packet.If no target is specified, the packet moves past the rule with no action taken. The counter for this rule, however, increases by one.-o— Sets the outgoing network interface for a rule. This option is only valid for the OUTPUT and FORWARD chains in thefiltertable, and the POSTROUTING chain in thenatandmangletables. This parameter accepts the same options as the incoming network interface parameter (-i).-p <protocol>— Sets the IP protocol affected by the rule. This can be eithericmp,tcp,udp, orall, or it can be a numeric value, representing one of these or a different protocol. You can also use any protocols listed in the/etc/protocolsfile.The "all" protocol means the rule applies to every supported protocol. If no protocol is listed with this rule, it defaults to "all".-s— Sets the source for a particular packet using the same syntax as the destination (-d) parameter.
48.9.3.4. IPTables Match Options
iptables command. For example, -p <protocol-name> enables options for the specified protocol. Note that you can also use the protocol ID, instead of the protocol name. Refer to the following examples, each of which have the same effect:
iptables -A INPUT -p icmp --icmp-type any -j ACCEPTiptables -A INPUT -p 5813 --icmp-type any -j ACCEPT
/etc/services file. For readability, it is recommended that you use the service names rather than the port numbers.
Important
/etc/services file to prevent unauthorized editing. If this file is editable, crackers can use it to enable ports on your machine you have otherwise closed. To secure this file, type the following commands as root:
chown root.root /etc/serviceschmod 0644 /etc/serviceschattr +i /etc/services
48.9.3.4.1. TCP Protocol
-p tcp):
--dport— Sets the destination port for the packet.To configure this option, use a network service name (such as www or smtp); a port number; or a range of port numbers.To specify a range of port numbers, separate the two numbers with a colon (:). For example:-p tcp --dport 3000:3200. The largest acceptable valid range is0:65535.Use an exclamation point character (!) after the--dportoption to match all packets that do not use that network service or port.To browse the names and aliases of network services and the port numbers they use, view the/etc/servicesfile.The--destination-portmatch option is synonymous with--dport.--sport— Sets the source port of the packet using the same options as--dport. The--source-portmatch option is synonymous with--sport.--syn— Applies to all TCP packets designed to initiate communication, commonly called SYN packets. Any packets that carry a data payload are not touched.Use an exclamation point character (!) after the--synoption to match all non-SYN packets.--tcp-flags <tested flag list> <set flag list>— Allows TCP packets that have specific bits (flags) set, to match a rule.The--tcp-flagsmatch option accepts two parameters. The first parameter is the mask; a comma-separated list of flags to be examined in the packet. The second parameter is a comma-separated list of flags that must be set for the rule to match.The possible flags are:ACKFINPSHRSTSYNURGALLNONE
For example, aniptablesrule that contains the following specification only matches TCP packets that have the SYN flag set and the ACK and FIN flags not set:--tcp-flags ACK,FIN,SYN SYNUse the exclamation point character (!) after the--tcp-flagsto reverse the effect of the match option.--tcp-option— Attempts to match with TCP-specific options that can be set within a particular packet. This match option can also be reversed with the exclamation point character (!).
48.9.3.4.2. UDP Protocol
-p udp):
--dport— Specifies the destination port of the UDP packet, using the service name, port number, or range of port numbers. The--destination-portmatch option is synonymous with--dport.--sport— Specifies the source port of the UDP packet, using the service name, port number, or range of port numbers. The--source-portmatch option is synonymous with--sport.
--dport and --sport options, to specify a range of port numbers, separate the two numbers with a colon (:). For example: -p tcp --dport 3000:3200. The largest acceptable valid range is 0:65535.
48.9.3.4.3. ICMP Protocol
-p icmp):
--icmp-type— Sets the name or number of the ICMP type to match with the rule. A list of valid ICMP names can be retrieved by typing theiptables -p icmp -hcommand.
48.9.3.4.4. Additional Match Option Modules
iptables command.
-m <module-name>, where <module-name> is the name of the module.
limitmodule — Places limits on how many packets are matched to a particular rule.When used in conjunction with theLOGtarget, thelimitmodule can prevent a flood of matching packets from filling up the system log with repetitive messages or using up system resources.Refer to Section 48.9.3.5, “Target Options” for more information about theLOGtarget.Thelimitmodule enables the following options:--limit— Sets the maximum number of matches for a particular time period, specified as a<value>/<period>pair. For example, using--limit 5/hourallows five rule matches per hour.Periods can be specified in seconds, minutes, hours, or days.If a number and time modifier are not used, the default value of3/houris assumed.--limit-burst— Sets a limit on the number of packets able to match a rule at one time.This option is specified as an integer and should be used in conjunction with the--limitoption.If no value is specified, the default value of five (5) is assumed.
statemodule — Enables state matching.Thestatemodule enables the following options:--state— match a packet with the following connection states:ESTABLISHED— The matching packet is associated with other packets in an established connection. You need to accept this state if you want to maintain a connection between a client and a server.INVALID— The matching packet cannot be tied to a known connection.NEW— The matching packet is either creating a new connection or is part of a two-way connection not previously seen. You need to accept this state if you want to allow new connections to a service.RELATED— The matching packet is starting a new connection related in some way to an existing connection. An example of this is FTP, which uses one connection for control traffic (port 21), and a separate connection for data transfer (port 20).
These connection states can be used in combination with one another by separating them with commas, such as-m state --state INVALID,NEW.
macmodule — Enables hardware MAC address matching.Themacmodule enables the following option:--mac-source— Matches a MAC address of the network interface card that sent the packet. To exclude a MAC address from a rule, place an exclamation point character (!) after the--mac-sourcematch option.
iptables man page for more match options available through modules.
48.9.3.5. Target Options
<user-defined-chain>— A user-defined chain within the table. User-defined chain names must be unique. This target passes the packet to the specified chain.ACCEPT— Allows the packet through to its destination or to another chain.DROP— Drops the packet without responding to the requester. The system that sent the packet is not notified of the failure.QUEUE— The packet is queued for handling by a user-space application.RETURN— Stops checking the packet against rules in the current chain. If the packet with aRETURNtarget matches a rule in a chain called from another chain, the packet is returned to the first chain to resume rule checking where it left off. If theRETURNrule is used on a built-in chain and the packet cannot move up to its previous chain, the default target for the current chain is used.
LOG— Logs all packets that match this rule. Because the packets are logged by the kernel, the/etc/syslog.conffile determines where these log entries are written. By default, they are placed in the/var/log/messagesfile.Additional options can be used after theLOGtarget to specify the way in which logging occurs:--log-level— Sets the priority level of a logging event. Refer to thesyslog.confman page for a list of priority levels.--log-ip-options— Logs any options set in the header of an IP packet.--log-prefix— Places a string of up to 29 characters before the log line when it is written. This is useful for writing syslog filters for use in conjunction with packet logging.Note
Due to an issue with this option, you should add a trailing space to the log-prefix value.--log-tcp-options— Logs any options set in the header of a TCP packet.--log-tcp-sequence— Writes the TCP sequence number for the packet in the log.
REJECT— Sends an error packet back to the remote system and drops the packet.TheREJECTtarget accepts--reject-with <type>(where <type> is the rejection type) allowing more detailed information to be returned with the error packet. The messageport-unreachableis the default error type given if no other option is used. Refer to theiptablesman page for a full list of<type>options.
nat table, or with packet alteration using the mangle table, can be found in the iptables man page.
48.9.3.6. Listing Options
iptables -L [<chain-name>], provides a very basic overview of the default filter table's current chains. Additional options provide more information:
-v— Displays verbose output, such as the number of packets and bytes each chain has processed, the number of packets and bytes each rule has matched, and which interfaces apply to a particular rule.-x— Expands numbers into their exact values. On a busy system, the number of packets and bytes processed by a particular chain or rule may be abbreviated toKilobytes,Megabytes(Megabytes) orGigabytes. This option forces the full number to be displayed.-n— Displays IP addresses and port numbers in numeric format, rather than the default hostname and network service format.--line-numbers— Lists rules in each chain next to their numeric order in the chain. This option is useful when attempting to delete the specific rule in a chain or to locate where to insert a rule within a chain.-t <table-name>— Specifies a table name. If omitted, defaults to the filter table.
-x option.
~]#iptables -L OUTPUT -v -n -xChain OUTPUT (policy ACCEPT 64005 packets, 6445791 bytes) pkts bytes target prot opt in out source destination 1593 133812 ACCEPT icmp -- * * 0.0.0.0/0 0.0.0.0/0 ~]#iptables -L OUTPUT -v -nChain OUTPUT (policy ACCEPT 64783 packets, 6492K bytes) pkts bytes target prot opt in out source destination 1819 153K ACCEPT icmp -- * * 0.0.0.0/0 0.0.0.0/0 ~]#
48.9.4. Saving IPTables Rules
iptables command are stored in memory. If the system is restarted before saving the iptables rule set, all rules are lost. For netfilter rules to persist through a system reboot, they need to be saved. To save netfilter rules, type the following command as root:
service iptables saveiptables init script, which runs the /sbin/iptables-save program and writes the current iptables configuration to /etc/sysconfig/iptables. The existing /etc/sysconfig/iptables file is saved as /etc/sysconfig/iptables.save.
iptables init script reapplies the rules saved in /etc/sysconfig/iptables by using the /sbin/iptables-restore command.
iptables rule before committing it to the /etc/sysconfig/iptables file, it is possible to copy iptables rules into this file from another system's version of this file. This provides a quick way to distribute sets of iptables rules to multiple machines.
iptables-save > <filename>Important
/etc/sysconfig/iptables file to other machines, type /sbin/service iptables restart for the new rules to take effect.
Note
iptables command (/sbin/iptables), which is used to manipulate the tables and chains that constitute the iptables functionality, and the iptables service (/sbin/iptables service), which is used to enable and disable the iptables service itself.
48.9.5. IPTables Control Scripts
iptables in Red Hat Enterprise Linux:
- Security Level Configuration Tool (
system-config-securitylevel) — A graphical interface for creating, activating, and saving basic firewall rules. Refer to Section 48.8.2, “Basic Firewall Configuration” for more information. /sbin/service iptables <option>— Used to manipulate various functions ofiptablesusing its initscript. The following options are available:start— If a firewall is configured (that is,/etc/sysconfig/iptablesexists), all runningiptablesare stopped completely and then started using the/sbin/iptables-restorecommand. This option only works if theipchainskernel module is not loaded. To check if this module is loaded, type the following command as root:lsmod | grep ipchainsIf this command returns no output, it means the module is not loaded. If necessary, use the/sbin/rmmodcommand to remove the module.stop— If a firewall is running, the firewall rules in memory are flushed, and all iptables modules and helpers are unloaded.If theIPTABLES_SAVE_ON_STOPdirective in the/etc/sysconfig/iptables-configconfiguration file is changed from its default value toyes, current rules are saved to/etc/sysconfig/iptablesand any existing rules are moved to the file/etc/sysconfig/iptables.save.Refer to Section 48.9.5.1, “IPTables Control Scripts Configuration File” for more information about theiptables-configfile.restart— If a firewall is running, the firewall rules in memory are flushed, and the firewall is started again if it is configured in/etc/sysconfig/iptables. This option only works if theipchainskernel module is not loaded.If theIPTABLES_SAVE_ON_RESTARTdirective in the/etc/sysconfig/iptables-configconfiguration file is changed from its default value toyes, current rules are saved to/etc/sysconfig/iptablesand any existing rules are moved to the file/etc/sysconfig/iptables.save.Refer to Section 48.9.5.1, “IPTables Control Scripts Configuration File” for more information about theiptables-configfile.status— Displays the status of the firewall and lists all active rules.The default configuration for this option displays IP addresses in each rule. To display domain and hostname information, edit the/etc/sysconfig/iptables-configfile and change the value ofIPTABLES_STATUS_NUMERICtono. Refer to Section 48.9.5.1, “IPTables Control Scripts Configuration File” for more information about theiptables-configfile.panic— Flushes all firewall rules. The policy of all configured tables is set toDROP.This option could be useful if a server is known to be compromised. Rather than physically disconnecting from the network or shutting down the system, you can use this option to stop all further network traffic but leave the machine in a state ready for analysis or other forensics.save— Saves firewall rules to/etc/sysconfig/iptablesusingiptables-save. Refer to Section 48.9.4, “Saving IPTables Rules” for more information.
Note
ip6tables for iptables in the /sbin/service commands listed in this section. For more information about IPv6 and netfilter, refer to Section 48.9.6, “IPTables and IPv6”.
48.9.5.1. IPTables Control Scripts Configuration File
iptables initscripts is controlled by the /etc/sysconfig/iptables-config configuration file. The following is a list of directives contained in this file:
IPTABLES_MODULES— Specifies a space-separated list of additionaliptablesmodules to load when a firewall is activated. These can include connection tracking and NAT helpers.IPTABLES_MODULES_UNLOAD— Unloads modules on restart and stop. This directive accepts the following values:yes— The default value. This option must be set to achieve a correct state for a firewall restart or stop.no— This option should only be set if there are problems unloading the netfilter modules.
IPTABLES_SAVE_ON_STOP— Saves current firewall rules to/etc/sysconfig/iptableswhen the firewall is stopped. This directive accepts the following values:yes— Saves existing rules to/etc/sysconfig/iptableswhen the firewall is stopped, moving the previous version to the/etc/sysconfig/iptables.savefile.no— The default value. Does not save existing rules when the firewall is stopped.
IPTABLES_SAVE_ON_RESTART— Saves current firewall rules when the firewall is restarted. This directive accepts the following values:yes— Saves existing rules to/etc/sysconfig/iptableswhen the firewall is restarted, moving the previous version to the/etc/sysconfig/iptables.savefile.no— The default value. Does not save existing rules when the firewall is restarted.
IPTABLES_SAVE_COUNTER— Saves and restores all packet and byte counters in all chains and rules. This directive accepts the following values:yes— Saves the counter values.no— The default value. Does not save the counter values.
IPTABLES_STATUS_NUMERIC— Outputs IP addresses in numeric form instead of domain or hostnames. This directive accepts the following values:yes— The default value. Returns only IP addresses within a status output.no— Returns domain or hostnames within a status output.
48.9.6. IPTables and IPv6
iptables-ipv6 package is installed, netfilter in Red Hat Enterprise Linux can filter the next-generation IPv6 Internet protocol. The command used to manipulate the IPv6 netfilter is ip6tables.
iptables, except the nat table is not yet supported. This means that it is not yet possible to perform IPv6 network address translation tasks, such as masquerading and port forwarding.
ip6tables are saved in the /etc/sysconfig/ip6tables file. Previous rules saved by the ip6tables initscripts are saved in the /etc/sysconfig/ip6tables.save file.
ip6tables init script are stored in /etc/sysconfig/ip6tables-config, and the names for each directive vary slightly from their iptables counterparts.
iptables-config directive IPTABLES_MODULES:the equivalent in the ip6tables-config file is IP6TABLES_MODULES.
48.9.7. Additional Resources
iptables.
- Section 48.8, “Firewalls” — Contains a chapter about the role of firewalls within an overall security strategy as well as strategies for constructing firewall rules.
48.9.7.1. Installed Documentation
man iptables— Contains a description ofiptablesas well as a comprehensive list of targets, options, and match extensions.
48.9.7.2. Useful Websites
- http://www.netfilter.org/ — The home of the netfilter/iptables project. Contains assorted information about
iptables, including a FAQ addressing specific problems and various helpful guides by Rusty Russell, the Linux IP firewall maintainer. The HOWTO documents on the site cover subjects such as basic networking concepts, kernel packet filtering, and NAT configurations. - http://www.linuxnewbie.org/nhf/Security/IPtables_Basics.html — An introduction to the way packets move through the Linux kernel, plus an introduction to constructing basic
iptablescommands.
Chapter 49. Security and SELinux
49.1. Access Control Mechanisms (ACMs)
49.1.1. Discretionary Access Control (DAC)
49.1.2. Access Control Lists (ACLs)
49.1.3. Mandatory Access Control (MAC)
49.1.4. Role-based Access Control (RBAC)
49.1.5. Multi-Level Security (MLS)
49.1.6. Multi-Category Security (MCS)
49.2. Introduction to SELinux
49.2.1. SELinux Overview
When a subject, (for example, an application), attempts to access an object (for example, a file), the policy enforcement server in the kernel checks an access vector cache (AVC), where subject and object permissions are cached. If a decision cannot be made based on data in the AVC, the request continues to the security server, which looks up the security context of the application and the file in a matrix. Permission is then granted or denied, with an avc: denied message detailed in /var/log/messages if permission is denied. The security context of subjects and objects is applied from the installed policy, which also provides the information to populate the security server's matrix.
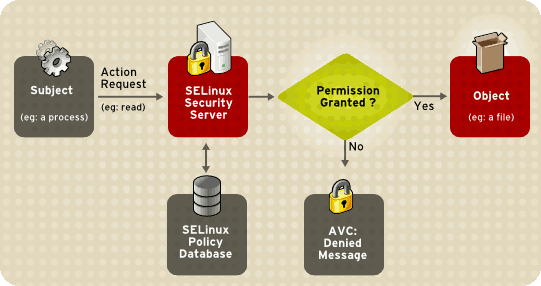
Figure 49.1. SELinux Decision Process
Instead of running in enforcing mode, SELinux can run in permissive mode, where the AVC is checked and denials are logged, but SELinux does not enforce the policy. This can be useful for troubleshooting and for developing or fine-tuning SELinux policy.
49.2.2. Files Related to SELinux
49.2.2.1. The SELinux Pseudo-File System
/selinux/ pseudo-file system contains commands that are most commonly used by the kernel subsystem. This type of file system is similar to the /proc/ pseudo-file system.
/selinux/ directory:
-rw-rw-rw- 1 root root 0 Sep 22 13:14 access dr-xr-xr-x 1 root root 0 Sep 22 13:14 booleans --w------- 1 root root 0 Sep 22 13:14 commit_pending_bools -rw-rw-rw- 1 root root 0 Sep 22 13:14 context -rw-rw-rw- 1 root root 0 Sep 22 13:14 create --w------- 1 root root 0 Sep 22 13:14 disable -rw-r--r-- 1 root root 0 Sep 22 13:14 enforce -rw------- 1 root root 0 Sep 22 13:14 load -r--r--r-- 1 root root 0 Sep 22 13:14 mls -r--r--r-- 1 root root 0 Sep 22 13:14 policyvers -rw-rw-rw- 1 root root 0 Sep 22 13:14 relabel -rw-rw-rw- 1 root root 0 Sep 22 13:14 user
cat command on the enforce file reveals either a 1 for enforcing mode or 0 for permissive mode.
49.2.2.2. SELinux Configuration Files
/etc/ directory.
49.2.2.2.1. The /etc/sysconfig/selinux Configuration File
system-config-selinux), or manually editing the configuration file (/etc/sysconfig/selinux).
/etc/sysconfig/selinux file is the primary configuration file for enabling or disabling SELinux, as well as for setting which policy to enforce on the system and how to enforce it.
Note
/etc/sysconfig/selinux contains a symbolic link to the actual configuration file, /etc/selinux/config.
SELINUX=enforcing|permissive|disabled— Defines the top-level state of SELinux on a system.enforcing— The SELinux security policy is enforced.permissive— The SELinux system prints warnings but does not enforce policy.This is useful for debugging and troubleshooting purposes. In permissive mode, more denials are logged because subjects can continue with actions that would otherwise be denied in enforcing mode. For example, traversing a directory tree in permissive mode producesavc: deniedmessages for every directory level read. In enforcing mode, SELinux would have stopped the initial traversal and kept further denial messages from occurring.disabled— SELinux is fully disabled. SELinux hooks are disengaged from the kernel and the pseudo-file system is unregistered.Note
Actions made while SELinux is disabled may result in the file system no longer having the correct security context. That is, the security context defined by the policy. The best way to relabel the file system is to create the flag file/.autorelabeland reboot the machine. This causes the relabel to occur very early in the boot process, before any processes are running on the system. Using this procedure means that processes can not accidentally create files in the wrong context or start up in the wrong context.It is possible to use thefixfiles relabelcommand prior to enabling SELinux to relabel the file system. This method is not recommended, however, because after it is complete, it is still possible to have processes potentially running on the system in the wrong context. These processes could create files that would also be in the wrong context.
Note
Additional white space at the end of a configuration line or as extra lines at the end of the file may cause unexpected behavior. To be safe, remove unnecessary white space.SELINUXTYPE=— Specifies which policy SELinux should enforce.targeted|stricttargeted— Only targeted network daemons are protected.Important
The following daemons are protected in the default targeted policy:dhcpd, httpd (apache.te), named, nscd, ntpd, portmap, snmpd, squid, andsyslogd. The rest of the system runs in the unconfined_t domain. This domain allows subjects and objects with that security context to operate using standard Linux security.The policy files for these daemons are located in/etc/selinux/targeted/src/policy/domains/program. These files are subject to change as newer versions of Red Hat Enterprise Linux are released.Policy enforcement for these daemons can be turned on or off, using Boolean values controlled by the SELinux Administration Tool (system-config-selinux).Setting a Boolean value for a targeted daemon to1disables SELinux protection for the daemon. For example, you can setdhcpd_disable_transto1to preventinit, which executes apps labeleddhcpd_exec_t, from transitioning to thedhcpd_tdomain.Use thegetsebool -acommand to list all SELinux booleans. The following is an example of using thesetseboolcommand to set an SELinux boolean. The-Poption makes the change permanent. Without this option, the boolean would be reset to1at reboot.setsebool -P dhcpd_disable_trans=0strict— Full SELinux protection, for all daemons. Security contexts are defined for all subjects and objects, and every action is processed by the policy enforcement server.
SETLOCALDEFS=— Controls how local definitions (users and booleans) are set. Set this value to 1 to have these definitions controlled by0|1load_policyfrom files in/etc/selinux/<policyname>. or set it to 0 to have them controlled bysemanage.Warning
You should not change this value from the default (0) unless you are fully aware of the impact of such a change.
49.2.2.2.2. The /etc/selinux/ Directory
/etc/selinux/ directory is the primary location for all policy files as well as the main configuration file.
/etc/selinux/ directory:
-rw-r--r-- 1 root root 448 Sep 22 17:34 config drwxr-xr-x 5 root root 4096 Sep 22 17:27 strict drwxr-xr-x 5 root root 4096 Sep 22 17:28 targeted
strict/ and targeted/, are the specific directories where the policy files of the same name (that is, strict and targeted) are contained.
49.2.2.3. SELinux Utilities
/usr/sbin/setenforce— Modifies in real-time the mode in which SELinux runs.For example:setenforce 1— SELinux runs in enforcing mode.setenforce 0— SELinux runs in permissive mode.To actually disable SELinux, you need to either specify the appropriatesetenforceparameter in/etc/sysconfig/selinuxor pass the parameterselinux=0to the kernel, either in/etc/grub.confor at boot time./usr/sbin/sestatus -v— Displays the detailed status of a system running SELinux. The following example shows an excerpt ofsestatus -voutput:SELinux status: enabled SELinuxfs mount: /selinux Current mode: enforcing Mode from config file: enforcing Policy version: 21 Policy from config file: targeted Process contexts: Current context: user_u:system_r:unconfined_t:s0 Init context: system_u:system_r:init_t:s0 /sbin/mingetty system_u:system_r:getty_t:s0
/usr/bin/newrole— Runs a new shell in a new context, or role. Policy must allow the transition to the new role.Note
This command is only available if you have thepolicycoreutils-newrolepackage installed, which is required for the strict and MLS policies./sbin/restorecon— Sets the security context of one or more files by marking the extended attributes with the appropriate file or security context./sbin/fixfiles— Checks or corrects the security context database on the file system.
setools or policycoreutils package contents for more information on all available binary utilities. To view the contents of a package, use the following command:
rpm -ql <package-name>
49.2.3. Additional Resources
49.2.3.1. Installed Documentation
/usr/share/doc/setools-<version-number>/All documentation for utilities contained in thesetoolspackage. This includes all helper scripts, sample configuration files, and documentation.
49.2.3.2. Useful Websites
- http://www.nsa.gov/research/selinux/index.shtml Homepage for the NSA SELinux development team. Many resources are available in HTML and PDF formats. Although many of these links are not SELinux specific, some concepts may apply.
- http://docs.fedoraproject.org/ Homepage for the Fedora documentation project, which contains Fedora Core specific materials that may be more timely, since the release cycle is much shorter.
- http://selinux.sourceforge.net Homepage for the SELinux community.
49.3. Brief Background and History of SELinux
49.4. Multi-Category Security (MCS)
49.4.1. Introduction
49.4.1.1. What is Multi-Category Security?
49.4.2. Applications for Multi-Category Security
49.4.3. SELinux Security Contexts
"security." namespace is used for security modules, and the security.selinux name is used to persistently store SELinux security labels on files. The contents of this attribute will vary depending on the file or directory you inspect and the policy the machine is enforcing.
Note
getxattr(2) always returns the kernel's canonicalized version of the label.
ls -Z command to view the category label of a file:
~]# ls -Z gravityControl.txt
-rw-r--r-- user user user_u:object_r:tmp_t:Moonbase_Plans gravityControl.txtgefattr(1) command to view the internal category value (c10):
~]# getfattr -n security.selinux gravityControl.txt
# file: gravityControl.txt
security.selinux="user_u:object_r:tmp_t:s0:c10\000"49.5. Getting Started with Multi-Category Security (MCS)
49.5.1. Introduction
49.5.2. Comparing SELinux and Standard Linux User Identities
- system_u — System processes
- root — System administrator
- user_u — All login users
semanage user -l command to list SELinux users:
~]# semanage user -l
Labeling MLS/ MLS/
SELinux User Prefix MCS Level MCS Range SELinux Roles
root user s0 s0-s0:c0.c1023 system_r sysadm_r user_r
system_u user s0 s0-s0:c0.c1023 system_r
user_u user s0 s0-s0:c0.c1023 system_r sysadm_r user_r
One of the properties of targeted policy is that login users all run in the same security context. From a TE point of view, in targeted policy, they are security-equivalent. To effectively use MCS, however, we need to be able to assign different sets of categories to different Linux users, even though they are all the same SELinux user (user_u). This is solved by introducing the concept of an SELinux login. This is used during the login process to assign MCS categories to Linux users when their shell is launched.
semanage login -a command to assign Linux users to SELinux user identities:
~]#semanage login -a james~]#semanage login -a daniel~]#semanage login -a olga
~]# semanage login -l
Login Name SELinux User MLS/MCS Range
__default__ user_u s0
james user_u s0
daniel user_u s0
root root s0-s0:c0.c1023
olga user_u s049.5.3. Configuring Categories
setrans.conf file. The system administrator edits this file to manage and maintain the required categories.
chcat -L command to list the current categories:
~]# chcat -L
s0
s0-s0:c0.c1023 SystemLow-SystemHigh
s0:c0.c1023 SystemHigh/etc/selinux/<selinuxtype>/setrans.conf file. For the example introduced above, add the Marketing, Finance, Payroll, and Personnel categories as follows (this example uses the targeted policy, and irrelevant sections of the file have been omitted):
~]# vi /etc/selinux/targeted/setrans.conf
s0:c0=Marketing
s0:c1=Finance
s0:c2=Payroll
s0:c3=Personnelchcat -L command to check the newly-added categories:
~]# chcat -L
s0:c0 Marketing
s0:c1 Finance
s0:c2 Payroll
s0:c3 Personnel
s0
s0-s0:c0.c1023 SystemLow-SystemHigh
s0:c0.c1023 SystemHighNote
setrans.conf file, you need to restart the MCS translation service before those changes take effect. Use the following command to restart the service:
~]# service mcstrans restart49.5.4. Assigning Categories to Users
chcat command to assign MCS categories to SELinux logins:
~]#chcat -l -- +Marketing james~]#chcat -l -- +Finance,+Payroll daniel~]#chcat -l -- +Personnel olga
chcat command with additional command-line arguments to list the categories that are assigned to users:
~]# chcat -L -l daniel james olga
daniel: Finance,Payroll
james: Marketing
olga: Personnel# Create a user account for the company director (Karl) ~]#useradd karl~]#passwd karlChanging password for user karl. New UNIX password: Retype new UNIX password: passwd: all authentication tokens updated successfully. # Assign the user account to an SELinux login ~]#semanage login -a karl# Assign all the MCS categories to the new login ~]#chcat -l -- +Marketing,+Finance,+Payroll,+Personnel karl
chcat command to verify the addition of the new user:
~]# chcat -L -l daniel james olga karl
daniel: Finance,Payroll
james: Marketing
olga: Personnel
karl: Marketing,Finance,Payroll,PersonnelNote
49.5.5. Assigning Categories to Files
[daniel@dhcp-133 ~]$ echo "Financial Records 2006" > financeRecords.txtls -Z command to check the initial security context of the file:
[daniel@dhcp-133 ~]$ ls -Z financeRecords.txt
-rw-r--r-- daniel daniel user_u:object_r:user_home_t financeRecords.txtuser_home_t) and has no categories assigned to it. We can add the required category using the chcat command. Now when you check the security context of the file, you can see the category has been applied.
[daniel@dhcp-133 ~]$chcat -- +Finance financeRecords.txt[daniel@dhcp-133 ~]$ls -Z financeRecords.txt-rw-r--r-- daniel daniel root:object_r:user_home_t:Finance financeRecords.txt
[daniel@dhcp-133 ~]$chcat -- +Payroll financeRecords.txt[daniel@dhcp-133 ~]$ls -Z financeRecords.txt-rw-r--r-- daniel daniel root:object_r:user_home_t:Finance,Payroll financeRecords.txt
[olga@dhcp-133 ~]$ cat financeRecords.txt
cat: financeRecords.txt: Permission DeniedNote
semanage and chcat for more information on the available options for these commands.
49.6. Multi-Level Security (MLS)
49.6.1. Why Multi-Level?

Figure 49.2. Information Security Levels
49.6.1.1. The Bell-La Padula Model (BLP)
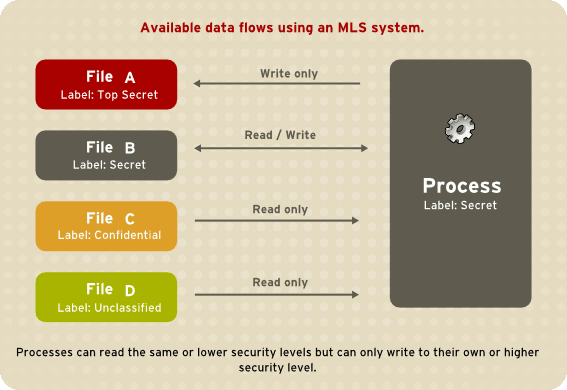
Figure 49.3. Available data flows using an MLS system
49.6.1.2. MLS and System Privileges
49.6.2. Security Levels, Objects and Subjects
Sensitivity: — A hierarchical attribute such as "Secret" or "Top Secret".Categories: — A set of non-hierarchical attributes such as "US Only" or "UFO".
Note
- Security Levels on objects are called Classifications.
- Security Levels on subjects are called Clearances.
49.6.3. MLS Policy
49.6.4. Enabling MLS in SELinux
Note
- Install the selinux-policy-mls package:
~]#
yum install selinux-policy-mls - Before the MLS policy is enabled, each file on the file system must be relabeled with an MLS label. When the file system is relabeled, confined domains may be denied access, which may prevent your system from booting correctly. To prevent this from happening, configure
SELINUX=permissivein the/etc/selinux/configfile. Also, enable the MLS policy by configuringSELINUXTYPE=mls. Your configuration file should look like this:# This file controls the state of SELinux on the system. # SELINUX= can take one of these three values: # enforcing - SELinux security policy is enforced. # permissive - SELinux prints warnings instead of enforcing. # disabled - No SELinux policy is loaded. SELINUX=permissive # SELINUXTYPE= can take one of these two values: # targeted - Targeted processes are protected, # minimum - Modification of targeted policy. Only selected processes are protected. # mls - Multi Level Security protection. SELINUXTYPE=mls
- Make sure SELinux is running in the permissive mode:
~]#
setenforce 0~]#getenforcePermissive - Create the
.autorelabelfile in root's home directory to ensure that files are relabeled upon next reboot:~]#
touch /.autorelabel - Reboot your system. During the next boot, all file systems will be relabeled according to the MLS policy. The label process labels all files with an appropriate SELinux context:
*** Warning -- SELinux mls policy relabel is required. *** Relabeling could take a very long time, depending on file *** system size and speed of hard drives. ***********
Each * (asterisk) character on the bottom line represents 1000 files that have been labeled. In the above example, eleven * characters represent 11000 files which have been labeled. The time it takes to label all files depends upon the number of files on the system, and the speed of the hard disk drives. On modern systems, this process can take as little as 10 minutes. Once the labeling process finishes, the system will automatically reboot. - Once the file system is relabeled, execute the following commands to assure that the
/rootdirectory and all other home directories are properly labeled:~]#
genhomedircon~]#restorecon -R -v /root /home <other_home_directories> - In permissive mode, SELinux policy is not enforced, but denials are still logged for actions that would have been denied if running in enforcing mode. Before changing to enforcing mode, as the Linux root user, run the
grep "SELinux is preventing" /var/log/messagescommand to confirm that SELinux did not deny actions during the last boot. If SELinux did not deny actions during the last boot, this command does not return any output. - If there were no denial messages in
/var/log/messages, or you have resolved all existing denials, configureSELINUX=enforcingin the/etc/selinux/configfile:# This file controls the state of SELinux on the system. # SELINUX= can take one of these three values: # enforcing - SELinux security policy is enforced. # permissive - SELinux prints warnings instead of enforcing. # disabled - No SELinux policy is loaded. SELINUX=enforcing # SELINUXTYPE= can take one of these two values: # targeted - Targeted processes are protected, # minimum - Modification of targeted policy. Only selected processes are protected. # mls - Multi Level Security protection. SELINUXTYPE=mls
- Reboot your system and make sure SELinux is running in permissive mode:
~]$
getenforceEnforcingand the MLS policy is enabled:~]#
sestatus |grep mlsPolicy from config file: mls
49.6.5. LSPP Certification
49.7. SELinux Policy Overview
49.7.1. What is the SELinux Policy?
49.7.1.1. SELinux Types
user_home_t.
unconfined_t domain have an executable file with a type such as sbin_t. From an SELinux perspective, this means they are all equivalent in terms of what they can and cannot do on the system.
/usr/bin/postgres has the type postgresql_exec_t. All of the targeted daemons have their own *_exec_t type for their executable applications. In fact, the entire set of PostgreSQL executables such as createlang, pg_dump, and pg_restore have the same type, postgresql_exec_t, and they transition to the same domain, postgresql_t, upon execution.
49.7.1.1.1. Using Policy Rules to Define Type Access
$AUDIT_LOG file. In Red Hat Enterprise Linux, this is set to /var/log/messages. The policy is compiled into binary format for loading into the kernel security server, and each time the security server makes a decision, it is cached in the AVC to optimize performance.
init, as explained in Section 49.7.3, “The Role of Policy in the Boot Process”. Ultimately, every system operation is determined by the policy and the type-labeling of the files.
Important
49.7.1.2. SELinux and Mandatory Access Control
m4 macros to capture common sets of low-level rules. A number of m4 macros are defined in the existing policy, which facilitate the writing of new policy. These rules are preprocessed into many additional rules as part of building the policy.conf file, which is compiled into the binary policy.
newrole, or by requiring a new process execution in the new domain. This movement between domains is referred to as a transition
.
49.7.2. Where is the Policy?
selinux-policy-<policyname> package and supplies the binary policy file.
selinux-policy-devel package is installed.
Note
49.7.2.1. Binary Tree Files
/etc/selinux/targeted/— this is the root directory for the targeted policy, and contains the binary tree./etc/selinux/targeted/policy/— this is the location of the binary policy filepolicy.<xx>. In this guide, the variableSELINUX_POLICYis used for this directory./etc/selinux/targeted/contexts/— this is the location of the security context information and configuration files, which are used during runtime by various applications./etc/selinux/targeted/contexts/files/— contains the default contexts for the entire file system. This is referenced byrestoreconwhen performing relabeling operations./etc/selinux/targeted/contexts/users/— in the targeted policy, only therootfile is in this directory. These files are used for determining context when a user logs in. For example, for the root user, the context is user_u:system_r:unconfined_t./etc/selinux/targeted/modules/active/booleans*— this is where the runtime Booleans are configured.Note
These files should never be manually changed. You should use thegetsebool,setseboolandsemanagetools to manipulate runtime Booleans.
49.7.2.2. Source Tree Files
selinux-policy-devel package includes all of the interface files used to build policy. It is recommended that people who build policy use these files to build the policy modules.
/usr/share/selinux/devel/include and has make files installed in /usr/share/selinux/devel/Makefile.
libselinux provides a number of functions that return the paths to the different configuration files and directories. This negates the need for applications to hard-code the paths, especially since the active policy location is dependent on the SELINUXTYPE setting in /etc/selinux/config.
/etc/selinux/strict.
man 3 selinux_binary_policy_pathNote
libselinux-devel RPM installed.
libselinux and related functions is outside the scope of this document.
49.7.3. The Role of Policy in the Boot Process
init performs some essential operations early in the boot process to maintain synchronization between labeling and policy enforcement.
- After the kernel has been loaded during the boot process, the initial process is assigned the predefined initial SELinux ID (initial SID) kernel. Initial SIDs are used for bootstrapping before the policy is loaded.
/sbin/initmounts/proc/, and then searches for theselinuxfsfile system type. If it is present, that means SELinux is enabled in the kernel.- If
initdoes not find SELinux in the kernel, or if it is disabled via theselinux=0boot parameter, or if/etc/selinux/configspecifies thatSELINUX=disabled, the boot process proceeds with a non-SELinux system.At the same time,initsets the enforcing status if it is different from the setting in/etc/selinux/config. This happens when a parameter is passed during the boot process, such asenforcing=0orenforcing=1. The kernel does not enforce any policy until the initial policy is loaded. - If SELinux is present,
/selinux/is mounted. initchecks/selinux/policyversfor the supported policy version. The version number in/selinux/policyversis the latest policy version your kernel supports.initinspects/etc/selinux/configto determine which policy is active, such as the targeted policy, and loads the associated file at$SELINUX_POLICY/policy.<version>.If the binary policy is not the version supported by the kernel,initattempts to load the policy file if it is a previous version. This provides backward compatibility with older policy versions.If the local settings in/etc/selinux/targeted/booleansare different from those compiled in the policy,initmodifies the policy in memory based on the local settings prior to loading the policy into the kernel.- By this stage of the process, the policy is fully loaded into the kernel. The initial SIDs are then mapped to security contexts in the policy. In the case of the targeted policy, the new domain is user_u:system_r:unconfined_t. The kernel can now begin to retrieve security contexts dynamically from the in-kernel security server.
initthen re-executes itself so that it can transition to a different domain, if the policy defines it. For the targeted policy, there is no transition defined andinitremains in theunconfined_tdomain.- At this point,
initcontinues with its normal boot process.
init re-executes itself is to accommodate stricter SELinux policy controls. The objective of re-execution is to transition to a new domain with its own granular rules. The only way that a process can enter a domain is during execution, which means that such processes are the only entry points
into the domains.
init, such as init_t, a method is required to change from the initial SID, such as kernel, to the correct runtime domain for init. Because this transition may need to occur, init is coded to re-execute itself after loading the policy.
init transition occurs if the domain_auto_trans(kernel_t, init_exec_t, <target_domain_t>) rule is present in the policy. This rule states that an automatic transition occurs on anything executing in the kernel_t domain that executes a file of type init_exec_t. When this execution occurs, the new process is assigned the domain <target_domain_t>, using an actual target domain such as init_t.
49.7.4. Object Classes and Permissions
- File-related classes include
filesystemfor file systems,filefor files, anddirfor directories. Each class has its own associated set of permissions.Thefilesystemclass can mount, unmount, get attributes, set quotas, relabel, and so forth. Thefileclass has common file permissions such as read, write, get and set attributes, lock, relabel, link, rename, append, etc. - Network related classes include
tcp_socketfor TCP sockets,netiffor network interfaces, andnodefor network nodes.Thenetifclass, for example, can send and receive on TCP, UDP and raw sockets (tcp_recv,tcp_send,udp_send,udp_recv,rawip_recv, andrawip_send.)
49.8. Targeted Policy Overview
49.8.1. What is the Targeted Policy?
unconfined_t domain except for the specific targeted daemons. Objects that are in the unconfined_t domain have no restrictions and fall back to using standard Linux security, that is, DAC. The daemons that are part of the targeted policy run in their own domains and are restricted in every operation they perform on the system. This way daemons that are exploited or compromised in any way are contained and can only cause limited damage.
http and ntp daemons are both protected in the default targeted policy, and run in the httpd_t and ntpd_t domains, respectively. The ssh daemon, however, is not protected in this policy, and consequently runs in the unconfined_t domain.
user_u:system_r:httpd_t 25129 ? 00:00:00 httpd user_u:system_r:ntpd_t 25176 ? 00:00:00 ntpd system_u:system_r:unconfined_t 25245 ? 00:00:00 sshd
The opposite of the targeted policy is the strict policy . In the strict policy, every subject and object exists in a specific security domain, and all interactions and transitions are individually considered within the policy rules.
dhcpd; httpd; mysqld; named; nscd; ntpd; portmap; postgres; snmpd; squid; syslogd; and winbind.
Note
49.8.2. Files and Directories of the Targeted Policy
49.8.3. Understanding the Users and Roles in the Targeted Policy
unconfined_t type exists in every role, which significantly reduces the usefulness of roles in the targeted policy. More extensive use of roles requires a change to the strict policy paradigm, where every process runs in an individually considered domain.
system_r and object_r. The initial role is system_r, and everything else inherits that role. The remaining roles are defined for compatibility purposes between the targeted policy and the strict policy.[20]
object_r, is an implied role and is not found in policy source. Because roles are created and populated by types using one or more declarations in the policy, there is no single file that declares all roles. (Remember that the policy itself is generated from a number of separate files.)
system_r- This role is for all system processes except user processes:
system_r (28 types) dhcpd_t httpd_helper_t httpd_php_t httpd_suexec_t httpd_sys_script_t httpd_t httpd_unconfined_script_t initrc_t ldconfig_t mailman_cgi_t mailman_mail_t mailman_queue_t mysqld_t named_t ndc_t nscd_t ntpd_t pegasus_t portmap_t postgresql_t snmpd_t squid_t syslogd_t system_mail_t unconfined_t winbind_helper_t winbind_t ypbind_t user_r- This is the default user role for regular Linux users. In a strict policy, individual users might be used, allowing for the users to have special roles to perform privileged operations. In the targeted policy, all users run in the
unconfined_tdomain. object_r- In SELinux, roles are not utilized for objects when RBAC is being used. Roles are strictly for subjects. This is because roles are task-oriented and they group together entities which perform actions (for example, processes). All such entities are collectively referred to as subjects. For this reason, all objects have the role
object_r, and the role is only used as a placeholder in the label. sysadm_r- This is the system administrator role in a strict policy. If you log in directly as the root user, the default role may actually be
staff_r. If this is true, use thenewrole -r sysadm_rcommand to change to the SELinux system administrator role to perform system administration tasks. In the targeted policy, the following retainsysadm_rfor compatibility:sysadm_r (6 types) httpd_helper_t httpd_sys_script_t initrc_t ldconfig_t ndc_t unconfined_t
user_u identity was chosen because libselinux falls back to user_u as the default SELinux user identity. This occurs when there is no matching SELinux user for the Linux user who is logging in. Using user_u as the single user in the targeted policy makes it easier to change to the strict policy. The remaining users exist for compatibility with the strict policy.[21]
root. You may notice root as the user identity in a process's context. This occurs when the SELinux user root starts daemons from the command line, or restarts a daemon originally started by init.
system_r already had existing authorization for the daemon domains, simplifying the process. This was done because no mechanism currently exists to alias roles.
Chapter 50. Working With SELinux
50.1. End User Control of SELinux
unconfined_t along with the rest of the system except the targeted daemons.
avc: denied message.
50.1.1. Moving and Copying Files
mv and cp may have unexpected results.
Unless you specify otherwise, cp follows the default behavior of creating a new file based on the domain of the creating process and the type of the target directory. Unless there is a specific rule to set the label, the file inherits the type from the target directory.
-Z user:role:type option to specify the required label for the new file.
-p (or --preserve=mode,ownership,timestamps) option preserves the specified attributes and, if possible, additional attributes such as links.
touch bar foo ls -Z bar foo -rw-rw-r-- auser auser user_u:object_r:user_home_t bar -rw-rw-r-- auser auser user_u:object_r:user_home_t foo
cp command without any additional command-line arguments, a copy of the file is created in the new location using the default type of the creating process and the target directory. In this case, because there is no specific rule that applies to cp and /tmp, the new file has the type of the parent directory:
cp bar /tmp ls -Z /tmp/bar -rw-rw-r-- auser auser user_u:object_r:tmp_t /tmp/bar
tmp_t is the default type for temporary files.
-Z option to specify the label for the new file:
cp -Z user_u:object_r:user_home_t foo /tmp ls -Z /tmp/foo -rw-rw-r-- auser auser user_u:object_r:user_home_t /tmp/foo
Moving files with mv retains the original type associated with the file. Care should be taken using this command as it can cause problems. For example, if you move files with the type user_home_t into ~/public_html, then the httpd daemon is not able to serve those files until you relabel them. Refer to Section 50.1.3, “Relabeling a File or Directory” for more information about file labeling.
| Command | Behavior |
|---|---|
mv | The file retains its original label. This may cause problems, confusion, or minor insecurity. For example, the tmpwatch program running in the sbin_t domain might not be allowed to delete an aged file in the /tmp directory because of the file's type. |
cp | Makes a copy of the file using the default behavior based on the domain of the creating process (cp) and the type of the target directory. |
cp -p | Makes a copy of the file, preserving the specified attributes and security contexts, if possible. The default attributes are mode, ownership, and timestamps. Additional attributes are links and all. |
cp -Z <user:role:type> | Makes a copy of the file with the specified labels. The -Z option is synonymous with --context. |
50.1.2. Checking the Security Context of a Process, User, or File Object
In Red Hat Enterprise Linux, the -Z option is equivalent to --context, and can be used with the ps, id, ls, and cp commands. The behavior of the cp command with respect to SELinux is explained in Table 50.1, “Behavior of mv and cp Commands”.
ps command. Most of the processes are running in the unconfined_t domain, with a few exceptions.
[user@localhost ~]$ ps auxZ LABEL USER PID %CPU %MEM VSZ RSS TTY STAT START TIME COMMAND system_u:system_r:init_t root 1 0.0 0.1 2032 620 ? Ss 15:09 0:00 init [5] system_u:system_r:kernel_t root 2 0.0 0.0 0 0 ? S 15:09 0:00 [migration/0] system_u:system_r:kernel_t root 3 0.0 0.0 0 0 ? SN 15:09 0:00 [ksoftirqd/0] user_u:system_r:unconfined_t user 3122 0.0 0.6 6908 3232 ? S 16:47 0:01 /usr/libexec/gconfd-2 5 user_u:system_r:unconfined_t user 3125 0.0 0.1 2540 588 ? S 16:47 0:00 /usr/bin/gnome-keyring-daemon user_u:system_r:unconfined_t user 3127 0.0 1.4 33612 6988 ? Sl 16:47 0:00 /usr/libexec/gnome-settings-daemon user_u:system_r:unconfined_t user 3144 0.1 1.4 16528 7360 ? Ss 16:47 0:01 metacity --sm-client-id=default1 user_u:system_r:unconfined_t user 3148 0.2 2.9 79544 14808 ? Ss 16:47 0:03 gnome-panel --sm-client-id default2
You can use the -Z option with the id command to determine a user's security context. Note that with this command you cannot combine -Z with other options.
[root@localhost ~]# id -Z user_u:system_r:unconfined_t
-Z option with the id command to inspect the security context of a different user. That is, you can only display the security context of the currently logged-in user:
[user@localhost ~]$ id uid=501(user) gid=501(user) groups=501(user) context=user_u:system_r:unconfined_t [user@localhost ~]$ id root uid=0(root) gid=0(root) groups=0(root),1(bin),2(daemon),3(sys),4(adm),6(disk),10(wheel) [user@localhost ~]$ id -Z root id: cannot display context when selinux not enabled or when displaying the id of a different user
You can use the -Z option with the ls command to group common long-format information. You can display mode, user, group, security context, and filename information.
cd /etc ls -Z h* -d drwxr-xr-x root root system_u:object_r:etc_t hal -rw-r--r-- root root system_u:object_r:etc_t host.conf -rw-r--r-- root root user_u:object_r:etc_t hosts -rw-r--r-- root root system_u:object_r:etc_t hosts.allow -rw-r--r-- root root system_u:object_r:etc_t hosts.canna -rw-r--r-- root root system_u:object_r:etc_t hosts.deny drwxr-xr-x root root system_u:object_r:hotplug_etc_t hotplug drwxr-xr-x root root system_u:object_r:etc_t hotplug.d drwxr-xr-x root root system_u:object_r:httpd_sys_content_t htdig drwxr-xr-x root root system_u:object_r:httpd_config_t httpd
50.1.3. Relabeling a File or Directory
~/public_html directories, or when writing scripts that work in directories outside of /home.
- Deliberately changing the type of a file
- Restoring files to the default state according to policy
Note
Note
/usr/sbin/mysqld has the wrong security label, and you address this by using a relabeling operation such as restorecon, you must restart mysqld after the relabeling operation. Setting the executable file to have the correct type (mysqld_exec_t) ensures that it transitions to the proper domain when started.
chcon command to change a file to the correct type. You need to know the correct type that you want to apply to use this command. The directories and files in the following example are labeled with the default type defined for file system objects created in /home:
cd ~ ls -Zd public_html/ drwxrwxr-x auser auser user_u:object_r:user_home_t public_html/ ls -Z web_files/ -rw-rw-r-- auser auser user_u:object_r:user_home_t 1.html -rw-rw-r-- auser auser user_u:object_r:user_home_t 2.html -rw-rw-r-- auser auser user_u:object_r:user_home_t 3.html -rw-rw-r-- auser auser user_u:object_r:user_home_t 4.html -rw-rw-r-- auser auser user_u:object_r:user_home_t 5.html -rw-rw-r-- auser auser user_u:object_r:user_home_t index.html
public_html directory, they retain the original type:
mv web_files/* public_html/ ls -Z public_html/ -rw-rw-r-- auser auser user_u:object_r:user_home_t 1.html -rw-rw-r-- auser auser user_u:object_r:user_home_t 2.html -rw-rw-r-- auser auser user_u:object_r:user_home_t 3.html -rw-rw-r-- auser auser user_u:object_r:user_home_t 4.html -rw-rw-r-- auser auser user_u:object_r:user_home_t 5.html -rw-rw-r-- auser auser user_u:object_r:user_home_t index.html
httpd has permissions to read, presuming the Apache HTTP Server is configured for UserDir and the Boolean value httpd_enable_homedirs is enabled.
chcon -R -t httpd_user_content_t public_html/ ls -Z public_html -rw-rw-r-- auser auser user_u:object_r:httpd_user_content_t 1.html -rw-rw-r-- auser auser user_u:object_r:httpd_user_content_t 2.html -rw-rw-r-- auser auser user_u:object_r:httpd_user_content_t 3.html -rw-rw-r-- auser auser user_u:object_r:httpd_user_content_t 4.html -rw-rw-r-- auser auser user_u:object_r:httpd_user_content_t 5.html -rw-rw-r-- auser auser user_u:object_r:httpd_user_content_t index.html ls -Z public_html/ -d drwxrwxr-x auser auser user_u:object_r:httpd_user_content_t public_html/
Note
chcon system_u:object_r:shlib_t foo.so. Otherwise, you will receive an error about applying a partial context to an unlabeled file.
restorecon command to restore files to the default values according to the policy. There are two other methods for performing this operation that work on the entire file system: fixfiles or a policy relabeling operation. Each of these methods requires superuser privileges. Cautions against both of these methods appear in Section 50.2.2, “Relabeling a File System”.
ls -Z /tmp/
-rw-rw-r-- auser auser user_u:object_r:tmp_t /tmp/file1
-rw-rw-r-- auser auser user_u:object_r:tmp_t /tmp/file2
-rw-rw-r-- auser auser user_u:object_r:tmp_t /tmp/file3
mv /tmp/{1,2,3} archives/
mv public_html/* archives/
ls -Z archives/
-rw-rw-r-- auser auser user_u:object_r:tmp_t file1
-rw-rw-r-- auser auser user_u:object_r:httpd_user_content_t file1.html
-rw-rw-r-- auser auser user_u:object_r:tmp_t file2
-rw-rw-r-- auser auser user_u:object_r:httpd_user_content_t file2.html
-rw-rw-r-- auser auser user_u:object_r:tmp_t file3
-rw-rw-r-- auser auser user_u:object_r:httpd_user_content_t file3.html
-rw-rw-r-- auser auser user_u:object_r:httpd_user_content_t file4.html
-rw-rw-r-- auser auser user_u:object_r:httpd_user_content_t file5.html
-rw-rw-r-- auser auser user_u:object_r:httpd_user_content_t index.html
archives/ directory already has the default type because it was created in the user's home directory:
ls -Zd archives/ drwxrwxr-x auser auser user_u:object_r:user_home_t archives/
restorecon command to relabel the files uses the default file contexts set by the policy, so these files are labeled with the default label for their current directory.
/sbin/restorecon -R archives/ ls -Z archives/ -rw-rw-r-- auser auser system_u:object_r:user_home_t file1 -rw-rw-r-- auser auser system_u:object_r:user_home_t file1.html -rw-rw-r-- auser auser system_u:object_r:user_home_t file2 -rw-rw-r-- auser auser system_u:object_r:user_home_t file2.html -rw-rw-r-- auser auser system_u:object_r:user_home_t file3 -rw-rw-r-- auser auser system_u:object_r:user_home_t file3.html -rw-rw-r-- auser auser system_u:object_r:user_home_t file4.html -rw-rw-r-- auser auser system_u:object_r:user_home_t file5.html -rw-rw-r-- auser auser system_u:object_r:user_home_t index.html
50.1.4. Creating Archives That Retain Security Contexts
tar or star utilities to create archives that retain SELinux security contexts. The following example uses star to demonstrate how to create such an archive. You need to use the appropriate -xattr and -H=exustar options to ensure that the extra attributes are captured and that the header for the *.star file is of a type that fully supports xattrs. Refer to the man page for more information about these and other options.
ls -Z public_html/ web_files/ public_html/: -rw-rw-r-- auser auser ...httpd_user_content_t 1.html -rw-rw-r-- auser auser ...httpd_user_content_t 2.html -rw-rw-r-- auser auser ...httpd_user_content_t 3.html -rw-rw-r-- auser auser ...httpd_user_content_t 4.html -rw-rw-r-- auser auser ...httpd_user_content_t 5.html -rw-rw-r-- auser auser ...httpd_user_content_t index.html web_files/: -rw-rw-r-- auser auser user_u:object_r:user_home_t 1.html -rw-rw-r-- auser auser user_u:object_r:user_home_t 2.html -rw-rw-r-- auser auser user_u:object_r:user_home_t 3.html -rw-rw-r-- auser auser user_u:object_r:user_home_t 4.html -rw-rw-r-- auser auser user_u:object_r:user_home_t 5.html -rw-rw-r-- auser auser user_u:object_r:user_home_t index.html
star -xattr -H=exustar -c -f all_web.star public_html/ web_files/ star: 11 blocks + 0 bytes (total of 112640 bytes = 110.00k).
ls command with the -Z option to validate the security context:
ls -Z all_web.star -rw-rw-r-- auser auser user_u:object_r:user_home_t \ all_web.star
/tmp. If there is no specific policy to make a derivative temporary type, the default behavior is to acquire the tmp_t type.
cp all_web.star /tmp/ cd /tmp/ ls -Z all_web.star -rw-rw-r-- auser auser user_u:object_r:tmp_t all_web.star
star and it restores the extended attributes:
star -xattr -x -f all_web.star star: 11 blocks + 0 bytes (total of 112640 bytes = 110.00k). ls -Z /tmp/public_html/ /tmp/web_files/ /tmp/public_html/: -rw-rw-r-- auser auser ...httpd_sys_content_t 1.html -rw-rw-r-- auser auser ...httpd_sys_content_t 2.html -rw-rw-r-- auser auser ...httpd_sys_content_t 3.html -rw-rw-r-- auser auser ...httpd_sys_content_t 4.html -rw-rw-r-- auser auser ...httpd_sys_content_t 5.html -rw-rw-r-- auser auser ...httpd_sys_content_t index.html /tmp/web_files/: -rw-rw-r-- auser auser user_u:object_r:user_home_t 1.html -rw-rw-r-- auser auser user_u:object_r:user_home_t 2.html -rw-rw-r-- auser auser user_u:object_r:user_home_t 3.html -rw-rw-r-- auser auser user_u:object_r:user_home_t 4.html -rw-rw-r-- auser auser user_u:object_r:user_home_t 5.html -rw-rw-r-- auser auser user_u:object_r:user_home_t \ index.html
Warning
star, the archive expands on that same path. For example, an archive made with this command restores the files to /var/log/httpd/:
star -xattr -H=exustar -c -f httpd_logs.star /var/log/httpd/
star issues a warning if the files in the path are newer than the ones in the archive.
50.2. Administrator Control of SELinux
50.2.1. Viewing the Status of SELinux
sestatus command provides a configurable view into the status of SELinux. The simplest form of this command shows the following information:
~]# sestatus
SELinux status: enabled
SELinuxfs mount: /selinux
Current mode: enforcing
Mode from config file: enforcing
Policy version: 21
Policy from config file: targeted-v option includes information about the security contexts of a series of files that are specified in /etc/sestatus.conf:
~]# sestatus -v
SELinux status: enabled
SELinuxfs mount: /selinux
Current mode: enforcing
Mode from config file: enforcing
Policy version: 21
Policy from config file: targeted
Process contexts:
Current context: user_u:system_r:unconfined_t
Init context: system_u:system_r:init_t
/sbin/mingetty system_u:system_r:getty_t
/usr/sbin/sshd system_u:system_r:unconfined_t:s0-s0:c0.c1023
File contexts:
Controlling term: user_u:object_r:devpts_t
/etc/passwd system_u:object_r:etc_t
/etc/shadow system_u:object_r:shadow_t
/bin/bash system_u:object_r:shell_exec_t
/bin/login system_u:object_r:login_exec_t
/bin/sh system_u:object_r:bin_t -> system_u:object_r:shell_exec_t
/sbin/agetty system_u:object_r:getty_exec_t
/sbin/init system_u:object_r:init_exec_t
/sbin/mingetty system_u:object_r:getty_exec_t
/usr/sbin/sshd system_u:object_r:sshd_exec_t
/lib/libc.so.6 system_u:object_r:lib_t -> system_u:object_r:lib_t
/lib/ld-linux.so.2 system_u:object_r:lib_t -> system_u:object_r:ld_so_t-b displays the current state of booleans. You can use this in combination with grep or other tools to determine the status of particular booleans:
~]# sestatus -b | grep httpd | grep on$
httpd_builtin_scripting on
httpd_disable_trans on
httpd_enable_cgi on
httpd_enable_homedirs on
httpd_unified on50.2.2. Relabeling a File System
The recommended method for relabeling a file system is to reboot the machine. This allows the init process to perform the relabeling, ensuring that applications have the correct labels when they are started and that they are started in the right order. If you relabel a file system without rebooting, some processes may continue running with an incorrect context. Manually ensuring that all the daemons are restarted and running in the correct context can be difficult.
touch /.autorelabelreboot
init.rc checks for the existence of /.autorelabel. If this file exists, SELinux performs a complete file system relabel (using the /sbin/fixfiles -f -F relabel command), and then deletes /.autorelabel.
It is possible to relabel a file system using the fixfiles command, or to relabel based on the RPM database:
fixfiles command:
fixfiles relabelfixfiles -R <packagename> restorefixfiles to restore contexts from packages is safer and quicker.
Warning
fixfiles on the entire file system without rebooting may make the system unstable.
fixfiles relabel prompts for approval to empty /tmp/ because it is not possible to reliably relabel /tmp/. Since fixfiles is run as root, temporary files that applications are relying upon are erased. This could make the system unstable or behave unexpectedly.
50.2.3. Managing NFS Home Directories
nfs_t type, which is not a type that httpd_t is allowed to execute.
nfs_t, try mounting the home directories with a different context:
mount -t nfs -o context=user_u:object_r:user_home_dir_t \fileserver.example.com:/shared/homes/ /home
Warning
httpd can execute scripts. If you do this for user home directories, it gives the Apache HTTP Server increased access to those directories. Remember that a mountpoint label applies to the entire mounted file system.
50.2.4. Granting Access to a Directory or a Tree
root_t, tmp_t, and usr_t that grant read access for a directory. These types are suitable for directories that do not contain any confidential information, and that you want to be widely readable. They could also be used for a parent directory of more secured directories with different contexts.
avc: denied message, there are some common problems that arise with directory traversal. For example, many programs run a command equivalent to ls -l / that is not necessary to their operation but generates a denial message in the logs. For this you need to create a dontaudit rule in your local.te file.
path=/ component. This path is not related to the label for the root file system, /. It is actually relative to the root of the file system on the device node. For example, if your /var/ directory is located on an LVM (Logical Volume Management [22]) device, /dev/dm-0, the device node is identified in the message as dev=dm-0. When you see path=/ in this example, that is the top level of the LVM device dm-0, not necessarily the same as the root file system designation /.
50.2.5. Backing Up and Restoring the System
50.2.6. Enabling or Disabling Enforcement
setenforce command to change between permissive and enforcing modes at runtime. Use setenforce 0 to enter permissive mode; use setenforce 1 to enter enforcing mode.
sestatus command displays the current mode and the mode from the configuration file referenced during boot:
~]# sestatus | grep -i mode
Current mode: permissive
Mode from config file: permissive~]#setenforce 1~]#sestatus | grep -i modeCurrent mode: enforcing Mode from config file: permissive
named daemon and SELinux, you can turn off enforcing for just that daemon.
getsebool command to get the current status of the boolean:
~]# getsebool named_disable_trans
named_disable_trans --> off~]#setsebool named_disable_trans 1~]#getsebool named_disable_transnamed_disable_trans --> on
Note
-P option to make the change persistent across reboots.
~]# getsebool -a | grep disable.*on
httpd_disable_trans=1
mysqld_disable_trans=1
ntpd_disable_trans=1setsebool command:
setsebool -P httpd_disable_trans=1 mysqld_disable_trans=1 ntpd_disable_trans=1togglesebool <boolean_name> to change the value of a specific boolean:
~]#getsebool httpd_disable_transhttpd_disable_trans --> off ~]#togglesebool httpd_disable_transhttpd_disable_trans: active
Use the following procedure to change a runtime boolean using the GUI.
Note
- On the menu, point to and then click to display the Security Level Configuration dialog box.
- Click the SELinux tab, and then click Modify SELinux Policy.
- In the selection list, click the arrow next to the Name Service entry, and select the Disable SELinux protection for named daemon check box.
- Click to apply the change. Note that it may take a short time for the policy to be reloaded.
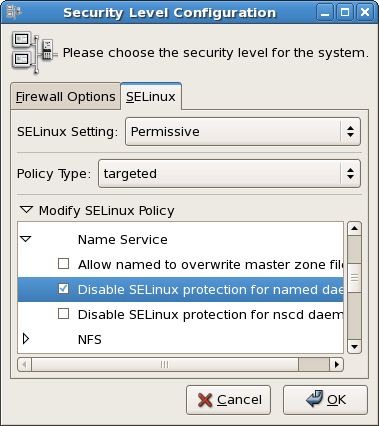
Figure 50.1. Using the Security Level Configuration dialog box to change a runtime boolean.
setenforce(1), getenforce(1), and selinuxenabled(1) commands.
50.2.7. Enable or Disable SELinux
Important
/etc/sysconfig/selinux file. This file is a symlink to /etc/selinux/config. The configuration file is self-explanatory. Changing the value of SELINUX or SELINUXTYPE changes the state of SELinux and the name of the policy to be used the next time the system boots.
~]# cat /etc/sysconfig/selinux
# This file controls the state of SELinux on the system.
# SELINUX= can take one of these three values:
# enforcing - SELinux security policy is enforced.
# permissive - SELinux prints warnings instead of enforcing.
# disabled - SELinux is fully disabled.
SELINUX=permissive
# SELINUXTYPE= type of policy in use. Possible values are:
# targeted - Only targeted network daemons are protected.
# strict - Full SELinux protection.
SELINUXTYPE=targeted
# SETLOCALDEFS= Check local definition changes
SETLOCALDEFS=0Use the following procedure to change the mode of SELinux using the GUI.
Note
- On the menu, point to and then click to display the Security Level Configuration dialog box.
- Click the SELinux tab.
- In the SELinux Setting select either
Disabled,EnforcingorPermissive, and then click . - If you changed from
EnabledtoDisabledor vice versa, you need to restart the machine for the change to take effect.
/etc/sysconfig/selinux.
50.2.8. Changing the Policy
/etc/sysconfig/selinux:
SELINUXTYPE=<policyname>
/etc/selinux/. This assumes that you have the custom policy installed. After changing the SELINUXTYPE parameter, run the following commands:
touch /.autorelabelreboot
Note
- Ensure that the complete directory structure for the required policy exists under
/etc/selinux. - On the menu, point to and then click to display the Security Level Configuration dialog box.
- Click the SELinux tab.
- In the Policy Type list, select the policy that you want to load, and then click . This list is only visible if more than one policy is installed.
- Restart the machine for the change to take effect.
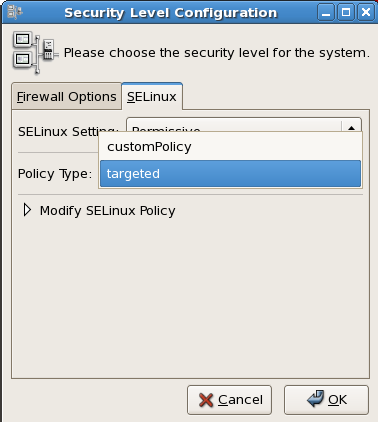
Figure 50.2. Using the Security Level Configuration dialog box to load a custom policy.
50.2.9. Specifying the Security Context of Entire File Systems
mount -o context= command to set a single context for an entire file system. This might be a file system that is already mounted and that supports xattrs, or a network file system that obtains a genfs label such as cifs_t or nfs_t.
httpd_sys_content_t:
mount -t nfs -o context=system_u:object_r:httpd_sys_content_t \server1.example.com:/shared/scripts /var/www/cgi
Note
httpd and SELinux problems, reduce the complexity of your situation. For example, if you have the file system mounted at /mnt and then symbolically linked to /var/www/html/foo, you have two security contexts to be concerned with. Because one security context is of the object class file and the other of type lnk_file, they are treated differently by the policy and unexpected behavior may occur.
50.2.10. Changing the Security Category of a File or User
50.2.11. Running a Command in a Specific Security Context
runcon command to run a command in a specific context. This is useful for scripting or for testing policy, but care should be taken to ensure that it is implemented correctly.
~/bin/contexttest is a user-defined script.)
runcon -t httpd_t ~/bin/contexttest -ARG1 -ARG2runcon user_u:system_r:httpd_t ~/bin/contexttest50.2.12. Useful Commands for Scripts
getenforce- This command returns the enforcing status of SELinux.
setenforce [ Enforcing | Permissive | 1 | 0 ]- This command controls the enforcing mode of SELinux. The option
1orEnforcingtells SELinux to enter enforcing mode. The option0orPermissivetells SELinux to enter passive mode. Access violations are still logged, but not prevented. selinuxenabled- This command exits with a status of
0if SELinux is enabled, and1if SELinux is disabled.~]#
selinuxenabled~]#echo $?0 getsebool [-a] [boolean_name]- This command shows the status of all booleans (
-a) or a specific boolean (<boolean_name>). setsebool [-P] <boolean_name> value | bool1=val1 bool2=val2 ...- This command sets one or more boolean values. The
-Poption makes the changes persistent across reboots. togglesebool boolean ...- This command toggles the setting of one or more booleans. This effects boolean settings in memory only; changes are not persistent across reboots.
50.2.13. Changing to a Different Role
newrole command to run a new shell with the specified type and/or role. Changing roles is typically only meaningful in the strict policy; the targeted policy is generally restricted to a single role. Changing types may be useful for testing, validation, and development purposes.
newrole -r <role_r> -t <type_t> [-- [ARGS]...]ARGS are passed directly to the shell specified in the user's entry in the /etc/passwd file.
Note
newrole command is part of the policycoreutils-newrole package, which is required if you install the strict or MLS policy. It is not installed by default in Red Hat Enterprise Linux.
50.3. Analyst Control of SELinux
50.3.1. Enabling Kernel Auditing
audit=1 parameter to your kernel boot line, either in the /etc/grub.conf file or on the GRUB menu at boot time.
httpd is denied access to ~/public_html because the directory is not labeled as Web content. Notice that the time and serial number stamps in the audit(...) field are identical in each case. This makes it easier to track a specific event in the audit logs:
Jan 15 08:03:56 hostname kernel: audit(1105805036.075:2392892): \
avc: denied { getattr } for pid=2239 exe=/usr/sbin/httpd \
path=/home/auser/public_html dev=hdb2 ino=921135 \
scontext=user_u:system_r:httpd_t \
tcontext=system_u:object_r:user_home_t tclass=dirJan 15 08:03:56 hostname kernel: audit(1105805036.075:2392892): \ syscall=195 exit=4294967283 a0=9ef88e0 a1=bfecc0d4 a2=a97ff4 \ a3=bfecc0d4 items=1 pid=2239 loginuid=-1 uid=48 gid=48 euid=48 \ suid=48 fsuid=48 egid=48 sgid=48 fsgid=48
Jan 15 08:03:56 hostname kernel: audit(1105805036.075:2392892): \ item=0 name=/home/auser/public_html inode=921135 dev=00:00
Note
/var/log/messages, such as /var/log/audit/audit.log.
Chapter 51. Customizing SELinux Policy
51.1. Introduction
selinux-policy-targeted-sources packages and then to create a local.te file in the /etc/selinux/targeted/src/policy/domains/misc directory. You could use the audit2allow utility to translate the AVC messages into allow rules, and then rebuild and reload the policy.
selinux-policy-XYZ.src.rpm. A further package, selinux-policy-devel, has also been added, which provides further customization functionality.
51.1.1. Modular Policy
semodule.
semodule is the tool used to manage SELinux policy modules, including installing, upgrading, listing and removing modules. You can also use semodule to force a rebuild of policy from the module store and/or to force a reload of policy without performing any other transaction. semodule acts on module packages created by semodule_package. Conventionally, these files have a .pp suffix (policy package), although this is not mandated in any way.
51.1.1.1. Listing Policy Modules
semodule -l command:
~]# semodule -l
amavis 1.1.0
ccs 1.0.0
clamav 1.1.0
dcc 1.1.0
evolution 1.1.0
iscsid 1.0.0
mozilla 1.1.0
mplayer 1.1.0
nagios 1.1.0
oddjob 1.0.1
pcscd 1.0.0
pyzor 1.1.0
razor 1.1.0
ricci 1.0.0
smartmon 1.1.0Note
/usr/share/selinux/targeted/ directory contains a number of policy package (*.pp) files. These files are included in the selinux-policy rpm and are used to build the policy file.
51.2. Building a Local Policy Module
ypbind init script, which executes the setsebool command, which in turn tries to use the terminal. This is generating the following denial:
type=AVC msg=audit(1164222416.269:22): avc: denied { use } for pid=1940 comm="setsebool" name="0" dev=devpts ino=2 \
scontext=system_u:system_r:semanage_t:s0 tcontext=system_u:system_r:init_t:s0 tclass=fd51.2.1. Using audit2allow to Build a Local Policy Module
audit2allow utility now has the ability to build policy modules. Use the following command to build a policy module based on specific contents of the audit.log file:
ausearch -m AVC --comm setsebool | audit2allow -M mysemanage
audit2allow utility has built a type enforcement file (mysemanage.te). It then executed the checkmodule command to compile a module file (mysemanage.mod). Lastly, it uses the semodule_package command to create a policy package (mysemanage.pp). The semodule_package command combines different policy files (usually just the module and potentially a file context file) into a policy package.
51.2.2. Analyzing the Type Enforcement (TE) File
cat command to inspect the contents of the TE file:
~]# cat mysemanag.te
module mysemanage 1.0;
require {
class fd use;
type init_t;
type semanage_t;
role system_r;
};
allow semanage_t init_t:fd use;module command, which identifies the module name and version. The module name must be unique. If you create an semanage module using the name of a pre-existing module, the system would try to replace the existing module package with the newly-created version. The last part of the module line is the version. semodule can update module packages and checks the update version against the currently installed version.
require block. This informs the policy loader which types, classes and roles are required in the system policy before this module can be installed. If any of these fields are undefined, the semodule command will fail.
dontaudit, because semodule does not need to access the file descriptor.
51.2.3. Loading the Policy Package
semodule command to load the policy package:
~]# semodule -i mysemanage.ppmysemanage.pp) to other machines and install it using semodule.
audit2allow command outputs the commands it executed to create the policy package so that you can edit the TE file. This means you can add new rules as required or change the allow rule to dontaudit. You could then recompile and repackage the policy package to be installed again.
Chapter 52. References
Books
- SELinux by Example
- Mayer, MacMillan, and CaplanPrentice Hall, 2007
Tutorials and Help
- Understanding and Customizing the Apache HTTP SELinux Policy
- Tutorials and talks from Russell Coker
- Generic Writing SELinux policy HOWTO
- Red Hat Knowledgebase
General Information
- NSA SELinux main website
- NSA SELinux FAQ
- Fedora SELinux FAQ
- SELinux NSA's Open Source Security Enhanced Linux
Technology
- An Overview of Object Classes and Permissions
- Integrating Flexible Support for Security Policies into the Linux Operating System (a history of Flask implementation in Linux)
- Implementing SELinux as a Linux Security Module
- A Security Policy Configuration for the Security-Enhanced Linux
Community
- SELinux community page
- IRC
- irc.freenode.net, #rhel-selinux
History
- Quick history of Flask
- Full background on Fluke
Part VIII. Red Hat Training And Certification
Chapter 53. Red Hat Training and Certification
53.1. Three Ways to Train
- Open Enrollment
- Open enrollment courses are offered continually in 50+ locations across North America and 125+ locations worldwide. Red Hat courses are performance—based—students have access to at least one dedicated system, and in some courses, as many as five. Instructors are all experienced Red Hat Certified Engineers (RHCEs) who are intimately familiar with course curriculum.Course schedules are available at http://www.redhat.com/explore/training
- Onsite Training
- Onsite training is delivered by Red Hat at your facility for teams of 12 to 16 people per class. Red Hat's technical staff will assist your technical staff prior to arrival to ensure the training venue is prepared to run Red Hat Enterprise Linux, Red Hat or JBoss courses, and/or Red Hat certification exams. Onsites are a great way to train large groups at once. Open enrollment can be leveraged later for incremental training.For more information, visit http://www.redhat.com/explore/onsite
- eLearning
- Fully updated for Red Hat Enterprise Linux 4! No time for class? Red Hat's e—Learning titles are delivered online and cover RHCT and RHCE track skills. Our growing catalog also includes courses on the latest programming languages, scripting and ecommerce.For course listings visit http://www.redhat.com/explore/elearning
53.2. Microsoft Certified Professional Resource Center
Chapter 54. Certification Tracks
- Red Hat Certified Technician® (RHCT®)
- Now entering its third year, Red Hat Certified Technician is the fastest-growing credential in all of Linux, with currently over 15,000 certification holders. RHCT is the best first step in establishing Linux credentials and is an ideal initial certification for those transitioning from non-UNIX®/ Linux environments.Red Hat certifications are indisputably regarded as the best in Linux, and perhaps, according to some, in all of IT. Taught entirely by experienced Red Hat experts, our certification programs measure competency on actual live systems and are in great demand by employers and IT professionals alike.Choosing the right certification depends on your background and goals. Whether you have advanced, minimal, or no UNIX or Linux experience whatsoever, Red Hat Training has a training and certification path that is right for you.
- Red Hat Certified Engineer® (RHCE®)
- Red Hat Certified Engineer began in 1999 and has been earned by more than 20,000 Linux experts. Called the "crown jewel of Linux certifications," independent surveys have ranked the RHCE program #1 in all of IT.
- Red Hat Certified Security Specialist (RHCSS)
- An RHCSS has RHCE security knowledge plus specialized skills in Red Hat Enterprise Linux, Red Hat Directory Server and SELinux to meet the security requirements of today's enterprise environments. RHCSS is Red Hat's newest certification, and the only one of its kind in Linux.
- Red Hat Certified Architect (RHCA)
- RHCEs who seek advanced training can enroll in Enterprise Architect courses and prove their competency with the newly announced Red Hat Certified Architect (RHCA) certification. RHCA is the capstone certification to Red Hat Certified Technician (RHCT) and Red Hat Certified Engineer (RHCE), the most acclaimed certifications in the Linux space.
54.1. Free Pre-assessment tests
Chapter 55. RH033: Red Hat Linux Essentials
55.1. Course Description
55.1.1. Prerequisites
55.1.2. Goal
55.1.3. Audience
55.1.4. Course Objectives
- Understand the Linux file system
- Perform common file maintenance
- Use and customize the GNOME interface
- Issue essential Linux commands from the command line
- Perform common tasks using the GNOME GUI
- Open, edit, and save text documents using the vi editor
- File access permissions
- Customize X Window System
- Regular expression pattern matching and I/O redirection
- Install, upgrade, delete and query packages on your system
- Network utilities for the user
- Power user utilities
55.1.5. Follow-on Courses
Chapter 56. RH035: Red Hat Linux Essentials for Windows Professionals
56.1. Course Description
56.1.1. Prerequisites
56.1.2. Goal
56.1.3. Audience
56.1.4. Course Objectives
- Learn to install software, configure the network, configure authentication, and install and configure various services using graphical tools
- Understand the Linux file system
- Issue essential Linux commands from the command line
- Understand file access permissions
- Customize X Window System
- Use regular expression pattern matching and I/O redirection
56.1.5. Follow-on Courses
Chapter 57. RH133: Red Hat Linux System Administration and Red Hat Certified Technician (RHCT) Certification
57.1. Course Description
57.1.1. Prerequisites
57.1.2. Goal
57.1.3. Audience
57.1.4. Course Objectives
- Install Red Hat Linux interactively and with Kickstart
- Control common system hardware; administer Linux printing subsystem
- Create and maintain the Linux filesystem
- Perform user and group administration
- Integrate a workstation with an existing network
- Configure a workstation as a client to NIS, DNS, and DHCP services
- Automate tasks with at, cron, and anacron
- Back up filesystems to tape and tar archive
- Manipulate software packages with RPM
- Configure the X Window System and the GNOME d.e.
- Perform performance, memory, and process mgmt.
- Configure basic host security
57.1.5. Follow-on Courses
Chapter 58. RH202 RHCT EXAM - The fastest growing credential in all of Linux.
- RHCT exam is included with RH133. It can also be purchased on its own for $349
- RHCT exams occur on the fifth day of all RH133 classes
58.1. Course Description
58.1.1. Prerequisites
Chapter 59. RH253 Red Hat Linux Networking and Security Administration
59.1. Course Description
59.1.1. Prerequisites
59.1.2. Goal
59.1.3. Audience
59.1.4. Course Objectives
- Networking services on Red Hat Linux server-side setup, configuration, and basic administration of common networking services: DNS, NIS, Apache, SMB, DHCP, Sendmail, FTP. Other common services: tftp, pppd, proxy.
- Introduction to security
- Developing a security policy
- Local security
- Files and filesystem security
- Password security
- Kernel security
- Basic elements of a firewall
- Red Hat Linux-based security tools
- Responding to a break-in attempt
- Security sources and methods
- Overview of OSS security tools
59.1.5. Follow-on Courses
Chapter 60. RH300: RHCE Rapid track course (and RHCE exam)
60.1. Course Description
60.1.1. Prerequisites
60.1.2. Goal
60.1.3. Audience
60.1.4. Course Objectives
- Hardware and Installation (x86 architecture)
- Configuration and administration
- Alternate installation methods
- Kernel services and configuration
- Standard networking services
- X Window system
- User and host security
- Routers, Firewalls, Clusters and Troubleshooting
60.1.5. Follow-on Courses
Chapter 61. RH302 RHCE EXAM
- RHCE exams are included with RH300. It can also be purchased on its own.
- RHCE exams occur on the fifth day of all RH300 classes
61.1. Course Description
61.1.1. Prerequisites
61.1.2. Content
- Section I: Troubleshooting and System Maintenance (2.5 hrs)
- Section II: Installation and Configuration (3 hrs.)
Chapter 62. RHS333: RED HAT enterprise security: network services
62.1. Course Description
62.1.1. Prerequisites
62.1.2. Goal
62.1.3. Audience
62.1.4. Course Objectives
- Mastering basic service security
- Understanding cryptography
- Logging system activity
- Securing BIND and DNS
- Network user authentication security
- Improving NFS security
- The secure shell: OpenSSH
- Securing email with Sendmail and Postfix
- Managing FTP access
- Apache security
- Basics of intrusion response
62.1.5. Follow-on Courses
Chapter 63. RH401: Red Hat Enterprise Deployment and systems management
63.1. Course Description
63.1.1. Prerequisites
63.1.2. Goal
63.1.3. Audience
63.1.4. Course Objectives
- Configuration management using CVS
- Construction of custom RPM packages
- Software management with Red Hat Network Proxy Server
- Assembling a host provisioning and management system
- Performance tuning and analysis
- High-availability network load-balancing clusters
- High-availability application failover clusters
63.1.5. Follow-on Courses
Chapter 64. RH423: Red Hat Enterprise Directory services and authentication
64.1. Course Description
64.1.1. Prerequisites
64.1.2. Goal
64.1.3. Audience
64.1.4. Course Objectives
- Basic LDAP concepts
- How to configure and manage an OpenLDAP server
- Using LDAP as a "white pages" directory service
- Using LDAP for user authentication and management
- Integrating multiple LDAP servers
64.1.5. Follow-on Courses
Chapter 65. SELinux Courses
65.1. RHS427: Introduction to SELinux and Red Hat Targeted Policy
65.1.1. Audience
65.1.2. Course Summary
65.2. RHS429: Red Hat Enterprise SELinux Policy Administration
Chapter 66. RH436: Red Hat Enterprise storage management
- five servers
- storage array
66.1. Course Description
66.1.1. Prerequisites
66.1.2. Goal
66.1.3. Audience
66.1.4. Course Objectives
- Review Red Hat Enterprise Linux storage management technologies
- Data storage design: Data sharing
- Cluster Suite overview
- Global File System (GFS) overview
- GFS management
- Modify the online GFS environment: Managing data capacity
- Monitor GFS
- Implement GFS modifications
- Migrating Cluster Suite NFS from DAS to GFS
- Re-visit Cluster Suite using GFS
66.1.5. Follow-on Courses
Chapter 67. RH442: Red Hat Enterprise system monitoring and performance tuning
67.1. Course Description
67.1.1. Prerequisites
67.1.2. Goal
- A discussion of system architecture with an emphasis on understanding the implications of system architecture on system performance
- Methods for testing the effects of performance adjustments (benchmarking)
- Open source benchmarking utilities
- Methods for analyzing system performance and networking performance
- Tuning configurations for specific application loads
67.1.3. Audience
67.1.4. Course Objectives
- Overview of system components and architecture as they relate to system performance
- Translating manufacturers' hardware specifications into useful information
- Using standard monitoring tools effectively to gather and analyze trend information
- Gathering performance-related data with SNMP
- Using open source benchmarking utilities
- Network performance tuning
- Application performance tuning considerations
- Tuning for specific configurations
67.1.5. Follow-on Courses
Chapter 68. Red Hat Enterprise Linux Developer Courses
68.1. RHD143: Red Hat Linux Programming Essentials
68.2. RHD221 Red Hat Linux Device Drivers
68.3. RHD236 Red Hat Linux Kernel Internals
68.4. RHD256 Red Hat Linux Application Development and Porting
Chapter 69. JBoss Courses
69.1. RHD161 JBoss and EJB3 for Java
69.1.1. Prerequisites
- The object-oriented concepts of inheritance, polymorphism and encapsulation
- Java syntax, specifically for data types, variables, operators, statements and control flow
- Writing Java classes as well as using Java interfaces and abstract classes
69.2. RHD163 JBoss for Web Developers
69.2.1. Prerequisites
- JNDI
- The Servlet 2.3/2.4 API
- The JSP 2.0 API
- J2EE application development and deployment on the JBoss Application Server
- Deployment of a Web Application on embedded (stand alone) Tomcat or on integrated Tomcat (JBossWeb)
- A working knowledge of JDBC and EJB2.1 or EJB3.0
69.3. RHD167: JBOSS - HIBERNATE ESSENTIALS
69.3.1. Prerequisites
- An understanding of the relational persistence model
- Competency with the Java language
- Knowledge of OOAD concepts
- Familiarity with the UML
- Experience with a dialect of SQL
- Using the JDK and creating the necessary environment for compilation and execution of a Java executable from the command line
- An understanding of JDB
69.3.2. Course Summary
69.4. RHD267: JBOSS - ADVANCED HIBERNATE
69.4.1. Prerequisites
- Basic Hibernate knowledge.
- Competency with the Java language
- Knowledge of OOAD concepts
- Familiarity with the UML
- Experience with a dialect of SQL
- Using the JDK and creating the necessary environment for compilation and execution of a Java executable from the command line.
- Experience with, or comprehensive knowledge of JNDI and JDBC.
- Entity EJB2.1 or EJB3.0 knowledge, while not a prerequisite, is helpful.
- Prior reading of the book Hibernate in Action, by Christian Bauer and Gavin King (published by Manning) is recommended.
69.5. RHD261:JBOSS for advanced J2EE developers
69.5.1. Prerequisites
- JNDI
- JDBC
- Servlets and JSPs
- Enterprise Java Beans
- JMS
- The J2EE Security Model
- J2EE application development and deployment on the JBoss Application
- Experience with ANT and XDoclet or similar technologies.
69.6. RH336: JBOSS for Administrators
69.6.1. Prerequisites
- Creating directories, files and modifying access rights to the file store
- Installing a JDK
- Configuring environment variables, such as JAVA_HOME, for an Operating system
- Launching Java applications and executing an OS-dependent script that launches a Java application.
- Creating and expanding a Java archive file (the jar utility)
69.6.2. Course Summary
69.7. RHD439: JBoss Clustering
69.7.1. Prerequisites
- JTA, Transactions, Java concurrency
- EJB 2.1, JMS, reliable messaging technologies
- Previous experience with Apache httpd and some exposure to mod_jk and/or mod_proxy
- Familiar with JBoss AS microkernel and JMX
- Familiarity with TCP/IP, UDP, Multicasting
69.8. RHD449: JBoss jBPM
69.8.1. Description
69.8.2. Prerequisites
- The student must have previous experience developing an Hibernate application. The student must know how to configure a simple Session Factory for Hibernate, utilize a Hibernate Session and transactional demarcation and how to perform basic queries on Hibernate objects.
- Competency with Java application development.
- Previous exposure to the concepts of workflow and business process modeling (BPM) is not required
- Experience with JBoss Eclipse or the Eclipse IDE with the JBoss plugin is recommended but not required
- Basic notions of JUnit test framework is recommended.
69.9. RHD451 JBoss Rules
69.9.1. Prerequisites
- Basic Java competency
- Some understanding of what constitutes an inferencing rule engine versus a scripting engine
- Viewing of the Jboss Rules webinars and demos is recommended but not required
- Java EE specific experience is not required for the course, but students who need to know how to integrate with Java EE will need the appropriate experience
Appendix A. Revision History
| Revision History | |||||||||||||
|---|---|---|---|---|---|---|---|---|---|---|---|---|---|
| Revision 11-1 | Tue 30 Jun 2015 | ||||||||||||
| |||||||||||||
| Revision 11-0 | Fri 12 Sep 2014 | ||||||||||||
| |||||||||||||
| Revision 10-0 | Tue 01 Oct 2013 | ||||||||||||
| |||||||||||||
| Revision 9-6 | Tue Jan 08 2013 | ||||||||||||
| |||||||||||||
| Revision 8-0 | Tue Feb 21 2012 | ||||||||||||
| |||||||||||||
| Revision 7-0 | Thu Jul 21 2011 | ||||||||||||
| |||||||||||||
| Revision 6-0 | Thu Jan 13 2011 | ||||||||||||
| |||||||||||||
| Revision 5-0 | Thu July 30 2010 | ||||||||||||
| |||||||||||||
| Revision 4-2 | Wed Sep 30 2009 | , , | |||||||||||
| |||||||||||||
| Revision 4-1 | Mon Sep 14 2009 | ||||||||||||
| |||||||||||||
| Revision 4-0 | Wed Sep 02 2009 | ||||||||||||
| |||||||||||||
| Revision 3-0 | Wed Jan 28 2009 | ||||||||||||
| |||||||||||||
Appendix B. Colophon
- East Asian Languages
- Simplified Chinese
- Tony Tongjie Fu
- Simon Xi Huang
- Leah Wei Liu
- Sarah Saiying Wang
- Traditional Chinese
- Chester Cheng
- Terry Chuang
- Ben Hung-Pin Wu
- Japanese
- Kiyoto Hashida
- Junko Ito
- Noriko Mizumoto
- Takuro Nagamoto
- Korean
- Eun-ju Kim
- Michelle Kim
- Latin Languages
- French
- Jean-Paul Aubry
- Fabien Decroux
- Myriam Malga
- Audrey Simons
- Corina Roe
- German
- Jasna Dimanoski
- Verena Furhuer
- Bernd Groh
- Daniela Kugelmann
- Timo Trinks
- Italian
- Francesco Valente
- Brazilian Portuguese
- Glaucia de Freitas
- Leticia de Lima
- David Barzilay
- Spanish
- Angela Garcia
- Gladys Guerrero
- Yelitza Louze
- Manuel Ospina
- Russian
- Yuliya Poyarkova
- Indic Languages
- Bengali
- Runa Bhattacharjee
- Gujarati
- Ankitkumar Rameshchandra Patel
- Sweta Kothari
- Hindi
- Rajesh Ranjan
- Malayalam
- Ani Peter
- Marathi
- Sandeep Shedmake
- Punjabi
- Amanpreet Singh Alam
- Jaswinder Singh
- Tamil
- I Felix
- N Jayaradha

