Security Guide
Making Red Hat JBoss A-MQ secure
Copyright © 2011-2015 Red Hat, Inc. and/or its affiliates.
Abstract
Chapter 1. Security Architecture
Abstract
1.1. OSGi Container Security
Overview
Figure 1.1. OSGi Container Security Architecture
JAAS realms
karaf realm
karaf realm. Red Hat JBoss A-MQ uses the karaf realm to provide authentication for remote administration of the OSGi runtime, for the Fuse Management Console, and for JMX management. The karaf realm uses a simple file-based repository, where authentication data is stored in the InstallDir/etc/users.properties file.
karaf realm in your own applications. Simply configure karaf as the name of the JAAS realm that you want to use. Your application then performs authentication using the data from the users.properties file.
Console port
ssh:ssh command. The console port is secured by a JAAS login feature that connects to the karaf realm. Users that try to connect to the console port will be prompted to enter a username and password that must match one of the accounts from the karaf realm.
JMX port
karaf realm.
Application bundles and JAAS security
1.2. Apache ActiveMQ Security
Overview
Figure 1.2. Apache ActiveMQ Security Architecture
SSL/TLS security
JAAS security
Chapter 2. Securing the Container
Abstract
2.1. JAAS Authentication
Abstract
2.1.1. Default JAAS Realm
Overview
Default JAAS realm
karaf realm, which is used by default to secure all aspects of the container.
How to integrate an application with JAAS
karaf realm in your own applications. Simply configure karaf as the name of the JAAS realm that you want to use.
Default JAAS login modules
karaf default realm. In this default configuration, the karaf realm deploys four JAAS login modules, which are enabled simultaneously. To see the deployed login modules, enter the jaas:realms console command, as follows:
FileAuditLoginModule login module and the EventAdminAuditLoginModule login module are used to record an audit trail of successful and failed login attempts. These login modules do not authenticate users.
Configuring users in the properties login module
InstallDir/etc/users.properties file using a text editor and add a line with the following syntax:
Username=Password[,UserGroup|Role][,UserGroup|Role]...
Username=Password[,UserGroup|Role][,UserGroup|Role]...jdoe user with password, topsecret, and role, Administrator, you could create an entry like the following:
jdoe=topsecret,Administrator
jdoe=topsecret,AdministratorAdministrator role gives full administrative privileges to the jdoe user.
Configuring user groups in the properties login module
InstallDir/etc/users.properties file using a text editor and add a line with the following syntax:
_g_\:GroupName=Role1,Role2,...
_g_\:GroupName=Role1,Role2,...admingroup user group with the roles, SuperUser and Administrator, you could create an entry like the following:
_g_\:admingroup=SuperUser,Administrator
_g_\:admingroup=SuperUser,Administratormajorclanger user to the admingroup, by creating the following user entry:
majorclanger=secretpass,_g_:admingroup
majorclanger=secretpass,_g_:admingroupConfiguring the public key login module
InstallDir/etc/keys.properties file using a text editor and add a line with the following syntax:
Username=PublicKey[,UserGroup|Role][,UserGroup|Role]...
Username=PublicKey[,UserGroup|Role][,UserGroup|Role]...jdoe user with the Administrator role by adding the following entry to the InstallDir/etc/keys.properties file (on a single line):
id_rsa.pub file here. Insert just the block of symbols which represents the public key itself.
Configuring user groups in the public key login module
InstallDir/etc/keys.properties file using a text editor and add a line with the following syntax:
_g_\:GroupName=Role1,Role2,...
_g_\:GroupName=Role1,Role2,...admingroup user group with the roles, SuperUser and Administrator, you could create an entry like the following:
_g_\:admingroup=SuperUser,Administrator
_g_\:admingroup=SuperUser,Administratorjdoe user to the admingroup, by creating the following user entry:
Encrypting the stored passwords
InstallDir/etc/users.properties file in plaintext format. To protect the passwords in this file, you must set the file permissions of the users.properties file so that it can be read only by administrators. To provide additional protection, you can optionally encrypt the stored passwords using a message digest algorithm.
InstallDir/etc/org.apache.karaf.jaas.cfg file and set the encryption properties as described in the comments. For example, the following settings would enable basic encryption using the MD5 message digest algorithm:
org.apache.karaf.jaas.cfg file are applied only to the default karaf realm in a standalone container. The have no effect on a Fabric container and no effect on a custom realm.
Overriding the default realm
karaf realm by defining a higher ranking karaf realm. This ensures that all of the Red Hat JBoss A-MQ security components switch to use your custom realm. For details of how to define and deploy custom JAAS realms, see Section 2.1.2, “Defining JAAS Realms”.
2.1.2. Defining JAAS Realms
Overview
jaas:config element for defining JAAS realms in a blueprint configuration file. The JAAS realms defined in this way are made available to all of the application bundles deployed in the container, making it possible to share the JAAS security infrastructure across the whole container.
Namespace
jaas:config element is defined in the http://karaf.apache.org/xmlns/jaas/v1.0.0 namespace. When defining a JAAS realm you will need to include the line shown in Example 2.1, “JAAS Blueprint Namespace”.
Example 2.1. JAAS Blueprint Namespace
xmlns:jaas="http://karaf.apache.org/xmlns/jaas/v1.0.0"
xmlns:jaas="http://karaf.apache.org/xmlns/jaas/v1.0.0"Configuring a JAAS realm
jaas:config element is shown in Example 2.2, “Defining a JAAS Realm in Blueprint XML”.
Example 2.2. Defining a JAAS Realm in Blueprint XML
jaas:config- Defines the JAAS realm. It has the following attributes:
name—specifies the name of the JAAS realm.rank—specifies an optional rank for resolving naming conflicts between JAAS realms . When two or more JAAS realms are registered under the same name, the OSGi container always picks the realm instance with the highest rank. If you decide to override the default realm,karaf, you should specify arankof100or more, so that it overrides all of the previously installedkarafrealms (in the context of Fabric, you need to override the defaultZookeeperLoginModule, which has a rank of99).
jaas:module- Defines a JAAS login module in the current realm.
jaas:modulehas the following attributes:className—the fully-qualified class name of a JAAS login module. The specified class must be available from the bundle classloader.flags—determines what happens upon success or failure of the login operation. Table 2.1, “Flags for Defining a JAAS Module” describes the valid values.Expand Table 2.1. Flags for Defining a JAAS Module Value Description requiredAuthentication of this login module must succeed. Always proceed to the next login module in this entry, irrespective of success or failure. requisiteAuthentication of this login module must succeed. If success, proceed to the next login module; if failure, return immediately without processing the remaining login modules. sufficientAuthentication of this login module is not required to succeed. If success, return immediately without processing the remaining login modules; if failure, proceed to the next login module. optionalAuthentication of this login module is not required to succeed. Always proceed to the next login module in this entry, irrespective of success or failure.
The contents of ajaas:moduleelement is a space separated list of property settings, which are used to initialize the JAAS login module instance. The specific properties are determined by the JAAS login module and must be put into the proper format.NoteYou can define multiple login modules in a realm.
Converting standard JAAS login properties to XML
PropertiesLogin realm using the Red Hat JBoss A-MQ properties login module class, PropertiesLoginModule:
Example 2.3. Standard JAAS Properties
PropertiesLogin {
    org.apache.activemq.jaas.PropertiesLoginModule required
        org.apache.activemq.jaas.properties.user="users.properties"
        org.apache.activemq.jaas.properties.group="groups.properties";
};
PropertiesLogin {
    org.apache.activemq.jaas.PropertiesLoginModule required
        org.apache.activemq.jaas.properties.user="users.properties"
        org.apache.activemq.jaas.properties.group="groups.properties";
};jaas:config element in a blueprint file, is shown in Example 2.4, “Blueprint JAAS Properties”.
Example 2.4. Blueprint JAAS Properties
Example
LDAPLogin realm to use Red Hat JBoss A-MQ's LDAPLoginModule class, which connects to the LDAP server located at ldap://localhost:10389.
Example 2.5. Configuring a JAAS Realm
2.1.3. JAAS Properties Login Module
Overview
jaas:* console commands.
InstallDir/etc/users.properties file.
Supported credentials
Implementation classes
org.apache.karaf.jaas.modules.properties.PropertiesLoginModule- Implements the JAAS login module.
org.apache.karaf.jaas.modules.properties.PropertiesBackingEngineFactory- Must be exposed as an OSGi service. This service makes it possible for you to manage the user data using the
jaas:*console commands from the Apache Karaf shell (see chapter "JAAS Console Commands" in "Console Reference").
Options
users- Location of the user properties file.
Format of the user properties file
Username=Password[,UserGroup|Role][,UserGroup|Role]...
Username=Password[,UserGroup|Role][,UserGroup|Role]..._g_\:GroupName=Role1[,Role2]...
_g_\:GroupName=Role1[,Role2]...bigcheese and guest, and the user groups, admingroup and guestgroup, as follows:
Sample Blueprint configuration
karaf realm using the properties login module, where the default karaf realm is overridden by setting the rank attribute to 200:
BackingEngineFactory bean as an OSGi service, so that the jaas:* console commands can manage the user data.
2.1.4. JAAS OSGi Config Login Module
Overview
etc/PersistentID.cfg or using any method of configuration that is supported by the OSGi Config Admin Service. The jaas:* console commands are not supported, however.
Supported credentials
Implementation classes
org.apache.karaf.jaas.modules.osgi.OsgiConfigLoginModule- Implements the JAAS login module.
jaas:* console commands.
Options
pid- The persistent ID of the OSGi configuration containing the user data. In the OSGi Config Admin standard, a persistent ID references a set of related configuration properties.
Location of the configuration file
PersistentID, is stored in the following file:
InstallDir/etc/PersistentID.cfg
InstallDir/etc/PersistentID.cfgFormat of the configuration file
PersistentID.cfg configuration file is used to store username, password, and role data for the OSGi config login module. Each user is represented by a single line in the configuration file, where a line has the following form:
Username=Password[,Role][,Role]...
Username=Password[,Role][,Role]...Sample Blueprint configuration
karaf realm using the OSGi config login module, where the default karaf realm is overridden by setting the rank attribute to 200:
InstallDir/etc/org.jboss.example.osgiconfigloginmodule.cfg, and it is not possible to edit the configuration using the jaas:* console commands.
2.1.5. JAAS Public Key Login Module
Overview
jaas:* console commands are not supported, however.
InstallDir/etc/keys.properties file.
Supported credentials
Implementation classes
org.apache.karaf.jaas.modules.publickey.PublickeyLoginModule- Implements the JAAS login module.
jaas:* console commands.
Options
users- Location of the user properties file for the public key login module.
Format of the keys properties file
keys.properties file is used to store username, public key, and role data for the public key login module. Each user is represented by a single line in the keys properties file, where a line has the following form:
Username=PublicKey[,UserGroup|Role][,UserGroup|Role]...
Username=PublicKey[,UserGroup|Role][,UserGroup|Role]...~/.ssh/id_rsa.pub in a UNIX system).
jdoe with the Administrator role, you would create an entry like the following:
id_rsa.pub file here. Insert just the block of symbols which represents the public key itself.
_g_\:GroupName=Role1[,Role2]...
_g_\:GroupName=Role1[,Role2]...Sample Blueprint configuration
karaf realm using the public key login module, where the default karaf realm is overridden by setting the rank attribute to 200:
InstallDir/etc/keys.properties, and it is not possible to edit the configuration using the jaas:* console commands.
2.1.6. JAAS JDBC Login Module
Overview
jaas:* console commands (where the backing engine uses configured SQL queries to perform the relevant database updates).
PropertiesLoginModule with JDBCLoginModule to ensure access to the system.
Supported credentials
Implementation classes
org.apache.karaf.jaas.modules.jdbc.JDBCLoginModule- Implements the JAAS login module.
org.apache.karaf.jaas.modules.jdbc.JDBCBackingEngineFactory- Must be exposed as an OSGi service. This service makes it possible for you to manage the user data using the
jaas:*console commands from the Apache Karaf shell (see chapter "JAAS Console Commands" in "Console Reference").
Options
- datasource
- The JDBC data source, specified either as an OSGi service or as a JNDI name. You can specify a data source's OSGi service using the following syntax:
osgi:ServiceInterfaceName[/ServicePropertiesFilter]
osgi:ServiceInterfaceName[/ServicePropertiesFilter]Copy to Clipboard Copied! Toggle word wrap Toggle overflow The ServiceInterfaceName is the interface or class that is exported by the data source's OSGi service (usuallyjavax.sql.DataSource).Because multiple data sources can be exported as OSGi services in a container, it is usually necessary to specify a filter, ServicePropertiesFilter, to select the particular data source that you want. Filters on OSGi services are applied to the service property settings and follow a syntax that is borrowed from LDAP filter syntax. - query.password
- The SQL query that retrieves the user's password. The query can contain a single question mark character,
?, which is substituted by the username at run time. - query.role
- The SQL query that retrieves the user's roles. The query can contain a single question mark character,
?, which is substituted by the username at run time. - insert.user
- The SQL query that creates a new user entry. The query can contain two question marks,
?, characters: the first question mark is substituted by the username and the second question mark is substituted by the password at run time. - insert.role
- The SQL query that adds a role to a user entry. The query can contain two question marks,
?, characters: the first question mark is substituted by the username and the second question mark is substituted by the role at run time. - delete.user
- The SQL query that deletes a user entry. The query can contain a single question mark character,
?, which is substituted by the username at run time. - delete.role
- The SQL query that deletes a role from a user entry. The query can contain two question marks,
?, characters: the first question mark is substituted by the username and the second question mark is substituted by the role at run time. - delete.roles
- The SQL query that deletes multiple roles from a user entry. The query can contain a single question mark character,
?, which is substituted by the username at run time.
Example of setting up a JDBC login module
Create the database tables
users table and roles table:
users table stores username/password data and the roles table associates a username with one or more roles.
Create the data source
javax.sql.DataSource type) using code like the following in a Blueprint file:
Specify the data source as an OSGi service
datasource option of the JDBC login module can reference the data source's OSGi service using the following syntax:
osgi:javax.sql.DataSource/(osgi.jndi.service.name=jdbc/karafdb)
osgi:javax.sql.DataSource/(osgi.jndi.service.name=jdbc/karafdb)javax.sql.DataSource is the interface type of the exported OSGi service and the filter, (osgi.jndi.service.name=jdbc/karafdb), selects the particular javax.sql.DataSource instance whose osgi.jndi.service.name service property has the value, jdbc/karafdb.
karaf realm with a JDBC login module that references the sample MySQL data source:
JDBCBackingEngineFactory instance, which enables you to manage the user data using the jaas:* console commands.
2.1.7. JAAS LDAP Login Module
Overview
jaas:* console commands are not supported.
Supported credentials
Implementation classes
org.apache.karaf.jaas.modules.ldap.LDAPLoginModule- Implements the JAAS login module. It is preloaded in the container, so you do not need to install its bundle.
jaas:* console commands.
Options
authentication- Specifies the authentication method used when binding to the LDAP server. Valid values are
simple—bind with user name and password authentication, requiring you to set theconnection.usernameandconnection.passwordproperties.none—bind anonymously. In this case theconnection.usernameandconnection.passwordproperties can be left unassigned.
NoteThe connection to the directory server is used only for performing searches. In this case, an anonymous bind is often preferred, because it is faster than an authenticated bind (but you would also need to ensure that the directory server is sufficiently protected, for example by deploying it behind a firewall). connection.url- Specifies specify the location of the directory server using an ldap URL, ldap://Host:Port. You can optionally qualify this URL, by adding a forward slash,
/, followed by the DN of a particular node in the directory tree. To enable SSL security on the connection, you need to specify theldaps:scheme in the URL—for example, ldaps://Host:Port. You can also specify multiple URLs, as a space-separated list, for example:connection.url=ldap://10.0.0.153:2389 ldap://10.10.178.20:389
connection.url=ldap://10.0.0.153:2389 ldap://10.10.178.20:389Copy to Clipboard Copied! Toggle word wrap Toggle overflow connection.username- Specifies the DN of the user that opens the connection to the directory server. For example,
uid=admin,ou=system. connection.password- Specifies the password that matches the DN from connection.username. In the directory server, the password is normally stored as a
userPasswordattribute in the corresponding directory entry. context.com.sun.jndi.ldap.connect.pool- If
true, enables connection pooling for LDAP connections. Default isfalse. context.com.sun.jndi.ldap.connect.timeout- Specifies the timeout for creating a TCP connection to the LDAP server, in units of milliseconds. We recommend that you set this property explicitly, because the default value is infinite, which can result in a hung connection attempt.
context.com.sun.jndi.ldap.read.timeout- Specifies the read timeout for an LDAP operation, in units of milliseconds. We recommend that you set this property explicitly, because the default value is infinite.
context.java.naming.referral- An LDAP referral is a form of indirection supported by some LDAP servers. The LDAP referral is an entry in the LDAP server which contains one or more URLs (usually referencing a node or nodes in another LDAP server). The
context.java.naming.referralproperty can be used to enable or disable referral following. It can be set to one of the following values:followto follow the referrals (assuming it is supported by the LDAP server),ignoreto silently ignore all referrals,throwto throw aPartialResultExceptionwhenever a referral is encountered.
initial.context.factory- Specifies the class of the context factory used to connect to the LDAP server. This must always be set to
com.sun.jndi.ldap.LdapCtxFactory. role.base.dn- Specifies the DN of the subtree of the DIT to search for role entries. For example,
ou=groups,ou=system. role.filter- Specifies the LDAP search filter used to locate roles. It is applied to the subtree selected by
role.base.dn. For example,(member=uid=%u). Before being passed to the LDAP search operation, the value is subjected to string substitution, as follows:%uis replaced by the user name extracted from the incoming credentials, and%dnis replaced by the RDN of the corresponding user in the LDAP server (which was found by matching against theuser.filterfilter).%fqdnis replaced by the DN of the corresponding user in the LDAP server (which was found by matching against theuser.filterfilter).
role.mapping- Specifies the mapping between LDAP groups and JAAS roles. If no mapping is specified, the default mapping is for each LDAP group to map to the corresponding JAAS role of the same name. The role mapping is specified with the following syntax:
ldap-group=jaas-role(,jaas-role)*(;ldap-group=jaas-role(,jaas-role)*)*
ldap-group=jaas-role(,jaas-role)*(;ldap-group=jaas-role(,jaas-role)*)*Copy to Clipboard Copied! Toggle word wrap Toggle overflow For example, given the LDAP groups,admin,devop, andtester, you could map them to JAAS roles, as follows:role.mapping=admin=Administrator;devop=Administrator,Deployer;tester=Monitor
role.mapping=admin=Administrator;devop=Administrator,Deployer;tester=MonitorCopy to Clipboard Copied! Toggle word wrap Toggle overflow role.name.attribute- Specifies the attribute type of the role entry that contains the name of the role/group. If you omit this option, the role search feature is effectively disabled. For example,
cn. role.search.subtree- Specifies whether the role entry search scope includes the subtrees of the tree selected by
role.base.dn. Iftrue, the role lookup is recursive (SUBTREE). Iffalse, the role lookup is performed only at the first level (ONELEVEL). ssl- Specifies whether the connection to the LDAP server is secured using SSL. If connection.url starts with ldaps:// SSL is used regardless of this property.
ssl.provider- Specifies the SSL provider to use for the LDAP connection. If not specified, the default SSL provider is used.
ssl.protocol- Specifies the protocol to use for the SSL connection. You must set this property to
TLSv1, in order to prevent the SSLv3 protocol from being used (POODLE vulnerability). ssl.algorithm- Specifies the algorithm used by the trust store manager. For example,
PKIX. ssl.keystore- The ID of the keystore that stores the LDAP client's own X.509 certificate (required only if SSL client authentication is enabled on the LDAP server). The keystore must be deployed using a
jaas:keystoreelement (see the section called “Sample configuration for Apache DS”). ssl.keyalias- The keystore alias of the LDAP client's own X.509 certificate (required only if there is more than one certificate stored in the keystore specified by
ssl.keystore). ssl.truststore- The ID of the keystore that stores trusted CA certificates, which are used to verify the LDAP server's certificate (the LDAP server's certificate chain must be signed by one of the certificates in the truststore). The keystore must be deployed using a
jaas:keystoreelement. user.base.dn- Specifies the DN of the subtree of the DIT to search for user entries. For example,
ou=users,ou=system. user.filter- Specifies the LDAP search filter used to locate user credentials. It is applied to the subtree selected by
user.base.dn. For example,(uid=%u). Before being passed to the LDAP search operation, the value is subjected to string substitution, as follows:%uis replaced by the user name extracted from the incoming credentials.
user.search.subtree- Specifies whether the user entry search scope includes the subtrees of the tree selected by
user.base.dn. Iftrue, the user lookup is recursive (SUBTREE). Iffalse, the user lookup is performed only at the first level (ONELEVEL).
Sample configuration for Apache DS
karaf realm using the LDAP login module, where the default karaf realm is overridden by setting the rank attribute to 200, and the LDAP login module connects to an Apache Directory Server:
ldaps scheme in the connection.url setting.
ssl.protocol to TLSv1, in order to protect against the Poodle vulnerability (CVE-2014-3566)
Filter settings for different directory servers
| Directory Server | Typical Filter Settings |
|---|---|
|
389-DS
Red Hat DS
|
user.filter=(&(objectClass=InetOrgPerson)(uid=%u)) role.filter=(uniquemember=%fqdn) |
|
MS Active Directory
|
user.filter=(&(objectCategory=person)(samAccountName=%u)) role.filter=(uniquemember=%fqdn) |
|
Apache DS
|
user.filter=(uid=%u) role.filter=(member=uid=%u) |
|
OpenLDAP
|
user.filter=(uid=%u) role.filter=(member:=uid=%u) |
& symbol (representing the logical And operator) is escaped as & because the option settings will be embedded in a Blueprint XML file.
2.1.8. Encrypting Stored Passwords
Overview
Options
/etc/org.apache.karaf.jaas.cfg file or deploy your own blueprint file as described in the section called “Example of a login module with Jasypt encryption”.
encryption.enabled- Set to
true, to enable password encryption. encryption.name- Name of the encryption service, which has been registered as an OSGi service.
encryption.prefix- Prefix for encrypted passwords.
encryption.suffix- Suffix for encrypted passwords.
encryption.algorithm- Specifies the name of the encryption algorithm—for example,
MD5orSHA-1. You can specify one of the following encryption algorithms:MD2MD5SHA-1SHA-256SHA-384SHA-512
encryption.encoding- Encrypted passwords encoding:
hexadecimalorbase64. encryption.providerName(Jasypt only)- Name of the
java.security.Providerinstance that is to provide the digest algorithm. encryption.providerClassName(Jasypt only)- Class name of the security provider that is to provide the digest algorithm
encryption.iterations(Jasypt only)- Number of times to apply the hash function recursively.
encryption.saltSizeBytes(Jasypt only)- Size of the salt used to compute the digest.
encryption.saltGeneratorClassName(Jasypt only)- Class name of the salt generator.
role.policy- Specifies the policy for identifying role principals. Can have the values,
prefixorgroup. role.discriminator- Specifies the discriminator value to be used by the role policy.
Encryption services
encryption.name = basic, described in the section called “Basic encryption service”,encryption.name = jasypt, described in the section called “Jasypt encryption”.
- implement interface
org.apache.karaf.jaas.modules.EncryptionService - and expose your implementation as OSGI service.
Basic encryption service
encryption.name property to the value, basic. In the basic encryption service, the message digest algorithms are provided by the SUN security provider (the default security provider in the Oracle JDK).
Jasypt encryption
jasypt-encryption feature, using the following console command:
JBossA-MQ:karaf@root> features:install jasypt-encryption
JBossA-MQ:karaf@root> features:install jasypt-encryptionencryption.name property to the value, jasypt.
Example of a login module with Jasypt encryption
jasypt-encryption feature, you could deploy a properties login module with Jasypt encryption using the following Blueprint configuration:
2.2. Role-Based Access Control
Abstract
Deployer or Administrator) to a user's credentials. For more advanced usage, you have the option of customizing the access control lists, in order to control exactly what each role can do. Finally, you have the option of applying custom ACLs to your own OSGi services.
2.2.1. Overview of Role-Based Access Control
Overview
users.properties file). You also have the option of customizing access control, by editing the relevant Access Control List (ACL) files.
Mechanisms
- JMX Guard
- The JBoss A-MQ container is configured with a JMX guard, which intercepts every incoming JMX invocation and filters the invocation through the configured JMX access control lists. The JMX guard is configured at the JVM level, so it intercepts every JMX invocation, without exception.
- OSGi Service Guard
- For any OSGi service, it is possible to configure an OSGi service guard. The OSGi service guard is implemented as a proxy object, which interposes itself between the client and the original OSGi service. An OSGi service guard must be explicitly configured for each OSGi service: it is not installed by default (except for the OSGi services that represent Karaf console commands, which are preconfigured for you).
Types of protection
- Fuse Management Console (Hawtio)
- Container access through the Fuse Management Console (Hawtio) is controlled by the JMX ACL files. The REST/HTTP service that provides the Fuse Management Console is implemented using Jolokia technology, which is layered above JMX. Hence, ultimately, all Fuse Management Console invocations pass through JMX and are regulated by JMX ACLs.
- JMX
- Direct access to the container's JMX port is regulated by the JMX ACLs. Moreover, any additional JMX ports opened by an application running in the container would also be regulated by the JMX ACLs, because the JMX guard is set at the JVM level.
- Karaf command console
- Access to the Karaf command console is regulated by the command console ACL files. Access control is applied no matter how the Karaf console is accessed. Whether accessing the command console through the Fuse Management Console or through the SSH protocol, access control is applied in both cases.NoteIn the special case where you start up the container directly at the command line (for example, using the
./bin/fusescript) and no user authentication is performed, you automatically get the roles specified by thekaraf.local.rolesproperty in theetc/system.propertiesfile. - OSGi services
- For any OSGi service deployed in the container, you can optionally enable an ACL file, which restricts method invocations to specific roles.
Adding roles to users
etc/users.properties file defines the admin user and grants the Administrator and SuperUser roles.
admin = secretpass,Administrator,SuperUser
admin = secretpass,Administrator,SuperUseradmingroup user group as follows:
admin = secretpass, _g_:admingroup

_g_\:admingroup = Administrator, SuperUser
admin = secretpass, _g_:admingroup

_g_\:admingroup = Administrator, SuperUserStandard roles
| Roles | Description |
|---|---|
Monitor, Operator, Maintainer | Grants read-only access to the container. |
Deployer, Auditor | Grants read-write access at the appropriate level for ordinary users, who want to deploy and run applications. But blocks access to sensitive container configuration settings. |
Administrator, SuperUser | Grants unrestricted access to the container. |
ACL files
etc/auth/ directory of the JBoss A-MQ installation, as follows:
etc/auth/jmx.acl[.*].cfg- JMX ACL files.
etc/auth/org.apache.karaf.command.acl.*.cfg- Command console ACL files.
Customizing role-based access control
Additional properties for controlling access
system.properties file under the etc directory provides the following additional properties for controlling access through the Karaf command console and the Fuse Management Console (Hawtio):
karaf.local.roles- Specifies the roles that apply when a user starts up the container console locally (for example, by running the
./bin/amqscript). hawtio.roles- Specifies the roles that are allowed to access the container through the Fuse Management Console. This constraint is applied in addition to the access control defined by the JMX ACL files.
karaf.secured.command.compulsory.roles- Specifies the default roles required to invoke a Karaf console command, in case the console command is not configured explicitly by a command ACL file,
etc/auth/org.apache.karaf.command.acl.*.cfg. A user must be configured with at least one of the roles from the list in order to invoke the command. The value is specified as a comma-separated list of roles.
2.2.2. Customizing the JMX ACLs
Overview
etc/auth/jmx.acl.*.cfg. This section explains how you can customize the JMX ACLs by editing these files yourself.
Architecture
Figure 2.1. Access Control Mechanism for JMX
How it works
MBeanServerBuilder object. The Apache Karaf launching scripts have been modified to include the following setting:
-Djavax.management.builder.initial=org.apache.karaf.management.boot.KarafMBeanServerBuilder
-Djavax.management.builder.initial=org.apache.karaf.management.boot.KarafMBeanServerBuilder- For every non-local JMX invocation, the JVM-wide
MBeanServerBuildercalls into an OSGi bundle that contains the JMX Guard. - The JMX Guard looks up the relevant ACL for the MBean the user is trying to access (where the ACLs are stored in the OSGi Config Admin service).
- The ACL returns the list of roles that are allowed to make this particular invocation on the MBean.
- The JMX Guard checks the list of roles against the current security subject (the user that is making the JMX invocation), to see whether the current user has any of the required roles.
- If no matching role is found, the JMX invocation is blocked and a
SecurityExceptionis raised.
Location of JMX ACL files
InstallDir/etc/auth directory, where the ACL file names obey the following convention:
etc/auth/jmx.acl[.*].cfg
etc/auth/jmx.acl[.*].cfgjmx.acl[.*]. It just so happens that the standalone container stores OSGi PIDs as files, PID.cfg, under the etc/ directory by default.
Mapping MBeans to ACL file names
jmx.acl. For example, given the MBean whose Object Name is given by org.apache.activemq:type=Broker, the corresponding PID would be:
jmx.acl.org.apache.activemq.Broker
jmx.acl.org.apache.activemq.Brokeretc/auth/jmx.acl.org.apache.activemq.Broker.cfg
etc/auth/jmx.acl.org.apache.activemq.Broker.cfgACL file format
Pattern = Role1[,Role2][,Role3]...
Pattern = Role1[,Role2][,Role3]...Pattern is a pattern that matches a method invocation on an MBean, and the right-hand side of the equals sign is a comma-separated list of roles that give a user permission to make that invocation. In the simplest cases, the Pattern is simply a method name. For example, as in the following settings for the org.apache.activemq.Broker MBean (from the jmx.acl.org.apache.activemq.Broker.cfg file):
addConnector = Deployer, Auditor, Administrator, SuperUser
removeConnector = Deployer, Auditor, Administrator, SuperUser
enableStatistics = Deployer, Auditor, Administrator, SuperUser
addNetworkConnector = Deployer, Auditor, Administrator, SuperUser
addConnector = Deployer, Auditor, Administrator, SuperUser
removeConnector = Deployer, Auditor, Administrator, SuperUser
enableStatistics = Deployer, Auditor, Administrator, SuperUser
addNetworkConnector = Deployer, Auditor, Administrator, SuperUser*, to match multiple method names. For example, the following entry gives permission to invoke all method names starting with set:
set* = Deployer, Auditor, Administrator, SuperUser
set* = Deployer, Auditor, Administrator, SuperUserorg.apache.karaf.config MBean package exploits this capability to prevent ordinary users from modifying sensitive configuration settings. The create method from this package is restricted, as follows:
create(java.lang.String)[/jmx[.]acl.*/] = Administrator, SuperUser
create(java.lang.String)[/org[.]apache[.]karaf[.]command[.]acl.+/] = Administrator, SuperUser
create(java.lang.String)[/org[.]apache[.]karaf[.]service[.]acl.+/] = Administrator, SuperUser
create(java.lang.String) = Deployer, Auditor, Administrator, SuperUser
create(java.lang.String)[/jmx[.]acl.*/] = Administrator, SuperUser
create(java.lang.String)[/org[.]apache[.]karaf[.]command[.]acl.+/] = Administrator, SuperUser
create(java.lang.String)[/org[.]apache[.]karaf[.]service[.]acl.+/] = Administrator, SuperUser
create(java.lang.String) = Deployer, Auditor, Administrator, SuperUserDeployer and Auditor roles generally have permission to invoke the create method, but only the Administrator and SuperUser roles have permission to invoke create with a PID argument matching jmx.acl.*, org.apache.karaf.command.acl.*, or org.apache.karaf.service.*.
etc/auth/jmx.acl.cfg file.
ACL file hierarchy
org.apache.activemq.Broker MBean could be affected by ACL settings at any of the following PID levels:
jmx.acl.org.apache.activemq.Broker
jmx.acl.org.apache.activemq
jmx.acl.org.apache
jmx.acl.org
jmx.acl
jmx.acl.org.apache.activemq.Broker
jmx.acl.org.apache.activemq
jmx.acl.org.apache
jmx.acl.org
jmx.aclRoot ACL definitions
jmx.acl.cfg, is a special case, because it supplies the default ACL settings for all MBeans. The root ACL has the following settings by default:
list* = viewer, Monitor, Operator, Maintainer,Deployer, Auditor, Administrator, SuperUser
get* = viewer, Monitor, Operator, Maintainer,Deployer, Auditor, Administrator, SuperUser
is* = viewer, Monitor, Operator, Maintainer,Deployer, Auditor, Administrator, SuperUser
set* = admin, Administrator, SuperUser
* = admin, Administrator, SuperUser
list* = viewer, Monitor, Operator, Maintainer,Deployer, Auditor, Administrator, SuperUser
get* = viewer, Monitor, Operator, Maintainer,Deployer, Auditor, Administrator, SuperUser
is* = viewer, Monitor, Operator, Maintainer,Deployer, Auditor, Administrator, SuperUser
set* = admin, Administrator, SuperUser
* = admin, Administrator, SuperUserlist*, get*, is*) are accessible to all standard roles, but the typical write method patterns and other methods (set* and *) are accessible only to the administrator roles, admin, Administrator, SuperUser.
Package ACL definitions
etc/auth/jmx.acl[.*].cfg apply to MBean packages. For example, the ACL for the org.apache.camel.endpoints MBean package is defined with the following permissions:
is* = Monitor, Operator, Maintainer, Deployer, Auditor, Administrator, SuperUser
get* = Monitor, Operator, Maintainer, Deployer, Auditor, Administrator, SuperUser
set* = Deployer, Auditor, Administrator, SuperUser
is* = Monitor, Operator, Maintainer, Deployer, Auditor, Administrator, SuperUser
get* = Monitor, Operator, Maintainer, Deployer, Auditor, Administrator, SuperUser
set* = Deployer, Auditor, Administrator, SuperUserACL for custom MBeans
jmx.acl.cfg. If you want to define a more fine-grained ACL for your MBean, create a new ACL file under etc/auth, using the standard JMX ACL file naming convention.
org.example:type=MyMBean, create a new ACL file under the etc/auth directory called:
jmx.acl.org.example.MyMBean.cfg
jmx.acl.org.example.MyMBean.cfgDynamic configuration at run time
2.2.3. Customizing the Command Console ACLs
Overview
etc/auth/org.apache.karaf.command.acl.*.cfg. This section explains how you can customize the command console ACLs by editing these files yourself.
Architecture
Figure 2.2. Access Control Mechanism for OSGi Services
How it works
- The invocation does not go directly to the requested OSGi service. Instead, the request is routed to a replacement proxy service, which has the same service properties as the original service (and some extra ones).
- The service guard looks up the relevant ACL for the target OSGi service (where the ACLs are stored in the OSGi Config Admin service).
- The ACL returns the list of roles that are allowed to make this particular method invocation on the service.
- If no ACL is found for this command, the service guard defaults to the list of roles specified in the
karaf.secured.command.compulsory.rolesproperty in theetc/system.propertiesfile. - The service guard checks the list of roles against the current security subject (the user that is making the method invocation), to see whether the current user has any of the required roles.
- If no matching role is found, the method invocation is blocked and a
SecurityExceptionis raised. - Alternatively, if a matching role is found, the method invocation is delegated to the original OSGi service.
Configuring default security roles
karaf.secured.command.compulsory.roles property in the etc/system.properties file (specified as a comma-separated list of roles).
Location of command console ACL files
InstallDir/etc/auth directory, with the prefix, org.apache.karaf.command.acl.
Mapping command scopes to ACL file names
etc/auth/org.apache.karaf.command.acl.CommandScope.cfg
etc/auth/org.apache.karaf.command.acl.CommandScope.cfgCommandScope corresponds to the prefix for a particular group of Karaf console commands. For example, the features:install and features:uninstall commands belong to the features command scope, which has the corresponding ACL file, org.apache.karaf.command.acl.features.cfg.
ACL file format
Pattern = Role1[,Role2][,Role3]...
Pattern = Role1[,Role2][,Role3]...Pattern is a pattern that matches a Karaf console command from the current command scope, and the right-hand side of the equals sign is a comma-separated list of roles that give a user permission to make that invocation. In the simplest cases, the Pattern is simply an unscoped command name. For example, the org.apache.karaf.command.acl.features.cfg ACL file includes the following rules for the features commands:
org.apache.karaf.command.acl.osgi.cfg ACL file exploits this capability to prevent ordinary users from invoking the osgi:start and osgi:stop commands with the -f (force) flag (which must be specified to manage system bundles). This restriction is coded as follows in the ACL file:
start[/.*[-][f].*/] = Administrator, SuperUser
start = Deployer, Auditor, Administrator, SuperUser
stop[/.*[-][f].*/] = Administrator, SuperUser
stop = Deployer, Auditor, Administrator, SuperUser
start[/.*[-][f].*/] = Administrator, SuperUser
start = Deployer, Auditor, Administrator, SuperUser
stop[/.*[-][f].*/] = Administrator, SuperUser
stop = Deployer, Auditor, Administrator, SuperUserDeployer and Auditor roles generally have permission to invoke the osgi:start and osgi:stop commands, but only the Administrator and SuperUser roles have permission to invoke these commands with the force option, -f.
etc/auth/org.apache.karaf.command.acl.osgi.cfg file.
Dynamic configuration at run time
2.2.4. Defining ACLs for OSGi Services
Overview
ACL file format
service.guard = (objectClass=InterfaceName)
service.guard = (objectClass=InterfaceName)service.guard is an LDAP search filter that is applied to the registry of OSGi service properties in order to pick out the matching OSGi service. The simplest type of filter, (objectClass=InterfaceName), picks out an OSGi service with the specified Java interface name, InterfaceName.
Pattern = Role1[,Role2][,Role3]...
Pattern = Role1[,Role2][,Role3]...Pattern is a pattern that matches a service method, and the right-hand side of the equals sign is a comma-separated list of roles that give a user permission to make that invocation. The syntax of these entries is essentially the same as the entries in a JMX ACL file—see the section called “ACL file format”.
How to define an ACL for a custom OSGi service
- It is customary to define an OSGi service using a Java interface (you could use a regular Java class, but this is not recommended). For example, consider the Java interface,
MyService, which we intend to expose as an OSGi service:package org.example; public interface MyService { void doit(String s); }package org.example; public interface MyService { void doit(String s); }Copy to Clipboard Copied! Toggle word wrap Toggle overflow - To expose the Java interface as an OSGi service, you would typically add a
serviceelement to an OSGi Blueprint XML file (where the Blueprint XML file is typically stored under thesrc/main/resources/OSGI-INF/blueprintdirectory in a Maven project). For example, assuming thatMyServiceImplis the class that implements theMyServiceinterface, you could expose theMyServiceOSGi service as follows:Copy to Clipboard Copied! Toggle word wrap Toggle overflow - To define an ACL for the the OSGi service, you must create an OSGi Config Admin PID with the prefix,
org.apache.karaf.service.acl.For example, in the case of a standalone container (where the OSGi Config Admin PIDs are stored as.cfgfiles under theetc/auth/directory), you can create the following ACL file for theMyServiceOSGi service:etc/auth/org.apache.karaf.service.acl.myservice.cfg
etc/auth/org.apache.karaf.service.acl.myservice.cfgCopy to Clipboard Copied! Toggle word wrap Toggle overflow NoteIt does not matter exactly how you name this file, as long as it starts with the required prefix,org.apache.karaf.service.acl. The corresponding OSGi service for this ACL file is actually specified by a property setting in this file (as you will see in the next step). - Specify the contents of the ACL file in a format like the following:
service.guard = (objectClass=InterfaceName)
Pattern = Role1[,Role2][,Role3]...
service.guard = (objectClass=InterfaceName)
Pattern = Role1[,Role2][,Role3]...
Copy to Clipboard Copied! Toggle word wrap Toggle overflow Theservice.guardsetting specifies theInterfaceNameof the OSGi service (using the syntax of an LDAP search filter, which is applied to the OSGi service properties). The other entries in the ACL file consist of a methodPattern, which associates a matching method to the specified roles. For example, you could define a simple ACL for theMyServiceOSGi service with the following settings in theorg.apache.karaf.service.acl.myservice.cfgfile:service.guard = (objectClass=org.example.MyService) doit = Deployer, Auditor, Administrator, SuperUser
service.guard = (objectClass=org.example.MyService) doit = Deployer, Auditor, Administrator, SuperUserCopy to Clipboard Copied! Toggle word wrap Toggle overflow - Finally, in order to enable the ACL for this OSGi service, you must edit the
karaf.secured.servicesproperty in theetc/system.propertiesfile. The value of thekaraf.secured.servicesproperty has the syntax of an LDAP search filter (which gets applied to the OSGi service properties). In general, to enable ACLs for an OSGi service,ServiceInterface, you must modify this property as follows:karaf.secured.services=(|(objectClass=ServiceInterface)(...ExistingPropValue...))
karaf.secured.services=(|(objectClass=ServiceInterface)(...ExistingPropValue...))Copy to Clipboard Copied! Toggle word wrap Toggle overflow For example, to enable theMyServiceOSGi service:karaf.secured.services=(|(objectClass=org.example.MyService)(&(osgi.command.scope=*)(osgi.command.function=*)))
karaf.secured.services=(|(objectClass=org.example.MyService)(&(osgi.command.scope=*)(osgi.command.function=*)))Copy to Clipboard Copied! Toggle word wrap Toggle overflow ImportantThe initial value of thekaraf.secured.servicesproperty has the settings to enable the command console ACLs. If you delete or corrupt these entries, the command console ACLs might stop working.
How to invoke an OSGi service secured with RBAC
MyService OSGi service using the Deployer role, you could use code like the following:
org.apache.karaf.jaas.boot.principal.RolePrincipal. If necessary, you could use your own custom role class instead, but in that case you would have to specify your roles using the syntax className:roleName in the OSGi service's ACL file.
How to discover the roles required by an OSGi service
org.apache.karaf.service.guard.roles. The value of this property is a java.util.Collection object, which contains a list of all the roles that could possibly invoke a method on that service.
2.3. Using Encrypted Property Placeholders
Overview
How to use encrypted property placeholders
- Download and install Jasypt, to gain access to the Jasypt
listAlgorithms.sh,encrypt.shanddecrypt.shcommand-line tools.NoteWhen installing the Jasypt command-line tools, don't forget to enable execute permissions on the script files, by runningchmod u+x ScriptName.sh. - Choose a master password and an encryption algorithm. To discover which algorithms are supported in your current Java environment, run the
listAlgorithms.shJasypt command-line tool, as follows:./listAlgorithms.sh DIGEST ALGORITHMS: [MD2, MD5, SHA, SHA-256, SHA-384, SHA-512] PBE ALGORITHMS: [PBEWITHMD5ANDDES, PBEWITHMD5ANDTRIPLEDES, PBEWITHSHA1ANDDESEDE, PBEWITHSHA1ANDRC2_40]
./listAlgorithms.sh DIGEST ALGORITHMS: [MD2, MD5, SHA, SHA-256, SHA-384, SHA-512] PBE ALGORITHMS: [PBEWITHMD5ANDDES, PBEWITHMD5ANDTRIPLEDES, PBEWITHSHA1ANDDESEDE, PBEWITHSHA1ANDRC2_40]Copy to Clipboard Copied! Toggle word wrap Toggle overflow On Windows platforms, the script islistAlgorithms.bat. JBoss A-MQ usesPBEWithMD5AndDESby default. - Use the Jasypt encrypt command-line tool to encrypt your sensitive configuration values (for example, passwords for use in configuration files). For example, the following command encrypts the
PlaintextValvalue, using the specified algorithm and master passwordMasterPass:./encrypt.sh input="PlaintextVal" algorithm=PBEWithMD5AndDES password=MasterPass
./encrypt.sh input="PlaintextVal" algorithm=PBEWithMD5AndDES password=MasterPassCopy to Clipboard Copied! Toggle word wrap Toggle overflow - Create a properties file with encrypted values. For example, suppose you wanted to store some LDAP credentials. You could create a file,
etc/ldap.properties, with the following contents:Example 2.6. Property File with an Encrypted Property
#ldap.properties
ldap.password=ENC(amIsvdqno9iSwnd7kAlLYQ==)
ldap.url=ldap://192.168.1.74:10389
#ldap.properties
ldap.password=ENC(amIsvdqno9iSwnd7kAlLYQ==)
ldap.url=ldap://192.168.1.74:10389
Copy to Clipboard Copied! Toggle word wrap Toggle overflow The encrypted property values (as generated in the previous step) are identified by wrapping in theENC()function. - (Blueprint XML only) Add the requisite namespaces to your Blueprint XML file:
- Aries extensions—
http://aries.apache.org/blueprint/xmlns/blueprint-ext/v1.0.0 - Apache Karaf Jasypt—
http://karaf.apache.org/xmlns/jasypt/v1.0.0
Example 2.7, “Encrypted Property Namespaces” shows a Blueprint file with the requisite namespaces.Example 2.7. Encrypted Property Namespaces
<blueprint xmlns="http://www.osgi.org/xmlns/blueprint/v1.0.0"
 	xmlns:ext="http://aries.apache.org/blueprint/xmlns/blueprint-ext/v1.0.0"
 	xmlns:enc="http://karaf.apache.org/xmlns/jasypt/v1.0.0">
...
</blueprint>
<blueprint xmlns="http://www.osgi.org/xmlns/blueprint/v1.0.0"
 	xmlns:ext="http://aries.apache.org/blueprint/xmlns/blueprint-ext/v1.0.0"
 	xmlns:enc="http://karaf.apache.org/xmlns/jasypt/v1.0.0">
...
</blueprint>
Copy to Clipboard Copied! Toggle word wrap Toggle overflow - Configure the location of the properties file for the property placeholder and configure the Jasypt encryption algorithm .
- Blueprint XMLExample 2.8, “Jasypt Blueprint Configuration” shows how to configure the
ext:property-placeholderelement to read properties from theetc/ldap.propertiesfile. Theenc:property-placeholderelement configures Jasypt to use thePBEWithMD5AndDESencryption algorithm and to read the master password from theJASYPT_ENCRYPTION_PASSWORDenvironment variable.Example 2.8. Jasypt Blueprint Configuration
Copy to Clipboard Copied! Toggle word wrap Toggle overflow - Spring XMLExample 2.9, “Jasypt Spring Configuration” shows how to configure Jasypt to use the
PBEWithMD5AndDESencryption algorithm and to read the master password from theJASYPT_ENCRYPTION_PASSWORDenvironment variable.TheEncryptablePropertyPlaceholderConfigurerbean is configured to read properties from theetc/ldap.propertiesfile and to read properties from theio.fabric8.mq.fabric.ConfigurationPropertiesclass (which defines thekaraf.baseproperty, for example).Example 2.9. Jasypt Spring Configuration
Copy to Clipboard Copied! Toggle word wrap Toggle overflow
- Use the placeholders in your configuration file. The placeholders you use for encrypted properties are the same as you use for regular properties. Use the syntax
${prop.name}. - Make sure that the
jasypt-encryptionfeature is installed in the container. If necessary, install thejasypt-encryptionfeature with the following console command:JBossFuse:karaf@root> features:install jasypt-encryption
JBossFuse:karaf@root> features:install jasypt-encryptionCopy to Clipboard Copied! Toggle word wrap Toggle overflow - Shut down the container, by entering the following command:
JBossFuse:karaf@root> shutdown
JBossFuse:karaf@root> shutdownCopy to Clipboard Copied! Toggle word wrap Toggle overflow - Carefully restart the container and deploy your secure application, as follows:
- Open a command window (first command window) and enter the following commands to start the JBoss A-MQ container in the background:
export JASYPT_ENCRYPTION_PASSWORD="your super secret master pass phrase"
./bin/start
export JASYPT_ENCRYPTION_PASSWORD="your super secret master pass phrase"
./bin/start
Copy to Clipboard Copied! Toggle word wrap Toggle overflow - Open a second command window and start the client utility, to connect to the container running in the background:
./bin/client -u Username -p Password
./bin/client -u Username -p PasswordCopy to Clipboard Copied! Toggle word wrap Toggle overflow WhereUsernameandPasswordare valid JAAS user credentials for logging on to the container console. - In the second command window, use the console to install your secure application that uses encrypted property placeholders. Check that the application has launched successfully (for example, using the
osgi:listcommand to check its status). - After the secure application has started up, go back to the first command window and unset the
JASYPT_ENCRYPTION_PASSWORDenvironment variable.ImportantUnsetting theJASYPT_ENCRYPTION_PASSWORDenvironment variable ensures there will be minimum risk of exposing the master password. The Jasypt library retains the master password in encrypted form in memory.
Blueprint XML example
Example 2.10. Jasypt Example in Blueprint XML
${ldap.password} placeholder is replaced with the decrypted value of the ldap.password property from the etc/ldap.properties properties file.
2.4. Enabling Remote JMX SSL
Overview
Prerequisites
- Set your
JAVA_HOMEenvironment variable - Configure a JBoss Fuse user with the
AdministratorroleEdit the<installDir>/jboss-fuse-6.2.1.redhat-084/etc/users.propertiesfile and add the following entry, on a single line:admin=YourPassword,Administrator
admin=YourPassword,AdministratorCopy to Clipboard Copied! Toggle word wrap Toggle overflow This creates a new user with username,admin, password,YourPassword, and theAdministratorrole.
Create the jbossweb.keystore file
etc/ directory of your JBoss A-MQ installation:
cd <installDir>/jboss-fuse-6.2.1.redhat-084/etc
cd <installDir>/jboss-fuse-6.2.1.redhat-084/etc-dname value (Distinguished Name) appropriate for your application, type this command:
$JAVA_HOME/bin/keytool -genkey -v -alias jbossalias -keyalg RSA -keysize 1024 -keystore jbossweb.keystore -validity 3650 -keypass JbossPassword -storepass JbossPassword -dname "CN=127.0.0.1, OU=RedHat Software Unit, O=RedHat, L=Boston, S=Mass, C=USA"
$JAVA_HOME/bin/keytool -genkey -v -alias jbossalias -keyalg RSA -keysize 1024 -keystore jbossweb.keystore -validity 3650 -keypass JbossPassword -storepass JbossPassword -dname "CN=127.0.0.1, OU=RedHat Software Unit, O=RedHat, L=Boston, S=Mass, C=USA"<installDir>/jboss-fuse-6.2.1.redhat-084/etc now contains the file jbossweb.keystore.
Create and deploy the keystore.xml file
- Using your favorite xml editor, create and save the
keystore.xmlfile in the<installDir>/jboss-fuse-6.2.1.redhat-084/etcdirectory. - Include this text in the file:
Copy to Clipboard Copied! Toggle word wrap Toggle overflow - Deploy the
keystore.xmlfile to the container, by copying it into the<installDir>/jboss-fuse-6.2.1.redhat-084/deploydirectory (the hot deploy directory).NoteSubsequently, if you need to undeploy thekeystore.xmlfile, you can do so by deleting thekeystore.xmlfile from thedeploy/directory while the Karaf container is running.
Add the required properties to org.apache.karaf.management.cfg
<installDir>/jboss-fuse-6.2.1.redhat-084/etc/org.apache.karaf.management.cfg file to include these properties at the end of the file:
secured = true
secureProtocol = TLSv1
keyAlias = jbossalias
keyStore = sample_keystore
trustStore = sample_keystore
secured = true
secureProtocol = TLSv1
keyAlias = jbossalias
keyStore = sample_keystore
trustStore = sample_keystoresecureProtocol to TLSv1, in order to protect against the Poodle vulnerability (CVE-2014-3566)
Restart the JBoss A-MQ container
Testing the Secure JMX connection
- Open a command prompt and make sure you are in the
etc/directory of your JBoss A-MQ installation:cd <installDir>/jboss-fuse-6.2.1.redhat-084/etc
cd <installDir>/jboss-fuse-6.2.1.redhat-084/etcCopy to Clipboard Copied! Toggle word wrap Toggle overflow - Open a terminal, and start up JConsole by entering this command:
jconsole -J-Djavax.net.debug=ssl -J-Djavax.net.ssl.trustStore=jbossweb.keystore -J-Djavax.net.ssl.trustStoreType=JKS -J-Djavax.net.ssl.trustStorePassword=JbossPassword
jconsole -J-Djavax.net.debug=ssl -J-Djavax.net.ssl.trustStore=jbossweb.keystore -J-Djavax.net.ssl.trustStoreType=JKS -J-Djavax.net.ssl.trustStorePassword=JbossPasswordCopy to Clipboard Copied! Toggle word wrap Toggle overflow Where the-J-Djavax.net.ssl.trustStoreoption specifies the location of thejbossweb.keystorefile (make sure this location is specified correctly, or the SSL/TLS handshake will fail). The-J-Djavax.net.debug=sslsetting enables logging of SSL/TLS handshake messages, so you can verify that SSL/TLS has been successfully enabled.ImportantType the entire command on the same command line. - When JConsole opens, select the option Remote Process in the New Connection wizard.
- Under the Remote Process option, enter the following value for the
service:jmx:<protocol>:<sap>connection URL:service:jmx:rmi://localhost:44444/jndi/rmi://localhost:1099/karaf-root
service:jmx:rmi://localhost:44444/jndi/rmi://localhost:1099/karaf-rootCopy to Clipboard Copied! Toggle word wrap Toggle overflow And fill in the Username, and Password fields with valid JAAS credentials (as set in theetc/users.propertiesfile):Username: admin Password: YourPassword
Username: admin Password: YourPasswordCopy to Clipboard Copied! Toggle word wrap Toggle overflow
Chapter 3. Securing the Jetty HTTP Server
Abstract
etc/org.ops4j.pax.web.cfg configuration file. In particular, you can add SSL/TLS security to the Fuse Management Console in this way.
Jetty server
http://Host:8181), the Jetty container can host multiple services, for example:
- Fuse Management Console (by default,
http://Host:8181/hawtio) - Apache CXF Web services endpoints (if the host and port are left unspecified in the endpoint configuration)
- Some Apache Camel endpoints
Create X.509 certificate and private key
Enabling SSL/TLS
- Open
etc/org.ops4j.pax.web.cfgin a text editor. - Disable the insecure HTTP port by adding the org.osgi.service.http.enabled and setting it to
false; and enable the secure HTTPS port by adding the org.osgi.service.http.secure.enabled and setting it totrue. Theetc/org.ops4j.pax.web.cfgfile should now have the following contents:Copy to Clipboard Copied! Toggle word wrap Toggle overflow - Edit the
etc/jetty.xmlfile and add the followingCallelement to configure the SSL connector for Jetty:Copy to Clipboard Copied! Toggle word wrap Toggle overflow ImportantThe preceding configuration explicitly disables the SSLv3 protocol, in order to safeguard against the Poodle vulnerability (CVE-2014-3566). For more details, see Disabling SSLv3 in JBoss Fuse 6.x and JBoss A-MQ 6.x. - (Optional) If you prefer, you can use a system property to help you specify the location of the Java keystore file. For example, instead of setting the
keyStoreproperty explicitly (in the precedingetc/jetty.xmlconfiguration):<Set name="keyStore">/home/jdoe/Documents/jetty.ks</Set>
<Set name="keyStore">/home/jdoe/Documents/jetty.ks</Set>Copy to Clipboard Copied! Toggle word wrap Toggle overflow You could use thekaraf.homesystem property to specify the location of the keystore file relative to the JBoss A-MQ install directory:<Set name="keyStore"> <SystemProperty name="karaf.home"/>/etc/jetty.ks </Set><Set name="keyStore"> <SystemProperty name="karaf.home"/>/etc/jetty.ks </Set>Copy to Clipboard Copied! Toggle word wrap Toggle overflow - Customize the properties of the
SslSocketConnectorinstance defined in theetc/jetty.xmlfile, as follows:port- The secure HTTPS port number.
keyStore- The location of the Java keystore file on the file system. Relative paths are resolved relative to the
KARAF_HOMEenvironment variable (by default, the install directory). keyStorePassword- The store password that unlocks the Java keystore file.
keyManagerPassword- The key password that decrypts the private key stored in the keystore (usually the same as the store password).
- Restart the JBoss A-MQ container, in order for the configuration changes to take effect.
Connect to the secure console
https://localhost:8183/
https://localhost:8183/https: scheme, instead of http:, in this URL.
Advanced Jetty security configuration
etc/jetty.xml file and configuring it as described in the Jetty security documentation:
Chapter 4. Securing the Management Console
Abstract
Access-Control-Allow-Origin header for the JBoss A-MQ Management Console permits unrestricted sharing. To restrict access to the JBoss A-MQ Management Console, an OSGI fragment bundle must be implemented.
4.1. Controlling Access to the Fuse Management Console
Contents of the Fragment Bundle
jolokia-access.xml policy file can be used to restrict access without altering the original hawtio-web.war. A fragment bundle that contains the jolokia-access.xml policy file within the CORS configuration can be added to limit access to a certain host by using <allow-origin> sections within the <cors> sections. The <allow-origin> section can contain the origin URL provided by browsers with the Origin: header, or a wildcard specification with *. For example:
Fragment-Host header in the Manifest.MF bundle. After building the fragment bundle, use the following command to install it:
install file:///Location_Of_Fragment_Bundle_file/hawtio-web-fragment/target/hawtio-web-fragment-1.2-redhat-379.jar
install file:///Location_Of_Fragment_Bundle_file/hawtio-web-fragment/target/hawtio-web-fragment-1.2-redhat-379.jar
Hawtio-web must be refreshed to pick up the fragment bundle. Use the follwing comands to refresh the hawtio-web bundle:
hawtio-web bundle ID:
JBossFuse:karaf@root> la | grep -i hawtio
JBossFuse:karaf@root> la | grep -i hawtiohawtio-web bundle. In the example below, the number is 253:
[ 253] [Active ] [ ] [ ] [ 80] hawtio :: hawtio-web (1.4.0.redhat-621083)
[ 253] [Active ] [ ] [ ] [ 80] hawtio :: hawtio-web (1.4.0.redhat-621083)hawtio-web bundle using the following command:
JBossFuse:karaf@root> refresh 253
JBossFuse:karaf@root> refresh 253la | grep -i hawtio command to see the hawtio-web line with the fragment bundle attached:
[ 253] [Active ] [ ] [ ] [ 80] hawtio :: hawtio-web (1.4.0.redhat-621083), Fragments: 270
[ 253] [Active ] [ ] [ ] [ 80] hawtio :: hawtio-web (1.4.0.redhat-621083), Fragments: 270Chapter 5. Securing an Apache ActiveMQ Broker
Abstract
5.1. Programming Client Credentials
Overview
ActiveMQConnectionFactory(String userName, String password, String brokerURL);
ActiveMQConnectionFactory(String userName, String password, URI brokerURL);
Connection createConnection(String userName, String password);
QueueConnection createQueueConnection(String userName, String password);
TopicConnection createTopicConnection(String userName, String password);
ActiveMQConnectionFactory(String userName, String password, String brokerURL);
ActiveMQConnectionFactory(String userName, String password, URI brokerURL);
Connection createConnection(String userName, String password);
QueueConnection createQueueConnection(String userName, String password);
TopicConnection createTopicConnection(String userName, String password);createConnection(String userName, String password) is the most flexible, since it enables you to specify credentials on a connection-by-connection basis.
Setting login credentials for the Openwire protocol
ActiveMQConnectionFactory.createConnection() method, as shown in the following example:
5.2. Configuring Credentials for Broker Components
Overview
Command agent
username attribute and the password attribute on the commandAgent element in the broker configuration file, InstallDir/etc/activemq.xml. By default, the command agent is configured to pick up its credentials from the activemq.username property and the activemq.password property as shown in the following example:
Apache Camel
activemq:. For example, the URI, activemq:example.A, represents a queue named example.A and the endpoint URI, activemq:example.B, represents a queue named example.B.
activemq. When the broker has authentication enabled, it is necessary to configure this component with a userName property and a password property, as follows:
5.3. Broker-to-Broker Authentication
Overview
Configuring the network connector
userName attribute and the password attribute in the networkConnector element, as follows:
networkConnector element must also be configured with username/password credentials, even if Broker B is not configured to perform authentication. This is because Broker A's authentication plug-in checks for Broker A's username.
5.4. Tutorial I: JAAS Authentication
Overview
Prerequisites
- Apache Ant—Apache Ant is a free, open source build tool from Apache. You can download the latest version from http://ant.apache.org/bindownload.cgi (minimum is 1.8).
- Apache ActiveMQ installation—the standalone installation of Apache ActiveMQ has some demonstration code that is not available in Red Hat JBoss A-MQ. The Apache ActiveMQ distribution is provided in the
InstallDir/extrasdirectory in an archive format. Uncompress and extract the archive to a convenient installation location,ActiveMQInstallDir.
Tutorial steps
Install the consumer and producer JMS clients
InstallDir/extras directory in an archive format. Uncompress and extract the archive to a convenient installation location, ActiveMQInstallDir (the consumer and producer clients can be accessed by running ant targets under the ActiveMQInstallDir/examples/openwire/swissarmy directory).
Customize the users.properties file
karaf JAAS realm can be administered by editing the InstallDir/etc/users.properties file, where the file contains entries in the following format:
Username=Password,Role1,Role2,...
Username=Password,Role1,Role2,...users.properties file shows a sample entry (which is commented out) for the user, admin, with password, admin, as follows:
#admin=admin,admin
#admin=admin,adminusers.properties file by adding at least one user entry with the Administrator role. For example:
Username=Password,Administrator
Username=Password,AdministratorStart the container
InstallDir/bin and enter the following command:
./amq
./amqRun the consumer with JMS credentials
tcp://localhost:61616 endpoint, change directory to ActiveMQInstallDir/examples/openwire/swissarmy and enter the following command:
ant consumer -Duser=admin -Dpassword=admin -Durl=tcp://localhost:61616 -Dmax=100
ant consumer -Duser=admin -Dpassword=admin -Durl=tcp://localhost:61616 -Dmax=100Run the producer with JMS credentials
tcp://localhost:61616 endpoint, open a new command prompt, change directory to ActiveMQInstallDir/examples/openwire/swissarmy and enter the following command:
ant producer -Duser=admin -Dpassword=admin -Durl=tcp://localhost:61616 -Dmax=100
ant producer -Duser=admin -Dpassword=admin -Durl=tcp://localhost:61616 -Dmax=100[java] [Thread-2] Received: 'Message: 0 sent at: Mon Mar 18 17:12:16 CET 2013 ...' (length 1000) [java] [Thread-2] Received: 'Message: 1 sent at: Mon Mar 18 17:12:16 CET 2013 ...' (length 1000) [java] [Thread-2] Received: 'Message: 2 sent at: Mon Mar 18 17:12:16 CET 2013 ...' (length 1000) [java] [Thread-2] Received: 'Message: 3 sent at: Mon Mar 18 17:12:16 CET 2013 ...' (length 1000) [java] [Thread-2] Received: 'Message: 4 sent at: Mon Mar 18 17:12:16 CET 2013 ...' (length 1000)
[java] [Thread-2] Received: 'Message: 0 sent at: Mon Mar 18 17:12:16 CET 2013  ...' (length 1000)
[java] [Thread-2] Received: 'Message: 1 sent at: Mon Mar 18 17:12:16 CET 2013  ...' (length 1000)
[java] [Thread-2] Received: 'Message: 2 sent at: Mon Mar 18 17:12:16 CET 2013  ...' (length 1000)
[java] [Thread-2] Received: 'Message: 3 sent at: Mon Mar 18 17:12:16 CET 2013  ...' (length 1000)
[java] [Thread-2] Received: 'Message: 4 sent at: Mon Mar 18 17:12:16 CET 2013 ...' (length 1000)5.5. Tutorial II: SSL/TLS Security
Overview
Tutorial steps
Install the consumer and producer JMS clients
InstallDir/extras directory in an archive format. Uncompress and extract the archive to a convenient installation location, ActiveMQInstallDir (the consumer and producer clients can be accessed by running ant targets under the ActiveMQInstallDir/examples/openwire/swissarmy directory).
Install sample broker keystore files
- Key store containing broker's own certificate and private key—used to identify the broker during an SSL handshake.
- Trust store containing CA certificate—used to verify that a received client certificate is correctly signed (strictly speaking, the trust store file is only needed by the broker, if the
transport.needClientAuthoptions is set totrueon the broker URI).
ActiveMQInstallDir.
broker.ks and broker.ts files from the Apache ActiveMQ distribution's conf directory, ActiveMQInstallDir/conf, to the InstallDir/etc directory of JBoss A-MQ.
Configure the broker
InstallDir/etc/activemq.xml file. Use your favorite text editor to edit the file, InstallDir/etc/activemq.xml, adding the bolded XML fragments:
- The Openwire network connector is configured to use SSL,
ssl://localhost:61617?.... - The enabled protocols are specified explicitly, using the
transport.enabledProtocolsoption. This setting effectively disables the SSLv3 protocol, which must not be used because of the POODLE security vulnerability. - The key store and trust store file locations and passwords are specified by the broker's
sslContextelement.
Encrypt the passwords
etc/activemq.xml file, you can optionally use a Jasypt encrypted property placeholder to obscure the passwords. For example, you can create a etc/credentials-enc.properties properties file, with contents like the following:
keystore.password=ENC(Cf3Jf3tM+UrSOoaKU50od5CuBa8rxjoL)
truststore.password=ENC(eeWjNyX6FY8Fjp3E+F6qTytV11bZItDp)
keystore.password=ENC(Cf3Jf3tM+UrSOoaKU50od5CuBa8rxjoL)
truststore.password=ENC(eeWjNyX6FY8Fjp3E+F6qTytV11bZItDp)JASYPT_ENCRYPTION_PASSWORD environment variable to the value of the master password (which was used to generate the encrypted passwords), as follows:
export JASYPT_ENCRYPTION_PASSWORD=MasterPass
export JASYPT_ENCRYPTION_PASSWORD=MasterPassetc/activemq.xml file (which replaces the existing plain Spring property placeholder, of org.springframework.beans.factory.config.PropertyPlaceholderConfigurer type):
sslContext element as follows:
Start the container
InstallDir/bin and enter the following command:
./amq
./amqJASYPT_ENCRYPTION_PASSWORD environment variable to the Jasypt master password value before starting up the container.
jasypt-encryption feature is installed in the container. If necessary, install the jasypt-encryption feature with the following console command:
JBossA-MQ:karaf@root> features:install jasypt-encryption
JBossA-MQ:karaf@root> features:install jasypt-encryptionConfigure the consumer and the producer clients
- Open the Ant build file,
ActiveMQInstallDir/examples/openwire/swissarmy/build.xml, with your favourite text editor. - Delete the existing
javax.net.ssl.*system property settings from theconsumertarget and theproducertarget. That is, remove the lines highlighted in the following example:Copy to Clipboard Copied! Toggle word wrap Toggle overflow - Add the
javax.net.ssl.trustStoreandjavax.net.ssl.trustStorePasswordJSSE system properties to the consumer target and the producer target as shown in the following example:Copy to Clipboard Copied! Toggle word wrap Toggle overflow In the context of the Ant build tool, this is equivalent to adding the system properties to the command line.
Run the consumer with the SSL protocol
ssl://localhost:61617 endpoint (Openwire over SSL), change directory to ActiveMQInstallDir/examples/openwire/swissarmy and enter the following command:
ant consumer -Duser=admin -Dpassword=admin -Durl=ssl://localhost:61617 -Dmax=100 -Dactivemq.home=../../..
ant consumer -Duser=admin -Dpassword=admin -Durl=ssl://localhost:61617 -Dmax=100 -Dactivemq.home=../../..Run the producer with the SSL protocol
ssl://localhost:61617 endpoint, open a new command prompt, change directory to ActiveMQInstallDir/examples/openwire/swissarmy and enter the following command:
ant producer -Duser=admin -Dpassword=admin -Durl=ssl://localhost:61617 -Dmax=100 -Dactivemq.home=../../..
ant producer -Duser=admin -Dpassword=admin -Durl=ssl://localhost:61617 -Dmax=100 -Dactivemq.home=../../..[java] [Thread-2] Received: 'Message: 0 sent at: Tue Mar 19 10:07:25 CET 2013 ...' (length 1000) [java] [Thread-2] Received: 'Message: 1 sent at: Tue Mar 19 10:07:25 CET 2013 ...' (length 1000) [java] [Thread-2] Received: 'Message: 2 sent at: Tue Mar 19 10:07:26 CET 2013 ...' (length 1000) [java] [Thread-2] Received: 'Message: 3 sent at: Tue Mar 19 10:07:26 CET 2013 ...' (length 1000) [java] [Thread-2] Received: 'Message: 4 sent at: Tue Mar 19 10:07:26 CET 2013 ...' (length 1000)
[java] [Thread-2] Received: 'Message: 0 sent at: Tue Mar 19 10:07:25 CET 2013  ...' (length 1000)
[java] [Thread-2] Received: 'Message: 1 sent at: Tue Mar 19 10:07:25 CET 2013  ...' (length 1000)
[java] [Thread-2] Received: 'Message: 2 sent at: Tue Mar 19 10:07:26 CET 2013  ...' (length 1000)
[java] [Thread-2] Received: 'Message: 3 sent at: Tue Mar 19 10:07:26 CET 2013  ...' (length 1000)
[java] [Thread-2] Received: 'Message: 4 sent at: Tue Mar 19 10:07:26 CET 2013 ...' (length 1000)Chapter 6. Securing the Camel ActiveMQ Component
Abstract
6.1. Secure ActiveMQ Connection Factory
Overview
Programming the security properties
ActiveMQSslConnectionFactory JMS connection factory. Programming the JMS connection factory is the correct approach to use in the context of the containers such as OSGi, J2EE, Tomcat, and so on, because these settings are local to the application using the JMS connection factory instance.
Defining a secure connection factory
Example 6.1. Defining a Secure Connection Factory Bean
ActiveMQSslConnectionFactory class:
brokerURL- The URL of the remote broker to connect to, where this example connects to an SSL-enabled OpenWire port on the local host. The broker must also define a corresponding transport connector with compatible port settings.
userNameandpassword- Any valid JAAS login credentials,
UsernameandPassword. trustStore- Location of the Java keystore file containing the certificate trust store for SSL connections. The location is specified as a classpath resource. If a relative path is specified, the resource location is relative to the
org/jbossfuse/exampledirectory on the classpath. trustStorePassword- The password that unlocks the keystore file containing the trust store.
keyStore and keyStorePassword properties, but these would only be needed, if SSL mutual authentication is enabled (where the client presents an X.509 certificate to the broker during the SSL handshake).
6.2. Example Camel ActiveMQ Component Configuration
Overview
Prerequisites
camel-activemq feature, which defines the bundles required for the Camel ActiveMQ component, is not installed by default. To install the camel-activemq feature, enter the following console command:
JBossFuse:karaf@root> features:install camel-activemq
JBossFuse:karaf@root> features:install camel-activemqSample Camel ActiveMQ component
activemqssl bean ID, which means it is associated with the activemqssl scheme (which you use when defining endpoints in a Camel route).
Sample Camel route
security.test queue on the broker, using the activemqssl scheme to reference the Camel ActiveMQ component defined in the preceding example:
Chapter 7. SSL/TLS Security
Abstract
7.1. Introduction to SSL/TLS
Overview
SSL/TLS security features
- Privacy—messages are encrypted using a secret symmetric key, making it impossible for eavesdroppers to read messages sent over the connection.
- Message integrity—messages are digitally signed, to ensure that they cannot be tampered with.
- Authentication—the identity of the target (server program) is authenticated and (optionally) the client as well.
- Immunity to man-in-the-middle attacks—because of the way authentication is performed in SSL/TLS, it is impossible for an attacker to interpose itself between a client and a target.
Cipher suites
Public key cryptography
- It becomes extremely easy to establish secure communications with people you have never previously had any contact with. Simply publish the public key in some accessible place. Anyone can now download the public key and use it to encrypt a message that only you can decrypt, using your private key.
- You can use your private key to digitally sign messages. Given a message to sign, simply generate a hash value from the message, encrypt that hash value using your private key, and append it to the message. Now, anyone can use the public key to decrypt the hash value and check that the message has not been tampered with.
X.509 certificates
- Self—if the certificate signs itself, it is called a self-signed certificate. If you need to deploy a self-signed certificate, the certificate must be obtained from a secure channel. The only guarantee you have of the certificate's authenticity is that you obtained it from a trusted source.
- CA certificate—a more scalable solution is to sign certificates using a Certificate Authority (CA) certificate. In this case, you only need to be careful about deploying the original CA certificate (that is, obtaining it through a secure channel). All of the certificates signed by this CA, on the other hand, can be distributed over insecure, public channels. The trusted CA can then be used to verify the signature on the certificates. In this case, the CA certificate is self-signed.
- Chain of CA certificates—an extension of the idea of signing with a CA certificate is to use a chain of CA certificates. For example, certificate X could be signed by CA foo, which is signed by CA bar. The last CA certificate in the chain (the root certificate) is self-signed.
Target-only authentication
7.2. Secure Transport Protocols
Overview
Transport protocols
| URL | Description |
|---|---|
ssl://Host:Port | Endpoint URL for Openwire over TCP/IP, where the socket layer is secured using SSL or TLS. |
https://Host:Port | Endpoint URL for Openwire over HTTP, where the socket layer is secured using SSL or TLS. |
stomp+ssl://Host:Port | Endpoint URL for Stomp over TCP/IP, where the socket layer is secured using SSL or TLS. |
mqtt+nio+ssl://Host:Port | Endpoint URL for MQTT over Java NIO, where the socket layer is secured using SSL or TLS. |
7.3. Java Keystores
Overview
Prerequisites
bin directory is on your path. See Java SE.
Default keystore provider
java.security file (located either in JavaInstallDir/lib/security or JavaInstallDir/jre/lib/security):
keystore.type=jks
keystore.type=jksjks (or JKS) keystore type represents the standard keystore.
Customizing the keystore provider
java.security.KeystoreSpi class. For details of how to do this see the following references:
Store password
Keystore entries
- Key entries—each key entry contains the following components:
- A private key.
- An X.509 certificate (can be v1, v2, or v3) containing the public key that matches this entry’s private key.
- Optionally, one or more CA certificates that belong to the preceding certificate’s trust chain.
NoteThe CA certificates belonging to a certificate’s trust chain can be stored either in its key entry or in trusted certificate entries.In addition, each key entry is tagged by an alias and protected by a key password. To access a particular key entry in the keystore, you must provide both the alias and the key password. - Trusted certificate entries—each trusted certificate entry contains just a single X.509 certificate.Each trusted certificate entry is tagged by an alias. There is no need to protect the entry with a password, however, because the X.509 certificate contains only a public key.
Keystore utilities
keytool and jarsigner. Only the keytool utility is needed here.
7.4. How to Use X.509 Certificates
Overview
Target-only authentication
Figure 7.1. Target-Only Authentication Scenario
broker.ks. The client is configured to have a trust store, client.ts, that contains the certificate that originally signed the broker certificate. Normally, the trusted certificate is a Certificate Authority (CA) certificate.
Mutual authentication
Figure 7.2. Mutual Authentication Scenario
client.ks, and a trust store, client.ts, which contains the certificate that signed the target certificate. The target is configured to have its own certificate and private key in the file, broker.ks, and a trust store, broker.ts, which contains the certificate that signed the client certificate.
Selecting the authentication scenario
WantClientAuth or NeedClientAuth flags in the SSL/TLS protocol layer. The following list describes all of the possible authentication scenarios:
- Target-only authentication—this is the most important authentication scenario. If you want to authenticate the client as well, the most common approach is to let the client log on using username/password credentials, which can be sent securely through the encrypted channel established by the SSL/TLS session.
- Target authentication and optional client authentication—if you want to authenticate the client using an X.509 certificate, simply configure the client to have its own certificate. By default, the target will authenticate the client's certificate, if it receives one.
- Target authentication and required client authentication—if want to enforce client authentication using an X.509 certificate, you can set the
NeedClientAuthflag on the SSL/TLS protocol layer. When this flag is set, the target would raise an error if the client fails to send a certificate during the SSL/TLS handshake. - No authentication—this scenario is potentially dangerous from a security perspective, because it is susceptible to a man-in-the-middle attack. It is therefore recommended that you always avoid using this (non-)authentication scenario.NoteIt is theoretically possible to get this scenario, if you select one of the anonymous Diffie-Hellman cipher suites for the SSL/TLS session. In practice, however, you normally do not need to worry about these cipher suites, because they have a low priority amongst the cipher suites supported by the
SunJSSEsecurity provider. Other, more secure cipher suites normally take precedence.
Custom certificates
7.5. Configuring JSSE System Properties
Overview
JSSE system properties
| System Property Name | Description |
|---|---|
javax.net.ssl.keyStore | Location of the Java keystore file containing an application process's own certificate and private key. On Windows, the specified pathname must use forward slashes, /, in place of backslashes, \. |
javax.net.ssl.keyStorePassword |
Password to access the private key from the keystore file specified by
javax.net.ssl.keyStore. This password is used twice:
In other words, the JSSE framework requires these passwords to be identical.
|
javax.net.ssl.keyStoreType | (Optional) For Java keystore file format, this property has the value jks (or JKS). You do not normally specify this property, because its default value is already jks. |
javax.net.ssl.trustStore |
Location of the Java keystore file containing the collection of CA certificates trusted by this application process (trust store). On Windows, the specified pathname must use forward slashes,
/, in place of backslashes, \.
If a trust store location is not specified using this property, the SunJSSE implementation searches for and uses a keystore file in the following locations (in order):
|
javax.net.ssl.trustStorePassword | Password to unlock the keystore file (store password) specified by javax.net.ssl.trustStore. |
javax.net.ssl.trustStoreType | (Optional) For Java keystore file format, this property has the value jks (or JKS). You do not normally specify this property, because its default value is already jks. |
javax.net.debug | To switch on logging for the SSL/TLS layer, set this property to ssl. |
jssecacerts and the cacerts directories) present a potential security hazard. If you do not take care to manage the trust stores under the JDK installation or if you do not have control over which JDK installation is used, you might find that the effective trust store is too lax.
javax.net.ssl.trustStore property for a secure client or server, so that you have control over the CA certificates trusted by your application.
Setting properties at the command line
-DProperty=Value. For example, to specify JSSE system properties to a client program, com.redhat.Client:
java -Djavax.net.ssl.trustStore=truststores/client.ts com.redhat.Client
java -Djavax.net.ssl.trustStore=truststores/client.ts com.redhat.ClientSSL_OPTS environment variable as follows, on Windows:
set SSL_OPTS=-Djavax.net.ssl.keyStore=C:/Programs/FUSE/fuse-message-broker-6.2.1.redhat-084/conf/broker.ks
         -Djavax.net.ssl.keyStorePassword=password
         -Djavax.net.ssl.trustStore=C:/Programs/FUSE/fuse-message-broker-6.2.1.redhat-084/conf/broker.ts
         -Djavax.net.ssl.trustStorePassword=password
set SSL_OPTS=-Djavax.net.ssl.keyStore=C:/Programs/FUSE/fuse-message-broker-6.2.1.redhat-084/conf/broker.ks
         -Djavax.net.ssl.keyStorePassword=password
         -Djavax.net.ssl.trustStore=C:/Programs/FUSE/fuse-message-broker-6.2.1.redhat-084/conf/broker.ts
-Djavax.net.ssl.trustStorePassword=passwordSSL_OPTS=-Djavax.net.ssl.keyStore=/local/FUSE/fuse-message-broker-6.2.1.redhat-084/conf/broker.ks
-Djavax.net.ssl.keyStorePassword=password
-Djavax.net.ssl.trustStore=/local/FUSE/fuse-message-broker-6.2.1.redhat-084/conf/broker.ts
-Djavax.net.ssl.trustStorePassword=password
export SSL_OPTS
SSL_OPTS=-Djavax.net.ssl.keyStore=/local/FUSE/fuse-message-broker-6.2.1.redhat-084/conf/broker.ks
         -Djavax.net.ssl.keyStorePassword=password
         -Djavax.net.ssl.trustStore=/local/FUSE/fuse-message-broker-6.2.1.redhat-084/conf/broker.ts
         -Djavax.net.ssl.trustStorePassword=password
export SSL_OPTSbin/activemq[.bat|.sh] script
SSL_OPTS environment variable is simply a convenient way of passing command-line properties to the bin/activemq[.bat|.sh] script. It is not accessed directly by the broker runtime or the JSSE package.
Setting properties by programming
7.6. Setting Security Context for the Openwire/SSL Protocol
Overview
ssl:) also supports an option to set its SSL security context using the broker configuration file.
Setting security context in the broker configuration file
sslContext element. For example, the default broker configuration file, etc/activemq.xml, includes the following entry:
activemq.base property is defined in the activemq[.bat|.sh] script. You can specify any of the following sslContext attributes:
keyStore—equivalent to settingjavax.net.ssl.keyStore.keyStorePassword—equivalent to settingjavax.net.ssl.keyStorePassword.keyStoreType—equivalent to settingjavax.net.ssl.keyStoreType.keyStoreAlgorithm—defaults to JKS.trustStore—equivalent to settingjavax.net.ssl.trustStore.trustStorePassword—equivalent to settingjavax.net.ssl.trustStorePassword.trustStoreType—equivalent to settingjavax.net.ssl.trustStoreType.
7.7. Securing Java Clients
ActiveMQSslConnectionFactory class
org.apache.activemq.ActiveMQSslConnectionFactory class. Use the ActiveMQSslConnectionFactory class in place of the insecure ActiveMQConnectionFactory class in order to enable SSL/TLS security in your clients.
ActiveMQSslConnectionFactory class exposes the following methods for configuring SSL/TLS security:
setTrustStore(String)- Specifies the location of the client's trust store file, in JKS format (as managed by the Java
keystoreutility). setTrustStorePassword(String)- Specifies the password that unlocks the client trust store.
setKeyStore(String)- (Optional) Specifies the location of the client's own X.509 certificate and private key in a key store file, in JKS format (as managed by the Java
keystoreutility). Clients normally do not need to provide their own certificate, unless the broker SSL/TLS configuration specifies that client authentication is required. setKeyStorePassword(String)- (Optional) Specifies the password that unlocks the client key store. This password is also used to decrypt the private key from in the key store.
ActiveMQSslConnectionFactory also exposes the setKeyAndTrustManagers method, which lets you specify the javax.net.ssl.KeyManager[] array and the javax.net.ssl.TrustManager[] array directly.
Specifying the trust store and key store locations
setTrustStore and setKeyStore methods can have either of the following formats:
- A pathname—where no scheme is specified, for example,
/conf/client.ts. In this case the resource is loaded from the classpath, which is convenient to use when the client and its certificates are packaged in a JAR file. - A Java URL—where you can use any of the standard Java URL schemes, such as
httporfile. For example, to reference the file,C:\ActiveMQ\conf\client.ts, in the filesystem on a Windows O/S, use the URL,file:///C:/ActiveMQ/conf/client.ts.
Sample client code
ActiveMQSslConnectionFactory class to create the connection, also setting the trust store and trust store password (no key store is required here, because we are assuming that the broker port does not require client authentication).
Example 7.1. Java Client Using the ActiveMQSslConnectionFactory Class
Chapter 8. Authorization
Abstract
8.1. Simple Authorization Plug-In
Overview
Configuring the simple authorization plug-in
authorizationPlugin element to the list of plug-ins in the broker's configuration, as shown in Example 8.1, “Simple Authorization Plug-In Configuration”.
Example 8.1. Simple Authorization Plug-In Configuration
authorizationMap element wrapped in a map element.
authorizationEntries—a collection ofauthorizationEntryelements that define the permissions assigned to authorized users have for destinations whose name matches the selectortempDestinationAuthorizationEntry—defines the permissions assigned to authorized users have for temporary destinations
Integration with the Apache Karaf authentication module
groupClass attribute on the authorizationMap element.
groupClass attribute defines the type of the class that implements the role principal. For example, in order to reuse roles defined for the Apache Karaf JAAS authentication plug-in, you would need to set this property to org.apache.karaf.jaas.boot.principal.RolePrincipal (as shown in Example 8.1, “Simple Authorization Plug-In Configuration”).
org.apache.activemq.jaas.GroupPrincipal.
Named destinations
authorizationEntry element, which supports the following attributes:
queueortopic—specifies the name of the queue or topic to which you are assigning permissions. The greater-than symbol,>, acts as a name segment wildcard. For example, an entry with,queue="USERS.>", would match any queue name beginning with theUSERS.string.ImportantIn order for the>wildcard to match multiple segments, it must be preceded by the.segment-delimiter character. Hence,USERS.>matches any queue name beginning withUSERS., butUSERS>does not match.read—specifies a comma-separated list of roles that have permission to consume messages from the matching destinations.write—specifies a comma-separated list of roles that have permission to publish messages to the matching destinations.admin—specifies a comma-separated list of roles that have permission to create destinations in the destination subtree.
Temporary destinations
tempDestinationAuthorizationEntry element the contains a tempDestinationAuthorizationEntry child element. The permissions set by this entry are for all temporary destinations. The attributes supported by the inner tempDestinationAuthorizationEntry element are:
read—specifies a comma-separated list of roles that have permission to consume messages from all temporary destinations.write—specifies a comma-separated list of roles that have permission to publish messages to all temporary destinations.admin—specifies a comma-separated list of roles that have permission to create temporary destinations.
Advisory destinations
authorizationEntry element. For advisory destinations, however, the topic attribute is always used and the name is always starts with ActiveMQ.Advisory.
Example 8.2. Setting Access Permissions for Advisory Destinations
<authorizationEntry topic="ActiveMQ.Advisory.>"
                   read="guests,users"
                   write="guests,users"
                   admin="guests,users" />
<authorizationEntry topic="ActiveMQ.Advisory.>"
                   read="guests,users"
                   write="guests,users"
admin="guests,users" />8.2. Cached LDAP Authorization Plug-In
Overview
Updating the cache
- Push mechanism—some LDAP directory server implementations support a persistent search feature, which enables applications to receive live updates from the LDAP server (push mechanism). By default, the cached LDAP authorization plug-in attempts to register with the LDAP server to receive these updates.
- Pull mechanism—if your LDAP directory server does not support live updates, you can configure the cached LDAP authorization plug-in to poll the LDAP server at regular intervals instead (pull mechanism). To enable the pull mechanism, you must set the
refreshIntervalproperty on the cached LDAP authorization plug-in.
Sample configuration
authorizationPlugin element must be added as a child of the plugins element.
Example 8.3. Cached LDAP Authorization Plug-In Configuration
Configuration properties
adminPermissionGroupSearchFilter- Specifies the filter used to search for admin permission groups. This filter is used when searching under the nodes specified by
queueSearchBase,topicSearchBase, ortempSearchBase, to obtain the permission groups for queues, topics, or temporary destinations, respectively.Default is(cn=Admin). authentication- The authentication method to use when connecting to the LDAP server.Default is
simple. connectionPassword- The password that matches the DN from
connectionUsername. In the directory server, the password is normally stored as auserPasswordattribute in the corresponding directory entry.Default issecret. connectionProtocol- The connection protocol to use when connecting to the LDAP server.Default is
s. connectionURL- Specifies the location of the directory server using an LDAP URL,
ldap://Host:Port.Default isldap://localhost:1024. connectionUsername- The DN of the user that opens the connection to the directory server.Default is
uid=admin,ou=system. groupClass- Type of the class that implements the role principal. For example, in order to reuse roles defined for the Apache Karaf JAAS authentication plug-in, you would need to set this property to
org.apache.karaf.jaas.boot.principal.RolePrincipal.Default isorg.apache.activemq.jaas.GroupPrincipal. groupNameAttribute- Specifies which attribute of a permission group node is interpreted as the group name.Default is
cn. groupObjectClass- Specifies the object class of the LDAP nodes used to store permission groups. Typical values are
groupOfNamesorgroupOfUniqueNames.Default isgroupOfNames. legacyGroupMapping- If
true, specifies that the role members of a privilege group must be specified using just the Common Name RDN,cn=CNValue, of the role group; or iffalse, specifies that the role members of a privilege group must be specified using the full Distinguished Name.Default istrue. permissionGroupMemberAttribute- Specifies which attribute of a permission group node defines a member. For example, if the
groupObjectClassis set togroupOfNames, this attribute should usually be set tomember. Alternatively, if thegroupObjectClassis set togroupOfUniqueNames, this attribute should usually be set touniquemember.Default ismember. queueSearchBase- The base DN of queue authorization entries.Default is
ou=Queue,ou=Destination,ou=ActiveMQ,ou=system. readPermissionGroupSearchFilter- Specifies the filter used to search for read permission groups. This filter is used when searching under the nodes specified by
queueSearchBase,topicSearchBase, ortempSearchBase, to obtain the permission groups for queues, topics, or temporary destinations, respectively.Default is(cn=Read). refreshDisabled- If
true, disables cache refreshing.Default isfalse. refreshInterval- Time interval between refreshes of the cache, expressed in milliseconds (where the cache is refreshed by pulling data from the LDAP server). The special value,
-1, disables the pull mechanism for refreshing the cache (but does not affect the push mechanism, if the LDAP server supports it).Default is-1. tempSearchBase- The base DN of authorization entries for temporary destinations.Default is
ou=Temp,ou=Destination,ou=ActiveMQ,ou=system. topicSearchBase- The base DN of topic authorization entries.Default is
ou=Topic,ou=Destination,ou=ActiveMQ,ou=system. userNameAttribute- Specifies which attribute of a user node is interpreted as the username.Default is
uid. userObjectClass- Specifies the object class of the LDAP nodes used to store users.Default is
person. writePermissionGroupSearchFilter- Specifies the filter used to search for write permission groups. This filter is used when searching under the nodes specified by
queueSearchBase,topicSearchBase, ortempSearchBase, to obtain the permission groups for queues, topics, or temporary destinations, respectively.Default is(cn=Write).
Authorization settings for different directory servers
| Directory Server | Object Class Settings |
|---|---|
|
389-DS
Red Hat DS
|
userObjectClass="inetorgperson" groupObjectClass="groupOfUniqueNames" permissionGroupMemberAttribute="uniqueMember" |
|
Apache DS
|
userObjectClass="person" groupObjectClass="groupOfNames" permissionGroupMemberAttribute="member" |
8.3. LDAP Authorization Plug-In
Overview
Configuring the LDAP authorization plug-in
authorizationPlugin element to the list of plug-ins in the broker configuration and configure it to use the LDAPAuthorizationMap authorization map, as shown in Example 8.4, “LDAP Authorization Plug-In Configuration”.
Example 8.4. LDAP Authorization Plug-In Configuration
LDAP authorization plug-in properties
initialContextFactory- Must always be set to
com.sun.jndi.ldap.LdapCtxFactory. connectionURL- Specify the location of the directory server using an ldap URL,
ldap://Host:Port. You can optionally qualify this URL, by adding a forward slash,/, followed by the DN of a particular node in the directory tree. For example,ldap://ldapserver:10389/ou=system. authentication- Specifies the authentication method used when binding to the LDAP server. Can take either of the values,
simple(username and password) ornone(anonymous).NoteSimple Authentication and Security Layer (SASL) authentication is currently not supported. connectionUsername- The DN of the user that opens the connection to the directory server. For example,
uid=admin,ou=system. connectionPassword- The password that matches the DN from
connectionUsername. In the directory server, in the DIT, the password is normally stored as auserPasswordattribute in the corresponding directory entry. connectionProtocol- Currently, the only supported value is a blank string. In future, this option will allow you to select the Secure Socket Layer (SSL) for the connection to the directory server.NoteThis option must be set explicitly to an empty string, because it has no default value.
topicSearchMatchingFormat- Specifies the DN of the node whose children provide the permissions for the current topic. Before passing to the LDAP search operation, the string value you provide here is subjected to string substitution, as implemented by the
java.text.MessageFormatclass. Essentially, this means that the special string,{0}, is substituted by the name of the current topic.For example, if this property is set tocn={0},ou=Topic,ou=Destination,ou=ActiveMQ,ou=systemand the current topic isTEST.FOO, the DN becomescn=TEST.FOO,ou=Topic,ou=Destination,ou=ActiveMQ,ou=system. topicSearchSubtreeBool- Specify the search depth for permission entries (admin, read or write entries), relative to the node specified by
topicSearchMatchingFormat. This option can take boolean values, as follows:false—(default) try to match one of the child entries of thetopicSearchMatchingFormatnode (maps tojavax.naming.directory.SearchControls.ONELEVEL_SCOPE).true—try to match any entry belonging to the subtree of thetopicSearchMatchingFormatnode (maps tojavax.naming.directory.SearchControls.SUBTREE_SCOPE).
queueSearchMatchingFormat- Specifies the DN of the node whose children provide the permissions for the current queue. The special string,
{0}, is substituted by the name of the current queue.For example, if this property is set tocn={0},ou=Queue,ou=Destination,ou=ActiveMQ,ou=systemand the current queue isTEST.FOO, the DN becomescn=TEST.FOO,ou=Queue,ou=Destination,ou=ActiveMQ,ou=system. queueSearchSubtreeBool- Specify the search depth for permission entries (admin, read or write entries), relative to the node specified by
topicSearchMatchingFormat. This option can take boolean values, as follows:false—(default) try to match one of the child entries of thetopicSearchMatchingFormatnode (maps tojavax.naming.directory.SearchControls.ONELEVEL_SCOPE).true—try to match any entry belonging to the subtree of thetopicSearchMatchingFormatnode (maps tojavax.naming.directory.SearchControls.SUBTREE_SCOPE).
advisorySearchBase- Specifies the DN of the node whose children provide the permissions for all advisory topics. In this case the DN is a literal value (that is, no string substitution is performed on the property value).For example, a typical value of this property is
cn=ActiveMQ.Advisory,ou=Topic,ou=Destination,ou=ActiveMQ,ou=system. tempSearchBase- Specifies the DN of the node whose children provide the permissions for all temporary queues and topics (apart from advisory topics). In this case the DN is a literal value (that is, no string substitution is performed on the property value).For example, a typical value of this property is
cn=ActiveMQ.Temp,ou=Topic,ou=Destination,ou=ActiveMQ,ou=system. adminBase- Specifies an LDAP search filter, which is used when looking up the admin permissions for any kind of queue or topic. The search filter attempts to match one of the children (or descendants, if
SUBTREE_SCOPEis enabled) of the queue or topic node.For example, if this property is set to(cn=admin), it will match any child whosecnattribute is set toadmin. adminAttribute- Specifies an attribute of the node matched by
adminBase, whose value is the DN of a role/group that has admin permissions.For example, consider acn=adminnode that is a child of the node,cn=TEST.FOO,ou=Queue,ou=Destination,ou=ActiveMQ,ou=system, as shown: The
Thecn=adminnode might typically have some attributes, as follows: If you now set the
adminAttributeproperty tomember, the authorization plug-in grants admin privileges over theTEST.FOOqueue to thecn=adminsgroup and thecn=usersgroup. readBase- Specifies an LDAP search filter, which is used when looking up the read permissions for any kind of queue or topic. The search filter attempts to match one of the children (or descendants, if
SUBTREE_SCOPEis enabled) of the queue or topic node.For example, if this property is set to(cn=read), it will match any child whosecnattribute is set toread. readAttribute- Specifies an attribute of the node matched by
readBase, whose value is the DN of a role/group that has read permissions. writeBase- Specifies an LDAP search filter, which is used when looking up the write permissions for any kind of queue or topic. The search filter attempts to match one of the children (or descendants, if
SUBTREE_SCOPEis enabled) of the queue or topic node.For example, if this property is set to(cn=write), it will match any child whosecnattribute is set towrite. writeAttribute- Specifies an attribute of the node matched by
writeBase, whose value is the DN of a role/group that has write permissions.
8.4. Programming Message-Level Authorization
Overview
Implement the MessageAuthorizationPolicy interface
WebServer application to reach only the admin user, with all other users blocked from reading these messages. This example presupposes that the WebServer application is configured to set the JMSXAppID property in the message's JMS header.
Example 8.5. Implementation of MessageAuthorizationPolicy
org.apache.activemq.broker.ConnectionContext class stores details of the current client connection and the org.apache.activemq.command.Message class is essentially an implementation of the standard javax.jms.Message interface.
$ACTIVEMQ_HOME/lib directory.
Configure the messageAuthorizationPolicy element
etc/activemq.xml, inside the broker element:
Chapter 9. LDAP Authentication Tutorial
Abstract
9.1. Tutorial Overview
Goals
- Install 389 Directory Server
- Add user entries to the LDAP server
- Add groups to manage security roles
- Configure JBoss A-MQ to use LDAP authentication
- Configure JBoss A-MQ to use roles for authorization
- Configure SSL/TLS connections to the LDAP server
9.2. Set-up a Directory Server and Console
Overview
Prerequisites
fedoraproject.org site.
Install 389 Directory Server
- On Red Hat Enterprise Linux and Fedora platforms, use the standard
yumpackage management utility to install 389 Directory Server. Enter the following command at a command prompt (you must have administrator privileges on your machine):sudo yum install 389-ds
sudo yum install 389-dsCopy to Clipboard Copied! Toggle word wrap Toggle overflow NoteThe required389-dsand389-consoleRPM packages are available for Fedora, RHEL6+EPEL, and CentOS7+EPEL platforms. At the time of writing, the389-consolepackage is not yet available for RHEL 7. - After installing the 389 directory server packages, enter the following command to configure the directory server:
sudo setup-ds-admin.pl
sudo setup-ds-admin.plCopy to Clipboard Copied! Toggle word wrap Toggle overflow The script is interactive and prompts you to provide the basic configuration settings for the 389 directory server. When the script is complete, it automatically launches the 389 directory server in the background. - For more details about how to install 389 Directory Server, see the Download page.
Install 389 Management Console
- On Red Hat Enterprise Linux and Fedora platforms—use the standard
yumpackage management utility to install the 389 Management Console. Enter the following command at a command prompt (you must have administrator privileges on your machine):sudo yum install 389-console
sudo yum install 389-consoleCopy to Clipboard Copied! Toggle word wrap Toggle overflow
Connect the console to the server
- Enter the following command to start up the 389 Management Console:
389-console
389-consoleCopy to Clipboard Copied! Toggle word wrap Toggle overflow - A login dialog appears. Fill in the LDAP login credentials in the User ID and Password fields, and customize the hostname in the Administration URL field to connect to your 389 management server instance (port
9830is the default port for the 389 management server instance).
- The 389 Management Console window appears. Select the Servers and Applications tab.
- In the left-hand pane, drill down to the Directory Server icon.

- Select the Directory Server icon in the left-hand pane and click Open, to open the 389 Directory Server Console.
- In the 389 Directory Server Console, click the Directory tab, to view the Directory Information Tree (DIT).
- Expand the root node,
YourDomain(usually named after a hostname, and shown aslocaldomainin the following screenshot), to view the DIT.
9.3. Add User Entries to the Directory Server
Overview
Alternative to adding user entries
role.mapping property in the LDAPLoginModule configuration, instead of creating new entries. For details, see Section 2.1.7, “JAAS LDAP Login Module”.
Goals
Adding user entries
- Ensure that the LDAP server and console are running. See Section 9.2, “Set-up a Directory Server and Console”.
- In the Directory Server Console, click on the Directory tab, and drill down to the People node, under the
YourDomainnode (whereYourDomainis shown aslocaldomainin the following screenshots).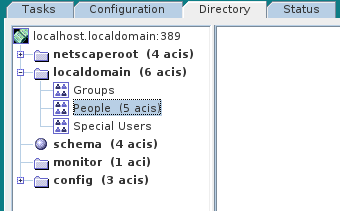
- Right-click the People node, and select → from the context menu, to open the Create New User dialog.
- Select the tab in the left-hand pane of the Create New User dialog.
- Fill in the fields of the User tab, as follows:
- Set the First Name field to
John. - Set the Last Name field to
Doe. - Set the User ID field to
jdoe. - Enter the password,
secret, in the Password field. - Enter the password,
secret, in the Confirm Password field.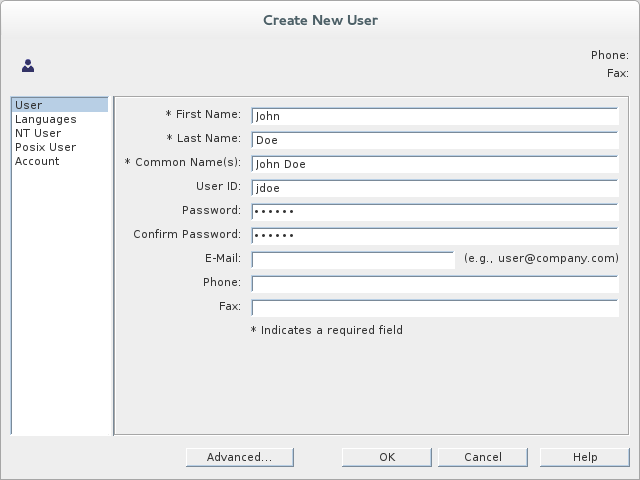
- Click .
- In Step 5.e, use
janedoefor the new user's User ID and use the password,secret, for the password fields. - In Step 5.e, use
criderfor the new user's User ID and use the password,secret, for the password fields.
Adding groups for the roles
- In the Directory tab of the Directory Server Console, drill down to the Groups node, under the
YourDomainnode. - Right-click the Groups node, and select → from the context menu, to open the Create New Group dialog.
- Select the tab in the left-hand pane of the Create New Group dialog.
- Fill in the fields of the General tab, as follows:
- Set the Group Name field to
Administrator. - Optionally, enter a description in the Description field.

- Select the tab in the left-hand pane of the Create New Group dialog.
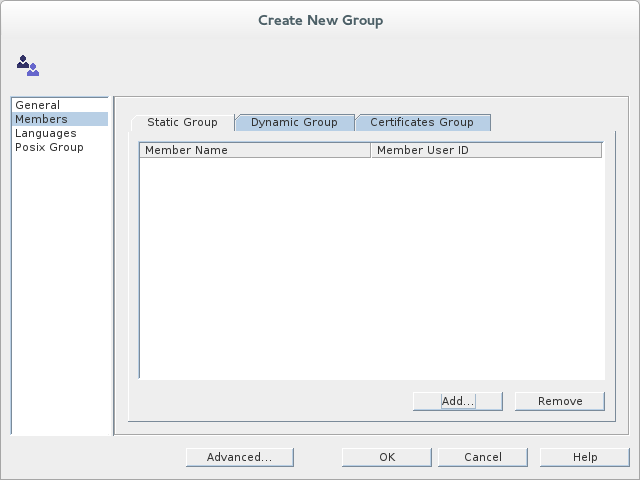
- Click Add to open the Search users and groups dialog.
- In the Search field, select
Usersfrom the drop-down menu, and click the Search button.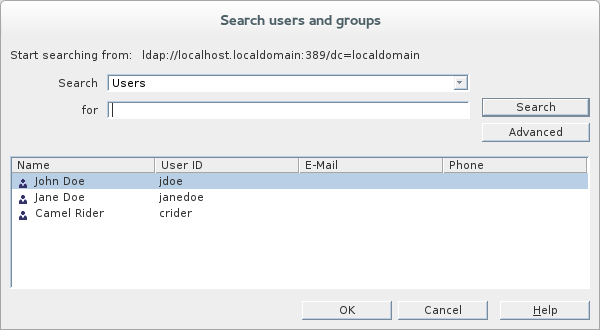
- From the list of users that is now displayed, select
John Doe. - Click , to close the Search users and groups dialog.
- Click , to close the Create New Group dialog.
- In Step 8, select
Jane Doe. - In Step 8, select
Camel Rider.
9.4. Enable LDAP Authentication in the OSGi Container
Overview
karaf realm, so that the container authenticates credentials based on user entries stored in the X.500 directory server.
References
- LDAPLoginModule options—are described in detail in Section 2.1.7, “JAAS LDAP Login Module”.
- Configurations for other directory servers—this tutorial covers only 389-DS. For details of how to configure other directory servers, such as Microsoft Active Directory, see the section called “Filter settings for different directory servers”.
Procedure for standalone OSGi container
- Ensure that the X.500 directory server is running.
- Start Red Hat JBoss A-MQ by entering the following command in a terminal window:
./amq
./amqCopy to Clipboard Copied! Toggle word wrap Toggle overflow - Create a file called
ldap-module.xml. - Copy Example 9.1, “JAAS Realm for Standalone” into
ldap-module.xml.Example 9.1. JAAS Realm for Standalone
Copy to Clipboard Copied! Toggle word wrap Toggle overflow You must customize the following settings in theldap-module.xmlfile:- connection.url
- Set this URL to the actual location of your directory server instance. Normally, this URL has the format,
ldap://Hostname:Port. For example, the default port for the 389 Directory Server is IP port389. - connection.username
- Specifies the username that is used to authenticate the connection to the directory server. For 389 Directory Server, the default is usually
cn=Directory Manager. - connection.password
- Specifies the password part of the credentials for connecting to the directory server.
- authentication
- You can specify either of the following alternatives for the authentication protocol:
simpleimplies that user credentials are supplied and you are obliged to set theconnection.usernameandconnection.passwordoptions in this case.noneimplies that authentication is not performed. There is no need to set theconnection.usernameandconnection.passwordoptions in this case.
This login module creates a JAAS realm calledkaraf, which is the same name as the default JAAS realm used by JBoss A-MQ. By redefining this realm with arankattribute value greater than0, it overrides the standardkarafrealm which has the rank0(but note that in the context of Fabric, the defaultkarafrealm has a rank of99, so you need to define a new realm with rank100or greater to override the default realm in a fabric).For more details about how to configure JBoss A-MQ to use LDAP, see Section 2.1.7, “JAAS LDAP Login Module”.ImportantWhen setting the JAAS properties above, do not enclose the property values in double quotes. - To deploy the new LDAP module, copy the
ldap-module.xmlinto the JBoss A-MQdeploy/directory.The LDAP module is automatically activated.NoteSubsequently, if you need to undeploy the LDAP module, you can do so by deleting theldap-module.xmlfile from thedeploy/directory while the Karaf container is running.
Procedure for a Fabric
- Ensure that the X.500 directory server is running.
- If your local Fabric container is not already running, start it now, by entering the following command in a terminal window:
./amq
./amqCopy to Clipboard Copied! Toggle word wrap Toggle overflow NoteIf the Fabric container you want to connect to is running on a remote host, you can connect to it using theclientcommand-line utility in theInstallDir/bindirectory. - Create a new version of the Fabric profile data, by entering the following console command:
JBossFuse:karaf@root> version-create
Created version: 1.1 as copy of: 1.0
JBossFuse:karaf@root> version-create
Created version: 1.1 as copy of: 1.0
Copy to Clipboard Copied! Toggle word wrap Toggle overflow NoteIn effect, this command creates a new branch named1.1in the Git repository underlying the ZooKeeper registry. - Create the new profile resource,
ldap-module.xml(a Blueprint configuration file), in version1.1of thedefaultprofile, as follows:JBossFuse:karaf@root> profile-edit --resource ldap-module.xml default 1.1
JBossFuse:karaf@root> profile-edit --resource ldap-module.xml default 1.1Copy to Clipboard Copied! Toggle word wrap Toggle overflow The built-in profile editor opens automatically, which you can use to edit the contents of theldap-module.xmlresource. - Copy Example 9.2, “JAAS Realm for Fabric” into the
ldap-module.xmlresource, customizing the configuration properties, as necessary.Example 9.2. JAAS Realm for Fabric
Copy to Clipboard Copied! Toggle word wrap Toggle overflow You must customize the following settings in theldap-module.xmlfile:- connection.url
- Set this URL to the actual location of your directory server instance. Normally, this URL has the format,
ldap://Hostname:Port. You must be sure to use a hostname that is accessible to all of the containers in the fabric (hence, you cannot uselocalhostas the hostname here). The default port for the 389 Directory Server is IP port389. - connection.username
- Specifies the username that is used to authenticate the connection to the directory server. For 389 Directory Server, the default is usually
cn=Directory Manager. - connection.password
- Specifies the password part of the credentials for connecting to the directory server.
- authentication
- You can specify either of the following alternatives for the authentication protocol:
simpleimplies that user credentials are supplied and you are obliged to set theconnection.usernameandconnection.passwordoptions in this case.noneimplies that authentication is not performed. There is no need to set theconnection.usernameandconnection.passwordoptions in this case.
This login module creates a JAAS realm calledkaraf, which is the same name as the default JAAS realm used by Red Hat JBoss A-MQ. By redefining this realm with arankof200, it overrides all of the previously installedkarafrealms (in the context of Fabric, you need to override the defaultZookeeperLoginModule, which has a rank of99).ImportantPay particular attention to the value of therankto ensure that it is higher than all previously installedkarafrealms. If therankis not sufficiently high, the new realm will not be used by the fabric.ImportantWhen setting the JAAS properties above, do not enclose the property values in double quotes.ImportantIn a Fabric, the Zookeeper login module must be enabled, in addition to the LDAP login module. This is because Fabric uses the Zookeeper login module internally, to support authentication between ensemble servers. With the configuration shown here, Fabric tries to authenticate first of all against the Zookeeper login module and, if that step fails, it tries to authenticate against the LDAP login module. - Save and close the
ldap-module.xmlresource by typing Ctrl-S and Ctrl-X. - Edit the agent properties of version 1.1 of the
defaultprofile, adding an instruction to deploy the Blueprint resource file defined in the previous step. Enter the following console command:JBossFuse:karaf@root> profile-edit default 1.1
JBossFuse:karaf@root> profile-edit default 1.1Copy to Clipboard Copied! Toggle word wrap Toggle overflow The built-in profile editor opens automatically. Add the following line to the agent properties:bundle.ldap-realm=blueprint:profile:ldap-module.xml
bundle.ldap-realm=blueprint:profile:ldap-module.xmlCopy to Clipboard Copied! Toggle word wrap Toggle overflow Save and close the agent properties by typing Ctrl-S and Ctrl-X. - The new LDAP realm is not activated, until you upgrade a container to use the new version,
1.1. To activate LDAP on a single container (for example, on a container calledroot), enter the following console command:JBossFuse:karaf@root> container-upgrade 1.1 root
JBossFuse:karaf@root> container-upgrade 1.1 rootCopy to Clipboard Copied! Toggle word wrap Toggle overflow To activate LDAP on all containers in the fabric, enter the following console command:JBossFuse:karaf@root> container-upgrade --all 1.1
JBossFuse:karaf@root> container-upgrade --all 1.1Copy to Clipboard Copied! Toggle word wrap Toggle overflow ImportantIt is advisable to upgrade just a single container initially, to make sure that everything is working properly. This is particularly important, if you have only remote access to the fabric: if you upgrade all of the containers at once, you might not be able to reconnect to the fabric. - To check that the LDAP realm is activated, enter the following console command:
JBossFuse:karaf@root> jaas-realms
Index Realm                Module Class
    1 karaf                org.apache.karaf.jaas.modules.ldap.LDAPLoginModule
JBossFuse:karaf@root> jaas-realms Index Realm Module Class 1 karaf org.apache.karaf.jaas.modules.ldap.LDAPLoginModuleCopy to Clipboard Copied! Toggle word wrap Toggle overflow If the output of this command lists theZookeperLoginModule, this means the LDAP realm is not yet activated. It might take a minute or so for activation of the LDAP realm to complete.
Test the LDAP authentication
client utility, as follows:
- Open a new command prompt.
- Change directory to the JBoss A-MQ
InstallDir/bindirectory. - Enter the following command to log on to the running container instance using the identity
jdoe:client -u jdoe -p secret
client -u jdoe -p secretCopy to Clipboard Copied! Toggle word wrap Toggle overflow You should successfully log into the container's remote console. At the command console, typejaas:followed by the [Tab] key (to activate content completion):Copy to Clipboard Copied! Toggle word wrap Toggle overflow You should see thatjdoehas access to all of thejaascommands (which is consistent with theAdministratorrole). - Log off the remote console by entering the logout command.
- Enter the following command to log on to the running container instance using the identity
janedoe:client -u janedoe -p secret
client -u janedoe -p secretCopy to Clipboard Copied! Toggle word wrap Toggle overflow You should successfully log into the container's remote console. At the command console, typejaas:followed by the [Tab] key (to activate content completion):Copy to Clipboard Copied! Toggle word wrap Toggle overflow You should see thatjanedoehas access to almost all of thejaascommands, except forjaas:update(which is consistent with theDeployerrole). - Log off the remote console by entering the logout command.
- Enter the following command to log on to the running container instance using the identity
crider:client -u crider -p secret
client -u crider -p secretCopy to Clipboard Copied! Toggle word wrap Toggle overflow You should successfully log into the container's remote console. At the command console, typejaas:followed by the [Tab] key (to activate content completion):JBossFuse:janedoe@root> jaas: jaas:groupcreate jaas:groups jaas:realms
JBossFuse:janedoe@root> jaas: jaas:groupcreate jaas:groups jaas:realmsCopy to Clipboard Copied! Toggle word wrap Toggle overflow You should see thatcriderhas access to only three of thejaascommands (which is consistent with theMonitorrole). - Log off the remote console by entering the logout command.
9.5. Add Broker Authorization Entries
Overview
- Queue entries
- Each queue entry has a Common Name (
cn), which can be the name of a specific queue or a wildcard pattern that matches multiple queues. Under each queue entry, you must create sub-entries for the admin, read, and write permissions. - Topic entries
- Each topic entry has a Common Name (
cn), which can be the name of a specific topic or a wildcard pattern that matches multiple topics. Under each topic entry, you must create sub-entries for the admin, read, and write permissions. - Advisory topics entry
- In particular, you must define one topic entry with the Common Name,
ActiveMQ.Advisory.$, which is a wildcard pattern that matches all advisory topics. - Temporary queues entry
- A single
Tempentry contains the admin, read, and write permissions that apply to all temporary queues.
Using wildcards in queue and topic entries
| Wildcard | Description |
|---|---|
. | Separates segments in a path name. |
* | Matches any single segment in a path name. |
$ | Matches any number of segments in a path name. |
FOO.*, will match FOO.BAR, but not FOO.BAR.LONG; whereas the pattern, FOO.$, will match FOO.BAR and FOO.BAR.LONG.
$ character is used instead of the usual > character to match multiple destination name segments.
Steps to add authorization entries
- The next few steps describe how to create the
ou=ActiveMQnode.- Right-click the
YourDomainnode, and select → from the context menu. The Create New Organizational Unit dialog appears. - Select the tab in the left-hand pane of the Create New Organizational Unit dialog.
- Enter
ActiveMQin the Name field. - Click OK, to close the Create New Organizational Unit dialog.
- The next few steps describe how to create the
ou=Destinationnode.- Right-click on the
ActiveMQnode and select → from the context menu. The Create New Organizational Unit dialog appears. - Select the tab in the left-hand pane of the Create New Organizational Unit dialog.
- Enter
Destinationin the Name field. - Click OK, to close the Create New Organizational Unit dialog.
- In a similar manner to the preceding steps, by right-clicking on the
Destinationnode and invoking the → context menu option, create the followingorganisationalUnitnodes as children of theou=Destinationnode:ou=Queue,ou=Destination,ou=ActiveMQ,dc=YourDomain ou=Topic,ou=Destination,ou=ActiveMQ,dc=YourDomain ou=Temp,ou=Destination,ou=ActiveMQ,dc=YourDomain
ou=Queue,ou=Destination,ou=ActiveMQ,dc=YourDomain ou=Topic,ou=Destination,ou=ActiveMQ,dc=YourDomain ou=Temp,ou=Destination,ou=ActiveMQ,dc=YourDomainCopy to Clipboard Copied! Toggle word wrap Toggle overflow - In the LDAP Browser window, you should now see the following tree:
Figure 9.1. DIT after Creating Destination, Queue, Topic and Temp Nodes
- The next few steps describe how to create the following nodes:
cn=$,ou=Queue,ou=Destination,ou=ActiveMQ,dc=YourDomain
cn=ActiveMQ.Advisory.$,ou=Topic,ou=Destination,ou=ActiveMQ,dc=YourDomain
cn=$,ou=Queue,ou=Destination,ou=ActiveMQ,dc=YourDomain
cn=ActiveMQ.Advisory.$,ou=Topic,ou=Destination,ou=ActiveMQ,dc=YourDomain
Copy to Clipboard Copied! Toggle word wrap Toggle overflow These nodes represent name patterns that match queue names and topic names, respectively. Thecn=$queue node defines an entry that matches all queue names, so it can be used to define access rights for all queues. Thecn=ActiveMQ.Advisory.$node defines a topic entry that matches all advisory topics.- Right-click on the
ou=Queuenode and select → . The New Object dialog appears. - Select applicationprocess. Click OK.
- The Property Editor dialog now appears. In the Full name field, enter
$(where$represents the wildcard that matches any queue name). Click OK.
- In a similar manner to the preceding steps, by right-clicking on the
ou=Topicnode and selecting the → context menu option, create the followingapplicationProcessnode as a child of theou=Topicnode:cn=ActiveMQ.Advisory.$,ou=Topic,ou=Destination,ou=ActiveMQ,dc=YourDomain
cn=ActiveMQ.Advisory.$,ou=Topic,ou=Destination,ou=ActiveMQ,dc=YourDomainCopy to Clipboard Copied! Toggle word wrap Toggle overflow
- The next few steps describe how to create the permission group nodes, which represent
admin,read, andwritepermissions, for theou=Queuenode.- Right-click on the
cn=$node (initially depicted as a spherical icon in the console) and select → from the context menu.
- The Create New Group dialog appears. Select the tab in the left-hand pane of the Create New Group dialog.
- Set the Group Name field to
admin.
- Select the tab in the left-hand pane of the Create New Group dialog.

- Click Add to open the Search users and groups dialog.
- In the Search field, select
Groupsfrom the drop-down menu, and click the Search button. - From the list of groups that is now displayed, select
Administrator. - Click , to close the Search users and groups dialog.
- Click , to close the Create New Group dialog.
- In a similar manner to the preceding steps, by right-clicking on the
cn=$node and opening the → dialog, create the following additionalgroupOfUniqueNamesnodes as children of thecn=$node:cn=read,cn=$,ou=Queue,ou=Destination,ou=ActiveMQ,dc=YourDomain cn=write,cn=$,ou=Queue,ou=Destination,ou=ActiveMQ,dc=YourDomain
cn=read,cn=$,ou=Queue,ou=Destination,ou=ActiveMQ,dc=YourDomain cn=write,cn=$,ou=Queue,ou=Destination,ou=ActiveMQ,dc=YourDomainCopy to Clipboard Copied! Toggle word wrap Toggle overflow
- Copy the
cn=admin,cn=read, andcn=writepermission nodes and paste them as children of thecn=ActiveMQ.Advisory.$node, as follows.Using a combination of mouse and keyboard, select the three nodes,cn=admin,cn=read, andcn=write, and typeCtrl-Cto copy them. Select thecn=ActiveMQ.Advisory.$node and typeCtrl-Vto paste the copied nodes as children. - Similarly, copy the
cn=admin,cn=read, andcn=writepermission nodes and paste them as children of theou=Tempnode. - In the LDAP Browser window, you should now see the following tree:
Figure 9.2. DIT after Creating Children of Queue, Topic and Temp Nodes

9.6. Enable LDAP Authorization in the Broker
Overview
Compatibility with Apache Karaf principals
- When you create authorization entries in the LDAP server (as described in Section 9.5, “Add Broker Authorization Entries”), you must specify the full DN of the roles that are being authorized. This enables you to specify roles from any location in the LDAP tree (previously, the LDAP authorization plug-in could read roles only from a fixed location under the
ou=ActiveMQ,ou=systemnode). - To enable the use of full DNs when specifying roles, you must set the
legacyGroupMappingproperty tofalsein the LDAP authorization plug-in (the default istrue). - Because the Apache Karaf roles are a different type than the roles natively supported by the LDAP authorization plug-in, you must also specify the type of the Karaf roles, by setting the
groupClassproperty.
Enable broker LDAP authorization in a standalone OSGi container
- Shut down the JBoss A-MQ container, if it is currently running. In the console window, enter the following command:
JBossA-MQ:karaf@root> shutdown
JBossA-MQ:karaf@root> shutdownCopy to Clipboard Copied! Toggle word wrap Toggle overflow - Make a backup copy of the broker configuration file,
InstallDir/etc/activemq.xml. - Replace the LDAP authorization plug-in in the broker configuration. Open the broker configuration file,
InstallDir/etc/activemq.xml, with a text editor and replace the defaultauthorizationMapelement by thecachedLDAPAuthorizationMapelement, as follows:Copy to Clipboard Copied! Toggle word wrap Toggle overflow You must customize the following settings in theactivemq.xmlfile:- connectionURL
- Set this URL to the actual location of your directory server instance. Normally, this URL has the format,
ldap://Hostname:Port. For example, the default port for the 389 Directory Server is IP port389. - connectionUsername
- Specifies the username that is used to authenticate the connection to the directory server. For 389 Directory Server, the default is usually
cn=Directory Manager. - connectionPassword
- Specifies the password part of the credentials for connecting to the directory server.
- queueSearchBase
- Replace
YourDomainwith the name of the root node on your directory server. - topicSearchBase
- Replace
YourDomainwith the name of the root node on your directory server. - tempSearchBase
- Replace
YourDomainwith the name of the root node on your directory server.
NoteFor more details about the options available on thecachedLDAPAuthorizationMapelement, see Section 8.2, “Cached LDAP Authorization Plug-In”. - Ensure that the X.500 directory server is running. If necessary, manually restart the X.500 directory server—see Section 9.2, “Set-up a Directory Server and Console”. If the server is not running, all broker connections will fail.
- Restart the JBoss A-MQ container. Open a new command prompt and start the broker by entering the following command:
amq
amqCopy to Clipboard Copied! Toggle word wrap Toggle overflow
Enable broker LDAP authorization in a Fabric
- Create a new version of the Fabric profile data, by entering the following console command:
JBossFuse:karaf@root> version-create
Created version: 1.2 as copy of: 1.1
JBossFuse:karaf@root> version-create
Created version: 1.2 as copy of: 1.1
Copy to Clipboard Copied! Toggle word wrap Toggle overflow Where we have assumed that the current version is1.1.NoteIn effect, this command creates a new branch named1.2in the Git repository underlying the ZooKeeper registry. - Edit the
broker.xmlresource in version1.2of themq-baseprofile, as follows:JBossFuse:karaf@root> profile-edit --resource broker.xml mq-base 1.2
JBossFuse:karaf@root> profile-edit --resource broker.xml mq-base 1.2Copy to Clipboard Copied! Toggle word wrap Toggle overflow The built-in profile editor opens automatically, which you can use to edit the contents of thebroker.xmlresource. - Add the LDAP authorization plug-in to the broker configuration,
broker.xml. Using the editor that opened in the previous step, add the defaultauthorizationPluginelement as a child of thepluginselement, as follows:Copy to Clipboard Copied! Toggle word wrap Toggle overflow You must customize the following settings in thebroker.xmlresource:- connectionURL
- Set this URL to the actual location of your directory server instance. Normally, this URL has the format,
ldap://Hostname:Port. For example, the default port for the 389 Directory Server is IP port389. - connectionUsername
- Specifies the username that is used to authenticate the connection to the directory server. For 389 Directory Server, the default is usually
cn=Directory Manager. - connectionPassword
- Specifies the password part of the credentials for connecting to the directory server.
- queueSearchBase
- Replace
YourDomainwith the name of the root node on your directory server. - topicSearchBase
- Replace
YourDomainwith the name of the root node on your directory server. - tempSearchBase
- Replace
YourDomainwith the name of the root node on your directory server.
NoteFor more details about the options available on thecachedLDAPAuthorizationMapelement, see Section 8.2, “Cached LDAP Authorization Plug-In”. - Save and close the
broker.xmlresource by typing Ctrl-S and Ctrl-X. - To check that you have edited the
broker.xmlresource correctly, you can print out the 1.2 version of themq-baseprofile and its resources using the following console command:JBossFuse:karaf@root> profile-display --version 1.2 -r mq-base
JBossFuse:karaf@root> profile-display --version 1.2 -r mq-baseCopy to Clipboard Copied! Toggle word wrap Toggle overflow - Ensure that the X.500 directory server is running. If necessary, manually restart the X.500 directory server—see Section 9.2, “Set-up a Directory Server and Console”. If the server is not running, all broker connections will fail.
- The broker LDAP authorization is not activated, until you upgrade a container to use the new version,
1.2, of themq-baseprofile. For example, to activate broker LDAP authorization on therootcontainer, enter the following console command (assuming a broker profile is already deployed on therootcontainer):JBossFuse:karaf@root> container-upgrade 1.2 root
JBossFuse:karaf@root> container-upgrade 1.2 rootCopy to Clipboard Copied! Toggle word wrap Toggle overflow
Install the Apache ActiveMQ kit
apache-activemq-5.11.0.redhat-621084-bin.zip, provided in the extras/ directory of the JBoss A-MQ installation.
- Find the Apache ActiveMQ kit at the following location:
InstallDir/extras/apache-activemq-5.11.0.redhat-621084-bin.zip
InstallDir/extras/apache-activemq-5.11.0.redhat-621084-bin.zipCopy to Clipboard Copied! Toggle word wrap Toggle overflow - Using a suitable archive utility on your platform, unzip the
apache-activemq-5.11.0.redhat-621084-bin.zipfile and extract it to a convenient location,ActiveMQInstallDir.
Test the new configuration
- Run the consumer client with the
jdoeuser credentials. Open a new command prompt, change directory toActiveMQInstallDir/examples/openwire/swissarmy, and enter the following Ant command:ant consumer -Durl=tcp://localhost:61616 -Dmax=100 -Duser=jdoe -Dpassword=secret
ant consumer -Durl=tcp://localhost:61616 -Dmax=100 -Duser=jdoe -Dpassword=secretCopy to Clipboard Copied! Toggle word wrap Toggle overflow NoteIf testing against a Fabric container, you might need to change the broker port to61617. - Run the producer client with the
jdoeuser credentials. Open a new command prompt, change directory toActiveMQInstallDir/examples/openwire/swissarmy, and enter the following Ant command:ant producer -Durl=tcp://localhost:61616 -Dmax=100 -Duser=jdoe -Dpassword=secret
ant producer -Durl=tcp://localhost:61616 -Dmax=100 -Duser=jdoe -Dpassword=secretCopy to Clipboard Copied! Toggle word wrap Toggle overflow - Run a negative test, to demonstrate that unauthorized users are blocked from accessing the broker queues.Run the consumer client with the
janedoeuser credentials. Open a new command prompt, change directory toActiveMQInstallDir/examples/openwire/swissarmy, and enter the following Ant command:ant consumer -Durl=tcp://localhost:61616 -Dmax=100 -Duser=janedoe -Dpassword=secret
ant consumer -Durl=tcp://localhost:61616 -Dmax=100 -Duser=janedoe -Dpassword=secretCopy to Clipboard Copied! Toggle word wrap Toggle overflow This time, the consumer client fails, becausejanedoedoes not belong to theAdministratorgroup.
Chapter 10. Securing the Apache ActiveMQ Standard Distribution
Abstract
10.1. Apache ActiveMQ Standard Distribution
Overview
- The broker does not run in a container (neither OSGi nor Java EE). It runs directly inside a JVM.
- The broker is launched by the
bin/activemqscript (extracted from the standard distribution archive). - The libraries included with the Red Hat version of Apache ActiveMQ are identical to (and have identical versions as) the libraries deployed in the main JBoss A-MQ product.
- The Red Hat version (and only the Red Hat version) of the Apache ActiveMQ standard distribution is supported and the libraries in this distribution can be patched from time to time.
Location of the standard distribution
InstallDir/extras/apache-activemq-5.11.0.redhat-621084-bin.zip
InstallDir/extras/apache-activemq-5.11.0.redhat-621084-bin.zip10.2. Configure and Run Active-MQ using Encrypted Passwords
Configure Password Encryption
- Run encrypt command.
bin/activemq encrypt --password encrypt123 --input password1
INFO: Using default configuration
...
Encrypted text: jkS8uzTLGwAoBzxEadnG6j7vkY1GD4Zt
$ bin/activemq encrypt --password encrypt123 --input password1
INFO: Using default configuration
...
Encrypted text: jkS8uzTLGwAoBzxEadnG6j7vkY1GD4Zt
Copy to Clipboard Copied! Toggle word wrap Toggle overflow Wherepasswordis a secret used by the encryptor andinputis the password you want to encrypt.NoteSpecial characters, such as $/^&, are not supported. Use only alphanumeric characters for passwords. - Add the password to the configuration file. By default, the credentials are added to the
$ACTIVEMQ_HOME/conf/credentials-enc.properties.The contents of thecredentials-enc.propertiesuse theENC()function to wrap encrypted passwords. - Instruct the property loader to encrypt variables while loading properties to the memory.NoteThe property loader used for encryption is
$ACTIVEMQ_HOME/examples/conf/activemq-security.xml.The contents of theactivemq-security.xmlshows the configuration that ActiveMQ uses to load encrypted passwords. TheACTIVEMQ_ENCRYPTION_PASSWORDenvironment variable is used to load the encryptor password. The property loads then de-crypts the password from thecredential-enc.propertiesfile.Copy to Clipboard Copied! Toggle word wrap Toggle overflow - Add the property to the
activemq-security.xmlas shown here:Copy to Clipboard Copied! Toggle word wrap Toggle overflow
Run Active-MQ using Encrypted Passwords
- Set environment variable for encryption
export ACTIVEMQ_ENCRYPTION_PASSWORD=encrypt123
$ export ACTIVEMQ_ENCRYPTION_PASSWORD=encrypt123Copy to Clipboard Copied! Toggle word wrap Toggle overflow - Set the AMQ broker
bin/activemq start xbean:examples/conf/activemq-security.xml
$ bin/activemq start xbean:examples/conf/activemq-security.xmlCopy to Clipboard Copied! Toggle word wrap Toggle overflow - Reset the environment variable for encryption
unset ACTIVEMQ_ENCRYPTION_PASSWORD
$ unset ACTIVEMQ_ENCRYPTION_PASSWORDCopy to Clipboard Copied! Toggle word wrap Toggle overflow Resetting the environment is important to avoid saving passwords on your system.
Configuring the network connector
userName attribute and the password attribute in the networkConnector element, as follows:
networkConnector element must also be configured with username/password credentials, even if Broker B is not configured to perform authentication. This is because Broker A's authentication plug-in checks for Broker A's username.
Appendix A. Managing Certificates
Abstract
A.1. What is an X.509 Certificate?
Role of certificates
Integrity of the public key
Digital signatures
Contents of an X.509 certificate
- A subject distinguished name (DN) that identifies the certificate owner.
- The public key associated with the subject.
- X.509 version information.
- A serial number that uniquely identifies the certificate.
- An issuer DN that identifies the CA that issued the certificate.
- The digital signature of the issuer.
- Information about the algorithm used to sign the certificate.
- Some optional X.509 v.3 extensions; for example, an extension exists that distinguishes between CA certificates and end-entity certificates.
Distinguished names
A.2. Certification Authorities
A.2.1. Introduction to Certificate Authorities
- commercial CAs are companies that sign certificates for many systems.
- private CAs are trusted nodes that you set up and use to sign certificates for your system only.
A.2.2. Commercial Certification Authorities
Signing certificates
Advantages of commercial CAs
Criteria for choosing a CA
- What are the certificate-signing policies of the commercial CAs?
- Are your applications designed to be available on an internal network only?
- What are the potential costs of setting up a private CA compared to the costs of subscribing to a commercial CA?
A.2.3. Private Certification Authorities
Choosing a CA software package
OpenSSL software package
Setting up a private CA using OpenSSL
Choosing a host for a private certification authority
Security precautions
- Do not connect the CA to a network.
- Restrict all access to the CA to a limited set of trusted users.
- Use an RF-shield to protect the CA from radio-frequency surveillance.
A.3. Certificate Chaining
Certificate chain
Figure A.1. A Certificate Chain of Depth 2
Self-signed certificate
Chain of trust
Certificates signed by multiple CAs
Figure A.2. A Certificate Chain of Depth 3
Trusted CAs
A.4. Special Requirements on HTTPS Certificates
Overview
HTTPS URL integrity check
Reference
How to specify the certificate identity
Using commonName
https://www.redhat.com/secure
https://www.redhat.com/secureC=IE,ST=Co. Dublin,L=Dublin,O=RedHat, OU=System,CN=www.redhat.com
C=IE,ST=Co. Dublin,L=Dublin,O=RedHat,
OU=System,CN=www.redhat.comwww.redhat.com.
Using subjectAltName (multi-homed hosts)
subjectAltName certificate extension.
www.redhat.com www.jboss.org
www.redhat.com
www.jboss.orgsubjectAltName that explicitly lists both of these DNS host names. If you generate your certificates using the openssl utility, edit the relevant line of your openssl.cnf configuration file to specify the value of the subjectAltName extension, as follows:
subjectAltName=DNS:www.redhat.com,DNS:www.jboss.org
subjectAltName=DNS:www.redhat.com,DNS:www.jboss.orgsubjectAltName (the subjectAltName takes precedence over the Common Name).
*, in host names. For example, you can define the subjectAltName as follows:
subjectAltName=DNS:*.jboss.org
subjectAltName=DNS:*.jboss.org., delimiter in front of the domain name). For example, if you specified *jboss.org, your certificate could be used on any domain that ends in the letters jboss.
A.5. Creating Your Own Certificates
Abstract
A.5.1. Install the OpenSSL Utilities
Installing OpenSSL on RHEL and Fedora platforms
yum install openssl
yum install opensslSource code distribution
A.5.2. Set Up a Private Certificate Authority
Overview
Steps to set up a private Certificate Authority
- Create the directory structure for the CA, as follows:
X509CA/demoCA X509CA/demoCA/private X509CA/demoCA/certs X509CA/demoCA/newcerts X509CA/demoCA/crl
X509CA/demoCA X509CA/demoCA/private X509CA/demoCA/certs X509CA/demoCA/newcerts X509CA/demoCA/crlCopy to Clipboard Copied! Toggle word wrap Toggle overflow - Using a text editor, create the file,
X509CA/openssl.cfg, and add the following contents to this file:Example A.1. OpenSSL Configuration
Copy to Clipboard Copied! Toggle word wrap Toggle overflow ImportantThe precedingopenssl.cfgconfiguration file is provided as a demonstration only. In a production environment, this configuration file would need to be carefully elaborated by an engineer with a high level of security expertise, and actively maintained to protect against evolving security threats. - Initialize the
demoCA/serialfile, which must have the initial contents01(zero one). Enter the following command:echo 01 > demoCA/serial
echo 01 > demoCA/serialCopy to Clipboard Copied! Toggle word wrap Toggle overflow - Initialize the
demoCA/index.txt, which must initially be completely empty. Enter the following command:touch demoCA/index.txt
touch demoCA/index.txtCopy to Clipboard Copied! Toggle word wrap Toggle overflow - Create a new self-signed CA certificate and private key with the command:
openssl req -x509 -new -config openssl.cfg -days 365 -out demoCA/cacert.pem -keyout demoCA/private/cakey.pem
openssl req -x509 -new -config openssl.cfg -days 365 -out demoCA/cacert.pem -keyout demoCA/private/cakey.pemCopy to Clipboard Copied! Toggle word wrap Toggle overflow You are prompted for a pass phrase for the CA private key and details of the CA distinguished name as shown in Example A.2, “Creating a CA Certificate”.Example A.2. Creating a CA Certificate
Copy to Clipboard Copied! Toggle word wrap Toggle overflow NoteThe security of the CA depends on the security of the private key file and the private key pass phrase used in this step.You must ensure that the file names and location of the CA certificate and private key,cacert.pemandcakey.pem, are the same as the values specified inopenssl.cfg.
A.5.3. Create a CA Trust Store File
Overview
Steps to create a CA trust store
- Assemble the collection of trusted CA certificates that you want to deploy.The trusted CA certificates can be obtained from public CAs or private CAs. The trusted CA certificates can be in any format that is compatible with the Java keystore utility; for example, PEM format. All you need are the certificates themselves—the private keys and passwords are not required.
- Add a CA certificate to the trust store using the keytool -import command.Enter the following command to add the CA certificate,
cacert.pem, in PEM format, to a JKS trust store.keytool -import -file cacert.pem -alias CAAlias -keystore truststore.ts -storepass StorePass
keytool -import -file cacert.pem -alias CAAlias -keystore truststore.ts -storepass StorePassCopy to Clipboard Copied! Toggle word wrap Toggle overflow Wheretruststore.tsis a keystore file containing CA certificates. If this file does not already exist, the keytool command creates it. TheCAAliasis a convenient identifier for the imported CA certificate andStorePassis the password required to access the keystore file. - Repeat the previous step to add all of the CA certificates to the trust store.
A.5.4. Generate and Sign a New Certificate
Overview
Steps to generate and sign a new certificate
- Generate a certificate and private key pair using the keytool -genkeypair command, as follows:
keytool -genkeypair -dname "CN=Alice, OU=Engineering, O=Red Hat, ST=Dublin, C=IE" -validity 365 -alias alice -keypass KeyPass -keystore alice.ks -storepass StorePass
keytool -genkeypair -dname "CN=Alice, OU=Engineering, O=Red Hat, ST=Dublin, C=IE" -validity 365 -alias alice -keypass KeyPass -keystore alice.ks -storepass StorePassCopy to Clipboard Copied! Toggle word wrap Toggle overflow Because the specified keystore,alice.ks, did not exist prior to issuing the command implicitly creates a new keystore and sets its password toStorePass.The-dnameand-validityflags define the contents of the newly created X.509 certificate.NoteWhen specifying the certificate's Distinguished Name (through the-dnameparameter), you must be sure to observe any policy constraints specified in theopenssl.cfgfile. If those policy constraints are not heeded, you will not be able to sign the certificate using the CA (in the next steps). - Create a certificate signing request using the keystore -certreq command.Create a new certificate signing request for the
alice.kscertificate and export it to thealice_csr.pemfile, as follows:keytool -certreq -alias alice -file alice_csr.pem -keypass KeyPass -keystore alice.ks -storepass StorePass
keytool -certreq -alias alice -file alice_csr.pem -keypass KeyPass -keystore alice.ks -storepass StorePassCopy to Clipboard Copied! Toggle word wrap Toggle overflow - Sign the CSR using the openssl ca command.Sign the CSR for the Alice certificate, using your private CA, as follows:
openssl ca -config openssl.cfg -days 365 -in alice_csr.pem -out alice_signed.pem
openssl ca -config openssl.cfg -days 365 -in alice_csr.pem -out alice_signed.pemCopy to Clipboard Copied! Toggle word wrap Toggle overflow You will prompted to enter the CA private key pass phrase you used when creating the CA (in Step 5).For more details about the openssl ca command see http://www.openssl.org/docs/apps/ca.html#. - Convert the signed certificate to PEM only format using the openssl x509 command with the
-outformoption set toPEM. Enter the following command:openssl x509 -in alice_signed.pem -out alice_signed.pem -outform PEM
openssl x509 -in alice_signed.pem -out alice_signed.pem -outform PEMCopy to Clipboard Copied! Toggle word wrap Toggle overflow - Concatenate the CA certificate file and the converted, signed certificate file to form a certificate chain. For example, on Linux and UNIX platforms, you can concatenate the CA certificate file and the signed Alice certificate,
alice_signed.pem, as follows:cat demoCA/cacert.pem alice_signed.pem > alice.chain
cat demoCA/cacert.pem alice_signed.pem > alice.chainCopy to Clipboard Copied! Toggle word wrap Toggle overflow - Import the new certificate's full certificate chain into the Java keystore using the keytool -import command. Enter the following command:
keytool -import -file alice.chain -keypass KeyPass -keystore alice.ks -storepass StorePass
keytool -import -file alice.chain -keypass KeyPass -keystore alice.ks -storepass StorePassCopy to Clipboard Copied! Toggle word wrap Toggle overflow
Appendix B. ASN.1 and Distinguished Names
Abstract
B.1. ASN.1
Overview
BER
DER
References
- ASN.1 is defined in X.208.
- BER is defined in X.209.
B.2. Distinguished Names
Overview
- X.509 certificates—for example, one of the DNs in a certificate identifies the owner of the certificate (the security principal).
- LDAP—DNs are used to locate objects in an LDAP directory tree.
String representation of DN
RFC 2253). The string representation provides a convenient basis for describing the structure of a DN.
DN string example
C=US,O=IONA Technologies,OU=Engineering,CN=A. N. Other
C=US,O=IONA Technologies,OU=Engineering,CN=A. N. OtherStructure of a DN string
OID
Attribute types
| String Representation | X.500 Attribute Type | Size of Data | Equivalent OID |
|---|---|---|---|
|
C
|
countryName
|
2
|
2.5.4.6
|
|
O
|
organizationName
|
1...64
|
2.5.4.10
|
|
OU
|
organizationalUnitName
|
1...64
|
2.5.4.11
|
|
CN
|
commonName
|
1...64
|
2.5.4.3
|
| ST |
stateOrProvinceName
|
1...64
|
2.5.4.8
|
|
L
|
localityName
|
1...64
|
2.5.4.7
|
|
STREET
|
streetAddress
| ||
|
DC
|
domainComponent
| ||
|
UID
|
userid
|
AVA
<attr-type>=<attr-value>
<attr-type>=<attr-value>CN=A. N. Other
CN=A. N. Other2.5.4.3=A. N. Other
2.5.4.3=A. N. OtherRDN
<attr-type>=<attr-value>[+<attr-type>=<attr-value> ...]
<attr-type>=<attr-value>[+<attr-type>=<attr-value> ...]OU=Eng1+OU=Eng2+OU=Eng3
OU=Eng1+OU=Eng2+OU=Eng3OU=Engineering
OU=EngineeringIndex
A
- Abstract Syntax Notation One (see ASN.1)
- ActiveMQSslConnectionFactory, ActiveMQSslConnectionFactory class
- ASN.1, Contents of an X.509 certificate, ASN.1 and Distinguished Names
- attribute types, Attribute types
- AVA, AVA
- OID, OID
- RDN, RDN
- attribute value assertion (see AVA)
- authorization
- temporary destinations, Temporary destinations
- authorizationEntries, Configuring the simple authorization plug-in
- authorizationEntry, Named destinations
- authorizationMap, Configuring the simple authorization plug-in
- authorizationPlugin, Configuring the simple authorization plug-in
- AVA, AVA
B
- Basic Encoding Rules (see BER)
- BER, BER
C
- CA, Integrity of the public key
- choosing a host, Choosing a host for a private certification authority
- commercial CAs, Commercial Certification Authorities
- list of trusted, Trusted CAs
- multiple CAs, Certificates signed by multiple CAs
- private CAs, Private Certification Authorities
- security precautions, Security precautions
- certificates
- chaining, Certificate chain
- peer, Chain of trust
- public key, Contents of an X.509 certificate
- self-signed, Self-signed certificate
- signing, Integrity of the public key
- X.509, Role of certificates
- chaining of certificates, Certificate chain
D
- DER, DER
- Distinguished Encoding Rules (see DER)
- distinguished names
- definition, Overview
- DN
- definition, Overview
- string representation, String representation of DN
J
- JAAS
- configuration syntax, Configuring a JAAS realm
- converting to blueprint, Converting standard JAAS login properties to XML
- namespace, Namespace
- jaas:config, Configuring a JAAS realm
- jaas:module, Configuring a JAAS realm
- JMX SSL connection, enabling, Enabling Remote JMX SSL
M
- multiple CAs, Certificates signed by multiple CAs
O
- OpenSSL, OpenSSL software package
P
- peer certificate, Chain of trust
- public keys, Contents of an X.509 certificate
R
- RDN, RDN
- relative distinguished name (see RDN)
- root certificate directory, Trusted CAs
S
- self-signed certificate, Self-signed certificate
- signing certificates, Integrity of the public key
- SSLeay, OpenSSL software package
T
- tempDestinationAuthorizationEntry, Configuring the simple authorization plug-in, Temporary destinations
- temporary destinations
- authorization, Temporary destinations
- trusted CAs, Trusted CAs
X
- X.500, ASN.1 and Distinguished Names
- X.509 certificate
- definition, Role of certificates
Legal Notice
Trademark Disclaimer