OpenID Connect (OIDC) authentication
Abstract
Providing feedback on Red Hat build of Quarkus documentation
To report an error or to improve our documentation, log in to your Red Hat Jira account and submit an issue. If you do not have a Red Hat Jira account, then you will be prompted to create an account.
Procedure
- Click the following link to create a ticket.
- Enter a brief description of the issue in the Summary.
- Provide a detailed description of the issue or enhancement in the Description. Include a URL to where the issue occurs in the documentation.
- Clicking Submit creates and routes the issue to the appropriate documentation team.
Making open source more inclusive
Red Hat is committed to replacing problematic language in our code, documentation, and web properties. We are beginning with these four terms: master, slave, blacklist, and whitelist. Because of the enormity of this endeavor, these changes will be implemented gradually over several upcoming releases. For more details, see our CTO Chris Wright’s message.
Chapter 1. OpenID Connect (OIDC) Bearer token authentication
Secure HTTP access to Jakarta REST (formerly known as JAX-RS) endpoints in your application with Bearer token authentication by using the Quarkus OpenID Connect (OIDC) extension.
1.1. Overview of the Bearer token authentication mechanism in Quarkus
Quarkus supports the Bearer token authentication mechanism through the Quarkus OpenID Connect (OIDC) extension.
The bearer tokens are issued by OIDC and OAuth 2.0 compliant authorization servers, such as Keycloak.
Bearer token authentication is the process of authorizing HTTP requests based on the existence and validity of a bearer token. The bearer token provides information about the subject of the call, which is used to determine whether or not an HTTP resource can be accessed.
The following diagrams outline the Bearer token authentication mechanism in Quarkus:
Figure 1.1. Bearer token authentication mechanism in Quarkus with single-page application

- The Quarkus service retrieves verification keys from the OIDC provider. The verification keys are used to verify the bearer access token signatures.
- The Quarkus user accesses the single-page application (SPA).
- The single-page application uses Authorization Code Flow to authenticate the user and retrieve tokens from the OIDC provider.
- The single-page application uses the access token to retrieve the service data from the Quarkus service.
- The Quarkus service verifies the bearer access token signature by using the verification keys, checks the token expiry date and other claims, allows the request to proceed if the token is valid, and returns the service response to the single-page application.
- The single-page application returns the same data to the Quarkus user.
Figure 1.2. Bearer token authentication mechanism in Quarkus with Java or command line client

- The Quarkus service retrieves verification keys from the OIDC provider. The verification keys are used to verify the bearer access token signatures.
-
The client uses
client_credentialsthat requires client id and secret or password grant, which requires client id, secret, username, and password to retrieve the access token from the OIDC provider. - The client uses the access token to retrieve the service data from the Quarkus service.
- The Quarkus service verifies the bearer access token signature by using the verification keys, checks the token expiry date and other claims, allows the request to proceed if the token is valid, and returns the service response to the client.
If you need to authenticate and authorize users by using OIDC authorization code flow, see the Quarkus OpenID Connect authorization code flow mechanism for protecting web applications guide. Also, if you use Keycloak and bearer tokens, see the Quarkus Using Keycloak to centralize authorization guide.
To learn about how you can protect service applications by using OIDC Bearer token authentication, see the following tutorial: * Protect a web application by using OpenID Connect (OIDC) authorization code flow.
For information about how to support multiple tenants, see the Quarkus Using OpenID Connect Multi-Tenancy guide.
1.1.1. Accessing JWT claims
If you need to access JWT token claims, you can inject JsonWebToken:
package org.acme.security.openid.connect;

import org.eclipse.microprofile.jwt.JsonWebToken;
import jakarta.inject.Inject;
import jakarta.annotation.security.RolesAllowed;
import jakarta.ws.rs.GET;
import jakarta.ws.rs.Path;
import jakarta.ws.rs.Produces;
import jakarta.ws.rs.core.MediaType;

@Path("/api/admin")
public class AdminResource {

    @Inject
    JsonWebToken jwt;

    @GET
    @RolesAllowed("admin")
    @Produces(MediaType.TEXT_PLAIN)
    public String admin() {
        return "Access for subject " + jwt.getSubject() + " is granted";
    }
}
Injection of JsonWebToken is supported in @ApplicationScoped, @Singleton, and @RequestScoped scopes. However, the use of @RequestScoped is required if the individual claims are injected as simple types. For more information, see the Supported injection scopes section of the Quarkus "Using JWT RBAC" guide.
1.1.2. UserInfo
If you must request a UserInfo JSON object from the OIDC UserInfo endpoint, set quarkus.oidc.authentication.user-info-required=true. A request is sent to the OIDC provider UserInfo endpoint, and an io.quarkus.oidc.UserInfo (a simple javax.json.JsonObject wrapper) object is created. io.quarkus.oidc.UserInfo can be injected or accessed as a SecurityIdentity userinfo attribute.
1.1.3. Configuration metadata
The current tenant’s discovered OpenID Connect Configuration Metadata is represented by io.quarkus.oidc.OidcConfigurationMetadata and can be injected or accessed as a SecurityIdentity configuration-metadata attribute.
The default tenant’s OidcConfigurationMetadata is injected if the endpoint is public.
1.1.4. Token claims and SecurityIdentity roles
You can map SecurityIdentity roles from the verified JWT access tokens as follows:
-
If the
quarkus.oidc.roles.role-claim-pathproperty is set, and matching array or string claims are found, then the roles are extracted from these claims. For example,customroles,customroles/array,scope,"http://namespace-qualified-custom-claim"/roles,"http://namespace-qualified-roles". -
If a
groupsclaim is available, then its value is used. -
If a
realm_access/rolesorresource_access/client_id/roles(whereclient_idis the value of thequarkus.oidc.client-idproperty) claim is available, then its value is used. This check supports the tokens issued by Keycloak.
For example, the following JWT token has a complex groups claim that contains a roles array that includes roles:
{
    "iss": "https://server.example.com",
    "sub": "24400320",
    "upn": "jdoe@example.com",
    "preferred_username": "jdoe",
    "exp": 1311281970,
    "iat": 1311280970,
    "groups": {
        "roles": [
          "microprofile_jwt_user"
        ],
    }
}
You must map the microprofile_jwt_user role to SecurityIdentity roles, and you can do so with this configuration: quarkus.oidc.roles.role-claim-path=groups/roles.
If the token is opaque (binary), then a scope property from the remote token introspection response is used.
If UserInfo is the source of the roles, then set quarkus.oidc.authentication.user-info-required=true and quarkus.oidc.roles.source=userinfo, and if needed, set quarkus.oidc.roles.role-claim-path.
Additionally, a custom SecurityIdentityAugmentor can also be used to add the roles. For more information, see the Security identity customization section of the Quarkus "Security tips and tricks" guide.
You can also map SecurityIdentity roles created from token claims to deployment-specific roles by using the HTTP Security policy.
1.1.5. Token scopes and SecurityIdentity permissions
SecurityIdentity permissions are mapped in the form of io.quarkus.security.StringPermission from the scope parameter of the source of the roles and using the same claim separator.
import java.util.List;
import jakarta.inject.Inject;
import jakarta.ws.rs.GET;
import jakarta.ws.rs.Path;

import org.eclipse.microprofile.jwt.Claims;
import org.eclipse.microprofile.jwt.JsonWebToken;

import io.quarkus.security.PermissionsAllowed;

@Path("/service")
public class ProtectedResource {

    @Inject
    JsonWebToken accessToken;

    @PermissionsAllowed("email")
    @GET
    @Path("/email")
    public Boolean isUserEmailAddressVerifiedByUser() {
        return accessToken.getClaim(Claims.email_verified.name());
    }

    @PermissionsAllowed("orders_read")
    @GET
    @Path("/order")
    public List<Order> listOrders() {
        return List.of(new Order(1));
    }

    public static class Order {
        String id;
        public Order() {
        }
        public Order(String id) {
            this.id = id;
        }
        public String getId() {
            return id;
        }
        public void setId() {
            this.id = id;
        }
    }
}
For more information about the io.quarkus.security.PermissionsAllowed annotation, see the Permission annotation section of the "Authorization of web endpoints" guide.
1.1.6. Token verification and introspection
If the token is a JWT token, then, by default, it is verified with a JsonWebKey (JWK) key from a local JsonWebKeySet, retrieved from the OIDC provider’s JWK endpoint. The token’s key identifier (kid) header value is used to find the matching JWK key. If no matching JWK is available locally, then JsonWebKeySet is refreshed by fetching the current key set from the JWK endpoint. The JsonWebKeySet refresh can be repeated only after the quarkus.oidc.token.forced-jwk-refresh-interval expires. The default expiry time is 10 minutes. If no matching JWK is available after the refresh, the JWT token is sent to the OIDC provider’s token introspection endpoint.
If the token is opaque, which means it can be a binary token or an encrypted JWT token, then it is always sent to the OIDC provider’s token introspection endpoint.
If you work only with JWT tokens and expect a matching JsonWebKey to always be available, for example, after refreshing a key set, you must disable token introspection, as shown in the following example:
quarkus.oidc.token.allow-jwt-introspection=false
quarkus.oidc.token.allow-opaque-token-introspection=false
There might be cases where JWT tokens must be verified through introspection only, which can be forced by configuring an introspection endpoint address only. The following properties configuration shows you an example of how you can achieve this with Keycloak:
quarkus.oidc.auth-server-url=http://localhost:8180/realms/quarkus
quarkus.oidc.discovery-enabled=false
# Token Introspection endpoint: http://localhost:8180/realms/quarkus/protocol/openid-connect/tokens/introspect
quarkus.oidc.introspection-path=/protocol/openid-connect/tokens/introspect
There are advantages and disadvantages to indirectly enforcing the introspection of JWT tokens remotely. An advantage is that you eliminate the need for two remote calls: a remote OIDC metadata discovery call followed by another remote call to fetch the verification keys that will not be used. A disadvantage is that you need to know the introspection endpoint address and configure it manually.
The alternative approach is to allow the default option of OIDC metadata discovery but also require that only the remote JWT introspection is performed, as shown in the following example:
quarkus.oidc.auth-server-url=http://localhost:8180/realms/quarkus
quarkus.oidc.token.require-jwt-introspection-only=true
An advantage of this approach is that the configuration is simpler and easier to understand. A disadvantage is that a remote OIDC metadata discovery call is required to discover an introspection endpoint address, even though the verification keys will not be fetched.
The io.quarkus.oidc.TokenIntrospection, a simple jakarta.json.JsonObject wrapper object, will be created. It can be injected or accessed as a SecurityIdentity introspection attribute, providing either the JWT or opaque token has been successfully introspected.
1.1.7. Token introspection and UserInfo cache
All opaque access tokens must be remotely introspected. Sometimes, JWT access tokens might also have to be introspected. If UserInfo is also required, the same access token is used in a subsequent remote call to the OIDC provider. So, if UserInfo is required, and the current access token is opaque, two remote calls are made for every such token; one remote call to introspect the token and another to get UserInfo. If the token is JWT, only a single remote call to get UserInfo is needed, unless it also has to be introspected.
The cost of making up to two remote calls for every incoming bearer or code flow access token can sometimes be problematic.
If this is the case in production, consider caching the token introspection and UserInfo data for a short period, for example, 3 or 5 minutes.
quarkus-oidc provides quarkus.oidc.TokenIntrospectionCache and quarkus.oidc.UserInfoCache interfaces, usable for @ApplicationScoped cache implementation. Use @ApplicationScoped cache implementation to store and retrieve quarkus.oidc.TokenIntrospection and/or quarkus.oidc.UserInfo objects, as outlined in the following example:
@ApplicationScoped
@Alternative
@Priority(1)
public class CustomIntrospectionUserInfoCache implements TokenIntrospectionCache, UserInfoCache {
...
}
Each OIDC tenant can either permit or deny the storing of its quarkus.oidc.TokenIntrospection data, quarkus.oidc.UserInfo data, or both with boolean quarkus.oidc."tenant".allow-token-introspection-cache and quarkus.oidc."tenant".allow-user-info-cache properties.
Additionally, quarkus-oidc provides a simple default memory-based token cache, which implements both quarkus.oidc.TokenIntrospectionCache and quarkus.oidc.UserInfoCache interfaces.
You can configure and activate the default OIDC token cache as follows:
# 'max-size' is 0 by default, so the cache can be activated by setting 'max-size' to a positive value:
quarkus.oidc.token-cache.max-size=1000
# 'time-to-live' specifies how long a cache entry can be valid for and will be used by a cleanup timer:
quarkus.oidc.token-cache.time-to-live=3M
# 'clean-up-timer-interval' is not set by default, so the cleanup timer can be activated by setting 'clean-up-timer-interval':
quarkus.oidc.token-cache.clean-up-timer-interval=1M
The default cache uses a token as a key, and each entry can have TokenIntrospection, UserInfo, or both. It will only keep up to a max-size number of entries. If the cache is already full when a new entry is to be added, an attempt is made to find a space by removing a single expired entry. Additionally, the cleanup timer, if activated, periodically checks for expired entries and removes them.
You can experiment with the default cache implementation or register a custom one.
1.1.8. JSON Web Token claim verification
After the bearer JWT token’s signature has been verified and its expires at (exp) claim has been checked, the iss (issuer) claim value is verified next.
By default, the iss claim value is compared to the issuer property, which might have been discovered in the well-known provider configuration. However, if the quarkus.oidc.token.issuer property is set, then the iss claim value is compared to it instead.
In some cases, this iss claim verification might not work. For example, if the discovered issuer property contains an internal HTTP/IP address while the token iss claim value contains an external HTTP/IP address. Or when a discovered issuer property contains the template tenant variable, but the token iss claim value has the complete tenant-specific issuer value.
In such cases, consider skipping the issuer verification by setting quarkus.oidc.token.issuer=any. Only skip the issuer verification if no other options are available:
-
If you are using Keycloak and observe the issuer verification errors caused by the different host addresses, configure Keycloak with a
KEYCLOAK_FRONTEND_URLproperty to ensure the same host address is used. -
If the
issproperty is tenant-specific in a multitenant deployment, use theSecurityIdentitytenant-idattribute to check that the issuer is correct in the endpoint or the custom Jakarta filter. For example:
import jakarta.inject.Inject;
import jakarta.ws.rs.container.ContainerRequestContext;
import jakarta.ws.rs.container.ContainerRequestFilter;
import jakarta.ws.rs.core.Response;
import jakarta.ws.rs.ext.Provider;

import org.eclipse.microprofile.jwt.JsonWebToken;
import io.quarkus.oidc.OidcConfigurationMetadata;
import io.quarkus.security.identity.SecurityIdentity;

@Provider
public class IssuerValidator implements ContainerRequestFilter {
    @Inject
    OidcConfigurationMetadata configMetadata;

    @Inject JsonWebToken jwt;
    @Inject SecurityIdentity identity;

    public void filter(ContainerRequestContext requestContext) {
        String issuer = configMetadata.getIssuer().replace("{tenant-id}", identity.getAttribute("tenant-id"));
        if (!issuer.equals(jwt.getIssuer())) {
            requestContext.abortWith(Response.status(401).build());
        }
    }
}
Consider using the quarkus.oidc.token.audience property to verify the token aud (audience) claim value.
1.1.9. Single-page applications
A single-page application (SPA) typically uses XMLHttpRequest(XHR) and the JavaScript utility code provided by the OIDC provider to acquire a bearer token to access Quarkus service applications.
For example, if you work with Keycloak, you can use keycloak.js to authenticate users and refresh the expired tokens from the SPA:
<html>
<head>
    <title>keycloak-spa</title>
    <script src="https://cdn.jsdelivr.net/npm/axios/dist/axios.min.js"></script>
    <script src="http://localhost:8180/js/keycloak.js"></script>
    <script>
        var keycloak = new Keycloak();
        keycloak.init({onLoad: 'login-required'}).success(function () {
            console.log('User is now authenticated.');
        }).error(function () {
            window.location.reload();
        });
        function makeAjaxRequest() {
            axios.get("/api/hello", {
                headers: {
                    'Authorization': 'Bearer ' + keycloak.token
                }
            })
            .then( function (response) {
                console.log("Response: ", response.status);
            }).catch(function (error) {
                console.log('refreshing');
                keycloak.updateToken(5).then(function () {
                    console.log('Token refreshed');
                }).catch(function () {
                    console.log('Failed to refresh token');
                    window.location.reload();
                });
            });
    }
    </script>
</head>
<body>
    <button onclick="makeAjaxRequest()">Request</button>
</body>
</html>
1.1.10. Cross-origin resource sharing
If you plan to use your OIDC service application from a single-page application running on a different domain, you must configure cross-origin resource sharing (CORS). For more information, see the CORS filter section of the "Cross-origin resource sharing" guide.
1.1.11. Provider endpoint configuration
An OIDC service application needs to know the OIDC provider’s token, JsonWebKey (JWK) set, and possibly UserInfo and introspection endpoint addresses.
By default, they are discovered by adding a /.well-known/openid-configuration path to the configured quarkus.oidc.auth-server-url.
Alternatively, if the discovery endpoint is not available, or if you want to save on the discovery endpoint round-trip, you can disable the discovery and configure them with relative path values. For example:
quarkus.oidc.auth-server-url=http://localhost:8180/realms/quarkus
quarkus.oidc.discovery-enabled=false
# Token endpoint: http://localhost:8180/realms/quarkus/protocol/openid-connect/token
quarkus.oidc.token-path=/protocol/openid-connect/token
# JWK set endpoint: http://localhost:8180/realms/quarkus/protocol/openid-connect/certs
quarkus.oidc.jwks-path=/protocol/openid-connect/certs
# UserInfo endpoint: http://localhost:8180/realms/quarkus/protocol/openid-connect/userinfo
quarkus.oidc.user-info-path=/protocol/openid-connect/userinfo
# Token Introspection endpoint: http://localhost:8180/realms/quarkus/protocol/openid-connect/tokens/introspect
quarkus.oidc.introspection-path=/protocol/openid-connect/tokens/introspect
1.1.12. Token propagation
For information about bearer access token propagation to the downstream services, see the Token propagation section of the Quarkus "OpenID Connect (OIDC) and OAuth2 client and filters reference" guide.
1.1.13. OIDC provider client authentication
quarkus.oidc.runtime.OidcProviderClient is used when a remote request to an OIDC provider is required. If introspection of the Bearer token is necessary, then OidcProviderClient must authenticate to the OIDC provider. For more information about supported authentication options, see the OIDC provider client authentication section in the Quarkus "OpenID Connect authorization code flow mechanism for protecting web applications" guide.
1.1.14. Testing
If you have to test Quarkus OIDC service endpoints that require Keycloak authorization, follow the Test Keycloak authorization section.
You can begin testing by adding the following dependencies to your test project:
Using Maven:
<dependency>
    <groupId>io.rest-assured</groupId>
    <artifactId>rest-assured</artifactId>
    <scope>test</scope>
</dependency>
<dependency>
    <groupId>io.quarkus</groupId>
    <artifactId>quarkus-junit5</artifactId>
    <scope>test</scope>
</dependency>
Using Gradle:
testImplementation("io.rest-assured:rest-assured")
testImplementation("io.quarkus:quarkus-junit5")
1.1.14.1. WireMock
Add the following dependencies to your test project:
Using Maven:
<dependency>
    <groupId>io.quarkus</groupId>
    <artifactId>quarkus-test-oidc-server</artifactId>
    <scope>test</scope>
</dependency>
Using Gradle:
testImplementation("io.quarkus:quarkus-test-oidc-server")
Prepare the REST test endpoint and set application.properties. For example:
# keycloak.url is set by OidcWiremockTestResource
quarkus.oidc.auth-server-url=${keycloak.url}/realms/quarkus/
quarkus.oidc.client-id=quarkus-service-app
quarkus.oidc.application-type=service
Finally, write the test code. For example:
import static org.hamcrest.Matchers.equalTo;

import java.util.Set;

import org.junit.jupiter.api.Test;

import io.quarkus.test.common.QuarkusTestResource;
import io.quarkus.test.junit.QuarkusTest;
import io.quarkus.test.oidc.server.OidcWiremockTestResource;
import io.restassured.RestAssured;
import io.smallrye.jwt.build.Jwt;

@QuarkusTest
@QuarkusTestResource(OidcWiremockTestResource.class)
public class BearerTokenAuthorizationTest {

    @Test
    public void testBearerToken() {
        RestAssured.given().auth().oauth2(getAccessToken("alice", Set.of("user")))
            .when().get("/api/users/me")
            .then()
            .statusCode(200)
            // The test endpoint returns the name extracted from the injected `SecurityIdentity` principal.
            .body("userName", equalTo("alice"));
    }

    private String getAccessToken(String userName, Set<String> groups) {
        return Jwt.preferredUserName(userName)
                .groups(groups)
                .issuer("https://server.example.com")
                .audience("https://service.example.com")
                .sign();
    }
}
The quarkus-test-oidc-server extension includes a signing RSA private key file in a JSON Web Key (JWK) format and points to it with a smallrye.jwt.sign.key.location configuration property. It allows you to sign the token by using a no-argument sign() operation.
Testing your quarkus-oidc service application with OidcWiremockTestResource provides the best coverage because even the communication channel is tested against the WireMock HTTP stubs. If you need to run a test with WireMock stubs that are not yet supported by OidcWiremockTestResource, you can inject a WireMockServer instance into the test class, as shown in the following example:
OidcWiremockTestResource does not work with @QuarkusIntegrationTest against Docker containers because the WireMock server runs in the JVM that runs the test, which is inaccessible from the Docker container that runs the Quarkus application.
package io.quarkus.it.keycloak;

import static com.github.tomakehurst.wiremock.client.WireMock.matching;
import static org.hamcrest.Matchers.equalTo;

import org.junit.jupiter.api.Test;

import com.github.tomakehurst.wiremock.WireMockServer;
import com.github.tomakehurst.wiremock.client.WireMock;

import io.quarkus.test.junit.QuarkusTest;
import io.quarkus.test.oidc.server.OidcWireMock;
import io.restassured.RestAssured;

@QuarkusTest
public class CustomOidcWireMockStubTest {

    @OidcWireMock
    WireMockServer wireMockServer;

    @Test
    public void testInvalidBearerToken() {
        wireMockServer.stubFor(WireMock.post("/auth/realms/quarkus/protocol/openid-connect/token/introspect")
                .withRequestBody(matching(".*token=invalid_token.*"))
                .willReturn(WireMock.aResponse().withStatus(400)));

        RestAssured.given().auth().oauth2("invalid_token").when()
                .get("/api/users/me/bearer")
                .then()
                .statusCode(401)
                .header("WWW-Authenticate", equalTo("Bearer"));
    }
}
1.1.15. OidcTestClient
If you use SaaS OIDC providers, such as Auth0, and want to run tests against the test (development) domain or to run tests against a remote Keycloak test realm, if you already have quarkus.oidc.auth-server-url configured, you can use OidcTestClient.
For example, you have the following configuration:
%test.quarkus.oidc.auth-server-url=https://dev-123456.eu.auth0.com/
%test.quarkus.oidc.client-id=test-auth0-client
%test.quarkus.oidc.credentials.secret=secret
To start, add the same dependency, quarkus-test-oidc-server, as described in the WireMock section.
Next, write the test code as follows:
package org.acme;

import org.junit.jupiter.api.AfterAll;
import static io.restassured.RestAssured.given;
import static org.hamcrest.CoreMatchers.is;

import java.util.Map;

import org.junit.jupiter.api.Test;

import io.quarkus.test.junit.QuarkusTest;
import io.quarkus.test.oidc.client.OidcTestClient;

@QuarkusTest
public class GreetingResourceTest {

    static OidcTestClient oidcTestClient = new OidcTestClient();

    @AfterAll
    public static void close() {
        oidcTestClient.close();
    }

    @Test
    public void testHelloEndpoint() {
        given()
          .auth().oauth2(getAccessToken("alice", "alice"))
          .when().get("/hello")
          .then()
             .statusCode(200)
             .body(is("Hello, Alice"));
    }

    private String getAccessToken(String name, String secret) {
        return oidcTestClient.getAccessToken(name, secret,
            Map.of("audience", "https://dev-123456.eu.auth0.com/api/v2/",
	           "scope", "profile"));
    }
}
This test code acquires a token by using a password grant from the test Auth0 domain, which has registered an application with the client id test-auth0-client, and created the user alice with password alice. For a test like this to work, the test Auth0 application must have the password grant enabled. This example code also shows how to pass additional parameters. For Auth0, these are the audience and scope parameters.
1.1.15.1. Dev Services for Keycloak
The preferred approach for integration testing against Keycloak is Dev Services for Keycloak. Dev Services for Keycloak will start and initialize a test container. Then, it will create a quarkus realm and a quarkus-app client (secret secret) and add alice (admin and user roles) and bob (user role) users, where all of these properties can be customized.
First, add the following dependency, which provides a utility class io.quarkus.test.keycloak.client.KeycloakTestClient that you can use in tests for acquiring the access tokens:
Using Maven:
<dependency>
    <groupId>io.quarkus</groupId>
    <artifactId>quarkus-test-keycloak-server</artifactId>
    <scope>test</scope>
</dependency>
Using Gradle:
testImplementation("io.quarkus:quarkus-test-keycloak-server")
Next, prepare your application.properties configuration file. You can start with an empty application.properties file because Dev Services for Keycloak registers quarkus.oidc.auth-server-url and points it to the running test container, quarkus.oidc.client-id=quarkus-app, and quarkus.oidc.credentials.secret=secret.
However, if you have already configured the required quarkus-oidc properties, then you only need to associate quarkus.oidc.auth-server-url with the prod profile for `Dev Services for Keycloak`to start a container, as shown in the following example:
%prod.quarkus.oidc.auth-server-url=http://localhost:8180/realms/quarkus
If a custom realm file has to be imported into Keycloak before running the tests, configure Dev Services for Keycloak as follows:
%prod.quarkus.oidc.auth-server-url=http://localhost:8180/realms/quarkus
quarkus.keycloak.devservices.realm-path=quarkus-realm.json
Finally, write your test, which will be executed in JVM mode, as shown in the following examples:
Example of a test executed in JVM mode:
package org.acme.security.openid.connect;

import io.quarkus.test.junit.QuarkusTest;
import io.quarkus.test.keycloak.client.KeycloakTestClient;
import io.restassured.RestAssured;
import org.junit.jupiter.api.Test;

@QuarkusTest
public class BearerTokenAuthenticationTest {

    KeycloakTestClient keycloakClient = new KeycloakTestClient();

    @Test
    public void testAdminAccess() {
        RestAssured.given().auth().oauth2(getAccessToken("alice"))
                .when().get("/api/admin")
                .then()
                .statusCode(200);
        RestAssured.given().auth().oauth2(getAccessToken("bob"))
                .when().get("/api/admin")
                .then()
                .statusCode(403);
    }

    protected String getAccessToken(String userName) {
        return keycloakClient.getAccessToken(userName);
    }
}
Example of a test executed in native mode:
package org.acme.security.openid.connect;

import io.quarkus.test.junit.QuarkusIntegrationTest;

@QuarkusIntegrationTest
public class NativeBearerTokenAuthenticationIT extends BearerTokenAuthenticationTest {
}
For more information about initializing and configuring Dev Services for Keycloak, see the Dev Services for Keycloak guide.
1.1.15.2. Local public key
You can use a local inlined public key for testing your quarkus-oidc service applications, as shown in the following example:
quarkus.oidc.client-id=test
quarkus.oidc.public-key=MIIBIjANBgkqhkiG9w0BAQEFAAOCAQ8AMIIBCgKCAQEAlivFI8qB4D0y2jy0CfEqFyy46R0o7S8TKpsx5xbHKoU1VWg6QkQm+ntyIv1p4kE1sPEQO73+HY8+Bzs75XwRTYL1BmR1w8J5hmjVWjc6R2BTBGAYRPFRhor3kpM6ni2SPmNNhurEAHw7TaqszP5eUF/F9+KEBWkwVta+PZ37bwqSE4sCb1soZFrVz/UT/LF4tYpuVYt3YbqToZ3pZOZ9AX2o1GCG3xwOjkc4x0W7ezbQZdC9iftPxVHR8irOijJRRjcPDtA6vPKpzLl6CyYnsIYPd99ltwxTHjr3npfv/3Lw50bAkbT4HeLFxTx4flEoZLKO/g0bAoV2uqBhkA9xnQIDAQAB

smallrye.jwt.sign.key.location=/privateKey.pem
To generate JWT tokens, copy privateKey.pem from the integration-tests/oidc-tenancy in the main Quarkus repository and use a test code similar to the one in the preceding WireMock section. You can use your own test keys, if preferred.
This approach provides limited coverage compared to the WireMock approach. For example, the remote communication code is not covered.
1.1.15.3. TestSecurity annotation
You can use @TestSecurity and @OidcSecurity annotations to test the service application endpoint code, which depends on either one, or all three, of the following injections:
-
JsonWebToken -
UserInfo -
OidcConfigurationMetadata
First, add the following dependency:
Using Maven:
<dependency>
    <groupId>io.quarkus</groupId>
    <artifactId>quarkus-test-security-oidc</artifactId>
    <scope>test</scope>
</dependency>
Using Gradle:
testImplementation("io.quarkus:quarkus-test-security-oidc")
Write a test code as outlined in the following example:
import static org.hamcrest.Matchers.is;
import org.junit.jupiter.api.Test;
import io.quarkus.test.common.http.TestHTTPEndpoint;
import io.quarkus.test.junit.QuarkusTest;
import io.quarkus.test.security.TestSecurity;
import io.quarkus.test.security.oidc.Claim;
import io.quarkus.test.security.oidc.ConfigMetadata;
import io.quarkus.test.security.oidc.OidcSecurity;
import io.quarkus.test.security.oidc.OidcConfigurationMetadata;
import io.quarkus.test.security.oidc.UserInfo;
import io.restassured.RestAssured;

@QuarkusTest
@TestHTTPEndpoint(ProtectedResource.class)
public class TestSecurityAuthTest {

    @Test
    @TestSecurity(user = "userOidc", roles = "viewer")
    public void testOidc() {
        RestAssured.when().get("test-security-oidc").then()
                .body(is("userOidc:viewer"));
    }

    @Test
    @TestSecurity(user = "userOidc", roles = "viewer")
    @OidcSecurity(claims = {
            @Claim(key = "email", value = "user@gmail.com")
    }, userinfo = {
            @UserInfo(key = "sub", value = "subject")
    }, config = {
            @ConfigMetadata(key = "issuer", value = "issuer")
    })
    public void testOidcWithClaimsUserInfoAndMetadata() {
        RestAssured.when().get("test-security-oidc-claims-userinfo-metadata").then()
                .body(is("userOidc:viewer:user@gmail.com:subject:issuer"));
    }

}
The ProtectedResource class, which is used in this code example, might look like this:
import jakarta.inject.Inject;
import jakarta.ws.rs.GET;
import jakarta.ws.rs.Path;

import io.quarkus.oidc.OidcConfigurationMetadata;
import io.quarkus.oidc.UserInfo;
import io.quarkus.security.Authenticated;

import org.eclipse.microprofile.jwt.JsonWebToken;

@Path("/service")
@Authenticated
public class ProtectedResource {

    @Inject
    JsonWebToken accessToken;
    @Inject
    UserInfo userInfo;
    @Inject
    OidcConfigurationMetadata configMetadata;

    @GET
    @Path("test-security-oidc")
    public String testSecurityOidc() {
        return accessToken.getName() + ":" + accessToken.getGroups().iterator().next();
    }

    @GET
    @Path("test-security-oidc-claims-userinfo-metadata")
    public String testSecurityOidcWithClaimsUserInfoMetadata() {
        return accessToken.getName() + ":" + accessToken.getGroups().iterator().next()
                + ":" + accessToken.getClaim("email")
                + ":" + userInfo.getString("sub")
                + ":" + configMetadata.get("issuer");
    }
}
You must always use the @TestSecurity annotation. Its user property is returned as JsonWebToken.getName() and its roles property is returned as JsonWebToken.getGroups(). The @OidcSecurity annotation is optional and you can use it to set the additional token claims and the UserInfo and OidcConfigurationMetadata properties. Additionally, if the quarkus.oidc.token.issuer property is configured, it is used as an OidcConfigurationMetadata issuer property value.
If you work with opaque tokens, you can test them as shown in the following code example:
import static org.hamcrest.Matchers.is;
import org.junit.jupiter.api.Test;
import io.quarkus.test.common.http.TestHTTPEndpoint;
import io.quarkus.test.junit.QuarkusTest;
import io.quarkus.test.security.TestSecurity;
import io.quarkus.test.security.oidc.OidcSecurity;
import io.quarkus.test.security.oidc.TokenIntrospection;
import io.restassured.RestAssured;

@QuarkusTest
@TestHTTPEndpoint(ProtectedResource.class)
public class TestSecurityAuthTest {

    @Test
    @TestSecurity(user = "userOidc", roles = "viewer")
    @OidcSecurity(introspectionRequired = true,
        introspection = {
            @TokenIntrospection(key = "email", value = "user@gmail.com")
        }
    )
    public void testOidcWithClaimsUserInfoAndMetadata() {
        RestAssured.when().get("test-security-oidc-claims-userinfo-metadata").then()
                .body(is("userOidc:viewer:userOidc:viewer"));
    }

}
The ProtectedResource class, which is used in this code example, might look like this:
import jakarta.inject.Inject;
import jakarta.ws.rs.GET;
import jakarta.ws.rs.Path;

import io.quarkus.oidc.TokenIntrospection;
import io.quarkus.security.Authenticated;
import io.quarkus.security.identity.SecurityIdentity;

@Path("/service")
@Authenticated
public class ProtectedResource {

    @Inject
    SecurityIdentity securityIdentity;
    @Inject
    TokenIntrospection introspection;

    @GET
    @Path("test-security-oidc-opaque-token")
    public String testSecurityOidcOpaqueToken() {
        return securityIdentity.getPrincipal().getName() + ":" + securityIdentity.getRoles().iterator().next()
            + ":" + introspection.getString("username")
            + ":" + introspection.getString("scope")
            + ":" + introspection.getString("email");
    }
}
The @TestSecurity, user, and roles attributes are available as TokenIntrospection, username, and scope properties. Use io.quarkus.test.security.oidc.TokenIntrospection to add the additional introspection response properties, such as an email, and so on.
@TestSecurity and @OidcSecurity can be combined in a meta-annotation, as outlined in the following example:
    @Retention(RetentionPolicy.RUNTIME)
    @Target({ ElementType.METHOD })
    @TestSecurity(user = "userOidc", roles = "viewer")
    @OidcSecurity(introspectionRequired = true,
        introspection = {
            @TokenIntrospection(key = "email", value = "user@gmail.com")
        }
    )
    public @interface TestSecurityMetaAnnotation {

    }
This is particularly useful if multiple test methods must use the same set of security settings.
1.1.16. Check errors in the logs
To see more details about token verification errors, enable io.quarkus.oidc.runtime.OidcProvider and TRACE level logging:
quarkus.log.category."io.quarkus.oidc.runtime.OidcProvider".level=TRACE
quarkus.log.category."io.quarkus.oidc.runtime.OidcProvider".min-level=TRACE
To see more details about OidcProvider client initialization errors, enable io.quarkus.oidc.runtime.OidcRecorder and TRACE level logging as follows:
quarkus.log.category."io.quarkus.oidc.runtime.OidcRecorder".level=TRACE
quarkus.log.category."io.quarkus.oidc.runtime.OidcRecorder".min-level=TRACE
1.1.17. External and internal access to OIDC providers
The externally-accessible token of the OIDC provider and other endpoints might have different HTTP(S) URLs compared to the URLs that are auto-discovered or configured relative to the quarkus.oidc.auth-server-url internal URL. For example, suppose your SPA acquires a token from an external token endpoint address and sends it to Quarkus as a bearer token. In that case, the endpoint might report an issuer verification failure.
In such cases, if you work with Keycloak, start it with the KEYCLOAK_FRONTEND_URL system property set to the externally accessible base URL. If you work with other OIDC providers, refer to your provider’s documentation.
1.1.18. Using the client-id property
The quarkus.oidc.client-id property identifies the OIDC client that requested the current bearer token. The OIDC client can be an SPA application running in a browser or a Quarkus web-app confidential client application propagating the access token to the Quarkus service application.
This property is required if the service application is expected to introspect the tokens remotely, which is always the case for the opaque tokens. This property is optional for local JSON Web Token (JWT) verification only.
Setting the quarkus.oidc.client-id property is encouraged even if the endpoint does not require access to the remote introspection endpoint. This is because when client-id is set, it can be used to verify the token audience. It will also be included in logs when the token verification fails, enabling better traceability of tokens issued to specific clients and analysis over a longer period.
For example, if your OIDC provider sets a token audience, consider the following configuration pattern:
# Set client-id
quarkus.oidc.client-id=quarkus-app
# Token audience claim must contain 'quarkus-app'
quarkus.oidc.token.audience=${quarkus.oidc.client-id}
If you set quarkus.oidc.client-id, but your endpoint does not require remote access to one of the OIDC provider endpoints (introspection, token acquisition, and so on), do not set a client secret with quarkus.oidc.credentials or similar properties because it will not be used.
Quarkus web-app applications always require the quarkus.oidc.client-id property.
1.2. Authentication after an HTTP request has completed
Sometimes, SecurityIdentity for a given token must be created when there is no active HTTP request context. The quarkus-oidc extension provides io.quarkus.oidc.TenantIdentityProvider to convert a token to a SecurityIdentity instance. For example, one situation when you must verify the token after the HTTP request has completed is when you are processing messages with Vert.x event bus. The example below uses the 'product-order' message within different CDI request contexts. Therefore, an injected SecurityIdentity would not correctly represent the verified identity and be anonymous.
package org.acme.quickstart.oidc;

import static jakarta.ws.rs.core.HttpHeaders.AUTHORIZATION;

import jakarta.inject.Inject;
import jakarta.ws.rs.HeaderParam;
import jakarta.ws.rs.POST;
import jakarta.ws.rs.Path;
import io.vertx.core.eventbus.EventBus;

@Path("order")
public class OrderResource {

    @Inject
    EventBus eventBus;

    @POST
    public void order(String product, @HeaderParam(AUTHORIZATION) String bearer) {
        String rawToken = bearer.substring("Bearer ".length());
        eventBus.publish("product-order", new Product(product, rawToken));
    }

    public static class Product {
         public String product;
         public String customerAccessToken;
         public Product() {
         }
         public Product(String product, String customerAccessToken) {
             this.product = product;
             this.customerAccessToken = customerAccessToken;
         }
    }
}- 1
- At this point, the token is not verified when proactive authentication is disabled.
package org.acme.quickstart.oidc;

import jakarta.enterprise.context.ApplicationScoped;
import jakarta.inject.Inject;

import io.quarkus.oidc.AccessTokenCredential;
import io.quarkus.oidc.TenantFeature;
import io.quarkus.oidc.TenantIdentityProvider;
import io.quarkus.security.identity.SecurityIdentity;
import io.quarkus.vertx.ConsumeEvent;
import io.smallrye.common.annotation.Blocking;

@ApplicationScoped
public class OrderService {

    @TenantFeature("tenantId")
    @Inject
    TenantIdentityProvider identityProvider;

    @Inject
    TenantIdentityProvider defaultIdentityProvider;
    @Blocking
    @ConsumeEvent("product-order")
    void processOrder(Product product) {
        AccessTokenCredential tokenCredential = new AccessTokenCredential(product.customerAccessToken);
        SecurityIdentity securityIdentity = identityProvider.authenticate(tokenCredential).await().indefinitely();
        ...
    }

}
When the provider is used during an HTTP request, the tenant configuration can be resolved as described in the Using OpenID Connect Multi-Tenancy guide. However, when there is no active HTTP request, you must select the tenant explicitly with the io.quarkus.oidc.TenantFeature qualifier.
Dynamic tenant configuration resolution is currently not supported. Authentication that requires a dynamic tenant will fail.
1.3. OIDC request filters
You can filter OIDC requests made by Quarkus to the OIDC provider by registering one or more OidcRequestFilter implementations, which can update or add new request headers, and log requests. For more information, see OIDC request filters.
1.4. References
- OIDC configuration properties
- Protect a service application by using OIDC Bearer token authentication
- Keycloak documentation
- OpenID Connect
- JSON Web Token
- OpenID Connect and OAuth2 client and filters reference guide
- Dev Services for Keycloak
- Sign and encrypt JWT tokens with SmallRye JWT Build
- Choosing between OpenID Connect, SmallRye JWT, and OAuth2 authentication mechanisms
- Combining authentication mechanisms
- Quarkus Security overview
- Using OpenID Connect Multi-Tenancy
Chapter 2. Protect a service application by using OpenID Connect (OIDC) Bearer token authentication
Use the Quarkus OpenID Connect (OIDC) extension to secure a Jakarta REST application with Bearer token authentication. The bearer tokens are issued by OIDC and OAuth 2.0 compliant authorization servers, such as Keycloak.
For more information about OIDC Bearer token authentication, see the Quarkus OpenID Connect (OIDC) Bearer token authentication guide.
If you want to protect web applications by using OIDC Authorization Code Flow authentication, see the OpenID Connect authorization code flow mechanism for protecting web applications guide.
2.1. Prerequisites
To complete this guide, you need:
- Roughly 15 minutes
- An IDE
-
JDK 17+ installed with
JAVA_HOMEconfigured appropriately - Apache Maven 3.9.6
- A working container runtime (Docker or Podman)
- Optionally the Quarkus CLI if you want to use it
- Optionally Mandrel or GraalVM installed and configured appropriately if you want to build a native executable (or Docker if you use a native container build)
- The jq command-line processor tool
2.2. Architecture
This example shows how you can build a simple microservice that offers two endpoints:
-
/api/users/me -
/api/admin
These endpoints are protected and can only be accessed if a client sends a bearer token along with the request, which must be valid (for example, signature, expiration, and audience) and trusted by the microservice.
A Keycloak server issues the bearer token and represents the subject for which the token was issued. Because it is an OAuth 2.0 authorization server, the token also references the client acting on the user’s behalf.
Any user with a valid token can access the /api/users/me endpoint. As a response, it returns a JSON document with user details obtained from the information in the token.
The /api/admin endpoint is protected with RBAC (Role-Based Access Control), which only users with the admin role can access. At this endpoint, the @RolesAllowed annotation is used to enforce the access constraint declaratively.
2.3. Solution
Follow the instructions in the next sections and create the application step by step. You can also go straight to the completed example.
You can clone the Git repository by running the command git clone https://github.com/quarkusio/quarkus-quickstarts.git -b 3.8, or you can download an archive.
The solution is located in the security-openid-connect-quickstart directory.
2.4. Create the Maven project
You can either create a new Maven project with the oidc extension or you can add the extension to an existing Maven project. Complete one of the following commands:
To create a new Maven project, use the following command:
Using the Quarkus CLI:
quarkus create app org.acme:security-openid-connect-quickstart \
    --extension='oidc,resteasy-reactive-jackson' \
    --no-code
cd security-openid-connect-quickstart
To create a Gradle project, add the
--gradleor--gradle-kotlin-dsloption.For more information about how to install and use the Quarkus CLI, see the Quarkus CLI guide.
Using Maven:
mvn io.quarkus.platform:quarkus-maven-plugin:3.8.5:create \
    -DprojectGroupId=org.acme \
    -DprojectArtifactId=security-openid-connect-quickstart \
    -Dextensions='oidc,resteasy-reactive-jackson' \
    -DnoCode
cd security-openid-connect-quickstart
To create a Gradle project, add the
-DbuildTool=gradleor-DbuildTool=gradle-kotlin-dsloption.
For Windows users:
-
If using cmd, (don’t use backward slash
\and put everything on the same line) -
If using Powershell, wrap
-Dparameters in double quotes e.g."-DprojectArtifactId=security-openid-connect-quickstart"
If you already have your Quarkus project configured, you can add the oidc extension to your project by running the following command in your project base directory:
Using the Quarkus CLI:
quarkus extension add oidcUsing Maven:
./mvnw quarkus:add-extension -Dextensions='oidc'Using Gradle:
./gradlew addExtension --extensions='oidc'
This will add the following to your build file:
Using Maven:
<dependency>
   <groupId>io.quarkus</groupId>
   <artifactId>quarkus-oidc</artifactId>
</dependency>
Using Gradle:
implementation("io.quarkus:quarkus-oidc")
2.5. Write the application
Implement the
/api/users/meendpoint as shown in the following example, which is a regular Jakarta REST resource:package org.acme.security.openid.connect; import jakarta.annotation.security.RolesAllowed; import jakarta.inject.Inject; import jakarta.ws.rs.GET; import jakarta.ws.rs.Path; import org.jboss.resteasy.reactive.NoCache; import io.quarkus.security.identity.SecurityIdentity; @Path("/api/users") public class UsersResource { @Inject SecurityIdentity securityIdentity; @GET @Path("/me") @RolesAllowed("user") @NoCache public User me() { return new User(securityIdentity); } public static class User { private final String userName; User(SecurityIdentity securityIdentity) { this.userName = securityIdentity.getPrincipal().getName(); } public String getUserName() { return userName; } } }Implement the
/api/adminendpoint as shown in the following example:package org.acme.security.openid.connect; import jakarta.annotation.security.RolesAllowed; import jakarta.ws.rs.GET; import jakarta.ws.rs.Path; import jakarta.ws.rs.Produces; import jakarta.ws.rs.core.MediaType; @Path("/api/admin") public class AdminResource { @GET @RolesAllowed("admin") @Produces(MediaType.TEXT_PLAIN) public String admin() { return "granted"; } }NoteThe main difference in this example is that the
@RolesAllowedannotation is used to verify that only users granted theadminrole can access the endpoint.
Injection of the SecurityIdentity is supported in both @RequestScoped and @ApplicationScoped contexts.
2.6. Configure the application
Configure the Quarkus OpenID Connect (OIDC) extension by setting the following configuration properties in the
src/main/resources/application.propertiesfile.%prod.quarkus.oidc.auth-server-url=http://localhost:8180/realms/quarkus quarkus.oidc.client-id=backend-service quarkus.oidc.credentials.secret=secret # Tell Dev Services for Keycloak to import the realm file # This property is not effective when running the application in JVM or native modes quarkus.keycloak.devservices.realm-path=quarkus-realm.json
Where:
-
%prod.quarkus.oidc.auth-server-urlsets the base URL of the OpenID Connect (OIDC) server. The%prod.profile prefix ensures thatDev Services for Keycloaklaunches a container when you run the application in development (dev) mode. For more information, see the Run the application in dev mode section. -
quarkus.oidc.client-idsets a client id that identifies the application. -
quarkus.oidc.credentials.secretsets the client secret, which is used by theclient_secret_basicauthentication method.
For more information, see the Quarkus OpenID Connect (OIDC) configuration properties guide.
2.7. Start and configure the Keycloak server
Put the realm configuration file on the classpath (
target/classesdirectory) so that it gets imported automatically when running in dev mode. You do not need to do this if you have already built a complete solution, in which case, this realm file is added to the classpath during the build.NoteDo not start the Keycloak server when you run the application in dev mode;
Dev Services for Keycloakwill start a container. For more information, see the Run the application in dev mode section.To start a Keycloak server, you can use Docker to run the following command:
docker run --name keycloak -e KEYCLOAK_ADMIN=admin -e KEYCLOAK_ADMIN_PASSWORD=admin -p 8180:8080 quay.io/keycloak/keycloak:{keycloak.version} start-dev-
Where the
keycloak.versionis set to version24.0.0or later.
-
Where the
- You can access your Keycloak server at localhost:8180.
To access the Keycloak Administration console, log in as the
adminuser by using the following login credentials:-
Username:
admin -
Password:
admin
-
Username:
- Import the realm configuration file from the upstream community repository to create a new realm.
For more information, see the Keycloak documentation about creating and configuring a new realm.
2.8. Run the application in dev mode
To run the application in dev mode, run the following commands:
Using the Quarkus CLI:
quarkus devUsing Maven:
./mvnw quarkus:devUsing Gradle:
./gradlew --console=plain quarkusDev
-
Dev Services for Keycloak will start a Keycloak container and import a
quarkus-realm.json.
-
Open a Dev UI, which you can find at /q/dev-ui. Then, in an
OpenID Connectcard, click theKeycloak providerlink . When prompted to log in to a
Single Page Applicationprovided byOpenID Connect Dev UI, do the following steps:Log in as
alice(password:alice), who has auserrole.-
Accessing
/api/adminreturns a403status code. -
Accessing
/api/users/mereturns a200status code.
-
Accessing
Log out and log in again as
admin(password:admin), who has bothadminanduserroles.-
Accessing
/api/adminreturns a200status code. -
Accessing
/api/users/mereturns a200status code.
-
Accessing
2.9. Run the Application in JVM mode
When you are done with dev mode, you can run the application as a standard Java application.
Compile the application:
Using the Quarkus CLI:
quarkus buildUsing Maven:
./mvnw installUsing Gradle:
./gradlew build
Run the application:
java -jar target/quarkus-app/quarkus-run.jar
2.10. Run the application in native mode
You can compile this same demo as-is into native mode without any modifications. This implies that you no longer need to install a JVM on your production environment. The runtime technology is included in the produced binary and optimized to run with minimal resources required.
Compilation takes a bit longer, so this step is disabled by default.
Build your application again by enabling the
nativeprofile:Using the Quarkus CLI:
quarkus build --nativeUsing Maven:
./mvnw install -DnativeUsing Gradle:
./gradlew build -Dquarkus.package.type=native
After waiting a little while, you run the following binary directly:
./target/security-openid-connect-quickstart-1.0.0-SNAPSHOT-runner
2.11. Test the application
For information about testing your application in dev mode, see the preceding Run the application in dev mode section.
You can test the application launched in JVM or native modes with curl.
- Because the application uses Bearer token authentication, you must first obtain an access token from the Keycloak server to access the application resources:
export access_token=$(\
    curl --insecure -X POST http://localhost:8180/realms/quarkus/protocol/openid-connect/token \
    --user backend-service:secret \
    -H 'content-type: application/x-www-form-urlencoded' \
    -d 'username=alice&password=alice&grant_type=password' | jq --raw-output '.access_token' \
 )
The preceding example obtains an access token for the user alice.
-
Any user can access the
http://localhost:8080/api/users/meendpoint, which returns a JSON payload with details about the user.
curl -v -X GET \
  http://localhost:8080/api/users/me \
-H "Authorization: Bearer "$access_token-
Only users with the
adminrole can access thehttp://localhost:8080/api/adminendpoint. If you try to access this endpoint with the previously-issued access token, you get a403response from the server.
curl -v -X GET \
   http://localhost:8080/api/admin \
-H "Authorization: Bearer "$access_token-
To access the admin endpoint, obtain a token for the
adminuser:
export access_token=$(\
    curl --insecure -X POST http://localhost:8180/realms/quarkus/protocol/openid-connect/token \
    --user backend-service:secret \
    -H 'content-type: application/x-www-form-urlencoded' \
    -d 'username=admin&password=admin&grant_type=password' | jq --raw-output '.access_token' \
 )
For information about writing integration tests that depend on Dev Services for Keycloak, see the Dev Services for Keycloak section of the "OpenID Connect (OIDC) Bearer token authentication" guide.
2.12. References
- OIDC configuration properties
- OpenID Connect (OIDC) Bearer token authentication
- Keycloak Documentation
- OpenID Connect
- JSON Web Token
- OpenID Connect and OAuth2 Client and Filters Reference Guide
- Dev Services for Keycloak
- Sign and encrypt JWT tokens with SmallRye JWT Build
- Combining authentication mechanisms
- Quarkus Security overview
Chapter 3. OpenID Connect authorization code flow mechanism for protecting web applications
To protect your web applications, you can use the industry-standard OpenID Connect (OIDC) Authorization Code Flow mechanism provided by the Quarkus OIDC extension.
3.1. Overview of the OIDC authorization code flow mechanism
The Quarkus OpenID Connect (OIDC) extension can protect application HTTP endpoints by using the OIDC Authorization Code Flow mechanism supported by OIDC-compliant authorization servers, such as Keycloak.
The Authorization Code Flow mechanism authenticates users of your web application by redirecting them to an OIDC provider, such as Keycloak, to log in. After authentication, the OIDC provider redirects the user back to the application with an authorization code that confirms that authentication was successful. Then, the application exchanges this code with the OIDC provider for an ID token (which represents the authenticated user), an access token, and a refresh token to authorize the user’s access to the application.
The following diagram outlines the Authorization Code Flow mechanism in Quarkus.
Figure 3.1. Authorization code flow mechanism in Quarkus

-
The Quarkus user requests access to a Quarkus
web-appapplication. - The Quarkus web-app redirects the user to the authorization endpoint, that is, the OIDC provider for authentication.
- The OIDC provider redirects the user to a login and authentication prompt.
- At the prompt, the user enters their user credentials.
- The OIDC provider authenticates the user credentials entered and, if successful, issues an authorization code and redirects the user back to the Quarkus web-app with the code included as a query parameter.
- The Quarkus web-app exchanges this authorization code with the OIDC provider for ID, access, and refresh tokens.
The authorization code flow is completed and the Quarkus web-app uses the tokens issued to access information about the user and grants the relevant role-based authorization to that user. The following tokens are issued:
-
ID token: The Quarkus
web-appapplication uses the user information in the ID token to enable the authenticated user to log in securely and to provide role-based access to the web application. - Access token: The Quarkus web-app might use the access token to access the UserInfo API to get additional information about the authenticated user or to propagate it to another endpoint.
- Refresh token: (Optional) If the ID and access tokens expire, the Quarkus web-app can use the refresh token to get new ID and access tokens.
See also the OIDC configuration properties reference guide.
To learn about how you can protect web applications by using the OIDC Authorization Code Flow mechanism, see Protect a web application by using OIDC authorization code flow.
If you want to protect service applications by using OIDC Bearer token authentication, see OIDC Bearer token authentication.
For information about how to support multiple tenants, see Using OpenID Connect Multi-Tenancy.
3.2. Using the authorization code flow mechanism
3.2.1. Configuring access to the OIDC provider endpoint
The OIDC web-app application requires URLs of the OIDC provider’s authorization, token, JsonWebKey (JWK) set, and possibly the UserInfo, introspection and end-session (RP-initiated logout) endpoints.
By convention, they are discovered by adding a /.well-known/openid-configuration path to the configured quarkus.oidc.auth-server-url.
Alternatively, if the discovery endpoint is not available, or you prefer to reduce the discovery endpoint round-trip, you can disable endpoint discovery and configure relative path values. For example:
quarkus.oidc.auth-server-url=http://localhost:8180/realms/quarkus
quarkus.oidc.discovery-enabled=false
# Authorization endpoint: http://localhost:8180/realms/quarkus/protocol/openid-connect/auth
quarkus.oidc.authorization-path=/protocol/openid-connect/auth
# Token endpoint: http://localhost:8180/realms/quarkus/protocol/openid-connect/token
quarkus.oidc.token-path=/protocol/openid-connect/token
# JWK set endpoint: http://localhost:8180/realms/quarkus/protocol/openid-connect/certs
quarkus.oidc.jwks-path=/protocol/openid-connect/certs
# UserInfo endpoint: http://localhost:8180/realms/quarkus/protocol/openid-connect/userinfo
quarkus.oidc.user-info-path=/protocol/openid-connect/userinfo
# Token Introspection endpoint: http://localhost:8180/realms/quarkus/protocol/openid-connect/token/introspect
quarkus.oidc.introspection-path=/protocol/openid-connect/token/introspect
# End-session endpoint: http://localhost:8180/realms/quarkus/protocol/openid-connect/logout
quarkus.oidc.end-session-path=/protocol/openid-connect/logout
Some OIDC providers support metadata discovery but do not return all the endpoint URL values required for the authorization code flow to complete or to support application functions, for example, user logout. To work around this limitation, you can configure the missing endpoint URL values locally, as outlined in the following example:
# Metadata is auto-discovered but it does not return an end-session endpoint URL

quarkus.oidc.auth-server-url=http://localhost:8180/oidcprovider/account

# Configure the end-session URL locally.
# It can be an absolute or relative (to 'quarkus.oidc.auth-server-url') address
quarkus.oidc.end-session-path=logout
You can use this same configuration to override a discovered endpoint URL if that URL does not work for the local Quarkus endpoint and a more specific value is required. For example, a provider that supports both global and application-specific end-session endpoints returns a global end-session URL such as http://localhost:8180/oidcprovider/account/global-logout. This URL will log the user out of all the applications into which the user is currently logged in. However, if the requirement is for the current application to log the user out of a specific application only, you can override the global end-session URL, by setting the quarkus.oidc.end-session-path=logout parameter.
3.2.1.1. OIDC provider client authentication
OIDC providers typically require applications to be identified and authenticated when they interact with the OIDC endpoints. Quarkus OIDC, specifically the quarkus.oidc.runtime.OidcProviderClient class, authenticates to the OIDC provider when the authorization code must be exchanged for the ID, access, and refresh tokens, or when the ID and access tokens must be refreshed or introspected.
Typically, client id and client secrets are defined for a given application when it enlists to the OIDC provider. All OIDC client authentication options are supported. For example:
Example of client_secret_basic:
quarkus.oidc.auth-server-url=http://localhost:8180/realms/quarkus/
quarkus.oidc.client-id=quarkus-app
quarkus.oidc.credentials.secret=mysecret
Or:
quarkus.oidc.auth-server-url=http://localhost:8180/realms/quarkus/
quarkus.oidc.client-id=quarkus-app
quarkus.oidc.credentials.client-secret.value=mysecret
The following example shows the secret retrieved from a credentials provider:
quarkus.oidc.auth-server-url=http://localhost:8180/realms/quarkus/
quarkus.oidc.client-id=quarkus-app

# This is a key which will be used to retrieve a secret from the map of credentials returned from CredentialsProvider
quarkus.oidc.credentials.client-secret.provider.key=mysecret-key
# Set it only if more than one CredentialsProvider can be registered
quarkus.oidc.credentials.client-secret.provider.name=oidc-credentials-provider
Example of client_secret_post
quarkus.oidc.auth-server-url=http://localhost:8180/realms/quarkus/
quarkus.oidc.client-id=quarkus-app
quarkus.oidc.credentials.client-secret.value=mysecret
quarkus.oidc.credentials.client-secret.method=post
Example of client_secret_jwt, where the signature algorithm is HS256:
quarkus.oidc.auth-server-url=http://localhost:8180/realms/quarkus/
quarkus.oidc.client-id=quarkus-app
quarkus.oidc.credentials.jwt.secret=AyM1SysPpbyDfgZld3umj1qzKObwVMkoqQ-EstJQLr_T-1qS0gZH75aKtMN3Yj0iPS4hcgUuTwjAzZr1Z9CAow
Example of client_secret_jwt, where the secret is retrieved from a credentials provider:
quarkus.oidc.auth-server-url=http://localhost:8180/realms/quarkus/
quarkus.oidc.client-id=quarkus-app

# This is a key which will be used to retrieve a secret from the map of credentials returned from CredentialsProvider
quarkus.oidc.credentials.jwt.secret-provider.key=mysecret-key
# Set it only if more than one CredentialsProvider can be registered
quarkus.oidc.credentials.jwt.secret-provider.name=oidc-credentials-provider
Example of private_key_jwt with the PEM key file, and where the signature algorithm is RS256:
quarkus.oidc.auth-server-url=http://localhost:8180/realms/quarkus/
quarkus.oidc.client-id=quarkus-app
quarkus.oidc.credentials.jwt.key-file=privateKey.pem
Example of private_key_jwt with the keystore file, where the signature algorithm is RS256:
quarkus.oidc.auth-server-url=http://localhost:8180/realms/quarkus/
quarkus.oidc.client-id=quarkus-app
quarkus.oidc.credentials.jwt.key-store-file=keystore.jks
quarkus.oidc.credentials.jwt.key-store-password=mypassword
quarkus.oidc.credentials.jwt.key-password=mykeypassword

# Private key alias inside the keystore
quarkus.oidc.credentials.jwt.key-id=mykeyAlias
Using client_secret_jwt or private_key_jwt authentication methods ensures that a client secret does not get sent to the OIDC provider, therefore avoiding the risk of a secret being intercepted by a 'man-in-the-middle' attack.
3.2.1.1.1. Additional JWT authentication options
If client_secret_jwt, private_key_jwt, or an Apple post_jwt authentication methods are used, then you can customize the JWT signature algorithm, key identifier, audience, subject and issuer. For example:
# private_key_jwt client authentication

quarkus.oidc.auth-server-url=http://localhost:8180/realms/quarkus/
quarkus.oidc.client-id=quarkus-app
quarkus.oidc.credentials.jwt.key-file=privateKey.pem

# This is a token key identifier 'kid' header - set it if your OIDC provider requires it:
# Note if the key is represented in a JSON Web Key (JWK) format with a `kid` property, then
# using 'quarkus.oidc.credentials.jwt.token-key-id' is not necessary.
quarkus.oidc.credentials.jwt.token-key-id=mykey

# Use RS512 signature algorithm instead of the default RS256
quarkus.oidc.credentials.jwt.signature-algorithm=RS512

# The token endpoint URL is the default audience value, use the base address URL instead:
quarkus.oidc.credentials.jwt.audience=${quarkus.oidc-client.auth-server-url}

# custom subject instead of the client id:
quarkus.oidc.credentials.jwt.subject=custom-subject

# custom issuer instead of the client id:
quarkus.oidc.credentials.jwt.issuer=custom-issuer
3.2.1.1.2. Apple POST JWT
The Apple OIDC provider uses a client_secret_post method whereby a secret is a JWT produced with a private_key_jwt authentication method, but with the Apple account-specific issuer and subject claims.
In Quarkus Security, quarkus-oidc supports a non-standard client_secret_post_jwt authentication method, which you can configure as follows:
# Apple provider configuration sets a 'client_secret_post_jwt' authentication method
quarkus.oidc.provider=apple

quarkus.oidc.client-id=${apple.client-id}
quarkus.oidc.credentials.jwt.key-file=ecPrivateKey.pem
quarkus.oidc.credentials.jwt.token-key-id=${apple.key-id}
# Apple provider configuration sets ES256 signature algorithm

quarkus.oidc.credentials.jwt.subject=${apple.subject}
quarkus.oidc.credentials.jwt.issuer=${apple.issuer}
3.2.1.1.3. mutual TLS (mTLS)
Some OIDC providers might require that a client is authenticated as part of the mutual TLS authentication process.
The following example shows how you can configure quarkus-oidc to support mTLS:
quarkus.oidc.tls.verification=certificate-validation

# Keystore configuration
quarkus.oidc.tls.key-store-file=client-keystore.jks
quarkus.oidc.tls.key-store-password=${key-store-password}

# Add more keystore properties if needed:
#quarkus.oidc.tls.key-store-alias=keyAlias
#quarkus.oidc.tls.key-store-alias-password=keyAliasPassword

# Truststore configuration
quarkus.oidc.tls.trust-store-file=client-truststore.jks
quarkus.oidc.tls.trust-store-password=${trust-store-password}
# Add more truststore properties if needed:
#quarkus.oidc.tls.trust-store-alias=certAlias
3.2.1.1.4. POST query
Some providers, such as the Strava OAuth2 provider, require client credentials be posted as HTTP POST query parameters:
quarkus.oidc.provider=strava
quarkus.oidc.client-id=quarkus-app
quarkus.oidc.credentials.client-secret.value=mysecret
quarkus.oidc.credentials.client-secret.method=query
3.2.1.2. Introspection endpoint authentication
Some OIDC providers require authentication to its introspection endpoint by using Basic authentication and with credentials that are different from the client_id and client_secret. If you have previously configured security authentication to support either the client_secret_basic or client_secret_post client authentication methods as described in the OIDC provider client authentication section, you might need to apply the additional configuration as follows.
If the tokens have to be introspected and the introspection endpoint-specific authentication mechanism is required, you can configure quarkus-oidc as follows:
quarkus.oidc.introspection-credentials.name=introspection-user-name
quarkus.oidc.introspection-credentials.secret=introspection-user-secret
3.2.1.3. OIDC request filters
You can filter OIDC requests made by Quarkus to the OIDC provider by registering one or more OidcRequestFilter implementations, which can update or add new request headers and can also log requests.
For example:
package io.quarkus.it.keycloak;

import jakarta.enterprise.context.ApplicationScoped;

import io.quarkus.arc.Unremovable;
import io.quarkus.oidc.common.OidcRequestContextProperties;
import io.quarkus.oidc.common.OidcRequestFilter;
import io.vertx.mutiny.core.buffer.Buffer;
import io.vertx.mutiny.ext.web.client.HttpRequest;

@ApplicationScoped
@Unremovable
public class OidcTokenRequestCustomizer implements OidcRequestFilter {
    @Override
    public void filter(HttpRequest<Buffer> request, Buffer buffer, OidcRequestContextProperties contextProps) {
        OidcConfigurationMetadata metadata = contextProps.get(OidcConfigurationMetadata.class.getName());
        // Metadata URI is absolute, request URI value is relative
        if (metadata.getTokenUri().endsWith(request.uri())) {
            request.putHeader("TokenGrantDigest", calculateDigest(buffer.toString()));
        }
    }
    private String calculateDigest(String bodyString) {
        // Apply the required digest algorithm to the body string
    }
}
Alternatively, you can use OidcRequestFilter.Endpoint enum to apply this filter to the token endpoint requests only:
import jakarta.enterprise.context.ApplicationScoped;

import io.quarkus.arc.Unremovable;
import io.quarkus.oidc.common.OidcEndpoint;
import io.quarkus.oidc.common.OidcEndpoint.Type;
import io.quarkus.oidc.common.OidcRequestContextProperties;
import io.quarkus.oidc.common.OidcRequestFilter;
import io.vertx.mutiny.core.buffer.Buffer;
import io.vertx.mutiny.ext.web.client.HttpRequest;

@ApplicationScoped
@Unremovable
@OidcEndpoint(value = Type.DISCOVERY)
public class OidcDiscoveryRequestCustomizer implements OidcRequestFilter {

    @Override
    public void filter(HttpRequest<Buffer> request, Buffer buffer, OidcRequestContextProperties contextProps) {
        request.putHeader("Discovery", "OK");
    }
}- 1
- Restrict this filter to requests targeting the OIDC discovery endpoint only.
3.2.1.4. Redirecting to and from the OIDC provider
When a user is redirected to the OIDC provider to authenticate, the redirect URL includes a redirect_uri query parameter, which indicates to the provider where the user has to be redirected to when the authentication is complete. In our case, this is the Quarkus application.
Quarkus sets this parameter to the current application request URL by default. For example, if a user is trying to access a Quarkus service endpoint at http://localhost:8080/service/1, then the redirect_uri parameter is set to http://localhost:8080/service/1. Similarly, if the request URL is http://localhost:8080/service/2, then the redirect_uri parameter is set to http://localhost:8080/service/2.
Some OIDC providers require the redirect_uri to have the same value for a given application, for example, http://localhost:8080/service/callback, for all the redirect URLs. In such cases, a quarkus.oidc.authentication.redirect-path property has to be set. For example, quarkus.oidc.authentication.redirect-path=/service/callback, and Quarkus will set the redirect_uri parameter to an absolute URL such as http://localhost:8080/service/callback, which will be the same regardless of the current request URL.
If quarkus.oidc.authentication.redirect-path is set, but you need the original request URL to be restored after the user is redirected back to a unique callback URL, for example, http://localhost:8080/service/callback, set quarkus.oidc.authentication.restore-path-after-redirect property to true. This will restore the request URL such as http://localhost:8080/service/1.
3.2.1.5. Customizing authentication requests
By default, only the response_type (set to code), scope (set to openid), client_id, redirect_uri, and state properties are passed as HTTP query parameters to the OIDC provider’s authorization endpoint when the user is redirected to it to authenticate.
You can add more properties to it with quarkus.oidc.authentication.extra-params. For example, some OIDC providers might choose to return the authorization code as part of the redirect URI’s fragment, which would break the authentication process. The following example shows how you can work around this issue:
quarkus.oidc.authentication.extra-params.response_mode=query3.2.1.6. Customizing the authentication error response
When the user is redirected to the OIDC authorization endpoint to authenticate and, if necessary, authorize the Quarkus application, this redirect request might fail, for example, when an invalid scope is included in the redirect URI. In such cases, the provider redirects the user back to Quarkus with error and error_description parameters instead of the expected code parameter.
For example, this can happen when an invalid scope or other invalid parameters are included in the redirect to the provider.
In such cases, an HTTP 401 error is returned by default. However, you can request that a custom public error endpoint be called to return a more user-friendly HTML error page. To do this, set the quarkus.oidc.authentication.error-path property, as shown in the following example:
quarkus.oidc.authentication.error-path=/error
Ensure that the property starts with a forward slash (/) character and the path is relative to the base URI of the current endpoint. For example, if it is set to '/error' and the current request URI is https://localhost:8080/callback?error=invalid_scope, then a final redirect is made to https://localhost:8080/error?error=invalid_scope.
To prevent the user from being redirected to this page to be re-authenticated, ensure that this error endpoint is a public resource.
3.2.2. Accessing authorization data
You can access information about authorization in different ways.
3.2.2.1. Accessing ID and access tokens
The OIDC code authentication mechanism acquires three tokens during the authorization code flow: ID token, access token, and refresh token.
The ID token is always a JWT token and represents a user authentication with the JWT claims. You can use this to get the issuing OIDC endpoint, the username, and other information called claims. You can access ID token claims by injecting JsonWebToken with an IdToken qualifier:
import jakarta.inject.Inject;
import org.eclipse.microprofile.jwt.JsonWebToken;
import io.quarkus.oidc.IdToken;
import io.quarkus.security.Authenticated;

@Path("/web-app")
@Authenticated
public class ProtectedResource {

    @Inject
    @IdToken
    JsonWebToken idToken;

    @GET
    public String getUserName() {
        return idToken.getName();
    }
}
The OIDC web-app application usually uses the access token to access other endpoints on behalf of the currently logged-in user. You can access the raw access token as follows:
import jakarta.inject.Inject;
import org.eclipse.microprofile.jwt.JsonWebToken;
import io.quarkus.oidc.AccessTokenCredential;
import io.quarkus.security.Authenticated;

@Path("/web-app")
@Authenticated
public class ProtectedResource {

    @Inject
    JsonWebToken accessToken;

    // or
    // @Inject
    // AccessTokenCredential accessTokenCredential;

    @GET
    public String getReservationOnBehalfOfUser() {
        String rawAccessToken = accessToken.getRawToken();
        //or
        //String rawAccessToken = accessTokenCredential.getToken();

        // Use the raw access token to access a remote endpoint.
        // For example, use RestClient to set this token as a `Bearer` scheme value of the HTTP `Authorization` header:
        // `Authorization: Bearer rawAccessToken`.
        return getReservationfromRemoteEndpoint(rawAccesstoken);
    }
}
AccessTokenCredential is used if the access token issued to the Quarkus web-app application is opaque (binary) and cannot be parsed to a JsonWebToken or if the inner content is necessary for the application.
Injection of the JsonWebToken and AccessTokenCredential is supported in both @RequestScoped and @ApplicationScoped contexts.
Quarkus OIDC uses the refresh token to refresh the current ID and access tokens as part of its session management process.
3.2.2.2. User info
If the ID token does not provide enough information about the currently authenticated user, you can get more information from the UserInfo endpoint. Set the quarkus.oidc.authentication.user-info-required=true property to request a UserInfo JSON object from the OIDC UserInfo endpoint.
A request is sent to the OIDC provider UserInfo endpoint by using the access token returned with the authorization code grant response, and an io.quarkus.oidc.UserInfo (a simple jakarta.json.JsonObject wrapper) object is created. io.quarkus.oidc.UserInfo can be injected or accessed as a SecurityIdentity userinfo attribute.
3.2.2.3. Accessing the OIDC configuration information
The current tenant’s discovered OpenID Connect configuration metadata is represented by io.quarkus.oidc.OidcConfigurationMetadata and can be injected or accessed as a SecurityIdentity configuration-metadata attribute.
The default tenant’s OidcConfigurationMetadata is injected if the endpoint is public.
3.2.2.4. Mapping token claims and SecurityIdentity roles
The way the roles are mapped to the SecurityIdentity roles from the verified tokens is identical to how it is done for the Bearer tokens. The only difference is that ID token is used as a source of the roles by default.
If you use Keycloak, set a microprofile-jwt client scope for the ID token to contain a groups claim. For more information, see the Keycloak server administration guide.
However, depending on your OIDC provider, roles might be stored in the access token or the user info.
If the access token contains the roles and this access token is not meant to be propagated to the downstream endpoints, then set quarkus.oidc.roles.source=accesstoken.
If UserInfo is the source of the roles, then set quarkus.oidc.roles.source=userinfo, and if needed, quarkus.oidc.roles.role-claim-path.
Additionally, you can also use a custom SecurityIdentityAugmentor to add the roles. For more information, see SecurityIdentity customization. You can also map SecurityIdentity roles created from token claims to deployment-specific roles with the HTTP Security policy.
3.2.3. Ensuring validity of tokens and authentication data
A core part of the authentication process is ensuring the chain of trust and validity of the information. This is done by ensuring tokens can be trusted.
3.2.3.1. Token verification and introspection
The verification process of OIDC authorization code flow tokens follows the Bearer token authentication token verification and introspection logic. For more information, see the Token verification and introspection section of the "Quarkus OpenID Connect (OIDC) Bearer token authentication" guide.
With Quarkus web-app applications, only the IdToken is verified by default because the access token is not used to access the current Quarkus web-app endpoint and is intended to be propagated to the services expecting this access token. If you expect the access token to contain the roles required to access the current Quarkus endpoint (quarkus.oidc.roles.source=accesstoken), then it will also be verified.
3.2.3.2. Token introspection and UserInfo cache
Code flow access tokens are not introspected unless they are expected to be the source of roles. However, they will be used to get UserInfo. There will be one or two remote calls with the code flow access token if the token introspection, UserInfo, or both are required.
For more information about using the default token cache or registering a custom cache implementation, see Token introspection and UserInfo cache.
3.2.3.3. JSON web token claim verification
For information about the claim verification, including the iss (issuer) claim, see the JSON Web Token claim verification section. It applies to ID tokens and also to access tokens in a JWT format, if the web-app application has requested the access token verification.
3.2.3.4. Further security with Proof Key for Code Exchange (PKCE)
Proof Key for Code Exchange (PKCE) minimizes the risk of authorization code interception.
While PKCE is of primary importance to public OIDC clients, such as SPA scripts running in a browser, it can also provide extra protection to Quarkus OIDC web-app applications. With PKCE, Quarkus OIDC web-app applications act as confidential OIDC clients that can securely store the client secret and use it to exchange the code for the tokens.
You can enable PKCE for your OIDC web-app endpoint with a quarkus.oidc.authentication.pkce-required property and a 32-character secret that is required to encrypt the PKCE code verifier in the state cookie, as shown in the following example:
quarkus.oidc.authentication.pkce-required=true
quarkus.oidc.authentication.state-secret=eUk1p7UB3nFiXZGUXi0uph1Y9p34YhBU
If you already have a 32-character client secret, you do not need to set the quarkus.oidc.authentication.pkce-secret property unless you prefer to use a different secret key. This secret will be auto-generated if it is not configured and if the fallback to the client secret is not possible in cases where the client secret is less than 16 characters long.
The secret key is required to encrypt a randomly generated PKCE code_verifier while the user is redirected with the code_challenge query parameter to an OIDC provider to authenticate. The code_verifier is decrypted when the user is redirected back to Quarkus and sent to the token endpoint alongside the code, client secret, and other parameters to complete the code exchange. The provider will fail the code exchange if a SHA256 digest of the code_verifier does not match the code_challenge that was provided during the authentication request.
3.2.4. Handling and controlling the lifetime of authentication
Another important requirement for authentication is to ensure that the data the session is based on is up-to-date without requiring the user to authenticate for every single request. There are also situations where a logout event is explicitly requested. Use the following key points to find the right balance for securing your Quarkus applications:
3.2.4.1. Cookies
The OIDC adapter uses cookies to keep the session, code flow, and post-logout state. This state is a key element controlling the lifetime of authentication data.
Use the quarkus.oidc.authentication.cookie-path property to ensure that the same cookie is visible when you access protected resources with overlapping or different roots. For example:
-
/index.htmland/web-app/service -
/web-app/service1and/web-app/service2 -
/web-app1/serviceand/web-app2/service
By default, quarkus.oidc.authentication.cookie-path is set to / but you can change this to a more specific path if required, for example, /web-app.
To set the cookie path dynamically, configure the quarkus.oidc.authentication.cookie-path-header property. Set the quarkus.oidc.authentication.cookie-path-header property. For example, to set the cookie path dynamically by using the value of the`X-Forwarded-Prefix` HTTP header, configure the property to quarkus.oidc.authentication.cookie-path-header=X-Forwarded-Prefix.
If quarkus.oidc.authentication.cookie-path-header is set but no configured HTTP header is available in the current request, then the quarkus.oidc.authentication.cookie-path will be checked.
If your application is deployed across multiple domains, set the quarkus.oidc.authentication.cookie-domain property so that the session cookie is visible to all protected Quarkus services. For example, if you have Quarkus services deployed on the following two domains, then you must set the quarkus.oidc.authentication.cookie-domain property to company.net:
- https://whatever.wherever.company.net/
- https://another.address.company.net/
3.2.4.2. Session cookie and default TokenStateManager
OIDC CodeAuthenticationMechanism uses the default io.quarkus.oidc.TokenStateManager interface implementation to keep the ID, access, and refresh tokens returned in the authorization code or refresh grant responses in an encrypted session cookie.
It makes Quarkus OIDC endpoints completely stateless and it is recommended to follow this strategy to achieve the best scalability results.
See the Session cookie and custom TokenStateManager section for alternative methods of token storage. This is ideal for those seeking customized solutions for token state management, especially when standard server-side storage does not meet your specific requirements.
You can configure the default TokenStateManager to avoid saving an access token in the session cookie and to only keep ID and refresh tokens or a single ID token only.
An access token is only required if the endpoint needs to do the following actions:
-
Retrieve
UserInfo - Access the downstream service with this access token
- Use the roles associated with the access token, which are checked by default
In such cases, use the quarkus.oidc.token-state-manager.strategy property to configure the token state strategy as follows:
| To… | Set the property to … |
|---|---|
| Keep the ID and refresh tokens only |
|
| Keep the ID token only |
|
If your chosen session cookie strategy combines tokens and generates a large session cookie value that is greater than 4KB, some browsers might not be able to handle such cookie sizes. This can occur when the ID, access, and refresh tokens are JWT tokens and the selected strategy is keep-all-tokens or with ID and refresh tokens when the strategy is id-refresh-token. To work around this issue, you can set quarkus.oidc.token-state-manager.split-tokens=true to create a unique session token for each token.
The default TokenStateManager encrypts the tokens before storing them in the session cookie. The following example shows how you configure it to split the tokens and encrypt them:
quarkus.oidc.auth-server-url=http://localhost:8180/realms/quarkus
quarkus.oidc.client-id=quarkus-app
quarkus.oidc.credentials.secret=secret
quarkus.oidc.application-type=web-app
quarkus.oidc.token-state-manager.split-tokens=true
quarkus.oidc.token-state-manager.encryption-secret=eUk1p7UB3nFiXZGUXi0uph1Y9p34YhBU
The token encryption secret must be at least 32 characters long. If this key is not configured, then either quarkus.oidc.credentials.secret or quarkus.oidc.credentials.jwt.secret will be hashed to create an encryption key.
Configure the quarkus.oidc.token-state-manager.encryption-secret property if Quarkus authenticates to the OIDC provider by using one of the following authentication methods:
- mTLS
-
private_key_jwt, where a private RSA or EC key is used to sign a JWT token
Otherwise, a random key is generated, which can be problematic if the Quarkus application is running in the cloud with multiple pods managing the requests.
You can disable token encryption in the session cookie by setting quarkus.oidc.token-state-manager.encryption-required=false.
3.2.4.3. Session cookie and custom TokenStateManager
If you want to customize the way the tokens are associated with the session cookie, register a custom io.quarkus.oidc.TokenStateManager implementation as an @ApplicationScoped CDI bean.
For example, you might want to keep the tokens in a cache cluster and have only a key stored in a session cookie. Note that this approach might introduce some challenges if you need to make the tokens available across multiple microservices nodes.
Here is a simple example:
package io.quarkus.oidc.test;

import jakarta.annotation.Priority;
import jakarta.enterprise.context.ApplicationScoped;
import jakarta.enterprise.inject.Alternative;
import jakarta.inject.Inject;

import io.quarkus.oidc.AuthorizationCodeTokens;
import io.quarkus.oidc.OidcTenantConfig;
import io.quarkus.oidc.TokenStateManager;
import io.quarkus.oidc.runtime.DefaultTokenStateManager;
import io.smallrye.mutiny.Uni;
import io.vertx.ext.web.RoutingContext;

@ApplicationScoped
@Alternative
@Priority(1)
public class CustomTokenStateManager implements TokenStateManager {

    @Inject
    DefaultTokenStateManager tokenStateManager;

    @Override
    public Uni<String> createTokenState(RoutingContext routingContext, OidcTenantConfig oidcConfig,
            AuthorizationCodeTokens sessionContent, TokenStateManager.CreateTokenStateRequestContext requestContext) {
        return tokenStateManager.createTokenState(routingContext, oidcConfig, sessionContent, requestContext)
                .map(t -> (t + "|custom"));
    }

    @Override
    public Uni<AuthorizationCodeTokens> getTokens(RoutingContext routingContext, OidcTenantConfig oidcConfig,
            String tokenState, TokenStateManager.GetTokensRequestContext requestContext) {
        if (!tokenState.endsWith("|custom")) {
            throw new IllegalStateException();
        }
        String defaultState = tokenState.substring(0, tokenState.length() - 7);
        return tokenStateManager.getTokens(routingContext, oidcConfig, defaultState, requestContext);
    }

    @Override
    public Uni<Void> deleteTokens(RoutingContext routingContext, OidcTenantConfig oidcConfig, String tokenState,
            TokenStateManager.DeleteTokensRequestContext requestContext) {
        if (!tokenState.endsWith("|custom")) {
            throw new IllegalStateException();
        }
        String defaultState = tokenState.substring(0, tokenState.length() - 7);
        return tokenStateManager.deleteTokens(routingContext, oidcConfig, defaultState, requestContext);
    }
}
For information about the default TokenStateManager storing tokens in an encrypted session cookie, see Session cookie and default TokenStateManager.
3.2.4.4. Logout and expiration
There are two main ways for the authentication information to expire: the tokens expired and were not renewed or an explicit logout operation was triggered.
Let’s start with explicit logout operations.
3.2.4.4.1. User-initiated logout
Users can request a logout by sending a request to the Quarkus endpoint logout path set with a quarkus.oidc.logout.path property. For example, if the endpoint address is https://application.com/webapp and the quarkus.oidc.logout.path is set to /logout, then the logout request must be sent to https://application.com/webapp/logout.
This logout request starts an RP-initiated logout. The user will be redirected to the OIDC provider to log out, where they can be asked to confirm the logout is indeed intended.
The user will be returned to the endpoint post-logout page once the logout has been completed and if the quarkus.oidc.logout.post-logout-path property is set. For example, if the endpoint address is https://application.com/webapp and the quarkus.oidc.logout.post-logout-path is set to /signin, then the user will be returned to https://application.com/webapp/signin. Note, this URI must be registered as a valid post_logout_redirect_uri in the OIDC provider.
If the quarkus.oidc.logout.post-logout-path is set, then a q_post_logout cookie will be created and a matching state query parameter will be added to the logout redirect URI and the OIDC provider will return this state once the logout has been completed. It is recommended for the Quarkus web-app applications to check that a state query parameter matches the value of the q_post_logout cookie, which can be done, for example, in a Jakarta REST filter.
Note that a cookie name varies when using OpenID Connect Multi-Tenancy. For example, it will be named q_post_logout_tenant_1 for a tenant with a tenant_1 ID, and so on.
Here is an example of how to configure a Quarkus application to initiate a logout flow:
quarkus.oidc.auth-server-url=http://localhost:8180/realms/quarkus
quarkus.oidc.client-id=frontend
quarkus.oidc.credentials.secret=secret
quarkus.oidc.application-type=web-app

quarkus.oidc.logout.path=/logout
# Logged-out users should be returned to the /welcome.html site which will offer an option to re-login:
quarkus.oidc.logout.post-logout-path=/welcome.html

# Only the authenticated users can initiate a logout:
quarkus.http.auth.permission.authenticated.paths=/logout
quarkus.http.auth.permission.authenticated.policy=authenticated

# All users can see the Welcome page:
quarkus.http.auth.permission.public.paths=/welcome.html
quarkus.http.auth.permission.public.policy=permit
You might also want to set quarkus.oidc.authentication.cookie-path to a path value common to all the application resources, which is / in this example. For more information, see the Cookies section.
Some OIDC providers do not support a RP-initiated logout specification and do not return an OpenID Connect well-known end_session_endpoint metadata property. However, this is not a problem for Quarkus because the specific logout mechanisms of such OIDC providers only differ in how the logout URL query parameters are named.
According to the RP-initiated logout specification, the quarkus.oidc.logout.post-logout-path property is represented as a post_logout_redirect_uri query parameter, which is not recognized by the providers that do not support this specification.
You can use quarkus.oidc.logout.post-logout-url-param to work around this issue. You can also request more logout query parameters added with quarkus.oidc.logout.extra-params. For example, here is how you can support a logout with Auth0:
quarkus.oidc.auth-server-url=https://dev-xxx.us.auth0.com
quarkus.oidc.client-id=redacted
quarkus.oidc.credentials.secret=redacted
quarkus.oidc.application-type=web-app

quarkus.oidc.tenant-logout.logout.path=/logout
quarkus.oidc.tenant-logout.logout.post-logout-path=/welcome.html

# Auth0 does not return the `end_session_endpoint` metadata property. Instead, you must configure it:
quarkus.oidc.end-session-path=v2/logout
# Auth0 will not recognize the 'post_logout_redirect_uri' query parameter so ensure it is named as 'returnTo':
quarkus.oidc.logout.post-logout-uri-param=returnTo

# Set more properties if needed.
# For example, if 'client_id' is provided, then a valid logout URI should be set as the Auth0 Application property, without it - as Auth0 Tenant property:
quarkus.oidc.logout.extra-params.client_id=${quarkus.oidc.client-id}
3.2.4.4.2. Back-channel logout
The OIDC provider can force the logout of all applications by using the authentication data. This is known as back-channel logout. In this case, the OIDC will call a specific URL from each application to trigger that logout.
OIDC providers use Back-channel logout to log out the current user from all the applications into which this user is currently logged in, bypassing the user agent.
You can configure Quarkus to support Back-channel logout as follows:
quarkus.oidc.auth-server-url=http://localhost:8180/realms/quarkus
quarkus.oidc.client-id=frontend
quarkus.oidc.credentials.secret=secret
quarkus.oidc.application-type=web-app

quarkus.oidc.logout.backchannel.path=/back-channel-logout
The absolute back-channel logout URL is calculated by adding quarkus.oidc.back-channel-logout.path to the current endpoint URL, for example, http://localhost:8080/back-channel-logout. You will need to configure this URL in the admin console of your OIDC provider.
You will also need to configure a token age property for the logout token verification to succeed if your OIDC provider does not set an expiry claim in the current logout token. For example, set quarkus.oidc.token.age=10S to ensure that no more than 10 seconds elapse since the logout token’s iat (issued at) time.
3.2.4.4.3. Front-channel logout
You can use Front-channel logout to log out the current user directly from the user agent, for example, its browser. It is similar to Back-channel logout but the logout steps are executed by the user agent, such as the browser, and not in the background by the OIDC provider. This option is rarely used.
You can configure Quarkus to support Front-channel logout as follows:
quarkus.oidc.auth-server-url=http://localhost:8180/realms/quarkus
quarkus.oidc.client-id=frontend
quarkus.oidc.credentials.secret=secret
quarkus.oidc.application-type=web-app

quarkus.oidc.logout.frontchannel.path=/front-channel-logout
This path will be compared to the current request’s path, and the user will be logged out if these paths match.
3.2.4.4.4. Local logout
User-initiated logout will log the user out of the OIDC provider. If it is used as single sign-on, it might not be what you require. If, for example, your OIDC provider is Google, you will be logged out from Google and its services. Instead, the user might just want to log out of that specific application. Another use case might be when the OIDC provider does not have a logout endpoint.
By using OidcSession, you can support a local logout, which means that only the local session cookie is cleared, as shown in the following example:
import jakarta.inject.Inject;
import jakarta.ws.rs.GET;
import jakarta.ws.rs.Path;

import io.quarkus.oidc.OidcSession;

@Path("/service")
public class ServiceResource {

    @Inject
    OidcSession oidcSession;

    @GET
    @Path("logout")
    public String logout() {
        oidcSession.logout().await().indefinitely();
        return "You are logged out".
    }
3.2.4.4.4.1. Using OidcSession for local logout
io.quarkus.oidc.OidcSession is a wrapper around the current IdToken, which can help to perform a Local logout, retrieve the current session’s tenant identifier, and check when the session will expire. More useful methods will be added to it over time.
3.2.4.5. Session management
By default, logout is based on the expiration time of the ID token issued by the OIDC provider. When the ID token expires, the current user session at the Quarkus endpoint is invalidated, and the user is redirected to the OIDC provider again to authenticate. If the session at the OIDC provider is still active, users are automatically re-authenticated without needing to provide their credentials again.
The current user session can be automatically extended by enabling the quarkus.oidc.token.refresh-expired property. If set to true, when the current ID token expires, a refresh token grant will be used to refresh the ID token as well as access and refresh tokens.
If you have a single page application for service applications where your OIDC provider script such as keycloak.js is managing an authorization code flow, then that script will also control the SPA authentication session lifespan.
If you work with a Quarkus OIDC web-app application, then the Quarkus OIDC code authentication mechanism manages the user session lifespan.
To use the refresh token, you should carefully configure the session cookie age. The session age should be longer than the ID token lifespan and close to or equal to the refresh token lifespan.
You calculate the session age by adding the lifespan value of the current ID token and the values of the quarkus.oidc.authentication.session-age-extension and quarkus.oidc.token.lifespan-grace properties.
You use only the quarkus.oidc.authentication.session-age-extension property to significantly extend the session lifespan, if required. You use the quarkus.oidc.token.lifespan-grace property only to consider some small clock skews.
When the current authenticated user returns to the protected Quarkus endpoint and the ID token associated with the session cookie has expired, then, by default, the user is automatically redirected to the OIDC Authorization endpoint to re-authenticate. The OIDC provider might challenge the user again if the session between the user and this OIDC provider is still active, which might happen if the session is configured to last longer than the ID token.
If the quarkus.oidc.token.refresh-expired is set to true, then the expired ID token (and the access token) is refreshed by using the refresh token returned with the initial authorization code grant response. This refresh token might also be recycled (refreshed) itself as part of this process. As a result, the new session cookie is created, and the session is extended.
In instances where the user is not very active, you can use the quarkus.oidc.authentication.session-age-extension property to help handle expired ID tokens. If the ID token expires, the session cookie might not be returned to the Quarkus endpoint during the next user request as the cookie lifespan would have elapsed. Quarkus assumes that this request is the first authentication request. Set quarkus.oidc.authentication.session-age-extension to be reasonably long for your barely-active users and in accordance with your security policies.
You can go one step further and proactively refresh ID tokens or access tokens that are about to expire. Set quarkus.oidc.token.refresh-token-time-skew to the value you want to anticipate the refresh. If, during the current user request, it is calculated that the current ID token will expire within this quarkus.oidc.token.refresh-token-time-skew, then it is refreshed, and the new session cookie is created. This property should be set to a value that is less than the ID token lifespan; the closer it is to this lifespan value, the more often the ID token is refreshed.
You can further optimize this process by having a simple JavaScript function ping your Quarkus endpoint periodically to emulate the user activity, which minimizes the time frame during which the user might have to be re-authenticated.
You cannot extend the user session indefinitely. The returning user with the expired ID token will have to re-authenticate at the OIDC provider endpoint once the refresh token has expired.
3.2.5. Integration with GitHub and non-OIDC OAuth2 providers
Some well-known providers such as GitHub or LinkedIn are not OpenID Connect providers, but OAuth2 providers that support the authorization code flow. For example, GitHub OAuth2 and LinkedIn OAuth2. Remember, OIDC is built on top of OAuth2.
The main difference between OIDC and OAuth2 providers is that OIDC providers return an ID Token that represents a user authentication, in addition to the standard authorization code flow access and refresh tokens returned by OAuth2 providers.
OAuth2 providers such as GitHub do not return IdToken, and the user authentication is implicit and indirectly represented by the access token. This access token represents an authenticated user authorizing the current Quarkus web-app application to access some data on behalf of the authenticated user.
For OIDC, you validate the ID token as proof of authentication validity whereas in the case of OAuth2, you validate the access token. This is done by subsequently calling an endpoint that requires the access token and that typically returns user information. This approach is similar to the OIDC UserInfo approach, with UserInfo fetched by Quarkus OIDC on your behalf.
For example, when working with GitHub, the Quarkus endpoint can acquire an access token, which allows the Quarkus endpoint to request a GitHub profile for the current user.
To support the integration with such OAuth2 servers, quarkus-oidc needs to be configured a bit differently to allow the authorization code flow responses without IdToken: quarkus.oidc.authentication.id-token-required=false.
Even though you configure the extension to support the authorization code flows without IdToken, an internal IdToken is generated to standardize the way quarkus-oidc operates. You use an IdToken to support the authentication session and to avoid redirecting the user to the provider, such as GitHub, on every request. In this case, the session lifespan is set to 5 minutes, which you can extend further as described in the session management section.
This simplifies how you handle an application that supports multiple OIDC providers.
The next step is to ensure that the returned access token can be useful and is valid to the current Quarkus endpoint. The first way is to call the OAuth2 provider introspection endpoint by configuring quarkus.oidc.introspection-path, if the provider offers such an endpoint. In this case, you can use the access token as a source of roles using quarkus.oidc.roles.source=accesstoken. If no introspection endpoint is present, you can attempt instead to request UserInfo from the provider as it will at least validate the access token. To do so, specify quarkus.oidc.token.verify-access-token-with-user-info=true. You also need to set the quarkus.oidc.user-info-path property to a URL endpoint that fetches the user info (or to an endpoint protected by the access token). For GitHub, since it does not have an introspection endpoint, requesting the UserInfo is required.
Requiring UserInfo involves making a remote call on every request. Therefore, you might want to consider caching UserInfo data. For more information, see the Token Introspection and UserInfo cache section of the "OpenID Connect (OIDC) Bearer token authentication" guide.
Alternatively, you might want to request that UserInfo is embedded into the internal generated IdToken with the quarkus.oidc.cache-user-info-in-idtoken=true property. The advantage of this approach is that, by default, no cached UserInfo state will be kept with the endpoint - instead it will be stored in a session cookie. You might also want to consider encrypting IdToken in this case if UserInfo contains sensitive data. For more information, see Encrypt tokens with TokenStateManager.
OAuth2 servers might not support a well-known configuration endpoint. In this case, you must disable the discovery and configure the authorization, token, and introspection and UserInfo endpoint paths manually.
For well-known OIDC or OAuth2 providers, such as Apple, Facebook, GitHub, Google, Microsoft, Spotify, and Twitter, Quarkus can help significantly simplify your application’s configuration with the quarkus.oidc.provider property. Here is how you can integrate quarkus-oidc with GitHub after you have created a GitHub OAuth application. Configure your Quarkus endpoint like this:
quarkus.oidc.provider=github
quarkus.oidc.client-id=github_app_clientid
quarkus.oidc.credentials.secret=github_app_clientsecret

# user:email scope is requested by default, use 'quarkus.oidc.authentication.scopes' to request different scopes such as `read:user`.
# See https://docs.github.com/en/developers/apps/building-oauth-apps/scopes-for-oauth-apps for more information.

# Consider enabling UserInfo Cache
# quarkus.oidc.token-cache.max-size=1000
# quarkus.oidc.token-cache.time-to-live=5M
#
# Or having UserInfo cached inside IdToken itself
# quarkus.oidc.cache-user-info-in-idtoken=true
For more information about configuring other well-known providers, see OpenID Connect providers.
This is all that is needed for an endpoint like this one to return the currently-authenticated user’s profile with GET http://localhost:8080/github/userinfo and access it as the individual UserInfo properties:
import jakarta.inject.Inject;
import jakarta.ws.rs.GET;
import jakarta.ws.rs.Path;
import jakarta.ws.rs.Produces;

import io.quarkus.oidc.UserInfo;
import io.quarkus.security.Authenticated;

@Path("/github")
@Authenticated
public class TokenResource {

    @Inject
    UserInfo userInfo;

    @GET
    @Path("/userinfo")
    @Produces("application/json")
    public String getUserInfo() {
        return userInfo.getUserInfoString();
    }
}
If you support more than one social provider with the help of OpenID Connect Multi-Tenancy, for example, Google, which is an OIDC provider that returns IdToken, and GitHub, which is an OAuth2 provider that does not return IdToken and only allows access to UserInfo, then you can have your endpoint working with only the injected SecurityIdentity for both Google and GitHub flows. A simple augmentation of SecurityIdentity will be required where a principal created with the internally-generated IdToken will be replaced with the UserInfo-based principal when the GitHub flow is active:
package io.quarkus.it.keycloak;

import java.security.Principal;

import jakarta.enterprise.context.ApplicationScoped;

import io.quarkus.oidc.UserInfo;
import io.quarkus.security.identity.AuthenticationRequestContext;
import io.quarkus.security.identity.SecurityIdentity;
import io.quarkus.security.identity.SecurityIdentityAugmentor;
import io.quarkus.security.runtime.QuarkusSecurityIdentity;
import io.smallrye.mutiny.Uni;
import io.vertx.ext.web.RoutingContext;

@ApplicationScoped
public class CustomSecurityIdentityAugmentor implements SecurityIdentityAugmentor {

    @Override
    public Uni<SecurityIdentity> augment(SecurityIdentity identity, AuthenticationRequestContext context) {
        RoutingContext routingContext = identity.getAttribute(RoutingContext.class.getName());
        if (routingContext != null && routingContext.normalizedPath().endsWith("/github")) {
	        QuarkusSecurityIdentity.Builder builder = QuarkusSecurityIdentity.builder(identity);
	        UserInfo userInfo = identity.getAttribute("userinfo");
	        builder.setPrincipal(new Principal() {

	            @Override
	            public String getName() {
	                return userInfo.getString("preferred_username");
	            }

	        });
	        identity = builder.build();
        }
        return Uni.createFrom().item(identity);
    }

}
Now, the following code will work when the user signs into your application by using Google or GitHub:
import jakarta.inject.Inject;
import jakarta.ws.rs.GET;
import jakarta.ws.rs.Path;
import jakarta.ws.rs.Produces;

import io.quarkus.security.Authenticated;
import io.quarkus.security.identity.SecurityIdentity;

@Path("/service")
@Authenticated
public class TokenResource {

    @Inject
    SecurityIdentity identity;

    @GET
    @Path("/google")
    @Produces("application/json")
    public String getUserName() {
        return identity.getPrincipal().getName();
    }

    @GET
    @Path("/github")
    @Produces("application/json")
    public String getUserName() {
        return identity.getPrincipal().getUserName();
    }
}
Possibly a simpler alternative is to inject both @IdToken JsonWebToken and UserInfo and use JsonWebToken when handling the providers that return IdToken and use UserInfo with the providers that do not return IdToken.
You must ensure that the callback path you enter in the GitHub OAuth application configuration matches the endpoint path where you want the user to be redirected after a successful GitHub authentication and application authorization. In this case, it has to be set to http:localhost:8080/github/userinfo.
3.2.6. Listening to important authentication events
You can register the @ApplicationScoped bean which will observe important OIDC authentication events. When a user logs in for the first time, re-authenticates, or refreshes the session, the listener is updated. In the future, more events might be reported. For example:
import jakarta.enterprise.context.ApplicationScoped;
import jakarta.enterprise.event.Observes;

import io.quarkus.oidc.IdTokenCredential;
import io.quarkus.oidc.SecurityEvent;
import io.quarkus.security.identity.AuthenticationRequestContext;
import io.vertx.ext.web.RoutingContext;

@ApplicationScoped
public class SecurityEventListener {

    public void event(@Observes SecurityEvent event) {
        String tenantId = event.getSecurityIdentity().getAttribute("tenant-id");
        RoutingContext vertxContext = event.getSecurityIdentity().getAttribute(RoutingContext.class.getName());
        vertxContext.put("listener-message", String.format("event:%s,tenantId:%s", event.getEventType().name(), tenantId));
    }
}You can listen to other security events as described in the Observe security events section of the Security Tips and Tricks guide.
3.2.7. Propagating tokens to downstream services
For information about Authorization Code Flow access token propagation to downstream services, see the Token Propagation section.
3.3. Integration considerations
Your application secured by OIDC integrates in an environment where it can be called from single-page applications. It must work with well-known OIDC providers, run behind HTTP Reverse Proxy, require external and internal access, and so on.
This section discusses these considerations.
3.3.1. Single-page applications
You can check if implementing single-page applications (SPAs) the way it is suggested in the Single-page applications section of the "OpenID Connect (OIDC) Bearer token authentication" guide meets your requirements.
If you prefer to use SPAs and JavaScript APIs such as Fetch or XMLHttpRequest(XHR) with Quarkus web applications, be aware that OIDC providers might not support cross-origin resource sharing (CORS) for authorization endpoints where the users are authenticated after a redirect from Quarkus. This will lead to authentication failures if the Quarkus application and the OIDC provider are hosted on different HTTP domains, ports, or both.
In such cases, set the quarkus.oidc.authentication.java-script-auto-redirect property to false, which will instruct Quarkus to return a 499 status code and a WWW-Authenticate header with the OIDC value.
The browser script must set a header to identify the current request as a JavaScript request for a 499 status code to be returned when the quarkus.oidc.authentication.java-script-auto-redirect property is set to false.
If the script engine sets an engine-specific request header itself, then you can register a custom quarkus.oidc.JavaScriptRequestChecker bean, which will inform Quarkus if the current request is a JavaScript request. For example, if the JavaScript engine sets a header such as HX-Request: true, then you can have it checked like this:
import jakarta.enterprise.context.ApplicationScoped;

import io.quarkus.oidc.JavaScriptRequestChecker;
import io.vertx.ext.web.RoutingContext;

@ApplicationScoped
public class CustomJavaScriptRequestChecker implements JavaScriptRequestChecker {

    @Override
    public boolean isJavaScriptRequest(RoutingContext context) {
        return "true".equals(context.request().getHeader("HX-Request"));
    }
}
and reload the last requested page in case of a 499 status code.
Otherwise, you must also update the browser script to set the X-Requested-With header with the JavaScript value and reload the last requested page in case of a 499 status code.
For example:
Future<void> callQuarkusService() async {
    Map<String, String> headers = Map.fromEntries([MapEntry("X-Requested-With", "JavaScript")]);

    await http
        .get("https://localhost:443/serviceCall")
        .then((response) {
            if (response.statusCode == 499) {
                window.location.assign("https://localhost.com:443/serviceCall");
            }
         });
  }
3.3.2. Cross-origin resource sharing
If you plan to consume this application from a single-page application running on a different domain, you need to configure cross-origin resource sharing (CORS). For more information, see the CORS filter section of the "Cross-origin resource sharing" guide.
3.3.3. Running Quarkus application behind a reverse proxy
The OIDC authentication mechanism can be affected if your Quarkus application is running behind a reverse proxy, gateway, or firewall when HTTP Host header might be reset to the internal IP address and HTTPS connection might be terminated, and so on. For example, an authorization code flow redirect_uri parameter might be set to the internal host instead of the expected external one.
In such cases, configuring Quarkus to recognize the original headers forwarded by the proxy will be required. For more information, see the Running behind a reverse proxy Vert.x documentation section.
For example, if your Quarkus endpoint runs in a cluster behind Kubernetes Ingress, then a redirect from the OIDC provider back to this endpoint might not work because the calculated redirect_uri parameter might point to the internal endpoint address. You can resolve this problem by using the following configuration, where X-ORIGINAL-HOST is set by Kubernetes Ingress to represent the external endpoint address.:
quarkus.http.proxy.proxy-address-forwarding=true
quarkus.http.proxy.allow-forwarded=false
quarkus.http.proxy.enable-forwarded-host=true
quarkus.http.proxy.forwarded-host-header=X-ORIGINAL-HOST
quarkus.oidc.authentication.force-redirect-https-scheme property can also be used when the Quarkus application is running behind an SSL terminating reverse proxy.
3.3.4. External and internal access to the OIDC provider
The OIDC provider externally-accessible authorization, logout, and other endpoints can have different HTTP(S) URLs compared to the URLs auto-discovered or configured relative to the quarkus.oidc.auth-server-url internal URL. In such cases, the endpoint might report an issuer verification failure and redirects to the externally-accessible OIDC provider endpoints might fail.
If you work with Keycloak, then start it with a KEYCLOAK_FRONTEND_URL system property set to the externally-accessible base URL. If you work with other OIDC providers, check the documentation of your provider.
3.4. OIDC SAML identity broker
If your identity provider does not implement OpenID Connect but only the legacy XML-based SAML2.0 SSO protocol, then Quarkus cannot be used as a SAML 2.0 adapter, similarly to how quarkus-oidc is used as an OIDC adapter.
However, many OIDC providers such as Keycloak, Okta, Auth0, and Microsoft ADFS offer OIDC to SAML 2.0 bridges. You can create an identity broker connection to a SAML 2.0 provider in your OIDC provider and use quarkus-oidc to authenticate your users to this SAML 2.0 provider, with the OIDC provider coordinating OIDC and SAML 2.0 communications. As far as Quarkus endpoints are concerned, they can continue using the same Quarkus Security, OIDC API, annotations such as @Authenticated, SecurityIdentity, and so on.
For example, assume Okta is your SAML 2.0 provider and Keycloak is your OIDC provider. Here is a typical sequence explaining how to configure Keycloak to broker with the Okta SAML 2.0 provider.
First, create a new SAML2 integration in your Okta Dashboard/Applications:
For example, name it as OktaSaml:
Next, configure it to point to a Keycloak SAML broker endpoint. At this point, you need to know the name of the Keycloak realm, for example, quarkus, and, assuming that the Keycloak SAML broker alias is saml, enter the endpoint address as http:localhost:8081/realms/quarkus/broker/saml/endpoint. Enter the service provider (SP) entity ID as http:localhost:8081/realms/quarkus, where http://localhost:8081 is a Keycloak base address and saml is a broker alias:
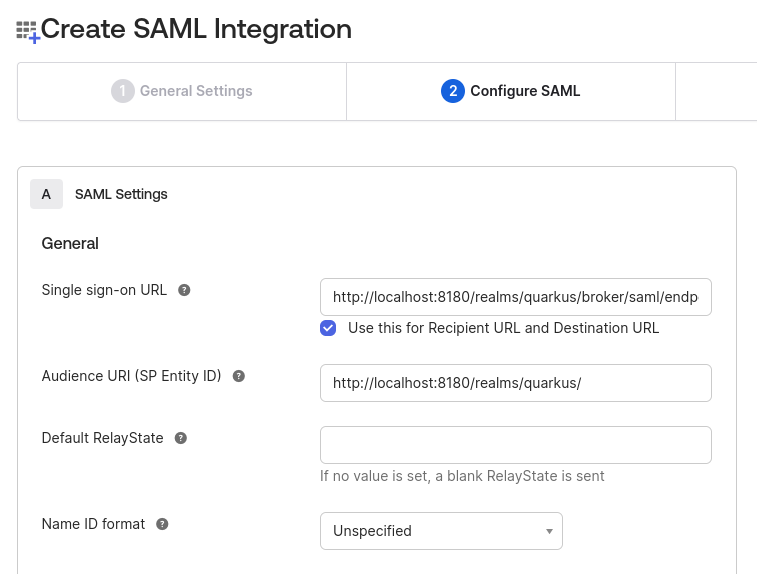
Next, save this SAML integration and note its Metadata URL:
Next, add a SAML provider to Keycloak:
First, as usual, create a new realm or import the existing realm to Keycloak. In this case, the realm name has to be quarkus.
Now, in the quarkus realm properties, navigate to Identity Providers and add a new SAML provider:
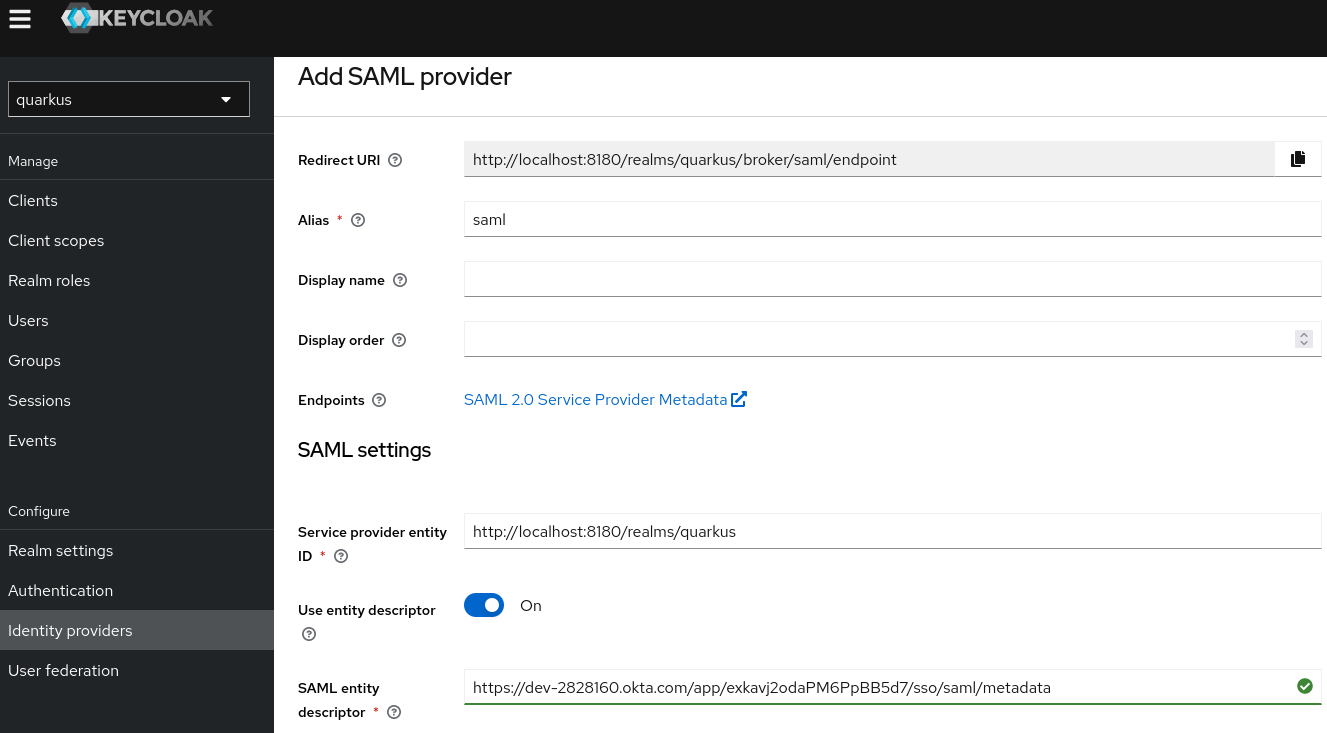
Note the alias is set to saml, Redirect URI is http:localhost:8081/realms/quarkus/broker/saml/endpoint and Service provider entity ID is http:localhost:8081/realms/quarkus - these are the same values you entered when creating the Okta SAML integration in the previous step.
Finally, set Service entity descriptor to point to the Okta SAML Integration Metadata URL you noted at the end of the previous step.
Next, if you want, you can register this Keycloak SAML provider as a default provider by navigating to Authentication/browser/Identity Provider Redirector config and setting both the Alias and Default Identity Provider properties to saml. If you do not configure it as a default provider then, at authentication time, Keycloak offers 2 options:
- Authenticate with the SAML provider
- Authenticate directly to Keycloak with the name and password
Now, configure the Quarkus OIDC web-app application to point to the Keycloak quarkus realm, quarkus.oidc.auth-server-url=http://localhost:8180/realms/quarkus. Then, you are ready to start authenticating your Quarkus users to the Okta SAML 2.0 provider by using an OIDC to SAML bridge that is provided by Keycloak OIDC and Okta SAML 2.0 providers.
You can configure other OIDC providers to provide a SAML bridge similarly to how it can be done for Keycloak.
3.5. Testing
Testing is often tricky when it comes to authentication to a separate OIDC-like server. Quarkus offers several options from mocking to a local run of an OIDC provider.
Start by adding the following dependencies to your test project:
Using Maven:
<dependency>
    <groupId>net.sourceforge.htmlunit</groupId>
    <artifactId>htmlunit</artifactId>
    <exclusions>
        <exclusion>
            <groupId>org.eclipse.jetty</groupId>
            <artifactId>*</artifactId>
       </exclusion>
    </exclusions>
    <scope>test</scope>
</dependency>
<dependency>
    <groupId>io.quarkus</groupId>
    <artifactId>quarkus-junit5</artifactId>
    <scope>test</scope>
</dependency>
Using Gradle:
testImplementation("net.sourceforge.htmlunit:htmlunit")
testImplementation("io.quarkus:quarkus-junit5")
3.5.1. Wiremock
Add the following dependency:
Using Maven:
<dependency>
    <groupId>io.quarkus</groupId>
    <artifactId>quarkus-test-oidc-server</artifactId>
    <scope>test</scope>
</dependency>
Using Gradle:
testImplementation("io.quarkus:quarkus-test-oidc-server")
Prepare the REST test endpoints and set application.properties. For example:
# keycloak.url is set by OidcWiremockTestResource
quarkus.oidc.auth-server-url=${keycloak.url}/realms/quarkus/
quarkus.oidc.client-id=quarkus-web-app
quarkus.oidc.credentials.secret=secret
quarkus.oidc.application-type=web-app
Finally, write the test code, for example:
import static org.junit.jupiter.api.Assertions.assertEquals;

import org.junit.jupiter.api.Test;

import com.gargoylesoftware.htmlunit.SilentCssErrorHandler;
import com.gargoylesoftware.htmlunit.WebClient;
import com.gargoylesoftware.htmlunit.html.HtmlForm;
import com.gargoylesoftware.htmlunit.html.HtmlPage;

import io.quarkus.test.common.QuarkusTestResource;
import io.quarkus.test.junit.QuarkusTest;
import io.quarkus.test.oidc.server.OidcWiremockTestResource;

@QuarkusTest
@QuarkusTestResource(OidcWiremockTestResource.class)
public class CodeFlowAuthorizationTest {

    @Test
    public void testCodeFlow() throws Exception {
        try (final WebClient webClient = createWebClient()) {
            // the test REST endpoint listens on '/code-flow'
            HtmlPage page = webClient.getPage("http://localhost:8081/code-flow");

            HtmlForm form = page.getFormByName("form");
            // user 'alice' has the 'user' role
            form.getInputByName("username").type("alice");
            form.getInputByName("password").type("alice");

            page = form.getInputByValue("login").click();

            assertEquals("alice", page.getBody().asText());
        }
    }

    private WebClient createWebClient() {
        WebClient webClient = new WebClient();
        webClient.setCssErrorHandler(new SilentCssErrorHandler());
        return webClient;
    }
}
OidcWiremockTestResource recognizes alice and admin users. The user alice has the user role only by default - it can be customized with a quarkus.test.oidc.token.user-roles system property. The user admin has the user and admin roles by default - it can be customized with a quarkus.test.oidc.token.admin-roles system property.
Additionally, OidcWiremockTestResource sets the token issuer and audience to https://service.example.com, which can be customized with quarkus.test.oidc.token.issuer and quarkus.test.oidc.token.audience system properties.
OidcWiremockTestResource can be used to emulate all OIDC providers.
3.5.2. Dev Services for Keycloak
Using Dev Services for Keycloak is recommended for integration testing against Keycloak. Dev Services for Keycloak will start and initialize a test container: it will create a quarkus realm, a quarkus-app client (secret secret), and add alice (admin and user roles) and bob (user role) users, where all of these properties can be customized.
First, prepare application.properties. You can start with a completely empty application.properties file as Dev Services for Keycloak will register quarkus.oidc.auth-server-url pointing to the running test container as well as quarkus.oidc.client-id=quarkus-app and quarkus.oidc.credentials.secret=secret.
However, if you already have all the required quarkus-oidc properties configured, then you only need to associate quarkus.oidc.auth-server-url with the prod profile for Dev Services for Keycloak to start a container. For example:
%prod.quarkus.oidc.auth-server-url=http://localhost:8180/realms/quarkus
If a custom realm file has to be imported into Keycloak before running the tests, then you can configure Dev Services for Keycloak as follows:
%prod.quarkus.oidc.auth-server-url=http://localhost:8180/realms/quarkus
quarkus.keycloak.devservices.realm-path=quarkus-realm.json
Finally, write a test code the same way as it is described in the Wiremock section. The only difference is that @QuarkusTestResource is no longer needed:
@QuarkusTest
public class CodeFlowAuthorizationTest {
}
3.5.3. TestSecurity annotation
You can use @TestSecurity and @OidcSecurity annotations to test the web-app application endpoint code, which depends on either one of the following injections, or all four:
-
ID
JsonWebToken -
Access
JsonWebToken -
UserInfo -
OidcConfigurationMetadata
For more information, see Use TestingSecurity with injected JsonWebToken.
3.5.4. Checking errors in the logs
To see details about the token verification errors, you must enable io.quarkus.oidc.runtime.OidcProvider TRACE level logging:
quarkus.log.category."io.quarkus.oidc.runtime.OidcProvider".level=TRACE
quarkus.log.category."io.quarkus.oidc.runtime.OidcProvider".min-level=TRACE
To see details about the OidcProvider client initialization errors, enable io.quarkus.oidc.runtime.OidcRecorder TRACE level logging:
quarkus.log.category."io.quarkus.oidc.runtime.OidcRecorder".level=TRACE
quarkus.log.category."io.quarkus.oidc.runtime.OidcRecorder".min-level=TRACE
From the quarkus dev console, type j to change the application global log level.
3.6. References
- OIDC configuration properties
- Configuring well-known OpenID Connect providers
- OpenID Connect and OAuth2 client and filters reference guide
- Dev Services for Keycloak
- Choosing between OpenID Connect, SmallRye JWT, and OAuth2 authentication mechanisms
- Combining authentication mechanisms
- Quarkus Security overview
- Keycloak documentation
- OpenID Connect
- JSON Web Token
Chapter 4. Protect a web application by using OpenID Connect (OIDC) authorization code flow
Discover how to secure application HTTP endpoints by using the Quarkus OpenID Connect (OIDC) authorization code flow mechanism with the Quarkus OIDC extension, providing robust authentication and authorization.
For more information, see OIDC code flow mechanism for protecting web applications.
To learn about how well-known social providers such as Apple, Facebook, GitHub, Google, Mastodon, Microsoft, Twitch, Twitter (X), and Spotify can be used with Quarkus OIDC, see Configuring well-known OpenID Connect providers. See also, Authentication mechanisms in Quarkus.
If you want to protect your service applications by using OIDC Bearer token authentication, see OIDC Bearer token authentication.
4.1. Prerequisites
To complete this guide, you need:
- Roughly 15 minutes
- An IDE
-
JDK 17+ installed with
JAVA_HOMEconfigured appropriately - Apache Maven 3.9.6
- A working container runtime (Docker or Podman)
- Optionally the Quarkus CLI if you want to use it
- Optionally Mandrel or GraalVM installed and configured appropriately if you want to build a native executable (or Docker if you use a native container build)
4.2. Architecture
In this example, we build a simple web application with a single page:
-
/index.html
This page is protected, and only authenticated users can access it.
4.3. Solution
Follow the instructions in the next sections and create the application step by step. Alternatively, you can go right to the completed example.
Clone the Git repository by running the git clone https://github.com/quarkusio/quarkus-quickstarts.git -b 3.8 command. Alternatively, download an archive.
The solution is located in the security-openid-connect-web-authentication-quickstart directory.
4.4. Create the Maven project
First, we need a new project. Create a new project by running the following command:
Using the Quarkus CLI:
quarkus create app org.acme:security-openid-connect-web-authentication-quickstart \
    --extension='resteasy-reactive,oidc' \
    --no-code
cd security-openid-connect-web-authentication-quickstart
To create a Gradle project, add the
--gradleor--gradle-kotlin-dsloption.For more information about how to install and use the Quarkus CLI, see the Quarkus CLI guide.
Using Maven:
mvn io.quarkus.platform:quarkus-maven-plugin:3.8.5:create \
    -DprojectGroupId=org.acme \
    -DprojectArtifactId=security-openid-connect-web-authentication-quickstart \
    -Dextensions='resteasy-reactive,oidc' \
    -DnoCode
cd security-openid-connect-web-authentication-quickstart
To create a Gradle project, add the
-DbuildTool=gradleor-DbuildTool=gradle-kotlin-dsloption.
For Windows users:
-
If using cmd, (don’t use backward slash
\and put everything on the same line) -
If using Powershell, wrap
-Dparameters in double quotes e.g."-DprojectArtifactId=security-openid-connect-web-authentication-quickstart"
If you already have your Quarkus project configured, you can add the oidc extension to your project by running the following command in your project base directory:
Using the Quarkus CLI:
quarkus extension add oidcUsing Maven:
./mvnw quarkus:add-extension -Dextensions='oidc'Using Gradle:
./gradlew addExtension --extensions='oidc'
This adds the following dependency to your build file:
Using Maven:
<dependency>
   <groupId>io.quarkus</groupId>
   <artifactId>quarkus-oidc</artifactId>
</dependency>
Using Gradle:
implementation("io.quarkus:quarkus-oidc")
4.5. Write the application
Let’s write a simple Jakarta REST resource that has all the tokens returned in the authorization code grant response injected:
package org.acme.security.openid.connect.web.authentication;

import jakarta.inject.Inject;
import jakarta.ws.rs.GET;
import jakarta.ws.rs.Path;
import jakarta.ws.rs.Produces;

import org.eclipse.microprofile.jwt.Claims;
import org.eclipse.microprofile.jwt.JsonWebToken;

import io.quarkus.oidc.IdToken;
import io.quarkus.oidc.RefreshToken;

@Path("/tokens")
public class TokenResource {

   /**
    * Injection point for the ID token issued by the OpenID Connect provider
    */
   @Inject
   @IdToken
   JsonWebToken idToken;

   /**
    * Injection point for the access token issued by the OpenID Connect provider
    */
   @Inject
   JsonWebToken accessToken;

   /**
    * Injection point for the refresh token issued by the OpenID Connect provider
    */
   @Inject
   RefreshToken refreshToken;

   /**
    * Returns the tokens available to the application.
    * This endpoint exists only for demonstration purposes.
    * Do not expose these tokens in a real application.
    *
    * @return an HTML page containing the tokens available to the application.
    */
   @GET
   @Produces("text/html")
   public String getTokens() {
       StringBuilder response = new StringBuilder().append("<html>")
               .append("<body>")
               .append("<ul>");


       Object userName = this.idToken.getClaim(Claims.preferred_username);

       if (userName != null) {
           response.append("<li>username: ").append(userName.toString()).append("</li>");
       }

       Object scopes = this.accessToken.getClaim("scope");

       if (scopes != null) {
           response.append("<li>scopes: ").append(scopes.toString()).append("</li>");
       }

       response.append("<li>refresh_token: ").append(refreshToken.getToken() != null).append("</li>");

       return response.append("</ul>").append("</body>").append("</html>").toString();
   }
}
This endpoint has ID, access, and refresh tokens injected. It returns a preferred_username claim from the ID token, a scope claim from the access token, and a refresh token availability status.
You only need to inject the tokens if the endpoint needs to use the ID token to interact with the currently authenticated user or use the access token to access a downstream service on behalf of this user.
For more information, see the Access ID and Access Tokens section of the reference guide.
4.6. Configure the application
The OIDC extension allows you to define the configuration by using the application.properties file in the src/main/resources directory.
quarkus.oidc.auth-server-url=http://localhost:8180/realms/quarkus
quarkus.oidc.client-id=frontend
quarkus.oidc.credentials.secret=secret
quarkus.oidc.application-type=web-app
quarkus.http.auth.permission.authenticated.paths=/*
quarkus.http.auth.permission.authenticated.policy=authenticated
This is the simplest configuration you can have when enabling authentication to your application.
The quarkus.oidc.client-id property references the client_id issued by the OIDC provider, and the quarkus.oidc.credentials.secret property sets the client secret.
The quarkus.oidc.application-type property is set to web-app to tell Quarkus that you want to enable the OIDC authorization code flow so that your users are redirected to the OIDC provider to authenticate.
Finally, the quarkus.http.auth.permission.authenticated permission is set to tell Quarkus about the paths you want to protect. In this case, all paths are protected by a policy that ensures only authenticated users can access them. For more information, see Security Authorization Guide.
4.7. Start and configure the Keycloak server
To start a Keycloak server, use Docker and run the following command:
docker run --name keycloak -e KEYCLOAK_ADMIN=admin -e KEYCLOAK_ADMIN_PASSWORD=admin -p 8180:8080 quay.io/keycloak/keycloak:{keycloak.version} start-dev
where keycloak.version is set to 24.0.0 or later.
You can access your Keycloak Server at localhost:8180.
To access the Keycloak Administration Console, log in as the admin user. The username and password are both admin.
To create a new realm, import the realm configuration file. For more information, see the Keycloak documentation about how to create and configure a new realm.
4.8. Run the application in dev and JVM modes
To run the application in dev mode, use:
Using the Quarkus CLI:
quarkus devUsing Maven:
./mvnw quarkus:devUsing Gradle:
./gradlew --console=plain quarkusDev
After exploring the application in dev mode, you can run it as a standard Java application.
First, compile it:
Using the Quarkus CLI:
quarkus buildUsing Maven:
./mvnw installUsing Gradle:
./gradlew build
Then, run it:
java -jar target/quarkus-app/quarkus-run.jar4.9. Run the application in Native mode
This same demo can be compiled into native code. No modifications are required.
This implies that you no longer need to install a JVM on your production environment, as the runtime technology is included in the produced binary and optimized to run with minimal resources.
Compilation takes longer, so this step is turned off by default. You can build again by enabling the native build:
Using the Quarkus CLI:
quarkus build --nativeUsing Maven:
./mvnw install -DnativeUsing Gradle:
./gradlew build -Dquarkus.package.type=native
After a while, you can run this binary directly:
./target/security-openid-connect-web-authentication-quickstart-runner4.10. Test the application
To test the application, open your browser and access the following URL:
If everything works as expected, you are redirected to the Keycloak server to authenticate.
To authenticate to the application, enter the following credentials at the Keycloak login page:
- Username: alice
- Password: alice
After clicking the Login button, you are redirected back to the application, and a session cookie will be created.
The session for this demo is valid for a short period of time and, on every page refresh, you will be asked to re-authenticate. For information about how to increase the session timeouts, see the Keycloak session timeout documentation. For example, you can access the Keycloak Admin console directly from the dev UI by clicking the Keycloak Admin link if you use Dev Services for Keycloak in dev mode:

For more information about writing the integration tests that depend on Dev Services for Keycloak, see the Dev Services for Keycloak section.
4.11. Summary
You have learned how to set up and use the OIDC authorization code flow mechanism to protect and test application HTTP endpoints. After you have completed this tutorial, explore OIDC Bearer token authentication and other authentication mechanisms.
4.12. References
- Quarkus Security overview
- OIDC code flow mechanism for protecting web applications
- Configuring well-known OpenID Connect providers
- OpenID Connect and OAuth2 Client and Filters reference guide
- Dev Services for Keycloak
- Sign and encrypt JWT tokens with SmallRye JWT Build
- Choosing between OpenID Connect, SmallRye JWT, and OAuth2 authentication mechanisms
- Keycloak Documentation
- Protect Quarkus web application by using Auth0 OpenID Connect provider
- OpenID Connect
- JSON Web Token
Chapter 5. Using OpenID Connect (OIDC) multitenancy
This guide demonstrates how your OpenID Connect (OIDC) application can support multitenancy to serve multiple tenants from a single application. These tenants can be distinct realms or security domains within the same OIDC provider or even distinct OIDC providers.
Each customer functions as a distinct tenant when serving multiple customers from the same application, such as in a SaaS environment. By enabling multitenancy support to your applications, you can support distinct authentication policies for each tenant, even authenticating against different OIDC providers, such as Keycloak and Google.
To authorize a tenant by using Bearer Token Authorization, see the OpenID Connect (OIDC) Bearer token authentication guide.
To authenticate and authorize a tenant by using the OIDC authorization code flow, read the OpenID Connect authorization code flow mechanism for protecting web applications guide.
Also, see the OpenID Connect (OIDC) configuration properties reference guide.
5.1. Prerequisites
To complete this guide, you need:
- Roughly 15 minutes
- An IDE
-
JDK 17+ installed with
JAVA_HOMEconfigured appropriately - Apache Maven 3.9.6
- A working container runtime (Docker or Podman)
- Optionally the Quarkus CLI if you want to use it
- Optionally Mandrel or GraalVM installed and configured appropriately if you want to build a native executable (or Docker if you use a native container build)
- jq tool
5.2. Architecture
In this example, we build a very simple application that supports two resource methods:
-
/{tenant}
This resource returns information obtained from the ID token issued by the OIDC provider about the authenticated user and the current tenant.
-
/{tenant}/bearer
This resource returns information obtained from the Access Token issued by the OIDC provider about the authenticated user and the current tenant.
5.3. Solution
For a thorough understanding, we recommend you build the application by following the upcoming step-by-step instructions.
Alternatively, if you prefer to start with the completed example, clone the Git repository: git clone https://github.com/quarkusio/quarkus-quickstarts.git -b 3.8, or download an archive.
The solution is located in the security-openid-connect-multi-tenancy-quickstart directory.
5.4. Creating the Maven project
First, we need a new project. Create a new project with the following command:
Using the Quarkus CLI:
quarkus create app org.acme:security-openid-connect-multi-tenancy-quickstart \
    --extension='oidc,resteasy-reactive-jackson' \
    --no-code
cd security-openid-connect-multi-tenancy-quickstart
To create a Gradle project, add the
--gradleor--gradle-kotlin-dsloption.For more information about how to install and use the Quarkus CLI, see the Quarkus CLI guide.
Using Maven:
mvn io.quarkus.platform:quarkus-maven-plugin:3.8.5:create \
    -DprojectGroupId=org.acme \
    -DprojectArtifactId=security-openid-connect-multi-tenancy-quickstart \
    -Dextensions='oidc,resteasy-reactive-jackson' \
    -DnoCode
cd security-openid-connect-multi-tenancy-quickstart
To create a Gradle project, add the
-DbuildTool=gradleor-DbuildTool=gradle-kotlin-dsloption.
For Windows users:
-
If using cmd, (don’t use backward slash
\and put everything on the same line) -
If using Powershell, wrap
-Dparameters in double quotes e.g."-DprojectArtifactId=security-openid-connect-multi-tenancy-quickstart"
If you already have your Quarkus project configured, add the oidc extension to your project by running the following command in your project base directory:
Using the Quarkus CLI:
quarkus extension add oidcUsing Maven:
./mvnw quarkus:add-extension -Dextensions='oidc'Using Gradle:
./gradlew addExtension --extensions='oidc'
This adds the following to your build file:
Using Maven:
<dependency>
    <groupId>io.quarkus</groupId>
    <artifactId>quarkus-oidc</artifactId>
</dependency>
Using Gradle:
implementation("io.quarkus:quarkus-oidc")
5.5. Writing the application
Start by implementing the /{tenant} endpoint. As you can see from the source code below, it is just a regular Jakarta REST resource:
package org.acme.quickstart.oidc;

import jakarta.inject.Inject;
import jakarta.ws.rs.GET;
import jakarta.ws.rs.Path;
import jakarta.ws.rs.Produces;

import org.eclipse.microprofile.jwt.JsonWebToken;

import io.quarkus.oidc.IdToken;

@Path("/{tenant}")
public class HomeResource {
    /**
     * Injection point for the ID Token issued by the OIDC provider.
     */
    @Inject
    @IdToken
    JsonWebToken idToken;

    /**
     * Injection point for the Access Token issued by the OIDC provider.
     */
    @Inject
    JsonWebToken accessToken;

    /**
     * Returns the ID Token info.
     * This endpoint exists only for demonstration purposes.
     * Do not expose this token in a real application.
     *
     * @return ID Token info
     */
    @GET
    @Produces("text/html")
    public String getIdTokenInfo() {
        StringBuilder response = new StringBuilder().append("<html>")
                .append("<body>");

        response.append("<h2>Welcome, ").append(this.idToken.getClaim("email").toString()).append("</h2>\n");
        response.append("<h3>You are accessing the application within tenant <b>").append(idToken.getIssuer()).append(" boundaries</b></h3>");

        return response.append("</body>").append("</html>").toString();
    }

    /**
     * Returns the Access Token info.
     * This endpoint exists only for demonstration purposes.
     * Do not expose this token in a real application.
     *
     * @return Access Token info
     */
    @GET
    @Produces("text/html")
    @Path("bearer")
    public String getAccessTokenInfo() {
        StringBuilder response = new StringBuilder().append("<html>")
                .append("<body>");

        response.append("<h2>Welcome, ").append(this.accessToken.getClaim("email").toString()).append("</h2>\n");
        response.append("<h3>You are accessing the application within tenant <b>").append(accessToken.getIssuer()).append(" boundaries</b></h3>");

        return response.append("</body>").append("</html>").toString();
    }
}
To resolve the tenant from incoming requests and map it to a specific quarkus-oidc tenant configuration in application.properties, create an implementation for the io.quarkus.oidc.TenantConfigResolver interface, which can dynamically resolve tenant configurations:
package org.acme.quickstart.oidc;

import jakarta.enterprise.context.ApplicationScoped;

import org.eclipse.microprofile.config.ConfigProvider;

import io.quarkus.oidc.OidcRequestContext;
import io.quarkus.oidc.OidcTenantConfig;
import io.quarkus.oidc.OidcTenantConfig.ApplicationType;
import io.quarkus.oidc.TenantConfigResolver;
import io.smallrye.mutiny.Uni;
import io.vertx.ext.web.RoutingContext;

@ApplicationScoped
public class CustomTenantResolver implements TenantConfigResolver {

    @Override
    public Uni<OidcTenantConfig> resolve(RoutingContext context, OidcRequestContext<OidcTenantConfig> requestContext) {
        String path = context.request().path();

        if (path.startsWith("/tenant-a")) {
           String keycloakUrl = ConfigProvider.getConfig().getValue("keycloak.url", String.class);

            OidcTenantConfig config = new OidcTenantConfig();
            config.setTenantId("tenant-a");
            config.setAuthServerUrl(keycloakUrl + "/realms/tenant-a");
            config.setClientId("multi-tenant-client");
            config.getCredentials().setSecret("secret");
            config.setApplicationType(ApplicationType.HYBRID);
            return Uni.createFrom().item(config);
        } else {
            // resolve to default tenant config
            return Uni.createFrom().nullItem();
        }
    }
}
In the preceding implementation, tenants are resolved from the request path. If no tenant can be inferred, null is returned to indicate that the default tenant configuration should be used.
The tenant-a application type is hybrid; it can accept HTTP bearer tokens if provided. Otherwise, it initiates an authorization code flow when authentication is required.
5.6. Configuring the application
# Default tenant configuration
%prod.quarkus.oidc.auth-server-url=http://localhost:8180/realms/quarkus
quarkus.oidc.client-id=multi-tenant-client
quarkus.oidc.application-type=web-app

# Tenant A configuration is created dynamically in CustomTenantConfigResolver

# HTTP security configuration
quarkus.http.auth.permission.authenticated.paths=/*
quarkus.http.auth.permission.authenticated.policy=authenticated
The first configuration is the default tenant configuration that should be used when the tenant cannot be inferred from the request. Be aware that a %prod profile prefix is used with quarkus.oidc.auth-server-url to support testing a multitenant application with Dev Services For Keycloak. This configuration uses a Keycloak instance to authenticate users.
The second configuration, provided by TenantConfigResolver, is used when an incoming request is mapped to the tenant-a tenant.
Both configurations map to the same Keycloak server instance while using distinct realms.
Alternatively, you can configure the tenant tenant-a directly in application.properties:
# Default tenant configuration
%prod.quarkus.oidc.auth-server-url=http://localhost:8180/realms/quarkus
quarkus.oidc.client-id=multi-tenant-client
quarkus.oidc.application-type=web-app

# Tenant A configuration
quarkus.oidc.tenant-a.auth-server-url=http://localhost:8180/realms/tenant-a
quarkus.oidc.tenant-a.client-id=multi-tenant-client
quarkus.oidc.tenant-a.application-type=web-app

# HTTP security configuration
quarkus.http.auth.permission.authenticated.paths=/*
quarkus.http.auth.permission.authenticated.policy=authenticated
In that case, also use a custom TenantConfigResolver to resolve it:
package org.acme.quickstart.oidc;

import jakarta.enterprise.context.ApplicationScoped;

import io.quarkus.oidc.TenantResolver;
import io.vertx.ext.web.RoutingContext;

@ApplicationScoped
public class CustomTenantResolver implements TenantResolver {

    @Override
    public String resolve(RoutingContext context) {
        String path = context.request().path();
        String[] parts = path.split("/");

        if (parts.length == 0) {
            //Resolve to default tenant configuration
            return null;
        }

        return parts[1];
    }
}
You can define multiple tenants in your configuration file. To map them correctly when resolving a tenant from your TenantResolver implementation, ensure each has a unique alias.
However, using a static tenant resolution, which involves configuring tenants in application.properties and resolving them with TenantResolver, does not work for testing endpoints with Dev Services for Keycloak because it does not know how the requests are be mapped to individual tenants, and cannot dynamically provide tenant-specific quarkus.oidc.<tenant-id>.auth-server-url values. Therefore, using %prod prefixes with tenant-specific URLs within application.properties does not work in both test and development modes.
When a current tenant represents an OIDC web-app application, the current io.vertx.ext.web.RoutingContext contains a tenant-id attribute by the time the custom tenant resolver has been called for all the requests completing the code authentication flow and the already authenticated requests, when either a tenant-specific state or session cookie already exists. Therefore, when working with multiple OIDC providers, you only need a path-specific check to resolve a tenant id if the RoutingContext does not have the tenant-id attribute set, for example:
package org.acme.quickstart.oidc;

import jakarta.enterprise.context.ApplicationScoped;

import io.quarkus.oidc.TenantResolver;
import io.vertx.ext.web.RoutingContext;

@ApplicationScoped
public class CustomTenantResolver implements TenantResolver {

    @Override
    public String resolve(RoutingContext context) {
        String tenantId = context.get("tenant-id");
        if (tenantId != null) {
            return tenantId;
        } else {
            // Initial login request
            String path = context.request().path();
            String[] parts = path.split("/");

            if (parts.length == 0) {
                //Resolve to default tenant configuration
                return null;
            }
            return parts[1];
        }
    }
}
This is how Quarkus OIDC resolves static custom tenants if no custom TenantResolver is registered.
A similar technique can be used with TenantConfigResolver, where a tenant-id provided in the context can return OidcTenantConfig already prepared with the previous request.
If you also use Hibernate ORM multitenancy or MongoDB with Panache multitenancy and both tenant ids are the same and must be extracted from the Vert.x RoutingContext, you can pass the tenant id from the OIDC Tenant Resolver to the Hibernate ORM Tenant Resolver or MongoDB with Panache Mongo Database Resolver as a RoutingContext attribute, for example:
public class CustomTenantResolver implements TenantResolver {

    @Override
    public String resolve(RoutingContext context) {
        String tenantId = extractTenantId(context);
        context.put("tenantId", tenantId);
        return tenantId;
    }
}
5.7. Starting and configuring the Keycloak server
To start a Keycloak server, you can use Docker and run the following command:
docker run --name keycloak -e KEYCLOAK_ADMIN=admin -e KEYCLOAK_ADMIN_PASSWORD=admin -p 8180:8080 quay.io/keycloak/keycloak:{keycloak.version} start-dev
where keycloak.version is set to 24.0.0 or higher.
Access your Keycloak server at localhost:8180.
Log in as the admin user to access the Keycloak administration console. The username and password are both admin.
Now, import the realms for the two tenants:
- Import the default-tenant-realm.json to create the default realm.
-
Import the tenant-a-realm.json to create the realm for the tenant
tenant-a.
For more information, see the Keycloak documentation about how to create a new realm.
5.8. Running and using the application
5.8.1. Running in developer mode
To run the microservice in dev mode, use:
Using the Quarkus CLI:
quarkus devUsing Maven:
./mvnw quarkus:devUsing Gradle:
./gradlew --console=plain quarkusDev
5.8.2. Running in JVM mode
After exploring the application in dev mode, you can run it as a standard Java application.
First, compile it:
Using the Quarkus CLI:
quarkus buildUsing Maven:
./mvnw installUsing Gradle:
./gradlew build
Then run it:
java -jar target/quarkus-app/quarkus-run.jar5.8.3. Running in native mode
This same demo can be compiled into native code; no modifications are required.
This implies that you no longer need to install a JVM on your production environment, as the runtime technology is included in the produced binary, and optimized to run with minimal resources.
Compilation takes a bit longer, so this step is turned off by default; let’s build again by enabling the native build:
Using the Quarkus CLI:
quarkus build --nativeUsing Maven:
./mvnw install -DnativeUsing Gradle:
./gradlew build -Dquarkus.package.type=native
After a little while, you can run this binary directly:
./target/security-openid-connect-multi-tenancy-quickstart-runner5.9. Test the application
5.9.1. Use the browser
To test the application, open your browser and access the following URL:
If everything works as expected, you are redirected to the Keycloak server to authenticate. Be aware that the requested path defines a default tenant, which we don’t have mapped in the configuration file. In this case, the default configuration is used.
To authenticate to the application, enter the following credentials in the Keycloak login page:
-
Username:
alice -
Password:
alice
After clicking the Login button, you are redirected back to the application.
If you try now to access the application at the following URL:
You are redirected again to the Keycloak login page. However, this time, you are going to authenticate by using a different realm.
In both cases, the landing page shows the user’s name and email if the user is successfully authenticated. Although alice exists in both tenants, the application treats them as distinct users in separate realms.
5.10. Static tenant configuration resolution
When you set multiple tenant configurations in the application.properties file, you only need to specify how the tenant identifier gets resolved. To configure the resolution of the tenant identifier, use one of the following options:
These tenant resolution options are tried in the order they are listed until the tenant id gets resolved. If the tenant id remains unresolved (null), the default (unnamed) tenant configuration is selected.
5.10.1. Resolve with TenantResolver
The following application.properties example shows how you can resolve the tenant identifier of two tenants named a and b by using the TenantResolver method:
# Tenant 'a' configuration
quarkus.oidc.a.auth-server-url=http://localhost:8180/realms/quarkus-a
quarkus.oidc.a.client-id=client-a
quarkus.oidc.a.credentials.secret=client-a-secret

# Tenant 'b' configuration
quarkus.oidc.b.auth-server-url=http://localhost:8180/realms/quarkus-b
quarkus.oidc.b.client-id=client-b
quarkus.oidc.b.credentials.secret=client-b-secret
You can return the tenant id of either a or b from quarkus.oidc.TenantResolver:
import quarkus.oidc.TenantResolver;

public class CustomTenantResolver implements TenantResolver {

    @Override
    public String resolve(RoutingContext context) {
        String path = context.request().path();
        if (path.endsWith("a")) {
            return "a";
        } else if (path.endsWith("b")) {
            return "b";
        } else {
            // default tenant
            return null;
        }
    }
}
In this example, the value of the last request path segment is a tenant id, but if required, you can implement a more complex tenant identifier resolution logic.
5.10.2. Default resolution
The default resolution for a tenant identifier is convention based, whereby the authentication request must include the tenant identifier in the last segment of the request path.
The following application.properties example shows how you can configure two tenants named google and github:
# Tenant 'google' configuration
quarkus.oidc.google.provider=google
quarkus.oidc.google.client-id=${google-client-id}
quarkus.oidc.google.credentials.secret=${google-client-secret}
quarkus.oidc.google.authentication.redirect-path=/signed-in

# Tenant 'github' configuration
quarkus.oidc.github.provider=google
quarkus.oidc.github.client-id=${github-client-id}
quarkus.oidc.github.credentials.secret=${github-client-secret}
quarkus.oidc.github.authentication.redirect-path=/signed-in
In the provided example, both tenants configure OIDC web-app applications to use an authorization code flow to authenticate users and require session cookies to be generated after authentication. After Google or GitHub authenticates the current user, the user gets returned to the /signed-in area for authenticated users, such as a secured resource path on the JAX-RS endpoint.
Finally, to complete the default tenant resolution, set the following configuration property:
quarkus.http.auth.permission.login.paths=/google,/github
quarkus.http.auth.permission.login.policy=authenticated
If the endpoint is running on http://localhost:8080, you can also provide UI options for users to log in to either http://localhost:8080/google or http://localhost:8080/github, without having to add specific /google or /github JAX-RS resource paths. Tenant identifiers are also recorded in the session cookie names after the authentication is completed. Therefore, authenticated users can access the secured application area without requiring either the google or github path values to be included in the secured URL.
Default resolution can also work for Bearer token authentication. Still, it might be less practical because a tenant identifier must always be set as the last path segment value.
5.10.3. Resolve with annotations
You can use the io.quarkus.oidc.Tenant annotation for resolving the tenant identifiers as an alternative to using io.quarkus.oidc.TenantResolver.
Proactive HTTP authentication must be disabled (quarkus.http.auth.proactive=false) for this to work. For more information, see the Proactive authentication guide.
Assuming your application supports two OIDC tenants, the hr and default tenants, all resource methods and classes carrying @Tenant("hr") are authenticated by using the OIDC provider configured by quarkus.oidc.hr.auth-server-url. In contrast, all other classes and methods are still authenticated by using the default OIDC provider.
import jakarta.ws.rs.GET;
import jakarta.ws.rs.Path;
import jakarta.ws.rs.Produces;
import jakarta.ws.rs.core.MediaType;

import io.quarkus.oidc.Tenant;
import io.quarkus.security.Authenticated;

@Authenticated
@Path("/api/hello")
public class HelloResource {

    @Tenant("hr")
    @GET
    @Produces(MediaType.TEXT_PLAIN)
    public String sayHello() {
        return "Hello!";
    }
}- 1
- The
io.quarkus.oidc.Tenantannotation must be placed on either the resource class or resource method.
5.11. Dynamic tenant configuration resolution
If you need a more dynamic configuration for the different tenants you want to support and don’t want to end up with multiple entries in your configuration file, you can use the io.quarkus.oidc.TenantConfigResolver.
This interface allows you to dynamically create tenant configurations at runtime:
package io.quarkus.it.keycloak;

import jakarta.enterprise.context.ApplicationScoped;
import java.util.function.Supplier;

import io.smallrye.mutiny.Uni;
import io.quarkus.oidc.OidcRequestContext;
import io.quarkus.oidc.OidcTenantConfig;
import io.quarkus.oidc.TenantConfigResolver;
import io.vertx.ext.web.RoutingContext;

@ApplicationScoped
public class CustomTenantConfigResolver implements TenantConfigResolver {

    @Override
    public Uni<OidcTenantConfig> resolve(RoutingContext context, OidcRequestContext<OidcTenantConfig> requestContext) {
        String path = context.request().path();
        String[] parts = path.split("/");

        if (parts.length == 0) {
            //Resolve to default tenant configuration
            return null;
        }

        if ("tenant-c".equals(parts[1])) {
            // Do 'return requestContext.runBlocking(createTenantConfig());'
            // if a blocking call is required to create a tenant config,
            return Uni.createFromItem(createTenantConfig());
        }

        //Resolve to default tenant configuration
        return null;
    }

    private Supplier<OidcTenantConfig> createTenantConfig() {
        final OidcTenantConfig config = new OidcTenantConfig();

        config.setTenantId("tenant-c");
        config.setAuthServerUrl("http://localhost:8180/realms/tenant-c");
        config.setClientId("multi-tenant-client");
        OidcTenantConfig.Credentials credentials = new OidcTenantConfig.Credentials();

        credentials.setSecret("my-secret");

        config.setCredentials(credentials);

        // Any other setting supported by the quarkus-oidc extension

        return () -> config;
    }
}
The OidcTenantConfig returned by this method is the same one used to parse the oidc namespace configuration from the application.properties. You can populate it by using any settings supported by the quarkus-oidc extension.
If the dynamic tenant resolver returns null, a Static tenant configuration resolution is attempted next.
5.11.1. Tenant resolution for OIDC web-app applications
The simplest option for resolving the OIDC web-app application configuration is to follow the steps described in the Default resolution section.
Try one of the options below if the default resolution strategy does not work for your application setup.
Several options are available for selecting the tenant configuration that should be used to secure the current HTTP request for both service and web-app OIDC applications, such as:
-
Check the URL paths. For example, a
tenant-serviceconfiguration must be used for the/servicepaths, while atenant-manageconfiguration must be used for the/managementpaths. -
Check the HTTP headers. For example, with a URL path always being
/service, a header such asRealm: serviceorRealm: managementcan help to select between thetenant-serviceandtenant-manageconfigurations. - Check the URL query parameters. It can work similarly to the way the headers are used to select the tenant configuration.
All these options can be easily implemented with the custom TenantResolver and TenantConfigResolver implementations for the OIDC service applications.
However, due to an HTTP redirect required to complete the code authentication flow for the OIDC web-app applications, a custom HTTP cookie might be needed to select the same tenant configuration before and after this redirect request because:
- The URL path might not be the same after the redirect request if a single redirect URL has been registered in the OIDC provider. The original request path can be restored after the tenant configuration has been resolved.
- The HTTP headers used during the original request are unavailable after the redirect.
- The custom URL query parameters are restored after the redirect but only after the tenant configuration is resolved.
One option to ensure the information for resolving the tenant configurations for web-app applications is available before and after the redirect is to use a cookie, for example:
package org.acme.quickstart.oidc;

import java.util.List;

import jakarta.enterprise.context.ApplicationScoped;

import io.quarkus.oidc.TenantResolver;
import io.vertx.core.http.Cookie;
import io.vertx.ext.web.RoutingContext;

@ApplicationScoped
public class CustomTenantResolver implements TenantResolver {

    @Override
    public String resolve(RoutingContext context) {
        List<String> tenantIdQuery = context.queryParam("tenantId");
        if (!tenantIdQuery.isEmpty()) {
            String tenantId = tenantIdQuery.get(0);
            context.response().addCookie(Cookie.cookie("tenant", tenantId));
            return tenantId;
        } else if (!context.request().cookies("tenant").isEmpty()) {
            return context.request().getCookie("tenant").getValue();
        }

        return null;
    }
}
5.12. Disabling tenant configurations
Custom TenantResolver and TenantConfigResolver implementations might return null if no tenant can be inferred from the current request and a fallback to the default tenant configuration is required.
If you expect the custom resolvers always to resolve a tenant, you do not need to configure the default tenant resolution.
-
To turn off the default tenant configuration, set
quarkus.oidc.tenant-enabled=false.
The default tenant configuration is automatically disabled when quarkus.oidc.auth-server-url is not configured, but either custom tenant configurations are available or TenantConfigResolver is registered.
Be aware that tenant-specific configurations can also be disabled, for example: quarkus.oidc.tenant-a.tenant-enabled=false.
5.13. References
Chapter 6. OpenID Connect (OIDC) configuration properties
As a Quarkus developer, you configure the Quarkus OpenID Connect (OIDC) extension by setting the following properties in the src/main/resources/application.properties file.
 Configuration property fixed at build time - All other configuration properties are overridable at runtime
| Type | Default | |
|
Flag to enable (default) or disable Dev Services. When enabled, Dev Services for Keycloak automatically configures and starts Keycloak in Dev or Test mode, and when Docker is running.
Environment variable: | boolean |
|
|
The container image name for Dev Services providers. Defaults to a Quarkus-based Keycloak image. For a WildFly-based distribution, use an image like
Environment variable: | string |
|
|
Indicates if a Keycloak-X image is used. By default, the image is identified by
Environment variable: | boolean | |
|
Determines if the Keycloak container is shared. When shared, Quarkus uses label-based service discovery to find and reuse a running Keycloak container, so a second one is not started. Otherwise, if a matching container is not is found, a new container is started. The service discovery uses the
Environment variable: | boolean |
|
|
The value of the
Environment variable: | string |
|
|
A comma-separated list of class or file system paths to Keycloak realm files. This list is used to initialize Keycloak. The first value in this list is used to initialize default tenant connection properties.
Environment variable: | list of string | |
|
The
Environment variable: | string | |
|
Show Keycloak log messages with a "Keycloak:" prefix.
Environment variable: | boolean |
|
|
Keycloak start command. Use this property to experiment with Keycloak start options, see
Environment variable: | string | |
|
The name of the Keycloak realm. This property is used to create the realm if the realm file pointed to by the
Environment variable: | string | |
|
Specifies whether to create the Keycloak realm when no realm file is found at the
Environment variable: | boolean |
|
|
The specific port for the dev service to listen on. If not specified, a random port is selected.
Environment variable: | int | |
|
Aliases to additional class or file system resources that are used to initialize Keycloak. Each map entry represents a mapping between an alias and a class or file system resource path.
Environment variable: |
| |
|
Additional class or file system resources that are used to initialize Keycloak. Each map entry represents a mapping between a class or file system resource path alias and the Keycloak container location.
Environment variable: |
| |
|
A map of Keycloak usernames to passwords. If empty, default users
Environment variable: |
| |
|
A map of roles for Keycloak users. If empty, default roles are assigned:
Environment variable: |
| |
|
Environment variables to be passed to the container.
Environment variable: |
| |
|
If the OIDC extension is enabled.
Environment variable: | boolean |
|
|
Grant type which will be used to acquire a token to test the OIDC 'service' applications
Environment variable: | tooltip:client['client_credentials' grant], tooltip:password['password' grant], tooltip:code['authorization_code' grant], tooltip:implicit['implicit' grant] | |
|
The WebClient timeout. Use this property to configure how long an HTTP client used by Dev UI handlers will wait for a response when requesting tokens from OpenId Connect Provider and sending them to the service endpoint. This timeout is also used by the OIDC dev service admin client.
Environment variable: |
| |
|
Enable the registration of the Default TokenIntrospection and UserInfo Cache implementation bean. Note: This only enables the default implementation. It requires configuration to be activated. See
Environment variable: | boolean |
|
|
The base URL of the OpenID Connect (OIDC) server, for example,
Environment variable: | string | |
|
Discovery of the OIDC endpoints. If not enabled, you must configure the OIDC endpoint URLs individually.
Environment variable: | boolean |
|
|
The OIDC token endpoint that issues access and refresh tokens; specified as a relative path or absolute URL. Set if
Environment variable: | string | |
|
The relative path or absolute URL of the OIDC token revocation endpoint.
Environment variable: | string | |
|
The client id of the application. Each application has a client id that is used to identify the application. Setting the client id is not required if
Environment variable: | string | |
|
The duration to attempt the initial connection to an OIDC server. For example, setting the duration to
Environment variable: | ||
|
The number of times to retry re-establishing an existing OIDC connection if it is temporarily lost. Different from
Environment variable: | int |
|
|
The number of seconds after which the current OIDC connection request times out.
Environment variable: |
| |
|
Whether DNS lookup should be performed on the worker thread. Use this option when you can see logged warnings about blocked Vert.x event loop by HTTP requests to OIDC server.
Environment variable: | boolean |
|
|
The maximum size of the connection pool used by the WebClient.
Environment variable: | int | |
|
The client secret used by the
Environment variable: | string | |
|
The client secret value. This value is ignored if
Environment variable: | string | |
|
The CredentialsProvider name, which should only be set if more than one CredentialsProvider is registered
Environment variable: | string | |
|
The CredentialsProvider client secret key
Environment variable: | string | |
|
The authentication method. If the
Environment variable: |
tooltip:basic[ | |
|
If provided, indicates that JWT is signed using a secret key.
Environment variable: | string | |
|
The CredentialsProvider name, which should only be set if more than one CredentialsProvider is registered
Environment variable: | string | |
|
The CredentialsProvider client secret key
Environment variable: | string | |
|
If provided, indicates that JWT is signed using a private key in PEM or JWK format. You can use the
Environment variable: | string | |
|
If provided, indicates that JWT is signed using a private key from a keystore.
Environment variable: | string | |
|
A parameter to specify the password of the keystore file.
Environment variable: | string | |
|
The private key id or alias.
Environment variable: | string | |
|
The private key password.
Environment variable: | string | |
|
The JWT audience (
Environment variable: | string | |
|
The key identifier of the signing key added as a JWT
Environment variable: | string | |
|
The issuer of the signing key added as a JWT
Environment variable: | string | |
|
Subject of the signing key added as a JWT
Environment variable: | string | |
|
The signature algorithm used for the
Environment variable: | string | |
|
The JWT lifespan in seconds. This value is added to the time at which the JWT was issued to calculate the expiration time.
Environment variable: | int |
|
|
The host name or IP address of the Proxy.
Environment variable: | string | |
|
The port number of the Proxy. The default value is
Environment variable: | int |
|
|
The username, if the Proxy needs authentication.
Environment variable: | string | |
|
The password, if the Proxy needs authentication.
Environment variable: | string | |
|
Certificate validation and hostname verification, which can be one of the following
Environment variable: | tooltip:required[Certificates are validated and hostname verification is enabled. This is the default value.], tooltip:certificate-validation[Certificates are validated but hostname verification is disabled.], tooltip:none[All certificates are trusted and hostname verification is disabled.] | |
|
An optional keystore that holds the certificate information instead of specifying separate files.
Environment variable: | path | |
|
The type of the keystore file. If not given, the type is automatically detected based on the file name.
Environment variable: | string | |
|
The provider of the keystore file. If not given, the provider is automatically detected based on the keystore file type.
Environment variable: | string | |
|
The password of the keystore file. If not given, the default value,
Environment variable: | string | |
|
The alias of a specific key in the keystore. When SNI is disabled, if the keystore contains multiple keys and no alias is specified, the behavior is undefined.
Environment variable: | string | |
|
The password of the key, if it is different from the
Environment variable: | string | |
|
The truststore that holds the certificate information of the certificates to trust.
Environment variable: | path | |
|
The password of the truststore file.
Environment variable: | string | |
|
The alias of the truststore certificate.
Environment variable: | string | |
|
The type of the truststore file. If not given, the type is automatically detected based on the file name.
Environment variable: | string | |
|
The provider of the truststore file. If not given, the provider is automatically detected based on the truststore file type.
Environment variable: | string | |
|
A unique tenant identifier. It can be set by
Environment variable: | string | |
|
If this tenant configuration is enabled. The default tenant is disabled if it is not configured but a
Environment variable: | boolean |
|
|
The application type, which can be one of the following
Environment variable: |
tooltip:web-app[A |
|
|
The relative path or absolute URL of the OpenID Connect (OIDC) authorization endpoint, which authenticates users. You must set this property for
Environment variable: | string | |
|
The relative path or absolute URL of the OIDC UserInfo endpoint. You must set this property for
Environment variable: | string | |
|
Relative path or absolute URL of the OIDC RFC7662 introspection endpoint which can introspect both opaque and JSON Web Token (JWT) tokens. This property must be set if OIDC discovery is disabled and 1) the opaque bearer access tokens must be verified or 2) JWT tokens must be verified while the cached JWK verification set with no matching JWK is being refreshed. This property is ignored if the discovery is enabled.
Environment variable: | string | |
|
Relative path or absolute URL of the OIDC JSON Web Key Set (JWKS) endpoint which returns a JSON Web Key Verification Set. This property should be set if OIDC discovery is disabled and the local JWT verification is required. This property is ignored if the discovery is enabled.
Environment variable: | string | |
|
Relative path or absolute URL of the OIDC end_session_endpoint. This property must be set if OIDC discovery is disabled and RP Initiated Logout support for the
Environment variable: | string | |
|
The public key for the local JWT token verification. OIDC server connection is not created when this property is set.
Environment variable: | string | |
|
Name
Environment variable: | string | |
|
Secret
Environment variable: | string | |
|
Include OpenId Connect Client ID configured with
Environment variable: | boolean |
|
|
A list of paths to claims containing an array of groups. Each path starts from the top level JWT JSON object and can contain multiple segments. Each segment represents a JSON object name only; for example: "realm/groups". Use double quotes with the namespace-qualified claim names. This property can be used if a token has no
Environment variable: | list of string | |
|
The separator for splitting strings that contain multiple group values. It is only used if the "role-claim-path" property points to one or more custom claims whose values are strings. A single space is used by default because the standard
Environment variable: | string | |
|
Source of the principal roles.
Environment variable: |
tooltip:idtoken[ID Token - the default value for the | |
|
The expected issuer
Environment variable: | string | |
|
The expected audience
Environment variable: | list of string | |
|
Require that the token includes a
Environment variable: | boolean |
|
|
Expected token type
Environment variable: | string | |
|
Life span grace period in seconds. When checking token expiry, current time is allowed to be later than token expiration time by at most the configured number of seconds. When checking token issuance, current time is allowed to be sooner than token issue time by at most the configured number of seconds.
Environment variable: | int | |
|
Token age. It allows for the number of seconds to be specified that must not elapse since the
Environment variable: | ||
|
Name of the claim which contains a principal name. By default, the
Environment variable: | string | |
|
Refresh expired authorization code flow ID or access tokens. If this property is enabled, a refresh token request is performed if the authorization code ID or access token has expired and, if successful, the local session is updated with the new set of tokens. Otherwise, the local session is invalidated and the user redirected to the OpenID Provider to re-authenticate. In this case, the user might not be challenged again if the OIDC provider session is still active. For this option be effective the
Environment variable: | boolean |
|
|
The refresh token time skew, in seconds. If this property is enabled, the configured number of seconds is added to the current time when checking if the authorization code ID or access token should be refreshed. If the sum is greater than the authorization code ID or access token’s expiration time, a refresh is going to happen.
Environment variable: | ||
|
The forced JWK set refresh interval in minutes.
Environment variable: |
| |
|
Custom HTTP header that contains a bearer token. This option is valid only when the application is of type
Environment variable: | string | |
|
HTTP Authorization header scheme.
Environment variable: | string |
|
|
Required signature algorithm. OIDC providers support many signature algorithms but if necessary you can restrict Quarkus application to accept tokens signed only using an algorithm configured with this property.
Environment variable: |
| |
|
Decryption key location. JWT tokens can be inner-signed and encrypted by OpenId Connect providers. However, it is not always possible to remotely introspect such tokens because the providers might not control the private decryption keys. In such cases set this property to point to the file containing the decryption private key in PEM or JSON Web Key (JWK) format. If this property is not set and the
Environment variable: | string | |
|
Allow the remote introspection of JWT tokens when no matching JWK key is available. This property is set to
Environment variable: | boolean |
|
|
Require that JWT tokens are only introspected remotely.
Environment variable: | boolean |
|
|
Allow the remote introspection of the opaque tokens. Set this property to
Environment variable: | boolean |
|
|
Token customizer name. Allows to select a tenant specific token customizer as a named bean. Prefer using
Environment variable: | string | |
|
Indirectly verify that the opaque (binary) access token is valid by using it to request UserInfo. Opaque access token is considered valid if the provider accepted this token and returned a valid UserInfo. You should only enable this option if the opaque access tokens must be accepted but OpenId Connect provider does not have a token introspection endpoint. This property has no effect when JWT tokens must be verified.
Environment variable: | boolean |
|
|
The relative path of the logout endpoint at the application. If provided, the application is able to initiate the logout through this endpoint in conformance with the OpenID Connect RP-Initiated Logout specification.
Environment variable: | string | |
|
Relative path of the application endpoint where the user should be redirected to after logging out from the OpenID Connect Provider. This endpoint URI must be properly registered at the OpenID Connect Provider as a valid redirect URI.
Environment variable: | string | |
|
Name of the post logout URI parameter which is added as a query parameter to the logout redirect URI.
Environment variable: | string |
|
|
The relative path of the Back-Channel Logout endpoint at the application.
Environment variable: | string | |
|
Maximum number of logout tokens that can be cached before they are matched against ID tokens stored in session cookies.
Environment variable: | int |
|
|
Number of minutes a logout token can be cached for.
Environment variable: |
| |
|
Token cache timer interval. If this property is set, a timer checks and removes the stale entries periodically.
Environment variable: | ||
|
Logout token claim whose value is used as a key for caching the tokens. Only
Environment variable: | string |
|
|
The relative path of the Front-Channel Logout endpoint at the application.
Environment variable: | string | |
|
Common name of the leaf certificate. It must be set if the
Environment variable: | string | |
|
Truststore file which keeps thumbprints of the trusted certificates.
Environment variable: | path | |
|
A parameter to specify the password of the truststore file if it is configured with
Environment variable: | string | |
|
A parameter to specify the alias of the truststore certificate.
Environment variable: | string | |
|
An optional parameter to specify type of the truststore file. If not given, the type is automatically detected based on the file name.
Environment variable: | string | |
|
Authorization code flow response mode.
Environment variable: |
tooltip:query[Authorization response parameters are encoded in the query string added to the |
|
|
The relative path for calculating a
Environment variable: | string | |
|
If this property is set to
Environment variable: | boolean |
|
|
Remove the query parameters such as
Environment variable: | boolean |
|
|
Relative path to the public endpoint which processes the error response from the OIDC authorization endpoint. If the user authentication has failed, the OIDC provider returns an
Environment variable: | string | |
|
Both ID and access tokens are fetched from the OIDC provider as part of the authorization code flow. ID token is always verified on every user request as the primary token which is used to represent the principal and extract the roles. Access token is not verified by default since it is meant to be propagated to the downstream services. The verification of the access token should be enabled if it is injected as a JWT token. Access tokens obtained as part of the code flow are always verified if
Environment variable: | boolean |
|
|
Force
Environment variable: | boolean |
|
|
List of scopes
Environment variable: | list of string | |
|
Require that ID token includes a
Environment variable: | boolean |
|
|
Add the
Environment variable: | boolean |
|
|
Request URL query parameters which, if present, are added to the authentication redirect URI.
Environment variable: | list of string | |
|
If enabled the state, session, and post logout cookies have their
Environment variable: | boolean |
|
|
Cookie name suffix. For example, a session cookie name for the default OIDC tenant is
Environment variable: | string | |
|
Cookie path parameter value which, if set, is used to set a path parameter for the session, state and post logout cookies. The
Environment variable: | string |
|
|
Cookie path header parameter value which, if set, identifies the incoming HTTP header whose value is used to set a path parameter for the session, state and post logout cookies. If the header is missing, the
Environment variable: | string | |
|
Cookie domain parameter value which, if set, is used for the session, state and post logout cookies.
Environment variable: | string | |
|
SameSite attribute for the session cookie.
Environment variable: |
|
|
|
If a state cookie is present, a
Environment variable: | boolean |
|
|
Fail with the HTTP 401 error if the state cookie is present but no state query parameter is present. When either multiple authentications are disabled or the redirect URL matches the original request URL, the stale state cookie might remain in the browser cache from the earlier failed redirect to an OpenId Connect provider and be visible during the current request. For example, if Single-page application (SPA) uses XHR to handle redirects to the provider which does not support CORS for its authorization endpoint, the browser blocks it and the state cookie created by Quarkus remains in the browser cache. Quarkus reports an authentication failure when it detects such an old state cookie but find no matching state query parameter.
Reporting HTTP 401 error is usually the right thing to do in such cases, it minimizes a risk of the browser redirect loop but also can identify problems in the way SPA or Quarkus application manage redirects. For example, enabling
However, setting this property to
Environment variable: | boolean |
|
|
If this property is set to
Environment variable: | boolean |
|
|
Session age extension in minutes. The user session age property is set to the value of the ID token life-span by default and the user is redirected to the OIDC provider to re-authenticate once the session has expired. If this property is set to a nonzero value, then the expired ID token can be refreshed before the session has expired. This property is ignored if the
Environment variable: |
| |
|
If this property is set to
If this property is set to
Environment variable: | boolean |
|
|
Requires that ID token is available when the authorization code flow completes. Disable this property only when you need to use the authorization code flow with OAuth2 providers which do not return ID token - an internal IdToken is generated in such cases.
Environment variable: | boolean |
|
|
Internal ID token lifespan. This property is only checked when an internal IdToken is generated when Oauth2 providers do not return IdToken.
Environment variable: |
| |
|
Requires that a Proof Key for Code Exchange (PKCE) is used.
Environment variable: | boolean |
|
|
Secret used to encrypt Proof Key for Code Exchange (PKCE) code verifier and/or nonce in the code flow state. This secret should be at least 32 characters long.
If this secret is not set, the client secret configured with either The secret is auto-generated if it remains uninitialized after checking all of these properties. Error is reported if the secret length is less than 16 characters.
Environment variable: | string | |
|
Default TokenStateManager strategy.
Environment variable: | tooltip:keep-all-tokens[Keep ID, access and refresh tokens.], tooltip:id-token[Keep ID token only], tooltip:id-refresh-tokens[Keep ID and refresh tokens only] |
|
|
Default TokenStateManager keeps all tokens (ID, access and refresh) returned in the authorization code grant response in a single session cookie by default. Enable this property to minimize a session cookie size
Environment variable: | boolean |
|
|
Mandates that the Default TokenStateManager encrypt the session cookie that stores the tokens.
Environment variable: | boolean |
|
|
The secret used by the Default TokenStateManager to encrypt the session cookie storing the tokens when
If this secret is not set, the client secret configured with either The length of the secret used to encrypt the tokens should be at least 32 characters long. A warning is logged if the secret length is less than 16 characters.
Environment variable: | string | |
|
Allow caching the token introspection data. Note enabling this property does not enable the cache itself but only permits to cache the token introspection for a given tenant. If the default token cache can be used, see
Environment variable: | boolean |
|
|
Allow caching the user info data. Note enabling this property does not enable the cache itself but only permits to cache the user info data for a given tenant. If the default token cache can be used, see
Environment variable: | boolean |
|
|
Allow inlining UserInfo in IdToken instead of caching it in the token cache. This property is only checked when an internal IdToken is generated when Oauth2 providers do not return IdToken. Inlining UserInfo in the generated IdToken allows to store it in the session cookie and avoids introducing a cached state.
Environment variable: | boolean |
|
|
If JWK verification keys should be fetched at the moment a connection to the OIDC provider is initialized. Disabling this property delays the key acquisition until the moment the current token has to be verified. Typically it can only be necessary if the token or other telated request properties provide an additional context which is required to resolve the keys correctly.
Environment variable: | boolean |
|
|
Maximum number of JWK keys that can be cached. This property is ignored if the
Environment variable: | int |
|
|
Number of minutes a JWK key can be cached for. This property is ignored if the
Environment variable: |
| |
|
Cache timer interval. If this property is set, a timer checks and removes the stale entries periodically. This property is ignored if the
Environment variable: | ||
|
Well known OpenId Connect provider identifier
Environment variable: |
| |
|
Maximum number of cache entries. Set it to a positive value if the cache has to be enabled.
Environment variable: | int |
|
|
Maximum amount of time a given cache entry is valid for.
Environment variable: |
| |
|
Clean up timer interval. If this property is set then a timer will check and remove the stale entries periodically.
Environment variable: | ||
|
Grant options
Environment variable: |
| |
|
Additional claims.
Environment variable: |
| |
|
A map of required claims and their expected values. For example,
Environment variable: |
| |
|
Additional properties which is added as the query parameters to the logout redirect URI.
Environment variable: |
| |
|
Additional properties added as query parameters to the authentication redirect URI.
Environment variable: |
| |
|
Additional parameters, in addition to the required
Environment variable: |
| |
|
Custom HTTP headers which must be sent to complete the authorization code grant request.
Environment variable: |
| |
| Type | Default | |
|
The base URL of the OpenID Connect (OIDC) server, for example,
Environment variable: | string | |
|
Discovery of the OIDC endpoints. If not enabled, you must configure the OIDC endpoint URLs individually.
Environment variable: | boolean |
|
|
The OIDC token endpoint that issues access and refresh tokens; specified as a relative path or absolute URL. Set if
Environment variable: | string | |
|
The relative path or absolute URL of the OIDC token revocation endpoint.
Environment variable: | string | |
|
The client id of the application. Each application has a client id that is used to identify the application. Setting the client id is not required if
Environment variable: | string | |
|
The duration to attempt the initial connection to an OIDC server. For example, setting the duration to
Environment variable: | ||
|
The number of times to retry re-establishing an existing OIDC connection if it is temporarily lost. Different from
Environment variable: | int |
|
|
The number of seconds after which the current OIDC connection request times out.
Environment variable: |
| |
|
Whether DNS lookup should be performed on the worker thread. Use this option when you can see logged warnings about blocked Vert.x event loop by HTTP requests to OIDC server.
Environment variable: | boolean |
|
|
The maximum size of the connection pool used by the WebClient.
Environment variable: | int | |
|
The client secret used by the
Environment variable: | string | |
|
The client secret value. This value is ignored if
Environment variable: | string | |
|
The CredentialsProvider name, which should only be set if more than one CredentialsProvider is registered
Environment variable: | string | |
|
The CredentialsProvider client secret key
Environment variable: | string | |
|
The authentication method. If the
Environment variable: |
tooltip:basic[ | |
|
If provided, indicates that JWT is signed using a secret key.
Environment variable: | string | |
|
The CredentialsProvider name, which should only be set if more than one CredentialsProvider is registered
Environment variable: | string | |
|
The CredentialsProvider client secret key
Environment variable: | string | |
|
If provided, indicates that JWT is signed using a private key in PEM or JWK format. You can use the
Environment variable: | string | |
|
If provided, indicates that JWT is signed using a private key from a keystore.
Environment variable: | string | |
|
A parameter to specify the password of the keystore file.
Environment variable: | string | |
|
The private key id or alias.
Environment variable: | string | |
|
The private key password.
Environment variable: | string | |
|
The JWT audience (
Environment variable: | string | |
|
The key identifier of the signing key added as a JWT
Environment variable: | string | |
|
The issuer of the signing key added as a JWT
Environment variable: | string | |
|
Subject of the signing key added as a JWT
Environment variable: | string | |
|
Additional claims.
Environment variable: |
| |
|
The signature algorithm used for the
Environment variable: | string | |
|
The JWT lifespan in seconds. This value is added to the time at which the JWT was issued to calculate the expiration time.
Environment variable: | int |
|
|
The host name or IP address of the Proxy.
Environment variable: | string | |
|
The port number of the Proxy. The default value is
Environment variable: | int |
|
|
The username, if the Proxy needs authentication.
Environment variable: | string | |
|
The password, if the Proxy needs authentication.
Environment variable: | string | |
|
Certificate validation and hostname verification, which can be one of the following
Environment variable: | tooltip:required[Certificates are validated and hostname verification is enabled. This is the default value.], tooltip:certificate-validation[Certificates are validated but hostname verification is disabled.], tooltip:none[All certificates are trusted and hostname verification is disabled.] | |
|
An optional keystore that holds the certificate information instead of specifying separate files.
Environment variable: | path | |
|
The type of the keystore file. If not given, the type is automatically detected based on the file name.
Environment variable: | string | |
|
The provider of the keystore file. If not given, the provider is automatically detected based on the keystore file type.
Environment variable: | string | |
|
The password of the keystore file. If not given, the default value,
Environment variable: | string | |
|
The alias of a specific key in the keystore. When SNI is disabled, if the keystore contains multiple keys and no alias is specified, the behavior is undefined.
Environment variable: | string | |
|
The password of the key, if it is different from the
Environment variable: | string | |
|
The truststore that holds the certificate information of the certificates to trust.
Environment variable: | path | |
|
The password of the truststore file.
Environment variable: | string | |
|
The alias of the truststore certificate.
Environment variable: | string | |
|
The type of the truststore file. If not given, the type is automatically detected based on the file name.
Environment variable: | string | |
|
The provider of the truststore file. If not given, the provider is automatically detected based on the truststore file type.
Environment variable: | string | |
|
A unique tenant identifier. It can be set by
Environment variable: | string | |
|
If this tenant configuration is enabled. The default tenant is disabled if it is not configured but a
Environment variable: | boolean |
|
|
The application type, which can be one of the following
Environment variable: |
tooltip:web-app[A |
|
|
The relative path or absolute URL of the OpenID Connect (OIDC) authorization endpoint, which authenticates users. You must set this property for
Environment variable: | string | |
|
The relative path or absolute URL of the OIDC UserInfo endpoint. You must set this property for
Environment variable: | string | |
|
Relative path or absolute URL of the OIDC RFC7662 introspection endpoint which can introspect both opaque and JSON Web Token (JWT) tokens. This property must be set if OIDC discovery is disabled and 1) the opaque bearer access tokens must be verified or 2) JWT tokens must be verified while the cached JWK verification set with no matching JWK is being refreshed. This property is ignored if the discovery is enabled.
Environment variable: | string | |
|
Relative path or absolute URL of the OIDC JSON Web Key Set (JWKS) endpoint which returns a JSON Web Key Verification Set. This property should be set if OIDC discovery is disabled and the local JWT verification is required. This property is ignored if the discovery is enabled.
Environment variable: | string | |
|
Relative path or absolute URL of the OIDC end_session_endpoint. This property must be set if OIDC discovery is disabled and RP Initiated Logout support for the
Environment variable: | string | |
|
The public key for the local JWT token verification. OIDC server connection is not created when this property is set.
Environment variable: | string | |
|
Name
Environment variable: | string | |
|
Secret
Environment variable: | string | |
|
Include OpenId Connect Client ID configured with
Environment variable: | boolean |
|
|
A list of paths to claims containing an array of groups. Each path starts from the top level JWT JSON object and can contain multiple segments. Each segment represents a JSON object name only; for example: "realm/groups". Use double quotes with the namespace-qualified claim names. This property can be used if a token has no
Environment variable: | list of string | |
|
The separator for splitting strings that contain multiple group values. It is only used if the "role-claim-path" property points to one or more custom claims whose values are strings. A single space is used by default because the standard
Environment variable: | string | |
|
Source of the principal roles.
Environment variable: |
tooltip:idtoken[ID Token - the default value for the | |
|
The expected issuer
Environment variable: | string | |
|
The expected audience
Environment variable: | list of string | |
|
Require that the token includes a
Environment variable: | boolean |
|
|
A map of required claims and their expected values. For example,
Environment variable: |
| |
|
Expected token type
Environment variable: | string | |
|
Life span grace period in seconds. When checking token expiry, current time is allowed to be later than token expiration time by at most the configured number of seconds. When checking token issuance, current time is allowed to be sooner than token issue time by at most the configured number of seconds.
Environment variable: | int | |
|
Token age. It allows for the number of seconds to be specified that must not elapse since the
Environment variable: | ||
|
Name of the claim which contains a principal name. By default, the
Environment variable: | string | |
|
Refresh expired authorization code flow ID or access tokens. If this property is enabled, a refresh token request is performed if the authorization code ID or access token has expired and, if successful, the local session is updated with the new set of tokens. Otherwise, the local session is invalidated and the user redirected to the OpenID Provider to re-authenticate. In this case, the user might not be challenged again if the OIDC provider session is still active. For this option be effective the
Environment variable: | boolean |
|
|
The refresh token time skew, in seconds. If this property is enabled, the configured number of seconds is added to the current time when checking if the authorization code ID or access token should be refreshed. If the sum is greater than the authorization code ID or access token’s expiration time, a refresh is going to happen.
Environment variable: | ||
|
The forced JWK set refresh interval in minutes.
Environment variable: |
| |
|
Custom HTTP header that contains a bearer token. This option is valid only when the application is of type
Environment variable: | string | |
|
HTTP Authorization header scheme.
Environment variable: | string |
|
|
Required signature algorithm. OIDC providers support many signature algorithms but if necessary you can restrict Quarkus application to accept tokens signed only using an algorithm configured with this property.
Environment variable: |
| |
|
Decryption key location. JWT tokens can be inner-signed and encrypted by OpenId Connect providers. However, it is not always possible to remotely introspect such tokens because the providers might not control the private decryption keys. In such cases set this property to point to the file containing the decryption private key in PEM or JSON Web Key (JWK) format. If this property is not set and the
Environment variable: | string | |
|
Allow the remote introspection of JWT tokens when no matching JWK key is available. This property is set to
Environment variable: | boolean |
|
|
Require that JWT tokens are only introspected remotely.
Environment variable: | boolean |
|
|
Allow the remote introspection of the opaque tokens. Set this property to
Environment variable: | boolean |
|
|
Token customizer name. Allows to select a tenant specific token customizer as a named bean. Prefer using
Environment variable: | string | |
|
Indirectly verify that the opaque (binary) access token is valid by using it to request UserInfo. Opaque access token is considered valid if the provider accepted this token and returned a valid UserInfo. You should only enable this option if the opaque access tokens must be accepted but OpenId Connect provider does not have a token introspection endpoint. This property has no effect when JWT tokens must be verified.
Environment variable: | boolean |
|
|
The relative path of the logout endpoint at the application. If provided, the application is able to initiate the logout through this endpoint in conformance with the OpenID Connect RP-Initiated Logout specification.
Environment variable: | string | |
|
Relative path of the application endpoint where the user should be redirected to after logging out from the OpenID Connect Provider. This endpoint URI must be properly registered at the OpenID Connect Provider as a valid redirect URI.
Environment variable: | string | |
|
Name of the post logout URI parameter which is added as a query parameter to the logout redirect URI.
Environment variable: | string |
|
|
Additional properties which is added as the query parameters to the logout redirect URI.
Environment variable: |
| |
|
The relative path of the Back-Channel Logout endpoint at the application.
Environment variable: | string | |
|
Maximum number of logout tokens that can be cached before they are matched against ID tokens stored in session cookies.
Environment variable: | int |
|
|
Number of minutes a logout token can be cached for.
Environment variable: |
| |
|
Token cache timer interval. If this property is set, a timer checks and removes the stale entries periodically.
Environment variable: | ||
|
Logout token claim whose value is used as a key for caching the tokens. Only
Environment variable: | string |
|
|
The relative path of the Front-Channel Logout endpoint at the application.
Environment variable: | string | |
|
Common name of the leaf certificate. It must be set if the
Environment variable: | string | |
|
Truststore file which keeps thumbprints of the trusted certificates.
Environment variable: | path | |
|
A parameter to specify the password of the truststore file if it is configured with
Environment variable: | string | |
|
A parameter to specify the alias of the truststore certificate.
Environment variable: | string | |
|
An optional parameter to specify type of the truststore file. If not given, the type is automatically detected based on the file name.
Environment variable: | string | |
|
Authorization code flow response mode.
Environment variable: |
tooltip:query[Authorization response parameters are encoded in the query string added to the |
|
|
The relative path for calculating a
Environment variable: | string | |
|
If this property is set to
Environment variable: | boolean |
|
|
Remove the query parameters such as
Environment variable: | boolean |
|
|
Relative path to the public endpoint which processes the error response from the OIDC authorization endpoint. If the user authentication has failed, the OIDC provider returns an
Environment variable: | string | |
|
Both ID and access tokens are fetched from the OIDC provider as part of the authorization code flow. ID token is always verified on every user request as the primary token which is used to represent the principal and extract the roles. Access token is not verified by default since it is meant to be propagated to the downstream services. The verification of the access token should be enabled if it is injected as a JWT token. Access tokens obtained as part of the code flow are always verified if
Environment variable: | boolean |
|
|
Force
Environment variable: | boolean |
|
|
List of scopes
Environment variable: | list of string | |
|
Require that ID token includes a
Environment variable: | boolean |
|
|
Add the
Environment variable: | boolean |
|
|
Additional properties added as query parameters to the authentication redirect URI.
Environment variable: |
| |
|
Request URL query parameters which, if present, are added to the authentication redirect URI.
Environment variable: | list of string | |
|
If enabled the state, session, and post logout cookies have their
Environment variable: | boolean |
|
|
Cookie name suffix. For example, a session cookie name for the default OIDC tenant is
Environment variable: | string | |
|
Cookie path parameter value which, if set, is used to set a path parameter for the session, state and post logout cookies. The
Environment variable: | string |
|
|
Cookie path header parameter value which, if set, identifies the incoming HTTP header whose value is used to set a path parameter for the session, state and post logout cookies. If the header is missing, the
Environment variable: | string | |
|
Cookie domain parameter value which, if set, is used for the session, state and post logout cookies.
Environment variable: | string | |
|
SameSite attribute for the session cookie.
Environment variable: |
|
|
|
If a state cookie is present, a
Environment variable: | boolean |
|
|
Fail with the HTTP 401 error if the state cookie is present but no state query parameter is present. When either multiple authentications are disabled or the redirect URL matches the original request URL, the stale state cookie might remain in the browser cache from the earlier failed redirect to an OpenId Connect provider and be visible during the current request. For example, if Single-page application (SPA) uses XHR to handle redirects to the provider which does not support CORS for its authorization endpoint, the browser blocks it and the state cookie created by Quarkus remains in the browser cache. Quarkus reports an authentication failure when it detects such an old state cookie but find no matching state query parameter.
Reporting HTTP 401 error is usually the right thing to do in such cases, it minimizes a risk of the browser redirect loop but also can identify problems in the way SPA or Quarkus application manage redirects. For example, enabling
However, setting this property to
Environment variable: | boolean |
|
|
If this property is set to
Environment variable: | boolean |
|
|
Session age extension in minutes. The user session age property is set to the value of the ID token life-span by default and the user is redirected to the OIDC provider to re-authenticate once the session has expired. If this property is set to a nonzero value, then the expired ID token can be refreshed before the session has expired. This property is ignored if the
Environment variable: |
| |
|
If this property is set to
If this property is set to
Environment variable: | boolean |
|
|
Requires that ID token is available when the authorization code flow completes. Disable this property only when you need to use the authorization code flow with OAuth2 providers which do not return ID token - an internal IdToken is generated in such cases.
Environment variable: | boolean |
|
|
Internal ID token lifespan. This property is only checked when an internal IdToken is generated when Oauth2 providers do not return IdToken.
Environment variable: |
| |
|
Requires that a Proof Key for Code Exchange (PKCE) is used.
Environment variable: | boolean |
|
|
Secret used to encrypt Proof Key for Code Exchange (PKCE) code verifier and/or nonce in the code flow state. This secret should be at least 32 characters long.
If this secret is not set, the client secret configured with either The secret is auto-generated if it remains uninitialized after checking all of these properties. Error is reported if the secret length is less than 16 characters.
Environment variable: | string | |
|
Additional parameters, in addition to the required
Environment variable: |
| |
|
Custom HTTP headers which must be sent to complete the authorization code grant request.
Environment variable: |
| |
|
Default TokenStateManager strategy.
Environment variable: | tooltip:keep-all-tokens[Keep ID, access and refresh tokens.], tooltip:id-token[Keep ID token only], tooltip:id-refresh-tokens[Keep ID and refresh tokens only] |
|
|
Default TokenStateManager keeps all tokens (ID, access and refresh) returned in the authorization code grant response in a single session cookie by default. Enable this property to minimize a session cookie size
Environment variable: | boolean |
|
|
Mandates that the Default TokenStateManager encrypt the session cookie that stores the tokens.
Environment variable: | boolean |
|
|
The secret used by the Default TokenStateManager to encrypt the session cookie storing the tokens when
If this secret is not set, the client secret configured with either The length of the secret used to encrypt the tokens should be at least 32 characters long. A warning is logged if the secret length is less than 16 characters.
Environment variable: | string | |
|
Allow caching the token introspection data. Note enabling this property does not enable the cache itself but only permits to cache the token introspection for a given tenant. If the default token cache can be used, see
Environment variable: | boolean |
|
|
Allow caching the user info data. Note enabling this property does not enable the cache itself but only permits to cache the user info data for a given tenant. If the default token cache can be used, see
Environment variable: | boolean |
|
|
Allow inlining UserInfo in IdToken instead of caching it in the token cache. This property is only checked when an internal IdToken is generated when Oauth2 providers do not return IdToken. Inlining UserInfo in the generated IdToken allows to store it in the session cookie and avoids introducing a cached state.
Environment variable: | boolean |
|
|
If JWK verification keys should be fetched at the moment a connection to the OIDC provider is initialized. Disabling this property delays the key acquisition until the moment the current token has to be verified. Typically it can only be necessary if the token or other telated request properties provide an additional context which is required to resolve the keys correctly.
Environment variable: | boolean |
|
|
Maximum number of JWK keys that can be cached. This property is ignored if the
Environment variable: | int |
|
|
Number of minutes a JWK key can be cached for. This property is ignored if the
Environment variable: |
| |
|
Cache timer interval. If this property is set, a timer checks and removes the stale entries periodically. This property is ignored if the
Environment variable: | ||
|
Well known OpenId Connect provider identifier
Environment variable: |
|

To write duration values, use the standard java.time.Duration format. See the Duration#parse() Java API documentation for more information.
You can also use a simplified format, starting with a number:
- If the value is only a number, it represents time in seconds.
-
If the value is a number followed by
ms, it represents time in milliseconds.
In other cases, the simplified format is translated to the java.time.Duration format for parsing:
-
If the value is a number followed by
h,m, ors, it is prefixed withPT. -
If the value is a number followed by
d, it is prefixed withP.
6.1. References
- OIDC Bearer token authentication
- Protect a service application by using OpenID Connect (OIDC) Bearer token authentication
- OpenID Connect
- OpenID Connect and OAuth2 Client and Filters Reference Guide
- Choosing between OpenID Connect, SmallRye JWT, and OAuth2 authentication mechanisms
- Combining authentication mechanisms
- Quarkus Security