Administration Guide (Common Criteria Edition)
Red Hat Certificate System 10.4 Common Criteria Edition
Abstract
Preface
Legal Notice
Copyright © 2024 Red Hat, Inc.
The text of and illustrations in this document are licensed by Red Hat under a Creative Commons Attribution–Share Alike 3.0 Unported license ("CC-BY-SA"). An explanation of CC-BY-SA is available at http://creativecommons.org/licenses/by-sa/3.0/. In accordance with CC-BY-SA, if you distribute this document or an adaptation of it, you must provide the URL for the original version.
Red Hat, as the licensor of this document, waives the right to enforce, and agrees not to assert, Section 4d of CC-BY-SA to the fullest extent permitted by applicable law.
Red Hat, Red Hat Enterprise Linux, the Shadowman logo, the Red Hat logo, JBoss, OpenShift, Fedora, the Infinity logo, and RHCE are trademarks of Red Hat, Inc., registered in the United States and other countries.
Linux ® is the registered trademark of Linus Torvalds in the United States and other countries.
Java ® is a registered trademark of Oracle and/or its affiliates.
XFS ® is a trademark of Silicon Graphics International Corp. or its subsidiaries in the United States and/or other countries.
MySQL ® is a registered trademark of MySQL AB in the United States, the European Union and other countries.
Node.js ® is an official trademark of Joyent. Red Hat is not formally related to or endorsed by the official Joyent Node.js open source or commercial project.
The OpenStack ® Word Mark and OpenStack logo are either registered trademarks/service marks or trademarks/service marks of the OpenStack Foundation, in the United States and other countries and are used with the OpenStack Foundation’s permission. We are not affiliated with, endorsed or sponsored by the OpenStack Foundation, or the OpenStack community.
All other trademarks are the property of their respective owners.
Abstract
This guide contains documentation about understanding, installing, and configuring Red Hat Certificate System 10.4.3 in a Common Criteria environment.
Chapter 1. Overview of Red Hat Certificate System subsystems
This chapter is an overview of Red Hat Certificate System and the various subsystems. For details on evaluated product features, please see the NIAP Product Compliant List at https://www.niap-ccevs.org/Product/PCL.cfm.
Network security services (NSS) and Federal Information Processing Standard (FIPS) hardware security modules (HSM) were the only evaluated cryptographic providers.
Every common PKI operation - issuing, renewing and revoking certificates; archiving and recovering keys; publishing CRLs and verifying certificate status - is carried out by interoperating subsystems within Red Hat Certificate System. The functions of each individual subsystem and the way they work together to establish a robust and local PKI is described in this chapter.
1.1. Uses for certificates
The purpose of certificates is to establish trust. Their usage varies depending on the kind of trust they are used to ensure. Some kinds of certificates are used to verify the identity of the presenter; others are used to verify that an object or item has not been tampered with.
1.2. A review of Certificate System subsystems
Red Hat Certificate System provides five different subsystems, each focusing on different aspects of a PKI deployment:
- A Certificate Authority (CA)
- A Key Recovery Authority (KRA)
- An online certificate status protocol (OCSP) responder
- A token key service (TKS)
- A token processing system (TPS)
These subsystems work together to create a public key infrastructure (PKI). Depending on what subsystems are installed, a PKI can function as a token management system (TMS) or a non token management system. For detailed descriptions of the subsystems and TMS and non-TMS environments, see the A Review of Certificate System Subsystems in the Planning, Installation and Deployment Guide (Common Criteria Edition).
Red Hat Certificate System includes Technology Preview code (e.g., EST). This early access to upcoming product functionality is not evaluated and not to be used in the evaluated configuration.
1.3. A look at managing certificates (non-TMS)
A conventional PKI environment provides the basic framework to manage certificates stored in software databases. This is a non-TMS environment, since it does not manage certificates on smart cards. At a minimum, a non-TMS requires only a CA, but a non-TMS environment can use OCSP responders and KRA instances as well.
For information on this topic, see the following sections in the Planning, Installation and Deployment Guide (Common Criteria Edition):
1.4. A look at the token management system (TMS)
Features in this section on TMS are not tested in the evaluation. This section is for reference only.
Certificate System creates, manages, renews, and revokes certificates, and it also archives and recovers keys. For organizations that use smart cards, the Certificate System has a token management system - a collection of subsystems with established relationships - to generate keys and requests and receive certificates to be used for smart cards.
For information on this topic, see the following sections in the Planning, Installation and Deployment Guide (Common Criteria Edition):
1.5. Red Hat Certificate System services
There are various interfaces for managing certificates and subsystems, depending on the type of user: administrators, agents, auditors, and end users. For an overview of the different functions that are performed through each interface, see Chapter 2, User interfaces.
Part I. Part I: User interfaces
Chapter 2. User interfaces
There are different interfaces for managing certificates and subsystems, depending on the user’s role: administrators, agents, auditors, and end users.
2.1. User interfaces overview
Administrators can use the following interfaces to securely interact with a completed Certificate System installation:
- The PKI command-line interface and other command-line utilities
- The PKI Console graphical interface
- The Certificate System web interface.
Which interface is used depends on the administrator’s preferences and functionality available. Common actions using these interfaces are described in the remainder of the guide after this chapter.
These interfaces require configuration prior to use for secure communication with the Certificate System server over TLS. Using these clients without proper configuration is not allowed. Some of these tools use TLS mutual authentication. When required, their required initialization procedure includes configuring this.
-
Some examples of using the PKI command-line utility are described in Section 2.5.1.2, “Using the "pki" CLI”. Additional examples are shown through the rest of the guide. By default, the PKI command-line interface uses the NSS database in the user’s
~/.dogtag/nssdb/directory. Section 2.5.1.1, “Initializing the pki CLI” provides detailed steps for initializing the NSS database with the administrator’s certificate and key. In addition, there are various command-line utilities used to interface with Certificate System (as an administrator in other user roles), for example to submit CMC requests, manage generated certificates, and so on. These utilities are described briefly in Section 2.5, “Command-line interfaces”, such as Section 2.5.2, “AtoB”. They are utilized in later sections such as Section 5.2.2, “Creating a CSR using PKCS10Client”. - The Certificate System web interface allows administrative access through the Firefox web browser. Section 2.4.1, “Browser initialization” describes instructions about configuring the client authentication. Other sections in Section 2.4, “Web interface” describe using the web interface of Certificate System.
-
The Certificate System’s PKI Console is a graphical interface. Please note that it is being deprecated. Section 2.3.1, “Initializing
pkiconsole” describes how to initialize this console interface. Section 2.3.2, “Usingpkiconsolefor CA, OCSP, KRA, and TKS subsystems” gives an overview of using it.
To terminate a PKI Console session, click the button. To terminate a web browser session, close the browser. A command-line utility terminates itself as soon as it performs the action and returns to the prompt, so no action is needed on the administrator’s part to terminate the session.
2.2. Client NSS database initialization
On Red Hat Certificate System, certain interfaces may need to access the server using TLS client certificate authentication (mutual authentication). Before performing server-side admin tasks, you need to:
- Prepare an NSS database for the client. This can be a new database or an existing one.
- Import the CA certificate chain and trust them.
- Have a certificate and corresponding key. They can be generated in the NSS database or imported from somewhere else, such as from a PKCS #12 file.
Based on the utility, you need to initialize the NSS database accordingly. See:
2.3. Graphical interface
The Certificate System console, pkiconsole, is a graphical interface that is designed for users with the Administrator role privilege to manage the subsystem itself. This includes adding users, configuring logs, managing profiles and plugins, and the internal database, among many other functions. This utility communicates with the Certificate System server via TLS using client-authentication and can be used to manage the server remotely.
pkiconsole is being deprecated and will be replaced by a new browser-based UI in a future major release. Although pkiconsole will continue to be available until the replacement UI is released, we encourage using the command line equivalent of pkiconsole at this time, as the pki CLI will continue to be supported and improved upon even when the new browser-based UI becomes available in the future.
2.3.1. Initializing pkiconsole
To use the
pkiconsoleinterface for the first time, specify a new password and use the following command:pki -c password -d ~/.redhat-idm-console client-init
$ pki -c password -d ~/.redhat-idm-console client-initCopy to Clipboard Copied! Toggle word wrap Toggle overflow This command creates a new client NSS database in the
~/.redhat-idm-console/directory.- To import the CA certificate into the PKI client NSS database, see 10.5 Importing a certificate into an NSS Database in the Planning, Installation and Deployment Guide (Common Criteria Edition).
- To request a new client certificate, see Chapter 5, Requesting, enrolling and managing certificates.
Execute the following command to extract the admin client certificate from the
.p12file:openssl pkcs12 -in file -clcerts -nodes -nokeys -out file.crt
$ openssl pkcs12 -in file -clcerts -nodes -nokeys -out file.crtCopy to Clipboard Copied! Toggle word wrap Toggle overflow Validate and import the admin client certificate as described in Chapter 10 Managing Certificate/Key Crypto Token in the Planning, Installation and Deployment Guide (Common Criteria Edition):
PKICertImport -d ~/.redhat-idm-console -n "nickname" -t ",," -a -i file.crt -u C
$ PKICertImport -d ~/.redhat-idm-console -n "nickname" -t ",," -a -i file.crt -u CCopy to Clipboard Copied! Toggle word wrap Toggle overflow
Make sure all intermediate certificates and the root CA certificate have been imported before importing the CA admin client certificate.
To import an existing client certificate and its key into the client NSS database:
pki -c password -d ~/.redhat-idm-console pkcs12-import --pkcs12-file file --pkcs12-password pkcs12-password
$ pki -c password -d ~/.redhat-idm-console pkcs12-import --pkcs12-file file --pkcs12-password pkcs12-passwordCopy to Clipboard Copied! Toggle word wrap Toggle overflow Verify the client certificate with the following command:
certutil -V -u C -n "nickname" -d ~/.redhat-idm-console
$ certutil -V -u C -n "nickname" -d ~/.redhat-idm-consoleCopy to Clipboard Copied! Toggle word wrap Toggle overflow
2.3.2. Using pkiconsole for CA, OCSP, KRA, and TKS subsystems
The Java console is used by four subsystems: the CA, OCSP, KRA, and TKS. The console is accessed using a locally-installed pkiconsole utility. It can access any subsystem because the command requires the host name, the subsystem’s administrative TLS port, and the specific subsystem type.
pkiconsole -d nssdb -n 'optional client cert nickname' https://server.example.com:admin_port/subsystem_type
# pkiconsole -d nssdb -n 'optional client cert nickname' https://server.example.com:admin_port/subsystem_typeIf DNS is not configured, you can use an IPv4 or IPv6 address to connect to the console. For example:
https://192.0.2.1:8443/ca https://[2001:DB8::1111]:8443/ca
https://192.0.2.1:8443/ca
https://[2001:DB8::1111]:8443/caThis opens a console, as in the below figure:
Figure 2.1. Certificate System console

The Configuration tab controls all of the setup for the subsystem, as the name implies. The choices available in this tab are different depending on which subsystem type the instance is; the CA has the most options since it has additional configuration for jobs, notifications, and certificate enrollment authentication.
All subsystems have four basic options:
- Users and groups
- Access control lists
- Log configuration
- Subsystem certificates (meaning the certificates issued to the subsystem for use, for example, in the security domain or audit signing)
2.4. Web interface
This section describes the web interface that allows administrative access to Red Hat Certificate System through the Firefox web browser.
2.4.1. Browser initialization
This section explains browser initialization for Firefox to access PKI services.
Importing a CA certificate
Click → → → .
Select the Authorities tab and click the button.
-
Select the
ca.crtfile and click .


Importing a client certificate
- Click → → → .
Select the Your Certificates tab.
-
Click on and select the client p12 file, such as
ca_admin_cert.p12. Enter the password for the client certificate on the prompt.
- Click .
Verify that an entry is added under Your Certificates.


Accessing the web console
You can access the PKI services by opening https://host_name:port in your browser.
2.4.2. The administrative interfaces
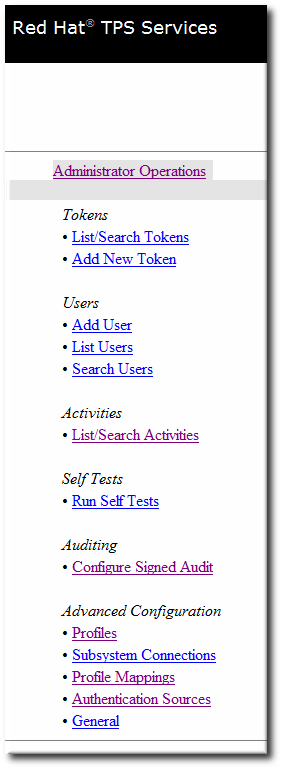
All subsystems use a HTML-based administrative interface. It is accessed by entering the host name and secure port as the URL, authenticating with the administrator’s certificate, and clicking the appropriate Administrators link.
There is a single TLS port for all subsystems which is used for both administrator and agent services. Access to those services is restricted by certificate-based authentication.
The HTML admin interface is much more limited than the Java console; the primary administrative function is managing the subsystem users.
The TPS only allows operations to manage users for the TPS subsystem. However, the TPS admin page can also list tokens and display all activities (including normally-hidden administrative actions) performed on the TPS.
Figure 2.2. TPS admin page
2.4.3. Agent interfaces
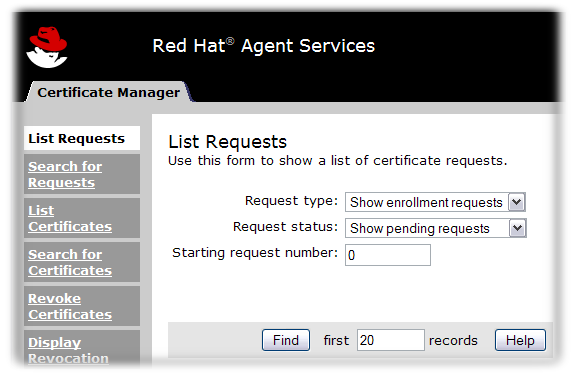
The agent services pages are where almost all of the certificate and token management tasks are performed. These services are HTML-based, and agents authenticate to the site using a special agent certificate.
Figure 2.3. Certificate Manager’s agent services page
The operations vary depending on the subsystem:
- The Certificate Manager agent services include approving certificate requests (which issues the certificates), revoking certificates, and publishing certificates and CRLs. All certificates issued by the CA can be managed through its agent services page.
- The TPS agent services, like the CA agent services, manages all of the tokens which have been formatted and have had certificates issued to them through the TPS. Tokens can be enrolled, suspended, and deleted by agents. Two other roles (operator and admin) can view tokens in web services pages, but cannot perform any actions on the tokens.
- KRA agent services pages process key recovery requests, which set whether to allow a certificate to be issued reusing an existing key pair if the certificate is lost.
- The OCSP agent services page allows agents to configure CAs which publish CRLs to the OCSP, to load CRLs to the OCSP manually, and to view the state of client OCSP requests.
The TKS is the only subsystem without an agent services page.
2.4.4. End user pages
The CA and TPS both process direct user requests in some way. That means that end users have to have a way to connect with those subsystems. The CA has end-user, or end-entities, HTML services. The TPS uses the Enterprise Security Client.
The end-user services are accessed over standard HTTP using the server’s host name and the standard port number; they can also be accessed over HTTPS using the server’s host name and the specific end-entities TLS port.
For CAs, each type of TLS certificate is processed through a specific online submission form, called a profile. There are about two dozen certificate profiles for the CA, covering all sorts of certificates - user TLS certificates, server TLS certificates, log and file signing certificates, email certificates, and every kind of subsystem certificate. There can also be custom profiles.
Figure 2.4. Certificate Manager’s end-entities page

End users retrieve their certificates through the CA pages when the certificates are issued. They can also download CA chains and CRLs and can revoke or renew their certificates through those pages.
2.5. Command-line interfaces
This section discusses command-line utilities.
2.5.1. The "pki" CLI
The pki command-line interface (CLI) provides access to various services on the server using the REST interface (see 2.3.4 REST Interface in the Planning, Installation and Deployment Guide (Common Criteria Edition). You can invoke the CLI as follows:
pki [CLI options] <command> [command parameters]
$ pki [CLI options] <command> [command parameters]Note that the CLI options must be placed before the command, and the command parameters after the command.
2.5.1.1. Initializing the pki CLI
To use the command line interface for the first time, specify a new password and use the following command:
pki -c <password> client-init
$ pki -c <password> client-initCopy to Clipboard Copied! Toggle word wrap Toggle overflow This will create a new client NSS database in the
~/.dogtag/nssdbdirectory. The password must be specified in all CLI operations that use the client NSS database.
Alternatively, if the password is stored in a file, you can specify the file using the -C option. For example:
pki -C password_file client-init
$ pki -C password_file client-initCopy to Clipboard Copied! Toggle word wrap Toggle overflow - To import the CA certificate into the client NSS database, refer to 10.5 Importing a certificate into an NSS Database in the Planning, Installation and Deployment Guide (Common Criteria Edition).
Some commands may require client certificate authentication. To import an existing client certificate and its key into the client NSS database, specify the PKCS #12 file and the password, and execute the following command:
First, extract the admin client certificate from the
.p12file:openssl pkcs12 -in file -clcerts -nodes -nokeys -out file.crt
$ openssl pkcs12 -in file -clcerts -nodes -nokeys -out file.crtCopy to Clipboard Copied! Toggle word wrap Toggle overflow Validate and import the admin client certificate as described in Chapter 10 Managing Certificate/Key Crypto Token in the Planning, Installation and Deployment Guide (Common Criteria Edition):
PKICertImport -d ~/.dogtag/nssdb -n "nickname" -t ",," -a -i file.crt -u C
$ PKICertImport -d ~/.dogtag/nssdb -n "nickname" -t ",," -a -i file.crt -u CCopy to Clipboard Copied! Toggle word wrap Toggle overflow
Make sure all intermediate certificates and the root CA certificate have been imported before importing the CA admin client certificate.
To import an existing client certificate and its key into the client NSS database, specify the PKCS #12 file and the password, and execute the following command:
pki -c <password> pkcs12-import --pkcs12-file <file> --pkcs12-password <password>
$ pki -c <password> pkcs12-import --pkcs12-file <file> --pkcs12-password <password>Copy to Clipboard Copied! Toggle word wrap Toggle overflow To verify the client certificate, run the following command:
certutil -V -u C -n "nickname" -d ~/.dogtag/nssdb
$ certutil -V -u C -n "nickname" -d ~/.dogtag/nssdbCopy to Clipboard Copied! Toggle word wrap Toggle overflow
2.5.1.2. Using the "pki" CLI
The command line interface supports a number of commands organized in a hierarchical structure. To list the top-level commands, execute the
pkicommand without any additional commands or parameters:pki
$ pkiCopy to Clipboard Copied! Toggle word wrap Toggle overflow Some commands have subcommands. To list them, execute
pkiwith the command name and no additional options. For example:pki ca
$ pki caCopy to Clipboard Copied! Toggle word wrap Toggle overflow pki ca-cert
$ pki ca-certCopy to Clipboard Copied! Toggle word wrap Toggle overflow To view command usage information, use the --help option:
pki --help
$ pki --helpCopy to Clipboard Copied! Toggle word wrap Toggle overflow pki ca-cert-find --help
$ pki ca-cert-find --helpCopy to Clipboard Copied! Toggle word wrap Toggle overflow To view manual pages, specify the
helpcommand:pki help
$ pki helpCopy to Clipboard Copied! Toggle word wrap Toggle overflow pki help ca-cert-find
$ pki help ca-cert-findCopy to Clipboard Copied! Toggle word wrap Toggle overflow To execute a command that does not require authentication, specify the command and its parameters (if required), for example:
pki ca-cert-find
$ pki ca-cert-findCopy to Clipboard Copied! Toggle word wrap Toggle overflow To execute a command that requires client certificate authentication, specify the certificate nickname, the client NSS database password, and optionally the server URL:
pki -U <server URL> -n <nickname> -c <password> <command> [command parameters]
$ pki -U <server URL> -n <nickname> -c <password> <command> [command parameters]Copy to Clipboard Copied! Toggle word wrap Toggle overflow For example:
pki -n jsmith -c password ca-user-find ...
$ pki -n jsmith -c password ca-user-find ...Copy to Clipboard Copied! Toggle word wrap Toggle overflow By default, the CLI communicates with the server at
http://local_host_name:8080. To communicate with a server at a different location, specify the URL with the -U option, for example:pki -U https://server.example.com:8443 -n jsmith -c password ca-user-find
$ pki -U https://server.example.com:8443 -n jsmith -c password ca-user-findCopy to Clipboard Copied! Toggle word wrap Toggle overflow
2.5.2. AtoB
The AtoB utility decodes the Base64-encoded certificates to their binary equivalents. For example:
AtoB input.ascii output.bin
$ AtoB input.ascii output.bin
For further details, more options, and additional examples, see the AtoB(1) man page.
2.5.3. AuditVerify
The AuditVerify utility verifies integrity of the audit logs by validating the signature on log entries.
For example:
AuditVerify -d ~jsmith/auditVerifyDir -n Log Signing Certificate -a ~jsmith/auditVerifyDir/logListFile -P "" -v
$ AuditVerify -d ~jsmith/auditVerifyDir -n Log Signing Certificate -a ~jsmith/auditVerifyDir/logListFile -P "" -v
The example verifies the audit logs using the Log Signing Certificate (-n) in the ~jsmith/auditVerifyDir NSS database (-d). The list of logs to verify (-a) are in the ~jsmith/auditVerifyDir/logListFile file, comma-separated and ordered chronologically. The prefix (-P) to prepend to the certificate and key database file names is empty. The output is verbose (-v).
For further details, more options, and additional examples, see the AuditVerify(1) man page or Section 12.2.1, “Displaying and verifying signed audit logs”.
2.5.4. BtoA
The BtoA utility encodes binary data in Base64. For example:
BtoA input.bin output.ascii
$ BtoA input.bin output.ascii
For further details, more options, and additional examples, see the BtoA(1) man page.
2.5.5. CMCRequest
The CMCRequest utility creates a certificate issuance or revocation request. For example:
CMCRequest example.cfg
$ CMCRequest example.cfg
All options to the CMCRequest utility are specified as part of the configuration filed passed to the utility. See the CMCRequest(1) man page for configuration file options and further information. Also see Section 5.3, “Requesting and receiving certificates using CMC” and Section 6.2.1.1, “Revoking a certificate using CMCRequest”.
2.5.6. CMCResponse
The CMCResponse utility is used to parse CMC responses returned from CMC issuance or revocation requests. For example:
*CMCResponse -d /home/agentSmith/certdb_dir -i /home/agentSmith/certdb_dir/cmc.dirsrv_pkcs10.resp -o /home/agentSmith/certdb_dir/Server-Cert.crt*
$ *CMCResponse -d /home/agentSmith/certdb_dir -i /home/agentSmith/certdb_dir/cmc.dirsrv_pkcs10.resp -o /home/agentSmith/certdb_dir/Server-Cert.crt*
For further details, more options, additional examples, see the CMCResponse(1) man page.
Running CMCResponse with the "-v" option returns the PEM of each certificate in the chain as Cert:0, Cert:1 etc. Below all the PEMs, the output also displays each certificate in the chain in pretty print format. Since the certificates are not displayed in a fixed order, in order to determine their position in the chain, you must examine the "Subject:" under each "Certificate". The corresponding PEM is displayed in the same position above.
2.5.7. CMCRevoke
Legacy. Do not use.
2.5.9. CRMFPopClient
The CRMFPopClient utility is Certificate Request Message Format (CRMF) client using NSS databases and supplying Proof of Possession.
For example:
CRMFPopClient -d . -p password -n "cn=subject_name" -q POP_SUCCESS -b kra.transport -w "AES/CBC/PKCS5Padding" -t false -v -o /user_or_entity_database_directory/example.csr
$ CRMFPopClient -d . -p password -n "cn=subject_name" -q POP_SUCCESS -b kra.transport -w "AES/CBC/PKCS5Padding" -t false -v -o /user_or_entity_database_directory/example.csr
This example creates a new CSR with the cn=subject_name subject DN (-n), NSS database in the current directory (-d), certificate to use for transport kra.transport (-b), the AES/CBC/PKCS5Padding key wrap algorithm verbose output is specified (-v) and the resulting CSR is written to the /user_or_entity_database_directory/example.csr file (-o).
For further details, more options, and additional examples, see the output of the CRMFPopClient --help command and also Section 5.2.3, “Creating a CSR using CRMFPopClient”.
2.5.10. HttpClient
The HttpClient utility is an NSS-aware HTTP client for submitting CMC requests.
For example:
HttpClient request.cfg
$ HttpClient request.cfg
All parameters to the HttpClient utility are stored in the request.cfg file. For further information, see the output of the HttpClient --help command.
2.5.11. OCSPClient
OCSPClient is an Online Certificate Status Protocol (OCSP) client for checking the certificate revocation status.
For example:
OCSPClient -h server.example.com -p 8080 -d /etc/pki/pki-tomcat/alias -c "caSigningCert cert-pki-ca" --serial 2
$ OCSPClient -h server.example.com -p 8080 -d /etc/pki/pki-tomcat/alias -c "caSigningCert cert-pki-ca" --serial 2
This example queries the server.example.com OCSP server (-h) on port 8080 (-p) to check whether the certificate signed by caSigningcet cert-pki-ca (-c) with serial number 2 (--serial) is valid. The NSS database in the /etc/pki/pki-tomcat/alias directory is used.
For further details, more options, and additional examples, see the output of the OCSPClient --help command.
2.5.12. PKCS10Client
The PKCS10Client utility creates a CSR in PKCS10 format for RSA and EC keys, optionally on an HSM.
For example:
PKCS10Client -d /etc/dirsrv/slapd-instance_name/ -p password -a rsa -l 2048 -o ~/ds.csr -n "CN=$HOSTNAME"
$ PKCS10Client -d /etc/dirsrv/slapd-instance_name/ -p password -a rsa -l 2048 -o ~/ds.csr -n "CN=$HOSTNAME"
This example creates a new RSA (-a) key with 2048 bits (-l) in the /etc/dirsrv/slapd-instance_name/ directory (-d with database password password (-p). The output CSR is stored in the ~/ds.cfg file (-o) and the certificate DN is CN=$HOSTNAME (-n).
For further details, more options, and additional examples, see the PKCS10Client(1) man page.
2.5.13. PrettyPrintCert
The PrettyPrintCert utility displays the contents of a certificate in a human-readable format.
For example:
PrettyPrintCert ascii_data.cert
$ PrettyPrintCert ascii_data.cert
This command parses the output of the ascii_data.cert file and displays its contents in human readable format. The output includes information like signature algorithm, exponent, modulus, and certificate extensions.
For further details, more options, and additional examples, see the PrettyPrintCert(1) man page.
2.5.14. PrettyPrintCrl
The PrettyPrintCrl utility displays the content of a CRL file in a human readable format.
For example:
PrettyPrintCrl ascii_data.crl
$ PrettyPrintCrl ascii_data.crl
This command parses the output of the ascii_data.crl and displays its contents in human readable format. The output includes information, such as revocation signature algorithm, the issuer of the revocation, and a list of revoked certificates and their reason.
For further details, more options, and additional examples, see the PrettyPrintCrl(1) man page.
2.5.15. TokenInfo
The TokenInfo utility lists all tokens in an NSS database.
For example:
TokenInfo ./nssdb/
$ TokenInfo ./nssdb/This command lists all tokens (HSMs, soft tokens, and so on) registered in the specified database directory.
For further details, more options, and additional examples, see the output of the TokenInfo command.
2.5.16. tkstool
The tkstool utility is interacting with the token Key Service (TKS) subsystem.
For example:
tkstool -M -n new_master -d /var/lib/pki/pki-tomcat/alias -h token_name
$ tkstool -M -n new_master -d /var/lib/pki/pki-tomcat/alias -h token_name
This command creates a new master key (-M) named new_master (-n) in the /var/lib/pki/pki-tomcat/alias NSS database on the HSM token_name.
For further details, more options, and additional examples, see the output of the tkstool -H command.
Part II. Part II: Setting up certificate services
For accountability purposes, direct modification of CS.cfg, server.xml or any configuration file post-installation is expressly prohibited in a certified environment. Such actions (direct modification of plain text configuration files) are allowed only during installation and the post-installation that comes immediately after the installation prior to going live.
Chapter 3. Certificate profiles (Making Rules for Issuing Certificates)
Red Hat Certificate System provides a customizable framework to apply policies for incoming certificate requests and to control the input request types and output certificate types; these are called certificate profiles. Certificate profiles set the required information for certificate enrollment forms in the Certificate Manager end-entities page. This chapter describes how to configure certificate profiles.
3.1. About certificate profiles
A certificate profile defines everything associated with issuing a particular type of certificate, including the authentication method, the authorization method, the default certificate content, constraints for the values of the content, and the contents of the input and output for the certificate profile. Enrollment and renewal requests are submitted to a certificate profile and are then subject to the defaults and constraints set in that certificate profile. These constraints are in place whether the request is submitted through the input form associated with the certificate profile or through other means. The certificate that is issued from a certificate profile request contains the content required by the defaults with the information required by the default parameters. The constraints provide rules for what content is allowed in the certificate.
For details about using and customizing certificate profiles, see Section 3.2, “Setting up certificate profiles”.
The Certificate System contains a set of default profiles. While the default profiles are created to satisfy most deployments, every deployment can add their own new certificate profiles or modify the existing profiles.
- Authentication. In every certification profile can be specified an authentication method.
- Authorization. In every certification profile can be specified an authorization method.
- Profile inputs. Profile inputs are parameters and values that are submitted to the CA when a certificate is requested. Profile inputs include public keys for the certificate request and the certificate subject name requested by the end entity for the certificate.
- Profile outputs. Profile outputs are parameters and values that specify the format in which to provide the certificate to the end entity. Profile outputs are CMC responses which contain a PKCS#7 certificate chain, when the request was successful.
Certificate content. Each certificate defines content information, such as the name of the entity to which it is assigned (the subject name), its signing algorithm, and its validity period. What is included in a certificate is defined in the X.509 standard. With version 3 of the X509 standard, certificates can also contain extensions. For more information about certificate extensions, see Section B.3, “Standard X.509 v3 certificate extension reference”.
All of the information about a certificate profile is defined in the
setentry of the profile policy in the profile’s configuration file. When multiple certificates are expected to be requested at the same time, multiple set entries can be defined in the profile policy to satisfy needs of each certificate. Each policy set consists of a number of policy rules and each policy rule describes a field in the certificate content. A policy rule can include the following parts:- Profile defaults. These are predefined parameters and allowed values for information contained within the certificate. Profile defaults include the validity period of the certificate, and what certificate extensions appear for each type of certificate issued.
-
Profile constraints. Constraints set rules or policies for issuing certificates. Amongst other, profile constraints include rules to require the certificate subject name to have at least one CN component, to set the validity of a certificate to a maximum of 360 days, to define the allowed grace period for renewal, or to require that the
subjectaltnameextension is always set totrue.
3.1.1. The enrollment profile
The parameters for each profile defining the inputs, outputs, and policy sets are listed in more detail in Profile configuration file parameters in the Planning, Installation and Deployment Guide (Common Criteria Edition).
A profile usually contains inputs, policy sets, and outputs, as illustrated in the caUserCert profile in the following example. .Example caCMCUserCert Profile
The first part of a certificate profile is the description. This shows the name, long description, whether it is enabled, and who enabled it.
desc=This certificate profile is for enrolling user certificates by using the CMC certificate request with CMC Signature authentication. visible=true enable=true enableBy=admin name=Signed CMC-Authenticated User Certificate Enrollment
desc=This certificate profile is for enrolling user certificates by using the CMC certificate request with CMC Signature authentication.
visible=true
enable=true
enableBy=admin
name=Signed CMC-Authenticated User Certificate Enrollment
The missing auth.instance_id= entry in this profile means that with this profile, authentication is not needed to submit the enrollment request. However, manual approval by an authorized CA agent will be required to get an issuance.
Next, the profile lists all of the required inputs for the profile:
input.list=i1 input.i1.class_id=cmcCertReqInputImp
input.list=i1
input.i1.class_id=cmcCertReqInputImp
For the caCMCUserCert profile, this defines the certificate request type, which is CMC.
Next, the profile must define the output, meaning the format of the final certificate. The only one available is certOutputImpl, which results in CMC response to be returned to the requestor in case of success.
output.list=o1 output.o1.class_id=certOutputImpl
output.list=o1
output.o1.class_id=certOutputImpl
The last - largest - block of configuration is the policy set for the profile. Policy sets list all of the settings that are applied to the final certificate, like its validity period, its renewal settings, and the actions the certificate can be used for. The policyset.list parameter identifies the block name of the policies that apply to one certificate; the policyset.userCertSet.list lists the individual policies to apply.
For example, the sixth policy populates the Key Usage Extension automatically in the certificate, according to the configuration in the policy. It sets the defaults and requires the certificate to use those defaults by setting the constraints:
3.1.2. Certificate extensions: defaults and constraints
An extension configures additional information to include in a certificate or rules about how the certificate can be used. These extensions can either be specified in the certificate request or taken from the profile default definition and then enforced by the constraints.
A certificate extension is added or identified in a profile by adding the default which corresponds to the extension and sets default values, if the certificate extension is not set in the request. For example, the Basic Constraints Extension identifies whether a certificate is a CA signing certificate, the maximum number of subordinate CAs that can be configured under the CA, and whether the extension is critical (required):
policyset.caCertSet.5.default.name=Basic Constraints Extension Default policyset.caCertSet.5.default.params.basicConstraintsCritical=true policyset.caCertSet.5.default.params.basicConstraintsIsCA=true policyset.caCertSet.5.default.params.basicConstraintsPathLen=-1
policyset.caCertSet.5.default.name=Basic Constraints Extension Default
policyset.caCertSet.5.default.params.basicConstraintsCritical=true
policyset.caCertSet.5.default.params.basicConstraintsIsCA=true
policyset.caCertSet.5.default.params.basicConstraintsPathLen=-1The extension can also set required values for the certificate request called constraints. If the contents of a request do not match the set constraints, then the request is rejected. The constraints generally correspond to the extension default, though not always. For example:
To allow user supplied extensions to be embedded in the certificate requests and ignore the system-defined default in the profile, the profile needs to contain the User Supplied Extension Default, which is described in Section B.1.32, “User Supplied extension default”.
3.1.3. Inputs and outputs
Inputs set information that must be submitted to receive a certificate. This can be requester information, a specific format of certificate request, or organizational information.
In a Common Criteria environment, set the input.i1.class_id parameter in all enabled profiles to cmcCertReqInputImpl:
input.i1.class_id=cmcCertReqInputImpl
input.i1.class_id=cmcCertReqInputImpl
The outputs configured in the profile define the format of the certificate that is issued. In a Common Criteria environment, set the output.o1.class_id parameter in all enabled profiles to certOutputImpl:
output.o1.class_id=CertOutputImpl
output.o1.class_id=CertOutputImpl
In a Common Criteria-compliant Certificate System environment, users access profiles through the /ca/ee/ca/profileSubmitUserSignedCMCFull servlet that is accessed through the end-entities interface.
3.2. Setting up certificate profiles
In Certificate System, you can add, delete, and modify enrollment profiles:
- Using the PKI command-line interface
- Editing the profile configuration files directly (this is recommended only at time of installation configuration; see Chapter 11 Configuring certificate profiles in the Planning, Installation and Deployment Guide (Common Criteria Edition).
This section provides information on the pki CLI method.
3.2.1. Managing certificate enrollment profiles using the pki command-line interface
This section describes how to manage certificate profiles using the pki utility. For further details, see the pki-ca-profile(1) man page.
Using the raw format is recommended. For details on each attribute and field of the profile, see Chapter 11 Configuring certificate profiles in the Planning, Installation and Deployment Guide (Common Criteria Edition).
3.2.2. Enabling and disabling a certificate profile
Before you can edit a certificate profile, you must disable it. After the modification is complete, you can re-enable the profile.
Only CA agents can enable and disable certificate profiles.
For example, to disable the
caCMCECserverCertcertificate profile:pki -c password -n caagent ca-profile-disable caCMCECserverCert
# pki -c password -n caagent ca-profile-disable caCMCECserverCertCopy to Clipboard Copied! Toggle word wrap Toggle overflow For example, to enable the
caCMCECserverCertcertificate profile:pki -c password -n caagent ca-profile-enable caCMCECserverCert
# pki -c password -n caagent ca-profile-enable caCMCECserverCertCopy to Clipboard Copied! Toggle word wrap Toggle overflow
3.2.2.1. Creating a certificate profile in raw format
To create a new profile in raw format:
pki -c password -n caadmin ca-profile-add profile_name.cfg --raw
# pki -c password -n caadmin ca-profile-add profile_name.cfg --rawIn raw format, specify the new profile ID as follows:
profileId=profile_name
profileId=profile_name3.2.2.2. Editing a certificate profile in raw format
CA administrators can edit a certificate profile in raw format without manually downloading the configuration file.
For example, to edit the caCMCECserverCert profile:
pki -c password -n caadmin ca-profile-edit caCMCECserverCert
# pki -c password -n caadmin ca-profile-edit caCMCECserverCert
This command automatically downloads the profile configuration in raw format and opens it in the VI editor. When you close the editor, the profile configuration is updated on the server.
You do not need to restart the CA after editing a profile.
Before you can edit a profile, disable the profile. For details, see Section 3.2.2, “Enabling and disabling a certificate profile”.
Example 3.1. Editing a certificate profile in raw format
For example, to edit the caCMCserverCert profile to accept multiple user-supplied extensions:
Disable the profile as a CA agent:
pki -c password -n caagemt ca-profile-disable caCMCserverCert
# pki -c password -n caagemt ca-profile-disable caCMCserverCertCopy to Clipboard Copied! Toggle word wrap Toggle overflow Edit the profile as a CA administrator:
Download and open the profile in the
VIeditor:pki -c password -n caadmin ca-profile-edit caCMCserverCert
# pki -c password -n caadmin ca-profile-edit caCMCserverCertCopy to Clipboard Copied! Toggle word wrap Toggle overflow - Update the configuration to accept the extensions. For details, see Example B.3, “Multiple user supplied extensions in CSR”.
Enable the profile as a CA agent:
pki -c password -n caagent ca-profile-enable caCMCserverCert
# pki -c password -n caagent ca-profile-enable caCMCserverCertCopy to Clipboard Copied! Toggle word wrap Toggle overflow
3.2.2.3. Deleting a certificate profile
To delete a certificate profile:
pki -c password -n caadmin ca-profile-del profile_name
# pki -c password -n caadmin ca-profile-del profile_nameBefore you can delete a profile, disable the profile. For details, see Section 3.2.2, “Enabling and disabling a certificate profile”.
3.2.3. Listing certificate enrollment profiles
The following pre-defined certificate profiles are ready to use and set up in this environment when the Certificate System CA is installed. These certificate profiles have been designed for the most common types of certificates, and they provide common defaults, constraints, authentication methods, inputs, and outputs.
For a list of supported profiles, see Section 8.3, “CMC authentication plugins”
To list the available profiles on the command line, use the pki utility. For example:
For further details, see the pki-ca-profile(1) man page. Additional information can also be found in Chapter 11 Configuring certificate profiles in the Planning, Installation and Deployment Guide (Common Criteria Edition).
3.2.4. Displaying details of a certificate enrollment profile
For example, to display a specific certificate profile, such as caECFullCMCUserSignedCert:
For example, to display a specific certificate profile, such as caECFullCMCUserSignedCert, in raw format:
For further details, see the pki-ca-profile(1) man page.
3.3. Defining key defaults in profiles
When creating certificate profiles, the Key Default must be added before the Subject Key Identifier Default. Certificate System processes the key constraints in the Key Default before creating or applying the Subject Key Identifier Default, so if the key has not been processed yet, setting the key in the subject name fails.
For example, an object-signing profile may define both defaults:
In the policyset list, then, the Key Default (p11) must be listed before the Subject Key Identifier Default (p3).
policyset.set1.list=p1,p2,p11,p3,p4,p5,p6,p7,p8,p9,p10
policyset.set1.list=p1,p2,p11,p3,p4,p5,p6,p7,p8,p9,p103.4. Configuring profiles to enable renewal
This section discusses how to set up profiles for certificate renewals.
Renewing a certificate regenerates the certificate using the same public key as the original certificate. Renewing a certificate can be preferable to simply generating new keys and installing new certificates; for example, if a new CA signing certificate is created, all of the certificates which that CA issued and signed must be reissued. If the CA signing certificate is renewed, then all of the issued certificates are still valid. A renewed certificate is identical to the original, only with an updated validity period and expiration date. This makes renewing certificates a much simpler and cleaner option for handling the expiration of many kinds of certificates, especially CA signing certificates.
For more information on how to renew certificates, see Section 5.4, “Renewing certificates”.
3.4.1. The renewal process
There are two methods of renewing a certificate:
- Regenerating the certificate takes the original key, profile, and request of the certificate and recreates a new certificate with a new validity period and expiration date using the identical key.
- Re-keying a certificate submits a certificate request through the original profile with the same information, so that a new key pair is generated.
A profile that allows renewal is often accompanied by the renewGracePeriodConstraint entry. For example:
The Renew Grace Period Constraint should be set in the original enrollment profile. This defines the amount of time before and after the certificate’s expiration date when the user is allowed to renew the certificate. There are only a few examples of these in the default profiles, and they are mostly not enabled by default. This entry is not required; however, if no grace period is set, it is only possible to renew a certificate on the date of its expiration.
3.4.2. Renewing using the same key
A profile that allows the same key to be submitted for renewal has the allowSameKeyRenewal parameter set to true in the uniqueKeyConstraint entry. For example:
policyset.cmcUserCertSet.9.constraint.class_id=uniqueKeyConstraintImpl policyset.cmcUserCertSet.9.constraint.name=Unique Key Constraint policyset.cmcUserCertSet.9.constraint.params.allowSameKeyRenewal=true policyset.cmcUserCertSet.9.default.class_id=noDefaultImpl policyset.cmcUserCertSet.9.default.name=No Default
policyset.cmcUserCertSet.9.constraint.class_id=uniqueKeyConstraintImpl
policyset.cmcUserCertSet.9.constraint.name=Unique Key Constraint
policyset.cmcUserCertSet.9.constraint.params.allowSameKeyRenewal=true
policyset.cmcUserCertSet.9.default.class_id=noDefaultImpl
policyset.cmcUserCertSet.9.default.name=No Default3.4.3. Renewing using a new key
To renew a certificate with a new key, use the same profile with a new key. Certificate System uses the subjectDN from the user signing certificate that signs the request for the new certificate.
3.5. Setting the signing algorithms for certificates
The CA’s signing certificate can sign the certificates it issues with any public key algorithm supported by the CA. Red Hat Certificate System supports ECC and RSA. Both public key algorithms support different cipher suites, algorithms used to encrypt and decrypt data.
Each certificate enrollment profile can define which cipher suite the CA should use to sign certificates processed through that profile. If no signing algorithm is set, then the profile uses the default signing algorithm set at installation (see Changing the signing algorithms).
3.6. Managing CA-related profiles
Certificate profiles and extensions must be used to set rules on how subordinate CAs can issue certificates. There are two parts to this:
- Managing the CA signing certificate
- Defining issuance rules
3.6.1. Setting restrictions on CA certificates
When a subordinate CA is created, the root CA can impose limits or restrictions on the subordinate CA. For example, the root CA can dictate the maximum depth of valid certification paths (the number of subordinate CAs allowed to be chained below the new CA) by setting the pathLenConstraint field of the Basic Constraints extension in the CA signing certificate.
A certificate chain generally consists of an entity certificate, zero or more intermediate CA certificates, and a root CA certificate. The root CA certificate is either self-signed or signed by an external trusted CA. Once issued, the root CA certificate is loaded into a certificate database as a trusted CA.
An exchange of certificates takes place when performing a TLS handshake, when sending an S/MIME message, or when sending a signed object. As part of the handshake, the sender is expected to send the subject certificate and any intermediate CA certificates needed to link the subject certificate to the trusted root. For certificate chaining to work properly the certificates should have the following properties:
- CA certificates must have the Basic Constraints extension.
- CA certificates must have the keyCertSign bit set in the Key Usage extension.
When the CAs generate new keys, they must add the Authority Key Identifier extension to all subject certificates. This extension helps distinguish the certificates from the older CA certificates. The CA certificates must contain the Subject Key Identifier extension.
For more information on certificates and their extensions, see Internet X.509 Public Key Infrastructure - Certificate and Certificate Revocation List (CRL) Profile (RFC 5280), available at RFC 5280.
These extensions can be configured through the certificate profile enrollment pages. By default, the CA contains the required and reasonable configuration settings, but it is possible to customize these settings.
This procedure describes editing the CA certificate profile used by a CA to issue CA certificates to its subordinate CAs.
The profile that is used when a CA instance is first configured is /var/lib/pki/instance_name/ca/conf/caCert.profile. This profile cannot be edited in pkiconsole (since it is only available before the instance is configured). It is possible to edit the policies for this profile in the template file before the CA is configured using a text editor.
To modify the default in the CA signing certificate profile used by a CA:
- If the profile is currently enabled, it must be disabled before it can be edited. Open the agent services page, select Manage Certificate Profiles from the left navigation menu, select the profile, and click Disable profile.
Open the CA Console.
pkiconsole -d nssdb -n 'optional client cert nickname' https://server.example.com:8443/ca
# pkiconsole -d nssdb -n 'optional client cert nickname' https://server.example.com:8443/caCopy to Clipboard Copied! Toggle word wrap Toggle overflow Notepkiconsoleis being deprecated and will be replaced by a new browser-based UI in a future major release. Althoughpkiconsolewill continue to be available until the replacement UI is released, we encourage using the command line equivalent ofpkiconsoleat this time, as the pki CLI will continue to be supported and improved upon even when the new browser-based UI becomes available in the future.- In the left navigation tree of the Configuration tab, select Certificate Manager, then Certificate Profiles.
- Select caCACert, or the appropriate CA signing certificate profile, from the right window, and click .
- In the Policies tab of the Certificate Profile Rule Editor, select and edit the Key Usage or Extended Key Usage Extension Default if it exists or add it to the profile.
- Select the Key Usage or Extended Key Usage Extension Constraint, as appropriate, for the default.
- Set the default values for the CA certificates. For more information, see Section B.1.13, “Key Usage extension default” and Section B.1.8, “Extended Key Usage extension default”.
- Set the constraint values for the CA certificates. There are no constraints to be set for a Key Usage extension; for an Extended Key Usage extension, set the appropriate OID constraints for the CA. For more information, see Section B.1.8, “Extended Key Usage extension default”.
- When the changes have been made to the profile, log into the agent services page again, and re-enable the certificate profile.
For more information on modifying certificate profiles, see Section 3.2, “Setting up certificate profiles”.
3.6.2. Changing the restrictions for CAs on issuing certificates
The restrictions on the certificates issued are set by default after the subsystem is configured. These include:
- Whether certificates can be issued with validity periods longer than the CA signing certificate. The default is to disallow this.
- The signing algorithm used to sign certificates.
- The serial number range the CA is able to use to issue certificates.
Subordinate CAs have constraints for the validity periods, types of certificates, and the types of extensions which they can issue. It is possible for a subordinate CA to issue certificates that violate these constraints, but a client authenticating a certificate that violates those constraints will not accept that certificate. Check the constraints set on the CA signing certificate before changing the issuing rules for a subordinate CA.
To change the certificate issuance rules:
Open the Certificate System Console.
pkiconsole -d nssdb -n 'optional client cert nickname' https://server.example.com:8443/ca
# pkiconsole -d nssdb -n 'optional client cert nickname' https://server.example.com:8443/caCopy to Clipboard Copied! Toggle word wrap Toggle overflow Notepkiconsoleis being deprecated and will be replaced by a new browser-based UI in a future major release. Althoughpkiconsolewill continue to be available until the replacement UI is released, we encourage using the command line equivalent ofpkiconsoleat this time, as the pki CLI will continue to be supported and improved upon even when the new browser-based UI becomes available in the future.Select the Certificate Manager item in the left navigation tree of the Configuration tab.
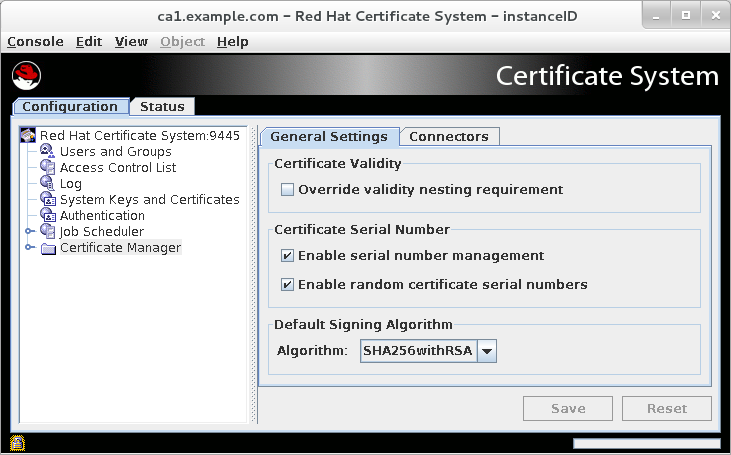
Figure 3.1. The General Settings tab in non-subordinate CAs by default
By default, in non-cloned CAs, the General Settings tab of the Certificate Manager menu item contains these options:
Override validity nesting requirement. This checkbox sets whether the Certificate Manager can issue certificates with validity periods longer than the CA signing certificate validity period.
If this checkbox is not selected and the CA receives a request with validity period longer than the CA signing certificate’s validity period, it automatically truncates the validity period to end on the day the CA signing certificate expires.
Certificate Serial Number. These fields display the serial number range for certificates issued by the Certificate Manager. The server assigns the serial number in the Next serial number field to the next certificate it issues and the number in the Ending serial number to the last certificate it issues.
The serial number range allows multiple CAs to be deployed and balances the number of certificates each CA issues. The combination of an issuer name and a serial number uniquely identifies a certificate.
NOTEThe serial number ranges with cloned CAs are fluid. All cloned CAs share a common configuration entry which defines the next available range. When one CA starts running low on available numbers, it checks this configuration entry and claims the next range. The entry is automatically updated, so that the next CA gets a new range.
The ranges are defined in
begin*Numberandend*Numberattributes, with separate ranges defined for requests and certificate serial numbers. For example:Copy to Clipboard Copied! Toggle word wrap Toggle overflow Serial number management can be enabled for CAs which are not cloned. However, by default, serial number management is disabled unless a system is cloned, when it is automatically enabled.
The serial number range cannot be updated manually through the console. The serial number ranges are read-only fields.
Default Signing Algorithm. Specifies the signing algorithm the Certificate Manager uses to sign certificates. The options are
SHA256withRSA, andSHA512withRSA, if the CA’s signing key type is RSA.The signing algorithm specified in the certificate profile configuration overrides the algorithm set here.
By default, in cloned CAs, the General Settings tab of the Certificate Manager menu item contains these options:
- Enable serial number management
Enable random certificate serial numbers
Select both check boxes.
Figure 3.2. The General Settings tab in cloned CAs by default
- Click .


3.6.3. Using random certificate serial numbers
Red Hat Certificate System contains a serial number range management for requests, certificates, and replica IDs. This allows the automation of cloning when installing Identity Management (IdM).
There are these ways to reduce the likelihood of hash-based attacks:
- making part of the certificate serial number unpredictable to the attacker
- adding a randomly chosen component to the identity
- making the validity dates unpredictable to the attacker by skewing each one forwards or backwards
The random certificate serial number assignment method adds a randomly chosen component to the identity. This method:
- works with cloning
- allows resolving conflicts
- is compatible with the current serial number management method
- is compatible with the current workflows for administrators, agents, and end entities
- fixes the existing bugs in sequential serial number management
Administrators must enable random certificate serial numbers.
Enabling random certificate serial numbers
You can enable automatic serial number range management either from the command line or from the console UI.
To enable automatic serial number management from the console UI:
Tick the Enable serial number management option in the General Settings tab.
Figure 3.3. The General Settings tab when random serial number assignment is enabled
- Tick the Enable random certificate serial numbers option.
3.7. Managing subject names and subject alternative names
The subject name of a certificate is a distinguished name (DN) that contains identifying information about the entity to which the certificate is issued. This subject name can be built from standard LDAP directory components, such as common names and organizational units. These components are defined in X.500. In addition to - or even in place of - the subject name, the certificate can have a subject alternative name, which is a kind of extension set for the certificate that includes additional information that is not defined in X.500.
The naming components for both subject names and subject alternative names can be customized.
If the subject name is empty, then the Subject Alternative Name extension must be present and marked critical.
3.7.1. Using the requester CN or UID in the subject name
The cn or uid value from a certificate request can be used to build the subject name of the issued certificate. This section demonstrates a profile that requires the naming attribute (CN or UID) being specified in the Subject Name Constraint to be present in the certificate request. If the naming attribute is missing, the request is rejected.
There are two parts to this configuration:
-
The CN or UID format is set in the
patternconfiguration in the Subject Name Constraint. - The format of the subject DN, including the CN or UID token and the specific suffix for the certificate, is set in the Subject Name Default.
For example, to use the CN in the subject DN:
In this example, if a request comes in with the CN of cn=John Smith, then the certificate will be issued with a subject DN of cn=John Smith,DC=example, DC=com. If the request comes in but it has a UID of uid=jsmith and no CN, then the request is rejected.
The same configuration is used to pull the requester UID into the subject DN:
The format for the pattern parameter is covered in Section B.2.11, “Subject Name constraint” and Section B.1.27, “Subject Name default”.
3.7.2. Inserting LDAP directory attribute values and other information into the subject alt name
Information from an LDAP directory or that was submitted by the requester can be inserted into the subject alternative name of the certificate by using matching variables in the Subject Alt Name Extension Default configuration. This default sets the type (format) of information and then the matching pattern (variable) to use to retrieve the information. For example:
This inserts the requester’s email as the first CN component in the subject alt name. To use additional components, increment the Type_, Pattern_, and Enable_ values numerically, such as Type_1.
Configuring the subject alt name is detailed in Section B.1.23, “Subject Alternative Name extension default”, as well.
To insert LDAP components into the subject alt name of the certificate:
Inserting LDAP attribute values requires enabling the user directory authentication plugin,
SharedSecret.Open the CA Console.
pkiconsole -d nssdb -n 'optional client cert nickname' https://server.example.com:8443/ca
# pkiconsole -d nssdb -n 'optional client cert nickname' https://server.example.com:8443/caCopy to Clipboard Copied! Toggle word wrap Toggle overflow Notepkiconsoleis being deprecated and will be replaced by a new browser-based UI in a future major release. Althoughpkiconsolewill continue to be available until the replacement UI is released, we encourage using the command line equivalent ofpkiconsoleat this time, as the pki CLI will continue to be supported and improved upon even when the new browser-based UI becomes available in the future.- Select Authentication in the left navigation tree.
-
In the Authentication Instance tab, click , and add an instance of the
SharedSecretauthentication plugin. Enter the following information:
Copy to Clipboard Copied! Toggle word wrap Toggle overflow - Save the new plugin instance.
For information on setting a CMC shared token, see Section 8.4.2, “Setting a CMC Shared Secret”.
The
ldapStringAttributesparameter instructs the authentication plugin to read the value of themailattribute from the user’s LDAP entry and put that value in the certificate request. When the value is in the request, the certificate profile policy can be set to insert that value for an extension value.The format for the
dnpatternparameter is covered in Section B.2.11, “Subject Name constraint” and Section B.1.27, “Subject Name default”.To enable the CA to insert the LDAP attribute value in the certificate extension, edit the profile’s configuration file, and insert a policy set parameter for an extension. For example, to insert the
mailattribute value in the Subject Alternative Name extension in thecaFullCMCSharedTokenCertprofile, change the following code:policyset.setID.8.default.params.subjAltExtPattern_0=$request.auth_token.mail[0]$
policyset.setID.8.default.params.subjAltExtPattern_0=$request.auth_token.mail[0]$Copy to Clipboard Copied! Toggle word wrap Toggle overflow For more details about editing a profile, see Section 3.2.2.2, “Editing a certificate profile in raw format”.
Restart the CA.
systemctl restart pki-tomcatd-nuxwdog@instance_name.service
# systemctl restart pki-tomcatd-nuxwdog@instance_name.serviceCopy to Clipboard Copied! Toggle word wrap Toggle overflow
For this example, certificates submitted through the caFullCMCSharedTokenCert profile enrollment form will have the Subject Alternative Name extension added with the value of the requester’s mail LDAP attribute. For example:
Identifier: Subject Alternative Name - 2.5.29.17
Critical: no
Value:
RFC822Name: jsmith@example.com
Identifier: Subject Alternative Name - 2.5.29.17
Critical: no
Value:
RFC822Name: jsmith@example.com
There are many attributes which can be automatically inserted into certificates by being set as a token ($X$) in any of the Pattern_ parameters in the policy set. The common tokens are listed in Table 3.1, “Variables used to populate certificates”, and the default profiles contain examples for how these tokens are used.
| Policy Set Token | Description |
|---|---|
| $request.auth_token.cn[0]$ |
The LDAP common name ( |
| $request.auth_token.mail[0]$ |
The value of the LDAP email ( |
| $request.auth_token.tokencertsubject$ | The certificate subject name. |
| $request.auth_token.uid$ |
The LDAP user ID ( |
| $request.auth_token.userdn$ | The user DN of the user who requested the certificate. |
| $request.auth_token.userid$ | The value of the user ID attribute for the user who requested the certificate. |
| $request.uid$ | The value of the user ID attribute for the user who requested the certificate. |
| $request.requestor_email$ | The email address of the person who submitted the request. |
| $request.requestor_name$ | The person who submitted the request. |
| $request.upn$ | The Microsoft UPN. This has the format (UTF8String)1.3.6.1.4.1.311.20.2.3,$request.upn$. |
| $server.source$ | Instructs the server to generate a version 4 UUID (random number) component in the subject name. This always has the format (IA5String)1.2.3.4,$server.source$. |
| $request.auth_token.user$ | Used when the request was submitted by TPS. The TPS subsystem trusted manager who requested the certificate. |
| $request.subject$ |
Used when the request was submitted by TPS. The subject name DN of the entity to which TPS has resolved and requested for. For example, |
3.7.3. Using the CN attribute in the SAN extension
Several client applications and libraries no longer support using the Common Name (CN) attribute of the Subject DN for domain name validation, which has been deprecated in RFC 2818. Instead, these applications and libraries use the dNSName Subject Alternative Name (SAN) value in the certificate request.
Certificate System copies the CN only if it matches the preferred name syntax according to RFC 1034 Section 3.5 and has more than one component. Additionally, existing SAN values are preserved. For example, the dNSName value based on the CN is appended to existing SANs.
To configure Certificate System to automatically use the CN attribute in the SAN extension, edit the certificate profile used to issue the certificates. For example:
Disable the profile:
pki -c password -d /administrator_nssdb_directory/ -p 8443 -n administrator_cert_nickname ca-profile-disable profile_name
# pki -c password -d /administrator_nssdb_directory/ -p 8443 -n administrator_cert_nickname ca-profile-disable profile_nameCopy to Clipboard Copied! Toggle word wrap Toggle overflow Edit the profile:
pki -c password -d /administrator_nssdb_directory/ -p 8443 -n administrator_cert_nickname ca-profile-edit profile_name
# pki -c password -d /administrator_nssdb_directory/ -p 8443 -n administrator_cert_nickname ca-profile-edit profile_nameCopy to Clipboard Copied! Toggle word wrap Toggle overflow Add the following configuration with a unique set number for the profile. For example:
policyset.serverCertSet.12.constraint.class_id=noConstraintImpl policyset.serverCertSet.12.constraint.name=No Constraint policyset.serverCertSet.12.default.class_id=commonNameToSANDefaultImpl policyset.serverCertSet.12.default.name=Copy Common Name to Subject
policyset.serverCertSet.12.constraint.class_id=noConstraintImpl policyset.serverCertSet.12.constraint.name=No Constraint policyset.serverCertSet.12.default.class_id=commonNameToSANDefaultImpl policyset.serverCertSet.12.default.name=Copy Common Name to SubjectCopy to Clipboard Copied! Toggle word wrap Toggle overflow The previous example uses
12as the set number.Append the new policy set number to the
policyset.userCertSet.listparameter. For example:policyset.userCertSet.list=1,10,2,3,4,5,6,7,8,9,12
policyset.userCertSet.list=1,10,2,3,4,5,6,7,8,9,12Copy to Clipboard Copied! Toggle word wrap Toggle overflow - Save the profile.
Enable the profile:
pki -c password -d /administrator_nssdb_directory/ -p 8443 -n administrator_nickname ca-profile-enable profile_name
# pki -c password -d /administrator_nssdb_directory/ -p 8443 -n administrator_nickname ca-profile-enable profile_nameCopy to Clipboard Copied! Toggle word wrap Toggle overflow
All default server profiles contain the commonNameToSANDefaultImpl default.
3.7.4. Accepting SAN extensions from a CSR
In certain environments, administrators want to allow specifying Subject Alternative Name (SAN) extensions in Certificate Signing Request (CSR).
3.7.4.1. Configuring a profile to retrieve SANs from a CSR
To allow retrieving SANs from a CSR, use the User Extension Default. For details, see Section B.1.32, “User Supplied extension default”.
A SAN extension can contain one or more SANs.
To accept SANs from a CSR, add the following default and constraint to a profile, such as caCMCECserverCert:
3.7.4.2. Generating a CSR with SANs
For example, to generate a CSR with two SANs using the certutil utility:
certutil -R -k ec -q nistp256 -d . -s "cn=Example Multiple SANs" --extSAN dns:www.example.com,dns:www.example.org -a -o request.csr.p10
# certutil -R -k ec -q nistp256 -d . -s "cn=Example Multiple SANs" --extSAN dns:www.example.com,dns:www.example.org -a -o request.csr.p10After generating the CSR, follow the steps described in Section 5.3.1, “The CMC enrollment process” to complete the CMC enrollment.
Chapter 4. Setting up key archival and recovery
This chapter explains how to setup the Key Recovery Authority (KRA), previously known as Data Recovery Manager (DRM), to archive private keys and to recover archived keys for restoring encrypted data.
See 4.4 "Supported Hardware Security Modules" in the Planning, Installation and Deployment Guide (Common Criteria Edition).
When the KRA is installed, it joins a security domain, and is paired up with the CA. At such time, it is configured to archive and recover private encryption keys. However, if the KRA certificates are issued by an external CA rather than one of the CAs within the security domain, then the key archival and recovery process must be set up manually.
For more information, see 12.1 Manually Setting up Key Archival in the Planning, Installation and Deployment Guide (Common Criteria Edition).
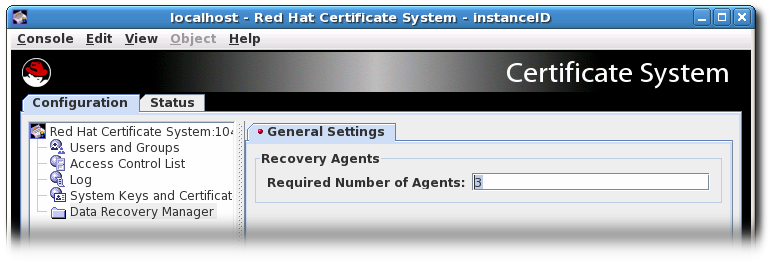
4.1. Configuring agent-approved key recovery in the console
While the number of key recovery agents can be configured in the Console, the group to use can only be set directly in the CS.cfg file. The Console uses the Key Recovery Authority Agents Group by default.
Open the KRA’s console. For example:
pkiconsole -d nssdb -n 'optional client cert nickname' https://server.example.com:8443/kra
# pkiconsole -d nssdb -n 'optional client cert nickname' https://server.example.com:8443/kraCopy to Clipboard Copied! Toggle word wrap Toggle overflow NoteTo configure
pkiconsole, please refer to 7.13.6 "Configure pkiconsole login with client authentication" in the Planning, Installation and Deployment Guide (Common Criteria Edition).pkiconsoleis being deprecated and will be replaced by a new browser-based UI in a future major release. Althoughpkiconsolewill continue to be available until the replacement UI is released, we encourage using the command line equivalent ofpkiconsoleat this time, as the pki CLI will continue to be supported and improved upon even when the new browser-based UI becomes available in the future.- Click the Key Recovery Authority link in the left navigation tree.
Enter the number of agents to use to approve key recover in the Required Number of Agents field.
For more information on how to configure agent-approved key recovery in the CS.cfg file, see 12.3.1 Configuring Agent-Approved Key Recovery in the Command Line in the Planning, Installation and Deployment Guide (Common Criteria Edition).
4.2. Testing the key archival and recovery setup
To test whether a key can be successfully archived:
- Create and enroll a CRMF request by following Section 11.3.2.1.1, “Enrolling for a user certificate”.
- Confirm that the key has been archived. In the KRA’s agent services page, select Show completed requests. If the key has been archived successfully, there will be information about that key. If the key is not shown, check the logs, and correct the problem. If the key has been successfully archived, close the browser window.
Test whether an archived key can be recovered successfully:
- Open the KRA’s agent services page, and click the Recover Keys link. Search for the key by the key owner, serial number, or public key. If the key has been archived successfully, the key information will be shown.
- Click .
- In the form that appears, enter the base-64 encoded certificate that corresponds to the private key to recover; use the CA to get this information. If the archived key was searched for by providing the base-64 encoded certificate, then the certificate does not have to be supplied here.
- Only "Async Recovery" is supported. Make sure that the Async Recovery checkbox is selected.
- Depending on the agent scheme, a specified number of agents must authorize this key recovery. Have the agents search for the key to recover and then to approve the initiated recovery.
- Once all the agents have authorized the recovery, the next screen requests a password to encrypt the PKCS #12 file with the certificate.
The next screen returns a link to download a PKCS #12 blob containing the recovered key pair. Follow the link, and save the blob to file.
ImportantOpening the PKCS #12 file directly from the browser in the
gcr-viewerutility can fail in certain situations. To work around the problem, download the file and manually open it ingcr-viewer.- For more information on Key Archival and Recovery, see 2.4.5 Archiving, Recovering, and Rotating Keys in the Planning, Installation and Deployment Guide (Common Criteria Edition).
Chapter 5. Requesting, enrolling and managing certificates
Certificates are requested and used by end users. Although certificate enrollment and renewal are operations that are not limited to administrators, understanding the enrollment and renewal processes can make it easier for administrators to manage and create appropriate certificate profiles, as described in Section 3.2, “Setting up certificate profiles”, and to use fitting authentication methods (described in Chapter 8, Authentication for enrolling certificates) for each certificate type.
This chapter discusses requesting, receiving, and renewing certificates for use outside Certificate System. For information on requesting and renewing Certificate System subsystem certificates, see Chapter 13, Managing subsystem certificates.
5.1. About enrolling and renewing certificates
Enrollment is the process for requesting and receiving a certificate. The mechanics for the enrollment process are slightly different depending on the type of certificate, the method for generating its key pair, and the method for generating and approving the certificate itself. Whatever the specific method, certificate enrollment, at a high level, has the same basic steps:
- A certificate request (CSR) is generated.
- The certificate request is submitted to the CA.
- The request is verified by authenticating the entity which requested it and by confirming that the request meets the certificate profile rules which were used to submit it.
- The request is approved.
- The requesting party retrieves the new certificate.
When the certificate reaches the end of its validity period, it can be renewed.
5.2. Creating certificate signing requests (CSR)
As explained in 2.4.1.1.2.2 Enrolling with CMC section in the Planning, Installation and Deployment Guide (Common Criteria Edition), the CMCRequest utility accepts Certificate Signing Requests (CSR) in PKCS #10 and CRMF format.
Red Hat Certificate System supports using the following utilities to create CSRs:
-
certutil: Supports creating PKCS #10 requests. -
PKCS10Client: Supports creating PKCS #10 requests. -
CRMFPopClient: Supports creating CRMF requests.
The following sections provide some examples on how to use these utilities with the feature-rich enrollment profile framework.
Although server-side key generation appears to be provided on the browser EE portal, to allow for key generation on the CS server (where keys are then transferred securely back to the client) in order to overcome the inconvenience caused by the removal of keygen support by the latest browsers, this feature is not evaluated in the Common Criteria release.
5.2.1. Creating a CSR using certutil
This section describes examples on how to use the certutil utility to create a CSR.
For further details about using certutil, see:
-
The
certutil(1)man page -
The output of the
certutil --helpcommand
5.2.1.1. Using certutil to create a CSR with EC keys
The following procedure demonstrates how to use the certutil utility to create an Elliptic Curve (EC) key pair and CSR:
Change to the certificate database directory of the user or entity for which the certificate is being requested, for example:
cd /user_or_entity_database_directory/
$ cd /user_or_entity_database_directory/Copy to Clipboard Copied! Toggle word wrap Toggle overflow Create the binary CSR and store it in the
request.csrfile:certutil -d . -R -k ec -q nistp256 -s "CN=subject_name" -o request-bin.csr
$ certutil -d . -R -k ec -q nistp256 -s "CN=subject_name" -o request-bin.csrCopy to Clipboard Copied! Toggle word wrap Toggle overflow Enter the required NSS database password when prompted.
For further details about the parameters, see the
certutil(1)man page.Convert the created binary format CSR to PEM format:
BtoA request-bin.csr request.csr
$ BtoA request-bin.csr request.csrCopy to Clipboard Copied! Toggle word wrap Toggle overflow Optionally, verify that the CSR file is correct:
cat request.csr MIICbTCCAVUCAQAwKDEQMA4GA1UEChMHRXhhbXBsZTEUMBIGA1UEAxMLZXhhbXBs ...
$ cat request.csr MIICbTCCAVUCAQAwKDEQMA4GA1UEChMHRXhhbXBsZTEUMBIGA1UEAxMLZXhhbXBs ...Copy to Clipboard Copied! Toggle word wrap Toggle overflow This is a PKCS#10 PEM certificate request.
- For the next steps, see Section 5.3.1, “The CMC enrollment process”, but skip the step about creating the certificate request.
5.2.1.2. Using certutil to create a CSR with user-defined extensions
The following procedure demonstrates how to create a CSR with user-defined extensions using the certutil utility.
Note that the enrollment requests are constrained by the enrollment profiles defined by the CA. See Example B.3, “Multiple user supplied extensions in CSR”.
Change to the certificate database directory of the user or entity for which the certificate is being requested, for example:
cd /user_or_entity_database_directory/
$ cd /user_or_entity_database_directory/Copy to Clipboard Copied! Toggle word wrap Toggle overflow Create the CSR with user-defined Key Usage extension as well as user-defined Extended Key Usage extension and store it in the
request.csrfile:certutil -d . -R -k rsa -g 1024 -s "CN=subject_name" --keyUsage keyEncipherment,dataEncipherment,critical --extKeyUsage timeStamp,msTrustListSign,critical -a -o request.csr
$ certutil -d . -R -k rsa -g 1024 -s "CN=subject_name" --keyUsage keyEncipherment,dataEncipherment,critical --extKeyUsage timeStamp,msTrustListSign,critical -a -o request.csrCopy to Clipboard Copied! Toggle word wrap Toggle overflow Enter the required NSS database password when prompted.
For further details about the parameters, see the
certutil(1)man page.Optionally, verify that the CSR file is correct:
Copy to Clipboard Copied! Toggle word wrap Toggle overflow This is a PKCS#10 PEM certificate request.
NoteSince the above certutil command contained the
-aoption for a text format CSR, be sure to remove header information before proceeding. If you omit-a, be sure to use theBtoAtool to convert from binary to text format, as seen above in section Section 5.2.1.1, “Usingcertutilto create a CSR with EC keys”. Since the above certutil command contained -a option for a text format CSR, be sure to remove header information before proceeding. If -a is omitted, be sure to use BtoA to convert from binary to text format, as seen above in section "5.2.1.1. Using certutil to create a CSR with EC keys".
For the next steps, see Section 5.3.1, “The CMC enrollment process”, but skip the step about creating the certificate request.
5.2.2. Creating a CSR using PKCS10Client
This section provides examples on how to use the PKCS10Client utility to create a CSR.
For further details about using PKCS10Client, see:
-
The
PKCS10Client(1)man page -
The output of the
PKCS10Client --helpcommand
5.2.2.1. Using PKCS10Client to create a CSR
The following procedure explains how to use the PKCS10Client utility to create an Elliptic Curve (EC) key pair and CSR:
Change to the certificate database directory of the user or entity for which the certificate is being requested, for example:
cd /user_or_entity_database_directory/
$ cd /user_or_entity_database_directory/Copy to Clipboard Copied! Toggle word wrap Toggle overflow Create the CSR and store it in the
example.csrfile:PKCS10Client -d . -p NSS_password -a ec -c nistp256 -o example.csr -n "CN=subject_name"
$ PKCS10Client -d . -p NSS_password -a ec -c nistp256 -o example.csr -n "CN=subject_name"Copy to Clipboard Copied! Toggle word wrap Toggle overflow For further details about the parameters, see the
PKCS10Client(1)man page.Optionally, verify that the CSR is correct:
Copy to Clipboard Copied! Toggle word wrap Toggle overflow
For the next steps, see Section 5.3.1, “The CMC enrollment process”.
5.2.2.2. Using PKCS10Client to create a CSR for SharedSecret-based CMC
The following procedure explains how to use the PKCS10Client utility to create an RSA key pair and CSR for SharedSecret-based CMC. Use it only with the CMC Shared Secret authentication method which is, by default, handled by the caFullCMCSharedTokenCert and caECFullCMCSharedTokenCert profiles.
Change to the certificate database directory of the user or entity for which the certificate is being requested, for example:
cd /user_or_entity_database_directory/
$ cd /user_or_entity_database_directory/Copy to Clipboard Copied! Toggle word wrap Toggle overflow Create the CSR and store it in the
example.csrfile:PKCS10Client -d . -p NSS_password -o example.csr -y true -n "CN=subject_name"
$ PKCS10Client -d . -p NSS_password -o example.csr -y true -n "CN=subject_name"Copy to Clipboard Copied! Toggle word wrap Toggle overflow The keypair private key ID generated in the output is saved to a file with the name format
<CSR output file name>.keyId. This ID will be used later on when following the Shared Secret or Decrypted POP CMC enrollment procedure.For further details about the parameters, see the
PKCS10Client(1)man page.Optionally, verify that the CSR is correct:
Copy to Clipboard Copied! Toggle word wrap Toggle overflow
For the next steps, skip to Section 5.3.2.2.2, “Authenticating for certificate enrollment using a shared secret”.
5.2.3. Creating a CSR using CRMFPopClient
Certificate Request Message Format (CRMF) is a CSR format accepted in CMC that allows key archival information to be securely embedded in the request.
This section provides examples on how to use the CRMFPopClient utility to create a CSR.
For further details about using CRMFPopClient, run the CRMFPopClient –help command.
5.2.3.1. Using CRMFPopClient to create a CSR with key archival
The following procedure explains how to use the CRMFPopClient utility to create an RSA key pair and a CSR with the key archival option:
Change to the certificate database directory of the user or entity for which the certificate is being requested, for example:
cd /user_or_entity_database_directory/
$ cd /user_or_entity_database_directory/Copy to Clipboard Copied! Toggle word wrap Toggle overflow Retrieve the KRA transport certificate from the CA:
Copy to Clipboard Copied! Toggle word wrap Toggle overflow Export the KRA transport certificate:
pki -p 8443 ca-cert-show 0x7 --output kra.transport
$ pki -p 8443 ca-cert-show 0x7 --output kra.transportCopy to Clipboard Copied! Toggle word wrap Toggle overflow Create the CSR and store it in the
example.csrfile:Copy to Clipboard Copied! Toggle word wrap Toggle overflow NoteTo create an Elliptic Curve (EC) key pair and CSR, pass the -a ec -t false options to the command. For further details about the parameters, see the
CRMFPopClient –helpcmmand.Optionally, verify that the CSR is correct:
Copy to Clipboard Copied! Toggle word wrap Toggle overflow
For the next steps, see Section 5.3.1, “The CMC enrollment process”.
5.2.3.2. Using CRMFPopClient to create a CSR for SharedSecret-based CMC
The following procedure explains how to use the CRMFPopClient utility to create an RSA key pair and CSR for SharedSecret-based CMC. Use it only with the CMC Shared Secret authentication method which is, by default, handled by the caFullCMCSharedTokenCert and caECFullCMCSharedTokenCert profiles.
Change to the certificate database directory of the user or entity for which the certificate is being requested, for example:
cd /user_or_entity_database_directory/
$ cd /user_or_entity_database_directory/Copy to Clipboard Copied! Toggle word wrap Toggle overflow Retrieve the KRA transport certificate:
Copy to Clipboard Copied! Toggle word wrap Toggle overflow Export the KRA transport certificate:
pki -p 8443 ca-cert-export 0xc --output-file kra.transport
$ pki -p 8443 ca-cert-export 0xc --output-file kra.transportCopy to Clipboard Copied! Toggle word wrap Toggle overflow Create the CSR and store it in the
example.csrfile:Copy to Clipboard Copied! Toggle word wrap Toggle overflow NoteTo create an EC key pair and CSR, pass the -a ec -t false options to the command. For further details about the parameters, see the output of the
CRMFPopClient --helpcommand.The keypair private key ID generated in the output is saved to a file with the name format
<CSR output file name>.keyId. This ID will be used later on when following the Shared Secret or DecryptedPOP CMC enrollment procedure.Optionally, verify that the CSR is correct:
cat example.csr -----BEGIN CERTIFICATE REQUEST----- MIICzzCCAbcCAQAwgYkx ... -----END CERTIFICATE REQUEST-----
$ cat example.csr -----BEGIN CERTIFICATE REQUEST----- MIICzzCCAbcCAQAwgYkx ... -----END CERTIFICATE REQUEST-----Copy to Clipboard Copied! Toggle word wrap Toggle overflow
For the next steps, skip to Section 5.3.2.2.2, “Authenticating for certificate enrollment using a shared secret”.
5.3. Requesting and receiving certificates using CMC
This section describes the procedure to enroll a certificate using Certificate Management over CMS (CMC).
For general information about configuration and the workflow of enrolling certificates using CMC, see:
- 9.6 Configuration for CMC in the Planning, Installation and Deployment Guide (Common Criteria Edition).
- 2.4.1.1.2.2 Enrolling with CMC in the Planning, Installation and Deployment Guide (Common Criteria Edition).
-
CMCRequest(1)man page -
CMCResponse(1)man page
CMC enrollment is possible in various ways to meet the requirements for different scenarios. Section 5.3.1, “The CMC enrollment process” supplements 2.4.1.1.2.2 Enrolling with CMC in the Planning, Installation and Deployment Guide (Common Criteria Edition) with more details. Additionally, the Section 5.3.2, “Practical CMC enrollment scenarios” section enables administrators to decide which mechanisms should be used in which scenario.
5.3.1. The CMC enrollment process
The most commonly used CMC enrollment process is the agent-approved certificate enrollment:
- The user generates a CSR and sends the CSR to a CA agent
-
Once a CSR is received, the CA agent (configured by "Setting up certificate and role for a pki agent" in the Planning, Installation and Deployment Guide (Common Criteria Edition)) creates a CMC request against the CSR, and sends the request to the CA via
HttpClient - Once the certificate is issued successfully, the CA agent then sends the certificate to back to the requesting user
- The user then imports the newly issued certificate into their nssdb where the CSR was originally generated
The rest of this section provides a more detailed procedure to issue a certificate using CMC:
The requesting user starts by creating a Certificate Signing Request (CSR) in one of the following formats:
- PKCS #10 format
- Certificate Request Message Format (CRMF) format
Next, the requesting user should send the CSR (e.g. /user_or_entity_database_directory/request.csr) to the user who holds the CA agent role.
Approving the CSR as a CA Agent
As the CA agent, switch to the nssdb directory that contains the agent certificate:
cd /home/agent_username/.dogtag/nssdb/
# cd /home/agent_username/.dogtag/nssdb/Copy to Clipboard Copied! Toggle word wrap Toggle overflow Place the CSR in the directory:
cp request.csr /home/agent_username/.dogtag/nssdb/
# cp request.csr /home/agent_username/.dogtag/nssdb/Copy to Clipboard Copied! Toggle word wrap Toggle overflow After you have placed the CSR in the directory, create a configuration file for a CMC request, such as
cmc-request.cfg, with the following content:Copy to Clipboard Copied! Toggle word wrap Toggle overflow For further details, see the
CMCRequest(1)man page.Create the CMC request:
Copy to Clipboard Copied! Toggle word wrap Toggle overflow If the command succeeds, the
CMCRequestutility stored the CMC request in the file specified in theoutputparameter in the request configuration file.Create a configuration file for
HttpClient, such ascmc-submit.cfg, to use in a later step to submit the CMC request to the CA. Add the following content to the created file:Copy to Clipboard Copied! Toggle word wrap Toggle overflow ImportantThe nickname of the certificate specified in the
nicknameparameter must match the one previously used for the CMC request.Depending on what type of certificate you request, add the following parameter to the configuration file created in the previous step:
servlet=/ca/ee/ca/profileSubmitCMCFull?profileId=profile_name
servlet=/ca/ee/ca/profileSubmitCMCFull?profileId=profile_nameCopy to Clipboard Copied! Toggle word wrap Toggle overflow For example, for a CA signing certificate:
servlet=/ca/ee/ca/profileSubmitCMCFull?profileId=caCMCcaCert
servlet=/ca/ee/ca/profileSubmitCMCFull?profileId=caCMCcaCertCopy to Clipboard Copied! Toggle word wrap Toggle overflow ImportantWhen an agent submits the CMC request in the next step, the profile specified in this parameter must use the
CMCAuthauthentication plugin. Whereas in user-initiated enrollments, the profile must use theCMCUserSignedAuthplugin. For further details, see the Section 8.3, “CMC authentication plugins”.Submit the CMC request to the CA:
Copy to Clipboard Copied! Toggle word wrap Toggle overflow To convert the CMC response to a PKCS #7 certificate chain, pass the CMC response file to the
-iparameter of theCMCResponseutility. For example:CMCResponse -i /home/user_name/cmc-response.bin -o /home/user_name/cert_chain.crt
$ CMCResponse -i /home/user_name/cmc-response.bin -o /home/user_name/cert_chain.crtCopy to Clipboard Copied! Toggle word wrap Toggle overflow ImportantRunning
CMCResponsewith the "-v" option returns the PEM of each certificate in the chain asCert:0,Cert:1etc. Below all the PEMs, the output also displays each certificate in the chain in pretty print format. Since the certificates are not displayed in a fixed order, in order to determine their position in the chain, you must examine the "Subject:" under each "Certificate". The corresponding PEM is displayed in the same position above.Once the certificate is issued successfully, the CA agent then sends the certificate back to the requesting user. The user can then import the certificate into their nssdb. For example:
pki -d /user_or_entity_database_directory/ -c <password> client-cert-import "user_name certificate" --cert cert_chain.crt
# pki -d /user_or_entity_database_directory/ -c <password> client-cert-import "user_name certificate" --cert cert_chain.crtCopy to Clipboard Copied! Toggle word wrap Toggle overflow
5.3.2. Practical CMC enrollment scenarios
This section describes frequent practical usage scenarios and their workflows to enable CA administrators to decide which CMC method to use in which situation.
For a general process of enrolling a certificate using CMC, see Section 5.3.1, “The CMC enrollment process”.
5.3.2.1. Obtaining system and server certificates
If a service, such as LDAP or a web server, requires a TLS server certificate, the administrator of this server creates a CSR based on the documentation of the service and sends it to the CA’s agent for approval. Use the procedure described in Section 5.3.1, “The CMC enrollment process” for this process. Additionally, consider the following requirements:
- Enrollment Profiles
-
The agent must either use one of the existing CMC profiles listed in Section 8.3, “CMC authentication plugins”, or, alternatively, create a custom profile that uses the
CMCAuthauthentication mechanism. - CMC Signing Certificate
For system certificates, the CA agent must generate and sign the CMC request. For this, set the
nicknameparameter in theCMCRequestconfiguration file to the nickname of the CA agent.NoteThe CA agent must have access to its own private key.
HttpClientnicknameparameter-
Use the same certificate for signing in the
CMCRequestutility’s configuration file as for TLS mutual authentication in the configuration file forHttpClient. HttpClientservletparameterThe
servletin the configuration file passed to theHttpClientutility refers to the CMC servlet and the enrollment profile which handles the request.Depending on what type of certificate you request, add one of the following entries to the configuration file created in the previous step:
For a CA signing certificate:
servlet=/ca/ee/ca/profileSubmitCMCFull?profileId=caCMCcaCert
servlet=/ca/ee/ca/profileSubmitCMCFull?profileId=caCMCcaCertCopy to Clipboard Copied! Toggle word wrap Toggle overflow For a KRA transport certificate:
servlet=/ca/ee/ca/profileSubmitCMCFull?profileId=caCMCkraTransportCert
servlet=/ca/ee/ca/profileSubmitCMCFull?profileId=caCMCkraTransportCertCopy to Clipboard Copied! Toggle word wrap Toggle overflow For an OCSP signing certificate:
servlet=/ca/ee/ca/profileSubmitCMCFull?profileId=caCMCocspCert
servlet=/ca/ee/ca/profileSubmitCMCFull?profileId=caCMCocspCertCopy to Clipboard Copied! Toggle word wrap Toggle overflow For an audit signing certificate:
servlet=/ca/ee/ca/profileSubmitCMCFull?profileId=caCMCauditSigningCert
servlet=/ca/ee/ca/profileSubmitCMCFull?profileId=caCMCauditSigningCertCopy to Clipboard Copied! Toggle word wrap Toggle overflow For a subsystem certificate:
For RSA certificates:
servlet=/ca/ee/ca/profileSubmitCMCFull?profileId=caCMCsubsystemCert
servlet=/ca/ee/ca/profileSubmitCMCFull?profileId=caCMCsubsystemCertCopy to Clipboard Copied! Toggle word wrap Toggle overflow For ECC certificates:
servlet=/ca/ee/ca/profileSubmitCMCFull?profileId=caCMCECCsubsystemCert
servlet=/ca/ee/ca/profileSubmitCMCFull?profileId=caCMCECCsubsystemCertCopy to Clipboard Copied! Toggle word wrap Toggle overflow
For a TLS server certificate:
For RSA certificates:
servlet=/ca/ee/ca/profileSubmitCMCFull?profileId=caCMCserverCert
servlet=/ca/ee/ca/profileSubmitCMCFull?profileId=caCMCserverCertCopy to Clipboard Copied! Toggle word wrap Toggle overflow For ECC certificates:
servlet=/ca/ee/ca/profileSubmitCMCFull?profileId=caCMCECCserverCert
servlet=/ca/ee/ca/profileSubmitCMCFull?profileId=caCMCECCserverCertCopy to Clipboard Copied! Toggle word wrap Toggle overflow
For an admin certificate:
servlet=/ca/ee/ca/profileSubmitCMCFull?profileId=caFullCMCUserCert
servlet=/ca/ee/ca/profileSubmitCMCFull?profileId=caFullCMCUserCertCopy to Clipboard Copied! Toggle word wrap Toggle overflow
Further details:
- When an agent pre-signs a CSR, the Proof of Identification is considered established because the agent examines the CSR for identification. No additional CMC-specific identification proof is required.
- PKCS #10 files already provide Proof of Possession information and no additional Proof of Possession (POP) is required.
-
In agent pre-approved requests, the
PopLinkWitnessV2feature must be disabled because the identification is checked by the agent.
5.3.2.2. Obtaining the first signing certificate for a user
There are two ways to approve a user’s first signing certificate:
- An agent signs the CMC request. See Section 5.3.2.2.1, “Signing a CMC Request with an agent certificate”.
- Certificate enrollment is authenticated by using a Shared Secret. See Section 5.3.2.2.2, “Authenticating for certificate enrollment using a shared secret”.
5.3.2.2.1. Signing a CMC Request with an agent certificate
The process for signing a CMC request with an agent certificate is the same as for obtaining system and server certificates, which can be found in Section 5.3.1, “The CMC enrollment process”.
5.3.2.3. Obtaining an encryption-only certificate for a user
This section describes the workflow for obtaining an encryption-only certificate which is signed with an existing user signing certificate:
If a user owns multiple certificates for different usages, where one is signing, the user must obtain the signing certificate first. Once the user owns a signing certificate, it can be used for Proof Of Origin without requiring to set up and rely on the CMC Shared Secret mechanism.
For details about obtaining a user’s first signing certificate, see Section 5.3.2.2, “Obtaining the first signing certificate for a user”.
As a user:
- Use the cryptographic token stored in a Network Security Services (NSS) database or on a smart card that contains the user’s signing certificate and keys.
Generate the CSR in PKCS #10 or the CRMF format.
NoteUse the CRMF format, if key archival is required.
Generate the CMC request.
Since this is an encryption-only certificate, the private key is not able to sign. Therefore, Proof Of Possession (POP) is not included. For this reason, the enrollment requires two steps: If the initial request is successful, results in a CMC status with the
EncryptedPOPcontrol. The user then uses the response and generates a CMC request that contains theDecryptedPOPcontrol and submits it in the second step.For the first step, in addition to the default parameters, the user must set the following parameters in the configuration file passed to the
CMCRequestutility:-
identification.enable -
witness.sharedSecret -
identityProofV2.enable -
identityProofV2.hashAlg -
identityProofV2.macAlg -
popLinkWitnessV2.enableif required by the CA -
popLinkWitnessV2.keyGenAlgif required by the CA -
popLinkWitnessV2.macAlgif required by the CA request.privKeyIdFor details, see the
CMCRequest(1)man page.The response contains:
- A CMC encrypted POP control
-
The
CMCStatusInfoV2control with thePOP requirederror - The request ID
-
For the second step, in addition to the default parameters, the user must set the following parameters in the configuration file passed to the
CMCRequestutility:-
decryptedPop.enable -
encryptedPopResponseFile -
decryptedPopRequestFile -
request.privKeyId -
oaep=true
-
For details, see the
CMCRequest(1)man page.
5.3.2.3.1. Example on obtaining an encryption-only certificate with Key Archival
To perform an enrollment with key archival, generate a CMC request that contains the user’s encrypted private key in the CRMF request. The following procedure assumes that the user already owns a signing certificate. The nickname of this signing certificate is set in the configuration files in the procedure.
The following procedure describes the two-trip issuance used with encryption-only keys, which cannot be used for signing. If you use a key which can sign certificates, pass the -q POP_SUCCESS option instead of -q POP_NONE to the CRMFPopClient utility for a single-trip issuance.
The procedure for obtaining an encryption-only certificate requires generating a CRMF request using CRMPopClient with the POP_NONE option only. For instructions about using CRMFPopClient with POP_SUCCESS, see Section 5.2.3.1, “Using CRMFPopClient to create a CSR with key archival” and Section 5.2.3.2, “Using CRMFPopClient to create a CSR for SharedSecret-based CMC”.
Generating a CSR
Change to the certificate database directory of the user or entity for which the certificate is being requested, for example:
cd /home/user_name/.dogtag/nssdb/
$ cd /home/user_name/.dogtag/nssdb/Copy to Clipboard Copied! Toggle word wrap Toggle overflow Search for the KRA transport certificate. For example:
pki -p 8443 ca-cert-find --name "DRM Transport Certificate"
$ pki -p 8443 ca-cert-find --name "DRM Transport Certificate"Copy to Clipboard Copied! Toggle word wrap Toggle overflow Use the serial number of the KRA transport certificate, which you retrieved in the previous step, to store the certificate in a file. For example, to store the certificate with the 12345 serial number in the
kra.transportfile:pki -p 8443 ca-cert-export 12345 --output kra.transport
$ pki -p 8443 ca-cert-export 12345 --output kra.transportCopy to Clipboard Copied! Toggle word wrap Toggle overflow Use the
CRMFPopClientutility to create a CRMF request with POP_NONE, where the RSA private key is wrapped by the KRA transport certificate. For example, to generate and store the request in the/home/user_name/.dogtag/nssdb/crmf.reqfile:Copy to Clipboard Copied! Toggle word wrap Toggle overflow
CMCRequest first trip (EncryptedPop)
Create a configuration file for the
CMCRequestutility, such ascmc-crmf-request.cfgwith the following content:Copy to Clipboard Copied! Toggle word wrap Toggle overflow Create the CMC request:
Copy to Clipboard Copied! Toggle word wrap Toggle overflow If the command succeeds, the
CMCRequestutility stored the CMC request in the file specified in theoutputparameter in the request configuration file.Create a configuration file for
HttpClient, such ascmc-submit.cfg, to use in a later step to submit the CMC request to the CA. Add the following content to the created file:Copy to Clipboard Copied! Toggle word wrap Toggle overflow Submit the CMC request to the CA:
Copy to Clipboard Copied! Toggle word wrap Toggle overflow If the command succeeds, the
HTTPClientutility stored the CMC response in the file specified in theoutputparameter in the configuration file.Verify the response by passing the response file to the
CMCResponseutility. For example:CMCResponse -d /home/user_name/.dogtag/nssdb/ -i /home/user_name/.dogtag/nssdb/cmc-response_round_1.bin
$ CMCResponse -d /home/user_name/.dogtag/nssdb/ -i /home/user_name/.dogtag/nssdb/cmc-response_round_1.binCopy to Clipboard Copied! Toggle word wrap Toggle overflow If the first trip was successful,
CMCResponsedisplays an output similar to the following:Copy to Clipboard Copied! Toggle word wrap Toggle overflow
CMCRequest second trip (DecryptedPop)
For the second trip, create a configuration file for
DecryptedPOP, such as/home/user_name/.dogtag/nssdb/cmc_DecryptedPOP.cfg, which you use in a later step.Copy to Clipboard Copied! Toggle word wrap Toggle overflow NoteFor the
request.privKeyId=parameter value, enter the private key ID that was saved into the keyId file after runningCRMFPopClient, e.g.crmf.req.keyId.Create the
DecryptPOPCMC request:Copy to Clipboard Copied! Toggle word wrap Toggle overflow If the command succeeds, the
CMCRequestutility stored the CMC request in the file specified in thedecryptedPopRequestFileparameter in the request configuration file.Create a configuration file for
HttpClient, such asdecrypted_POP_cmc-submit.cfg, to use in a later step to submit theDecryptedPOPCMC request to the CA. Add the following content to the created file:Copy to Clipboard Copied! Toggle word wrap Toggle overflow Submit the
DecryptedPOPCMC request to the CA:Copy to Clipboard Copied! Toggle word wrap Toggle overflow If the command succeeds, the
HTTPClientutility stored the CMC response in the file specified in theoutputparameter in the configuration file.To convert the CMC response to a PKCS #7 certificate chain, pass the CMC response file to the
-iparameter of theCMCResponseutility. For example:CMCResponse -i cmc-response_round_2.bin -o encryption_only_certs.p7
$ CMCResponse -i cmc-response_round_2.bin -o encryption_only_certs.p7Copy to Clipboard Copied! Toggle word wrap Toggle overflow Alternatively, to display the individual certificates in PEM format, pass the -v to the utility.
If the second trip was successful,
CMCResponsedisplays output similar to the following:Copy to Clipboard Copied! Toggle word wrap Toggle overflow Once the certificate is issued successfully, the user can then import the certificate into their own
/home/user_name/.dogtag/nssdb/database. For example:pki -d /home/user_name/.dogtag/nssdb/ -c <password> client-cert-import "user_name certificate" --cert encryption_only_certs.p7
# pki -d /home/user_name/.dogtag/nssdb/ -c <password> client-cert-import "user_name certificate" --cert encryption_only_certs.p7Copy to Clipboard Copied! Toggle word wrap Toggle overflow
5.4. Renewing certificates
This section explains how to use the different types of certificate renewal described in Section 3.4.1, “The renewal process”. You can use the methods described in this section to renew a certificate both with and without agent approval. To renew a certificate as a user without agent approval, use profiles that require the CMCUserSignedAuth authentication plugin, and to renew with agent approval, use profiles that require the CMCAuth authentication plugin. For further details about these plugins and in which profiles they are enabled by default, see Section 8.3, “CMC authentication plugins”.
Renewal Using the Same Key
Section 5.3.1, “The CMC enrollment process” describes how to request and issue a certificate using CMC. When a user submits the same CMC request created during this process again with the same enrollment profile, Certificate System renews the certificate with the same key.
For renewing a certificate as the user using the same key, the enrollment profile must contain the uniqueKeyConstraint entry with the params.allowSameKeyRenewal parameter set to True as described in Section 3.4.1, “The renewal process”.
Renewal Using a New Key
To renew a certificate using a new key, follow the procedure described in Section 5.3.1, “The CMC enrollment process”. The process for renewal is the same as for a new enrollment. When you sign the request with the same signing certificate, the newly issued certificate contains the same subjectDN attribute as the signing certificate.
5.5. Linking between an issued certificate and CSR
This section details how a CA agent can trace an issued certificate to the original submitted CSR, and from a CSR to an issued certificate.
Tracing from CSR to issued certificate
If a certificate request has been approved successfully, a CA agent can do the following to search for the request and see the CSR matching the certificate:
-
Access
https://host_name:port/ca/agent/ca. - Click Search for Requests.
-
Select and fill in Request ID Range (for example
12for Lowest Request ID and12for Highest Request ID). - Select Request Type and choose enrollment type.
- Select Request Status and choose completed status
- Make sure everything else is unselected.
- Click Submit.
- Click on the request number. You see the certificate in clear text at this point.
To display the CSR and certificate linking, right-click and select This Frame and View Frame Source.
-
Search for
inputList.inputName="Certificate Request";. The request is theinputList.inputValbelow that. -
Search for
outputList.outputSyntax="pretty_print";. The certificate is theoutputList.outputValbelow that.
-
Search for
-
Access
Tracing from issued certificate to CSR:
-
Access
https://host_name:port/ca/agent/ca. - Click Find.
- Click Details.
- You see the certificate in clear text, along with a Request ID link. Click on the link to open the Request page.
To display the certificate and CSR linking:
-
Search for
inputList.inputName="Certificate Request";. The request is theinputList.inputValbelow that. -
Search for
outputList.outputSyntax="pretty_print";. The certificate is theoutputList.outputValbelow that.
-
Search for
You can also use the CLI to find the certificate request for a certificate in the CA database, for example:
pki-server ca-cert-request-find --cert-file <cert file>
$ pki-server ca-cert-request-find --cert-file <cert file>Where the certificate file has the following requirements:
- The certificate must be base-64 encoded.
-
Each line must be at most 64 bytes long and terminated with
CRLF. -
There is no
BEGIN/END CERTIFICATEheader/footer.
Chapter 6. Revoking certificates and issuing CRLs
The Certificate System provides methods for revoking certificates and for producing lists of revoked certificates, called certificate revocation lists (CRLs). This chapter describes the methods for revoking a certificate, describes CMC revocation, and provides details about CRLs and setting up CRLs.
6.1. About revoking certificates
Server and client applications that use public-key certificates as ID tokens need access to information about the validity of a certificate. Because one of the factors that determines the validity of a certificate is its revocation status, these applications need to know whether the certificate being validated has been revoked. The CA has a responsibility to do the following:
- Revoke the certificate if a revocation request is received by the CA and approved.
- Make the revoked certificate status available to parties or applications that need to verify its validity status.
Certificates can be revoked by an end user (the original owner of the certificate) or by a Certificate Manager agent. An end user can revoke only certificates that contain the same subject name as the certificate presented for authentication.
Whenever a revocation request is approved, the Certificate Manager automatically updates the status of the certificate in its internal database: it marks the copy of the certificate in its internal database as revoked and, if configured to do so, removes the revoked certificate from the publishing directory. These changes are reflected in the next CRL issued by the CA.
6.1.1. Certificate Revocation List (CRL)
One of the standard methods for conveying the revocation status of certificates is by publishing a list of revoked certificates, known as certificate revocation list (CRL). A CRL is a publicly available list of certificates that have been revoked.
The Certificate Manager can be configured to generate CRLs. These CRLs can be created to conform to X.509 standards by enabling extension-specific modules in the CRL configuration. The server supports standard CRL extensions through its CRL issuing points framework; see Section 6.3.3, “Setting CRL extensions” for more information on setting up CRL extensions for issuing points. The Certificate Manager can generate a CRL every time a certificate is revoked and at periodic intervals. If publishing is set up, the CRLs can be published to a file, an LDAP directory, or an OCSP responder.
A CRL is issued and digitally signed by the CA that issued the certificates listed in the CRL or by an entity that has been authorized by that CA to issue CRLs. The CA may use a single key pair to sign both the certificates and CRLs it issues or two separate key pairs, one for signing certificates and another one for signing CRLs.
By default, the Certificate Manager uses a single key pair for signing the certificates it issues and CRLs it generates. To create another key pair for the Certificate Manager and use it exclusively for signing CRLs, see Section 6.3.4, “Setting a CA to use a different certificate to sign CRLs”.
CRLs are generated when issuing points are defined and configured and when CRL generation is enabled.
When CRLs are enabled, the server collects revocation information as certificates are revoked. The server attempts to match the revoked certificate against all issuing points that are set up. A given certificate can match none of the issuing points, one of the issuing points, several of the issuing points, or all of the issuing points. When a certificate that has been revoked matches an issuing point, the server stores the information about the certificate in the cache for that issuing point.
The cache is copied to the internal directory at the intervals set for copying the cache. When the interval for creating a CRL is reached, a CRL is created from the cache. If a delta CRL has been set up for this issuing point, a delta CRL is also created at this time. The full CRL contains all revoked certificate information since the Certificate Manager began collecting this information. The delta CRL contains all revoked certificate information since the last update of the full CRL.
The full CRLs are numbered sequentially, as are delta CRLs. A full CRL and a delta CRL can have the same number; in that case, the delta CRL has the same number as the next full CRL. For example, if the full CRL is the first CRL, it is CRL 1. The delta CRL is Delta CRL 2. The data combined in CRL 1 and Delta CRL 2 is equivalent to the next full CRL, which is CRL 2.
When changes are made to the extensions for an issuing point, no delta CRL is created with the next full CRL for that issuing point. A delta CRL is created with the second full CRL that is created, and then all subsequent full CRLs.
The internal database stores only the latest CRL and delta CRL. As each new CRL is created, the old one is overwritten.
When CRLs are published, each update to the CRL and delta CRL is published to the locations specified in the publishing set up. The method of publishing determines how many CRLs are stored. For file publishing, each CRL that is published to a file using the number for the CRL, so no file is overwritten. For LDAP publishing, each CRL that is published replaces the old CRL in the attribute containing the CRL in the directory entry.
By default, CRLs do not contain information about revoked expired certificates. The server can include revoked expired certificates by enabling that option for the issuing point. If expired certificates are included, information about revoked certificates is not removed from the CRL when the certificate expires. If expired certificates are not included, information about revoked certificates is removed from the CRL when the certificate expires.
6.1.2. User-initiated revocation
When an end user submits a certificate revocation request, the first step in the revocation process is for the Certificate Manager to identify and authenticate the end user to verify that the user is attempting to revoke his own certificate, not a certificate belonging to someone else.
In SSL/TLS client authentication, the server expects the end user to present a certificate that has the same subject name as the one to be revoked and uses that for authentication purposes. The server verifies the authenticity of a revocation request by mapping the subject name in the certificate presented for client authentication to certificates in its internal database. The server revokes the certificate only if the certificate maps successfully to one or more valid or expired certificates in its internal database.
After successful authentication, the server lists the valid or expired certificates that match the subject name of the certificate presented for client authentication. The user can then either select the certificates to be revoked or revoke all certificates in the list.
6.1.3. Reasons for revoking a certificate
A Certificate Manager can revoke any certificate it has issued. There are generally accepted reason codes for revoking a certificate that are often included in the CRL, such as the following:
-
0. Unspecified; no particular reason is given. -
1. The private key associated with the certificate was compromised. -
2. The private key associated with the CA that issued the certificate was compromised. -
3. The owner of the certificate is no longer affiliated with the issuer of the certificate and either no longer has rights to the access gained with the certificate or no longer needs it. -
4. Another certificate replaces this one. -
5. The CA that issued the certificate has ceased to operate. -
6. The certificate is on hold pending further action. It is treated as revoked but may be taken off hold in the future so that the certificate is active and valid again. -
8. The certificate is going to be removed from the CRL because it was removed from hold. This only occurs in delta CRLs. -
9. The certificate is revoked because the privilege of the owner of the certificate has been withdrawn.
6.1.4. CRL issuing points
Because CRLs can grow very large, there are several methods to minimize the overhead of retrieving and delivering large CRLs. One of these methods partitions the entire certificate space and associates a separate CRL with every partition. This partition is called a CRL issuing point, the location where a subset of all the revoked certificates is maintained. Partitioning can be based on whether the revoked certificate is a CA certificate, whether it was revoked for a specific reason, or whether it was issued using a specific profile. Each issuing point is identified by its name.
By default, the Certificate Manager generates and publishes a single CRL, the master CRL. An issuing point can generate CRLs for all certificates, for only CA signing certificates, or for all certificates including expired certificates.
Once the issuing points have been defined, they can be included in certificates so that an application that needs to check the revocation status of a certificate can access the CRL issuing points specified in the certificate instead of the master or main CRL. Since the CRL maintained at the issuing point is smaller than the master CRL, checking the revocation status is much faster.
CRL distribution points can be associated with certificates by setting the CRLDistributionPoint extension.
6.1.5. Delta CRLs
Delta CRLs can be issued for any defined issuing point. A delta CRL contains information about any certificates revoked since the last update to the full CRL. Delta CRLs for an issuing point are created by enabling the DeltaCRLIndicator extension.
6.1.6. Publishing CRLs
The Certificate Manager can publish the CRL to a file, an LDAP-compliant directory, or to an OCSP responder. Where and how frequently CRLs are published are configured in the Certificate Manager, as described in Chapter 7, Publishing certificates and CRLs.
Because CRLs can be very large, publishing CRLs can take a very long time, and it is possible for the process to be interrupted. Special publishers can be configured to publish CRLs to a file over HTTP1.1, and, if the process is interrupted, the CA subsystem’s web server can resume publishing at the point it was interrupted, instead of having to begin again. This is described in Section 7.7, “Setting up resumable CRL downloads”.
6.1.7. Certificate revocation pages
The end-entities page of the Certificate Manager includes default HTML forms for revocation authenticated by an SSL/TLS client. The forms are accessible from the Revocation tab. You can see the form for such a revocation by clicking the User Certificate link.
To change the form appearance to suit organization’s requirements, edit the UserRevocation.html, the form that allows the SSL/TLS client authenticated revocation of client or personal certificates. The file is in the /var/lib/instance_name/webapps/subsystem_type/ee/subsystem_type directory.
6.2. Revoking Certificates
6.2.1. Performing a CMC revocation
Similar to Certificate Management over CMS (CMC) enrollment, CMC revocation enables users to set up a revocation client, and sign the revocation request with either an agent certificate or a user certificate with a matching subjectDN attribute. Then the user can send the signed request to the Certificate Manager.
Alternatively, CMC revocation can also be authenticated using the Shared Secret Token mechanism. For details, see Adding a CMC Shared Secret to a certificate for certificate revocations.
Regardless of whether a user or agent signs the request or if a Shared Secret Token is used, the Certificate Manager automatically revokes the certificate when it receives a valid revocation request.
Certificate System provides the following utilities for CMC revocation requests:
-
CMCRequest. For details, see Section 6.2.1.1, “Revoking a certificate usingCMCRequest”. -
CMCRevoke. For details, see Section 6.2.1.2, “Revoking a certificate usingCMCRevoke”.
Red Hat recommends using the CMCRequest utility to generate CMC revocation requests, because it provides more options than CMCRevoke.
6.2.1.1. Revoking a certificate using CMCRequest
To revoke a certificate using CMCRequest:
Create a configuration file for the CMC revocation request, such as
/home/user_name/cmc-request.cfg, with the following content:Copy to Clipboard Copied! Toggle word wrap Toggle overflow Create the CMC request:
CMCRequest /home/user_name/cmc-request.cfg
# CMCRequest /home/user_name/cmc-request.cfgCopy to Clipboard Copied! Toggle word wrap Toggle overflow If the command succeeds, the
CMCRequestutility stores the CMC request in the file specified in theoutputparameter in the request configuration file.Create a configuration file, such as
/home/user_name/cmc-submit.cfg, to use in a later step to submit the CMC revocation request to the CA. Add the following content to the created file:Copy to Clipboard Copied! Toggle word wrap Toggle overflow ImportantIf the CMC revocation request is signed, set the
secureandclientmodeparameters totrueand, additionally, fill thenicknameparameter.Depending on who signed the request, the
servletparameter in the configuration file forHttpClientmust be set accordingly:If an agent signed the request, set:
-
RSA:
servlet=/ca/ee/ca/profileSubmitCMCFull?profileId=caFullCMCUserCert -
ECC:
servlet=/ca/ee/ca/profileSubmitCMCFull?profileId=caECFullCMCUserCert
-
RSA:
If a user signed the request, set:
-
RSA:
servlet=/ca/ee/ca/profileSubmitCMCFull?profileId=caFullCMCSharedTokenCert -
ECC:
servlet=/ca/ee/ca/profileSubmitCMCFull?profileId=caECFullCMCSharedTokenCert
-
RSA:
Submit the CMC request:
HttpClient /home/user_name/cmc-submit.cfg
# HttpClient /home/user_name/cmc-submit.cfgCopy to Clipboard Copied! Toggle word wrap Toggle overflow
For further details about revoking a certificate using CMCRequest, see the CMCRequest(1) man page.
6.2.1.2. Revoking a certificate using CMCRevoke
The CMC revocation utility, CMCRevoke, is used to sign a revocation request with an agent’s certificate. This utility simply passes the required information - certificate serial number, issuer name, and revocation reason - to identify the certificate to revoke, and then the require information to identify the CA agent performing the revocation (certificate nickname and the database with the certificate).
For more information on enabling CMCRevoke, see 9.6.4 "Enabling CMCRevoke for the Web User Interface" section in the Planning, Installation and Deployment Guide (Common Criteria Edition).
The reason the certificate is being revoked can be any of the following (with the number being the value passed to the CMCRevoke utility):
-
0- unspecified -
1- the key was compromised -
2- the CA key was compromised -
3- the employee’s affiliation changed -
4- the certificate has been superseded -
5- cessation of operation -
6- the certificate is on hold
Testing CMCRevoke
Create a CMC revocation request for an existing certificate.
IMPORTANT- The correct syntax does not have a space between the argument and its value. For example, giving a serial number of 26 is -s26, not -s 26.
-
If certain values include spaces, surround these values in quotation marks. For example,
-c"test comment".
CMCRevoke -d/path/to/AgentCertDb -pPasswordToDb -nNickname -iIssuerName -sDecimalSerialNumber -mReasonToRevoke -cComment*
# CMCRevoke -d/path/to/AgentCertDb -pPasswordToDb -nNickname -iIssuerName -sDecimalSerialNumber -mReasonToRevoke -cComment*Copy to Clipboard Copied! Toggle word wrap Toggle overflow For example, if the directory containing the agent certificate is
~jsmith/.mozilla/firefox/, the nickname of the certificate isAgentCert, and the serial number of the certificate is22, the command is as shown:CMCRevoke -d"~jsmith/.mozilla/firefox/" -pPass -n"AgentCert" -i"cn=agentAuthMgr" -s22 -m0 -c"test comment"
# CMCRevoke -d"~jsmith/.mozilla/firefox/" -pPass -n"AgentCert" -i"cn=agentAuthMgr" -s22 -m0 -c"test comment"Copy to Clipboard Copied! Toggle word wrap Toggle overflow Open the end-entities page.
https://server.example.com:8443/ca/ee/ca
https://server.example.com:8443/ca/ee/caCopy to Clipboard Copied! Toggle word wrap Toggle overflow - Select the Revocation tab.
- Select the CMC Revoke link on the menu.
-
Paste the output from the
CMCRevokeinto the text area. -
Remove
-----BEGIN NEW CERTIFICATE REQUEST-----and----END NEW CERTIFICATE REQUEST-----from the pasted content. - Click .
- The returned page should confirm that the correct certificate has been revoked.
6.2.2. Performing revocation as an agent from the Web UI
A Certificate Manager agent can use the agent services page to find a specific certificate issued by the Certificate System or to retrieve a list of certificates that match specified criteria. The certificates which are retrieved can be examined or revoked by the agent. The Certificate Manager agent can also manage the certificate revocation list (CRL).
6.2.2.1. Listing certificates
It is possible to list certificates within a range of serial numbers. All certificates within the range may be displayed or, if the agent selects, only those that are currently valid.
To find a specific certificate or to list certificates by serial number:
- Open the Certificate Manager agent services page.
Click List Certificates.
- To find a certificate with a specific serial number, enter the serial number in both the upper limit and lower limit fields of the List Certificates form, in either decimal or hexadecimal form. Use 0x to indicate the beginning of a hexadecimal number; for example, 0x00000006. Serial numbers are displayed in hexadecimal form in the Search Results and Details pages.
- To find all certificates within a range of serial numbers, enter the upper and lower limits of the serial number range in decimal or hexadecimal form.
Leaving either the lower limit or upper limit field blank displays the certificate with the specified number, plus all certificates before or after it in sequence.
- To limit the returned list to valid certificates, select the check boxes labeled with filtering methods. It is possible to include revoked certificates, to include expired certificates or certificates that are not yet valid, or to display only valid certificates.
Enter the maximum number of certificates matching the criteria that should be returned in the results page.
When any number is entered, the first certificates up to that number matching the criteria are displayed.
Click .
The Certificate System displays a list of the certificates that match the search criteria. Select a certificate in the list to examine it in more detail or perform various operations on it. For more information, refer to Section 6.2.2.3, “Examining certificate details”.

6.2.2.2. Searching for certificates (advanced)
Search for certificates by more complex criteria than serial number using the advanced search form. To perform an advanced search for certificates:
- Open the Certificate Manager agent services page. The agent must submit the proper client certificate to access this page.
Click Search for Certificates to display the Search for Certificates form to specify search criteria.
To search by particular criteria, use one or more of the sections of the Search for Certificates form. To use a section, select the check box, then fill in any necessary information.
Serial Number Range. Finds a certificate with a specific serial number or lists all certificates within a range of serial numbers.
- To find a certificate with a specific serial number, enter the serial number in both the upper limit and lower limit fields in either decimal or hexadecimal. Use 0x to indicate the beginning of a hexadecimal number, such as 0x2A. Serial numbers are displayed in hexadecimal form in the Search Results and Details pages.
- To find all certificates within a range of serial numbers, enter the upper and lower limits of the serial number range in decimal or hexadecimal. Leaving either the lower limit or upper limit field blank returns all certificates before or after the number specified.
Status. Selects certificates by their status. A certificate has one of the following status codes:
- Valid. A valid certificate has been issued, its validity period has begun but not ended, and it has not been revoked.
- Invalid. An invalid certificate has been issued, but its validity period has not yet begun.
- Revoked. The certificate has been revoked.
- Expired. An expired certificate has passed the end of its validity period.
- Revoked and Expired. The certificate has passed its validity period and been revoked.
Subject Name. Lists certificates belonging to a particular owner; it is possible to use wildcards in this field.
NOTECertificate System certificate request forms support all UTF-8 characters for the common name, organizational unit, and requester name fields. The common name and organization unit fields are included in the subject name of the certificate. This means that the searches for subject names support UTF-8 characters.
This support does not include supporting internationalized domain names.
Revocation Information. Lists certificates that have been revoked during a particular period, by a particular agent, or for a particular reason. For example, an agent can list all certificates revoked between July 2005 and April 2006 or all certificates revoked by the agent with the username admin.
- To list certificates revoked within a time period, select the day, month, and year from the drop-down lists to identify the beginning and end of the period.
- To list certificates revoked by a particular agent, enter the name of the agent; it is possible to use wildcards in this field.
- To list certificates revoked for a specific reason, select the revocation reasons from the list.
Issuing Information. Lists certificates that have been issued during a particular period or by a particular agent. For example, an agent can list all certificates issued between July 2005 and April 2006 or all certificates issued by the agent with the username jsmith.
- To list certificates issued within a time period, select the day, month, and year from the drop-down lists to identify the beginning and end of the period.
- To list certificates issued by a particular agent, enter the name of the agent; it is possible to use wildcards in this field.
- To list certificates enrolled through a specific profile, enter the name of the profile.
Dates of Validity. List certificates that become effective or expire during a particular period. For example, an agent can list all certificates that became valid on June 1, 2003, or that expired between January 1, 2006, and June 1, 2006.
It is also possible to list certificates that have a validity period of a certain length of time, such as all certificates that are valid for less than one month.
- To list certificates that become effective or expire within a time period, select the day, month, and year from the drop-down lists to identify the beginning and end of the period.
- To list certificates that have a validity period of a certain length in time, select Not greater than or Not less than from the drop-down list, enter a number, and select a time unit from the drop-down list: days, weeks, months, or years.
- Basic Constraints. Shows CA certificates that are based on the Basic Constraints extension.
- Type. Lists certain types of certificates, such as all certificates for subordinate CAs. This search works only for certificates containing the Netscape Certificate Type extension, which stores type information. For each type, choose from the drop-down list to find certificates where that type is On, Off or Do Not Care.
To find a certificate with a specific subject name, use the Subject Name section. Select the check box, then enter the subject name criteria. Enter values for the included search criteria and leave the others blank.
The standard tags or components are as follows:
- Email address. Narrows the search by email address.
- Common name. Finds certificates associated with a specific person or server.
- UserID. Searches certificates by the user ID for the person to whom the certificate belongs.
- Organization unit. Narrows the search to a specific division, department, or unit within an organization.
- Organization. Narrows the search by organization.
- Locality. Narrows the search by locality, such as the city.
- State. Narrows the search by state or province.
- Country. Narrows the search by country; use the two-letter country code, such as US.
NOTECertificate System certificate request forms support all UTF-8 characters for the common name and organizational unit fields. The common name and organization unit fields are included in the subject name of the certificate. This means that the searches for subject names or those elements in the subject name support UTF-8 characters.
This support does not include supporting internationalized domain names, such as in email addresses.
After entering the field values for the server to match, specify the type of search to perform:
- Exact searches for certificate subject names match the exact components specified and contain none of the components left blank. Wildcards cannot be used in this type of search.
Partial searches for certificate subject names match the specified components, but the returned certificates may also contain values in components that were left blank. Wildcard patterns can be used in this type of search by using a question mark (?) to match an arbitrary single character and an asterisk (\*) to match an arbitrary string of characters.
NOTEPlacing a single asterisk in a search field means that the component must be in the certificate’s subject name but may have any value. Leave the field blank if it does not matter if the field is present.
After entering the search criteria, scroll to the bottom of the form, and enter the number of certificates matching the specified criteria that should be returned.
Setting the number of certificates to be returned returns the first certificates found that match the search criteria up to that number. It is also possible to put a time limit on the search in seconds.
- Click .
The Search Results form appears, showing a list of the certificates that match the search criteria. Select a certificate in the list to examine it in more detail. For more information, refer to Section 6.2.2.3, “Examining certificate details”.


6.2.2.3. Examining certificate details
- On the agent services page, click List Certificates or Search for Certificates, specify search criteria, and click to display a list of certificates.
On the Search Results form, select a certificate to examine.
If the desired certificate is not shown, scroll to the bottom of the list, specify an additional number of certificates to be returned, and click . The system displays the next certificates up to that number that match the original search criteria.
- After selecting a certificate, click the button at the left side of its entry.
The Certificate page shows the detailed contents of the selected certificate and instructions for installing the certificate in a server or in a web browser.
Figure 6.1. Certificate details
- The certificate is shown in base-64 encoded form at the bottom of the Certificate page, under the heading Installing this certificate in a server.

6.2.2.4. Revoking certificates
Only Certificate Manager agents can revoke certificates other than their own. A certificate must be revoked if one of the following situations occurs:
- The owner of the certificate has changed status and no longer has the right to use the certificate.
The private key of a certificate owner has been compromised.
These two reasons are not the only ones why a certificate would need revoked; there are six reasons available for revoking a certificate.
These two reasons are not the only ones why a certificate would need revoked; there are six reasons available for revoking a certificate.Copy to Clipboard Copied! Toggle word wrap Toggle overflow
To revoke one or more certificates, search for the certificates to revoke using the button. While the search is similar to the one through the Search for Certificates form, the Search Results form returned by this search offers the option of revoking one or all of the returned certificates.
6.2.2.4.1. Revoking certificates
- Open the Certificate Manager agent services page.
Click .
NOTEThe search form that appears has the same search criteria sections as the Search for Certificates form.
- Specify the search criteria by selecting the check boxes for the sections and filling in the required information.
- Scroll to the bottom of the form, and set the number of matching certificates to display.
- Click .
The search returns a list of matching certificates. It is possible to revoke one or all certificates in the list.
TIPIf the search criteria are very specific and all of the certificates returned are to be revoked, then click the button at the bottom of the page. The number shown on the button is the total number of certificates returned by the search. This is usually a larger number than the number of certificates displayed on the current page.
Verify that all of the certificates returned by the search should be revoked, not only those displayed on the current page.
Click the button next to the certificate to be revoked.
CAUTIONWhether revoking a single certificate or a list of certificates, be extremely careful that the correct certificate has been selected or that the list contains only certificates which should be revoked. Once a revocation operation has been confirmed, there is no way to undo it.
Select an invalidity date. The invalidity date is the date which it is known or suspected that the user’s private key was compromised or that the certificate became invalid. A set of drop down lists allows the agent to select the correct invalidity date.
Select a reason for the revocation.
- Key compromised
- CA key compromised
- Affiliation changed
- Certificate superseded
- Cessation of operation
- Certificate is on hold
- Enter any additional comment. The comment is included in the revocation request.


When the revocation request is submitted, it is automatically approved, and the certificate is revoked. Revocation requests are viewed by listing requests with a status of Completed.
6.2.2.4.2. Taking certificates off hold
There can be instances when a certificate is inaccessible, and therefore should be treated as revoked, but that certificate can be recovered. For example, a user may have a personal email certificate stored on a flash drive which he accidentally leaves at home. The certificate is not compromised, but it should be temporarily suspended.
That certificate can be temporarily revoked by putting it on hold (one of the options given when revoking a certificate, as in Section 6.2, “Revoking Certificates”). At a later time - such as when the forgotten flash drive is picked up - that certificate can be taken off hold and is again active.
Search for the on hold certificate, as in Section 6.2.2.2, “Searching for certificates (advanced)”. Scroll to the Revocation Information section, and set the Certificate is on hold revocation reason as the search criterion.
In the results list, click the button by the certificate to take off hold.
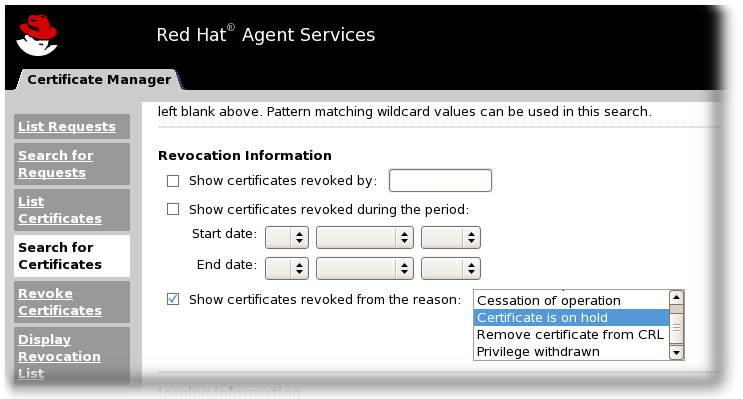
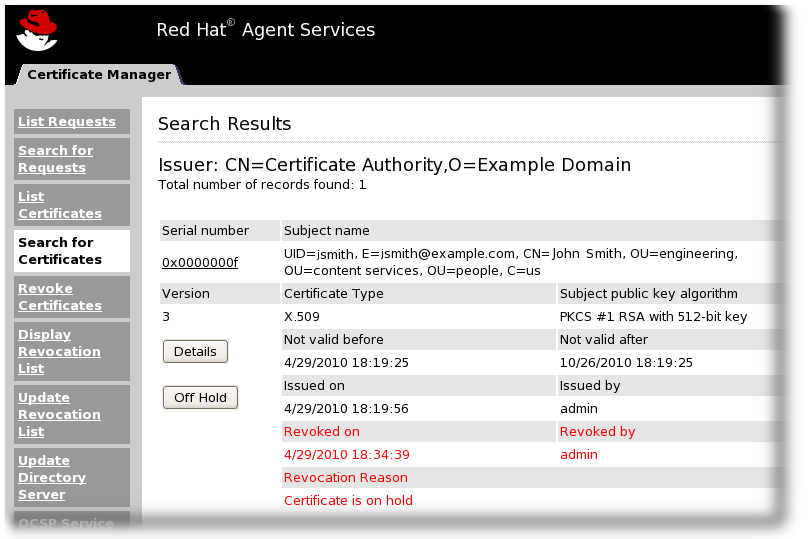
6.2.2.5. Managing the certificate revocation list
Revoking a certificate notifies other users that the certificate is no longer valid. This notification is done by publishing a list of the revoked certificates, called the certificate revocation list (CRL), to an LDAP directory or to a flat file. This list is publicly available and ensures that revoked certificates are not misused.
6.2.2.5.1. Viewing or examining CRLs
It may be necessary to view or examine a CRL, such as before manually updating a directory with the latest CRL. To view or display the CRL:
- Go to the Certificate Manager agent services page.
- Click Display Certificate Revocation List to display the form for viewing the CRL.
- Select the CRL to view. If the administrator has created multiple issuing points, these are listed in the drop-down list. Otherwise, only the master CRL is shown.
Choose how to display the CRL by selecting one of the options from the menu. The choices on this menu are as follows:
- Cached CRL. Views the CRL from the cache rather than from the CRL itself. This option displays results faster than viewing the entire CRL.
- Entire CRL. Retrieves and displays the entire CRL.
- CRL header. Retrieves and displays the CRL header only.
- Base 64 Encoded. Retrieves and displays the CRL in base-64 encoded format.
- Delta CRL. Retrieves and displays a delta CRL, which is a subset of the CRL showing only new revocations since the last CRL was published. This option is available only if delta CRL generation is enabled.
To examine the selected CRL, click .
The CRL appears in the browser window. This allows the agent to check whether a particular certificate (by its serial number) appears in the list and to note recent changes such as the total number of certificates revoked since the last update, the total number of certificates taken off hold since the last update, and the total number of certificates that expired since the last update.
6.2.2.5.2. Updating the CRL
CRLs can be automatically updated if a schedule for automatic CRL generation is enabled, and the schedule can set the CRL to be generated at set time schedules or whenever there are certificate revocations.
Likewise, CRLs can be also automatically published if CRL publishing is enabled.
In some cases, the CRL may need to be updated manually, such as updating the list after the system has been down or removing expired certificates to reduce the file size. (Expired certificates do not need to be included in the CRL because they are already invalid because of the expiration date.) Only a Certificate Manager agent can manually update the CRL.
To update the CRL manually:
- Open the Certificate Manager agent services page.
Click Update Revocation List to display the form for updating the CRL.
Figure 6.2. Update certificate revocation list
- Select the CRL issuing point which will update the CRL. There can be multiple issuing points configured for a single CA.
Select the algorithm to use to sign the new CRL. Before choosing an algorithm, make sure that any system or network applications that need to read or view this CRL support the algorithm.
- SHA-256 with RSA.
- SHA-384 with RSA.
SHA-512 with RSA.
NoteSHA1 is no longer supported.
Before selecting an algorithm, make sure that the Certificate System has that algorithm enabled. The Certificate System administrator will have that information.
- Click to update the CRL with the latest certificate revocation information.
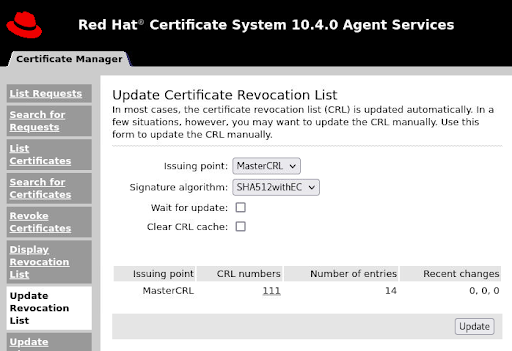
6.2.3. Performing revocation on an own certificate as a user using the Web UI
Revoking a certificate invalidates it before its expiration date. This can be necessary if a certificate is lost, compromised, or no longer needed.
6.2.3.1. Revoking your user certificate
- Click the Revocation tab.
- Click the User Certificate link.
Select the reason why the certificate is being revoked, and click .
- Select the certificates to revoke from the list.

6.2.3.2. Checking whether a certificate is revoked
- Click the Retrieval tab.
- Click the Import Certificate Revocation List link.
Select the radio button by Check whether the following certificate is included in CRL cache or Check whether the following certificate is listed by CRL, and enter the serial number of the certificate.
Click the Submit button.
A message is returned either saying that the certificate is not listed in any CRL or giving the information for the CRL which contains the certificate.

6.2.3.3. Downloading and importing CRLs
Certificate revocation lists (CRLs) can be downloaded and installed in a web client, application, or machine. They can also be viewed to see what certificates have been revoked.
- Click the Retrieval tab.
- Click the Import Certificate Revocation List link.
Select the radio button to view, download, or import the CRL.
- To import the CRL into the browser or download and save it, select the appropriate radio button. There are two options: to download/import the full CRL or the delta CRL. The delta CRL only imports/downloads the list of certificates which have been revoked since the last time the CRL was generated.
To view the CRL, select Display the CRL information and select which CRL subset (called an issuing point) to view. This shows the CRL information, including the number of certificates included in it.
- Click the button.
- Save the file or approve the import operation.
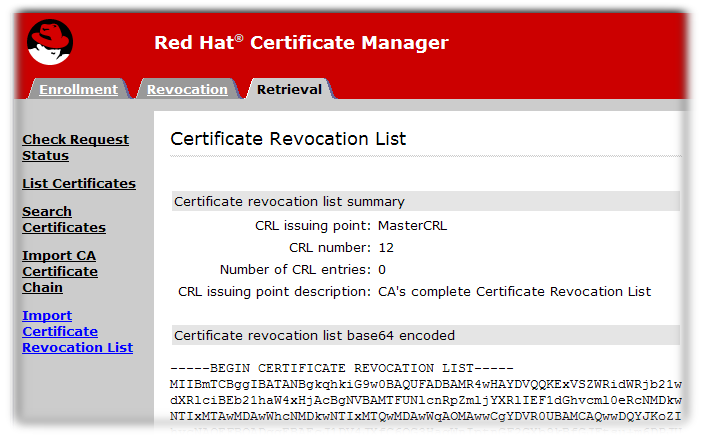
6.3. Issuing CRLs
The tabs for configuring CRL Issuing points on pkiconsole are broken and do not respond at “submit”. Due to the deprecation of pkiconsole, please edit the CA’s CS.cfg directly at installation time, or use the alternative pki cli method to configure the parameters. E.g.:
pki-server ca-config-set -i rhcs10-RSA-RootCA <param name> <param value>
# pki-server ca-config-set -i rhcs10-RSA-RootCA <param name> <param value>For the relevant configuration parameter name/value pairs, see section 7.3.8. Configure support for CRL Distribution Point in the Planning, Installation, and Deployment Guide (Common Criteria Edition).
- The Certificate Manager uses its CA signing certificate key to sign CRLs. To use a separate signing key pair for CRLs, set up a CRL signing key and change the Certificate Manager configuration to use this key to sign CRLs. See Section 6.3.4, “Setting a CA to use a different certificate to sign CRLs” for more information.
Set up CRL issuing points. An issuing point is already set up and enabled for a master CRL.
Figure 6.3. Default CRL issuing point
Additional issuing points for the CRLs can be created. See Section 6.3.1, “Configuring issuing points” for details.
There are five types of CRLs the issuing points can create, depending on the options set when configuring the issuing point to define what the CRL will list:
- Master CRL contains the list of revoked certificates from the entire CA.
- ARL is an Authority Revocation List containing only revoked CA certificates.
- CRL with expired certificates includes revoked certificates that have expired in the CRL.
- CRL from certificate profiles determines the revoked certificates to include based on the profiles used to create the certificates originally.
- CRLs by reason code determines the revoked certificates to include based on the revocation reason code.
- Configure the CRLs for each issuing point. See Section 6.3.2, “Configuring CRLs for each issuing point” for details.
- Set up the CRL extensions which are configured for the issuing point. See Section 6.3.3, “Setting CRL extensions” for details.
-
Set up the delta CRL for an issuing point by enabling extensions for that issuing point,
DeltaCRLIndicatororCRLNumber. -
Set up the
CRLDistributionPointextension to include information about the issuing point. - Set up publishing CRLs to files, an LDAP directory, or an OCSP responder. See Chapter 7, Publishing certificates and CRLs for details about setting up publishing.

6.3.1. Configuring issuing points
Issuing points define which certificates are included in a new CRL. A master CRL issuing point is created by default for a master CRL containing a list of all revoked certificates for the Certificate Manager.
To create a new issuing point, do the following:
Open the Certificate System Console.
pkiconsole -d nssdb -n 'optional client cert nickname' https://server.example.com:8443/ca
pkiconsole -d nssdb -n 'optional client cert nickname' https://server.example.com:8443/caCopy to Clipboard Copied! Toggle word wrap Toggle overflow Notepkiconsoleis being deprecated and will be replaced by a new browser-based UI in a future major release. Althoughpkiconsolewill continue to be available until the replacement UI is released, we encourage using the command line equivalent ofpkiconsoleat this time, as the pki CLI will continue to be supported and improved upon even when the new browser-based UI becomes available in the future.- In the Configuration tab, expand Certificate Manager from the left navigation menu. Then select CRL Issuing Points.
To edit an issuing point, select the issuing point, and click . The only parameters which can be edited are the name of the issuing point and whether the issuing point is enabled or disabled.
To add an issuing point, click . The CRL Issuing Point Editor window opens.
Figure 6.4. CRL issuing point editor
NOTEIf some fields do not appear large enough to read the content, expand the window by dragging one of the corners.
Fill in the following fields:
- Enable. Enables the issuing point if selected; deselect to disable.
- CRL Issuing Point name. Gives the name for the issuing point; spaces are not allowed.
- Description. Describes the issuing point.
- Click .
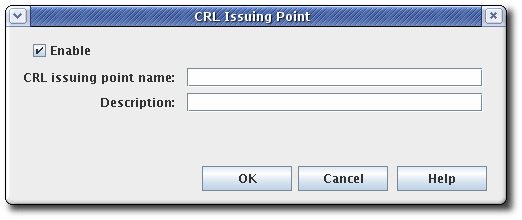
To view and configure a new issuing point, close the CA Console, then open the Console again. The new issuing point is listed below the CRL Issuing Points entry in the navigation tree.
Configure CRLs for the new issuing point, and set up any CRL extensions that will be used with the CRL. See Section 6.3.2, “Configuring CRLs for each issuing point” for details on configuring an issuing point. See Section 6.3.3, “Setting CRL extensions” for details on setting up the CRL extensions. All the CRLs created appear on the Update Revocation List page of the agent services pages.
6.3.2. Configuring CRLs for each issuing point
Information, such as the generation interval, the CRL version, CRL extensions, and the signing algorithm, can all be configured for the CRLs for the issuing point. The CRLs must be configured for each issuing point.
Open the CA console.
pkiconsole -d nssdb -n 'optional client cert nickname' https://server.example.com:8443/ca
pkiconsole -d nssdb -n 'optional client cert nickname' https://server.example.com:8443/caCopy to Clipboard Copied! Toggle word wrap Toggle overflow Notepkiconsoleis being deprecated and will be replaced by a new browser-based UI in a future major release. Althoughpkiconsolewill continue to be available until the replacement UI is released, we encourage using the command line equivalent ofpkiconsoleat this time, as the pki CLI will continue to be supported and improved upon even when the new browser-based UI becomes available in the future.- In the navigation tree, select Certificate Manager, and then select CRL Issuing Points.
- Select the issuing point name below the Issuing Points entry.
Configure how and how often the CRLs are updated by supplying information in the Update tab for the issuing point. This tab has two sections, Update Schema and Update Frequency.
The Update Schema section has the following options:
- Enable CRL generation. This checkbox sets whether CRLs are generated for that issuing point.
- Generate full CRL every # delta(s). This field sets how frequently CRLs are created in relation to the number of changes.
-
Extend next update time in full CRLs. This provides an option to set the
nextUpdatefield in the generated CRLs. ThenextUpdateparameter shows the date when the next CRL is issued, regardless of whether it is a full or delta CRL. When using a combination of full and delta CRLs, enablingExtend next update time in full CRLswill make thenextUpdateparameter in a full CRL show when the next full CRL will be issued. Otherwise, thenextUpdateparameter in the full CRL will show when the next delta CRL will be issued, since the delta will be the next CRL to be issued.
The Update Frequency section sets the different intervals when the CRLs are generated and issued to the directory.
Every time a certificate is revoked or released from hold. This sets the Certificate Manager to generate the CRL every time it revokes a certificate. The Certificate Manager attempts to issue the CRL to the configured directory whenever it is generated. Generating a CRL can be time consuming if the CRL is large. Configuring the Certificate Manager to generate CRLs every time a certificate is revoked may engage the server for a considerable amount of time; during this time, the server will not be able to update the directory with any changes it receives.
This setting is not recommended for a standard installation. This option should be selected to test revocation immediately, such as testing whether the server issues the CRL to a flat file.
Update the CRL at. This field sets a daily time when the CRL should be updated. To specify multiple times, enter a comma-separate list of times, such as
01:50,04:55,06:55. To enter a schedule for multiple days, enter a comma-separated list to set the times within the same day, and then a semicolon separated list to identify times for different days. For example, this sets revocation on Day 1 of the cycle at 1:50am, 4:55am, and 6:55am and then Day 2 at 2am, 5am, and 5pm:01:50,04:55,06:55;02:00,05:00,17:00
01:50,04:55,06:55;02:00,05:00,17:00Copy to Clipboard Copied! Toggle word wrap Toggle overflow Update the CRL every. This checkbox enables generating CRLs at the interval set in the field. For example, to issue CRLs every day, select the checkbox, and enter
1440in this field.- Next update grace period. If the Certificate Manager updates the CRL at a specific frequency, the server can be configured to have a grace period to the next update time to allow time to create the CRL and issue it. For example, if the server is configured to update the CRL every 20 minutes with a grace period of 2 minutes, and if the CRL is updated at 16:00, the CRL is updated again at 16:18.
-
Next update as this update extension. This field (
ca.crl.MasterCRL.nextAsThisUpdateExtensioninCS.cfg) configures the time interval for the next Full CRL update. It extends the update interval from the current update time. if Next update as this update extension is less than the Next update grace period, then the Next update stays on course. However, if it is greater, the Next update time is set to ("extension" time + the grace period ). For example, if the CRL is set to update every 3 minutes with a 60-minute Next update as this update extension and a grace period of 1 minute, and the current update is at 5:30 AM, the next update will be scheduled for 6:31 AM (60 minutes after the current update).
IMPORTANTDue to a known issue, when currently setting full and delta Certificate Revocation List schedules, the Update CRL every time a certificate is revoked or released from hold option also requires you to fill out the two grace period settings. Thus, in order to select this option you need to first select the Update CRL every option and enter a number for the Next update grace period # minutes box.
The Cache tab sets whether caching is enabled and the cache frequency.
Figure 6.5. CRL cache tab
- Enable CRL cache. This checkbox enables the cache, which is used to create delta CRLs. If the cache is disabled, delta CRLs will not be created. For more information about the cache, see Section 6.1, “About revoking certificates”.
-
Update cache every. This field sets how frequently the cache is written to the internal database. Set to
0to have the cache written to the database every time a certificate is revoked. - Enable cache recovery. This checkbox allows the cache to be restored.
- Enable CRL cache testing. This checkbox enables CRL performance testing for specific CRL issuing points. CRLs generated with this option should not be used in deployed CAs, as CRLs issued for testing purposed contain data generated solely for the purpose of performance testing.
The Format tab sets the formatting and contents of the CRLs that are created. There are two sections, CRL Format and CRL Contents.
Figure 6.6. CRL format tab
The CRL Format section has two options:
Revocation list signing algorithm is a drop down list of allowed ciphers to encrypt the CRL.
NoteSHA1 is no longer supported.
Allow extensions for CRL v2 is a checkbox which enabled CRL v2 extensions for the issuing point. If this is enabled, set the required CRL extensions described in Section 6.3.3, “Setting CRL extensions”.
NoteExtensions must be turned on to create delta CRLs.
The CRL Contents section has four checkboxes which set what types of certificates to include in the CRL:
- Include expired certificates. This includes revoked certificates that have expired. If this is enabled, information about revoked certificates remains in the CRL after the certificate expires. If this is not enabled, information about revoked certificates is removed when the certificate expires.
- Include revoked certificates one extra time after their expiration. This includes the listing of revoked certificates one time after their expiration, ensuring revoked certificate information stays in the CRL until the next update, providing additional time for systems to recognize and manage their status, even after expiration.
- CA certificates only. This includes only CA certificates in the CRL. Selecting this option creates an Authority Revocation List (ARL), which lists only revoked CA certificates.
- Certificates issued according to profiles. This only includes certificates that were issued according to the listed profiles; to specify multiple profiles, enter a comma-separated list.
- Click .
- Extensions are allowed for this issuing point and can be configured. See Section 6.3.3, “Setting CRL extensions” for details.

6.3.3. Setting CRL extensions
Extensions only need configured for an issuing point if the Allow extensions for CRLs v2 checkbox is selected for that issuing point.
When the issuing point is created, three extensions are automatically enabled: CRLReason, InvalidityDate, and CRLNumber. Other extensions are available but are disabled by default. These can be enabled and modified. For more information about the available CRL extensions, see Section B.4.2, “Standard X.509 v3 CRL extensions reference”.
To configure CRL extensions, do the following:
Open the CA console.
pkiconsole -d nssdb -n 'optional client cert nickname' https://server.example.com:8443/ca
# pkiconsole -d nssdb -n 'optional client cert nickname' https://server.example.com:8443/caCopy to Clipboard Copied! Toggle word wrap Toggle overflow Notepkiconsoleis being deprecated and will be replaced by a new browser-based UI in a future major release. Althoughpkiconsolewill continue to be available until the replacement UI is released, we encourage using the command line equivalent ofpkiconsoleat this time, as the pki CLI will continue to be supported and improved upon even when the new browser-based UI becomes available in the future.- In the navigation tree, select Certificate Manager, and then select CRL Issuing Points.
Select the issuing point name below the Issuing Points entry, and select the CRL Extension entry below the issuing point.
The right pane shows the CRL Extensions Management tab, which lists configured extensions.
Figure 6.7. CRL extensions
- To modify a rule, select it, and click .
- Most extensions have two options, enabling them and setting whether they are critical. Some require more information. Supply all required values. See Section B.4.2, “Standard X.509 v3 CRL extensions reference” for complete information about each extension and the parameters for those extensions.
- Click .
- Click to see the updated status of all the rules.
6.3.4. Setting a CA to use a different certificate to sign CRLs
For instruction on how to configure this feature by editing the CS.cfg file, see 9.2.3.10 Setting a CA to Use a Different Certificate to Sign CRLs in the Planning, Installation and Deployment Guide (Common Criteria Edition).
6.3.5. Generating CRLs from cache
By default, CRLs are generated from the CA’s internal database. However, revocation information can be collected as the certificates are revoked and kept in memory. This revocation information can then be used to update CRLs from memory. Bypassing the database searches that are required to generate the CRL from the internal database significantly improves performance.
Because of the performance enhancement from generating CRLs from cache, enable the enableCRLCache parameter in most environments. However, the Enable CRL cache testing parameter should not be enabled in a production environment.
Configuring CRL generation from cache in the console
Open the console.
pkiconsole -d nssdb -n 'optional client cert nickname' https://server.example.com:8443/ca
# pkiconsole -d nssdb -n 'optional client cert nickname' https://server.example.com:8443/caCopy to Clipboard Copied! Toggle word wrap Toggle overflow Notepkiconsoleis being deprecated and will be replaced by a new browser-based UI in a future major release. Althoughpkiconsolewill continue to be available until the replacement UI is released, we encourage using the command line equivalent ofpkiconsoleat this time, as the pki CLI will continue to be supported and improved upon even when the new browser-based UI becomes available in the future.- In the Configuration tab, expand the Certificate Manager folder and the CRL Issuing Points subfolder.
Select the MasterCRL node.
Select Enable CRL cache.
- Save the changes.
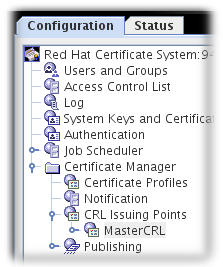
Configuring CRL generation from cache in CS.cfg
For instruction on how to configure this feature by editing the CS.cfg file, see 9.2.3.11 Configuring CRL Generation from Cache in CS.cfg in the Planning, Installation and Deployment Guide (Common Criteria Edition).
6.4. Setting full and delta CRL schedules
CRLs are generated periodically. Setting that period is touched on in the configuration in Section 6.3.2, “Configuring CRLs for each issuing point”.
CRLs are issued according to a time-based schedule. CRLs can be issued every single time a certificate is revoked, at a specific time of day, or once every so-many minutes.
Time-based CRL generation schedules apply to every CRL that is generated. There are two kinds of CRLs, full CRLs and delta CRLs. A full CRL has a record of every single revoked certificate, whereas delta CRLs contain only the certificates that have been revoked since the last CRL (delta or full) was generated.
By default, full CRLs are generated at every specified interval in the schedule. It is possible space out the time between generating full CRLs by generating interim delta CRLs. The generation interval is configured in the CRL schema, which sets the scheme for generating delta and full CRLs.
If the interval is set to 3, for example, then the first CRL generated will be both a full and delta CRL, then the next two generation updates are delta CRLs only, and then the fourth interval is both a full and delta CRL again. In other words, every third generation interval has both a full CRL and a delta CRL.
Interval 1, 2, 3, 4, 5, 6, 7 ... Full CRL 1 4 7 ... Delta CRL 1, 2, 3, 4, 5, 6, 7 ...
Interval 1, 2, 3, 4, 5, 6, 7 ...
Full CRL 1 4 7 ...
Delta CRL 1, 2, 3, 4, 5, 6, 7 ...For delta CRLs to be generated in addition to full CRLs, the CRL cache must be enabled.
6.4.1. Configuring CRL update intervals in the console
pkiconsole is being deprecated and will be replaced by a new browser-based UI in a future major release. Although pkiconsole will continue to be available until the replacement UI is released, we encourage using the command line equivalent of pkiconsole at this time, as the pki CLI will continue to be supported and improved upon even when the new browser-based UI becomes available in the future.
Open the console.
pkiconsole -d nssdb -n 'optional client cert nickname' https://server.example.com:8443/ca
# pkiconsole -d nssdb -n 'optional client cert nickname' https://server.example.com:8443/caCopy to Clipboard Copied! Toggle word wrap Toggle overflow - In the Configuration tab, expand the Certificate Manager folder and the CRL Issuing Points subfolder.
Select the MasterCRL node.
Enter the required interval in the Generate full CRL every # delta(s) field.
Set the update frequency, either by specifying the occasion of a certificate revocation, a cyclical interval or set times for the updates to occur:
- Select the Update CRL every time a certificate is revoked or released from hold checkbox. The Update CRL every time a certificate is revoked or released from hold option also requires you to fill out the two Grace period settings. This is a known issue, and the bug is being tracked in Red Hat Bugzilla.
- Select the Update CRL every time a certificate is revoked or released from hold checkbox.
Select the Update CRL at checkbox and enter specific times separated by commas, such as
01:50,04:55,06:55.Select the Update CRL every checkbox and enter the required interval, such as
240.
- Save the changes.

The Update CRL every time a certificate is revoked or released from hold option also requires you to fill out the two grace period settings. This is a known issue, and the bug is being tracked in Red Hat Bugzilla.
Schedule drift can occur when updating CRLs by interval. Typically, drift occurs as a result of manual updates and CA restarts.
To prevent schedule drift, select the Update CRL at checkbox and enter a value. The interval updates will resynchronize with the Update CRL at value every 24 hours.
Only one Update CRL at value will be accepted when updating CRLs by interval.
6.4.2. Configuring update intervals for CRLs in CS.cfg
For instructions on how to configure this feature by editing the CS.cfg file, see 9.2.3.12 Configuring Update Intervals for CRLs in CS.cfg in the Planning, Installation and Deployment Guide (Common Criteria Edition).
6.4.3. Configuring CRL generation schedules over multiple days
By default, CRL generation schedules cover 24 hours. Also, by default, when full and delta CRLs are enabled full CRLs occur at specific intervals in place of one or all delta CRLs, i.e., every third update.
To set CRL generation schedules across multiple days, the list of times uses commas to separate times within the same day and a semicolon to delimit days:
ca.crl.MasterCRL.dailyUpdates=01:00,03:00,18:00;02:00,05:00,17:00
ca.crl.MasterCRL.dailyUpdates=01:00,03:00,18:00;02:00,05:00,17:00This example updates CRLs on day one of the schedule at 01:00, 03:00, and 18:00, and on day two of the schedule at 02:00, 05:00, and 17:00. On day three the cycle starts again.
The semicolon indicates a new day. Starting the list with a semicolon results in an initial day where no CRLs are generated. Likewise, ending the list with a semicolon adds a final day to the schedule where no CRLs are generated. Two semicolons together result in a day with no CRL generation.
To set full CRL updates independent of delta updates, the list of times accepts time values prepended with an asterisk to indicate when full CRL updates should occur:
ca.crl.MasterCRL.dailyUpdates=01:00,03:00,18:00,*23:00;02:00,05:00,21:00,*23:30
ca.crl.MasterCRL.dailyUpdates=01:00,03:00,18:00,*23:00;02:00,05:00,21:00,*23:30This example generates delta CRL updates on day one at 01:00, 03:00, and 18:00, with a full and delta CRL update at 23:00. On day two, delta CRLs are updated at 02:00, 05:00, and 21:00, with a full and delta CRL update at 23:30. On day three, the cycle starts again.
The semicolon and asterisk syntax works in both the pkiconsole and when manually editing the CS.cfg file.
6.5. Enabling Revocation Checking
Revocation checking means that a Certificate System subsystem verifies that a certificate is both valid and not revoked when an agent or administrator attempts to access the instance’s secure interfaces. This leverages a local OCSP service (either a CA’s internal OCSP service or a separate OCSP responder) to check the revocation status of the certificate.
OCSP configuration is covered in Section 6.6, “Using the Online Certificate Status Protocol (OCSP) responder”.
See 9.4.1.2 Enabling Automatic Revocation Checking on the CA in the Planning, Installation and Deployment Guide (Common Criteria Edition).
See 9.4.1.3 Enabling Certificate Revocation Checking for Subsystems in the Planning, Installation and Deployment Guide (Common Criteria Edition).
6.6. Using the Online Certificate Status Protocol (OCSP) responder
6.6.1. Setting up the OCSP responder
Red Hat Certificate System offers two methods of CRL publishing to be consumed by an OCSP instance external to the CA:
- Direct CA→OCSP CRL publishing
- Indirect publishing with CA→LDAP, then OCSP←LDAP
By default, once you set up an OCSP instance, the first CRL publishing method is automatically set up as well, which allows direct CA→OCSP CRL publishing.
The second publishing method is the one evaluated for Common Criteria. For an example setup, see 7.4.7 "Configuration for CRL publishing" in the Planning, Installation and Deployment Guide (Common Criteria Edition).
If you select a CA within the security domain when configuring the Online Certificate Status Manager, there is no extra step required to configure the OCSP service. The CA’s CRL publishing is set up automatically, and its signing certificate is automatically added and trusted in the Online Certificate Status Manager’s certificate database. However, if you select a non-security domain CA, then you must manually configure the OCSP service after configuring the Online Certificate Status Manager.
Not every CA within the security domain to which the OCSP Manager belongs is automatically trusted by the OCSP Manager when it is configured. Every CA in the certificate chain of the CA configured in the CA panel is trusted automatically by the OCSP Manager. Other CAs within the security domain but not in the certificate chain must be trusted manually.
To set up the Online Certificate Status Manager for a Certificate Manager outside the security domain:
- Configure the CRLs for every CA that will publish to an OCSP responder.
- Enable publishing, set up a publisher, and set publishing rules in every CA that the OCSP service will handle (Chapter 7, Publishing certificates and CRLs). This is not necessary if the Certificate Managers publish to an LDAP directory and the Online Certificated Status Manager is set up to read from that directory.
- The certificate profiles must be configured to include the Authority Information Access extension, pointing to the location at which the Certificate Manager listens for OCSP service requests (Section 6.6.4, “Enabling the Certificate Manager’s internal OCSP service”).
Configure the OCSP Responder.
- Configure the Revocation Info store (Section 6.6.2.2, “Configure the Revocation Info Stores: internal database” and Section 6.6.2.3, “Configure the Revocation Info Stores: LDAP directory”).
- Identify every publishing Certificate Manager to the OCSP responder (Section 6.6.2, “Identifying the CA to the OCSP Responder”).
- If necessary, configure the trust settings for the CA which signed the OCSP signing certificate (Section 13.6, “Changing the trust settings of a CA certificate”).
- Restart both subsystems after configuring them.
- Verify that the CA is properly connected to the OCSP responder (Section 6.6.2.1, “Verify Certificate Manager and Online Certificate Status Manager connection”).
6.6.2. Identifying the CA to the OCSP Responder
Before a CA is configured to publish CRLs to the Online Certificate Status Manager, the CA must be identified to the Online Certificate Status Manager by storing the CA signing certificate in the internal database of the Online Certificate Status Manager. The Certificate Manager signs CRLs with the key pair associated with this certificate; the Online Certificate Status Manager verifies the signature against the stored certificate.
If a CA within the security domain is selected when the Online Certificate Status Manager is configured, there is no extra step required to configure the Online Certificate Status Manager to recognize the CA; the CA signing certificate is automatically added and trusted in the Online Certificate Status Manager’s certificate database. However, if a non-security domain CA is selected, then the CA signing certificate must be manually added to the certificate database after the Online Certificate Status Manager is configured.
It is not necessary to import the certificate chain for a CA which will publish its CRL to the Online Certificate Status Manager. The only time a certificate chain is needed for the OCSP service is if the CA connects to the Online Certificate Status Manager through SSL/TLS authentication when it publishes its CRL. Otherwise, the Online Certificate Status Manager does not need to have the complete certificate chain.
However, the Online Certificate Status Manager must have the certificate which signed the CRL, either a CA signing certificate or a separate CRL signing certificate, in its certificate database. The OCSP service verifies the CRL by comparing the certificate which signed the CRL against the certificates in its database, not against a certificate chain. If both a root CA and one of its subordinate CAs publish CRLs to the Online Certificate Status Manager, the Online Certificate Status Manager needs the CA signing certificate of both CAs.
To import the CA or CRL signing certificate which is used to sign the certificates the CA is publishing to the Online Certificate Status Manager, do the following:
- Get the Certificate Manager’s base-64 CA signing certificate from the end-entities page of the CA.
-
Open the Online Certificate Status Manager agent page. The URL has the format
https://hostname:SSLport/ocsp/agent/ocsp. - In the left frame, click .
- In the form, paste the encoded CA signing certificate inside the text area labeled Base 64 encoded certificate (including the header and footer).
- To verify that the certificate is added successfully, in the left frame, click List Certificate Authorities.
The resulting form should show information about the new CA. The This Update, Next Update, and Requests Served Since Startup fields should show a value of zero (0).
6.6.2.1. Verify Certificate Manager and Online Certificate Status Manager connection
When the Certificate Manager is restarted, it tries to connect to the Online Certificate Status Manager’s SSL/TLS port. To verify that the Certificate Manager did indeed communicate with the Online Certificate Status Manager, check the This Update and Next Update fields, which should be updated with the appropriate timestamps of the CA’s last communication with the Online Certificate Status Manager. The Requests Served Since Startup field should still show a value of zero (0) since no client has tried to query the OCSP service for certificate revocation status.
6.6.2.2. Configure the Revocation Info Stores: internal database
The Online Certificate Status Manager stores each Certificate Manager’s CRL in its internal database and uses it as the CRL store for verifying the revocation status of certificates. To change the configuration that the Online Certificate Status Manager uses for storing the CRLs in its internal database:
Open the Online Certificate Status Manager Console.
pkiconsole -d nssdb -n 'optional client cert nickname' https://server.example.com:8443/ocsp
# pkiconsole -d nssdb -n 'optional client cert nickname' https://server.example.com:8443/ocspCopy to Clipboard Copied! Toggle word wrap Toggle overflow Notepkiconsoleis being deprecated and will be replaced by a new browser-based UI in a future major release. Althoughpkiconsolewill continue to be available until the replacement UI is released, we encourage using the command line equivalent ofpkiconsoleat this time, as the pki CLI will continue to be supported and improved upon even when the new browser-based UI becomes available in the future.In the Configuration tab, select Online Certificate Status Manager, and then select Revocation Info Stores.
The right pane shows the two repositories the Online Certificate Status Manager can use; by default, it uses the CRL in its internal database.
-
Select the
defStore, and click . Edit the
defStorevalues.- notFoundAsGood. Sets the OCSP service to return an OCSP response of GOOD if the certificate in question cannot be found in any of the CRLs. If this is not selected, the response is UNKNOWN, which, when encountered by a client, results in an error message.
-
byName. The OCSP Responder only supports the basic response type, which includes the ID of the OCSP Responder making the response. The ResponderID field within the basic response type is determined by the value of the
ocsp.store.defStore.byNameparameter. IfbyNameparameter is true or is missing, the OCSP authority signing certificate subject name is used as the ResponderID field of the OCSP response. IfbyNameparameter is false, the OCSP authority signing certificate key hash will be the ResponderID field of the OCSP response. - includeNextUpdate. Includes the timestamp of the next CRL update time.


6.6.2.3. Configure the Revocation Info Stores: LDAP directory
Although the OCSP Manager stores the CA CRLs in its internal database by default, you can configure it to use a CRL published to an LDAP directory instead.
When configuring the OCSP manager to use an LDAP directory, you need to disable the default direct CA→OCSP CRL publishing method. To do so, please refer to 9.2.3.17 "Disabling the direct CA-OCSP CRL publishing" in the Planning, Installation and Deployment Guide (Common Criteria Edition).
By default, if the ldapStore method is enabled, the OCSP user interface does not check the certificate status. However, the OCSP subsystem can take advantage of having the frequently updated CRL to verify its peer’s certificate without reaching out to another OCSP system. To do so, please refer to 9.2.3.18 "Enabling Client Certificate Verification using latest CRL within OCSP" in the Planning, Installation and Deployment Guide (Common Criteria Edition).
To configure the Online Certificate Status Manager to use an LDAP directory:
Open the Online Certificate Status Manager Console.
pkiconsole -d nssdb -n 'optional client cert nickname' https://server.example.com:8443/ocsp
# pkiconsole -d nssdb -n 'optional client cert nickname' https://server.example.com:8443/ocspCopy to Clipboard Copied! Toggle word wrap Toggle overflow Notepkiconsoleis being deprecated and will be replaced by a new browser-based UI in a future major release. Althoughpkiconsolewill continue to be available until the replacement UI is released, we encourage using the command line equivalent ofpkiconsoleat this time, as the pki CLI will continue to be supported and improved upon even when the new browser-based UI becomes available in the future.In the Configuration tab, select Online Certificate Status Manager, and then select Revocation Info Stores.
The right pane shows the two repositories the Online Certificate Status Manager can use; by default, it uses the CRL in its internal database.
-
To use the CRLs in LDAP directories, click to enable the
ldapStoreoption. -
Select
ldapStore, and click . Set the
ldapStoreparameters.- numConns. The total number of LDAP directories the OCSP service should check. By default, this is set to 0. Setting this value shows the corresponding number of host, port, baseDN, and refreshInSec fields.
- host. The fully-qualified DNS hostname of the LDAP directory.
- port. The non-SSL/TLS port of the LDAP directory.
-
baseDN. The DN to start searching for the CRL. For example,
O=example.com. - refreshInSec. How often the connection is refreshed. The default is 86400 seconds (daily).
-
caCertAttr. Leave the default value,
cACertificate;binary, as it is. It is the attribute to which the Certificate Manager publishes its CA signing certificate. -
crlAttr. Leave the default value,
certificateRevocationList;binary, as it is. It is the attribute to which the Certificate Manager publishes CRLs. - notFoundAsGood. Sets the OCSP service to return an OCSP response of GOOD if the certificate in question cannot be found in any of the CRLs. If this is not selected, the response is UNKNOWN, which, when encountered by a client, results in an error message.
-
byName. The OCSP Responder only supports the basic response type, which includes the ID of the OCSP Responder making the response. The ResponderID field within the basic response type is determined by the value of the
ocsp.store.defStore.byNameparameter. IfbyNameparameter is true or is missing, the OCSP authority signing certificate subject name is used as the ResponderID field of the OCSP response. IfbyNameparameter is false, the OCSP authority signing certificate key hash will be the ResponderID field of the OCSP response. - includeNextUpdate. The Online Certificate Status Manager can include the timestamp of the next CRL update time.

6.6.2.4. Configure the default OCSP response signing algorithm
To configure the Online Certificate Status Manager to use a different OCSP response signing algorithm:
Open the Online Certificate Status Manager Console.
pkiconsole -d nssdb -n 'optional client cert nickname' https://server.example.com:8443/ocsp
# pkiconsole -d nssdb -n 'optional client cert nickname' https://server.example.com:8443/ocspCopy to Clipboard Copied! Toggle word wrap Toggle overflow Notepkiconsoleis being deprecated and will be replaced by a new browser-based UI in a future major release. Althoughpkiconsolewill continue to be available until the replacement UI is released, we encourage using the command line equivalent ofpkiconsoleat this time, as the pki CLI will continue to be supported and improved upon even when the new browser-based UI becomes available in the future.- In the Configuration tab, select Online Certificate Status Manager.
In General Settings, select the desired signing algorithm from the pulldown list. For example
SHA384withRSA.NoteSHA1 algorithms are no longer supported.
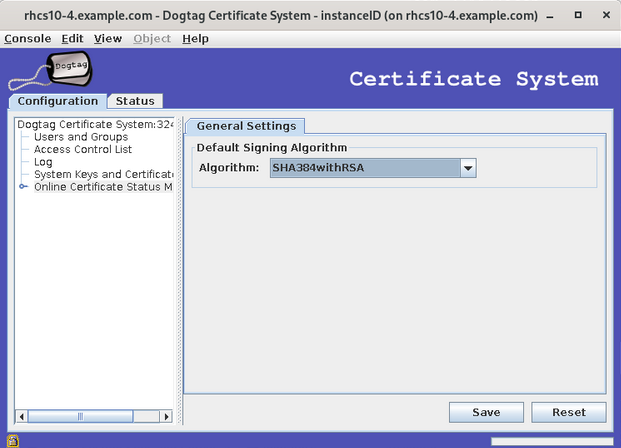
6.6.2.5. Testing the OCSP service setup
Test whether the Certificate Manager can service OCSP requests properly by doing the following:
- Turn on revocation checking in the browser or client.
- Request a certificate from the CA that has been enabled for OCSP services.
- Approve the request.
- Download the certificate to the browser or client.
- Make sure the CA is trusted by the browser or client.
Check the status of Certificate Manager’s internal OCSP service.
Open the CA agent services page, and select the OCSP Services link.
Test the independent Online Certificate Status Manager subsystem.
Open the Online Certificate Status Manager agent services page, and click the List Certificate Authorities link.
The page should show information about the Certificate Manager configured to publish CRLs to the Online Certificate Status Manager. The page also summarizes the Online Certificate Status Manager’s activity since it was last started.
- Revoke the certificate.
- Verify the certificate in the browser or client. The server should return that the certificate has been revoked.
Check the Certificate Manager’s OCSP-service status again to verify that these things happened:
- The browser sent an OCSP query to the Certificate Manager.
- The Certificate Manager sent an OCSP response to the browser.
- The browser used that response to validate the certificate and returned its status, that the certificate could not be verified.
Check the independent OCSP service subsystem again to verify that these things happened:
- The Certificate Manager published the CRL to the Online Certificate Status Manager.
- The browser sent an OCSP response to the Online Certificate Status Manager.
- The Online Certificate Status Manager sent an OCSP response to the browser.
- The browser used that response to validate the certificate and returned its status, that the certificate could not be verified.
6.6.3. Setting the response for bad serial numbers
OCSP responders check the revocation status and expiration date of a certificate before determining whether the certificate is valid; by default, the OCSP does not validate other information on the certificate.
The notFoundAsGood parameter sets how the OCSP handles a certificate with an invalid serial number. This parameter is enabled by default, which means that if a certificate is present with a bad serial number but the certificate is otherwise valid, the OCSP returns a status of GOOD for the certificate.
To have the OCSP check and reject certificates based on bad serial numbers as well as revocation status, change the notFoundAsGood setting. In that case, the OCSP returns a status of UNKNOWN with a certificate with a bad serial number. The client interprets that as an error and can respond accordingly.
Open the Online Certificate Status Manager Console.
pkiconsole -d nssdb -n 'optional client cert nickname' https://server.example.com:8443/ocsp
# pkiconsole -d nssdb -n 'optional client cert nickname' https://server.example.com:8443/ocspCopy to Clipboard Copied! Toggle word wrap Toggle overflow Notepkiconsoleis being deprecated and will be replaced by a new browser-based UI in a future major release. Althoughpkiconsolewill continue to be available until the replacement UI is released, we encourage using the command line equivalent ofpkiconsoleat this time, as the pki CLI will continue to be supported and improved upon even when the new browser-based UI becomes available in the future.In the Configuration tab, select Online Certificate Status Manager, and then select Revocation Info Stores.
-
Select the
defStore, and click . Edit the
notFoundAsGoodvalue. Selecting the checkbox means that the OCSP returns a value ofGOODeven if the serial number on the certificate is bad. Unselecting the checkbox means that the OCSP sends a value ofUNKNOWN, which the client can intrepret as an error.Restart the OCSP Manager.
pki-server restart instance-name
# pki-server restart instance-nameCopy to Clipboard Copied! Toggle word wrap Toggle overflow
6.6.4. Enabling the Certificate Manager’s internal OCSP service
The Certificate Manager has a built-in OCSP service, which can be used by OCSP-compliant clients to query the Certificate Manager directly about the revocation status of the certificate. When the Certificate Manager is installed, an OCSP signing certificate is issued and the OCSP service is turned on by default. This OCSP signing certificate is used to sign all responses to OCSP service requests. Since the internal OCSP service checks the status of certificates stored in the Certificate Manager’s internal database, publishing does not have to be configured to use this service.
Clients can query the OCSP service through the non-SSL/TLS end-entity port of the Certificate Manager. When queried for the revocation status of a certificate, the Certificate Manager searches its internal database for the certificate, checks its status, and responds to the client. Since the Certificate Manager has real-time status of all certificates it has issued, this method of revocation checking is the most accurate.
Every CA’s built-in OCSP service is turned on at installation. However, to use this service, the CA needs to issue certificates with the Authority Information Access extension.
Go to the CA’s end-entities page. For example:
https://server.example.com:8443/ca/ee/ca
https://server.example.com:8443/ca/ee/caCopy to Clipboard Copied! Toggle word wrap Toggle overflow - Find the CA signing certificate.
-
Look for the Authority Info Access extension in the certificate, and note the
Location URINamevalue, such ashttps://server.example.com:8443/ca/ocsp. -
Update the enrollment profiles to enable the Authority Information Access extension, and set the
Locationparameter to the Certificate Manager’s URI. For information on editing the certificate profiles, see Section 3.2, “Setting up certificate profiles”. Restart the CA instance.
pki-server restart instance-name
# pki-server restart instance-nameCopy to Clipboard Copied! Toggle word wrap Toggle overflow
To disable the Certificate Manager’s internal OCSP service, edit the CA’s CS.cfg file and change the value of the ca.ocsp parameter to false.
ca.ocsp=false
ca.ocsp=false6.6.5. Submitting OCSP requests using the OCSPClient program
The OCSPClient program can be used for performing OCSP requests. For example:
# OCSPClient -h server.example.com -p 8080 -d /etc/pki/pki-tomcat/alias -c "caSigningCert cert-pki-ca" --serial 2 CertID.serialNumber=2 CertStatus=Good
# OCSPClient -h server.example.com -p 8080 -d /etc/pki/pki-tomcat/alias -c "caSigningCert cert-pki-ca" --serial 2
CertID.serialNumber=2
CertStatus=Good
The OCSPClient command can be used with the following command-line options:
| Option | Description |
|---|---|
| -d database | Security database location (default: current directory) |
| -h hostname | OCSP server hostname (default: example.com) |
| -p port | OCSP server port number (default: 8080) |
| -t path | OCSP service path (default: /ocsp/ee/ocsp) |
| -c nickname | CA certificate nickname (defaut: CA Signing Certificate) |
| -n times | Number of submissions (default: 1) |
| --serial serial_number | Serial number of certificate to be checked |
| --input input_file | Input file containing DER-encoded OCSP request |
| --output output_file | Output file to store DER-encoded OCSP response |
| -v, --verbose | Run in verbose mode |
| --help | Show help message |
6.6.6. Submitting OCSP requests using the GET method
OCSP requests which are smaller than 255 bytes can be submitted to the Online Certificate Status Manager using a GET method, as described in RFC 6960. To submit OCSP requests over GET:
Generate an OCSP request for the certificate the status of which is being queried. For example:
openssl ocsp -CAfile ca.pem -issuer issuer.pem -url https://rhcs10.example.com:22443/ocsp/ee/ocsp -serial 16836380 -reqout - | base64 | tr -d '\n' MEIwQDA+MDwwOjAJBgUrDgMCGgUABBT4cyABkyiCIhU4JpmIBewdDnn8ZgQUbyBZ44kgy35o7xW5BMzM8FTvyTwCAQE=
# openssl ocsp -CAfile ca.pem -issuer issuer.pem -url https://rhcs10.example.com:22443/ocsp/ee/ocsp -serial 16836380 -reqout - | base64 | tr -d '\n' MEIwQDA+MDwwOjAJBgUrDgMCGgUABBT4cyABkyiCIhU4JpmIBewdDnn8ZgQUbyBZ44kgy35o7xW5BMzM8FTvyTwCAQE=Copy to Clipboard Copied! Toggle word wrap Toggle overflow Paste the URL in the address bar of a web browser to return the status information. The browser must be able to handle OCSP requests and downloads the response file to the system. .
https://rhcs10.example.com:22443/ocsp/ee/ocsp/MEIwQDA+MDwwOjAJBgUrDgMCGgUABBT4cyABkyiCIhU4JpmIBewdDnn8ZgQUbyBZ44kgy35o7xW5BMzM8FTvyTwCAQE=
https://rhcs10.example.com:22443/ocsp/ee/ocsp/MEIwQDA+MDwwOjAJBgUrDgMCGgUABBT4cyABkyiCIhU4JpmIBewdDnn8ZgQUbyBZ44kgy35o7xW5BMzM8FTvyTwCAQE=Copy to Clipboard Copied! Toggle word wrap Toggle overflow The possible statuses are
GOOD,REVOKED, andUNKNOWN. Parse the response using theopenssltool:openssl ocsp -respin <ocsp_response_file> -resp_text
# openssl ocsp -respin <ocsp_response_file> -resp_textCopy to Clipboard Copied! Toggle word wrap Toggle overflow
Alternatively, run the OCSP from the command line by using a tool such as curl to send the request and openssl to parse the response. For example:
Generate an OCSP request for the certificate whose status is being queried. For example:
openssl ocsp -CAfile ca.pem -issuer issuer.pem -url https://rhcs10.example.com:22443/ocsp/ee/ocsp -serial 16836380 -reqout - | base64 | tr -d '\n' MEIwQDA+MDwwOjAJBgUrDgMCGgUABBT4cyABkyiCIhU4JpmIBewdDnn8ZgQUbyBZ44kgy35o7xW5BMzM8FTvyTwCAQE=
# openssl ocsp -CAfile ca.pem -issuer issuer.pem -url https://rhcs10.example.com:22443/ocsp/ee/ocsp -serial 16836380 -reqout - | base64 | tr -d '\n' MEIwQDA+MDwwOjAJBgUrDgMCGgUABBT4cyABkyiCIhU4JpmIBewdDnn8ZgQUbyBZ44kgy35o7xW5BMzM8FTvyTwCAQE=Copy to Clipboard Copied! Toggle word wrap Toggle overflow Connect to the OCSP Manager using
curlto send the OCSP request.curl --cacert cert.pem https://rhcs10.example.com:22443/ocsp/ee/ocsp/MEIwQDA+MDwwOjAJBgUrDgMCGgUABBT4cyABkyiCIhU4JpmIBewdDnn8ZgQUbyBZ44kgy35o7xW5BMzM8FTvyTwCAQE= > ocspresp.der
# curl --cacert cert.pem https://rhcs10.example.com:22443/ocsp/ee/ocsp/MEIwQDA+MDwwOjAJBgUrDgMCGgUABBT4cyABkyiCIhU4JpmIBewdDnn8ZgQUbyBZ44kgy35o7xW5BMzM8FTvyTwCAQE= > ocspresp.derCopy to Clipboard Copied! Toggle word wrap Toggle overflow Parse the response using the
openssltool:openssl ocsp -respin ocspresp.der -resp_text
# openssl ocsp -respin ocspresp.der -resp_textCopy to Clipboard Copied! Toggle word wrap Toggle overflow
Part III. Part III: Additional Configuration to manage CA services
Chapter 7. Publishing certificates and CRLs
Red Hat Certificate System includes a customizable publishing framework for the Certificate Manager, enabling certificate authorities to publish certificates, certificate revocation lists (CRLs), and other certificate-related objects to any of the supported repositories: an LDAP-compliant directory, a flat file, and an online validation authority. This chapter explains how to configure a Certificate Manager to publish certificates and CRLs to a file, to a directory, and to the Online Certificate Status Manager.
Features in this section on TMS are not tested in the evaluation. This section is for reference only.
The general process to configure publishing is as follows:
Configure publishing to a file, LDAP directory, or OCSP responder.
There can be a single publisher or multiple publishers, depending on how many locations will be used. The locations can be split by certificates and CRLs or narrower definitions, such as certificate type. Rules determine which type to publish and to what location by being associated with the publisher.
Set rules to determine what certificates are published to the locations. Any rule which a certificate or CRL matches is activated, so the same certificate can be published to a file and to an LDAP directory by matching a file-based rule and matching a directory-based rule.
Rules can be set for each object type: CA certificates, CRLs, user certificates, and cross-pair certificates. Disable all rules that will not be used.
- Configure CRLs. CRLs must be configured before they can be published. See Chapter 6, Revoking certificates and issuing CRLs.
- Enable publishing after setting up publishers, mappers, and rules. Once publishing is enabled, the server starts publishing immediately. If the publishers, mappers, and rules are not completely configured, publishing may not work correctly or at all.
7.1. About publishing
The Certificate System is capable of publishing certificates to a file or an LDAP directory and of publishing CRLs to a file, an LDAP directory, or to an OCSP responder.
For additional flexibility, specific types of certificates or CRLs can be published to a single format or all three. For example, CA certificates can be published only to a directory and not to a file, and user certificates can be published to both a file and a directory.
An OCSP responder only provides information about CRLs; certificates are not published to an OCSP responder.
Different publishing locations can be set for certificates files and CRL files, as well as different publishing locations for different types of certificates files or different types of CRL files.
Similarly, different types of certificates and different types of CRLs can be published to different places in a directory. For example, certificates for users from the West Coast division of a company can be published in one branch of the directory, while certificates for users in the East Coast division can be published to another branch in the directory.
When publishing is enabled, every time a certificate or a CRL is issued, updated, or revoked, the publishing system is invoked. The certificate or CRL is evaluated by the rules to see if it matches the type and predicate set in the rule. The type specifies if the object is a CRL, CA certificate, or any other certificate. The predicate sets more criteria for the type of object being evaluated. For example, it can specify user certificates, or it can specify West Coast user certificates. To use predicates, a value needs to be entered in the predicate field of the publishing rule, and a corresponding value (although formatted somewhat differently) needs to be contained in the certificate or certificate request to match. The value in the certificate or certificate request may be derived from information in the certificate, such as the type of certificate, or may be derived from a hidden value that is placed in the request form. If no predicate is set, all certificates of that type are considered to match. For example, all CRLs match the rule if CRL is set as the type.
Every rule that is matched publishes the certificate or CRL according to the method and location specified in that rule. A given certificate or CRL can match no rules, one rule, more than one rule, or all rules. The publishing system attempts to match every certificate and CRL issued against all rules.
When a rule is matched, the certificate or CRL is published according to the method and location specified in the publisher associated with that rule. For example, if a rule matches all certificates issued to users, and the rule has a publisher that publishes to a file in the location /etc/CS/certificates, the certificate is published as a file to that location. If another rule matches all certificates issued to users, and the rule has a publisher that publishes to the LDAP attribute userCertificate;binary attribute, the certificate is published to the directory specified when LDAP publishing was enabled in this attribute in the user’s entry.
For rules that specify to publish to a file, a new file is created when either a certificate or a CRL is issued in the stipulated directory.
For rules that specify to publish to an LDAP directory, the certificate or CRL is published to the entry specified in the directory, in the attribute specified. The CA overwrites the values for any published certificate or CRL attribute with any subsequent certificate or CRL. Simply put, any existing certificate or CRL that is already published is replaced by the next certificate or CRL.
For rules that specify to publish to an Online Certificate Status Manager, a CRL is published to this manager. Certificates are not published to an Online Certificate Status Manager.
For LDAP publishing, the location of the user’s entry needs to be determined. Mappers are used to determine the entry to which to publish. The mappers can contain an exact DN for the entry, some variable that associates information that can be gotten from the certificate to create the DN, or enough information to search the directory for a unique attribute or set of attributes in the entry to ascertain the correct DN for the entry.
When a certificate is revoked, the server uses the publishing rules to locate and delete the corresponding certificate from the LDAP directory or from the filesystem.
When a certificate expires, the server can remove that certificate from the configured directory. The server does not do this automatically; the server must be configured to run the appropriate job.
Setting up publishing involves configuring publishers, mappers, and rules.
7.1.1. Publishers
Publishers specify the location to which certificates and CRLs are published. When publishing to a file, publishers specify the filesystem publishing directory. When publishing to an LDAP directory, publishers specify the attribute in the directory that stores the certificate or CRL; a mapper is used to determine the DN of the entry. For every DN, a different formula is set for deriving that DN. The location of the LDAP directory is specified when LDAP publishing is enabled. When publishing a CRL to an OCSP responder, publishers specify the hostname and URI of the Online Certificate Status Manager.
7.1.2. Mappers
Mappers are only used in LDAP publishing. Mappers construct the DN for an entry based on information from the certificate or the certificate request. The server has information from the subject name of the certificate and the certificate request and needs to know how to use this information to create a DN for that entry. The mapper provides a formula for converting the information available either to a DN or to some unique information that can be searched in the directory to obtain a DN for the entry.
7.1.3. Rules
Rules for file, LDAP, and OCSP publishing tell the server whether and how a certificate or CRL is to be published. A rule first defines what is to be published, a certificate or CRL matching certain characteristics, by setting a type and predicate for the rule. A rule then specifies the publishing method and location by being associated with a publisher and, for LDAP publishing, with a mapper.
Rules can be as simple or complex as necessary for the PKI deployment and are flexible enough to accommodate different scenarios.
7.1.4. Publishing to Files
The server can publish certificates and CRLs to flat files, which can then be imported into any repository, such as a relational database. When the server is configured to publish certificates and CRLs to file, the published files are DER-encoded binary blobs, base-64 encoded text blobs, or both.
-
For each certificate the server issues, it creates a file that contains the certificate in either DER-encoded or base-64 encoded format. Each file is named either
cert-serial_number.derorcert-serial_number.b64. The serial_number is the serial number of the certificate contained in the file. For example, the filename for a DER-encoded certificate with the serial number1234iscert-1234.der. -
Every time the server generates a CRL, it creates a file that contains the new CRL in either DER-encoded or base-64 encoded format. Each file is named either
issuing_point_name-this_update.derorissuing_point_name-this_update.b64, depending on the format. The issuing_point_name identifies the CRL issuing point which published the CRL, and this_update specifies the value derived from the time-dependent update value for the CRL contained in the file. For example, the filename for a DER-encoded CRL with the valueThis Update: Friday January 28 15:36:00 PST 2023, isMasterCRL-20230128-153600.der.
7.1.5. OCSP Publishing
There are two forms of Certificate System OCSP services, an internal service for the Certificate Manager and the Online Certificate Status Manager. The internal service checks the internal database of the Certificate Manager to report on the status of a certificate. The internal service is not set for publishing; it uses the certificates stored in its internal database to determine the status of a certificate. The Online Certificate Status Manager checks CRLs sent to it by Certificate Manager. A publisher is set for each location a CRL is sent and one rule for each type of CRL sent.
For detailed information on both OCSP services, see Section 6.6, “Using the Online Certificate Status Protocol (OCSP) responder”.
7.1.6. LDAP Publishing
In LDAP publishing, the server publishes the certificates, CRLs, and other certificate-related objects to a directory using LDAP or LDAPS. The branch of the directory to which it publishes is called the publishing directory.
- For each certificate the server issues, it creates a blob that contains the certificate in its DER-encoded format in the specified attribute of the user’s entry. The certificate is published as a DER encoded binary blob.
- Every time the server generates a CRL, it creates a blob that contains the new CRL in its DER-encoded format in the specified attribute of the entry for the CA.
The server can publish certificates and CRLs to an LDAP-compliant directory using the LDAP protocol or LDAP over SSL (LDAPS) protocol, and applications can retrieve the certificates and CRLs over HTTP. Support for retrieving certificates and CRLs over HTTP enables some browsers to import the latest CRL automatically from the directory that receives regular updates from the server. The browser can then use the CRL to check all certificates automatically to ensure that they have not been revoked.
For LDAP publishing to work, the user entry must be present in the LDAP directory.
If the server and publishing directory become out of sync for some reason, privileged users (administrators and agents) can also manually initiate the publishing process. For instructions, see Section 7.11.2, “Manually updating the crl in the directory”.
7.2. Configuring publishing to a file
The general process to configure publishing involves setting up a publisher to publish the certificates or CRLs to the specific location. There can be a single publisher or multiple publishers, depending on how many locations will be used. The locations can be split by certificates and CRLs or finer definitions, such as certificate type. Rules determine which type to publish and to what location by being associated with the publisher.
Publishing to file simply publishes the CRLs or certificates to text files on a given host.
Publishers must be created and configured for each publishing location; publishers are not automatically created for publishing to a file. To publish all files to a single location, create one publisher. To publish to different locations, create a publisher for each location. A location can either contain an object type, like user certificates, or a subset of an object type, like West Coast user certificates.
To create publishers for publishing to files:
Get the URL and port that apply to your instance:
pki-server status <CA Instance name>
# pki-server status <CA Instance name>Copy to Clipboard Copied! Toggle word wrap Toggle overflow Log into the Certificate Manager Console. For example:
pkiconsole -d <location of CA Admin Cert nssdb> https://server.example.com:_<CA Console Port>_/ca
# pkiconsole -d <location of CA Admin Cert nssdb> https://server.example.com:_<CA Console Port>_/caCopy to Clipboard Copied! Toggle word wrap Toggle overflow NoteFor more information on using
pkiconsole, runpkiconsole --help.pkiconsoleis being deprecated and will be replaced by a new browser-based UI in a future major release. Althoughpkiconsolewill continue to be available until the replacement UI is released, we encourage using the command line equivalent ofpkiconsoleat this time, as the pki CLI will continue to be supported and improved upon even when the new browser-based UI becomes available in the future.In the Configuration tab, select Certificate Manager from the navigation tree on the left. Select Publishing, and then Publishers.
The Publishers Management tab, which lists configured publisher instances, opens on the right.
Click to open the Select Publisher Plug-in Implementation window, which lists registered publisher modules.
Select the
FileBasedPublishermodule, then open the editor window.This is the module that enables the Certificate Manager to publish certificates and CRLs to files.
Configure the information for publishing the certificate:
-
The publisher ID, an alphanumeric string with no spaces like
PublishCertsToFile -
The path to the directory in which the Certificate Manager should publish the files. The path can be an absolute path or can be relative to the Certificate System instance directory. For example,
/export/CS/certificates. - The file type to publish, by selecting the checkboxes for DER-encoded files, base-64 encoded files, or both.
- For CRLs, the format of the timestamp. Published certificates include serial numbers in their file names, while CRLs use timestamps.
- For CRLs, whether to generate a link in the file to go to the latest CRL. If enabled, the link assumes that the name of the CRL issuing point to use with the extension will be supplied in the crlLinkExt field.
- For CRLs, whether to compress (zip) CRLs and the compression level to use.
-
The publisher ID, an alphanumeric string with no spaces like
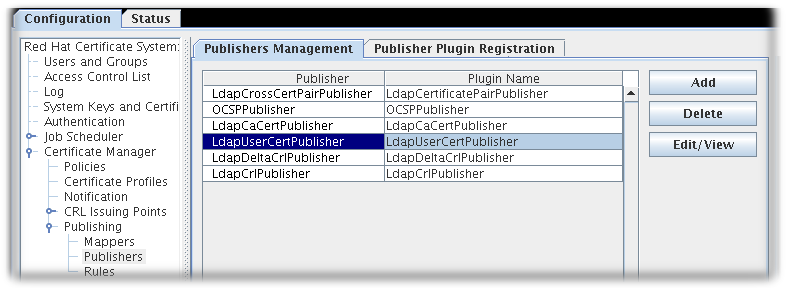
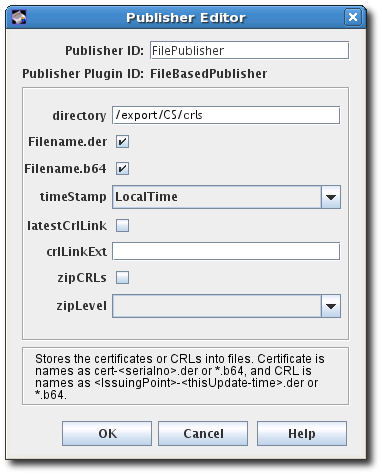
After configuring the publisher, configure the rules for the published certificates and CRLs, as described in Section 7.5, “Creating rules”.
7.3. Configuring publishing to an OCSP
The general process to configure publishing involves setting up a publisher to publish the certificates or CRLs to the specific location. There can be a single publisher or multiple publishers, depending on how many locations will be used. The locations can be split by certificates and CRLs or finer definitions, such as certificate type. Rules determine which type to publish and to what location by being associated with the publisher.
Publishing to an OCSP Manager is a way to publish CRLs to a specific location for client verification.
A publisher must be created and configured for each publishing location; publishers are not automatically created for publishing to the OCSP responder. Create a single publisher to publish everything to s single location, or create a publisher for every location to which CRLs will be published. Each location can contain a different kind of CRL.
direct CA→OCSP CRL publishing is set up automatically when an OCSP instance is created. If you have set up an OCSP instance, it is likely you do not need any further action.
Log into the Certificate Manager Console.
pkiconsole -d nssdb -n 'optional client cert nickname' https://server.example.com:8443/ca
# pkiconsole -d nssdb -n 'optional client cert nickname' https://server.example.com:8443/caCopy to Clipboard Copied! Toggle word wrap Toggle overflow Notepkiconsoleis being deprecated and will be replaced by a new browser-based UI in a future major release. Althoughpkiconsolewill continue to be available until the replacement UI is released, we encourage using the command line equivalent ofpkiconsoleat this time, as the pki CLI will continue to be supported and improved upon even when the new browser-based UI becomes available in the future.In the Configuration tab, select Certificate Manager from the navigation tree on the left. Select Publishing, and then Publishers.
Click to open the Select Publisher Plug-in Implementation window, which lists registered publisher modules.
Select the
OCSPPublishermodule, then open the editor window. This is the publisher module that enables the Certificate Manager to publish CRLs to the Online Certificate Status Manager.-
The publisher ID must be an alphanumeric string with no spaces, like
PublishCertsToOCSP. -
The host can be the fully-qualified domain name, such as
ocspResponder.example.com, or an IPv4 or IPv6 address. The value of the port is the port number on which the OCSP server is running. -
The default path is the directory to send the CRL to, like
/ocsp/agent/ocsp/addCRL. - If client authentication is used (enableClientAuth is checked), then the nickname field gives the nickname of the certificate to use for authentication. This certificate must already exist in the OCSP security database; this will usually be the CA subsystem certificate.
-
The publisher ID must be an alphanumeric string with no spaces, like
Create a user entry for the CA on the OCSP Manager. The user is used to authenticate to the OCSP when sending a new CRL. There are two things required:
-
Name the OCSP user entry after the CA server, like
CA-hostname-EEport. - Use whatever certificate was specified in the publisher configuration as the user certificate in the OCSP user account. This is usually the CA’s subsystem certificate.
Setting up subsystem users is covered in Section 11.3.2.1, “Creating role users”.
-
Name the OCSP user entry after the CA server, like
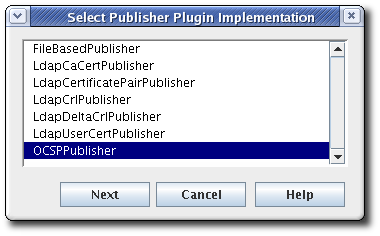
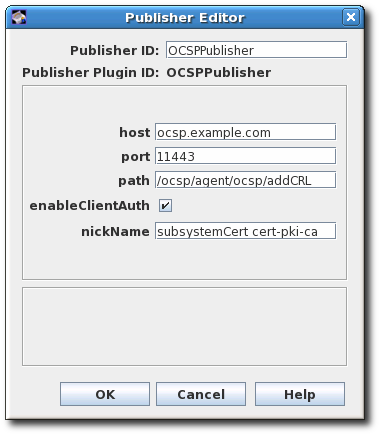
After configuring the publisher, configure the rules for the published certificates and CRLs, as described in Section 7.5, “Creating rules”.
7.4. Configuring publishing to an LDAP directory
The general process to configure publishing involves setting up a publisher to publish the certificates or CRLs to the specific location. There can be a single publisher or multiple publishers, depending on how many locations will be used. The locations can be split by certificates and CRLs or finer definitions, such as certificate type. Rules determine which type to publish and to what location by being associated with the publisher.
Configuring LDAP publishing is similar to other publishing procedures, with additional steps to configure the directory:
- Configure the Directory Server to which certificates will be published. Certain attributes have to be added to entries and bind identities and authentication methods have to be configured.
- Configure a publisher for each type of object published: CA certificates, cross-pair certificates, CRLs, and user certificates. The publisher declares in which attribute to store the object. The attributes set by default are the X.500 standard attributes for storing each object type. This attribute can be changed in the publisher, but generally, it is not necessary to change the LDAP publishers.
Set up mappers to enable an entry’s DN to be derived from the certificate’s subject name. This generally does not need set for CA certificates, CRLs, and user certificates. There can be more than one mapper set for a type of certificate. This can be useful, for example, to publish certificates for two sets of users from different divisions of a company who are located in different parts of the directory tree. A mapper is created for each of the groups to specify a different branch of the tree.
For details about setting up mappers, see Section 7.4.3, “Creating mappers”.
- Create rules to connect publishers to mappers, as described in Section 7.5, “Creating rules”.
- Enable publishing, as described in Section 7.6, “Enabling publishing”.
CRL publishing by way of CA→LDAP and then OCSP←LDAP is the Common-Criteria -evaluated method for CRL publishing. Please see 7.4.7 "Configuration for CRL publishing" in the Planning, Installation and Deployment Guide (Common Criteria Edition) for an example setup.
7.4.1. Configuring the LDAP directory
Before certificates and CRLs can be published, the Directory Server must be configured to work with the publishing system. This means that user entries must have attributes that allow them to receive certificate information, and entries must be created to represent the CRLs.
Set up the entry for the CA. For the Certificate Manager to publish its CA certificate and CRL, the directory must include an entry for the CA.
TIPWhen LDAP publishing is configured, the Certificate Manager automatically creates or converts an entry for the CA in the directory. This option is set in both the CA and CRL mapper instances and enabled by default. If the directory restricts the Certificate Manager from creating entries in the directory, turn off this option in those mapper instances, and add an entry for the CA manually in the directory.
When adding the CA’s entry to the directory, select the entry type based on the DN of the CA:
-
If the CA’s DN begins with the
cncomponent, create a newpersonentry for the CA. Selecting a different type of entry may not allow thecncomponent to be specified. If the CA’s DN begins with the
oucomponent, create a neworganizationalunitentry for the CA.The entry does not have to be in the
pkiCAorcertificationAuthorityobject class. The Certificate Manager will convert this entry to thepkiCAorcertificationAuthorityobject class automatically by publishing its CA’s signing certificate.NOTEThe
pkiCAobject class is defined in RFC 4523, while thecertificationAuthorityobject class is defined in the (obsolete) RFC 2256. Either object class is acceptable, depending on the schema definitions used by the Directory Server. In some situations, both object classes can be used for the same CA entry.
For more information on creating directory entries, see the Red Hat Directory Server documentation.
-
If the CA’s DN begins with the
Add the correct schema elements to the CA and user directory entries.
For a Certificate Manager to publish certificates and CRLs to a directory, it must be configured with specific attributes and object classes.
Expand Object Type Schema Reason End-entity certificate
userCertificate;binary (attribute)
This is the attribute to which the Certificate Manager publishes the certificate.
This is a multi-valued attribute, and each value is a DER-encoded binary X.509 certificate. The LDAP object class named
inetOrgPersonallows this attribute. ThestrongAuthenticationUserobject class allows this attribute and can be combined with any other object class to allow certificates to be published to directory entries with other object classes. The Certificate Manager does not automatically add this object class to the schema table of the corresponding Directory Server.If the directory object that it finds does not allow the
userCertificate;binaryattribute, adding or removing the certificate fails.CA certificate
caCertificate;binary (attribute)
This is the attribute to which the Certificate Manager publishes the certificate.
The Certificate Manager publishes its own CA certificate to its own LDAP directory entry when the server starts. The entry corresponds to the Certificate Manager’s issuer name.
This is a required attribute of the
pkiCAorcertificationAuthorityobject class. The Certificate Manager adds this object class to the directory entry for the CA if it can find the CA’s directory entry.CRL
certificateRevocationList;binary (attribute)
This is the attribute to which the Certificate Manager publishes the CRL.
The Certificate Manager publishes the CRL to its own LDAP directory entry. The entry corresponds to the Certificate Manager’s issuer name.
This is an attribute of the
pkiCAorcertificationAuthorityobject class. The value of the attribute is the DER-encoded binary X.509 CRL. The CA’s entry must already contain thepkiCAorcertificationAuthorityobject class for the CRL to be published to the entry.Delta CRL
deltaRevocationList;binary (attribute)
This is the attribute to which the Certificate Manager publishes the delta CRL. The Certificate Manager publishes the delta CRL to its own LDAP directory entry, separate from the full CRL. The delta CRL entry corresponds to the Certificate Manager’s issuer name.
This attribute belongs to the
deltaCRLorcertificationAuthority-V2object class. The value of the attribute is the DER-encoded binary X.509 delta CRL.Set up a bind DN for the Certificate Manager to use to access the Directory Server.
The Certificate Manager user must have read-write permissions to the directory to publish certificates and CRLs to the directory so that the Certificate Manager can modify the user entries with certificate-related information and the CA entry with CA’s certificate and CRL related information.
The bind DN entry can be either of the following:
- An existing DN that has write access, such as the Directory Manager.
A new user which is granted write access. The entry can be identified by the Certificate Manager’s DN, such as
cn=testCA, ou=Research Dept, o=Example Corporation, st=California, c=US.NOTECarefully consider what privileges are given to this user. This user can be restricted in what it can write to the directory by creating ACLs for the account. For instructions on giving write access to the Certificate Manager’s entry, see the Directory Server documentation.
Set the directory authentication method for how the Certificate Manager authenticates to Directory Server. There are three options: basic authentication (simple username and password); SSL without client authentication (simple username and password); and SSL with client authentication (certificate-based).
See the Red Hat Directory Server documentation for instructions on setting up these methods of communication with the server.
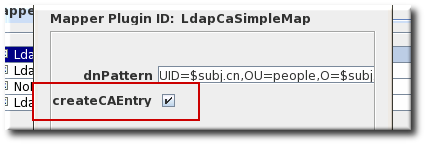
7.4.2. Configuring LDAP publishers
The Certificate Manager creates, configures, and enables a set of publishers that are associated with LDAP publishing. The default publishers (for CA certificates, user certificates, CRLs, and cross-pair certificates) already conform to the X.500 standard attributes for storing certificates and CRLs and do not need to be changed.
| Publisher | Description |
|---|---|
| LdapCaCertPublisher | Publishes CA certificates to the LDAP directory. |
| LdapCrlPublisher | Publishes CRLs to the LDAP directory. |
| LdapDeltaCrlPublisher | Publishes delta CRLs to the LDAP directory. |
| LdapUserCertPublisher | Publishes all types of end-entity certificates to the LDAP directory. |
| LdapCrossCertPairPublisher | Publishes cross-signed certificates to the LDAP directory. |
7.4.3. Creating mappers
Mappers are only used with LDAP publishing. Mappers define a relationship between a certificate’s subject name and the DN of the directory entry to which the certificate is published. The Certificate Manager needs to derive the DN of the entry from the certificate or the certificate request so it can determine which entry to use. The mapper defines the relationship between the DN for the user entry and the subject name of the certificate or other input information so that the exact DN of the entry can be determined and found in the directory.
When it is configured, the Certificate Manager automatically creates a set of mappers defining the most common relationships. The default mappers are listed in Table 7.2, “Default mappers”.
| Mapper | Description |
|---|---|
| LdapUserCertMap | Locates the correct attribute of user entries in the directory in order to publish user certificates. |
| LdapCrlMap | Locates the correct attribute of the CA’s entry in the directory in order to publish the CRL. |
| LdapCaCertMap | Locates the correct attribute of the CA’s entry in the directory in order to publish the CA certificate. |
To use the default mappers, configure each of the macros by specifying the DN pattern and whether to create the CA entry in the directory. To use other mappers, create and configure an instance of the mapper. For more information, see Section C.2, “Mapper plugin modules”.
Log into the Certificate Manager Console.
pkiconsole -d nssdb -n 'optional client cert nickname' https://server.example.com:8443/ca
# pkiconsole -d nssdb -n 'optional client cert nickname' https://server.example.com:8443/caCopy to Clipboard Copied! Toggle word wrap Toggle overflow Notepkiconsoleis being deprecated and will be replaced by a new browser-based UI in a future major release. Althoughpkiconsolewill continue to be available until the replacement UI is released, we encourage using the command line equivalent ofpkiconsoleat this time, as the pki CLI will continue to be supported and improved upon even when the new browser-based UI becomes available in the future.In the Configuration tab, select Certificate Manager from the navigation tree on the left. Select Publishing, and then Mappers.
The Mappers Management tab, which lists configured mappers, opens on the right.
To create a new mapper instance, click . The Select Mapper Plugin Implementation window opens, which lists registered mapper modules. Select a module, and edit it. For complete information about these modules, see Section C.2, “Mapper plugin modules”.
Edit the mapper instance, and click .
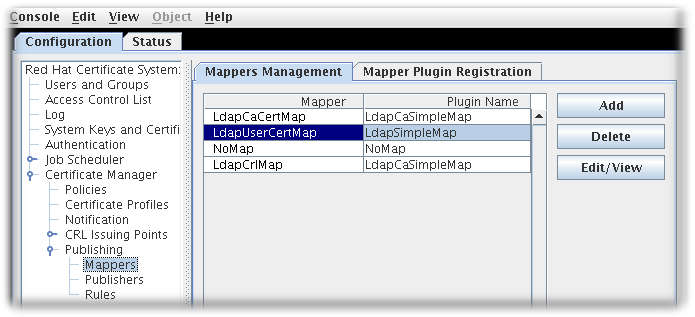
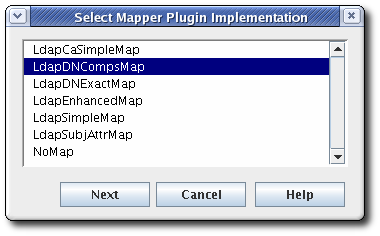

See Section C.2, “Mapper plugin modules” for detailed information about each mapper.
7.4.4. Completing configuration: rules and enabling
After configuring the mappers for LDAP publishing, configure the rules for the published certificates and CRLs, as described in Section 7.5, “Creating rules”.
Once the configuration is complete, enable publishing, as described in Section 7.6, “Enabling publishing”.
7.5. Creating rules
Rules determine what certificate object is published in what location. Rules work independently, not in tandem. A certificate or CRL that is being published is matched against every rule. Any rule which it matches is activated. In this way, the same certificate or CRL can be published to a file, to an Online Certificate Status Manager, and to an LDAP directory by matching a file-based rule, an OCSP rule, and matching a directory-based rule.
Rules can be set for each object type: CA certificates, CRLs, user certificates, and cross-pair certificates. The rules can be more detailed for different kinds of certificates or different kinds of CRLs.
The rule first determines if the object matches by matching the type and predicate set up in the rule with the object. Where matching objects are published is determined by the publisher and mapper associated with the rule.
Rules are created for each type of certificate the Certificate Manager issues.
Modify publishing rules by doing the following:
Log into the Certificate Manager Console.
pkiconsole -d nssdb -n 'optional client cert nickname' https://server.example.com:8443/ca
# pkiconsole -d nssdb -n 'optional client cert nickname' https://server.example.com:8443/caCopy to Clipboard Copied! Toggle word wrap Toggle overflow Notepkiconsoleis being deprecated and will be replaced by a new browser-based UI in a future major release. Althoughpkiconsolewill continue to be available until the replacement UI is released, we encourage using the command line equivalent ofpkiconsoleat this time, as the pki CLI will continue to be supported and improved upon even when the new browser-based UI becomes available in the future.In the Configuration tab, select Certificate Manager from the navigation tree on the left. Select Publishing, and then Rules.
The Rules Management tab, which lists configured rules, opens on the right.
To edit an existing rule, select that rule from the list, and click . This opens the Rule Editor window.
To create a rule, click . This opens the Select Rule Plug-in Implementation window.
Select the
Rulemodule. This is the only default module. If any custom modules have been been registered, they are also available.Edit the rule.
-
type. This is the type of certificate for which the rule applies. For a CA signing certificate, the value is
cacert. For a cross-signed certificate, the value isxcert. For all other types of certificates, the value iscerts. For CRLs, specifycrl. - predicate. This sets the predicate value for the type of certificate or CRL issuing point to which this rule applies. The predicate values for CRL issuing points, delta CRLs, and certificates are listed in Table 7.3, “Predicate expressions”.
- enable.
- mapper. Mappers are not necessary when publishing to a file; they are only needed for LDAP publishing. If this rule is associated with a publisher that publishes to an LDAP directory, select an appropriate mapper here. Leave blank for all other forms of publishing.
- publisher. Sets the publisher to associate with the rule.
-
type. This is the type of certificate for which the rule applies. For a CA signing certificate, the value is
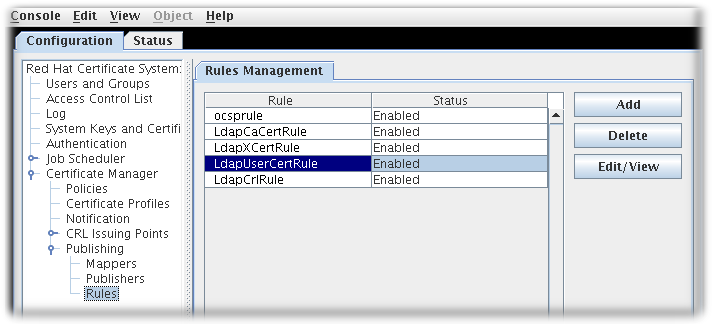
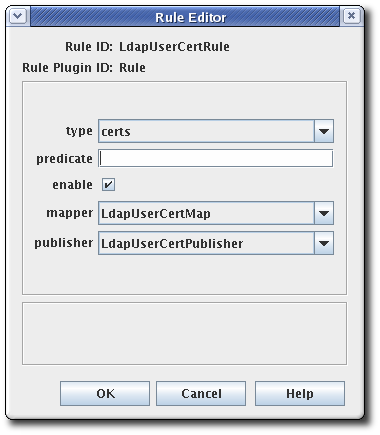
The following table lists the predicates that can be used to identify CRL issuing points and delta CRLs and certificate profiles.
| Predicate Type | Predicate |
|---|---|
| CRL Issuing Point |
To publish only the master CRL, set |
| Certificate Profile |
To publish certificates based on the profile used to issue them, set |
7.6. Enabling publishing
Publishing can be enabled for only files, only LDAP, or both. Publishing should be enabled after setting up publishers, rules, and mappers. Once enabled, the server attempts to begin publishing. If publishing was not configured correctly before being enabled, publishing may exhibit undesirable behavior or may fail.
Configure CRLs. CRLs must be configured before they can be published. See Chapter 6, Revoking certificates and issuing CRLs.
Log into the Certificate Manager Console.
pkiconsole -d nssdb -n 'optional client cert nickname' https://server.example.com:8443/ca
# pkiconsole -d nssdb -n 'optional client cert nickname' https://server.example.com:8443/caCopy to Clipboard Copied! Toggle word wrap Toggle overflow Notepkiconsoleis being deprecated and will be replaced by a new browser-based UI in a future major release. Althoughpkiconsolewill continue to be available until the replacement UI is released, we encourage using the command line equivalent ofpkiconsoleat this time, as the pki CLI will continue to be supported and improved upon even when the new browser-based UI becomes available in the future.In the Configuration tab, select Certificate Manager from the navigation tree on the left. Select Publishing.
The right pane shows the details for publishing to an LDAP-compliant directory.
-
To enable publishing to a file only, select Enable Publishing (This corresponds to the
ca.publish.enableparameter inCS.cfg). To enable LDAP publishing, select both Enable Publishing and Enable Default LDAP Connection (This corresponds to
ca.publish.ldappublish.enableinCS.cfg).In the Destination section, set the information for the Directory Server instance.
Host name. If the Directory Server is configured for SSL client authenticated communication, the name must match the
cncomponent in the subject DN of the Directory Server’s SSL server certificate.The hostname can be the fully-qualified domain name or an IPv4 or IPv6 address.
- Port number. Directory Server Publishing Port
- Directory Manager DN. This is the distinguished name (DN) of the directory entry that has Directory Manager privileges. The Certificate Manager uses this DN to access the directory tree and to publish to the directory. The access control set up for this DN determines whether the Certificate Manager can perform publishing. It is possible to create another DN that has limited read-write permissions for only those attributes that the publishing system actually needs to write.
Password. The CA uses this password to bind to the LDAP directory to which the certificate or CRL is published. The Certificate Manager saves this password in its
password.conffile. For example:CA LDAP Publishing:password
CA LDAP Publishing:passwordCopy to Clipboard Copied! Toggle word wrap Toggle overflow NoteThe parameter name that identifies the publishing password (
CA LDAP Publishing) is set in the Certificate Manager’sCS.cfgfile in theca.publish.ldappublish.ldap.ldapauth.bindPWPromptparameter, and it can be edited.- Client certificate. This sets the certificate the Certificate Manager uses for SSL client authentication to the publishing directory. By default, the Certificate Manager uses its SSL server certificate.
- LDAP version. Select LDAP version 3.
Authentication. The way the Certificate Manager authenticates to the Directory Server. The choices are
Basic authenticationandSSL client authentication.If the Directory Server is configured for basic authentication or for SSL communication without client authentication, select
Basic authenticationand specify values for the Directory manager DN and password.If the Directory Server is configured for SSL communication with client authentication, select
SSL client authenticationand theUse SSL communicationoption, and identify the certificate that the Certificate Manager must use for SSL client authentication to the directory.
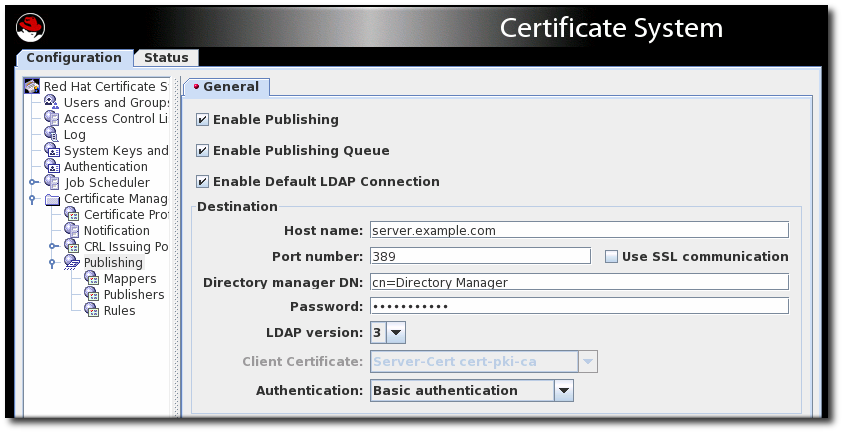
The server attempts to connect to the Directory Server. If the information is incorrect, the server displays an error message.
7.7. Setting up resumable CRL downloads
Certificate System provides an option for interrupted CRL downloads to be resumed smoothly. This is done by publishing the CRLs as a plain file over HTTP. This method of downloading CRLs gives flexibility in retrieving CRLs and lowers overall network congestion.
Retrieving CRLs using curl
Because CRLs can be published as a text file over HTTP, they can be manually retrieved from the CA using a tool such as curl. The curl command can be used to retrieve a published CRL. For example, to retrieve a full CRL that is newer than the previous full CRL:
Download the latest published CRL file, for example:
curl -k -o MasterCRL.bin -s "https://rhcs10.example.com:21443/ca/ee/ca/getCRL?op=getCRL&crlIssuingPoint=MasterCRL"
# curl -k -o MasterCRL.bin -s "https://rhcs10.example.com:21443/ca/ee/ca/getCRL?op=getCRL&crlIssuingPoint=MasterCRL"Copy to Clipboard Copied! Toggle word wrap Toggle overflow Convert the binary file to base-64. For example:
BtoA MasterCRL.bin MasterCRL.b64
# BtoA MasterCRL.bin MasterCRL.b64Copy to Clipboard Copied! Toggle word wrap Toggle overflow Use the
PrettyPrintCrltool to convert the base-64 to pretty-print format. For example:PrettyPrintCrl MasterCRL.b64
# PrettyPrintCrl MasterCRL.b64Copy to Clipboard Copied! Toggle word wrap Toggle overflow
7.8. Publishing cross-pair certificates
The cross-pair certificates can be published as a crossCertificatePair entry to an LDAP directory or to a file; this is enabled by default. If this has been disabled, it can be re-enabled through the Certificate Manager Console by doing the following:
Open the CA console.
pkiconsole -d nssdb -n 'optional client cert nickname' https://server.example.com:8443/ca
# pkiconsole -d nssdb -n 'optional client cert nickname' https://server.example.com:8443/caCopy to Clipboard Copied! Toggle word wrap Toggle overflow Notepkiconsoleis being deprecated and will be replaced by a new browser-based UI in a future major release. Althoughpkiconsolewill continue to be available until the replacement UI is released, we encourage using the command line equivalent ofpkiconsoleat this time, as the pki CLI will continue to be supported and improved upon even when the new browser-based UI becomes available in the future.- In the Configuration tab, select the Certificate Manager link in the left pane, then the Publishing link.
- Click the Rules link under Publishing. This opens the Rules Management pane on the right.
If the rule exists and has been disabled, select the enable checkbox. If the rule has been deleted, then click and create a new rule.
- Select xcerts from the type drop-down menu.
- Make sure the enable checkbox is selected.
- Select LdapCaCertMap from the mapper drop-down menu.
- Select LdapCrossCertPairPublisher from the publisher drop-down menu.
The mapper and publisher specified in the publishing rule are both listed under Mapper and Publisher under the Publishing link in the left navigation window of the CA Console. The mapper, LdapCaCertMap, by default designates that the crossCertificatePair be stored to the LdapCaSimpleMap LDAP entry. The publisher, LDAPCrossPairPublisher, by default sets the attribute to store the cross-pair certificate in the CA entry to crossCertificatePair;binary.
7.9. Testing publishing to files
To verify that the Certificate Manager is publishing certificates and CRLs correctly to file:
- Open the CA’s end-entities page, and request a certificate.
- Approve the request through the agent services page, if required.
- Retrieve the certificate from the end-entities page, and download the certificate into the browser.
Check whether the server generated the DER-encoded file containing the certificate.
Open the directory to which the binary blob of the certificate is supposed to be published. The certificate file should be named
cert-serial_number.der.Convert the DER-encoded certificate to its base 64-encoded format using the Binary to ASCII tool. For more information on this tool, refer to the
BtoA(1)man page.BtoA input_file output_file
# BtoA input_file output_fileCopy to Clipboard Copied! Toggle word wrap Toggle overflow input_file sets the path to the file that contains the DER-encoded certificate, and output_file sets the path to the file to write the base-64 encoded certificate.
Open the ASCII file; the base-64 encoded certificate is similar to the one shown:
Copy to Clipboard Copied! Toggle word wrap Toggle overflow Convert the base 64-encoded certificate to a readable form using the Pretty Print Certificate tool. For more information on this tool, refer to the
PrettyPrintCert(1)man page.PrettyPrintCert input_file [output_file]
# PrettyPrintCert input_file [output_file]Copy to Clipboard Copied! Toggle word wrap Toggle overflow input_file sets the path to the ASCII file that contains the base-64 encoded certificate, and output_file, optionally, sets the path to the file to write the certificate. If an output file is not set, the certificate information is written to the standard output.
Compare the output with the certificate issued; check the serial number in the certificate with the one used in the filename.
If everything matches, the Certificate Manager is configured correctly to publish certificates to file.
- Revoke the certificate.
Check whether the server generated the DER-encoded file containing the CRL.
Open the directory to which the server is to publish the CRL as a binary blob. The CRL file should have a name in the form
crl-this_update.der. this_update specifies the value derived from the time-dependentThis Updatevariable of the CRL.Convert the DER-encoded CRL to its base 64-encoded format using the Binary to ASCII tool.
BtoA input_file output_file
# BtoA input_file output_fileCopy to Clipboard Copied! Toggle word wrap Toggle overflow Convert the base 64-encoded CRL to readable form using the Pretty Print CRL tool.
PrettyPrintCrl input_file [output_file]
# PrettyPrintCrl input_file [output_file]Copy to Clipboard Copied! Toggle word wrap Toggle overflow - Compare the output.
7.10. Viewing certificates and CRLs published to file
Certificates and CRLs can be published to two types of files: base-64 encoded or DER-encoded. The content of these files can be viewed by converting the files to pretty-print format using the dumpasn1 tool or the PrettyPrintCert or PrettyPrintCrl tool.
To view the content in a base-64 encoded file:
Convert the base-64 file to binary. For example:
AtoB /tmp/example.b64 /tmp/example.bin
# AtoB /tmp/example.b64 /tmp/example.binCopy to Clipboard Copied! Toggle word wrap Toggle overflow Use the
PrettyPrintCertorPrettyPrintCrltool to convert the binary file to pretty-print format. For example:PrettyPrintCert example.bin example.cert
# PrettyPrintCert example.bin example.certCopy to Clipboard Copied! Toggle word wrap Toggle overflow
To view the content of a DER-encoded file, simply run the
dumpasn1,PrettyPrintCert, orPrettyPrintCrltool with the DER-encoded file. For example:PrettyPrintCrl example.der example.crl
# PrettyPrintCrl example.der example.crlCopy to Clipboard Copied! Toggle word wrap Toggle overflow
7.11. Updating certificates and CRLs in a directory
The Certificate Manager and the publishing directory can become out of sync if certificates are issued or revoked while the Directory Server is down. Certificates that were issued or revoked need to be published or unpublished manually when the Directory Server comes back up.
To find certificates that are out of sync with the directory - valid certificates that are not in the directory and revoked or expired certificates that are still in the directory - the Certificate Manager keeps a record of whether a certificate in its internal database has been published to the directory. If the Certificate Manager and the publishing directory become out of sync, use the Update Directory option in the Certificate Manager agent services page to synchronize the publishing directory with the internal database.
The following choices are available for synchronizing the directory with the internal database:
- Search the internal database for certificates that are out of sync and publish or unpublish.
- Publish certificates that were issued while the Directory Server was down. Similarly, unpublish certificates that were revoked or that expired while Directory Server was down.
- Publish or unpublish a range of certificates based on serial numbers, from serial number xx to serial number yy.
A Certificate Manager’s publishing directory can be manually updated by a Certificate Manager agent only.
7.11.1. Manually updating certificates in the directory
The Update Directory Server form in the Certificate Manager agent services page can be used to update the directory manually with certificate-related information. This form initiates a combination of the following operations:
- Update the directory with certificates.
Remove expired certificates from the directory.
Removing expired certificates from the publishing directory can be automated by scheduling an automated job.
- Remove revoked certificates from the directory.
Manually update the directory with changes by doing the following:
- Open the Certificate Manager agent services page.
- Select the Update Directory Server link.
Select the appropriate options, and click .
The Certificate Manager starts updating the directory with the certificate information in its internal database. If the changes are substantial, updating the directory can take considerable time. During this period, any changes made through the Certificate Manager, including any certificates issued or any certificates revoked, may not be included in the update. If any certificates are issued or revoked while the directory is updated, update the directory again to reflect those changes.
When the directory update is complete, the Certificate Manager displays a status report. If the process is interrupted, the server logs an error message.
If the Certificate Manager is installed as a root CA, the CA signing certificate may get published using the publishing rule set up for user certificates when using the agent interface to update the directory with valid certificates. This may return an object class violation error or other errors in the mapper. Selecting the appropriate serial number range to exclude the CA signing certificate can avoid this problem. The CA signing certificate is the first certificate a root CA issues.
-
Modify the default publishing rule for user certificates by changing the value of the
predicateparameter toprofileId!=caCACert. -
Use the
LdapCaCertPublisherpublisher plugin module to add another rule, with the predicate parameter set toprofileId=caCACert, for publishing subordinate CA certificates.
7.11.2. Manually updating the crl in the directory
The Certificate Revocation List form in the Certificate Manager agent services page manually updates the directory with CRL-related information.
Manually update the CRL information by doing the following:
- Open the Certificate Manager agent services page.
- Select Update Revocation List.
- Click .
The Certificate Manager starts updating the directory with the CRL in its internal database. If the CRL is large, updating the directory takes considerable time. During this period, any changes made to the CRL may not be included in the update.
When the directory is updated, the Certificate Manager displays a status report. If the process is interrupted, the server logs an error message.
Chapter 8. Authentication for enrolling certificates
This chapter covers how to enroll end entity certificates, how to create and manage server certificates, the authentication methods available in the Certificate System to use when enrolling end entity certificates, and how to set up those authentication methods.
Enrollment is the process of issuing certificates to an end entity. The process is creating and submitting the request, authenticating the user requesting it, and then approving the request and issuing the certificate.
The method used to authenticate the end entity determines the entire enrollment process. There are three ways for the Certificate System to authenticate an entity:
- In agent-approved enrollment, end-entity requests are sent to an agent for approval. The agent approves the certificate request.
- In automatic enrollment, end-entity requests are authenticated using a plugin, and then the certificate request is processed; an agent is not involved in the enrollment process.
- In CMC enrollment, a third party application can create a request that is signed by an agent and then automatically processed.
A Certificate Manager is initially configured for agent-approved enrollment and for CMC authentication. Automated enrollment is enabled by configuring one of the authentication plugin modules. More than one authentication method can be configured in a single instance of a subsystem.
8.1. Configuring agent-approved enrollment
The Certificate Manager is initially configured for agent-approved enrollment. An end entity makes a request which is sent to the agent queue for an agent’s approval. An agent can modify request, change the status of the request, reject the request, or approve the request. Once the request is approved, the signed request is sent to the Certificate Manager for processing. The Certificate Manager processes the request and issues the certificate.
The agent-approved enrollment method is not configurable. If a Certificate Manager is not configured for any other enrollment method, the server automatically sends all certificate-related requests to a queue where they await agent approval. This ensures that all requests that lack authentication credentials are sent to the request queue for agent approval.
To use agent-approved enrollment, leave the authentication method blank in the profile’s
.cfgfile. For example:auth.instance_id=
auth.instance_id=Copy to Clipboard Copied! Toggle word wrap Toggle overflow
8.2. Automated enrollment
In automated enrollment, an end-entity enrollment request is processed as soon as the user successfully authenticates by the method set in the authentication plugin module; no agent approval is necessary. The following authentication plugin modules are provided:
- Directory-based enrollment. End entities are authenticated against an LDAP directory using their user ID and password or their DN and password. See Section 8.2.1, “Setting up directory-based authentication”.
- PIN-based enrollment. End entities are authenticated against an LDAP directory using their user ID, password, and a PIN set in their directory entry. See Section 8.2.2, “Setting up PIN-based enrollment”.
- Certificate-based authentication. Entities of some kind - both end users and other entities, like servers or tokens - are authenticated to the CA using a certificate issued by the CA which proves their identity. This is most commonly used for renewal, where the original certificate is presented to authenticate the renewal process. See Section 8.2.3, “Using Certificate-Based Authentication”.
AgentCertAuth. This method automatically approves a certificate request if the entity submitting the request is authenticated as a subsystem agent. A user authenticates as an agent by presenting an agent certificate. If the presented certificate is recognized by the subsystem as an agent certificate, then the CA automatically processes the certificate request.
This form of automatic authentication can be associated with the certificate profile for enrolling for server certificates.
This plugin is enabled by default and has no parameters.
- Flat file-based enrollment. Used exclusively for router (SCEP) enrollments, a text file is used which contains a list of IP addresses, hostnames, or other identifier and a password, which is usually a random PIN. A router authenticates to the CA using its ID and PIN, and then the CA compares the presented credentials to the list of identities in the text file. See Section 8.2.4, “Configuring Flat File Authentication”.
8.2.1. Setting up directory-based authentication
The UidPwdDirAuth and the UdnPwdDirAuth plugin modules implement directory-based authentication. End users enroll for a certificate by providing their user IDs or DN and password to authenticate to an LDAP directory.
Create an instance of either the
UidPwdDirAuthorUdnPwdDirAuthauthentication plugin module and configure the instance.Open the CA Console.
pkiconsole -d nssdb -n 'optional client cert nickname' https://server.example.com:8443/ca
# pkiconsole -d nssdb -n 'optional client cert nickname' https://server.example.com:8443/caCopy to Clipboard Copied! Toggle word wrap Toggle overflow Notepkiconsoleis being deprecated and will be replaced by a new browser-based UI in a future major release. Althoughpkiconsolewill continue to be available until the replacement UI is released, we encourage using the command line equivalent ofpkiconsoleat this time, as the pki CLI will continue to be supported and improved upon even when the new browser-based UI becomes available in the future.In the Configuration tab, select Authentication in the navigation tree.
The right pane shows the Authentication Instance tab, which lists the currently configured authentication instances.
NOTEThe
UidPwdDirAuthplugin is enabled by default.Click .
The Select Authentication Plug-in Implementation window appears.
-
Select
UidPwdDirAuthfor user ID and password authentication, or selectUdnPwdDirAuthfor DN and password authentication. Fill in the following fields in the Authentication Instance Editor window:
- Authentication Instance ID. Accept the default instance name, or enter a new name.
- dnpattern. Specifies a string representing a subject name pattern to formulate from the directory attributes and entry DN.
- ldapStringAttributes. Specifies the list of LDAP string attributes that should be considered authentic for the end entity. If specified, the values corresponding to these attributes are copied from the authentication directory into the authentication token and used by the certificate profile to generate the subject name. Entering values for this parameter is optional.
ldapByteAttributes. Specifies the list of LDAP byte (binary) attributes that should be considered authentic for the end entity. If specified, the values corresponding to these attributes will be copied from the authentication directory into the authentication token for use by other modules, such as adding additional information to users' certificates.
Entering values for this parameter is optional.
- ldap.ldapconn.host. Specifies the fully-qualified DNS hostname of the authentication directory.
- ldap.ldapconn.port. Specifies the TCP/IP port on which the authentication directory listens to requests; if the ldap.ldapconn.secureConn. checkbox is selected, this should be the SSL port number.
- ldap.ldapconn.secureConn. Specifies the type, SSL or non-SSL, of the port on which the authentication directory listens to requests from the Certificate System. Select if this is an SSL port.
-
ldap.ldapconn.version. Specifies the LDAP protocol version, either
2or3. The default is3, since all Directory Servers later than version 3.x are LDAPv3. -
ldap.basedn. Specifies the base DN for searching the authentication directory. The server uses the value of the
uidfield from the HTTP input (what a user enters in the enrollment form) and the base DN to construct an LDAP search filter. -
ldap.minConns. Specifies the minimum number of connections permitted to the authentication directory. The permissible values are
1to3. -
ldap.maxConns. Specifies the maximum number of connections permitted to the authentication directory. The permissible values are
3to10.
- Click . The authentication instance is set up and enabled.
Set the certificate profiles to use to enroll users by setting policies for specific certificates. Customize the enrollment forms by configuring the inputs in the certificate profiles, and include inputs for the information needed by the plugin to authenticate the user. If the default inputs do not contain all of the information that needs to be collected, submit a request created with a third-party tool.
For information on configuring the profiles, see Section 3.7.2, “Inserting LDAP directory attribute values and other information into the subject alt name”.
Setting up bound LDAP connection
Some environments require disallowing an anonymous bind for the LDAP server that is used for authentication. To create a bound connection between a CA and the LDAP server, you need to make the following configuration changes:
Set up directory-based authentication according to the following example in
CS.cfg:Copy to Clipboard Copied! Toggle word wrap Toggle overflow where bindPWPrompt is the tag or prompt that is used in the
password.conffile; it is also the name used under the cms.passwordlist and authPrefix options.Add the tag or prompt from
CS.cfgwith its password inpassword.conf:externalLDAP=your_password
externalLDAP=your_passwordCopy to Clipboard Copied! Toggle word wrap Toggle overflow
Setting up external authorization
A directory-based authentication plugin can also be configured to evaluate the group membership of the user for authentication. To set up the plugin this way, the following options has to be configured in CS.cfg:
-
groupsEnable is a boolean option that enables retrieval of groups. The default value is
false. - groupsBasedn is the base DN of groups. It needs to be specified when it differs from the default basedn.
-
groups is the DN component for groups. The default value is
ou=groups. -
groupObjectClass is one of the following group object classes:
groupofuniquenames,groupofnames. The default value isgroupofuniquenames. -
groupUseridName is the name of the user ID attribute in the group object member attribute. The default value is
cn. -
useridName is the name of the user ID DN component. The default value is
uid. -
searchGroupUserByUserdn is a boolean option that determines whether to search the group object member attribute for the userdn or
${groupUserIdName}=${uid}attributes. The default value istrue.
For example:
Finally, you have to modify the /instance_path/ca/profiles/ca/profile_id.cfg file to configure the profile to use the UserDirEnrollment auth instance defined in CS.cfg, and if appropriate, provide an ACL for authorization based on groups. For example:
auth.instance_id=UserDirEnrollment authz.acl=group="cn=devlab-access,ou=engineering,dc=example,dc=com"
auth.instance_id=UserDirEnrollment
authz.acl=group="cn=devlab-access,ou=engineering,dc=example,dc=com"8.2.2. Setting up PIN-based enrollment
PIN-based authentication involves setting up PINs for each user in the LDAP directory, distributing those PINs to the users, and then having the users provide the PIN along with their user ID and password when filling out a certificate request. Users are then authenticated both against an LDAP directory using their user ID and password and against the PIN in their LDAP entry. When the user successfully authenticates, the request is automatically processed, and a new certificate is issued.
The Certificate System provides a tool, setpin, that adds the necessary schema for PINs to the Directory Server and generates the PINs for each user.
The PIN tool performs the following functions:
- Adds the necessary schema for PINs to the LDAP directory.
- Adds a PIN manager user who has read-write permissions to the PINs that are set up.
- Sets up ACIs to allow for PIN removal once the PIN has been used, giving read-write permissions for PINs to the PIN manager, and preventing users from creating or changing PINs.
- Creates PINs in each user entry.
Use the PIN tool to add schema needed for PINs, add PINs to the user entries, and then distribute the PINs to users.
-
Open the
/usr/share/pki/native-tools/directory. -
Open the
setpin.conffile in a text editor. Follow the instructions outlined in the file and make the appropriate changes.
Usually, the parameters which need updated are the Directory Server’s host name, Directory Manager’s bind password, and PIN manager’s password.
Run the
setpincommand with itsoptfileoption pointing to thesetpin.conffile.setpin optfile=/usr/share/pki/native-tools/setpin.conf
# setpin optfile=/usr/share/pki/native-tools/setpin.confCopy to Clipboard Copied! Toggle word wrap Toggle overflow The tool modifies the schema with a new attribute (by default,
pin) and a new object class (by default,pinPerson), creates apinmanageruser, and sets the ACI to allow only thepinmanageruser to modify thepinattribute.To generate PINs for specific user entries or to provide user-defined PINs, create an input file with the DNs of those entries listed. For example:
dn:uid=bjensen,ou=people,dc=example,dc=com dn:uid=jsmith,ou=people,dc=example,dc=com dn:jtyler,ou=people,dc=example,dc=com ...
dn:uid=bjensen,ou=people,dc=example,dc=com dn:uid=jsmith,ou=people,dc=example,dc=com dn:jtyler,ou=people,dc=example,dc=com ...Copy to Clipboard Copied! Toggle word wrap Toggle overflow
-
Open the
Disable setup mode for the
setpincommand. Either comment out thesetupline or change the value to no.vim /usr/share/pki/native-tools/setpin.conf setup=no
# vim /usr/share/pki/native-tools/setpin.conf setup=noCopy to Clipboard Copied! Toggle word wrap Toggle overflow Setup mode creates the required uers and object classes, but the tool will not generate PINs while in setup mode.
Run the
setpincommand to create PINs in the directory.TIPTest-run the tool first without the write option to generate a list of PINs without actually changing the directory.
For example:
setpin host=yourhost port=9446 length=11 input=infile output=outfile write "binddn=cn=pinmanager,o=example.com" bindpw="password" basedn=o=example.com "filter=(uid=u)" hash=sha256*
# setpin host=yourhost port=9446 length=11 input=infile output=outfile write "binddn=cn=pinmanager,o=example.com" bindpw="password" basedn=o=example.com "filter=(uid=u)" hash=sha256*Copy to Clipboard Copied! Toggle word wrap Toggle overflow WARNINGDo not set the hash argument to
none. Running thesetpincommand withhash=noneresults in the pin being stored in the user LDAP entry as plain text.Use the output file for delivering PINs to users after completing setting up the required authentication method.
After confirming that the PIN-based enrollment works, deliver the PINs to users so they can use them during enrollment. To protect the privacy of PINs, use a secure, out-of-band delivery method. . Set the policies for specific certificates in the certificate profiles to enroll users. See Chapter 3, Certificate profiles (Making Rules for Issuing Certificates) for information about certificate profile policies. . Create and configure an instance of the
UidPwdPinDirAuthauthentication plugin.Open the CA Console.
pkiconsole -d nssdb -n 'optional client cert nickname' https://server.example.com:8443/ca
# pkiconsole -d nssdb -n 'optional client cert nickname' https://server.example.com:8443/caCopy to Clipboard Copied! Toggle word wrap Toggle overflow Notepkiconsoleis being deprecated and will be replaced by a new browser-based UI in a future major release. Althoughpkiconsolewill continue to be available until the replacement UI is released, we encourage using the command line equivalent ofpkiconsoleat this time, as the pki CLI will continue to be supported and improved upon even when the new browser-based UI becomes available in the future.In the Configuration tab, select Authentication in the navigation tree.
The right pane shows the Authentication Instance tab, which lists the currently configured authentication instances.
Click .
The Select Authentication Plug-in Implementation window appears.
-
Select the
UidPwdPinDirAuthplugin module. Fill in the following fields in the Authentication Instance Editor window:
- Authentication Instance ID. Accept the default instance name or enter a new name.
- removePin. Sets whether to remove PINs from the authentication directory after end users successfully authenticate. Removing PINs from the directory restricts users from enrolling more than once, and thus prevents them from getting more than one certificate.
-
pinAttr. Specifies the authentication directory attribute for PINs. The
PIN Generatorutility sets the attribute to the value of theobjectclassparameter in thesetpin.conffile; the default value for this parameter ispin. - dnpattern. Specifies a string representing a subject name pattern to formulate from the directory attributes and entry DN.
- ldapStringAttributes. Specifies the list of LDAP string attributes that should be considered authentic for the end entity. Entering values for this parameter is optional.
ldapByteAttributes. Specifies the list of LDAP byte (binary) attributes that should be considered authentic for the end entity. If specified, the values corresponding to these attributes will be copied from the authentication directory into the authentication token for use by other modules, such as adding additional information to users' certificates.
Entering values for this parameter is optional.
- ldap.ldapconn.host. Specifies the fully-qualified DNS host name of the authentication directory.
- ldap.ldapconn.port. Specifies the TCP/IP port on which the authentication directory listens to requests from the Certificate System.
- ldap.ldapconn.secureConn. Specifies the type, SSL or non-SSL, of the port on which the authentication directory listens to requests. Select if this is an SSL port.
-
ldap.ldapconn.version. Specifies the LDAP protocol version, either
2or3. By default, this is3, since all Directory Server versions later than 3.x are LDAPv3. - ldap.ldapAuthentication.bindDN. Specifies the user entry as whom to bind when removing PINs from the authentication directory. Specify this parameter only if the removePin checkbox is selected. It is recommended that a separate user entry that has permission to modify only the PIN attribute in the directory be created and used. For example, do not use the Directory Manager’s entry because it has privileges to modify the entire directory content.
-
password. Gives the password associated with the DN specified by the
ldap.ldapauthbindDNparameter. When saving changes, the server stores the password in the single sign-on password cache and uses it for subsequent start ups. This parameter needs set only if the removePin checkbox is selected. -
ldap.ldapAuthentication.clientCertNickname. Specifies the nickname of the certificate to use for SSL client authentication to the authentication directory to remove PINs. Make sure that the certificate is valid and has been signed by a CA that is trusted in the authentication directory’s certificate database and that the authentication directory’s
certmap.conffile has been configured to map the certificate correctly to a DN in the directory. This is needed for PIN removal only. ldap.ldapAuthentication.authtype. Specifies the authentication type, basic authentication or SSL client authentication, required in order to remove PINs from the authentication directory.
- BasicAuth specifies basic authentication. With this option, enter the correct values for ldap.ldapAuthentication.bindDN and password parameters; the server uses the DN from the ldap.ldapAuthentication.bindDN attribute to bind to the directory.
-
SslClientAuth specifies SSL client authentication. With this option, set the value of the ldap.ldapconn.secureConn parameter to
trueand the value of the ldap.ldapAuthentication.clientCertNickname parameter to the nickname of the certificate to use for SSL client authentication.
-
ldap.basedn. Specifies the base DN for searching the authentication directory; the server uses the value of the
uidfield from the HTTP input (what a user enters in the enrollment form) and the base DN to construct an LDAP search filter. -
ldap.minConns. Specifies the minimum number of connections permitted to the authentication directory. The permissible values are
1to3. -
ldap.maxConns. Specifies the maximum number of connections permitted to the authentication directory. The permissible values are
3to10.
Click .
- Customize the enrollment forms by configuring the inputs in the certificate profiles. Include the information that will be needed by the plugin to authenticate the user. If the default inputs do not contain all of the information that needs to be collected, submit a request created with a third-party tool.
8.2.3. Using Certificate-Based Authentication
Certificate-based authentication is when a certificate is presented that verifies the identity of the requester and automatically validates and authenticates the request being submitted. This is most commonly used for renewal processes, when the original certificate is presented by the user, server, and application and that certificate is used to authenticate the request.
There are other circumstances when it may be useful to use certificate-based authentication for initially requesting a certificate. For example, tokens may be bulk-loaded with generic certificates which are then used to authenticate the users when they enroll for their user certificates or, alternatively, users can be issued signing certificates which they then use to authenticate their requests for encryption certificates.
The certificate-based authentication module, SSLclientCertAuth, is enabled by default, and this authentication method can be referenced in any custom certificate profile.
8.2.4. Configuring Flat File Authentication
A router certificate is enrolled and authenticated using a randomly-generated PIN. The CA uses the flatFileAuth authentication module to process a text file which contains the router’s authentication credentials.
8.2.4.1. Configuring the flatFileAuth Module
Flat file authentication is already configured for SCEP enrollments, but the location of the flat file and its authentication parameters can be edited.
Open the CA Console.
pkiconsole -d nssdb -n 'optional client cert nickname' https://server.example.com:8443/ca
# pkiconsole -d nssdb -n 'optional client cert nickname' https://server.example.com:8443/caCopy to Clipboard Copied! Toggle word wrap Toggle overflow Notepkiconsoleis being deprecated and will be replaced by a new browser-based UI in a future major release. Althoughpkiconsolewill continue to be available until the replacement UI is released, we encourage using the command line equivalent ofpkiconsoleat this time, as the pki CLI will continue to be supported and improved upon even when the new browser-based UI becomes available in the future.- In the Configuration tab, select Authentication in the navigation tree.
Select the flatFileAuth authentication module.
- Click .
To change the file location and name, reset the fileName field.
To change the authentication name parameter, reset the keyAttributes value to another value submitted in the SCEP enrollment form, like CN. It is also possible to use multiple name parameters by separating them by commas, like
UID,CN. To change the password parameter name, reset theauthAttributesfield.- Save the edits.

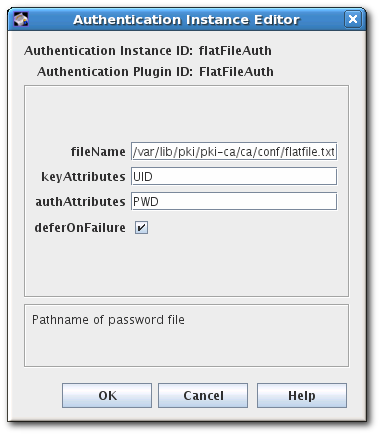
8.2.4.2. Editing flatfile.txt
The same flatfile.txt file is used to authenticate every SCEP enrollment. This file must be manually updated every time a new PIN is issued to a router.
By default, this file is in /var/lib/pki/pki-ca/ca/conf/ and specifies two parameters per authentication entry, the UID of the site (usually its IP address, either IPv4 or IPv6) and the PIN issued by the router.
UID:192.168.123.123 PIN:HU89dj
UID:192.168.123.123
PIN:HU89djEach entry must be followed by a blank line. For example:
If the authentication entries are not separated by an empty line, then when the router attempts to authenticate to the CA, it will fail. For example:
8.3. CMC authentication plugins
CMC enrollment allows an enrollment client to use a CMC Authentication plugin for authentication, by which the certificate request is either pre-signed with an agent certificate or a user certificate, depending on the plugin. The Certificate Manager automatically issues certificates when a CMC request signed with a valid certificate is received.
The CMC authentication plugins also provide CMC revocation for the client. CMC revocation allows the client to have the certificate request either signed by the agent certificate, or a verifiable user that owns the certificate, and then send such a request to the Certificate Manager. The Certificate Manager automatically revokes certificates when a CMC revocation request signed with a valid certificate is received.
Certificate System provides the following CMC authentication plugins:
CMCAuthUse this plugin when a CA agent signs CMC requests.
To use the
CMCAuthplugin, set the following in the enrollment profile:auth.instance_id=CMCAuth
auth.instance_id=CMCAuthCopy to Clipboard Copied! Toggle word wrap Toggle overflow By default, the following enrollment profiles use the
CMCAuthplugin:For system certificates:
-
caCMCauditSigningCert -
caCMCcaCert -
caCMCECserverCert -
caCMCECsubsystemCert -
caCMCECUserCert -
caCMCkraStorageCert -
caCMCkraTransportCert -
caCMCocspCert -
caCMCserverCert -
caCMCsubsystemCert
-
For user certificates:
-
caCMCUserCert -
caECFullCMCUserCert -
caFullCMCUserCert
-
CMCUserSignedAuthUse this plugin when users submit signed or SharedSecret-based CMC requests.
To use the
CMCUserSignedAuthplugin, set the following in the enrollment profile:auth.instance_id=CMCUserSignedAuth
auth.instance_id=CMCUserSignedAuthCopy to Clipboard Copied! Toggle word wrap Toggle overflow A user-signed CMC request must be signed by the user’s certificate which contains the same
subjectDNattribute as the requested certificate. You can only use a user-signed CMC request if the user already obtained a signing certificate which can be used to prove the user’s identity for other certificates.A SharedSecret-based CMC request means that the request was signed by the private key of the request itself. In this case, the CMC request must use the Shared Secret mechanism for authentication. A SharedSecret-based CMC request is typically used to obtain the user’s first signing certificate, which is later used to obtain other certificates. For further details, see Section 8.4, “CMC SharedSecret authentication”.
By default, the following enrollment profiles use the
CMCUserSignedAuthplugin:-
caFullCMCUserSignedCert -
caECFullCMCUserSignedCert -
caFullCMCSharedTokenCert -
caECFullCMCSharedTokenCert
-
8.5. Registering custom authentication plugins
Custom authentication plugin modules can be registered through the CA Console. Authentication plugin modules can also be deleted through the CA Console. Before deleting a module, delete instances that are based on that module.
For writing custom plugins, refer to the Authentication Plug-in Tutorial.
-
Create the custom authentication class. For this example, the custom authentication plugin is called
UidPwdDirAuthenticationTestms.java. Compile the new class.
javac -d . -classpath $CLASSPATH UidPwdDirAuthenticationTestms.java
# javac -d . -classpath $CLASSPATH UidPwdDirAuthenticationTestms.javaCopy to Clipboard Copied! Toggle word wrap Toggle overflow Create a directory in the CA’s
WEB-INFweb directory to hold the custom classes, so that the CA can access them for the enrollment forms.mkdir /usr/share/pki/ca/webapps/ca/WEB-INF/classes
# mkdir /usr/share/pki/ca/webapps/ca/WEB-INF/classesCopy to Clipboard Copied! Toggle word wrap Toggle overflow Copy the new plugin files into the new
classesdirectory, and set the owner to the Certificate System system user (pkiuser).cp -pr com /usr/share/pki/ca/webapps/ca/WEB-INF/classes chown -R pkiuser:pkiuser /usr/share/pki/ca/webapps/ca/WEB-INF/classes
# cp -pr com /usr/share/pki/ca/webapps/ca/WEB-INF/classes # chown -R pkiuser:pkiuser /usr/share/pki/ca/webapps/ca/WEB-INF/classesCopy to Clipboard Copied! Toggle word wrap Toggle overflow Log into the console.
pkiconsole -d nssdb -n 'optional client cert nickname' https://server.example.com:8443/ca
# pkiconsole -d nssdb -n 'optional client cert nickname' https://server.example.com:8443/caCopy to Clipboard Copied! Toggle word wrap Toggle overflow Notepkiconsoleis being deprecated and will be replaced by a new browser-based UI in a future major release. Althoughpkiconsolewill continue to be available until the replacement UI is released, we encourage using the command line equivalent ofpkiconsoleat this time, as the pki CLI will continue to be supported and improved upon even when the new browser-based UI becomes available in the future.Register the plugin.
- In the Configuration tab, click Authentication in the navigation tree.
In the right pane, click the Authentication Plug-in Registration tab.
The tab lists modules that are already registered.
To register a plugin, click .
The Register Authentication Plug-in Implementation window appears.
Specify which module to register by filling in the two fields:
- Plugin name. The name for the module.
-
Class name. The full name of the class for this module. This is the path to the implementing #Java™ class. If this class is part of a package, include the package name. For example, to register a class named
customAuthin a package namedcom.customplugins, the class name iscom.customplugins.customAuth.
After registering the module, add the module as an active authentication instance.
- In the Configuration tab, click Authentication in the navigation tree.
- In the right pane, click the Authentication Instance tab.
- Click .
-
Select the custom module,
UidPwdDirAuthenticationTestms.java, from the list to add the module. Fill in the appropriate configuration for the module.
Create a new end-entity enrollment form to use the new authentication module.
cd /var/lib/pki/pki-tomcat/ca/profiles/ca
# cd /var/lib/pki/pki-tomcat/ca/profiles/caCopy to Clipboard Copied! Toggle word wrap Toggle overflow cp -p caDirUserCert.cfg caDirUserCertTestms.cfg
# cp -p caDirUserCert.cfg caDirUserCertTestms.cfgCopy to Clipboard Copied! Toggle word wrap Toggle overflow Copy to Clipboard Copied! Toggle word wrap Toggle overflow Add the new profile to the CA’s
CS.cfgfile.TIPBack up the
CS.cfgfile before editing it.Copy to Clipboard Copied! Toggle word wrap Toggle overflow Restart the CA.
pki-server restart instance_name
# pki-server restart instance_nameCopy to Clipboard Copied! Toggle word wrap Toggle overflow
8.6. Manually reviewing the certificate status
To review certificate requests, ensure that you are authenticated as an agent with proper permissions to approve certificate requests. For details about configuring the pki command-line interface, see Section 2.5.1.1, “Initializing the pki CLI”.
8.6.1. Manually reviewing the certificate status using the command line
To review the requests using the CLI:
Display the list of pending certificate requests:
pki agent_authentication_parameters ca-cert-request-find --status pending
$ pki agent_authentication_parameters ca-cert-request-find --status pendingCopy to Clipboard Copied! Toggle word wrap Toggle overflow This command lists all pending certificate requests.
Download a particular certificate request:
pki agent_authentication_parameters ca-cert-request-review id --file request.xml
$ pki agent_authentication_parameters ca-cert-request-review id --file request.xmlCopy to Clipboard Copied! Toggle word wrap Toggle overflow -
Open the
request.xmlfile in an editor or a separate terminal, and review the contents of the request to ensure it is legitimate. Then answer the prompt: if the request is valid, answerapproveand press Enter. If the request is invalid, answerrejectand press Enter. Organizations can subscribe semantic differences torejectandcancel; both result in no certificate being issued.
8.6.2. Manually reviewing the certificate status using the web interface
To review the requests using Web UI:
Open the following URL in a web browser:
https://server_host_name:8443/ca/agent/ca
https://server_host_name:8443/ca/agent/caCopy to Clipboard Copied! Toggle word wrap Toggle overflow - Authenticate as an agent. For information about authenticating as a user and configuring your browser, see Section 2.4.1, “Browser initialization”.
- On the sidebar on the left, click the List requests link.
-
Filter the requests by selecting
Show all requestsfor Request type andShow pending requestsfor Request status. Click in the lower right corner.
- The results page lists all pending requests waiting for review. Click on the request number to review a request.
Review the request information and ensure that it is a legitimate request. If necessary, modify the policy information to correct any mistakes or make any desired changes to the certificate, such as changing the not valid after field. Optionally, leave an additional note.
The drop down menu includes several review status updates. Select Approve request to approve the request or Reject request to deny it, and click . Organizations can subscribe semantic differences to Reject request and Cancel Request; both result in no certificate being issued.

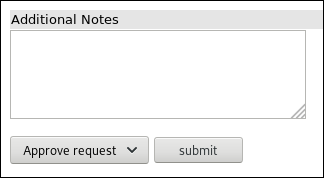
Chapter 9. Authorization for Enrolling Certificates (Access Evaluators)
This chapter describes the authorization mechanism using access evaluators.
For instructions on how to edit certificate enrollment profiles, see Section 3.2, “Setting up certificate profiles”.
9.1. Authorization Mechanism
In addition to the authentication mechanism, each enrollment profile can be configured to have its own authorization mechanism. The authorization mechanism is executed only after a successful authentication.
The authorization mechanism is provided by the Access Evaluator plugin framework. Access evaluators are pluggable classes that are used for evaluating access control instructions (ACI) entries. The mechanism provides an evaluate method that takes a predefined list of arguments (that is, type, op, value), evaluates an expression such as group='Certificate Manager Agents' and returns a boolean depending on the result of evaluation.
9.2. Default Evaluators
Red Hat Certificate System provides four default evaluators. The following entries are listed by default in the CS.cfg file:
accessEvaluator.impl.group.class=com.netscape.cms.evaluators.GroupAccessEvaluator accessEvaluator.impl.ipaddress.class=com.netscape.cms.evaluators.IPAddressAccessEvaluator accessEvaluator.impl.user.class=com.netscape.cms.evaluators.UserAccessEvaluator accessEvaluator.impl.user_origreq.class=com.netscape.cms.evaluators.UserOrigReqAccessEvaluator
accessEvaluator.impl.group.class=com.netscape.cms.evaluators.GroupAccessEvaluator
accessEvaluator.impl.ipaddress.class=com.netscape.cms.evaluators.IPAddressAccessEvaluator
accessEvaluator.impl.user.class=com.netscape.cms.evaluators.UserAccessEvaluator
accessEvaluator.impl.user_origreq.class=com.netscape.cms.evaluators.UserOrigReqAccessEvaluatorThe
groupaccess evaluator evaluates the group membership properties of a user. For example, in the following enrollment profile entry, only the CA agents are allowed to go through enrollment with that profile:authz.acl=group="Certificate Manager Agents"
authz.acl=group="Certificate Manager Agents"Copy to Clipboard Copied! Toggle word wrap Toggle overflow The
ipaddressaccess evaluator evaluates the IP address of the requesting subject. For example, in the following enrollment profile entry, only the host bearing the specified IP address can go through enrollment with that profile:authz.acl=ipaddress="a.b.c.d.e.f"
authz.acl=ipaddress="a.b.c.d.e.f"Copy to Clipboard Copied! Toggle word wrap Toggle overflow The
useraccess evaluator evaluates the user ID for exact match. For example, in the following enrollment profile entry, only the user matching the listed user is allowed to go through enrollment with that profile:authz.acl=user="bob"
authz.acl=user="bob"Copy to Clipboard Copied! Toggle word wrap Toggle overflow The
user_origreqaccess evaluator evaluates the authenticated user against a previous matching request for equality. This special evaluator is designed specifically for renewal purpose to make sure the user requesting the renewal is the same user that owns the original request. For example, in the following renewal enrollment profile entry, the UID of the authenticated user must match the UID of the user requesting the renewal:authz.acl=user_origreq="auth_token.uid"
authz.acl=user_origreq="auth_token.uid"Copy to Clipboard Copied! Toggle word wrap Toggle overflow
New evaluators can be written in the current framework and can be registered through the CS console. The default evaluators can be used as templates to expand and customize into more targeted plugins.
Part IV. Part IV: Managing the subsystem instances
Chapter 10. Self-tests
Red Hat Certificate System has the added functionality to allow self-tests of the server. The self-tests are run at start up and can also be run on demand. The startup self-tests run when the server starts and keep the server from starting if a critical self-test fails. The on-demand self-tests are run by clicking the self-tests button in the subsystem console.
10.1. Running self-tests
You can run the on-demand self-tests using the CLI on all CS subsystems (CA, OCSP, KRA, TKS, and TPS).
The console also provides on-demand self-tests services, however only for the CA, OCSP, KRA, and TKS subsystems - not for the TPS. As the pkiconsole tool is also being deprecated, we encourage using the CLI.
10.1.1. Running self-tests from the console
Log into the Console.
pkiconsole -d nssdb -n 'optional client cert nickname' https://server.example.com:admin_port/subsystem_type
# pkiconsole -d nssdb -n 'optional client cert nickname' https://server.example.com:admin_port/subsystem_typeCopy to Clipboard Copied! Toggle word wrap Toggle overflow Notepkiconsoleis being deprecated and will be replaced by a new browser-based UI in a future major release. Althoughpkiconsolewill continue to be available until the replacement UI is released, we encourage using the command line equivalent ofpkiconsoleat this time, as the pki CLI will continue to be supported and improved upon even when the new browser-based UI becomes available in the future.Select the subsystem name at the top of the left pane.
- Select the Self Tests tab.
Click .
The self-tests that are configured for the subsystem will run. If any critical self-tests fail, the server will stop.
- The On-Demand Self Tests Results window appears, showing the logged events for this run of the self-tests.
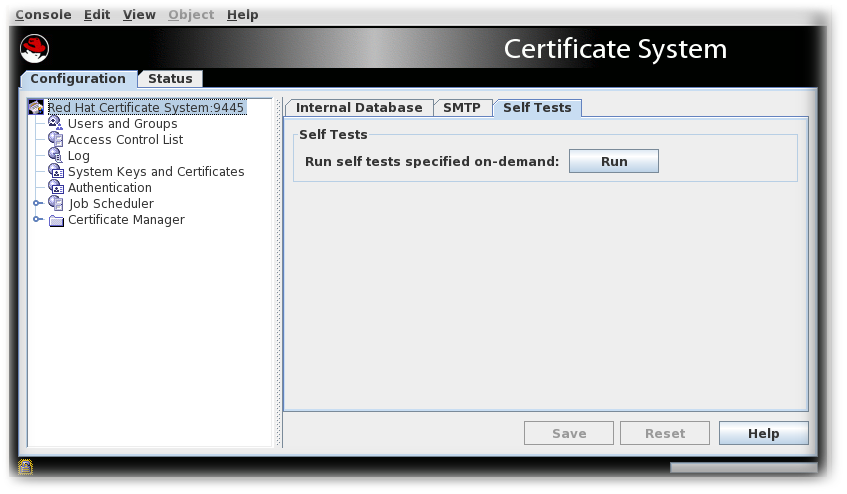
10.1.2. Running self-tests using the CLI
The following command-line interfaces (CLIs) are available for self-tests for all subsystems. Where <subsystem> can be “ca”, “kra”, “ocsp”, “tks”, or “tps”
To view all the self-tests enabled for a subsystem:
pki -d nssdb -n 'cert-nickname' -p subsystem_port <subsystem>-selftest-find
# pki -d nssdb -n 'cert-nickname' -p subsystem_port <subsystem>-selftest-findCopy to Clipboard Copied! Toggle word wrap Toggle overflow For example:
Copy to Clipboard Copied! Toggle word wrap Toggle overflow To run on demand self-tests:
pki -d nssdb -n ‘cert-nickname’ -p subsystem_port <subsystem>-selftest-run
# pki -d nssdb -n ‘cert-nickname’ -p subsystem_port <subsystem>-selftest-runCopy to Clipboard Copied! Toggle word wrap Toggle overflow For example:
Copy to Clipboard Copied! Toggle word wrap Toggle overflow To show the details of a self-test:
pki -d nssdb -n ‘cert-nickname’ -p subsystem_port <subsystem>-selftest-show
# pki -d nssdb -n ‘cert-nickname’ -p subsystem_port <subsystem>-selftest-showCopy to Clipboard Copied! Toggle word wrap Toggle overflow For example:
Copy to Clipboard Copied! Toggle word wrap Toggle overflow
10.2. Debugging self-tests failures
In the event of self-test failure, the Certificate System instance will stop completely and will not respond to any HTTP or HTTPS requests.
To diagnose a manually run self-test failure, refer to the various logs described in Section 10.2.1, “Self-Test logging”. Often other logs are useful as well, including debug logs. For more information on subsystem logs, refer to Chapter 12, Configuring subsystem logs. For more information on debug logs, refer to 2.3.14 Logs section under Chapter 2 Certificate System Architecture Overview in the Planning, Installation and Deployment Guide (Common Criteria Edition).
Common causes of self-test failures are services (such as LDAP) are down or unreachable, certificates are expired, or the system configuration is wrong. A precise cause of self-test failure is given in the logs.
After the cause of the self-test failure is identified and fixed, please restart the Certificate System server to resume normal operations:
systemctl restart pki-tomcatd-nuxwdog@instance_name.service
# systemctl restart pki-tomcatd-nuxwdog@instance_name.service10.2.1. Self-Test logging
A separate log, selftests.log, is added to the log directory that contains reports for both the start up self-tests and the on-demand self-tests. This log is configured by changing the setting for the log in the CS.cfg file. See the Modifying Self-Test Configuration in the Planning, Installation and Deployment Guide (Common Criteria Edition) for details.
Chapter 11. Managing Certificate System Users and Groups
This chapter explains how to set up authorization for access to the administrative, agent services, and end-entities pages.
11.1. About authorization
Authorization is the process of allowing access to certain tasks associated with the Certificate System. Access can be limited to allow certain tasks to certain areas of the subsystem for certain users or groups and different tasks to different users and groups.
The ACLs associated with each group discussed in this section must not be modified.
Users are specific to the subsystem in which they are created. Each subsystem has its own set of users independent of any other subsystem installed. The users are placed in groups, which can be predefined or user-created. Privileges are assigned to a group through access control lists (ACLs). There are ACLs associated with areas in the administrative console, agent services interface, and end-entities page that perform an authorization check before allowing an operation to proceed. Access control instructions (ACIs) in each of the ACLs are created that specifically allow or deny possible operations for that ACL to specified users, groups, or IP addresses.
The ACLs contain a default set of ACIs for the default groups that are created. These ACIs can be modified to change the privileges of predefined groups or to assign privileges to newly-created groups.
Authorization goes through the following process:
- The users authenticate to the interface using either the Certificate System user ID and password or a certificate.
- The server authenticates the user either by matching the user ID and password with the one stored in the database or by checking the certificate against one stored in the database. With certificate-based authentication, the server also checks that the certificate is valid and finds the group membership of the user by associating the DN of the certificate with a user and checking the user entry. With password-based authentication, the server checks the password against the user ID and then finds the group membership of the user by associating that user ID with the user ID contained in the group.
- When the user tries to perform an operation, the authorization mechanism compares the user ID of the user, the group in which the user belongs, or the IP address of the user to the ACLs set for that user, group, or IP address. If an ACL exists that allows that operation, then the operation proceeds.
11.2. Default groups
The privileges of a user are determined by its group (role) membership. A user can be assigned to three groups (roles):
- Administrators. This group is given full access to all of the tasks available in the administrative interface.
- Agents. This group is given full access to all of the tasks available in the agent services interface.
- Auditors. This group is given access to view the signed audit logs. This group does not have any other privileges.
There is a fourth role that is exclusively created for communication between subsystems. Administrators should never assign a real user to such a role:
- Enterprise administrators. Each subsystem instance is automatically assigned a subsystem-specific role as an enterprise administrator when it is joined to a security domain during configuration. These roles automatically provide trusted relationships among subsystems in the security domain, so that each subsystem can efficiently carry out interactions with other subsystems.
11.2.1. Administrators
Administrators have permissions to perform all administrative tasks. A user is designated or identified as being an administrator by being added to the Administrators group for the group. Every member of that group has administrative privileges for that instance of Certificate System.
At least one administrator must be defined for each Certificate System instance, but there is no limit to the number of administrators an instance can have. The first administrator entry is created when the instance is configured.
Administrators are authenticated with a simple bind using their Certificate System user ID and password.
| Role | Description |
|---|---|
| Security Domain Administrators |
By default, the CA administrator of the CA hosting the domain is assigned as the security domain administrator. |
| Enterprise CA Administrators |
|
| Enterprise KRA Administrators |
|
| Enterprise OCSP Administrators |
|
| Enterprise TKS Administrators |
|
| Enterprise TPS Administrators |
|
As necessary, the security domain administrator can manage access controls on the security domain and on the individual subsystems. For example, the security domain administrator can restrict access so that only finance department KRA administrators can set up finance department KRAs.
Enterprise subsystem administrators are given enough privileges to perform operations on the subsystems in the domain. For example, an enterprise CA administrator has the privileges to have SubCA certificates approved automatically during configuration. Alternatively, a security domain administrator can restrict this right if necessary.
11.2.2. Auditors
An auditor can view the signed audit logs and is created to audit the operation of the system. The auditor cannot administer the server in any way.
An auditor is created by adding a user to the Auditors group and storing the auditor’s certificate in the user entry. The auditor’s certificate is used to encrypt the private key of the key pair used to sign the audit log.
The Auditors group is set when the subsystem is configured. No auditors are assigned to this group during configuration.
Auditors are authenticated into the administrative console with a simple bind using their UID and password. Once authenticated, auditors can only view the audit logs. They cannot edit other parts of the system.
11.2.3. Agents
Agents are users who have been assigned end-entity certificate and key-management privileges. Agents can access the agent services interface.
Agents are created by assigning a user to the appropriate subsystem agent group and identifying certificates that the agents must use for SSL client authentication to the subsystem for it to service requests from the agents. Each subsystem has its own agent group:
- The Certificate Manager Agents group.
- The Key Recovery Authority Agents group.
- The Online Certificate Status Manager Agents group.
- The Token Key Service Agents group.
- The Token Processing System Agents group.
Each Certificate System subsystem has its own agents with roles defined by the subsystem. Each subsystem must have at least one agent, but there is no limit to the number of agents a subsystem can have.
Certificate System identifies and authenticates a user with agent privileges by checking the user’s SSL client certificate in its internal database.
11.2.4. Enterprise Groups
No real user should ever be assigned to this group.
During subsystem configuration, every subsystem instance is joined to a security domain. Each subsystem instance is automatically assigned a subsystem-specific role as an enterprise administrator. These roles automatically provide trusted relationships among subsystems in the security domain, so that each subsystem can efficiently carry out interactions with other subsystems. For example, this allows OCSPs to push CRL publishing publishing information to all CAs in the domain, KRAs to push KRA connector information, and CAs to approve certificates generated within the CA automatically.
Enterprise subsystem administrators are given enough privileges to perform operations on the subsystems in the domain. Each subsystem has its own security domain role:
- Enterprise CA Administrators
- Enterprise KRA Administrators
- Enterprise OCSP Administrators
- Enterprise TKS Administrators
- Enterprise TPS Administrators
Additionally, there is a Security Domain Administrators group for the CA instance which manages the security domain, access control, users, and trust relationships within the domain.
Each subsystem administrator authenticates to the other subsystems using SSL client authentication with the subsystem certificate issued during configuration by the security domain CA.
11.3. Managing users and groups for a CA, OCSP, KRA, or TKS
Many of the operations that users can perform are dictated by the groups that they belong to; for instance, agents for the CA manage certificates and profiles, while administrators manage CA server configuration.
Four subsystems - the CA, OCSP, KRA, and TKS - use the Java administrative console to manage groups and users. The TPS has web-based admin services, and users and groups are configured through its web service page.
11.3.1. Managing groups
11.3.1.1. Creating a new group
Log into the administrative console.
pkiconsole -d nssdb -n 'optional client cert nickname' https://server.example.com:8443/subsystem_type
# pkiconsole -d nssdb -n 'optional client cert nickname' https://server.example.com:8443/subsystem_typeCopy to Clipboard Copied! Toggle word wrap Toggle overflow Notepkiconsoleis being deprecated and will be replaced by a new browser-based UI in a future major release. Althoughpkiconsolewill continue to be available until the replacement UI is released, we encourage using the command line equivalent ofpkiconsoleat this time, as the pki CLI will continue to be supported and improved upon even when the new browser-based UI becomes available in the future.- Select Users and Groups from the navigation menu on the left.
- Select the Groups tab.
Click , and fill in the group information.
It is only possible to add users who already exist in the internal database.
- Edit the ACLs to grant the group privileges. See Section 11.4.3.1, “Editing ACLs” for more information. If no ACIs are added to the ACLs for the group, the group will have no access permissions to any part of Certificate System.
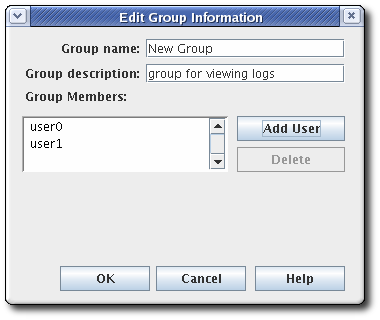
11.3.1.2. Changing members in a group
Members can be added or deleted from all groups. The group for administrators must have at least one user entry.
- Log into the administrative console.
- Select Users and Groups from the navigation tree on the left.
- Click the Groups tab.
- Select the group from the list of names, and click .
Make the appropriate changes.
- To change the group description, type a new description in the Group description field.
- To remove a user from the group, select the user, and click .
- To add users, click . Select the users to add from the dialog box, and click .
11.3.2. Managing users (Administrators, Agents, and Auditors)
The users for each subsystem are maintained separately. Just because a person is an administrator in one subsystem does not mean that person has any rights (or even a user entry) for another subsystem. Users can be configured and, with their user certificates, trusted as agents, administrators, or auditors for a subsystem.
11.3.2.1. Creating role users
After you have installed the Certificate System, only the bootstrap user created during the setup exists. In order to create additional role users, you can use the command line or the console. In this section, it is assumed that you have already created the CA admin user (e.g. )jgenie and the CA agent user (e.g. jsmith) by following 7.12 "Create PKI role users" in the Planning, Installation and Deployment Guide (Common Criteria Edition).
For security and audit reasons, create individual accounts for Certificate System users and administrators.
11.3.2.1.1. Enrolling for a user certificate
A role user must possess a personal certificate for authentication purposes. The following procedure describes how a user enrolls for a certificate.
As the user, create a certificate request, which you will then send to a CA agent:
If a Key Recovery Authority (KRA) exists in your Certificate System environment:
Copy to Clipboard Copied! Toggle word wrap Toggle overflow This command stores the Certificate Signing Request (CSR) in the
CRMFformat in the~/user_name.reqfile. Send the CSR request file to a CA agent.If no Key Recovery Authority (KRA) exists in your Certificate System environment:
# PKCS10Client -d /home/example-user/certs_db -p password -n "CN=user_name" -o ~/user_name.req PKCS10Client: Certificate request written into /home/example-user/certs_db/user_name.req PKCS10Client: PKCS#10 request key id written into /home/example-user/certs_db/user_name.req.keyId "
# PKCS10Client -d /home/example-user/certs_db -p password -n "CN=user_name" -o ~/user_name.req PKCS10Client: Certificate request written into /home/example-user/certs_db/user_name.req PKCS10Client: PKCS#10 request key id written into /home/example-user/certs_db/user_name.req.keyId "Copy to Clipboard Copied! Toggle word wrap Toggle overflow This command stores the CSR in
pkcs10format in the~/user_name.reqfile. Send the CSR request file to a CA agent.
As the CA agent, create an enrollment request using the received CSR file as the input:
Create the
~/cmc.role_crmf.cfgfile with the following content:Copy to Clipboard Copied! Toggle word wrap Toggle overflow Set the parameters based on your environment and the CSR format used in the previous step.
Pass the previously created configuration file to the
CMCRequestutility to create the CMC request:CMCRequest ~/cmc.role_crmf.cfg
# CMCRequest ~/cmc.role_crmf.cfgCopy to Clipboard Copied! Toggle word wrap Toggle overflow
As the CA agent
jsmith, submit a CMC (Certificate Management over CMS) request:Create the
~/HttpClient_role_crmf.cfgfile with the following content:Copy to Clipboard Copied! Toggle word wrap Toggle overflow Set the parameters based on your environment.
Submit the request to the CA:
Copy to Clipboard Copied! Toggle word wrap Toggle overflow Verify the result:
Copy to Clipboard Copied! Toggle word wrap Toggle overflow If the issuance is successful, retrieve the newly issued
.crtcertificate file:pki -d /home/jsmith/certs_db -c password -p 8443 -n 'jsmith - CA Agent for Example.com' ca-cert-export 0xF9D290B --output-file ~/user.crt
# pki -d /home/jsmith/certs_db -c password -p 8443 -n 'jsmith - CA Agent for Example.com' ca-cert-export 0xF9D290B --output-file ~/user.crtCopy to Clipboard Copied! Toggle word wrap Toggle overflow The CA agent
jsmiththen sends the certificate to the requesting user.
As the requesting user, import the certificate received from the CA agent
jsmithinto the own<user home directory>/certs_db/database:certutil -d ~/certs_db -A -t "u,u,u" -n "user_name" -i ~/user.crt
# certutil -d ~/certs_db -A -t "u,u,u" -n "user_name" -i ~/user.crtCopy to Clipboard Copied! Toggle word wrap Toggle overflow
11.3.2.1.2. Creating users using the command line
To create a user using the command line:
As a CA administrator (e.g.
jgenie), add a user account. For example, to add theuser_nameuser to the CA:Copy to Clipboard Copied! Toggle word wrap Toggle overflow This command uses the CA admin user to add a new account.
Optionally, as a CA administrator (e.g.
jgenie), add a user to a group. For example, to add theuser_nameuser to theCertificate Manager Agentsgroup:Copy to Clipboard Copied! Toggle word wrap Toggle overflow As a CA administrator, add the certificate to the user record:
Add the certificate using its serial number or certificate file to the user account in the Certificate System database. For example, for the
user_nameuser:pki -d /home/jgenie/certs_db/ -c password -n jgenie ca-user-cert-add user_name --input ~/user.crt
# pki -d /home/jgenie/certs_db/ -c password -n jgenie ca-user-cert-add user_name --input ~/user.crtCopy to Clipboard Copied! Toggle word wrap Toggle overflow OR
Copy to Clipboard Copied! Toggle word wrap Toggle overflow Verify that the certificate is added to the user record. For example, to list certificates that contain the
user_nameuser in the certificate’s subject:Copy to Clipboard Copied! Toggle word wrap Toggle overflow
11.3.2.1.3. Creating users using the console
To create a user using the PKI Console:
Log into the administrative console.
pkiconsole -d nssdb -n 'optional client cert nickname' https://server.example.com:8443/subsystem_type
# pkiconsole -d nssdb -n 'optional client cert nickname' https://server.example.com:8443/subsystem_typeCopy to Clipboard Copied! Toggle word wrap Toggle overflow Notepkiconsoleis being deprecated and will be replaced by a new browser-based UI in a future major release. Althoughpkiconsolewill continue to be available until the replacement UI is released, we encourage using the command line equivalent ofpkiconsoleat this time, as the pki CLI will continue to be supported and improved upon even when the new browser-based UI becomes available in the future.- In the Configuration tab, select Users and Groups. Click .
Fill in the information in the Edit User Information dialog.
Most of the information is standard user information, such as the user’s name, email address, and password. This window also contains a field called User State, which can contain any string, which is used to add additional information about the user; most basically, this field can show whether this is an active user.
- Select the group to which the user will belong. The user’s group membership determines what privileges the user has. Assign agents, administrators, and auditors to the appropriate subsystem group.
Add the user’s certificate.
- Request a user certificate through the CA end-entities service page.
- If auto-enrollment is not configured for the user profile, then approve the certificate request.
-
Copy the content of
user.crt(result from Section 11.3.2.1.1, “Enrolling for a user certificate”) to the clipboard. - Select the new user entry, and click .
- Click , and paste in the base-64 encoded certificate.

11.3.2.2. Changing a Certificate System user’s certificate
- Log into the administrative console.
- Select Users and Groups.
- Select the user to edit from the list of user IDs, and click .
- Click to add the new certificate.
-
In the Import Certificate window, paste the new certificate in the text area. Include the
-----BEGIN CERTIFICATE-----and-----END CERTIFICATE-----marker lines.
11.3.2.3. Renewing Administrator, Agent, and Auditor user certificates
There are two methods of renewing a certificate. Regenerating the certificate takes its original key and its original profile and request, and recreates an identical key with a new validity period and expiration date. Re-keying a certificate resubmits the initial certificate request to the original profile, but generates a new key pair. Administrator certificates can be renewed by being re-keyed.
Each subsystem has a bootstrap user that was created at the time the subsystem was created. A new certificate can be requested for this user before their original one expires, using one of the default renewal profiles.
Certificates for administrative users can be renewed directly in the end user enrollment forms, using the serial number of the original certificate.
- Renew the admin user certificates. For details, see Section 5.4, “Renewing certificates”.
Add the renewed user certificate to the user entry in the internal LDAP database.
Open the console for the subsystem.
pkiconsole -d nssdb -n 'optional client cert nickname' https://server.example.com:admin_port/subsystem_type
# pkiconsole -d nssdb -n 'optional client cert nickname' https://server.example.com:admin_port/subsystem_typeCopy to Clipboard Copied! Toggle word wrap Toggle overflow Notepkiconsoleis being deprecated and will be replaced by a new browser-based UI in a future major release. Althoughpkiconsolewill continue to be available until the replacement UI is released, we encourage using the command line equivalent ofpkiconsoleat this time, as the pki CLI will continue to be supported and improved upon even when the new browser-based UI becomes available in the future.- Configuration | Users and Groups | Users | admin | Certificates | Import
- In the Configuration tab, select Users and Groups.
- In the Users tab, double-click the user entry with the renewed certificate, and click .
- Click , and paste in the base-64 encoded certificate.
This can also be done by using ldapmodify to add the renewed certification directly to the user entry in the internal LDAP database, by replacing the userCertificate attribute in the user entry, such as uid=admin,ou=people,dc=subsystem-base-DN.
11.3.2.4. Deleting a Certificate System user
Users can be deleted from the internal database. Deleting a user from the internal database deletes that user from all groups to which the user belongs. To remove the user from specific groups, modify the group membership.
Delete a privileged user from the internal database by doing the following:
- Log into the administrative console.
- Select Users and Groups from the navigation menu on the left.
- Select the user from the list of user IDs, and click .
- Confirm the deletion when prompted.
Alternatively, you can delete a system user by running the following in the CLI as an administrator:
pki -d /home/jgenie/certs_db -c password -n caadmin ca-user-del user_name ------------------------ Deleted user "user_name" ------------------------
# pki -d /home/jgenie/certs_db -c password -n caadmin ca-user-del user_name ------------------------ Deleted user "user_name" ------------------------Copy to Clipboard Copied! Toggle word wrap Toggle overflow
11.4. Configuring access control for users
Authorization is the mechanism that checks whether a user is allowed to perform an operation. Authorization points are defined in certain groups of operations that require an authorization check.
11.4.1. About access control
Access control lists (ACLs) are the mechanisms that specify the authorization to server operations. An ACL exists for each set of operations where an authorization check occurs. Additional operations can be added to a ACL.
The ACL contains access control instructions (ACIs) which specifically allow or deny operations, such as read or modify. The ACI also contains an evaluator expression. The default implementation of ACLs specifies only users, groups, and IP addresses as possible evaluator types. Each ACI in an ACL specifies whether access is allowed or denied, what the specific operator is being allowed or denied, and which users, groups, or IP addresses are being allowed or denied to perform the operation.
The privileges of Certificate System users are changed by changing the access control lists (ACL) that are associated with the group in which the user is a member, for the users themselves, or for the IP address of the user. New groups are assigned access control by adding that group to the access control lists. For example, a new group for administrators who are only authorized to view logs, LogAdmins, can be added to the ACLs relevant to logs to allow read or modify access to this group. If this group is not added to any other ACLs, members of this group only have access to the logs.
The access for a user, group, or IP address is changed by editing the ACI entries in the ACLs. In the ACL interface, each ACI is shown on a line of its own. In this interface window, the ACI has the following syntax:
allow|deny (operation) user|group|IP="name"
allow|deny (operation) user|group|IP="name"The IP address can be an IPv4 or IPv6 address. An IPv4 address must be in the format n.n.n.n or n.n.n.n,m.m.m.m. For example, 128.21.39.40 or 128.21.39.40,255.255.255.00. An IPv6 address uses a 128-bit namespace, with the IPv6 address separated by colons and the netmask separated by periods. For example, 0:0:0:0:0:0:13.1.68.3, FF01::43, 0:0:0:0:0:0:13.1.68.3,FFFF:FFFF:FFFF:FFFF:FFFF:FFFF:255.255.255.0, and FF01::43,FFFF:FFFF:FFFF:FFFF:FFFF:FFFF:FF00:0000.
For example, the following is an ACI that allows administrators to perform read operations:
allow (read) group="Administrators"
allow (read) group="Administrators"An ACI can have more than one operation or action configured. The operations are separated with a comma with no space on either side. For example:
allow (read,modify) group="Administrators"
allow (read,modify) group="Administrators"
An ACI can have more than one group, user, or IP address by separating them with two pipe symbols (||) with a space on either side. For example:
allow (read) group="Administrators" || group="Auditors"
allow (read) group="Administrators" || group="Auditors"The administrative console can create or modify ACIs. The interface sets whether to allow or deny the operation in the Allow and Deny field, sets which operations are possible in the Operations field, and then lists the groups, users, or IP addresses being granted or denied access in the Syntax field.
An ACI can either allow or deny an operation for the specified group, user ID, or IP address. Generally, ACIs do not need to be created to deny access. If there are no allow ACIs that include a user ID, group, or IP address, then the group, user ID, or IP address is denied access.
If a user is not explicitly allowed access to any of the operations for a resource, then this user is considered denied; he does not specifically need to be denied access.
For example, user JohnB is a member of the Administrators group. If an ACL has only the following ACL, JohnB is denied any access since he does not match any of the allow ACIs:
Allow (read,modify) group="Auditors" || user="BrianC"
Allow (read,modify) group="Auditors" || user="BrianC"
There usually is no need to include a deny statement. Some situations can arise, however, when it is useful to specify one. For example, JohnB, a member of the Administrators group, has just been fired. It may be necessary to deny access specifically to JohnB if the user cannot be deleted immediately. Another situation is that a user, BrianC, is an administrator, but he should not have the ability to change some resource. Since the Administrators group must access this resource, BrianC can be specifically denied access by creating an ACI that denies this user access.
The allowed rights are the operations which the ACI controls, either by allowing or denying permission to perform the operation. The actions that can be set for an ACL vary depending on the ACL and subsystem. Two common operations that can be defined are read and modify.
The syntax field of the ACI editor sets the evaluator for the expression. The evaluator can specify group, name, and IP address (both IPv4 and IPv6 addresses). These are specified along with the name of the entity set as equals (=) or does not equal (!=).
The syntax to include a group in the ACL is group="groupname". The syntax to exclude a group is group!="groupname", which allows any group except for the group named. For example:
group="Administrators" || group!="Auditors"
group="Administrators" || group!="Auditors"
It is also possible to use regular expressions to specify the group, such as using wildcard characters like an asterisk (*). For example:
group="* Managers"
group="* Managers"
The syntax to include a user in the ACL is user="userID". The syntax to exclude the user is user!="userID", which allows any user ID except for the user ID named. For example:
user="BobC" || user!="JaneK"
user="BobC" || user!="JaneK"
To specify all users, provide the value anybody. For example:
user="anybody"
user="anybody"
It is also possible to use regular expressions to specify the user names, such as using wildcard characters like an asterisk (*). For example:
user="*johnson"
user="*johnson"
The syntax to include an IP address in the ACL is ipaddress="ipaddress". The syntax to exclude an ID address from the ACL is ipaddress!="ipaddress". An IP address is specified using its numeric value; DNS values are not permitted. For example:
ipaddress="12.33.45.99" ipaddress!="23.99.09.88"
ipaddress="12.33.45.99"
ipaddress!="23.99.09.88"The IP address can be an IPv4 address, as shown above, or IPv6 address. An IPv4 address has the format n.n.n.n or n.n.n.n,m.m.m.m with the netmask. An IPv6 address uses a 128-bit namespace, with the IPv6 address separated by colons and the netmask separated by periods. For example:
ipaddress="0:0:0:0:0:0:13.1.68.3"
ipaddress="0:0:0:0:0:0:13.1.68.3"
It is also possible to use regular expressions to specify the IP address, such as using wildcard characters like an asterisk (*). For example:
ipaddress="12.33.45.*"
ipaddress="12.33.45.*"It is possible to create a string with more than one value by separating each value with two pipe characters (||) with a space on either side. For example:
user="BobC" || group="Auditors" || group="Administrators"
user="BobC" || group="Auditors" || group="Administrators"11.4.2. Changing the access control settings for the subsystem
For instruction on how to configure this feature by editing the CS.cfg file, see 9.2.3.13 Changing the Access Control Settings for the Subsystem in the Planning, Installation and Deployment Guide (Common Criteria Edition).
11.4.3. Adding ACLs
ACLs are stored in the internal database and can only be modified in the administrative console.
To add a new ACL:
Log into the administrative console.
Notepkiconsoleis being deprecated and will be replaced by a new browser-based UI in a future major release. Althoughpkiconsolewill continue to be available until the replacement UI is released, we encourage using the command line equivalent ofpkiconsoleat this time, as the pki CLI will continue to be supported and improved upon even when the new browser-based UI becomes available in the future.Select Access Control List.
- Click to open the Access Control Editor.
Fill the
Resource nameandAvailable rightsfields.To add an access control instruction (ACI), click , and supply the ACI information.
- Select the allow or deny radio button from the Access field to allow or deny the operation to the groups, users, or IP addresses specified. For more information about allowing or denying access, see Section 11.4.1, “About access control”.
-
Set the rights. The available options are
readandmodify. To select both, hold the or button while selecting the entries. - Specify the user, group, or IP address that will be granted or denied access in the Syntax field. See Section 11.4.1, “About access control” for details on syntax.
- Click to return to the Access Control Editor window.
- Click to store the ACI.
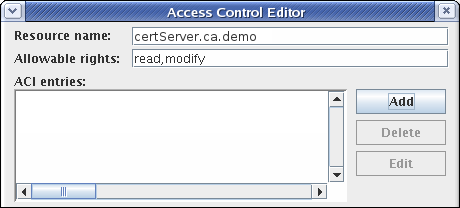
11.4.3.1. Editing ACLs
ACLs are stored in the internal database and can only be modified in the administrative console.
To edit the existing ACLs:
Log into the administrative console.
Notepkiconsoleis being deprecated and will be replaced by a new browser-based UI in a future major release. Althoughpkiconsolewill continue to be available until the replacement UI is released, we encourage using the command line equivalent ofpkiconsoleat this time, as the pki CLI will continue to be supported and improved upon even when the new browser-based UI becomes available in the future.Select Access Control List in the left navigation menu.
Select the ACL to edit from the list, and click .
The ACL opens in the Access Control Editor window.
To add an ACI, click , and supply the ACI information.
To edit an ACI, select the ACI from the list in the ACI entries text area of the ACL Editor window. Click .
- Select the allow or deny radio button from the Access field to allow or deny the operation to the groups, users, or IP addresses specified. For more information about allowing or denying access, see Section 11.4.1, “About access control”.
-
Set the rights for the access control. The options are
readandmodify. To set both, use the or buttons. - Specify the user, group, or IP address that will be granted or denied access in the Syntax field. See Section 11.4.1, “About access control” for details on syntax.
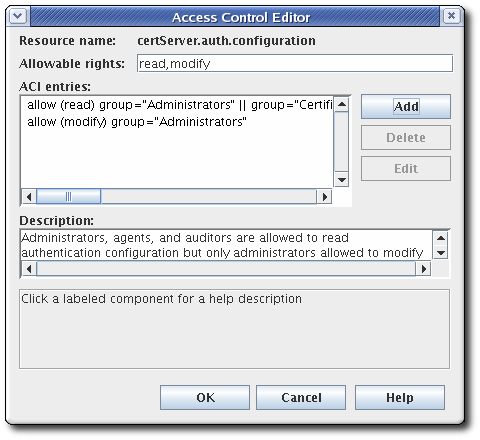
Chapter 12. Configuring subsystem logs
This chapter describes…
- For an overview on logs, see 2.3.14 Logs in Chapter 2 Architecture Overview in the Planning, Installation and Deployment Guide (Common Criteria Edition).
- For log configuration during the installation and additional information, see Chapter 13 Configuring Logs in the Planning, Installation and Deployment Guide (Common Criteria Edition).
12.1. Managing logs
The Certificate System subsystem log files record events related to operations within that specific subsystem instance. For each subsystem, different logs are kept for issues such as installation, access, and web servers.
All subsystems have similar log configuration, options, and administrative paths.
12.1.1. Configuring logs
Logs are configured through the subsystem’s CS.cfg file. Specialized logs, such as signed audit logs and custom logs, can also be created through the Console or configuration file.
Audit logs can be configured through the subsystem Console for the CA, OCSP, TKS, and KRA subsystems. TPS logs are only configured through the configuration file.
- In the navigation tree of the Configuration tab, select Log.
The Log Event Listener Management tab lists the currently configured listeners.
To create a new log instance, click , and select a module plugin from the list in the Select Log Event Listener Plug-in Implementation window.
- Set or modify the fields in the Log Event Listener Editor window. The different parameters are listed in the below table.
| Field | Description |
|---|---|
| Log Event Listener ID | Gives the unique name that identifies the listener. The names can have any combination of letters (aA to zZ), digits (0 to 9), an underscore (_), and a hyphen (-), but it cannot contain other characters or spaces. |
| type |
Gives the type of log file. E.g. |
| enabled |
Sets whether the log is active. Only enabled logs actually record events. The value is either |
| level | Sets the log level in the text field. The level must be manually entered in the field; there is no selection menu. The choices are Debug, Information, Warning, Failure, Misconfiguration, Catastrophe, and Security. For more information, see 13.1.2 Log Levels (Message Categories) in the Planning, Installation and Deployment Guide (Common Criteria Edition). |
| fileName | Gives the full path, including the file name, to the log file. The subsystem user should have read/write permission to the file. [id=""] |
| bufferSize | Sets the buffer size in kilobytes (KB) for the log. Once the buffer reaches this size, the contents of the buffer are flushed out and copied to the log file. The default size is 512 KB. For more information on buffered logging, see 13.1.3 Buffered and unbuffered logging in the Planning, Installation and Deployment Guide (Common Criteria Edition). |
| flushInterval | Sets the amount of time before the contents of the buffer are flushed out and added to the log file. The default interval is 5 seconds. |
| maxFileSize | Sets the size, in kilobytes (KB), a log file can become before it is rotated. Once it reaches this size, the file is copied to a rotated file, and the log file is started new. For more information on log file rotation, see 13.1.4 Log file rotation in the Planning, Installation and Deployment Guide (Common Criteria Edition). The default size is 2000 KB. |
| rolloverInterval | Sets the frequency for the server to rotate the active log file. The available options are hourly, daily, weekly, monthly, and yearly. The default value is 2592000 which represents monthly in seconds. For more information, see 13.1.4 Log file rotation in the Planning, Installation and Deployment Guide (Common Criteria Edition). |
During post-installation configuration, you have the opportunity to make some configuration changes directly by updating the configuration files prior to deployment. Log configuration is one of the operations.
For instructions on how to configure logs by editing the CS.cfg file or running the pki-server command, see Chapter 13 Configuring Logs in the CS.cfg File in the Planning, Installation and Deployment Guide (Common Criteria Edition).
12.1.2. Managing audit logs
The audit log contains records for events that have been set up as recordable events. If the logSigning attribute is set to true, the audit log is signed with a log signing certificate belonging to the server. This certificate can be used by auditors to verify that the log has not been tampered with.
By default, regular audit logs are located in the /var/log/pki/instance_name/subsystem_name/ directory with other types of logs, while signed audit logs are written to /var/log/pki/instance_name/subsystem_name/signedAudit/. The default location for logs can be changed by modifying the configuration.
Signed audit logs are optional. To enable them, please refer to Section 12.1.2.3, “Configuring a signed audit log in the console”
The signed audit log creates a log recording system events, and the events are selected from a list of potential events. When enabled, signed audit logs record a verbose set of messages about the selected event activity.
Signed audit logs are configured by default when the instance is first created, but it is possible to configure signed audits logs after installation. (See Section 12.1.2.2, “Enabling signed audit logging after installation”.) It is also possible to edit the configuration or change the signing certificates after configuration, as covered in Section 12.1.2.3, “Configuring a signed audit log in the console”.
12.1.2.1. A List of audit events
For a list of audit events in Certificate System, see Appendix E, Audit events.
12.1.2.2. Enabling signed audit logging after installation
By default, audit logging is enabled upon installation. However, you need to enable log signing manually after installation. Please see "Enabling signed audit logging" in the Installation Guide.
12.1.2.3. Configuring a signed audit log in the console
Signed audit logs are configured by default when the instance is first created, but it is possible to edit the configuration or change the signing certificates after configuration.
Provide enough space in the file system for the signed audit logs, since they can be large.
A log is set to a signed audit log by setting the logSigning parameter to enable and providing the nickname of the certificate used to sign the log. A special log signing certificate is created when the subsystems are first configured.
Only a user with auditor privileges can access and view a signed audit log. Auditors can use the AuditVerify tool to verify that signed audit logs have not been tampered with.
The signed audit log is created and enabled when the subsystem is configured, but it needs additional configuration to begin creating and signing audit logs.
Open the Console.
NoteTo create or configure the audit log by editing the
CS.cfgfile, see Chapter 13 Configuring Logs in the CS.cfg File in the Planning, Installation and Deployment Guide (Common Criteria Edition).- In the navigation tree of the Configuration tab, select Log.
- In the Log Event Listener Management tab, select the SignedAudit entry.
- Click .
There are three fields which must be reset in the Log Event Listener Editor window.
Fill in the signedAuditCertNickname. This is the nickname of the certificate used to sign audit logs. An audit signing certificate is created when the subsystem is configured; it has a nickname like
auditSigningCert cert-instance_name__subsystem_name.NoteTo get the audit signing certificate nickname, list the certificates in the subsystem’s certificate database using
certutil. For example:Copy to Clipboard Copied! Toggle word wrap Toggle overflow -
Set the logSigning field to
trueto enable signed logging. - Set any events which are logged to the audit log. Appendix E, Audit events lists the loggable events. Log events are separated by commas with no spaces.
Set any other settings for the log, such as the file name, the log level, the file size, or the rotation schedule.
NoteBy default, regular audit logs are located in the
/var/log/pki/instance_name/subsystem_name/directory with other types of logs, while signed audit logs are written to/var/log/pki/instance_name/subsystem_name/signedAudit/. The default location for logs can be changed by modifying the configuration.- Save the log configuration.
After enabling signed audit logging, assign auditor users by creating the user and assigning that entry to the auditor group. Members of the auditor group are the only users who can view and verify the signed audit log. See Section 11.3.2.1, “Creating role users” for details about setting up auditors.
Auditors can verify logs by using the AuditVerify tool. See the AuditVerify(1) man page for details about using this tool.
12.1.2.4. Handling audit logging failures
There are events that could cause the audit logging function to fail, so events cannot be written to the log. For example, audit logging can fail when the file system containing the audit log file is full or when the file permissions for the log file are accidentally changed. If audit logging fails, the Certificate System instance shuts down in the following manner.
- Servlets are disabled and will not process new requests.
- All pending and new requests are killed.
- The subsystem is shut down.
When this happens, administrators and auditors should work together with the operating system administrator to resolve the disk space or file permission issues. When the IT problem is resolved, the auditor should make sure that the last audit log entries are signed. If not, they should be preserved by manual signing, archived, and removed to prevent audit verification failures in the future. When this is completed, the administrators can restart the Certificate System.
12.2. Using logs
12.2.1. Displaying and verifying signed audit logs
This section explains how a user in the Auditor group displays and verifies signed audit logs.
12.2.1.1. Listing audit logs
As a user with auditor privileges, use the pki subsystem-audit-file-find command to list existing audit log files on the server.
For example, to list the audit log files on the CA hosted on server.example.com:8443:
The command uses the client certificate with the auditor nickname stored in the ~/.dogtag/nssdb/ directory for authenticating to the CA. For further details about the parameters used in the command and alternative authentication methods, see the pki(1) man page.
12.2.1.2. Downloading audit logs
As a user with auditor privileges, use the pki subsystem-audit-file-retrieve command to download a specific audit log from the server.
For example, to download an audit log file from the CA hosted on server.example.com:
- Optionally, list the available log files on the CA. See Section 12.2.1.1, “Listing audit logs”.
Download the log file. For example, to download the
ca_auditfile:pki -U https://server.example.com:8443 -n auditor ca-audit-file-retrieve ca_audit
# pki -U https://server.example.com:8443 -n auditor ca-audit-file-retrieve ca_auditCopy to Clipboard Copied! Toggle word wrap Toggle overflow The command uses the client certificate with the auditor nickname stored in the
~/.dogtag/nssdb/directory for authenticating to the CA. For further details about the parameters used in the command and alternative authentication methods, see thepki(1)man page.
After downloading a log file, you can search for specific log entries, for example, using the grep utility:
grep "\[AuditEvent=ACCESS_SESSION_ESTABLISH\]" log_file
# grep "\[AuditEvent=ACCESS_SESSION_ESTABLISH\]" log_file12.2.1.3. Verifying signed audit logs
If audit log signing is enabled, users with auditor privileges can verify the logs:
- Initialize the NSS database and import the CA certificate. For details, see Section 2.5.1.1, “Initializing the pki CLI” and 10.5 Importing a certificate into an NSS Database in the Planning, Installation and Deployment Guide (Common Criteria Edition).
If the audit signing certificate does not exist in the PKI client database, import it:
Search the audit signing certificate for the subsystem logs you want to verify. For example:
Copy to Clipboard Copied! Toggle word wrap Toggle overflow Import the audit signing certificate into the PKI client:
pki client-cert-import "CA Audit Signing Certificate" --serial 0x5 --trust ",,P" --------------------------------------------------- Imported certificate "CA Audit Signing Certificate" ---------------------------------------------------
# pki client-cert-import "CA Audit Signing Certificate" --serial 0x5 --trust ",,P" --------------------------------------------------- Imported certificate "CA Audit Signing Certificate" ---------------------------------------------------Copy to Clipboard Copied! Toggle word wrap Toggle overflow
- Download the audit logs. See Section 12.2.1.2, “Downloading audit logs”.
Verify the audit logs.
Create a text file that contains a list of the audit log files you want to verify in chronological order. For example:
Copy to Clipboard Copied! Toggle word wrap Toggle overflow Use the
AuditVerifyutility to verify the signatures. For example:Copy to Clipboard Copied! Toggle word wrap Toggle overflow For further details about using
AuditVerify, see theAuditVerify(1)man page.
12.2.1.4. Viewing signed audit logs using pkiconsole
Log into the administrative console using Auditor user:
pkiconsole -d /root/.dogtag/pki_ecc_bootstrap/certs_db/ -n ecc_SubCA_AuditV https://rhcs10.example.com:21443/ca
# pkiconsole -d /root/.dogtag/pki_ecc_bootstrap/certs_db/ -n ecc_SubCA_AuditV https://rhcs10.example.com:21443/caCopy to Clipboard Copied! Toggle word wrap Toggle overflow Select Status in the right navigation menu:
Select SignedAudit from the log dropdown:
Select the audit event and click on View:
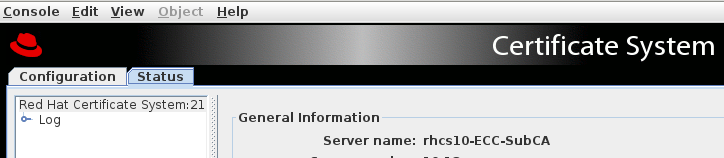
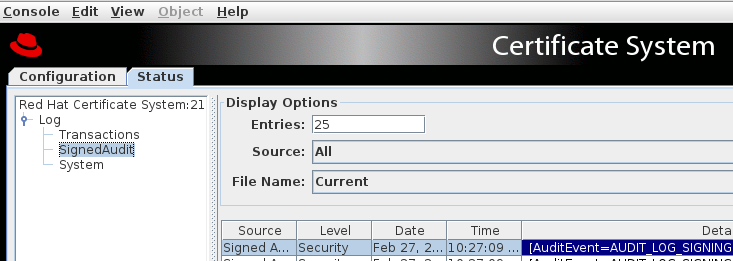
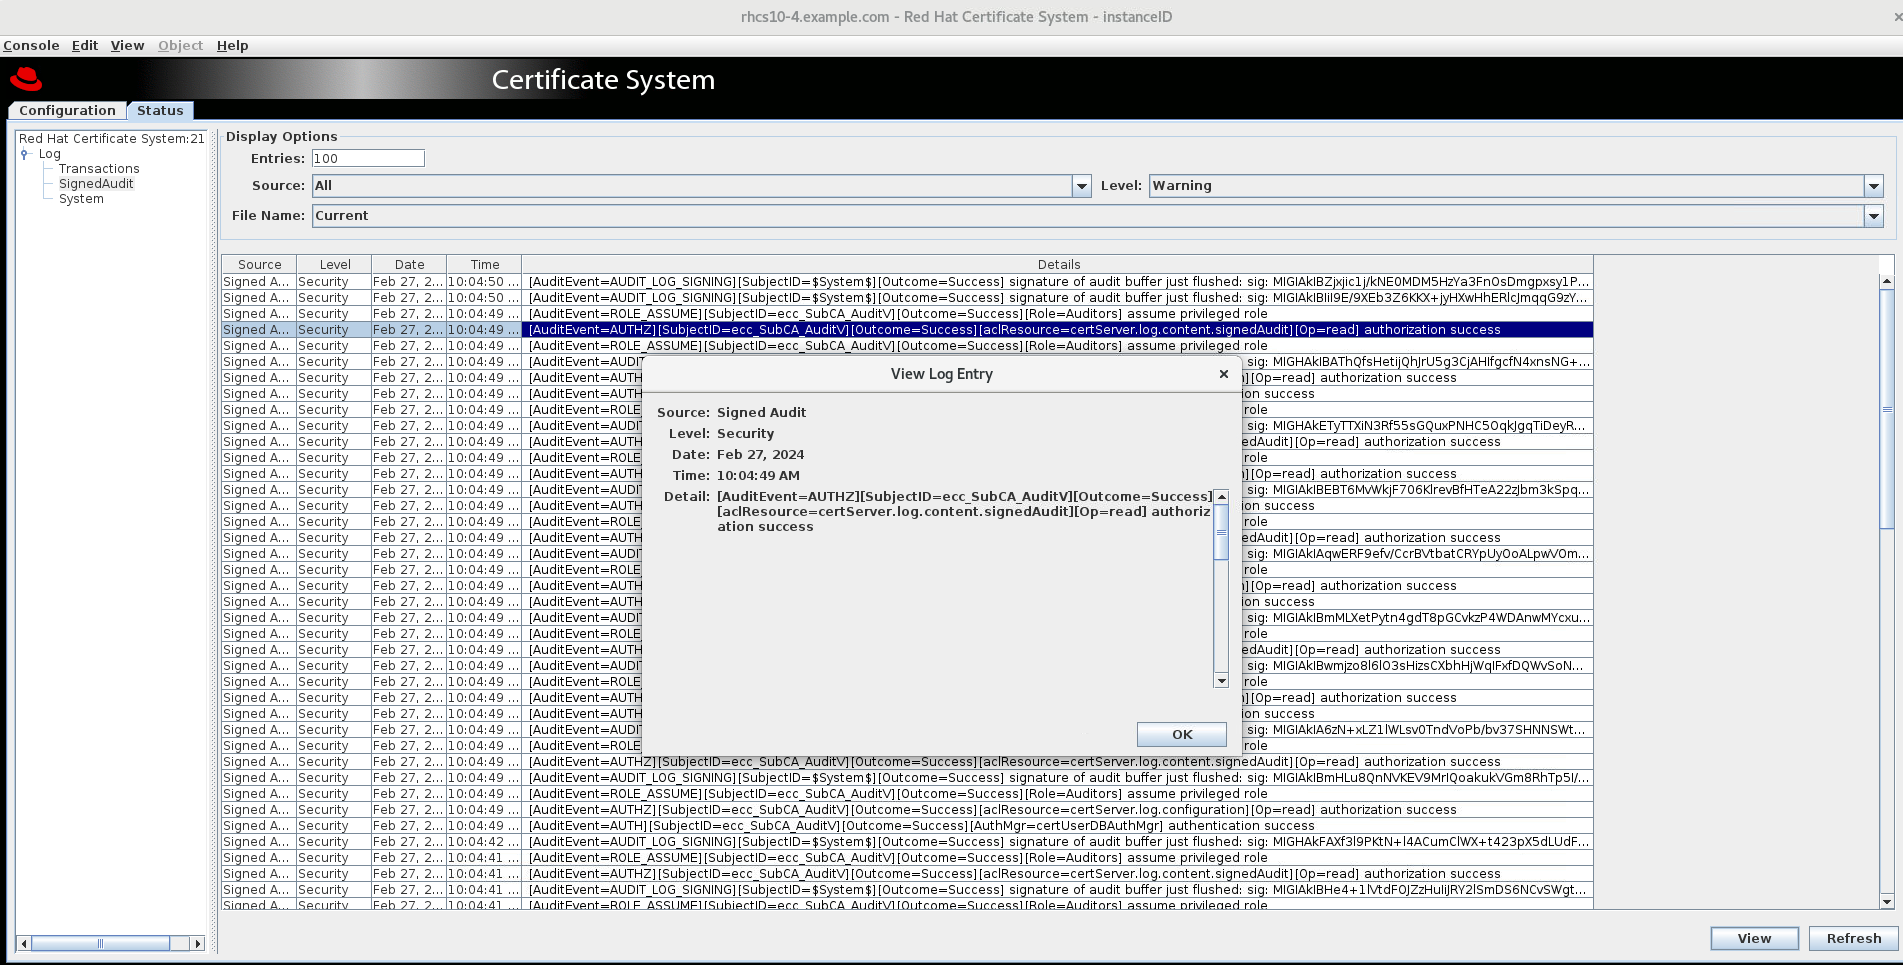
12.2.2. Viewing non-audit logs
To troubleshoot the subsystem for a pki administrator, check the error or informational messages that the server has logged. Examining the log files can also monitor many aspects of the server’s operation.
For logs that are not audit logs, such as debug logs under /var/lib/pki/<instance>/<subsystem type>/logs, contact your operating system administrators to share the non-audit logs with you.
12.2.3. Displaying OS-level audit logs
To see operating system-level audit logs using the instructions below, the auditd logging framework must be configured per 13.2.1 Enabling OS-level Audit Logs in the Planning, Installation and Deployment Guide (Common Criteria Edition).
To display operating system-level access logs, use the ausearch utility as root or as a privileged user with the sudo utility.
12.2.3.1. Displaying audit log deletion events
Since these events are keyed (with rhcs_audit_deletion), use the -k parameter to find events matching that key:
ausearch -k rhcs_audit_deletion
# ausearch -k rhcs_audit_deletion12.2.3.2. Displaying access to the NSS database for secret and private keys
Since these events are keyed (with rhcs_audit_nssdb), use the -k parameter to find events matching that key:
ausearch -k rhcs_audit_nssdb
# ausearch -k rhcs_audit_nssdb12.2.3.3. Displaying time change events
Since these events are keyed (with rhcs_audit_time_change), use the -k parameter to find events matching that key:
ausearch -k rhcs_audit_time_change
# ausearch -k rhcs_audit_time_change12.2.3.4. Displaying package update events
Since these events are a typed message (of type SOFTWARE_UPDATE), use the -m parameter to find events matching that type:
ausearch -m SOFTWARE_UPDATE
# ausearch -m SOFTWARE_UPDATE12.2.3.5. Displaying changes to the PKI configuration
Since these events are keyed (with rhcs_audit_config), use the -k parameter to find events matching that key:
ausearch -k rhcs_audit_config
# ausearch -k rhcs_audit_config12.2.4. Smart card error codes
Smart cards can report certain error codes to the TPS; these are recorded in the TPS’s debug log file, depending on the cause for the message.
| Return Code | Description |
|---|---|
| General Error Codes | 6400 |
| No specific diagnosis | 6700 |
| Wrong length in Lc | 6982 |
| Security status not satisfied | 6985 |
| Conditions of use not satisfied | 6a86 |
| Incorrect P1 P2 | 6d00 |
| Invalid instruction | 6e00 |
| Invalid class | Install Load Errors |
| 6581 | Memory Failure |
| 6a80 | Incorrect parameters in data field |
| 6a84 | Not enough memory space |
| 6a88 | Referenced data not found |
| Delete Errors | 6200 |
| Application has been logically deleted | 6581 |
| Memory failure | 6985 |
| Referenced data cannot be deleted | 6a88 |
| Referenced data not found | 6a82 |
| Application not found | 6a80 |
| Incorrect values in command data | Get Data Errors |
| 6a88 | Referenced data not found |
| Get Status Errors | 6310 |
| More data available | 6a88 |
| Referenced data not found | 6a80 |
| Incorrect values in command data | Load Errors |
| 6581 | Memory failure |
| 6a84 | Not enough memory space |
| 6a86 | Incorrect P1/P2 |
| 6985 | Conditions of use not satisfied |
Chapter 13. Managing subsystem certificates
This chapter gives an overview of using certificates: what types and formats are available, how to request and create them through the HTML end-entity forms and through the Certificate System Console, and how to install certificates in the Certificate System and on different clients. Additionally, there is information on managing certificates through the Console and configuring the servers to use them.
13.1. Required subsystem certificates
Each subsystem has a defined set of certificates which must be issued to the subsystem instance for it to perform its operations. There are certain details of the certificate contents that are set during the Certificate Manager configuration, with different considerations for constraints, settings, and attributes depending on the types of certificates.
13.1.1. Certificate Manager certificates
When a Certificate Manager is installed, the keys and requests for the CA signing certificate, SSL server certificate, and OCSP signing certificate are generated. The certificates are created before the configuration can be completed.
The CA certificate request is either submitted as a self-signing request to the CA, which then issues the certificate and finishes creating the self-signed root CA, or is submitted to a third-party public CA or another Certificate System CA. When the external CA returns the certificate, the certificate is installed, and installation of the subordinate CA is completed.
13.1.1.1. CA signing key pair and certificate
Every Certificate Manager has a CA signing certificate with a public key corresponding to the private key the Certificate Manager uses to sign the certificates and CRLs it issues. This certificate is created and installed when the Certificate Manager is installed. The default nickname for the certificate is caSigningCert cert-instance_ID CA, where instance_ID identifies the Certificate Manager instance. The default validity period for the certificate is five years.
The subject name of the CA signing certificate reflects the name of the CA that was set during installation. All certificates signed or issued by the Certificate Manager include this name to identify the issuer of the certificate.
The Certificate Manager’s status as a root or subordinate CA is determined by whether its CA signing certificate is self-signed or is signed by another CA, which affects the subject name on the certificates.
- If the Certificate Manager is a root CA, its CA signing certificate is self-signed, meaning the subject name and issuer name of the certificate are the same.
- If the Certificate Manager is a subordinate CA, its CA signing certificate is signed by another CA, usually the one that is a level above in the CA hierarchy (which may or may not be a root CA). The root CA’s signing certificate must be imported into individual clients and servers before the Certificate Manager can be used to issue certificates to them.
The CA name cannot be changed or all previously-issued certificates are invalidated. Similarly, reissuing a CA signing certificate with a new key pair invalidates all certificates that were signed by the old key pair.
13.1.1.2. OCSP signing key pair and certificate
The subject name of the OCSP signing certificate is in the form cn=OCSP cert-instance_ID CA, and it contains extensions, such as OCSPSigning and OCSPNoCheck, required for signing OCSP responses.
The default nickname for the OCSP signing certificate is ocspSigningCert cert-instance_ID CA, where instance_ID CA identifies the Certificate Manager instance.
The OCSP private key, corresponding to the OCSP signing certificate’s public key, is used by the Certificate Manager to sign the OCSP responses to the OCSP-compliant clients when queried about certificate revocation status.
13.1.1.3. Subsystem certificate
Every member of the security domain is issued a server certificate to use for communications among other domain members, which is separate from the server SSL certificate. This certificate is signed by the security domain CA; for the security domain CA itself, its subsystem certificate is signed by itself.
The default nickname for the certificate is subsystemCert cert-instance_ID.
13.1.1.4. SSL server key pair and certificate
Every Certificate Manager has at least one SSL server certificate that was first generated when the Certificate Manager was installed. The default nickname for the certificate is Server-Cert cert-instance_ID, where instance_ID identifies the Certificate Manager instance.
By default, the Certificate Manager uses a single SSL server certificate for authentication. However, additional server certificates can be requested to use for different operations, such as configuring the Certificate Manager to use separate server certificates for authenticating to the end-entity services interface and agent services interface.
If the Certificate Manager is configured for SSL-enabled communication with a publishing directory, it uses its SSL server certificate for client authentication to the publishing directory by default. The Certificate Manager can also be configured to use a different certificate for SSL client authentication.
13.1.1.5. Audit log signing key pair and certificate
The CA keeps a secure audit log of all events which occurred on the server. To guarantee that the audit log has not been tampered with, the log file is signed by a special log signing certificate.
The audit log signing certificate is issued when the server is first configured.
13.1.2. Online Certificate Status Manager certificates
When the Online Certificate Status Manager is first configured, the keys for all required certificates are created, and the certificate requests for the OCSP signing, SSL server, audit log signing, and subsystem certificates are made. These certificate requests are submitted to a CA (either a Certificate System CA or a third-party CA) and must be installed in the Online Certificate Status Manager database to complete the configuration process.
13.1.2.1. OCSP signing key pair and certificate
Every Online Certificate Status Manager has a certificate, the OCSP signing certificate, which has a public key corresponding to the private key the Online Certificate Status Manager uses to sign OCSP responses. The Online Certificate Status Manager’s signature provides persistent proof that the Online Certificate Status Manager has processed the request. This certificate is generated when the Online Certificate Status Manager is configured. The default nickname for the certificate is ocspSigningCert cert-instance_ID, where instance_ID OSCP is the Online Certificate Status Manager instance name.
13.1.2.2. SSL server key pair and certificate
Every Online Certificate Status Manager has at least one SSL server certificate which was generated when the Online Certificate Status Manager was configured. The default nickname for the certificate is Server-Cert cert-instance_ID, where instance_ID identifies the Online Certificate Status Manager instance name.
The Online Certificate Status Manager uses its server certificate for server-side authentication for the Online Certificate Status Manager agent services page.
The Online Certificate Status Manager uses a single server certificate for authentication purposes. Additional server certificates can be installed and used for different purposes.
13.1.2.3. Subsystem certificate
Every member of the security domain is issued a server certificate to use for communications among other domain members, which is separate from the server SSL certificate. This certificate is signed by the security domain CA.
The default nickname for the certificate is subsystemCert cert-instance_ID.
13.1.2.4. Audit log signing key pair and certificate
The OCSP keeps a secure audit log of all events which occurred on the server. To guarantee that the audit log has not been tampered with, the log file is signed by a special log signing certificate.
The audit log signing certificate is issued when the server is first configured.
13.1.2.5. Recognizing Online Certificate Status Manager certificates
Depending on the CA which signed the Online Certificate Status Manager’s SSL server certificate, it may be necessary to get the certificate and issuing CA recognized by the Certificate Manager.
- If the Online Certificate Status Manager’s server certificate is signed by the CA that is publishing CRLs, then nothing needs to be done.
- If the Online Certificate Status Manager’s server certificate is signed by the same root CA that signed the subordinate Certificate Manager’s certificates, then the root CA must be marked as a trusted CA in the subordinate Certificate Manager’s certificate database.
- If the Online Certificate Status Manager’s SSL server certificate is signed by a different root CA, then the root CA certificate must be imported into the subordinate Certificate Manager’s certificate database and marked as a trusted CA.
If the Online Certificate Status Manager’s server certificate is signed by a CA within the selected security domain, the certificate chain is imported and marked when the Online Certificate Status Manager is configured. No other configuration is required. However, if the server certificate is signed by an external CA, the certificate chain has to be imported for the configuration to be completed.
Not every CA within the security domain is automatically trusted by the OCSP Manager when it is configured. Every CA in the certificate chain of the CA configured in the CA panel is, however, trusted automatically by the OCSP Manager. Other CAs within the security domain but not in the certificate chain must be added manually.
13.1.3. Key Recovery Authority certificates
The KRA uses the following key pairs and certificates:
13.1.3.1. Transport key pair and certificate
Every KRA has a transport certificate. The public key of the key pair that is used to generate the transport certificate is used by the client software to encrypt an end entity’s private encryption key before it is sent to the KRA for archival; only those clients capable of generating dual-key pairs use the transport certificate.
13.1.3.2. Storage key pair
Every KRA has a storage key pair. The KRA uses the public component of this key pair to encrypt (or wrap) private encryption keys when archiving the keys. It uses the private component to decrypt (or unwrap) the archived key during recovery. For more information on how this key pair is used, see Chapter 4, Setting up key archival and recovery.
Keys encrypted with the storage key can be retrieved only by authorized key recovery agents.
13.1.3.3. SSL server certificate
Every Certificate System KRA has at least one SSL server certificate. The first SSL server certificate is generated when the KRA is configured. The default nickname for the certificate is Server-Cert cert-instance_ID, where instance_id identifies the KRA instance is installed.
The KRA’s SSL server certificate was issued by the CA to which the certificate request was submitted, which can be a Certificate System CA or a third-party CA. To view the issuer name, open the certificate details in the System Keys and Certificates option in the KRA Console.
The KRA uses its SSL server certificate for server-side authentication to the KRA agent services interface. By default, the Key Recovery Authority uses a single SSL server certificate for authentication. However, additional SSL server certificates can be requested and installed for the KRA.
13.1.3.4. Subsystem certificate
Every member of the security domain is issued a server certificate to use for communications among other domain members, which is separate from the server SSL certificate. This certificate is signed by the security domain CA.
The default nickname for the certificate is subsystemCert cert-instance_ID.
13.1.3.5. Audit log signing key pair and certificate
The KRA keeps a secure audit log of all events which occurred on the server. To guarantee that the audit log has not been tampered with, the log file is signed by a special log signing certificate.
The audit log signing certificate is issued when the server is first configured.
13.1.4. TKS certificates
The TKS has three certificates. The SSL server and subsystem certificates are used for standard operations. An additional signing certificate is used to protect audit logs.
13.1.4.1. SSL server certificate
Every Certificate System TKS has at least one SSL server certificate. The first SSL server certificate is generated when the TKS is configured. The default nickname for the certificate is Server-Cert cert-instance_ID.
13.1.4.2. Subsystem certificate
Every member of the security domain is issued a server certificate to use for communications among other domain members, which is separate from the server SSL certificate. This certificate is signed by the security domain CA.
The default nickname for the certificate is subsystemCert cert-instance_ID.
13.1.4.3. Audit log signing key pair and certificate
The TKS keeps a secure audit log of all events which occurred on the server. To guarantee that the audit log has not been tampered with, the log file is signed by a special log signing certificate.
The audit log signing certificate is issued when the server is first configured.
13.1.5. TPS Certificates
The TPS only uses three certificates: a server certificate, subsystem certificate, and audit log signing certificate.
13.1.5.1. SSL server certificate
Every Certificate System TPS has at least one SSL server certificate. The first SSL server certificate is generated when the TPS is configured. The default nickname for the certificate is Server-Cert cert-instance_ID.
13.1.5.2. Subsystem certificate
Every member of the security domain is issued a server certificate to use for communications among other domain members, which is separate from the server SSL certificate. This certificate is signed by the security domain CA.
The default nickname for the certificate is subsystemCert cert-instance_ID.
13.1.5.3. Audit log signing key pair and certificate
The TPS keeps a secure audit log of all events which occurred on the server. To guarantee that the audit log has not been tampered with, the log file is signed by a special log signing certificate.
The audit log signing certificate is issued when the server is first configured.
13.1.6. About subsystem certificate key types
When you create a new instance, you can specify the key type and key size in the configuration file passed to the pkispawn utility.
Example 13.1. Key type-related Configuration Parameters for a CA
The following are key type-related parameters including example values. You can set these parameters in the configuration file which you pass to pkispawn when creating a new CA.
The values in the example are for a CA. Other subsystems require different parameters.
For further details, see:
- 7.2 Installing RHCS using the pkispawn utility in the Planning, Installation and Deployment Guide (Common Criteria Edition).
-
The
pki_default.cfg(5)man page for descriptions of the parameters and examples.
13.1.7. Using an HSM to store subsystem certificates
By default, keys and certificates are stored in locally-managed databases, key4.db and cert9.db, respectively, in the /var/lib/pki/instance_name/alias directory. However, Red Hat Certificate System also supports hardware security modules (HSM), external devices which can store keys and certificates in a centralized place on the network. Using an HSM can make some functions, like cloning, easier because the keys and certificates for the instance are readily accessible.
When an HSM is used to store certificates, then the HSM name is prepended to the certificate nickname, and the full name is used in the subsystem configuration, such as the server.xml file. For example:
serverCert="nethsm:Server-Cert cert-instance_ID
serverCert="nethsm:Server-Cert cert-instance_IDA single HSM can be used to store certificates and keys for mulitple subsystem instances, which may be installed on multiple hosts. When an HSM is used, any certificate nickname for a subsystem must be unique for every subsystem instance managed on the HSM.
Certificate System supports two types of HSM, nShield Connect XC and Luna.
13.2. Renewing subsystem certificates
For details about renewing subsystem certificates, see Section 3.4.1, “The renewal process”.
The process for renewing a subsystem certificate is the same as for renewing a user certificate.
To renew a system certificate, submit the request using the corresponding enrollment profile when using the HttpClient utility. For details about the different system certificate profiles, see Section 5.3.2.1, “Obtaining system and server certificates”.
13.2.1. Renewing certificates using certutil
certutil can be used to generate a certificate request using an existing key pair in the certificate database. The new certificate request can then be submitted through the regular profile pages for the CA to issue a renewed certificate.
Encryption and signing certificates are created in a single step. However, the renewal process only renews one certificate at a time.
To renew both certificates in a certificate pair, each one has to be renewed individually.
Get the password for the token database.
cat /var/lib/pki/instance_name/conf/password.conf internal=263163888660
# cat /var/lib/pki/instance_name/conf/password.conf internal=263163888660Copy to Clipboard Copied! Toggle word wrap Toggle overflow Open the certificate database directory of the instance whose certificate is being renewed.
cd /var/lib/pki/instance_name/alias
# cd /var/lib/pki/instance_name/aliasCopy to Clipboard Copied! Toggle word wrap Toggle overflow List the key and nickname for the certificate being renewed. In order to renew a certificate, the key pairs used to generate and the subject name given to the new certificate must be the same as the one in the old certificate.
# certutil -K -d . certutil: Checking token "NSS Certificate DB" in slot "NSS User Private Key and Certificate Services" Enter Password or Pin for "NSS Certificate DB": < 0> rsa 69481646e38a6154dc105960aa24ccf61309d37d caSigningCert cert-pki-tomcat CA
# certutil -K -d . certutil: Checking token "NSS Certificate DB" in slot "NSS User Private Key and Certificate Services" Enter Password or Pin for "NSS Certificate DB": < 0> rsa 69481646e38a6154dc105960aa24ccf61309d37d caSigningCert cert-pki-tomcat CACopy to Clipboard Copied! Toggle word wrap Toggle overflow Copy the
aliasdirectory as a backup, then delete the original certificate from the certificate database. For example:certutil -D -n "ServerCert cert-example" -d .
# certutil -D -n "ServerCert cert-example" -d .Copy to Clipboard Copied! Toggle word wrap Toggle overflow Run the
certutilcommand with the options set to the values in the existing certificate.certutil -d . -R -n "NSS Certificate DB:cert-pki-tomcat CA" -s "cn=CA Authority,o=Example Domain" -a -o example.req2.txt
# certutil -d . -R -n "NSS Certificate DB:cert-pki-tomcat CA" -s "cn=CA Authority,o=Example Domain" -a -o example.req2.txtCopy to Clipboard Copied! Toggle word wrap Toggle overflow The difference between generating a new certificate and key pair and renewing the certificate is the value of the -n option. To generate an entirely new request and key pair, then -k sets the key type and is used with -g, which sets the bit length. For a renewal request, the -n option uses the certificate nickname to access the existing key pair stored in the security database.
For further details about the parameters, see the
certutil(1)man page.- Submit the certificate request and then retrieve it and install it, as described in Section 5.3, “Requesting and receiving certificates using CMC”.
13.2.2. Renewing expired Certificate System server certificates
Certificate System does not automatically renew its server certificates online while the PKI server is running. In general, administrators should renew the system certificates before they expire. However, if a system certificate expires, Certificate System will fail to start.
To renew system certificates after expiration, you can set up a temporary server certificate:
If the system certificate is expired:
Create a temporary certificate:
pki-server cert-create sslserver --temp
# pki-server cert-create sslserver --tempCopy to Clipboard Copied! Toggle word wrap Toggle overflow Import the temporary certificate into Certificate System’s Network Security Services (NSS) database:
pki-server cert-import sslserver
# pki-server cert-import sslserverCopy to Clipboard Copied! Toggle word wrap Toggle overflow Start Certificate System:
pki-server start instance_name
# pki-server start instance_nameCopy to Clipboard Copied! Toggle word wrap Toggle overflow
Display the certificates and note the ID of the expired system certificate:
pki-server cert-find
# pki-server cert-findCopy to Clipboard Copied! Toggle word wrap Toggle overflow Create the new permanent certificate:
pki-server cert-create certificate_ID
# pki-server cert-create certificate_IDCopy to Clipboard Copied! Toggle word wrap Toggle overflow Stop Certificate System:
pki-server stop instance_name
# pki-server stop instance_nameCopy to Clipboard Copied! Toggle word wrap Toggle overflow Import the new certificate to replace the expired certificate:
pki-server cert-import certificate_ID
# pki-server cert-import certificate_IDCopy to Clipboard Copied! Toggle word wrap Toggle overflow Start Certificate System:
pki-server start instance_name
# pki-server start instance_nameCopy to Clipboard Copied! Toggle word wrap Toggle overflow
13.3. Changing the Names of Subsystem Certificates
One alternative to renewing certificates is replacing them with new certificates, meaning that a new certificate is generated with new keys. Generally, a new certificate can be added to the database and the old one deleted, a simple one-to-one swap. This is possible because the individual subsystem servers identify certificates based on their nickname; as long as the certificate nickname remains the same, the server can find the required certificate even if other factors -like the subject name, serial number, or key -are different.
However, in some situations, the new certificate may have a new certificate nickname, as well. In that case, the certificate nickname needs to be updated in all of the required settings in the subsystem’s CS.cfg configuration file.
Always restart a subsystem after editing the CS.cfg file.
These tables list all of the configuration parameters for each of the subsystem’s certificates:
| CA Signing Certificate |
|
| OCSP Signing Certificate |
|
| Subsystem Certificate |
|
| Server Certificate |
|
| Audit Signing Certificate |
|
| Transport Certificate |
|
| Storage Certificate |
|
| Server Certificate |
|
| Subsystem Certificate |
|
| Audit Log Signing Certificate |
|
| OCSP Signing Certificate |
|
| Server Certificate |
|
| Subsystem Certificate |
|
| Audit Log Signing Certificate |
|
| KRA Transport Certificate[a] |
|
| Server Certificate |
|
| Subsystem Certificate |
|
| Audit Log Signing Certificate |
|
[a]
This needs to be changed in the TKS configuration if the KRA transport certificate nickname changes, even if the TKS certificates all stay the same.
| |
| Server Certificate |
|
| Subsystem Certificate |
|
| Audit Log Signing Certificate |
|
13.4. Using cross-pair certificates
In the late 1990s, as the US government began enhancing its public key infrastructure, it became apparent that branches of government with their own, separate PKI deployments still needed to be able to recognize and trust each others certificates as if the certificates were issued from their own CA. (The method of getting certificates trusted outside a network for external clients to use is a serious, not easily resolved issue for any PKI administrator.)
The US government devised a standard for issuing cross-pair certificates called the Federal Bridge Certificate Authority. These certificates are also called bridge certificates, for obvious reasons. Bridge or cross-pair certificates are CA signing certificate that are framed as dual certificate pairs, similar to encryption and signing certificate pairs for users, only each certificate in the pair is issued by a different CA. Both partner CAs store the other CA signing certificate in its database, so all of the certificates issued within the other PKI are trusted and recognized.
Bridging certificates honors certificates issued by a CA that is not chained to the root CA in its own PKI. By establishing a trust between the Certificate System CA and another CA through a cross-pair CA certificate, the cross-pair certificate can be downloaded and used to trust the certificates issued by the other CA, just as downloading and installing a single CA certificate trusts all certificates issued by the CA.
The Certificate System can issue, import, and publish cross-pair CA certificates. A special profile must be created for issuing cross-pair certificates, and then the certificates can be requested and installed for the CA using the Certificate Wizard for the CA subsystem.
For more information on creating cross-pair certificate profiles, see the Configuring Cross-Pair profiles in the Planning, Installation and Deployment Guide (Common Criteria Edition).
For more information on publishing cross-pair certificates, see Section 7.8, “Publishing cross-pair certificates”.
13.4.1. Installing cross-pair certificates
Both cross-pair certificates can be imported into the Certificate System databases using the certutil tool or by selecting the Cross-Pair Certificates option from the Certificate Setup Wizard, as described in Section 13.5.1, “Installing certificates in the Certificate System database”.
When both certificates have been imported into the database, a crossCertificatePair entry is formed and stored in the database. The original individual cross-pair CA certificates are deleted once the crossCertificatePair entry is created.
13.4.2. Searching for cross-pair certificates
Both CAs in bridge certificates can store or publish the cross-pair certificates as a crossCertificatePair entry in an LDAP database. The Certificate Manager’s internal database can be searched for the crossCertificatePair entry with ldapsearch.
/usr/lib[64]/mozldap/ldapsearch -D "cn=directory manager" -w secret -p 389 -h server.example.com -b "o=server.example.com-pki-ca" -s sub "(crossCertificatePair=*)"
/usr/lib[64]/mozldap/ldapsearch -D "cn=directory manager" -w secret -p 389 -h server.example.com -b "o=server.example.com-pki-ca" -s sub "(crossCertificatePair=*)"13.5. Managing the certificate database
Each Certificate System instance has a certificate database, which is maintained in its internal token. This database contains certificates belonging to the subsystem installed in the Certificate System instance and various CA certificates the subsystems use for validating the certificates they receive.
Even if an external token is used to generate and store key pairs, Certificate System always maintains its list of trusted and untrusted CA certificates in its internal token.
This section explains how to view the contents of the certificate database, delete unwanted certificates, and change the trust settings of CA certificates installed in the database using the Certificate System window. For information on adding certificates to the database, see Section 13.5.1, “Installing certificates in the Certificate System database”.
The Certificate System command-line utility certutil can be used to manage the certificate database by editing trust settings and adding and deleting certificates. For details about this tool, see http://www.mozilla.org/projects/security/pki/nss/tools/.
Administrators should periodically check the contents of the certificate database to make sure that it does not include any unwanted CA certificates. For example, if the database includes CA certificates that should not ever be trusted within the PKI setup, delete them.
13.5.1. Installing certificates in the Certificate System database
If new server certificates are issued for a subsystem, they must be installed in that subsystem database. Additionally, user and agent certificates must be installed in the subsystem databases. If the certificates are issued by an external CA, then usually the corresponding CA certificate or certificate chain needs to be installed.
Certificates can be installed in the subsystem certificate database through the Console’s Certificate Setup Wizard or using the certutil utility.
13.5.1.1. Installing certificates through the console
pkiconsole is being deprecated and will be replaced by a new browser-based UI in a future major release. Although pkiconsole will continue to be available until the replacement UI is released, we encourage using the command line equivalent of pkiconsole at this time, as the pki CLI will continue to be supported and improved upon even when the new browser-based UI becomes available in the future.
The Certificate Setup Wizard can install or import the following certificates into either an internal or external token used by the Certificate System instance:
- Any of the certificates used by a Certificate System subsystem
- Any trusted CA certificates from external CAs or other Certificate System CAs
- Certificate chains
A certificate chain includes a collection of certificates: the subject certificate, the trusted root CA certificate, and any intermediate CA certificates needed to link the subject certificate to the trusted root. However, the certificate chain the wizard imports must include only CA certificates; none of the certificates can be a user certificate.
In a certificate chain, each certificate in the chain is encoded as a separate DER-encoded object. When the wizard imports a certificate chain, it imports these objects one after the other, all the way up the chain to the last certificate, which may or may not be the root CA certificate. If any of the certificates in the chain are already installed in the local certificate database, the wizard replaces the existing certificates with the ones in the chain. If the chain includes intermediate CA certificates, the wizard adds them to the certificate database as untrusted CA certificates.
The subsystem console uses the same wizard to install certificates and certificate chains. To install certificates in the local security database, do the following:
Open the console.
pkiconsole -d nssdb -n 'optional client cert nickname' https://server.example.com:secure_port/subsystem_type
# pkiconsole -d nssdb -n 'optional client cert nickname' https://server.example.com:secure_port/subsystem_typeCopy to Clipboard Copied! Toggle word wrap Toggle overflow - In the Configuration tab, select System Keys and Certificates from the left navigation tree.
There are two tabs where certificates can be installed, depending on the subsystem type and the type of certificate.
- The CA Certificates tab is for installing CA certificates and certificate chains. For Certificate Managers, this tab is used for third-party CA certificates or other Certificate System CA certificates; all of the local CA certificates are installed in the Local Certificates tab. For all other subsystems, all CA certificates and chains are installed through this tab.
- The Local Certificates tab is where all server certificates, subsystem certificates, and local certificates such as OCSP signing or KRA transport are installed.
Select the appropriate tab.
To install a certificate in the Local Certificates tab, click . To install a certificate in the CA Certificates tab, click . Both will open the Certificate Setup Wizard.
- When the wizard opens, select the Install a certificate radio button, and click .
- Select the type of certificate to install. The options for the drop-down menu are the same options available for creating a certificate, depending on the type of subsystem, with the additional option to install a cross-pair certificate.
Paste in the certificate body, including the
-----BEGIN CERTIFICATE-----and-----END CERTIFICATE-----, into the text area, or specify the absolute file location; this must be a local file.The certificate will look like the following:
Copy to Clipboard Copied! Toggle word wrap Toggle overflow
The wizard displays the certificate details. Review the fingerprint to make sure this is the correct certificate, or use the button to go back and submit a different one. Give a nickname for the certificate.
The wizard installs the certificate.
Any CA that signed the certificate must be trusted by the subsystem. Make sure that this CA’s certificate exists in the subsystem’s certificate database (internal or external) and that it is trusted.
If the CA certificate is not listed, add the certificate to the certificate database as a trusted CA. If the CA’s certificate is listed but untrusted, change the trust setting to trusted, as shown in Section 13.6, “Changing the trust settings of a CA certificate”.
When installing a certificate issued by a CA that is not stored in the Certificate System certificate database, add that CA’s certificate chain to the database. To add the CA chain to the database, copy the CA chain to a text file, start the wizard again, and install the CA chain.
13.5.1.2. Installing certificates using certutil
To install subsystem certificates in the Certificate System instance’s security databases using certutil, do the following:
Open the subsystem’s security database directory.
cd /var/lib/pki/instance_name/alias
# cd /var/lib/pki/instance_name/aliasCopy to Clipboard Copied! Toggle word wrap Toggle overflow Run the
certutilcommand with the-Ato add the certificate and-ipointing to the file containing the certificate issued by the CA.certutil -A -n cert-name -t trustargs -d . -a -i certificate_file
# certutil -A -n cert-name -t trustargs -d . -a -i certificate_fileCopy to Clipboard Copied! Toggle word wrap Toggle overflow NoteIf the Certificate System instance’s certificates and keys are stored on an HSM, then specify the token name using the
-hoption.For example:
certutil -A -n "ServerCert cert-instance_name" -t u,u,u -d . -a -i /tmp/example.cert
certutil -A -n "ServerCert cert-instance_name" -t u,u,u -d . -a -i /tmp/example.certCopy to Clipboard Copied! Toggle word wrap Toggle overflow
For information about using the certutil command, see http://www.mozilla.org/projects/security/pki/nss/tools/certutil.html.
13.5.1.3. About CA certificate chains
Any client or server software that supports certificates maintains a collection of trusted CA certificates in its certificate database. These CA certificates determine which other certificates the software can validate. In the simplest case, the software can validate only certificates issued by one of the CAs for which it has a certificate. It is also possible for a trusted CA certificate to be part of a chain of CA certificates, each issued by the CA above it in a certificate hierarchy.
The first certificate in the chain is processed in a context-specific manner, which varies according to how it is being imported. For Mozilla Firefox, this handling depends upon the MIME content type used on the object being downloaded. For Red Hat servers, it depends upon the options selected in the server administration interface.
Subsequent certificates are all treated the same. If the certificates contain the SSL-CA bit in the Netscape Certificate Type certificate extension and do not already exist in the local certificate database, they are added as untrusted CAs. They can be used for certificate chain validation as long as there is a trusted CA somewhere in the chain.
13.5.1.4. Viewing database content
The certificates stored in the subsystem certificates database, cert9.db, can be viewed through the subsystem administrative console. Alternatively, the certificates can be listed using the certutil utility. certutil must be used to view the TPS certificates because the TPS subsystem does not use an administrative console.
The certificates listed in the cert9.db database are the subsystem certificates used for subsystem operations. User certificates are stored with the user entries in the LDAP internal database.
13.5.1.4.1. Viewing Database Content through the Console
pkiconsole is being deprecated and will be replaced by a new browser-based UI in a future major release. Although pkiconsole will continue to be available until the replacement UI is released, we encourage using the command line equivalent of pkiconsole at this time, as the pki CLI will continue to be supported and improved upon even when the new browser-based UI becomes available in the future.
To view the contents of the database through the administrative console, do the following:
Open the subsystem console.
pkiconsole -d nssdb -n 'optional client cert nickname' https://server.example.com:secure_port/subsystem_type
# pkiconsole -d nssdb -n 'optional client cert nickname' https://server.example.com:secure_port/subsystem_typeCopy to Clipboard Copied! Toggle word wrap Toggle overflow - In the Configuration tab, select System Keys and Certificates from the left navigation tree.
There are two tabs, CA Certificates and Local Certificates, which list different kinds of certificates.
- CA Certificates lists CA certificates for which the corresponding private key material is not available, such as certificates issued by third-party CAs such as Entrust or Verisign or external Certificate System Certificate Managers.
- Local Certificates lists certificates kept by the Certificate System subsystem instance, such as the KRA transport certificate or OCSP signing certificate.
.Certificate database tab image::cert-db1.png[]
The Certificate Database Management table lists the all of the certificates installed on the subsystem. The following information is supplied for each certificate:
- Certificate Name
- Serial Number
-
Issuer Names, the common name (
cn) of the issuer of this certificate. -
Token Name, the name of the cryptographic token holding the certificate; for certificate stored in the database, this is
internal.
To view more detailed information about the certificate, select the certificate, and click . This opens a window which shows the serial number, validity period, subject name, issuer name, and certificate fingerprint of the certificate.
13.5.1.5. Viewing database content using certutil
To view the certificates in the subsystem database using certutil, open the instance’s certificate database directory, and run the certutil with the -L option. For example:
cd /var/lib/pki/instance_name/alias
cd /var/lib/pki/instance_name/aliascertutil -L -d . Certificate Authority - Example Domain CT,c, subsystemCert cert-instance name u,u,u Server-Cert cert-instance_name u,u,u
certutil -L -d .
Certificate Authority - Example Domain CT,c,
subsystemCert cert-instance name u,u,u
Server-Cert cert-instance_name u,u,u
To view the keys stored in the subsystem databases using certutil, run the certutil with the -K option. For example:
cd /var/lib/pki/instance_name/alias
cd /var/lib/pki/instance_name/alias
For information about using the certutil command, see http://www.mozilla.org/projects/security/pki/nss/tools/certutil.html.
13.5.2. Deleting certificates from the database
Removing unwanted certificates reduces the size of the certificate database.
When deleting CA certificates from the certificate database, be careful not to delete the intermediate CA certificates, which help a subsystem chain up to the trusted CA certificate. If in doubt, leave the certificates in the database as untrusted CA certificates; see Section 13.6, “Changing the trust settings of a CA certificate”.
13.5.2.1. Deleting certificates through the console
pkiconsole is being deprecated and will be replaced by a new browser-based UI in a future major release. Although pkiconsole will continue to be available until the replacement UI is released, we encourage using the command line equivalent of pkiconsole at this time, as the pki CLI will continue to be supported and improved upon even when the new browser-based UI becomes available in the future.
To delete a certificate through the Console, do the following:
Open the subsystem console.
pkiconsole -d nssdb -n 'optional client cert nickname' https://server.example.com:secure_port/subsystem_type
# pkiconsole -d nssdb -n 'optional client cert nickname' https://server.example.com:secure_port/subsystem_typeCopy to Clipboard Copied! Toggle word wrap Toggle overflow - In the Configuration tab, select System Keys and Certificates from the left navigation tree.
- Select the certificate to delete, and click .
- When prompted, confirm the deletion.
13.5.2.2. Deleting certificates using certutil
To delete a certificate from the database using certutil:
Open the instance’s certificate databases directory.
/var/lib/pki/instance_name/alias
/var/lib/pki/instance_name/aliasCopy to Clipboard Copied! Toggle word wrap Toggle overflow List the certificates in the database by running the
certutilwith the-Loption. For example:# certutil -L -d . Certificate Authority - Example Domain CT,c, subsystemCert cert-instance_name u,u,u Server-Cert cert-instance_name u,u,u
# certutil -L -d . Certificate Authority - Example Domain CT,c, subsystemCert cert-instance_name u,u,u Server-Cert cert-instance_name u,u,uCopy to Clipboard Copied! Toggle word wrap Toggle overflow Delete the certificate by running the
certutilwith the-Doption.certutil -D -d . -n certificate_nickname
# certutil -D -d . -n certificate_nicknameCopy to Clipboard Copied! Toggle word wrap Toggle overflow For example:
certutil -D -d . -n "ServerCert cert-instance_name"
# certutil -D -d . -n "ServerCert cert-instance_name"Copy to Clipboard Copied! Toggle word wrap Toggle overflow List the certificates again to confirm that the certificate was removed.
# certutil -L -d . Certificate Authority - Example Domain CT,c, subsystemCert cert-instance_name u,u,u
# certutil -L -d . Certificate Authority - Example Domain CT,c, subsystemCert cert-instance_name u,u,uCopy to Clipboard Copied! Toggle word wrap Toggle overflow
For information about using the certutil command, see http://www.mozilla.org/projects/security/pki/nss/tools/certutil.html.
13.6. Changing the trust settings of a CA certificate
Certificate System subsystems use the CA certificates in their certificate databases to validate certificates received during an SSL-enabled communication.
It can be necessary to change the trust settings on a CA stored in the certificate database, temporarily or permanently. For example, if there is a problem with access or compromised certificates, marking the CA certificate as untrusted prevents entities with certificates signed by that CA from authenticating to the Certificate System. When the problem is resolved, the CA can be marked as trusted again.
To untrust a CA permanently, consider removing its certificate from the trust database. For instructions, see Section 13.5.2, “Deleting certificates from the database”.
13.6.1. Changing trust settings through the console
pkiconsole is being deprecated and will be replaced by a new browser-based UI in a future major release. Although pkiconsole will continue to be available until the replacement UI is released, we encourage using the command line equivalent of pkiconsole at this time, as the pki CLI will continue to be supported and improved upon even when the new browser-based UI becomes available in the future.
To change the trust setting of a CA certificate, do the following:
Open the subsystem console.
pkiconsole -d nssdb -n 'optional client cert nickname' https://server.example.com:secure_port/subsystem_type
# pkiconsole -d nssdb -n 'optional client cert nickname' https://server.example.com:secure_port/subsystem_typeCopy to Clipboard Copied! Toggle word wrap Toggle overflow - In the Configuration tab, System Keys and Certificates from the left navigation tree.
- Select the CA certificates tab.
- Select the CA certificate to modify, and click .
A prompt opens which reads The Certificate chain is (un)trusted, are you sure you want to (un)trust it?
Clicking yes changes the trust setting of the certificate chain; pressing no preserves the original trust relationship.
13.6.2. Changing trust settings using certutil
To change the trust setting of a certificate using certutil, do the following:
Open the instance’s certificate databases directory.
cd /var/lib/pki/instance_name/alias
# cd /var/lib/pki/instance_name/aliasCopy to Clipboard Copied! Toggle word wrap Toggle overflow List the certificates in the database by running the
certutilwith the-Loption. For example:# certutil -L -d . Certificate Authority - Example Domain CT,c, subsystemCert cert-instance_name u,u,u Server-Cert cert-instance_name u,u,u
# certutil -L -d . Certificate Authority - Example Domain CT,c, subsystemCert cert-instance_name u,u,u Server-Cert cert-instance_name u,u,uCopy to Clipboard Copied! Toggle word wrap Toggle overflow Change the trust settings for the certificate by running the
certutilwith the-Moption.certutil -M -n cert_nickname -t trust -d .
# certutil -M -n cert_nickname -t trust -d .Copy to Clipboard Copied! Toggle word wrap Toggle overflow For example:
certutil -M -n "Certificate Authority - Example Domain" -t TCu,TCu,TCu -d .
# certutil -M -n "Certificate Authority - Example Domain" -t TCu,TCu,TCu -d .Copy to Clipboard Copied! Toggle word wrap Toggle overflow List the certificates again to confirm that the certificate trust was changed.
# certutil -L -d . Certificate Authority - Example Domain CTu,CTu,CTu subsystemCert cert-instance_name u,u,u Server-Cert cert-instance_name u,u,u
# certutil -L -d . Certificate Authority - Example Domain CTu,CTu,CTu subsystemCert cert-instance_name u,u,u Server-Cert cert-instance_name u,u,uCopy to Clipboard Copied! Toggle word wrap Toggle overflow
For information about using the certutil command, see http://www.mozilla.org/projects/security/pki/nss/tools/certutil.html.
13.7. Managing tokens used by the subsystems
Certificate System manages two groups of tokens: tokens used by the subsystems to perform PKI tasks and tokens issued through the subsystem. These management tasks refer specifically to tokens that are used by the subsystems.
13.7.1. Detecting tokens
To see if a token can be detected by Certificate System to be installed or configured, use the TokenInfo utility. For example:
TokenInfo /var/lib/pki/instance_name/alias Database Path: /var/lib/pki/instance_name/alias Found external module 'NSS Internal PKCS #11 Module'
TokenInfo /var/lib/pki/instance_name/alias
Database Path: /var/lib/pki/instance_name/alias
Found external module 'NSS Internal PKCS #11 Module'This utility will return all tokens which can be detected by the Certificate System, not only tokens which are installed in the Certificate System.
13.7.1.1. Viewing tokens
To view a list of the tokens currently installed for a Certificate System instance, use the modutil utility.
Open the instance
aliasdirectory. For example:cd /var/lib/pki/instance_name/alias
cd /var/lib/pki/instance_name/aliasCopy to Clipboard Copied! Toggle word wrap Toggle overflow Show the information about the installed PKCS #11 modules installed as well as information on the corresponding tokens using the
modutiltool.modutil -dbdir . -nocertdb -list
modutil -dbdir . -nocertdb -listCopy to Clipboard Copied! Toggle word wrap Toggle overflow
13.7.2. Changing a token’s password
The token, internal or external, that stores the key pairs and certificates for the subsystems is protected (encrypted) by a password. To decrypt the key pairs or to gain access to them, enter the token password. This password is set when the token is first accessed, usually during Certificate System installation.
It is good security practice to change the password that protects the server’s keys and certificates periodically. Changing the password minimizes the risk of someone finding out the password. To change a token’s password, use the certutil command-line utility.
For information about certutil, see http://www.mozilla.org/projects/security/pki/nss/tools/.
The single sign-on password cache stores token passwords in the password.conf file. This file must be manually updated every time the token password is changed. For more information on managing passwords through the password.conf file, see 9.3 Managing system passwords in the Planning, Installation and Deployment Guide (Common Criteria Edition).
Chapter 14. Setting Time and Date in Red Hat Enterprise Linux
The section contains how to set time and date in Red Hat Enterprise Linux:
The system time is always kept in Coordinated Universal Time (UTC) and converted in applications to local time as needed. Local time is the actual time in your current time zone, taking into account daylight saving time (DST).
The timedatectl utility is distributed as part of the systemd system and service manager and allows you to review and change the configuration of the system clock.
To change the current time:
timedatectl set-time HH:MM:SS
# timedatectl set-time HH:MM:SSCopy to Clipboard Copied! Toggle word wrap Toggle overflow Replace HH with an hour, MM with a minute, and SS with a second, all typed in two-digit form.
To change the current date:
timedatectl set-time YYYY-MM-DD
# timedatectl set-time YYYY-MM-DDCopy to Clipboard Copied! Toggle word wrap Toggle overflow Replace YYYY with a four-digit year, MM with a two-digit month, and DD with a two-digit day of the month.
To set the time zone:
First, display the list of available time zones:
timedatectl list-timezones
# timedatectl list-timezonesCopy to Clipboard Copied! Toggle word wrap Toggle overflow Based on the above list, set your desired time zone with this command:
timedatectl set-timezone <your_preferred_timezone>
# timedatectl set-timezone <your_preferred_timezone>Copy to Clipboard Copied! Toggle word wrap Toggle overflow
The time change is audited by the operating system. For more information see 13.2.1.3 Auditing Time Change Events in the Planning, Installation and Deployment Guide (Common Criteria Edition).
Chapter 15. Determining Certificate System product version
The Red Hat Certificate System product version is stored in the /usr/share/pki/CS_SERVER_VERSION file. To display the version:
cat /usr/share/pki/CS_SERVER_VERSION
Red Hat Certificate System {Version} (Batch Update 1)
# cat /usr/share/pki/CS_SERVER_VERSION
Red Hat Certificate System {Version} (Batch Update 1)To find the product version of a running server, access the following URLs from your browser:
-
http://host_name:_port_number_/ca/admin/ca/getStatus -
http://host_name:_port_number_/kra/admin/kra/getStatus -
http://host_name:_port_number_/ocsp/admin/ocsp/getStatus -
http://host_name:_port_number_/tks/admin/tks/getStatus -
http://host_name:_port_number_/tps/admin/tps/getStatus
Note that each component is a separate package and thus could have a separate version number. The above will show the version number for each currently running component.
Chapter 16. Updating Red Hat Certificate System
To update Certificate System and the operating system it is running on, use the dnf update command. This downloads, verifies, and installs updates for Certificate System as well as operating system packages.
For example:
dnf update
# dnf updateCopy to Clipboard Copied! Toggle word wrap Toggle overflow This downloads, verifies, and installs updates for Certificate System as well as operating system packages. You can verify the version number before and after updating packages, to confirm they were successfully installed.
Updating Certificate System requires the PKI infrastructure to be restarted. We suggest scheduling a maintenance window to take the PKI infrastructure offline and install the update.
To optionally download updates without installing, use the
--downloadonlyoption in the above procedure:dnf update --downloadonly
# dnf update --downloadonlyCopy to Clipboard Copied! Toggle word wrap Toggle overflow The downloaded packages are stored in the
/var/cache/yum/directory.
Thednf updatewill later use the packages if they are the latest versions.
Chapter 17. Troubleshooting
This chapter covers some of the more common usage problems that are encountered when installing Certificate System.
- Q: The init script returned an OK status, but my CA instance does not respond. Why?
- Q: I can’t open the pkiconsole and I’m seeing Java exceptions in stdout
- Q: I tried to run pkiconsole, and I got "Socket exceptions in stdout". Why?
- Q: I tried to enroll for a certificate, and I got the error "request is not submitted…Subject Name Not Found"?
- Q: Why are my enrolled certificates not being published?
- Q: How do I open the pkiconsole utility from a remote host?
The init script returned an OK status, but my CA instance does not respond. Why?
This should not happen. Usually (but not always), this indicates a listener problem with the CA, but it can have many different causes. Check in the catalina.out, system, and debug log files for the instance to see what errors have occurred. This lists a couple of common errors. One situation is when there is a PID for the CA, indicating the process is running, but that no listeners have been opened for the server. This would return Java invocation class errors in the catalina.out file:
This could mean that you have the wrong version of JSS or NSS. The process requires libnss3.so in the path. Check this with this command:
ldd /usr/lib64/libjss4.so
# ldd /usr/lib64/libjss4.so
If libnss3.so is not found, try unsetting the LD_LIBRARY_PATH variable and restart the CA.
unset LD_LIBRARY_PATH
# unset LD_LIBRARY_PATHpki-server restart <instance_name>
# pki-server restart <instance_name>
I can’t open the pkiconsole and I’m seeing Java exceptions in stdout
This probably means that you have the wrong JRE installed or the wrong JRE set as the default. Run alternatives --config java to see what JRE is selected. Red Hat Certificate System requires OpenJDK 1.8.
I tried to run pkiconsole, and I got "Socket exceptions in stdout". Why?
This means that there is a port problem. Either there are incorrect SSL settings for the administrative port (meaning there is bad configuration in the server.xml) or the wrong port was given to access the admin interface. Port errors will look like the following:
I tried to enroll for a certificate, and I got the error "request is not submitted…Subject Name Not Found"?
This most often occurs with a custom LDAP directory authentication profile and it shows that the directory operation failed. Particularly, it failed because it could not construct a working DN. The error will be in the CA’s debug log. For example, this profile used a custom attribute (MYATTRIBUTE) that the directory didn’t recognize:
Any custom components — attributes, object classes, and unregistered OIDs — which are used in the subject DN can cause a failure. For most cases, the X.509 attributes defined in RHC 2253 should be used in subject DNs instead of custom attributes.
Why are my enrolled certificates not being published?
This usually indicates that the CA is misconfigured. The main place to look for errors is the debug log, which can indicate where the misconfiguration is. For example, this has a problem with the mappers:
Check the publishing configuration in the CA’s CS.cfg file or in the Publishing tab of the CA console. In this example, the problem was in the mapping parameter, which must point to an existing LDAP suffix:
ca.publish.mapper.instance.LdapUserCertMap.dnPattern=UID=$subj.UID,dc=publish
ca.publish.mapper.instance.LdapUserCertMap.dnPattern=UID=$subj.UID,dc=publish
How do I open the pkiconsole utility from a remote host?
In certain situations, administrators want to open the pkiconsole on the Certificate System server from a remote host. For that, administrators can use a Virtual Network Computing (VNC) connection:
Setup a VNC server, for example, on the Red Hat Certificate System server. For details about remote desktop access, see Accessing the desktop remotely in the Red Hat Enterprise Linux 8 documentation.
ImportantThe pkiconsole utility cannot run on a server with Federal Information Processing Standard (FIPS) mode enabled. Use a different host with Red Hat Enterprise Linux to run the VNC server, if FIPS mode is enabled on your Certificate System server. Note that this utility will be deprecated.
Open the
pkiconsoleutility in the VNC window. For example:pkiconsole -d nssdb -n 'optional client cert nickname' https://server.example.com:8443/ca
# pkiconsole -d nssdb -n 'optional client cert nickname' https://server.example.com:8443/caCopy to Clipboard Copied! Toggle word wrap Toggle overflow
VNC viewers are available for different kind of operating systems. However, Red Hat supports only VNC viewers installed on Red Hat Enterprise Linux from the integrated repositories.
- What do I do when the LDAP server is not responding?
If the Red Hat Directory Server instance used for the internal database is not running, a connectivity issue occurred, or a TLS connection failure occurred, then you cannot connect to the subsystem instances which rely on it. The instance debug logs will specifically identify the problem with the LDAP connection. For example, if the LDAP server was not online:
Copy to Clipboard Copied! Toggle word wrap Toggle overflow After fixing the underlying network problem, such as an unplugged cable, the Red Hat Directory Server was stopped, significant packet loss occurred, or ensuring that the TLS connection can be recreated, stop and then start the Certificate System instance in question:
systemctl stop pki-tomcatd-nuxwdog@<instance_name>.service
# systemctl stop pki-tomcatd-nuxwdog@<instance_name>.serviceCopy to Clipboard Copied! Toggle word wrap Toggle overflow systemctl start pki-tomcatd-nuxwdog@<instance_name>.service
# systemctl start pki-tomcatd-nuxwdog@<instance_name>.serviceCopy to Clipboard Copied! Toggle word wrap Toggle overflow
Chapter 18. Subsystem control and maintenance
This chapter provides information on how to control (start, stop, restart, and status check) a Red Hat Certificate System subsystem, as well as general maintenance (health check) recommendation.
18.1. Starting, stopping, restarting and obtaining status
You can start and stop the Red Hat Certificate System subsystem instances using the systemctl utility on Red Hat Enterprise Linux 8.
You can also use the pki-server alias to start and stop instances: pki-server <command> <instance> is an alias to systemctl <command> pki-tomcatd@<instance>.service.
- To start an instance:
*systemctl start unit_file@instance_name.service*
# *systemctl start unit_file@instance_name.service*pki-server start instance_name
# pki-server start instance_name- To stop an instance:
*systemctl stop unit_file@instance_name.service*
# *systemctl stop unit_file@instance_name.service*pki-server stop instance_name
# pki-server stop instance_name- To restart an instance:
*systemctl restart unit_file@instance_name.service*
# *systemctl restart unit_file@instance_name.service*pki-server restart instance_name
# pki-server restart instance_name- To display the status of an instance:
*systemctl status unit_file@instance_name.service*
# *systemctl status unit_file@instance_name.service*unit_file has one of the following values:
-
pki-tomcat: with watchdog disabled -
pki-tomcat-nuxwdog: with watchdog enabled
18.2. Subsystem health check
It is important for administrators to periodically monitor possible failures, such as the following:
- Audit failure caused by a full disk
- Signing failure caused by HSM connection issue
- LDAP server connection issues
- And so on
Self-tests can also be run by demand as described in Chapter 10, Self-tests.
PKI Healthcheck is a command-line tool that helps find issues that may impact the health of your Certificate System environment. If needed, this tool can report to the Healthcheck tool present in Red Hat Identity Management.
18.2.1. PKI Healthcheck Test Modules
PKI Healthcheck consists of independent modules that test for:
- Certificate sync between CS.cfg and NSS database
-
Checks whether the system certificates in
CS.cfg(located in/var/lib/pki/<instance>/<subsystem>/conf/CS.cfg) and NSS database (located in/var/lib/pki/<instance>/alias/) match. Else, the Certificate Authority (CA) fails to start. - System certificate expiry
- Checks the expiry status of the installed system certificates (See System Certificates for more information).
- System certificate trust flags
- Checks whether the installed system certificates carry the correct Trust flags (See System Certificates for more information).
- Subsystem connectivity check
- Checks whether a subsystem is running and able to respond to requests.
- Subsystem clones connectivity and data check
- Checks simple connectivity and data sanity for a set of clones configured within a given CS subsystem. A given CA subsystem’s security domain is consulted to identify clones that have been set. The check then proceeds to reach out to each clone and verify data sanity where applicable.
18.2.2. PKI Healthcheck configuration
The PKI Healthcheck tool configuration is stored at /etc/pki/healthcheck.conf. It looks like the following:
18.2.3. Running PKI Healthcheck
-
To perform a health check, run the
pki-healthcheckcommand. You can also execute a specific check. For example:
pki-healthcheck --source pki.server.healthcheck.meta.csconfig --check DogtagCertsConfigCheck
# pki-healthcheck --source pki.server.healthcheck.meta.csconfig --check DogtagCertsConfigCheckCopy to Clipboard Copied! Toggle word wrap Toggle overflow
For more information on the possible options, see the man page: man pki-healthcheck.
18.2.4. PKI Healthcheck output formats
Healthcheck generates the following outputs, which you can set using the --output-type:
- By default, machine-readable output in JSON format (json).
- Alternatively, human-readable output (human).
You can specify a alternative file destination with the --output-file option.
18.2.5. PKI Healthcheck results
The report consists of a message describing what was run and the status. Each health check module returns one of the following results:
- SUCCESS
- configured as expected, the check executed and found no issue
- WARNING
- not an error, but worth keeping an eye on or evaluating (e.g. a certificate will expire soon)
- ERROR
- not configured as expected, something is wrong but your server is probably still working (e.g. a clone conflict)
- CRITICAL
- not configured as expected, with a high possibility for impact (e.g. a service is not started, certificates are expired, etc.)
If the status is not successful, the message may include additional information or recommandations, which can be used by the admin to correct the issue (e.g. a file has the wrong permissions, expected X and got Y).
Part V. Part V: References
Appendix A. Certificate Profile Input and Output Reference
Profile inputs and outputs define the expected input parameters in the certificate request and the output format of the enrollment result. Like many other components in Red Hat Certificate System, profile inputs and outputs are implemented as JAVA plugins to offer customization and flexibility. This appendix provides reference for the default input and output plugins.
A.1. Input Reference
An input puts certain fields on the enrollment page associated with a particular certificate profile. The inputs set for a certificate profile are used to generate the enrollment page dynamically with the appropriate fields; these input fields collect necessary information for the profile to generate the final certificate.
A.1.1. Certificate Request Input
The Certificate Request input is used for enrollments in which a certificate request is pasted into the enrollment form. It allows the request format to be set from a drop-down list and provides an input field to paste the request.
This input puts the following fields in the enrollment form:
- Certificate Request Type. This drop-down menu lets the user specify the certificate request type. The choices are PKCS #10 or CRMF. Certificate Management Messages over Cryptographic Message Syntax (CMC) enrollment is supported with both PKCS #10 and CRMF.
- Certificate Request. This is the text area in which to paste the request.
caAdminCert.cfg:input.i1.class_id=certReqInputImpl
caAdminCert.cfg:input.i1.class_id=certReqInputImplA.1.2. CMC Certificate Request Input
The CMC Certificate Request input is used for enrollments using a Certificate Message over CMS (CMC) certificate request is submitted in the request form. The request type must be either PKCS#10 or CRMF, and the only field is the Certificate Request text area in which to paste the request.
caCMCUserCert.cfg:input.i1.class_id=cmcCertReqInputImpl
caCMCUserCert.cfg:input.i1.class_id=cmcCertReqInputImplA.1.3. Dual Key Generation Input
The Dual Key Generation input is for enrollments in which dual key pairs will be generated, and thus two certificates issued, one for signing and one for encryption.
This input puts the following fields into the enrollment form:
-
Key Generation Request Type. This field is a read-only field displaying
crmfas the request type. - Key Generation Request. This field sets the selection for the key size in the key generation request for both encryption and signing certificates.
caDualCert.cfg:input.i1.class_id=dualKeyGenInputImpl
caDualCert.cfg:input.i1.class_id=dualKeyGenInputImplA.1.4. File-Signing Input
The File-Signing input sets the fields to sign a file to show it has not been tampered with.
This input creates the following fields:
-
Key Generation Request Type. This field is a read-only field displaying
crmfas the request type. - Key Generation Request. This input adds a drop-down menu to select the key size to use in the key generation request.
- URL Of File Being Signed. This gives the location of the file which is to be signed.
- Text Being Signed. This gives the filename.
caAgentFileSigning.cfg:input.i2.class_id=fileSigningInputImpl
caAgentFileSigning.cfg:input.i2.class_id=fileSigningInputImplA.1.5. Image Input
The Image input sets the field to sign an image file. The only field which this input creates is Image URL, which gives the location of the image which is to be signed.
A.1.6. Key Generation Input
The Key Generation input is used for enrollments in which a single key pair will be generated, generally user-based certificate enrollments.
This input puts the following fields into the enrollment form:
-
Key Generation Request Type. This field is a read-only field displaying
crmfas the request type. - Key Generation Request. This input adds a drop-down menu to select the key size to use in the key generation request.
caDualCert.cfg:input.i1.class_id=keyGenInputImpl
caDualCert.cfg:input.i1.class_id=keyGenInputImplA.1.7. nsHKeyCertRequest (Token Key) Input
The Token Key input is used to enroll keys for hardware tokens for agents to use later for certificate-based authentication.
This input puts the following fields into the enrollment form:
- Token Key CUID. This field gives the CUID (contextually unique user ID) for the token device.
- Token Key User Public Key. This field must contain the token user’s public key.
caTempTokenDeviceKeyEnrollment.cfg:input.i1.class_id=nsHKeyCertReqInputImpl
caTempTokenDeviceKeyEnrollment.cfg:input.i1.class_id=nsHKeyCertReqInputImplA.1.8. nsNKeyCertRequest (Token User Key) Input
The Token User Key input is used to enroll keys for the user of a hardware token, for agents to use the token later for certificate-based authentication. This input puts the following fields into the enrollment form:
- Token Key User UID. This field gives the UID for the LDAP entry of the user of the token device.
- Token Key User Public Key. This field must contain the token user’s public key.
caTempTokenUserEncryptionKeyEnrollment.cfg:input.i1.class_id=nsNKeyCertReqInputImpl
caTempTokenUserEncryptionKeyEnrollment.cfg:input.i1.class_id=nsNKeyCertReqInputImplA.1.9. Serial Number Renewal Input
The Serial Number Renewal Input is used to set the serial number of an existing certificate so that the CA can pull the original certificate entry and use the information to regenerate the certificate. The input inserts a Serial Number field into the enrollment form.
This is the only input that needs to be used with a renewal form; all the other information is supplied by the certificate entry.
caTokenUserEncryptionKeyRenewal.cfg:input.i1.class_id=serialNumRenewInputImpl
caTokenUserEncryptionKeyRenewal.cfg:input.i1.class_id=serialNumRenewInputImplA.1.10. Subject DN Input
The Subject DN input allows the user to input the specific DN to set as the certificate subject name, and the input inserts a single Subject Name field into the enrollment form.
caAdminCert.cfg:input.i3.class_id=subjectDNInputImpl
caAdminCert.cfg:input.i3.class_id=subjectDNInputImplA.1.11. Subject Name Input
The Subject Name input is used for enrollment when DN parameters need to be collected from the user. The parameters are used to formulate the subject name in the certificate. This input puts the following fields into the enrollment form:
- UID (the LDAP directory user ID)
- Common Name (the name of the user)
-
Organizational Unit (the organizational unit (
ou) to which the user belongs) - Organization (the organization name)
- Country (the country where the user is located)
caDualCert.cfg:input.i2.class_id=subjectNameInputImpl
caDualCert.cfg:input.i2.class_id=subjectNameInputImplA.1.12. Submitter Information Input
The Submitter Information input collects the certificate requester’s information such as name, email, and phone.
This input puts the following fields into the enrollment form:
- Requester Name
- Requester Email
- Requester Phone
caAdminCert.cfg:input.i2.class_id=submitterInfoInputImpl
caAdminCert.cfg:input.i2.class_id=submitterInfoInputImplA.1.13. Generic Input
The Generic Input allows admins to specify any number of input fields to be used with extension plugins that handle patterns. For example, the ccm and GUID parameters are used in the patterned Subject Alternative Name Extension Default plugin:
A.1.14. Subject Alternative Name Extension Input
The Subject Alternative Name Extension Input is used along with the Subject Alternative Name Extension Default plugin. It allows admins to enable the numbered parameters in URI with the pattern req_san_pattern_# into the input and therefore the SubjectAltNameExt extension. For example, URI containing:
...&req_san_pattern_0=host0.Example.com&req_san_pattern_1=host1.Example.com
...&req_san_pattern_0=host0.Example.com&req_san_pattern_1=host1.Example.com
injects host0.Example.com and host1.Example.com into the SubjectAltNameExt extension from the profile below.
A.2. Output Reference
An output is the response to the end user of a successful enrollment.
A.2.1. Certificate Output
This output displays the certificate in pretty-print format. This output cannot be configured or changed. It does not display anything other than the certificate in pretty-print format.
This output needs to be specified for any automated enrollment. Once a user successfully authenticates using the automated enrollment method, the certificate is automatically generated, and this output page is returned to the user. In an agent-approved enrollment, the user can get the certificate, once it is issued, by providing the request ID in the end-entities page.
caAdminCert.cfg:output.o1.class_id=certOutputImpl
caAdminCert.cfg:output.o1.class_id=certOutputImplA.2.2. PKCS #7 Output
This output returns the certificate and the certificate chain in PKCS #7 format. PKCS #7 format is the Cryptographic Message Syntax Standard, which is used for signing. This output cannot be configured or changed.
caAgentFileSigning.cfg:output.o1.class_id=pkcs7OutputImpl
caAgentFileSigning.cfg:output.o1.class_id=pkcs7OutputImplA.2.3. nsNSKeyOutput
This class implements the output plugin that returns the DER encoded certificates for token keys.
A.2.4. CMMF Output
This output returns the certificate in Certificate Management Messages Formats (CMMF). CMMF govern communication between different parts of a PKI and is used for requesting certificates and requesting certificate revocation.
Appendix B. Defaults, Constraints, and Extensions for Certificates and CRLs
This appendix explains both the standard certificate extensions defined by X.509 v3 and the extensions defined by Netscape that were used in versions of products released before X.509 v3 was finalized. It provides recommendations for extensions to use with specific kinds of certificates, including PKIX Part 1 recommendations.
This appendix is a reference for defaults, constraints, and certificate and CRL extensions that are used or are configurable in Red Hat Certificate System. For a complete reference and explanation of certificate and CRL extensions, see RFC 3280.
This appendix contains the following sections:
B.1. Defaults reference
Defaults are used to define the contents of a certificate. This section lists and defines the predefined defaults.
B.1.1. Authority Info Access extension default
This default attaches the Authority Info Access extension. This extension specifies how an application validating a certificate can access information, such as online validation services and CA policy data, about the CA that has issued the certificate. This extension should not be used to point directly to the CRL location maintained by a CA; the CRL Distribution Points extension, Section B.1.7, “CRL Distribution Points extension default”, provides references to CRL locations.
For general information about this extension, see Section B.3.1, “authorityInfoAccess”.
The following constraints can be defined with this default:
- Extension Constraint; see Section B.2.4, “Extension constraint”.
- No Constraints; see Section B.2.8, “No Constraint”.
This default can define up to five locations, with parameters for each location. The parameters are marked with an n in the table to show with which location the parameter is associated.
| Parameter | Description |
|---|---|
| Critical |
Select |
| Method_n | Specifies the access method for retrieving additional information about the CA that has issued the certificate in which the extension appears. This is one of the following values:
|
| LocationType_n | Specifies the general name type for the location that contains additional information about the CA that has issued the certificate. This is one of the following types:
|
| Location_n | Specifies the address or location to get additional information about the CA that has issued the certificate.
|
| Enable_n |
Specifies whether this location is enabled. Select |
B.1.2. Authority Key Identifier extension default
This default attaches the Authority Key Identifier extension to the certificate. The extension identifies the public key that corresponds to the private key used by a CA to sign certificates. This default has no parameters. If used, this extension is included in the certificate with the public key information.
This default takes the following constraint:
- No Constraints; see Section B.2.8, “No Constraint”.
For general information about this extension, see Section B.3.2, “authorityKeyIdentifier”.
B.1.3. Authentication Token Subject Name default
This profile default populates subject names based on the attribute values in the authentication token (AuthToken) object.
This default plugin works with the directory-based authentication manager. The Directory-Based User Dual-Use Certificate Enrollment certificate profile has two input parameters, UID and password. The directory-based authentication manager checks if the given UID and password are correct.
In addition, the directory-based authentication manager formulates the subject name of the issuing certificate. It forms the subject name by using the user’s DN value from AuthToken.
This default is responsible for reading the subject name from the AuthToken and placing it in the certificate request so that the final certificate contains the subject name.
The following constraints can be defined with this default:
- No Constraints; see Section B.2.8, “No Constraint”.
B.1.4. Basic Constraints extension default
This default attaches the B*asic Constraint* extension to the certificate. The extension identifies whether the Certificate Manager is a CA. The extension is also used during the certificate chain verification process to identify CA certificates and to apply certificate chain-path length constraints.
For general information about this extension, see Section B.3.3, “basicConstraints”.
The following constraints can be defined with this default:
- Basic Constraints Extension Constraint; see Section B.2.1, “Basic Constraints extension constraint”.
- Extension Constraint; see Section B.2.4, “Extension constraint”.
- No Constraints; see Section B.2.8, “No Constraint”.
| Parameter | Description |
|---|---|
| Critical |
Select |
| IsCA |
Specifies whether the certificate subject is a CA. With |
| PathLen | Specifies the path length, the maximum number of CA certificates that may be chained below (subordinate to) the subordinate CA certificate being issued. The path length affects the number of CA certificates to be used during certificate validation. The chain starts with the end-entity certificate being validated and moves up.
The
The permissible values are If the field is blank, the path length defaults to a value that is determined by the path length set in the Basic Constraints extension in the issuer’s certificate. If the issuer’s path length is unlimited, the path length in the subordinate CA certificate will also be unlimited. If the issuer’s path length is an integer greater than zero, the path length in the subordinate CA certificate will be set to a value that is one less than the issuer’s path length; for example, if the issuer’s path length is 4, the path length in the subordinate CA certificate will be set to 3. |
B.1.5. CA Validity default
This default adds an option to a CA certificate enrollment or renewal profile to bypass the CA’s signing certificate’s expiration constraint. This means that the issued CA certificate can have an expiration date that is later than the issuing CA signing certificate expiration date.
The following constraints can be defined with this default:
- Validity Constraint; see Section B.2.14, “Validity constraint”.
- No Constraints; see Section B.2.8, “No Constraint”.
| Parameter | Description |
|---|---|
| bypassCAnotafterrange | Sets the default value for whether a requesting CA can request a certificate whose validity period extends past the issuing CA’s validity period. |
| range | Specifies the absolute validity period for this certificate, in the number of days. |
| startTime | Sets when the validity period begins, based on the current time. |
B.1.6. Certificate Policies extension default
This default attaches the Certificate Policy Mappings extension into the certificate template. This extension defines one or more policies, indicating the policy under which the certificate has been issued and the purposes for which the certificate may be used. This default defines up to five policies, but this can be value can be changed.
For general information about this extension, see Section B.3.4, “certificatePoliciesExt”
| Parameter | Description |
|---|---|
| Critical |
Select |
| numCertPolicies |
Specifies the number of policies that can be defined. The default is |
| enable |
Select |
| policyId | Specifies the OID identifier for the policy. |
| cpsURI.enable |
The extension can include a URI to the issuer’s Certificate Practice Statement. Select |
| CPSURI.value | This value is a pointer to a Certification Practice Statement (CPS) published by the CA. The pointer is in the form of a URI. |
| usernotice.enable |
The extension can include a URI to the issuer’s Certificate Practice Statement or can embed issuer information, such as a user notice in text form. Select |
| usernotice.noticeReference.noticeNumbers | This optional user notice parameter is a sequence of numbers that points to messages stored elsewhere. |
| usernotice.noticeReference.organization | This optional user notice parameter specifies the name of the company. |
| usernotice.explicitText.value | This optional user notice parameter contains the message within the certificate. |
B.1.7. CRL Distribution Points extension default
This default attaches the CRL Distribution Points extension to the certificate. This extension identifies locations from which an application that is validating the certificate can obtain the CRL information to verify the revocation status of the certificate.
For general information about this extension, see Section B.3.5, “CRLDistributionPoints”.
The following constraints can be defined with this default:
- Extension Constraint; see Section B.2.4, “Extension constraint”.
- No Constraints; see Section B.2.8, “No Constraint”.
This default defines up to five locations, with parameters for each location. The parameters are marked with an n in the table to show with which location the parameter is associated.
| Parameter | Description |
|---|---|
| Critical |
Select |
| Type_n |
Specifies the type of CRL distribution point. The permissible values are |
| Name_n | Specifies the name of the CRL distribution point, the name can be in any of the following formats:
|
| Reasons_n | Specifies revocation reasons covered by the CRL maintained at the distribution point. Provide a comma-separated list of the following constants:
|
| IssuerType_n | Specifies the naming type of the issuer that has signed the CRL maintained at the distribution point. The issuer name can be in any of the following formats:
|
| IssuerName_n | Specifies the name format of the CRL issuer that signed the CRL. The permissible values are as follows:
The value for this parameter must correspond to the value in the |
B.1.8. Extended Key Usage extension default
This default attaches the Extended Key Usage extension to the certificate.
For general information about this extension, see Section B.3.6, “extKeyUsage”.
The extension identifies the purposes, in addition to the basic purposes indicated in the Key Usage extension, for which the certified public key may be used. For example, if the key usage extension identifies a signing key, the Extended Key Usage extension can narrow the usage of the key for only signing OCSP responses or only #Java™ applets.
| Usage | OID |
|---|---|
| Server authentication | 1.3.6.1.5.5.7.3.1 |
| Client authentication | 1.3.6.1.5.5.7.3.2 |
| Code signing | 1.3.6.1.5.5.7.3.3 |
| | 1.3.6.1.5.5.7.3.4 |
| IPsec end system | 1.3.6.1.5.5.7.3.5 |
| IPsec tunnel | 1.3.6.1.5.5.7.3.6 |
| IPsec user | 1.3.6.1.5.5.7.3.7 |
| Timestamping | 1.3.6.1.5.5.7.3.8 |
Windows 2000 can encrypt files on the hard disk, a feature known as encrypted file system (EFS), using certificates that contain the Extended Key Usage extension with the following two OIDs:
1.3.6.1.4.1.311.10.3.4 (EFS certificate)
1.3.6.1.4.1.311.10.3.4.1 (EFS recovery certificate)
The EFS recovery certificate is used by a recovery agent when a user loses the private key and the data encrypted with that key needs to be used. Certificate System supports these two OIDs and allows certificates to be issued containing the Extended Key Usage extension with these OIDs.
Normal user certificates should be created with only the EFS OID, not the recovery OID.
The following constraints can be defined with this default:
- Extended Key Usage Constraint; see Section B.2.3, “Extended Key Usage extension constraint”.
- Extension Constraint; see Section B.2.4, “Extension constraint”.
- No Constraints; see Section B.2.8, “No Constraint”.
| Parameter | Description |
|---|---|
| Critical |
Select |
| OIDs | Specifies the OID that identifies a key-usage purpose. The permissible values are a unique, valid OID specified in the dot-separated numeric component notation. For example, 2.16.840.1.113730.1.99. Depending on the key-usage purposes, the OIDs can be designated by PKIX (listed in Table B.6, “PKIX usage definitions for the Extended Key Usage extension”) or custom OIDs. Custom OIDs must be in the registered subtree of IDs reserved for the company’s use. Although it is possible to use custom OIDs for evaluating and testing the Certificate System, in a production environment, comply with the ISO rules for defining OIDs and for registering subtrees of IDs. |
B.1.9. Freshest CRL extension default
This default attaches the Freshest CRL extension to the certificate.
The following constraints can be defined with this default:
- Extension Constraint; see Section B.2.4, “Extension constraint”.
- No Constraints; see Section B.2.8, “No Constraint”.
This default defines five locations with parameters for each location. The parameters are marked with an n in the table to show with which location the parameter is associated.
| Parameter | Description |
|---|---|
| Critical |
Select |
| PointEnable_n |
Select |
| PointType_n |
Specifies the type of issuing point, either |
| PointName_n |
|
| PointIssuerName_n | Specifies the name of the issuer that has signed the CRL. The name can be in any of the following formats:
The name value must comply with the format specified in |
| PointType_n | Specifies the general name type of the CRL issuer that signed the CRL. The permissible values are as follows:
The value for this parameter must correspond to the value in the |
B.1.10. Generic extension default
This extension allows for the creation of a generic extension with user determined data. The default ensures the generic extension is populated correctly.
| Parameter | Description |
|---|---|
| Critical |
Select |
| genericExtOID | Specifies the extensions OID identifier. |
| genericExtData | The binary data contained within the extension. |
B.1.11. Inhibit Any-Policy extension default
The inhibit any-policy extension can be used for certificates issued to CAs. The inhibit any-policy indicates that the special anyPolicy OID, with the value { 2 5 29 32 0 }, is not considered an explicit match for other certificate policies.
| Parameter | Description |
|---|---|
| Critical |
This policy must be marked as critical. Select |
| SkipCerts |
This parameter indicate the number of additional certificates that may appear in the path before any-policy is no longer allowed. A value of |
B.1.12. Issuer Alternative Name extension default
This default attaches the Issuer Alternative Name extension to the certificate. The Issuer Alternative Name extension is used to associate Internet-style identities with the certificate issuer.
The following constraints can be defined with this default:
- Extension Constraint; see Section B.2.4, “Extension constraint”.
- No Constraints; see Section B.2.8, “No Constraint”.
This default defines five locations with parameters for each location. The parameters are marked with an n in the table to show with which location the parameter is associated.
| Parameter | Description |
|---|---|
| Critical |
Select |
| issuerAltExtType | This sets the type of name extension to be used, which can be one of the following:
|
| issuerAltExtPattern | Specifies the request attribute value to include in the extension. The attribute value must conform to any of the supported general name types. The permissible value is a request attribute included in the certificate request. If the server finds the attribute in the request, it sets the attribute value in the extension and adds the extension to certificates. If multiple attributes are specified and none of the attributes are present in the request, the server does not add the Issuer Alternative Name extension to certificates. If no suitable attributes can be used from the request to form the issuerAlternativeName, then literal string can be used without any token expression. For example, Certificate Authority. |
B.1.13. Key Usage extension default
This default attaches the Key Usage extension to the certificate. The extension specifies the purposes for which the key contained in a certificate should be used, such as data signing, key encryption, or data encryption, which restricts the usage of a key pair to predetermined purposes.
For general information about this extension, see Section B.3.8, “keyUsage”.
The following constraints can be defined with this default:
- Key Usage Constraint; see Section B.2.6, “Key Usage extension constraint”.
- Extension Constraint; see Section B.2.4, “Extension constraint”.
- No Constraints; see Section B.2.8, “No Constraint”.
| Parameter | Description |
|---|---|
| Critical |
Select |
| digitalSignature |
Specifies whether to allow signing SSL client certificates and S/MIME signing certificates. Select |
| nonRepudiation |
Specifies whether to use for S/MIME signing certificates. Select .WARNING [WARNING] ==== Using this bit is controversial. Carefully consider the legal consequences of its use before setting it for any certificate. ==== |
| keyEncipherment |
Specifies whether the public key in the subject is used to encipher private or secret keys. This is set for SSL server certificates and S/MIME encryption certificates. Select |
| dataEncipherment |
Specifies whether to set the extension when the subject’s public key is used to encipher user data as opposed to key material. Select |
| keyAgreement |
Specifies whether to set the extension whenever the subject’s public key is used for key agreement. Select |
| keyCertsign |
Specifies whether the public key is used to verify the signature of other certificates. This setting is used for CA certificates. Select |
| cRLSign |
Specifies whether to set the extension for CA signing certificates that sign CRLs. Select |
| encipherOnly |
Specifies whether to set the extension if the public key is only for encrypting data while performing key agreement. If this bit is set, |
| decipherOnly |
Specifies whether to set the extension if the public key is only for decrypting data while performing key agreement. If this bit is set, |
B.1.14. Name Constraints extension default
This default attaches a Name Constraints extension to the certificate. The extension is used in CA certificates to indicate a name space within which the subject names or subject alternative names in subsequent certificates in a certificate chain should be located.
For general information about this extension, see Section B.3.9, “nameConstraints”.
The following constraints can be defined with this default:
- Extension Constraint; see Section B.2.4, “Extension constraint”.
- No Constraints; see Section B.2.8, “No Constraint”.
This default defines up to five locations for both the permitted subtree and the excluded subtree and sets parameters for each location. The parameters are marked with an n in the table to show with which location the parameter is associated.
| Parameter | Description |
|---|---|
| Critical |
Select |
| PermittedSubtreesn.min | Specifies the minimum number of permitted subtrees.
|
| PermittedSubtreesmax_n | Specifies the maximum number of permitted subtrees.
|
| PermittedSubtreeNameChoice_n | Specifies the general name type for the permitted subtree to include in the extension. The permissible values are as follows:
|
| PermittedSubtreeNameValue_n | Specifies the general name value for the permitted subtree to include in the extension.
|
| PermittedSubtreeEnable_n |
Select |
| ExcludedSubtreesn.min | Specifies the minimum number of excluded subtrees.
|
| ExcludedSubtreeMax_n | Specifies the maximum number of excluded subtrees.
|
| ExcludedSubtreeNameChoice_n | Specifies the general name type for the excluded subtree to include in the extension. The permissible values are as follows:
|
| ExcludedSubtreeNameValue_n | Specifies the general name value for the permitted subtree to include in the extension.
|
| ExcludedSubtreeEnable_n |
Select |
B.1.15. Netscape Certificate Type extension default
This extension is obsolete. Use the Key Usage or Extended Key Usage certificate extensions instead.
This default attaches a Netscape Certificate Type extension to the certificate. The extension identifies the certificate type, such as CA certificate, server SSL certificate, client SSL certificate, or S/MIME certificate. This restricts the usage of a certificate to predetermined purposes.
B.1.16. Netscape Comment extension default
This extension is obsolete.
This default attaches a Netscape Comment extension to the certificate. The extension can be used to include textual comments in certificates. Applications that are capable of interpreting the comment display it when the certificate is used or viewed.
For general information about this extension, see Section B.4.3.1.1, “netscape-comment”.
The following constraints can be defined with this default:
- Extension Constraint; see Section B.2.4, “Extension constraint”.
- No Constraints; see Section B.2.8, “No Constraint”.
| Parameter | Description |
|---|---|
| Critical |
Select |
| CommentContent | Specifies the content of the comment to appear in the certificate. |
B.1.17. No Default Extension
This default can be used to set constraints when no defaults are being used. This default has no settings and sets no defaults but does allow all of the constraints available to be set.
B.1.18. OCSP No Check extension default
This default attaches an OCSP No Check extension to the certificate. The extension, which should be used in OCSP responder certificates only, indicates how OCSP-compliant applications can verify the revocation status of the certificate an authorized OCSP responder uses to sign OCSP responses.
For general information about this extension, see Section B.3.10, “OCSPNocheck”.
The following constraints can be defined with this default:
- Extension Constraint; see Section B.2.4, “Extension constraint”.
- No Constraints; see Section B.2.8, “No Constraint”.
| Parameter | Description |
|---|---|
| Critical |
Select |
B.1.19. Policy Constraints extension default
This default attaches a Policy Constraints extension to the certificate. The extension, which can be used in CA certificates only, constrains path validation in two ways: either to prohibit policy mapping or to require that each certificate in a path contain an acceptable policy identifier. The default can specify both ReqExplicitPolicy and InhibitPolicyMapping. PKIX standard requires that, if present in the certificate, the extension must never consist of a null sequence. At least one of the two specified fields must be present.
For general information about this extension, see Section B.3.11, “policyConstraints”.
The following constraints can be defined with this default:
- Extension Constraint; see Section B.2.4, “Extension constraint”.
- No Constraints; see Section B.2.8, “No Constraint”.
| Parameter | Description |
|---|---|
| Critical |
Select |
| reqExplicitPolicy | Specifies the total number of certificates permitted in the path before an explicit policy is required. This is the number of CA certificates that can be chained below the subordinate CA certificate before an acceptable policy is required.
This number affects the number of CA certificates to be used during certificate validation. The chain starts with the end-entity certificate being validated and moving up the chain. The parameter has no effect if the extension is set in end-entity certificates. |
| inhibitPolicyMapping | Specifies the total number of certificates permitted in the path before policy mapping is no longer permitted.
|
B.1.20. Policy Mappers extension default
This default attaches a Policy Mappings extension to the certificate. The extension lists pairs of OIDs, each pair identifying two policy statements of two CAs. The pairing indicates that the corresponding policies of one CA are equivalent to policies of another CA. The extension may be useful in the context of cross-certification. If supported, the extension is included in CA certificates only. The default maps policy statements of one CA to that of another by pairing the OIDs assigned to their policy statements
Each pair is defined by two parameters, issuerDomainPolicy and subjectDomainPolicy. The pairing indicates that the issuing CA considers the issuerDomainPolicy equivalent to the subjectDomainPolicy of the subject CA. The issuing CA’s users may accept an issuerDomainPolicy for certain applications. The policy mapping tells these users which policies associated with the subject CA are equivalent to the policy they accept.
For general information about this extension, see Section B.3.12, “policyMappings”.
The following constraints can be defined with this default:
- Extension Constraint; see Section B.2.4, “Extension constraint”.
- No Constraints; see Section B.2.8, “No Constraint”.
| Parameter | Description |
|---|---|
| Critical |
Select |
| IssuerDomainPolicy_n | Specifies the OID assigned to the policy statement of the issuing CA to map with the policy statement of another CA. For example, 1.2.3.4.5. |
| SubjectDomainPolicy_n | Specifies the OID assigned to the policy statement of the subject CA that corresponds to the policy statement of the issuing CA. For example, 6.7.8.9.10. |
B.1.21. Private Key Usage Period extension default
The Private Key Usage Period extension allows the certificate issuer to specify a different validity period for the private key than for the certificate itself. This extension is intended for use with digital signature keys.
| Parameter | Description |
|---|---|
| Critical | This extension should always be non-critical. |
| puStartTime |
This parameters sets the start time. The default value is |
| puDurationDays |
This parameters sets the duration of the usage period. The default value is |
B.1.22. Signing Algorithm Default
This default attaches a signing algorithm in the certificate request. This default presents an agent with the possible algorithms that can be used for signing the certificate.
The following constraints can be defined with this default:
- Signing Algorithm Constraint; see Section B.2.10, “Signing Algorithm constraint”.
- No Constraints; see Section B.2.8, “No Constraint”.
| Parameter | Description |
|---|---|
| signingAlg |
Specify the default signing algorithm to be used to create this certificate. An agent can override this value by specifying one of the values contained in the |
| signingAlgsAllowed | Specify the signing algorithms that can be used for signing this certificate. The algorithms can be any or all of the following:
|
B.1.23. Subject Alternative Name extension default
This default attaches a Subject Alternative Name extension to the certificate. The extension binds additional identities, such as an email address, a DNS name, an IP address (both IPv4 and IPv6), or a URI, to the subject of the certificate. The standard requires that if the certificate subject field contains an empty sequence, then the Subject Alternative name extension must contain the subject’s alternative name and that the extension be marked critical.
For any of the directory-based authentication methods, the Certificate System can retrieve values for any string and byte attributes and set them in the certificate request. These attributes are set by entering them in the ldapStringAttributes and ldapByteAttributes fields defined in the automated enrollment modules.
If authenticated attributes - meaning attributes stored in an LDAP database - need to be part of this extension, use values from the $request.X$ token.
There is an additional attribute to insert a universally unique identifier (UUID) into the subject alt name. This option generates a random number for version 4 UUID; the pattern is defined by referencing the server which will generate the number in an additional subjAltExtSource parameter.
A basic Subject Alternative Name extension default is configured in the example.
Example B.1. Default Subject Alternative Name extension configuration
The Subject Alternative Name extension default checks the certificate request for the profile attributes. If the request contains an attribute, the profile reads its value and sets it in the extension. It is also possible for the Subject Alternative Name extension default to insert attribute values from an LDAP directory, if LDAP-based authentication is configured. The extension added to the certificates contain all the configured attributes.
The variables that can be used with the Subject Alternative Name extension default are listed in the below table.
| Policy Set Token | Description |
|---|---|
| $request.auth_token.cn$ |
The LDAP common name ( |
| $request.auth_token.mail$ |
The value of the LDAP email ( |
| $request.auth_token.tokenCertSubject$ | The certificate subject name. |
| $request.auth_token.uid$ |
The LDAP user ID ( |
| $request.auth_token.user$ | |
| $request.auth_token.userDN$ | The user DN of the user who requested the certificate. |
| $request.auth_token.userid$ | The value of the user ID attribute for the user who requested the certificate. |
| $request.uid$ | The value of the user ID attribute for the user who requested the certificate. |
| $request.profileRemoteAddr$ | The IP address of the user making the request. This can be an IPv4 or an IPv6 address, depending on the client. An IPv4 address must be in the format n.n.n.n or n.n.n.n,m.m.m.m. For example, 128.21.39.40 or 128.21.39.40,255.255.255.00. An IPv6 address uses a 128-bit namespace, with the IPv6 address separated by colons and the netmask separated by periods. For example, 0:0:0:0:0:0:13.1.68.3, FF01::43, 0:0:0:0:0:0:13.1.68.3,FFFF:FFFF:FFFF:FFFF:FFFF:FFFF:255.255.255.0, and FF01::43,FFFF:FFFF:FFFF:FFFF:FFFF:FFFF:FF00:0000. |
| $request.profileRemoteHost$ |
The hostname or IP address of the user’s machine. The hostname can be the fully-qualified domain name and the protocol, such as |
| $request.requestor_email$ | The email address of the person who submitted the request. |
| $request.requestowner$ | The person who submitted the request. |
| $request.subject$ | The subject name DN of the entity to which the certificate is issued. For example,uid=jsmith, e=jsmith@example.com. |
| $request.tokencuid$ | The card unique ID (CUID) of the smart card token used for requesting the enrollment. |
| $request.upn$ | The Microsoft UPN. This has the format (UTF8String)1.3.6.1.4.1.311.20.2.3,$request.upn$. |
| $server.source$ | Instructs the server to generate a version 4 UUID (random number) component in the subject name. This always has the format (IA5String)1.2.3.4,$server.source$. |
You can set multiple attributes for a single extension. The subjAltNameNumGNs parameter controls how many of the listed attributes are required to be added to the certificate. This parameter must be added to custom profiles and may need to be modified in the default profiles to include as many attributes as required. In the Example B.1, “Default Subject Alternative Name extension configuration” table, the subjAltNameNumGNs is set to 5 to insert the RFC822Name, DNSName, URIName, OtherName, and RFC822Name names (generic names \_0, \_1, \_2 \_3 and \_4).
The following constraints can be defined with this default:
- Extension Constraint; see Section B.2.4, “Extension constraint”.
- No Constraints; see Section B.2.8, “No Constraint”.
| Parameter | Description |
|---|---|
| Critical |
Select |
| Pattern | Specifies the request attribute value to include in the extension. The attribute value must conform to any of the supported general name types. If the server finds the attribute in the request, it sets the attribute value in the extension and adds the extension to certificates. If multiple attributes are specified and none of the attributes are present in the request, the server does not add the Subject Alternative Name extension to certificates. The permissible value is a request attribute included in the certificate request. For example, $request.requestor_email$. |
| Type | Specifies the general name type for the request attribute.
|
| Source | Specifies an identification source or protocol to use to generate an ID. The only supported source is UUID4, which generates a random number to create the UUID. |
| Number of Components (NumGNs) | Specifies the number of name components that must be included in the subject alternative name. |
B.1.24. Subject Directory Attributes extension default
This default attaches a Subject Directory Attributes extension to the certificate. The Subject Directory Attributes extension conveys any desired directory attribute values for the subject of the certificate.
The following constraints can be defined with this default:
- Extension Constraint; see Section B.2.4, “Extension constraint”.
- No Constraints; see Section B.2.8, “No Constraint”.
| Parameter | Description |
|---|---|
| Critical |
Select |
| Name |
The attribute name; this can be any LDAP directory attribute, such as |
| Pattern | Specifies the request attribute value to include in the extension. The attribute value must conform to the allowed values of the attribute. If the server finds the attribute, it sets the attribute value in the extension and adds the extension to certificates. If multiple attributes are specified and none of the attributes are present in the request, the server does not add the Subject Directory Attributes extension to certificates. For example, $request.requestor_email$. |
| Enable |
Sets whether that attribute is able to be added to the certificate. Select |
B.1.25. Subject Info Access extension default
Implements an enrollment default policy that populates a Subject Information Access extension in the certificate template. This extension indicates how to access information and services for the subject of the certificate in which the extension appears.
| Parameter | Description |
|---|---|
| Critical | This extension is supposed to be non-critical. |
| subjInfoAccessNumADs | The number of information access sections included with the certificate. |
| subjInfoAccessADMethod_n | OID of the access method. |
| subjInfoAccessADMethod_n | Type of access method.
|
| subjInfoAccessADLocation_n | Location based on the type subjInfoAccessADMethod_n i.e., a URL for URI Name. |
| subjInfoAccessADEnable_n |
Select |
B.1.26. Subject Key Identifier extension default
This default attaches a Subject Key Identifier extension to the certificate. The extension identifies certificates that contain a particular public key, which identifies a certificate from among several that have the same subject name.
For general information about this extension, see Section B.3.16, “subjectKeyIdentifier”.
If enabled, the profile adds a Subject Key Identifier Extension to an enrollment request if the extension does not already exist. If the extension exists in the request, such as a CRMF request, the default replaces the extension. After an agent approves the manual enrollment request, the profile accepts any Subject Key Identifier Extension that is already there.
This default has no parameters. If used, this extension is included in the certificate with the public key information.
The following constraints can be defined with this default:
- Extension Constraint; see Section B.2.4, “Extension constraint”.
- No Constraints; see Section B.2.8, “No Constraint”.
B.1.27. Subject Name default
This default attaches a server-side configurable subject name to the certificate request. A static subject name is used as the subject name in the certificate.
The following constraints can be defined with this default:
- Subject Name Constraint; see Section B.2.11, “Subject Name constraint”.
- Unique Subject Name Constraint; see Section B.2.13, “Unique Subject Name constraint”.
- No Constraints; see Section B.2.8, “No Constraint”.
| Parameter | Description |
|---|---|
| Name | Specify the subject name for this certificate. |
If you need to get a certificate subject name that uses the DNPATTERN value from the UidPwdDirAuth plugin, then configure the profile to use the Subject Name Default plugin and substitute the Name parameter with the "Subject Name" from the AuthToken as shown below.
policyset.userCertSet.1.default.class_id=subjectNameDefaultImpl policyset.userCertSet.1.default.name=Subject Name Default policyset.userCertSet.1.default.params.name=$request.auth_token.tokenCertSubject$
policyset.userCertSet.1.default.class_id=subjectNameDefaultImpl
policyset.userCertSet.1.default.name=Subject Name Default
policyset.userCertSet.1.default.params.name=$request.auth_token.tokenCertSubject$B.1.28. User Key default
The User Key default attaches a user-supplied key into the certificate request. This is a required default. Keys are part of the enrollment request.
The following constraints can be defined with this default:
- Key Constraint; see Section B.2.5, “Key constraint”.
- No Constraints; see Section B.2.8, “No Constraint”.
B.1.29. User Signing Algorithm default
The User Signing Algorithm default implements an enrollment default profile that populates a user-supplied signing algorithm in the certificate request. If included in the certificate profile, this allows a user to choose a signing algorithm for the certificate, subject to the constraint set.
No inputs are provided to add signing algorithm choices to the enrollment form, but it is possible to submit a request that contains this information.
The following constraints can be defined with this default:
- Signing Algorithm Constraint; see Section B.2.10, “Signing Algorithm constraint”.
- No Constraints; see Section B.2.8, “No Constraint”.
B.1.30. User Subject Name default
This default attaches a user-supplied subject name to the certificate request. If included in the certificate profile, it allows a user to supply a subject name for the certificate, subject to the constraints set. This extension preserves the subject name that is specified in the original certificate request when the certificate is issued.
The following constraints can be defined with this default:
- Subject Name Constraint; see Section B.2.11, “Subject Name constraint”.
- Unique Subject Name Constraint; see Section B.2.13, “Unique Subject Name constraint”.
- No Constraints; see Section B.2.8, “No Constraint”.
B.1.31. User Validity default
This default attaches a user-supplied validity to the certificate request. If included in the certificate profile, it allows a user to supply the validity period, subject to the constraints set. This default profile preserves that user-defined validity period in the original certificate request when the certificate is issued.
No inputs are provided to add user-supplied validity date to the enrollment form, but it is possible to submit a request that contains this information.
The following constraints can be defined with this default:
- Validity Constraint; see Section B.2.14, “Validity constraint”.
- No Constraints; see Section B.2.8, “No Constraint”.
B.1.32. User Supplied extension default
The User Supplied extension default class populates a certificate with any certificate extension defined by the user in the certificate request. This requires users to submit certificate requests which meet certain standards or give certain information because the profile can require specific extensions before enrolling a certificate.
Be exceptionally cautious about setting this extension default, since it allows users to specify an extension in the certificate request. If this default is used, then Red Hat strongly recommends using a constraint corresponding to the extension to minimize any possible abuse of the User Supplied extension default.
The user-defined extension is validated against whatever constraint is set, so it is possible to restrict the kind of extension (through the Extension Constraint) or to set rules for the key and other basic constraints, such as whether this is a CA certificate.
If this extension is set on a profile with a corresponding OID (Extension Constraint), then any certificate request processed through that profile must carry the specified extension or the request is rejected.
If a certificate profile was enabled with the User Supplied extension default before the errata RHSA 2008:0500, then this profile must be edited to support user supplied extensions in certificate requests. Apply the userExtensionDefaultImpl default, as shown in the example. The given OID is for the Basic Constraints Extension Constraint.
policyset.set1.p6.default.class_id=userExtensionDefaultImpl policyset.set1.p6.default.name=User Supplied extension default policyset.set1.p6.default.params.userExtOID=2.5.29.19
policyset.set1.p6.default.class_id=userExtensionDefaultImpl
policyset.set1.p6.default.name=User Supplied extension default
policyset.set1.p6.default.params.userExtOID=2.5.29.19The CA handles an enrollment with the User Supplied extension default in one of three ways:
- If the OID of the extension is specified in both the certificate request and the default, then the extension is validated by the constraints and applied to the certificate.
- If an OID of an extension is given in the request but is not specified in the User Supplied extension default in the profile, then the user-specified extension is ignored, and the certificate is successfully enrolled without that extension.
- If this extension is set on a profile with a corresponding OID (Extension Constraint), then any certificate request processed through that profile must carry the specified extension or the request is rejected.
A certificate request that contains the user-defined extensions must be submitted to the profile. The certificate enrollment forms, however, do not have any input fields for users to add user-supplied extensions. Submitting a certificate request without supplying the extension fails.
The following example adds the User Supplied extension default to a profile with the Extended Key Usage Constraint. The OID specified in the userExtOID parameter is for the Extended Key Usage Extension.
Example B.2. User Supplied extension default for the Extended Key Usage extension
In this example, although the User Supplied extension default allows a user to specify the Extended Key Usage Extension (2.5.29.37), the constraint limits the user request to only the SSL client authentication (1.3.6.1.5.5.7.3.2) and email protection (1.3.6.1.5.5.7.3.4) uses.
Editing profiles is described in Section 3.2, “Setting up certificate profiles”.
Example B.3. Multiple user supplied extensions in CSR
The RHCS enrollment profile framework allows to define multiple User Supplied Extensions in the same profile. For example, a combination of the following can be specified.
For Extended Key Usage Extension:
Copy to Clipboard Copied! Toggle word wrap Toggle overflow For Key Usage Extension:
By using the following format, you can apply a policy in which the parameter of the extension:
-
Must exist in the CSR:
value = "true" -
Must not exist in the CSR:
value = "false" Is optional:
value = "-"For example:
Copy to Clipboard Copied! Toggle word wrap Toggle overflow
-
Must exist in the CSR:
For an example on how to create a CSR with user-defined extensions attributes, see Section 5.2.1.2, “Using certutil to create a CSR with user-defined extensions”.
B.1.32.1. Validity Default
The Validity default attaches a server-side configurable validity period into the certificate request.
The following constraints can be defined with this default:
- Validity Constraint; see Section B.2.14, “Validity constraint”.
- No Constraints; see Section B.2.8, “No Constraint”.
| Parameter | Description |
|---|---|
| range | Specifies the validity period for this certificate. |
| startTime | Sets when the validity period begins, based on the current time. |
B.2. Constraints reference
Constraints are used to define the allowable contents of a certificate and the values associated with that content. This section lists the predefined constraints with complete definitions of each.
B.2.1. Basic Constraints extension constraint
The Basic Constraints extension constraint checks if the basic constraint in the certificate request satisfies the criteria set in this constraint.
| Parameter | Description |
|---|---|
| basicConstraintsCritical |
Specifies whether the extension can be marked critical or noncritical. Select |
| basicConstraintsIsCA |
Specifies whether the certificate subject is a CA. Select |
| basicConstraintsMinPathLen | Specifies the minimum allowable path length, the maximum number of CA certificates that may be chained below (subordinate to) the subordinate CA certificate being issued. The path length affects the number of CA certificates used during certificate validation. The chain starts with the end-entity certificate being validated and moves up. This parameter has no effect if the extension is set in end-entity certificates.
The permissible values are
n must be an integer greater than zero. This is the minimun number of subordinate CA certificates allowed below the subordinate CA certificate being used. |
| basicConstraintsMaxPathLen | Specifies the maximum allowable path length, the maximum number of CA certificates that may be chained below (subordinate to) the subordinate CA certificate being issued. The path length affects the number of CA certificates used during certificate validation. The chain starts with the end-entity certificate being validated and moves up. This parameter has no effect if the extension is set in end-entity certificates.
The permissible values are
n must be an integer greater than zero. This is the maximum number of subordinate CA certificates allowed below the subordinate CA certificate being used. If the field is blank, the path length defaults to a value determined by the path length set on the Basic Constraints extension in the issuer’s certificate. If the issuer’s path length is unlimited, the path length in the subordinate CA certificate is also unlimited. If the issuer’s path length is an integer greater than zero, the path length in the subordinate CA certificate is set to a value one less than the issuer’s path length; for example, if the issuer’s path length is 4, the path length in the subordinate CA certificate is set to 3. |
B.2.2. CA Validity constraint
The CA Validity constraint checks if the validity period in the certificate template is within the CA’s validity period. If the validity period of the certificate is out outside the CA certificate’s validity period, the constraint is rejected.
B.2.3. Extended Key Usage extension constraint
The Extended Key Usage extension constraint checks if the Extended Key Usage extension on the certificate satisfies the criteria set in this constraint.
| Parameter | Description |
|---|---|
| exKeyUsageCritical |
When set to |
| exKeyUsageOIDs | Specifies the allowable OIDs that identifies a key-usage purpose. Multiple OIDs can be added in a comma-separated list. |
B.2.4. Extension constraint
This constraint implements the general extension constraint. It checks if the extension is present.
| Parameter | Description |
|---|---|
| extCritical |
Specifies whether the extension can be marked critical or noncritical. Select |
| extOID | The OID of an extension that must be present in the cert to pass the constraint. |
B.2.5. Key constraint
This constraint checks the size of the key for RSA keys, and the name of the elliptic curve for EC keys. When used with RSA keys the KeyParameters parameter contains a comma-separated list of legal key sizes, and with EC Keys the KeyParameters parameter contains a comma-separated list of available ECC curves.
| Parameter | Description |
|---|---|
| keyType |
Gives a key type; this is set to |
| KeyParameters |
Defines the specific key parameters. The parameters which are set for the key differe, depending on the value of the
* With RSA keys, the |
B.2.6. Key Usage extension constraint
The Key Usage extension constraint checks if the key usage constraint in the certificate request satisfies the criteria set in this constraint.
| Parameter | Description |
|---|---|
| keyUsageCritical |
Select |
| keyUsageDigitalSignature |
Specifies whether to sign SSL client certificates and S/MIME signing certificates. Select |
| kleyUsageNonRepudiation |
Specifies whether to set S/MIME signing certificates. Select .WARNING [WARNING] ==== Using this bit is controversial. Carefully consider the legal consequences of its use before setting it for any certificate. ==== |
| keyEncipherment |
Specifies whether to set the extension for SSL server certificates and S/MIME encryption certificates. Select |
| keyUsageDataEncipherment |
Specifies whether to set the extension when the subject’s public key is used to encrypt user data, instead of key material. Select |
| keyUsageKeyAgreement |
Specifies whether to set the extension whenever the subject’s public key is used for key agreement. Select |
| keyUsageCertsign |
Specifies whether the extension applies for all CA signing certificates. Select |
| keyUsageCRLSign |
Specifies whether to set the extension for CA signing certificates that are used to sign CRLs. Select |
| keyUsageEncipherOnly |
Specifies whether to set the extension if the public key is to be used only for encrypting data. If this bit is set, |
| keyUsageDecipherOnly |
Specifies whether to set the extension if the public key is to be used only for deciphering data. If this bit is set, |
B.2.7. Netscape Certificate Type extension constraint
This constraint is obsolete. Instead of using the Netscape Certificate Type extension constraint, use the Key Usage extension or Extended Key Usage extension.
The Netscape Certificate Type extension constraint checks if the Netscape Certificate Type extension in the certificate request satisfies the criteria set in this constraint.
B.2.8. No Constraint
This constraint implements no constraint. When chosen along with a default, there are not constraints placed on that default.
B.2.9. Renewal Grace Period constraint
The Renewal Grace Period Constraint sets rules on when a user can renew a certificate based on its expiration date. For example, users cannot renew a certificate until a certain time before it expires or if it goes past a certain time after its expiration date.
One important thing to remember when using this constraint is that this constraint is set on the original enrollment profile, not the renewal profile. The rules for the renewal grace period are part of the original certificate and are carried over and applied for any subsequent renewals.
This constraint is only available with the No Default extension.
| Parameter | Description |
|---|---|
| renewal.graceAfter | Sets the period, in days, after the certificate expires that it can be submitted for renewal. If the certificate has been expired longer that that time, then the renewal request is rejected. If no value is given, there is no limit. |
| renewal.graceBefore | Sets the period, in days, before the certificate expires that it can be submitted for renewal. If the certificate is not that close to its expiration date, then the renewal request is rejected. If no value is given, there is no limit. |
B.2.10. Signing Algorithm constraint
The Signing Algorithm constraint checks if the signing algorithm in the certificate request satisfies the criteria set in this constraint.
| Parameter | Description |
|---|---|
| signingAlgsAllowed | Sets the signing algorithms that can be specified to sign the certificate. The algorithms can be any or all of the following:
|
B.2.11. Subject Name constraint
The Subject Name constraint checks if the subject name in the certificate request satisfies the criteria.
| Parameter | Description |
|---|---|
| Pattern | Specifies a regular expression or other string to build the subject DN. |
Subject names and regular expressions
The regular expression for the Subject Name Constraint is matched by the Java facility for matching regular expressions. The format for these regular expressions are listed in https://docs.oracle.com/en/java/javase/21/docs/api/java.base/java/util/regex/Pattern. This allows wildcards such as asterisks (\*) to search for any number of the characters and periods (.) to search for any type character.
For example, if the pattern of the subject name constraint is set to uid=., the certificate profile framework checks if the subject name in the certificate request matches the pattern. A subject name like uid=user, o=Example, c=US satisfies the pattern uid=.. The subject name cn=user, o=example,c=US does not satisfy the pattern. uid=.* means the subject name must begin with the uid attribute; the period-asterisk (.*) wildcards allow any type and number of characters to follow uid.
It is possible to require internal patterns, such as .ou=Engineering., which requires the ou=Engineering attribute with any kind of string before and after it. This matches cn=jdoe,ou=internal,ou=west coast,ou=engineering,o="Example Corp",st=NC as well as uid=bjensen,ou=engineering,dc=example,dc=com.
Lastly, it is also possible to allow requests that are either one string or another by setting a pipe sign (|) between the options. For example, to permit subject names that contain either ou=engineering,ou=people or ou=engineering,o="Example Corp", the pattern is .ou=engineering,ou=people. | .ou=engineering,o="Example Corp"..
For constructing a pattern which uses a special character, such as a period (.), escape the character with a back slash (\). For example, to search for the string o="Example Inc.", set the pattern to o="Example Inc\.".
Subject names and the UID or CN in the certificate request
The pattern that is used to build the subject DN can also be based on the CN or UID of the person requesting the certificate. The Subject Name Constraint sets the pattern of the CN (or UID) to recognize in the DN of the certificate request, and then the Subject Name Default builds on that CN to create the subject DN of the certificate, using a predefined directory tree.
For example, to use the CN of the certificate request:
B.2.12. Unique Key constraint
This constraint checks that the public key is unique.
| Parameter | Description |
|---|---|
| allowSameKeyRenewal |
A request is considered a renewal and is accepted if this parameter is set to
When the parameter is set to |
B.2.13. Unique Subject Name constraint
The Unique Subject Name constraint restricts the server from issuing multiple certificates with the same subject names. When a certificate request is submitted, the server automatically checks the nickname against other issued certificate nicknames. This constraint can be applied to certificate enrollment and renewal through the end-entities' page.
Certificates cannot have the same subject name unless one certificate is expired or revoked (and not on hold). So, active certificates cannot share a subject name, with one exception: if certificates have different key usage bits, then they can share the same subject name, because they have different uses.
| Parameter | Description |
|---|---|
| enableKeyUsageExtensionChecking |
Optional setting which allows certificates to have the same subject name as long as their key usage settings are different. This is either |
B.2.14. Validity constraint
The Validity constraint checks if the validity period in the certificate request satisfies the criteria.
The parameters provided must be sensible values. For instance, a notBefore parameter that provides a time which has already passed will not be accepted, and a notAfter parameter that provides a time earlier than the notBefore time will not be accepted.
| Parameter | Description |
|---|---|
| range |
The range of the validity period. This is an integer which sets the number of days. The difference (in days) between the |
| notBeforeCheck |
Verifies that the range is not within the grace period. When the |
| notBeforeGracePeriod |
The grace period (in seconds) after the |
| notAfterCheck |
Verfies whether the given time is not after the expiration period. When the |
B.3. Standard X.509 v3 certificate extension reference
An X.509 v3 certificate contains an extension field that permits any number of additional fields to be added to the certificate. Certificate extensions provide a way of adding information such as alternative subject names and usage restrictions to certificates. Older Netscape servers, such as Red Hat Directory Server and Red Hat Certificate System, that were developed before PKIX part 1 standards were defined require Netscape-specific extensions.
The following is an example of the section of a certificate containing X.509 v3 extensions. The Certificate System can display certificates in readable pretty-print format, as shown here. As in this example, certificate extensions appear in sequence and only one instance of a particular extension may appear per certificate; for example, a certificate may contain only one subject key identifier extension. Certificates that support these extensions have the version 0x2 (which corresponds to version 3).
Example B.4. Sample pretty-print certificate extensions
An object identifier (OID) is a string of numbers identifying a unique object, such as a certificate extension or a company’s certificate practice statement. The Certificate System comes with a set of extension-specific profile plugin modules which enable X.509 certificate extensions to be added to the certificates the server issues. Some of the extensions contain fields for specifying OIDs.
The PKIX standard recommends that all objects, such as extensions and statements, that are used in certificates be included in the form of an OID. This promotes interoperability between organizations on a shared network. If certificates will be issued that will be used on shared networks, register the OID prefixes with the appropriate registration authority.
OIDs are controlled by the International Standards Organization (ISO) registration authority. In some cases, this authority is delegated by ISO to regional registration authorities. In the United States, the American National Standards Institute (ANSI) manages this registration.
Using an OID registered to another organization or failing to register an OID may carry legal consequences, depending the situation. Registration may be subject to fees. For more information, contact the appropriate registration authority.
To define or assign OIDs for custom objects, know the company’s arc, an OID for a private enterprise. If the company does not have an arc, it needs to get one. The http://www.alvestrand.no/objectid/ has more information on registering and using OIDs.
For example, the Netscape-defined OID for an extension named Netscape Certificate Comment is 2.16.840.1.113730.1.13. The OID assigned to this extension is hierarchical and includes the former Netscape company arc, 2.16.840.1. The OID definition entry is http://www.alvestrand.no/objectid/2.16.840.1.113730.1.13.html.
If an OID extension exists in a certificate and is marked critical, the application validating the certificate must be able to interpret the extension, including any optional qualifiers, or it must reject the certificate. Since it is unlikely that all applications will be able to interpret a company’s custom extensions embedded in the form of OIDs, the PKIX standard recommends that the extension be always marked noncritical.
This section summarizes the extension types defined as part of the Internet X.509 version 3 standard and indicates which types are recommended by the PKIX working group.
This reference summarizes important information about each certificate. For complete details, see both the X.509 v3 standard, available from the ITU, and Internet X.509 Public Key Infrastructure - Certificate and CRL Profile (RFC 3280), available at RFC 3280. The descriptions of extensions reference the RFC and section number of the standard draft that discusses the extension; the object identifier (OID) for each extension is also provided.
Each extension in a certificate can be designated as critical or noncritical. A certificate-using system, such as a web browser, must reject the certificate if it encounters a critical extension it does not recognize; however, a noncritical extension can be ignored if it is not recognized.
B.3.1. authorityInfoAccess
The Authority Information Access extension indicates how and where to access information about the issuer of the certificate. The extension contains an accessMethod and an accessLocation field. accessMethod specifies by OID the type and format of information about the issuer named in accessLocation.
PKIX Part 1 defines one accessMethod (id-ad-caIssuers) to get a list of CAs that have issued certificates higher in the CA chain than the issuer of the certificate using the extension. The accessLocation field then typically contains a URL indicating the location and protocol (LDAP, HTTP, or FTP) used to retrieve the list.
The Online Certificate Status Protocol (RFC 2560), available at RFC 2560, defines an accessMethod (id-ad-ocsp) for using OCSP to verify certificates. The accessLocation field then contains a URL indicating the location and protocol used to access an OCSP responder that can validate the certificate.
OID
1.3.6.1.5.5.7.1.1
Criticality
This extension must be noncritical.
B.3.2. authorityKeyIdentifier
The Authority Key Identifier extension identifies the public key corresponding to the private key used to sign a certificate. This extension is useful when an issuer has multiple signing keys, such as when a CA certificate is renewed.
The extension consists of one or both of the following:
-
An explicit key identifier, set in the
keyIdentifierfield -
An issuer, set in the
authorityCertIssuerfield, and serial number, set in theauthorityCertSerialNumberfield, identifying a certificate
If the keyIdentifier field exists, it is used to select the certificate with a matching subjectKeyIdentifier extension. If the authorityCertIssuer and authorityCertSerialNumber fields are present, then they are used to identify the correct certificate by issuer and serialNumber.
If this extension is not present, then the issuer name alone is used to identify the issuer certificate.
PKIX Part 1 requires this extension for all certificates except self-signed root CA certificates. Where a key identifier has not been established, PKIX recommends that the authorityCertIssuer and authorityCertSerialNumber fields be specified. These fields permit construction of a complete certificate chain by matching the SubjectName and CertificateSerialNumber fields in the issuer’s certificate against the authortiyCertIssuer and authorityCertSerialNumber in the Authority Key Identifier extension of the subject certificate.
OID
2.5.29.35
Criticality
This extension is always noncritical and is always evaluated.
B.3.3. basicConstraints
This extension is used during the certificate chain verification process to identify CA certificates and to apply certificate chain path length constraints. The cA component should be set to true for all CA certificates. PKIX recommends that this extension should not appear in end-entity certificates.
If the pathLenConstraint component is present, its value must be greater than the number of CA certificates that have been processed so far, starting with the end-entity certificate and moving up the chain. If pathLenConstraint is omitted, then all of the higher level CA certificates in the chain must not include this component when the extension is present.
OID
2.5.29.19
Criticality
PKIX Part 1 requires that this extension be marked critical. This extension is evaluated regardless of its criticality.
B.3.4. certificatePoliciesExt
The Certificate Policies extension defines one or more policies, each of which consists of an OID and optional qualifiers. The extension can include a URI to the issuer’s Certificate Practice Statement or can embed issuer information, such as a user notice in text form. This information can be used by certificate-enabled applications.
If this extension is present, PKIX Part 1 recommends that policies be identified with an OID only, or, if necessary, only certain recommended qualifiers.
OID
2.5.29.32
Criticality
This extension may be critical or noncritical.
B.3.5. CRLDistributionPoints
This extension defines how CRL information is obtained. It should be used if the system is configured to use CRL issuing points.
If the extension contains a DistributionPointName with a type set to URI, the URI is assumed to be a pointer to the current CRL for the specified revocation reasons and will be issued by the named cRLIssuer. The expected values for the URI are those defined for the Subject Alternative Name extension. If the distributionPoint omits reasons, the CRL must include revocations for all reasons. If the distributionPoint omits cRLIssuer, the CRL must be issued by the CA that issued the certificate.
PKIX recommends that this extension be supported by CAs and applications.
OID
2.5.29.31
Criticality
PKIX recommends that this extension be marked noncritical and that it be supported for all certificates.
B.3.6. extKeyUsage
The Extended Key Usage extension indicates the purposes for which the certified public key may be used. These purposes may be in addition to or in place of the basic purposes indicated in the Key Usage extension.
The Extended Key Usage extension must include OCSP Signing in an OCSP responder’s certificate unless the CA signing key that signed the certificates validated by the responder is also the OCSP signing key. The OCSP responder’s certificate must be issued directly by the CA that signs certificates the responder will validate.
The Key Usage, Extended Key Usage, and Basic Constraints extensions act together to define the purposes for which the certificate is intended to be used. Applications can use these extensions to disallow the use of a certificate in inappropriate contexts.
The following tables list respectively the uses defined by PKIX for this extension, and the uses privately defined by Netscape.
OID
2.5.29.37
Criticality
If this extension is marked critical, the certificate must be used for one of the indicated purposes only. If it is not marked critical, it is treated as an advisory field that may be used to identify keys but does not restrict the use of the certificate to the indicated purposes.
| Use | OID |
|---|---|
| Server authentication | 1.3.6.1.5.5.7.3.1 |
| Client authentication | 1.3.6.1.5.5.7.3.2 |
| Code signing | 1.3.6.1.5.5.7.3.3 |
| | 1.3.6.1.5.5.7.3.4 |
| Timestamping | 1.3.6.1.5.5.7.3.8 |
| OCSP Signing | 1.3.6.1.5.5.7.3.9[a] |
[a]
OCSP Signing is not defined in PKIX Part 1, but in RFC 2560, X.509 Internet Public Key Infrastructure Online Certificate Status Protocol - OCSP.
| |
| Use | OID |
|---|---|
| Certificate trust list signing | 1.3.6.1.4.1.311.10.3.1 |
| Microsoft Server Gated Crypto (SGC) | 1.3.6.1.4.1.311.10.3.3 |
| Microsoft Encrypted File System | 1.3.6.1.4.1.311.10.3.4 |
| Netscape SGC | 2.16.840.1.113730.4.1 |
B.3.7. issuerAltName extension
The Issuer Alternative Name extension is used to associate Internet-style identities with the certificate issuer. Names must use the forms defined for the Subject Alternative Name extension.
OID
2.5.29.18
Criticality
PKIX Part 1 recommends that this extension be marked noncritical.
B.3.8. keyUsage
The Key Usage extension defines the purpose of the key contained in the certificate. The Key Usage, Extended Key Usage, and Basic Constraints extensions act together to specify the purposes for which a certificate can be used.
If this extension is included at all, set the bits as follows:
-
digitalSignature(0) for SSL client certificates, S/MIME signing certificates, and object-signing certificates. nonRepudiation(1) for some S/MIME signing certificates and object-signing certificates.WARNINGUse of this bit is controversial. Carefully consider the legal consequences of its use before setting it for any certificate.
-
keyEncipherment(2) for SSL server certificates and S/MIME encryption certificates. -
dataEncipherment(3) when the subject’s public key is used to encrypt user data instead of key material. -
keyAgreement(4) when the subject’s public key is used for key agreement. -
keyCertSign(5) for all CA signing certificates. -
cRLSign(6) for CA signing certificates that are used to sign CRLs. -
encipherOnly(7) if the public key is used only for enciphering data. If this bit is set,keyAgreementshould also be set. -
decipherOnly(8) if the public key is used only for deciphering data. If this bit is set,keyAgreementshould also be set.
Table B.38, “Certificate uses and corresponding key usage bits” summarizes the guidelines for typical certificate uses.
If the keyUsage extension is present and marked critical, then it is used to enforce the usage of the certificate and key. The extension is used to limit the usage of a key; if the extension is not present or not critical, all types of usage are allowed.
If the keyUsage extension is present, critical or not, it is used to select from multiple certificates for a given operation. For example, it is used to distinguish separate signing and encryption certificates for users who have separate certificates and key pairs for operations.
OID
2.5.29.15
Criticality
This extension may be critical or noncritical. PKIX Part 1 recommends that it should be marked critical if it is used.
| Purpose of Certificate | Required Key Usage Bit |
|---|---|
| CA Signing |
|
| SSL Client | digitalSignature |
| SSL Server | keyEncipherment |
| S/MIME Signing | digitalSignature |
| S/MIME Encryption | keyEncipherment |
| Certificate Signing | keyCertSign |
| Object Signing | digitalSignature |
B.3.9. nameConstraints
This extension, which can used in CA certificates only, defines a name space within which all subject names in subsequent certificates in a certification path must be located.
OID
2.5.29.30
Criticality
PKIX Part 1 requires that this extension be marked critical.
B.3.10. OCSPNocheck
The extension is meant to be included in an OCSP signing certificate. The extension tells an OCSP client that the signing certificate can be trusted without querying the OCSP responder (since the reply would again be signed by the OCSP responder, and the client would again request the validity status of the signing certificate). This extension is null-valued; its meaning is determined by its presence or absence.
Since the presence of this extension in a certificate will cause OCSP clients to trust responses signed with that certificate, use of this extension should be managed carefully. If the OCSP signing key is compromised, the entire process of validating certificates in the PKI will be compromised for the duration of the validity period of the certificate. Therefore, certificates using OCSPNocheck should be issued with short lifetimes and be renewed frequently.
OID
1.3.6.1.5.5.7.48.4
Criticality
This extension should be noncritical.
B.3.11. policyConstraints
This extension, which is for CA certificates only, constrains path validation in two ways. It can be used to prohibit policy mapping or to require that each certificate in a path contain an acceptable policy identifier.
PKIX requires that, if present, this extension must never consist of a null sequence. At least one of the two available fields must be present.
OID
2.5.29.36
Criticality
This extension may be critical or noncritical.
B.3.12. policyMappings
The Policy Mappings extension is used in CA certificates only. It lists one or more pairs of OIDs used to indicate that the corresponding policies of one CA are equivalent to policies of another CA. It may be useful in the context of cross-pair certificates.
This extension may be supported by CAs and applications.
OID
2.5.29.33
Criticality
This extension must be noncritical.
B.3.13. privateKeyUsagePeriod
The Private Key Usage Period extension allows the certificate issuer to specify a different validity period for the private key than for the certificate itself. This extension is intended for use with digital signature keys.
PKIX Part 1 recommends against the use of this extension. CAs conforming to PKIX Part 1 must not generate certificates with this extension.
OID
2.5.29.16
B.3.14. subjectAltName
The Subject Alternative Name extension includes one or more alternative (non-X.500) names for the identity bound by the CA to the certified public key. It may be used in addition to the certificate’s subject name or as a replacement for it. Defined name forms include Internet electronic mail address (SMTP, as defined in RFC-822), DNS name, IP address (both IPv4 and IPv6), and uniform resource identifier (URI).
PKIX requires this extension for entities identified by name forms other than the X.500 distinguished name (DN) used in the subject field. PKIX Part 1 describes additional rules for the relationship between this extension and the subject field.
Email addresses may be provided in the Subject Alternative Name extension, the certificate subject name field, or both. If the email address is part of the subject name, it must be in the form of the EmailAddress attribute defined by PKCS #9. Software that supports S/MIME must be able to read an email address from either the Subject Alternative Name extension or from the subject name field.
OID
2.5.29.17
Criticality
If the certificate’s subject field is empty, this extension must be marked critical.
B.3.15. subjectDirectoryAttributes
The Subject Directory Attributes extension conveys any desired directory attribute values for the subject of the certificate. It is not recommended as an essential part of the proposed PKIX standard but may be used in local environments.
OID
2.5.29.9
Criticality
PKIX Part 1 requires that this extension be marked noncritical.
B.3.16. subjectKeyIdentifier
The Subject Key Identifier extension identifies the public key certified by this certificate. This extension provides a way of distinguishing public keys if more than one is available for a given subject name.
The value of this extension should be calculated by performing a SHA-1 hash of the certificate’s DER-encoded subjectPublicKey, as recommended by PKIX. The Subject Key Identifier extension is used in conjunction with the Authority Key Identifier extension for CA certificates. If the CA certificate has a Subject Key Identifier extension, the key identifier in the Authority Key Identifier extension of the certificate being verified should match the key identifier of the CA’s Subject Key Identifier extension. It is not necessary for the verifier to recompute the key identifier in this case.
PKIX Part 1 requires this extension for all CA certificates and recommends it for all other certificates.
OID
2.5.29.14
Criticality
This extension is always non-critical.
B.4. CRL extensions
B.4.1. About CRL extensions
Since its initial publication, the X.509 standard for CRL formats has been amended to include additional information within a CRL. This information is added through CRL extensions.
The extensions defined by ANSI X9 and ISO/IEC/ITU for X.509 CRLs [X.509] [X9.55] allow additional attributes to be associated with CRLs. The Internet X.509 Public Key Infrastructure Certificate and CRL Profile, available at RFC 5280, recommends a set of extensions to be used in CRLs. These extensions are called standard CRL extensions.
The standard also allows custom extensions to be created and included in CRLs. These extensions are called private, proprietary, or custom CRL extensions and carry information unique to an organization or business. Applications may not able to validate CRLs that contain private critical extensions, so it is not recommended that custom extensions be used in a general context.
Abstract Syntax Notation One (ASN.1) and Distinguished Encoding Rules (DER) standards are specified in the CCITT Recommendations X.208 and X.209. For a quick summary of ASN.1 and DER, see A Layman’s Guide to a Subset of ASN.1, BER, and DER, which is available at RSA Laboratories' web site, http://www.rsa.com.
B.4.1.1. Structure of CRL extensions
A CRL extension consists of the following parts:
-
The object identifier (OID) for the extension. This identifier uniquely identifies the extension. It also determines the ASN.1 type of value in the value field and how the value is interpreted. When an extension appears in a CRL, the OID appears as the extension ID field (
extnID) and the corresponding ASN.1 encoded structure appears as the value of the octet string (extnValue); examples are shown in Example B.4, “Sample pretty-print certificate extensions”. A flag or Boolean field called
critical.The
trueorfalsevalue assigned to this field indicates whether the extension is critical or noncritical to the CRL. If the extension is critical and the CRL is sent to an application that does not understand the extension based on the extension’s ID, the application must reject the CRL. If the extension is not critical and the CRL is sent to an application that does not understand the extension based on the extension’s ID, the application can ignore the extension and accept the CRL.- An octet string containing the DER encoding of the value of the extension.
The application receiving the CRL checks the extension ID to determine if it can recognize the ID. If it can, it uses the extension ID to determine the type of value used.
B.4.1.2. Sample CRL and CRL Entry extensions
The following is an example of an X.509 CRL version 2 extension. The Certificate System can display CRLs in readable pretty-print format, as shown here. As shown in the example, CRL extensions appear in sequence and only one instance of a particular extension may appear per CRL; for example, a CRL may contain only one Authority Key Identifier extension. However, CRL-entry extensions appear in appropriate entries in the CRL.
A delta CRL is a subset of the CRL which contains only the changes since the last CRL was published. Any CRL which contains the delta CRL indicator extension is a delta CRL.
B.4.2. Standard X.509 v3 CRL extensions reference
In addition to certificate extensions, the X.509 proposed standard defines extensions to CRLs, which provide methods for associating additional attributes with Internet CRLs. These are one of two kinds: extensions to the CRL itself and extensions to individual certificate entries in the CRL.
B.4.2.1. Extensions for CRLs
The following CRL descriptions are defined as part of the Internet X.509 v3 Public Key Infrastructure proposed standard.
- Section B.4.2.1.1, “authorityInfoAccess”
- Section B.4.2.1.2, “authorityKeyIdentifier”
- Section B.4.2.1.3, “CRLNumber”
- Section B.4.2.1.4, “deltaCRLIndicator”
- Section B.4.2.1.5, “FreshestCRL”
- Section B.4.2.1.6, “issuerAltName”
- Section B.4.2.1.7, “issuingDistributionPoint”
- Section B.4.2.1.5, “FreshestCRL”
B.4.2.1.1. authorityInfoAccess
The Authority Information Access extension identifies how delta CRL information is obtained. The freshestCRL extension is placed in the full CRL to indicate where to find the latest delta CRL.
OID
1.3.6.1.5.5.7.1.1
Criticality
PKIX requires that this extension must not be critical.
| Parameter | Description |
|---|---|
| enable | Specifies whether the rule is enabled or disabled. The default is to have this extension disabled. |
| critical | Sets whether the extension is marked as critical; the default is noncritical. |
| numberOfAccessDescriptions | Indicates the number of access descriptions, from 0 to any positive integer; the default is 0. When setting this parameter to an integer other than 0, set the number, and then click OK to close the window. Re-open the edit window for the rule, and the fields to set the points will be present. |
| accessMethodn | The only accepted value for this parameter is caIssuers. The caIssuers method is used when the information available lists certificates that can be used to verify the signature on the CRL. No other method should be used when the AIA extension is included in a CRL. |
| accessLocationTypen |
Specifies the type of access location for the n access description. The options are either |
| accessLocationn |
If
If |
B.4.2.1.2. authorityKeyIdentifier
The Authority Key Identifier extension for a CRL identifies the public key corresponding to the private key used to sign the CRL. For details, see the discussion under certificate extensions at Section B.3.2, “authorityKeyIdentifier”.
The PKIX standard recommends that the CA must include this extension in all CRLs it issues because a CA’s public key can change, for example, when the key gets updated, or the CA may have multiple signing keys because of multiple concurrent key pairs or key changeover. In these cases, the CA ends up with more than one key pair. When verifying a signature on a certificate, other applications need to know which key was used in the signature.
OID
2.5.29.35
| Parameter | Description |
|---|---|
| enable | Specifies whether the rule is enabled or disabled. The default is to have this extension disabled. |
| critical | Sets whether the extension is marked as critical; the default is noncritical. |
B.4.2.1.3. CRLNumber
The CRLNumber extension specifies a sequential number for each CRL issued by a CA. It allows users to easily determine when a particular CRL supersedes another CRL. PKIX requires that all CRLs have this extension.
OID
2.5.29.20
Criticality
This extension must not be critical.
| Parameter | Description |
|---|---|
| enable | Specifies whether the rule is enabled, which is the default. |
| critical | Sets whether the extension is marked as critical; the default is noncritical. |
B.4.2.1.4. deltaCRLIndicator
The deltaCRLIndicator extension generates a delta CRL, a list only of certificates that have been revoked since the last CRL; it also includes a reference to the base CRL. This updates the local database while ignoring unchanged information already in the local database. This can significantly improve processing time for applications that store revocation information in a format other than the CRL structure.
OID
2.5.29.27
Criticality
PKIX requires that this extension be critical if it exists.
| Parameter | Description |
|---|---|
| enable | Sets whether the rule is enabled. By default, it is disabled. |
| critical | Sets whether the extension is critical or noncritical. By default, this is critical. |
B.4.2.1.5. FreshestCRL
The freshestCRL extension identifies how delta CRL information is obtained. The freshestCRL extension is placed in the full CRL to indicate where to find the latest delta CRL.
OID
2.5.29.46
Criticality
PKIX requires that this extension must be noncritical.
| Parameter | Description |
|---|---|
| enable | Sets whether the extension rule is enabled. By default, this is disabled. |
| critical | Marks the extension as critical or noncritical. The default is noncritical. |
| numPoints |
Indicates the number of issuing points for the delta CRL, from |
| pointTypen |
Specifies the type of issuing point for the n issuing point. For each number specified in |
| pointNamen |
If
If |
B.4.2.1.6. issuerAltName
The Issuer Alternative Name extension allows additional identities to be associated with the issuer of the CRL, like binding attributes such as a mail address, a DNS name, an IP address (both IPv4 and IPv6), and a uniform resource indicator (URI), with the issuer of the CRL. For details, see the discussion under certificate extensions at Section B.3.7, “issuerAltName extension”.
OID
2.5.29.18
| Parameter | Description |
|---|---|
| enable | Sets whether the extension rule is enabled; by default, this is disabled. |
| critical | Sets whether the extension is critical; by default, this is noncritical. |
| numNames |
Sets the total number of alternative names or identities permitted in the extension. Each name has a set of configuration parameters, |
| nameTypen | Specifies the general-name type; this can be any of the following:
|
| namen |
Specifies the general-name value; the allowed values depend on the name type specified in the
|
B.4.2.1.7. issuingDistributionPoint
The Issuing Distribution Point CRL extension identifies the CRL distribution point for a particular CRL and indicates what kinds of revocation it covers, such as revocation of end-entity certificates only, CA certificates only, or revoked certificates that have a limited set of reason codes.
PKIX Part I does not require this extension.
OID
2.5.29.28
Criticality
PKIX requires that this extension be critical if it exists.
| Parameter | Description |
|---|---|
| enable | Sets whether the extension is enabled; the default is disabled. |
| critical | Marks the extension as critical, the default, or noncritical. |
| pointType | Specifies the type of the issuing distribution point from the following:
|
| pointName |
Gives the name of the issuing distribution point. The name of the distribution point depends on the value specified for the
NOTE The CRL may be stored in the directory entry corresponding to the CRL issuing point, which may be different than the directory entry of the CA. |
| onlySomeReasons | Specifies the reason codes associated with the distribution point.
Permissible values are a combination of reason codes ( |
| onlyContainsCACerts | Specifies that the distribution point contains user certificates only if set. By default, this is not set, which means the distribution point contains all types of certificates. |
| indirectCRL | Specifies that the distribution point contains an indirect CRL; by default, this is not selected. |
B.4.2.2. CRL Entry extensions
The sections that follow lists the CRL entry extension types that are defined as part of the Internet X.509 v3 Public Key Infrastructure proposed standard. All of these extensions are noncritical.
B.4.2.2.1. certificateIssuer
The Certificate Issuer extension identifies the certificate issuer associated with an entry in an indirect CRL.
This extension is used only with indirect CRLs, which are not supported by the Certificate System.
OID
2.5.29.29
B.4.2.2.2. invalidityDate
The Invalidity Date extension provides the date on which the private key was compromised or that the certificate otherwise became invalid.
OID
2.5.29.24
| Parameter | Description |
|---|---|
| enable | Sets whether the extension rule is enabled or disabled. By default, this is enabled. |
| critical | Marks the extension as critical or noncritical; by default, this is noncritical. |
B.4.2.2.3. CRLReason
The Reason Code extension identifies the reason for certificate revocation.
OID
2.5.29.21
| Parameter | Description |
|---|---|
| enable | Sets whether the extension rule is enabled or disabled. By default, this is enabled. |
| critical | Marks the extension as critical or noncritical. By default, this is noncritical. |
B.4.3. Netscape-defined certificate extensions reference
Netscape defined certain certificate extensions for its products. Some of the extensions are now obsolete, and others have been superseded by the extensions defined in the X.509 proposed standard. All Netscape extensions should be tagged as noncritical, so that their presence in a certificate does not make that certificate incompatible with other clients.
B.4.3.1. netscape-cert-type
The Netscape Certificate Type extension can be used to limit the purposes for which a certificate can be used. It has been replaced by the X.509 v3 extensions Section B.3.6, “extKeyUsage” and Section B.3.3, “basicConstraints”.
If the extension exists in a certificate, it limits the certificate to the uses specified in it. If the extension is not present, the certificate can be used for all applications, except for object signing.
The value is a bit-string, where the individual bit positions, when set, certify the certificate for particular uses as follows:
- bit 0: SSL Client certificate
- bit 1: SSL Server certificate
- bit 2: S/MIME certificate
- bit 3: Object Signing certificate
- bit 4: reserved
- bit 5: SSL CA certificate
- bit 6: S/MIME CA certificate
- bit 7: Object Signing CA certificate
OID
2.16.840.1.113730.1.1
B.4.3.1.1. netscape-comment
The value of this extension is an IA5String. It is a comment that can be displayed to the user when the certificate is viewed.
OID
2.16.840.1.113730.13
Appendix C. Publishing modules reference
Several publisher, mapper, and rule modules are configured by default with the Certificate Manager.
C.1. Publisher plugin modules
This section describes the publisher modules provided for the Certificate Manager. The modules are used by the Certificate Manager to enable and configure specific publisher instances.
C.1.1. FileBasedPublisher
The FileBasedPublisher plugin module configures a Certificate Manager to publish certificates and CRLs to file. This plugin can publish base-64 encoded files, DER-encoded files, or both, depending on the checkboxes selected when the publisher is configured. The certificate and CRL content can be viewed by converting the files using the PrettyPrintCert and PrettyPrintCRL tools. For details on viewing the content in base-64 and DER-encoded certificates and CRLs, see Section 7.10, “Viewing certificates and CRLs published to file”.
By default, the Certificate Manager does not create an instance of the FileBasedPublisher module.
| Parameter | Description |
|---|---|
|
|
Specifies a name for the publisher, an alphanumeric string with no spaces. For example, |
|
|
Specifies the complete path to the directory to which the Certificate Manager creates the files; the path can be an absolute path or can be relative to the Certificate System instance directory. For example, |
C.1.2. LdapCaCertPublisher
The LdapCaCertPublisher plugin module configures a Certificate Manager to publish or unpublish a CA certificate to the caCertificate;binary attribute of the CA’s directory entry.
The module converts the object class of the CA’s entry to pkiCA or certificationAuthority, if it is not used already. Similarly, it also removes the pkiCA or certificationAuthority object class when unpublishing if the CA has no other certificates.
During installation, the Certificate Manager automatically creates an instance of the LdapCaCertPublisher module for publishing the CA certificate to the directory.
| Parameter | Description |
|---|---|
|
|
Specifies the LDAP directory attribute to publish the CA certificate. This must be |
|
|
Specifies the object class for the CA’s entry in the directory. This must be |
C.1.3. LdapUserCertPublisher
The LdapUserCertPublisher plugin module configures a Certificate Manager to publish or unpublish a user certificate to the userCertificate;binary attribute of the user’s directory entry.
This module is used to publish any end-entity certificate to an LDAP directory. Types of end-entity certificates include SSL client, S/MIME, SSL server, and OCSP responder.
During installation, the Certificate Manager automatically creates an instance of the LdapUserCertPublisher module for publishing end-entity certificates to the directory.
| Parameter | Description |
|---|---|
|
|
Specifies the directory attribute of the mapped entry to which the Certificate Manager should publish the certificate. This must be |
C.1.4. LdapCrlPublisher
The LdapCrlPublisher plugin module configures a Certificate Manager to publish or unpublish the CRL to the certificateRevocationList;binary attribute of a directory entry.
During installation, the Certificate Manager automatically creates an instance of the LdapCrlPublisher module for publishing CRLs to the directory.
| Parameter | Description |
|---|---|
|
|
Specifies the directory attribute of the mapped entry to which the Certificate Manager should publish the CRL. This must be |
C.1.5. LdapDeltaCrlPublisher
The LdapDeltaCrlPublisher plugin module configures a Certificate Manager to publish or unpublish a delta CRL to the deltaRevocationList attribute of a directory entry.
During installation, the Certificate Manager automatically creates an instance of the LdapDeltaCrlPublisher module for publishing CRLs to the directory.
| Parameter | Description |
|---|---|
|
|
Specifies the directory attribute of the mapped entry to which the Certificate Manager should publish the delta CRL. This must be |
C.1.6. LdapCertificatePairPublisher
The LdapCertificatePairPublisher plugin module configures a Certificate Manager to publish or unpublish a cross-signed certificate to the crossCertPair;binary attribute of the CA’s directory entry.
The module also converts the object class of the CA’s entry to a pkiCA or certificationAuthority, if it is not used already. Similarly, it also removes the pkiCA or certificationAuthority object class when unpublishing if the CA has no other certificates.
During installation, the Certificate Manager automatically creates an instance of the LdapCertificatePairPublisher module named LdapCrossCertPairPublisher for publishing the cross-signed certificates to the directory.
| Parameter | Description |
|---|---|
|
|
Specifies the LDAP directory attribute to publish the CA certificate. This must be |
|
|
Specifies the object class for the CA’s entry in the directory. This must be |
C.1.7. OCSPPublisher
The OCSPPublisher plugin module configures a Certificate Manager to publish its CRLs to an Online Certificate Status Manager.
The Certificate Manager does not create any instances of the OCSPPublisher module at installation.
| Parameter | Description |
|---|---|
|
| Specifies the fully qualified hostname of the Online Certificate Status Manager. |
|
| Specifies the port number on which the Online Certificate Status Manager is listening to the Certificate Manager. This is the Online Certificate Status Manager’s SSL port number. |
|
|
Specifies the path for publishing the CRL. This must be the default path, |
|
| Sets whether to use client (certificate-based) authentication to access the OCSP service. |
|
|
Gives the nickname of the certificate in the OCSP service’s database to use for client authentication. This is only used if the |
C.2. Mapper plugin modules
This section describes the mapper plugin modules provided for the Certificate Manager. These modules configure a Certificate Manager to enable and configure specific mapper instances.
The available mapper plugin modules include the following:
C.2.1. LdapCaSimpleMap
The LdapCaSimpleMap plugin module configures a Certificate Manager to create an entry for the CA in an LDAP directory automatically and then map the CA’s certificate to the directory entry by formulating the entry’s DN from components specified in the certificate request, certificate subject name, certificate extension, and attribute variable assertion (AVA) constants. For more information on AVAs, check the directory documentation.
The CA certificate mapper specifies whether to create an entry for the CA, to map the certificate to an existing entry, or to do both.
If a CA entry already exists in the publishing directory and the value assigned to the dnPattern parameter of this mapper is changed, but the uid and o attributes are the same, the mapper fails to create the second CA entry. For example, if the directory already has a CA entry for uid=CA,ou=Marketing,o=example.com and a mapper is configured to create another CA entry with uid=CA,ou=Engineering,o=example.com, the operation fails.
The operation may fail because the directory has the UID Uniqueness plugin set to a specific base DN. This setting prevents the directory from having two entries with the same UID under that base DN. In this example, it prevents the directory from having two entries under o=example.com with the same UID, CA.
If the mapper fails to create a second CA entry, check the base DN to which the UID Uniqueness plugin is set, and check if an entry with the same UID already exists in the directory. If necessary, adjust the mapper setting, remove the old CA entry, comment out the plugin, or create the entry manually.
During installation, the Certificate Manager automatically creates two instances of the CA certificate mapper module. The mappers are named as follows:
-
LdapCrlMapfor CRLs (see Section C.2.1.2, “LdapCrlMap”) -
LdapCaCertMapfor CA certificates (see Section C.2.1.1, “LdapCaCertMap”).
| Parameter | Description |
|---|---|
|
| Creates a CA’s entry, if selected (default). If selected, the Certificate Manager first attempts to create an entry for the CA in the directory. If the Certificate Manager succeeds in creating the entry, it then attempts to publish the CA’s certificate to the entry. If this is not selected, the entry must already be present in order to publish to it. |
|
|
Specifies the DN pattern the Certificate Manager should use to construct to search for the CA’s entry in the publishing directory. The value of
If the CA certificate does not have the
In the above examples, |
C.2.1.1. LdapCaCertMap
The LdapCaCertMap mapper is an instance of the LdapCaSimpleMap module. The Certificate Manager automatically creates this mapper during installation.
This mapper creates an entry for the CA in the directory and maps the CA certificate to the CA’s entry in the directory.
By default, the mapper is configured to create an entry for the CA in the directory, The default DN pattern for locating the CA’s entry is as follows:
uid=$subj.cn,ou=people,o=$subj.o
uid=$subj.cn,ou=people,o=$subj.oC.2.1.2. LdapCrlMap
The LdapCrlMap mapper is an instance of the LdapCaSimpleMap module. The Certificate Manager automatically creates this mapper during installation.
This mapper creates an entry for the CA in the directory and maps the CRL to the CA’s entry in the directory.
By default, the mapper is configured to create an entry for the CA in the directory. The default DN pattern for locating the CA’s entry is as follows:
uid=$subj.cn,ou=people,o=$subj.o
uid=$subj.cn,ou=people,o=$subj.oC.2.2. LdapDNExactMap
The LdapDNExactMap plugin module configures a Certificate Manager to map a certificate to an LDAP directory entry by searching for the LDAP entry DN that matches the certificate subject name. To use this mapper, each certificate subject name must exactly match a DN in a directory entry. For example, if the certificate subject name is uid=jdoe, o=Example Corporation, c=US, when searching the directory for the entry, the Certificate Manager only searches for an entry with the DN uid=jdoe, o=Example Corporation, c=US.
If no matching entries are found, the server returns an error and does not publish the certificate.
This mapper does not require any values for any parameters because it obtains all values from the certificate.
C.2.3. LdapSimpleMap
The LdapSimpleMap plugin module configures a Certificate Manager to map a certificate to an LDAP directory entry by deriving the entry’s DN from components specified in the certificate request, certificate’s subject name, certificate extension, and attribute variable assertion (AVA) constants. For more information on AVAs, see the directory documentation.
By default, the Certificate Manager uses mapper rules that are based on the simple mapper. During installation, the Certificate Manager automatically creates an instance of the simple mapper module, named LdapUserCertMap. The default mapper maps various types of end-entity certificates to their corresponding directory entries.
The simple mapper requires one parameter, dnPattern. The value of dnPattern can be a list of AVAs separated by commas. An AVA can be a variable, such as uid=$subj.UID, or a constant, such as o=Example Corporation.
-
Example 1:
uid=CertMgr, o=Example Corporation -
Example 2:
cn=$subj.cn,ou=$subj.ou,o=$subj.o,c=US -
Example 3: uid=
$req.HTTP_PARAMS.uid, e=$ext.SubjectAlternativeName.RFC822Name,ou=$subj.ou
In the examples, $req takes the attribute from the certificate request, $subj takes the attribute from the certificate subject name, and $ext takes the attribute from the certificate extension.
C.2.4. LdapSubjAttrMap
The LdapSubjAttrMap plugin module configures a Certificate Manager to map a certificate to an LDAP directory entry using a configurable LDAP attribute. To use this mapper, the directory entries must include the specified LDAP attribute.
This mapper requires the exact pattern of the subject DN because the Certificate Manager searches the directory for the attribute with a value that exactly matches the entire subject DN. For example, if the specified LDAP attribute is certSubjectDN and the certificate subject name is uid=jdoe, o=Example Corporation, c=US, the Certificate Manager searches the directory for entries that have the attribute certSubjectDN=uid=jdoe, o=Example Corporation, c=US.
If no matching entries are found, the server returns an error and writes it to the log.
The following table describes these parameters.
| Parameter | Description |
|---|---|
|
|
Specifies the name of the LDAP attribute that contains a certificate subject name as its value. The default is |
|
|
Specifies the base DN for starting the attribute search. The permissible value is a valid DN of an LDAP entry, such as |
C.2.5. LdapDNCompsMap
The LdapDNCompsMap plugin module implements the DN components mapper. This mapper maps a certificate to an LDAP directory entry by constructing the entry’s DN from components, such as cn, ou, o, and c, specified in the certificate subject name, and then uses it as the search DN to locate the entry in the directory. The mapper locates the following entries:
- The CA’s entry in the directory for publishing the CA certificate and the CRL.
- End-entity entries in the directory for publishing end-entity certificates.
The mapper takes DN components to build the search DN. The mapper also takes an optional root search DN. The server uses the DN components to form an LDAP entry to begin a subtree search and the filter components to form a search filter for the subtree. If none of the DN components are configured, the server uses the base DN for the subtree. If the base DN is null and none of the DN components match, an error is returned. If none of the DN components and filter components match, an error is returned. If the filter components are null, a base search is performed.
Both the DNComps and filterComps parameters accept valid DN components or attributes separated by commas. The parameters do not accept multiple entries of an attribute; for example, filterComps can be set to cn,ou but not to cn,ou2,ou1. To create a filter with multiple instances of the same attribute, such as if directory entries contain multiple ou s, modify the source code for the LdapDNCompsMap module.
The following components are commonly used in DNs:
-
uidrepresents the user ID of a user in the directory. -
cnrepresents the common name of a user in the directory. -
ourepresents an organizational unit in the directory. -
orepresents an organization in the directory. -
lrepresents a locality (city). -
strepresents a state. -
crepresents a country.
For example, the following DN represents the user named Jane Doe who works for the Sales department at Example Corporation, which is located in Mountain View, California, United States:
cn=Jane Doe, ou=Sales, o=Example Corporation, l=Mountain View, st=California, c=US
cn=Jane Doe, ou=Sales, o=Example Corporation, l=Mountain View, st=California, c=US
The Certificate Manager can use some or all of these components (cn, ou, o, l, st, and c) to build a DN for searching the directory. When creating a mapper rule, these components can be specified for the server to use to build a DN; that is, components to match attributes in the directory. This is set through the dnComps parameter.
For example, the components cn, ou, o, and c are set as values for the dnComps parameter. To locate Jane Doe’s entry in the directory, the Certificate Manager constructs the following DN by reading the DN attribute values from the certificate, and uses the DN as the base for searching the directory:
cn=Jane Doe, ou=Sales, o=Example Corporation, c=US
cn=Jane Doe, ou=Sales, o=Example Corporation, c=US-
A subject name does not need to have all of the components specified in the
dnCompsparameter. The server ignores any components that are not part of the subject name, such aslandstin this example. Unspecified components are not used to build the DN. In the example, if the
oucomponent is not included, the server uses this DN as the base for searching the directory:cn=Jane Doe, o=Example Corporation, c=US
cn=Jane Doe, o=Example Corporation, c=USCopy to Clipboard Copied! Toggle word wrap Toggle overflow
For the dnComps parameter, enter those DN components that the Certificate Manager can use to form the LDAP DN exactly. In certain situations, however, the subject name in a certificate may match more than one entry in the directory. Then, the Certificate Manager might not get a single, distinct matching entry from the DN. For example, the subject name cn=Jane Doe, ou=Sales, o=Example Corporation, c=US might match two users with the name Jane Doe in the directory. If that occurs, the Certificate Manager needs additional criteria to determine which entry corresponds to the subject of the certificate.
To specify the components the Certificate Manager must use to distinguish between different entries in the directory, use the filterComps parameter; for details, see Table C.10, “LdapDNCompsMap configuration parameters”. For example, if cn, ou, o, and c are values for the dnComps parameter, enter l for the filterComps parameter only if the l attribute can be used to distinguish between entries with identical cn, ou, o, and c values.
If the two Jane Doe entries are distinguished by the value of the uid attribute - one entry’s uid is janedoe1, and the other entry’s uid is janedoe2 - the subject names of certificates can be set to include the uid component.
The e, l, and st components are not included in the standard set of certificate request forms provided for end entities. These components can be added to the forms, or the issuing agents can be required to insert these components when editing the subject name in the certificate issuance forms.
C.2.5.1. Configuration parameters of LdapDNCompsMap
With this configuration, a Certificate Manager maps its certificates with the ones in the LDAP directory by using the dnComps values to form a DN and the filterComps values to form a search filter for the subtree.
-
If the formed DN is null, the server uses the
baseDNvalue for the subtree. If both the formed DN and base DN are null, the server logs an error. -
If the filter is null, the server uses the
baseDNvalue for the search. If both the filter and base DN are null, the server logs an error.
The following table describes these parameters.
| Parameter | Description |
|---|---|
|
|
Specifies the DN to start searching for an entry in the publishing directory. If the |
|
| Specifies where in the publishing directory the Certificate Manager should start searching for an LDAP entry that matches the CA’s or the end entity’s information.
For example, if
If the The permissible values are valid DN components or attributes separated by commas. |
|
|
Specifies components the Certificate Manager should use to filter entries from the search result. The server uses the
If the server finds more than one entry in the directory that matches the information gathered from the certificate, the search is successful, and the server optionally performs a verification. For example, if
The permissible values are valid directory attributes in the certificate DN separated by commas. The attribute names for the filters need to be attribute names from the certificate, not from ones in the LDAP directory. For example, most certificates have an |
C.3. Rule instances
This section discusses the rule instances that have been set.
C.3.1. LdapCaCertRule
The LdapCaCertRule can be used to publish CA certificates to an LDAP directory.
| Parameter | Value | Description |
|---|---|---|
|
|
| Specifies the type of certificate that will be published. |
|
| Specifies a predicate for the publisher. | |
|
|
| Enables the rule. |
|
|
| Specifies the mapper used with the rule. See Section C.2.1.1, “LdapCaCertMap” for details on the mapper. |
|
|
| Specifies the publisher used with the rule. See Section C.1.2, “LdapCaCertPublisher” for details on the publisher. |
C.3.2. LdapXCertRule
The LdapXCertRule is used to publish cross-pair certificates to an LDAP directory.
| Parameter | Value | Description |
|---|---|---|
|
|
| Specifies the type of certificate that will be published. |
|
| Specifies a predicate for the publisher. | |
|
|
| Enables the rule. |
|
|
| Specifies the mapper used with the rule. See Section C.2.1.1, “LdapCaCertMap” for details on the mapper. |
|
|
| Specifies the publisher used with the rule. See Section C.1.6, “LdapCertificatePairPublisher” for details on this publisher. |
C.3.3. LdapUserCertRule
The LdapUserCertRule is used to publish user certificates to an LDAP directory.
| Parameter | Value | Description |
|---|---|---|
|
|
| Specifies the type of certificate that will be published. |
|
| Specifies a predicate for the publisher. | |
|
|
| Enables the rule. |
|
|
| Specifies the mapper used with the rule. See Section C.2.3, “LdapSimpleMap” for details on the mapper. |
|
|
| Specifies the publisher used with the rule. See Section C.1.3, “LdapUserCertPublisher” for details on the publisher. |
C.3.4. LdapCRLRule
The LdapCRLRule is used to publish CRLs to an LDAP directory.
| Parameter | Value | Description |
|---|---|---|
|
|
| Specifies the type of certificate that will be published. |
|
| Specifies a predicate for the publisher. | |
|
|
| Enables the rule. |
|
|
| Specifies the mapper used with the rule. See Section C.2.1.2, “LdapCrlMap” for details on the mapper. |
|
|
| Specifies the publisher used with the rule. See Section C.1.4, “LdapCrlPublisher” for details on the publisher. |
Appendix D. ACL reference
This section describes what each resource controls, lists the possible operations describing the outcome of those operations, and provides the default ACIs for each ACL resource defined. Each subsystem contains only those ACLs that are relevant to that subsystem.
D.1. About ACL configuration files
Access control is the method to set rules on who can access part of a server and the operations that user can perform. The four subsystems which depend on the LDAP directory service and use a Java console - the CA, KRA, OCSP, and TKS - all implement LDAP-style access control to access their resources. These access control lists (ACL) are located in the /var/lib/pki/instance_name/conf/subsystem/acl.ldif file.
This section provides only a very brief overview of access control concepts. Access control is described in much more detail in the Managing Access Control chapter in the Red Hat Directory Server Administration Guide.
The Certificate System ACL files are LDIF files that are loaded by the internal database. The individual ACLs are defined as resourceACLS attributes which identify the area of the subsystem being protected and then a list of all of the specific access controls being set.
resourceACLS: class_name:all rights: allow|deny (rights) type=target description
resourceACLS: class_name:all rights: allow|deny (rights) type=target descriptionEach rule which allows or denies access to a resource is called an access control instruction (ACI). (The sum of all of the ACIs for a resource is an access control list.) Before defining the actual ACI, the ACL attribute is first applied to a specific plugin class used by the Certificate System subsystem. This focuses each ACL to a specific function performed by the subsystem, providing both more security for the instance and better control over applying ACLs.
Example D.1. Default ACL to list certificate profiles
resourceACLS: certServer.ca.profiles:list:allow (list) group="Certificate Manager Agents":Certificate Manager agents may list profiles
resourceACLS: certServer.ca.profiles:list:allow (list) group="Certificate Manager Agents":Certificate Manager agents may list profiles
Because each subsystem (CA, KRA, OCSP, and TKS) has different resources for its operations, each subsystem instance has its own acl.ldif file and its own defined ACLs.
Each ACI defines what access or behavior can be done (the right) and who the ACI applies to (the target). The basic format of an ACI is, then:
allow|deny (rights) user|group
allow|deny (rights) user|groupRights are types of operations that the ACI allows a user to perform. For LDAP ACIs, there is a relatively limited list of rights to directory entries, like search, read, write, and delete. The Certificate System uses additional rights that cover common PKI tasks, like revoke, submit, and assign.
If an operation is not explicitly allowed in an ACI, then it is implicitly denied. If an operation is explicitly denied in one ACI, then it trumps any ACI which explicitly allows it. Deny rules are always superior to allow rules to provide additional security.
Each ACI has to apply to specific users or groups. This is set using a couple of common conditions, usually user= or group=, though there are other options, like ipaddress= which defines client-based access rather than entry-based access. If there is more than one condition, the conditions can be composed using the double pipe (||) operator, signifying logical disjunction ("or"), and the double ampersand (&&) operator, signifying logical conjunction ("and"). For example, group="group1" || "group2".
Each area of the resourceACLS attribute value is defined in the below table.
| Value | Description |
|---|---|
| class_name | The plugin class to which the ACI is applied. |
| all operations |
The list of every operation covered in the ACI definition. There can be multiple operations in a single ACI and multiple ACIs in a single |
| allow|deny | Whether the action is being allowed for the target user or group or denied to the target user or group. |
| (operations) | The operations being allowed or denied. |
| type=target |
The target to identify who this applies to. This is commonly a user (such as |
| description | A description of what the ACL is doing. |
D.2. Common ACLs
This section covers the default access control configuration that is common for all four subsystem types. These access control rules manage access to basic and common configuration settings, such as logging and adding users and groups.
These ACLs are common in that the same ACLs occur in each subsystem instance’s acl.ldif file. These are not shared ACLs in the sense that the configuration files or settings are held in common by all subsystem instances. As with all other instance configuration, these ACLs are maintained independently of other subsystem instances, in the instance-specific acl.ldif file.
D.2.1. certServer.acl.configuration
Controls operations to the ACL configuration. The default configuration is:
allow (read) group="Administrators" || group="Certificate Manager Agents" || group="Registration Manager Agents" || group="Key Recovery Authority Agents" || group="Online Certificate Status Manager Agents" || group="Auditors";allow (modify) group="Administrators"
allow (read) group="Administrators" || group="Certificate Manager Agents" || group="Registration Manager Agents" || group="Key Recovery Authority Agents" || group="Online Certificate Status Manager Agents" || group="Auditors";allow (modify) group="Administrators"| Operations | Description | Allow/Deny Access | Targeted Users/Groups |
|---|---|---|---|
| read | View ACL resources and list ACL resources, ACL listing evaluators, and ACL evaluator types. | Allow |
|
| modify | Add, delete, and update ACL evaluators. | Allow | Administrators |
D.2.2. certServer.admin.certificate
Controls which users can import a certificate through a Certificate Manager. By default, this operation is allowed to everyone. The default configuration is:
allow (import) user="anybody"
allow (import) user="anybody"This entry is associated with the CA administration web interface which is used to configure the instance. This ACL is only available during instance configuration and is unavailable after the CA is running.
| Operations | Description | Allow/Deny Access | Targeted Users/Groups |
|---|---|---|---|
| import | Import a CA administrator certificate, and retrieve certificates by serial number. | Allow | Anyone |
D.2.3. certServer.auth.configuration
Controls operations on the authentication configuration.
allow (read) group="Administrators" || group="Certificate Manager Agents" || group="Registration Manager Agents" || group="Key Recovery Authority Agents" || group="Online Certificate Status Manager Agents" || group="Auditors";allow (modify) group="Administrators
allow (read) group="Administrators" || group="Certificate Manager Agents" || group="Registration Manager Agents" || group="Key Recovery Authority Agents" || group="Online Certificate Status Manager Agents" || group="Auditors";allow (modify) group="Administrators| Operations | Description | Allow/Deny Access | Targeted Users/Groups |
|---|---|---|---|
| read | View authentication plugins, authentication type, configured authentication manager plugins, and authentication instances. List authentication manager plugins and authentication manager instances. | Allow |
|
| modify | Add or delete authentication plugins and authentication instances. Modify authentication instances. | Allow | Administrators |
D.2.4. certServer.clone.configuration
Controls who can read and modify the configuration information used in cloning. The default setting is:
allow (modify,read) group="Enterprise CA Administrators" || group="Enterprise KRA Administrators" || group="Enterprise OCSP Administrators" || group="Enterprise TKS Administrators"
allow (modify,read) group="Enterprise CA Administrators" || group="Enterprise KRA Administrators" || group="Enterprise OCSP Administrators" || group="Enterprise TKS Administrators"| Operations | Description | Allow/Deny Access | Targeted Users/Groups |
|---|---|---|---|
| read | View original instance configuration. | Allow | Enterprise Administrators |
| modify | Modify original instance configuration. | Allow | Enterprise Administrators |
D.2.5. certServer.general.configuration
Controls access to the general configuration of the subsystem instance, including who can view and edit the CA’s settings.
allow (read) group="Administrators" || group="Auditors" || group="Certificate Manager Agents" || group="Registration Manager Agents" || group="Key Recovery Authority Agents" || group="Online Certificate Status Manager Agents";allow (modify) group="Administrators"
allow (read) group="Administrators" || group="Auditors" || group="Certificate Manager Agents" || group="Registration Manager Agents" || group="Key Recovery Authority Agents" || group="Online Certificate Status Manager Agents";allow (modify) group="Administrators"| Operations | Description | Allow/Deny Access | Targeted Users/Groups |
|---|---|---|---|
| read | View the operating environment, LDAP configuration, SMTP configuration, server statistics, encryption, token names, subject name of certificates, certificate nicknames, all subsystems loaded by the server, CA certificates, and all certificates for management. | Allow |
|
| modify | Modify the settings for the LDAP database, SMTP, and encryption. Issue import certificates, install certificates, trust and untrust CA certificates, import cross-pair certificates, and delete certificates. Perform server restart and stop operations. Log in all tokens and check token status. Run self-tests on demand. Get certificate information. Process the certificate subject name. Validate the certificate subject name, certificate key length, and certificate extension. | Allow | Administrators |
D.2.6. certServer.log.configuration
Controls access to the log configuration for the Certificate Manager, including changing the log settings.
allow (read) group="Administrators" || group="Auditors" || group="Certificate Manager Agents" || group="Registration Manager Agents" || group="Key Recovery Authority Agents" || group="Online Certificate Status Manager Agents";allow (modify) group="Administrators"
allow (read) group="Administrators" || group="Auditors" || group="Certificate Manager Agents" || group="Registration Manager Agents" || group="Key Recovery Authority Agents" || group="Online Certificate Status Manager Agents";allow (modify) group="Administrators"| Operations | Description | Allow/Deny Access | Targeted Users/Groups |
|---|---|---|---|
| read | View log plugin information, log plugin configuration, and log instance configuration. List log plugins and log instances (excluding NTEventLog). | Allow |
|
| modify | Add and delete log plugins and log instances. Modify log instances, including log rollover parameters and log level. | Allow | Administrators |
D.2.7. certServer.log.configuration.fileName
Restricts access to change the file name of a log for the instance.
allow (read) group="Administrators" || group="Auditors" || group="Certificate Manager Agents" || group="Registration Manager Agents" || group="Key Recovery Authority Agents" || group="Online Certificate Status Manager Agents";deny (modify) user=anybody
allow (read) group="Administrators" || group="Auditors" || group="Certificate Manager Agents" || group="Registration Manager Agents" || group="Key Recovery Authority Agents" || group="Online Certificate Status Manager Agents";deny (modify) user=anybody| Operations | Description | Allow/Deny Access | Targeted Users/Groups |
|---|---|---|---|
| read |
View the value of the | Allow |
|
| modify |
Change the value of the | Deny | Anyone |
D.2.8. certServer.log.content.signedAudit
Controls who has access to the signed audit logs. The default setting is:
allow (read) group="Auditors"
allow (read) group="Auditors"| Operations | Description | Allow/Deny Access | Targeted Users/Groups |
|---|---|---|---|
| read | View log content. List logs. | Allow |
|
D.2.9. certServer.registry.configuration
Controls access to the administration registry, the file that is used to register plugin modules. Currently, this is only used to register certificate profile plugins.
allow (read) group="Administrators" || group="Certificate Manager Agents" || group="Registration Manager Agents" || group="Key Recovery Authority Agents" || group="Online Certificate Status Manager Agents" || group="Auditors";allow (modify) group="Administrators"
allow (read) group="Administrators" || group="Certificate Manager Agents" || group="Registration Manager Agents" || group="Key Recovery Authority Agents" || group="Online Certificate Status Manager Agents" || group="Auditors";allow (modify) group="Administrators"| Operations | Description | Allow/Deny Access | Targeted Users/Groups |
|---|---|---|---|
| read | View the administration registry, supported policy constraints, profile plugin configuration, and the list of profile plugins. | Allow |
|
| modify | Register individual profile implementation plugins. | Allow | Administrators |
D.3. Certificate manager-specific ACLs
This section covers the default access control configuration attributes which are set specifically for the Certificate Manager. The CA ACL configuration also includes all of the common ACLs listed in Section D.2, “Common ACLs”.
There are access control rules set for each of the CA’s interfaces (administrative console and agents and end-entities services pages) and for common operations like listing and downloading certificates.
D.3.1. certServer.admin.ocsp
Limits access to the Certificate Manager’s OCSP configuration to members of the enterprise OCSP administrators group.
allow (modify,read) group="Enterprise OCSP Administrators"
allow (modify,read) group="Enterprise OCSP Administrators"| Operations | Description | Allow/Deny Access | Targeted Users/Groups |
|---|---|---|---|
| modify | Modify the OCSP configuration, OCSP stores configuration, and default OCSP store. | Allow | Enterprise OCSP Administrators |
| read | Read the OCSP configuration. | Allow | Enterprise OCSP Administrators |
D.3.2. certServer.ca.certificate
Controls basic management operations for certificates in the agents services interface, including importing and revoking certificates. The default configuration is:
allow (import,unrevoke,revoke,read) group="Certificate Manager Agents"
allow (import,unrevoke,revoke,read) group="Certificate Manager Agents"| Operations | Description | Allow/Deny Access | Targeted Users/Groups |
|---|---|---|---|
| import | Retrieve a certificate by serial number. | Allow | Certificate Manager Agents |
| unrevoke | Change the status of a certificate from revoked. | Allow | Certificate Manager Agents |
| revoke | Change the status of a certificate to revoked. | Allow | Certificate Manager Agents |
| read | Retrieve certificates based on the request ID, and display certificate details based on the request ID or serial number. | Allow | Certificate Manager Agents |
D.3.3. certServer.ca.certificates
Controls operations for listing or revoking certificates through the agent services interface. The default configuration is:
allow (revoke,list) group="Certificate Manager Agents"|| group="Registration Manager Agents"
allow (revoke,list) group="Certificate Manager Agents"|| group="Registration Manager Agents"| Operations | Description | Allow/Deny Access | Targeted Users/Groups |
|---|---|---|---|
| revoke | Revoke a certificates, or approve certificate revocation requests. Revoke a certificate from the TPS. Prompt users for additional data about a revocation request. | Allow |
|
| list | List certificates based on a search. Retrieve details about a range of certificates based on a range of serial numbers. | Allow |
|
D.3.4. certServer.ca.configuration
Controls operations on the general configuration for a Certificate Manager. The default configuration is:
allow (read) group="Administrators" || group="Certificate Manager Agents" || group="Registration Manager Agents" || group="Key Recovery Authority Agents" || group="Online Certificate Status Manager Agents" || group="Auditors";allow (modify) group="Administrators"
allow (read) group="Administrators" || group="Certificate Manager Agents" || group="Registration Manager Agents" || group="Key Recovery Authority Agents" || group="Online Certificate Status Manager Agents" || group="Auditors";allow (modify) group="Administrators"| Operations | Description | Allow/Deny Access | Targeted Users/Groups |
|---|---|---|---|
| read | View CRL plugin information, general CA configuration, CA connector configuration, CRL issuing points configuration, CRL profile configuration, request notification configuration, revocation notification configuration, request in queue notification configuration, and CRL extensions configuration. List CRL extensions configuration and CRL issuing points configuration. | Allow |
|
| modify | Add and delete CRL issuing points. Modify general CA settings, CA connector configuration, CRL issuing points configuration, CRL configuration, request notification configuration, revocation notification configuration, request in queue notification configuration, and CRL extensions configuration. | Allow | Administrators |
D.3.5. certServer.ca.connector
Controls operations to submit requests over a special connector to the CA. The default configuration is:
allow (submit) group="Trusted Managers"
allow (submit) group="Trusted Managers"| Operations | Description | Allow/Deny Access | Targeted Users/Groups |
|---|---|---|---|
| submit | Submit requests from remote trusted managers. | Allow | Trusted Managers |
D.3.6. certServer.ca.connectorInfo
Controls access to the connector information to manage trusted relationships between a CA and KRA. These trust relationships are special configurations which allow a CA and KRA to automatically connect to perform key archival and recovery operations. These trust relationships are configured through special connector plugins.
allow (read) group="Enterprise KRA Administrators";allow (modify) group="Enterprise KRA Administrators" || group="Subsystem Group"
allow (read) group="Enterprise KRA Administrators";allow (modify) group="Enterprise KRA Administrators" || group="Subsystem Group"| Operations | Description | Allow/Deny Access | Targeted Users/Groups |
|---|---|---|---|
| read | Read connector plugin settings. | Allow | Enterprise KRA Administrators |
| modify | Modify connector plugin settings. | Allow |
|
D.3.7. certServer.ca.crl
Controls access to read or update CRLs through the agent services interface. The default setting is:
allow (read,update) group="Certificate Manager Agents"
allow (read,update) group="Certificate Manager Agents"| Operations | Description | Allow/Deny Access | Targeted Users/Groups |
|---|---|---|---|
| read | Display CRLs and get detailed information about CA CRL processing. | Allow | Certificate Manager Agents |
| update | Update CRLs. | Allow | Certificate Manager Agents |
D.3.8. certServer.ca.directory
Controls access to the LDAP directory used for publishing certificates and CRLs.
allow (update) group="Certificate Manager Agents"
allow (update) group="Certificate Manager Agents"| Operations | Description | Allow/Deny Access | Targeted Users/Groups |
|---|---|---|---|
| update | Publish CA certificates, CRLs, and user certificates to the LDAP directory. | Allow | Certificate Manager Agents |
D.3.9. certServer.ca.group
Controls access to the internal database for adding users and groups for the Certificate Manager instance.
allow (modify,read) group="Administrators"
allow (modify,read) group="Administrators"| Operations | Description | Allow/Deny Access | Targeted Users/Groups |
|---|---|---|---|
| modify | Create, edit, or delete user and group entries for the instance. Add or modify a user certificate within attributes | Allow | Administrators |
| read | View user and group entries for the instance. | Allow | Administrators |
D.3.10. certServer.ca.ocsp
Controls the ability to access and read OCSP information, such as usage statistics, through the agent services interface.
allow (read) group="Certificate Manager Agents"
allow (read) group="Certificate Manager Agents"| Operations | Description | Allow/Deny Access | Targeted Users/Groups |
|---|---|---|---|
| read | Retrieve OCSP usage statistics. | Allow | Certificate Manager Agents |
D.3.11. certServer.ca.profile
Controls access to certificate profile configuration in the agent services pages.
allow (read,approve) group="Certificate Manager Agents"
allow (read,approve) group="Certificate Manager Agents"| Operations | Description | Allow/Deny Access | Targeted Users/Groups |
|---|---|---|---|
| read | View the details of the certificate profiles. | Allow | Certificate Manager Agents |
| approve | Approve and enable certificate profiles. | Allow | Certificate Manager Agents |
D.3.12. certServer.ca.profiles
Controls access to list certificate profiles in the agent services interface.
allow (list) group="Certificate Manager Agents"
allow (list) group="Certificate Manager Agents"| Operations | Description | Allow/Deny Access | Targeted Users/Groups |
|---|---|---|---|
| list | List certificate profiles. | Allow | Certificate Manager Agents |
D.3.13. certServer.ca.registerUser
Defines which group or user can create an agent user for the instance. The default configuration is:
allow (modify,read) group="Enterprise CA Administrators" || group="Enterprise KRA Administrators" || group="Enterprise OCSP Administrators" || group="Enterprise TKS Administrators" || group="Enterprise TPS Administrators"
allow (modify,read) group="Enterprise CA Administrators" || group="Enterprise KRA Administrators" || group="Enterprise OCSP Administrators" || group="Enterprise TKS Administrators" || group="Enterprise TPS Administrators"| Operations | Description | Allow/Deny Access | Targeted Users/Groups |
|---|---|---|---|
| modify | Register a new agent. | Allow | Enterprise Administrators |
| read | Read existing agent information. | Allow | Enterprise Administrators |
D.3.14. certServer.ca.request.enrollment
Controls how the enrollment request are handled and assigned. The default setting is:
allow (submit) user="anybody";allow (read,execute,assign,unassign) group="Certificate Manager Agents"
allow (submit) user="anybody";allow (read,execute,assign,unassign) group="Certificate Manager Agents"| Operations | Description | Allow/Deny Access | Targeted Users/Groups |
|---|---|---|---|
| read | View an enrollment request. | Allow | Certificate Manager Agents |
| execute | Modify the approval state of a request. | Allow | Certificate Manager Agents |
| submit | Sumbit a request. | Allow | Anybody |
| assign | Assign a request to a Certificate Manager agent. | Allow | Certificate Manager Agents |
| unassign | Change the assignment of a request. | Allow | Certificate Manager Agents |
D.3.15. certServer.ca.request.profile
Controls the handling of certificate profile-based requests. The default setting is:
allow (approve,read) group="Certificate Manager Agents"
allow (approve,read) group="Certificate Manager Agents"| Operations | Description | Allow/Deny Access | Targeted Users/Groups |
|---|---|---|---|
| approve | Modify the approval state of a certificate profile-based certificate request. | Allow | Certificate Manager Agents |
| read | View a certificate profile-based certificate request. | Allow | Certificate Manager Agents |
D.3.16. certServer.ca.requests
Controls who can list certificate requests in the agents services interface.
allow (list) group="Certificate Manager Agents"|| group="Registration Manager Agents"
allow (list) group="Certificate Manager Agents"|| group="Registration Manager Agents"| Operations | Description | Allow/Deny Access | Targeted Users/Groups |
|---|---|---|---|
| list | Retrieve details on a range of requests, and search for certificates using a complex filter. | Allow |
|
D.3.17. certServer.ca.systemstatus
Controls who can view the statistics for the Certificate Manager instance.
allow (read) group="Certificate Manager Agents"
allow (read) group="Certificate Manager Agents"| Operations | Description | Allow/Deny Access | Targeted Users/Groups |
|---|---|---|---|
| read | View statistics. | Allow | Certificate Manager Agents |
D.3.18. certServer.ee.certchain
Controls who can access the CA certificate chain in the end-entities page.
allow (download,read) user="anybody"
allow (download,read) user="anybody"| Operations | Description | Allow/Deny Access | Targeted Users/Groups |
|---|---|---|---|
| download | Download the CA’s certificate chain. | Allow | Anyone |
| read | View the CA’s certificate chain. | Allow | Anyone |
D.3.19. certServer.ee.certificate
Controls who can access certificates, for most operations like importing or revoking certificates, through the end-entities page.
allow (renew,revoke,read,import) user="anybody"
allow (renew,revoke,read,import) user="anybody"| Operations | Description | Allow/Deny Access | Targeted Users/Groups |
|---|---|---|---|
| renew | Submit a request to renew an existing certificate. | Allow | Anyone |
| revoke | Submit a revocation request for a user certificate. | Allow | Anyone |
| read | Retrieve and view certificates based on the certificate serial number or request ID. | Allow | Anyone |
| import | Import a certificate based on serial number. | Allow | Anyone |
D.3.20. certServer.ee.certificates
Controls who can list revoked certificates or submit a revocation request in the end-entities page.
allow (revoke,list) user="anybody"
allow (revoke,list) user="anybody"| Operations | Description | Allow/Deny Access | Targeted Users/Groups |
|---|---|---|---|
| revoke | Submit a list of certificates to revoke. | Allow | Subject of Certificate to be Revoked must match Certificate presented to authenticate to the CA. |
| list | Search for certificates matching specified criteria. | Allow | Anyone |
D.3.21. certServer.ee.crl
Controls access to CRLs through the end-entities page.
allow (read,add) user="anybody"
allow (read,add) user="anybody"| Operations | Description | Allow/Deny Access | Targeted Users/Groups |
|---|---|---|---|
| read | Retrieve and view the certificate revocation list. | Allow | Anyone |
| add | Add CRLs to the OCSP server. | Allow | Anyone |
D.3.22. certServer.ee.profile
Controls some access to certificate profiles in the end-entities page, including who can view details about a profile or submit a request through the profile.
allow (submit,read) user="anybody"
allow (submit,read) user="anybody"| Operations | Description | Allow/Deny Access | Targeted Users/Groups |
|---|---|---|---|
| submit | Submit a certificate request through a certificate profile. | Allow | Anyone |
| read | Displaying details of a certificate profile. | Allow | Anyone |
D.3.23. certServer.ee.profiles
Controls who can list active certificate profiles in the end-entities page.
allow (list) user="anybody"
allow (list) user="anybody"| Operations | Description | Allow/Deny Access | Targeted Users/Groups |
|---|---|---|---|
| list | List certificate profiles. | Allow | Anyone |
D.3.24. certServer.ee.request.ocsp
Controls access, based on IP address, on which clients submit OCSP requests.
allow (submit) ipaddress=".*"
allow (submit) ipaddress=".*"| Operations | Description | Allow/Deny Access | Targeted Users/Groups |
|---|---|---|---|
| submit | Submit OCSP requests. | Allow | All IP addresses |
D.3.25. certServer.ee.request.revocation
Controls what users can submit certificate revocation requests in the end-entities page.
allow (submit) user="anybody"
allow (submit) user="anybody"| Operations | Description | Allow/Deny Access | Targeted Users/Groups |
|---|---|---|---|
| submit | Submit a request to revoke a certificate. | Allow | Anyone |
D.3.26. certServer.ee.requestStatus
Controls who can view the status for a certificate request in the end-entities page.
allow (read) user="anybody"
allow (read) user="anybody"| Operations | Description | Allow/Deny Access | Targeted Users/Groups |
|---|---|---|---|
| read | Retrieve the status of a request and serial numbers of any certificates that have been issued against that request. | Allow | Anyone |
D.3.27. certServer.job.configuration
Controls who can configure jobs for the Certificate Manager.
allow (read) group="Administrators" || group="Certificate Manager Agents" || group="Registration Manager Agents" || group="Key Recovery Authority Agents" || group="Online Certificate Status Manager Agents" || group="Auditors";allow (modify) group="Administrators"
allow (read) group="Administrators" || group="Certificate Manager Agents" || group="Registration Manager Agents" || group="Key Recovery Authority Agents" || group="Online Certificate Status Manager Agents" || group="Auditors";allow (modify) group="Administrators"| Operations | Description | Allow/Deny Access | Targeted Users/Groups |
|---|---|---|---|
| read | View basic job settings, job instance settings, and job plugin settings. List job plugins and job instances. | Allow |
|
| modify | Add and delete job plugins and job instances. Modify job plugins and job instances. | Allow | Administrators |
D.3.28. certServer.profile.configuration
Controls access to the certificate profile configuration. The default setting is:
allow (read) group="Administrators" || group="Certificate Manager Agents" || group="Registration Manager Agents" || group="Key Recovery Authority Agents" || group="Online Certificate Status Manager Agents" || group="Auditors";allow (modify) group="Administrators"
allow (read) group="Administrators" || group="Certificate Manager Agents" || group="Registration Manager Agents" || group="Key Recovery Authority Agents" || group="Online Certificate Status Manager Agents" || group="Auditors";allow (modify) group="Administrators"| Operations | Description | Allow/Deny Access | Targeted Users/Groups |
|---|---|---|---|
| read | View certificate profile defaults and constraints, input, output, input configuration, output configuration, default configuration, policy constraints configuration, and certificate profile instance configuration. List certificate profile plugins and certificate profile instances. | Allow |
|
| modify | Add, modify, and delete certificate profile defaults and constraints, input, output, and certificate profile instances. Add and modify default policy constraints configuration. | Allow | Administrators |
D.3.29. certServer.publisher.configuration
Controls who can view and edit the publishing configuration for the Certificate Manager. The default configuration is:
allow (read) group="Administrators" || group="Auditors" || group="Certificate Manager Agents" || group="Registration Manager Agents" || group="Key Recovery Authority Agents" || group="Online Certificate Status Manager Agents";allow (modify) group="Administrators"
allow (read) group="Administrators" || group="Auditors" || group="Certificate Manager Agents" || group="Registration Manager Agents" || group="Key Recovery Authority Agents" || group="Online Certificate Status Manager Agents";allow (modify) group="Administrators"| Operations | Description | Allow/Deny Access | Targeted Users/Groups |
|---|---|---|---|
| read | View LDAP server destination information, publisher plugin configuration, publisher instance configuration, mapper plugin configuration, mapper instance configuration, rules plugin configuration, and rules instance configuration. List publisher plugins and instances, rules plugins and instances, and mapper plugins and instances. | Allow |
|
| modify | Add and delete publisher plugins, publisher instances, mapper plugins, mapper instances, rules plugins, and rules instances. Modify publisher instances, mapper instances, rules instances, and LDAP server destination information. | Allow | Administrators |
D.3.30. certServer.securitydomain.domainxml
Controls access to the security domain information maintained in a registry by the domain host Certificate Manager. The security domain configuration is directly accessed and modified by subsystem instances during configuration, so appropriate access must always be allowed to subsystems, or configuration could fail.
allow (read) user="anybody";allow (modify) group="Subsystem Group"
allow (read) user="anybody";allow (modify) group="Subsystem Group"| Operations | Description | Allow/Deny Access | Targeted Users/Groups |
|---|---|---|---|
| read | View the security domain configuration. | Allow | Anybody |
| modify | Modify the security domain configuration by changing instance information and adding and removing instances. | Allow |
|
D.4. Key Recovery Authority-specific ACLs
This section covers the default access control configuration which apply specifically to the KRA. The KRA ACL configuration also includes all of the common ACLs listed in Section D.2, “Common ACLs”.
There are access control rules set for each of the KRA’s interfaces (administrative console and agents and end-entities services pages) and for common operations like listing and downloading keys.
D.4.1. certServer.job.configuration
Controls who can configure jobs for the KRA.
allow (read) group="Administrators" || group="Key Recovery Authority Agents" || group="Auditors";allow (modify) group="Administrators"
allow (read) group="Administrators" || group="Key Recovery Authority Agents" || group="Auditors";allow (modify) group="Administrators"| Operations | Description | Allow/Deny Access | Targeted Users/Groups |
|---|---|---|---|
| read | View basic job settings, job instance settings, and job plugin settings. List job plugins and job instances. | Allow |
|
| modify | Add and delete job plugins and job instances. Modify job plugins and job instances. | Allow | Administrators |
D.4.2. certServer.kra.certificate.transport
Controls who can view the transport certificate for the KRA.
allow (read) user="anybody"
allow (read) user="anybody"| Operations | Description | Allow/Deny Access | Targeted Users/Groups |
|---|---|---|---|
| read | View the transport certificate for the KRA instance. | Allow | Anyone |
D.4.3. certServer.kra.configuration
Controls who can configure and manage the setup for the KRA.
allow (read) group="Administrators" || group="Auditors" || group="Key Recovery Authority Agents" || allow (modify) group="Administrators"
allow (read) group="Administrators" || group="Auditors" || group="Key Recovery Authority Agents" || allow (modify) group="Administrators"| Operations | Description | Allow/Deny Access | Targeted Users/Groups |
|---|---|---|---|
| read | Read the number of required recovery agent approvals. | Allow |
|
| modify | Change the number of required recovery agent approvals. | Allow | Administrators |
D.4.4. certServer.kra.connector
Controls what entities can submit requests over a special connector configured on the CA to connect to the KRA. The default configuration is:
allow (submit) group="Trusted Managers"
allow (submit) group="Trusted Managers"| Operations | Description | Allow/Deny Access | Targeted Users/Groups |
|---|---|---|---|
| submit | Submit a new key archival request (for non-TMS only). | Allow | Trusted Managers |
D.4.5. certServer.kra.GenerateKeyPair
Controls who can submit key recovery requests to the KRA. The default configuration is:
allow (execute) group="Key Recovery Authority Agents"
allow (execute) group="Key Recovery Authority Agents"| Operations | Description | Allow/Deny Access | Targeted Users/Groups |
|---|---|---|---|
| Execute | Execute server-side key generation (TMS only). | Allow | KRA Agents |
D.4.6. certServer.kra.getTransportCert
Controls who can submit key recovery requests to the KRA. The default configuration is:
allow (download) group="Enterprise CA Administrators" || group="Enterprise KRA Administrators" || group="Enterprise OCSP Administrators" || group="Enterprise TKS Administrators" || group="Enterprise TPS Administrators"
allow (download) group="Enterprise CA Administrators" || group="Enterprise KRA Administrators" || group="Enterprise OCSP Administrators" || group="Enterprise TKS Administrators" || group="Enterprise TPS Administrators"| Operations | Description | Allow/Deny Access | Targeted Users/Groups |
|---|---|---|---|
| download | Retrieve KRA transport certificate. | Allow | Enterprise Administrators |
D.4.7. certServer.kra.group
Controls access to the internal database for adding users and groups for the KRA instance.
allow (modify,read) group="Administrators"
allow (modify,read) group="Administrators"| Operations | Description | Allow/Deny Access | Targeted Users/Groups |
|---|---|---|---|
| modify | Create, edit, or delete user and group entries for the instance. | Allow | Administrators |
| read | View user and group entries for the instance. | Allow |
|
D.4.8. certServer.kra.key
Controls who can access key information through viewing, recovering, or downloading keys. The default configuration is:
allow (read,recover,download) group="Key Recovery Authority Agents"
allow (read,recover,download) group="Key Recovery Authority Agents"| Operations | Description | Allow/Deny Access | Targeted Users/Groups |
|---|---|---|---|
| read | Display public information about key archival record. | Allow | KRA Agents |
| recover | Retrieve key information from the database to perform a recovery operation. | Allow | KRA Agents |
| download | Download key information through the agent services pages. | Allow | KRA Agents |
D.4.9. certServer.kra.keys
Controls who can list archived keys through the agent services pages.
allow (list) group="Key Recovery Authority Agents"
allow (list) group="Key Recovery Authority Agents"| Operations | Description | Allow/Deny Access | Targeted Users/Groups |
|---|---|---|---|
| list | Search for and list a range of archived keys. | Allow | KRA Agents |
D.4.10. certServer.kra.registerUser
Defines which group or user can create an agent user for the instance. The default configuration is:
allow (modify,read) group="Enterprise CA Administrators" || group="Enterprise KRA Administrators" || group="Enterprise OCSP Administrators" || group="Enterprise TKS Administrators" || group="Enterprise TPS Administrators"
allow (modify,read) group="Enterprise CA Administrators" || group="Enterprise KRA Administrators" || group="Enterprise OCSP Administrators" || group="Enterprise TKS Administrators" || group="Enterprise TPS Administrators"| Operations | Description | Allow/Deny Access | Targeted Users/Groups |
|---|---|---|---|
| modify | Register a new user. | Allow | Enterprise Administrators |
| read | Read existing user info. | Allow | Enterprise Administrators |
D.4.11. certServer.kra.request
Controls who can view key archival and recovery requests in the agents services interface.
allow (read) group="Key Recovery Authority Agents"
allow (read) group="Key Recovery Authority Agents"| Operations | Description | Allow/Deny Access | Targeted Users/Groups |
|---|---|---|---|
| read | View a key archival or recovery request. | Allow | KRA Agents |
D.4.12. certServer.kra.request.status
Controls who can view the status for a key recovery request in the end-entities page.
allow (read) group="Key Recovery Authority Agents"
allow (read) group="Key Recovery Authority Agents"| Operations | Description | Allow/Deny Access | Targeted Users/Groups |
|---|---|---|---|
| read | Retrieve the status of a key recovery request in the agents services pages. | Allow | KRA Agents |
D.4.13. certServer.kra.requests
Controls who can list key archival and recovery requests in the agents services interface.
allow (list) group="Key Recovery Authority Agents"
allow (list) group="Key Recovery Authority Agents"| Operations | Description | Allow/Deny Access | Targeted Users/Groups |
|---|---|---|---|
| list | Retrieve details on a range of key archival and recovery requests. | Allow | KRA Agents |
D.4.14. certServer.kra.systemstatus
Controls who can view the statistics for the KRA instance.
allow (read) group="Key Recovery Authority Agents"
allow (read) group="Key Recovery Authority Agents"| Operations | Description | Allow/Deny Access | Targeted Users/Groups |
|---|---|---|---|
| read | View statistics. | Allow | KRA Agents |
D.4.15. certServer.kra.TokenKeyRecovery
Controls who can submit key recovery requests for a token to the KRA. This is a common request for replacing a lost token. The default configuration is:
allow (submit) group="Key Recovery Authority Agents"
allow (submit) group="Key Recovery Authority Agents"| Operations | Description | Allow/Deny Access | Targeted Users/Groups |
|---|---|---|---|
| submit | Submit or initiate key recovery requests for a token recovery. | Allow | KRA Agents |
D.5. Online Certificate Status Manager-specific ACLs
This section covers the default access control configuration attributes which are set specifically for the Online Certificate Status Manager. The OCSP responder’s ACL configuration also includes all of the common ACLs listed in Section D.2, “Common ACLs”.
There are access control rules set for each of the OCSP’s interfaces (administrative console and agents and end-entities services pages) and for common operations like listing and downloading CRLs.
D.5.1. certServer.ee.crl
Controls access to CRLs through the end-entities page.
allow (read) user="anybody"
allow (read) user="anybody"| Operations | Description | Allow/Deny Access | Targeted Users/Groups |
|---|---|---|---|
| read | Retrieve and view the certificate revocation list. | Allow | Anyone |
D.5.2. certServer.ee.request.ocsp
Controls access, based on IP address, on which clients submit OCSP requests.
allow (submit) ipaddress=".*"
allow (submit) ipaddress=".*"| Operations | Description | Allow/Deny Access | Targeted Users/Groups |
|---|---|---|---|
| submit | Submit OCSP requests. | Allow | All IP addresses |
D.5.3. certServer.ocsp.ca
Controls who can instruct the OCSP responder. The default setting is:
allow (add) group="Online Certificate Status Manager Agents"
allow (add) group="Online Certificate Status Manager Agents"| Operations | Description | Allow/Deny Access | Targeted Users/Groups |
|---|---|---|---|
| Add | Instruct the OCSP responder to respond to OCSP requests for a new CA. | Allow | OCSP Manager Agents |
D.5.4. certServer.ocsp.cas
Controls who can list, in the agent services interface, all of the Certificate Managers which publish CRLs to the Online Certificate Status Manager. The default setting is:
allow (list) group="Online Certificate Status Manager Agents"
allow (list) group="Online Certificate Status Manager Agents"| Operations | Description | Allow/Deny Access | Targeted Users/Groups |
|---|---|---|---|
| list | Lists all of the Certificate Managers which publish CRLs to the OCSP responder. | Allow | Agents |
D.5.5. certServer.ocsp.certificate
Controls who can validate the status of a certificate. The default setting is:
allow (validate) group="Online Certificate Status Manager Agents"
allow (validate) group="Online Certificate Status Manager Agents"| Operations | Description | Allow/Deny Access | Targeted Users/Groups |
|---|---|---|---|
| validate | Verifies the status of a specified certificate. | Allow | OCSP Agents |
D.5.6. certServer.ocsp.configuration
Controls who can access, view, or modify the configuration for the Certificate Manager’s OCSP services. The default configuration is:
allow (read) group="Administrators" || group="Online Certificate Status Manager Agents" || group="Auditors";allow (modify) group="Administrators"
allow (read) group="Administrators" || group="Online Certificate Status Manager Agents" || group="Auditors";allow (modify) group="Administrators"| Operations | Description | Allow/Deny Access | Targeted Users/Groups |
|---|---|---|---|
| read | View OCSP plugin information, OCSP configuration, and OCSP stores configuration. List OCSP stores configuration. | Allow |
|
| modify | Modify the OCSP configuration, OCSP stores configuration, and default OCSP store. | Allow | Administrators |
D.5.7. certServer.ocsp.crl
Controls access to read or update CRLs through the agent services interface. The default setting is:
allow (add) group="Online Certificate Status Manager Agents" || group="Trusted Managers"
allow (add) group="Online Certificate Status Manager Agents" || group="Trusted Managers"| Operations | Description | Allow/Deny Access | Targeted Users/Groups |
|---|---|---|---|
| add | Add new CRLs to those managed by the OCSP responder. | Allow |
|
D.5.8. certServer.ocsp.group
Controls access to the internal database for adding users and groups for the Online Certificate Status Manager instance.
allow (modify,read) group="Administrators"
allow (modify,read) group="Administrators"| Operations | Description | Allow/Deny Access | Targeted Users/Groups |
|---|---|---|---|
| modify | Create, edit or delete user and group entries for the instance. | Allow | Administrators |
| read | View user and group entries for the instance. | Allow | Administrators |
D.5.9. certServer.ocsp.info
Controls who can read information about the OCSP responder.
allow (read) group="Online Certificate Status Manager Agents"
allow (read) group="Online Certificate Status Manager Agents"| Operations | Description | Allow/Deny Access | Targeted Users/Groups |
|---|---|---|---|
| read | View OCSP responder information. | Allow | OCSP Agents |
D.6. Token Key Service-specific ACLs
This section covers the default access control configuration attributes which are set specifically for the Token Key Service (TKS). The TKS ACL configuration also includes all of the common ACLs listed in Section D.2, “Common ACLs”.
There are access control rules set for the TKS’s administrative console and for access by other subsystems to the TKS.
D.6.1. certServer.tks.encrypteddata
Controls who can encrypt data.
allow(execute) group="Token Key Service Manager Agents"
allow(execute) group="Token Key Service Manager Agents"| Operations | Description | Allow/Deny Access | Targeted Users/Groups |
|---|---|---|---|
| Execute | Encrypted data stored in the TKS. | Allow | TKS Agents |
D.6.2. certServer.tks.group
Controls access to the internal database for adding users and groups for the TKS instance.
allow (modify,read) group="Administrators"
allow (modify,read) group="Administrators"| Operations | Description | Allow/Deny Access | Targeted Users/Groups |
|---|---|---|---|
| modify | Create, edit, or delete user and group entries for the instance. | Allow | Administrators |
| read | View user and group entries for the instance. | Allow | Administrators |
D.6.3. certServer.tks.importTransportCert
Controls who can import the transport certificate used by the TKS to deliver keys.
allow (modify,read) group="Enterprise CA Administrators" || group="Enterprise KRA Administrators" || group="Enterprise OCSP Administrators" || group="Enterprise TKS Administrators" || group="Enterprise TPS Administrators"
allow (modify,read) group="Enterprise CA Administrators" || group="Enterprise KRA Administrators" || group="Enterprise OCSP Administrators" || group="Enterprise TKS Administrators" || group="Enterprise TPS Administrators"| Operations | Description | Allow/Deny Access | Targeted Users/Groups |
|---|---|---|---|
| modify | Update the transport certificate. | Allow | Enterprise Administrators |
| read | Import the transport certificate. | Allow | Enterprise Administrators |
D.6.4. certServer.tks.keysetdata
Controls who can view information about key sets derived and stored by the TKS.
allow (execute) group="Token Key Service Manager Agents"
allow (execute) group="Token Key Service Manager Agents"| Operations | Description | Allow/Deny Access | Targeted Users/Groups |
|---|---|---|---|
| Execute | Create diversified key set data. | Allow | TKS Agents |
D.6.5. certServer.tks.registerUser
Defines which group or user can create an agent user for the instance. The default configuration is:
allow (modify,read) group="Enterprise CA Administrators" || group="Enterprise KRA Administrators" || group="Enterprise OCSP Administrators" || group="Enterprise TKS Administrators" || group="Enterprise TPS Administrators"
allow (modify,read) group="Enterprise CA Administrators" || group="Enterprise KRA Administrators" || group="Enterprise OCSP Administrators" || group="Enterprise TKS Administrators" || group="Enterprise TPS Administrators"| Operations | Description | Allow/Deny Access | Targeted Users/Groups |
|---|---|---|---|
| modify | Register a new agent. | Allow | Enterprise Administrators |
| read | Read existing agent information. | Allow | Enterprise Administrators |
D.6.6. certServer.tks.sessionkey
Controls who can create the session keys used by the TKS instance to connections to the TPS.
allow (execute) group="Token Key Service Manager Agents"
allow (execute) group="Token Key Service Manager Agents"| Operations | Description | Allow/Deny Access | Targeted Users/Groups |
|---|---|---|---|
| Execute | Create session keys generated by the TKS. | Allow | TKS Agents |
D.6.7. certServer.tks.randomdata
Controls who can create random data.
allow (execute) group="Token Key Service Manager Agents"
allow (execute) group="Token Key Service Manager Agents"| Operations | Description | Allow/Deny Access | Targeted Users/Groups |
|---|---|---|---|
| Execute | Generate random data. | Allow | TKS Agents |
Appendix E. Audit events
This appendix contains two parts. The first part, Section E.1, “Required audit events and their examples”, contains a list of required audit events grouped by the requirement ID from the CA Protection Profile V2.1, where each audit event is accompanied by one or more examples. The second part, Section E.2, “Audit Event Descriptions” provides individual audit event and their parameter description and format. Every audit event in the log is accompanied by the following information:
The Java identifier of the thread. For example:
0.localhost-startStop-1
0.localhost-startStop-1Copy to Clipboard Copied! Toggle word wrap Toggle overflow The time stamp the event occurred at. For example:
[21/May/2023:17:53:00 IST]
[21/May/2023:17:53:00 IST]Copy to Clipboard Copied! Toggle word wrap Toggle overflow The log source (14 is SIGNED_AUDIT):
[14]
[14]Copy to Clipboard Copied! Toggle word wrap Toggle overflow The current log level (6 is Security-related events. See 13.1.2 Log Levels (Message Categories) in the Planning, Installation and Deployment Guide (Common Criteria Edition). For example:
[6]
[6]Copy to Clipboard Copied! Toggle word wrap Toggle overflow The information about the log event (which is log event specific; see Section E.2, “Audit Event Descriptions” for information about each field in a particular log event). For example:
[AuditEvent=AUDIT_LOG_STARTUP][SubjectID=$System$][Outcome=Success] audit function startup
[AuditEvent=AUDIT_LOG_STARTUP][SubjectID=$System$][Outcome=Success] audit function startupCopy to Clipboard Copied! Toggle word wrap Toggle overflow
E.1. Required audit events and their examples
This section contains all required audit events per Common Criteria CA Protection Profile v.2.1.
For audit events descriptions, see Section E.2, “Audit Event Descriptions”.
FAU_GEN.1
Start-up of the TSF audit functions
AUDIT_LOG_STARTUPTest case: start up a CS instance.
0.main - [17/Mar/2023:04:31:50 EDT] [14] [6] [AuditEvent=AUDIT_LOG_STARTUP][SubjectID=$System$][Outcome=Success] audit function startup
0.main - [17/Mar/2023:04:31:50 EDT] [14] [6] [AuditEvent=AUDIT_LOG_STARTUP][SubjectID=$System$][Outcome=Success] audit function startupCopy to Clipboard Copied! Toggle word wrap Toggle overflow
All administrative actions invoked through the TFS interface
CONFIG_CERT_PROFILETest case: modifying a profile via CLI or console.
0.https-jsse-nio-31443-exec-11 - [25/Apr/2023:05:59:44 EDT] [14] [6] [AuditEvent=CONFIG_CERT_PROFILE][SubjectID=caadmin][Outcome=Success][ParamNameValPairs=Scope;;rules+Operation;;OP_ADD+Resource;;caFullCMCUserCertFoobar+class_id;;caEnrollImpl] certificate profile configuration parameter(s) change
0.https-jsse-nio-31443-exec-11 - [25/Apr/2023:05:59:44 EDT] [14] [6] [AuditEvent=CONFIG_CERT_PROFILE][SubjectID=caadmin][Outcome=Success][ParamNameValPairs=Scope;;rules+Operation;;OP_ADD+Resource;;caFullCMCUserCertFoobar+class_id;;caEnrollImpl] certificate profile configuration parameter(s) changeCopy to Clipboard Copied! Toggle word wrap Toggle overflow CERT_PROFILE_APPROVALTest case: as a CA admin, enabling a profile (e.g.
caUserCert) via console or CLI. Then as a CA agent, approving the profile from the agent portal in the WebUI.0.https-jsse-nio-31443-exec-1 - [28/Apr/2023:02:13:21 EDT] [14] [6] [AuditEvent=CERT_PROFILE_APPROVAL][SubjectID=rsa_SubCA_AgentV][Outcome=Success][ProfileID=caUserCert][Op=approve] certificate profile approval
0.https-jsse-nio-31443-exec-1 - [28/Apr/2023:02:13:21 EDT] [14] [6] [AuditEvent=CERT_PROFILE_APPROVAL][SubjectID=rsa_SubCA_AgentV][Outcome=Success][ProfileID=caUserCert][Op=approve] certificate profile approvalCopy to Clipboard Copied! Toggle word wrap Toggle overflow CONFIG_OCSP_PROFILETest case: changing OCSP parameters via console, e.g.
includeNextUpdate(make sure you revert changes after each test).0.https-jsse-nio-32443-exec-20 - [11/May/2023:18:32:39 EDT] [14] [6] [AuditEvent=CONFIG_OCSP_PROFILE][SubjectID=ocspadmin][Outcome=Success][ParamNameValPairs=Scope;;ocspStoresRules+Operation;;OP_MODIFY+Resource;;defStore+includeNextUpdate;;false+byName;;true+implName;;com.netscape.cms.ocsp.DefStore+notFoundAsGood;;true] OCSP profile configuration parameter(s) change
0.https-jsse-nio-32443-exec-20 - [11/May/2023:18:32:39 EDT] [14] [6] [AuditEvent=CONFIG_OCSP_PROFILE][SubjectID=ocspadmin][Outcome=Success][ParamNameValPairs=Scope;;ocspStoresRules+Operation;;OP_MODIFY+Resource;;defStore+includeNextUpdate;;false+byName;;true+implName;;com.netscape.cms.ocsp.DefStore+notFoundAsGood;;true] OCSP profile configuration parameter(s) changeCopy to Clipboard Copied! Toggle word wrap Toggle overflow CONFIG_CRL_PROFILETest case: in the console, selecting Certificate Manager > CRL Issuing Points > MasterCRL > Updates > and modifying the
Update CRL everyfield as well as theNext update race periodandNext update as this update extensionfields.0.https-jsse-nio-31443-exec-17 - [11/May/2023:18:37:05 EDT] [14] [6] [AuditEvent=CONFIG_CRL_PROFILE][SubjectID=caadmin][Outcome=Success][ParamNameValPairs=Scope;;crl+Operation;;OP_MODIFY+Resource;;MasterCRL+enableCRLUpdates;;true+updateSchema;;1+extendedNextUpdate;;true+alwaysUpdate;;true+enableDailyUpdates;;true+dailyUpdates;;1:00+enableUpdateInterval;;true+autoUpdateInterval;;241+nextUpdateGracePeriod;;1+nextAsThisUpdateExtension;;1] CRL profile configuration parameter(s) change
0.https-jsse-nio-31443-exec-17 - [11/May/2023:18:37:05 EDT] [14] [6] [AuditEvent=CONFIG_CRL_PROFILE][SubjectID=caadmin][Outcome=Success][ParamNameValPairs=Scope;;crl+Operation;;OP_MODIFY+Resource;;MasterCRL+enableCRLUpdates;;true+updateSchema;;1+extendedNextUpdate;;true+alwaysUpdate;;true+enableDailyUpdates;;true+dailyUpdates;;1:00+enableUpdateInterval;;true+autoUpdateInterval;;241+nextUpdateGracePeriod;;1+nextAsThisUpdateExtension;;1] CRL profile configuration parameter(s) changeCopy to Clipboard Copied! Toggle word wrap Toggle overflow CONFIG_AUTHTest case: in the console, selecting Authentication > Authentication Instance > and adding a new authentication instance by entering a new Auth Instance ID. For example,
AgentCertAuthand then enteringAgentCertAuth2for the instance name.0.https-jsse-nio-31443-exec-18 - [11/May/2023:19:13:09 EDT] [14] [6] [AuditEvent=CONFIG_AUTH][SubjectID=caadmin][Outcome=Success][ParamNameValPairs=Scope;;instance+Operation;;OP_ADD+Resource;;AgentCertAuth+implName;;AgentCertAuth] authentication configuration parameter(s) change
0.https-jsse-nio-31443-exec-18 - [11/May/2023:19:13:09 EDT] [14] [6] [AuditEvent=CONFIG_AUTH][SubjectID=caadmin][Outcome=Success][ParamNameValPairs=Scope;;instance+Operation;;OP_ADD+Resource;;AgentCertAuth+implName;;AgentCertAuth] authentication configuration parameter(s) changeCopy to Clipboard Copied! Toggle word wrap Toggle overflow CONFIG_ROLE(success)Test case: adding an user, e.g. # pki -d /root/.dogtag/pki_rsa_bootstrap/certs_db/ -c SECret.123 -p 31443 -n 'rsa_SubCA_AdminV' ca-user-add Test_UserV --fullName Testuser --password SECret.123.
0.https-jsse-nio-31443-exec-24 - [26/Apr/2023:08:29:25 EDT] [14] [6] [AuditEvent=CONFIG_ROLE][SubjectID=rsa_SubCA_AdminV][Outcome=Success][ParamNameValPairs=Scope;;users+Operation;;OP_ADD+Resource;;Test_UserV+password;;**+phone;;<null>+fullname;;Testuser+state;;<null>+userType;;<null>+email;;<null>] role configuration parameter(s) change
0.https-jsse-nio-31443-exec-24 - [26/Apr/2023:08:29:25 EDT] [14] [6] [AuditEvent=CONFIG_ROLE][SubjectID=rsa_SubCA_AdminV][Outcome=Success][ParamNameValPairs=Scope;;users+Operation;;OP_ADD+Resource;;Test_UserV+password;;**+phone;;<null>+fullname;;Testuser+state;;<null>+userType;;<null>+email;;<null>] role configuration parameter(s) changeCopy to Clipboard Copied! Toggle word wrap Toggle overflow CONFIG_ROLE(Failure)Test case: adding an existing user, e.g. # pki -d /root/.dogtag/pki_rsa_bootstrap/certs_db/ -c SECret.123 -p 31443 -n 'rsa_SubCA_AdminV' ca-user-add Test_UserV --fullName Testuser --password SECret.123.
0.https-jsse-nio-31443-exec-5 - [26/Apr/2023:08:31:53 EDT] [14] [6] [AuditEvent=CONFIG_ROLE][SubjectID=rsa_SubCA_AdminV][Outcome=Failure][ParamNameValPairs=Scope;;users+Operation;;OP_ADD+Resource;;Test_UserV+password;;**+phone;;<null>+fullname;;Testuser+state;;<null>+userType;;<null>+email;;<null>] role configuration parameter(s) change
0.https-jsse-nio-31443-exec-5 - [26/Apr/2023:08:31:53 EDT] [14] [6] [AuditEvent=CONFIG_ROLE][SubjectID=rsa_SubCA_AdminV][Outcome=Failure][ParamNameValPairs=Scope;;users+Operation;;OP_ADD+Resource;;Test_UserV+password;;**+phone;;<null>+fullname;;Testuser+state;;<null>+userType;;<null>+email;;<null>] role configuration parameter(s) changeCopy to Clipboard Copied! Toggle word wrap Toggle overflow CONFIG_ACLCA
Test case: in the console, clicking Access Control List and removing a variable (adding it back afterwards).
0.https-jsse-nio-31443-exec-9 - [11/May/2023:18:13:52 EDT] [14] [6] [AuditEvent=CONFIG_ACL][SubjectID=caadmin][Outcome=Success][ParamNameValPairs=Scope;;acls+Operation;;OP_MODIFY+Resource;;certServer.ca.crl+aci;;allow (read,update) group="Certificate Manager Agents"+desc;;Certificate Manager agents may read or update crl+rights;;read] ACL configuration parameter(s) change
0.https-jsse-nio-31443-exec-9 - [11/May/2023:18:13:52 EDT] [14] [6] [AuditEvent=CONFIG_ACL][SubjectID=caadmin][Outcome=Success][ParamNameValPairs=Scope;;acls+Operation;;OP_MODIFY+Resource;;certServer.ca.crl+aci;;allow (read,update) group="Certificate Manager Agents"+desc;;Certificate Manager agents may read or update crl+rights;;read] ACL configuration parameter(s) changeCopy to Clipboard Copied! Toggle word wrap Toggle overflow
CONFIG_SIGNED_AUDIT(FAU_SEL.1)CA
Test case: disabling, e.g. # pki -U https://rhcs10.example.com:21443 -d /root/.dogtag/pki_ecc_bootstrap/certs_db -c SECret.123 -n ecc_SubCA_AdminV ca-audit-mod --action disable.
0.https-jsse-jss-nio-21443-exec-5 - [23/Oct/2023:04:38:52 EDT] [14] [6] [AuditEvent=CONFIG_SIGNED_AUDIT][SubjectID=ecc_SubCA_AdminV][Outcome=Success][ParamNameValPairs=Action;;disable] signed audit configuration parameter(s) change
0.https-jsse-jss-nio-21443-exec-5 - [23/Oct/2023:04:38:52 EDT] [14] [6] [AuditEvent=CONFIG_SIGNED_AUDIT][SubjectID=ecc_SubCA_AdminV][Outcome=Success][ParamNameValPairs=Action;;disable] signed audit configuration parameter(s) changeCopy to Clipboard Copied! Toggle word wrap Toggle overflow Test case: reenabling, e.g. # pki -U https://rhcs10.example.com:21443 -d /root/.dogtag/pki_ecc_bootstrap/certs_db -c SECret.123 -n ecc_SubCA_AdminV ca-audit-mod --action enable.
0.https-jsse-jss-nio-21443-exec-10 - [23/Oct/2023:04:47:23 EDT] [14] [6] [AuditEvent=CONFIG_SIGNED_AUDIT][SubjectID=ecc_SubCA_AdminV][Outcome=Success][ParamNameValPairs=Action;;enable] signed audit configuration parameter(s) change
0.https-jsse-jss-nio-21443-exec-10 - [23/Oct/2023:04:47:23 EDT] [14] [6] [AuditEvent=CONFIG_SIGNED_AUDIT][SubjectID=ecc_SubCA_AdminV][Outcome=Success][ParamNameValPairs=Action;;enable] signed audit configuration parameter(s) changeCopy to Clipboard Copied! Toggle word wrap Toggle overflow KRA
Test case: disabling audit using the
pki kra-audit-modcommand: # pki -p 28443 -d /root/.dogtag/pki_rsa_bootstrap/certs_db/ -c SECret.123 -n "PKI KRA Administrator for RSA-KRA" kra-audit-mod --action disable.0.https-jsse-nio-28443-exec-17 - [15/May/2023:18:30:44 EDT] [14] [6] [AuditEvent=CONFIG_SIGNED_AUDIT][SubjectID=kraadmin][Outcome=Success][ParamNameValPairs=Action;;disable] signed audit configuration parameter(s) change
0.https-jsse-nio-28443-exec-17 - [15/May/2023:18:30:44 EDT] [14] [6] [AuditEvent=CONFIG_SIGNED_AUDIT][SubjectID=kraadmin][Outcome=Success][ParamNameValPairs=Action;;disable] signed audit configuration parameter(s) changeCopy to Clipboard Copied! Toggle word wrap Toggle overflow OCSP
Test case: in the console, selecting Log > Log Event Listener Management tab > SignedAudit > Edit/View > and changing the
flushIntervalvalue.0.https-jsse-nio-31443-exec-15 - [11/May/2023:19:42:24 EDT] [14] [6] [AuditEvent=CONFIG_SIGNED_AUDIT][SubjectID=caadmin][Outcome=Success][ParamNameValPairs=Scope;;logRule+Operation;;OP_MODIFY+Resource;;SignedAudit+level;;Information+rolloverInterval;;Monthly+flushInterval;;5+mandatory.events;;<null>+bufferSize;;512+maxFileSize;;2000+fileName;;/var/lib/pki/rhcs10-RSA-SubCA/logs/ca/signedAudit/ca_audit+enable;;true+signedAuditCertNickname;;NHSM-CONN-XC:auditSigningCert cert-rhcs10-RSA-SubCA CA+implName;;file+type;;signedAudit+logSigning;;true+events;;ACCESS_SESSION_ESTABLISH,ACCESS_SESSION_TERMINATED,AUDIT_LOG_SIGNING,AUDIT_LOG_STARTUP,AUTH,AUTHORITY_CONFIG,AUTHZ,CERT_PROFILE_APPROVAL,CERT_REQUEST_PROCESSED,CERT_SIGNING_INFO,CERT_STATUS_CHANGE_REQUEST,CERT_STATUS_CHANGE_REQUEST_PROCESSED,CLIENT_ACCESS_SESSION_ESTABLISH,CLIENT_ACCESS_SESSION_TERMINATED,CMC_REQUEST_RECEIVED,CMC_RESPONSE_SENT,CMC_SIGNED_REQUEST_SIG_VERIFY,CMC_USER_SIGNED_REQUEST_SIG_VERIFY,CONFIG_ACL,CONFIG_AUTH,CONFIG_CERT_PROFILE,CONFIG_CRL_PROFILE,CONFIG_ENCRYPTION,CONFIG_ROLE,CONFIG_SERIAL_NUMBER,CONFIG_SIGNED_AUDIT,CONFIG_TRUSTED_PUBLIC_KEY,CRL_SIGNING_INFO,DELTA_CRL_GENERATION,FULL_CRL_GENERATION,KEY_GEN_ASYMMETRIC,LOG_PATH_CHANGE,OCSP_GENERATION,OCSP_SIGNING_INFO,PROFILE_CERT_REQUEST,PROOF_OF_POSSESSION,RANDOM_GENERATION,ROLE_ASSUME,SCHEDULE_CRL_GENERATION,SECURITY_DOMAIN_UPDATE,SELFTESTS_EXECUTION,SERVER_SIDE_KEYGEN_REQUEST,SERVER_SIDE_KEYGEN_REQUEST_PROCESSED] signed audit configuration parameter(s) change
0.https-jsse-nio-31443-exec-15 - [11/May/2023:19:42:24 EDT] [14] [6] [AuditEvent=CONFIG_SIGNED_AUDIT][SubjectID=caadmin][Outcome=Success][ParamNameValPairs=Scope;;logRule+Operation;;OP_MODIFY+Resource;;SignedAudit+level;;Information+rolloverInterval;;Monthly+flushInterval;;5+mandatory.events;;<null>+bufferSize;;512+maxFileSize;;2000+fileName;;/var/lib/pki/rhcs10-RSA-SubCA/logs/ca/signedAudit/ca_audit+enable;;true+signedAuditCertNickname;;NHSM-CONN-XC:auditSigningCert cert-rhcs10-RSA-SubCA CA+implName;;file+type;;signedAudit+logSigning;;true+events;;ACCESS_SESSION_ESTABLISH,ACCESS_SESSION_TERMINATED,AUDIT_LOG_SIGNING,AUDIT_LOG_STARTUP,AUTH,AUTHORITY_CONFIG,AUTHZ,CERT_PROFILE_APPROVAL,CERT_REQUEST_PROCESSED,CERT_SIGNING_INFO,CERT_STATUS_CHANGE_REQUEST,CERT_STATUS_CHANGE_REQUEST_PROCESSED,CLIENT_ACCESS_SESSION_ESTABLISH,CLIENT_ACCESS_SESSION_TERMINATED,CMC_REQUEST_RECEIVED,CMC_RESPONSE_SENT,CMC_SIGNED_REQUEST_SIG_VERIFY,CMC_USER_SIGNED_REQUEST_SIG_VERIFY,CONFIG_ACL,CONFIG_AUTH,CONFIG_CERT_PROFILE,CONFIG_CRL_PROFILE,CONFIG_ENCRYPTION,CONFIG_ROLE,CONFIG_SERIAL_NUMBER,CONFIG_SIGNED_AUDIT,CONFIG_TRUSTED_PUBLIC_KEY,CRL_SIGNING_INFO,DELTA_CRL_GENERATION,FULL_CRL_GENERATION,KEY_GEN_ASYMMETRIC,LOG_PATH_CHANGE,OCSP_GENERATION,OCSP_SIGNING_INFO,PROFILE_CERT_REQUEST,PROOF_OF_POSSESSION,RANDOM_GENERATION,ROLE_ASSUME,SCHEDULE_CRL_GENERATION,SECURITY_DOMAIN_UPDATE,SELFTESTS_EXECUTION,SERVER_SIDE_KEYGEN_REQUEST,SERVER_SIDE_KEYGEN_REQUEST_PROCESSED] signed audit configuration parameter(s) changeCopy to Clipboard Copied! Toggle word wrap Toggle overflow TKS
Test case: disabling audit using the
pki tps-audit-modcommand, after importing the TKS admin cert into the db: # pki -d /root/.dogtag/pki_rsa_bootstrap/certs_db/ client-cert-import --pkcs12 /opt/pki_rsa/rhcs10-RSA-TKS/tks_admin_cert.p12 --pkcs12-password SECret.123 then # pki -p 24443 -d /root/.dogtag/pki_rsa_bootstrap/certs_db/ -c SECret.123 -n "PKI TKS Administrator for RSA-TKS" tks-audit-mod --action disable.0.https-jsse-nio-24443-exec-4 - [15/May/2023:18:23:02 EDT] [14] [6] [AuditEvent=CONFIG_SIGNED_AUDIT][SubjectID=tksadmin][Outcome=Success][ParamNameValPairs=Action;;disable] signed audit configuration parameter(s) change
0.https-jsse-nio-24443-exec-4 - [15/May/2023:18:23:02 EDT] [14] [6] [AuditEvent=CONFIG_SIGNED_AUDIT][SubjectID=tksadmin][Outcome=Success][ParamNameValPairs=Action;;disable] signed audit configuration parameter(s) changeCopy to Clipboard Copied! Toggle word wrap Toggle overflow TPS
Test case: disabling audit using the
pki tps-audit-modcommand, after importing the TPS admin cert into the db: # pki -d /root/.dogtag/pki_rsa_bootstrap/certs_db/ client-cert-import --pkcs12 /opt/pki_rsa/rhcs10-RSA-TPS/tks_admin_cert.p12 --pkcs12-password SECret.123 then # pki -p 24443 -d /root/.dogtag/pki_rsa_bootstrap/certs_db/ -c SECret.123 -n "PKI TPS Administrator for RSA-TPS" tps-audit-mod --action disable.0.https-jsse-nio-25443-exec-23 - [15/May/2023:18:39:02 EDT] [14] [6] [AuditEvent=CONFIG_SIGNED_AUDIT][SubjectID=tpsadmin][Outcome=Success][ParamNameValPairs=Action;;enable] signed audit configuration parameter(s) change
0.https-jsse-nio-25443-exec-23 - [15/May/2023:18:39:02 EDT] [14] [6] [AuditEvent=CONFIG_SIGNED_AUDIT][SubjectID=tpsadmin][Outcome=Success][ParamNameValPairs=Action;;enable] signed audit configuration parameter(s) changeCopy to Clipboard Copied! Toggle word wrap Toggle overflow
CONFIG_DRMTest case: in the console, clicking Configuration > Data Recovery Manager > General Settings > and setting the number of required recovery agents to 2.
0.https-jsse-nio-28443-exec-19 - [20/Jun/2023:19:43:36 EDT] [14] [6] [AuditEvent=CONFIG_DRM][SubjectID=kraadmin][Outcome=Success][ParamNameValPairs=Scope;;general+Operation;;OP_MODIFY+Resource;;RS_ID_CONFIG+noOfRequiredRecoveryAgents;;8] DRM configuration parameter(s) change
0.https-jsse-nio-28443-exec-19 - [20/Jun/2023:19:43:36 EDT] [14] [6] [AuditEvent=CONFIG_DRM][SubjectID=kraadmin][Outcome=Success][ParamNameValPairs=Scope;;general+Operation;;OP_MODIFY+Resource;;RS_ID_CONFIG+noOfRequiredRecoveryAgents;;8] DRM configuration parameter(s) changeCopy to Clipboard Copied! Toggle word wrap Toggle overflow OCSP_ADD_CA_REQUEST_PROCESSEDSuccess
Test case: in the WebUI, clicking Agent Services > Add Certificate Authority > then entering a valid CA certificate in PEM format.
0.https-jsse-jss-nio-22443-exec-8 - [08/Sep/2023:13:01:19 EDT] [14] [6] [AuditEvent=OCSP_ADD_CA_REQUEST_PROCESSED][SubjectID=OCSP_AgentV][Outcome=Success][CASubjectDN=CN=CA Signing Certificate,OU=rhcs10-ECC-SubCA,O=Example-rhcs10-ECC-RootCA] Add CA for OCSP Responder
0.https-jsse-jss-nio-22443-exec-8 - [08/Sep/2023:13:01:19 EDT] [14] [6] [AuditEvent=OCSP_ADD_CA_REQUEST_PROCESSED][SubjectID=OCSP_AgentV][Outcome=Success][CASubjectDN=CN=CA Signing Certificate,OU=rhcs10-ECC-SubCA,O=Example-rhcs10-ECC-RootCA] Add CA for OCSP ResponderCopy to Clipboard Copied! Toggle word wrap Toggle overflow Failure
Test case: in the WebUI, clicking Agent Services > Add Certificate Authority > then not entering anything valid.
0.https-jsse-jss-nio-22443-exec-14 - [08/Sep/2023:13:04:06 EDT] [14] [6] [AuditEvent=OCSP_ADD_CA_REQUEST_PROCESSED][SubjectID=OCSP_AgentV][Outcome=Failure][CASubjectDN=<null>] Add CA for OCSP Responder
0.https-jsse-jss-nio-22443-exec-14 - [08/Sep/2023:13:04:06 EDT] [14] [6] [AuditEvent=OCSP_ADD_CA_REQUEST_PROCESSED][SubjectID=OCSP_AgentV][Outcome=Failure][CASubjectDN=<null>] Add CA for OCSP ResponderCopy to Clipboard Copied! Toggle word wrap Toggle overflow
OCSP_REMOVE_CA_REQUEST_PROCESSEDTest case: in the WebUI, clicking Agent Services > List Certificate Authorities > then clicking Remove CA (Remember to add it back after the test).
0.https-jsse-jss-nio-22443-exec-21 - [08/Sep/2023:13:06:04 EDT] [14] [6] [AuditEvent=OCSP_REMOVE_CA_REQUEST_PROCESSED][SubjectID=OCSP_AgentV][Outcome=Success][CASubjectDN=CN=CA Signing Certificate,OU=rhcs10-ECC-SubCA,O=Example-rhcs10-ECC-RootCA] Remove CA for OCSP Responder is successful
0.https-jsse-jss-nio-22443-exec-21 - [08/Sep/2023:13:06:04 EDT] [14] [6] [AuditEvent=OCSP_REMOVE_CA_REQUEST_PROCESSED][SubjectID=OCSP_AgentV][Outcome=Success][CASubjectDN=CN=CA Signing Certificate,OU=rhcs10-ECC-SubCA,O=Example-rhcs10-ECC-RootCA] Remove CA for OCSP Responder is successfulCopy to Clipboard Copied! Toggle word wrap Toggle overflow SECURITY_DOMAIN_UPDATEOperation: Issue_token
Test case: checking the CA logs when other subsystems are added to or removed from the security domain.
0.https-jsse-nio-31443-exec-15 - [28/Apr/2023:09:52:30 EDT] [14] [6] [AuditEvent=SECURITY_DOMAIN_UPDATE][SubjectID=caadmin][Outcome=Success][ParamNameValPairs=operation;;issue_token+token;;2094141712918570861+ip;;10.0.188.59+uid;;caadmin+groupname;;Enterprise TKS Administrators] security domain update
0.https-jsse-nio-31443-exec-15 - [28/Apr/2023:09:52:30 EDT] [14] [6] [AuditEvent=SECURITY_DOMAIN_UPDATE][SubjectID=caadmin][Outcome=Success][ParamNameValPairs=operation;;issue_token+token;;2094141712918570861+ip;;10.0.188.59+uid;;caadmin+groupname;;Enterprise TKS Administrators] security domain updateCopy to Clipboard Copied! Toggle word wrap Toggle overflow Operation: Add
Test case: checking the CA logs when other subsystems are added to or removed from the security domain.
0.https-jsse-nio-31443-exec-15 - [28/Apr/2023:09:53:10 EDT] [14] [6] [AuditEvent=SECURITY_DOMAIN_UPDATE][SubjectID=caadmin][Outcome=Success][ParamNameValPairs=host;;ccrsa-1.rhcs10.example.com+name;;TKS ccrsa-1.rhcs10.example.com 24443+sport;;24443+clone;;false+type;;TKS+operation;;add] security domain update
0.https-jsse-nio-31443-exec-15 - [28/Apr/2023:09:53:10 EDT] [14] [6] [AuditEvent=SECURITY_DOMAIN_UPDATE][SubjectID=caadmin][Outcome=Success][ParamNameValPairs=host;;ccrsa-1.rhcs10.example.com+name;;TKS ccrsa-1.rhcs10.example.com 24443+sport;;24443+clone;;false+type;;TKS+operation;;add] security domain updateCopy to Clipboard Copied! Toggle word wrap Toggle overflow
CONFIG_SERIAL_NUMBERCA
Test case: creating a RootCA subsystem clone.
0.https-jsse-jss-nio-8443-exec-13 - [18/Sep/2023:08:11:13 EDT] [14] [6] [AuditEvent=CONFIG_SERIAL_NUMBER][SubjectID=caadmin][Outcome=Success][ParamNameValPairs=source;;updateNumberRange+type;;request+beginNumber;;9990001+endNumber;;10000000] serial number range update
0.https-jsse-jss-nio-8443-exec-13 - [18/Sep/2023:08:11:13 EDT] [14] [6] [AuditEvent=CONFIG_SERIAL_NUMBER][SubjectID=caadmin][Outcome=Success][ParamNameValPairs=source;;updateNumberRange+type;;request+beginNumber;;9990001+endNumber;;10000000] serial number range updateCopy to Clipboard Copied! Toggle word wrap Toggle overflow KRA
Test case: creating a KRA subsystem clone.
0.https-jsse-jss-nio-21443-exec-8 - [18/Sep/2023:11:04:18 EDT] [14] [6] [AuditEvent=CONFIG_SERIAL_NUMBER][SubjectID=caadmin][Outcome=Success][ParamNameValPairs=source;;updateNumberRange+type;;request+beginNumber;;9990001+endNumber;;10000000] serial number range update
0.https-jsse-jss-nio-21443-exec-8 - [18/Sep/2023:11:04:18 EDT] [14] [6] [AuditEvent=CONFIG_SERIAL_NUMBER][SubjectID=caadmin][Outcome=Success][ParamNameValPairs=source;;updateNumberRange+type;;request+beginNumber;;9990001+endNumber;;10000000] serial number range updateCopy to Clipboard Copied! Toggle word wrap Toggle overflow
FDP_CER_EXT.1 (extended)
Certificate generation
CERT_REQUEST_PROCESSED(success)Test case: a successful CMC request using SharedSecret (with
cmc.popLinkWitnessRequired=true).0.https-jsse-jss-nio-21443-exec-8 - [21/Nov/2023:16:49:57 EST] [14] [6] [AuditEvent=CERT_REQUEST_PROCESSED][SubjectID=$Unidentified$][Outcome=Success][ReqID=86][CertSerialNum=229508606] certificate request processed
0.https-jsse-jss-nio-21443-exec-8 - [21/Nov/2023:16:49:57 EST] [14] [6] [AuditEvent=CERT_REQUEST_PROCESSED][SubjectID=$Unidentified$][Outcome=Success][ReqID=86][CertSerialNum=229508606] certificate request processedCopy to Clipboard Copied! Toggle word wrap Toggle overflow
FDP_CER_EXT.2 (extended)
Linking of certificates to certificate requests
Test case: a successful CMC request signed and issued by a CA agent (with
cmc.popLinkWitnessRequired=false):PROFILE_CERT_REQUEST0.https-jsse-jss-nio-21443-exec-3 - [21/Nov/2023:16:58:45 EST] [14] [6] [AuditEvent=PROFILE_CERT_REQUEST][SubjectID=caadmin][Outcome=Success][ReqID=87][ProfileID=caECFullCMCUserCert][CertSubject=CN=ecc test ecc-user1,UID=ecc-ecc-user1] certificate request made with certificate profiles
0.https-jsse-jss-nio-21443-exec-3 - [21/Nov/2023:16:58:45 EST] [14] [6] [AuditEvent=PROFILE_CERT_REQUEST][SubjectID=caadmin][Outcome=Success][ReqID=87][ProfileID=caECFullCMCUserCert][CertSubject=CN=ecc test ecc-user1,UID=ecc-ecc-user1] certificate request made with certificate profilesCopy to Clipboard Copied! Toggle word wrap Toggle overflow CERT_REQUEST_PROCESSED(Success)0.https-jsse-jss-nio-21443-exec-3 - [21/Nov/2023:16:58:45 EST] [14] [6] [AuditEvent=CERT_REQUEST_PROCESSED][SubjectID=caadmin][Outcome=Success][ReqID=87][CertSerialNum=87161545] certificate request processed
0.https-jsse-jss-nio-21443-exec-3 - [21/Nov/2023:16:58:45 EST] [14] [6] [AuditEvent=CERT_REQUEST_PROCESSED][SubjectID=caadmin][Outcome=Success][ReqID=87][CertSerialNum=87161545] certificate request processedCopy to Clipboard Copied! Toggle word wrap Toggle overflow NoteIn the success case, the
ReqIDfield effectively links to theReqIDfield of a successfulCERT_REQUEST_PROCESSEDevent where theCertSerialNumfield contains the certificate serial number.
FFDP_CER_EXT.3 FDP_CER_EXT.2 (Failure)
- Failed certificate approvals
A failed CMC request using SharedSecret (with cmc.popLinkWitnessRequired=true) with wrong witness.sharedSecret
CMC_REQUEST_RECEIVED0.https-jsse-jss-nio-21443-exec-9 - [21/Nov/2023:16:57:14 EST] [14] [6] [AuditEvent=CMC_REQUEST_RECEIVED][SubjectID=caadmin][Outcome=Success][CMCRequest=MIILQQYJKoZIhvcNAQcCoIILMjCCCy4CAQMxDzANBglghkgBZQ…] CMC request received
0.https-jsse-jss-nio-21443-exec-9 - [21/Nov/2023:16:57:14 EST] [14] [6] [AuditEvent=CMC_REQUEST_RECEIVED][SubjectID=caadmin][Outcome=Success][CMCRequest=MIILQQYJKoZIhvcNAQcCoIILMjCCCy4CAQMxDzANBglghkgBZQ…] CMC request receivedCopy to Clipboard Copied! Toggle word wrap Toggle overflow CERT_REQUEST_PROCESSED(failure)0.https-jsse-jss-nio-21443-exec-3 - [29/Nov/2023:16:32:16 PST] [14] [6] [AuditEvent=CERT_REQUEST_PROCESSED][SubjectID=$Unidentified$][Outcome=Failure][ReqID=$Unidentified$][InfoName=rejectReason][InfoValue=Proof-of-Identification Verification Failed after verifyIdentityProofV2] certificate request processed
0.https-jsse-jss-nio-21443-exec-3 - [29/Nov/2023:16:32:16 PST] [14] [6] [AuditEvent=CERT_REQUEST_PROCESSED][SubjectID=$Unidentified$][Outcome=Failure][ReqID=$Unidentified$][InfoName=rejectReason][InfoValue=Proof-of-Identification Verification Failed after verifyIdentityProofV2] certificate request processedCopy to Clipboard Copied! Toggle word wrap Toggle overflow NoteThe concurrent occurrence of
CMC_REQUEST_RECEIVEDandCERT_REQUEST_PROCESSEDlinked the request object with the failure.
FIA_X509_EXT.1, FIA_X509_EXT.2
Failed certificate validations; failed authentications
ACCESS_SESSION_ESTABLISH(failure)User with revoked cert trying to perform an operation.
Test case: # pki -d /root/.dogtag/pki_ecc_bootstrap/certs_db/ -c SECret.123 -p 21443 -n 'ecc_SubCA_AgentR' ca-cert-find.
0.https-jsse-jss-nio-21443-exec-18 - [10/Jun/2024:08:48:13 EDT] [14] [6] [AuditEvent=ACCESS_SESSION_ESTABLISH][ClientIP=10.0.188.72][ServerIP=10.0.188.72][SubjectID=CN=ecc_SubCA_AgentR,UID=ecc_SubCA_AgentR][CertSerialNum=135246246][IssuerDN=CN=CA Signing Certificate,OU=rhcs10-ECC-SubCA,O=Example-rhcs10-ECC-RootCA][Outcome=Failure][Info=serverAlertSent: CERTIFICATE_REVOKED] access session establish failure
0.https-jsse-jss-nio-21443-exec-18 - [10/Jun/2024:08:48:13 EDT] [14] [6] [AuditEvent=ACCESS_SESSION_ESTABLISH][ClientIP=10.0.188.72][ServerIP=10.0.188.72][SubjectID=CN=ecc_SubCA_AgentR,UID=ecc_SubCA_AgentR][CertSerialNum=135246246][IssuerDN=CN=CA Signing Certificate,OU=rhcs10-ECC-SubCA,O=Example-rhcs10-ECC-RootCA][Outcome=Failure][Info=serverAlertSent: CERTIFICATE_REVOKED] access session establish failureCopy to Clipboard Copied! Toggle word wrap Toggle overflow User with expired cert trying to perform an operation.
Test case: # pki -d /root/.dogtag/pki_ecc_bootstrap/certs_db/ -c SECret.123 -p 21443 -n 'ecc_SubCA_AgentE' ca-cert-find.
0.https-jsse-jss-nio-21443-exec-19 - [10/Jun/2024:08:49:54 EDT] [14] [6] [AuditEvent=ACCESS_SESSION_ESTABLISH][ClientIP=10.0.188.72][ServerIP=10.0.188.72][SubjectID=CN=ecc_SubCA_AgentE,UID=ecc_SubCA_AgentE][CertSerialNum=70705426][IssuerDN=CN=CA Signing Certificate,OU=rhcs10-ECC-SubCA,O=Example-rhcs10-ECC-RootCA][Outcome=Failure][Info=serverAlertSent: CERTIFICATE_EXPIRED] access session establish failure
0.https-jsse-jss-nio-21443-exec-19 - [10/Jun/2024:08:49:54 EDT] [14] [6] [AuditEvent=ACCESS_SESSION_ESTABLISH][ClientIP=10.0.188.72][ServerIP=10.0.188.72][SubjectID=CN=ecc_SubCA_AgentE,UID=ecc_SubCA_AgentE][CertSerialNum=70705426][IssuerDN=CN=CA Signing Certificate,OU=rhcs10-ECC-SubCA,O=Example-rhcs10-ECC-RootCA][Outcome=Failure][Info=serverAlertSent: CERTIFICATE_EXPIRED] access session establish failureCopy to Clipboard Copied! Toggle word wrap Toggle overflow CMC enrollment request submitted using a TLS client cert issued by an unknown CA.
Test case: Adding a client cert issued by unknown CA to nssdb and running # HttpClient /root/.dogtag/pki_ecc_bootstrap/certs_db/HttpClient-cmc-p10.self.cfg.
0.https-jsse-jss-nio-21443-exec-20 - [10/Jun/2024:09:20:34 EDT] [14] [6] [AuditEvent=ACCESS_SESSION_ESTABLISH][ClientIP=10.0.188.72][ServerIP=10.0.188.72][SubjectID=CN=PKI Administrator,E=caadmin@example.com,OU=topology-02-CA,O=topology-02_Foobarmaster.org][CertSerialNum=233456275785924569566051339521314398673][IssuerDN=CN=CA Signing Certificate,OU=topology-02-CA,O=topology-02_Foobarmaster.org][Outcome=Failure][Info=serverAlertSent: UNKNOWN_CA] access session establish failure
0.https-jsse-jss-nio-21443-exec-20 - [10/Jun/2024:09:20:34 EDT] [14] [6] [AuditEvent=ACCESS_SESSION_ESTABLISH][ClientIP=10.0.188.72][ServerIP=10.0.188.72][SubjectID=CN=PKI Administrator,E=caadmin@example.com,OU=topology-02-CA,O=topology-02_Foobarmaster.org][CertSerialNum=233456275785924569566051339521314398673][IssuerDN=CN=CA Signing Certificate,OU=topology-02-CA,O=topology-02_Foobarmaster.org][Outcome=Failure][Info=serverAlertSent: UNKNOWN_CA] access session establish failureCopy to Clipboard Copied! Toggle word wrap Toggle overflow No common encryption algorithm(s).
Test case: changing the ciphers in the ECC CA’s
server.xmlto RSA ciphers, then running # pki -d /root/.dogtag/pki_ecc_bootstrap/certs_db/ -c SECret.123 -p 21443 -n 'ecc_SubCA_AdminV' ca-user-find.0.https-jsse-jss-nio-21443-exec-1 - [10/Jun/2024:09:30:21 EDT] [14] [6] [AuditEvent=ACCESS_SESSION_ESTABLISH][ClientIP=10.0.188.72][ServerIP=10.0.188.72][SubjectID=--][CertSerialNum=--][IssuerDN=--][Outcome=Failure][Info=serverAlertSent: HANDSHAKE_FAILURE] access session establish failure
0.https-jsse-jss-nio-21443-exec-1 - [10/Jun/2024:09:30:21 EDT] [14] [6] [AuditEvent=ACCESS_SESSION_ESTABLISH][ClientIP=10.0.188.72][ServerIP=10.0.188.72][SubjectID=--][CertSerialNum=--][IssuerDN=--][Outcome=Failure][Info=serverAlertSent: HANDSHAKE_FAILURE] access session establish failureCopy to Clipboard Copied! Toggle word wrap Toggle overflow
FIA_UIA_EXT.1 FIA_UAU_EXT.1
Privileged user identification and authentication
ACCESS_SESSION_ESTABLISH→ The
ClientIPfield of theACCESS_SESSION_ESTABLISHaudit event contains the IP address of the client.
→ TheSubjectIDfield of theACCESS_SESSION_ESTABLISHaudit event contains the identity of the entity.CA
Test case: # pki -d /root/.dogtag/pki_ecc_bootstrap/certs_db/ -c SECret.123 -p 21443 -n 'ecc_SubCA_AdminV' ca-user-find.
0.https-jsse-jss-nio-21443-exec-7 - [10/Jun/2024:10:11:19 EDT] [14] [6] [AuditEvent=ACCESS_SESSION_ESTABLISH][ClientIP=10.0.188.72][ServerIP=10.0.188.72][SubjectID=CN=ecc_SubCA_AdminV,UID=ecc_SubCA_AdminV][CertSerialNum=195854754][IssuerDN=CN=CA Signing Certificate,OU=rhcs10-ECC-SubCA,O=Example-rhcs10-ECC-RootCA][Outcome=Success] access session establish success
0.https-jsse-jss-nio-21443-exec-7 - [10/Jun/2024:10:11:19 EDT] [14] [6] [AuditEvent=ACCESS_SESSION_ESTABLISH][ClientIP=10.0.188.72][ServerIP=10.0.188.72][SubjectID=CN=ecc_SubCA_AdminV,UID=ecc_SubCA_AdminV][CertSerialNum=195854754][IssuerDN=CN=CA Signing Certificate,OU=rhcs10-ECC-SubCA,O=Example-rhcs10-ECC-RootCA][Outcome=Success] access session establish successCopy to Clipboard Copied! Toggle word wrap Toggle overflow TPS
Test case: # pki -d /root/.dogtag/pki_rsa_bootstrap/certs_db/ -c SECret.123 -p 25443 -n 'TPS_AdminV' tps-user-find.
0.https-jsse-jss-nio-25443-exec-1 - [11/Jun/2024:05:56:34 EDT] [14] [6] [AuditEvent=ACCESS_SESSION_ESTABLISH][ClientIP=10.0.188.72][ServerIP=10.0.188.72][SubjectID=CN=TPS_AdminV,UID=TPS_AdminV][CertSerialNum=190384736][IssuerDN=CN=CA Signing Certificate,OU=rhcs10-RSA-SubCA,O=Example-rhcs10-RSA-RootCA][Outcome=Success] access session establish success
0.https-jsse-jss-nio-25443-exec-1 - [11/Jun/2024:05:56:34 EDT] [14] [6] [AuditEvent=ACCESS_SESSION_ESTABLISH][ClientIP=10.0.188.72][ServerIP=10.0.188.72][SubjectID=CN=TPS_AdminV,UID=TPS_AdminV][CertSerialNum=190384736][IssuerDN=CN=CA Signing Certificate,OU=rhcs10-RSA-SubCA,O=Example-rhcs10-RSA-RootCA][Outcome=Success] access session establish successCopy to Clipboard Copied! Toggle word wrap Toggle overflow
AUTHThe
AuthMgrfield contains the authentication mechanism in theAUTHaudit event.CA
Test case: # pki -d /root/.dogtag/pki_rsa_bootstrap/certs_db/ -c SECret.123 -P https -p 31443 -n 'rsa_SubCA_AdminV'.
0.https-jsse-nio-31443-exec-9 - [28/Apr/2023:06:16:11 EDT] [14] [6] [AuditEvent=AUTH][SubjectID=rsa_SubCA_AdminV][Outcome=Success][AuthMgr=certUserDBAuthMgr] authentication success
0.https-jsse-nio-31443-exec-9 - [28/Apr/2023:06:16:11 EDT] [14] [6] [AuditEvent=AUTH][SubjectID=rsa_SubCA_AdminV][Outcome=Success][AuthMgr=certUserDBAuthMgr] authentication successCopy to Clipboard Copied! Toggle word wrap Toggle overflow TPS
Test case: # pki -d /root/.dogtag/pki_rsa_bootstrap/certs_db/ -c SECret.123 -p 25443 -n 'PKI TPS Administrator for RSA-TPS' tps-user-find.
0.https-jsse-nio-25443-exec-3 - [28/Apr/2023:06:13:46 EDT] [14] [6] [AuditEvent=AUTH][SubjectID=tpsadmin][Outcome=Success][AuthMgr=certUserDBAuthMgr] authentication success
0.https-jsse-nio-25443-exec-3 - [28/Apr/2023:06:13:46 EDT] [14] [6] [AuditEvent=AUTH][SubjectID=tpsadmin][Outcome=Success][AuthMgr=certUserDBAuthMgr] authentication successCopy to Clipboard Copied! Toggle word wrap Toggle overflow
AUTHZCA
Test case: # pki -d /root/.dogtag/pki_rsa_bootstrap/certs_db/ -c SECret.123 -P https -p 31443 -n 'rsa_SubCA_AuditV' ca-audit-file-find.
0.https-jsse-nio-31443-exec-10 - [28/Apr/2023:06:43:30 EDT] [14] [6] [AuditEvent=AUTHZ][SubjectID=rsa_SubCA_AuditV][Outcome=Success][aclResource=certServer.log.content.signedAudit][Op=read][Info=AuditResource.findAuditFiles] authorization success
0.https-jsse-nio-31443-exec-10 - [28/Apr/2023:06:43:30 EDT] [14] [6] [AuditEvent=AUTHZ][SubjectID=rsa_SubCA_AuditV][Outcome=Success][aclResource=certServer.log.content.signedAudit][Op=read][Info=AuditResource.findAuditFiles] authorization successCopy to Clipboard Copied! Toggle word wrap Toggle overflow TPS
Test case: # pki -d /root/.dogtag/pki_rsa_bootstrap/certs_db/ -c SECret.123 -p 25443 -n 'PKI TPS Administrator for RSA-TPS' tps-user-show tpsadmin.
0.https-jsse-nio-25443-exec-20 - [28/Apr/2023:06:46:23 EDT] [14] [6] [AuditEvent=AUTHZ][SubjectID=tpsadmin][Outcome=Success][aclResource=certServer.tps.users][Op=execute][Info=UserResource.getUser] authorization success
0.https-jsse-nio-25443-exec-20 - [28/Apr/2023:06:46:23 EDT] [14] [6] [AuditEvent=AUTHZ][SubjectID=tpsadmin][Outcome=Success][aclResource=certServer.tps.users][Op=execute][Info=UserResource.getUser] authorization successCopy to Clipboard Copied! Toggle word wrap Toggle overflow
ROLE_ASSUMEThe
Rolefield of theROLE_ASSUMEaudit event contains the name of the role that the user is assuming.CA
Test case: logging in to
pkiconsolewith valid credentials, e.g.: # pkiconsole -d /home/jgenie/.redhat-idm-console -n rsa_SubCA_AdminV.0.https-jsse-nio-31443-exec-4 - [28/Apr/2023:06:59:18 EDT] [14] [6] [AuditEvent=ROLE_ASSUME][SubjectID=rsa_SubCA_AdminV][Outcome=Success][Role=Administrators] assume privileged role
0.https-jsse-nio-31443-exec-4 - [28/Apr/2023:06:59:18 EDT] [14] [6] [AuditEvent=ROLE_ASSUME][SubjectID=rsa_SubCA_AdminV][Outcome=Success][Role=Administrators] assume privileged roleCopy to Clipboard Copied! Toggle word wrap Toggle overflow TPS
Test case: accessing the TPS Web UI Agent page using the TPS_AgentV certificate.
0.https-jsse-jss-nio-25443-exec-25 - [20/Sep/2023:06:32:56 EDT] [14] [6] [AuditEvent=ROLE_ASSUME][SubjectID=TPS_AgentV][Outcome=Success][Role=TPS Agents] assume privileged role
0.https-jsse-jss-nio-25443-exec-25 - [20/Sep/2023:06:32:56 EDT] [14] [6] [AuditEvent=ROLE_ASSUME][SubjectID=TPS_AgentV][Outcome=Success][Role=TPS Agents] assume privileged roleCopy to Clipboard Copied! Toggle word wrap Toggle overflow
FMT_SMR.2
Modifications to the group of users that are part of a role
CONFIG_ROLESee
CONFIG_ROLEevent above.
FPT_FLS.1
Failure with preservation of secure state
SELFTESTS_EXECUTIONTest case: pointing the OCSP signing certificate to a non-existing certificate. E.g.
ca.cert.ocsp_signing.nickname=NHSM-CONN-XC:non-existing certificate.CA
0.main - [02/May/2023:05:04:54 EDT] [14] [6] [AuditEvent=SELFTESTS_EXECUTION][SubjectID=$System$][Outcome=Failure] self tests execution (see selftests.log for details)
0.main - [02/May/2023:05:04:54 EDT] [14] [6] [AuditEvent=SELFTESTS_EXECUTION][SubjectID=$System$][Outcome=Failure] self tests execution (see selftests.log for details)Copy to Clipboard Copied! Toggle word wrap Toggle overflow CA_AUDIT
0.main - [01/Dec/2023:12:55:07 EST] [14] [6] [AuditEvent=SELFTESTS_EXECUTION][SubjectID=$System$][Outcome=Failure] self tests execution (see selftests.log for details)
0.main - [01/Dec/2023:12:55:07 EST] [14] [6] [AuditEvent=SELFTESTS_EXECUTION][SubjectID=$System$][Outcome=Failure] self tests execution (see selftests.log for details)Copy to Clipboard Copied! Toggle word wrap Toggle overflow SELFTESTS.LOG
0.main - [01/Dec/2023:12:55:07 EST] [20] [1] SystemCertsVerification: system certs verification failure: Unable to validate certificate NHSM-CONN-XC:non-existing certificate not found: NHSM-CONN-XC:non-existing certificate
0.main - [01/Dec/2023:12:55:07 EST] [20] [1] SystemCertsVerification: system certs verification failure: Unable to validate certificate NHSM-CONN-XC:non-existing certificate not found: NHSM-CONN-XC:non-existing certificateCopy to Clipboard Copied! Toggle word wrap Toggle overflow 0.main - [01/Dec/2023:12:55:07 EST] [20] [1] SelfTestSubsystem: The CRITICAL self test plugin called selftests.container.instance.SystemCertsVerification running at startup FAILED!
0.main - [01/Dec/2023:12:55:07 EST] [20] [1] SelfTestSubsystem: The CRITICAL self test plugin called selftests.container.instance.SystemCertsVerification running at startup FAILED!Copy to Clipboard Copied! Toggle word wrap Toggle overflow
FPT_KST_EXT.2
Private/secret keys are stored by the HSM and the only operations to "access" those keys are through the TSF as signing operations.
N/a: Under normal circumstances, HSM authentication is done at RHCS system startup time (server will not start if failed to authenticate), so once the system is up, there is no need to authenticate (no loggable cause of failure).
FPT_RCV.1
The fact that a failure or service discontinuity occurred. Resumption of the regular operation.
Failure:
SELFTESTS_EXECUTION(failure)CA
Test case: adding a bogus cert nickname in the config file and restarting the server, e.g.:
ca.cert.sslserver.nickname=Bogus Server-Cert.0.main - [02/May/2023:05:04:54 EDT] [14] [6] [AuditEvent=SELFTESTS_EXECUTION][SubjectID=$System$][Outcome=Failure] self tests execution (see selftests.log for details)
0.main - [02/May/2023:05:04:54 EDT] [14] [6] [AuditEvent=SELFTESTS_EXECUTION][SubjectID=$System$][Outcome=Failure] self tests execution (see selftests.log for details)Copy to Clipboard Copied! Toggle word wrap Toggle overflow TPS
Test case: adding a bogus cert nickname in the config file and restarting the server, e.g.:
selftests.plugin.TPSPresence.nickname=bogusCert.0.main - [02/May/2023:05:11:04 EDT] [14] [6] [AuditEvent=SELFTESTS_EXECUTION][SubjectID=$System$][Outcome=Failure] self tests execution (see selftests.log for details)
0.main - [02/May/2023:05:11:04 EDT] [14] [6] [AuditEvent=SELFTESTS_EXECUTION][SubjectID=$System$][Outcome=Failure] self tests execution (see selftests.log for details)Copy to Clipboard Copied! Toggle word wrap Toggle overflow
- Self-test log, see "Configuring Self-Tests" in the Installation Guide.
Resumption (e.g. fixing the bogus certificate nickname and restarting):
AUDIT_LOG_STARTUP; SELFTESTS_EXECUTION(success)TPS
0.main - [27/Apr/2023:09:38:36 EDT] [14] [6] [AuditEvent=SELFTESTS_EXECUTION][SubjectID=$System$][Outcome=Success] self tests execution (see selftests.log for details)
0.main - [27/Apr/2023:09:38:36 EDT] [14] [6] [AuditEvent=SELFTESTS_EXECUTION][SubjectID=$System$][Outcome=Success] self tests execution (see selftests.log for details)Copy to Clipboard Copied! Toggle word wrap Toggle overflow 0.main - [11/May/2023:02:35:32 EDT] [14] [6] [AuditEvent=AUDIT_LOG_STARTUP][SubjectID=$System$][Outcome=Success] audit function startup
0.main - [11/May/2023:02:35:32 EDT] [14] [6] [AuditEvent=AUDIT_LOG_STARTUP][SubjectID=$System$][Outcome=Success] audit function startupCopy to Clipboard Copied! Toggle word wrap Toggle overflow CA
0.main - [02/May/2023:05:20:27 EDT] [14] [6] [AuditEvent=AUDIT_LOG_STARTUP][SubjectID=$System$][Outcome=Success] audit function startup
0.main - [02/May/2023:05:20:27 EDT] [14] [6] [AuditEvent=AUDIT_LOG_STARTUP][SubjectID=$System$][Outcome=Success] audit function startupCopy to Clipboard Copied! Toggle word wrap Toggle overflow 0.main - [25/Apr/2023:02:30:14 EDT] [14] [6] [AuditEvent=SELFTESTS_EXECUTION][SubjectID=$System$][Outcome=Success] self tests execution (see selftests.log for details)
0.main - [25/Apr/2023:02:30:14 EDT] [14] [6] [AuditEvent=SELFTESTS_EXECUTION][SubjectID=$System$][Outcome=Success] self tests execution (see selftests.log for details)Copy to Clipboard Copied! Toggle word wrap Toggle overflow
FPT_STM.1
Changes to the time.
Timestamps in the audit log for each event are provided by the Operational Environment, e.g.:
date Wed Nov 29 17:31:28 PST 2023
# date Wed Nov 29 17:31:28 PST 2023Copy to Clipboard Copied! Toggle word wrap Toggle overflow Changes to the time on the OS level are audited. See Section 12.2.3.3, “Displaying time change events”.
Test steps: following "Enable OS-level audit logs" in the post-installation section (Installation Guide) and executing
# ausearch -k rhcs_audit_time_change.To change the timezone, run
# timedatectl list-timezonesto list the zones then set the desired zone usingtimedatectl set-timezone. E.g.:timedatectl set-timezone America/Los_Angeles
# timedatectl set-timezone America/Los_AngelesCopy to Clipboard Copied! Toggle word wrap Toggle overflow Running the time change audit command will result in similar logs:
Copy to Clipboard Copied! Toggle word wrap Toggle overflow
FPT_TUD_EXT.1
Initiation of update.
See Section 12.2.3.4, “Displaying package update events”.
Test case: assuming some prior package updates were done, use the
# ausearch -m SOFTWARE_UPDATE | grep pkicommand:Copy to Clipboard Copied! Toggle word wrap Toggle overflow
FTA_SSL.4
The termination of an interactive session.
ACCESS_SESSION_TERMINATEDCA
Test case: # pki -d /root/.dogtag/pki_ecc_bootstrap/certs_db/ -c SECret.123 -p 21443 -n 'ecc_SubCA_AgentV' ca-cert-find.
0.https-jsse-jss-nio-21443-exec-5 - [10/Jun/2024:13:18:54 EDT] [14] [6] [AuditEvent=ACCESS_SESSION_TERMINATED][ClientIP=10.0.188.72][ServerIP=10.0.188.72][SubjectID=CN=ecc_SubCA_AgentV,UID=ecc_SubCA_AgentV][CertSerialNum=72118278][IssuerDN=CN=CA Signing Certificate,OU=rhcs10-ECC-SubCA,O=Example-rhcs10-ECC-RootCA][Outcome=Success][Info=serverAlertSent: CLOSE_NOTIFY] access session terminated
0.https-jsse-jss-nio-21443-exec-5 - [10/Jun/2024:13:18:54 EDT] [14] [6] [AuditEvent=ACCESS_SESSION_TERMINATED][ClientIP=10.0.188.72][ServerIP=10.0.188.72][SubjectID=CN=ecc_SubCA_AgentV,UID=ecc_SubCA_AgentV][CertSerialNum=72118278][IssuerDN=CN=CA Signing Certificate,OU=rhcs10-ECC-SubCA,O=Example-rhcs10-ECC-RootCA][Outcome=Success][Info=serverAlertSent: CLOSE_NOTIFY] access session terminatedCopy to Clipboard Copied! Toggle word wrap Toggle overflow TPS
Test case: # pki -d /root/.dogtag/pki_rsa_bootstrap/certs_db/ -c SECret.123 -p 25443 -n 'TPS_AdminV' tps-user-find.
0.https-jsse-jss-nio-25443-exec-6 - [11/Jun/2024:05:56:36 EDT] [14] [6] [AuditEvent=ACCESS_SESSION_TERMINATED][ClientIP=10.0.188.72][ServerIP=10.0.188.72][SubjectID=CN=TPS_AdminV,UID=TPS_AdminV][CertSerialNum=190384736][IssuerDN=CN=CA Signing Certificate,OU=rhcs10-RSA-SubCA,O=Example-rhcs10-RSA-RootCA][Outcome=Success][Info=serverAlertSent: CLOSE_NOTIFY] access session terminated
0.https-jsse-jss-nio-25443-exec-6 - [11/Jun/2024:05:56:36 EDT] [14] [6] [AuditEvent=ACCESS_SESSION_TERMINATED][ClientIP=10.0.188.72][ServerIP=10.0.188.72][SubjectID=CN=TPS_AdminV,UID=TPS_AdminV][CertSerialNum=190384736][IssuerDN=CN=CA Signing Certificate,OU=rhcs10-RSA-SubCA,O=Example-rhcs10-RSA-RootCA][Outcome=Success][Info=serverAlertSent: CLOSE_NOTIFY] access session terminatedCopy to Clipboard Copied! Toggle word wrap Toggle overflow
FTP_TRP.1
Initiation of the trusted channel. Termination of the trusted channel. Failures of the trusted path functions.
ACCESS_SESSION_ESTABLISHCA
Test case: adding client certificate issued by unknown CA to nssdb and use it for running # HttpClient /root/.dogtag/pki_ecc_bootstrap/certs_db/HttpClient-cmc-p10.self.cfg.
0.https-jsse-jss-nio-21443-exec-20 - [10/Jun/2024:09:20:34 EDT] [14] [6] [AuditEvent=ACCESS_SESSION_ESTABLISH][ClientIP=10.0.188.72][ServerIP=10.0.188.72][SubjectID=CN=PKI Administrator,E=caadmin@example.com,OU=topology-02-CA,O=topology-02_Foobarmaster.org][CertSerialNum=233456275785924569566051339521314398673][IssuerDN=CN=CA Signing Certificate,OU=topology-02-CA,O=topology-02_Foobarmaster.org][Outcome=Failure][Info=serverAlertSent: UNKNOWN_CA] access session establish failure
0.https-jsse-jss-nio-21443-exec-20 - [10/Jun/2024:09:20:34 EDT] [14] [6] [AuditEvent=ACCESS_SESSION_ESTABLISH][ClientIP=10.0.188.72][ServerIP=10.0.188.72][SubjectID=CN=PKI Administrator,E=caadmin@example.com,OU=topology-02-CA,O=topology-02_Foobarmaster.org][CertSerialNum=233456275785924569566051339521314398673][IssuerDN=CN=CA Signing Certificate,OU=topology-02-CA,O=topology-02_Foobarmaster.org][Outcome=Failure][Info=serverAlertSent: UNKNOWN_CA] access session establish failureCopy to Clipboard Copied! Toggle word wrap Toggle overflow TPS
Test case: # pki -d /root/.dogtag/pki_rsa_bootstrap/certs_db/ -c SECret.123 -p 25443 -n 'PKI TPS Administrator for RSA-TPS' tps-token-find.
0.https-jsse-jss-nio-25443-exec-7 - [11/Jun/2024:06:00:52 EDT] [14] [6] [AuditEvent=ACCESS_SESSION_ESTABLISH][ClientIP=10.0.188.72][ServerIP=10.0.188.72][SubjectID=CN=PKI Administrator,E=tpsadmin@example.com,OU=rhcs10-RSA-TPS,O=Example-SubCA][CertSerialNum=32899047][IssuerDN=CN=CA Signing Certificate,OU=rhcs10-RSA-SubCA,O=Example-rhcs10-RSA-RootCA][Outcome=Success] access session establish success
0.https-jsse-jss-nio-25443-exec-7 - [11/Jun/2024:06:00:52 EDT] [14] [6] [AuditEvent=ACCESS_SESSION_ESTABLISH][ClientIP=10.0.188.72][ServerIP=10.0.188.72][SubjectID=CN=PKI Administrator,E=tpsadmin@example.com,OU=rhcs10-RSA-TPS,O=Example-SubCA][CertSerialNum=32899047][IssuerDN=CN=CA Signing Certificate,OU=rhcs10-RSA-SubCA,O=Example-rhcs10-RSA-RootCA][Outcome=Success] access session establish successCopy to Clipboard Copied! Toggle word wrap Toggle overflow
ACCESS_SESSION_TERMINATEDCA
Test case: # pki -d /root/.dogtag/pki_ecc_bootstrap/certs_db/ -c SECret.123 -p 21443 -n 'ecc_SubCA_AgentV' ca-cert-find.
0.https-jsse-jss-nio-21443-exec-7 - [10/Jun/2024:10:36:08 EDT] [14] [6] [AuditEvent=ACCESS_SESSION_TERMINATED][ClientIP=10.0.188.72][ServerIP=10.0.188.72][SubjectID=CN=ecc_SubCA_AgentV,UID=ecc_SubCA_AgentV][CertSerialNum=72118278][IssuerDN=CN=CA Signing Certificate,OU=rhcs10-ECC-SubCA,O=Example-rhcs10-ECC-RootCA][Outcome=Success][Info=serverAlertSent: CLOSE_NOTIFY] access session terminated
0.https-jsse-jss-nio-21443-exec-7 - [10/Jun/2024:10:36:08 EDT] [14] [6] [AuditEvent=ACCESS_SESSION_TERMINATED][ClientIP=10.0.188.72][ServerIP=10.0.188.72][SubjectID=CN=ecc_SubCA_AgentV,UID=ecc_SubCA_AgentV][CertSerialNum=72118278][IssuerDN=CN=CA Signing Certificate,OU=rhcs10-ECC-SubCA,O=Example-rhcs10-ECC-RootCA][Outcome=Success][Info=serverAlertSent: CLOSE_NOTIFY] access session terminatedCopy to Clipboard Copied! Toggle word wrap Toggle overflow Test case: logging in to the CA Agent page using the role user and closing the browser.
0.https-jsse-jss-nio-21443-exec-11 - [10/Jun/2024:13:35:09 EDT] [14] [6] [AuditEvent=ACCESS_SESSION_TERMINATED][ClientIP=10.0.188.72][ServerIP=10.0.188.72][SubjectID=CN=ecc_SubCA_AgentV,UID=ecc_SubCA_AgentV][CertSerialNum=72118278][IssuerDN=CN=CA Signing Certificate,OU=rhcs10-ECC-SubCA,O=Example-rhcs10-ECC-RootCA][Outcome=Success][Info=serverAlertSent: CLOSE_NOTIFY] access session terminated
0.https-jsse-jss-nio-21443-exec-11 - [10/Jun/2024:13:35:09 EDT] [14] [6] [AuditEvent=ACCESS_SESSION_TERMINATED][ClientIP=10.0.188.72][ServerIP=10.0.188.72][SubjectID=CN=ecc_SubCA_AgentV,UID=ecc_SubCA_AgentV][CertSerialNum=72118278][IssuerDN=CN=CA Signing Certificate,OU=rhcs10-ECC-SubCA,O=Example-rhcs10-ECC-RootCA][Outcome=Success][Info=serverAlertSent: CLOSE_NOTIFY] access session terminatedCopy to Clipboard Copied! Toggle word wrap Toggle overflow TPS
Test case: # pki -d /root/.dogtag/pki_rsa_bootstrap/certs_db/ -c SECret.123 -p 25443 -n 'TPS_AdminV' tps-user-find or login to the TPS Agent page using a role user and close the browser.
0.https-jsse-jss-nio-25443-exec-20 - [11/Jun/2024:06:03:06 EDT] [14] [6] [AuditEvent=ACCESS_SESSION_TERMINATED][ClientIP=10.0.188.72][ServerIP=10.0.188.72][SubjectID=CN=TPS_AdminV,UID=TPS_AdminV][CertSerialNum=190384736][IssuerDN=CN=CA Signing Certificate,OU=rhcs10-RSA-SubCA,O=Example-rhcs10-RSA-RootCA][Outcome=Success][Info=serverAlertSent: CLOSE_NOTIFY] access session terminated
0.https-jsse-jss-nio-25443-exec-20 - [11/Jun/2024:06:03:06 EDT] [14] [6] [AuditEvent=ACCESS_SESSION_TERMINATED][ClientIP=10.0.188.72][ServerIP=10.0.188.72][SubjectID=CN=TPS_AdminV,UID=TPS_AdminV][CertSerialNum=190384736][IssuerDN=CN=CA Signing Certificate,OU=rhcs10-RSA-SubCA,O=Example-rhcs10-RSA-RootCA][Outcome=Success][Info=serverAlertSent: CLOSE_NOTIFY] access session terminatedCopy to Clipboard Copied! Toggle word wrap Toggle overflow
FCS_CKM.1 and FCS_CKM.2
- Not available. There are no TOE-related functions where a TOE subsystem generates (or requests the OE to generate) a non-ephemeral key. All system certificates are generated in the same manner as user keys during the installation, before the TOE is running and, thus, before it can audit.
FCS_CKM_EXT.4
- Not available
FCS_COP.1(2)
All occurrences of signature generation using a CA signing key.
CERT_SIGNING_INFOrecords CA signing certificate key info at system startup0.https-jsse-nio-8443-exec-5 - [25/Apr/2023:02:26:34 EDT] [14] [6] [AuditEvent=CERT_SIGNING_INFO][SubjectID=$System$][Outcome=Success][SKI=96:44:A6:53:DB:AF:3D:C3:3D:A0:00:0A:84:CB:6E:0E:B5:3E:4E:10] certificate signing info
0.https-jsse-nio-8443-exec-5 - [25/Apr/2023:02:26:34 EDT] [14] [6] [AuditEvent=CERT_SIGNING_INFO][SubjectID=$System$][Outcome=Success][SKI=96:44:A6:53:DB:AF:3D:C3:3D:A0:00:0A:84:CB:6E:0E:B5:3E:4E:10] certificate signing infoCopy to Clipboard Copied! Toggle word wrap Toggle overflow CERT_REQUEST_PROCESSED(success)Test case: See
CERT_REQUEST_PROCESSED(success) above.0.https-jsse-nio-8443-exec-3 - [25/Apr/2023:02:28:17 EDT] [14] [6] [AuditEvent=CERT_REQUEST_PROCESSED][SubjectID=caadmin][Outcome=Success][ReqID=7][CertSerialNum=165675596] certificate request processed
0.https-jsse-nio-8443-exec-3 - [25/Apr/2023:02:28:17 EDT] [14] [6] [AuditEvent=CERT_REQUEST_PROCESSED][SubjectID=caadmin][Outcome=Success][ReqID=7][CertSerialNum=165675596] certificate request processedCopy to Clipboard Copied! Toggle word wrap Toggle overflow OCSP_SIGNING_INFOrecords OCSP signing certificate key info at system startup0.main - [25/Apr/2023:02:28:39 EDT] [14] [6] [AuditEvent=OCSP_SIGNING_INFO][SubjectID=$System$][Outcome=Success][SKI=A3:AB:71:4C:E0:C8:8B:E4:6D:08:5B:10:EC:F3:E4:6B:F3:70:EB:57] OCSP signing info
0.main - [25/Apr/2023:02:28:39 EDT] [14] [6] [AuditEvent=OCSP_SIGNING_INFO][SubjectID=$System$][Outcome=Success][SKI=A3:AB:71:4C:E0:C8:8B:E4:6D:08:5B:10:EC:F3:E4:6B:F3:70:EB:57] OCSP signing infoCopy to Clipboard Copied! Toggle word wrap Toggle overflow OCSP_GENERATION(success)Test case: following the procedure in TBD "Testing CRL publishing" to run
OCSPClientin order to trigger an OCSP response.0.http-nio-32080-exec-1 - [25/Apr/2023:06:07:29 EDT] [14] [6] [AuditEvent=OCSP_GENERATION][SubjectID=$NonRoleUser$][Outcome=Success] OCSP response generation
0.http-nio-32080-exec-1 - [25/Apr/2023:06:07:29 EDT] [14] [6] [AuditEvent=OCSP_GENERATION][SubjectID=$NonRoleUser$][Outcome=Success] OCSP response generationCopy to Clipboard Copied! Toggle word wrap Toggle overflow CRL_SIGNING_INFOrecords CRL signing certificate key info at system startup0.main - [25/Apr/2023:05:55:22 EDT] [14] [6] [AuditEvent=CRL_SIGNING_INFO][SubjectID=$System$][Outcome=Success][SKI=2C:E1:7C:DB:B0:6E:62:36:70:67:B7:BF:19:80:4C:D0:8F:B5:80:02] CRL signing info
0.main - [25/Apr/2023:05:55:22 EDT] [14] [6] [AuditEvent=CRL_SIGNING_INFO][SubjectID=$System$][Outcome=Success][SKI=2C:E1:7C:DB:B0:6E:62:36:70:67:B7:BF:19:80:4C:D0:8F:B5:80:02] CRL signing infoCopy to Clipboard Copied! Toggle word wrap Toggle overflow FULL_CRL_GENERATION(success)Test case: removing the filters
log.instance.SignedAudit.filters.FULL_CRL_GENERATION=(Outcome=Failure)and setting the revocation bufferauths.revocationChecking.bufferSizeto0andca.crl.MasterCRL.alwaysUpdatetotrue. Then revoking a certificate and invoking theUpdateCRLendpoint as per the procedure in "Testing CRL publishing" in the Installation Guide.0.Thread-17 - [04/May/2023:05:46:26 EDT] [14] [6] [AuditEvent=FULL_CRL_GENERATION][SubjectID=$Unidentified$][Outcome=Success][CRLnum=62] Full CRL generation
0.Thread-17 - [04/May/2023:05:46:26 EDT] [14] [6] [AuditEvent=FULL_CRL_GENERATION][SubjectID=$Unidentified$][Outcome=Success][CRLnum=62] Full CRL generationCopy to Clipboard Copied! Toggle word wrap Toggle overflow DELTA_CRL_GENERATION(success)Test case: following all the configuration of the previous case and enabling the DELTA CRL (
ca.crl.MasterCRL.extension.DeltaCRLIndicator.enabletotrue). Then revoking a certificate and invoking theUpdateCRLendpoint as per the procedure in "Testing CRL publishing" in the Installation Guide.0.Thread-17 - [04/May/2023:06:29:03 EDT] [14] [6] [AuditEvent=DELTA_CRL_GENERATION][SubjectID=$Unidentified$][Outcome=Success][CRLnum=63] Delta CRL generation
0.Thread-17 - [04/May/2023:06:29:03 EDT] [14] [6] [AuditEvent=DELTA_CRL_GENERATION][SubjectID=$Unidentified$][Outcome=Success][CRLnum=63] Delta CRL generationCopy to Clipboard Copied! Toggle word wrap Toggle overflow
Failure in signature generation.
CERT_REQUEST_PROCESSED(failure)Test case: follow the CMC enrollment procedure described above, but use the profile
caCMCUserCertinstead ofcaCMCECUserCertwhen composing theHttpClientconfiguration file.0.https-jsse-jss-nio-21443-exec-18 - [14/Sep/2023:13:44:35 EDT] [14] [6] [AuditEvent=CERT_REQUEST_PROCESSED][SubjectID=$NonRoleUser$][Outcome=Failure][ReqID=71][InfoName=rejectReason][InfoValue=Request 71 Rejected - Key Type RSA Not Matched] certificate request processed
0.https-jsse-jss-nio-21443-exec-18 - [14/Sep/2023:13:44:35 EDT] [14] [6] [AuditEvent=CERT_REQUEST_PROCESSED][SubjectID=$NonRoleUser$][Outcome=Failure][ReqID=71][InfoName=rejectReason][InfoValue=Request 71 Rejected - Key Type RSA Not Matched] certificate request processedCopy to Clipboard Copied! Toggle word wrap Toggle overflow OCSP_GENERATION(failure)0.http-nio-32080-exec-15 - [25/Apr/2023:02:47:47 EDT] [14] [6] [AuditEvent=OCSP_GENERATION][SubjectID=$NonRoleUser$][Outcome=Failure][FailureReason=End-of-file reached while decoding ASN.1 header] OCSP response generation
0.http-nio-32080-exec-15 - [25/Apr/2023:02:47:47 EDT] [14] [6] [AuditEvent=OCSP_GENERATION][SubjectID=$NonRoleUser$][Outcome=Failure][FailureReason=End-of-file reached while decoding ASN.1 header] OCSP response generationCopy to Clipboard Copied! Toggle word wrap Toggle overflow
FCS_HTTPS_EXT.1 and FCS_TLSS_EXT.2
Failure to establish a HTTPS/TLS session.
ACCESS_SESSION_ESTABLISH(failure)See FTP_TRP.1
Establishment/termination of a HTTPS/TLS session
ACCESS_SESSION_TERMINATEDSee FIA_UIA_EXT.1
FCS_TLSC_EXT.2
Failure to establish a TLS session.
CLIENT_ACCESS_SESSION_ESTABLISH(failure)When Server is not reachable by Client and Session ran into failures. In this scenario, CA acts as a client for KRA during Key Archival and KRA is not reachable by CA.
Test case: disabling the KRA and perform a
HttpClientrequest. E.g. following the procedure in "Test key archival" in the Installation Guide.0.https-jsse-jss-nio-21443-exec-15 - [10/Jun/2024:12:29:16 EDT] [14] [6] [AuditEvent=CLIENT_ACCESS_SESSION_ESTABLISH][ClientHost=10.0.188.72][ServerHost=rhcs10.example.com][ServerPort=23443][SubjectID=SYSTEM][Outcome=Failure][Info=send:java.io.IOException: Socket has been closed, and cannot be reused.] access session failed to establish when Certificate System acts as client
0.https-jsse-jss-nio-21443-exec-15 - [10/Jun/2024:12:29:16 EDT] [14] [6] [AuditEvent=CLIENT_ACCESS_SESSION_ESTABLISH][ClientHost=10.0.188.72][ServerHost=rhcs10.example.com][ServerPort=23443][SubjectID=SYSTEM][Outcome=Failure][Info=send:java.io.IOException: Socket has been closed, and cannot be reused.] access session failed to establish when Certificate System acts as clientCopy to Clipboard Copied! Toggle word wrap Toggle overflow When CA’s subsystem cert is revoked and it tried to access KRA.
Test case: revoking the CA system certificate and performing the KRA test.
KRA
Test case: marking the CA’s subsystem certificate on-hold and performing the Key archival ( CA → KRA ).
HttpClienttriggers the event in the KRA’s audit logging file.0.https-jsse-jss-nio-23443-exec-1 - [10/Jun/2024:12:35:25 EDT] [14] [6] [AuditEvent=ACCESS_SESSION_ESTABLISH][ClientIP=10.0.188.72][ServerIP=10.0.188.72][SubjectID=CN=Subsystem Certificate,OU=rhcs10-ECC-SubCA,O=Example-rhcs10-ECC-RootCA][CertSerialNum=208481924][IssuerDN=CN=CA Signing Certificate,OU=rhcs10-ECC-SubCA,O=Example-rhcs10-ECC-RootCA][Outcome=Failure][Info=serverAlertSent: CERTIFICATE_REVOKED] access session establish failure
0.https-jsse-jss-nio-23443-exec-1 - [10/Jun/2024:12:35:25 EDT] [14] [6] [AuditEvent=ACCESS_SESSION_ESTABLISH][ClientIP=10.0.188.72][ServerIP=10.0.188.72][SubjectID=CN=Subsystem Certificate,OU=rhcs10-ECC-SubCA,O=Example-rhcs10-ECC-RootCA][CertSerialNum=208481924][IssuerDN=CN=CA Signing Certificate,OU=rhcs10-ECC-SubCA,O=Example-rhcs10-ECC-RootCA][Outcome=Failure][Info=serverAlertSent: CERTIFICATE_REVOKED] access session establish failureCopy to Clipboard Copied! Toggle word wrap Toggle overflow CA
Test case: revoking the CA System certificate and performing the KRA test.
0.https-jsse-jss-nio-21443-exec-3 - [10/Jun/2024:12:35:25 EDT] [14] [6] [AuditEvent=CLIENT_ACCESS_SESSION_ESTABLISH][ClientHost=10.0.188.72][ServerHost=rhcs10.example.com][ServerPort=23443][SubjectID=SYSTEM][Outcome=Failure][Info=send:java.io.IOException: Socket has been closed, and cannot be reused.] access session failed to establish when Certificate System acts as client
0.https-jsse-jss-nio-21443-exec-3 - [10/Jun/2024:12:35:25 EDT] [14] [6] [AuditEvent=CLIENT_ACCESS_SESSION_ESTABLISH][ClientHost=10.0.188.72][ServerHost=rhcs10.example.com][ServerPort=23443][SubjectID=SYSTEM][Outcome=Failure][Info=send:java.io.IOException: Socket has been closed, and cannot be reused.] access session failed to establish when Certificate System acts as clientCopy to Clipboard Copied! Toggle word wrap Toggle overflow 0.ConnectAsync - [10/Jun/2024:12:35:25 EDT] [14] [6] [AuditEvent=CLIENT_ACCESS_SESSION_TERMINATED][ClientHost=10.0.188.72][ServerHost=10.0.188.72][ServerPort=23443][SubjectID=CN=rhcs10.example.com,OU=rhcs10-ECC-KRA,O=Example-SubCA][CertSerialNum=42383494][IssuerDN=CN=CA Signing Certificate,OU=rhcs10-ECC-SubCA,O=Example-rhcs10-ECC-RootCA][Outcome=Success][Info=clientAlertReceived: CERTIFICATE_REVOKED] access session terminated when Certificate System acts as client
0.ConnectAsync - [10/Jun/2024:12:35:25 EDT] [14] [6] [AuditEvent=CLIENT_ACCESS_SESSION_TERMINATED][ClientHost=10.0.188.72][ServerHost=10.0.188.72][ServerPort=23443][SubjectID=CN=rhcs10.example.com,OU=rhcs10-ECC-KRA,O=Example-SubCA][CertSerialNum=42383494][IssuerDN=CN=CA Signing Certificate,OU=rhcs10-ECC-SubCA,O=Example-rhcs10-ECC-RootCA][Outcome=Success][Info=clientAlertReceived: CERTIFICATE_REVOKED] access session terminated when Certificate System acts as clientCopy to Clipboard Copied! Toggle word wrap Toggle overflow
Establishment/termination of a TLS session.
CLIENT_ACCESS_SESSION_TERMINATEDTest case: attempting to sign into a PKI Console without setting up CA Admin cert.
0.https-jsse-jss-nio-31443-exec-9 - [11/Jun/2024:09:31:47 EDT] [14] [6] [AuditEvent=CLIENT_ACCESS_SESSION_TERMINATED][ClientHost=10.0.188.72][ServerHost=10.0.188.64][ServerPort=7636][SubjectID=CN=rhds11-5.example.com][CertSerialNum=119813240][IssuerDN=CN=CA Signing Certificate,OU=rhcs10-RSA-SubCA,O=Example-rhcs10-RSA-RootCA][Outcome=Success][Info=clientAlertSent: CLOSE_NOTIFY] access session terminated when Certificate System acts as client
0.https-jsse-jss-nio-31443-exec-9 - [11/Jun/2024:09:31:47 EDT] [14] [6] [AuditEvent=CLIENT_ACCESS_SESSION_TERMINATED][ClientHost=10.0.188.72][ServerHost=10.0.188.64][ServerPort=7636][SubjectID=CN=rhds11-5.example.com][CertSerialNum=119813240][IssuerDN=CN=CA Signing Certificate,OU=rhcs10-RSA-SubCA,O=Example-rhcs10-RSA-RootCA][Outcome=Success][Info=clientAlertSent: CLOSE_NOTIFY] access session terminated when Certificate System acts as clientCopy to Clipboard Copied! Toggle word wrap Toggle overflow
FDP_CRL_EXT.1
Failure to generate a CRL.
FULL_CRL_GENERATION(failure)Test case: as an agent, logging in on a CA agent WebUI portal, clicking on Update Revocation List and under Signature algorithm, selecting
SHA1withRSA. Counting onSHA1withRSAstill being an option in the UI, although no longer allowed.0.CRLIssuingPoint-MasterCRL - [11/May/2023:00:09:42 EDT] [14] [6] [AuditEvent=FULL_CRL_GENERATION][SubjectID=$Unidentified$][Outcome=Failure][FailureReason=Signing algorithm not supported: SHA1withRSA: Unable to create signing context: (-8011) Unknown error] Full CRL generation
0.CRLIssuingPoint-MasterCRL - [11/May/2023:00:09:42 EDT] [14] [6] [AuditEvent=FULL_CRL_GENERATION][SubjectID=$Unidentified$][Outcome=Failure][FailureReason=Signing algorithm not supported: SHA1withRSA: Unable to create signing context: (-8011) Unknown error] Full CRL generationCopy to Clipboard Copied! Toggle word wrap Toggle overflow
FDP_OCSPG_EXT.1 (extended)
Failure to generate certificate status information.
OCSP_GENERATION(failure)Test case: setting
ca.ocsp=falseto disable OCSP service in the CA and runOCSPClient.0.http-nio-31080-exec-1 - [30/Nov/2023:18:50:51 EST] [14] [6] [AuditEvent=OCSP_GENERATION][SubjectID=$NonRoleUser$][Outcome=Failure][FailureReason=OCSP service disabled] OCSP response generation
0.http-nio-31080-exec-1 - [30/Nov/2023:18:50:51 EST] [14] [6] [AuditEvent=OCSP_GENERATION][SubjectID=$NonRoleUser$][Outcome=Failure][FailureReason=OCSP service disabled] OCSP response generationCopy to Clipboard Copied! Toggle word wrap Toggle overflow
FIA_AFL.1
The reaching of the threshold for the Unsuccessful Authentication Attempts. The action Taken. The re-enablement of disabled non-administrative accounts.
Not available. For password authentication only. Certificate System provides certificate-based authentication only.
FIA_CMCS_EXT.1
CMC requests (generated or received) containing certificate requests or revocation requests. CMC responses issued.
CMC_SIGNED_REQUEST_SIG_VERIFYTest case: Removing the
log.instance.SignedAudit.filters.CMC_SIGNED_REQUEST_SIG_VERIFYparameter fromCS.cfgand restarting the CA. Then creating and submitting an agent-signed CMC request, e.g. the procedure for the issuance ofuser1’s certificate under "Testing CRL publishing" in the Installation Guide.0.https-jsse-jss-nio-21443-exec-3 - [25/Nov/2023:16:47:47 PST] [14] [6] [AuditEvent=CMC_SIGNED_REQUEST_SIG_VERIFY][SubjectID=CN=PKI Administrator,E=example@redhat.com,OU=rhcs10-ECC-SubCA,O=Example-rhcs10-ECC-RootCA][Outcome=Success][ReqType=enrollment][CertSubject=CN=ecc test ecc-user1,UID=ecc-ecc-user1][SignerInfo=CN=PKI Administrator,E=example@redhat.com,OU=rhcs10-ECC-SubCA,O=Example-rhcs10-ECC-RootCA] agent signed CMC request signature verification
0.https-jsse-jss-nio-21443-exec-3 - [25/Nov/2023:16:47:47 PST] [14] [6] [AuditEvent=CMC_SIGNED_REQUEST_SIG_VERIFY][SubjectID=CN=PKI Administrator,E=example@redhat.com,OU=rhcs10-ECC-SubCA,O=Example-rhcs10-ECC-RootCA][Outcome=Success][ReqType=enrollment][CertSubject=CN=ecc test ecc-user1,UID=ecc-ecc-user1][SignerInfo=CN=PKI Administrator,E=example@redhat.com,OU=rhcs10-ECC-SubCA,O=Example-rhcs10-ECC-RootCA] agent signed CMC request signature verificationCopy to Clipboard Copied! Toggle word wrap Toggle overflow CMC_USER_SIGNED_REQUEST_SIG_VERIFYSuccessful request:
Test case: submitting a CMC (user-signed or self-signed) certificate enrollment or revocation request and verifying the signature. E.g:
-
Removing the
log.instance.SignedAudit.filters.CMC_SIGNED_REQUEST_SIG_VERIFYparameter fromCS.cfgand restarting the CA. - Then creating and submitting an user-signed (shared token) request, e.g. by following 7.8.4.3 "Test the CMC Shared Token" in the Installation Guide.
0.https-jsse-jss-nio-21443-exec-6 - [25/Nov/2023:17:02:13 PST] [14] [6] [AuditEvent=CMC_USER_SIGNED_REQUEST_SIG_VERIFY][SubjectID=CN=PKI Administrator,E=example@redhat.com,OU=rhcs10-ECC-SubCA,O=Example-rhcs10-ECC-RootCA][Outcome=Success][ReqType=enrollment][CertSubject=CN=eccFooUser123,UID=eccFooUser123,OU=self-signed][SignerInfo=$Unidentified$] User signed CMC request signature verification success
0.https-jsse-jss-nio-21443-exec-6 - [25/Nov/2023:17:02:13 PST] [14] [6] [AuditEvent=CMC_USER_SIGNED_REQUEST_SIG_VERIFY][SubjectID=CN=PKI Administrator,E=example@redhat.com,OU=rhcs10-ECC-SubCA,O=Example-rhcs10-ECC-RootCA][Outcome=Success][ReqType=enrollment][CertSubject=CN=eccFooUser123,UID=eccFooUser123,OU=self-signed][SignerInfo=$Unidentified$] User signed CMC request signature verification successCopy to Clipboard Copied! Toggle word wrap Toggle overflow -
Removing the
CMC_REQUEST_RECEIVEDSuccessful request:
Test case: a successful CMC request using SharedSecret (with
cmc.popLinkWitnessRequired=true).0.https-jsse-jss-nio-21443-exec-8 - [21/Nov/2023:16:49:57 EST] [14] [6] [AuditEvent=CMC_REQUEST_RECEIVED][SubjectID=$Unidentified$][Outcome=Success][CMCRequest=MIIDYgYJKoZIhvcNAQcCoIIDUzCCA08CAQMxDzANBglghkgBZQMEAgEFA…] CMC request received
0.https-jsse-jss-nio-21443-exec-8 - [21/Nov/2023:16:49:57 EST] [14] [6] [AuditEvent=CMC_REQUEST_RECEIVED][SubjectID=$Unidentified$][Outcome=Success][CMCRequest=MIIDYgYJKoZIhvcNAQcCoIIDUzCCA08CAQMxDzANBglghkgBZQMEAgEFA…] CMC request receivedCopy to Clipboard Copied! Toggle word wrap Toggle overflow
PROOF_OF_POSSESSION(Enrollment Event)Test case: a successful CMC request using SharedSecret (with
cmc.popLinkWitnessRequired=true).0.https-jsse-jss-nio-21443-exec-8 - [21/Nov/2023:16:49:57 EST] [14] [6] [AuditEvent=PROOF_OF_POSSESSION][SubjectID=eccFooUser123][Outcome=Success][Info=method=EnrollProfile: fillTaggedRequest: ] proof of possession
0.https-jsse-jss-nio-21443-exec-8 - [21/Nov/2023:16:49:57 EST] [14] [6] [AuditEvent=PROOF_OF_POSSESSION][SubjectID=eccFooUser123][Outcome=Success][Info=method=EnrollProfile: fillTaggedRequest: ] proof of possessionCopy to Clipboard Copied! Toggle word wrap Toggle overflow PROFILE_CERT_REQUEST(Enrollment Event)Test case: a successful CMC request signed and issued by a CA agent (with
cmc.popLinkWitnessRequired=false).0.https-jsse-jss-nio-21443-exec-3 - [21/Nov/2023:16:58:45 EST] [14] [6] [AuditEvent=PROFILE_CERT_REQUEST][SubjectID=caadmin][Outcome=Success][ReqID=87][ProfileID=caECFullCMCUserCert][CertSubject=CN=ecc test ecc-user1,UID=ecc-ecc-user1] certificate request made with certificate profiles
0.https-jsse-jss-nio-21443-exec-3 - [21/Nov/2023:16:58:45 EST] [14] [6] [AuditEvent=PROFILE_CERT_REQUEST][SubjectID=caadmin][Outcome=Success][ReqID=87][ProfileID=caECFullCMCUserCert][CertSubject=CN=ecc test ecc-user1,UID=ecc-ecc-user1] certificate request made with certificate profilesCopy to Clipboard Copied! Toggle word wrap Toggle overflow CERT_STATUS_CHANGE_REQUESTSuccess:
Test case: following the example in "Testing CRL publishing" of the Installation Guide to issue and then revoke certificate for
user2.[AuditEvent=CERT_STATUS_CHANGE_REQUEST_PROCESSED][SubjectID=CN=ecc test ecc-user2,UID=ecc-ecc-user2][Outcome=Success][ReqID=14][CertSerialNum=15390937][RequestType=revoke][RevokeReasonNum=Unspecified][Approval=complete] certificate status change request processed
[AuditEvent=CERT_STATUS_CHANGE_REQUEST_PROCESSED][SubjectID=CN=ecc test ecc-user2,UID=ecc-ecc-user2][Outcome=Success][ReqID=14][CertSerialNum=15390937][RequestType=revoke][RevokeReasonNum=Unspecified][Approval=complete] certificate status change request processedCopy to Clipboard Copied! Toggle word wrap Toggle overflow Failure:
0.https-jsse-nio-31443-exec-5 - [09/May/2023:16:42:56 EDT] [14] [6] [AuditEvent=CERT_STATUS_CHANGE_REQUEST][SubjectID=caadmin][Outcome=Failure][ReqID=<null>][CertSerialNum=0x2c192ac][RequestType=on-hold] certificate revocation/unrevocation request made
0.https-jsse-nio-31443-exec-5 - [09/May/2023:16:42:56 EDT] [14] [6] [AuditEvent=CERT_STATUS_CHANGE_REQUEST][SubjectID=caadmin][Outcome=Failure][ReqID=<null>][CertSerialNum=0x2c192ac][RequestType=on-hold] certificate revocation/unrevocation request madeCopy to Clipboard Copied! Toggle word wrap Toggle overflow
CERT_REQUEST_PROCESSEDSuccessful request:
Test case: compelting certificate status change (revoked, expired, on-hold, off-hold).
0.https-jsse-nio-31443-exec-24 - [28/Apr/2023:09:58:07 EDT] [14] [6] [AuditEvent=CERT_REQUEST_PROCESSED][SubjectID=caadmin][Outcome=Success][ReqID=67][CertSerialNum=86198753] certificate request processed
0.https-jsse-nio-31443-exec-24 - [28/Apr/2023:09:58:07 EDT] [14] [6] [AuditEvent=CERT_REQUEST_PROCESSED][SubjectID=caadmin][Outcome=Success][ReqID=67][CertSerialNum=86198753] certificate request processedCopy to Clipboard Copied! Toggle word wrap Toggle overflow
CERT_STATUS_CHANGE_REQUEST_PROCESSEDSuccessful request:
Test case: completing certificate status change (revoked, expired, on-hold, off-hold).
0.https-jsse-nio-31443-exec-14 - [09/May/2023:17:29:35 EDT] [14] [6] [AuditEvent=CERT_STATUS_CHANGE_REQUEST_PROCESSED][SubjectID=rsa_SubCA_AgentV][Outcome=Success][ReqID=80][CertSerialNum=0x2c192ac][RequestType=<null>][RevokeReasonNum=6][Approval=complete] certificate status change request processed
0.https-jsse-nio-31443-exec-14 - [09/May/2023:17:29:35 EDT] [14] [6] [AuditEvent=CERT_STATUS_CHANGE_REQUEST_PROCESSED][SubjectID=rsa_SubCA_AgentV][Outcome=Success][ReqID=80][CertSerialNum=0x2c192ac][RequestType=<null>][RevokeReasonNum=6][Approval=complete] certificate status change request processedCopy to Clipboard Copied! Toggle word wrap Toggle overflow Failed request:
Completing a revocation,
shrToknot found.Test case:
0.http-bio-20443-exec-14 - [29/Jan/2019:07:15:27 EST] [14] [6] [AuditEvent=CERT_STATUS_CHANGE_REQUEST_PROCESSED][SubjectID=<null>][Outcome=Failure][ReqID=<null>][CertSerialNum=20][RequestType=revoke][RevokeReasonNum=Certificate_Hold][Approval=rejected][Info=CMCOutputTemplate: SharedSecret.getSharedToken(BigInteger serial): shrTok not found in metaInfo] certificate status change request processed
0.http-bio-20443-exec-14 - [29/Jan/2019:07:15:27 EST] [14] [6] [AuditEvent=CERT_STATUS_CHANGE_REQUEST_PROCESSED][SubjectID=<null>][Outcome=Failure][ReqID=<null>][CertSerialNum=20][RequestType=revoke][RevokeReasonNum=Certificate_Hold][Approval=rejected][Info=CMCOutputTemplate: SharedSecret.getSharedToken(BigInteger serial): shrTok not found in metaInfo] certificate status change request processedCopy to Clipboard Copied! Toggle word wrap Toggle overflow Completing a revocation, cert issuer and request issuer do not match.
Test case:
0.http-bio-20443-exec-20 - [29/Jan/2019:07:30:41 EST] [14] [6] [AuditEvent=CERT_STATUS_CHANGE_REQUEST_PROCESSED][SubjectID=UID=user1a,OU=People,DC=rhel76,DC=test][Outcome=Failure][ReqID=<null>][CertSerialNum=20][RequestType=revoke][RevokeReasonNum=Certificate_Hold][Approval=rejected][Info= certificate issuer DN and revocation request issuer DN do not match] certificate status change request processed
0.http-bio-20443-exec-20 - [29/Jan/2019:07:30:41 EST] [14] [6] [AuditEvent=CERT_STATUS_CHANGE_REQUEST_PROCESSED][SubjectID=UID=user1a,OU=People,DC=rhel76,DC=test][Outcome=Failure][ReqID=<null>][CertSerialNum=20][RequestType=revoke][RevokeReasonNum=Certificate_Hold][Approval=rejected][Info= certificate issuer DN and revocation request issuer DN do not match] certificate status change request processedCopy to Clipboard Copied! Toggle word wrap Toggle overflow Completing a revocation, on-hold cert status update.
Test case: following "Testing CRL publishing" in the Installation Guide to revoke a certificate as with
user2in the example, but instead of creating/revoking an actual certificate, just editing the CMC request file so thatrevRequest.serialis assigned a non-existent serial number, e.g.revRequest.serial=1111111.0.https-jsse-jss-nio-21443-exec-12 - [27/Nov/2023:11:34:53 PST] [14] [6] [AuditEvent=CERT_STATUS_CHANGE_REQUEST_PROCESSED][SubjectID=<null>][Outcome=Failure][ReqID=<null>][CertSerialNum=1111111][RequestType=revoke][RevokeReasonNum=Unspecified][Approval=rejected][Info= The certificate is not found] certificate status change request processed
0.https-jsse-jss-nio-21443-exec-12 - [27/Nov/2023:11:34:53 PST] [14] [6] [AuditEvent=CERT_STATUS_CHANGE_REQUEST_PROCESSED][SubjectID=<null>][Outcome=Failure][ReqID=<null>][CertSerialNum=1111111][RequestType=revoke][RevokeReasonNum=Unspecified][Approval=rejected][Info= The certificate is not found] certificate status change request processedCopy to Clipboard Copied! Toggle word wrap Toggle overflow
CMC_RESPONSE_SENTEnrollment
Successful response
Test case: creating a CSR by following Section 5.2, “Creating certificate signing requests (CSR)”, then creating a CMCRequest config file by following Section 5.3.1, “The CMC enrollment process” then submitting the request using
HttpClient.0.https-jsse-nio-31443-exec-8 - [01/May/2023:23:37:50 EDT] [14] [6] [AuditEvent=CMC_RESPONSE_SENT][SubjectID=FooUser123][Outcome=Success][CMCResponse=MIIM+wYJkwWSE/] CMC response sent
0.https-jsse-nio-31443-exec-8 - [01/May/2023:23:37:50 EDT] [14] [6] [AuditEvent=CMC_RESPONSE_SENT][SubjectID=FooUser123][Outcome=Success][CMCResponse=MIIM+wYJkwWSE/] CMC response sentCopy to Clipboard Copied! Toggle word wrap Toggle overflow
Revocation
Successful revocation
Test case: revoking a certificate, for example by following the procedure in Section 6.2.1.1, “Revoking a certificate using
CMCRequest”.0.http-bio-20443-exec-9 - [29/Jan/2019:07:43:36 EST] [14] [6] [AuditEvent=CMC_RESPONSE_SENT][SubjectID=$Unidentified$][Outcome=Success][CMCResponse=MIIExgYJKoZ...] CMC response sent
0.http-bio-20443-exec-9 - [29/Jan/2019:07:43:36 EST] [14] [6] [AuditEvent=CMC_RESPONSE_SENT][SubjectID=$Unidentified$][Outcome=Success][CMCResponse=MIIExgYJKoZ...] CMC response sentCopy to Clipboard Copied! Toggle word wrap Toggle overflow Failed revocation
Revocation does not happen
Test case: revoking a non-existing certificate, for example by following the procedure in Section 6.2.1.1, “Revoking a certificate using
CMCRequest”.0.https-jsse-nio-31443-exec-8 - [01/May/2023:23:37:50 EDT] [14] [6] [AuditEvent=CMC_RESPONSE_SENT][SubjectID=FooUser123][Outcome=Success][CMCResponse=MIIM+wYJKoZIh…] CMC response sent
0.https-jsse-nio-31443-exec-8 - [01/May/2023:23:37:50 EDT] [14] [6] [AuditEvent=CMC_RESPONSE_SENT][SubjectID=FooUser123][Outcome=Success][CMCResponse=MIIM+wYJKoZIh…] CMC response sentCopy to Clipboard Copied! Toggle word wrap Toggle overflow
FPT_SKY_EXT.1(2)/OTH
AUTHZFailure: Agent user attempts to retrieve audit log:
Test case: # pki -d /root/.dogtag/pki_rsa_bootstrap/certs_db/ -c SECret.123 -p 31443 -n 'rsa_SubCA_AdminV' ca-audit-file-find.
0.https-jsse-nio-31443-exec-24 - [03/May/2023:08:30:38 EDT] [14] [6] [AuditEvent=AUTHZ][SubjectID=rsa_SubCA_AdminV][Outcome=Failure][aclResource=certServer.log.content.signedAudit][Op=read][Info=Authorization Error] authorization failure
0.https-jsse-nio-31443-exec-24 - [03/May/2023:08:30:38 EDT] [14] [6] [AuditEvent=AUTHZ][SubjectID=rsa_SubCA_AdminV][Outcome=Failure][aclResource=certServer.log.content.signedAudit][Op=read][Info=Authorization Error] authorization failureCopy to Clipboard Copied! Toggle word wrap Toggle overflow Success: Auditor user retrieved audit log:
Test case: # pki -d /root/.dogtag/pki_rsa_bootstrap/certs_db/ -c SECret.123 -p 31443 -n 'rsa_SubCA_AuditV' ca-audit-file-find.
0.https-jsse-nio-31443-exec-5 - [03/May/2023:08:31:11 EDT] [14] [6] [AuditEvent=AUTHZ][SubjectID=rsa_SubCA_AuditV][Outcome=Success][aclResource=certServer.log.content.signedAudit][Op=read][Info=AuditResource.findAuditFiles] authorization success
0.https-jsse-nio-31443-exec-5 - [03/May/2023:08:31:11 EDT] [14] [6] [AuditEvent=AUTHZ][SubjectID=rsa_SubCA_AuditV][Outcome=Success][aclResource=certServer.log.content.signedAudit][Op=read][Info=AuditResource.findAuditFiles] authorization successCopy to Clipboard Copied! Toggle word wrap Toggle overflow
FTP_ITC.1
Initiation of the trusted channel. Termination of the trusted channel. Failure of the trusted channel functions.
- See FCS_HTTPS_EXT.1
- See FCS_TLSC_EXT.2
E.2. Audit Event Descriptions
This section provides descriptions to audit events.
For required audit events and their examples, see Section E.1, “Required audit events and their examples”.
E.2.1. TOE Environment audit events
This section provides the format description of TOE (Target of Evaluation) Environment audit events.
E.2.2. Operational Environment audit events
For Operational Environment audit events format descriptions, please see https://access.redhat.com/articles/4409591. In addition, for events relevant to RHCS, please reference "Enable OS-level audit logs" in the Installation Guide.
Appendix F. Glossary
F.1. A
- access control
- The process of controlling what particular users are allowed to do. For example, access control to servers is typically based on an identity, established by a password or a certificate, and on rules regarding what that entity can do. See also ???TITLE???.
- access control instructions (ACI)
- An access rule that specifies how subjects requesting access are to be identified or what rights are allowed or denied for a particular subject. See ???TITLE???.
- access control list (ACL)
- A collection of access control entries that define a hierarchy of access rules to be evaluated when a server receives a request for access to a particular resource. See ???TITLE???.
- administrator
- The person who installs and configures one or more Certificate System managers and sets up privileged users, or agents, for them. See also ???TITLE???.
- Advanced Encryption Standard (AES)
- The Advanced Encryption Standard (AES), like its predecessor Data Encryption Standard (DES), is a FIPS-approved symmetric-key encryption standard. AES was adopted by the US government in 2002. It defines three block ciphers, AES-128, AES-192 and AES-256. The National Institute of Standards and Technology (NIST) defined the AES standard in U.S. FIPS PUB 197. For more information, see http://csrc.nist.gov/publications/fips/fips197/fips-197.pdf.
- agent
- A user who belongs to a group authorized to manage ???TITLE??? for a Certificate System manager. See also ???TITLE???, ???TITLE???.
- agent-approved enrollment
- An enrollment that requires an agent to approve the request before the certificate is issued.
- agent services
- Services that can be administered by a Certificate System ???TITLE??? through HTML pages served by the Certificate System subsystem for which the agent has been assigned the necessary privileges.
- The HTML pages for administering such services.
- APDU
- Application protocol data unit. A communication unit (analogous to a byte) that is used in communications between a smart card and a smart card reader.
- attribute value assertion (AVA)
-
An assertion of the form attribute = value, where attribute is a tag, such as
o(organization) oruid(user ID), and value is a value such as "Red Hat, Inc." or a login name. AVAs are used to form the ???TITLE??? that identifies the subject of a certificate, called the ???TITLE??? of the certificate.
- audit log
- A log that records various system events. This log can be signed, providing proof that it was not tampered with, and can only be read by an auditor user.
- auditor
- A privileged user who can view the signed audit logs.
- authentication
- Confident identification; assurance that a party to some computerized transaction is not an impostor. Authentication typically involves the use of a password, certificate, PIN, or other information to validate identity over a computer network. See also ???TITLE???, ???TITLE???, ???TITLE???, ???TITLE???.
- authentication module
- A set of rules (implemented as a Java™ class) for authenticating an end entity, agent, administrator, or any other entity that needs to interact with a Certificate System subsystem. In the case of typical end-user enrollment, after the user has supplied the information requested by the enrollment form, the enrollment servlet uses an authentication module associated with that form to validate the information and authenticate the user’s identity. See ???TITLE???.
- authorization
- Permission to access a resource controlled by a server. Authorization typically takes place after the ACLs associated with a resource have been evaluated by a server. See ???TITLE???.
- automated enrollment
- A way of configuring a Certificate System subsystem that allows automatic authentication for end-entity enrollment, without human intervention. With this form of authentication, a certificate request that completes authentication module processing successfully is automatically approved for profile processing and certificate issuance.
F.2. B
- bind DN
- A user ID, in the form of a distinguished name (DN), used with a password to authenticate to Red Hat Directory Server.
F.3. C
- CA certificate
- A certificate that identifies a certificate authority. See also ???TITLE???, ???TITLE???, ???TITLE???.
- CA hierarchy
- A hierarchy of CAs in which a root CA delegates the authority to issue certificates to subordinate CAs. Subordinate CAs can also expand the hierarchy by delegating issuing status to other CAs. See also ???TITLE???, ???TITLE???, ???TITLE???.
- CA server key
- The SSL server key of the server providing a CA service.
- CA signing key
- The private key that corresponds to the public key in the CA certificate. A CA uses its signing key to sign certificates and CRLs.
- certificate
- Digital data, formatted according to the X.509 standard, that specifies the name of an individual, company, or other entity (the ???TITLE??? of the certificate) and certifies that a ???TITLE???, which is also included in the certificate, belongs to that entity. A certificate is issued and digitally signed by a ???TITLE???. A certificate’s validity can be verified by checking the CA’s ???TITLE??? through ???TITLE??? techniques. To be trusted within a ???TITLE???, a certificate must be issued and signed by a CA that is trusted by other entities enrolled in the PKI.
- certificate authority (CA)
- A trusted entity that issues a ???TITLE??? after verifying the identity of the person or entity the certificate is intended to identify. A CA also renews and revokes certificates and generates CRLs. The entity named in the issuer field of a certificate is always a CA. Certificate authorities can be independent third parties or a person or organization using certificate-issuing server software, such as Red Hat Certificate System.
- certificate-based authentication
- Authentication based on certificates and public-key cryptography. See also ???TITLE???.
- certificate chain
- A hierarchical series of certificates signed by successive certificate authorities. A CA certificate identifies a ???TITLE??? and is used to sign certificates issued by that authority. A CA certificate can in turn be signed by the CA certificate of a parent CA, and so on up to a ???TITLE???. Certificate System allows any end entity to retrieve all the certificates in a certificate chain.
- certificate extensions
- An X.509 v3 certificate contains an extensions field that permits any number of additional fields to be added to the certificate. Certificate extensions provide a way of adding information such as alternative subject names and usage restrictions to certificates. A number of standard extensions have been defined by the PKIX working group.
- certificate fingerprint
- A ???TITLE??? associated with a certificate. The number is not part of the certificate itself, but is produced by applying a hash function to the contents of the certificate. If the contents of the certificate changes, even by a single character, the same function produces a different number. Certificate fingerprints can therefore be used to verify that certificates have not been tampered with.
- Certificate Management Messages over Cryptographic Message Syntax (CMC)
- Message format used to convey a request for a certificate to a Certificate Manager. A proposed standard from the Internet Engineering Task Force (IETF) PKIX working group. For detailed information, see https://tools.ietf.org/html/draft-ietf-pkix-cmc-02.
- Certificate Management Message Formats (CMMF)
- Message formats used to convey certificate requests and revocation requests from end entities to a Certificate Manager and to send a variety of information to end entities. A proposed standard from the Internet Engineering Task Force (IETF) PKIX working group. CMMF is subsumed by another proposed standard, ???TITLE???. For detailed information, see https://tools.ietf.org/html/draft-ietf-pkix-cmmf-02.
- Certificate Manager
- An independent Certificate System subsystem that acts as a certificate authority. A Certificate Manager instance issues, renews, and revokes certificates, which it can publish along with CRLs to an LDAP directory. It accepts requests from end entities. See ???TITLE???.
- Certificate Manager agent
- A user who belongs to a group authorized to manage agent services for a Certificate Manager. These services include the ability to access and modify (approve and reject) certificate requests and issue certificates.
- certificate profile
- A set of configuration settings that defines a certain type of enrollment. The certificate profile sets policies for a particular type of enrollment along with an authentication method in a certificate profile.
- Certificate Request Message Format (CRMF)
- Format used for messages related to management of X.509 certificates. This format is a subset of CMMF. See also ???TITLE???. For detailed information, see https://tools.ietf.org/html/rfc2511.
- certificate revocation list (CRL)
- As defined by the X.509 standard, a list of revoked certificates by serial number, generated and signed by a ???TITLE???.
- Certificate System
- See ???TITLE???, ???TITLE???.
- Certificate System subsystem
- One of the five Certificate System managers: ???TITLE???, Online Certificate Status Manager, ???TITLE???, Token Key Service, or Token Processing System.
- Certificate System console
- A console that can be opened for any single Certificate System instance. A Certificate System console allows the Certificate System administrator to control configuration settings for the corresponding Certificate System instance.
- chain of trust
- See ???TITLE???.
- chained CA
- See ???TITLE???.
- cipher
- See ???TITLE???.
- client authentication
- The process of identifying a client to a server, such as with a name and password or with a certificate and some digitally signed data. See ???TITLE???, ???TITLE???, ???TITLE???.
- client SSL certificate
- A certificate used to identify a client to a server using the SSL protocol. See ???TITLE???.
- CMC
- See ???TITLE???.
- CMC Enrollment
- Features that allow either signed enrollment or signed revocation requests to be sent to a Certificate Manager using an agent’s signing certificate. These requests are then automatically processed by the Certificate Manager.
- CMMF
- See ???TITLE???.
- CRL
- See ???TITLE???.
- cross-pair certificate
- A certificate issued by one CA to another CA which is then stored by both CAs to form a circle of trust. The two CAs issue certificates to each other, and then store both cross-pair certificates as a certificate pair.
- CRMF
- See ???TITLE???.
- cross-certification
- The exchange of certificates by two CAs in different certification hierarchies, or chains. Cross-certification extends the chain of trust so that it encompasses both hierarchies. See also ???TITLE???.
- cryptographic algorithm
- A set of rules or directions used to perform cryptographic operations such as ???TITLE??? and ???TITLE???.
- Cryptographic Message Syntax (CS)
- The syntax used to digitally sign, digest, authenticate, or encrypt arbitrary messages, such as CMMF.
- cryptographic module
- See ???TITLE???.
- cryptographic service provider (CSP)
- A cryptographic module that performs cryptographic services, such as key generation, key storage, and encryption, on behalf of software that uses a standard interface such as that defined by PKCS #11 to request such services.
- CSP
- See ???TITLE???.
F.4. D
- Key Recovery Authority
- An optional, independent Certificate System subsystem that manages the long-term archival and recovery of RSA encryption keys for end entities. A Certificate Manager can be configured to archive end entities' encryption keys with a Key Recovery Authority before issuing new certificates. The Key Recovery Authority is useful only if end entities are encrypting data, such as sensitive email, that the organization may need to recover someday. It can be used only with end entities that support dual key pairs: two separate key pairs, one for encryption and one for digital signatures.
- Key Recovery Authority agent
- A user who belongs to a group authorized to manage agent services for a Key Recovery Authority, including managing the request queue and authorizing recovery operation using HTML-based administration pages.
- Key Recovery Authority recovery agent
- One of the m of n people who own portions of the storage key for the ???TITLE???.
- Key Recovery Authority storage key
- Special key used by the Key Recovery Authority to encrypt the end entity’s encryption key after it has been decrypted with the Key Recovery Authority’s private transport key. The storage key never leaves the Key Recovery Authority.
- Key Recovery Authority transport certificate
- Certifies the public key used by an end entity to encrypt the entity’s encryption key for transport to the Key Recovery Authority. The Key Recovery Authority uses the private key corresponding to the certified public key to decrypt the end entity’s key before encrypting it with the storage key.
- decryption
- Unscrambling data that has been encrypted. See ???TITLE???.
- delta CRL
- A CRL containing a list of those certificates that have been revoked since the last full CRL was issued.
- digital ID
- See ???TITLE???.
- digital signature
- To create a digital signature, the signing software first creates a ???TITLE??? from the data to be signed, such as a newly issued certificate. The one-way hash is then encrypted with the private key of the signer. The resulting digital signature is unique for each piece of data signed. Even a single comma added to a message changes the digital signature for that message. Successful decryption of the digital signature with the signer’s public key and comparison with another hash of the same data provides ???TITLE???. Verification of the ???TITLE??? for the certificate containing the public key provides authentication of the signer. See also ???TITLE???, ???TITLE???.
- distribution points
- Used for CRLs to define a set of certificates. Each distribution point is defined by a set of certificates that are issued. A CRL can be created for a particular distribution point.
- distinguished name (DN)
- A series of AVAs that identify the subject of a certificate. See ???TITLE???.
- dual key pair
- Two public-private key pairs, four keys altogether, corresponding to two separate certificates. The private key of one pair is used for signing operations, and the public and private keys of the other pair are used for encryption and decryption operations. Each pair corresponds to a separate ???TITLE???. See also ???TITLE???, ???TITLE???, ???TITLE???.
F.5. E
- eavesdropping
- Surreptitious interception of information sent over a network by an entity for which the information is not intended.
- Elliptic Curve Cryptography (ECC)
- A cryptographic algorithm which uses elliptic curves to create additive logarithms for the mathematical problems which are the basis of the cryptographic keys. ECC ciphers are more efficient to use than RSA ciphers and, because of their intrinsic complexity, are stronger at smaller bits than RSA ciphers.
- encryption
- Scrambling information in a way that disguises its meaning. See ???TITLE???.
- encryption key
- A private key used for encryption only. An encryption key and its equivalent public key, plus a ???TITLE??? and its equivalent public key, constitute a ???TITLE???.
- enrollment
- The process of requesting and receiving an X.509 certificate for use in a ???TITLE???. Also known as registration.
- end entity
- In a ???TITLE???, a person, router, server, or other entity that uses a ???TITLE??? to identify itself.
- extensions field
- See ???TITLE???.
F.6. F
- Federal Bridge Certificate Authority (FBCA)
- A configuration where two CAs form a circle of trust by issuing cross-pair certificates to each other and storing the two cross-pair certificates as a single certificate pair.
- fingerprint
- See ???TITLE???.
- FIPS PUBS 140
- Federal Information Standards Publications (FIPS PUBS) 140 is a US government standard for implementations of cryptographic modules, hardware or software that encrypts and decrypts data or performs other cryptographic operations, such as creating or verifying digital signatures. Many products sold to the US government must comply with one or more of the FIPS standards. See http://www.nist.gov/itl/fipscurrent.cfm.
- firewall
- A system or combination of systems that enforces a boundary between two or more networks.
F.7. H
- Hypertext Transport Protocol (HTTP) and Hypertext Transport Protocol Secure (HTTPS)
- Protocols used to communicate with web servers. HTTPS consists of communication over HTTP (Hypertext Transfer Protocol) within a connection encrypted by Transport Layer Security (TLS). The main purpose of HTTPS is authentication of the visited website and protection of privacy and integrity of the exchanged data.
F.8. I
- impersonation
- The act of posing as the intended recipient of information sent over a network. Impersonation can take two forms: ???TITLE??? and ???TITLE???.
- input
- In the context of the certificate profile feature, it defines the enrollment form for a particular certificate profile. Each input is set, which then dynamically creates the enrollment form from all inputs configured for this enrollment.
- intermediate CA
- A CA whose certificate is located between the root CA and the issued certificate in a ???TITLE???.
- IP spoofing
- The forgery of client IP addresses.
- IPv4 and IPv6
- Certificate System supports both IPv4 and IPv6 address namespaces for communications and operations with all subsystems and tools, as well as for clients, subsystem creation, and token and certificate enrollment.
F.9. J
- JAR file
- A digital envelope for a compressed collection of files organized according to the ???TITLE???.
- Java™ archive (JAR) format
- A set of conventions for associating digital signatures, installer scripts, and other information with files in a directory.
- Java™ Cryptography Architecture (JCA)
- The API specification and reference developed by Sun Microsystems for cryptographic services. See http://java.sun.com/products/jdk/1.2/docs/guide/security/CryptoSpec.Introduction.
- Java™ Development Kit (JDK)
- Software development kit provided by Sun Microsystems for developing applications and applets using the Java™ programming language.
- Java™ Native Interface (JNI)
- A standard programming interface that provides binary compatibility across different implementations of the Java™ Virtual Machine (JVM) on a given platform, allowing existing code written in a language such as C or C++ for a single platform to bind to Java™. See http://java.sun.com/products/jdk/1.2/docs/guide/jni/index.html.
- Java™ Security Services (JSS)
- A Java™ interface for controlling security operations performed by Network Security Services (NSS).
F.10. K
- KEA
- See ???TITLE???.
- key
- A large number used by a ???TITLE??? to encrypt or decrypt data. A person’s ???TITLE???, for example, allows other people to encrypt messages intended for that person. The messages must then be decrypted by using the corresponding ???TITLE???.
- key exchange
- A procedure followed by a client and server to determine the symmetric keys they will both use during an SSL session.
- Key Exchange Algorithm (KEA)
- An algorithm used for key exchange by the US Government.
- KEYGEN tag
- An HTML tag that generates a key pair for use with a certificate.
F.11. L
- Lightweight Directory Access Protocol (LDAP)
- A directory service protocol designed to run over TCP/IP and across multiple platforms. LDAP is a simplified version of Directory Access Protocol (DAP), used to access X.500 directories. LDAP is under IETF change control and has evolved to meet Internet requirements.
- linked CA
- An internally deployed ???TITLE??? whose certificate is signed by a public, third-party CA. The internal CA acts as the root CA for certificates it issues, and the third- party CA acts as the root CA for certificates issued by other CAs that are linked to the same third-party root CA. Also known as "chained CA" and by other terms used by different public CAs.
F.12. M
- manual authentication
- A way of configuring a Certificate System subsystem that requires human approval of each certificate request. With this form of authentication, a servlet forwards a certificate request to a request queue after successful authentication module processing. An agent with appropriate privileges must then approve each request individually before profile processing and certificate issuance can proceed.
- MD5
- A message digest algorithm that was developed by Ronald Rivest. See also ???TITLE???.
- message digest
- See ???TITLE???.
- misrepresentation
- The presentation of an entity as a person or organization that it is not. For example, a website might pretend to be a furniture store when it is really a site that takes credit-card payments but never sends any goods. Misrepresentation is one form of ???TITLE???. See also ???TITLE???.
F.13. N
- Network Security Services (NSS)
- A set of libraries designed to support cross-platform development of security-enabled communications applications. Applications built using the NSS libraries support the ???TITLE??? protocol for authentication, tamper detection, and encryption, and the PKCS #11 protocol for cryptographic token interfaces. NSS is also available separately as a software development kit.
- nonrepudiation
- The inability by the sender of a message to deny having sent the message. A ???TITLE??? provides one form of nonrepudiation.
- non-TMS
- Non-token management system. Refers to a configuration of subsystems (the CA and, optionally, KRA and OCSP) which do not handle smart cards directly. See also ???TITLE???.
F.14. O
- object signing
- A method of file signing that allows software developers to sign Java code, JavaScript scripts, or any kind of file and allows users to identify the signers and control access by signed code to local system resources.
- object-signing certificate
- A certificate whose associated private key is used to sign objects; related to ???TITLE???.
- OCSP
- Online Certificate Status Protocol.
- one-way hash
- A number of fixed-length generated from data of arbitrary length with the aid of a hashing algorithm. The number, also called a message digest, is unique to the hashed data. Any change in the data, even deleting or altering a single character, results in a different value.
- The content of the hashed data cannot be deduced from the hash.
- operation
- The specific operation, such as read or write, that is being allowed or denied in an access control instruction.
- output
- In the context of the certificate profile feature, it defines the resulting form from a successful certificate enrollment for a particular certificate profile. Each output is set, which then dynamically creates the form from all outputs configured for this enrollment.
F.15. P
- password-based authentication
- Confident identification by means of a name and password. See also ???TITLE???, ???TITLE???.
- PKCS #7
- The public-key cryptography standard that governs signing and encryption.
- PKCS #10
- The public-key cryptography standard that governs certificate requests.
- PKCS #11
- The public-key cryptography standard that governs cryptographic tokens such as smart cards.
- PKCS #11 module
- A driver for a cryptographic device that provides cryptographic services, such as encryption and decryption, through the PKCS #11 interface. A PKCS #11 module, also called a cryptographic module or cryptographic service provider, can be implemented in either hardware or software. A PKCS #11 module always has one or more slots, which may be implemented as physical hardware slots in some form of physical reader, such as for smart cards, or as conceptual slots in software. Each slot for a PKCS #11 module can in turn contain a token, which is the hardware or software device that actually provides cryptographic services and optionally stores certificates and keys. Red Hat provides a built-in PKCS #11 module with Certificate System.
- PKCS #12
- The public-key cryptography standard that governs key portability.
- private key
- One of a pair of keys used in public-key cryptography. The private key is kept secret and is used to decrypt data encrypted with the corresponding ???TITLE???.
- proof-of-archival (POA)
- Data signed with the private Key Recovery Authority transport key that contains information about an archived end-entity key, including key serial number, name of the Key Recovery Authority, ???TITLE??? of the corresponding certificate, and date of archival. The signed proof-of-archival data are the response returned by the Key Recovery Authority to the Certificate Manager after a successful key archival operation. See also ???TITLE???.
- public key
- One of a pair of keys used in public-key cryptography. The public key is distributed freely and published as part of a ???TITLE???. It is typically used to encrypt data sent to the public key’s owner, who then decrypts the data with the corresponding ???TITLE???.
- public-key cryptography
- A set of well-established techniques and standards that allow an entity to verify its identity electronically or to sign and encrypt electronic data. Two keys are involved, a public key and a private key. A ???TITLE??? is published as part of a certificate, which associates that key with a particular identity. The corresponding private key is kept secret. Data encrypted with the public key can be decrypted only with the private key.
- public-key infrastructure (PKI)
- The standards and services that facilitate the use of public-key cryptography and X.509 v3 certificates in a networked environment.
F.16. R
- RC2, RC4
- Cryptographic algorithms developed for RSA Data Security by Rivest. See also ???TITLE???.
- Red Hat Certificate System
- A highly configurable set of software components and tools for creating, deploying, and managing certificates. Certificate System is comprised of five major subsystems that can be installed in different Certificate System instances in different physical locations: ???TITLE???, Online Certificate Status Manager, ???TITLE???, Token Key Service, and Token Processing System.
- registration
- See ???TITLE???.
- root CA
- The ???TITLE??? with a self-signed certificate at the top of a certificate chain. See also ???TITLE???, ???TITLE???.
- RSA algorithm
- Short for Rivest-Shamir-Adleman, a public-key algorithm for both encryption and authentication. It was developed by Ronald Rivest, Adi Shamir, and Leonard Adleman and introduced in 1978.
- RSA key exchange
- A key-exchange algorithm for SSL based on the RSA algorithm.
F.17. S
- sandbox
- A Java™ term for the carefully defined limits within which Java™ code must operate.
- Simple Certificate Enrollment Protocol (SCEP)
- A protocol designed by Cisco to specify a way for a router to communicate with a CA for router certificate enrollment. Certificate System supports SCEP’s CA mode of operation, where the request is encrypted with the CA signing certificate.
- secure channel
- A security association between the TPS and the smart card which allows encrypted communciation based on a shared master key generated by the TKS and the smart card APDUs.
- Secure Sockets Layer (SSL)
- A protocol that allows mutual authentication between a client and server and the establishment of an authenticated and encrypted connection. SSL runs above TCP/IP and below HTTP, LDAP, IMAP, NNTP, and other high-level network protocols.
- security domain
- A centralized repository or inventory of PKI subsystems. Its primary purpose is to facilitate the installation and configuration of new PKI services by automatically establishing trusted relationships between subsystems.
- Security-Enhanced Linux (SELinux)
- Security-enhanced Linux (SELinux) is a set of security protocols enforcing mandatory access control on Linux system kernels. SELinux was developed by the United States National Security Agency to keep applications from accessing confidential or protected files through lenient or flawed access controls.
- self tests
- A feature that tests a Certificate System instance both when the instance starts up and on-demand.
- server authentication
- The process of identifying a server to a client. See also ???TITLE???.
- server SSL certificate
- A certificate used to identify a server to a client using the ???TITLE??? protocol.
- servlet
- Java™ code that handles a particular kind of interaction with end entities on behalf of a Certificate System subsystem. For example, certificate enrollment, revocation, and key recovery requests are each handled by separate servlets.
- SHA
- Secure Hash Algorithm, a hash function used by the US government.
- signature algorithm
- A cryptographic algorithm used to create digital signatures. Certificate System supports the MD5 and ???TITLE??? signing algorithms. See also ???TITLE???, ???TITLE???.
- signed audit log
- See ???TITLE???.
- signing certificate
- A certificate whose public key corresponds to a private key used to create digital signatures. For example, a Certificate Manager must have a signing certificate whose public key corresponds to the private key it uses to sign the certificates it issues.
- signing key
- A private key used for signing only. A signing key and its equivalent public key, plus an ???TITLE??? and its equivalent public key, constitute a ???TITLE???.
- single sign-on
- In Certificate System, a password that simplifies the way to sign on to Red Hat Certificate System by storing the passwords for the internal database and tokens. Each time a user logs on, he is required to enter this single password.
- The ability for a user to log in once to a single computer and be authenticated automatically by a variety of servers within a network. Partial single sign-on solutions can take many forms, including mechanisms for automatically tracking passwords used with different servers. Certificates support single sign-on within a ???TITLE???. A user can log in once to a local client’s private-key database and, as long as the client software is running, rely on ???TITLE??? to access each server within an organization that the user is allowed to access.
- slot
- The portion of a ???TITLE???, implemented in either hardware or software, that contains a ???TITLE???.
- smart card
- A small device that contains a microprocessor and stores cryptographic information, such as keys and certificates, and performs cryptographic operations. Smart cards implement some or all of the ???TITLE??? interface.
- spoofing
-
Pretending to be someone else. For example, a person can pretend to have the email address
jdoe@example.comor a computer can identify itself as a site calledwww.redhat.comwhen it is not. Spoofing is one form of ???TITLE???. See also ???TITLE???.
- SSL
- See ???TITLE???.
- subject
- The entity identified by a ???TITLE???. In particular, the subject field of a certificate contains a ???TITLE??? that uniquely describes the certified entity.
- subject name
- A ???TITLE??? that uniquely describes the ???TITLE??? of a ???TITLE???.
- subordinate CA
- A certificate authority whose certificate is signed by another subordinate CA or by the root CA. See ???TITLE???, ???TITLE???.
- symmetric encryption
- An encryption method that uses the same cryptographic key to encrypt and decrypt a given message.
F.18. T
- tamper detection
- A mechanism ensuring that data received in electronic form entirely corresponds with the original version of the same data.
- token
- A hardware or software device that is associated with a ???TITLE??? in a ???TITLE???. It provides cryptographic services and optionally stores certificates and keys.
- token key service (TKS)
- A subsystem in the token management system which derives specific, separate keys for every smart card based on the smart card APDUs and other shared information, like the token CUID.
- token management system (TMS)
- The interrelated subsystems — CA, TKS, TPS, and, optionally, the KRA - which are used to manage certificates on smart cards (tokens).
- transport layer security (TLS)
- A set of rules governing server authentication, client authentication, and encrypted communication between servers and clients.
- token processing system (TPS)
- A subsystem which interacts directly the Enterprise Security Client and smart cards to manage the keys and certificates on those smart cards.
- tree hierarchy
- The hierarchical structure of an LDAP directory.
- trust
- Confident reliance on a person or other entity. In a ???TITLE???, trust refers to the relationship between the user of a certificate and the ???TITLE??? that issued the certificate. If a CA is trusted, then valid certificates issued by that CA can be trusted.
F.19. U
- UTF-8
- The certificate enrollment pages support all UTF-8 characters for specific fields (common name, organizational unit, requester name, and additional notes). The UTF-8 strings are searchable and correctly display in the CA, OCSP, and KRA end user and agents services pages. However, the UTF-8 support does not extend to internationalized domain names, such as those used in email addresses.
F.20. V
- virtual private network (VPN)
- A way of connecting geographically distant divisions of an enterprise. The VPN allows the divisions to communicate over an encrypted channel, allowing authenticated, confidential transactions that would normally be restricted to a private network.
F.21. X
- X.509 version 1 and version 3
- Digital certificate formats recommended by the International Telecommunications Union (ITU).