Installation Guide
Installing Red Hat CodeReady Studio
Abstract
Making open source more inclusive
Red Hat is committed to replacing problematic language in our code, documentation, and web properties. We are beginning with these four terms: master, slave, blacklist, and whitelist. Because of the enormity of this endeavor, these changes will be implemented gradually over several upcoming releases. For more details, see our CTO Chris Wright’s message.
Chapter 1. Minimal requirements
CodeReady Studio 12.21.3 is compatible with a range of operating systems, architectures, and Java Development Kit combinations. For a complete list, see Supported Configurations and Components.
Hardware requirements
2 GB RAM
- 4 GB RAM is strongly recommended.
- 2 GB hard disk space
Software requirements
OpenJDK is installed.
- Red Hat OpenJDK is strongly recommended.
Operating system requirements
For Linux (x86_64)
- Red Hat Enterprise Linux 7 or 8
- Fedora 34 or 35
- Ubuntu 20.04 LTS or 21.10
For Windows (x86_64)
- Microsoft Windows 8 or 10
For macOS (x86_64)
- Catalina (10.15), Big Sur (11.00), or Monterey (12.0)
On Windows: If you want the CodeReady Studio instance to be available to all users, install it in a folder accessible to all users (C:\codereadystudio). If it is not possible for the given user to write this main installation folder, any newly installed features and updates will be saved inside the home directory of the user.
Chapter 2. Installing OpenJDK
The following sections describe how to install OpenJDK on Microsoft Windows and Red Hat Enterprise Linux (RHEL).
2.1. Installing OpenJDK on Windows
The following section describes how to install OpenJDK 11 on Windows using the MSI-based installer.
Procedure
- Download the MSI-based Installer from the Red Hat Developer Portal.
- Run the installer and follow the on-screen installation instructions.
- Configure CodeReady Studio to use OpenJDK by following the instructions for Working with Java Runtime Environments.
2.1.1. Additional resources
- For more information on how to install OpenJDK 11, see the Installing and Using OpenJDK 11 for Windows Guide.
2.2. Installing OpenJDK on RHEL
The following section describes how to install OpenJDK 11 on RHEL.
Prerequisites
-
Rootaccess. A registered system with attached subscriptions.
For more information, see the Registering the system and managing subscriptions Guide.
Procedure
To install OpenJDK RPMs, run:
yum install java-11-openjdk-devel
# yum install java-11-openjdk-develCopy to Clipboard Copied! Toggle word wrap Toggle overflow
Optionally, you can install the java-11-openjdk-src and the java-11-openjdk-demo packages. The java-11-openjdk-src package contains the complete OpenJDK 11 class library source code you can use with IDE indexers and debuggers. The java-11-openjdk-demo package contains Java runtimes for OpenJDK (demos and examples).
To install java-11-openjdk-demo and java-11-openjdk-src, run:
yum install java-11-openjdk-src java-11-openjdk-demo
# yum install java-11-openjdk-src java-11-openjdk-demoCopy to Clipboard Copied! Toggle word wrap Toggle overflow
Troubleshooting
If you encounter the following error message while attempting to log in to the OpenShift cluster, configure your Java to use TLSv1.2. This problem only occurs in Java JDK versions prior to Java 11.0.7 and OpenShift cluster 4.4.0 or higher.
Unable to execute request to request url https://<openshift-cluster-oauth-authorization-server>
To configure Java to use TLSv1.2:
-
Open the file
codereadystudio.inilocated in thestudiodirectory inside of the CodeReady Studio installation directory. Add the following line under the
-vmargssection:`-Djdk.tls.client.protocols=TLSv1.2`
`-Djdk.tls.client.protocols=TLSv1.2`Copy to Clipboard Copied! Toggle word wrap Toggle overflow
-
Open the file
2.2.1. Additional resources
- For more information on how to install, run, and switch between two parallel installed major OpenJDK versions on RHEL8, see How to install Java 8 and 11 on Red Hat Enterprise Linux 8.
Chapter 3. Installing CodeReady Studio
The following section describes how to install CodeReady Studio:
Note that you can have multiple versions of CodeReady Studio installed on your system with Installer or Eclipse, provided you have these versions located in different directories.
3.1. Installing CodeReady Studio in Eclipse
CodeReady Studio for Eclipse packages the CodeReady Studio plug-ins for your existing Eclipse instance.
You can install CodeReady Studio from Eclipse Marketplace when you are online. This installation method is referred to as Bring Your Own Eclipse (BYOE).
Alternatively, you can use the Update Site Zip to install CodeReady Studio when you are offline.
The following sections describe how to install CodeReady Studio when online and offline.
3.1.1. Installing CodeReady Studio in Eclipse when online
The following section describes how to install CodeReady Studio BYOE from Eclipse Marketplace.
Procedure
- Start the Eclipse IDE.
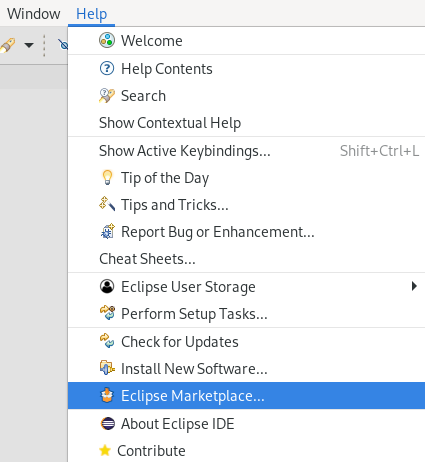
Click → .
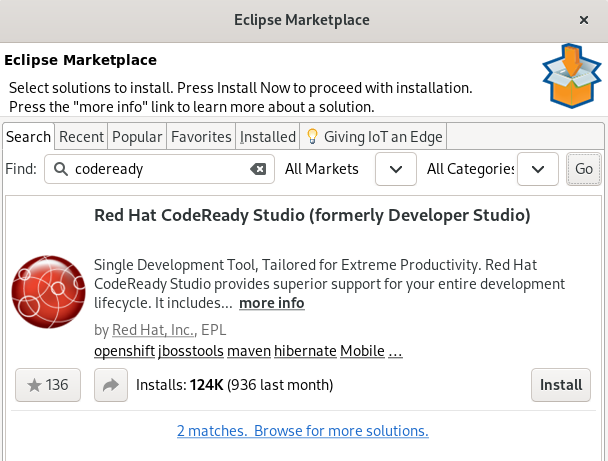
The Eclipse Marketplace window appears.
Locate Red Hat CodeReady Studio 12.21.3 GA.
- Click .
Follow the on-screen instructions to complete the installation process.
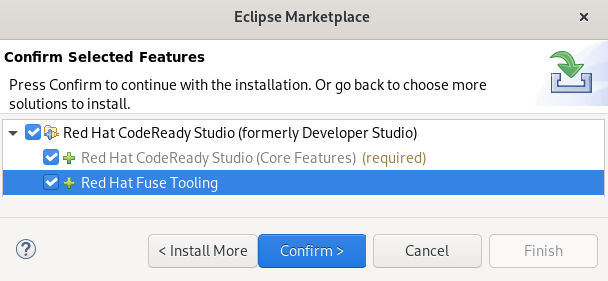
ImportantWhen prompted to select additional features to install, select the Fuse Tooling feature for creating, testing, and debugging integration applications.
If you receive warnings about installing unsigned content, review the details of the content and, if satisfied, click to continue with the installation.
Restart Eclipse.
When prompted to restart the Eclipse IDE, click . Note that the changes do not take effect until you restart Eclipse.
3.1.2. Installing CodeReady Studio in Eclipse when offline
The following section describes how to install CodeReady Studio with the Update Site Zip.
Prerequisites
- Download the Red Hat CodeReady Studio 12.21.3 Update Site Zip from the Red Hat Developer Portal.
Procedure
- Start the Eclipse IDE.
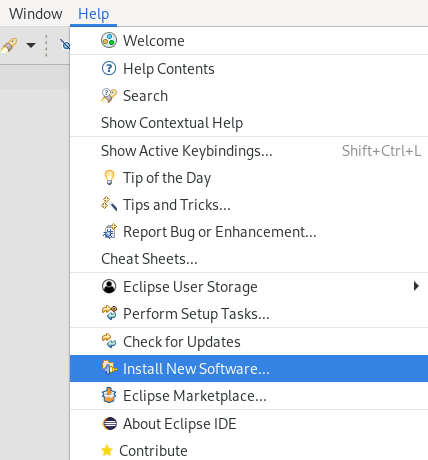
Click → .
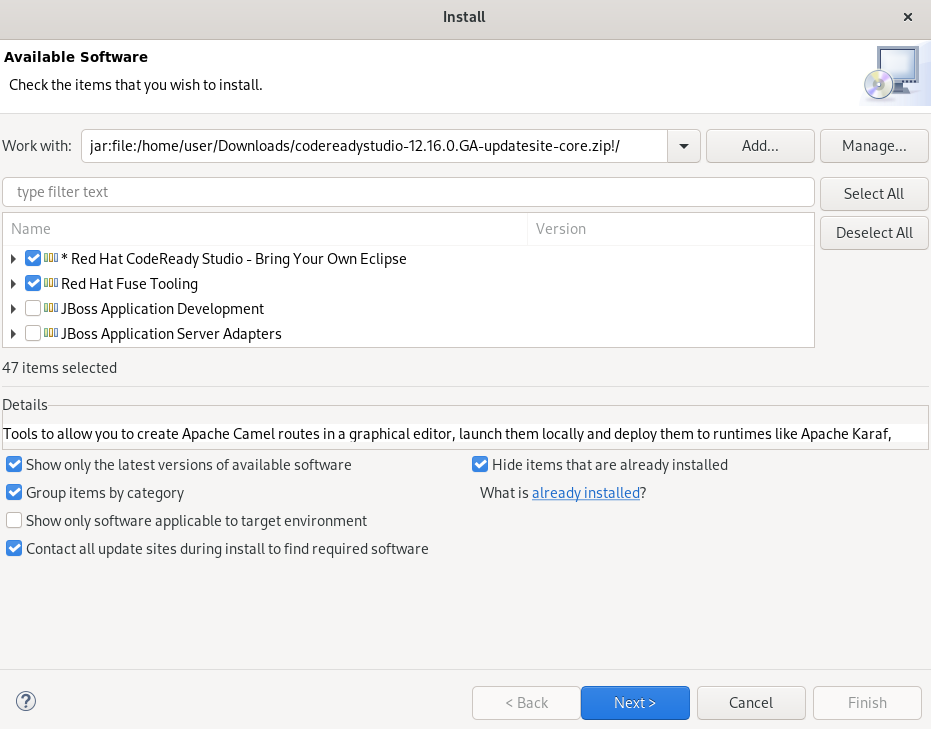
The Available Software window appears.
Click .
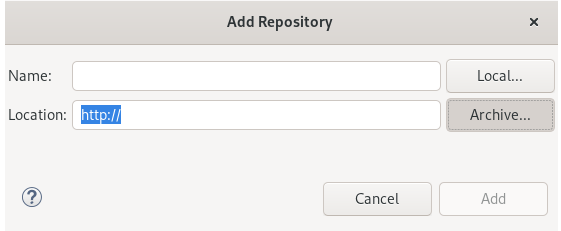
The Add Repository window appears.
-
Click and locate the
Update Site Zipfile. - Click .
Select the Red Hat CodeReady Studio - Bring Your Own Eclipse and Red Hat Fuse Tooling check boxes.
- Click .
Follow the on-screen instructions to complete the installation process.
If you receive warnings about installing unsigned content, review the details of the content and, if satisfied, click to continue with the installation.
Restart Eclipse.
When prompted to restart the Eclipse IDE, click . Note that the changes do not take effect until you restart Eclipse.
3.2. Installing CodeReady Studio stand-alone using the Installer
The Installer contains CodeReady Studio stand-alone, which packages the CodeReady Studio plug-ins with Eclipse and dependent third-party plug-ins. The Installer is compatible with all operating systems and is available from a variety of sources, including the Red Hat Customer Portal.
The following section describes how to install CodeReady Studio using the Installer.
Procedure
- Download the Red Hat CodeReady Studio 12.21.3 Installer from the Red Hat Developer Portal.
-
Go to the directory that contains the
codereadystudio-12.21.3.0.GA-installer-standalone.jarfile you downloaded. Start the Installer:
java -jar codereadystudio-12.21.3.0.GA-installer-standalone.jar
$ java -jar codereadystudio-12.21.3.0.GA-installer-standalone.jarCopy to Clipboard Copied! Toggle word wrap Toggle overflow Follow the on-screen instructions to complete the installation process.
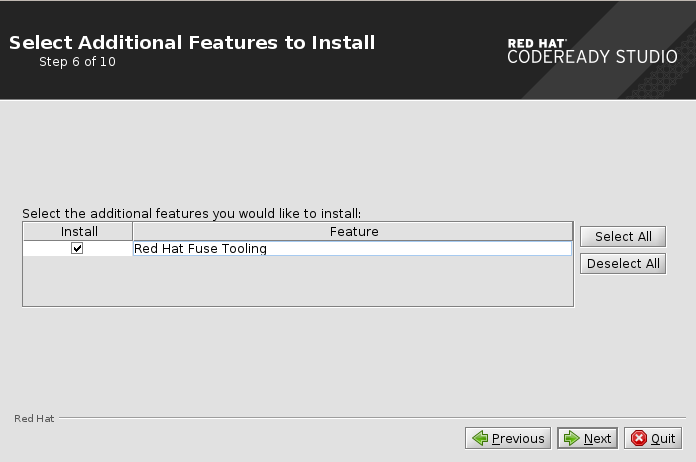
ImportantWhen prompted to select additional features to install, select the Fuse Tooling feature for creating, testing, and debugging integration applications.
3.3. Performing advanced installation tasks
The following sections describe how to install CodeReady Studio using a script and how to build the Red Hat CodeReady Studio Installer from source code.
3.3.1. Installing CodeReady Studio using a script
The following section describes how to install CodeReady Studio using a script.
Procedure
- Download the Red Hat CodeReady Studio 12.21.3 Installer from the Red Hat Developer Portal.
-
Go to the directory that contains the
codereadystudio-12.21.3.0.GA-installer-standalone.jarfile you downloaded. Start the Installer:
java -jar codereadystudio-12.21.3.0.GA-installer-standalone.jar
$ java -jar codereadystudio-12.21.3.0.GA-installer-standalone.jarCopy to Clipboard Copied! Toggle word wrap Toggle overflow Follow the on-screen instructions to complete the installation process.
ImportantWhen prompted to select additional features to install, select the Fuse Tooling feature for creating, testing and debugging integration applications.
After the installation is complete, an
InstallConfigRecord.xmlfile is generated in the CodeReady Studio installation directory.Run the following command:
java -jar codereadystudio-12.21.3.0.GA-installer-standalone.jar \
  /path-to/InstallConfigRecord.xml
$ java -jar codereadystudio-12.21.3.0.GA-installer-standalone.jar \
  /path-to/InstallConfigRecord.xml
Copy to Clipboard Copied! Toggle word wrap Toggle overflow -
Replace path-to with the path to the
InstallConfigRecord.xmlfile.
The generated InstallConfigRecord.xml file is machine-specific and uses Java Development Kit (JDK) and installation paths of your system. To use the InstallConfigRecord.xml file for other operating systems, JDKs, or paths, you must manually modify the file.
3.3.2. Building the CodeReady Studio stand-alone Installer from source
The following section describes how to build the CodeReady Studio stand-alone Installer from source.
Prerequisites
- Maven 3.3 or later with Java 11 is installed. To obtain and configure Maven, see the Apache Maven Project.
Procedure
Clone the CodeReady Studio Git repository:
git clone https://github.com/jbdevstudio/jbdevstudio-product.git
$ git clone https://github.com/jbdevstudio/jbdevstudio-product.gitCopy to Clipboard Copied! Toggle word wrap Toggle overflow Navigate to the
jbdevstudio-productdirectory:cd jbdevstudio-product
$ cd jbdevstudio-productCopy to Clipboard Copied! Toggle word wrap Toggle overflow Checkout
master:git checkout master
$ git checkout masterCopy to Clipboard Copied! Toggle word wrap Toggle overflow - Follow the instructions in the README.adoc file.
When the build is complete, the .jar file for the CodeReady Studio stand-alone Installer is located in the /jbdevstudio-product/installer/target directory.
Chapter 4. Upgrading CodeReady Studio
The following section describes the possibilities of upgrading your version of CodeReady Studio to the latest major and minor versions.
4.1. Upgrading major versions of CodeReady Studio
Each major version of CodeReady Studio is based on a different version of Eclipse. As a result, it is not possible to upgrade an older major version of CodeReady Studio to a newer major version. For example, it is not possible to update a CodeReady Studio 10.x installation to 11.x. However, it is possible to use the workspaces created using CodeReady Studio 11.x with CodeReady Studio 12.x.
Note that you can have multiple versions of CodeReady Studio installed on your system with Installer or Eclipse, provided you have these versions located in different directories.
The following table details the Eclipse versions supported with each major version of Red Hat CodeReady Studio:
| Red Hat CodeReady Studio Version | Base Eclipse Version |
|---|---|
| CodeReady Studio 12.21.3 | Eclipse IDE 2021‑09 |
| CodeReady Studio 12.21 | Eclipse IDE 2021‑09 |
| CodeReady Studio 12.19.1 | Eclipse IDE 2021‑03 |
| CodeReady Studio 12.19 | Eclipse IDE 2021‑03 |
| CodeReady Studio 12.18 | Eclipse IDE 2020‑09 |
| CodeReady Studio 12.17 | Eclipse IDE 2020‑09 |
| CodeReady Studio 12.16 | Eclipse IDE 2020‑06 |
| CodeReady Studio 12.15 | Eclipse IDE 2020‑03 |
| CodeReady Studio 12.14 | Eclipse IDE 2019‑12 |
| CodeReady Studio 12.13 | Eclipse IDE 2019‑09 |
| CodeReady Studio 12.11 | Eclipse SimRel 2019-03 GA |
| CodeReady Studio 12.9 | Eclipse SimRel 2018-09 GA |
| CodeReady Studio 12.0 | Eclipse 4.8 (Photon) |
| CodeReady Studio 11.x | Eclipse 4.7 (Oxygen) |
| Red Hat CodeReady Studio 10.x | Eclipse 4.6 (Neon) |
| Red Hat CodeReady Studio 9.x | Eclipse 4.5 (Mars) |
4.2. Updating minor versions of Red Hat CodeReady Studio
It is possible to update Red Hat CodeReady Studio to the latest minor versions within the major release. For example, you can update your Red Hat CodeReady Studio 12.0 installation to 12.9.
You may be automatically notified by the IDE when the latest Red Hat CodeReady Studio update is available, depending on your IDE settings for automatic updates.
Back up your workspace before updating. In addition to your project files, your workspace contains metadata about customized settings and preferences for the IDE. To back up your workspace, either copy the workspace directory to a backup location, or save it as a compressed file.
Procedure
- Start the Eclipse IDE.
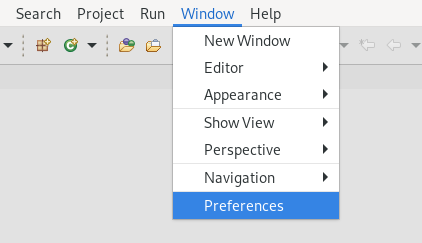
Click → .
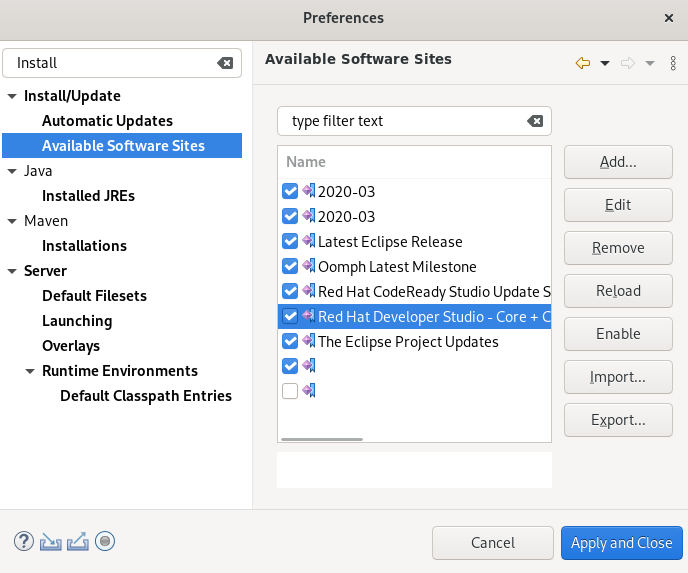
The Preferences window appears.
Select → .
- Ensure that the URL https://devstudio.redhat.com/12/stable/updates/ is listed in enabled locations. If it is not listed, add it.
- Click .
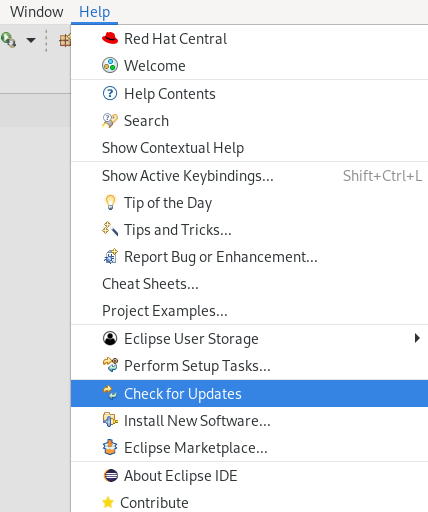
Click → .
Note that the search for updates might take some time.
Follow the on-screen instructions to apply available updates.
If you receive warnings about installing unsigned content, review the details of the content and, if satisfied, click to continue with the installation.
Restart Eclipse.
When prompted to restart the Eclipse IDE, click . Note that the changes do not take effect until you restart Eclipse.
Chapter 5. Uninstalling CodeReady Studio
The following section describes how to uninstall CodeReady Studio using Eclipse or the Installer.
Note that you can have multiple versions of CodeReady Studio installed on your system, provided you have these versions located in different directories.
5.1. Uninstalling Red Hat CodeReady Studio using Eclipse
The following section describes how to uninstall CodeReady Studio installed with Eclipse Marketplace or the Update Site Zip.
Procedure
- Start the Eclipse IDE.
Click → .
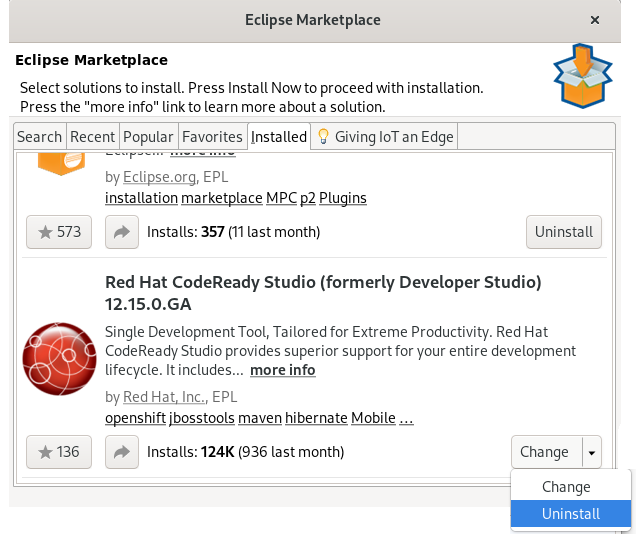
The Eclipse Marketplace window appears.
Navigate to the Installed section.
- Locate Red Hat CodeReady Studio.
- Click the down arrow near the button.
Click .
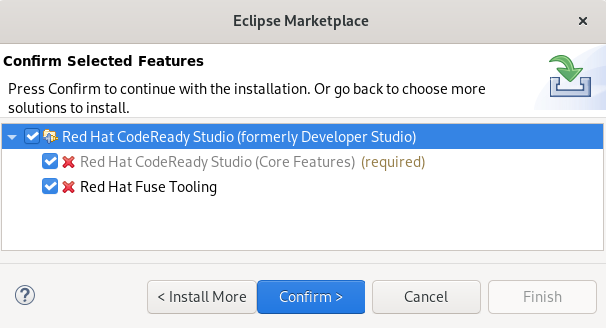
The Confirm Selected Features window appears.
- Ensure that Red Hat CodeReady Studio is selected.
- Click .
Click .
The Software Updates dialog box appears prompting you to restart Eclipse.
Click .
Note that the changes do not take effect until you restart Eclipse.
5.2. Uninstalling CodeReady Studio using the Installer
The following section describes how to uninstall CodeReady Studio installed with the Installer.
Procedure
- Ensure that CodeReady Studio is not running.
Navigate to the
/Uninstallerdirectory:cd /path-to/codereadystudio/Uninstaller
$ cd /path-to/codereadystudio/UninstallerCopy to Clipboard Copied! Toggle word wrap Toggle overflow -
Replace path-to with the path to the CodeReady Studio
/codereadystudio/Uninstallerdirectory. Start the Uninstaller:
java -jar uninstaller.jar
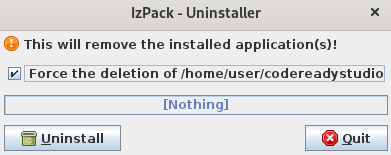
$ java -jar uninstaller.jarCopy to Clipboard Copied! Toggle word wrap Toggle overflow The IzPack Uninstaller dialog box appears.
Select the Force the deletion check box.
If the check box is not selected, some files will be left behind in the installation directory.
- Click .
Chapter 6. Reporting issues
You can report errors by raising a ticket in JIRA. When creating a JIRA ticket, please create it against one of the following projects: JBDS or JBIDE. Provide as much detail as possible in the JIRA ticket to help the team debug the error. You can also attach the error log to the JIRA tickets to provide context for the issue.
