Managing Single Sign-On and Smart Cards
Red Hat Enterprise Linux 6
On Using the Enterprise Security Client
Abstract
This guide is for both users and administrators for Red Hat Enterprise Linux 6 to learn how to manage personal certificates and keys using the Enterprise Security Client. The Enterprise Security Client is a simple GUI which works as a front end for the Red Hat Certificate System token management system. The Enterprise Security Client allows users of Red Hat Enterprise Linux 6 to format and manage smart cards easily as part of a single sign-on solution.
Chapter 1. Introduction to the Enterprise Security Client
Copy linkLink copied to clipboard!
The Enterprise Security Client is a tool for Red Hat Certificate System which simplifies managing smart cards. End users can use security tokens (smart cards) to store user certificates used for applications such as single sign-on access and client authentication. End users are issued the tokens containing certificates and keys required for signing, encryption, and other cryptographic functions.
After a token is enrolled, applications such as Mozilla Firefox and Thunderbird can be configured to recognize the token and use it for security operations, like client authentication and S/MIME mail. The Enterprise Security Client provides the following capabilities:
- Supports Global Platform-compliant smart cards.
- Enrolls security tokens so they are recognized by the token management system in Red Hat Certificate System.
- Maintains the security token, such as re-enrolling a token.
- Provides information about the current status of the token or tokens being managed.
- Supports server-side key generation through the Certificate System subsystems so that keys can be archived and recovered on a separate token if a token is lost.
1.1. Red Hat Enterprise Linux, Single Sign-On, and Authentication
Copy linkLink copied to clipboard!
Network users frequently have to submit multiple passwords for the various services they use, such as email, web browsing and intranets, and servers on the network. Maintaining multiple passwords, and constantly being prompted to enter them, is a hassle for users and administrators. Single sign-on is a configuration which allows administrators to create a single password store so that users can log in once, using a single password, and be authenticated to all network resources.
Red Hat Enterprise Linux 6 supports single sign-on for several resources, including logging into workstations and unlocking screensavers, accessing encrypted web pages using Mozilla Firefox, and sending encrypted email using Mozilla Thunderbird.
Single sign-on is both a convenience to users and another layer of security for the server and the network. Single sign-on hinges on secure and effective authentication. Red Hat Enterprise Linux provides two authentication mechanisms which can be used to enable single sign-on:
- Kerberos-based authentication
- Smart card-based authentication, using the Enterprise Security Client tied into the public-key infrastructure implemented by Red Hat Certificate System
One of the cornerstones of establishing a secure network environment is making sure that access is restricted to people who have the right to access the network. If access is allowed, users can authenticate to the system, meaning they can verify their identities.
Many systems use Kerberos to establish a system of short-lived credentials, called tickets, which are generated ad hoc at a user request. The user is required to present credentials in the form of a username-password pair that identify the user and indicate to the system that the user can be issued a ticket. This ticket can be referenced repeatedly by other services, like websites and email, requiring the user to go through only a single authentication process.
An alternative method of verifying an identity is presenting a certificate. A certificate is an electronic document which identifies the entity which presents it. With smart card-based authentication, these certificates are stored on a small hardware device called a smart card or token. When a user inserts a smart card, the smart card presents the certificates to the system and identifies the user so the user can be authenticated.
Single sign-on using smart cards goes through three steps:
- A user inserts a smart card into the card reader. This is detected by the pluggable authentication modules (PAM) on Red Hat Enterprise Linux.
- The system maps the certificate to the user entry and then compares the presented certificates on the smart card to the certificates stored in the user entry.
- If the certificate is successfully validated against the key distribution center (KDC), then the user is allowed to log in.
Smart card-based authentication builds on the simple authentication layer established by Kerberos by adding additional identification mechanisms (certificates) and physical access requirements.
1.2. Red Hat Certificate System and the Enterprise Security Client
Copy linkLink copied to clipboard!
Red Hat Certificate System creates, manages, renews, and revokes certificates and keys. For managing smart cards, the Certificate System has a token management system to generate keys, create certificate requests, and receive certificates.
Two subsystems — the Token Key Service (TKS) and Token Processing System (TPS) — are used to process token-related operations. The Enterprise Security Client is the interface which allows the smart card and user to access the token management system.
A total of four Certificate System subsystems are involved with managing tokens, two for managing the tokens (TKS and TPS) and two for managing the keys and certificates within the public-key infrastructure (CA and DRM).
- The Token Processing System (TPS) interacts with smart cards to help them generate and store keys and certificates for a specific entity, such as a user or device. Smart card operations go through the TPS and are forwarded to the appropriate subsystem for action, such as the Certificate Authority to generate certificates or the Data Recovery Manager to archive and recover keys.
- The Token Key Service (TKS) generates, or derives, symmetric keys used for communication between the TPS and smart card. Each set of keys generated by the TKS is unique because they are based on the card's unique ID. The keys are formatted on the smart card and are used to encrypt communications, or provide authentication, between the smart card and TPS.
- The Certificate Authority (CA) creates and revokes user certificates stored on the smart card.
- Optionally, the Data Recovery Manager (DRM) archives and recovers keys for the smart card.

Figure 1.1. How Certificate System Manages Smart Cards
As Figure 1.1, “How Certificate System Manages Smart Cards” shows, the TPS is the central hub in the Red Hat Certificate System token management system. The token communicates with the TPS directly. The TPS then communicates with the TKS to derive a set of unique keys that can be used for TPS-token communication (1). When the smart card is enrolled, new private keys are created for the token; those keys can be archived in a DRM (2), if key archival is configured. The CA then processes the certificate request (3) and issues the certificates to store on the token. The TPS sends those certificates back to the Enterprise Security Client (4), and they are saved to the token.
The Enterprise Security Client is the conduit through which TPS communicates with each token over a secure HTTP channel (HTTPS), and, through the TPS, with the Certificate System.
To use the tokens, the Token Processing System must be able to recognize and communicate with them. The tokens must first be enrolled to populate the tokens with required keys and certificates and add the tokens to the Certificate System. The Enterprise Security Client provides the user interface for users to format and manage smart cards.
Chapter 2. Using Pluggable Authentication Modules (PAM)
Copy linkLink copied to clipboard!
Pluggable authentication modules are a common framework for authentication and security. Both of Red Hat Enterprise Linux's single sign-on methods — Kerberos and smart cards — depend on underlying PAM configuration.
Understanding and using PAM can be very beneficial for planning and implementing a secure, efficient single sign-on solution.
2.1. About PAM
Copy linkLink copied to clipboard!
Programs that grant users access to a system use authentication to verify each other's identity (that is, to establish that a user is who they say they are).
Historically, each program had its own way of authenticating users. In Red Hat Enterprise Linux, many programs are configured to use a centralized authentication mechanism called Pluggable Authentication Modules (PAM).
PAM uses a pluggable, modular architecture, which affords the system administrator a great deal of flexibility in setting authentication policies for the system. PAM is a useful system for developers and administrators for several reasons:
- PAM provides a common authentication scheme that can be used with a wide variety of applications.
- PAM provides significant flexibility and control over authentication for both system administrators and application developers.
- PAM provides a single, fully-documented library which allows developers to write programs without having to create their own authentication schemes.
PAM has an extensive documentation set with much more detail about both using PAM and writing modules to extend or integrate PAM with other applications. Almost all of the major modules and configuration files with PAM have their own manpages. Additionally, the
/usr/share/doc/pam-version# directory contains a System Administrators' Guide, a Module Writers' Manual, and the Application Developers' Manual, as well as a copy of the PAM standard, DCE-RFC 86.0.
The libraries for PAM are available at http://www.kernel.org/pub/linux/libs/pam/. This is the primary distribution website for the Linux-PAM project, containing information on various PAM modules, frequently asked questions, and additional PAM documentation.
2.2. PAM Configuration Files
Copy linkLink copied to clipboard!
The
/etc/pam.d/ directory contains the PAM configuration files for each PAM-aware application.
2.2.1. PAM Service Files
Copy linkLink copied to clipboard!
Each PAM-aware application or service has a file in the
/etc/pam.d/ directory. Each file in this directory has the same name as the service to which it controls access.
The PAM-aware program is responsible for defining its service name and installing its own PAM configuration file in the
/etc/pam.d/ directory. For example, the login program defines its service name as login and installs the /etc/pam.d/login PAM configuration file.
2.2.2. PAM Configuration File Format
Copy linkLink copied to clipboard!
Each PAM configuration file contains a group of directives that define the module and any controls or arguments with it.
The directives all have a simple syntax that identifies the module purpose (interface) and the configuration settings for the module.
module_interface control_flag module_name module_arguments
module_interface control_flag module_name module_arguments2.2.2.1. PAM Module Interfaces
Copy linkLink copied to clipboard!
Four types of PAM module interface are available. Each of these corresponds to a different aspect of the authorization process:
auth— This module interface authenticates use. For example, it requests and verifies the validity of a password. Modules with this interface can also set credentials, such as group memberships or Kerberos tickets.account— This module interface verifies that access is allowed. For example, it checks if a user account has expired or if a user is allowed to log in at a particular time of day.password— This module interface is used for changing user passwords.session— This module interface configures and manages user sessions. Modules with this interface can also perform additional tasks that are needed to allow access, like mounting a user's home directory and making the user's mailbox available.
Note
An individual module can provide any or all module interfaces. For instance,
pam_unix.so provides all four module interfaces.
In a PAM configuration file, the module interface is the first field defined. For example:
auth required pam_unix.so
auth required pam_unix.so
This instructs PAM to use the
pam_unix.so module's auth interface.
Module interface directives can be stacked, or placed upon one another, so that multiple modules are used together for one purpose. If a module's control flag uses the
sufficient or requisite value, then the order in which the modules are listed is important to the authentication process.
Stacking makes it easy for an administrator to require specific conditions to exist before allowing the user to authenticate. For example, the
reboot command normally uses several stacked modules, as seen in its PAM configuration file:
- The first line is a comment and is not processed.
auth sufficient pam_rootok.so— This line uses thepam_rootok.somodule to check whether the current user is root, by verifying that their UID is 0. If this test succeeds, no other modules are consulted and the command is executed. If this test fails, the next module is consulted.auth required pam_console.so— This line uses thepam_console.somodule to attempt to authenticate the user. If this user is already logged in at the console,pam_console.sochecks whether there is a file in the/etc/security/console.apps/directory with the same name as the service name (reboot). If such a file exists, authentication succeeds and control is passed to the next module.#auth include system-auth— This line is commented and is not processed.account required pam_permit.so— This line uses thepam_permit.somodule to allow the root user or anyone logged in at the console to reboot the system.
2.2.2.2. PAM Control Flags
Copy linkLink copied to clipboard!
All PAM modules generate a success or failure result when called. Control flags tell PAM what do with the result. Modules can be stacked in a particular order, and the control flags determine how important the success or failure of a particular module is to the overall goal of authenticating the user to the service.
There are several simple flags, which use only a keyword to set the configuration:
required— The module result must be successful for authentication to continue. If the test fails at this point, the user is not notified until the results of all module tests that reference that interface are complete.requisite— The module result must be successful for authentication to continue. However, if a test fails at this point, the user is notified immediately with a message reflecting the first failedrequiredorrequisitemodule test.sufficient— The module result is ignored if it fails. However, if the result of a module flaggedsufficientis successful and no previous modules flaggedrequiredhave failed, then no other results are required and the user is authenticated to the service.optional— The module result is ignored. A module flagged asoptionalonly becomes necessary for successful authentication when no other modules reference the interface.include— Unlike the other controls, this does not relate to how the module result is handled. This flag pulls in all lines in the configuration file which match the given parameter and appends them as an argument to the module.
Important
The order in which
required modules are called is not critical. Only the sufficient and requisite control flags cause order to become important.
There are many complex control flags that can be set. These are set in attribute=value pairs; a complete list of attributes is available in the
pam.d manpage.
2.2.2.3. PAM Module Names
Copy linkLink copied to clipboard!
The module name provides PAM with the name of the pluggable module containing the specified module interface. The directory name is omitted because the application is linked to the appropriate version of
libpam, which can locate the correct version of the module.
2.2.2.4. PAM Module Arguments
Copy linkLink copied to clipboard!
PAM uses arguments to pass information to a pluggable module during authentication for some modules.
For example, the
pam_userdb.so module uses information stored in a Berkeley DB file to authenticate the user. Berkeley DB is an open source database system embedded in many applications. The module takes a db argument so that Berkeley DB knows which database to use for the requested service. For example:
auth required pam_userdb.so db=/path/to/BerkeleyDB_file
auth required pam_userdb.so db=/path/to/BerkeleyDB_file
Invalid arguments are generally ignored and do not otherwise affect the success or failure of the PAM module. Some modules, however, may fail on invalid arguments. Most modules report errors to the
/var/log/secure file.
2.2.3. Sample PAM Configuration Files
Copy linkLink copied to clipboard!
Example 2.1, “Simple PAM Configuration” is a sample PAM application configuration file:
Example 2.1. Simple PAM Configuration
- The first line is a comment, indicated by the hash mark (
#) at the beginning of the line. - Lines two through four stack three modules for login authentication.
auth required pam_securetty.so— This module ensures that if the user is trying to log in as root, the tty on which the user is logging in is listed in the/etc/securettyfile, if that file exists.If the tty is not listed in the file, any attempt to log in as root fails with aLogin incorrectmessage.auth required pam_unix.so nullok— This module prompts the user for a password and then checks the password using the information stored in/etc/passwdand, if it exists,/etc/shadow.The argumentnullokinstructs thepam_unix.somodule to allow a blank password. auth required pam_nologin.so— This is the final authentication step. It checks whether the/etc/nologinfile exists. If it exists and the user is not root, authentication fails.Note
In this example, all threeauthmodules are checked, even if the firstauthmodule fails. This prevents the user from knowing at what stage their authentication failed. Such knowledge in the hands of an attacker could allow them to more easily deduce how to crack the system.account required pam_unix.so— This module performs any necessary account verification. For example, if shadow passwords have been enabled, the account interface of thepam_unix.somodule checks to see if the account has expired or if the user has not changed the password within the allowed grace period.password required pam_cracklib.so retry=3— If a password has expired, the password component of thepam_cracklib.somodule prompts for a new password. It then tests the newly created password to see whether it can easily be determined by a dictionary-based password cracking program.The argumentretry=3specifies that if the test fails the first time, the user has two more chances to create a strong password.password required pam_unix.so shadow nullok use_authtok— This line specifies that if the program changes the user's password, using thepasswordinterface of thepam_unix.somodule.- The argument
shadowinstructs the module to create shadow passwords when updating a user's password. - The argument
nullokinstructs the module to allow the user to change their password from a blank password, otherwise a null password is treated as an account lock. - The final argument on this line,
use_authtok, provides a good example of the importance of order when stacking PAM modules. This argument instructs the module not to prompt the user for a new password. Instead, it accepts any password that was recorded by a previous password module. In this way, all new passwords must pass thepam_cracklib.sotest for secure passwords before being accepted.
session required pam_unix.so— The final line instructs the session interface of thepam_unix.somodule to manage the session. This module logs the user name and the service type to/var/log/secureat the beginning and end of each session. This module can be supplemented by stacking it with other session modules for additional functionality.
2.3. Creating PAM Modules
Copy linkLink copied to clipboard!
New PAM modules can be created or added at any time for use by PAM-aware applications. PAM-aware programs can immediately use the new module and any methods it defines without being recompiled or otherwise modified. This allows developers and system administrators to mix-and-match, as well as test, authentication methods for different programs without recompiling them.
Documentation on writing modules is included in the
/usr/share/doc/pam-version# directory.
2.4. PAM and Administrative Credential Caching
Copy linkLink copied to clipboard!
A number of graphical administrative tools in Red Hat Enterprise Linux provide users with elevated privileges for up to five minutes using the
pam_timestamp.so module. It is important to understand how this mechanism works, because a user who walks away from a terminal while pam_timestamp.so is in effect leaves the machine open to manipulation by anyone with physical access to the console.
In the PAM timestamp scheme, the graphical administrative application prompts the user for the root password when it is launched. When the user has been authenticated, the
pam_timestamp.so module creates a timestamp file. By default, this is created in the /var/run/sudo/ directory. If the timestamp file already exists, graphical administrative programs do not prompt for a password. Instead, the pam_timestamp.so module freshens the timestamp file, reserving an extra five minutes of unchallenged administrative access for the user.
You can verify the actual state of the timestamp file by inspecting the file in the
/var/run/sudo/user directory. For the desktop, the relevant file is unknown:root. If it is present and its timestamp is less than five minutes old, the credentials are valid.
The existence of the timestamp file is indicated by an authentication icon, which appears in the notification area of the panel.

Figure 2.1. The Authentication Icon
2.4.1. Removing the Timestamp File
Copy linkLink copied to clipboard!
Before abandoning a console where a PAM timestamp is active, it is recommended that the timestamp file be destroyed. To do this from a graphical environment, click the authentication icon on the panel. This causes a dialog box to appear. Click the button to destroy the active timestamp file.
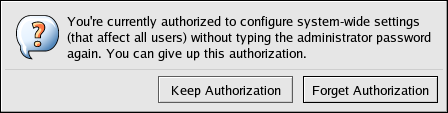
Figure 2.2. Dismiss Authentication Dialog
The PAM timestamp file has some important characteristics:
- If logged in to the system remotely using
ssh, use the/sbin/pam_timestamp_check -k rootcommand to destroy the timestamp file. - Run the
/sbin/pam_timestamp_check -k rootcommand from the same terminal window where the privileged application was launched. - The logged in user who originally invoked the
pam_timestamp.somodule must be the user who runs the/sbin/pam_timestamp_check -kcommand. Do not run this command as root. - Killing the credentials on the desktop without using the action on the icon can be done with the
/sbin/pam_timestamp_checcommand./sbin/pam_timestamp_check -k root </dev/null >/dev/null 2>/dev/null
/sbin/pam_timestamp_check -k root </dev/null >/dev/null 2>/dev/nullCopy to Clipboard Copied! Toggle word wrap Toggle overflow Any other method only removes the credentials from the pty where the command was run.
Refer to the
pam_timestamp_check man page for more information about destroying the timestamp file using pam_timestamp_check.
2.4.2. Common pam_timestamp Directives
Copy linkLink copied to clipboard!
The
pam_timestamp.so module accepts several directives, with two used most commonly:
timestamp_timeout— Specifies the period (in seconds) for which the timestamp file is valid. The default value is 300 (five minutes).timestampdir— Specifies the directory in which the timestamp file is stored. The default value is/var/run/sudo/.
Chapter 3. Using Kerberos
Copy linkLink copied to clipboard!
Maintaining system security and integrity within a network is critical, and it encompasses every user, application, service, and server within the network infrastructure. It requires an understanding of everything that is running on the network and the manner in which these services are used. At the core of maintaining this security is maintaining access to these applications and services and enforcing that access.
Kerberos provides a mechanism that allows both users and machines to identify themselves to network and receive defined, limited access to the areas and services that the administrator configured. Kerberos authenticates entities by verifying their identity, and Kerberos also secures this authenticating data so that it cannot be accessed and used or tampered with by an outsider.
3.1. About Kerberos
Copy linkLink copied to clipboard!
Kerberos is a network authentication protocol created by MIT, and uses symmetric-key cryptography[1] to authenticate users to network services, which means passwords are never actually sent over the network.
Consequently, when users authenticate to network services using Kerberos, unauthorized users attempting to gather passwords by monitoring network traffic are effectively thwarted.
3.1.1. How Kerberos Works
Copy linkLink copied to clipboard!
Most conventional network services use password-based authentication schemes, where a user supplies a password to access a given network server. However, the transmission of authentication information for many services is unencrypted. For such a scheme to be secure, the network has to be inaccessible to outsiders, and all computers and users on the network must be trusted and trustworthy.
With simple, password-based authentication, a network that is connected to the Internet cannot be assumed to be secure. Any attacker who gains access to the network can use a simple packet analyzer, or packet sniffer, to intercept usernames and passwords, compromising user accounts and, therefore, the integrity of the entire security infrastructure.
Kerberos eliminates the transmission of unencrypted passwords across the network and removes the potential threat of an attacker sniffing the network.
Rather than authenticating each user to each network service separately as with simple password authentication, Kerberos uses symmetric encryption and a trusted third party (a key distribution center or KDC) to authenticate users to a suite of network services. The computers managed by that KDC and any secondary KDCs constitute a realm.
When a user authenticates to the KDC, the KDC sends a set of credentials (a ticket) specific to that session back to the user's machine, and any Kerberos-aware services look for the ticket on the user's machine rather than requiring the user to authenticate using a password.
As shown in Figure 3.1, “Kerberos Authentication, in Steps”, each user is identified to the KDC with a unique identity, called a principal. When a user on a Kerberos-aware network logs into his workstation, his principal is sent to the KDC as part of a request for a ticket-getting ticket (or TGT) from the authentication server. This request can be sent by the login program so that it is transparent to the user or can be sent manually by a user through the
kinit program after the user logs in.
The KDC then checks for the principal in its database. If the principal is found, the KDC creates a TGT, encrypts it using the user's key, and sends the TGT to that user.

Figure 3.1. Kerberos Authentication, in Steps
The login or
kinit program on the client then decrypts the TGT using the user's key, which it computes from the user's password. The user's key is used only on the client machine and is not transmitted over the network. The ticket (or credentials) sent by the KDC are stored in a local file, the credentials cache, which can be checked by Kerberos-aware services.
After authentication, servers can check an unencrypted list of recognized principals and their keys rather than checking
kinit; this is kept in a keytab.
The TGT is set to expire after a certain period of time (usually ten to twenty-four hours) and is stored in the client machine's credentials cache. An expiration time is set so that a compromised TGT is of use to an attacker for only a short period of time. After the TGT has been issued, the user does not have to re-enter their password until the TGT expires or until they log out and log in again.
Whenever the user needs access to a network service, the client software uses the TGT to request a new ticket for that specific service from the ticket-granting server (TGS). The service ticket is then used to authenticate the user to that service transparently.
Warning
The Kerberos system can be compromised if a user on the network authenticates against a non-Kerberos aware service by transmitting a password in plain text. The use of non-Kerberos aware services (including telnet and FTP) is highly discouraged. Other encrypted protocols, such as SSH or SSL-secured services, is preferred to unencrypted services, but this is still not ideal.
Kerberos relies on being able to resolve machine names and on accurate timestamps to issue and expire tickets. Thus, Kerberos requires both adequate clock synchronization and a working domain name service (DNS) to function correctly.
- Approximate clock synchronization between the machines on the network can be set up using a service such as
ntpd, which is documented in/usr/share/doc/ntp-version-number/html/index.html. - Both DNS entries and hosts on the network must be properly configured, which is covered in the Kerberos documentation in
/usr/share/doc/krb5-server-version-number.
3.1.2. Considerations for Deploying Kerberos
Copy linkLink copied to clipboard!
Although Kerberos removes a common and severe security threat, it is difficult to implement for a variety of reasons:
- Migrating user passwords from a standard UNIX password database, such as
/etc/passwdor/etc/shadow, to a Kerberos password database can be tedious. There is no automated mechanism to perform this task. This is covered in question 2.23 in the online Kerberos FAQ for the US Navy. - Kerberos assumes that each user is trusted but is using an untrusted host on an untrusted network. Its primary goal is to prevent unencrypted passwords from being transmitted across that network. However, if anyone other than the proper user has access to the one host that issues tickets used for authentication — the KDC — the entire Kerberos authentication system are at risk.
- For an application to use Kerberos, its source must be modified to make the appropriate calls into the Kerberos libraries. Applications modified in this way are considered to be Kerberos-aware, or kerberized. For some applications, this can be quite problematic due to the size of the application or its design. For other incompatible applications, changes must be made to the way in which the server and client communicate. Again, this can require extensive programming. Closed-source applications that do not have Kerberos support by default are often the most problematic.
- Kerberos is an all-or-nothing solution. If Kerberos is used on the network, any unencrypted passwords transferred to a non-Kerberos aware service are at risk. Thus, the network gains no benefit from the use of Kerberos. To secure a network with Kerberos, one must either use Kerberos-aware versions of all client/server applications that transmit passwords unencrypted, or not use that client/server application at all.
3.1.3. Additional Resources for Kerberos
Copy linkLink copied to clipboard!
Kerberos can be a complex service to implement, with a lot of flexibility in how it is deployed. Table 3.1, “External Kerberos Documentation” and Table 3.2, “Important Kerberos Manpages” list of a few of the most important or most useful sources for more information on using Kerberos.
| Documentation | Location |
|---|---|
| Kerberos V5 Installation Guide (in both PostScript and HTML) | /usr/share/doc/krb5-server-version-number |
| Kerberos V5 System Administrator's Guide (in both PostScript and HTML) | /usr/share/doc/krb5-server-version-number |
| Kerberos V5 UNIX User's Guide (in both PostScript and HTML) | /usr/share/doc/krb5-workstation-version-number |
| "Kerberos: The Network Authentication Protocol" webpage from MIT | http://web.mit.edu/kerberos/www/ |
| The Kerberos Frequently Asked Questions (FAQ) | http://www.cmf.nrl.navy.mil/CCS/people/kenh/kerberos-faq.html |
| Designing an Authentication System: a Dialogue in Four Scenes, originally by Bill Bryant in 1988, modified by Theodore Ts'o in 1997. This document is a conversation between two developers who are thinking through the creation of a Kerberos-style authentication system. The conversational style of the discussion makes this a good starting place for people who are completely unfamiliar with Kerberos. | http://web.mit.edu/kerberos/www/dialogue.html |
| A how-to article for kerberizing a network. | http://www.ornl.gov/~jar/HowToKerb.html |
Any of the manpage files can be opened by running
man command_name.
| Manpage | Description |
|---|---|
| Client Applications | |
| kerberos | An introduction to the Kerberos system which describes how credentials work and provides recommendations for obtaining and destroying Kerberos tickets. The bottom of the man page references a number of related man pages. |
| kinit | Describes how to use this command to obtain and cache a ticket-granting ticket. |
| kdestroy | Describes how to use this command to destroy Kerberos credentials. |
| klist | Describes how to use this command to list cached Kerberos credentials. |
| Administrative Applications | |
| kadmin | Describes how to use this command to administer the Kerberos V5 database. |
| kdb5_util | Describes how to use this command to create and perform low-level administrative functions on the Kerberos V5 database. |
| Server Applications | |
| krb5kdc | Describes available command line options for the Kerberos V5 KDC. |
| kadmind | Describes available command line options for the Kerberos V5 administration server. |
| Configuration Files | |
| krb5.conf | Describes the format and options available within the configuration file for the Kerberos V5 library. |
| kdc.conf | Describes the format and options available within the configuration file for the Kerberos V5 AS and KDC. |
3.2. Installing Kerberos
Copy linkLink copied to clipboard!
Kerberos packages may be installed by default, but make sure that the appropriate packages are installed for the Kerberos server or client being configured.
To install packages for a Kerberos server:
yum install krb5-server krb5-libs krb5-auth-dialog
# yum install krb5-server krb5-libs krb5-auth-dialog
To install packages for a Kerberos client:
yum install krb5-workstation krb5-libs krb5-auth-dialog
# yum install krb5-workstation krb5-libs krb5-auth-dialog
If the Red Hat Enterprise Linux system will use Kerberos as part of single sign-on with smart cards, then also install the required PKI/OpenSSL package:
yum install krb5-pkinit-openssl
# yum install krb5-pkinit-openssl3.3. Configuring a Kerberos 5 Server
Copy linkLink copied to clipboard!
When setting up Kerberos, install the master KDC first and then install any necessary secondary servers after the master is set up.
3.3.1. Configuring the Master KDC Server
Copy linkLink copied to clipboard!
- Ensure that time synchronization and DNS are functioning correctly on all client and server machines before configuring Kerberos.Pay particular attention to time synchronization between the Kerberos server and its clients. If the time difference between the server and client is greater than the configured limit (five minutes by default), Kerberos clients cannot authenticate to the server. This time synchronization is necessary to prevent an attacker from using an old Kerberos ticket to masquerade as a valid user.The NTP documentation is located at
/usr/share/doc/ntp-version-number/html/index.htmland online at http://www.ntp.org. - Install the
krb5-libs,krb5-server, andkrb5-workstationpackages on the dedicated machine which runs the KDC. This machine needs to be very secure — if possible, it should not run any services other than the KDC. - Edit the
/etc/krb5.confand/var/kerberos/krb5kdc/kdc.confconfiguration files to reflect the realm name and domain-to-realm mappings. A simple realm can be constructed by replacing instances of EXAMPLE.COM and example.com with the correct domain name — being certain to keep uppercase and lowercase names in the correct format — and by changing the KDC from kerberos.example.com to the name of the Kerberos server. By convention, all realm names are uppercase and all DNS hostnames and domain names are lowercase. The man pages of these configuration files have full details about the file formats. - Create the database using the
kdb5_utilutility./usr/sbin/kdb5_util create -s
/usr/sbin/kdb5_util create -sCopy to Clipboard Copied! Toggle word wrap Toggle overflow Thecreatecommand creates the database that stores keys for the Kerberos realm. The-sargument creates a stash file in which the master server key is stored. If no stash file is present from which to read the key, the Kerberos server (krb5kdc) prompts the user for the master server password (which can be used to regenerate the key) every time it starts. - Edit the
/var/kerberos/krb5kdc/kadm5.aclfile. This file is used bykadmindto determine which principals have administrative access to the Kerberos database and their level of access. Most organizations can be accommodated by a single line:*/admin@EXAMPLE.COM *
*/admin@EXAMPLE.COM *Copy to Clipboard Copied! Toggle word wrap Toggle overflow Most users are represented in the database by a single principal (with a NULL, or empty, instance, such as joe@EXAMPLE.COM). In this configuration, users with a second principal with an instance of admin (for example, joe/admin@EXAMPLE.COM) are able to exert full administrative control over the realm's Kerberos database.Afterkadmindhas been started on the server, any user can access its services by runningkadminon any of the clients or servers in the realm. However, only users listed in thekadm5.aclfile can modify the database in any way, except for changing their own passwords.Note
Thekadminutility communicates with thekadmindserver over the network, and uses Kerberos to handle authentication. Consequently, the first principal must already exist before connecting to the server over the network to administer it. Create the first principal with thekadmin.localcommand, which is specifically designed to be used on the same host as the KDC and does not use Kerberos for authentication. - Create the first principal using
kadmin.localat the KDC terminal:/usr/sbin/kadmin.local -q "addprinc username/admin"
/usr/sbin/kadmin.local -q "addprinc username/admin"Copy to Clipboard Copied! Toggle word wrap Toggle overflow - Start Kerberos using the following commands:
/sbin/service krb5kdc start
/sbin/service kadmin start
/sbin/service krb5kdc start
/sbin/service kadmin start
Copy to Clipboard Copied! Toggle word wrap Toggle overflow - Add principals for the users using the
addprinccommand withinkadmin.kadminandkadmin.localare command line interfaces to the KDC. As such, many commands — such asaddprinc— are available after launching thekadminprogram. Refer to thekadminman page for more information. - Verify that the KDC is issuing tickets. First, run
kinitto obtain a ticket and store it in a credential cache file. Next, useklistto view the list of credentials in the cache and usekdestroyto destroy the cache and the credentials it contains.Note
By default,kinitattempts to authenticate using the same system login username (not the Kerberos server). If that username does not correspond to a principal in the Kerberos database,kinitissues an error message. If that happens, supplykinitwith the name of the correct principal as an argument on the command line:kinit principal
kinit principalCopy to Clipboard Copied! Toggle word wrap Toggle overflow
3.3.2. Setting up Secondary KDCs
Copy linkLink copied to clipboard!
When there are multiple KDCs for a given realm, one KDC (the master KDC) keeps a writable copy of the realm database and runs
kadmind. The master KDC is also the realm's admin server. Additional secondary KDCs keep read-only copies of the database and run kpropd.
The master-slave propagation procedure entails the master KDC dumping its database to a temporary dump file and then transmitting that file to each of its slaves, which then overwrite their previously-received read-only copies of the database with the contents of the dump file.
To set up a secondary KDC:
- Copy the master KDC's
krb5.confandkdc.conffiles to the secondary KDC. - Start
kadmin.localfrom a root shell on the master KDC.- Use the
kadmin.local add_principalcommand to create a new entry for the master KDC's host service. - Use the
kadmin.local ktaddcommand to set a random key for the service and store the random key in the master's default keytab file.Note
This key is used by thekpropcommand to authenticate to the secondary servers. You will only need to do this once, regardless of how many secondary KDC servers you install.Copy to Clipboard Copied! Toggle word wrap Toggle overflow
- Start
kadminfrom a root shell on the secondary KDC.- Use the
kadmin add_principalcommand to create a new entry for the secondary KDC's host service. - Use the
kadmin ktaddcommand to set a random key for the service and store the random key in the secondary KDC server's default keytab file. This key is used by thekpropdservice when authenticating clients.Copy to Clipboard Copied! Toggle word wrap Toggle overflow
- With its service key, the secondary KDC could authenticate any client which would connect to it. Obviously, not all potential clients should be allowed to provide the
kpropservice with a new realm database. To restrict access, thekpropservice on the secondary KDC will only accept updates from clients whose principal names are listed in/var/kerberos/krb5kdc/kpropd.acl.Add the master KDC's host service's name to that file.echo host/masterkdc.example.com@EXAMPLE.COM > /var/kerberos/krb5kdc/kpropd.acl
# echo host/masterkdc.example.com@EXAMPLE.COM > /var/kerberos/krb5kdc/kpropd.aclCopy to Clipboard Copied! Toggle word wrap Toggle overflow - Once the secondary KDC has obtained a copy of the database, it will also need the master key which was used to encrypt it. If the KDC database's master key is stored in a stash file on the master KDC (typically named
/var/kerberos/krb5kdc/.k5.REALM), either copy it to the secondary KDC using any available secure method, or create a dummy database and identical stash file on the secondary KDC by runningkdb5_util create -sand supplying the same password. The dummy database will be overwritten by the first successful database propagation. - Ensure that the secondary KDC's firewall allows the master KDC to contact it using TCP on port 754 (krb5_prop), and start the
kpropservice. - Double-check that the
kadminservice is disabled. - Perform a manual database propagation test by dumping the realm database on the master KDC to the default data file which the
kpropcommand will read (/var/kerberos/krb5kdc/slave_datatrans)./usr/sbin/kdb5_util dump /var/kerberos/krb5kdc/slave_datatrans
# /usr/sbin/kdb5_util dump /var/kerberos/krb5kdc/slave_datatransCopy to Clipboard Copied! Toggle word wrap Toggle overflow - Use the
kpropcommand to transmit its contents to the secondary KDC.kprop slavekdc.example.com
# kprop slavekdc.example.comCopy to Clipboard Copied! Toggle word wrap Toggle overflow - Using
kinit, verify that the client system is able to correctly obtain the initial credentials from the KDC. The/etc/krb5.conffor the client should list only the secondary KDC in its list of KDCs. - Create a script which dumps the realm database and runs the
kpropcommand to transmit the database to each secondary KDC in turn, and configure thecronservice to run the script periodically.
3.4. Configuring a Kerberos 5 Client
Copy linkLink copied to clipboard!
All that is required to set up a Kerberos 5 client is to install the client packages and provide each client with a valid
krb5.conf configuration file. While ssh and slogin are the preferred methods of remotely logging in to client systems, Kerberized versions of rsh and rlogin are still available, with additional configuration changes.
- Be sure that time synchronization is in place between the Kerberos client and the KDC and that DNS is working properly on the Kerberos client.
- Install the
krb5-libsandkrb5-workstationpackages on all of the client machines. - Supply a valid
/etc/krb5.conffile for each client (usually this can be the samekrb5.conffile used by the KDC). - To use kerberized
rshandrloginservices, install thershpackage. - Before a workstation can use Kerberos to authenticate users who connect using
ssh,rsh, orrlogin, it must have its own host principal in the Kerberos database. Thesshd,kshd, andklogindserver programs all need access to the keys for the host service's principal.- Using
kadmin, add a host principal for the workstation on the KDC. The instance in this case is the hostname of the workstation. Use the-randkeyoption for thekadmin'saddprinccommand to create the principal and assign it a random key:addprinc -randkey host/server.example.com
addprinc -randkey host/server.example.comCopy to Clipboard Copied! Toggle word wrap Toggle overflow - The keys can be extracted for the workstation by running
kadminon the workstation itself and using thektaddcommand.ktadd -k /etc/krb5.keytab host/server.example.com
ktadd -k /etc/krb5.keytab host/server.example.comCopy to Clipboard Copied! Toggle word wrap Toggle overflow
- To use other kerberized network services, install the krb5-server package and start the services. The kerberized services are listed in Table 3.3, “Common Kerberized Services”.
| Service Name | Usage Information |
|---|---|
| ssh | OpenSSH uses GSS-API to authenticate users to servers if the client's and server's configuration both have GSSAPIAuthentication enabled. If the client also has GSSAPIDelegateCredentials enabled, the user's credentials are made available on the remote system. |
| rsh and rlogin | Enable klogin, eklogin, and kshell. |
| Telnet | Enable krb5-telnet. |
| FTP | Create and extract a key for the principal with a root of ftp. Be certain to set the instance to the fully qualified hostname of the FTP server, then enable gssftp. |
| IMAP |
The
cyrus-imap package uses Kerberos 5 if it also has the cyrus-sasl-gssapi package installed. The cyrus-sasl-gssapi package contains the Cyrus SASL plugins which support GSS-API authentication. Cyrus IMAP functions properly with Kerberos as long as the cyrus user is able to find the proper key in /etc/krb5.keytab, and the root for the principal is set to imap (created with kadmin).
An alternative to
cyrus-imap can be found in the dovecot package, which is also included in Red Hat Enterprise Linux. This package contains an IMAP server but does not, to date, support GSS-API and Kerberos.
|
| CVS | gserver uses a principal with a root of cvs and is otherwise identical to the CVS pserver. |
3.5. Setting up a Kerberos Client for Smart Cards
Copy linkLink copied to clipboard!
Smart cards can be used with Kerberos, but it requires additional configuration to recognize the X.509 (SSL) user certificates on the smart cards:
- Install the required PKI/OpenSSL package, along with the other client packages:
yum install krb5-pkinit-openssl
yum install krb5-workstation krb5-libs krb5-auth-dialog
[root@server ~]# yum install krb5-pkinit-openssl
[root@server ~]# yum install krb5-workstation krb5-libs krb5-auth-dialog
Copy to Clipboard Copied! Toggle word wrap Toggle overflow - Edit the
/etc/krb5.confconfiguration file to add a parameter for the public key infrastructure (PKI) to the[realms]section of the configuration. Thepkinit_anchorsparameter sets the location of the CA certificate bundle file.Copy to Clipboard Copied! Toggle word wrap Toggle overflow - Add the PKI module information to the PAM configuration for both smart card authentication (
/etc/pam.d/smartcard-auth) and system authentication (/etc/pam.d/system-auth). The line to be added to both files is as follows:auth optional pam_krb5.so use_first_pass no_subsequent_prompt preauth_options=X509_user_identity=PKCS11:/usr/lib64/pkcs11/libcoolkeypk11.so
auth optional pam_krb5.so use_first_pass no_subsequent_prompt preauth_options=X509_user_identity=PKCS11:/usr/lib64/pkcs11/libcoolkeypk11.soCopy to Clipboard Copied! Toggle word wrap Toggle overflow
3.6. Domain-to-Realm Mapping
Copy linkLink copied to clipboard!
When a client attempts to access a service running on a particular server, it knows the name of the service (host) and the name of the server (foo.example.com), but because more than one realm can be deployed on your network, it must guess at the name of the realm in which the service resides.
By default, the name of the realm is taken to be the DNS domain name of the server in all capital letters.
foo.example.org → EXAMPLE.ORG
foo.example.com → EXAMPLE.COM
foo.hq.example.com → HQ.EXAMPLE.COM
foo.example.org → EXAMPLE.ORG
foo.example.com → EXAMPLE.COM
foo.hq.example.com → HQ.EXAMPLE.COM
In some configurations, this will be sufficient, but in others, the realm name which is derived will be the name of a non-existent realm. In these cases, the mapping from the server's DNS domain name to the name of its realm must be specified in the domain_realm section of the client system's
krb5.conf. For example:
[domain_realm]
.example.com = EXAMPLE.COM
example.com = EXAMPLE.COM
[domain_realm]
.example.com = EXAMPLE.COM
example.com = EXAMPLE.COM
The configuration specifies two mappings. The first mapping specifies that any system in the example.com DNS domain belongs to the EXAMPLE.COM realm. The second specifies that a system with the exact name example.com is also in the realm. The distinction between a domain and a specific host is marked by the presence or lack of an initial period character. The mapping can also be stored directly in DNS.
3.7. Setting up Cross Realm Authentication
Copy linkLink copied to clipboard!
Allowing clients (typically users) of one realm to use Kerberos to authenticate to services (typically server processes running on a particular server system) which belong to another realm requires cross-realm authentication.
3.7.1. Setting up Basic Trust Relationships
Copy linkLink copied to clipboard!
For the simplest case, for a client of realm
A.EXAMPLE.COM to access a service in the B.EXAMPLE.COM realm, both realms must share a key for a principal named krbtgt/B.EXAMPLE.COM@A.EXAMPLE.COM, and both keys must have the same key version number associated with them.
To accomplish this, select a very strong password or passphrase, and create an entry for the principal in both realms using
kadmin.
Use the
get_principal command to verify that both entries have matching key version numbers (kvno values) and encryption types.
Important
A common, but incorrect, situation is for administrators to try to use the
add_principal command's -randkey option to assign a random key instead of a password, dump the new entry from the database of the first realm, and import it into the second. This will not work unless the master keys for the realm databases are identical, as the keys contained in a database dump are themselves encrypted using the master key.
Clients in the
A.EXAMPLE.COM realm are now able to authenticate to services in the B.EXAMPLE.COM realm. Put another way, the B.EXAMPLE.COM realm now trusts the A.EXAMPLE.COM realm.
This brings us to an important point: cross-realm trust is unidirectional by default. The KDC for the
B.EXAMPLE.COM realm can trust clients from the A.EXAMPLE.COM to authenticate to services in the B.EXAMPLE.COM realm. However, this trust is not automatically reciprocated so that the B.EXAMPLE.COM realm are trusted to authenticate to services in the A.EXAMPLE.COM realm. To establish trust in the other direction, both realms would need to share keys for the krbtgt/A.EXAMPLE.COM@B.EXAMPLE.COM service — an entry with a reverse mapping from the previous example.
3.7.2. Setting up Complex Trust Relationships
Copy linkLink copied to clipboard!
If direct trust relationships were the only method for providing trust between realms, networks which contain multiple realms would be very difficult to set up. Luckily, cross-realm trust is transitive. If clients from
A.EXAMPLE.COM can authenticate to services in B.EXAMPLE.COM, and clients from B.EXAMPLE.COM can authenticate to services in C.EXAMPLE.COM, then clients in A.EXAMPLE.COM can also authenticate to services in C.EXAMPLE.COM, even if C.EXAMPLE.COM does not directly trust A.EXAMPLE.COM. This means that, on a network with multiple realms which all need to trust each other, making good choices about which trust relationships to set up can greatly reduce the amount of effort required.
The client's system must be configured so that it can properly deduce the realm to which a particular service belongs, and it must be able to determine how to obtain credentials for services in that realm.
Taking first things first, the principal name for a service provided from a specific server system in a given realm typically looks like this:
service/server.example.com@EXAMPLE.COM
service/server.example.com@EXAMPLE.COM
service is typically either the name of the protocol in use (other common values include LDAP, IMAP, CVS, and HTTP) or host. server.example.com is the fully-qualified domain name of the system which runs the service.
EXAMPLE.COM is the name of the realm.
To deduce the realm to which the service belongs, clients will most often consult DNS or the
domain_realm section of /etc/krb5.conf to map either a hostname (server.example.com) or a DNS domain name (.example.com) to the name of a realm (EXAMPLE.COM).
After determining the realm to which a service belongs, a client then has to determine the set of realms which it needs to contact, and in which order it must contact them, to obtain credentials for use in authenticating to the service.
This can be done in one of two ways. The simplest is to use a shared hierarchy to name realms. The second uses explicit configuration in the
krb5.conf file.
3.7.2.1. Configuring a Shared Hierarchy of Names
Copy linkLink copied to clipboard!
The default method, which requires no explicit configuration, is to give the realms names within a shared hierarchy. For an example, assume realms named
A.EXAMPLE.COM, B.EXAMPLE.COM, and EXAMPLE.COM. When a client in the A.EXAMPLE.COM realm attempts to authenticate to a service in B.EXAMPLE.COM, it will, by default, first attempt to get credentials for the EXAMPLE.COM realm, and then to use those credentials to obtain credentials for use in the B.EXAMPLE.COM realm.
The client in this scenario treats the realm name as one might treat a DNS name. It repeatedly strips off the components of its own realm's name to generate the names of realms which are "above" it in the hierarchy until it reaches a point which is also "above" the service's realm. At that point it begins prepending components of the service's realm name until it reaches the service's realm. Each realm which is involved in the process is another "hop".
For example, using credentials in
A.EXAMPLE.COM, authenticating to a service in B.EXAMPLE.COM has three hops: A.EXAMPLE.COM → EXAMPLE.COM → B.EXAMPLE.COM .
A.EXAMPLE.COMandEXAMPLE.COMshare a key forkrbtgt/EXAMPLE.COM@A.EXAMPLE.COMEXAMPLE.COMandB.EXAMPLE.COMshare a key forkrbtgt/B.EXAMPLE.COM@EXAMPLE.COM
Another example, using credentials in
Copy to Clipboard
Copied!
Toggle word wrap
Toggle overflow
SITE1.SALES.EXAMPLE.COM, authenticating to a service in EVERYWHERE.EXAMPLE.COM can have several series of hops:
SITE1.SALES.EXAMPLE.COM →
SALES.EXAMPLE.COM →
EXAMPLE.COM →
EVERYWHERE.EXAMPLE.COM
SITE1.SALES.EXAMPLE.COM →
SALES.EXAMPLE.COM →
EXAMPLE.COM →
EVERYWHERE.EXAMPLE.COMSITE1.SALES.EXAMPLE.COMandSALES.EXAMPLE.COMshare a key forkrbtgt/SALES.EXAMPLE.COM@SITE1.SALES.EXAMPLE.COMSALES.EXAMPLE.COMandEXAMPLE.COMshare a key forkrbtgt/EXAMPLE.COM@SALES.EXAMPLE.COMEXAMPLE.COMandEVERYWHERE.EXAMPLE.COMshare a key forkrbtgt/EVERYWHERE.EXAMPLE.COM@EXAMPLE.COM
There can even be hops between realm names whose names share no common suffix, such as
Copy to Clipboard
Copied!
Toggle word wrap
Toggle overflow
DEVEL.EXAMPLE.COM and PROD.EXAMPLE.ORG.
DEVEL.EXAMPLE.COMandEXAMPLE.COMshare a key forkrbtgt/EXAMPLE.COM@DEVEL.EXAMPLE.COMEXAMPLE.COMandCOMshare a key forkrbtgt/COM@EXAMPLE.COMCOMandORGshare a key forkrbtgt/ORG@COMORGandEXAMPLE.ORGshare a key forkrbtgt/EXAMPLE.ORG@ORGEXAMPLE.ORGandPROD.EXAMPLE.ORGshare a key forkrbtgt/PROD.EXAMPLE.ORG@EXAMPLE.ORG
3.7.2.2. Configuring Paths in krb5.conf
Copy linkLink copied to clipboard!
The more complicated, but also more flexible, method involves configuring the
capaths section of /etc/krb5.conf, so that clients which have credentials for one realm will be able to look up which realm is next in the chain which will eventually lead to the being able to authenticate to servers.
The format of the
capaths section is relatively straightforward: each entry in the section is named after a realm in which a client might exist. Inside of that subsection, the set of intermediate realms from which the client must obtain credentials is listed as values of the key which corresponds to the realm in which a service might reside. If there are no intermediate realms, the value "." is used.
For example:
Clients in the
A.EXAMPLE.COM realm can obtain cross-realm credentials for B.EXAMPLE.COM directly from the A.EXAMPLE.COM KDC.
If those clients wish to contact a service in the
C.EXAMPLE.COM realm, they will first need to obtain necessary credentials from the B.EXAMPLE.COM realm (this requires that krbtgt/B.EXAMPLE.COM@A.EXAMPLE.COM exist), and then use those credentials to obtain credentials for use in the C.EXAMPLE.COM realm (using krbtgt/C.EXAMPLE.COM@B.EXAMPLE.COM).
If those clients wish to contact a service in the
D.EXAMPLE.COM realm, they will first need to obtain necessary credentials from the B.EXAMPLE.COM realm, and then credentials from the C.EXAMPLE.COM realm, before finally obtaining credentials for use with the D.EXAMPLE.COM realm.
Note
Without a capath entry indicating otherwise, Kerberos assumes that cross-realm trust relationships form a hierarchy.
Clients in the
A.EXAMPLE.COM realm can obtain cross-realm credentials from B.EXAMPLE.COM realm directly. Without the "." indicating this, the client would instead attempt to use a hierarchical path, in this case:
A.EXAMPLE.COM → EXAMPLE.COM → B.EXAMPLE.COM
A.EXAMPLE.COM → EXAMPLE.COM → B.EXAMPLE.COM[1]
A system where both the client and the server share a common key that is used to encrypt and decrypt network communication.
Chapter 4. Setting up Enterprise Security Client
Copy linkLink copied to clipboard!
The following sections contain basic instructions on using the Enterprise Security Client for token enrollment, formatting, and password reset operations.
4.1. Installing the Smart Card Package Group
Copy linkLink copied to clipboard!
Packages used to manage smart cards, such as esc, should already be installed on the Red Hat Enterprise Linux system. If the packages are not installed or need to be updated, all of the smart card-related packages can be pulled in by installing the
Smart card support package group. For example:
yum groupinstall "Smart card support"
yum groupinstall "Smart card support"4.2. Launching the Smart Card Manager UI
Copy linkLink copied to clipboard!
There are two aspects to launching the Enterprise Security Client UI. The Enterprise Security Client process must be started and it runs silently, waiting to detect any inserted smart card or token. The Smart Card Manager UI for the Enterprise Security Client opens automatically when smart cards are inserted or can be opened manually.
Initiate the Enterprise Security Client daemon (
escd) from the command line:
esc
esc
This daemon listens silently for smart cards and opens the GUI as soon as a smart card is inserted.
To open the Smart Card Manager GUI manually, click , , and then .
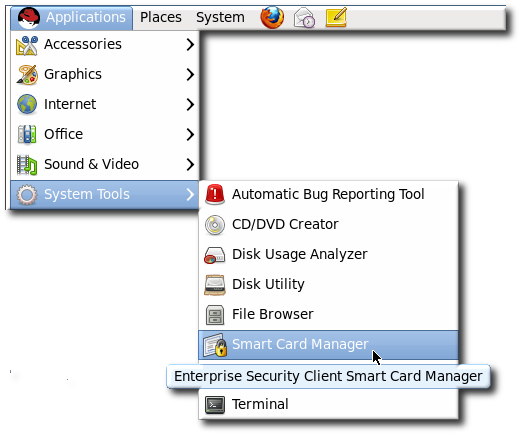
Figure 4.1. Selecting the Smart Card Manager Item in the Menu
4.3. Overview of Enterprise Security Client Configuration
Copy linkLink copied to clipboard!
The Enterprise Security Client is an intermediary frontend that provides connections between users (and their tokens), the Token Processing System, and certificate authority. The Enterprise Security Client provides two slightly different interfaces:
- A local interface, based on XUL and JavaScript
- A web-hosted interface which can be used for remote access, based on CGIs, HTML, and JavaScript
The primary Enterprise Security Client user interface, which is accessed from the local server, incorporates Mozilla XULRunner technology. XULRunner is a runtime package which hosts standalone applications based on XUL, an XML markup language with a rich feature set for user interfaces and offers several advantages over HTML for applications:
- A wide UI widget set and greater control over the presentation.
- Local markup to the client machine, so it has a greater privilege level than HTML.
- JavaScript as the scripting language for convenient program logic scripting and the ability to leverage XPCOM technology.
All of the files for the web-hosted interface can be customized and edited to change the behavior or appearance of the Enterprise Security Client, within reason.
The Enterprise Security Client, in conjunction with the Token Processing System, supports different user profiles so that different types of users have different token enrollment paths. Both the Enterprise Security Client and TPS also support different token profiles, so that the certificate settings can be custom-defined for different types of tokens. Both of these configurations are set in the TPS, and are described in the Certificate System Administrator's Guide.
4.3.1. Enterprise Security Client File Locations
Copy linkLink copied to clipboard!
This reference shows the different directories and file locations for the different client machines.
On Red Hat Enterprise Linux 32-bit, the Enterprise Security Client is installed by its binary RPM to the default location,
/usr/lib/esc-1.1.0/esc. On Red Hat Enterprise Linux 64-bit systems, the installation directory is /usr/lib64/esc-1.1.0/esc.
Note
The Enterprise Security Client uses some specific XUL configuration files, but, overall, the Enterprise Security Client uses the system XULRunner packages on Red Hat Enterprise Linux.
| File or Directory | Purpose |
|---|---|
| application.ini | XULRunner application configuration file. |
| components/ | XPCOM components. |
| chrome/ | Directory for Chrome components and additional application files for Enterprise Security Client XUL and JavaScript. |
| defaults/ | Enterprise Security Client default preferences. |
| esc | The script which launches the Enterprise Security Client. |
4.3.2. About the Preferences Configuration Files
Copy linkLink copied to clipboard!
The Enterprise Security Client is configured similarly to Mozilla applications, using preferences files. The primary configuration file is
esc-prefs.js, which is installed with Enterprise Security Client. The second one is prefs.js in the Mozilla profiles directory, which is created when the Enterprise Security Client is first launched.
The Enterprise Security Client uses the Mozilla configuration preferences for each of the supported platforms. The default configuration file on Red Hat Enterprise Linux 32-bit is in
/usr/lib/esc-1.1.0/defaults/preferences/esc-prefs.js. On Red Hat Enterprise Linux 64-bit, this is in /usr/lib64/esc-1.1.0/defaults/preferences/esc-prefs.js.
The
esc-prefs.js file specifies the default configuration to use when the Enterprise Security Client is first launched. This includes parameters to connect to the TPS subsystem, set the password prompt, and configure Phone Home information. Each setting is prefaced by the word pref, then the parameter and value are enclosed in parentheses. For example:
pref(parameter, value);
pref(parameter, value);
The
esc-prefs.js file parameters are listed in Table 4.2, “esc-prefs.js Parameters”. The default esc-prefs.js file is shown in Example 4.1, “Default esc-prefs.js File”.
| Parameter | Description | Notes and Defaults |
|---|---|---|
| toolkit.defaultChromeURI | Defines the URL for the Enterprise Security Client to use to contact the XUL Chrome page. | ("toolkit.defaultChromeURI", "chrome://esc/content/settings.xul") |
| esc.tps.message.timeout | Sets a timeout period, in seconds, for connecting to the TPS. | ("esc.tps.message.timeout","90"); |
| esc.disable.password.prompt | Enables the password prompt, which means that a password is required to read the certificate information off the smart card.
The password prompt is disabled by default, so anyone can use the Enterprise Security Client. However, in security contexts, like when a company uses security officers to manage token operations, then enable the password prompt to restrict access to the Enterprise Security Client.
|
("esc.disable.password.prompt","yes");
|
| esc.global.phone.home.url |
Sets the URL to use to contact the TPS server.
Normally, the Phone Home information is set on the token already through its applet. If a token does not have Phone Home information, meaning it has no way to contact the TPS server, then the Enterprise Security Client checks for a global default Phone Home URL.
This setting is only checked if it is explicitly set. This setting also applies to every token formatted through the client, so setting this parameter forces all tokens to point to the same TPS. Only use this parameter if that specific behavior is desired.
|
("esc.global.phone.home.url", "http://server.example.com:7888/cgi-bin/home/index.cgi");
|
| esc.global.alt.nss.db |
Points to a directory that contains a common security database that is used by all Enterprise Security Client users on the server.
Phone Home URL.
This setting is only checked if it is explicitly set. If this is not set, then each user accesses only each individual profile security database, rather than a shared database.
|
prefs("esc.global.alt.nss.db", "C:/Documents and Settings/All Users/shared-db");
|
Example 4.1. Default esc-prefs.js File
The comments in this file are not included in the example.
When the Enterprise Security Client is launched, it creates a separate, unique profile directory for each user on the system. These profiles are stored in
~/.redhat/esc/alphanumeric_string.default/prefs.js in Red Hat Enterprise Linux 6.
Note
When the Enterprise Security Client requires any changes to a user's configuration values, the updated values are written to the user's profile area, not to the default JavaScript file.
Table 4.3, “prefs.js Parameters” lists the most relevant parameters for the
prefs.js file. Editing this file is tricky. The prefs.js file is generated and edited dynamically by the Enterprise Security Client, and manual changes to this file are overwritten when the Enterprise Security Client exits.
| Parameter | Description | Notes and Defaults |
|---|---|---|
| esc.tps.url | Sets a URL for the Enterprise Security Client to use to connect to the TPS. This is not set by default. | |
| esc.key.token_ID.tps.url |
Sets the hostname and port to use to contact a TPS.
If this Phone Home information was not burned into the card at the factory, it can be manually added to the card by adding the TPS URL, an enrollment page URL, the issuer's name, and Phone Home URL.
|
("esc.key.token_ID.tps.url" = "http://server.example.com:7888/nk_service");
|
| esc.key.token_ID.tps.enrollment-ui.url |
Gives the URL to contact the enrollment page for enroll certificates on the token.
If this Phone Home information was not burned into the card at the factory, it can be manually added to the card by adding the TPS URL, an enrollment page URL, the issuer's name, and Phone Home URL.
| ("esc.key.token_ID.tps.enrollment-ui.url" = "http://server.example.com:7888/cgi_bin/esc.cgi?"); |
| esc.key.token_ID.issuer.name |
Gives the name of the organization enrolling the token.
| ("esc.key.token_ID.issuer.name" = "Example Corp"); |
| esc.key.token_ID.phone.home.url |
Gives the URL to use to contact the Phone Home functionality for the TPS.
The global Phone Home parameter sets a default to use with any token enrollment, if the token does not specify the Phone Home information. By setting this parameter to a specific token ID number, the specified Phone Home parameter applies only to that token.
| ("esc.key.token_ID.phone.home.url" = "http://server.example.com:7888/cgi-bin/home/index.cgi?"); |
| esc.security.url |
Points to the URL to use for security officer mode.
If this is pointed to the security officer enrollment form, then the Enterprise Security Client opens the forms to enroll security officer tokens. If this is pointed to the security officer workstation URL, then it opens the workstation to enroll regular users with security officer approval.
| ("esc.security.url","https://server.example.com:7888/cgi-bin/so/enroll.cgi"); |
4.3.3. About the XUL and JavaScript Files in the Enterprise Security Client
Copy linkLink copied to clipboard!
Smart Card Manager stores the XUL markup and JavaScript functionality in
/usr/lib[64]/esc-1.1.0/chrome/content/esc/.
The primary Enterprise Security Client XUL files are listed in Table 4.4, “Main XUL Files”.
| Filename | Purpose |
|---|---|
| settings.xul | Contains the code for the Settings page. |
| esc.xul | Contains the code for the Enrollment page. |
| config.xul | Contains the code for the configuration UI. |
The primary Smart Card Manager JavaScript files are listed in the following table.
| Filename | Purpose |
|---|---|
| ESC.js | Contains most of the Smart Card Manager JavaScript functionality. |
| TRAY.js | Contains the tray icon functionality. |
| AdvancedInfo.js | Contains the code for the Diagnostics feature. |
| GenericAuth.js | Contains the code for the authentication prompt. This prompt is configurable from the TPS server, which requires dynamic processing by the Smart Card Manager. |
4.4. Configuring Phone Home
Copy linkLink copied to clipboard!
The Phone Home feature in the Enterprise Security Client associates information within each smart card with information that points to distinct TPS servers and Smart Card Manager UI pages. Whenever the Enterprise Security Client accesses a new smart card, it can connect to the TPS instance and retrieve the Phone Home information.
Phone Home retrieves and then caches this information; because the information is cached locally, the TPS subsystem does not have to be contacted each time a formatted smart card is inserted.
The information can be different for every key or token, which means that different TPS servers and enrollment URLs can be configured for different corporate or customer groups. Phone Home makes it possible to configure different TPS servers for different issuers or company units, without having to configure the Enterprise Security Client manually to locate the correct server and URL.
Note
In order for the TPS subsystem to utilize the Phone Home feature, Phone Home must be enabled in the TPS configuration file, as follows:
op.format.userKey.issuerinfo.enable=true
op.format.userKey.issuerinfo.value=http://server.example.com
op.format.userKey.issuerinfo.enable=true
op.format.userKey.issuerinfo.value=http://server.example.com4.4.1. About Phone Home Profiles
Copy linkLink copied to clipboard!
The Enterprise Security Client is based on Mozilla XULRunner. Consequently, each user has a profile similar to the user profiles used by Mozilla Firefox and Thunderbird. The Enterprise Security Client accesses the configuration preferences file. When the Enterprise Security Client caches information for each token, the information is stored in the user's configuration file. The next time the Enterprise Security Client is launched, it retrieves the information from the configuration file instead of contacting the server again.
When a smart card is inserted and Phone Home is launched, the Enterprise Security Client first checks the token for the Phone Home information. If no information is on the token, then the client checks the
esc-prefs.js file for the esc.global.phone.home.url parameter.
If no Phone Home information is stored on the token and there is no global Phone Home parameter, the user is prompted for the Phone Home URL when a smart card is inserted, as shown in Figure 4.2, “Prompt for Phone Home Information”. The other information is supplied and stored when the token is formatted. In this case, the company supplies the specific Phone Home URL for the user. After the user submits the URL, the format process adds the rest of the information to the Phone Home profile. The format process is not any different for the user.
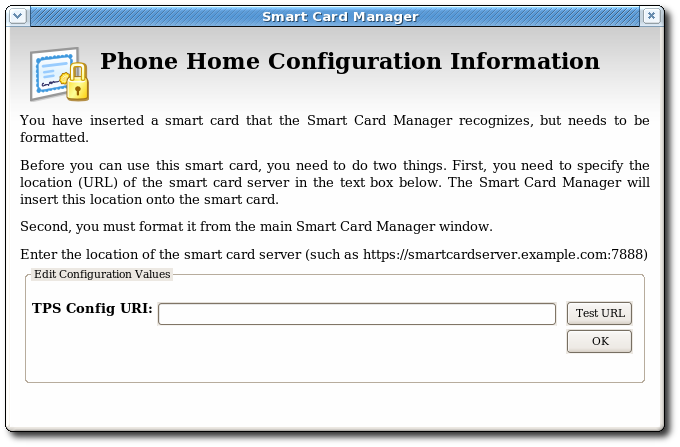
Figure 4.2. Prompt for Phone Home Information
4.4.2. Setting Global Phone Home Information
Copy linkLink copied to clipboard!
Phone Home is triggered automatically when a security token is inserted into a machine. The system immediately attempts to read the Phone Home URL from the token and to contact the TPS server. For new tokens or for previously formatted tokens, the Phone Home information may not be available to the card.
The Enterprise Security Client configuration file,
esc-prefs.js, has a parameter which allows a global Phone Home URL default to be set. This parameter is esc.global.phone.home.url and is not in the file by default.
To define the global Phone Home URL:
- Remove any existing Enterprise Security Client user profile directory. Profile directories are created automatically when a smart card is inserted. By default, the profile directory is
~/.redhat/esc. - Open the
esc-prefs.jsfile.On Red Hat Enterprise Linux 6, the profile directory is/usr/lib/esc-1.1.0/defaults/preferences. On 64-bit systems, this is/usr/lib64/esc-1.1.0/defaults/preferences. - Add the global Phone Home parameter line to the
esc-prefs.jsfile. For example:pref("esc.global.phone.home.url","http://server.example.com:7888/cgi-bin/home/index.cgi");pref("esc.global.phone.home.url","http://server.example.com:7888/cgi-bin/home/index.cgi");Copy to Clipboard Copied! Toggle word wrap Toggle overflow The URL can reference a machine name, a fully-qualified domain name, or an IPv4 or IPv6 address, depending on the DNS and network configuration.
4.4.3. Adding Phone Home Information to a Token Manually
Copy linkLink copied to clipboard!
The Phone Home information can be manually put on a token in one of two ways:
- The preferred method is that the information is burned onto the token at the factory. When the tokens are ordered from the manufacturer, the company supplies detailed information on how the tokens should be configured when shipped.
- If tokens are blank, the company IT department can supply the information when formatting small groups of tokens.
The following information is used by the Phone Home feature for each smart card in the
~/.redhat/esc/alphanumeric_string.default/prefs.js file:
- The TPS server and port. For example:
"esc.key.token_ID.tps.url" = "http://server.example.com:7888/nk_service"
"esc.key.token_ID.tps.url" = "http://server.example.com:7888/nk_service"Copy to Clipboard Copied! Toggle word wrap Toggle overflow - The TPS enrollment interface URL. For example:
"esc.key.token_ID.tps.enrollment-ui.url" = "http://server.example.com:7888/cgi_bin/esc.cgi?"
"esc.key.token_ID.tps.enrollment-ui.url" = "http://server.example.com:7888/cgi_bin/esc.cgi?"Copy to Clipboard Copied! Toggle word wrap Toggle overflow - The issuing company name or ID. For example:
"esc.key.token_ID.issuer.name" = "Example Corp"
"esc.key.token_ID.issuer.name" = "Example Corp"Copy to Clipboard Copied! Toggle word wrap Toggle overflow - The Phone Home URL. For example:
"esc.key.token_ID.phone.home.url" = "http://server.example.com:7888/cgi-bin/home/index.cgi?"
"esc.key.token_ID.phone.home.url" = "http://server.example.com:7888/cgi-bin/home/index.cgi?"Copy to Clipboard Copied! Toggle word wrap Toggle overflow - Optionally, a default browser URL to access when an enrolled smart card is inserted.
"esc.key.token_ID.EnrolledTokenBrowserURL" = "http://www.test.example.com"
"esc.key.token_ID.EnrolledTokenBrowserURL" = "http://www.test.example.com"Copy to Clipboard Copied! Toggle word wrap Toggle overflow
More of the parameters used by the
prefs.js file are listed in Table 4.3, “prefs.js Parameters”.
Note
The URLs for these parameters can reference a machine name, a fully-qualified domain name, or an IPv4 or IPv6 address, depending on the DNS and network configuration.
4.4.4. Configuring the TPS to Use Phone Home
Copy linkLink copied to clipboard!
The Phone Home feature and the different type of information used by it only work when the TPS has been properly configured to use Phone Home. If the TPS is not configured for Phone Home, then this feature is ignored. Phone Home is configured in the
index.cgi in the /var/lib/pki-tps/cgi-bin/home directory; this prints the Phone Home information to XML.
Example 4.2, “TPS Phone Home Configuration File” shows an example XML file used by the TPS subsystem to configure the Phone Home feature.
Example 4.2. TPS Phone Home Configuration File
The TPS configuration URI is the URL of the TPS server which returns the rest of the Phone Home information to the Enterprise Security Client. An example of this URL is
http://server.example.com:7888/cgi-bin/home/index.cgi; the URL can reference the machine name, fully-qualified domain name, or an IPv4 or IPv6 address, as appropriate. When the TPS configuration URI is accessed, the TPS server is prompted to return all of the Phone Home information to the Enterprise Security Client.
To test the URL of the Smart Card server, enter the address in the TPS Config URI field, and click .
If the server is successfully contacted, a message box indicates success. If the test connection fails, an error dialog appears.
4.5. Using Security Officer Mode
Copy linkLink copied to clipboard!
The Enterprise Security Client, together with the TPS subsystem, supports a special security officer mode of operation. This mode allows a supervisory individual, a security officer, the ability to oversee the face to face enrollment of regular users in a given organization.
Security officer mode provides the ability to enroll individuals under the supervision of a security officer, a designated user-type who can manage other user's smart cards in face-to-face and very secure operations. Security officer mode overlaps with some regular user operations, with additional security features:
- The ability to search for an individual within an organization.
- An interface that displays a photo and other pertinent information about an individual.
- The ability to enroll approved individuals.
- Formatting or resetting a user's card.
- Formatting or resetting a security officer's card.
- Enrolling a temporary card for a user that has misplaced their primary card.
- Storing TPS server information on a card. This Phone Home information is used by the Enterprise Security Client to contact a given TPS server installation.
Working in the security officer mode falls into two distinct areas:
- Creating and managing security officers.
- Managing regular users by security officers.
When security officer mode is enabled, the Enterprise Security Client uses an external user interface provided by the server. This interface takes control of smart card operations in place of the local XUL code that the Enterprise Security Client normally uses.
The external interface maintains control until security officer mode is disabled.
Note
It is a good idea to run security officer clients over SSL, so make sure that the TPS is configured to run in SSL, and then point the Enterprise Security Client to the TPS's SSL agent port.
4.5.1. Enabling Security Officer Mode
Copy linkLink copied to clipboard!
There are two areas where the security officer mode must be configured, both in the TPS and in the Enterprise Security Client's
esc-prefs.js file.
In the TPS:
- Add the security officer user entry to the TPS database as a member of the TUS Officers group. This group is created by default in the TPS LDAP database and is the expected location for all security officer user entries.
Note
It can be simpler to add and copy user entries in the LDAP database using the Red Hat Directory Server Console. Using the Directory Server Console is described in the Red Hat Directory Server Administrators Guide in section 3.1.2, "Creating Directory Entries."There are two subtrees associated with the TPS, each associated with a different database. (Commonly, both databases can be on the same server, but that is not required.)The LDAP directory and the suffix are defined in the token profile in the TPS- The first suffix, within the authentication database, is for external users; the TPS checks their user credentials against the directory to authenticate any user attempting to enroll a smart card. This has a distinguished name (DN) like
dc=server,dc=example,dc=com. - The other database is used for internal TPS instance entries, including TPS agents, administrators, and security officers. This subtree is within the internal database for the TPS, which includes the token database. This subtree has a DN based on the TPS server, like
dc=server.example.com-pki-tps. The TUS Officers group entry is under thedc=server.example.com-pki-tpssuffix.
CS.cfgfile in theauthIdandbaseDNparameters for the security officer's auth instance. For example:auth.instance.1.authId=ldap2 auth.instance.1.baseDN=dc=sec officers,dc=server.example.com-pki-tps
auth.instance.1.authId=ldap2 auth.instance.1.baseDN=dc=sec officers,dc=server.example.com-pki-tpsCopy to Clipboard Copied! Toggle word wrap Toggle overflow Any security officer entry has to be a child entry of the TUS Officers group entry. This means that the group entry is the main entry, and the user entry is directly beneath it in the directory tree.The TUS Officers group entry iscn=TUS Officers,ou=Groups,dc=server.example.com-pki-tps.For example, to add the security officer entry usingldapmodify:Copy to Clipboard Copied! Toggle word wrap Toggle overflow Press the Enter key twice to send the entry, or use Ctrl+D.
Then, configure the Enterprise Security Client.
- First, trust the CA certificate chain.
Note
This step is only required if the certificate is not yet trusted in the Enterprise Security Client database.If you want to point the Enterprise Security Client to a database which already contains the required certificates, use theesc.global.alt.nss.dbin theesc-prefs.jsfile to point to another database.- Open the CA's end-entities page.
https://server.example.com:9444/ca/ee/ca/
https://server.example.com:9444/ca/ee/ca/Copy to Clipboard Copied! Toggle word wrap Toggle overflow - Click the Retrieval tab, and download the CA certificate chain.
- Open the Enterprise Security Client.
esc
escCopy to Clipboard Copied! Toggle word wrap Toggle overflow - Click the View Certificates button.
- Click the Authorities tab.
- Click the button, and import the CA certificate chain.
- Set the trust settings for the CA certificate chain.
- Then, format and enroll the security officer's token. This token is used to access the security officer Smart Card Manager UI.
- Insert a blank token.
- When the prompt for the Phone Home information opens, enter the security officer URL.
/var/lib/pki-tps/cgi-bin/so/index.cgi
/var/lib/pki-tps/cgi-bin/so/index.cgiCopy to Clipboard Copied! Toggle word wrap Toggle overflow - Click the button to format the security officer's token.
- Close the interface and stop the Enterprise Security Client.
- Add two parameters in the
esc-prefs.jsfile. The first,esc.disable.password.prompt, sets security officer mode. The second,esc.security.url, points to the security officer enrollment page. Just the presence of theesc.security.urlparameter instructs the Enterprise Security Client to open in security officer mode next time it opens.pref("esc.disable.password.prompt","no"); pref("esc.security.url","https://server.example.com:7888/cgi-bin/so/enroll.cgi");pref("esc.disable.password.prompt","no"); pref("esc.security.url","https://server.example.com:7888/cgi-bin/so/enroll.cgi");Copy to Clipboard Copied! Toggle word wrap Toggle overflow - Start the Enterprise Security Client again, and open the UI.
esc
escCopy to Clipboard Copied! Toggle word wrap Toggle overflow - The Enterprise Security Client is configured to connect to the security officer enrollment form in order to enroll the new security officer's token. Enroll the token as described in Section 4.5.2, “Enrolling a New Security Officer”.
- Close the interface and stop the Enterprise Security Client.
- Edit the
esc-prefs.jsfile again, and this time change theesc.security.urlparameter to point to the security officer workstation page.pref("esc.security.url","https://server.example.com:7889/cgi-bin/sow/welcome.cgi");pref("esc.security.url","https://server.example.com:7889/cgi-bin/sow/welcome.cgi");Copy to Clipboard Copied! Toggle word wrap Toggle overflow - Restart the Enterprise Security Client again. The UI now points to the security officer workstation to allow security officers to enroll tokens for regular users.
To disable security officer mode, close the Smart Card Manager GUI, stop the
escd process, and comment out the esc.security.url and esc.disable.password.prompt lines in the esc-prefs.js file. When the esc process is restarted, it starts in normal mode.
4.5.2. Enrolling a New Security Officer
Copy linkLink copied to clipboard!
Security officers are set up using a separate, unique interface rather than the one for regular enrollments or the one used for security officer-managed enrollments.
- Make sure the
escprocess is running.esc
escCopy to Clipboard Copied! Toggle word wrap Toggle overflow With security officer mode enabled in theesc-pref.jsfile (Section 4.5.1, “Enabling Security Officer Mode”), the security officer enrollment page opens. - In the Security Officer Enrollment window, enter the LDAP user name and password of the new security officer and a password that will be used with the security officer's smart card.

Note
If the password is stored using the SSHA hash, then any exclamation point (!) and dollar sign ($) characters in the password must be properly escaped for a user to bind successfully to the Enterprise Security Client on Windows XP and Vista systems.- For the dollar sign ($) character, escape the dollar sign when the password is created:Then, enter only the dollar sign ($) character when logging into the Enterprise Security Client.
\$
\$Copy to Clipboard Copied! Toggle word wrap Toggle overflow - For the exclamation point (!) character, escape the character when the password is created and when the password is entered to log into the Enterprise Security Client.
\!
\!Copy to Clipboard Copied! Toggle word wrap Toggle overflow
- Click .
This produces a smart card which contains the certificates needed by the security officer to access the Enterprise Security Client security officer, so that regular users can be enrolled and managed within the system.
4.5.3. Using Security Officers to Manage Users
Copy linkLink copied to clipboard!
The security officer Station page manages regular users through operations such as enrolling new or temporary cards, formatting cards, and setting the Phone Home URL.
4.5.3.1. Enrolling a New User
Copy linkLink copied to clipboard!
There is one significant difference between enrolling a user's smart card in security officer mode and the process in Section 5.3, “Enrolling a Smart Card Automatically” and Section 5.4.6, “Enrolling Smart Cards”. All processes require logging into an LDAP database to verify the user's identity, but the security officer mode has an extra step to compare some credentials presented by the user against some information in the database (such as a photograph).
- Make sure the
escprocess is running. If necessary, start the process.esc
escCopy to Clipboard Copied! Toggle word wrap Toggle overflow Also, make sure that security officer mode is enabled, as described in Section 4.5.1, “Enabling Security Officer Mode”. - Then open the Smart Card Manager UI.
Note
Ensure that there is a valid and enrolled security officer card plugged into the computer. A security officer's credentials are required to access the following pages.
- Click to display the security officer Station page. The client prompts for the password for the security officer's card (which is required for SSL client authentication) or to select the security officer's signing certificate from the drop-down menu.
- Click the link to display the Security Officer Select User page.

- Enter the LDAP name of the user who is to receive a new smart card.
- Click . If the user exists, the Security Officer Confirm User page opens.
- Compare the information returned in the Smart Card Manager UI to the person or credentials that are present.
- If all the details are correct, click to display the Security Officer Enroll User page. This page prompts the officer to insert a new smart card into the computer.
- If the smart card is properly recognized, enter the new password for this card and click .
A successful enrollment produces a smart card that a user can use to access the secured network and services for which the smart card was made.
4.5.3.2. Performing Other Security Officer Tasks
Copy linkLink copied to clipboard!
All of the other operations that can be performed for regular users by a security officer — issuing temporary tokens, re-enrolling tokens, or setting a Phone Home URL — are performed as described in Chapter 4, Setting up Enterprise Security Client, after opening the security officer UI.
- Make sure the
escprocess is running. If necessary, start the process.esc
escCopy to Clipboard Copied! Toggle word wrap Toggle overflow Also, make sure that security officer mode is enabled, as described in Section 4.5.1, “Enabling Security Officer Mode”. - Then open the Smart Card Manager UI.
Note
Ensure that there is a valid and enrolled security officer card plugged into the computer. A security officer's credentials are required to access the following pages.
- Click to display the security officer Station page. If prompted, enter the password for the security officer's card. This is required for SSL client authentication.
- Select the operation from the menu (enrolling a temporary token, formatting the card, or setting the Phone Home URL).
- Continue the operation as described in Chapter 4, Setting up Enterprise Security Client.
4.5.3.3. Formatting an Existing Security Officer Smart Card
Copy linkLink copied to clipboard!
Important
Reformatting a token is a destructive operation to the security officer's token and should only be done if absolutely needed.
- Make sure that security officer mode is enabled, as described in Section 4.5.1, “Enabling Security Officer Mode”.
- Open the Smart Card Manager UI.
Note
Ensure that there is a valid and enrolled security officer card plugged into the computer. A security officer's credentials are required to access the following pages.
- Click to display the security officer Station page. If prompted, enter the password for the security officer's card. This is required for SSL client authentication.
- Select the operation from the menu (enrolling a temporary token, formatting the card, or setting the Phone Home URL).
- Click . Because the security officer card is already inserted, the following screen displays:

- Click to begin the operation.
When the card is successfully formatted, the security officer's card values are reset. Another security officer's card must be used to enter security officer mode and perform any further operations.
4.6. Configuring SSL Connections with the TPS
Copy linkLink copied to clipboard!
By default, the TPS communicates with the Enterprise Security Client over standard HTTP. It is also possible, and in many situations desirable, to secure the TPS-client communications by using HTTP over SSL (HTTPS).
The Enterprise Security Client has to have the CA certificate for the CA which issued the TPS's certificates in order to trust the TPS connection. From there, the Enterprise Security Client can be configured to connect to the TPS's SSL certificate.
- Download the CA certificate used by the TPS.
- Open the CA's end user pages in a web browser.
https://server.example.com:9444/ca/ee/ca/
https://server.example.com:9444/ca/ee/ca/Copy to Clipboard Copied! Toggle word wrap Toggle overflow - Click the Retrieval tab at the top.
- In the left menu, click the Import CA Certificate Chain link.
- Choose the radio button to download the chain as a file, and remember the location and name of the downloaded file.
- Open the Enterprise Security Client.
- Import the CA certificate.
- Click the button.

- Click the Authorities tab.
- Click Import.

- Browse to the CA certificate chain file, and select it.
- When prompted, confirm that you want to trust the CA.
- The Enterprise Security Client needs to be configured to communicate with the TPS over SSL; this is done by setting the Phone Home URL, which is the default URL the Enterprise Security Client uses to connect to the TPS.
- Insert a new, blank token into the machine.Blank tokens are unformatted, so they do not have an existing Phone Home URL, and the URL must be set manually. Formatted tokens (tokens can be formatted by the manufacturer or by your IT department) already have the URL set, and thus do not prompt to set the Phone Home URL.
- Fill in the new TPS URL with the SSL port information. For example:
https://server.example.com:7890/cgi-bin/home/index.cgi
https://server.example.com:7890/cgi-bin/home/index.cgiCopy to Clipboard Copied! Toggle word wrap Toggle overflow - Click the button to send a message to the TPS.If the request is successful, the client opens a dialog box saying that the Phone Home URL was successfully obtained.
4.7. Customizing the Smart Card Enrollment User Interface
Copy linkLink copied to clipboard!
The TPS subsystem displays a generically-formatted smart card enrollment screen which is opened automatically when an uninitialized smart card is inserted. This is actually comprised of three pages, depending on the mode in which the client is running:
/var/lib/pki-tps/cgi-bin/home/Enroll.htmlfor regular enrollments/var/lib/pki-tps/cgi-bin/so/Enroll.htmlfor security officer enrollments/var/lib/pki-tps/cgi-bin/sow/Enroll.htmlfor security officer workstation enrollments (users enrolled through the security officer UI)Note
The security officer workstation directory contains other HTML files for other token operations, such as formats and PIN resets.
There can be even more enrollment pages if there are custom user profiles.
These enrollment pages are basic HTML and JavaScript, which allows them to be easily customized for both their appearance and functionality. The resources, such as images and JavaScript files, referenced by the enrollment file are located in the corresponding
docroot/ directory, such as /var/lib/pki-tps/docroot/esc/sow for the security officer enrollment file in /var/lib/pki-tps/cgi-bin/sow.
There are several ways that the smart card enrollment pages can be customized. The first, and simplest, is changing the text on the page. The page title, section headings, field names, and descriptions can all be changed by editing the HTML file, as shown in the extracts in Example 4.3, “Changing Page Text”.
Example 4.3. Changing Page Text
The styles of the page can be changed through two files: the
style.css CSS style sheet and the logo image, logo.png.
Example 4.4. Changing Page Styles
The
style.css file is a standard CSS file, so all of the tags and classes can be defined as follows:
body {
background-color: grey;
        font-family: arial;
        font-size: 7p
}
body {
background-color: grey;
        font-family: arial;
        font-size: 7p
}
More information on CSS is available at http://www.w3.org/Style/CSS/learning.
The last way to customize the
Enroll.html files is through the JavaScript file which sets the page functionality. This file controls features like the progress meter, as well as processing the inputs which are used to authenticate the user to the user directory.
Example 4.5. Changing Page Script
Warning
Be very cautious about changing the
util.js file. If this file is improperly edited, it can break the Enterprise Security Client UI and prevent tokens from being enrolled.
The complete
/var/lib/pki-tps/cgi-bin/home/Enroll.html file is in Example 4.6, “Complete Enroll.html File”.
Example 4.6. Complete Enroll.html File
4.8. Disabling LDAP Authentication for Token Operations
Copy linkLink copied to clipboard!
By default, each user who requests a token operation is authenticated against an LDAP directory. If the user has an entry, then the operation is allowed; if the user does not have an entry, then the operation is rejected.
For testing or for certain types of users, then it can be simpler or preferable to disable LDAP authentication. This is not configured in the Enterprise Security Client configuration, but in the Token Processing System configuration, and must be done by a TPS administrator.
- Stop the TPS subsystem.
service pki-tps stop
service pki-tps stopCopy to Clipboard Copied! Toggle word wrap Toggle overflow - Open the TPS configuration file.
vim /var/lib/pki-tps/conf/CS.cfg
vim /var/lib/pki-tps/conf/CS.cfgCopy to Clipboard Copied! Toggle word wrap Toggle overflow - Set the authentication parameters to
false.op.operation_type.token_type.loginRequest.enable=false op.operation_type.token_type.auth.enable=false
op.operation_type.token_type.loginRequest.enable=false op.operation_type.token_type.auth.enable=falseCopy to Clipboard Copied! Toggle word wrap Toggle overflow The operation_type is the token operation for which LDAP authentication is being disabled, such asenroll,format, orpinreset. Disabling authentication for one operation type does not disable it for any other operation types.The token_type is the token profile. There are default profiles for regular users, security officers, and the users enrolled by security officers. There can also be custom token types for other kinds of users or certificates.For example:op.enroll.userKey.loginRequest.enable=false op.enroll.userKey.pinReset.enable=false
op.enroll.userKey.loginRequest.enable=false op.enroll.userKey.pinReset.enable=falseCopy to Clipboard Copied! Toggle word wrap Toggle overflow - Restart the TPS subsystem.
service pki-tps start
service pki-tps startCopy to Clipboard Copied! Toggle word wrap Toggle overflow
Editing the TPS configuration is covered in the Certificate System Administrator's Guide.
Chapter 5. Using Smart Cards with the Enterprise Security Client
Copy linkLink copied to clipboard!
When a smart card is enrolled, it means that user-specific keys and certificates are generated and placed on the card. In Red Hat Enterprise Linux, the interface that works between the user and the system which issues certificates is the Enterprise Security Client. The Enterprise Security Client recognizes when a smart card is inserted (or removed) and signals the appropriate subsystem in Red Hat Certificate System. That subsystem then generates the certificate materials and sends them to the Enterprise Security Client, which writes them to the token. That is the enrollment process.
The following sections contain basic instructions on using the Enterprise Security Client for token enrollment, formatting, and password reset operations.
5.1. Supported Smart Cards
Copy linkLink copied to clipboard!
The Enterprise Security Client supports smart cards which are JavaCard 2.1 or higher and Global Platform 2.01-compliant and was tested using the following cards:
- Safenet 330J Java smart cards
- Gemalto 64K V2 tokens, both as a smart card and GemPCKey USB form factor key
- Gemalto GCx4 72K and TOPDLGX4 144K common access cards (CAC)
- Oberthur ID One V5.2 common access cards (CAC)
- Personal identity verification (PIV) cards, compliant with FIPS 201
Note
Enterprise Security Client does not provision PIV or CAC cards, but it will read them and display information.
Smart card testing was conducted using two card readers:
- SCM SCR331 CCID
- OMNIKEY 3121
The only card manager applet supported with Enterprise Security Client is the CoolKey applet.
5.2. Setting up Users to Be Enrolled
Copy linkLink copied to clipboard!
When the Token Processing System is installed, one of its configuration settings is the LDAP directory which contains the users who are allowed to enroll a token. Only users who are stored within this authentication directory are allowed to enroll, format, or have a token. Before attempting to enroll a token or smart card, make sure that the person requesting the operation has an entry in the LDAP directory.
The TPS is configured to look at a specific base DN in the LDAP directory. This is configured in the TPS's
CS.cfg:
 auth.instance.0.baseDN=dc=example,dc=com
 auth.instance.0.hostport=server.example.com:389
 auth.instance.0.baseDN=dc=example,dc=com
 auth.instance.0.hostport=server.example.com:389
For a user to be allowed to enroll a token, the user must be somewhere below the base DN.
If the user does not already have an entry, then the administrator must add the user to the specified LDAP directory in the specified base DN before any tokens can be enrolled for the user.
5.3. Enrolling a Smart Card Automatically
Copy linkLink copied to clipboard!
Because the Enterprise Security Client is configured using the Phone Home feature, enrolling a smart card is extremely easy. Because the information needed to contact the backend TPS server is provided with each smart card, the user is guided quickly and easily through the procedure.
To enroll an uninitialized smart card:
Note
This procedure assumes that the smart card is uninitialized and the appropriate Phone Home information has been configured.
- Ensure that the Enterprise Security Client is running.
- Insert an uninitialized smart card, pre-formatted with the Phone Home information for the TPS and the enrollment interface URL for the user's organization.The smart card can be added either by placing a USB form factor smart card into a free USB slot, or by inserting a standard, full-sized smart card into a smart card reader.When the system recognizes the smart card, it displays a message indicating it has detected an uninitialized smart card.

- Click to display the smart card enrollment form.
Note
If you remove the card at this point, a message displays stating that the smart card can no longer be detected. Reinsert the card to continue with the enrollment process.The enrollment files are accessed remotely; they reside on the TPS instance. If the network connection is bad or broken, then an error may come up saying Check the Network Connection and Try Again. It is also possible that the enrollment window appears to open but the enrollment process does not proceed. The enrollment pages can be cached if the Enterprise Security Client previously connect to them successfully, so the enrollment UI opens even if the network is offline. Try restarting Enterprise Security Client and check the network connection. - Because the Smart Card Manager now knows where the enrollment UI is located (it is included in the Phone Home information), the enrollment form is displayed for the user to enter the required information.
 This illustration shows the default enrollment UI included with the TPS server. This UI is a standard HTML form, which you can customize to suit your own deployment requirements. This could include adding a company logo or adding and changing field text.See Section 4.7, “Customizing the Smart Card Enrollment User Interface” for information on customizing the UI.
 - The sample enrollment UI requires the following information for the TPS server to process the smart card enrollment operation:
- LDAP User ID. This is the LDAP user ID of the user enrolling the smart card; this can also be a screen name or employee or customer ID number.
- LDAP Password. This is the password corresponding to the user ID entered; this can be a simple password or a customer number.
Note
The LDAP user ID and password are related to the Directory Server user. The TPS server is usually associated with a Directory Server, which stores user information and through which the TPS authenticates users.Passwords must conform to the password policy configured in the Directory Server. - Password and Re-Enter Password. These fields set and confirm the smart card's password, used to protect the card information.
- After you have entered all required information, click Enroll My Smart Card to submit the information and enroll the card.
- When the enrollment process is complete, a message page opens which shows that the card was successfully enrolled and can offer custom instructions on using the newly-enrolled smart card.

5.4. Managing Smart Cards
Copy linkLink copied to clipboard!
You can use the Manage Smart Cards page to perform many of the operations that can be applied to one of the cryptographic keys stored on the token.
You can use this page to format the token, set and reset the card's password, and to display card information. Two other operations, enrolling tokens and viewing the diagnostic logs, are also accessed through the Manage Smart Cards page. These operations are addressed in other sections.
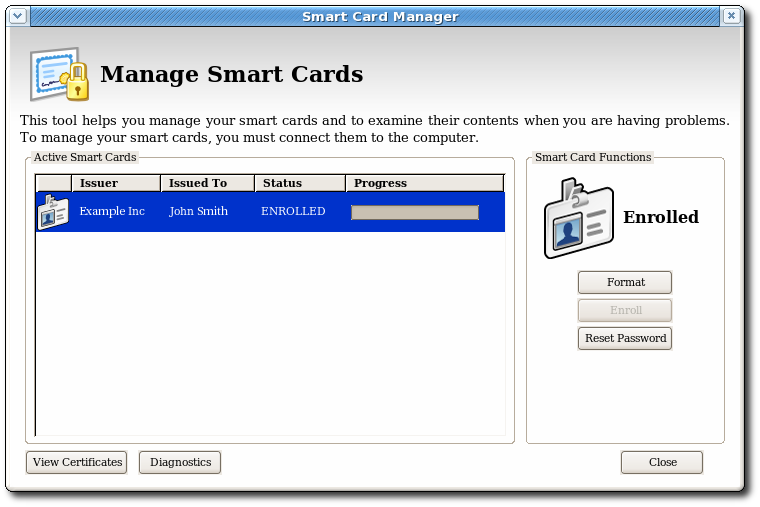
Figure 5.1. Manage Smart Cards Page
5.4.1. Formatting the Smart Card
Copy linkLink copied to clipboard!
When you format a smart card, it is reset to the uninitialized state. This removes all previously generated user key pairs and erases the password set on the smart card during enrollment.
The TPS server can be configured to load newer versions of the applet and symmetric keys onto the card. The TPS supports the CoolKey applet which is shipped with Red Hat Enterprise Linux 6.
To format a smart card:
- Insert a supported smart card into the computer. Ensure that the card is listed in the Active Smart Cards table.
- In the Smart Card Functions section of the Manage Smart Cards screen, click .
- If the TPS has been configured for user authentication, enter the user credentials in the authentication dialog, and click .
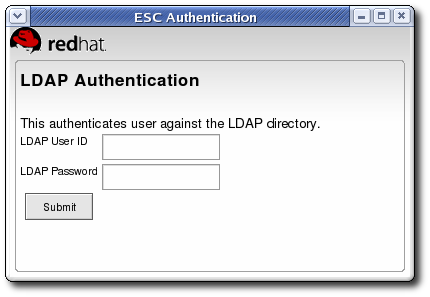
- During the formatting process, the status of the card changes to BUSY and a progress bar is displayed. A success message is displayed when the formatting process is complete. Click to close the message box.
- When the formatting process is complete, the Active Smart Cards table shows the card status as UNINITIALIZED.
5.4.2. Resetting a Smart Card Password
Copy linkLink copied to clipboard!
- Insert a supported smart card into the computer. Ensure that the card is listed in the Active Smart Cards table.
- In the Smart Card Functions section of the Manage Smart Cards screen, click to display the Password dialog.
- Enter a new smart card password in the Enter new password field.
- Confirm the new smart card password in the Re-Enter password field, and then click .

- If the TPS has been configured for user authentication, enter the user credentials in the authentication dialog, and click .
- Wait for the password to finish being reset.
5.4.3. Viewing Certificates
Copy linkLink copied to clipboard!
The Smart Card Manager can display basic information about a selected smart card, including stored keys and certificates. To view certificate information:
- Insert a supported smart card into the computer. Ensure that the card is listed in the Active Smart Cards table.
- Select the card from the list, and click .
This displays basic information about the certificates stored on the card, including the serial number, certificate nickname, and validity dates.
- To view more detailed information about a certificate, select the certificate from the list and click .
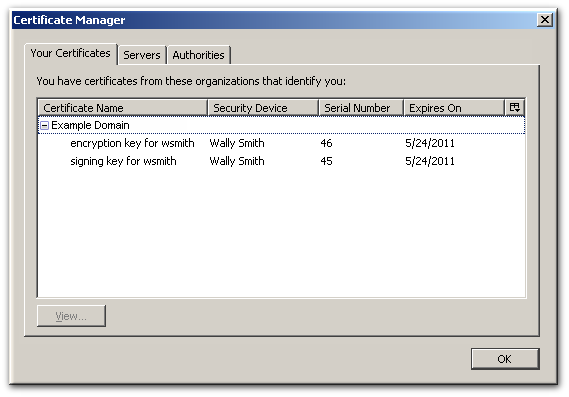
5.4.4. Importing CA Certificates
Copy linkLink copied to clipboard!
The XULRunner Gecko engine implements stringent controls over which SSL-based URLs can be visited by client like a browser or the Enterprise Security Client. If the Enterprise Security Client (through the XULRunner framework) does not trust a URL, the URL can not be visited.
One way to trust an SSL-based URL is to import and trust the CA certificate chain of the CA which issued the certificates for the site. (The other is to create a trust security exception for the site, as in Section 5.4.5, “Adding Exceptions for Servers”.)
Any CA which issues certificates for smart cards must be trusted by the Enterprise Security Client application, which means that its CA certificate must be imported into the Enterprise Security Client.
- Open the CA's end user pages in a web browser.
https://server.example.com:9444/ca/ee/ca/
https://server.example.com:9444/ca/ee/ca/Copy to Clipboard Copied! Toggle word wrap Toggle overflow - Click the Retrieval tab at the top.
- In the left menu, click the Import CA Certificate Chain link.
- Choose the radio button to download the chain as a file, and remember the location and name of the downloaded file.
- Open the Smart Card Manager GUI.
- Click the button.
- Click the Authorities tab.
- Click Import.
- Browse to the CA certificate chain file, and select it.
- When prompted, confirm that you want to trust the CA.
5.4.5. Adding Exceptions for Servers
Copy linkLink copied to clipboard!
The XULRunner Gecko engine implements stringent controls over which SSL-based URLs can be visited by client like a browser or the Enterprise Security Client. If the Enterprise Security Client (through the XULRunner framework) does not trust a URL, the URL can not be visited.
One way to trust an SSL-based URL is to create a trust security exception for the site, which imports the certificate for the site and forces the Enterprise Security Client to recognize it. (The other option is to import the CA certificate chain for the site and automatically trust it, as in Section 5.4.4, “Importing CA Certificates”.)
The smart card can be used to access services or websites over SSL that require special security exceptions; these exceptions can be configured through the Enterprise Security Client, similar to configuring exceptions for websites in a browser like Mozilla Firefox.
- Open the Smart Card Manager UI.
- Click the button.
- Click the Servers tab.
- Click Add Exception.
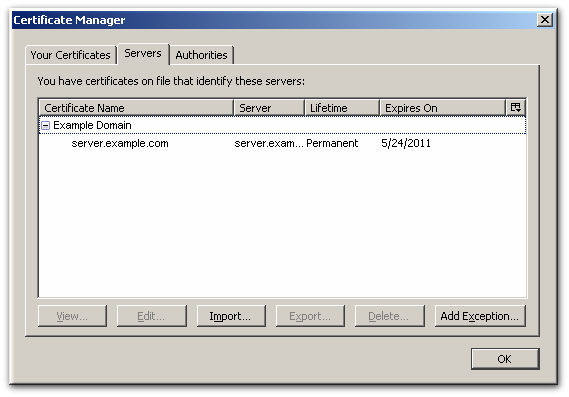
- Enter the URL, including any port numbers, for the site or service which the smart card will be used to access. Then click the button to download the server certificate for the site.

- Click to add the site to the list of allowed sites.
5.4.6. Enrolling Smart Cards
Copy linkLink copied to clipboard!
Most smart cards will be automatically enrolled using the automated enrollment procedure, described in Section 5.3, “Enrolling a Smart Card Automatically”. You can also use the Manage Smart Cards facility to manually enroll a smart card.
If you enroll a token with the user key pairs, then the token can be used for certificate-based operations such as SSL client authentication and S/MIME.
Note
The TPS server can be configured to generate the user key pairs on the server and then archived in the DRM subsystem for recovery if the token is lost.
To enroll a smart card manually:
- Insert a supported, unenrolled smart card into the computer. Ensure that the card is listed in the Active Smart Cards table.
- Click to display the Password dialog.
- Enter a new key password in the Enter a password field.Confirm the new password in the Re-Enter a password field.
- Click to begin the enrollment.
- If the TPS has been configured for user authentication, enter the user credentials in the authentication dialog, and click .
- If the TPS has been configured to archive keys to the DRM, the enrollment process will begin generating and archiving keys.
When the enrollment is complete, the status of the smart card is displayed as ENROLLED.
5.5. Diagnosing Problems
Copy linkLink copied to clipboard!
The Enterprise Security Client includes basic diagnostic tools and a simple interface to log errors and common events, such as inserting and removing a smart card or changing the card's password. The diagnostic tools can identify and notify users about problems with the Enterprise Security Client, smart cards, and TPS connections.
To open the Diagnostics Information window:
- Open the Smart Card Manager UI.
- Select the smart card to check from the list.
- Click the button.

- This opens the window for the selected smart card.

The Diagnostics Information screen displays the following information:
- The Enterprise Security Client version number (listed as the Smart Card Manager version).
- The version information for the XULRunner framework upon which the client is running.
- The number of cards detected by the Enterprise Security Client.
For each card detected, the following information is displayed:
- The version of the applet running on the smart card.
- The alpha-numeric ID of the smart card.
- The card's status, which can be any of the three things:
- NO_APPLET No key was detected.
- UNINITIALIZED. The key was detected, but no certificates have been enrolled.
- ENROLLED. The detected card has been enrolled with certificate and card information.
- The card's Phone Home URL. This is the URL from which all Phone Home information is obtained.
- The card issuer name, such as
Example Corp. - The card's answer-to-reset (ATR) string. This is a unique value that can be used to identify different classes of smart cards. For example:
3BEC00FF8131FE45A0000000563333304A330600A1
3BEC00FF8131FE45A0000000563333304A330600A1Copy to Clipboard Copied! Toggle word wrap Toggle overflow - The TPS Phone Home URL.
- The TPS server URL. This is retrieved through Phone Home.
- The TPS enrollment form URL. This is retrieved through Phone Home.
- Detailed information about each certificate contained on the card.
- A running log of the most recent Enterprise Security Client errors and common events.
The Enterprise Security Client records two types of diagnostic information. It records errors that are returned by the smart card, and it records events that have occurred through the Enterprise Security Client. It also returns basic information about the smart card configuration.
5.5.1. Errors
Copy linkLink copied to clipboard!
- The Enterprise Security Client does not recognize a card.
- Problems occur during a smart card operation, such as a certificate enrollment, password reset, or format operation.
- The Enterprise Security Client loses the connection to the smart card. This can happen when problems occur communicating with the
PCSCdaemon. - The connection between the Enterprise Security Client and TPS is lost.
Smart cards can report certain error codes to the TPS; these are recorded in the TPS's
tps-debug.log or tps-error.log files, depending on the cause for the message.
| Return Code | Description |
|---|---|
| General Error Codes | |
| 6400 | No specific diagnosis |
| 6700 | Wrong length in Lc |
| 6982 | Security status not satisfied |
| 6985 | Conditions of use not satisfied |
| 6a86 | Incorrect P1 P2 |
| 6d00 | Invalid instruction |
| 6e00 | Invalid class |
| Install Load Errors | |
| 6581 | Memory Failure |
| 6a80 | Incorrect parameters in data field |
| 6a84 | Not enough memory space |
| 6a88 | Referenced data not found |
| Delete Errors | |
| 6200 | Application has been logically deleted |
| 6581 | Memory failure |
| 6985 | Referenced data cannot be deleted |
| 6a88 | Referenced data not found |
| 6a82 | Application not found |
| 6a80 | Incorrect values in command data |
| Get Data Errors | |
| 6a88 | Referenced data not found |
| Get Status Errors | |
| 6310 | More data available |
| 6a88 | Referenced data not found |
| 6a80 | Incorrect values in command data |
| Load Errors | |
| 6581 | Memory failure |
| 6a84 | Not enough memory space |
| 6a86 | Incorrect P1/P2 |
| 6985 | Conditions of use not satisfied |
5.5.2. Events
Copy linkLink copied to clipboard!
- Simple events such as card insertions and removals, successfully completed operations, card operations that result in an error, and similar events.
- Errors are reported from the TPS to the Enterprise Security Client.
- The NSS crypto library is initialized.
- Other low-level smart card events are detected.
Chapter 6. Configuring Applications for Single Sign-On
Copy linkLink copied to clipboard!
After a smart card is enrolled, the smart card can be used for SSL client authentication and S/MIME email applications. The PKCS #11 module used by these applications, by default, is located in
/usr/lib/libcoolkeypk11.so.
6.1. Configuring Firefox to Use Kerberos for Single Sign-On
Copy linkLink copied to clipboard!
Firefox can use Kerberos for single sign-on to intranet sites and other protected websites. For Firefox to use Kerberos, it first has to be configured to send Kerberos credentials to the appropriate KDC.
- In the address bar of Firefox, type
about:configto display the list of current configuration options. - In the Filter field, type
negotiateto restrict the list of options. - Double-click the network.negotiate-auth.trusted-uris entry.
- Enter the name of the domain against which to authenticate.

- Next, configure the network.negotiate-auth.delegation-uris entry, using the same domain as for network.negotiate-auth.trusted-uris.
Note
Even after Firefox is configured to pass Kerberos credentials, it still requires a valid Kerberos ticket to use. To generate a Kerberos ticket, use the
kinit command and supply the user password for the user on the KDC.
[jsmith@host ~] $ kinit
Password for jsmith@EXAMPLE.COM:
[jsmith@host ~] $ kinit
Password for jsmith@EXAMPLE.COM:
If Kerberos authentication is not working, turn on verbose logging for the authentication process.
- Close all instances of Firefox.
- In a command prompt, export values for the
NSPR_LOG_*variables:export NSPR_LOG_MODULES=negotiateauth:5 export NSPR_LOG_FILE=/tmp/moz.log
export NSPR_LOG_MODULES=negotiateauth:5 export NSPR_LOG_FILE=/tmp/moz.logCopy to Clipboard Copied! Toggle word wrap Toggle overflow - Restart Firefox from that shell, and visit the website where Kerberos authentication is failing.
- Check the
/tmp/moz.logfile for error messages with nsNegotiateAuth in the message.
There are several common errors that occur with Kerberos authentication.
- The first error says that no credentials have been found.
-1208550944[90039d0]: entering nsNegotiateAuth::GetNextToken()
-1208550944[90039d0]: gss_init_sec_context() failed: Miscellaneous failure
No credentials cache found
-1208550944[90039d0]: entering nsNegotiateAuth::GetNextToken()
-1208550944[90039d0]: gss_init_sec_context() failed: Miscellaneous failure
No credentials cache found
Copy to Clipboard Copied! Toggle word wrap Toggle overflow This means that there are no Kerberos tickets (meaning that they expired or were not generated). To fix this, runkinitto generate the Kerberos ticket and then open the website again. - The second potential error is if the browser is unable to contact the KDC, with the message Server not found in Kerberos database.
-1208994096[8d683d8]: entering nsAuthGSSAPI::GetNextToken()
-1208994096[8d683d8]: gss_init_sec_context() failed: Miscellaneous failure
Server not found in Kerberos database
-1208994096[8d683d8]: entering nsAuthGSSAPI::GetNextToken()
-1208994096[8d683d8]: gss_init_sec_context() failed: Miscellaneous failure
Server not found in Kerberos database
Copy to Clipboard Copied! Toggle word wrap Toggle overflow This is usually a Kerberos configuration problem. The correct entries must be in the[domain_realm]section of the/etc/krb5.conffile to identify the domain. For example:.example.com = EXAMPLE.COM example.com = EXAMPLE.COM
.example.com = EXAMPLE.COM example.com = EXAMPLE.COMCopy to Clipboard Copied! Toggle word wrap Toggle overflow - If there are no errors in the log, then the problem could be that an HTTP proxy server is stripping off the HTTP headers required for Kerberos authentication. Try to connect to the site using HTTPS, which allows the request to pass through unmodified.
6.2. Enabling Smart Card Login
Copy linkLink copied to clipboard!
Smart card login for Red Hat Enterprise Linux servers and workstations is not enabled by default and must be enabled in the system settings.
Note
Using single sign-on when logging into Red Hat Enterprise Linux requires these packages:
- nss-tools
- esc
- pam_pkcs11
- coolkey
- ccid
- gdm
- authconfig
- authconfig-gtk
- krb5-libs
- krb5-workstation
- krb5-auth-dialog
- krb5-pkinit-openssl
- Log into the system as root.
- Download the root CA certificates for the network in base 64 format, and install them on the server. The certificates are installed in the appropriate system database using the
certutilcommand. For example:certutil -A -d /etc/pki/nssdb -n "root CA cert" -t "CT,C,C" -i /tmp/ca_cert.crt
# certutil -A -d /etc/pki/nssdb -n "root CA cert" -t "CT,C,C" -i /tmp/ca_cert.crtCopy to Clipboard Copied! Toggle word wrap Toggle overflow - In the top menu, select the menu, select , and then click .
- Open the Advanced Options tab.
- Click the Enable Smart Card Support checkbox.
- When the button is active, click .There are two behaviors that can be configured for smart cards:
- The Require smart card for login checkbox requires smart cards and essentially disables Kerberos password authentication for logging into the system. Do not select this until after you have successfully logged in using a smart card.
- The Card removal action menu sets the response that the system takes if the smart card is removed during an active session.
Ignoremeans that the system continues functioning as normal if the smart card is removed, whileLockimmediately locks the screen.
- By default, the mechanisms to check whether a certificate has been revoked (Online Certificate Status Protocol, or OCSP, responses) are disabled. To validate whether a certificate has been revoked before its expiration period, enable OCSP checking by adding the
ocsp_onoption to thecert_policydirective.- Open the
pam_pkcs11.conffile.vim /etc/pam_pkcs11/pam_pkcs11.conf
vim /etc/pam_pkcs11/pam_pkcs11.confCopy to Clipboard Copied! Toggle word wrap Toggle overflow - Change every
cert_policyline so that it contains theocsp_onoption.cert_policy = ca, ocsp_on, signature;
cert_policy = ca, ocsp_on, signature;Copy to Clipboard Copied! Toggle word wrap Toggle overflow Note
Because of the way the file is parsed, there must be a space betweencert_policyand the equals sign. Otherwise, parsing the parameter fails.
- If the smart card has not yet been enrolled (set up with personal certificates and keys), enroll the smart card, as described in Section 5.3, “Enrolling a Smart Card Automatically”.
- If the smart card is a CAC card, the PAM modules used for smart card login must be configured to recognize the specific CAC card.
- As root, create a file called
/etc/pam_pkcs11/cn_map. - Add the following entry to the
cn_mapfile:MY.CAC_CN.123454 -> login
MY.CAC_CN.123454 -> loginCopy to Clipboard Copied! Toggle word wrap Toggle overflow MY.CAC_CN.123454 is the common name on the CAC card and login is the Red Hat Enterprise Linux login ID.
Note
When a smart card is inserted, the
pklogin_finder tool (in debug mode) first maps the login ID to the certificates on the card and then attempts to output information about the validity of certificates.
pklogin_finder debug
pklogin_finder debug
This is useful for diagnosing any problems with using the smart card to log into the system.
6.3. Setting up Browsers to Support SSL for Tokens
Copy linkLink copied to clipboard!
- In Mozilla Firefox, open the menu, choose , and then click .
- Open the tab.
- Add a PKCS #11 driver.
- Click to open the Device Manager window, and then click the button.
- Enter a module name, such as
token key pk11 driver. - Click , find the Enterprise Security Client PKCS #11 driver, and click . The PKCS #11 module used by these applications, by default, is located in
/usr/lib/libcoolkeypk11.so.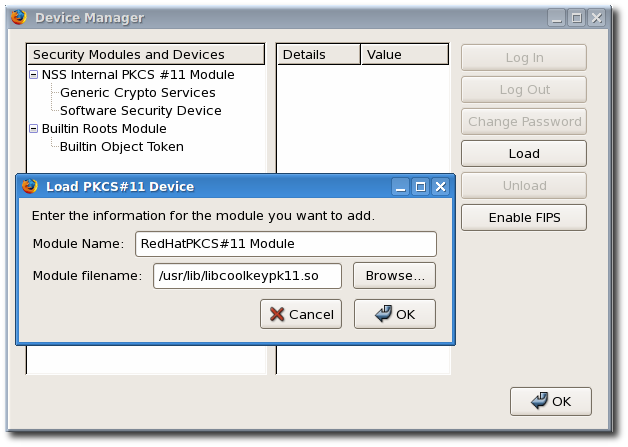
- If the CA is not yet trusted, download and import the CA certificate.
- Open the SSL End Entity page on the CA. For example:
https://server.example.com:9444/ca/ee/ca/
https://server.example.com:9444/ca/ee/ca/Copy to Clipboard Copied! Toggle word wrap Toggle overflow - Click the Retrieval tab, and then click Import CA Certificate Chain.
- Click Download the CA certificate chain in binary form and then click .
- Choose a suitable directory to save the certificate chain, and then click .
- Click , and select the Advanced tab.
- Click the button.
- Click , and import the CA certificate.
- Set the certificate trust relationships.
- Click , and select the Advanced tab.
- Click the button.
- Click , and set the trust for websites.
The certificates can be used for SSL.
6.4. Using the Certificates on Tokens for Mail Clients
Copy linkLink copied to clipboard!
- In Mozilla Thunderbird, open the menu, choose , and then click .
- Open the tab.
- Add a PKCS #11 driver.
- Click to open the Device Manager window.
- Click the button.
- Enter the module name, such as
token keypk11 driver. - Click , find the Enterprise Security Client PKCS #11 driver, and click . The PKCS #11 module used by these applications, by default, is located in
/usr/lib/libcoolkeypk11.so.
- If the CA is not yet trusted, download and import the CA certificate.
- Open the SSL End Entity page on the CA. For example:
https://server.example.com:9444/ca/ee/ca/
https://server.example.com:9444/ca/ee/ca/Copy to Clipboard Copied! Toggle word wrap Toggle overflow - Click the Retrieval tab, and then click Import CA Certificate Chain.
- Click Download the CA certificate chain in binary form and then click .
- Choose a suitable directory to save the certificate chain, and then click .
- In Mozilla Thunderbird, open the menu, choose , and then click .
- Open the tab, and click the button.
- Click the tab, and import the CA certificate.
- Set up the certificate trust relationships.
- In Mozilla Thunderbird, open the menu, choose , and then click .
- Open the tab, and click the button.
- In the Authorities tab, select the CA, and click the button.
- Set the trust settings for identifying websites and mail users.
- In the Digital Signing section of the Security panel, click to choose a certificate to use for signing messages.
- In the Encryption of the Security panel, click to choose the certificate to encrypt and decrypt messages.
Appendix A. Revision History
Copy linkLink copied to clipboard!
Note that revision numbers relate to the edition of this manual, not to version numbers of Red Hat Enterprise Linux.
| Revision History | |||
|---|---|---|---|
| Revision 6.7-4 | Wed Mar 8 2017 | ||
| |||
| Revision 6.7-3 | Wed May 4 2016 | ||
| |||
| Revision 6.7-2 | Thu Jan 7 2016 | ||
| |||
| Revision 6.7-1 | Tue Jan 5 2016 | ||
| |||
| Revision 6.7-0 | Tue Jul 14 2015 | ||
| |||
| Revision 6.6-1 | Fri Dec 19 2014 | ||
| |||
| Revision 6.6-0 | Fri Oct 10 2014 | ||
| |||
| Revision 6.4-0 | March 28, 2013 | ||
| |||
| Revision 6.2-4 | December 5, 2011 | ||
| |||
| Revision 6.1-0 | Thu May 5, 2011 | ||
| |||
| Revision 6.0-0 | Thu Oct 22 2009 | ||
| |||
Legal Notice
Copy linkLink copied to clipboard!
Copyright © 2016 Red Hat, Inc.
This document is licensed by Red Hat under the Creative Commons Attribution-ShareAlike 3.0 Unported License. If you distribute this document, or a modified version of it, you must provide attribution to Red Hat, Inc. and provide a link to the original. If the document is modified, all Red Hat trademarks must be removed.
Red Hat, as the licensor of this document, waives the right to enforce, and agrees not to assert, Section 4d of CC-BY-SA to the fullest extent permitted by applicable law.
Red Hat, Red Hat Enterprise Linux, the Shadowman logo, JBoss, OpenShift, Fedora, the Infinity logo, and RHCE are trademarks of Red Hat, Inc., registered in the United States and other countries.
Linux® is the registered trademark of Linus Torvalds in the United States and other countries.
Java® is a registered trademark of Oracle and/or its affiliates.
XFS® is a trademark of Silicon Graphics International Corp. or its subsidiaries in the United States and/or other countries.
MySQL® is a registered trademark of MySQL AB in the United States, the European Union and other countries.
Node.js® is an official trademark of Joyent. Red Hat Software Collections is not formally related to or endorsed by the official Joyent Node.js open source or commercial project.
The OpenStack® Word Mark and OpenStack logo are either registered trademarks/service marks or trademarks/service marks of the OpenStack Foundation, in the United States and other countries and are used with the OpenStack Foundation's permission. We are not affiliated with, endorsed or sponsored by the OpenStack Foundation, or the OpenStack community.
All other trademarks are the property of their respective owners.