Configuring and Running JBoss Fuse
Managing the runtime container
Copyright © 2011-2015 Red Hat, Inc. and/or its affiliates.
Abstract
Chapter 1. Configuring the Initial Features in a Standalone Container
Abstract
Overview
etc/org.apache.karaf.features.cfg file to discover the feature URLs (feature repository locations) and to determine which features it will load. By default, Red Hat JBoss Fuse loads a large number of features and you may not need all of them. You may also decide you need features that are not included in the default configuration.
etc/org.apache.karaf.features.cfg are only used the first time the container is started. On subsequent start-ups, the container uses the contents of the InstallDir/data directory to determine what to load. If you need to adjust the features loaded into a container, you can delete the data directory, but this will also destroy any state or persistence information stored by the container.
Modifying the default installed features
Modifying the default set of feature URLs
Chapter 2. Installing Red Hat JBoss Fuse as a Service
Abstract
2.1. Generating the Service Wrapper
Overview
wrapper feature generates a wrapper around the JBoss Fuse runtime instance. You use the wrapper to install the message broker as a system service. The wrapper feature is not installed by default in the console, so before you can generate the service wrapper you must install the wrapper feature.
Generating the service wrapper
- Start JBoss Fuse in console mode with the fuse command.
- Enter
features:install wrapper.The features:install command locates the required libraries to provision the wrapper feature and deploys it into the runtime instance. - Generate the wrapper with the wrapper:install command in the following format:
wrapper:install -n <serviceName> -d <displayName> -D <<description>
wrapper:install -n <serviceName> -d <displayName> -D <<description>Copy to Clipboard Copied! Toggle word wrap Toggle overflow The Table 2.1, “Wrapper Install Options” table describes the wrapper:install options.Expand Table 2.1. Wrapper Install Options Option Default Description -sAUTO_START(Windows only) Specifies the mode in which the service is installed. Valid values are AUTO_STARTorDEMAND_START.-nkarafSpecifies the service name that will be used when installing the service. -dSpecifies the display name of the service. -DSpecifies the description of the service. -i --includeSpecifies an include statement for the JSW wrapper configuration. To specify multiple include statement, enter this option multiple times. -e --envSpecifies environment variable and values. To set multiple environment variable and values, enter this option multiple times.
Results
bin\ServiceName-wrapper[.exe]—the executable file for the wrapper.bin\ServiceName-service[.bat]—the script used to install and remove the service.etc\ServiceName-wrapper.conf—the wrapper configuration file.
lib\libwrapper.solib\karaf-wrapper.jarlib\karaf-wrapper-main.jar
2.2. Configuring the Batch Script
Overview
ServiceName-service[.bat] file to control the script execution priority and system user assignment.
RUN_AS_USER
RUN_AS_USER variable to instruct the script to run from a specific user account. For example, to run the script as the user mquser, uncomment the line #RUN_AS_USER and set the value as follows:
RUN_AS_USER=mquser
RUN_AS_USER=mquserwrapper.log files. If you attempt to run the script from a user that cannot write the log file, the wrapper will exit without logging an error message.
PRIORITY
PRIORITY environment variable to control the nice level of the service.
2.3. Configuring the Service Wrapper
Overview
ServiceName-wrapper.conf file, which is located under the InstallDir/etc/ directory.
- default environment settings
- properties passed to the JVM
- Classpath
- JMX settings
- logging settings
Default environment settings
- JAVA_HOME
- Location of the Java runtime installation.NoteOn Windows, you can set
JAVA_HOMEeither as a system variable only in the registry or inServiceName-wrapper.conf. You cannot set the variable as a regular environment variable in the Environment Variables list. - KARAF_HOME
- Location of the Red Hat JBoss Fuse installation.
- KARAF_BASE
- Location of the configuration data and OSGi data for the broker instance.NoteRuntime OSGi data is stored in sub-directories of this directory.
- KARAF_DATA
- Location of the logging and persistance data for the broker instance.
Example 2.1. Default Environment Settings
set.default.KARAF_HOME=InstallDir
set.default.KARAF_BASE=InstallDir
set.default.KARAF_DATA=InstallDir\data
set.default.KARAF_HOME=InstallDir
set.default.KARAF_BASE=InstallDir
set.default.KARAF_DATA=InstallDir\dataJVM parameters
wrapper.java.additional.<param_sequence_number>
wrapper.java.additional.<param_sequence_number>wrapper.java.additional.<n>=-DPropName=PropValue
wrapper.java.additional.<n>=-DPropName=PropValueExample 2.2. Default Java System Properties
Additional classpath entries
wrapper.java.classpath.<n>
wrapper.java.classpath.<n>Example 2.3. Default Wrapper Classpath
wrapper.java.classpath.1=%KARAF_BASE%/lib/karaf-wrapper.jar
wrapper.java.classpath.2=%KARAF_HOME%/lib/karaf.jar
wrapper.java.classpath.3=%KARAF_HOME%/lib/karaf-jaas-boot.jar
wrapper.java.classpath.4=%KARAF_BASE%/lib/karaf-wrapper-main.jar
wrapper.java.classpath.1=%KARAF_BASE%/lib/karaf-wrapper.jar
wrapper.java.classpath.2=%KARAF_HOME%/lib/karaf.jar
wrapper.java.classpath.3=%KARAF_HOME%/lib/karaf-jaas-boot.jar
wrapper.java.classpath.4=%KARAF_BASE%/lib/karaf-wrapper-main.jarJMX configuration properties
Example 2.4. Wrapper JMX Properties
#wrapper.java.additional.n=-Dcom.sun.management.jmxremote.port=1616
#wrapper.java.additional.n=-Dcom.sun.management.jmxremote.authenticate=false
#wrapper.java.additional.n=-Dcom.sun.management.jmxremote.ssl=false
#wrapper.java.additional.n=-Dcom.sun.management.jmxremote.port=1616
#wrapper.java.additional.n=-Dcom.sun.management.jmxremote.authenticate=false
#wrapper.java.additional.n=-Dcom.sun.management.jmxremote.ssl=false- Locate the following line:
# Uncomment to enable jmx - Remove the prefix
#from each of the properties. - Replace the
nin each property with a sequence number. Make sure that the number adheres to the sequence of all parameters and properties in the configuration file.
Logging configuration
| Property | Description |
|---|---|
wrapper.console.format |
Specifies how the logging information sent to the console is formated. The format consists of the following tokens:
|
wrapper.console.loglevel | Specifies the logging level displayed on the console. |
wrapper.logfile | Specifies the file used to store the log. |
wrapper.logfile.format | Specifies how the logging information sent to the log file is formated. |
wrapper.console.loglevel | Specifies the logging level sent to the log file. |
wrapper.console.maxsize | Specifies the maximum size, in bytes, that the log file can grow to before the log is archived. The default value of 0 disables log rolling. |
wrapper.console.maxfiles | Specifies the maximum number of archived log files which will be allowed before old files are deleted. The default value of 0 implies no limit. |
wrapper.syslog.loglevel | Specifies the logging level for the sys/event log output. |
2.4. Installing and Starting the Service
Overview
Windows
- Installing the service
- Run the following command:
InstallDir\bin\ServiceName-service.bat install
InstallDir\bin\ServiceName-service.bat installCopy to Clipboard Copied! Toggle word wrap Toggle overflow By default, the service to start when Windows starts. If you specified theDEMAND_STARToption, you need to start the service manually. - Uninstalling the service
- Run the following command:
InstallDir\bin\ServiceName-service.bat remove
InstallDir\bin\ServiceName-service.bat removeCopy to Clipboard Copied! Toggle word wrap Toggle overflow - Starting the service
- Run the following command:
net start "ServiceName"
net start "ServiceName"Copy to Clipboard Copied! Toggle word wrap Toggle overflow You can also start the service from the Windows Service dialog box. - Stopping the service
- Run the following command:
net stop "ServiceName"
net stop "ServiceName"Copy to Clipboard Copied! Toggle word wrap Toggle overflow You can also stop the service from the Windows Service dialog box.
Red Hat Enterprise Linux
- Installing the service
- Run the following commands:
ln -s InstallDir/bin/ServiceName-service /etc/init.d/
chkconfig ServiceName-service --add
chkconfig ServiceName-service on
# ln -s InstallDir/bin/ServiceName-service /etc/init.d/
# chkconfig ServiceName-service --add
# chkconfig ServiceName-service on
Copy to Clipboard Copied! Toggle word wrap Toggle overflow By default, the service to start when Red Hat Enterprise Linux starts. - Uninstalling the service
- Run the following command:
#service ServiceName-service stop
chkconfig ServiceName-service --del
rm /etc/init.d/ServiceName-service
#service ServiceName-service stop
# chkconfig ServiceName-service --del
# rm /etc/init.d/ServiceName-service
Copy to Clipboard Copied! Toggle word wrap Toggle overflow - Starting the service
- Run the following command:
service ServiceName-service start
service ServiceName-service startCopy to Clipboard Copied! Toggle word wrap Toggle overflow - Stopping the service
- Run the following command:
service ServiceName-service stop
service ServiceName-service stopCopy to Clipboard Copied! Toggle word wrap Toggle overflow
Ubuntu Linux
- Installing the service
- Run the following commands:
ln -s InstallDir/bin/ServiceName-service /etc/init.d/
update-rc.d ServiceName-service defaults
# ln -s InstallDir/bin/ServiceName-service /etc/init.d/
# update-rc.d ServiceName-service defaults
Copy to Clipboard Copied! Toggle word wrap Toggle overflow By default, the service to start when Red Hat Enterprise Linux starts. - Uninstalling the service
- Run the following command:
#/etc/init.d/ServiceName-service stop
rm /etc/init.d/ServiceName-service
#/etc/init.d/ServiceName-service stop
# rm /etc/init.d/ServiceName-service
Copy to Clipboard Copied! Toggle word wrap Toggle overflow - Starting the service
- Run the following command:
/etc/init.d/ServiceName-service startservice ServiceName-service start
/etc/init.d/ServiceName-service startservice ServiceName-service startCopy to Clipboard Copied! Toggle word wrap Toggle overflow - Stopping the service
- Run the following command:
/etc/init.d/ServiceName-service stop
/etc/init.d/ServiceName-service stopCopy to Clipboard Copied! Toggle word wrap Toggle overflow
Chapter 3. Basic Security
Abstract
3.1. Configuring Basic Security
Overview
Before you start the container
Create a secure JAAS user
InstallDir/etc/users.properties file and add a new user field, as follows:
Username=Password,Administrator
Username=Password,AdministratorUsername and Password are the new user credentials. The Administrator role gives this user the privileges to access all administration and management functions of the container. For more details about JAAS, see Chapter 14, Configuring JAAS Security.
Role-based access control
| Roles | Description |
|---|---|
Monitor, Operator, Maintainer | Grants read-only access to the container. |
Deployer, Auditor | Grants read-write access at the appropriate level for ordinary users, who want to deploy and run applications. But blocks access to sensitive container configuration settings. |
Administrator, SuperUser | Grants unrestricted access to the container. |
Ports exposed by the JBoss Fuse container
Figure 3.1. Ports Exposed by the JBoss Fuse Container
- Console port—enables remote control of a container instance, through Apache Karaf shell commands. This port is enabled by default and is secured both by JAAS authentication and by SSH.
- JMX port—enables management of the container through the JMX protocol. This port is enabled by default and is secured by JAAS authentication.
- Web console port—provides access to an embedded Jetty container that can host Web console servlets. By default, the Fuse Management Console is installed in the Jetty container.
Enabling the remote console port
- JAAS is configured with at least one set of login credentials.
- The JBoss Fuse runtime has not been started in client mode (client mode disables the remote console port completely).
./client -u Username -p Password
./client -u Username -p PasswordUsername and Password are the credentials of a JAAS user with Administrator privileges. For more details, see Chapter 8, Using Remote Connections to Manage a Container.
Strengthening security on the remote console port
- Make sure that the JAAS user credentials have strong passwords.
- Customize the X.509 certificate (replace the Java keystore file,
InstallDir/etc/host.key, with a custom key pair).
Enabling the JMX port
jconsole) and connect to the following JMX URI:
service:jmx:rmi:///jndi/rmi://localhost:1099/karaf-root
service:jmx:rmi:///jndi/rmi://localhost:1099/karaf-root/karaf-ContainerName. If you change the container name from root to some other name, you must modify the JMX URI accordingly.
Strengthening security on the Fuse Management Console port
3.2. Disabling Broker Security
Overview
Standalone server
InstallDir/etc/broker.xml file using a text editor and look for the following lines:
...
<plugins>
 <jaasAuthenticationPlugin configuration="karaf" />
</plugins>
...
...
<plugins>
 <jaasAuthenticationPlugin configuration="karaf" />
</plugins>
...jaasAuthenticationPlugin element. The next time you start up the Red Hat JBoss Fuse container (using the InstallDir/bin/fusemq script), the broker will run with unsecured ports.
Chapter 4. Starting and Stopping JBoss Fuse
Abstract
4.1. Starting JBoss Fuse
Abstract
Overview
Setting up your environment
bin directory of your JBoss Fuse installation to the PATH environment variable, as follows:
set PATH=%PATH%;InstallDir\bin
export PATH=$PATH,InstallDir/bin
Launching the runtime
bin\fuse.bat
bin\fuse.batbin/fuse
bin/fuseLaunching the runtime in server mode
bin\start.bat
bin\start.batbin/start
bin/startLaunching the runtime in client mode
bin\fuse.bat client
bin\fuse.bat clientbin/fuse client
bin/fuse client4.2. Stopping JBoss Fuse
Abstract
stop script.
Stopping an instance from a local console
fuse or fuse client, you can stop it by doing one of the following at the karaf> prompt:
- Type
shutdown -f - Press Ctrl+D
Stopping an instance running in server mode
start script (or by running fuse server or ), you can stop it remotely, as described in Section 8.3, “Stopping a Remote Container”.
InstallDir/bin directory:
./admin stopinstanceName./stop
etc/org.apache.karaf.shell.cfg is set to the default value of 0.0.0.0, you can run the stop script without any arguments. However, if you have configured a different hostname, you must run stop -h hostname.
Chapter 5. Creating a New Fabric
Abstract
Static IP address required for Fabric Server
- For simple examples and tests (with a single Fabric Server) you can work around the static IP requirement by using the loopback address,
127.0.0.1. - For distributed tests (multiple Fabric Servers) and production deployments, you must assign a static IP address to each of the Fabric Server hosts.
--resolver manualip --manual-ip StaticIPAddress options to specify the static IP address explicitly, when creating a new Fabric Server.
Procedure
- (Optional) Customise the name of the root container by editing the
InstallDir/etc/system.propertiesfile and specifying a different name for this property:karaf.name=root
karaf.name=rootCopy to Clipboard Copied! Toggle word wrap Toggle overflow NoteFor the first container in your fabric, this step is optional. But at some later stage, if you want to join a root container to the fabric, you might need to customise the container's name to prevent it from clashing with any existing root containers in the fabric. - Any existing users in the
InstallDir/etc/users.propertiesfile are automatically used to initialize the fabric's user data, when you create the fabric. You can populate theusers.propertiesfile, by adding one or more lines of the following form:Username=Password[,RoleA][,RoleB]...
Username=Password[,RoleA][,RoleB]...Copy to Clipboard Copied! Toggle word wrap Toggle overflow But there must not be any users in this file that have administrator privileges (Administrator,SuperUser, oradminroles). If theInstallDir/etc/users.propertiesalready contains users with administrator privileges, you should delete those users before creating the fabric.WarningIf you leave some administrator credentials in theusers.propertiesfile, this represents a security risk because the file could potentially be accessed by other containers in the fabric.NoteThe initialization of user data fromusers.propertieshappens only once, at the time the fabric is created. After the fabric has been created, any changes you make tousers.propertieswill have no effect on the fabric's user data. - If you use a VPN (virtual private network) on your local machine, it is advisable to log off VPN before you create the fabric and to stay logged off while you are using the local container.NoteA local Fabric Server is permanently associated with a fixed IP address or hostname. If VPN is enabled when you create the fabric, the underlying Java runtime is liable to detect and use the VPN hostname instead of your permanent local hostname. This can also be an issue with multi-homed machines.
- Start up your local container.In JBoss Fuse, start the local container as follows:
cd InstallDir/bin
./fuse
cd InstallDir/bin
./fuse
Copy to Clipboard Copied! Toggle word wrap Toggle overflow - Create a new fabric by entering the following command:
JBossFuse:karaf@root> fabric:create --new-user AdminUser --new-user-password AdminPass --new-user-role Administrator --zookeeper-password ZooPass --resolver manualip --manual-ip StaticIPAddress --wait-for-provisioning
JBossFuse:karaf@root> fabric:create --new-user AdminUser --new-user-password AdminPass --new-user-role Administrator --zookeeper-password ZooPass --resolver manualip --manual-ip StaticIPAddress --wait-for-provisioningCopy to Clipboard Copied! Toggle word wrap Toggle overflow The current container, namedrootby default, becomes a Fabric Server with a registry service installed. Initially, this is the only container in the fabric. The--new-user,--new-user-password, and--new-user-roleoptions specify the credentials for a newAdministratoruser. The Zookeeper password is used to protect sensitive data in the Fabric registry service (all of the nodes under/fabric). The--manual-ipoption specifies the Fabric Server's static IP addressStaticIPAddress(see the section called “Static IP address required for Fabric Server”).For more details on fabric:create see section "fabric:create" in "Console Reference".For more details about resolver policies, see section "fabric:container-resolver-list" in "Console Reference" and section "fabric:container-resolver-set" in "Console Reference".
Fabric creation process
- The container installs the requisite OSGi bundles to become a Fabric Server.
- The Fabric Server starts a registry service, which listens on TCP port 2181 (which makes fabric configuration data available to all of the containers in the fabric).NoteYou can customize the value of the registry service port by specifying the
--zookeeper-server-portoption. - The Fabric Server installs a new JAAS realm (based on the ZooKeeper login module), which overrides the default JAAS realm and stores its user data in the ZooKeeper registry.
- The new Fabric Ensemble consists of a single Fabric Server (the current container).
- A default set of profiles is imported from
InstallDir/fabric/import(can optionally be overridden). - After the standalone container is converted into a Fabric Server, the previously installed OSGi bundles and Karaf features are completely cleared away and replaced by the default Fabric Server configuration. For example, some of the shell command sets that were available in the standalone container are no longer available in the Fabric Server.
Expanding a Fabric
- Child container, created on the local machine as a child process in its own JVM.Instructions on creating a child container are found in Child Containers.
- SSH container, created on any remote machine for which you have
sshaccess.Instructions on creating a SSH container are found in SSH Containers. - Cloud container, created on compute instance in the cloud.Instructions on creating a cloud container are found in Cloud Containers.
Chapter 6. Joining a Fabric
Overview
- A managed container is a full member of the fabric and is managed by a Fabric Agent. The agent configures the container based on information provided by the fabric's ensemble. The ensemble knows which profiles are associated with the container and the agent determines what to install based on the contents of the profiles.
- A non-managed container is not managed by a Fabric Agent. Its configuration remains intact after it joins the fabric and is controlled as if the container were a standalone container. Joining the fabric in this manner registers the container with the fabric's ensemble and allows clients to locate the services running in the container using the fabric's discovery mechanism.
Joining a fabric as a managed container
fabric profile. If you want to preserve the previous configuration of the container, however, you must ensure that the fabric has an appropriately configured profile, which you can deploy into the container after it joins the fabric.
-p option enables you to specify a profile to install into the container once the agent is installed.
Joining a fabric as an non-managed container
osgi:install, features:install, and hot deployment), because a Fabric Agent does not take control of its configuration. The agent only registers the container with the fabric's ensemble and keeps the registry entries for it up to date. This enables the newly joined container to discover services running in the container (through Fabric's discovery mechanisms) and to administer these services.
How to join a fabric
- Get the registry service URL for one of the Fabric Servers in the existing fabric. The registry service URL has the following format:
Hostname[:IPPort]
Hostname[:IPPort]Copy to Clipboard Copied! Toggle word wrap Toggle overflow Normally, it is sufficient to specify just the hostname, Hostname, because the registry service uses the fixed port number, 2182, by default. In exceptional cases, you can discover the registry service port by following the instructions in the section called “How to discover the URL of a Fabric Server”. - Get the ZooKeeper password for the fabric. An administrator can access the fabric's ZooKeeper password at any time, by entering the following console command (while logged into one of the Fabric Containers):
JBossFuse:karaf@root> fabric:ensemble-password
JBossFuse:karaf@root> fabric:ensemble-passwordCopy to Clipboard Copied! Toggle word wrap Toggle overflow - Connect to the standalone container's command console.
- Join a container in one of the following ways:
- Join as a managed container, with a default profile—uses the
fabricprofile.JBossFuse:karaf@root> fabric:join --zookeeper-password ZooPass URL ContainerName
JBossFuse:karaf@root> fabric:join --zookeeper-password ZooPass URL ContainerNameCopy to Clipboard Copied! Toggle word wrap Toggle overflow - Join as a managed container, specifying a custom profile—uses a custom profile.
JBossFuse:karaf@root> fabric:join --zookeeper-password ZooPass -p Profile URL ContainerName
JBossFuse:karaf@root> fabric:join --zookeeper-password ZooPass -p Profile URL ContainerNameCopy to Clipboard Copied! Toggle word wrap Toggle overflow - Join as a non-managed container—preserves the existing container configuration.
JBossFuse:karaf@root> fabric:join -n --zookeeper-password ZooPass URL ContainerName
JBossFuse:karaf@root> fabric:join -n --zookeeper-password ZooPass URL ContainerNameCopy to Clipboard Copied! Toggle word wrap Toggle overflow
Where you can specify the following values:-
ZooPass - The existing fabric's ZooKeeper password.
-
URL - The URL for one of the fabric's registry services (usually just the hostname where a Fabric Server is running).
-
ContainerName - The new name of the container when it registers itself with the fabric.WarningIf the container your're adding to the fabric has the same name as a container already registered with the fabric, both containers will be reset and will always share the same configuration.
-
Profile - The name of the custom profile to install into the container after it joins the fabric (managed container only).
- If you joined the container as a managed container, you can subsequently deploy a different profile into the container using the
fabric:container-change-profileconsole command.
How to discover the URL of a Fabric Server
- Connect to the command console of one of the containers in the fabric.
- Enter the following sequence of console commands:
Copy to Clipboard Copied! Toggle word wrap Toggle overflow Thezookeeper.urlproperty holds a comma-separated list of Fabric Server URLs. You can use any one of these URLs to join the fabric.
Chapter 7. Shutting Down a Fabric
Overview
Shutting down a managed container
fabric:container-stop command, specifying the name of the managed container—for example:
fabric:container-stop ManagedContainerName
fabric:container-stop ManagedContainerNamefabric:container-stop command looks up the container name in the registry and retrieves the data it needs to shut down that container. This approach works no matter where the container is deployed: whether on a remote host or in a cloud.
Shutting down a Fabric Server
registry1, registry2, and registry3, you can shut down at most one of these Fabric Servers at a time using the fabric:container-stop command—for example:
fabric:container-stop -f registry3
fabric:container-stop -f registry3-f flag is required when shutting down a container that belongs to the ensemble.
fabric:container-start registry3
fabric:container-start registry3Shutting down an entire fabric
- To take a concrete example, consider a fabric which consists of the following containers:
- Three Fabric Servers (ensemble servers):
registry1,registry2,registry3. - Four managed containers:
managed1,managed2,managed3,managed4.
- Use the
clientconsole utility to log on to one of the containers in the fabric. Because this will be the last container to shut down, it is convenient to choose one of the Fabric Servers. For example, to log on to theregistry1server, enter the following command:./client -u AdminUser -p AdminPass -h Registry1Host
./client -u AdminUser -p AdminPass -h Registry1HostCopy to Clipboard Copied! Toggle word wrap Toggle overflow WhereRegistry1Hostis the host whereregistry1is running andAdminUserandAdminPassare the credentials of a user with administration privileges. It is assumed that theregistry1server is listening for console connections on the default IP port (that is,8101) - Shut down all of the managed containers in the fabric, using the
fabric:container-stopcommand—for example:fabric:container-stop managed1 fabric:container-stop managed2 fabric:container-stop managed3 fabric:container-stop managed4
fabric:container-stop managed1 fabric:container-stop managed2 fabric:container-stop managed3 fabric:container-stop managed4Copy to Clipboard Copied! Toggle word wrap Toggle overflow - Remove all but one of the Fabric Servers from the ensemble, using the
fabric:ensemble-removecommand. For example, given the ensemble consisting ofregistry1,registry2, andregistry3(where you are logged on toregistry1), removeregistry2andregistry3from the ensemble as follows:fabric:ensemble-remove registry2 registry3
fabric:ensemble-remove registry2 registry3Copy to Clipboard Copied! Toggle word wrap Toggle overflow - You can now shut down the
registry2andregistry3containers using thefabric:container-stopcommand, as follows:fabric:container-stop registry2 fabric:container-stop registry3
fabric:container-stop registry2 fabric:container-stop registry3Copy to Clipboard Copied! Toggle word wrap Toggle overflow - Assuming you are logged on to
registry1(the sole remaining Fabric Server), shut it down as follows:shutdown -f
shutdown -fCopy to Clipboard Copied! Toggle word wrap Toggle overflow - Whenever you restart the fabric, you will have to remember to recreate the ensemble, so that it consists of three Fabric Servers again. For example, to recreate the ensemble consisting of
registry1,registry2, andregistry3, you would restart the three servers, and then enter the following command:fabric:ensemble-add registry2 registry3
fabric:ensemble-add registry2 registry3Copy to Clipboard Copied! Toggle word wrap Toggle overflow
Note on shutting down the ensemble
fabric:container-stop registry1 fabric:container-stop registry2 fabric:container-stop registry3
fabric:container-stop registry1
fabric:container-stop registry2
fabric:container-stop registry3fabric:container-stop will fail and throw an error. This is because of the quorum-based voting system used by the ensemble (which is designed to protect against network splits). After the first two Fabric servers (registry1 and registry2) are shut down, fewer than half of the ensemble servers are available. At this point, the registry shuts down and refuses to service any more requests, because there is no longer a quorum of ensemble servers available (that is, fewer than 50% of the ensemble servers are available). This causes a problem for the fabric:container-stop command, which normally contacts the registry to retrieve details about the container it is trying to shut down.
fabric:ensemble-remove, before attempting to shut down the ensemble servers.
Chapter 8. Using Remote Connections to Manage a Container
Abstract
8.1. Configuring a Container for Remote Access
Overview
Configuring a standalone container for remote access
InstallDir/etc/org.apache.karaf.shell.cfg configuration file. Example 8.1, “Changing the Port for Remote Access” shows a sample configuration that changes the port used to 8102.
Example 8.1. Changing the Port for Remote Access
sshPort=8102
sshHost=0.0.0.0
sshPort=8102
sshHost=0.0.0.0Configuring a fabric container for remote access
8.2. Connecting and Disconnecting Remotely
Abstract
8.2.1. Connecting to a Standalone Container from a Remote Container
Overview
Using the ssh:ssh console command
Example 8.2. ssh:ssh Command Syntax
ssh:ssh {
-l username
} {
-P password
} {
-p port
} {
hostname
}
-
-l username - The username used to connect to the remote container. Use valid JAAS login credentials that have
adminprivileges (see Chapter 14, Configuring JAAS Security). -
-P password - The password used to connect to the remote container.
-
-p port - The SSH port used to access the desired container's remote console.By default this value is
8101. See the section called “Configuring a standalone container for remote access” for details on changing the port number. -
hostname - The hostname of the machine that the remote container is running on. See the section called “Configuring a standalone container for remote access” for details on changing the hostname.
etc/users.properties file. See Chapter 14, Configuring JAAS Securityfor details.
Example 8.3. Connecting to a Remote Console
JBossFuse:karaf@root>ssh:ssh -l smx -P smx -p 8108 hostname
JBossFuse:karaf@root>ssh:ssh -l smx -P smx -p 8108 hostnameshell:info at the prompt. Information about the currently connected instance is returned, as shown in Example 8.4, “Output of the shell:info Command”.
Example 8.4. Output of the shell:info Command
Karaf Karaf version 2.2.5.fuse-beta-7-052 Karaf home /Volumes/ESB/jboss-fuse-full-6.0.0.redhat-0XX Karaf base /Volumes/ESB/jboss-fuse-full-6.0.0.redhat-0XX/instances/child1 OSGi Framework org.apache.felix.framework - 4.0.3.fuse-beta-7-052 JVM Java Virtual Machine Java HotSpot(TM) 64-Bit Server VM version 20.6-b01-415 Version 1.6.0_31 Vendor Apple Inc. Uptime 6 minutes Total compile time 24.048 seconds Threads Live threads 62 Daemon threads 43 Peak 287 Total started 313 Memory Current heap size 78,981 kbytes Maximum heap size 466,048 kbytes Committed heap size 241,920 kbytes Pending objects 0 Garbage collector Name = 'PS Scavenge', Collections = 11, Time = 0.271 seconds Garbage collector Name = 'PS MarkSweep', Collections = 1, Time = 0.117 seconds Classes Current classes loaded 5,720 Total classes loaded 5,720 Total classes unloaded 0 Operating system Name Mac OS X version 10.7.3 Architecture x86_64 Processors 2
Karaf Karaf version 2.2.5.fuse-beta-7-052 Karaf home /Volumes/ESB/jboss-fuse-full-6.0.0.redhat-0XX Karaf base /Volumes/ESB/jboss-fuse-full-6.0.0.redhat-0XX/instances/child1 OSGi Framework org.apache.felix.framework - 4.0.3.fuse-beta-7-052 JVM Java Virtual Machine Java HotSpot(TM) 64-Bit Server VM version 20.6-b01-415 Version 1.6.0_31 Vendor Apple Inc. Uptime 6 minutes Total compile time 24.048 seconds Threads Live threads 62 Daemon threads 43 Peak 287 Total started 313 Memory Current heap size 78,981 kbytes Maximum heap size 466,048 kbytes Committed heap size 241,920 kbytes Pending objects 0 Garbage collector Name = 'PS Scavenge', Collections = 11, Time = 0.271 seconds Garbage collector Name = 'PS MarkSweep', Collections = 1, Time = 0.117 seconds Classes Current classes loaded 5,720 Total classes loaded 5,720 Total classes unloaded 0 Operating system Name Mac OS X version 10.7.3 Architecture x86_64 Processors 2Disconnecting from a remote console
logout or press Ctrl+D at the prompt.
8.2.2. Connecting to a Fabric Container From another Fabric Container
Overview
Using the fabric:container-connect command
Example 8.5. fabric:container-connect Command Syntax
fabric:container-connect {
-u username
} {
-p password
} {
containerName
}
-
-u username - The username used to connect to the remote console. The default value is
admin. -
-p password - The password used to connect to the remote console. The default value is
admin. -
containerName - The name of the container.
Example 8.6. Connecting to a Remote Container
JBossFuse:karaf@root>fabric:container-connect -u admin -p admin containerName
JBossFuse:karaf@root>fabric:container-connect -u admin -p admin containerNameshell:info at the prompt. Information about the currently connected instance is returned, as shown in Example 8.7, “Output of the shell:info Command”.
Example 8.7. Output of the shell:info Command
Karaf Karaf version 2.3.0.fuse-71-044 Karaf home /Volumes/SAMSUNG/Programs/ESB/jboss-fuse-full-6.0.0.redhat-0XX Karaf base /Volumes/SAMSUNG/Programs/ESB/jboss-fuse-full-6.0.0.redhat-0XX/instances/child1 OSGi Framework org.apache.felix.framework - 4.0.3.fuse-71-044 JVM Java Virtual Machine Java HotSpot(TM) 64-Bit Server VM version 20.8-b03-424 Version 1.6.0_33 Vendor Apple Inc. Uptime 7 minutes Total compile time 5.336 seconds Threads Live threads 42 Daemon threads 31 Peak 96 Total started 123 Memory Current heap size 32,832 kbytes Maximum heap size 466,048 kbytes Committed heap size 104,960 kbytes Pending objects 0 Garbage collector Name = 'PS Scavenge', Collections = 7, Time = 0.063 seconds Garbage collector Name = 'PS MarkSweep', Collections = 1, Time = 0.060 seconds Classes Current classes loaded 4,019 Total classes loaded 4,019 Total classes unloaded 0 Operating system Name Mac OS X version 10.7.4 Architecture x86_64 Processors 2
Karaf Karaf version 2.3.0.fuse-71-044 Karaf home /Volumes/SAMSUNG/Programs/ESB/jboss-fuse-full-6.0.0.redhat-0XX Karaf base /Volumes/SAMSUNG/Programs/ESB/jboss-fuse-full-6.0.0.redhat-0XX/instances/child1 OSGi Framework org.apache.felix.framework - 4.0.3.fuse-71-044 JVM Java Virtual Machine Java HotSpot(TM) 64-Bit Server VM version 20.8-b03-424 Version 1.6.0_33 Vendor Apple Inc. Uptime 7 minutes Total compile time 5.336 seconds Threads Live threads 42 Daemon threads 31 Peak 96 Total started 123 Memory Current heap size 32,832 kbytes Maximum heap size 466,048 kbytes Committed heap size 104,960 kbytes Pending objects 0 Garbage collector Name = 'PS Scavenge', Collections = 7, Time = 0.063 seconds Garbage collector Name = 'PS MarkSweep', Collections = 1, Time = 0.060 seconds Classes Current classes loaded 4,019 Total classes loaded 4,019 Total classes unloaded 0 Operating system Name Mac OS X version 10.7.4 Architecture x86_64 Processors 2Disconnecting from a remote console
logout or press Ctrl+D at the prompt.
8.2.3. Connecting to a Container Using the Client Command-Line Utility
Using the remote client
InstallDir/bin directory), as follows:
client
clientclient -a 8101 -h hostname -u username -p password shell:info
client -a 8101 -h hostname -u username -p password shell:info-p option, you will be prompted to enter a password.
admin privileges.
admin and admin.
client --help
client --helpExample 8.8. Karaf Client Help
Apache Felix Karaf client -a [port] specify the port to connect to -h [host] specify the host to connect to -u [user] specify the user name -p [password] specify the password --help shows this help message -v raise verbosity -r [attempts] retry connection establishment (up to attempts times) -d [delay] intra-retry delay (defaults to 2 seconds) [commands] commands to run If no commands are specified, the client will be put in an interactive mode
Apache Felix Karaf client -a [port] specify the port to connect to -h [host] specify the host to connect to -u [user] specify the user name -p [password] specify the password --help shows this help message -v raise verbosity -r [attempts] retry connection establishment (up to attempts times) -d [delay] intra-retry delay (defaults to 2 seconds) [commands] commands to run If no commands are specified, the client will be put in an interactive modeDisconnecting from a remote client console
8.2.4. Connecting to a Container Using the SSH Command-Line Utility
Overview
ssh command-line utility (a standard utility on UNIX-like operating systems) to log in to the Red Hat JBoss Fuse container, where the authentication mechanism is based on public key encryption (the public key must first be installed in the container). For example, given that the container is configured to listen on IP port 8101, you could log in as follows:
ssh -p 8101 jdoe@localhost
ssh -p 8101 jdoe@localhostPrerequisites
- The container must be standalone (Fabric is not supported) with the
PublickeyLoginModuleinstalled. - You must have created an SSH key pair (see the section called “Creating a new SSH key pair”).
- You must install the public key from the SSH key pair into the container (see the section called “Installing the SSH public key in the container”).
Default key location
ssh command automatically looks for the private key in the default key location. It is recommended that you install your key in the default location, because it saves you the trouble of specifying the location explicitly.
~/.ssh/id_rsa
~/.ssh/id_rsa.pub
~/.ssh/id_rsa
~/.ssh/id_rsa.pubC:\Documents and Settings\Username\.ssh\id_rsa C:\Documents and Settings\Username\.ssh\id_rsa.pub
C:\Documents and Settings\Username\.ssh\id_rsa
C:\Documents and Settings\Username\.ssh\id_rsa.pubCreating a new SSH key pair
ssh-keygen utility. Open a new command prompt and enter the following command:
ssh-keygen -t rsa -b 2048
ssh-keygen -t rsa -b 2048Generating public/private rsa key pair. Enter file in which to save the key (/Users/Username/.ssh/id_rsa):
Generating public/private rsa key pair.
Enter file in which to save the key (/Users/Username/.ssh/id_rsa):Enter passphrase (empty for no passphrase):
Enter passphrase (empty for no passphrase):Installing the SSH public key in the container
InstallDir/etc/keys.properties file. Each user entry in this file appears on a single line, in the following format:
Username=PublicKey,Role1,Role2,...
Username=PublicKey,Role1,Role2,...~/.ssh/id_rsa.pub, has the following contents:
jdoe user with the admin role by adding the following entry to the InstallDir/etc/keys.properties file (on a single line):
id_rsa.pub file here. Insert just the block of symbols which represents the public key itself.
Checking that public key authentication is supported
jaas:realms console command, as follows:
Index Realm                Module Class
    1 karaf                org.apache.karaf.jaas.modules.properties.PropertiesLoginModule
    2 karaf                org.apache.karaf.jaas.modules.publickey.PublickeyLoginModule
Index Realm                Module Class
    1 karaf                org.apache.karaf.jaas.modules.properties.PropertiesLoginModule
2 karaf org.apache.karaf.jaas.modules.publickey.PublickeyLoginModulePublickeyLoginModule is installed. With this configuration you can log in to the container using either username/password credentials or public key credentials.
Logging in using key-based SSH
ssh utility will prompt you to enter the pass phrase.
8.3. Stopping a Remote Container
Using the stop script
InstallDir/bin directory.
Example 8.9. stop Script Syntax
stop [
-a port
] {
-h hostname
} {
-u username
} {
-p password
}
-
-a port - The SSH port of the remote instance. Defaults to 8101.
-
-h hostname - The hostname of the machine that the remote instance is running on.
-
-u username - The username used to connect to the remote instance. Use valid JAAS login credentials that have
adminprivileges -
-p password - The password used to connect to the remote instance.
Using the fabric:container-stop console command
child1, you would enter the following console command:
JBossFuse:karaf@root> fabric:container-stop child1
JBossFuse:karaf@root> fabric:container-stop child1Using the remote console
Chapter 9. Managing Child Containers
Abstract
9.1. Standalone Child Containers
Using the admin console commands
Installing the admin console commands
admin commands are not installed by default. To install the command set, install the admin feature with the following command:
JBossFuse:karaf@root> features:install admin
JBossFuse:karaf@root> features:install adminCloning a container
-s option. For example, to create a new child with the SSH port number of 8102:
JBossFuse:karaf@root> admin:clone -s 8102 root cloned
JBossFuse:karaf@root> admin:clone -s 8102 root clonedCreating a Karaf child container
admin:create command creates a new Apache Karaf child container. That is, the new child container is not a full JBoss Fuse container, and is missing many of the standard bundles, features, and feature repositories that are normally available in a JBoss Fuse container. What you get is effectively a plain Apache Karaf container with JBoss Fuse branding. Additional feature repositories or features that you require will have to be added to the child manually.
instances/containerName directory. The child container is assigned an SSH port number based on an incremental count starting at 8101.
Example 9.1. Creating a Runtime Instance
JBossFuse:karaf@root> admin:create finn
Creating new instance on SSH port 8102 and RMI ports 1100/44445 at:
  /home/jdoe/apps/fuse/jboss-fuse-6.2.0.redhat-133/instances/finn
JBossFuse:karaf@root> admin:create finn
Creating new instance on SSH port 8102 and RMI ports 1100/44445 at:
/home/jdoe/apps/fuse/jboss-fuse-6.2.0.redhat-133/instances/finnChanging a child's SSH port
admin:change-port {
containerName
} {
portNumber
}
Starting child containers
Listing all child containers
Example 9.2. Listing Instances
Connecting to a child container
Example 9.3. Admin connect Command
admin:connect {
containerName
} {
-u username
} {
-p password
}
- containerName
- The name of the child to which you want to connect.
-
-uusername - The username used to connect to the child's remote console. Use valid JAAS user credentials that have admin privileges (see Chapter 14, Configuring JAAS Security).
-
-ppassword - This argument specifies the password used to connect to the child's remote console.
JBossFuse:karaf@harry>
JBossFuse:karaf@harry>Stopping a child container
osgi:shutdown or simply shutdown.
admin:stop containerName.
Destroying a child container
Changing the JVM options on a child container
admin:change-opts command. For example, you could change the amamount of memory allocated to the child container's JVM, as follows:
JBossFuse:karaf@harry> admin:change-opts tom "-server -Xms128M -Xmx1345m -Dcom.sun.management.jmxremote"
JBossFuse:karaf@harry> admin:change-opts tom "-server -Xms128M -Xmx1345m -Dcom.sun.management.jmxremote"Using the admin script
InstallDir/bin directory provides the all of the admin console commands except for admin:connect.
Example 9.4. The admin Script
admin.bat list
admin.bat list./admin list
./admin list9.2. Fabric Child Containers
Creating child containers
fabric:container-create-child console command, which has the following syntax:
karaf@root> fabric:container-create-child parent child [number]
karaf@root> fabric:container-create-child parent child [number]child1, child2, and so on.
karaf@root> fabric:container-create-child root child 2
The following containers have been created successfully:
	child1
	child2
karaf@root> fabric:container-create-child root child 2
The following containers have been created successfully:
	child1
child2Listing all container instances
fabric:container-list console command. For example:
JBossFuse:karaf@root> fabric:container-list
[id]                           [version] [alive] [profiles]                     [provision status]
root                           1.0       true    fabric, fabric-ensemble-0000-1
  child1                       1.0       true    default                        success
  child2                       1.0       true    default                        success
JBossFuse:karaf@root> fabric:container-list
[id]                           [version] [alive] [profiles]                     [provision status]
root                           1.0       true    fabric, fabric-ensemble-0000-1
  child1                       1.0       true    default                        success
child2 1.0 true default successAssigning a profile to a child container
default profile when it is created. To assign a new profile (or profiles) to a child container after it has been created, use the fabric:container-change-profile console command.
default to a newly created container by using the fabric:container-create-child command's --profile argument.
example-camel profile to the child1 container, enter the following console command:
JBossFuse:karaf@root> fabric:container-change-profile child1 example-camel
JBossFuse:karaf@root> fabric:container-change-profile child1 example-camelchild1 and replaces them with the specified list of profiles (where in this case, there is just one profile in the list, example-camel).
Connecting to a child container
fabric:container-connect console command. For example, to connect to child1, enter the following console command:
JBossFuse:karaf@root>fabric:container-connect -u admin -p admin child1
JBossFuse:karaf@root>fabric:container-connect -u admin -p admin child1Ctrl-D.
Starting a child container
child1:
JBossFuse:karaf@root>fabric:container-start child1
JBossFuse:karaf@root>fabric:container-start child1Stopping a child container
child1:
JBossFuse:karaf@root>fabric:container-stop child1
JBossFuse:karaf@root>fabric:container-stop child1child1 container.
Destroying a child container
child1 container instance, enter the following console command:
JBossFuse:karaf@root> fabric:container-delete child1
JBossFuse:karaf@root> fabric:container-delete child1- stops the child's JVM process
- physically removes all files related to the child container
Chapter 10. Deploying a New Broker Instance
Abstract
Overview
Standalone containers
- Create a template Apache ActiveMQ XML configuration file in a location that is accessible to the container.
- In the JBoss Fuse command console, use the config:edit command to create a new OSGi configuration file.ImportantThe PID must start with
io.fabric8.mq.fabric.server-. - Use the config:propset command to associate your template XML configuration with the broker OSGi configuration as shown in Example 10.1, “Specifying a Broker's Template XML Configuration”.
Example 10.1. Specifying a Broker's Template XML Configuration
JBossFuse:karaf@root> config:propset config configFile
JBossFuse:karaf@root> config:propset config configFileCopy to Clipboard Copied! Toggle word wrap Toggle overflow - Use the config:propset command to set the required properties.The properties that need to be set will depend on the properties you specified using property place holders in the template XML configuration and the broker's network settings.For information on using config:propset see section "config:propset, propset" in "Console Reference".
- Save the new OSGi configuration using the config:update command.
${karaf.base}/etc/broker.xml. You will also need to provide values for the data property, the broker-name property, and the openwire-port property.
Example
myBroker that stores its data in InstallDir/data/myBroker and opens a port at 61617, you would do the following:
- Open the JBoss Fuse command console.
- In the JBoss Fuse command console, use the config:edit command to create a new OSGi configuration file:
JBossFuse:karaf@root> config:edit io.fabric8.mq.fabric.server-myBroker
JBossFuse:karaf@root> config:edit io.fabric8.mq.fabric.server-myBrokerCopy to Clipboard Copied! Toggle word wrap Toggle overflow - Use the config:propset command to associate your template XML configuration with the broker OSGi configuration:
JBossFuse:karaf@root> config:propset config ${karaf.base}/etc/broker.xmlJBossFuse:karaf@root> config:propset config ${karaf.base}/etc/broker.xmlCopy to Clipboard Copied! Toggle word wrap Toggle overflow - Use the config:propset command to specify the new broker's data directory:
JBossFuse:karaf@root> config:propset data ${karaf.data}/myBrokerJBossFuse:karaf@root> config:propset data ${karaf.data}/myBrokerCopy to Clipboard Copied! Toggle word wrap Toggle overflow - Use the config:propset command to specify the new broker's name:
JBossFuse:karaf@root> config:propset broker-name myBroker
JBossFuse:karaf@root> config:propset broker-name myBrokerCopy to Clipboard Copied! Toggle word wrap Toggle overflow - Use the config:propset command to specify the new broker's openwire port:
JBossFuse:karaf@root> config:propset openwire-port 61617
JBossFuse:karaf@root> config:propset openwire-port 61617Copy to Clipboard Copied! Toggle word wrap Toggle overflow - Save the new OSGi configuration using the config:update command.
Chapter 11. Configuring JBoss Fuse
Abstract
11.1. Introducing JBoss Fuse Configuration
OSGi configuration
.cfg file in the InstallDir/etc directory. The file is interpreted using the Java properties file format. The filename is mapped to the persistent identifier (PID) of the service that is to be configured. In OSGi, a PID is used to identify a service across restarts of the container.
Configuration files
| Filename | Description |
|---|---|
broker.xml | Configures the default Apache ActiveMQ broker in a Fabric (used in combination with the io.fabric8.mq.fabric.server-default.cfg file). |
config.properties | The main configuration file for the container See Section 11.2, “Setting OSGi Framework and Initial Container Properties” for details. |
keys.properties | Lists the users who can access the JBoss Fuse runtime using the SSH key-based protocol. The file's contents take the format username=publicKey,role |
org.apache.aries.transaction.cfg | Configures the transaction feature |
org.apache.felix.fileinstall-deploy.cfg | Configures a watched directory and polling interval for hot deployment. |
org.apache.karaf.features.cfg | Configures a list of feature repositories to be registered and a list of features to be installed when JBoss Fuse starts up for the first time. |
org.apache.karaf.features.obr.cfg | Configures the default values for the features OSGi Bundle Resolver (OBR). |
org.apache.karaf.jaas.cfg | Configures options for the Karaf JAAS login module. Mainly used for configuring encrypted passwords (disabled by default). |
org.apache.karaf.log.cfg | Configures the output of the log console commands. See Section 16.2, “Logging Configuration”. |
org.apache.karaf.management.cfg |
Configures the JMX system. See Chapter 13, Configuring JMX for details.
|
org.apache.karaf.shell.cfg |
Configures the properties of remote consoles. For more information see Section 8.1, “Configuring a Container for Remote Access”.
|
org.apache.servicemix.jbi.cfg |
Configures the shutdown timeout for the JBI container.
|
org.apache.servicemix.nmr.cfg |
Configures the default thread pool settings for JBI. See Configuring JBI Component Thread Pools.
|
org.apache.servicemix.components.Name.cfg |
Configures the thread pool settings specifically for the Name JBI component. See Configuring JBI Component Thread Pools.
|
org.fusesource.bai.agent.cfg | Configures the Fuse BAI (Business Activity Insight) feature, if it is installed. |
io.fabric8.maven.cfg | Configures the Maven repositories used by the Fabric Maven Proxy when downloading artifacts, (The Fabric Maven Proxy is used for provisioning new containers on a remote host.) |
io.fabric8.mq.fabric.server-default.cfg | Configures the default Apache ActiveMQ broker in a Fabric (used in combination with the broker.xml file). |
org.jclouds.shell.cfg | Configures options for formatting the output of jclouds:* console commands. |
org.ops4j.pax.logging.cfg |
Configures the logging system. For more, see Section 16.2, “Logging Configuration”.
|
org.ops4j.pax.url.mvn.cfg | Configures additional URL resolvers. |
org.ops4j.pax.web.cfg | Configures the default Jetty container (Web server). See Securing the Web Console. |
startup.properties
| Specifies which bundles are started in the container and their start-levels. Entries take the format bundle=start-level. |
system.properties |
Specifies Java system properties. Any properties set in this file are available at runtime using
System.getProperties(). See Setting System and Config Properties for more.
|
users.properties | Lists the users who can access the JBoss Fuse runtime either remotely or via the web console. The file's contents take the format username=password,role |
setenv or setenv.bat | This file is in the /bin directory. It is used to set JVM options. The file's contents take the format JAVA_MIN_MEM=512M, where 512M is the minimum size of Java memory. See Setting Java Options for more information. |
Configuration file naming convention
<PID>.cfg
<PID>.cfg<PID> is the persistent ID of the OSGi Managed Service (as defined in the OSGi Configuration Admin specification). A persistent ID is normally dot-delimited—for example, org.ops4j.pax.web.
<PID>-<InstanceID>.cfg
<PID>-<InstanceID>.cfg<PID> is the persistent ID of the OSGi Managed Service Factory. In the case of a managed service factory's <PID>, you can append a hyphen followed by an arbitrary instance ID, <InstanceID>. The managed service factory then creates a unique service instance for each <InstanceID> that it finds.
JBI component configuration
InstallDir/etc folder may contain a number of configuration files for the JBI components that ship with Red Hat JBoss Fuse.
org.apache.servicemix.components.ComponentName.cfg. For example, you would configure the JMS component using a file called org.apache.servicemix.components.jms.cfg.
Setting Java Options
/bin/setenv file in Linux, or the bin/setenv.bat file for Windows. Use this file to directly set a group of Java options: JAVA_MIN_MEM, JAVA_MAX_MEM, JAVA_PERM_MEM, JAVA_MAX_PERM_MEM. Other Java options can be set using the EXTRA_JAVA_OPTS variable.
JAVA_MIN_MEM=512M # Minimum memory for the JVM
JAVA_MIN_MEM=512M # Minimum memory for the JVMEXTRA_JAVA_OPTS="Java option"
EXTRA_JAVA_OPTS="Java option"EXTRA_JAVA_OPTS="-XX:+UseG1GC"
EXTRA_JAVA_OPTS="-XX:+UseG1GC"11.2. Setting OSGi Framework and Initial Container Properties
Overview
etc folder:
config.properties—specifies the bootstrap properties for the OSGi frameworksystem.properties—specifies properties to configure container functions
OSGi framework properties
etc/config.properties file contains the properties used to specify which OSGi framework implementation to load and properties for configuring the framework's behaviors. Table 11.2, “Properties for the OSGi Framework” describes the key properties to set.
| Property | Description |
|---|---|
| karaf.framework | Specifies the OSGi framework that Red Hat JBoss Fuse uses. The default framework is Apache Felix which is specified using the value felix. |
| karaf.framework.felix | Specifies the path to the Apache Felix JAR on the file system. |
Initial container properties
etc/system.properties file contains properties that configure how various aspects of the container behave including:
- the container's name
- the default feature repository used by the container
- the default port used by the OSGi HTTP service
- the initial message broker configuration
| Property | Description |
|---|---|
| karaf.name | Specifies the name of this container. The default is root. |
| karaf.default.repository | Specifies the location of the feature repository the container will use by default. The default setting is the local feature repository installed with JBoss Fuse. |
| org.osgi.service.http.port | Specifies the default port for the OSGi HTTP Service. |
11.3. Configuring Standalone Containers Using the Command Console
Overview
Listing the current configuration
Example 11.1. Output of the config:list Command
...
---------------------------------------------------------------- Pid: org.ops4j.pax.logging BundleLocation: mvn:org.ops4j.pax.logging/pax-logging-service/1.4 Properties: log4j.appender.out.layout.ConversionPattern = %d{ABSOLUTE} | %-5.5p | %-16.16 t | %-32.32c{1} | %-32.32C %4L | %m%n felix.fileinstall.filename = org.ops4j.pax.logging.cfg service.pid = org.ops4j.pax.logging log4j.appender.stdout.layout.ConversionPattern = %d{ABSOLUTE} | %-5.5p | %-16 .16t | %-32.32c{1} | %-32.32C %4L | %m%n log4j.appender.out.layout = org.apache.log4j.PatternLayout log4j.rootLogger = INFO, out, osgi:VmLogAppender log4j.appender.stdout.layout = org.apache.log4j.PatternLayout log4j.appender.out.file = C:\apache\apache-servicemix-6.2.0.redhat-133/data/log/karaf.log log4j.appender.stdout = org.apache.log4j.ConsoleAppender log4j.appender.out.append = true log4j.appender.out = org.apache.log4j.FileAppender ---------------------------------------------------------------- Pid: org.ops4j.pax.web BundleLocation: mvn:org.ops4j.pax.web/pax-web-runtime/0.7.1 Properties: org.apache.karaf.features.configKey = org.ops4j.pax.web service.pid = org.ops4j.pax.web org.osgi.service.http.port = 8181 ----------------------------------------------------------------
...
...
---------------------------------------------------------------- Pid: org.ops4j.pax.logging BundleLocation: mvn:org.ops4j.pax.logging/pax-logging-service/1.4 Properties: log4j.appender.out.layout.ConversionPattern = %d{ABSOLUTE} | %-5.5p | %-16.16 t | %-32.32c{1} | %-32.32C %4L | %m%n felix.fileinstall.filename = org.ops4j.pax.logging.cfg service.pid = org.ops4j.pax.logging log4j.appender.stdout.layout.ConversionPattern = %d{ABSOLUTE} | %-5.5p | %-16 .16t | %-32.32c{1} | %-32.32C %4L | %m%n log4j.appender.out.layout = org.apache.log4j.PatternLayout log4j.rootLogger = INFO, out, osgi:VmLogAppender log4j.appender.stdout.layout = org.apache.log4j.PatternLayout log4j.appender.out.file = C:\apache\apache-servicemix-6.2.0.redhat-133/data/log/karaf.log log4j.appender.stdout = org.apache.log4j.ConsoleAppender log4j.appender.out.append = true log4j.appender.out = org.apache.log4j.FileAppender ---------------------------------------------------------------- Pid: org.ops4j.pax.web BundleLocation: mvn:org.ops4j.pax.web/pax-web-runtime/0.7.1 Properties: org.apache.karaf.features.configKey = org.ops4j.pax.web service.pid = org.ops4j.pax.web org.osgi.service.http.port = 8181 ----------------------------------------------------------------
...Editing the configuration
- Start an editing session by typing
config:edit PID.PID is the PID for the configuration you are editing. It must be entered exactly. If it does not match the desired PID, the container will create a new PID with the specified name. - Remind yourself of the available properties in a particular configuration by typing
config:proplist. - Use one of the editing commands to change the properties in the configuration.The editing commands include:
- config:propappend—appends a new property to the configuration
- config:propset—set the value for a configuration property
- config:propdel—delete a property from the configuration
- Update the configuration in memory and save it to disk by typing
config:update.
config:cancel.
Example 11.2. Editing a Configuration
JBossFuse:karaf@root> config:edit org.apache.karaf.log
JBossFuse:karaf@root> config:proplist
 service.pid = org.apache.karaf.log size = 500 felix.fileinstall.filename = org.apache.karaf.log.cfg pattern = %d{ABSOLUTE} | %-5.5p | %-16.16t | %-32.32c{1} | %-32.32C %4L | %m%n
JBossFuse:karaf@root> config:propset size 300
JBossFuse:karaf@root> config:update
JBossFuse:karaf@root> config:edit org.apache.karaf.log
JBossFuse:karaf@root> config:proplist
 service.pid = org.apache.karaf.log size = 500 felix.fileinstall.filename = org.apache.karaf.log.cfg pattern = %d{ABSOLUTE} | %-5.5p | %-16.16t | %-32.32c{1} | %-32.32C %4L | %m%n
JBossFuse:karaf@root> config:propset size 300
JBossFuse:karaf@root> config:update11.4. Configuring Fabric Containers
Overview
Profiles
- the Apache Karaf features to be deployed
- OSGi bundles to be deployed
- the feature repositories to be scanned for features
- properties that configure the container's runtime behavior
Best practices
Making changes using the command console
- fabric:version-create—create a new version
- fabric:profile-create—create a new profile
- fabric:profile-edit—edit the properties in a profile
- fabric:container-change-profile—change the profiles assigned to a container
Example 11.3. Editing Fabric Profile
JBossFuse:karaf@root> fabric:version-create
Created version: 1.1 as copy of: 1.0
JBossFuse:karaf@root> fabric:profile-edit -p org.apache.karaf.log/size=300 NEBroker
JBossFuse:karaf@root> fabric:version-create
Created version: 1.1 as copy of: 1.0
JBossFuse:karaf@root> fabric:profile-edit -p org.apache.karaf.log/size=300 NEBrokerUsing the management console
Chapter 12. Configuring the Hot Deployment System
Abstract
Overview
org.apache.felix.fileinstall-deploy PID.
Specifying the hot deployment folder
deploy folder that is relative to the folder from which you launched the container. You change the folder the container monitors by setting the felix.fileinstall.dir property in the rg.apache.felix.fileinstall-deploy PID. The value is the absolute path of the folder to monitor. If you set the value to /home/joe/deploy, the container will monitor a folder in Joe's home directory.
Specifying the scan interval
org.apache.felix.fileinstall-deploy PID. The value is specified in milliseconds.
Example
/home/smx/jbideploy as the hot deployment folder and sets the scan interval to half a second.
Example 12.1. Configuring the Hot Deployment Folders
JBossFuse:karaf@root> config:edit org.apache.felix.fileinstall-deploy
JBossFuse:karaf@root> config:propset felix.fileinstall.dir /home/smx/jbideploy
JBossFuse:karaf@root> config:propset felix.fileinstall.poll 500
JBossFuse:karaf@root> config:update
JBossFuse:karaf@root> config:edit org.apache.felix.fileinstall-deploy
JBossFuse:karaf@root> config:propset felix.fileinstall.dir /home/smx/jbideploy
JBossFuse:karaf@root> config:propset felix.fileinstall.poll 500
JBossFuse:karaf@root> config:updateChapter 13. Configuring JMX
Abstract
Overview
org.apache.karaf.management PID.
Changing the RMI port and JMX URL
| Property | Description |
|---|---|
| rmiRegistryPort | Specifies the RMI registry port. The default value is 1099. |
| serviceUrl | Specifies the the URL used to connect to the JMX server. The default URL is service:jmx:rmi:///jndi/rmi://localhost:1099/karaf-KarafName, where KarafName is the container's name (by default, root). |
Setting the JMX username and password
admin and the default password is admin.
Troubleshooting on Linux platforms
- Check that the hostname resolves to the correct IP address. For example, if the
hostname -icommand returns 127.0.0.1, JConsole will not be able to connect to the JMX server. To fix this, edit the/etc/hostsfile so that the hostname resolves to the correct IP address. - Check whether the Linux machine is configured to accept packets from the host where JConsole is running (packet filtering is built in the Linux kernel). You can enter the command,
/sbin/iptables --list, to determine whether an external client is allowed to connect to the JMX server.Use the following command to add a rule to allow an external client such as JConsole to connect:/usr/sbin/iptables -I INPUT -s JconsoleHost -p tcp --destination-port JMXRemotePort -j ACCEPT
/usr/sbin/iptables -I INPUT -s JconsoleHost -p tcp --destination-port JMXRemotePort -j ACCEPTCopy to Clipboard Copied! Toggle word wrap Toggle overflow Where JconsoleHost is either the hostname or the IP address of the host on which JConsole is running and JMXRemotePort is the IP port exposed by the JMX server.
Chapter 14. Configuring JAAS Security
14.1. Alternative JAAS Realms
Overview
Default realm
karaf realm name. The standard administration services in JBoss Fuse (SSH remote console, JMX port, and so on) are all configured to use the karaf realm by default.
Available realm implementations
Standalone JAAS realm
karaf realm installs four JAAS login modules, which are used in parallel:
PropertiesLoginModule- Authenticates username/password credentials and stores the secure user data in the
InstallDir/etc/users.propertiesfile. PublickeyLoginModule- Authenticates SSH key-based credentials (consisting of a username and a public/private key pair). Secure user data is stored in the
InstallDir/etc/keys.propertiesfile. FileAuditLoginModule- Provides an audit trail of successful/failed login attempts, which are logged to an audit file. Does not perform user authentication.
EventAdminAuditLoginModule- Provides an audit trail of successful/failed login attempts, which are logged to the OSGi Event Admin service. Does not perform user authentication.
Fabric JAAS realm
karaf realm based on the ZookeeperLoginModule login module is automatically installed in every container (the fabric-jaas feature is included in the default profile) and is responsible for securing the SSH remote console and other administrative services. The Zookeeper login module stores the secure user data in the Fabric Registry.
karaf realm with a higher rank.
LDAP JAAS realm
14.2. JAAS Console Commands
Editing user data from the console
jaas:* console commands, which you can use to edit JAAS user data from the console. This works both for standalone JAAS realms and for Fabric JAAS realms.
jaas:* console commands are not compatible with the LDAP JAAS module.
Standalone realm configuration
PropertiesLoginModule and the PublickeyLoginModule) maintains its own database of secure user data, independently of any other containers. To configure the user data for a standalone container, you must log into the specific container (see Connecting and Disconnecting Remotely) whose data you want to modify. Each standalone container must be configured separately.
jaas:realms command, as follows:
karaf JAAS realm. Enter the following console command to start editing the properties login module in the karaf realm:
JBossFuse:karaf@root> jaas:manage --index 1
JBossFuse:karaf@root> jaas:manage --index 1Fabric realm configuration
ZookeeperLoginModule by default) shares its secure user data with all of the other containers in the fabric and the user data is stored in the Fabric Registry. To configure the user data for a fabric, you can log into any of the containers. Because the user data is shared in the registry, any modifications you make are instantly propagated to all of the containers in the fabric.
jaas:realms console command, you might see a listing similar to this:
Index Realm                Module Class
    1 karaf                io.fabric8.jaas.ZookeeperLoginModule
    2 karaf                org.apache.karaf.jaas.modules.properties.PropertiesLoginModule
    3 karaf                org.apache.karaf.jaas.modules.publickey.PublickeyLoginModule
Index Realm                Module Class
    1 karaf                io.fabric8.jaas.ZookeeperLoginModule
    2 karaf                org.apache.karaf.jaas.modules.properties.PropertiesLoginModule
3 karaf org.apache.karaf.jaas.modules.publickey.PublickeyLoginModuleZookeeperLoginModule login module has the highest priority and is used by the fabric (you cannot see this from the listing, but its realm is defined to have a higher rank than the other modules). In this example, the ZookeeperLoginModule has the index 1, but it might have a different index number in your container.
ZookeeperLoginModule):
JBossFuse:karaf@root> jaas:manage --index 1
JBossFuse:karaf@root> jaas:manage --index 1Adding a new user to the JAAS realm
jdoe, to the JAAS realm.
- List the available realms and login modules by entering the following command:
JBossFuse:karaf@root> jaas:realms
JBossFuse:karaf@root> jaas:realmsCopy to Clipboard Copied! Toggle word wrap Toggle overflow - Choose the login module to edit by specifying its index, Index, using a command of the following form:
JBossFuse:karaf@root> jaas:manage --index Index
JBossFuse:karaf@root> jaas:manage --index IndexCopy to Clipboard Copied! Toggle word wrap Toggle overflow
jdoe, with password, secret, by entering the following console command:
JBossFuse:karaf@root> jaas:useradd jdoe secret
JBossFuse:karaf@root> jaas:useradd jdoe secretadmin role to jdoe, by entering the following console command:
JBossFuse:karaf@root> jaas:roleadd jdoe admin
JBossFuse:karaf@root> jaas:roleadd jdoe adminjaas:pending console command, as follows:
JBossFuse:karaf@root> jaas:pending
Jaas Realm:karaf Jaas Module:org.apache.karaf.jaas.modules.properties.PropertiesLoginModule
UserAddCommand{username='jdoe', password='secret'}
RoleAddCommand{username='jdoe', role='admin'}
JBossFuse:karaf@root> jaas:pending
Jaas Realm:karaf Jaas Module:org.apache.karaf.jaas.modules.properties.PropertiesLoginModule
UserAddCommand{username='jdoe', password='secret'}
RoleAddCommand{username='jdoe', role='admin'}jaas:update, as follows:
JBossFuse:karaf@root> jaas:update
JBossFuse:karaf@root> jaas:updateetc/users.properties file, in the case of a standalone container, or by storing the user data in the Fabric Registry, in the case of a fabric).
Canceling pending changes
jaas:update command, you could abort the pending changes using the jaas:cancel command, as follows:
JBossFuse:karaf@root> jaas:cancel
JBossFuse:karaf@root> jaas:cancel14.3. Standalone Realm Properties File
Overview
PropertiesLoginModule JAAS module. This login module stores its user data in a Java properties file in the following location:
InstallDir/etc/users.properties
InstallDir/etc/users.propertiesFormat of users.properties entries
etc/users.properties file has the following format (on its own line):
Username=Password[,UserGroup|Role][,UserGroup|Role]...
Username=Password[,UserGroup|Role][,UserGroup|Role]...Changing the default username and password
etc/users.properties file initially contains a commented out entry for a single user, admin, with password admin and role admin. It is strongly recommended that you create a new user entry that is different from the admin user example.
Username=Password,Administrator
Username=Password,AdministratorAdministrator role grants full administration privileges to this user.
Chapter 15. Securing Fabric Containers
Abstract
Default authentication system
io.fabric8.jaas.ZookeeperLoginModule). This system allows you to define user accounts and assign passwords and roles to the users. Out of the box, the user credentials are stored in the Fabric registry, unencrypted.
Managing users
jaas:* family of console commands. First of all you need to attach the jaas:* commands to the ZookeeperLoginModule login module, as follows:
jaas:* commands to the ZookeeperLoginModule login module. You can then add users and roles, using the jaas:useradd and jaas:roleadd commands. Finally, when you are finished editing the user data, you must commit the changes by entering the jaas:update command, as follows:
JBossFuse:karaf@root> jaas:update
JBossFuse:karaf@root> jaas:updatejaas:cancel.
Obfuscating stored passwords
ZookeeperLoginModule stores passwords in plain text. You can provide additional protection to passwords by storing them in an obfuscated format. This can be done by adding the appropriate configuration properties to the io.fabric8.jaas PID and ensuring that they are applied to all of the containers in the fabric.
Enabling LDAP authentication
LDAPLoginModule), which you can enable by adding the requisite configuration to the default profile.
Chapter 16. Logging
Abstract
16.1. Logging Overview
- Apache Log4j
- Apache Commons Logging
- SLF4J
- Java Util Logging
16.2. Logging Configuration
Overview
etc/system.properties—the configuration file that sets the logging level during the container’s boot process. The file contains a single property, org.ops4j.pax.logging.DefaultServiceLog.level, that is set toERRORby default.org.ops4j.pax.logging—the PID used to configure the logging back end service. It sets the logging levels for all of the defined loggers and defines the appenders used to generate log output. It uses standard Log4j configuration. By default, it sets the root logger's level toINFOand defines two appenders: one for the console and one for the log file.NoteThe console's appender is disabled by default. To enable it, addlog4j.appender.stdout.append=trueto the configuration For example, to enable the console appender in a standalone container, you would use the following commands:JBossFuse:karaf@root> config:edit org.ops4j.pax.logging JBossFuse:karaf@root> config:propappend log4j.appender.stdout.append true JBossFuse:karaf@root> config:update
JBossFuse:karaf@root> config:edit org.ops4j.pax.logging JBossFuse:karaf@root> config:propappend log4j.appender.stdout.append true JBossFuse:karaf@root> config:updateCopy to Clipboard Copied! Toggle word wrap Toggle overflow org.apache.karaf.log.cfg—configures the output of the log console commands.
Changing the log levels
org.ops4j.pax.logging PID's log4j.rootLogger property so that the logging level is one of the following:
TRACEDEBUGINFOWARNERRORFATALNONE
Example 16.1. Changing Logging Levels
JBossFuse:karaf@root> config:edit org.ops4j.pax.logging
JBossFuse:karaf@root> config:propset log4j.rootLogger "DEBUG, out, osgi:VmLogAppender"
JBossFuse:karaf@root> config:update
JBossFuse:karaf@root> config:edit org.ops4j.pax.logging
JBossFuse:karaf@root> config:propset log4j.rootLogger "DEBUG, out, osgi:VmLogAppender"
JBossFuse:karaf@root> config:updateChanging the appenders' thresholds
log4j.appender.appenderName.threshold property that controls what level of messages are written to the appender. The appender threshold values are the same as the log level values.
DEBUG but limiting the information displayed on the console to WARN.
Example 16.2. Changing the Log Information Displayed on the Console
JBossFuse:karaf@root> config:edit org.ops4j.pax.logging
JBossFuse:karaf@root> config:propset log4j.rootLogger "DEBUG, out, osgi:VmLogAppender"
JBossFuse:karaf@root> config:propappend log4j.appender.stdout.threshold WARN
JBossFuse:karaf@root> config:update
JBossFuse:karaf@root> config:edit org.ops4j.pax.logging
JBossFuse:karaf@root> config:propset log4j.rootLogger "DEBUG, out, osgi:VmLogAppender"
JBossFuse:karaf@root> config:propappend log4j.appender.stdout.threshold WARN
JBossFuse:karaf@root> config:updateLogging per bundle
sift appender to the Log4j root logger as shown in Example 16.3, “Enabling Per Bundle Logging”.
Example 16.3. Enabling Per Bundle Logging
JBossFuse:karaf@root> config:edit org.ops4j.pax.logging
JBossFuse:karaf@root> config:propset log4j.rootLogger "INFO, out, sift, osgi:VmLogAppender"
JBossFuse:karaf@root> config:update
JBossFuse:karaf@root> config:edit org.ops4j.pax.logging
JBossFuse:karaf@root> config:propset log4j.rootLogger "INFO, out, sift, osgi:VmLogAppender"
JBossFuse:karaf@root> config:updatedata/log/BundleName.log.
org.ops4j.pax.logging.cfg.
Logging History
~/.karaf/karaf.history. JBoss Fuse can be configured to prevent the history from being saved each time.
Procedure 16.1. Stop JBoss Fuse saving Logging History on shutdown.
- Stop JBoss Fuse.
- Edit
$FUSE_HOME/etc/system.properties. - Uncomment the line that says
# karaf.shell.history.maxSize = 0. - Restart JBoss Fuse
~/.karaf/karaf.history will still be created, but it will always have a size of 0, and will be empty.
16.3. Logging per Application
Overview
Application key
Enabling per application logging
- In each of your applications, edit the Java source code to define a unique application key.If you are using slf4j, add the following static method call to your application:
org.slf4j.MDC.put("app.name","MyFooApp");org.slf4j.MDC.put("app.name","MyFooApp");Copy to Clipboard Copied! Toggle word wrap Toggle overflow If you are using log4j, add the following static method call to your application:org.apache.log4j.MDC.put("app.name","MyFooApp");org.apache.log4j.MDC.put("app.name","MyFooApp");Copy to Clipboard Copied! Toggle word wrap Toggle overflow - Edit the
etc/org.ops4j.pax.loggingPID to customize the sift appender.- Set
log4j.appender.sift.keytoapp.name. - Set
log4j.appender.sift.appender.fileto=${karaf.data}/log/$\\{app.name\\}.log.
- Edit the
etc/org.ops4j.pax.loggingPID to add the sift appender to the root logger.JBossFuse:karaf@root> config:edit org.ops4j.pax.logging JBossFuse:karaf@root> config:propset log4j.rootLogger "INFO, out, sift, osgi:VmLogAppender" JBossFuse:karaf@root> config:update
JBossFuse:karaf@root> config:edit org.ops4j.pax.logging JBossFuse:karaf@root> config:propset log4j.rootLogger "INFO, out, sift, osgi:VmLogAppender" JBossFuse:karaf@root> config:updateCopy to Clipboard Copied! Toggle word wrap Toggle overflow
16.4. Log Commands
- log:display
- Displays the most recent log entries. By default, the number of entries returned and the pattern of the output depends on the size and pattern properties in the
org.apache.karaf.log.cfgfile. You can override these using the-pand-darguments. - log:display-exception
- Displays the most recently logged exception.
- log:get
- Displays the current log level.
- log:set
- Sets the log level.
- log:tail
- Continuously display log entries .
- log:clear
- Clear log entries.
Chapter 17. Persistence
Abstract
Overview
data folder in the directory from which you launch the container. This folder is populated by folders storing information about the message broker used by the container, the OSGi framework, and the JBI container.
The data folder
data folder is used by the JBoss Fuse runtime to store persistent state information. It contains the following folders:
activemq- Contains persistent data needed by any Apache ActiveMQ brokers that are started by the container.
cache- The OSGi bundle cache. The cache contains a directory for each bundle, where the directory name corresponds to the bundle identifier number.
generated-bundles- Contains bundles that are generated by the container. Typically these are to support deployed JBI artifacts.
jbi- Contains a subdirectory for each JBI artifact deployed to the JBoss Fuse runtime. For JBI components the folder's name is generated by the component's name. For JBI service assemblies, the folder's name is the identifier of the bundle generated to support the service assembly.
log- Contains the log files.
maven- A temporary directory used by the Fabric Maven Proxy when uploading files.
txlog- Contains the log files used by the transaction management system. You can set the location of this directory in the
org.apache.aries.transaction.cfgfile
Changing the bundle cache location
InstallDir/data/cache.
config.properties.
Flushing the bundle cache
config.properties. This property is set to none by default.
Changing the generated-bundle cache location
org.apache.felix.fileinstall-deploy.cfg file.
Adjusting the bundle cache buffer
config.properties configuration file. The value is specified in bytes.
Chapter 18. Failover Deployments
Abstract
18.1. Using a Simple Lock File System
Overview
Configuring a lock file system
etc/system.properties file on both the master and the slave installation to include the properties in Example 18.1, “Lock File Failover Configuration”.
Example 18.1. Lock File Failover Configuration
karaf.lock=true
karaf.lock.class=org.apache.karaf.main.SimpleFileLock
karaf.lock.dir=PathToLockFileDirectory
karaf.lock.delay=10000
karaf.lock=true
karaf.lock.class=org.apache.karaf.main.SimpleFileLock
karaf.lock.dir=PathToLockFileDirectory
karaf.lock.delay=10000- karaf.lock—specifies whether the lock file is written.
- karaf.lock.class—specifies the Java class implementing the lock. For a simple file lock it should always be
org.apache.karaf.main.SimpleFileLock. - karaf.lock.dir—specifies the directory into which the lock file is written. This must be the same for both the master and the slave installation.
- karaf.lock.delay—specifies, in milliseconds, the delay between attempts to reaquire the lock.
18.2. Using a JDBC Lock System
Overview
Adding the JDBC driver to the classpath
- Copy the JDBC driver JAR file to the
ESBInstallDir/libdirectory for each Red Hat JBoss Fuse instance. - Modify the
bin/karafstart script so that it includes the JDBC driver JAR in itsCLASSPATHvariable.For example, given the JDBC JAR file,JDBCJarFile.jar, you could modify the start script as follows (on a *NIX operating system):Copy to Clipboard Copied! Toggle word wrap Toggle overflow NoteIf you are adding a MySQL driver JAR or a PostgreSQL driver JAR, you must rename the driver JAR by prefixing it with thekaraf-prefix. Otherwise, Apache Karaf will hang and the log will tell you that Apache Karaf was unable to find the driver.
Configuring a JDBC lock system
etc/system.properties file for each instance in the master/slave deployment as shown
Example 18.2. JDBC Lock File Configuration
Configuring JDBC locking on Oracle
etc/system.properties file must point to org.apache.karaf.main.OracleJDBCLock.
system.properties file as normal for your setup, as shown:
Example 18.3. JDBC Lock File Configuration for Oracle
Configuring JDBC locking on Derby
etc/system.properties file should point to org.apache.karaf.main.DerbyJDBCLock. For example, you could configure the system.properties file as shown:
Example 18.4. JDBC Lock File Configuration for Derby
Configuring JDBC locking on MySQL
etc/system.properties file must point to org.apache.karaf.main.MySQLJDBCLock. For example, you could configure the system.properties file as shown:
Example 18.5. JDBC Lock File Configuration for MySQL
Configuring JDBC locking on PostgreSQL
etc/system.properties file must point to org.apache.karaf.main.PostgreSQLJDBCLock. For example, you could configure the system.properties file as shown:
Example 18.6. JDBC Lock File Configuration for PostgreSQL
JDBC lock classes
org.apache.karaf.main.DefaultJDBCLock
org.apache.karaf.main.DerbyJDBCLock
org.apache.karaf.main.MySQLJDBCLock
org.apache.karaf.main.OracleJDBCLock
org.apache.karaf.main.PostgreSQLJDBCLock
org.apache.karaf.main.DefaultJDBCLock
org.apache.karaf.main.DerbyJDBCLock
org.apache.karaf.main.MySQLJDBCLock
org.apache.karaf.main.OracleJDBCLock
org.apache.karaf.main.PostgreSQLJDBCLock18.3. Container-level Locking
Overview
Configuring container-level locking
etc/system.properties file on each system in the master/slave setup:
Example 18.7. Container-level Locking Configuration
karaf.lock=true
karaf.lock.level=50
karaf.lock.delay=10000
karaf.lock=true
karaf.lock.level=50
karaf.lock.delay=10000etc/startup.properties, in the format BundleName.jar=level. The core system bundles have levels below 50, where as user bundles have levels greater than 50.
| Start Level | Behavior |
|---|---|
| 1 | A 'cold' standby instance. Core bundles are not loaded into container. Slaves will wait until lock acquired to start server. |
| <50 | A 'hot' standby instance. Core bundles are loaded into the container. Slaves will wait until lock acquired to start user level bundles. The console will be accessible for each slave instance at this level. |
| >50 | This setting is not recommended as user bundles will be started. |
Avoiding port conflicts
servicemix start script (or the karaf script on a child instance) to include the following:
DEFAULT_JAVA_OPTS="-server $DEFAULT_JAVA_OPTS -Dcom.sun.management.jmxremote.port=1100 -Dcom.sun.management.jmxremote.authenticate=false"
DEFAULT_JAVA_OPTS="-server $DEFAULT_JAVA_OPTS -Dcom.sun.management.jmxremote.port=1100 -Dcom.sun.management.jmxremote.authenticate=false"Chapter 19. Applying Patches
Abstract
19.1. Patching Overview
.patch file that lists the contained artifacts. The artifacts are typically one or more bundles. They can, however, include configuration files and feature descriptors.
- Customer Support sends you a patch.
- Customer Support sends you a link to download a patch.
- Download a patch directly from the Red Hat customer portal.
- standalone—the container's command console's patch shell has commands for managing the patching process
- fabric—patching a fabric requires applying the patch to a profile and then applying the profile to a containerThe management console is the recommended way to patch containers in a fabric. See chapter "Patching a Fabric" in "Management Console User Guide"for more information.
19.2. Finding the Right Patches to Apply
Abstract
Locate the patches on the customer portal
- Login to the Red Hat Customer Portal using your customer account. This account must be associated with an appropriate Red Hat software subscription, otherwise you will not be able to see the patch downloads for JBoss Fuse.
- Navigate to the customer portal Software Downloads page.
- In the Product dropdown menu, select the appropriate product (for example, A-MQ or Fuse), and then select the version, 6.1.0, from the Version dropdown menu. A table of downloads now appears, which has three tabs: Releases, Patches, and Security Advisories.NoteMake sure you select the right GA version for your product. A micro version release (for example, 6.1.1) is not the same thing as a patched release.
- Click the Patches tab to view the regular patches (with no security-related fixes).
- Click the Security Advisories tab to view the patches with security-related fixes.
Types of patch
- Patches with GA baseline (for example, Patch 1, Patch 2, Patch 3, and so on)
- Rollup patches (for example, Rollup 1, Rollup 2, and so on)
- Patches with rollup baseline (for example, Rollup 1 Patch1, Rollup1 Patch2, and so on)
Patches with GA baseline
Rollup patches
Patches with rollup baseline
Which patches are needed to update the GA product to the latest patch level?
- If the only patches released so far are patches with GA baseline (Patch 1, Patch 2, and so on), apply the latest of these patches directly to the GA product.
- If a rollup patch has been released and no patches have been released after the latest rollup patch, simply apply the latest rollup patch to the GA product.
- If the latest patch is a patch with a rollup baseline, you must apply two patches to the GA product, as follows:
- Apply the latest rollup patch, and then
- Apply the latest patch with a rollup baseline.
Which patches to apply, if you only want to install regression-tested patches?
Example of identifying patches to apply
Patches available under the Patches tab
Figure 19.1. Patches Tab
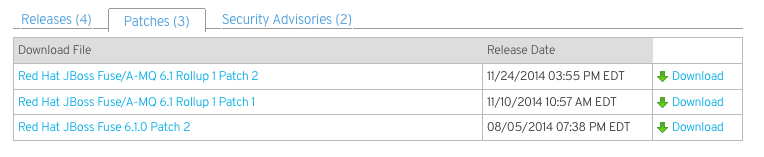
Patches available under the Security Advisories tab
Figure 19.2. Security Advisories Tab

Complete list of available patches
- Red Hat JBoss Fuse 6.1.0 Patch 1
- Red Hat JBoss Fuse 6.1.0 Patch 2
- Red Hat JBoss Fuse/A-MQ 6.1 Rollup 1
- Red Hat JBoss Fuse/A-MQ 6.1 Rollup 1 Patch 1
- Red Hat JBoss Fuse/A-MQ 6.1 Rollup 1 Patch 2
Patches you would apply to update to the latest patch level
- Red Hat JBoss Fuse/A-MQ 6.1 Rollup 1
- Red Hat JBoss Fuse/A-MQ 6.1 Rollup 1 Patch 2
19.3. Patching a Standalone Container
Abstract
Overview
system folder. When the patch is applied, the container's configuration is changed so that it points to the patched artifacts instead of the artifacts from the original installation. This makes it easy for the system to be restored to its original state or to selectively back out patches.
Applying a patch
- Before you proceed to install the patch, make sure to read the text of the
READMEfile that comes with the patch, as there might be additional manual steps required to install a particular patch. - Make sure you install all the Apache Karaf features you need before you start to install the patch. If you install any features after installing the patch, the features will install the original unpatched versions of the dependencies—see the section called “Adding features to a patched container”.
- Add the patch to the container's environment using the patch:add command.Example 19.1, “Adding a Patch to a Broker's Environment” shows the command for adding the patch contained in the patch file
patch.zipfrom the local file system.Example 19.1. Adding a Patch to a Broker's Environment
JBoss Fuse> patch:add file://patch.zip
JBoss Fuse> patch:add file://patch.zipCopy to Clipboard Copied! Toggle word wrap Toggle overflow This command copies the specified patch file to the container'ssystemfolder and unpacks it. - Simulate installing the patch using the patch:simulate command.This will generate a log of the changes that will be made to the container when the patch is installed, but will not make any actual changes to the container.NoteThe patch:list command displays a list of all patches added to the container's
systemfolder. - Review the simulation log to understand the changes that will be made to the container.
- Apply the patch to the container using the patch:install command.WarningRunning patch:install before the container is fully started and all of the bundles are active will cause the container to hang.NoteThe patch:list command displays a list of all patches added to the container's
systemfolder.The container will need to restart to apply the patch. If you are using a remote console, you will lose the connection to the container. If you are using the container's local console, it will automatically reconnect when the container restarts. - Validate the patch, by searching for one of the patched artifacts. For example, if you had just upgraded JBoss Fuse 6.1 to the patch with build number
611423, you could search for bundles with this build number, as follows:JBoss Fuse:karaf@root> osgi:list -s -t 0 | grep -i 611423 [ 6] [Active ] [ ] [ ] [ 10] org.apache.felix.configadmin (1.4.0.redhat-611423)
JBoss Fuse:karaf@root> osgi:list -s -t 0 | grep -i 611423 [ 6] [Active ] [ ] [ ] [ 10] org.apache.felix.configadmin (1.4.0.redhat-611423)Copy to Clipboard Copied! Toggle word wrap Toggle overflow
Rolling back a patch
Example 19.2. Rolling Back a Patch
JBoss Fuse> patch:rollback patch1
JBoss Fuse> patch:rollback patch1system folder.
Adding features to a patched container
- Roll back the patch, as follows:
JBoss Fuse> patch:rollback patch1
JBoss Fuse> patch:rollback patch1Copy to Clipboard Copied! Toggle word wrap Toggle overflow - Install the additional features you require, using the features:install command.
- Apply the patch to the container using the patch:install command.
- The container automatically restarts to apply the patch. If you are using a remote console, you will lose the connection to the container. If you are using the container's local console, it will automatically reconnect when the container restarts.
19.4. Patching a Container in a Fabric
Abstract
Overview
Is it necessary to patch the underlying container?
fabric:create command). Always read the patch README file to find out whether there are any special steps required to install a particular patch.
Using the management console
Using the command console
- Before you proceed to install the patch, make sure to read the text of the
READMEfile that comes with the patch, as there might be additional manual steps required to install a particular patch. - Create a new version, using the
fabric:version-createcommand:JBossFuse:karaf@root> fabric:version-create 1.1 Created version: 1.1 as copy of: 1.0
JBossFuse:karaf@root> fabric:version-create 1.1 Created version: 1.1 as copy of: 1.0Copy to Clipboard Copied! Toggle word wrap Toggle overflow ImportantThe version name must be a pure numeric string, such as1.1,1.2,2.1, or2.2. You cannot incorporate alphabetic characters in the version name (such as1.0.patch). - Apply the patch to the new version, using the
fabric:patch-applycommand. For example, to apply theactivemq.zippatch file to version1.1:JBossFuse:karaf@root> fabric:patch-apply --version 1.1 file:///patches/activemq.zip
JBossFuse:karaf@root> fabric:patch-apply --version 1.1 file:///patches/activemq.zipCopy to Clipboard Copied! Toggle word wrap Toggle overflow - Upgrade the container using the
fabric:container-upgradecommand, specifying which container you want to upgrade. For example, to upgrade therootcontainer, enter the following command:JBossFuse:karaf@root> fabric:container-upgrade 1.1 root Upgraded container root from version 1.0 to 1.1
JBossFuse:karaf@root> fabric:container-upgrade 1.1 root Upgraded container root from version 1.0 to 1.1Copy to Clipboard Copied! Toggle word wrap Toggle overflow ImportantIt is recommended that you upgrade only one or two containers to the patched profile version, to ensure that the patch does not introduce any new issues. When you are certain that the patch works as expected, upgrade the remaining containers in the fabric. - You can check that the new patch profile has been created using the
fabric:profile-listcommand, as follows:BossFuse:karaf@root> fabric:profile-list --version 1.1 | grep patch default 0 patch-activemq-patch patch-activemq-patch
BossFuse:karaf@root> fabric:profile-list --version 1.1 | grep patch default 0 patch-activemq-patch patch-activemq-patchCopy to Clipboard Copied! Toggle word wrap Toggle overflow Where we presume that the patch was applied to profile version 1.1.TipIf you want to avoid specifying the profile version (with--version) every time you invoke a profile command, you can change the default profile version using thefabric:version-set-default Versioncommand.You can also check whether specific JARs are included in the patch, for example:JBossFuse:karaf@root> list | grep -i activemq [ 131] [Active ] [Created ] [ ] [ 50] activemq-osgi (5.9.0.redhat-61037X) [ 139] [Active ] [Created ] [ ] [ 50] activemq-karaf (5.9.0.redhat-61037X) [ 207] [Active ] [ ] [ ] [ 60] activemq-camel (5.9.0.redhat-61037X)
JBossFuse:karaf@root> list | grep -i activemq [ 131] [Active ] [Created ] [ ] [ 50] activemq-osgi (5.9.0.redhat-61037X) [ 139] [Active ] [Created ] [ ] [ 50] activemq-karaf (5.9.0.redhat-61037X) [ 207] [Active ] [ ] [ ] [ 60] activemq-camel (5.9.0.redhat-61037X)Copy to Clipboard Copied! Toggle word wrap Toggle overflow
Chapter 20. Configuring a Fabric's Maven Proxy
Abstract
Overview
Default repositories
- Maven Central (http://repo1.maven.org/maven2)
- Fuse Public (
https://repo.fusesource.com/nexus/content/groups/public) - Fuse Releases (https://repo.fusesource.com/nexus/content/repositories/releases)
- Fuse Early Access (https://repo.fusesource.com/nexus/content/groups/ea)
- JBoss Public (
https://repository.jboss.org/nexus/content/repositories/public) - SpringSource (http://repository.springsource.com/maven/bundles/release, http://repository.springsource.com/maven/bundles/external)
- User's Local (~/.m2/repository)
Changing the repositories
- Create a new profile version. From the command console this is done using the fabric:version-create command. See section "fabric:version-create" in "Console Reference" for more information.
- Change the
org.ops4j.pax.url.mvn.repositoriesproperty in theio.fabric8.agentPID of thedefaultprofile. Example 20.1, “Configuring the Maven Proxy URL” shows the console command for editing this property.Example 20.1. Configuring the Maven Proxy URL
JBossFuse:karaf@root> fabric:profile-edit -p io.fabric8.agent/org.ops4j.pax.url.mvn.repositories = file:${runtime.home}/${karaf.default.repository}@snapshots@id=karaf-default, file:${runtime.data}/maven/upload@snapshots@id=fabric-upload, http://repo1.maven.org/maven2@id=central, https://repo.fusesource.com/nexus/content/groups/public@id=fusepublic, https://repository.jboss.org/nexus/content/repositories/public@id=jbosspublic, https://repo.fusesource.com/nexus/content/repositories/releases@id=jbossreleases, https://repo.fusesource.com/nexus/content/groups/ea@id=jbossearlyaccess, http://repository.springsource.com/maven/bundles/release@id=ebrreleases, http://repository.springsource.com/maven/bundles/external@id=ebrexternalJBossFuse:karaf@root> fabric:profile-edit -p io.fabric8.agent/org.ops4j.pax.url.mvn.repositories = file:${runtime.home}/${karaf.default.repository}@snapshots@id=karaf-default, file:${runtime.data}/maven/upload@snapshots@id=fabric-upload, http://repo1.maven.org/maven2@id=central, https://repo.fusesource.com/nexus/content/groups/public@id=fusepublic, https://repository.jboss.org/nexus/content/repositories/public@id=jbosspublic, https://repo.fusesource.com/nexus/content/repositories/releases@id=jbossreleases, https://repo.fusesource.com/nexus/content/groups/ea@id=jbossearlyaccess, http://repository.springsource.com/maven/bundles/release@id=ebrreleases, http://repository.springsource.com/maven/bundles/external@id=ebrexternalCopy to Clipboard Copied! Toggle word wrap Toggle overflow NoteTheio.fabric8.agentPID is refined in all of the fabric profiles. Setting the proxy URL, theorg.ops4j.pax.url.mvn.repositoriesproperty, in thedefaultprofile ensures that all of the other fabric profiles share the same Maven proxy setting.ImportantThefabricprofile'sio.fabric8.mavenPID, which ultimately controls the Maven proxy, imports its value from thedefaultprofile'sio.fabric8.agentPID. You should not change the settings of theio.fabric8.mavenPID.Alternatively, instead of resetting the entire list of repositories, you can append a new entry to the repository list by invokingfabric:profile-editwith the--appendoption, as follows:JBossFuse:karaf@root> profile-edit --pid io.fabric8.agent/org.ops4j.pax.url.mvn.repositories='http://fusewin.tpb.lab.eng.brq.redhat.com:8081/nexus/content/repositories/fuse-qe-repo@id=fuse-qa' --append default 1.1
JBossFuse:karaf@root> profile-edit --pid io.fabric8.agent/org.ops4j.pax.url.mvn.repositories='http://fusewin.tpb.lab.eng.brq.redhat.com:8081/nexus/content/repositories/fuse-qe-repo@id=fuse-qa' --append default 1.1Copy to Clipboard Copied! Toggle word wrap Toggle overflow - Roll the changes out the fabric by upgrading the containers to the new profile version.ImportantYou cannot test this configuration change out on a few containers to validate it. The change must be made to the entire fabric or it will result in conflicts.
Using an HTTP proxy with the Maven proxy
settings.xml file that includes an HTTP proxy configuration.
- Prepare an HTTP proxy settings file (see Example 20.2, “Example HTTP proxy settings
.xmlfile” for example content), and put it in the Red Hat JBoss Fuse InstallDir/fuse/directory. - Start up JBoss Fuse, and create a fabric. For details, see ???.
- Specify the name and location of the HTTP settings file. At the
JBossFuse:karaf@root>command line, type:profile-edit --pid io.fabric8.maven/io.fabric8.maven.settings=/home/fuse/http-proxy-settings.xml default
profile-edit --pid io.fabric8.maven/io.fabric8.maven.settings=/home/fuse/http-proxy-settings.xml defaultCopy to Clipboard Copied! Toggle word wrap Toggle overflow - Remove the org.ops4j.pax,url.mvn.repositories property from the
defaultprofile. At theJBossFuse:karaf@root>command line, type:profile-edit --delete --pid io.fabric8.agent/org.ops4j.pax.url.mvn.repositories default
profile-edit --delete --pid io.fabric8.agent/org.ops4j.pax.url.mvn.repositories defaultCopy to Clipboard Copied! Toggle word wrap Toggle overflow Removing this property causes the Maven proxy to pick up repositories from Maven's/home/.m2/settings.xmlfile, pointed to in the/home/fuse/http-proxy-settings.xmlfile.All fabric Maven proxy requests for remote repositories will now be redirected to the HTTP proxy server.
Example 20.2. Example HTTP proxy settings .xml file
Chapter 21. Maven Indexer Plugin
Procedure 21.1. Deploy the Maven Indexer Plugin
- In the Container perspective go to the Karaf console and enter the following command to install the Maven Indexer plugin:
features:install hawtio-maven-indexer
features:install hawtio-maven-indexerCopy to Clipboard Copied! Toggle word wrap Toggle overflow In the Fabric perspective go to the Karaf console and add add the feature to a profile:fabric:profile-edit --features hawtio-maven-indexer jboss-fuse-full
fabric:profile-edit --features hawtio-maven-indexer jboss-fuse-fullCopy to Clipboard Copied! Toggle word wrap Toggle overflow - For both perspectives, the rest of the commands are the same. Enter the following commands to configure the Maven Indexer plugin:
config:edit io.hawt.maven.indexer
config:proplist
config:propset repositories 'https://maven.oracle.com'
config:proplist
config:update
config:edit io.hawt.maven.indexer
config:proplist
config:propset repositories 'https://maven.oracle.com'
config:proplist
config:update
Copy to Clipboard Copied! Toggle word wrap Toggle overflow - Wait for the Maven Indexer plugin to be deployed. This may take a few minutes. Look out for messages like those shown below to appear on the log tab.

config:edit io.hawt.maven.indexer
config:proplist
config:propset repositories external repository
config:proplist
config:update
config:edit io.hawt.maven.indexer
config:proplist
config:propset repositories external repository
config:proplist
config:updateChapter 22. Welcome Banner
welcome banner, edit Fuse install dir/etc/org.apache.karaf.shell.cfg. Uncomment welcomBanner =
# Specify an additional welcome banner to be displayed when a user logs into the server.
#
welcomeBanner =
# Specify an additional welcome banner to be displayed when a user logs into the server.
#
welcomeBanner =Figure 22.1. Log in screen for the Management Console
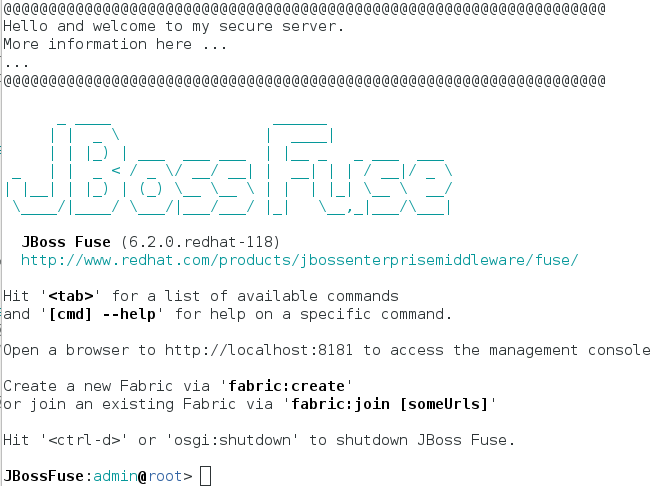
Chapter 23. Branding JBoss Fuse Console
- Adding a
branding.propertiesfile toFuse install dir/etcdirectoryProcedure 23.1. Adding a
branding.propertiesfile toFuse install dir/etcdirectory- Create a
branding.propertiesfile with your message. A sample file is given below:Copy to Clipboard Copied! Toggle word wrap Toggle overflow - Copy the
branding.propertiesfile toFuse install dir/etcdirectory. - Navigate to
Fuse install dir/bindirectory. Open the terminal and enter the command./fuseto start the JBoss Fuse server. You will see your branded message on the JBoss Fuse console.
- Creating a branding bundleAt the startup, JBoss Fuse is looking for a bundle which exports the
org.apache.karaf.brandingpackage, containing abranding.propertiesfile. This branding bundle contains a file which stores your customized brand.You can create a simple branding bundle using Maven. Copy yourbranding.propertiesfile to the maven project resources directory, for example,src/main/resources/org/apache/karaf/branding/directory. Then using your project'spom.xmlfile you can generate the branding bundle as per the steps given below:Procedure 23.2. Creating a branding bundle
- Create
branding.propertiesfile as shown above. Copy this file to project resources directory, for example,src/main/resources/org/apache/karaf/branding/branding.propertiesdirectory. - A sample
pom.xmlfile can be as follows:Copy to Clipboard Copied! Toggle word wrap Toggle overflow - Open a terminal and navigate to directory where you have saved the
pom.xmlfile. Run mvn clean install command to create a branding bundle. - Copy generated branded bundle from the project's
/targetdirectory toFuse install dir/libdirectory. - In order for JBoss Fuse to use this branding bundle instead of default one, add the following line to
Fuse install dir/etc/custom.propertiesfile:org.osgi.framework.system.packages.extra = \ org.apache.karaf.branding - Save your changes. Navigate to
Fuse install dir/bindirectory and run ./fuse to start JBoss Fuse server. You can see your branded console after the startup.
Index
A
- admin commands, Using the admin console commands
B
- broker
- deploying
- standalone container, Standalone containers
- bundle cache, Changing the bundle cache location
C
- child containers, Managing Child Containers
- config shell, Standalone containers
- config.properties, OSGi framework properties, Overview
- config:list, Listing the current configuration
- configuration
- Java Options, Setting Java Options
- JBI, JBI component configuration
- OSGi, Introducing JBoss Fuse Configuration
F
- fabric:container-stop, Shutting Down a Fabric
- fabric:container-upgrade, Using the command console
- fabric:join, Joining a Fabric
- failover, Failover Deployments
- featureRepositories, Modifying the default set of feature URLs
- featuresBoot, Modifying the default installed features
- felix.cache.bufsize, Adjusting the bundle cache buffer
- felix.fileinstall.dir, Specifying the hot deployment folder
- felix.fileinstall.poll, Specifying the scan interval
- felix.fileinstall.tmpdir, Changing the generated-bundle cache location
G
- generated bundle cache, Changing the generated-bundle cache location
H
- hot deployment
- folder, Specifying the hot deployment folder
- monitor interval, Specifying the scan interval
I
- io.fabric8.agent, Changing the repositories
- io.fabric8.maven, Changing the repositories
J
- Java Options
- configuration, Setting Java Options
- JBI
- configuration, JBI component configuration
- JDBC lock, Using a JDBC Lock System
- JMX configuration
K
- karaf.default.repository, Initial container properties
- karaf.framework, OSGi framework properties
- karaf.framework.felix, OSGi framework properties
- karaf.name, Initial container properties
- KARAF_BASE, Default environment settings
- KARAF_DATA, Default environment settings
- KARAF_HOME, Default environment settings
L
- launching
- client mode, Launching the runtime in client mode
- default mode, Launching the runtime
- server mode, Launching the runtime in server mode
- lock file, Using a Simple Lock File System
- logging
- commands, Log Commands
O
- org.apache.felix.fileinstall-deploy, Overview
- org.apache.karaf.log, Overview
- org.ops4j.pax.logging, Overview
- org.ops4j.pax.logging.DefaultServiceLog.level, Overview
- org.ops4j.pax.url.mvn.repositories, Changing the repositories
- org.osgi.framework.storage, Changing the bundle cache location
- org.osgi.framework.storage.clean, Flushing the bundle cache
- org.osgi.service.http.port, Initial container properties
- OSGi
- configuration, Introducing JBoss Fuse Configuration
- OSGi configuration
- creating, Standalone containers
- OSGi framework
- configuring, OSGi framework properties
P
- patch:add, Applying a patch
- patch:install, Applying a patch
- patch:list, Applying a patch, Rolling back a patch
- patch:rollback, Rolling back a patch
- patch:simulate, Applying a patch
- patching
- fabric
- command console, Using the command console
- management console, Using the management console
- standalone, Applying a patch
- rollback, Rolling back a patch
R
- remote client, Using the remote client
- remote console
- address, Configuring a standalone container for remote access
- container-connect, Using the fabric:container-connect command
- ssh, Using the ssh:ssh console command
- remoteShellLocation, Configuring a standalone container for remote access
- RMI port, Changing the RMI port and JMX URL
- RMI registry
- port number, Changing the RMI port and JMX URL
- rmiRegistryPort, Changing the RMI port and JMX URL
S
- security, Configuring JAAS Security
- service wrapper
- classpath, Additional classpath entries
- JMX configuration, JMX configuration properties
- JVM properties, JVM parameters
- logging, Logging configuration
- serviceUrl, Changing the RMI port and JMX URL
- standalone
- initial features, Configuring the Initial Features in a Standalone Container
- starting, Starting JBoss Fuse
- stopping, Stopping JBoss Fuse
- remote container, Stopping a Remote Container
- system service
- Redhat, Red Hat Enterprise Linux
- Ubuntu, Ubuntu Linux
- Windows, Windows
- system.properties, Initial container properties
Legal Notice
Trademark Disclaimer