Designing APIs with Apicurito
Designing REST APIs for Fuse applications on OpenShift
Abstract
Chapter 1. Overview
Red Hat Fuse on OpenShift provides Apicurito, a web-based API designer, that you can use to design REST APIs that comply with the OpenAPI 2.0 specification, a vendor-neutral and portable open description format for API services. Apicurito is a “light” version of the Apicurio Studio open source project (https://www.apicur.io/). This means that your Apicurito design sessions are stateless and you must save your API definition as a JSON file at the end of each session.
You can also use Apicurito to generate a preliminary Fuse project based on a REST API definition. In your Fuse development environment, you can then complete the project’s Camel routes and build the project. Finally, you can deploy the resulting REST service on Fuse on OpenShift.
Here is an overview of how you can use Apicurito to incorporate REST APIs in your Fuse on OpenShift application solution:
- Add Apicurito as a service to your OpenShift project.
In the Apicurito web-based designer:
- Create an API definition with Apicurito. Save the REST API definition as a JSON file to your local file system. You can save your API definition at any point during your editing session, even if the API definition is not complete.
- Upload an API definition to Apicurito.
- Generate a Fuse Camel project based on the current REST API definition. Apicurito provides a downloadable zip file that contains a complete Maven project.
- In your Fuse development environment, complete the skeleton implementation provided by the generated Fuse project.
- Build and deploy the Fuse application to OpenShift.
- (Optional) Integrate the Fuse application with Red Hat 3scale API Management, using the 3scale service discovery capability to find and configure your Fuse application.
1.1. Add Apicurito as a service to your OpenShift project
You can add Apicurito as a service to your OpenShift project from the OpenShift service catalog. You can access this instance at a URL external to the OpenShift environment.
Prerequisites
- Obtain the hostname that will allow you to access Apicurito by following the guidelines recommended by your OpenShift system administrator.
Verify that the Fuse on OpenShift images and templates, including
apicurito-uiandfuse-apicurito-generator, are installed on your OpenShift cluster, by running the following command in a command window:oc get is -n openshift
If the images and templates are not pre-installed, or if the provided versions are out of date, install (or update) the Fuse on OpenShift images and templates as described in the Fuse on OpenShift Guide.
Procedure
To add Apicurito as a service to your OpenShift project:
In a command window, log in to the OpenShift server:
oc login -u developer -p developer
Create a new project namespace. For example, the following command creates a new project named test:
oc new-project test
-
In your web browser, open the OpenShift console and log in with your credentials (for example, username
developerand passworddeveloper). Click Catalog. In the Catalog search field, type
Apicuritoand then select Red Hat Fuse Apicurito.
The Information step of the Red Hat Fuse Apicurito wizard opens.
Click Next.
The Configuration step of the Red Hat Fuse Apicurito wizard opens.
In the Image Stream Namespace field, type
openshift.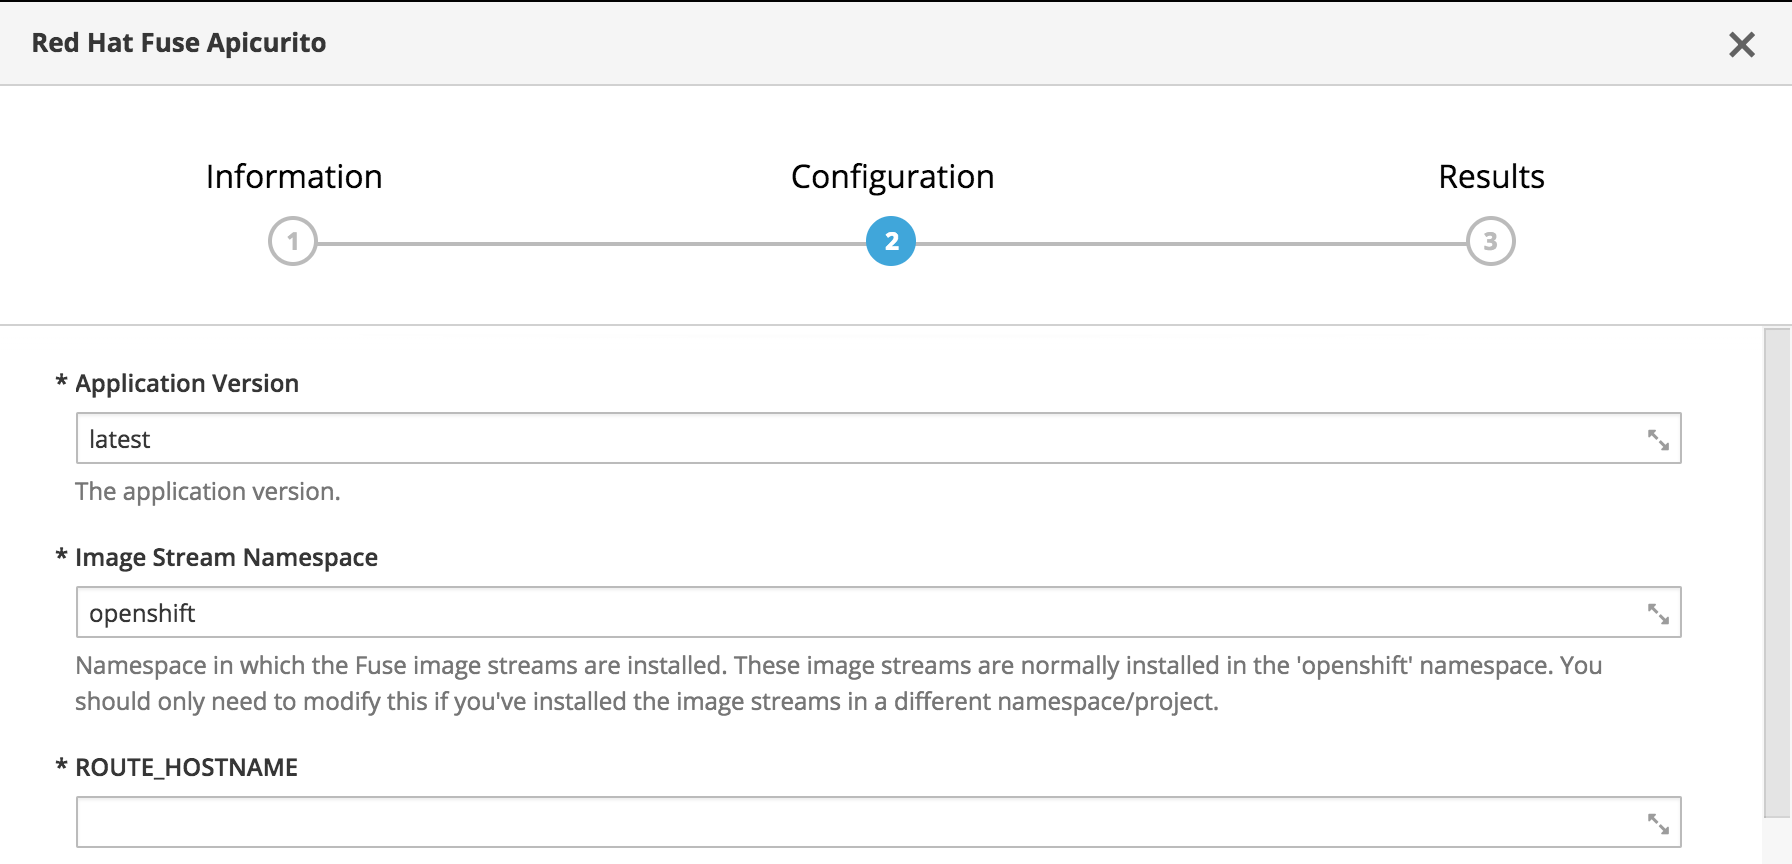
-
In the ROUTE_HOSTNAME field, type the external hostname that allows you to access the Apicurito instance, for example
apicurito-myproject.192.168.64.43.nip.io. Accept the default values for the rest of the settings in the Configuration step and click Create.
The Results step of the template wizard opens.
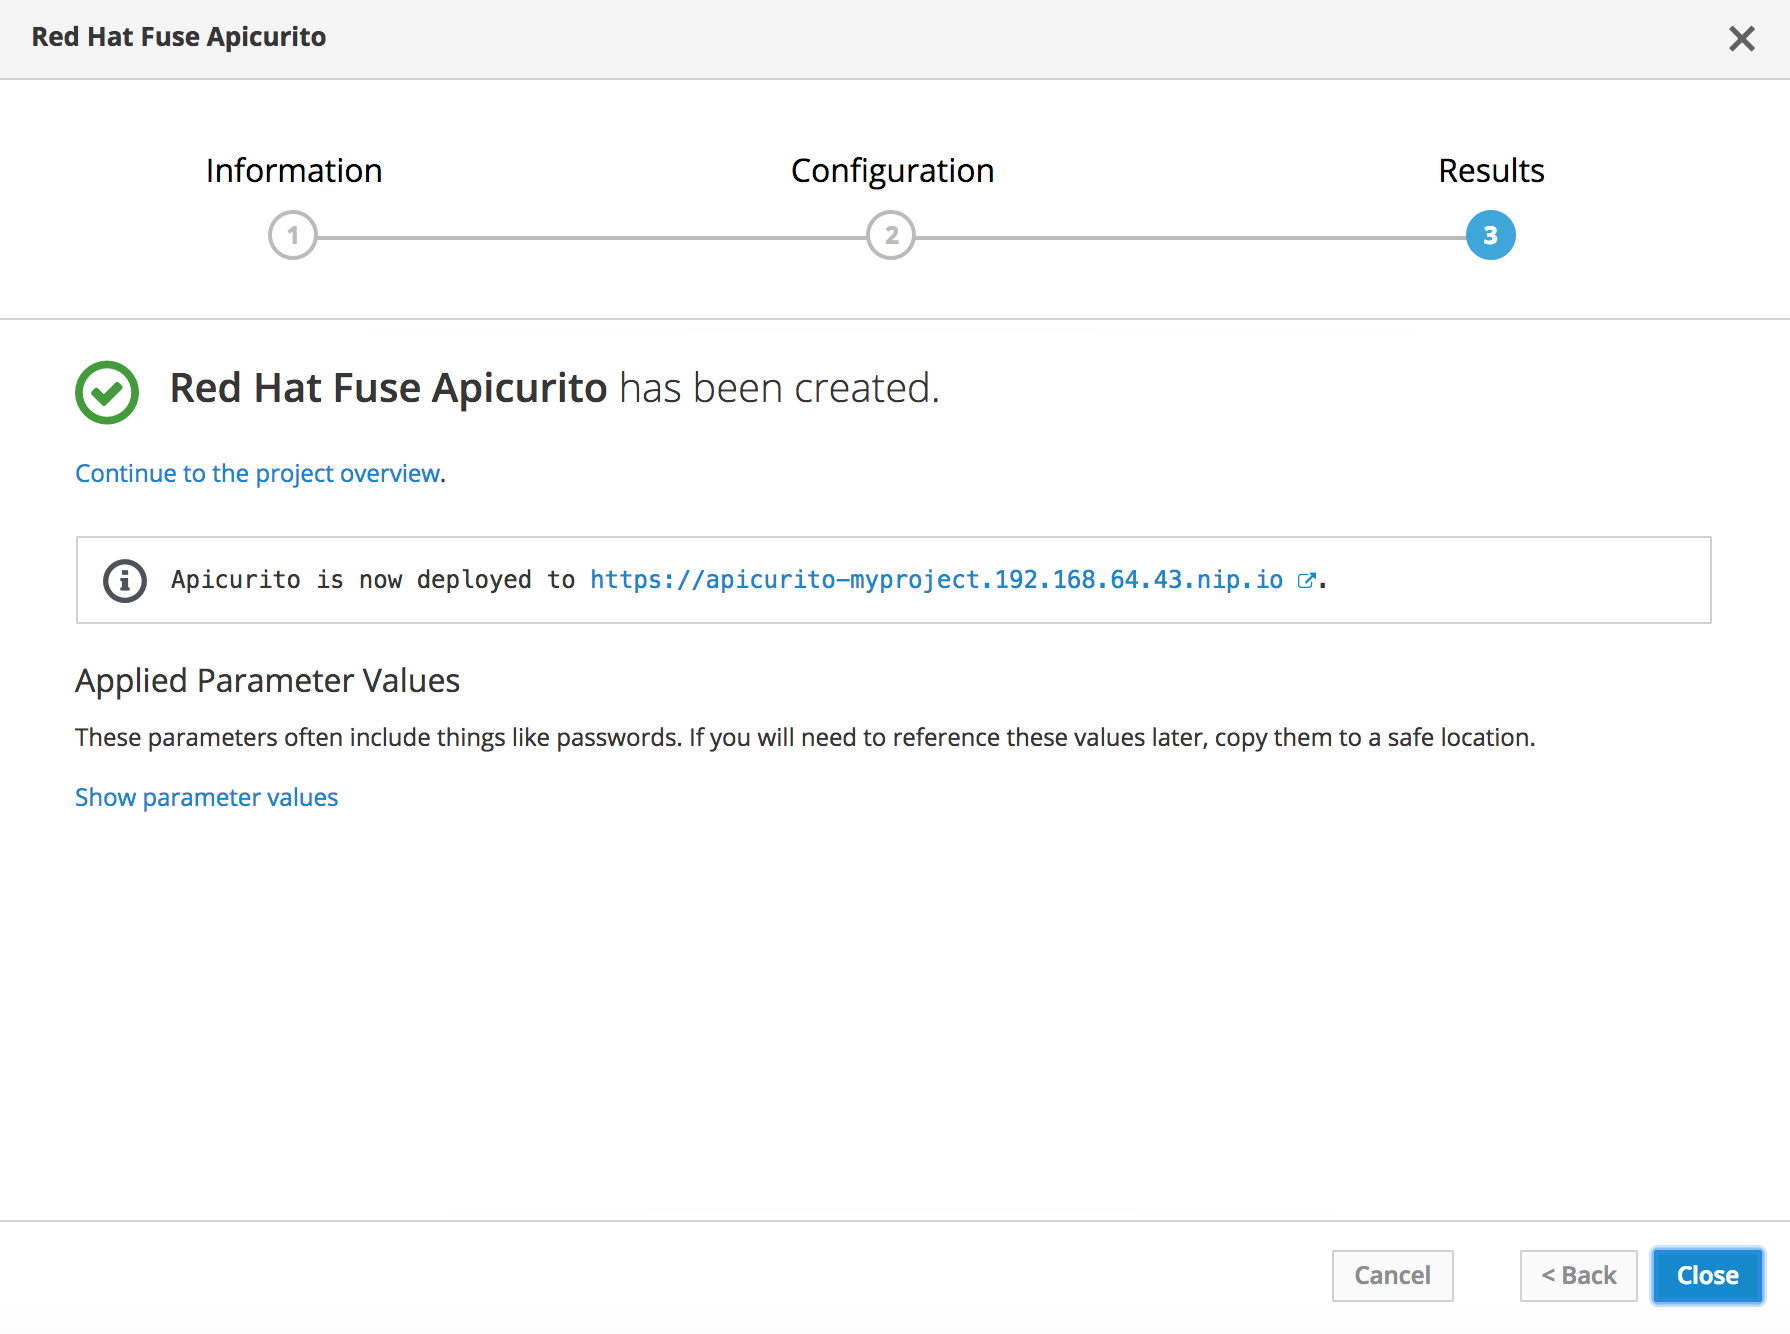
- Click Close.
In the OpenShift web console, in the My Projects pane, select the project, for example select test.
The project’s Overview tab opens, showing the apicurito-ui application.
Click the arrow to the left of the apicurito-ui deployment to expand and view the deployment details:

Click the link for the Aplicurito instance, for example
https://apicurito-myproject.192.168.64.43.nip.io.Apicurito opens in a new web browser window or tab:

If you cannot open the Apicurito instance, you might need to edit your computer’s /etc/hosts file to add the ROUTE_HOSTNAME by using the following syntax, where $OPENSHIFT_IP_ADDR is the IP address for the OpenShift server and apicurito.my-minishift.apicurio.io is the ROUTE_HOSTNAME that you specified in step 7.
$OPENSHIFT_IP_ADDR apicurito.my-minishift.apicurio.io
Chapter 2. Design and develop an API definition with Apicurito
You can use Apicurito to design and develop a REST API definition that complies with the OpenAPI 2.0 specification.
Prerequisites
- You created an OpenShift project.
- You added the Apicurito service to your OpenShift project.
2.1. Creating a REST API definition
The following steps describe how to create a REST API definition.
- You can access the Apicurito user interface from Fuse Online or Fuse on OpenShift.
- For Fuse on OpenShift only, Apicurito is stateless which means that it does not save your work between OpenShift sessions. You need to save the API to your local file system between sessions.
About the example
The Task Management API example simulates a simple API that sales consultants might use to track the tasks that they need to do when interacting with customer contacts. Example "to-do" tasks might be "create an account for a new contact" or "place an order for an existing contact". To implement the Task Management API example, you create two paths - one for tasks and one for a specific task. You then define operations to create a task, retrieve a task by its ID, and delete a task by its ID.
Prerequisites
-
You know the endpoints for the API that you want to create. For the Task Management API example, there are two endpoints:
/todoand/todo/{id}. - For Fuse on OpenShift only, you created an OpenShift project and you added the Apicurito service to your OpenShift project.
Procedure
If you are using Fuse Online, skip to step 2.
If you are using Fuse on OpenShift:
- Log in to your OpenShift web console and then open the project that contains Apicurito.
In the list of applications, click the URL for Apicurito, for example
https://apicurito-myproject.192.168.64.43.nip.io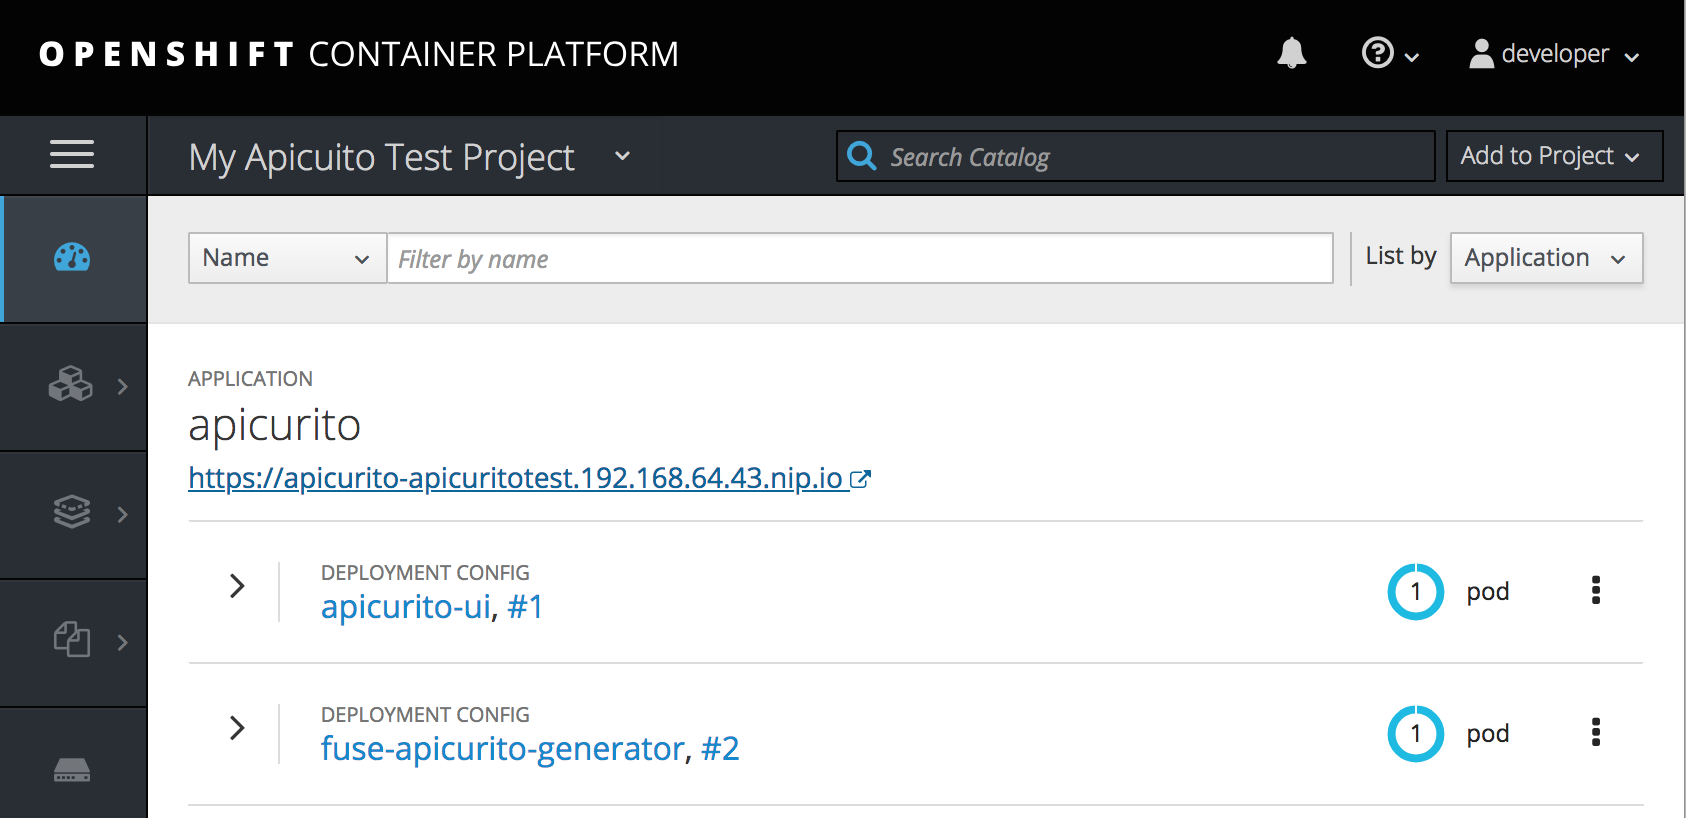
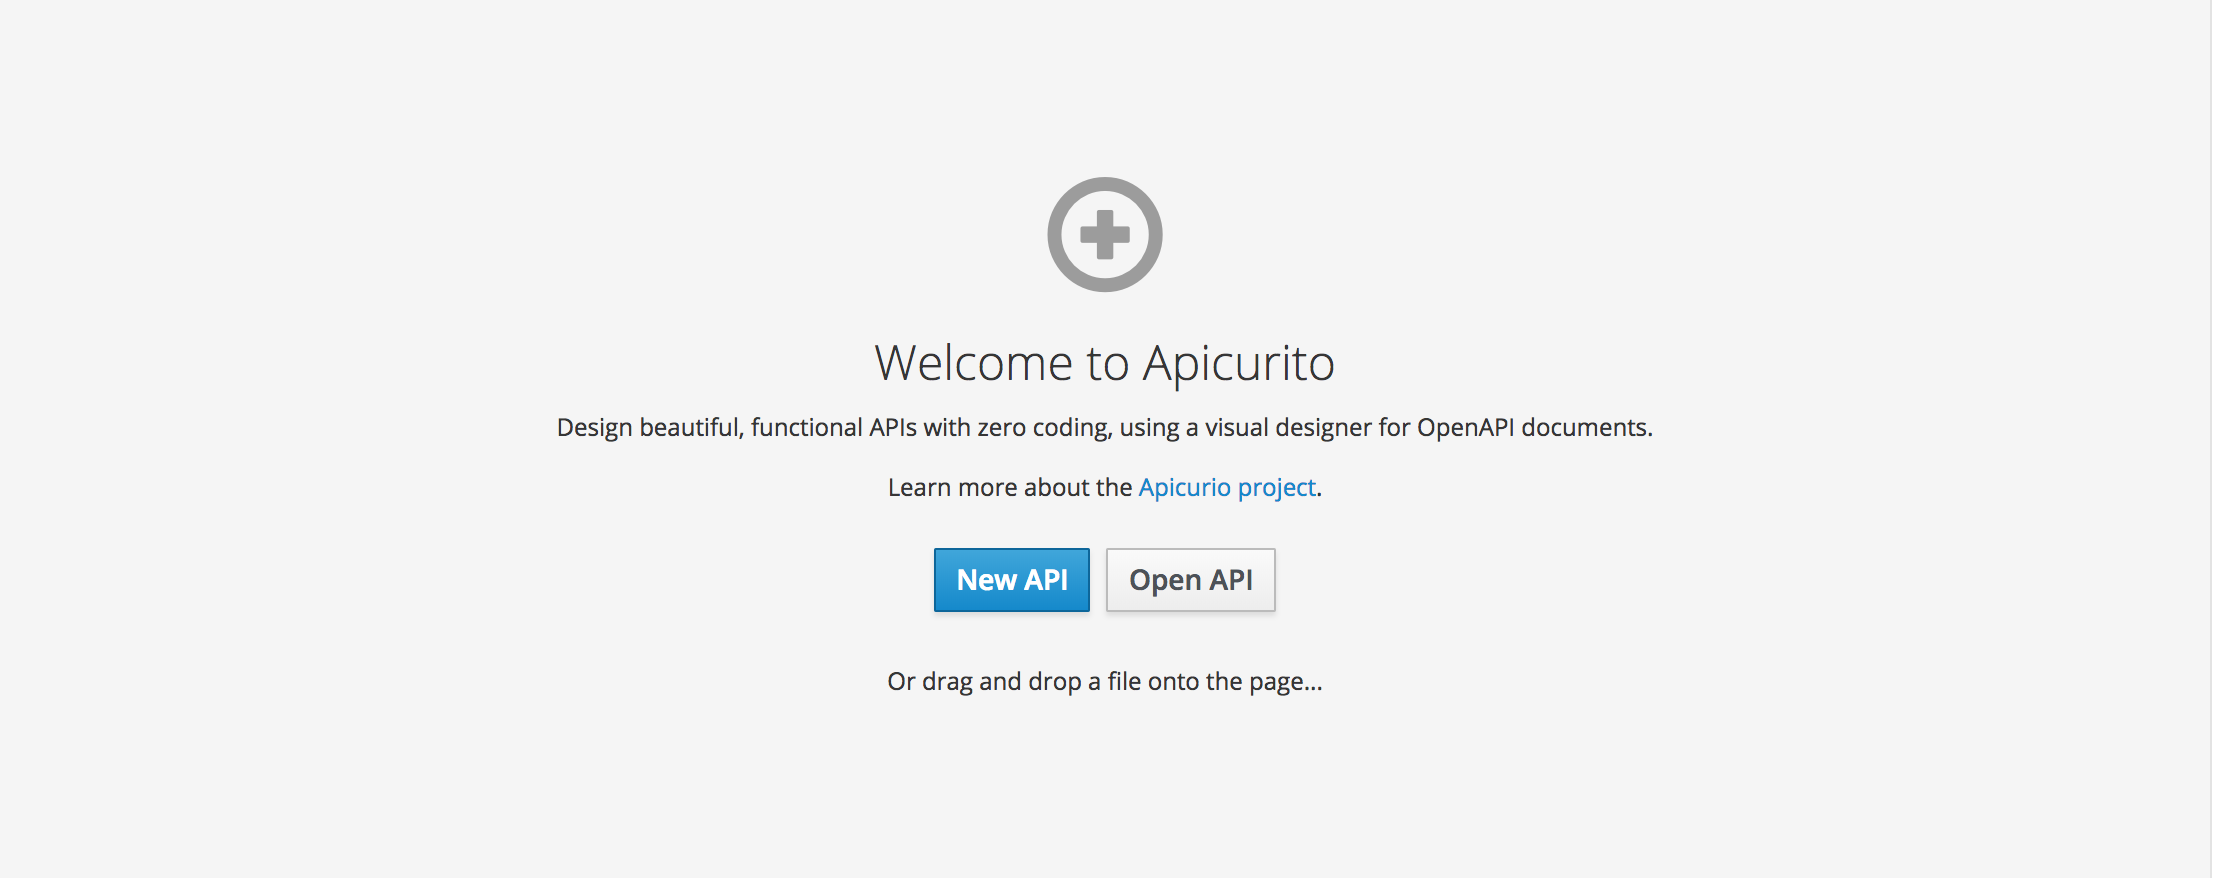
A new browser window or tab opens for Apicurito:
 Note
NoteBecause Apicurito is a “light” version of the Apicurio Studio open source project, "Apicurio" shows in the Apicurito interface.
- Click New API. A new API page opens.
To change the API name:
-
Hover the cursor over the name and then click the edit icon (
 ) that appears.
- Edit the name. For example, type Task API.
- Confirm the name change.
-
Hover the cursor over the name and then click the edit icon (
Optionally:
- Add your contact information (name, email address, and URL).
- Select a license.
- Define tags.
- Define a security scheme.
- Specify security requirements.
Define a relative path to each individual endpoint of the API. The field name must begin with a slash (/).
For the Task Management API example, create two paths:
-
A path for tasks:
/todo A path for a specific task by ID:
/todo/{id}
-
A path for tasks:
Specify the type of any path parameters.
For the example
idparameter:In the Paths list, click
/todo/{id}.The id parameter appears in the PATH PARAMETERS section.
- Click Create.
- For the description, type: The ID of the task to find.
For the type, select integer as 32-Bit integer.

In the Data Types section, define reusable types for the API.
- Click Add a data type.
- In the Add Data Type dialog, type a name. For the Task Management API example, type Todo.
Optionally, you can provide an example from which Apicurito creates the data type’s schema. You can then edit the generated schema.
For the Task Management API example, start with the following JSON example:
{ "id": 1, "task": "my task", "completed": false }- Optionally, you can choose to create a REST Resource with the data type.
Click Save. If you provided an example, Apicurito generates a schema from the example:

- Optionally, you can add edit the schema properties and add new ones.
For the Task Management API example, create another data type named Task with one property named task of type string.

For each path, define operations (GET, PUT, POST, DELETE, OPTIONS, HEAD, or PATCH).
For the Task Management API example, define the operations as described in the following table:
Table 2.1. Task Management API oeprations Path Operation Description Request Response /todoPOST
Create a new task.
Request Body type: Task
Status Code: 201
Description: Task created
Response Body: Todo type
/todo/{id}GET
Get a task by ID.
Not applicable
Status Code: 200
Description: Task found for ID
Response Body: Todo type
/todo/{id}DELETE
Delete a task by ID.
Not applicable
Status Code: 200
Description: Task deleted
Status Code: 400
Description: Task not deleted
- Resolve any issues, as described in Section 2.2, “Resolving issues in Apicurito”.
For Fuse on OpenShift only, save your API specification by clicking Save As and then select JSON or YAML format.
The JSON or YAML file is downloaded to your local download folder. The default filename is
openapi-specwith the appropriate file extension.
Additional resources
- For information about the OpenAPI 2.0 Specification, go to: https://github.com/OAI/OpenAPI-Specification/blob/master/versions/2.0.md
2.2. Resolving issues in Apicurito
When you create and edit an API, Apicurito identifies issues that you must resolve with an exclamation (!) icon.
Prerequisites
- Open an API in Apicurito.
Procedure
Find an issue indicated by an exclamation (!) icon. For example:

Click the exclamation icon to view a description of the issue. For example:

Based on the information provided by the issue description, navigate to the location of the issue and fix it.
For example, open the GET operation and then add a response.
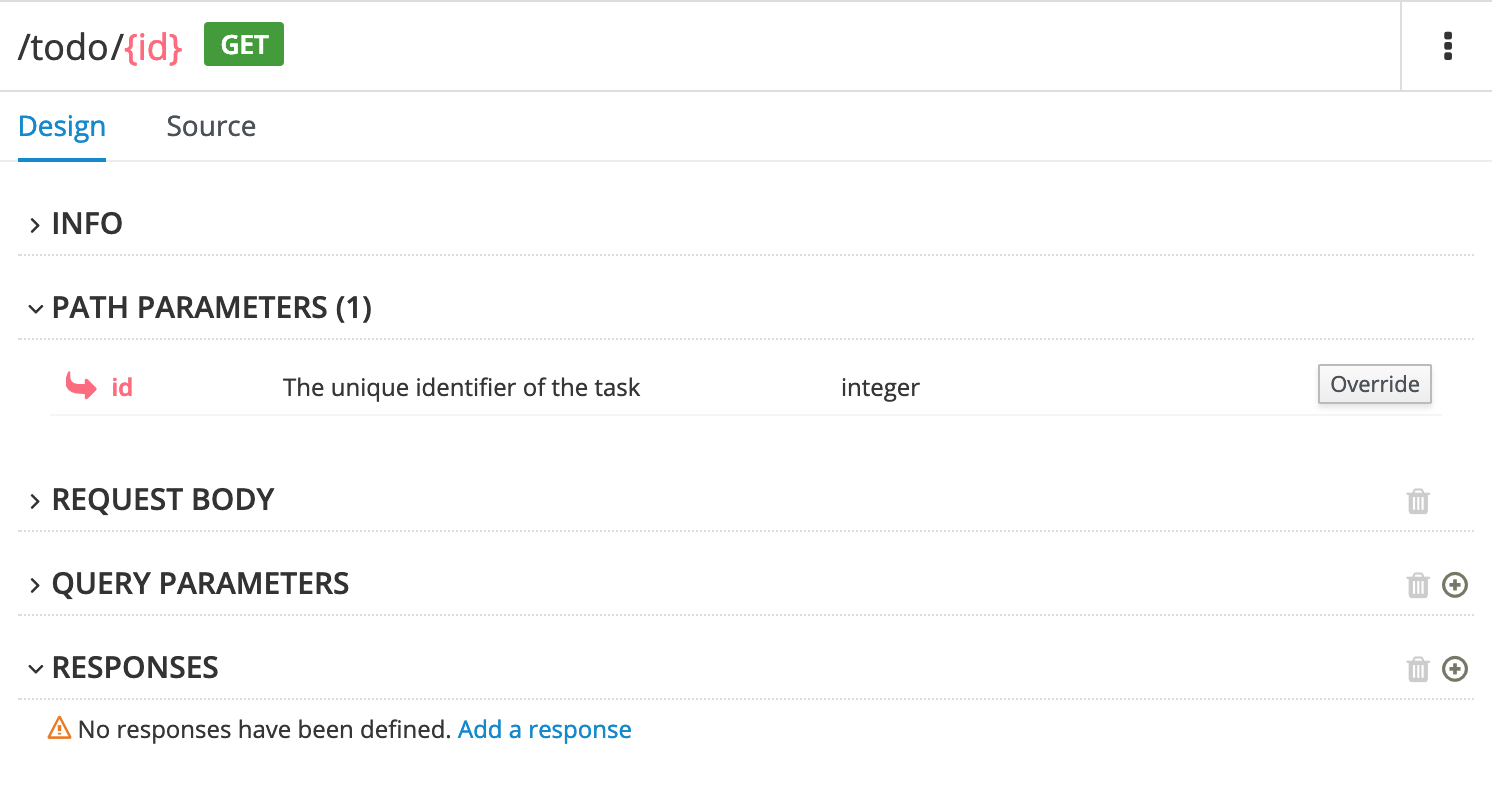
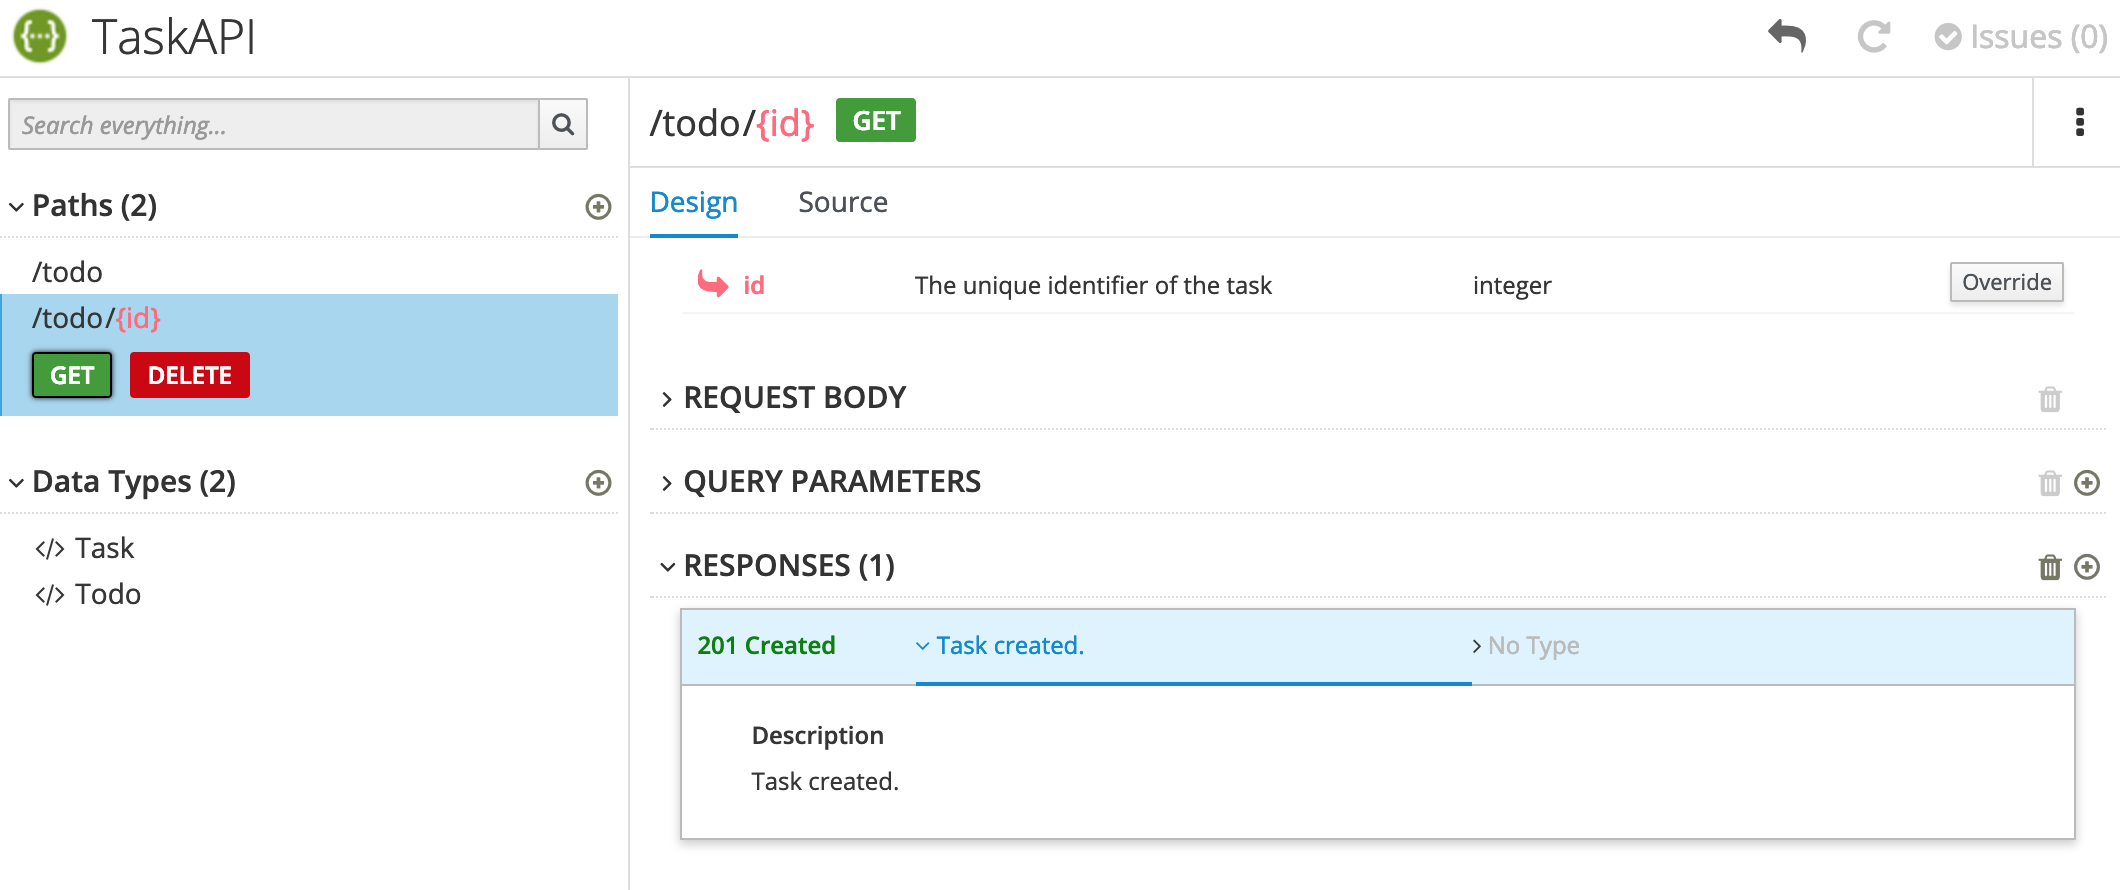
After you add a description, the issue is resolved and the exclamation icon disappears:
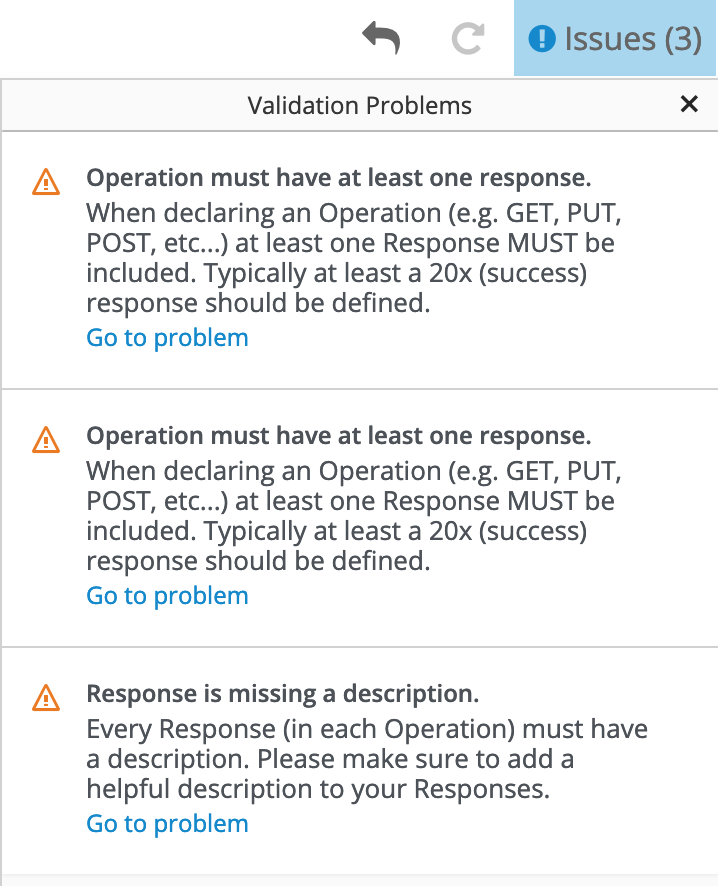
For a summary of all issues:
Click the Issues link in the upper right corner.

Click Go to a problem for a specific issue to go to the location of the issue so that you can resolve it.
Chapter 3. Implement, build, and deploy a Fuse application based on a REST API
You can use Red Hat Fuse Apicurito to generate a Camel Fuse project based on a REST API definition. In your Fuse development environment, you can complete the Camel routes and Rest DSL API. Finally, you can build the project and deploy the resulting application to Fuse on OpenShift.
Prerequisites
-
You have an existing API definition, which complies with the OpenAPI 2.0 specification. For example, an
openapi-spec.jsonfile that you created with Apicurito. - Apicurito is installed and running on your local OpenShift cluster.
- You have an existing OpenShift project with Apicurito added as a service.
- You have installed Maven and Red Hat Fuse.
The following topics describe how to implement, build, and deploy a Fuse application based on a REST API:
3.1. Uploading an API definition to Apicurito
You can upload an existing API definition to Apicurito.
Prerequisites
-
You have an existing API definition, which complies with the OpenAPI 2.0 specification. For example, an
openapi.jsonfile that you created with Apicurito. - Apicurito is installed and running on your local OpenShift cluster.
- You have an existing OpenShift project with Apicurito added as an application.
Procedure
- In your OpenShift web console, open the project that contains Apicurito.
Open the Apicurito console. In the list of applications for the project, click the URL under apicurito. For example:
https://apicurito-myproject.192.168.64.38.nip.io
The Apicurito console opens in a separate web browser tab or window:

Click Open API.
A file manager window opens.
In the file manager window:
-
Navigate to the folder that contains the existing OpenAPI definition file, for example,
openapi.json. Select the OpenAPI definition file and then click Open.
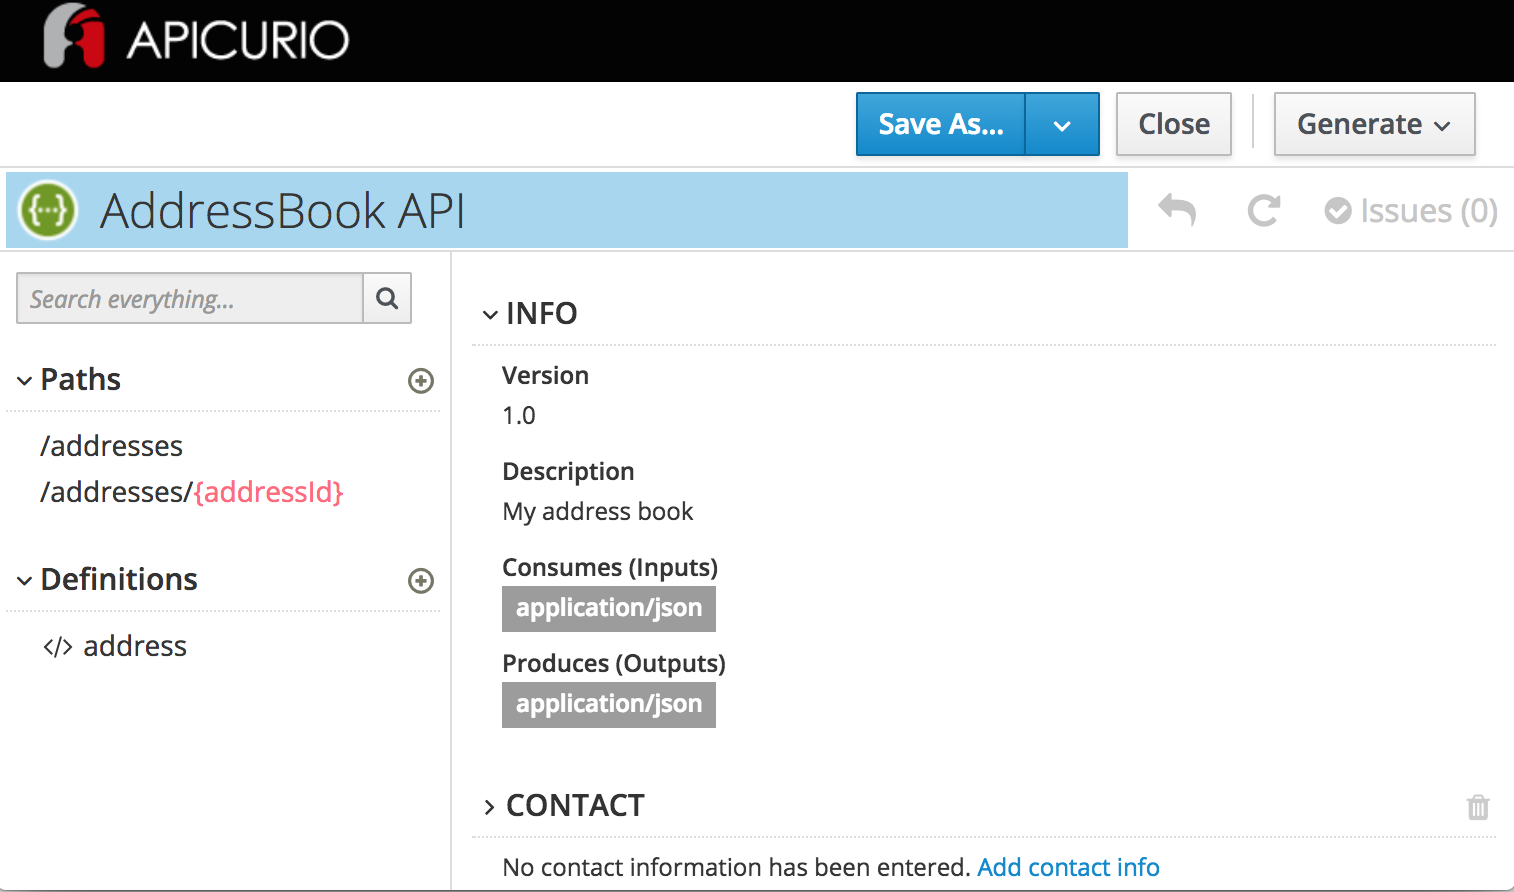
The OpenAPI definition opens in the Apicurito console. For example:
-
Navigate to the folder that contains the existing OpenAPI definition file, for example,
3.2. Generating a Fuse Camel project from Apicurito
You can use Apicurito to generate a Fuse Camel project based on an API definition.
Prerequisites
- Apicurito is installed and running on your local OpenShift cluster.
- You have an existing OpenShift project with Apicurito added as an application.
- You have created or opened an API definition file in the Apicurito console.
Procedure
In the Apicurito console:
- Click Generate.
- Select Fuse Camel Project from the drop-down list.
Apicurito generates a camel-project.zip file and downloads it to your local default download folder.
The zip file contains a Fuse Camel project that provides a default skeleton implementation of the API definition using Camel’s Rest DSL and includes all resource operations. The project also includes the original OpenAPI definition file that you used to generate the project.
3.3. Completing the Apicurito-generated Camel project
Apicurito generates a Fuse project that provides a default skeleton implementation of the API definition using Camel’s Rest DSL and covering all resource operations. In your Fuse development environment, you complete the project.
Prerequisites
-
You have a
camel-project.zipfile generated by Apicurito. - (Optional) You have installed Red Hat Developer Studio with Fuse Tooling.
Procedure
-
Unzip the Apicurito-generated
camel-project.zipfile to a temporary folder. - Open Red Hat Developer Studio.
- In Developer Studio, select File → Import.
- In the Import dialog, select Maven → Existing Maven Projects.
-
Open the project’s
camel-context.xmlfile in the editor view. Click the REST tab to edit the Rest DSL components.
For information on defining REST services, see the "Defining REST services" section of the Apache Camel Development Guide.
For information on extending JAX-RS endpoints with Swagger support, see the Apache CXF Development Guide.
For information on using the Fuse Tooling REST editor, see the "Viewing and editing Rest DSL components" section of the Tooling User Guide.
In the Design tab, edit the Camel routes.
For information on editing Camel routes, see the "Editing a routing context in the route editor" section of the Tooling User Guide.
3.4. Building and deploying a REST service
After you complete the Fuse project, you can build and deploy the project in OpenShift.
Prerequisites
- You have a complete, error-free Fuse project that defines a REST service.
- You have installed Java 8 JDK (or later) and Maven 3.3.x (or later).
Procedure
If you have a single-node OpenShift cluster, such as Minishift or the Red Hat Container Development Kit, installed and running, you can deploy your project there.
To deploy this project to a running single-node OpenShift cluster:
Log in to your OpenShift cluster:
$ oc login -u developer -p developer
Create a new OpenShift project for the project. For example, the following command creates a new project named test-deploy.
$ oc new-project test-deploy
Change the directory to the folder that contains your Fuse Camel project (for example,
myworkspace/camel-project) :$ cd myworkspace/camel-project
Build and deploy the project to the OpenShift cluster:
$ mvn clean fabric8:deploy -Popenshift
-
In your browser, open the OpenShift console and navigate to the project (for example, test-deploy). Wait until you can see that the pod for the
camel-projectapplication has started. -
On the project’s Overview page, locate the URL for the
camel-projectapplication. The URL uses this form:http://camel-project-MY_PROJECT_NAME.OPENSHIFT_IP_ADDR.nip.io. - Click the URL to access the service.
Chapter 4. Discover an API service in 3scale
Red Hat 3scale API Management is an offering from Red Hat that enables you to regulate access to API services on the public Internet. The functionality of 3scale includes the ability to enforce service-level agreements (SLAs), manage API versions, provide security and authentication services and more. Fuse supports a service discovery feature for 3scale, which makes it easy to discover Fuse services from the 3scale Admin Portal UI. Using service discovery, you can scan for Fuse applications running in the same OpenShift cluster and automatically import the associated API definitions into 3scale.
Prerequisites
- A Fuse application that provides an API service is deployed and running in OpenShift.
The Fuse application is annotated with the requisite annotations to make it discoverable by 3scale.
NoteFuse projects that are generated by Apicurito are pre-configured to automatically provide the requisite annotations.
For Fuse projects that are not generated by Apicurito, you must configure your project as described in Section 4.1, “Adding annotations for Fuse projects that are not generated by Apicurito”.
- The 3scale API Management system is deployed on the same OpenShift cluster as the API service that is to be discovered.
For details of the procedure to discover an API service in 3scale, see the service discovery section of the Red Hat 3scale API Management Admin Portal Guide.
Additional resources
4.1. Adding annotations for Fuse projects that are not generated by Apicurito
In order for 3scale to discover an API service, the Fuse application that provides the API service must include Kubernetes Service Annotations that make it discoverable. These annotations are provided by the Fabric8 service discovery enricher which is part of the Fabric8 Maven Plugin.
For Apache Camel Rest DSL projects, the Fabric8 Maven Plugin runs the Fabric8 service discovery enricher by default.
Fuse projects that are generated by Apicurito are pre-configured to automatically provide the required annotations.
Procedure
For a Fuse Rest DSL project that is not generated by Apicurito, configure the project as follows:
Edit the Fuse project’s
pom.xmlfile to include thefabric8-maven-plugindependency, as shown in this example:<plugin> <groupId>org.jboss.redhat-fuse</groupId> <artifactId>fabric8-maven-plugin</artifactId> <version>${fuse.version}</version> <executions> <execution> <goals> <goal>resource</goal> <goal>build</goal> </goals> </execution> </executions> </plugin>The Fabric8 Maven Plugin runs the Fabric8 service discovery enricher if certain project-level conditions are met (for example, the project must be a Camel Rest DSL project). You do not need to specify the Fabric8 service discovery enricher as a dependency in the
pom.xmlfile, unless you want to customize the enricher’s behavior (as described in Section 4.2, “Customizing the API service annotation values”.)In the Fuse Rest DSL project’s
camel-context.xmlfile, specify the following attributes in therestConfigurationelement:-
scheme: The scheme part of the URL where the service is hosted. You can specify “http” or “https”. -
contextPath: The path part of the URL where the API service is hosted. apiContextPath: The path to the location where the API service description document is hosted. You can specify either a relative path if the document is self-hosted or a full URL if the document is hosted externally.The following excerpt from an example
camel-context.xmlfile shows annotation attribute values in therestConfigurationelement:<?xml version="1.0" encoding="UTF-8"?> <beans xmlns="http://www.springframework.org/schema/beans" xmlns:xsi="http://www.w3.org/2001/XMLSchema-instance" xsi:schemaLocation=" http://www.springframework.org/schema/beans http://www.springframework.org/schema/beans/spring-beans.xsd http://camel.apache.org/schema/spring http://camel.apache.org/schema/spring/camel-spring.xsd"> <camelContext xmlns="http://camel.apache.org/schema/spring"> <restConfiguration component="servlet" scheme="https" contextPath="myapi" apiContextPath="myapi/openapi.json"/> ...
-
The enricher uses the information provided by these restConfiguration element attribute values to create values for the discovery.3scale.net/scheme, discovery.3scale.net/path, and the discovery.3scale.net/description-path annotations, thereby making the project’s deployed OpenShift service discoverable by 3scale as described in the Making a service discoverable section of the Red Hat 3scale API Management Admin Portal Guide guide.
The enricher adds the following label and annotations to make the service discoverable by 3scale:
-
The
discovery.3scale.netlabel: By default, the enricher sets this value to “true”. 3scale uses this label when it executes the selector definition to find all services that need discovery. The following annotations:
-
discovery.3scale.net/discovery-version: (optional) The version of the 3scale discovery process. The enricher sets this value to "v1" by default. -
discovery.3scale.net/scheme: The scheme part of the URL where the service is hosted. The enricher uses the default "http" unless you override it in therestConfigurationelement’sschemeattribute. The other possible value is "https". -
discovery.3scale.net/path: The path part of the URL where the service is hosted. This annotation is omitted when the path is at root, "/". The enricher gets this value from therestConfigurationelement’spathattribute. -
discovery.3scale.net/port: The port of the service. The enricher obtains this value from the Kubernetes service definition, which contains the the port numbers of the services it exposes. If the Kubernetes service definition exposes more than one service, the enricher uses the first port listed. -
discovery.3scale.net/description-path: (optional) The path to the OpenAPI service description document. The enricher gets this value from therestConfigurationelement’scontextPathattribute.
-
You can customize the behavior of the Fabric8 service discovery enricher, as described in Section 4.2, “Customizing the API service annotation values”.
4.2. Customizing the API service annotation values
The Maven Fabric8 Plugin runs the Fabric8 service discovery enricher by default. The enricher adds annotations to the Fuse Rest DSL project’s API service so that the API service is discoverable by 3scale, as described in Using Service Discovery in the Red Hat 3scale API Management Admin Portal Guide guide.
The enricher uses default values for some annotations and obtains values for other annotations from the project’s camel-context.xml file.
You can override the default values and the values defined in the camel-context.xml file by defining values in the Fuse project pom.xml file or in a service.yml file. (If you define values in both files, the enricher uses the values from the service.yml file.) See Section 4.3, “Fabric8 service discovery enricher elements” for a description of the elements that you can specify for the Fabric8 service discovery enricher.
Procedure
To specify annotation values in the Fuse project pom.xml file:
-
Open your Fuse project’s
pom.xmlfile in an editor of your choice. Locate the
fabric8-maven-plugindependency, as shown in this example:<plugin> <groupId>org.jboss.redhat-fuse</groupId> <artifactId>fabric8-maven-plugin</artifactId> <version>${fuse.version}</version> <executions> <execution> <goals> <goal>resource</goal> <goal>build</goal> </goals> </execution> </executions> </plugin>Add the Fabric8 service discovery enricher as a dependency to the Fabric8-Maven plugin as shown in the following example.
<plugin> <groupId>org.jboss.redhat-fuse</groupId> <artifactId>fabric8-maven-plugin</artifactId> <version>${fuse.version}</version> <executions> <execution> <goals> <goal>resource</goal> <goal>build</goal> </goals> </execution> </executions> <dependencies> <dependency> <groupId>io.acme</groupId> <artifactId>myenricher</artifactId> <version>1.0</version> <configuration> <enricher> <config> <f8-service-discovery> <scheme>https</scheme> <path>/api</path> <descriptionPath>/api/openapi.json</descriptionPath> </f8-service-discovery> </config> </enricher> </configuration> </dependency> </dependencies> </plugin>- Save your changes.
Alternatively, you can use a src/main/fabric8/service.yml fragment to override the annotation values, as shown in the following example:
kind: Service
name:
metadata:
  labels:
    discovery.3scale.net/discoverable : "true"
  annotations:
    discovery.3scale.net/discovery-version : "v1"
    discovery.3scale.net/scheme : "https"
    discovery.3scale.net/path : "/api"
    discovery.3scale.net/port : "443"
    discovery.3scale.net/description-path : "/api/openapi.json"
spec:
  type: LoadBalancer
4.3. Fabric8 service discovery enricher elements
The following table describes the elements that you can specify for the Fabric8 service discovery enricher, if you want to override the default values and the values defined in the camel-context.xml file.
You can define these values in the Fuse Rest DSL project’s pom.xml file or in a src/main/fabric8/service.yml file. (If you define values in both files, the enricher uses the values from the service.yml file.) See Section 4.2, “Customizing the API service annotation values” for examples.
| Element | Description | Default |
|---|---|---|
|
|
The path to the spring configuration directory that contains the |
The |
|
| The scheme part of the URL where the service is hosted. You can specify “http” or “https”. | http |
|
| The path part of the URL where the API service is hosted. | |
|
| The port part of the URL where the API service is hosted. | 80 |
|
| The path to a location where the API service description document is hosted. You can specify either a relative path if the document is self-hosted or a full URL if the document is hosted externally. | |
|
| The version of the 3scale discovery implementation. | v1 |
|
|
The element that sets the If set to true, 3scale will try to discover this service. If set to false, 3scale will not try to discover this service. You can use this element as a switch, to temporary turn off 3scale discovery integration by setting it to "false". | If you do not specify a value, the enricher tries to auto-detect whether it can make the service discoverable. If the enricher determines that it cannot make the service discoverable, 3scale will not try to discover this service. |