Quick Start Guide
Getting Started with Web Administration
Abstract
Chapter 1. Overview
Red Hat Gluster Storage Web Administration provides monitoring and metrics infrastructure for Red Hat Gluster Storage 3.3.1 and is the primary method to monitor your Red Hat Gluster Storage environment. The Red Hat Gluster Storage Web Administration is based on the Tendrl upstream project and utilizes Ansible automation for installation. The key goal of Red Hat Gluster Storage Web Administration is to provide deep metrics and visualization of Red Hat Storage Gluster clusters and the associated physical storage elements such as storage nodes, volumes, and bricks.
Key Features
- Monitoring dashboards for Clusters, Hosts, Volumes, and Bricks
- Top-level list views of Clusters, Hosts, and Volumes
- SNMPv3 Configuration and alerting
- User Management
- Importing Gluster cluster
1.1. Web Administration System Components
The Red Hat Gluster Storage Web Administration environment consists of the following system components.
Web Administration Server
The Web Administration server system hosts the Web Administration user interface, the API and etcd. The Web Administration server is the system on which the Ansible installation process is run.
Red Hat Gluster Storage Node
The system on which Red Hat Gluster Storage is installed. Multiple systems with Red Hat Gluster Storage forms a storage cluster and is monitored by the Web Administration server. Web Administration node agents are installed on the storage nodes.
Client System
Any external system that accesses the Web Administration user interface on a compatible web browser.
Chapter 2. System Requirements
This chapter outlines the minimum hardware and software requirements to install Red Hat Gluster Storage Web Administration.
Ensure that all requirements are met before installation starts. Missing requirements can result in Red Hat Gluster Storage Web Administration environment to not function as expected.
2.1. Requirements for Web Administration Server System
On the system to be designated as the Web Administration server, verify that these recommended hardware and software requirements are available.
2.1.1. Hardware Requirements
Recommended Requirements:
- 12 vCPUs
- 32 GB of available system RAM that is not being consumed by existing processes
- One Network Interface Card (NIC) with bandwidth of at least 1 Gbps
Additional Storage Devices
-
One separate storage disk to host the etcd data directory. Format the disk with the XFS or ext4 filesystem and mount it to the
/var/lib/etcddirectory. No other specific mount parameters are required. -
One separate storage disk to host the time-series data from Graphite, Carbon, and Whisper applications. Format the disk with the XFS or ext4 filesystem and mount it to the
/var/lib/carbondirectory. No other specific mount parameters are required.
For more information on how to prepare and mount the additional disks, see the Creating a Partition and Mounting a File System sections in the Red Hat Enterprise Linux Storage Administration Guide.
2.1.2. Software Requirements
Red Hat Gluster Storage Web Administration is supported on Red Hat Enterprise Linux 7.4 64-bit version.
| Software | Name and Version |
|---|---|
| Operating System | Red Hat Enterprise Linux 7.4 |
| Storage Provider | Red Hat Gluster Storage 3.3.1 or later |
2.2. Requirements for Red Hat Gluster Storage Nodes
Ensure the following requirements are met on the Red Hat Gluster Storage node:
Minimum hardware requirements.
NoteFor more information, see the knowledge base article on Red Hat Gluster Storage Hardware Compatibility.
- Network Time Protocol (NTP) setup
- Firewall access to ports
- Red Hat Gluster Storage Server
- Red Hat Enterprise Linux 7.4
For detailed information on prerequisites and setting up Red Hat Gluster Storage server, see the Red Hat Gluster Storage 3.3.1 Installation Guide.
2.3. Requirements for the Client System
The Red Hat Gluster Storage Web Administration environment can be accessed by a client machine with the following web browser compatibility.
| Software | Name and Version |
|---|---|
| Web Browser | Mozilla Firefox 38.7.0 or later |
| Web Browser | Google Chrome 46 or later |
2.4. Firewall Configuration
Red Hat Gluster Storage Web Administration uses the firewalld service, which you must configure to suit your environment.
The ports listed in this section are the default ports that must be accessible through your system’s firewall
Configure the firewall permanently to keep the configuration persistent and intact after a system reboot or firewall configuration reload.
To apply the changes immediately, reload the firewall configuration after executing the port opening commands described below:
firewall-cmd --reload
# firewall-cmd --reloadSSH port is needed by all the nodes. By default, it is opened on all the Red Hat Enterprise Linux nodes.
Ports to be enabled on the Web Administration Server
For Etcd:
firewall-cmd --permanent --zone=public --add-port=2379/tcp
# firewall-cmd --permanent --zone=public --add-port=2379/tcpFor Graphite:
firewall-cmd --permanent --zone=public --add-port=2003/tcp
# firewall-cmd --permanent --zone=public --add-port=2003/tcpFor Graphite Web:
firewall-cmd --permanent --zone=public --add-port=10080/tcp
# firewall-cmd --permanent --zone=public --add-port=10080/tcpFor tendrl HTTP:
firewall-cmd --permanent --zone=public --add-service=http
# firewall-cmd --permanent --zone=public --add-service=httpFor tendrl-api:
firewall-cmd --permanent --zone=public --add-port=9292/tcp
# firewall-cmd --permanent --zone=public --add-port=9292/tcpFor Grafana server:
firewall-cmd --permanent --zone=public --add-port=3000/tcp
# firewall-cmd --permanent --zone=public --add-port=3000/tcpFor tendrl-monitoring-integration:
firewall-cmd --permanent --zone=public --add-port=8789/tcp
# firewall-cmd --permanent --zone=public --add-port=8789/tcpPorts to be enabled on storage nodes
Enable all the ports needed for Red Hat Gluster Storage. For details, see the Port Information section in the Red Hat Gluster Storage Installation Guide.
In addition to enabling storage node ports, enable port for tendrl-gluster-integration:
firewall-cmd --permanent --zone=public --add-port=8697/tcp
# firewall-cmd --permanent --zone=public --add-port=8697/tcpChapter 3. Installing Web Administration
This chapter covers installing Red Hat Gluster Web Administration using Ansible automation.
3.1. Prerequisites
Before installing Red Hat Gluster Web Administration, ensure the following prerequisites are met:
Enable the following repositories on the Web Administration server:
subscription-manager repos --enable=rhel-7-server-rpms
subscription-manager repos --enable=rh-gluster-3-web-admin-server-for-rhel-7-server-rpms
# subscription-manager repos --enable=rhel-7-server-rpms
# subscription-manager repos --enable=rh-gluster-3-web-admin-server-for-rhel-7-server-rpms
Copy to Clipboard Copied! Toggle word wrap Toggle overflow Enable the following repositories on the Gluster storage server:
subscription-manager repos --enable=rhel-7-server-rpms --enable=rh-gluster-3-for-rhel-7-server-rpms
subscription-manager repos --enable=rh-gluster-3-web-admin-agent-for-rhel-7-server-rpms
# subscription-manager repos --enable=rhel-7-server-rpms --enable=rh-gluster-3-for-rhel-7-server-rpms
# subscription-manager repos --enable=rh-gluster-3-web-admin-agent-for-rhel-7-server-rpms
Copy to Clipboard Copied! Toggle word wrap Toggle overflow Set up SSH password-less connection from the Web Administration server system to the remote Gluster servers in addition to itself (SSH to localhost).
NoteFor information on how to set up SSH key-based authentication, see the Using Key-based Authentication section in the Red Hat Enterprise Linux System Administrator’s Guide.
- The Web Administration server and the Gluster Storage servers must have properly configured Fully Qualified Domain Name (FQDN) and should be resolved from the rest of the nodes.
Ensure to use FQDNs for volumes creation as Web Administration does not support short hostnames. Volumes already created in the Gluster clusters using short names or IP addresses will display inconsistent data in the Web Administration interface.
Before initiating Web Administration installation using tendrl-ansible, it is highly recommended to create the Gluster Cluster to be imported first in the absence of an existing one. If the Gluster cluster is created after installation of Web Administration, the cluster import operation may fail. In case of Web Administration manual installation, create the Gluster cluster first and then subsequently install the tendrl-node-agent to avoid potential cluster import failure issues.
3.2. Installation Workflow
The entire installation process goes through the following sequence:
- Installing the latest version of Ansible and tendrl-ansible.
- Creating inventory file with the required groups: tendrl-server and gluster-servers.
-
Creating a
site.ymlplaybook based onsite.yml.samplefrom tendrl-ansible package. -
Executing the
site.ymlplaybook and accessing the Web Administration environment.
To check if Tendrl minimal requirements and setup are satisfied, run the /usr/share/doc/tendrl-ansible-*/prechecks.yml playbook which is included in the sample playbook. If there are any problems with the prechecks.yml file then the sample site.yml file will fail, pointing you to the particular configuration problem. Running the prechecks.yml file is advisable before commencing installation.
The site.yml.sample file can be accessed from this path: /usr/share/doc/tendrl-ansible-*/site.yml.sample
See also the README file from tendrl-ansible package available on the following path: /usr/share/doc/tendrl-ansible-*/README.md
Ansible Groups
The sample site.yml playbook from tendrl-ansible package expects the hosts to be divided into two groups according to its functionality:
- tendrl-server: contains one machine acting as Web Administration server.
- gluster-servers: contains all the Red Hat Gluster Storage nodes.
Ansible Roles
The tendrl-ansible package contains two Ansible roles with tasks intended for a particular component:
tendrl-ansible.tendrl-server: contains tasks for Web Administration server belonging to the tendrl-server group in the inventory file.
NoteFor more information on this role and the variables, see the README file from tendrl-ansible package available on the following path:
/usr/share/ansible/roles/tendrl-ansible.tendrl-server/README.md- tendrl-ansible.tendrl-storage-node: contains tasks for Red Hat Gluster Storage nodes belonging to the gluster-servers group in inventory file.
For more information on this role and the variables, see the README file from tendrl-ansible package available on the following path: /usr/share/ansible/roles/tendrl-ansible.tendrl-storage-node/README.md
For more information on writing Ansible playbooks, see the Ansible playbooks documentation.
3.3. Web Administration Installation
The following procedure outlines the steps to install Web Administration the Ansible way.
Procedure. Installing Web Administration
Install the latest version of Ansible and tendrl-ansible:
yum -y install ansible tendrl-ansible
# yum -y install ansible tendrl-ansibleCopy to Clipboard Copied! Toggle word wrap Toggle overflow NoteVerify the version installed by running
ansible --version.Create an Ansible inventory file with two Ansible groups: tendrl-server and gluster-servers. Ensure to use FQDNs for tendrl-server and gluster-servers in the inventory file.
NoteFor instructions on setting up an inventory file, see Ansible Inventory information in Ansible documentation.
Create a
site.ymlfile based on thesite.yml.samplefile:cp /usr/share/doc/tendrl-ansible-*/site.yml.sample site.yml
# cp /usr/share/doc/tendrl-ansible-*/site.yml.sample site.ymlCopy to Clipboard Copied! Toggle word wrap Toggle overflow Edit the
site.ymlfile using a preferred text editor and prospectively update the ansible variables in the playbook if required.NoteThe site.yml.sample file contains ansible variables with pre-defined default values. If required, edit the variables based on the system parameters and preferences.
NoteTo configure TLS-based security for etcd, follow the instructions in the TLS Encryption Configuration chapter. After TLS encryption is configured, continue with the remaining steps below
Verify SSH connection to all the nodes from the inventory file without asking for password or validation of public key by running:
ansible -i <inventory_file> -m ping all
# ansible -i <inventory_file> -m ping allCopy to Clipboard Copied! Toggle word wrap Toggle overflow Example
Copy to Clipboard Copied! Toggle word wrap Toggle overflow NoteAnsible should return
SUCCESSandpongmessage for all the nodes like shown in the example above. Do not proceed unless the SSH connection is successfully established.Run the prepared
site.ymlplaybook using the following command to set up the Web Administration server and the Storage nodes:ansible-playbook -i <inventory_file> site.yml
# ansible-playbook -i <inventory_file> site.ymlCopy to Clipboard Copied! Toggle word wrap Toggle overflow - Log in to the Web Administration environment. For login instructions, see Chapter 4. Web Administration Login of this Guide.
The tendrl-ansible.tendrl-server role creates the default user as admin and default password as adminuser. The default password is stored in the /root/password file of the Web Administration server.
3.3.1. Installation File Samples
Sample Inventory File
Here is an example of an inventory file for a 4-node Gluster cluster:
Chapter 4. TLS Encryption Configuration
Red Hat Gluster Storage Web Administration supports etcd’s TLS-based security model which supports authentication and encryption of traffic between etcd and Web Administration system components.
By default, etcd functions without authentication and encryption but it is recommended to use TLS authentication for client-server encryption.
4.1. Prerequisites
The tendrl-ansible installation of Web Administration does not generate and deploy encryption certificates and keys. To configure etcd TLS client-server authentication, generate and deploy encryption certificates on all the nodes of the cluster before executing tendrl-ansible based Web Administration installation.
Before setting up the Transport Layer Security (TLS ) encryption, ensure the following encryption components are generated:
Certificate Authority (CA) Certificate
Generate a CA certificate either self-signed or signed by a trusted Certificate Authority (CA). For instructions on generating a CA certificate, see etcd security documentation.
Private Keys
Generate a private key and a client certificate for each storage node and the Web Administration server. For more information, see the Creating and Managing Encryption Keys section of the Red Hat Enterprise Linux Security Guide. On each Web Administration managed storage node, and on the Web Administration server, place the PEM-encoded private key and the client/CA certificates in a secure place that is only accessible by the Web Administration server’s root user.
4.2. Configuring TLS Encryption
After generating and placing the TLS certificate files in the preferred directory, update the value of the Ansible variables in the site.yml file with the respective file paths of the certificate files.
In the site.yml file, add and modify the etcd TLS variables.
etcd_tls_client_auth: this variable is to enable or disable TLS authentication.
etcd_cert_file: certificate used for SSL/TLS connections to etcd. When this option is set, advertise-client-urls can use the HTTPS schema.
etcd_key_file: key for the certificate which must be unencrypted.
etcd_trusted_ca_file: the trusted Certificate Authority.
Configuring TLS
-
Open the
site.ymlplaybook file. - Set the value for etcd_tls_client_auth variable to True for both the Ansible roles: tendrl-server and gluster-servers. By default, the value of this variable is False.
-
Edit the file path for the etcd_cert_file variable as per required. The default value is:
/etc/pki/tls/certs/etcd.crt -
Edit the file path for etcd_key_file variable as per required. The default value is:
/etc/pki/tls/private/etcd.key -
Edit the file path for the etcd_trusted_ca_file variable. The default value is:
/etc/pki/tls/certs/ca-etcd.crt - Continue the Web Administration installation process by following the Web Administration Installation chapter, from step 5 onward - verifying SSH connection.
Chapter 5. Web Administration Login
The Web Administration interface can be accessed on a client system using a compatible web browser.
Procedure. Logging in the Web Administration interface
Open the following URL in a web browser.
<http://web-admin-server.example.com>
<http://web-admin-server.example.com>Copy to Clipboard Copied! Toggle word wrap Toggle overflow NoteReplace web-admin-server.example.com with the hostname or FQDN of the Web Administration server.
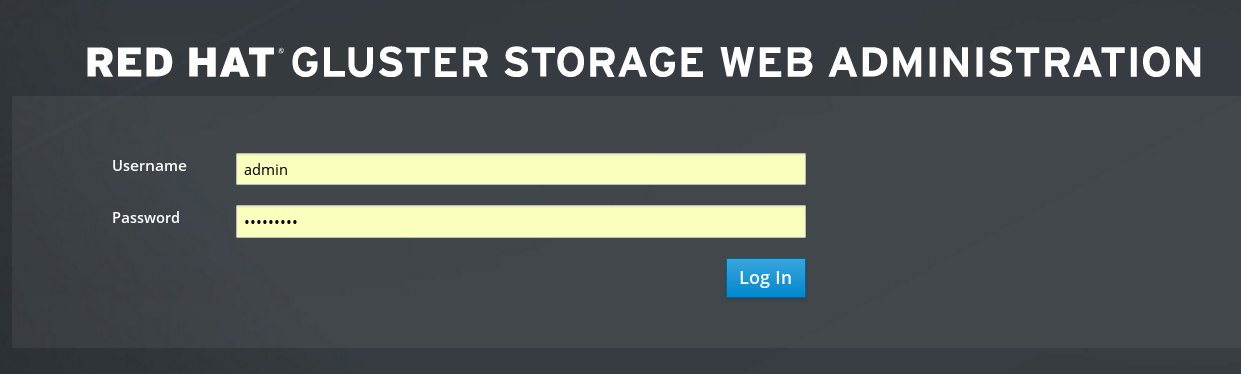
The login page is displayed. Enter the default username admin and the default password adminuser, and click Log in.
Figure 5.1. Login Page
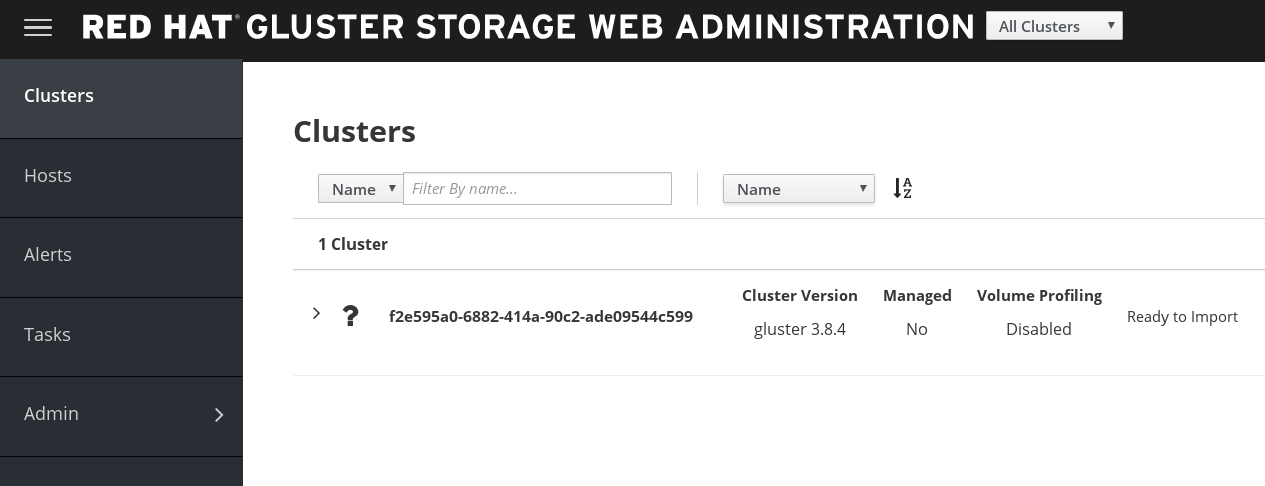
The Clusters interface is displayed after logging in the Web Administration interface. This interface is the starting point to initiate a cluster import.
Figure 5.2. Landing Page
NoteFor instructions on how to import a Gluster cluster, see the Red Hat Gluster Storage Web Administration Monitoring Guide.
Chapter 6. Web Administration Interface Navigation
Red Hat Gluster Storage Web Administration interface provides a vertical navigation pane available at the left hand side of the interface to conveniently access the core administrative actions.
Figure 6.1. Navigation Pane
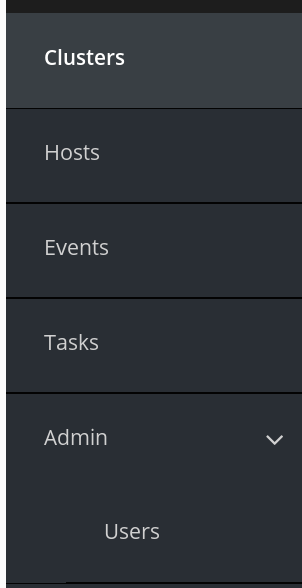
The navigation pane provides access to the following menus:
- Clusters: clusters view and monitoring dashboard shortcut
- Hosts : hosts view and monitoring dashboard shortcut
- Events: view all the system-wide events
- Tasks: view completed and failed system tasks
- Admin: user and roles configuration
The Admin menu in the navigation pane will not be visible if the configured user role is not Admin.
6.1. Clusters View and Monitoring Dashboard Shortcut
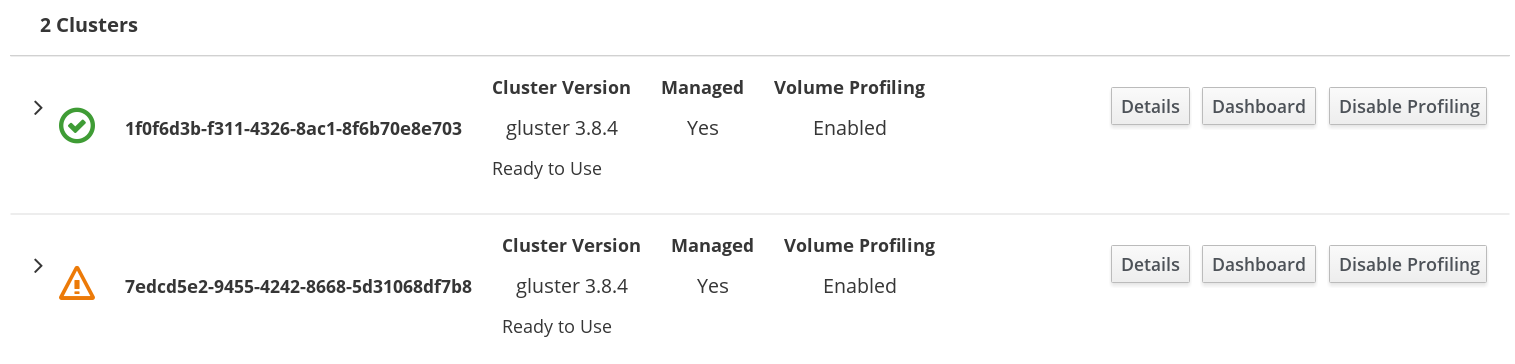
The Clusters tab in the navigation pane lists all the imported clusters in a rows format. Each row shows the individual cluster attributes such as the version of the cluster, whether managed or unmanaged and the status of Volume Profiling whether enabled or disabled.
Figure 6.2. Clusters View
Accessing Monitoring Dashboard
The Clusters tab provides a shortcut button to access the Grafana Monitoring Dashboard. At the right hand side of a cluster row, click on Dashboard and you will be redirected to the Grafana Monitoring dashboard.
6.2. Hosts View and Monitoring Dashboard Shortcut
The Hosts tab in the navigation pane lists all the accepted hosts assigned to different clusters. The Hosts can be filtered by the host Name, Cluster, Role, and Status.
Figure 6.3. Hosts View
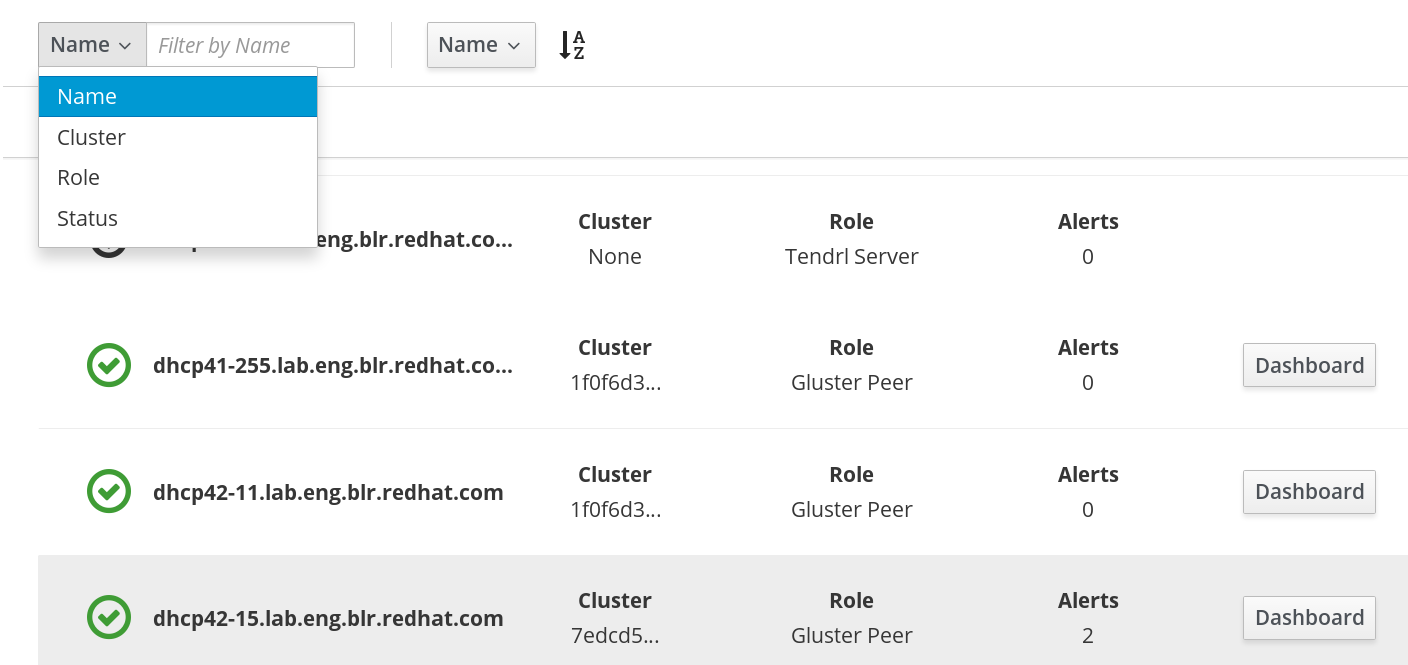
Accessing Monitoring Dashboard
The Hosts tab provides a shortcut button to access the Grafana Monitoring Dashboard. At the right hand side of a Host row, click on Dashboard, and you will be redirected to the Grafana Monitoring dashboard.
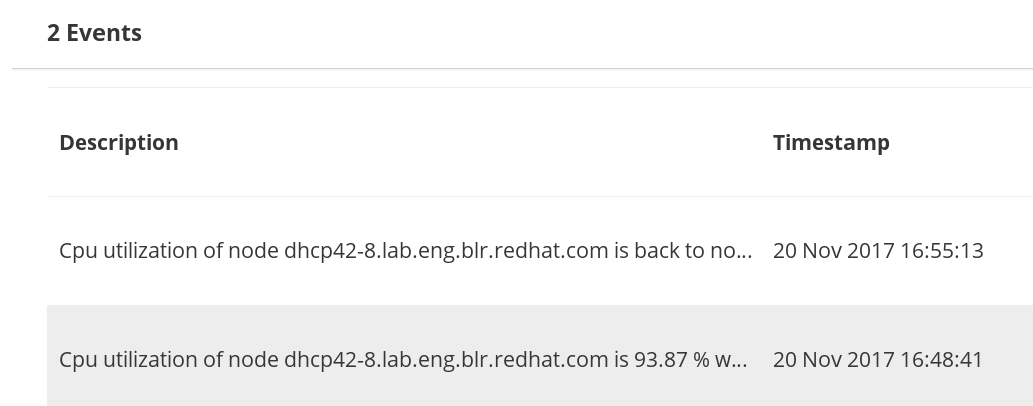
6.3. Events View
The Events view lists all the events occurred in the system. The events sent to the Events view interface of the Web Administration are not resent as notifications via SMTP or SNMP.
Figure 6.4. Events View
6.4. Tasks View
The Web Administration consists of a sizeable number of user-initiated actions to accomplish operations such as importing clusters. It is crucial for Web Administration users to monitor and view the status of the actions they initiated.
A user can view the following task information:
- The status of an initiated task whether completed or failed
- The details of all past and present cluster-wide initiated actions
- The timestamp of the initiated task
- Retrieve a specific task by using the available filters
Figure 6.5. Tasks View
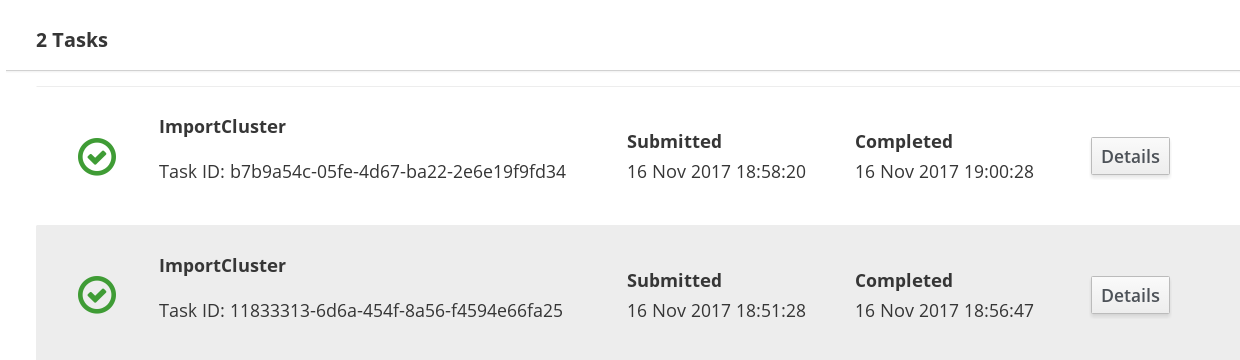
The Task details will remain in the Web Administration interface for not more than the default Time to live (TTL) of 2 days. Once the timespan has elapsed, the task details will be discarded from the system.
6.5. Admin and Users
The Users tab lists all the users created to access the Web Administration interface. The interface provides user tasks such as adding, editing and deleting a user. For more user administration actions, see the Managing Users and Roles section in the Red Hat Gluster Storage Web Administration Monitoring Guide.
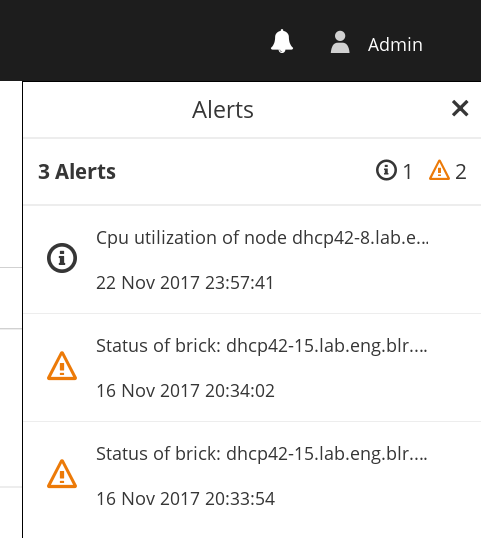
6.6. Alerts and User Settings
To view system-wide severe and critical alerts and to change the user password, a menubar is available at the top right corner of the interface.

To view system-wide alerts, click on the bell icon at the top left menubar of the interface.
Changing User Password
To change the user password:
Click on the user icon from the menu bar.
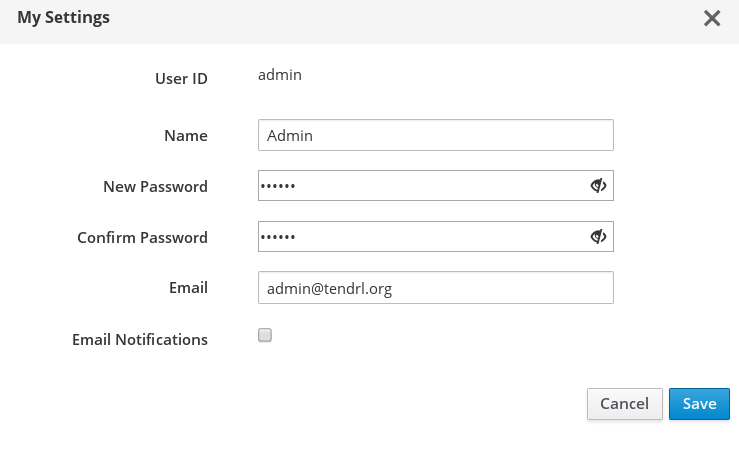
Click My Settings.
- A dialog window is opened. Enter the new password twice and click Save. Email notifications are disabled by default. To enable, check the Email Notifications box.

Signing out from the interface
To signout from the interface:
- Click on the user icon from the menu bar.
- Click Logout.