Security Guide
For Use with Red Hat JBoss Enterprise Application Platform 6
Abstract
Part I. Security for Red Hat JBoss Enterprise Application Platform 6
Chapter 1. Introduction
1.1. About Red Hat JBoss Enterprise Application Platform 6
1.2. About Securing JBoss EAP 6
Part II. Securing the Platform
Chapter 2. Java Security Manager
2.1. About the Java Security Manager
The Java Security Manager is a class that manages the external boundary of the Java Virtual Machine (JVM) sandbox, controlling how code executing within the JVM can interact with resources outside the JVM. When the Java Security Manager is activated, the Java API checks with the security manager for approval before executing a wide range of potentially unsafe operations.
2.2. About Java Security Manager Policies
A set of defined permissions for different classes of code. The Java Security Manager compares actions requested by applications against the security policy. If an action is allowed by the policy, the Security Manager will permit that action to take place. If the action is not allowed by the policy, the Security Manager will deny that action. The security policy can define permissions based on the location of code, on the code's signature, or based on the subject's principals.
java.security.manager and java.security.policy.
A security policy's entry consists of the following configuration elements, which are connected to the policytool:
- CodeBase
- The URL location (excluding the host and domain information) where the code originates from. This parameter is optional.
- SignedBy
- The alias used in the keystore to reference the signer whose private key was used to sign the code. This can be a single value or a comma-separated list of values. This parameter is optional. If omitted, presence or lack of a signature has no impact on the Java Security Manager.
- Principals
- A list of
principal_type/principal_namepairs, which must be present within the executing thread's principal set. The Principals entry is optional. If it is omitted, it signifies that the principals of the executing thread will have no impact on the Java Security Manager. - Permissions
- A permission is the access which is granted to the code. Many permissions are provided as part of the Java Enterprise Edition 6 (Java EE 6) specification.
2.3. Run JBoss EAP 6 Within the Java Security Manager
domain.sh or standalone.sh scripts. The following procedure guides you through the steps of configuring your instance to run within a Java Security Manager policy.
Prerequisites
- Before you following this procedure, you need to write a security policy, using the
policytoolcommand which is included with your Java Development Kit (JDK). This procedure assumes that your policy is located atEAP_HOME/bin/server.policy. As an alternative, write the security policy using any text editor and manually save it asEAP_HOME/bin/server.policy - The domain or standalone server must be completely stopped before you edit any configuration files.
Procedure 2.1. Configure the Security Manager for JBoss EAP 6
Open the configuration file.
Open the configuration file for editing. This file is located in one of two places, depending on whether you use a managed domain or standalone server. This is not the executable file used to start the server or domain.Managed Domain
- For Linux:
EAP_HOME/bin/domain.conf - For Windows:
EAP_HOME\bin\domain.conf.bat
Standalone Server
- For Linux:
EAP_HOME/bin/standalone.conf - For Windows:
EAP_HOME\bin\standalone.conf.bat
Add the Java options to the file.
To ensure the Java options are used, add them to the code block that begins with:if [ "x$JAVA_OPTS" = "x" ]; then
if [ "x$JAVA_OPTS" = "x" ]; thenCopy to Clipboard Copied! Toggle word wrap Toggle overflow You can modify the-Djava.security.policyvalue to specify the exact location of your security policy. It should go onto one line only, with no line break. Using==when setting the-Djava.security.policyproperty specifies that the security manager will use only the specified policy file. Using=specifies that the security manager will use the specified policy combined with the policy set in thepolicy.urlsection ofJAVA_HOME/lib/security/java.security.Important
JBoss Enterprise Application Platform releases from 6.2.2 onwards require that the system propertyjboss.modules.policy-permissionsis set to true.Example 2.1. domain.conf
JAVA_OPTS="$JAVA_OPTS -Djava.security.manager -Djava.security.policy==$PWD/server.policy -Djboss.home.dir=/path/to/EAP_HOME -Djboss.modules.policy-permissions=true"
JAVA_OPTS="$JAVA_OPTS -Djava.security.manager -Djava.security.policy==$PWD/server.policy -Djboss.home.dir=/path/to/EAP_HOME -Djboss.modules.policy-permissions=true"Copy to Clipboard Copied! Toggle word wrap Toggle overflow Example 2.2. domain.conf.bat
set "JAVA_OPTS=%JAVA_OPTS% -Djava.security.manager -Djava.security.policy==\path\to\server.policy -Djboss.home.dir=\path\to\EAP_HOME -Djboss.modules.policy-permissions=true"
set "JAVA_OPTS=%JAVA_OPTS% -Djava.security.manager -Djava.security.policy==\path\to\server.policy -Djboss.home.dir=\path\to\EAP_HOME -Djboss.modules.policy-permissions=true"Copy to Clipboard Copied! Toggle word wrap Toggle overflow Example 2.3. standalone.conf
JAVA_OPTS="$JAVA_OPTS -Djava.security.manager -Djava.security.policy==$PWD/server.policy -Djboss.home.dir=$JBOSS_HOME -Djboss.modules.policy-permissions=true"
JAVA_OPTS="$JAVA_OPTS -Djava.security.manager -Djava.security.policy==$PWD/server.policy -Djboss.home.dir=$JBOSS_HOME -Djboss.modules.policy-permissions=true"Copy to Clipboard Copied! Toggle word wrap Toggle overflow Example 2.4. standalone.conf.bat
set "JAVA_OPTS=%JAVA_OPTS% -Djava.security.manager -Djava.security.policy==\path\to\server.policy -Djboss.home.dir=%JBOSS_HOME% -Djboss.modules.policy-permissions=true"
set "JAVA_OPTS=%JAVA_OPTS% -Djava.security.manager -Djava.security.policy==\path\to\server.policy -Djboss.home.dir=%JBOSS_HOME% -Djboss.modules.policy-permissions=true"Copy to Clipboard Copied! Toggle word wrap Toggle overflow Start the domain or server.
Start the domain or server as normal.
2.4. Write a Java Security Manager Policy
An application called policytool is included with most JDK and JRE distributions, for the purpose of creating and editing Java Security Manager security policies. Detailed information about policytool is linked from http://docs.oracle.com/javase/6/docs/technotes/tools/.
Procedure 2.2. Setup a new Java Security Manager Policy
Start
policytool.Start thepolicytooltool in one of the following ways.Red Hat Enterprise Linux
From your GUI or a command prompt, run/usr/bin/policytool.Microsoft Windows Server
Runpolicytool.exefrom your Start menu or from thebin\of your Java installation. The location can vary.
Create a policy.
To create a policy, select . Add the parameters you need, then click .Edit an existing policy
Select the policy from the list of existing policies, and select the button. Edit the parameters as needed.Delete an existing policy.
Select the policy from the list of existing policies, and select the button.
2.5. IBM JRE and the Java Security Manager
JAVA_HOME/jre/lib/security/java.security file, and set the policy.provider value to sun.security.provider.PolicyFile.
policy.provider=sun.security.provider.PolicyFile
policy.provider=sun.security.provider.PolicyFile2.6. Debug Security Manager Policies
java.security.debug option configures the level of security-related information reported. The command java -Djava.security.debug=help will produce help output with the full range of debugging options. Setting the debug level to all is useful when troubleshooting a security-related failure whose cause is completely unknown, but for general use it will produce too much information. A sensible general default is access:failure.
Procedure 2.3. Enable general debugging
This procedure will enable a sensible general level of security-related debug information.
Add the following line to the server configuration file.- If the JBoss EAP 6 instance is running in a managed domain, the line is added to the
bin/domain.conffile for Linux or thebin\domain.conf.batfile for Windows. - If the JBoss EAP 6 instance is running as a standalone server, the line is added to the
bin/standalone.conffile for Linux, or thebin\standalone.conf.batfile for Windows.
Linux
JAVA_OPTS="$JAVA_OPTS -Djava.security.debug=access:failure"
JAVA_OPTS="$JAVA_OPTS -Djava.security.debug=access:failure"Windows
set "JAVA_OPTS=%JAVA_OPTS% -Djava.security.debug=access:failure"
set "JAVA_OPTS=%JAVA_OPTS% -Djava.security.debug=access:failure"A general level of security-related debug information has been enabled.
Chapter 3. Security Realms
3.1. About Security Realms
ManagementRealmstores authentication information for the Management API, which provides the functionality for the Management CLI and web-based Management Console. It provides an authentication system for managing JBoss EAP 6 itself. You could also use theManagementRealmif your application needed to authenticate with the same business rules you use for the Management API.ApplicationRealmstores user, password, and role information for Web Applications and EJBs.
REALM-users.propertiesstores usernames and hashed passwords.REALM-roles.propertiesstores user-to-role mappings.mgmt-groups.propertiesstores user-to-group mapping file forManagementRealm. Only used when Role-based Access Control (RBAC) is enabled.
domain/configuration/ and standalone/configuration/ directories. The files are written simultaneously by the add-user.sh or add-user.bat command. When you run the command, the first decision you make is which realm to add your new user to.
3.2. Add a New Security Realm
Run the Management CLI.
Start thejboss-cli.shorjboss-cli.batcommand and connect to the server.Create the new security realm itself.
Run the following command to create a new security realm namedMyDomainRealmon a domain controller or a standalone server.For a domain instance, use this command:/host=master/core-service=management/security-realm=MyDomainRealm:add()
/host=master/core-service=management/security-realm=MyDomainRealm:add()Copy to Clipboard Copied! Toggle word wrap Toggle overflow For a standalone instance, use this command:/core-service=management/security-realm=MyDomainRealm:add()
/core-service=management/security-realm=MyDomainRealm:add()Copy to Clipboard Copied! Toggle word wrap Toggle overflow Create the references to the properties file which will store information about the new role.
Run the following command to create a pointer a file namedmyfile.properties, which will contain the properties pertaining to the new role.Note
The newly created properties file is not managed by the includedadd-user.shandadd-user.batscripts. It must be managed externally.For a domain instance, use this command:/host=master/core-service=management/security-realm=MyDomainRealm/authentication=properties:add(path=myfile.properties)
/host=master/core-service=management/security-realm=MyDomainRealm/authentication=properties:add(path=myfile.properties)Copy to Clipboard Copied! Toggle word wrap Toggle overflow For a standalone instance, use this command:/core-service=management/security-realm=MyDomainRealm/authentication=properties:add(path=myfile.properties)
/core-service=management/security-realm=MyDomainRealm/authentication=properties:add(path=myfile.properties)Copy to Clipboard Copied! Toggle word wrap Toggle overflow
Your new security realm is created. When you add users and roles to this new realm, the information will be stored in a separate file from the default security realms. You can manage this new file using your own applications or procedures.
3.3. Add a User to a Security Realm
Run the
add-user.shoradd-user.batcommand.Open a terminal and change directories to theEAP_HOME/bin/directory. If you run Red Hat Enterprise Linux or another UNIX-like operating system, runadd-user.sh. If you run Microsoft Windows Server, runadd-user.bat.Choose whether to add a Management User or Application User.
For this procedure, typebto add an Application User.Choose the realm the user will be added to.
By default, the only available realm isApplicationRealm. If you have added a custom realm, you can type its name instead.Type the username, password, and roles, when prompted.
Type the desired username, password, and optional roles when prompted. Verify your choice by typingyes, or typenoto cancel the changes. The changes are written to each of the properties files for the security realm.
Chapter 4. Encrypt Network Traffic
4.1. Specify Which Network Interface JBoss EAP 6 Uses
Isolating services so that they are accessible only to the clients who need them increases the security of your network. JBoss EAP 6 includes two interfaces in its default configuration, both of which bind to the IP address 127.0.0.1, or localhost, by default. One of the interfaces is called management, and is used by the Management Console, CLI, and API. The other is called public, and is used to deploy applications. These interfaces are not special or significant, but are provided as a starting point.
management interface uses ports 9990 and 9999 by default, and the public interface uses port 8080, or port 8443 if you use HTTPS.
Warning
Stop JBoss EAP 6.
Stop JBoss EAP 6 by sending an interrupt in the appropriate way for your operating system. If you are running JBoss EAP 6 as a foreground application, the typical way to do this is to press Ctrl+C.Restart JBoss EAP 6, specifying the bind address.
Use the-bcommand-line switch to start JBoss EAP 6 on a specific interface.Example 4.1. Specify the public interface.
EAP_HOME/bin/domain.sh -b 10.1.1.1
EAP_HOME/bin/domain.sh -b 10.1.1.1Copy to Clipboard Copied! Toggle word wrap Toggle overflow Example 4.2. Specify the management interface.
EAP_HOME/bin/domain.sh -bmanagement=10.1.1.1
EAP_HOME/bin/domain.sh -bmanagement=10.1.1.1Copy to Clipboard Copied! Toggle word wrap Toggle overflow Example 4.3. Specify different addresses for each interface.
EAP_HOME/bin/domain.sh -bmanagement=127.0.0.1 -b 10.1.1.1
EAP_HOME/bin/domain.sh -bmanagement=127.0.0.1 -b 10.1.1.1Copy to Clipboard Copied! Toggle word wrap Toggle overflow Example 4.4. Bind the public interface to all network interfaces.
EAP_HOME/bin/domain.sh -b 0.0.0.0
EAP_HOME/bin/domain.sh -b 0.0.0.0Copy to Clipboard Copied! Toggle word wrap Toggle overflow
-b command-line switch to specify an IP address at runtime, so this is not recommended. If you do decide to do this, be sure to stop JBoss EAP 6 completely before editing the XML file.
4.2. Configure Network Firewalls to Work with JBoss EAP 6
Most production environments use firewalls as part of an overall network security strategy. If you need multiple server instances to communicate with each other or with external services such as web servers or databases, your firewall must take this into account. A well-managed firewall only opens the ports which are necessary for operation, and limits access to the ports to specific IP addresses, subnets, and network protocols.
Prerequisites
- Determine the ports you need to open.
- An understanding of your firewall software is required. This procedure uses the
system-config-firewallcommand in Red Hat Enterprise Linux 6. Microsoft Windows Server includes a built-in firewall, and several third-party firewall solutions are available for each platform. On Microsoft Windows Server, you can use PowerShell to configure the firewall.
This procedure configures a firewall in an environment with the following assumptions:
- The operating system is Red Hat Enterprise Linux 6.
- JBoss EAP 6 runs on host
10.1.1.2. Optionally, the server has its own firewall. - The network firewall server runs on host
10.1.1.1on interfaceeth0, and has an external interfaceeth1. - You want traffic on port
5445(a port used by JMS) forwarded to JBoss EAP 6. No other traffic should be allowed through the network firewall.
Procedure 4.1. Manage Network Firewalls and JBoss EAP 6 to work together
Log into the Management Console.
Log into the Management Console. By default, it runs on http://localhost:9990/console/.Determine the socket bindings used by the socket binding group.
- Click the Configuration label at the top of the Management Console.
- Expand the General Configuration menu. Select the Socket Binding.
- The Socket Binding Declarations screen appears. Initially, the
standard-socketsgroup is shown. Choose a different group by selecting it from the combo box on the right-hand side.
Note
If you use a standalone server, it has only one socket binding group.The list of socket names and ports is shown, eight values per page. You can go through the pages by using the arrow navigation below the table.Determine the ports you need to open.
Depending on the function of the particular port and the requirements of your environment, some ports may need to be opened on your firewall.Configure your firewall to forward traffic to JBoss EAP 6.
Perform these steps to configure your network firewall to allow traffic on the desired port.- Log into your firewall machine and access a command prompt, as the root user.
- Issue the command
system-config-firewallto launch the firewall configuration utility. A GUI or command-line utility launches, depending on the way you are logged into the firewall system. This task makes the assumption that you are logged in via SSH and using the command-line interface. - Use the TAB key on your keyboard to navigate to the button, and press the ENTER key. The Trusted Services screen appears.
- Do not change any values, but use the TAB key to navigate to the button, and press ENTER to advanced to the next screen. The Other Ports screen appears.
- Use the TAB key to navigate to the <Add> button, and press ENTER. The Port and Protocol screen appears.
- Enter
5445in the Port / Port Range field, then use the TAB key to move to the Protocol field, and entertcp. Use the TAB key to navigate to the button, and press ENTER. - Use the TAB key to navigate to the button until you reach the Port Forwarding screen.
- Use the TAB key to navigate to the <Add> button, and press the ENTER key.
- Fill in the following values to set up port forwarding for port
5445.- Source interface:
eth1 - Protocol:
tcp - Port / Port Range:
5445 - Destination IP address:
10.1.1.2 - Port / Port Range:
5445
Use the TAB key to navigate to the button, and press ENTER. - Use the TAB key to navigate to the button, and press ENTER.
- Use the TAB key to navigate to the button, and press ENTER. To apply the changes, read the warning and click .
Configure a firewall on your JBoss EAP 6 host.
Some organizations choose to configure a firewall on the JBoss EAP 6 server itself, and close all ports that are not necessary for its operation. See Section 4.3, “Network Ports Used By JBoss EAP 6” and determine which ports to open, then close the rest. The default configuration of Red Hat Enterprise Linux 6 closes all ports except22(used for Secure Shell (SSH) and5353(used for multicast DNS). While you are configuring ports, ensure you have physical access to your server so that you do not inadvertently lock yourself out.
Your firewall is configured to forward traffic to your internal JBoss EAP 6 server in the way you specified in your firewall configuration. If you chose to enable a firewall on your server, all ports are closed except the ones needed to run your applications.
Procedure 4.2. Configuring Firewall on Microsoft Windows using PowerShell
- Switch off firewall for debug purpose to determine whether the current network behavior is related to the firewall configuration.
Start-Process "$psHome\powershell.exe" -Verb Runas -ArgumentList '-command "NetSh Advfirewall set allprofiles state off"'
Start-Process "$psHome\powershell.exe" -Verb Runas -ArgumentList '-command "NetSh Advfirewall set allprofiles state off"'Copy to Clipboard Copied! Toggle word wrap Toggle overflow - Allow UDP connections on port 23364. For example:
Start-Process "$psHome\powershell.exe" -Verb Runas -ArgumentList '-command "NetSh Advfirewall firewall add rule name="UDP Port 23364" dir=in action=allow protocol=UDP localport=23364"' Start-Process "$psHome\powershell.exe" -Verb Runas -ArgumentList '-command "NetSh Advfirewall firewall add rule name="UDP Port 23364" dir=out action=allow protocol=UDP localport=23364"'
Start-Process "$psHome\powershell.exe" -Verb Runas -ArgumentList '-command "NetSh Advfirewall firewall add rule name="UDP Port 23364" dir=in action=allow protocol=UDP localport=23364"' Start-Process "$psHome\powershell.exe" -Verb Runas -ArgumentList '-command "NetSh Advfirewall firewall add rule name="UDP Port 23364" dir=out action=allow protocol=UDP localport=23364"'Copy to Clipboard Copied! Toggle word wrap Toggle overflow
Procedure 4.3. Configure the Firewall on Red Hat Enterprise Linux 7 to Allow mod_cluster Advertising
- To allow mod_cluster advertising on Red Hat Enterprise Linux 7, you must enable the UDP port in the firewall as follows:
firewall-cmd --permanent --zone=public --add-port=23364/udp
firewall-cmd --permanent --zone=public --add-port=23364/udpCopy to Clipboard Copied! Toggle word wrap Toggle overflow Note
224.0.1.105:23364 is the default address and port for mod_cluster balancer advertising UDP multicast.
4.3. Network Ports Used By JBoss EAP 6
- Whether your server groups use one of the default socket binding groups, or a custom group.
- The requirements of your individual deployments.
Note
8080, and your server uses a port offset of 100, its HTTP port is 8180.
The default socket binding groups
full-ha-socketsfull-socketsha-socketsstandard-sockets
| Name | Port | Multicast Port | Description | full-ha-sockets | full-sockets | ha-socket | standard-socket |
|---|---|---|---|---|---|---|---|
ajp | 8009 | Apache JServ Protocol. Used for HTTP clustering and load balancing. | Yes | Yes | Yes | Yes | |
http | 8080 | The default port for deployed web applications. | Yes | Yes | Yes | Yes | |
https | 8443 | SSL-encrypted connection between deployed web applications and clients. | Yes | Yes | Yes | Yes | |
jacorb | 3528 | CORBA services for JTS transactions and other ORB-dependent services. | Yes | Yes | No | No | |
jacorb-ssl | 3529 | SSL-encrypted CORBA services. | Yes | Yes | No | No | |
jgroups-diagnostics | 7500 | Multicast. Used for peer discovery in HA clusters. Not configurable using the Management Interfaces. | Yes | No | Yes | No | |
jgroups-mping | 45700 | Multicast. Used to discover initial membership in a HA cluster. | Yes | No | Yes | No | |
jgroups-tcp | 7600 | Unicast peer discovery in HA clusters using TCP. | Yes | No | Yes | No | |
jgroups-tcp-fd | 57600 | Used for HA failure detection over TCP. | Yes | No | Yes | No | |
jgroups-udp | 55200 | 45688 | Multicast peer discovery in HA clusters using UDP. | Yes | No | Yes | No |
jgroups-udp-fd | 54200 | Used for HA failure detection over UDP. | Yes | No | Yes | No | |
messaging | 5445 | JMS service. | Yes | Yes | No | No | |
messaging-group | Referenced by HornetQ JMS broadcast and discovery groups. | Yes | Yes | No | No | ||
messaging-throughput | 5455 | Used by JMS Remoting. | Yes | Yes | No | No | |
mod_cluster | 23364 | Multicast port for communication between JBoss EAP 6 and the HTTP load balancer. | Yes | No | Yes | No | |
osgi-http | 8090 | Used by internal components which use the OSGi subsystem. Not configurable using the Management Interfaces. | Yes | Yes | Yes | Yes | |
remoting | 4447 | Used for remote EJB invocation. | Yes | Yes | Yes | Yes | |
txn-recovery-environment | 4712 | The JTA transaction recovery manager. | Yes | Yes | Yes | Yes | |
txn-status-manager | 4713 | The JTA / JTS transaction manager. | Yes | Yes | Yes | Yes |
In addition to the socket binding groups, each host controller opens two more ports for management purposes:
9990- The Web Management Console port9999- The port used by the Management Console and Management API
4.4. About Encryption
4.5. About SSL Encryption
Warning
4.6. Implement SSL Encryption for the JBoss EAP 6 Web Server
Many web applications require an SSL-encrypted connection between clients and server, also known as a HTTPS connection. You can use this procedure to enable HTTPS on your server or server group.
Warning
Prerequisites
- A set of SSL encryption keys and an SSL encryption certificate. You may purchase these from a certificate-signing authority, or you can generate them yourself using command-line utilities. To generate encryption keys using utilities available on Red Hat Enterprise Linux, see Section 4.7, “Generate a SSL Encryption Key and Certificate”.
- The following details about your specific environment and setup:
- The full directory name where the certificate files are stored.
- The encryption password for your encryption keys.
- Management CLI running and connected to your domain controller or standalone server.
- Select appropriate cipher suites.
There are a number of available cryptographic primitives used as building blocks to form cipher suites. The first table lists recommended cryptographic primitives. The second lists cryptographic primitives which, while they may be used for compatibility with existing software, are not considered as secure as those recommended.
Warning
cipher-suite. Enabling weak ciphers is a significant security risk. Consult your JDK vendor's documentation before deciding on particular cipher suites as there may be compatibility issues.
| RSA with 2048 bit keys and OAEP |
| AES-128 in CBC mode |
| SHA-256 |
| HMAC-SHA-256 |
| HMAC-SHA-1 |
| RSA with key sizes larger than 1024 and legacy padding |
| AES-192 |
| AES-256 |
| 3DES (triple DES, with two or three 56 bit keys) |
| RC4 (strongly discouraged) |
| SHA-1 |
| HMAC-MD5 |
Note
/profile=default from the beginning of any management CLI commands.
Warning
Procedure 4.4. Configure the JBoss Web Server to use HTTPS
Add a new HTTPS connector.
Create a secure connector, named HTTPS, which uses thehttpsscheme, thehttpssocket binding (which defaults to8443), and is set to be secure./profile=default/subsystem=web/connector=HTTPS/:add(socket-binding=https,scheme=https,protocol=HTTP/1.1,secure=true)
/profile=default/subsystem=web/connector=HTTPS/:add(socket-binding=https,scheme=https,protocol=HTTP/1.1,secure=true)Copy to Clipboard Copied! Toggle word wrap Toggle overflow Configure the SSL encryption certificate and keys.
Configure your SSL certificate, substituting your own values for the example ones. This example assumes that the keystore is copied to the server configuration directory, which isEAP_HOME/domain/configuration/for a managed domain./profile=default/subsystem=web/connector=HTTPS/ssl=configuration:add(name=https,certificate-key-file="${jboss.server.config.dir}/keystore.jks",password=SECRET, key-alias=KEY_ALIAS, cipher-suite=CIPHERS)/profile=default/subsystem=web/connector=HTTPS/ssl=configuration:add(name=https,certificate-key-file="${jboss.server.config.dir}/keystore.jks",password=SECRET, key-alias=KEY_ALIAS, cipher-suite=CIPHERS)Copy to Clipboard Copied! Toggle word wrap Toggle overflow Set the protocol to
TLSv1./profile=default/subsystem=web/connector=HTTPS/ssl=configuration/:write-attribute(name=protocol,value=TLSv1)
/profile=default/subsystem=web/connector=HTTPS/ssl=configuration/:write-attribute(name=protocol,value=TLSv1)Copy to Clipboard Copied! Toggle word wrap Toggle overflow Deploy an application.
Deploy an application to a server group which uses the profile you have configured. If you use a standalone server, deploy an application to your server. HTTPS requests to it use the new SSL-encrypted connection.
4.7. Generate a SSL Encryption Key and Certificate
Prerequisites
- You need the
keytoolutility, which is provided by any Java Development Kit implementation. OpenJDK on Red Hat Enterprise Linux installs this command to/usr/bin/keytool. - Understand the syntax and parameters of the
keytoolcommand. This procedure uses extremely generic instructions, because further discussion of the specifics of SSL certificates or thekeytoolcommand are out of scope for this documentation.
Procedure 4.5. Generate a SSL Encryption Key and Certificate
Generate a keystore with public and private keys.
Run the following command to generate a keystore namedserver.keystorewith the aliasjbossin your current directory.The following table describes the parameters used in the keytool command:keytool -genkeypair -alias jboss -keyalg RSA -keystore server.keystore -storepass mykeystorepass --dname "CN=jsmith,OU=Engineering,O=mycompany.com,L=Raleigh,S=NC,C=US"
keytool -genkeypair -alias jboss -keyalg RSA -keystore server.keystore -storepass mykeystorepass --dname "CN=jsmith,OU=Engineering,O=mycompany.com,L=Raleigh,S=NC,C=US"Copy to Clipboard Copied! Toggle word wrap Toggle overflow Expand Parameter Description -genkeypairThe keytoolcommand to generate a key pair containing a public and private key.-aliasThe alias for the keystore. This value is arbitrary, but the alias jbossis the default used by the JBoss Web server.-keyalgThe key pair generation algorithm. In this case it is RSA.-keystoreThe name and location of the keystore file. The default location is the current directory. The name you choose is arbitrary. In this case, the file will be named server.keystore.-storepassThis password is used to authenticate to the keystore so that the key can be read. The password must be at least 6 characters long and must be provided when the keystore is accessed. In this case, we used mykeystorepass. If you omit this parameter, you will be prompted to enter it when you execute the command.-keypassThis is the password for the actual key.Note
Due to an implementation limitation this must be the same as the store password.--dnameA quoted string describing the distinguished name for the key, for example: "CN=jsmith,OU=Engineering,O=mycompany.com,L=Raleigh,C=US". This string is a concatenation of the following components: CN- The common name or host name. If the hostname is "jsmith.mycompany.com", theCNis "jsmith".OU- The organizational unit, for example "Engineering"O- The organization name, for example "mycompany.com".L- The locality, for example "Raleigh" or "London"S- The state or province, for example "NC". This parameter is optional.C- The 2 letter country code, for example "US" or "UK",
When you execute the above command, you are prompted for the following information:- If you did not use the
-storepassparameter on the command line, you are asked to enter the keystore password. Re-enter the new password at the next prompt. - If you did not use the
-keypassparameter on the command line, you are asked to enter the key password. Press Enter to set this to the same value as the keystore password.
When the command completes, the fileserver.keystorenow contains the single key with the aliasjboss.Verify the key.
Verify that the key works properly by using the following command.keytool -list -keystore server.keystore
keytool -list -keystore server.keystoreCopy to Clipboard Copied! Toggle word wrap Toggle overflow You are prompted for the keystore password. The contents of the keystore are displayed (in this case, a single key calledjboss). Notice the type of thejbosskey, which isPrivateKeyEntry. This indicates that the keystore contains both a public and private entry for this key.Generate a certificate signing request.
Run the following command to generate a certificate signing request using the public key from the keystore you created in step 1.keytool -certreq -keyalg RSA -alias jboss -keystore server.keystore -file certreq.csr
keytool -certreq -keyalg RSA -alias jboss -keystore server.keystore -file certreq.csrCopy to Clipboard Copied! Toggle word wrap Toggle overflow You are prompted for the password in order to authenticate to the keystore. Thekeytoolcommand then creates a new certificate signing request calledcertreq.csrin the current working directory.Test the newly generated certificate signing request.
Test the contents of the certificate by using the following command.openssl req -in certreq.csr -noout -text
openssl req -in certreq.csr -noout -textCopy to Clipboard Copied! Toggle word wrap Toggle overflow The certificate details are shown.Optional: Submit your certificate signing request to a Certificate Authority (CA).
A Certificate Authority (CA) can authenticate your certificate so that it is considered trustworthy by third-party clients. The CA supplies you with a signed certificate, and optionally with one or more intermediate certificates.Optional: Export a self-signed certificate from the keystore.
If you only need it for testing or internal purposes, you can use a self-signed certificate. You can export one from the keystore you created in step 1 as follows:keytool -export -alias jboss -keystore server.keystore -file server.crt
keytool -export -alias jboss -keystore server.keystore -file server.crtCopy to Clipboard Copied! Toggle word wrap Toggle overflow You are prompted for the password in order to authenticate to the keystore. A self-signed certificate, namedserver.crt, is created in the current working directory.Import the signed certificate, along with any intermediate certificates.
Import each certificate, in the order that you are instructed by the CA. For each certificate to import, replaceintermediate.caorserver.crtwith the actual file name. If your certificates are not provided as separate files, create a separate file for each certificate, and paste its contents into the file.Note
Your signed certificate and certificate keys are valuable assets. Be cautious with how you transport them between servers.keytool -import -keystore server.keystore -alias intermediateCA -file intermediate.ca
keytool -import -keystore server.keystore -alias intermediateCA -file intermediate.caCopy to Clipboard Copied! Toggle word wrap Toggle overflow keytool -importcert -alias jboss -keystore server.keystore -file server.crt
keytool -importcert -alias jboss -keystore server.keystore -file server.crtCopy to Clipboard Copied! Toggle word wrap Toggle overflow Test that your certificates imported successfully.
Run the following command, and enter the keystore password when prompted. The contents of your keystore are displayed, and the certificates are part of the list.keytool -list -keystore server.keystore
keytool -list -keystore server.keystoreCopy to Clipboard Copied! Toggle word wrap Toggle overflow
Your signed certificate is now included in your keystore and is ready to be used to encrypt SSL connections, including HTTPS web server communications.
4.8. SSL Connector Reference
default. Change the profile name to the one you wish to configure, for a managed domain, or omit the /profile=default portion of the command, for a standalone server.
| Attribute | Description | CLI Command |
|---|---|---|
| name |
The display name of the SSL connector.
|
Attribute
name is read-only.
|
| verify-client |
The possible values of
verify-client differ, based upon whether the HTTP/HTTPS connector is used, or the native APR connector is used.
HTTP/HTTPS Connector
Possible values are Native APR Connector
Possible values are |
The first example command uses the HTTPS connector.
/profile=default/subsystem=web/connector=HTTPS/ssl=configuration/:write-attribute(name=verify-client,value=want)
The second example command uses the APR connector.
/profile=default/subsystem=web/connector=APR/ssl=configuration/:write-attribute(name=verify-client,value=require) |
| verify-depth |
The maximum number of intermediate certificate issuers checked before deciding that the clients do not have a valid certificate. The default value is
10.
|
/profile=default/subsystem=web/connector=HTTPS/ssl=configuration/:write-attribute(name=verify-depth,value=10) |
| certificate-key-file |
The full file path and file name of the keystore file where the signed server certificate is stored. With JSSE encryption, this certificate file will be the only one, while OpenSSL uses several files. The default value is the
.keystore file in the home directory of the user running JBoss EAP 6. If your keystoreType does not use a file, set the parameter to an empty string.
|
/profile=default/subsystem=web/connector=HTTPS/ssl=configuration/:write-attribute(name=certificate-key-file,value=../domain/configuration/server.keystore) |
| certificate-file |
If you use OpenSSL encryption, set the value of this parameter to the path to the file containing the server certificate.
|
/profile=default/subsystem=web/connector=HTTPS/ssl=configuration/:write-attribute(name=certificate-file,value=server.crt) |
| password |
The password for both the truststore and keystore. In the following example, replace PASSWORD with your own password.
|
/profile=default/subsystem=web/connector=HTTPS/ssl=configuration/:write-attribute(name=password,value=PASSWORD) |
| protocol |
The version of the SSL protocol to use. Supported values depend on the underlying SSL implementation (whether JSSE or OpenSSL). Refer to the Java SSE Documentation.
You can also specify a combination of protocols, which is comma separated. For example, TLSv1, TLSv1.1,TLSv1.2.
Warning
Red Hat recommends that you explicitly disable SSL in favor of TLSv1.1 or TLSv1.2 in all affected packages.
|
/profile=default/subsystem=web/connector=HTTPS/ssl=configuration/:write-attribute(name=protocol,value=ALL) /profile=default/subsystem=web/connector=HTTPS/ssl=configuration/:write-attribute(name=protocol,value="TLSv1, TLSv1.1,TLSv1.2") |
| cipher-suite |
A list of the encryption ciphers which are allowed. For JSSE syntax, it must be a comma-separated list. For OpenSSL syntax, it must be a colon-separated list. Ensure that you only use one syntax.
The default is
HIGH:!aNULL:!eNULL:!EXPORT:!DES:!RC4:!MD5.
The example only lists two possible ciphers, but real-world examples will likely use more.
Important
Using weak ciphers is a significant security risk. See http://www.nist.gov/manuscript-publication-search.cfm?pub_id=915295 for NIST recommendations on cipher suites.
For a list of available OpenSSL ciphers, see https://www.openssl.org/docs/apps/ciphers.html#CIPHER_STRINGS. Note that the following are not supported:
@SECLEVEL, SUITEB128, SUITEB128ONLY, SUITEB192.
|
/profile=default/subsystem=web/connector=HTTPS/ssl=configuration/:write-attribute(name=cipher-suite, value="TLS_RSA_WITH_AES_128_CBC_SHA,TLS_RSA_WITH_AES_256_CBC_SHA") |
| key-alias |
The alias used to for the server certificate in the keystore. In the following example, replace KEY_ALIAS with your certificate's alias.
|
/profile=default/subsystem=web/connector=HTTPS/ssl=configuration/:write-attribute(name=key-alias,value=KEY_ALIAS) |
| truststore-type |
The type of the truststore. Various types of truststores are available, including
PKCS12 and Java's standard JKS.
|
/profile=default/subsystem=web/connector=HTTPS/ssl=configuration/:write-attribute(name=truststore-type,value=jks) |
| keystore-type |
The type of the keystore, Various types of keystores are available, including
PKCS12 and Java's standard JKS.
|
/profile=default/subsystem=web/connector=HTTPS/ssl=configuration/:write-attribute(name=keystore-type,value=jks) |
| ca-certificate-file |
The file containing the CA certificates. This is the
truststoreFile, in the case of JSSE, and uses the same password as the keystore. The ca-certificate-file file is used to validate client certificates.
|
/profile=default/subsystem=web/connector=HTTPS/ssl=configuration/:write-attribute(name=certificate-file,value=ca.crt) |
| ca-certificate-password |
The Certificate password for the
ca-certificate-file. In the following example, replace the MASKED_PASSWORD with your own masked password.
|
/profile=default/subsystem=web/connector=HTTPS/ssl=configuration/:write-attribute(name=ca-certificate-password,value=MASKED_PASSWORD) |
| ca-revocation-url |
A file or URL which contains the revocation list. It refers to the
crlFile for JSSE or the SSLCARevocationFile for SSL.
|
/profile=default/subsystem=web/connector=HTTPS/ssl=configuration/:write-attribute(name=ca-revocation-url,value=ca.crl) |
| session-cache-size |
The size of the SSLSession cache. This attribute applies only to JSSE connectors. The default is
0, which specifies an unlimited cache size.
|
/profile=default/subsystem=web/connector=HTTPS/ssl=configuration/:write-attribute(name=session-cache-size,value=100) |
| session-timeout |
The number of seconds before a cached SSLSession expires. This attribute applies only to JSSE connectors. The default is
86400 seconds, which is 24 hours.
|
/profile=default/subsystem=web/connector=HTTPS/ssl=configuration/:write-attribute(name=session-timeout,value=43200) |
4.9. FIPS 140-2 Compliant Encryption
4.9.1. About FIPS 140-2 Compliance
4.9.2. FIPS 140-2 Compliant Cryptography on IBM JDK
Key storage
keytool in FIPS-compliant mode use the -providerClass option on each command like this:
keytool -list -storetype JCEKS -keystore mystore.jck -storepass mystorepass -providerClass com.ibm.crypto.fips.provider.IBMJCEFIPS
keytool -list -storetype JCEKS -keystore mystore.jck -storepass mystorepass -providerClass com.ibm.crypto.fips.provider.IBMJCEFIPSExamine FIPS provider information
-Djavax.net.debug=true to standalone.conf or domain.conf. Information about the FIPS provider is logged to server.log, for example:
4.9.3. FIPS 140-2 Compliant Passwords
- Must be at least seven (7) characters in length.
- Must include characters from at least three (3) of the following character classes:
- ASCII digits,
- lowercase ASCII,
- uppercase ASCII,
- non-alphanumeric ASCII, and
- non-ASCII.
4.9.4. Enable FIPS 140-2 Cryptography for SSL on Red Hat Enterprise Linux 6
Prerequisites
- Red Hat Enterprise Linux 6 must already be configured to be FIPS 140-2 compliant. Refer to https://access.redhat.com/knowledge/solutions/137833.
Procedure 4.6. Enable FIPS 140-2 Compliant Cryptography for SSL
Create the database
Create the NSS database in a directory own by thejbossuser.mkdir -p /usr/share/jboss-as/nssdb chown jboss /usr/share/jboss-as/nssdb modutil -create -dbdir /usr/share/jboss-as/nssdb
$ mkdir -p /usr/share/jboss-as/nssdb $ chown jboss /usr/share/jboss-as/nssdb $ modutil -create -dbdir /usr/share/jboss-as/nssdbCopy to Clipboard Copied! Toggle word wrap Toggle overflow Create NSS configuration file
Create a new text file with the namenss_pkcsll_fips.cfgin the/usr/share/jboss-asdirectory with the following contents:name = nss-fips nssLibraryDirectory=/usr/lib64 nssSecmodDirectory=/usr/share/jboss-as/nssdb nssModule = fips
name = nss-fips nssLibraryDirectory=/usr/lib64 nssSecmodDirectory=/usr/share/jboss-as/nssdb nssModule = fipsCopy to Clipboard Copied! Toggle word wrap Toggle overflow The NSS configuration file must specify:- a name,
- the directory where the NSS library is located, and
- the directory where the NSS database was created as per step 1.
If you are not running a 64bit version of Red Hat Enterprise Linux 6 then setnssLibraryDirectoryto/usr/libinstead of/usr/lib64.Enable SunPKCS11 provider
Edit thejava.securityconfiguration file for your JRE ($JAVA_HOME/jre/lib/security/java.security) and add the following line:security.provider.1=sun.security.pkcs11.SunPKCS11 /usr/share/jboss-as/nss_pkcsll_fips.cfg
security.provider.1=sun.security.pkcs11.SunPKCS11 /usr/share/jboss-as/nss_pkcsll_fips.cfgCopy to Clipboard Copied! Toggle word wrap Toggle overflow Note that the configuration file specified in this line is the file created in step 2.Any othersecurity.provider.Xlines in this file must have the value of their X increased by one to ensure that this provider is given priority.Enable FIPS mode for the NSS library
Run themodutilcommand as shown to enable FIPS mode:modutil -fips true -dbdir /usr/share/jboss-as/nssdb
modutil -fips true -dbdir /usr/share/jboss-as/nssdbCopy to Clipboard Copied! Toggle word wrap Toggle overflow Note that the directory specified here is the one created in step 1.You may get a security library error at this point requiring you to regenerate the library signatures for some of the NSS shared objects.Change the password on the FIPS token
Set the password on the FIPS token using the following command. Note that the name of the token must beNSS FIPS 140-2 Certificate DB.modutil -changepw "NSS FIPS 140-2 Certificate DB" -dbdir /usr/share/jboss-as/nssdb
modutil -changepw "NSS FIPS 140-2 Certificate DB" -dbdir /usr/share/jboss-as/nssdbCopy to Clipboard Copied! Toggle word wrap Toggle overflow The password used for the FIPS token must be a FIPS compliant password.Create certificate using NSS tools
Enter the following command to create a certificate using the NSS tools.certutil -S -k rsa -n jbossweb -t "u,u,u" -x -s "CN=localhost, OU=MYOU, O=MYORG, L=MYCITY, ST=MYSTATE, C=MY" -d /usr/share/jboss-as/nssdb
certutil -S -k rsa -n jbossweb -t "u,u,u" -x -s "CN=localhost, OU=MYOU, O=MYORG, L=MYCITY, ST=MYSTATE, C=MY" -d /usr/share/jboss-as/nssdbCopy to Clipboard Copied! Toggle word wrap Toggle overflow Configure the HTTPS connector to use the PKCS11 keystore
Add a HTTPS connector using the following command in the JBoss CLI Tool:/subsystem=web/connector=https/:add(socket-binding=https,scheme=https,protocol=HTTP/1.1,secure=true)
/subsystem=web/connector=https/:add(socket-binding=https,scheme=https,protocol=HTTP/1.1,secure=true)Copy to Clipboard Copied! Toggle word wrap Toggle overflow Then add the SSL configuration with the following command, replacing PASSWORD with the FIPS compliant password from step 5.Copy to Clipboard Copied! Toggle word wrap Toggle overflow Verify
Verify that the JVM can read the private key from the PKCS11 keystore by running the following command:keytool -list -storetype pkcs11
keytool -list -storetype pkcs11Copy to Clipboard Copied! Toggle word wrap Toggle overflow
Example 4.5. XML configuration for HTTPS connector using FIPS 140-2 compliance
cipher-suite attribute has linebreaks inserted to make it easier to read.
Chapter 5. Secure the Management Interfaces
5.1. Default User Security Configuration
All management interfaces in JBoss EAP 6 are secured by default. This security takes two different forms:
- Local interfaces are secured by a SASL contract between local clients and the server they connect to. This security mechanism is based on the client's ability to access the local filesystem. This is because access to the local filesystem would allow the client to add a user or otherwise change the configuration to thwart other security mechanisms. This adheres to the principle that if physical access to the filesystem is achieved, other security mechanisms are superfluous. The mechanism happens in four steps:
Note
HTTP access is considered to be remote, even if you connect to the localhost using HTTP.- The client sends a message to the server which includes a request to authenticate with the local SASL mechanism.
- The server generates a one-time token, writes it to a unique file, and sends a message to the client with the full path of the file.
- The client reads the token from the file and sends it to the server, verifying that it has local access to the filesystem.
- The server verifies the token and then deletes the file.
- Remote clients, including local HTTP clients, use realm-based security. The default realm with the permissions to configure the JBoss EAP 6 instance remotely using the management interfaces is
ManagementRealm. A script is provided which allows you to add users to this realm (or realms you create). For more information on adding users, see the Getting Started chapter of the JBoss EAP 6 Installation Guide. For each user, the username and a hashed password are stored in a file.- Managed domain
EAP_HOME/domain/configuration/mgmt-users.properties- Standalone server
EAP_HOME/standalone/configuration/mgmt-users.properties
Even though the contents of themgmt-users.propertiesare masked, the file must still be treated as a sensitive file. It is recommended that it be set to the file mode of600, which gives no access other than read and write access by the file owner.
5.2. Overview of Advanced Management Interface Configuration
EAP_HOME/domain/configuration/host.xml or EAP_HOME/standalone/configuration/standalone.xml controls which network interfaces the host controller process binds to, which types of management interfaces are available at all, and which type of authentication system is used to authenticate users on each interface. This topic discusses how to configure the Management Interfaces to suit your environment.
<management> element that includes the following four configurable child elements. The security realms and outbound connections are each first defined, and then applied to the management interfaces as attributes.
- <security-realms>
- <outbound-connections>
- <management-interfaces>
- <audit-log>
Note
The security realm is responsible for the authentication and authorization of users allowed to administer JBoss EAP 6 via the Management API, Management CLI, or web-based Management Console.
ManagementRealm and ApplicationRealm. Each of these security realms uses a -users.properties file to store users and hashed passwords, and a -roles.properties to store mappings between users and roles. Support is also included for an LDAP-enabled security realm.
Note
Some security realms connect to external interfaces, such as an LDAP server. An outbound connection defines how to make this connection. A pre-defined connection type, ldap-connection, sets all of the required and optional attributes to connect to the LDAP server and verify the credential.
A management interface includes properties about how connect to and configure JBoss EAP. Such information includes the named network interface, port, security realm, and other configurable information about the interface. Two interfaces are included in a default installation:
http-interfaceis the configuration for the web-based Management Console.native-interfaceis the configuration for the command-line Management CLI and the REST-like Management API.
5.3. Disable the HTTP Management Interface
Note
console-enabled attribute of the HTTP interface to false, instead of disabling the interface completely.
/host=master/core-service=management/management-interface=http-interface/:write-attribute(name=console-enabled,value=false)
/host=master/core-service=management/management-interface=http-interface/:write-attribute(name=console-enabled,value=false)Example 5.1. Read the Configuration of the HTTP Interface
Example 5.2. Remove the HTTP Interface
/host=master/core-service=management/management-interface=http-interface/:remove
/host=master/core-service=management/management-interface=http-interface/:remove
Example 5.3. Re-Create the HTTP Interface
/host=master/core-service=management/management-interface=http-interface:add(console-enabled=true,interface=management,port="${jboss.management.http.port:9990}",security-realm=ManagementRealm)
/host=master/core-service=management/management-interface=http-interface:add(console-enabled=true,interface=management,port="${jboss.management.http.port:9990}",security-realm=ManagementRealm)5.4. Remove Silent Authentication from the Default Security Realm
The default installation of JBoss EAP 6 contains a method of silent authentication for a local Management CLI user. This allows the local user the ability to access the Management CLI without username or password authentication. This functionality is enabled as a convenience, and to assist local users running Management CLI scripts without requiring authentication. It is considered a useful feature given that access to the local configuration typically also gives the user the ability to add their own user details or otherwise disable security checks.
local element within the security-realm section of the configuration file. This applies to both the standalone.xml for a Standalone Server instance, or host.xml for a Managed Domain. You should only consider the removal of the local element if you understand the impact that it might have on your particular server configuration.
local element visible in the following example.
Example 5.4. Example of the local element in the security-realm
Prerequisites
- Start the JBoss EAP 6 instance.
- Launch the Management CLI.
Procedure 5.1. Remove Silent Authentication from the Default Security Realm
Remove silent authentication with the Management CLI
Remove thelocalelement from the Management Realm and Application Realm as required.- Remove the
localelement from the Management Realm.For Standalone Servers
/core-service=management/security-realm=ManagementRealm/authentication=local:remove
/core-service=management/security-realm=ManagementRealm/authentication=local:removeCopy to Clipboard Copied! Toggle word wrap Toggle overflow For Managed Domains
/host=HOST_NAME/core-service=management/security-realm=ManagementRealm/authentication=local:remove
/host=HOST_NAME/core-service=management/security-realm=ManagementRealm/authentication=local:removeCopy to Clipboard Copied! Toggle word wrap Toggle overflow
- Remove the
localelement from the Application Realm.For Standalone Servers
/core-service=management/security-realm=ApplicationRealm/authentication=local:remove
/core-service=management/security-realm=ApplicationRealm/authentication=local:removeCopy to Clipboard Copied! Toggle word wrap Toggle overflow For Managed Domains
/host=HOST_NAME/core-service=management/security-realm=ApplicationRealm/authentication=local:remove
/host=HOST_NAME/core-service=management/security-realm=ApplicationRealm/authentication=local:removeCopy to Clipboard Copied! Toggle word wrap Toggle overflow
The silent authentication mode is removed from the ManagementRealm and the ApplicationRealm.
5.5. Disable Remote Access to the JMX Subsystem
/profile=default prefix from the commands.
Note
Example 5.5. Remove the Remoting Connector from the JMX Subsystem
/profile=default/subsystem=jmx/remoting-connector=jmx/:remove
/profile=default/subsystem=jmx/remoting-connector=jmx/:removeExample 5.6. Remove the JMX Subsystem
/profile=default/subsystem=jmx/:remove
/profile=default/subsystem=jmx/:remove5.6. Configure Security Realms for the Management Interfaces
The management interfaces are configured to use the ManagementRealm security realm by default. The ManagementRealm stores its user password combinations in the file mgmt-users.properties.
Example 5.7. Default ManagementRealm
The following commands create a new security realm called TestRealm and set the directory for the relevant properties file.
Example 5.8. Create a new Security Realm
/host=master/core-service=management/security-realm=TestRealm/:add /host=master/core-service=management/security-realm=TestRealm/authentication=properties/:add(path=TestUsers.properties, relative-to=jboss.domain.config.dir)
/host=master/core-service=management/security-realm=TestRealm/:add
/host=master/core-service=management/security-realm=TestRealm/authentication=properties/:add(path=TestUsers.properties, relative-to=jboss.domain.config.dir)To use Security Domain to authenticate to the Management interfaces:
security-realm attribute of the management interface:
Example 5.9. Specify a Security Realm to use for the HTTP Management Interface
/host=master/core-service=management/management-interface=http-interface/:write-attribute(name=security-realm,value=TestRealm)
/host=master/core-service=management/management-interface=http-interface/:write-attribute(name=security-realm,value=TestRealm)5.7. Configure the Management Console for HTTPS
standalone and domain mode configurations. For domain mode, prefix the management CLI commands with the name of the host, for example: /host=master.
Procedure 5.2.
Create a keystore to secure the management console.
Note
This keystore must be in JKS format as the management console is not compatible with keystores in JCEKS format.In a terminal emulator, enter the following command. For the parametersalias,keypass,keystore,storepassanddname, replace the example values with values of your choice.The parametervalidityspecifies for how many days the key is valid. A value of 730 equals two years.keytool -genkeypair -alias appserver -storetype jks -keyalg RSA -keysize 2048 -keypass password1 -keystore EAP_HOME/standalone/configuration/identity.jks -storepass password1 -dname "CN=appserver,OU=Sales,O=Systems Inc,L=Raleigh,ST=NC,C=US" -validity 730 -v
keytool -genkeypair -alias appserver -storetype jks -keyalg RSA -keysize 2048 -keypass password1 -keystore EAP_HOME/standalone/configuration/identity.jks -storepass password1 -dname "CN=appserver,OU=Sales,O=Systems Inc,L=Raleigh,ST=NC,C=US" -validity 730 -vCopy to Clipboard Copied! Toggle word wrap Toggle overflow Ensure the Management Console Binds to HTTPS
Standalone Mode
Ensure the management console binds toHTTPSfor its interface by adding themanagement-httpsconfiguration and removing themanagement-httpconfiguration.Ensure the JBoss EAP instance is running, then enter the following management CLI commands:/core-service=management/management-interface=http-interface:write-attribute(name=secure-socket-binding, value=management-https)
/core-service=management/management-interface=http-interface:write-attribute(name=secure-socket-binding, value=management-https)Copy to Clipboard Copied! Toggle word wrap Toggle overflow /core-service=management/management-interface=http-interface:undefine-attribute(name=socket-binding)
/core-service=management/management-interface=http-interface:undefine-attribute(name=socket-binding)Copy to Clipboard Copied! Toggle word wrap Toggle overflow The expected output from these commands is:{"outcome" => "success"}{"outcome" => "success"}Copy to Clipboard Copied! Toggle word wrap Toggle overflow Note
At this point the JBoss EAP log may display the following error message. This is to be expected because the SSL configuration is not yet completed.JBAS015103: A secure port has been specified for the HTTP interface but no SSL configuration in the realm.
JBAS015103: A secure port has been specified for the HTTP interface but no SSL configuration in the realm.Copy to Clipboard Copied! Toggle word wrap Toggle overflow Domain Mode
Change the socket element within the management-interface section by adding secure-port and removing port configuration.Ensure the JBoss EAP instance is running, then enter the following management CLI commands:/host=master/core-service=management/management-interface=http-interface:write-attribute(name=secure-port,value=9443) /host=master/core-service=management/management-interface=http-interface:undefine-attribute(name=port)
/host=master/core-service=management/management-interface=http-interface:write-attribute(name=secure-port,value=9443) /host=master/core-service=management/management-interface=http-interface:undefine-attribute(name=port)Copy to Clipboard Copied! Toggle word wrap Toggle overflow Note
At this point the JBoss EAP log may display the following error message. This is to be expected because the SSL configuration is not yet completed.JBAS015103: A secure port has been specified for the HTTP interface but no SSL configuration in the realm.
JBAS015103: A secure port has been specified for the HTTP interface but no SSL configuration in the realm.Copy to Clipboard Copied! Toggle word wrap Toggle overflow
Optional: Custom socket-binding group
If you are using a customsocket-bindinggroup, ensure themanagement-httpsbinding is defined (it is present by default, bound to port9443). Edit the master configuration file - for examplestandalone.xml- to match the following.<socket-binding-group name="standard-sockets" default-interface="public" port-offset="${jboss.socket.binding.port-offset:0}"> <socket-binding name="management-native" interface="management" port="${jboss.management.native.port:9999}"/> <socket-binding name="management-http" interface="management" port="${jboss.management.http.port:9990}"/> <socket-binding name="management-https" interface="management" port="${jboss.management.https.port:9443}"/><socket-binding-group name="standard-sockets" default-interface="public" port-offset="${jboss.socket.binding.port-offset:0}"> <socket-binding name="management-native" interface="management" port="${jboss.management.native.port:9999}"/> <socket-binding name="management-http" interface="management" port="${jboss.management.http.port:9990}"/> <socket-binding name="management-https" interface="management" port="${jboss.management.https.port:9443}"/>Copy to Clipboard Copied! Toggle word wrap Toggle overflow Create a new Security Realm
Enter the following commands to create a new security realm namedManagementRealmHTTPS:/host=master/core-service=management/security-realm=ManagementRealmHTTPS/:add /host=master/core-service=management/security-realm=ManagementRealmHTTPS/authentication=properties/:add(path=ManagementUsers.properties, relative-to=jboss.domain.config.dir)
/host=master/core-service=management/security-realm=ManagementRealmHTTPS/:add /host=master/core-service=management/security-realm=ManagementRealmHTTPS/authentication=properties/:add(path=ManagementUsers.properties, relative-to=jboss.domain.config.dir)Copy to Clipboard Copied! Toggle word wrap Toggle overflow Configure Management Interface to use the new security realm
Enter the following commands:/host=master/core-service=management/management-interface=http-interface/:write-attribute(name=security-realm,value=ManagementRealmHTTPS)
/host=master/core-service=management/management-interface=http-interface/:write-attribute(name=security-realm,value=ManagementRealmHTTPS)Copy to Clipboard Copied! Toggle word wrap Toggle overflow Configure the management console to use the keystore.
Enter the following management CLI command. For the parametersfile,passwordandaliastheir values must be copied from the step Create a keystore to secure the management console./core-service=management/security-realm=ManagementRealmHTTPS/server-identity=ssl:add(keystore-path=identity.jks,keystore-relative-to=jboss.server.config.dir, keystore-password=password1, alias=appserver)
/core-service=management/security-realm=ManagementRealmHTTPS/server-identity=ssl:add(keystore-path=identity.jks,keystore-relative-to=jboss.server.config.dir, keystore-password=password1, alias=appserver)Copy to Clipboard Copied! Toggle word wrap Toggle overflow The expected output from this command is:Copy to Clipboard Copied! Toggle word wrap Toggle overflow Restart the JBoss EAP server.
On restarting the server the log should contain the following, just before the text which states the number of services that are started. The management console is now listening on port 9443, which confirms that the procedure was successful.14:53:14,720 INFO [org.jboss.as] (Controller Boot Thread) JBAS015962: Http management interface listening on https://127.0.0.1:9443/management 14:53:14,721 INFO [org.jboss.as] (Controller Boot Thread) JBAS015952: Admin console listening on https://127.0.0.1:9443
14:53:14,720 INFO [org.jboss.as] (Controller Boot Thread) JBAS015962: Http management interface listening on https://127.0.0.1:9443/management 14:53:14,721 INFO [org.jboss.as] (Controller Boot Thread) JBAS015952: Admin console listening on https://127.0.0.1:9443Copy to Clipboard Copied! Toggle word wrap Toggle overflow
Note
5.8. Use Distinct Interfaces for HTTP and HTTPS connections to the Management Interface
secure-interface attribute specifies the network interface on which the host's socket for HTTPS management communication should be opened, if a different interface should be used from that specified by the interface attribute. If it is not specified then the interface specified by the interface attribute is used.
secure-interface attribute has no effect if the secure-port attribute is not set.
EAP_HOME/domain/configuration/host.xml configuration that sets the secure-interface attribute to listen for HTTPS traffic on a distinct interface from HTTP traffic:
5.9. Using 2-way SSL for the Management interface and the CLI
- HOST1
- The JBoss server hostname. For example;
jboss.redhat.com - HOST2
- A suitable name for the client. For example:
myclient. Note this is not necessarily an actual hostname. - CA_HOST1
- The DN (distinguished name) to use for the HOST1 certificate. For example
cn=jboss,dc=redhat,dc=com. - CA_HOST2
- The DN (distinguished name) to use for the HOST2 certificate. For example
cn=myclient,dc=redhat,dc=com.
Prerequisites
- If you are going to use a password vault to store the keystore and truststore passwords (recommended), the password vault should already be created. Refer to Section 7.1, “Password Vault System”.
Procedure 5.3.
- Generate the stores:
keytool -genkeypair -alias HOST1_alias -keyalg RSA -keysize 1024 -validity 365 -keystore host1.keystore.jks -dname "CA_HOST1" -keypass secret -storepass secret
keytool -genkeypair -alias HOST1_alias -keyalg RSA -keysize 1024 -validity 365 -keystore host1.keystore.jks -dname "CA_HOST1" -keypass secret -storepass secretCopy to Clipboard Copied! Toggle word wrap Toggle overflow keytool -genkeypair -alias HOST2_alias -keyalg RSA -keysize 1024 -validity 365 -keystore host2.keystore.jks -dname "CA_HOST2" -keypass secret -storepass secret
keytool -genkeypair -alias HOST2_alias -keyalg RSA -keysize 1024 -validity 365 -keystore host2.keystore.jks -dname "CA_HOST2" -keypass secret -storepass secretCopy to Clipboard Copied! Toggle word wrap Toggle overflow - Export the certificates:
keytool -exportcert -keystore HOST1.keystore.jks -alias HOST1_alias -keypass secret -storepass secret -file HOST1.cer
keytool -exportcert -keystore HOST1.keystore.jks -alias HOST1_alias -keypass secret -storepass secret -file HOST1.cerCopy to Clipboard Copied! Toggle word wrap Toggle overflow keytool -exportcert -keystore HOST2.keystore.jks -alias HOST2_alias -keypass secret -storepass secret -file HOST2.cer
keytool -exportcert -keystore HOST2.keystore.jks -alias HOST2_alias -keypass secret -storepass secret -file HOST2.cerCopy to Clipboard Copied! Toggle word wrap Toggle overflow - Import the certificates into the opposing trust stores:
keytool -importcert -keystore HOST1.truststore.jks -storepass secret -alias HOST2_alias -trustcacerts -file HOST2.cer
keytool -importcert -keystore HOST1.truststore.jks -storepass secret -alias HOST2_alias -trustcacerts -file HOST2.cerCopy to Clipboard Copied! Toggle word wrap Toggle overflow keytool -importcert -keystore HOST2.truststore.jks -storepass secret -alias HOST1_alias -trustcacerts -file HOST1.cer
keytool -importcert -keystore HOST2.truststore.jks -storepass secret -alias HOST1_alias -trustcacerts -file HOST1.cerCopy to Clipboard Copied! Toggle word wrap Toggle overflow - Define a CertificateRealm in the configuration for your installation (
host.xmlorstandalone.xml) and point the interface to it:This can be done by manually editing the configuration file (not recommended) or by using the following commands:/core-service=management/security-realm=CertificateRealm:add()
/core-service=management/security-realm=CertificateRealm:add()Copy to Clipboard Copied! Toggle word wrap Toggle overflow /core-service=management/security-realm=CertificateRealm/server-identity=ssl:add(keystore-path=/path/to/HOST1.keystore.jks,keystore-password=secret, alias=HOST1_alias)
/core-service=management/security-realm=CertificateRealm/server-identity=ssl:add(keystore-path=/path/to/HOST1.keystore.jks,keystore-password=secret, alias=HOST1_alias)Copy to Clipboard Copied! Toggle word wrap Toggle overflow /core-service=management/security-realm=CertificateRealm/authentication=truststore:add(keystore-path=/path/to/HOST1.truststore.jks,keystore-password=secret)
/core-service=management/security-realm=CertificateRealm/authentication=truststore:add(keystore-path=/path/to/HOST1.truststore.jks,keystore-password=secret)Copy to Clipboard Copied! Toggle word wrap Toggle overflow Important
The provided commands apply to standalone mode only. For domain mode, add/host=masterbefore each command. - Change the
security-realmof the native-interface to the new Certificate Realm./host=master/core-service=management/management-interface=native-interface:write-attribute(name=security-realm,value=CertificateRealm)
/host=master/core-service=management/management-interface=native-interface:write-attribute(name=security-realm,value=CertificateRealm)Copy to Clipboard Copied! Toggle word wrap Toggle overflow - Add the SSL configuration for the CLI, which uses
EAP_HOME/bin/jboss-cli.xmlas a settings file. Either use a password vault to store the keystore and truststore passwords (recommended), or store them in plain text:- To store the keystore and truststore passwords in a password vault:Edit
EAP_HOME/bin/jboss-cli.xmland add the SSL configuration (using the appropriate values for the variables). Also add the vault configuration, replacing each value with those of your vault.Copy to Clipboard Copied! Toggle word wrap Toggle overflow - To store the keystore and truststore passwords in plain text:Edit
EAP_HOME/bin/jboss-cli.xmland add the SSL configuration (using the appropriate values for the variables):Copy to Clipboard Copied! Toggle word wrap Toggle overflow
5.10. Secure the Management Interfaces via JAAS
/subsystem=security/security-domain=UsersLMDomain:add(cache-type=default) /subsystem=security/security-domain=UsersLMDomain/authentication=classic:add /subsystem=security/security-domain=UsersLMDomain/authentication=classic/login-module=UsersRoles:add()
/subsystem=security/security-domain=UsersLMDomain:add(cache-type=default)
/subsystem=security/security-domain=UsersLMDomain/authentication=classic:add
/subsystem=security/security-domain=UsersLMDomain/authentication=classic/login-module=UsersRoles:add()/core-service=management/security-realm=SecurityDomainAuthnRealm:add /core-service=management/security-realm=SecurityDomainAuthnRealm/authentication=jaas:add(name=UsersLMDomain)
/core-service=management/security-realm=SecurityDomainAuthnRealm:add
/core-service=management/security-realm=SecurityDomainAuthnRealm/authentication=jaas:add(name=UsersLMDomain)assign-groups determines whether loaded user membership information from the Security Domain is used for group assignment in the Security Realm. When set to true this group assignment is used for Role-Based Access Control (RBAC).
assign-groups attribute can be set to true by this CLI command:
/core-service=management/security-realm=ManagementRealm/authentication=jaas:write-attribute(name=assign-groups,value=true)
/core-service=management/security-realm=ManagementRealm/authentication=jaas:write-attribute(name=assign-groups,value=true)5.11. LDAP
5.11.1. About LDAP
5.11.2. Use LDAP to Authenticate to the Management Interfaces
- Create an outbound connection to the LDAP server.
- Create an LDAP-enabled security realm.
- Reference the new security domain in the Management Interface.
The LDAP outbound connection allows the following attributes:
| Attribute | Required | Description |
|---|---|---|
url | yes |
The URL address of the directory server.
|
search-dn | no |
The fully distinguished name (DN) of the user authorized to perform searches.
|
search-credentials | no |
The password of the user authorized to perform searches.
|
initial-context-factory | no |
The initial context factory to use when establishing the connection. Defaults to
com.sun.jndi.ldap.LdapCtxFactory.
|
security-realm | no |
The security realm to reference to obtain a configured
SSLContext to use when establishing the connection.
|
Example 5.10. Add an LDAP Outbound Connection
- Search DN:
cn=search,dc=acme,dc=com - Search Credential:
myPass - URL:
ldap://127.0.0.1:389
/host=master/core-service=management/security-realm=ldap_security_realm:add
/host=master/core-service=management/security-realm=ldap_security_realm:add/host=master/core-service=management/ldap-connection=ldap_connection/:add(search-credential=myPass,url=ldap://127.0.0.1:389,search-dn="cn=search,dc=acme,dc=com")
/host=master/core-service=management/ldap-connection=ldap_connection/:add(search-credential=myPass,url=ldap://127.0.0.1:389,search-dn="cn=search,dc=acme,dc=com")The Management Interfaces can authenticate against LDAP server instead of the property-file based security realms configured by default. The LDAP authenticator operates by first establishing a connection to the remote directory server. It then performs a search using the username which the user passed to the authentication system, to find the fully-qualified distinguished name (DN) of the LDAP record. A new connection is established, using the DN of the user as the credential, and password supplied by the user. If this authentication to the LDAP server is successful, the DN is verified to be valid.
- connection
- The name of the connection defined in
outbound-connectionsto use to connect to the LDAP directory. - advanced-filter
- The fully defined filter used to search for a user based on the supplied user ID. The filter must contain a variable in the following format:
{0}. This is later replaced with the user name supplied by the user. - base-dn
- The distinguished name of the context to begin searching for the user.
- recursive
- Whether the search should be recursive throughout the LDAP directory tree, or only search the specified context. Defaults to
false. - user-dn
- The attribute of the user that holds the distinguished name. This is subsequently used to test authentication as the user can complete. Defaults to
dn. - username-attribute
- The name of the attribute to search for the user. This filter performs a simple search where the user name entered by the user matches the specified attribute.
- allow-empty-passwords
- This attribute determines whether an empty password is accepted. The default value for this attribute is
false. - Either
username-filteroradvanced-filtermust be specified - The
advanced-filterattribute contains a filter query in the standard LDAP syntax, for example:(&(sAMAccountName={0})(memberOf=cn=admin,cn=users,dc=acme,dc=com))(&(sAMAccountName={0})(memberOf=cn=admin,cn=users,dc=acme,dc=com))Copy to Clipboard Copied! Toggle word wrap Toggle overflow
Example 5.11. XML Representing an LDAP-enabled Security Realm
- connection -
ldap_connection - base-dn -
cn=users,dc=acme,dc=com. - username-filter -
attribute="sambaAccountName"
Warning
Example 5.12. Add an LDAP Security Realm
/host=master/core-service=management/security-realm=ldap_security_realm/authentication=ldap:add(base-dn="DC=mycompany,DC=org", recursive=true, username-attribute="MyAccountName", connection="ldap_connection")
/host=master/core-service=management/security-realm=ldap_security_realm/authentication=ldap:add(base-dn="DC=mycompany,DC=org", recursive=true, username-attribute="MyAccountName", connection="ldap_connection")After you create a security realm, you need to reference it in the configuration of your management interface. The management interface will use the security realm for HTTP digest authentication.
Example 5.13. Apply the Security Realm to the HTTP Interface
/host=master/core-service=management/management-interface=http-interface/:write-attribute(name=security-realm,value=ldap_security_realm)
/host=master/core-service=management/management-interface=http-interface/:write-attribute(name=security-realm,value=ldap_security_realm)Example 5.14. Apply the Security Realm to the Native Interface
/host=master/core-service=management/management-interface=native-interface/:write-attribute(name=security-realm,value=ldap_security_realm)
/host=master/core-service=management/management-interface=native-interface/:write-attribute(name=security-realm,value=ldap_security_realm)5.11.3. Using Outbound LDAP with 2-way SSL in the Management Interface and CLI
- An LDAP-enabled security realm must be created. See Section 5.11.2, “Use LDAP to Authenticate to the Management Interfaces” for details on creating the security realm.
Procedure 5.4. Configure Outbound LDAP with 2-way SSL
- Configure the security realm keystore and truststore. The security realm must contain a keystore configured with the key that the JBoss EAP 6 server will use to authenticate against the LDAP server. The security realm must also contain a truststore configured with the LDAP server's certificates. See Section 5.9, “Using 2-way SSL for the Management interface and the CLI” for instructions on configuring keystores and truststores.
- Add the outbound connection to the LDAP server, specifying the configured security realm:
/core-service=management/ldap-connection=LocalLdap:add(url="ldaps://LDAP_HOST:LDAP_PORT") /core-service=management/ldap-connection=LocalLdap:write-attribute(name=security-realm,value="LdapSSLRealm")
/core-service=management/ldap-connection=LocalLdap:add(url="ldaps://LDAP_HOST:LDAP_PORT") /core-service=management/ldap-connection=LocalLdap:write-attribute(name=security-realm,value="LdapSSLRealm")Copy to Clipboard Copied! Toggle word wrap Toggle overflow - Configure LDAP authentication within the security realm and the management interfaces as shown in Section 5.11.2, “Use LDAP to Authenticate to the Management Interfaces”.
Chapter 6. Secure the Management Interfaces with Role-Based Access Control
6.1. About Role-Based Access Control (RBAC)
6.2. Role-Based Access Control in the Management Console and CLI
- The Management Console
- In the management console some controls and views are disabled (greyed out) or not visible at all depending on the permissions of the role to which the user has been assigned.If you do not have read permissions to a resource attribute, that attribute will appear blank in the console. For example, most roles cannot read the username and password fields for datasources.If you do not have write permissions to a resource attribute, that attribute will be disabled (greyed-out) in the edit form for the resource. If you do not have write permissions to the resource, then the edit button for the resource will not appear.If a user does not have permissions to access a resource or attribute (it is "unaddressable" for that role), it will not appear in the console for that user. An example of that is the access control system itself which is only visible to a few roles by default.
- The Management CLI or API
- Users of the Management CLI or management API will encounter slightly different behavior in the API when RBAC is enabled.Resources and attributes that cannot be read are filtered from results. If the filtered items are addressable by the role, their names are listed as
filtered-attributesin theresponse-headerssection of the result. If a resource or attribute is not addressable by the role, it is not listed.Attempting to access a resource that is not addressable will result in aresource not founderror.If a user attempts to write or read a resource that they can address but lack the appropriate write or read permissions, aPermission Deniederror is returned.
6.3. Supported Authentication Schemes
username/password, client certificate, and local user.
- Username/Password
- Users are authenticated using a username and password combination which is verified against either the
mgmt-users.propertiesfile, or an LDAP server. - Client Certificate
- Using the Trust Store.
- Local User
jboss-cli.shauthenticates automatically as Local User if the server that is running on the same machine. By default Local User is a member of theSuperUsergroup.
mgmt-users.properties file or an LDAP server, those systems can supply user group information. This information can also be used by JBoss EAP to assign roles to users.
6.4. The Standard Roles
- Monitor
- Users of the Monitor role have the fewest permissions and can only read the current configuration and state of the server. This role is intended for users who need to track and report on the performance of the server.Monitors cannot modify server configuration nor can they access sensitive data or operations.
- Operator
- The Operator role extends the Monitor role by adding the ability to modify the runtime state of the server. This means that Operators can reload and shutdown the server as well as pause and resume JMS destinations. The Operator role is ideal for users who are responsible for the physical or virtual hosts of the application server so they can ensure that servers can be shutdown and restarted corrected when needed.Operators cannot modify server configuration or access sensitive data or operations.
- Maintainer
- The Maintainer role has access to view and modify runtime state and all configuration except sensitive data and operations. The Maintainer role is the general purpose role that doesn't have access to sensitive data and operation. The Maintainer role allows users to be granted almost complete access to administer the server without giving those users access to passwords and other sensitive information.Maintainers cannot access sensitive data or operations.
- Administrator
- The Administrator role has unrestricted access to all resources and operations on the server except the audit logging system. The Administrator role has access to sensitive data and operations. This role can also configure the access control system. The Administrator role is only required when handling sensitive data or configuring users and roles.Administrators cannot access the audit logging system and cannot change themselves to the Auditor or SuperUser role.
- SuperUser
- The SuperUser role has no restrictions and has complete access to all resources and operations of the server including the audit logging system. This role is equivalent to the administrator users of earlier versions of JBoss EAP 6 (6.0 and 6.1). If RBAC is disabled, all management users have permissions equivalent to the SuperUser role.
- Deployer
- The Deployer role has the same permissions as the Monitor, but can modify configuration and state for deployments and any other resource type enabled as an application resource.
- Auditor
- The Auditor role has all the permissions of the Monitor role and can also view (but not modify) sensitive data, and has full access to the audit logging system. The Auditor role is the only role other than SuperUser that can access the audit logging system.Auditors cannot modify sensitive data or resources. Only read access is permitted.
6.5. About Role Permissions
|
Monitor
|
Operator
|
Maintainer
|
Deployer
|
Auditor
|
Administrator
|
SuperUser
| |
|
Read Config and State
|
X
|
X
|
X
|
X
|
X
|
X
|
X
|
|
Read Sensitive Data [2]
|
X
|
X
|
X
| ||||
|
Modify Sensitive Data [2]
|
X
|
X
| |||||
|
Read/Modify Audit Log
|
X
|
X
| |||||
|
Modify Runtime State
|
X
|
X
|
X[1]
|
X
|
X
| ||
|
Modify Persistent Config
|
X
|
X[1]
|
X
|
X
| |||
|
Read/Modify Access Control
|
X
|
X
|
6.6. About Constraints
- Application Constraints
- Application Constraints define sets of resources and attributes that can be accessed by users of the Deployer role. By default the only enabled Application Constraint is core which includes deployments, deployment overlays. Application Constraints are also included (but not enabled by default) for datasources, logging, mail, messaging, naming, resource-adapters and security. These constraints allow Deployer users to not only deploy applications but also configure and maintain the resources that are required by those applications.Application constraint configuration is in the Management API at
/core-service=management/access=authorization/constraint=application-classification. - Sensitivity Constraints
- Sensitivity Constraints define sets of resources that are considered "sensitive". A sensitive resource is generally one that is either secret, like a password, or one that will have serious impact on the operation of the server, like networking, JVM configuration, or system properties. The access control system itself is also considered sensitive.The only roles permitted to write to sensitive resources are Administrator and SuperUser. The Auditor role is only able to read sensitive resources. No other roles have access.Sensitivity constraint configuration is in the Management API at
/core-service=management/access=authorization/constraint=sensitivity-classification. - Vault Expression Constraint
- The Vault Expression constraint defines if reading or writing vault expressions is consider a sensitive operation. By default both reading and writing vault expressions is a sensitive operation.Vault Expression constraint configuration is in the Management API at
/core-service=management/access=authorization/constraint=vault-expression.
6.7. About JMX and Role-Based Access Control
- The Management API of JBoss EAP 6 is exposed as JMX Management Beans. These Management Beans are referred to as "core mbeans" and access to them is controlled and filtered exactly the same as the underlying Management API itself.
- The JMX subsystem is configured with write permissions being "sensitive". This means only users of the Administrator and SuperUser roles can make changes to that subsystem. Users of the Auditor role can also read this subsystem configuration.
- By default Management Beans registered by deployed applications and services (non-core mbeans) can be accessed by all management users, but only users of the Maintainer, Operator, Administrator, SuperUser roles can write to them.
6.8. Configuring Role-Based Access Control
6.8.1. Overview of RBAC Configuration Tasks
- View and configure what roles are assigned to (or excluded from) each user
- View and configure what roles are assigned to (or excluded from) each group
- View group and user membership per role.
- Configure default membership per role.
- Create a scoped role
- Enable and disable RBAC
- Change permission combination policy
- Configuring Application Resource and Resource Sensitivity Constraints
6.8.2. Enabling Role-Based Access Control
simple to rbac. This can be done using the Management CLI or by editing the server configuration XML file if the server is offline. When RBAC is disabled or enabled on a running server, the server configuration must be reloaded before it takes effect.
SuperUser role if it is run on the same machine as the server.
Procedure 6.1. Enabling RBAC
- To enable RBAC with the Management CLI, use the
write-attributeoperation of the access authorization resource to set the provider attribute torbac./core-service=management/access=authorization:write-attribute(name=provider, value=rbac)
/core-service=management/access=authorization:write-attribute(name=provider, value=rbac)Copy to Clipboard Copied! Toggle word wrap Toggle overflow Copy to Clipboard Copied! Toggle word wrap Toggle overflow
Procedure 6.2. Disabling RBAC
- To disable RBAC with the Management CLI, use the
write-attributeoperation of the access authorization resource to set the provider attribute tosimple./core-service=management/access=authorization:write-attribute(name=provider, value=simple)
/core-service=management/access=authorization:write-attribute(name=provider, value=simple)Copy to Clipboard Copied! Toggle word wrap Toggle overflow Copy to Clipboard Copied! Toggle word wrap Toggle overflow
provider attribute of the access-control element of the management element. Set the value to rbac to enable, and simple to disable.
6.8.3. Changing the Permission Combination Policy
permissive or rejecting. The default is permissive.
permissive, if any role is assigned to the user that permits an action, then the action is allowed.
rejecting, if multiple roles are assigned to a user, then no action is allowed. This means that when the policy is set to rejecting each user should only be assigned one role. Users with multiple roles will not be able to use the Management Console or the Management CLI when the policy is set to rejecting.
permission-combination-policy attribute to either permissive or rejecting. This can be done using the Management CLI or by editing the server configuration XML file if the server is offline.
Procedure 6.3. Set the Permission Combination Policy
- Use the
write-attributeoperation of the access authorization resource to set thepermission-combination-policyattribute to the required policy name./core-service=management/access=authorization:write-attribute(name=permission-combination-policy, value=POLICYNAME)
/core-service=management/access=authorization:write-attribute(name=permission-combination-policy, value=POLICYNAME)Copy to Clipboard Copied! Toggle word wrap Toggle overflow The valid policy names are rejecting and permissive.[standalone@localhost:9999 /] /core-service=management/access=authorization:write-attribute(name=permission-combination-policy, value=rejecting) {"outcome" => "success"} [standalone@localhost:9999 access=authorization][standalone@localhost:9999 /] /core-service=management/access=authorization:write-attribute(name=permission-combination-policy, value=rejecting) {"outcome" => "success"} [standalone@localhost:9999 access=authorization]Copy to Clipboard Copied! Toggle word wrap Toggle overflow
permission-combination-policy attribute of the access-control element.
6.9. Managing Roles
6.9.1. About Role Membership
- The user is:
- listed as a user to be included in the role, or
- a member of a group that is listed to be included in the role.
- The user is not:
- listed as a user to exclude from the role, or
- a member of a group that is listed to be excluded from the role.
6.9.2. Configure User Role Assignment
SuperUser or Administrator roles can perform this configuration.
- Login to the Management Console.
- Click on the tab.
- Expand the Access Control menu and select .
- Select the tab.
Procedure 6.4. Create a new role assignment for a user
- Login to the Management console.
- Navigate to the tab of the Role Assignment section.
- Click the button at the top right of the user list. Add User dialog appears.
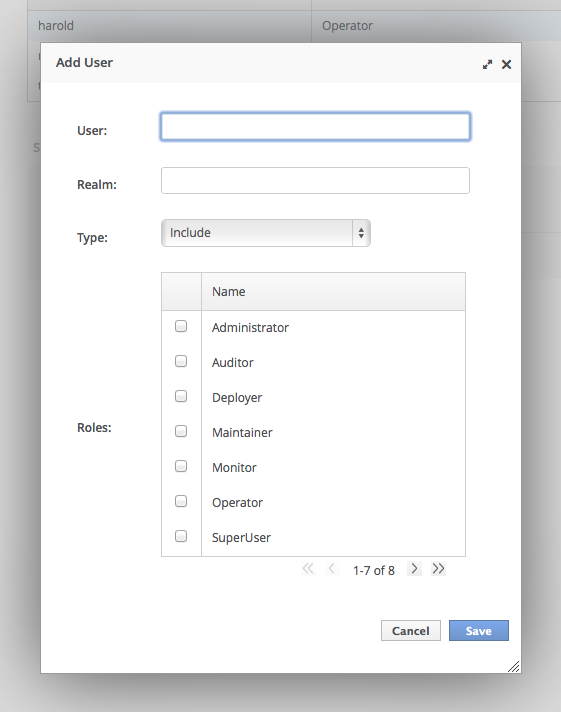
Figure 6.1. Add User Dialog
- Specify user name, and optionally realm.
- Set the type menu to include or exclude.
- Click the checkbox of the roles to include or exclude. To check multiple items, hold down the Control key (Command key on OSX).
- Click to finish.When successful, the Add User dialog closes, and the list of users is updated to reflect the changes made. If unsuccessful a
Failed to save role assignmentmessage is displayed.
Procedure 6.5. Update the role assignment for a user
- Login to the Management console.
- Navigate to the tab of the Role Assignment section.
- Select user from the list.
- Click . The selection panel enters edit mode.
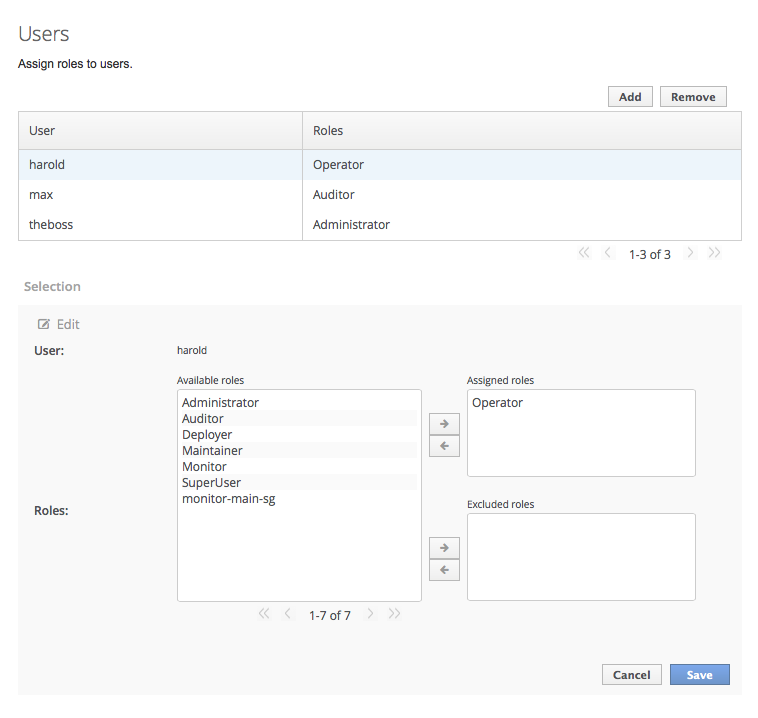
Figure 6.2. Selection Edit View
Here you can add and remove assigned and excluded roles for the user.- To add an assigned role, select the required role from the list of available roles on the left and click button with the right-facing arrow next to the assigned roles list. The role moves from the available list to the assigned list.
- To remove an assigned role, selected the required role from the assigned roles list on the right and click the button with the left-facing arrow next to the assigned roles list. The role moves from the assigned list to the available list.
- To add an excluded role, select the required role from the list of available roles on the left and click button with the right-facing arrow next to the excluded roles list. The role moves from the available list to the excluded list.
- To remove an excluded role, selected the required role from the excluded roles list on the right and click the button with the left-facing arrow next to the excluded roles list. The role moves from the excluded list to the available list.
- Click to finish.When successful, the edit view closes, and the list of users is updated to reflect the changes made. If unsuccessful a
Failed to save role assignmentmessage is displayed.
Procedure 6.6. Remove role assignment for a user
- Login to the Management console.
- Navigate to the tab of the Role Assignment section.
- Select the user from the list.
- Click . The Remove Role Assignment confirmation prompt appears.
- Click .When successful, the user will no longer appear in the list of user role assignments.
Important
6.9.3. Configure User Role Assignment using the Management CLI
/core-service=management/access=authorization as role-mapping elements.
/core-service=management/access=authorization location:
[standalone@localhost:9999] cd /core-service=management/access=authorization
[standalone@localhost:9999] cd /core-service=management/access=authorizationProcedure 6.7. Viewing Role Assignment Configuration
- Use the :read-children-names operation to get a complete list of the configured roles:
/core-service=management/access=authorization:read-children-names(child-type=role-mapping)
/core-service=management/access=authorization:read-children-names(child-type=role-mapping)Copy to Clipboard Copied! Toggle word wrap Toggle overflow Copy to Clipboard Copied! Toggle word wrap Toggle overflow - Use the
read-resourceoperation of a specified role-mapping to get the full details of a specific role:/core-service=management/access=authorization/role-mapping=ROLENAME:read-resource(recursive=true)
/core-service=management/access=authorization/role-mapping=ROLENAME:read-resource(recursive=true)Copy to Clipboard Copied! Toggle word wrap Toggle overflow Copy to Clipboard Copied! Toggle word wrap Toggle overflow
Procedure 6.8. Add a new role
- Use the
addoperation to add a new role configuration./core-service=management/access=authorization/role-mapping=ROLENAME:add
/core-service=management/access=authorization/role-mapping=ROLENAME:addCopy to Clipboard Copied! Toggle word wrap Toggle overflow ROLENAME is the name of the role that the new mapping is for.[standalone@localhost:9999 access=authorization] ./role-mapping=Auditor:add {"outcome" => "success"} [standalone@localhost:9999 access=authorization][standalone@localhost:9999 access=authorization] ./role-mapping=Auditor:add {"outcome" => "success"} [standalone@localhost:9999 access=authorization]Copy to Clipboard Copied! Toggle word wrap Toggle overflow
Procedure 6.9. Add a user as included in a role
- Use the
addoperation to add a user entry to the includes list of the role./core-service=management/access=authorization/role-mapping=ROLENAME/include=ALIAS:add(name=USERNAME, type=USER)
/core-service=management/access=authorization/role-mapping=ROLENAME/include=ALIAS:add(name=USERNAME, type=USER)Copy to Clipboard Copied! Toggle word wrap Toggle overflow ROLENAME is the name of the role being configured.ALIASis a unique name for this mapping. Red Hat recommends that you use a naming convention for your aliases such asuser-USERNAME.USERNAME is the name of the user being added to the include list.[standalone@localhost:9999 access=authorization] ./role-mapping=Auditor/include=user-max:add(name=max, type=USER) {"outcome" => "success"} [standalone@localhost:9999 access=authorization][standalone@localhost:9999 access=authorization] ./role-mapping=Auditor/include=user-max:add(name=max, type=USER) {"outcome" => "success"} [standalone@localhost:9999 access=authorization]Copy to Clipboard Copied! Toggle word wrap Toggle overflow
Procedure 6.10. Add a user as excluded in a role
- Use the
addoperation to add a user entry to the excludes list of the role./core-service=management/access=authorization/role-mapping=ROLENAME/exclude=ALIAS:add(name=USERNAME, type=USER)
/core-service=management/access=authorization/role-mapping=ROLENAME/exclude=ALIAS:add(name=USERNAME, type=USER)Copy to Clipboard Copied! Toggle word wrap Toggle overflow ROLENAME is the name of the role being configured.USERNAME is the name of the user being added to the exclude list.ALIASis a unique name for this mapping. Red Hat recommends that you use a naming convention for your aliases such asuser-USERNAME.[standalone@localhost:9999 access=authorization] ./role-mapping=Auditor/exclude=user-max:add(name=max, type=USER) {"outcome" => "success"} [standalone@localhost:9999 access=authorization][standalone@localhost:9999 access=authorization] ./role-mapping=Auditor/exclude=user-max:add(name=max, type=USER) {"outcome" => "success"} [standalone@localhost:9999 access=authorization]Copy to Clipboard Copied! Toggle word wrap Toggle overflow
Procedure 6.11. Remove user role include configuration
- Use the
removeoperation to remove the entry./core-service=management/access=authorization/role-mapping=ROLENAME/include=ALIAS:remove
/core-service=management/access=authorization/role-mapping=ROLENAME/include=ALIAS:removeCopy to Clipboard Copied! Toggle word wrap Toggle overflow ROLENAME is the name of the role being configuredALIASis a unique name for this mapping. Red Hat recommends that you use a naming convention for your aliases such asuser-USERNAME.[standalone@localhost:9999 access=authorization] ./role-mapping=Auditor/include=user-max:remove {"outcome" => "success"} [standalone@localhost:9999 access=authorization][standalone@localhost:9999 access=authorization] ./role-mapping=Auditor/include=user-max:remove {"outcome" => "success"} [standalone@localhost:9999 access=authorization]Copy to Clipboard Copied! Toggle word wrap Toggle overflow Removing the user from the list of includes does not remove the user from the system, nor does it guarantee that the role won't be assigned to the user. The role might still be assigned based on group membership.
Procedure 6.12. Remove user role exclude configuration
- Use the
removeoperation to remove the entry./core-service=management/access=authorization/role-mapping=ROLENAME/exclude=ALIAS:remove
/core-service=management/access=authorization/role-mapping=ROLENAME/exclude=ALIAS:removeCopy to Clipboard Copied! Toggle word wrap Toggle overflow ROLENAME is the name of the role being configured.ALIASis a unique name for this mapping. Red Hat recommends that you use a naming convention for your aliases such asuser-USERNAME.[standalone@localhost:9999 access=authorization] ./role-mapping=Auditor/exclude=user-max:remove {"outcome" => "success"} [standalone@localhost:9999 access=authorization][standalone@localhost:9999 access=authorization] ./role-mapping=Auditor/exclude=user-max:remove {"outcome" => "success"} [standalone@localhost:9999 access=authorization]Copy to Clipboard Copied! Toggle word wrap Toggle overflow Removing the user from the list of excludes does not remove the user from the system, nor does it guarantee the role will be assigned to the user. Roles might still be excluded based on group membership.
6.9.4. About Roles and User Groups
mgmt-users.properties file or an LDAP server, can be members of user groups. A user group is an arbitrary label that can be assigned to one or more users.
mgmt-users.properties file, group information is stored in the mgmt-groups.properties file. When using LDAP the group information is stored in the LDAP sever and maintained by those responsible for the LDAP server.
6.9.5. Configure Group Role Assignment
SuperUser or Administrator roles can perform this configuration.
- Login to the Management Console.
- Click on the tab.
- Expand the menu and select .
- Select the tab.
Procedure 6.13. Create a new role assignment for a group
- Login to the Management console
- Navigate to the tab of the Role Assignment section.
- Click the button at the top right of the user list. Add Group dialog appears.
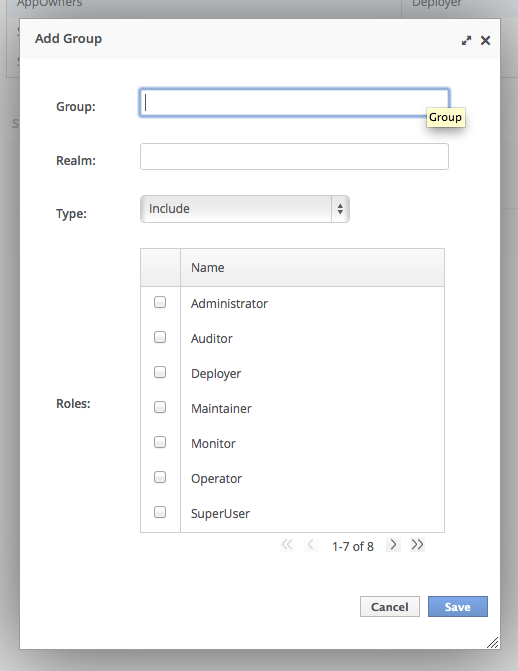
Figure 6.3. Add Group Dialog
- Specify the group name, and optionally the realm.
- Set the type menu to include or exclude.
- Click the checkbox of the roles to include or exclude. To check multiple items, hold down the Control key (Command key on OSX).
- Click to finish.When successful, the Add Group dialog closes, and the list of groups is updated to reflect the changes made. If unsuccessful a
Failed to save role assignmentmessage is displayed.
Procedure 6.14. Update a role assignment for a group
- Login to the Management console.
- Navigate to the tab of the Role Assignment section.
- Select the group from the list.
- Click Edit. The Selection view enters Edit mode.
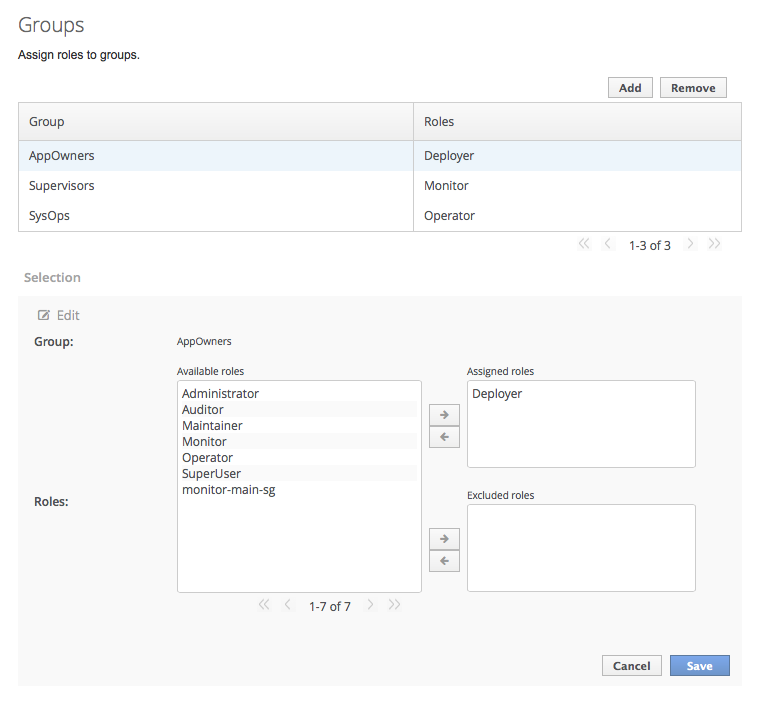
Figure 6.4. Selection View Edit Mode
Here you can add and remove assigned and excluded roles from the group:- To add assigned role, select the required role from the list of available roles on the left and click button with the right-facing arrow next to the assigned roles list. The role moves from the available list to the assigned list.
- To remove an assigned role, selected the required role from the assigned roles list on the right and click the button with the left-facing arrow next to the assigned roles list. The role moves from the assigned list to the available list.
- To add an excluded role, select the required role from the list of available roles on the left and click button with the right-facing arrow next to the excluded roles list. The role moves from the available list to the excluded list.
- To remove an excluded role, selected the required role from the excluded roles list on the right and click the button with the left-facing arrow next to the excluded roles list. The role moves from the excluded list to the available list.
- Click to finish.When successful, the edit view closes, and the list of groups is updated to reflect the changes made. If unsuccessful a message is displayed.
Procedure 6.15. Remove role assignment for a group
- Login to the Management console.
- Navigate to the tab of the section.
- Select the group from the list.
- Click . The Remove Role Assignment confirmation prompt appears.
- Click .When successful, the role will no longer appear in the list of group role assignments.Removing the group from the list of role assignments does not remove the user group from the system, nor does it guarantee that no roles will be assigned to members of that group. Each group member might still have a role assigned to them directly.
6.9.6. Configure Group Role Assignment using the Management CLI
/core-service=management/access=authorization as role-mapping elements.
/core-service=management/access=authorization location:
[standalone@localhost:9999] cd /core-service=management/access=authorization
[standalone@localhost:9999] cd /core-service=management/access=authorizationProcedure 6.16. Viewing Group Role Assignment Configuration
- Use the
read-children-namesoperation to get a complete list of the configured roles:/core-service=management/access=authorization:read-children-names(child-type=role-mapping)
/core-service=management/access=authorization:read-children-names(child-type=role-mapping)Copy to Clipboard Copied! Toggle word wrap Toggle overflow Copy to Clipboard Copied! Toggle word wrap Toggle overflow - Use the
read-resourceoperation of a specified role-mapping to get the full details of a specific role:/core-service=management/access=authorization/role-mapping=ROLENAME:read-resource(recursive=true)
/core-service=management/access=authorization/role-mapping=ROLENAME:read-resource(recursive=true)Copy to Clipboard Copied! Toggle word wrap Toggle overflow Copy to Clipboard Copied! Toggle word wrap Toggle overflow
Procedure 6.17. Add a new role
- Use the
addoperation to add a new role configuration./core-service=management/access=authorization/role-mapping=ROLENAME:add
/core-service=management/access=authorization/role-mapping=ROLENAME:addCopy to Clipboard Copied! Toggle word wrap Toggle overflow [standalone@localhost:9999 access=authorization] ./role-mapping=Auditor:add {"outcome" => "success"} [standalone@localhost:9999 access=authorization][standalone@localhost:9999 access=authorization] ./role-mapping=Auditor:add {"outcome" => "success"} [standalone@localhost:9999 access=authorization]Copy to Clipboard Copied! Toggle word wrap Toggle overflow
Procedure 6.18. Add a Group as included in a role
- Use the
addoperation to add a Group entry to the includes list of the role./core-service=management/access=authorization/role-mapping=ROLENAME/include=ALIAS:add(name=GROUPNAME, type=GROUP)
/core-service=management/access=authorization/role-mapping=ROLENAME/include=ALIAS:add(name=GROUPNAME, type=GROUP)Copy to Clipboard Copied! Toggle word wrap Toggle overflow ROLENAME is the name of the role being configured.GROUPNAME is the name of the group being added to the include list.ALIASis a unique name for this mapping. Red Hat recommends that you use a naming convention for your aliases such asgroup-GROUPNAME.[standalone@localhost:9999 access=authorization] ./role-mapping=Auditor/include=group-investigators:add(name=investigators, type=GROUP) {"outcome" => "success"} [standalone@localhost:9999 access=authorization][standalone@localhost:9999 access=authorization] ./role-mapping=Auditor/include=group-investigators:add(name=investigators, type=GROUP) {"outcome" => "success"} [standalone@localhost:9999 access=authorization]Copy to Clipboard Copied! Toggle word wrap Toggle overflow
Procedure 6.19. Add a group as excluded in a role
- Use the
addoperation to add a group entry to the excludes list of the role./core-service=management/access=authorization/role-mapping=ROLENAME/exclude=ALIAS:add(name=GROUPNAME, type=GROUP)
/core-service=management/access=authorization/role-mapping=ROLENAME/exclude=ALIAS:add(name=GROUPNAME, type=GROUP)Copy to Clipboard Copied! Toggle word wrap Toggle overflow ROLENAME is the name of the role being configuredGROUPNAME is the name of the group being added to the include listALIASis a unique name for this mapping. Red Hat recommends that you use a naming convention for your aliases such asgroup-GROUPNAME.[standalone@localhost:9999 access=authorization] ./role-mapping=Auditor/exclude=group-supervisors:add(name=supervisors, type=GROUP) {"outcome" => "success"} [standalone@localhost:9999 access=authorization][standalone@localhost:9999 access=authorization] ./role-mapping=Auditor/exclude=group-supervisors:add(name=supervisors, type=GROUP) {"outcome" => "success"} [standalone@localhost:9999 access=authorization]Copy to Clipboard Copied! Toggle word wrap Toggle overflow
Procedure 6.20. Remove group role include configuration
- Use the
removeoperation to remove the entry./core-service=management/access=authorization/role-mapping=ROLENAME/include=ALIAS:remove
/core-service=management/access=authorization/role-mapping=ROLENAME/include=ALIAS:removeCopy to Clipboard Copied! Toggle word wrap Toggle overflow ROLENAME is the name of the role being configuredALIASis a unique name for this mapping. Red Hat recommends that you use a naming convention for your aliases such asgroup-GROUPNAME.[standalone@localhost:9999 access=authorization] ./role-mapping=Auditor/include=group-investigators:remove {"outcome" => "success"} [standalone@localhost:9999 access=authorization][standalone@localhost:9999 access=authorization] ./role-mapping=Auditor/include=group-investigators:remove {"outcome" => "success"} [standalone@localhost:9999 access=authorization]Copy to Clipboard Copied! Toggle word wrap Toggle overflow Removing the group from the list of includes does not remove the group from the system, nor does it guarantee that the role won't be assigned to users in this group. The role might still be assigned to users in the group individually.
Procedure 6.21. Remove a user group exclude entry
- Use the
removeoperation to remove the entry./core-service=management/access=authorization/role-mapping=ROLENAME/exclude=ALIAS:remove
/core-service=management/access=authorization/role-mapping=ROLENAME/exclude=ALIAS:removeCopy to Clipboard Copied! Toggle word wrap Toggle overflow ROLENAME is the name of the role being configured.ALIASis a unique name for this mapping. Red Hat recommends that you use a naming convention for your aliases such asgroup-GROUPNAME.[standalone@localhost:9999 access=authorization] ./role-mapping=Auditor/exclude=group-supervisors:remove {"outcome" => "success"} [standalone@localhost:9999 access=authorization][standalone@localhost:9999 access=authorization] ./role-mapping=Auditor/exclude=group-supervisors:remove {"outcome" => "success"} [standalone@localhost:9999 access=authorization]Copy to Clipboard Copied! Toggle word wrap Toggle overflow Removing the group from the list of excludes does not remove the group from the system. It also does not guarantee the role will be assigned to members of the group. Roles might still be excluded based on group membership.
6.9.7. About Authorization and Group Loading with LDAP
memberOf attributes; a group entity may map which users belong to it through uniqueMember attributes; or both mappings may be maintained by the LDAP server.
force attribute is set to "false". When force is true, the search is performed again during authorization (while loading groups). This is typically done when different servers perform authentication and authorization.
Important
force attribute. It is required, even when set to the default value of false.
username-to-dn
username-to-dn element specifies how to map the user name to the distinguished name of their entry in the LDAP directory. This element is only required when both of the following are true:
- The authentication and authorization steps are against different LDAP servers.
- The group search uses the distinguished name.
- 1:1 username-to-dn
- This specifies that the user name entered by the remote user is the user's distinguished name.
<username-to-dn force="false"> <username-is-dn /> </username-to-dn>
<username-to-dn force="false"> <username-is-dn /> </username-to-dn>Copy to Clipboard Copied! Toggle word wrap Toggle overflow This defines a 1:1 mapping and there is no additional configuration. - username-filter
- The next option is very similar to the simple option described above for the authentication step. A specified attribute is searched for a match against the supplied user name.
<username-to-dn force="true"> <username-filter base-dn="dc=people,dc=harold,dc=example,dc=com" recursive="false" attribute="sn" user-dn-attribute="dn" /> </username-to-dn><username-to-dn force="true"> <username-filter base-dn="dc=people,dc=harold,dc=example,dc=com" recursive="false" attribute="sn" user-dn-attribute="dn" /> </username-to-dn>Copy to Clipboard Copied! Toggle word wrap Toggle overflow The attributes that can be set here are:base-dn: The distinguished name of the context to begin the search.recursive: Whether the search will extend to sub contexts. Defaults tofalse.attribute: The attribute of the users entry to try and match against the supplied user name. Defaults touid.user-dn-attribute: The attribute to read to obtain the users distinguished name. Defaults todn.
- advanced-filter
- The final option is to specify an advanced filter, as in the authentication section this is an opportunity to use a custom filter to locate the users distinguished name.
<username-to-dn force="true"> <advanced-filter base-dn="dc=people,dc=harold,dc=example,dc=com" recursive="false" filter="sAMAccountName={0}" user-dn-attribute="dn" /> </username-to-dn><username-to-dn force="true"> <advanced-filter base-dn="dc=people,dc=harold,dc=example,dc=com" recursive="false" filter="sAMAccountName={0}" user-dn-attribute="dn" /> </username-to-dn>Copy to Clipboard Copied! Toggle word wrap Toggle overflow For the attributes that match those in the username-filter example, the meaning and default values are the same. There is one new attribute:filter: Custom filter used to search for a user's entry where the user name will be substituted in the{0}place holder.
Important
The XML must remain valid after the filter is defined so if any special characters are used such as&ensure the proper form is used. For example&for the&character.
The Group Search
Example 6.1. Principal to Group - LDIF example.
TestUserOne who is a member of GroupOne, GroupOne is in turn a member of GroupFive. The group membership is shown by the use of a memberOf attribute which is set to the distinguished name of the group of which the user (or group) is a member.
memberOf attributes set, one for each group of which the user is directly a member.
Example 6.2. Group to Principal - LDIF Example
TestUserOne who is a member of GroupOne which is in turn a member of GroupFive - however in this case it is an attribute uniqueMember from the group to the user being used for the cross reference.
General Group Searching
<group-search group-name="..." iterative="..." group-dn-attribute="..." group-name-attribute="..." >
...
</group-search>
<group-search group-name="..." iterative="..." group-dn-attribute="..." group-name-attribute="..." >
...
</group-search>group-name: This attribute is used to specify the form that should be used for the group name returned as the list of groups of which the user is a member. This can either be the simple form of the group name or the group's distinguished name. If the distinguished name is required this attribute can be set toDISTINGUISHED_NAME. Defaults toSIMPLE.iterative: This attribute is used to indicate if, after identifying the groups a user is a member of, we should also iteratively search based on the groups to identify which groups the groups are a member of. If iterative searching is enabled we keep going until either we reach a group that is not a member if any other groups or a cycle is detected. Defaults tofalse.
Important
group-dn-attribute: On an entry for a group which attribute is its distinguished name. Defaults todn.group-name-attribute: On an entry for a group which attribute is its simple name. Defaults touid.
Example 6.3. Principal to Group Example Configuration
memberOf attribute on the user.
principal-to-group element has been added with a single attribute.
group-attribute: The name of the attribute on the user entry that matches the distinguished name of the group the user is a member of. Defaults tomemberOf.
Example 6.4. Group to Principal Example Configuration
group-to-principal is added. This element is used to define how searches for groups that reference the user entry will be performed. The following attributes are set:
base-dn: The distinguished name of the context to use to begin the search.recursive: Whether sub-contexts also be searched. Defaults tofalse.search-by: The form of the role name used in searches. Valid values areSIMPLEandDISTINGUISHED_NAME. Defaults toDISTINGUISHED_NAME.
principal-attribute: The name of the attribute on the group entry that references the user entry. Defaults tomember.
6.9.8. About Scoped Roles
- A unique name.
- Which of the standard roles it is based on.
- If it applies to Server Groups or Hosts
- The list of server groups or hosts that it is restricted to.
- If all users are automatically include. This defaults to false.
- Host-scoped roles
- A role that is host-scoped restricts the permissions of that role to one or more hosts. This means access is provided to the relevant
/host=*/resource trees but resources that are specific to other hosts are hidden. - Server-Group-scoped roles
- A role that is server-group-scoped restricts the permissions of that role to one or more server groups. Additionally the role permissions will also apply to the profile, socket binding group, server config and server resources that are associated with the specified server-groups. Any sub-resources within any of those that are not logically related to the server-group will not be visible to the user.
6.9.9. Creating Scoped Roles
SuperUser or Administrator roles can perform this configuration.
- Login to the Management Console
- Click on the tab
- Expand the menu and select .
- Select tab, and then the tab within it.
Procedure 6.22. Add a New Scoped Role
- Login to the Management Console
- Navigate to the area of the tab.
- Click . The Add Scoped Role dialog appears.
- Specify the following details:
- Name, the unique name for the new scoped role.
- Base Role, the role which this role will base its permissions on.
- Type, whether this role will be restricted to hosts or server groups.
- Scope, the list of hosts or server groups that the role is restricted to. Multiple entries can be selected.
- Include All, should this role automatically include all users. Defaults to no.
- Click and the dialog will close and the newly created role will appear in the table.
Procedure 6.23. Edit a Scoped Role
- Login to the Management Console
- Navigate to the area of the tab.
- Click on the scoped role you want to edit in the table. The details of that role appears in the Selection panel below the table.
- Click in the Selection panel. The Selection panel enters edit mode.
- Update the details you need to change and click the button. The Selection panel returns to its previous state. Both the Selection panel and table show the newly updated details.
Procedure 6.24. View Scoped Role Members
- Login to the Management Console
- Navigate to the Scoped Roles area of the tab.
- Click on the scoped role in the table that you want to view the of, then click . The dialog appears. It shows users and groups that are included or excluded from the role.
- Click when you have finished reviewing this information.
Procedure 6.25. Delete a Scoped Role
Important
- Login to the Management Console
- Navigate to the area of the tab.
- Select the scoped role to be removed in the table.
- Click the button. The Remove Scoped Role dialog appears.
- Click .The dialog closes and the role is removed.
6.10. Configuring Constraints
6.10.1. Configure Sensitivity Constraints
/core-service=management/access=authorization/constraint=sensitivity-classification.
classification. The classifications are then grouped into types. There are 39 included classifications that are arranged into 13 types.
write-attribute operation to set the configured-requires-read, configured-requires-write, or configured-requires-addressable attribute. To make that type of operation sensitive set the value of the attribute to true, otherwise to make it nonsensitive set it to false. By default these attributes are not set and the values of default-requires-read, default-requires-write, and default-requires-addressable are used. Once the configured attribute is set it is that value that is used instead of the default. The default values cannot be changed.
Example 6.5. Make reading system properties a sensitive operation
| Value | requires-read | requires-write | requires-addressable |
|---|---|---|---|
true
|
Read is sensitive.
Only
Auditor, Administrator, SuperUser can read.
|
Write is sensitive.
Only
Administrator and SuperUser can write
|
Addressing is sensitive.
Only
Auditor, Administrator, SuperUser can address.
|
false
|
Read is not sensitive.
Any management user can read.
|
Write is not sensitive.
Only
Maintainer, Administrator and SuperUser can write. Deployers can also write the resource is an application resource.
|
Addressing is not sensitive.
Any management user can address.
|
6.10.2. Configure Application Resource Constraints
/core-service=management/access=authorization/constraint=application-classification/.
classification. The classifications are then grouped into types. There are 14 included classifications that are arranged into 8 types. Each classification has an applies-to element which is a list of resource path patterns to which the classifications configuration applies.
core. Core includes deployments, deployment overlays, and the deployment operations.
write-attribute operation to set the configured-application attribute of the classification to true. To disable an Application Resource, set this attribute to false. By default these attributes are not set and the value of default-application attribute is used. The default value cannot be changed.
Example 6.6. Enabling the logger-profile application resource classification
Important
Deployer user access to one datasource resource but not another. If this level of separation is required then it is recommended to configure the resources in different server groups and create different scoped Deployer roles for each group.
6.10.3. Configure the Vault Expression Constraint
/core-service=management/access=authorization/constraint=vault-expression.
write-attribute operation to set the attributes of configured-requires-write and configured-requires-read to true or false. By default these are not set and the values of default-requires-read and default-requires-write are used. The default values cannot be changed.
Example 6.7. Making writing to vault expressions a nonsensitive operation
| Value | requires-read | requires-write |
|---|---|---|
true
|
Read operation is sensitive.
Only
Auditor, Administrator, and SuperUser can read.
|
Write operation is sensitive.
Only
Administrator, and SuperUser can write.
|
false
|
Read operation is not sensitive.
All management users can read.
|
Write operation is not sensitive.
Monitor, Administrator, and SuperUser can write. Deployers can also write if the vault expression is in an Application Resource.
|
6.11. Constraints Reference
6.11.1. Application Resource Constraints Reference
Type: core
- Classification: deployment-overlay
- default: true
- PATH: /deployment-overlay=*
- PATH: /deployment=*
- PATH: /Operation:upload-deployment-stream, full-replace-deployment, upload-deployment-url, upload-deployment-bytes
Type: datasources
- Classification: datasource
- default: false
- PATH: /deployment=*/subdeployment=*/subsystem=datasources/data-source=*
- PATH: /subsystem=datasources/data-source=*
- PATH: /subsystem=datasources/data-source=ExampleDS
- PATH: /deployment=*/subsystem=datasources/data-source=*
- Classification: jdbc-driver
- default: false
- PATH: /subsystem=datasources/jdbc-driver=*
- Classification: xa-data-source
- default: false
- PATH: /subsystem=datasources/xa-data-source=*
- PATH: /deployment=*/subsystem=datasources/xa-data-source=*
- PATH: /deployment=*/subdeployment=*/subsystem=datasources/xa-data-source=*
Type: logging
- Classification: logger
- default: false
- PATH: /subsystem=logging/logger=*
- PATH: /subsystem=logging/logging-profile=*/logger=*
- Classification: logging-profile
- default: false
- PATH: /subsystem=logging/logging-profile=*
Type: mail
- Classification: mail-session
- default: false
- PATH: /subsystem=mail/mail-session=*
Type: naming
- Classification: binding
- default: false
- PATH: /subsystem=naming/binding=*
Type: resource-adapters
- Classification: resource-adapters
- default: false
- PATH: /subsystem=resource-adapters/resource-adapter=*
Type: security
- Classification: security-domain
- default: false
- PATH: /subsystem=security/security-domain=*
6.11.2. Sensitivity Constraints Reference
Type: core
- Classification: access-control
- requires-addressable: true
- requires-read: true
- requires-write: true
- PATH: /core-service=management/access=authorization
- PATH: /subsystem=jmx ATTRIBUTE: non-core-mbean-sensitivity
- Classification: credential
- requires-addressable: false
- requires-read: true
- requires-write: true
- PATH: /subsystem=mail/mail-session=*/server=pop3 ATTRIBUTE: username , password
- PATH: /subsystem=mail/mail-session=*/server=imap ATTRIBUTE: username , password
- PATH: /subsystem=datasources/xa-data-source=* ATTRIBUTE: user-name, recovery-username, password, recovery-password
- PATH: /subsystem=mail/mail-session=*/custom=* ATTRIBUTE: username, password
- PATH: /subsystem=datasources/data-source=*" ATTRIBUTE: user-name, password
- PATH: /subsystem=remoting/remote-outbound-connection=*" ATTRIBUTE: username
- PATH: /subsystem=mail/mail-session=*/server=smtp ATTRIBUTE: username, password
- PATH: /subsystem=web/connector=*/configuration=ssl ATTRIBUTE: key-alias, password
- PATH: /subsystem=resource-adapters/resource-adapter=*/connection-definitions=*" ATTRIBUTE: recovery-username, recovery-password
- Classification: domain-controller
- requires-addressable: false
- requires-read: false
- requires-write: true
- Classification: domain-names
- requires-addressable: false
- requires-read: false
- requires-write: true
- Classification: extensions
- requires-addressable: false
- requires-read: false
- requires-write: true
- PATH: /extension=*
- Classification: jvm
- requires-addressable: false
- requires-read: false
- requires-write: true
- PATH: /core-service=platform-mbean/type=runtime ATTRIBUTE: input-arguments, boot-class-path, class-path, boot-class-path-supported, library-path
- Classification: management-interfaces
- requires-addressable: false
- requires-read: false
- requires-write: true
- /core-service=management/management-interface=native-interface
- /core-service=management/management-interface=http-interface
- Classification: module-loading
- requires-addressable: false
- requires-read: false
- requires-write: true
- PATH: /core-service=module-loading
- Classification: patching
- requires-addressable: false
- requires-read: false
- requires-write: true
- PATH: /core-service=patching/addon=*
- PATH: /core-service=patching/layer=*"
- PATH: /core-service=patching
- Classification: read-whole-config
- requires-addressable: false
- requires-read: true
- requires-write: true
- PATH: / OPERATION: read-config-as-xml
- Classification: security-domain
- requires-addressable: true
- requires-read: true
- requires-write: true
- PATH: /subsystem=security/security-domain=*
- Classification: security-domain-ref
- requires-addressable: true
- requires-read: true
- requires-write: true
- PATH: /subsystem=datasources/xa-data-source=* ATTRIBUTE: security-domain
- PATH: /subsystem=datasources/data-source=* ATTRIBUTE: security-domain
- PATH: /subsystem=ejb3 ATTRIBUTE: default-security-domain
- PATH: /subsystem=resource-adapters/resource-adapter=*/connection-definitions=* ATTRIBUTE: security-domain, recovery-security-domain, security-application, security-domain-and-application
- Classification: security-realm
- requires-addressable: true
- requires-read: true
- requires-write: true
- PATH: /core-service=management/security-realm=*
- Classification: security-realm-ref
- requires-addressable: true
- requires-read: true
- requires-write: true
- PATH: /subsystem=remoting/connector=* ATTRIBUTE: security-realm
- PATH: /core-service=management/management-interface=native-interface ATTRIBUTE: security-realm
- PATH: /core-service=management/management-interface=http-interface ATTRIBUTE: security-realm
- PATH: /subsystem=remoting/remote-outbound-connection=* ATTRIBUTE: security-realm
- Classification: security-vault
- requires-addressable: false
- requires-read: false
- requires-write: true
- PATH: /core-service=vault
- Classification: service-container
- requires-addressable: false
- requires-read: false
- requires-write: true
- PATH: /core-service=service-container
- Classification: snapshots
- requires-addressable: false
- requires-read: false
- requires-write: false
- PATH: / ATTRIBUTE: take-snapshot, list-snapshots, delete-snapshot
- Classification: socket-binding-ref
- requires-addressable: false
- requires-read: false
- requires-write: false
- PATH: /subsystem=mail/mail-session=*/server=pop3 ATTRIBUTE: outbound-socket-binding-ref
- PATH: /subsystem=mail/mail-session=*/server=imap ATTRIBUTE: outbound-socket-binding-ref
- PATH: /subsystem=remoting/connector=* ATTRIBUTE: socket-binding
- PATH: /subsystem=web/connector=* ATTRIBUTE: socket-binding
- PATH: /subsystem=remoting/local-outbound-connection=* ATTRIBUTE: outbound-socket-binding-ref
- PATH: /socket-binding-group=*/local-destination-outbound-socket-binding=* ATTRIBUTE: socket-binding-ref
- PATH: /subsystem=remoting/remote-outbound-connection=* ATTRIBUTE: outbound-socket-binding-ref
- PATH: /subsystem=mail/mail-session=*/server=smtp ATTRIBUTE: outbound-socket-binding-ref
- PATH: /subsystem=transactions ATTRIBUTE: process-id-socket-binding, status-socket-binding, socket-binding
- Classification: socket-config
- requires-addressable: false
- requires-read: false
- requires-write: true
- PATH: /interface=* OPERATION: resolve-internet-address
- PATH: /core-service=management/management-interface=native-interface ATTRIBUTE: port, interface, socket-binding
- PATH: /socket-binding-group=*
- PATH: /core-service=management/management-interface=http-interface ATTRIBUTE: port, secure-port, interface, secure-socket-binding, socket-binding
- PATH: / OPERATION: resolve-internet-address
- PATH: /subsystem=transactions ATTRIBUTE: process-id-socket-max-ports
- Classification: system-property
- requires-addressable: false
- requires-read: false
- requires-write: true
- PATH: /core-service=platform-mbean/type=runtime ATTRIBUTE: system-properties
- PATH: /system-property=*
- PATH: / OPERATION: resolve-expression
Type: datasources
- Classification: data-source-security
- requires-addressable: false
- requires-read: true
- requires-write: true
- PATH: /subsystem=datasources/xa-data-source=* ATTRIBUTE: user-name, security-domain, password
- PATH: /subsystem=datasources/data-source=* ATTRIBUTE: user-name, security-domain, password
Type: jdr
- Classification: jdr
- requires-addressable: false
- requires-read: false
- requires-write: true
- PATH: /subsystem=jdr OPERATION: generate-jdr-report
Type: jmx
- Classification: jmx
- requires-addressable: false
- requires-read: false
- requires-write: true
- PATH: /subsystem=jmx
Type: mail
- Classification: mail-server-security
- requires-addressable: false
- requires-read: false
- requires-write: true
- PATH: /subsystem=mail/mail-session=*/server=pop3 ATTRIBUTE: username, tls, ssl, password
- PATH: /subsystem=mail/mail-session=*/server=imap ATTRIBUTE: username, tls, ssl, password
- PATH: /subsystem=mail/mail-session=*/custom=* ATTRIBUTE: username, tls, ssl, password
- PATH: /subsystem=mail/mail-session=*/server=smtp ATTRIBUTE: username, tls, ssl, password
Type: naming
- Classification: jndi-view
- requires-addressable: false
- requires-read: true
- requires-write: true
- PATH: /subsystem=naming OPERATION: jndi-view
- Classification: naming-binding
- requires-addressable: false
- requires-read: false
- requires-write: false
- PATH: /subsystem=naming/binding=*
Type: remoting
- Classification: remoting-security
- requires-addressable: false
- requires-read: true
- requires-write: true
- PATH: /subsystem=remoting/connector=* ATTRIBUTE: authentication-provider, security-realm
- PATH: /subsystem=remoting/remote-outbound-connection=* ATTRIBUTE: username, security-realm
- PATH: /subsystem=remoting/connector=*/security=sasl
Type: resource-adapters
- Classification: resource-adapter-security
- requires-addressable: false
- requires-read: true
- requires-write: true
- PATH: /subsystem=resource-adapters/resource-adapter=*/connection-definitions=* ATTRIBUTE: security-domain, recovery-username, recovery-security-domain, security-application, security-domain-and-application, recovery-password
Type: security
- Classification: misc-security
- requires-addressable: false
- requires-read: true
- requires-write: true
- PATH: /subsystem=security ATTRIBUTE: deep-copy-subject-mode
Type: web
- Classification: web-access-log
- requires-addressable: false
- requires-read: false
- requires-write: false
- PATH: /subsystem=web/virtual-server=*/configuration=access-log
- Classification: web-connector
- requires-addressable: false
- requires-read: false
- requires-write: false
- PATH: /subsystem=web/connector=*
- Classification: web-ssl
- requires-addressable: false
- requires-read: true
- requires-write: true
- PATH: /subsystem=web/connector=*/configuration=ssl
- Classification: web-sso
- requires-addressable: false
- requires-read: true
- requires-write: true
- PATH: /subsystem=web/virtual-server=*/configuration=sso
- Classification: web-valve
- requires-addressable: false
- requires-read: false
- requires-write: false
- PATH: /subsystem=web/valve=*
Chapter 7. Secure Passwords and Other Sensitive Strings with Password Vault
7.1. Password Vault System
7.2. Create a Java Keystore to Store Sensitive Strings
Prerequisites
- The
keytoolcommand must be available to use. It is provided by the Java Runtime Environment (JRE). Locate the path for the file. In Red Hat Enterprise Linux, it is installed to/usr/bin/keytool.
Warning
vault.keystore using the keytool from the same vendor as the JDK you use.
keytool from one vendor's JDK in an EAP instance running on a JDK from a different vendor results in the following exception:
java.io.IOException: com.sun.crypto.provider.SealedObjectForKeyProtector
java.io.IOException: com.sun.crypto.provider.SealedObjectForKeyProtectorProcedure 7.1. Setup a Java Keystore
Create a directory to store your keystore and other encrypted information.
Create a directory to hold your keystore and other important information. The rest of this procedure assumes that the directory isEAP_HOME/vault/. Since this directory will contain sensitive information it should be accessible to only limited users. At a minimum the user account under which JBoss EAP is running requires read-write access.Determine the parameters to use with
keytool.Determine the following parameters:- alias
- The alias is a unique identifier for the vault or other data stored in the keystore. The alias in the example command at the end of this procedure is
vault. Aliases are case-insensitive. - keyalg
- The algorithm to use for encryption. The example in this procedure uses
AES. Use the documentation for your JRE and operating system to see which other choices may be available to you. - keysize
- The size of an encryption key impacts how difficult it is to decrypt through brute force. The example in this procedure uses
128. For information on appropriate values, see the documentation distributed with thekeytool. - keystore
- The keystore is a database which holds encrypted information and the information about how to decrypt it. If you do not specify a keystore, the default keystore to use is a file called
.keystorein your home directory. The first time you add data to a keystore, it is created. The example in this procedure uses thevault.keystorekeystore.
Thekeytoolcommand has many other options. See the documentation for your JRE or your operating system for more details.Determine the answers to questions the
keystorecommand will ask.Thekeystoreneeds the following information in order to populate the keystore entry:- Keystore password
- When you create a keystore, you must set a password. In order to work with the keystore in the future, you need to provide the password. Create a strong password that you will remember. The keystore is only as secure as its password and the security of the file system and operating system where it resides.
- Key password (optional)
- In addition to the keystore password, you can specify a password for each key it holds. In order to use such a key, the password needs to be given each time it is used. Usually, this facility is not used.
- First name (given name) and last name (surname)
- This, and the rest of the information in the list, helps to uniquely identify the key and place it into a hierarchy of other keys. It does not necessarily need to be a name at all, but it should be two words, and must be unique to the key. The example in this procedure uses
Accounting Administrator. In directory terms, this becomes the common name of the certificate. - Organizational unit
- This is a single word that identifies who uses the certificate. It may be the application or the business unit. The example in this procedure uses
AccountingServices. Typically, all keystores used by a group or application use the same organizational unit. - Organization
- This is usually a single-word representation of your organization's name. This typically remains the same across all certificates used by an organization. This example uses
MyOrganization. - City or municipality
- Your city.
- State or province
- Your state or province, or the equivalent for your locality.
- Country
- The two-letter code for your country.
All of this information together will create a hierarchy for your keystores and certificates, ensuring that they use a consistent naming structure but are unique.Run the
keytoolcommand, supplying the information that you gathered.Example 7.1. Example input and output of
keystorecommandCopy to Clipboard Copied! Toggle word wrap Toggle overflow
A file named vault.keystore is created in the EAP_HOME/vault/ directory. It stores a single key, called vault, which will be used to store encrypted strings, such as passwords, for JBoss EAP 6.
7.3. Mask the Keystore Password and Initialize the Password Vault
Run the
vault.shcommand.RunEAP_HOME/bin/vault.sh. Start a new interactive session by typing0.Enter the directory where encrypted files will be stored.
This directory should be accessible to only limited users. At a minimum the user account under which JBoss EAP is running requires read-write access. If you followed Section 7.2, “Create a Java Keystore to Store Sensitive Strings”, your keystore is in a directory calledEAP_HOME/vault/.Note
Do not forget to include the trailing slash on the directory name. Either use/or\, depending on your operating system.Enter the path to the keystore.
Enter the full path to the keystore file. This example usesEAP_HOME/vault/vault.keystore.Encrypt the keystore password.
The following steps encrypt the keystore password, so that you can use it in configuration files and applications securely.Enter the keystore password.
When prompted, enter the keystore password.Enter a salt value.
Enter an 8-character salt value. The salt value, together with the iteration count (below), are used to create the hash value.Enter the iteration count.
Enter a number for the iteration count.Make a note of the masked password information.
The masked password, the salt, and the iteration count are printed to standard output. Make a note of them in a secure location. An attacker could use them to decrypt the password.Enter the alias of the vault.
When prompted, enter the alias of the vault. If you followed Section 7.2, “Create a Java Keystore to Store Sensitive Strings” to create your vault, the alias isvault.
Exit the interactive console.
Type2to exit the interactive console.
Your keystore password has been masked for use in configuration files and deployments. In addition, your vault is fully configured and ready to use.
7.4. Configure JBoss EAP 6 to Use the Password Vault
Before you can mask passwords and other sensitive attributes in configuration files, you need to make JBoss EAP 6 aware of the password vault which stores and decrypts them. Follow this procedure to enable this functionality.
Prerequisites
Procedure 7.2. Setup a Password Vault
Determine the correct values for the command.
Determine the values for the following parameters, which are determined by the commands used to create the keystore itself. For information on creating a keystore, refer the following topics: Section 7.2, “Create a Java Keystore to Store Sensitive Strings” and Section 7.3, “Mask the Keystore Password and Initialize the Password Vault”.Expand Parameter Description KEYSTORE_URL The file system path or URI of the keystore file, usually called something likevault.keystoreKEYSTORE_PASSWORD The password used to access the keystore. This value should be masked.KEYSTORE_ALIAS The name of the keystore alias.SALT The salt used to encrypt and decrypt keystore values.ITERATION_COUNT The number of times the encryption algorithm is run.ENC_FILE_DIR The path to the directory from which the keystore commands are run. Typically the directory containing the password vault.host (managed domain only) The name of the host you are configuringUse the Management CLI to enable the password vault.
Run one of the following commands, depending on whether you use a managed domain or standalone server configuration. Substitute the values in the command with the ones from the first step of this procedure.Note
If you use Microsoft Windows Server, in the CLI command, escape each\character in a directory path with an additional\character. For example,C:\\data\\vault\\vault.keystore. This is because single\character is used for character escaping.Managed Domain
/host=YOUR_HOST/core-service=vault:add(vault-options=[("KEYSTORE_URL" => "PATH_TO_KEYSTORE"), ("KEYSTORE_PASSWORD" => "MASKED_PASSWORD"), ("KEYSTORE_ALIAS" => "ALIAS"), ("SALT" => "SALT"),("ITERATION_COUNT" => "ITERATION_COUNT"), ("ENC_FILE_DIR" => "ENC_FILE_DIR")])/host=YOUR_HOST/core-service=vault:add(vault-options=[("KEYSTORE_URL" => "PATH_TO_KEYSTORE"), ("KEYSTORE_PASSWORD" => "MASKED_PASSWORD"), ("KEYSTORE_ALIAS" => "ALIAS"), ("SALT" => "SALT"),("ITERATION_COUNT" => "ITERATION_COUNT"), ("ENC_FILE_DIR" => "ENC_FILE_DIR")])Copy to Clipboard Copied! Toggle word wrap Toggle overflow Standalone Server
/core-service=vault:add(vault-options=[("KEYSTORE_URL" => "PATH_TO_KEYSTORE"), ("KEYSTORE_PASSWORD" => "MASKED_PASSWORD"), ("KEYSTORE_ALIAS" => "ALIAS"), ("SALT" => "SALT"),("ITERATION_COUNT" => "ITERATION_COUNT"), ("ENC_FILE_DIR" => "ENC_FILE_DIR")])/core-service=vault:add(vault-options=[("KEYSTORE_URL" => "PATH_TO_KEYSTORE"), ("KEYSTORE_PASSWORD" => "MASKED_PASSWORD"), ("KEYSTORE_ALIAS" => "ALIAS"), ("SALT" => "SALT"),("ITERATION_COUNT" => "ITERATION_COUNT"), ("ENC_FILE_DIR" => "ENC_FILE_DIR")])Copy to Clipboard Copied! Toggle word wrap Toggle overflow
The following is an example of the command with hypothetical values:/core-service=vault:add(vault-options=[("KEYSTORE_URL" => "/home/user/vault/vault.keystore"), ("KEYSTORE_PASSWORD" => "MASK-3y28rCZlcKR"), ("KEYSTORE_ALIAS" => "vault"), ("SALT" => "12438567"),("ITERATION_COUNT" => "50"), ("ENC_FILE_DIR" => "/home/user/vault/")])/core-service=vault:add(vault-options=[("KEYSTORE_URL" => "/home/user/vault/vault.keystore"), ("KEYSTORE_PASSWORD" => "MASK-3y28rCZlcKR"), ("KEYSTORE_ALIAS" => "vault"), ("SALT" => "12438567"),("ITERATION_COUNT" => "50"), ("ENC_FILE_DIR" => "/home/user/vault/")])Copy to Clipboard Copied! Toggle word wrap Toggle overflow
JBoss EAP 6 is configured to decrypt masked strings using the password vault. To add strings to the vault and use them in your configuration, refer to the following topic: Section 7.6, “Store and Retrieve Encrypted Sensitive Strings in the Java Keystore”.
7.5. Configure JBoss EAP 6 to Use a Custom Implementation of the Password Vault
You can use your own implementation of SecurityVault to mask passwords and other sensitive attributes in configuration files.
Procedure 7.3. Use a Custom Implementation of the Password Vault
- Create a class that implements the interface
SecurityVault. - Create a module containing the class from the previous step, and specify a dependency on
org.picketboxwhere the interface isSecurityVault. - Enable the custom Password Vault in the JBoss EAP server configuration by adding the vault element with the following attributes:
- code
- The fully qualified name of class that implements
SecurityVault. - module
- The name of the module that contains the custom class.
Optionally, you can usevault-optionsparameters to initialize the custom class for a Password Vault. For example:/core-service=vault:add(code="custom.vault.implementation.CustomSecurityVault", module="custom.vault.module", vault-options=[("KEYSTORE_URL" => "PATH_TO_KEYSTORE"), ("KEYSTORE_PASSWORD" => "MASKED_PASSWORD"), ("KEYSTORE_ALIAS" => "ALIAS"), ("SALT" => "SALT"),("ITERATION_COUNT" => "ITERATION_COUNT"), ("ENC_FILE_DIR" => "ENC_FILE_DIR")])/core-service=vault:add(code="custom.vault.implementation.CustomSecurityVault", module="custom.vault.module", vault-options=[("KEYSTORE_URL" => "PATH_TO_KEYSTORE"), ("KEYSTORE_PASSWORD" => "MASKED_PASSWORD"), ("KEYSTORE_ALIAS" => "ALIAS"), ("SALT" => "SALT"),("ITERATION_COUNT" => "ITERATION_COUNT"), ("ENC_FILE_DIR" => "ENC_FILE_DIR")])Copy to Clipboard Copied! Toggle word wrap Toggle overflow
JBoss EAP 6 is configured to decrypt masked strings using a custom implementation of the password vault.
7.6. Store and Retrieve Encrypted Sensitive Strings in the Java Keystore
Including passwords and other sensitive strings in plain-text configuration files is insecure. JBoss EAP 6 includes the ability to store and mask these sensitive strings in an encrypted keystore, and use masked values in configuration files.
Prerequisites
- The
EAP_HOME/bin/vault.shapplication must be accessible via a command-line interface.
Procedure 7.4. Setup the Java Keystore
Run the
vault.shcommand.RunEAP_HOME/bin/vault.sh. Start a new interactive session by typing0.Enter the directory where encrypted files will be stored.
If you followed Section 7.2, “Create a Java Keystore to Store Sensitive Strings”, your keystore is in the directoryEAP_HOME/vault. In most cases, it makes sense to store all of your encrypted information in the same place as the key store. Since this directory will contain sensitive information it should be accessible to only limited users. At a minimum the user account under which JBoss EAP is running requires read-write access.Note
Do not forget to include the trailing slash on the directory name. Either use/or\, depending on your operating system.Enter the path to the keystore.
Enter the full path to the keystore file. This example usesEAP_HOME/vault/vault.keystore.Enter the keystore password, vault name, salt, and iteration count.
When prompted, enter the keystore password, vault name, salt, and iteration count. A handshake is performed.Select the option to store a password.
Select option0to store a password or other sensitive string.Enter the value.
When prompted, enter the value twice. If the values do not match, you are prompted to try again.Enter the vault block.
Enter the vault block, which is a container for attributes which pertain to the same resource. An example of an attribute name would beds_ExampleDS. This will form part of the reference to the encrypted string, in your datasource or other service definition.Enter the attribute name.
Enter the name of the attribute you are storing. An example attribute name would bepassword.ResultA message such as the one below shows that the attribute has been saved.
Secured attribute value has been stored in vault.
Secured attribute value has been stored in vault.Copy to Clipboard Copied! Toggle word wrap Toggle overflow Make note of the information about the encrypted string.
A message prints to standard output, showing the vault block, attribute name, shared key, and advice about using the string in your configuration. Make note of this information in a secure location. Example output is shown below.Copy to Clipboard Copied! Toggle word wrap Toggle overflow Use the encrypted string in your configuration.
Use the string from the previous step in your configuration, in place of a plain-text string. A datasource using the encrypted password above is shown below.Copy to Clipboard Copied! Toggle word wrap Toggle overflow You can use an encrypted string anywhere in your domain or standalone configuration file where expressions are allowed.Note
To check if expressions are allowed within a particular subsystem, run the following CLI command against that subsystem:/host=master/core-service=management/security-realm=TestRealm:read-resource-description(recursive=true)
/host=master/core-service=management/security-realm=TestRealm:read-resource-description(recursive=true)Copy to Clipboard Copied! Toggle word wrap Toggle overflow From the output of running this command, look for the value for theexpressions-allowedparameter. If this is true, then you can use expressions within the configuration of this particular subsystem.After you store your string in the keystore, use the following syntax to replace any clear-text string with an encrypted one.${VAULT::VAULT_BLOCK::ATTRIBUTE_NAME::ENCRYPTED_VALUE}${VAULT::VAULT_BLOCK::ATTRIBUTE_NAME::ENCRYPTED_VALUE}Copy to Clipboard Copied! Toggle word wrap Toggle overflow Here is a sample real-world value, where the vault block isds_ExampleDSand the attribute ispassword.<password>${VAULT::ds_ExampleDS::password::1}</password><password>${VAULT::ds_ExampleDS::password::1}</password>Copy to Clipboard Copied! Toggle word wrap Toggle overflow
7.7. Store and Resolve Sensitive Strings In Your Applications
Configuration elements of JBoss EAP 6 support the ability to resolve encrypted strings against values stored in a Java Keystore, via the Security Vault mechanism. You can add support for this feature to your own applications.
Before performing this procedure, make sure that the directory for storing your vault files exists. It does not matter where you place them, as long as the user who executes JBoss EAP 6 has permission to read and write the files. This example places the vault/ directory into the /home/USER/vault/ directory. The vault itself is a file called vault.keystore inside the vault/ directory.
Example 7.2. Adding the Password String to the Vault
EAP_HOME/bin/vault.sh command. The full series of commands and responses is included in the following screen output. Values entered by the user are emphasized. Some output is removed for formatting. In Microsoft Windows, the name of the command is vault.bat. Note that in Microsoft Windows, file paths use the \ character as a directory separator, rather than the / character.
VAULT.
Example 7.3. Servlet Using a Vaulted Password
Chapter 8. Web, HTTP Connectors, and HTTP Clustering
8.1. Configure a mod_cluster Worker Node
A mod_cluster worker node is an application server that participates in a load-balanced cluster. Requests from users are received by a web server, which then forwards these requests to a pool of mod_cluster worker nodes. A worker node can be part of a server group in a Managed Domain, or a standalone server. For an overview of web server load balancing, refer to Overview of HTTP Connectors in the Administration and Configuration Guide.
mod_cluster subsystem. To configure the mod_cluster subsystem, refer to Configure the mod_cluster Subsystem in the Administration and Configuration Guide.
Worker Node Configuration
- A standalone server must be started with the
standalone-haorstandalone-full-haprofile. - A server group in a managed domain must use the
haorfull-haprofile, and theha-socketsorfull-ha-socketssocket binding group. JBoss EAP 6 ships with a cluster-enabled server group calledother-server-groupwhich meets these requirements.
Note
/profile=full-ha portion of the commands.
Procedure 8.1. Configure a Worker Node
Configure the network interfaces.
By default, the network interfaces all default to127.0.0.1. Every physical host that hosts either a standalone server or one or more servers in a server group needs its interfaces to be configured to use its public IP address, which the other servers can see.To change the IP address of a JBoss EAP 6 host, you need to shut it down and edit its configuration file directly. This is because the Management API which drives the Management Console and Management CLI relies on a stable management address.Follow these steps to change the IP address on each server in your cluster to the master's public IP address.- Start the JBoss EAP server using the profile described earlier in this topic.
- Launch the Management CLI, using the
EAP_HOME/bin/jboss-cli.shcommand in Linux or theEAP_HOME\bin\jboss-cli.batcommand in Microsoft Windows Server. Typeconnectto connect to the domain controller on the localhost, orconnect IP_ADDRESSto connect to a domain controller on a remote server. - Modify the external IP address for the
management,publicandunsecureinterfaces by typing the following commands. Be sure to replaceEXTERNAL_IP_ADDRESSin the command with the actual external IP address of the host.You should see the following result for each command./interface=management:write-attribute(name=inet-address,value="${jboss.bind.address.management:EXTERNAL_IP_ADDRESS}" /interface=public:write-attribute(name=inet-address,value="${jboss.bind.address.public:EXTERNAL_IP_ADDRESS}" /interface=unsecure:write-attribute(name=inet-address,value="${jboss.bind.address.unsecure:EXTERNAL_IP_ADDRESS}" :reload/interface=management:write-attribute(name=inet-address,value="${jboss.bind.address.management:EXTERNAL_IP_ADDRESS}" /interface=public:write-attribute(name=inet-address,value="${jboss.bind.address.public:EXTERNAL_IP_ADDRESS}" /interface=unsecure:write-attribute(name=inet-address,value="${jboss.bind.address.unsecure:EXTERNAL_IP_ADDRESS}" :reloadCopy to Clipboard Copied! Toggle word wrap Toggle overflow "outcome" => "success"
"outcome" => "success"Copy to Clipboard Copied! Toggle word wrap Toggle overflow - For hosts that participate in a managed domain but are not the master, you must change the host name from
masterto a unique name. This name must be unique across slaves and will be used for the slave to identify to the cluster, so make a note of the name you use.- Start the JBoss EAP slave host using the following syntax:For example:
bin/domain.sh --host-config=HOST_SLAVE_XML_FILE_NAME
bin/domain.sh --host-config=HOST_SLAVE_XML_FILE_NAMECopy to Clipboard Copied! Toggle word wrap Toggle overflow bin/domain.sh --host-config=host-slave01.xml
bin/domain.sh --host-config=host-slave01.xmlCopy to Clipboard Copied! Toggle word wrap Toggle overflow - Launch the Management CLI.
- Use the following syntax to replace the host name:For example:
/host=master:write-attribute(name="name",value=UNIQUE_HOST_SLAVE_NAME)
/host=master:write-attribute(name="name",value=UNIQUE_HOST_SLAVE_NAME)Copy to Clipboard Copied! Toggle word wrap Toggle overflow You should see the following result./host=master:write-attribute(name="name",value="host-slave01")
/host=master:write-attribute(name="name",value="host-slave01")Copy to Clipboard Copied! Toggle word wrap Toggle overflow "outcome" => "success"
"outcome" => "success"Copy to Clipboard Copied! Toggle word wrap Toggle overflow This modifies the XML in thehost-slave01.xmlfile as follows:<host name="host-slave01" xmlns="urn:jboss:domain:1.6">
<host name="host-slave01" xmlns="urn:jboss:domain:1.6">Copy to Clipboard Copied! Toggle word wrap Toggle overflow
- For newly configured hosts that need to join a managed domain, you must remove the
localelement and add theremoteelementhostattribute that points to the domain controller. This step does not apply for a standalone server.- Start the JBoss EAP slave host using the following syntax:For example:
bin/domain.sh --host-config=HOST_SLAVE_XML_FILE_NAME
bin/domain.sh --host-config=HOST_SLAVE_XML_FILE_NAMECopy to Clipboard Copied! Toggle word wrap Toggle overflow bin/domain.sh --host-config=host-slave01.xml
bin/domain.sh --host-config=host-slave01.xmlCopy to Clipboard Copied! Toggle word wrap Toggle overflow - Launch the Management CLI.
- Use the following syntax specify the domain controller:For example:
/host=UNIQUE_HOST_SLAVE_NAME/:write-remote-domain-controller(host=DOMAIN_CONTROLLER_IP_ADDRESS,port=${jboss.domain.master.port:9999},security-realm="ManagementRealm")/host=UNIQUE_HOST_SLAVE_NAME/:write-remote-domain-controller(host=DOMAIN_CONTROLLER_IP_ADDRESS,port=${jboss.domain.master.port:9999},security-realm="ManagementRealm")Copy to Clipboard Copied! Toggle word wrap Toggle overflow You should see the following result./host=host-slave01/:write-remote-domain-controller(host="192.168.1.200",port=${jboss.domain.master.port:9999},security-realm="ManagementRealm")/host=host-slave01/:write-remote-domain-controller(host="192.168.1.200",port=${jboss.domain.master.port:9999},security-realm="ManagementRealm")Copy to Clipboard Copied! Toggle word wrap Toggle overflow "outcome" => "success"
"outcome" => "success"Copy to Clipboard Copied! Toggle word wrap Toggle overflow This modifies the XML in thehost-slave01.xmlfile as follows:<domain-controller> <remote host="192.168.1.200" port="${jboss.domain.master.port:9999}" security-realm="ManagementRealm"/> </domain-controller><domain-controller> <remote host="192.168.1.200" port="${jboss.domain.master.port:9999}" security-realm="ManagementRealm"/> </domain-controller>Copy to Clipboard Copied! Toggle word wrap Toggle overflow
Configure authentication for each slave server.
Each slave server needs a username and password created in the domain controller's or standalone master'sManagementRealm. On the domain controller or standalone master, run theEAP_HOME/bin/add-user.shcommand. Add a user with the same username as the slave, to theManagementRealm. When asked if this user will need to authenticate to an external JBoss AS instance, answeryes. An example of the input and output of the command is below, for a slave calledslave1, with passwordchangeme.Copy to Clipboard Copied! Toggle word wrap Toggle overflow Copy the Base64-encoded
<secret>element from theadd-user.shoutput.If you plan to specify the Base64-encoded password value for authentication, copy the<secret>element value from the last line of theadd-user.shoutput as you will need it in the step below.Modify the slave host's security realm to use the new authentication.
You can specify the secret value in one of the following ways:Specify the Base64-encoded password value in the server configuration file using the Management CLI.
- Launch the Management CLI, using the
EAP_HOME/bin/jboss-cli.shcommand in Linux or theEAP_HOME\bin\jboss-cli.batcommand in Microsoft Windows Server. Typeconnectto connect to the domain controller on the localhost, orconnect IP_ADDRESSto connect to a domain controller on a remote server. - Specify the secret value by typing the following command. Be sure to replace the
SECRET_VALUEwith the secret value returned from theadd-useroutput from the previous step.You should see the following result for each command./core-service=management/security-realm=ManagementRealm/server-identity=secret:add(value="SECRET_VALUE") :reload
/core-service=management/security-realm=ManagementRealm/server-identity=secret:add(value="SECRET_VALUE") :reloadCopy to Clipboard Copied! Toggle word wrap Toggle overflow "outcome" => "success"
"outcome" => "success"Copy to Clipboard Copied! Toggle word wrap Toggle overflow
Configure the host to get the password from the vault.
- Use the
vault.shscript to generate a masked password. It will generate a string like the following:VAULT::secret::password::ODVmYmJjNGMtZDU2ZC00YmNlLWE4ODMtZjQ1NWNmNDU4ZDc1TElORV9CUkVBS3ZhdWx0.You can find more information on the vault in the Password Vaults for Sensitive Strings section of this guide starting here: Section 7.1, “Password Vault System”. - Launch the Management CLI, using the
EAP_HOME/bin/jboss-cli.shcommand in Linux or theEAP_HOME\bin\jboss-cli.batcommand in Microsoft Windows Server. Typeconnectto connect to the domain controller on the localhost, orconnect IP_ADDRESSto connect to a domain controller on a remote server. - Specify the secret value by typing the following command. Be sure to replace the
SECRET_VALUEwith the masked password generated in the previous step.You should see the following result for each command./core-service=management/security-realm=ManagementRealm/server-identity=secret:add(value="${VAULT::secret::password::SECRET_VALUE}") :reload/core-service=management/security-realm=ManagementRealm/server-identity=secret:add(value="${VAULT::secret::password::SECRET_VALUE}") :reloadCopy to Clipboard Copied! Toggle word wrap Toggle overflow "outcome" => "success"
"outcome" => "success"Copy to Clipboard Copied! Toggle word wrap Toggle overflow Note
When creating a password in the vault, it must be specified in plain text, not Base64-encoded.
Specify the password as a system property.
The following examples useserver.identity.passwordas the system property name for the password.- Specify the system property for the password in the server configuration file using the Management CLI.
- Launch the Management CLI, using the
EAP_HOME/bin/jboss-cli.shcommand in Linux or theEAP_HOME\bin\jboss-cli.batcommand in Microsoft Windows Server. Typeconnectto connect to the domain controller on the localhost, orconnect IP_ADDRESSto connect to a domain controller on a remote server. - Type the following command to configure the secret identity to use the system property.You should see the following result for each command.
/core-service=management/security-realm=ManagementRealm/server-identity=secret:add(value="${server.identity.password}") :reload/core-service=management/security-realm=ManagementRealm/server-identity=secret:add(value="${server.identity.password}") :reloadCopy to Clipboard Copied! Toggle word wrap Toggle overflow "outcome" => "success"
"outcome" => "success"Copy to Clipboard Copied! Toggle word wrap Toggle overflow
- When you specify the password as a system property, you can configure the host in either of the following ways:
- Start the server entering the password in plain text as a command line argument, for example:
-Dserver.identity.password=changeme
-Dserver.identity.password=changemeCopy to Clipboard Copied! Toggle word wrap Toggle overflow Note
The password must be entered in plain text and will be visible to anyone who issues aps -efcommand. - Place the password in a properties file and pass the properties file URL as a command line argument.
- Add the key/value pair to a properties file. For example:
server.identity.password=changeme
server.identity.password=changemeCopy to Clipboard Copied! Toggle word wrap Toggle overflow - Start the server with the command line arguments.
--properties=URL_TO_PROPERTIES_FILE
--properties=URL_TO_PROPERTIES_FILECopy to Clipboard Copied! Toggle word wrap Toggle overflow
Restart the server.
The slave will now authenticate to the master using its host name as the username and the encrypted string as its password.
Your standalone server, or servers within a server group of a managed domain, are now configured as mod_cluster worker nodes. If you deploy a clustered application, its sessions are replicated to all cluster nodes for failover, and it can accept requests from an external Web server or load balancer. Each node of the cluster discovers the other nodes using automatic discovery, by default.To configure automatic discovery, and the other specific settings of the mod_cluster subsystem, see Configure the mod_cluster Subsystem in the Administration and Configuration Guide. To configure the Apache HTTP Server, see Use an External Web Server as the Web Front-end for JBoss EAP 6 Applications in the Administration and Configuration Guide.
Chapter 9. Patch Installation
9.1. About Patches and Upgrades
9.2. About Patching Mechanisms
Important
- Asynchronous updates: individual patches which are released outside the normal update cycle of the existing product. These may include security patches, as well as other individual patches provided by Red Hat Global Support Services (GSS) to fix specific issues.
- Planned updates: These include cumulative patches, as well as micro, minor or major upgrades of an existing product. Cumulative patches include all previously developed updates for that version of the product.
Important
EAP_HOME/modules/system/layers/base/.overlays/$PATCH_ID/$MODULE directory. The original files are left in EAP_HOME/modules/system/layers/base/$MODULE. The patching mechanism cripples the original jar files for security reasons. This means that if you apply a patch which updates a module, the original module's jar files are altered to be unusable. If the patch is rolled back, the original files will be reverted back to a usable state. This also means that the proper rollback procedure must be used to rollback any applied patch. See Section 9.4.3, “Rollback the Application of a Patch in Zip Form Using the Patch Management System” for the proper rollback procedure.
9.3. Subscribe to Patch Mailing Lists
The JBoss team at Red Hat maintains a mailing list for security announcements for Red Hat JBoss Middleware products. This section covers what you need to do to subscribe to this list.
Prerequisites
- None
Procedure 9.1. Subscribe to the JBoss Watch List
- Click the following link to go to the JBoss Watch mailing list page: JBoss Watch Mailing List.
- Enter your email address in the Subscribing to Jboss-watch-list section.
- [You may also wish to enter your name and select a password. Doing so is optional but recommended.]
- Press the button to start the subscription process.
- You can browse the archives of the mailing list by going to: JBoss Watch Mailing List Archives.
After confirmation of your email address, you will be subscribed to receive security related announcements from the JBoss patch mailing list.
9.4. Install Patches in Zip Form
9.4.1. The Patch Management System
patch command, or through the Management Console. The patch management system cannot be used to automatically patch JBoss EAP 6 server instances across a managed domain, but individual server instances in a managed domain can be patched independently.
Important
Note
patch command.
| Argument or Switch | Description |
|---|---|
apply | Applies a patch. |
--override-all | If there is a conflict, the patch operation overrides any user modifications. |
--override-modules | If there is a conflict as a result of any modified modules, this switch overrides those modifications with the contents of the patch operation. |
--override=path(,path) | For specified miscellaneous files only, this will override the conflicting modified files with the files in the patch operation. |
--preserve=path(,path) | For specified miscellaneous files only, this will preserve the conflicting modified files. |
--host=HOST_NAME | Available in domain mode, this specifies the host that the patch operation will be performed on. |
info | Returns information on currently installed patches. |
history | Returns information on the patching history. |
rollback | Rollsback the application of a patch. |
--patch-id=PATCH_ID | Required for rollback, the ID of the patch to rollback. |
--reset-configuration=TRUE|FALSE | Required for rollback, this specifies whether to restore the server configuration files as part of the rollback operation. |
--rollback-to | If the patch to rollback is an individual (one-off) patch, using this argument specifies that the rollback operation will also rollback all other one-off patches that have been applied on top of the specified patch. |
9.4.2. Installing Patches in Zip Form Using the Patch Management System
Patches that are in the zip format can be installed using the JBoss EAP 6 patch management system via either the Management CLI or the Management Console.
Important
Prerequisites
- Valid access and subscription to the Red Hat Customer Portal.
- A current subscription to a JBoss product installed in zip format.
- Access to the Management CLI or the Management Console for the JBoss EAP 6 server to be updated. Refer to Launch the Management CLI or Log in to the Management Console in the Administration and Configuration Guide.
Warning
Procedure 9.2. Apply a zip patch to a JBoss EAP 6 server instance using the Management CLI
- Download the patch zip file from the Customer Portal at https://access.redhat.com/downloads/
- From the Management CLI, apply the patch with the following command including the appropriate path to the patch file:
[standalone@localhost:9999 /] patch apply /path/to/downloaded-patch.zip
[standalone@localhost:9999 /] patch apply /path/to/downloaded-patch.zipCopy to Clipboard Copied! Toggle word wrap Toggle overflow Thepatchtool will warn if there are any conflicts in attempting the apply the patch. Refer to Section 9.4.1, “The Patch Management System” for availablepatchcommand switches to re-run the command to resolve any conflicts. - Restart the JBoss EAP 6 server for the patch to take effect:
[standalone@localhost:9999 /] shutdown --restart=true
[standalone@localhost:9999 /] shutdown --restart=trueCopy to Clipboard Copied! Toggle word wrap Toggle overflow
Procedure 9.3. Apply a zip patch to a JBoss EAP 6 server instance using the Management Console
- Download the patch zip file from the Customer Portal at https://access.redhat.com/downloads/
- In the Management Console:
- For a standalone server: click on the Runtime tab at the top of the screen, then click Patch Management.
- For a managed domain: click on the Domain tab at the top of the screen, select the host you want to patch from the Host drop-down menu, then click Patch Management.
- Click .
- If you are patching a managed domain host, on the next screen select whether to shutdown the servers on the host, and click .
- Click the button, select the downloaded patch you want to apply, and then click .
- If there are any conflicts in attempting to apply the patch, a warning will be displayed. Click View error details to see the detail of the conflicts. If there is a conflict, you can either cancel the operation, or select the Override all conflicts check box and click . Overriding conflicts will result in the content of the patch overriding any user modifications.
- After the patch has been successfully applied, select whether to restart the JBoss EAP 6 server now for the patch to take effect, and click .
The JBoss EAP 6 server instance is patched with the latest update.
9.4.3. Rollback the Application of a Patch in Zip Form Using the Patch Management System
The JBoss EAP 6 patch management system can be used to rollback the application of a previously applied zip patch, via either the Management CLI or the Management Console.
Warning
Important
Prerequisites
- A patch that was previously applied using the JBoss EAP 6 patch management system.
- Access to the Management CLI or the Management Console for the JBoss EAP 6 server. Refer to Launch the Management CLI or Log in to the Management Console in the Administration and Configuration Guide.
Warning
Reset Configuration option:
TRUE, the patch rollback process will also rollback the JBoss EAP 6 server configuration files to their pre-patch state. Any changes that were made to the JBoss EAP 6 server configuration files after the patch was applied will be lost.
FALSE, the server configuration files will not be rolled back. In this situation, it is possible that the server will not start after the rollback, as the patch may have altered configurations, such as namespaces, which may no longer be valid and have to be fixed manually.
Procedure 9.4. Rollback a patch from a JBoss EAP 6 server instance using the Management CLI
- From the Management CLI, use the
patch infocommand to find the ID of the patch that is to be rolled back.- For cumulative patches, the patch ID is the value of the first
cumulative-patch-idshown in thepatch infooutput. - Individual security or bug fix patch IDs are listed as the value of the first
patchesshown in thepatch infooutput, with the most recently applied individual patch listed first.
- From the Management CLI, rollback the patch with the appropriate patch ID from the previous step.
[standalone@localhost:9999 /] patch rollback --patch-id=PATCH_ID --reset-configuration=TRUE
[standalone@localhost:9999 /] patch rollback --patch-id=PATCH_ID --reset-configuration=TRUECopy to Clipboard Copied! Toggle word wrap Toggle overflow Thepatchtool will warn if there are any conflicts in attempting the rollback the patch. Refer to Section 9.4.1, “The Patch Management System” for availablepatchcommand switches to re-run the command to resolve any conflicts. - Restart the JBoss EAP 6 server for the patch rollback to take effect:
[standalone@localhost:9999 /] shutdown --restart=true
[standalone@localhost:9999 /] shutdown --restart=trueCopy to Clipboard Copied! Toggle word wrap Toggle overflow
Procedure 9.5. Rollback a patch from a JBoss EAP 6 server instance using the Management Console
- In the Management Console:
- For a standalone server: click on the Runtime tab at the top of the screen, then click Patch Management.
- For a managed domain: click on the Domain tab at the top of the screen, select the relevant host from the Host drop-down menu, then click Patch Management.
- In the Recent Patch History table, select the patch that you want to rollback, then click .
- For a managed domain host, on the next screen select whether to shutdown the servers on the host, and click .
- Choose your options for the rollback process, then click .
- Confirm the options and the patch to be rolled back, then click .
- If the Override all option was not selected and there are any conflicts in attempting to rollback the patch, a warning will be displayed. Click View error details to see the detail of the conflicts. If there is a conflict, you can either cancel the operation, or click and try the operation again with the Override all check box selected. Overriding conflicts will result in the rollback operation overriding any user modifications.
- After the patch has been successfully rolled back, select whether to restart the JBoss EAP 6 server now for the changes to take effect, and click .
The patch, and optionally also the server configuration files, are rolled back on the JBoss EAP 6 server instance.
9.5. Patching an RPM Installation
JBoss patches are distributed in two forms: ZIP (for all products) and RPM (for a subset of products). This task describes the steps you need to take to install the patches via the RPM format.
Prerequisites
- A valid subscription to the Red Hat Network.
- A current subscription to a JBoss product installed via an RPM package.
Procedure 9.6. Apply a patch to a JBoss product via the RPM method
yum.
Warning
- Get notified about the security patch either via being a subscriber to the JBoss watch mailing list or by browsing the JBoss watch mailing list archives.
- Read the errata for the security patch and confirm that it applies to a JBoss product in your environment.
- If the security patch applies to a JBoss product in your environment, then follow the link to download the updated RPM package which is included in the errata.
- Useto install the patch.
yum update
yum updateCopy to Clipboard Copied! Toggle word wrap Toggle overflow Important
When updating an RPM installation, your JBoss product is updated cumulatively with all RPM-released fixes.
The JBoss product is patched with the latest update using the RPM format.
9.6. Severity and Impact Rating of JBoss Security Patches
| Severity | Description |
|---|---|
| Critical |
This rating is given to flaws that could be easily exploited by a remote unauthenticated attacker and lead to system compromise (arbitrary code execution) without requiring user interaction. These are the types of vulnerabilities that can be exploited by worms. Flaws that require an authenticated remote user, a local user, or an unlikely configuration are not classed as critical impact.
|
| Important |
This rating is given to flaws that can easily compromise the confidentiality, integrity, or availability of resources. These are the types of vulnerabilities that allow local users to gain privileges, allow unauthenticated remote users to view resources that should otherwise be protected by authentication, allow authenticated remote users to execute arbitrary code, or allow local or remote users to cause a denial of service.
|
| Moderate |
This rating is given to flaws that may be more difficult to exploit but could still lead to some compromise of the confidentiality, integrity, or availability of resources, under certain circumstances. These are the types of vulnerabilities that could have had a critical impact or important impact but are less easily exploited based on a technical evaluation of the flaw, or affect unlikely configurations.
|
| Low |
This rating is given to all other issues that have a security impact. These are the types of vulnerabilities that are believed to require unlikely circumstances to be able to be exploited, or where a successful exploit would give minimal consequences.
|
Example 9.1. CVSS v2 Impact Score
C:N/I:P/A:C
C:N/I:P/A:C9.7. Manage Security Updates for Dependencies Bundled Inside the Applications Deployed on JBoss EAP
Tools and Data Sources
- JBoss patch mailing lists
- Subscribing to the JBoss patch mailing lists will keep you informed regarding security flaws that have been fixed in JBoss products, allowing you to check whether your deployed applications are bundling vulnerable versions of the affected components.
- Security advisory page for bundled components.
- Many open source components have their own security advisory page. For example, Struts 2 is a commonly-used component with many known security issues that is not provided as part of the JBoss EAP distribution. The Struts 2 project maintains an upstream security advisory page, which should be monitored if your deployed applications bundle Struts 2. Many commercially-provided components also maintain security advisory pages.
- Regularly scan your deployed applications for known vulnerabilities
- There are several commercial tools available to do this. There is also an open source tool called Victims, which is developed by Red Hat employees, but comes with no support or warranty. Victims provides plugins for several build and integration tools, which automatically scan applications for bundling known-vulnerable dependencies. Plugins are available for Maven, Ant and Jenkins. For more information about the Victims tool, see https://victi.ms/about.html.
Part III. Developing Secure Applications
Chapter 10. Security Overview
10.1. About Application Security
10.2. Declarative Security
10.2.1. Java EE Declarative Security Overview
ejb-jar.xml and web.xml deployment descriptors.
10.2.2. Security References
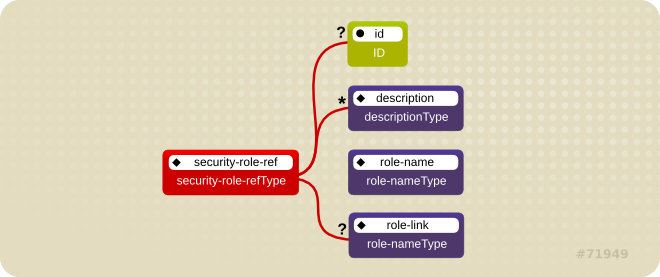
Figure 10.1. Security Roles Reference Model
role-nameType attribute value as an argument to the isCallerInRole(String) method. By using the isCallerInRole method, a component can verify whether the caller is in a role that has been declared with a <security-role-ref> or <role-name> element. The <role-name> element value must link to a <security-role> element through the <role-link> element. The typical use of isCallerInRole is to perform a security check that cannot be defined by using the role-based <method-permissions> elements.
Example 10.1. ejb-jar.xml descriptor fragment
Note
Example 10.2. web.xml descriptor fragment
10.2.3. Security Identity
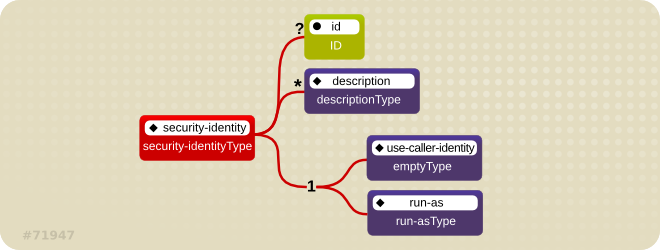
Figure 10.2. Java EE Security Identity Data Model
EJBContext.getCallerPrincipal() method. Rather, the caller's security roles are set to the single role specified by the <run-as> or <role-name> element value.
anonymous is assigned to all outgoing calls. If you want another principal to be associated with the call, you must associate a <run-as-principal> with the bean in the jboss-ejb3.xml file. The following fragment associates a principal named internal with RunAsBean from the prior example.
web.xml file. The following example shows how to assign the role InternalRole to a servlet:
principal. The <run-as-principal> element is available in the jboss-web.xml file to assign a specific principal to go along with the run-as role. The following fragment shows how to associate a principal named internal to the servlet above.
<servlet>
<servlet-name>AServlet</servlet-name>
<run-as-principal>internal</run-as-principal>
</servlet>
<servlet>
<servlet-name>AServlet</servlet-name>
<run-as-principal>internal</run-as-principal>
</servlet>
10.2.4. Security Roles
security-role-ref or security-identity element needs to map to one of the application's declared roles. An application assembler defines logical security roles by declaring security-role elements. The role-name value is a logical application role name like Administrator, Architect, SalesManager, etc.
security-role element is only used to map security-role-ref/role-name values to the logical role that the component role references. The user's assigned roles are a dynamic function of the application's security manager. JBoss does not require the definition of security-role elements in order to declare method permissions. However, the specification of security-role elements is still a recommended practice to ensure portability across application servers and for deployment descriptor maintenance.
Example 10.3. An ejb-jar.xml descriptor fragment that illustrates the security-role element usage.
Example 10.4. An example web.xml descriptor fragment that illustrates the security-role element usage.
10.2.5. EJB Method Permissions
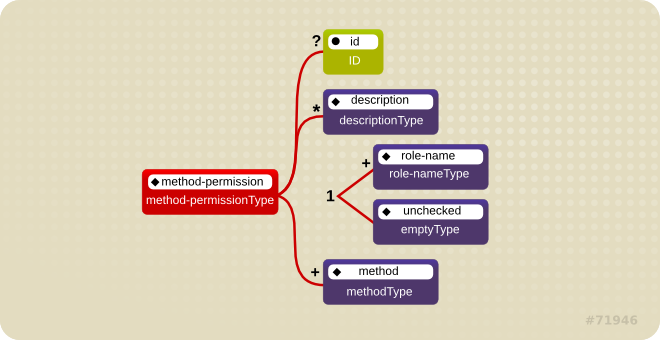
Figure 10.3. Java EE Method Permissions Element
method-permission element contains one or more role-name child elements that define the logical roles that are allowed to access the EJB methods as identified by method child elements. You can also specify an unchecked element instead of the role-name element to declare that any authenticated user can access the methods identified by method child elements. In addition, you can declare that no one should have access to a method that has the exclude-list element. If an EJB has methods that have not been declared as accessible by a role using a method-permission element, the EJB methods default to being excluded from use. This is equivalent to defaulting the methods into the exclude-list.
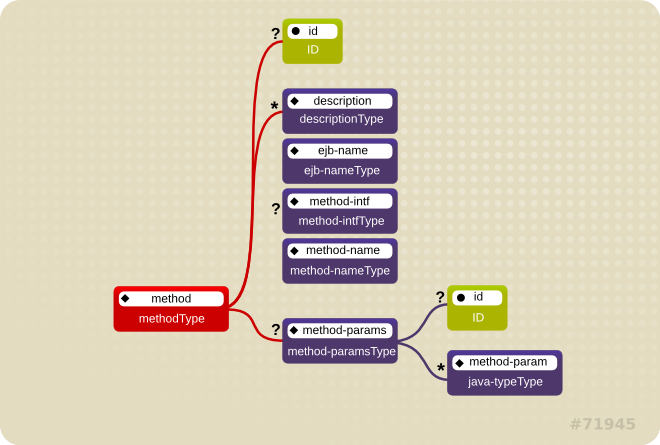
Figure 10.4. Java EE Method Element
<method> <ejb-name>EJBNAME</ejb-name> <method-name>*</method-name> </method>
<method>
<ejb-name>EJBNAME</ejb-name>
<method-name>*</method-name>
</method>
<method>
<ejb-name>EJBNAME</ejb-name>
<method-name>METHOD</method-name>
</method>
<method>
<ejb-name>EJBNAME</ejb-name>
<method-name>METHOD</method-name>
</method>
method-intf element can be used to differentiate methods with the same name and signature that are defined in both the home and remote interfaces of an enterprise bean.
method-permission element usage.
Example 10.5. An ejb-jar.xml descriptor fragment that illustrates the method-permission element usage.
10.2.6. Enterprise Beans Security Annotations
@DeclareRoles- Declares each security role declared in the code. For information about configuring roles, refer to the Java EE 6 Tutorial Specifying Authorized Users by Declaring Security Roles.
@RolesAllowed,@PermitAll, and@DenyAll- Specifies method permissions for annotations. For information about configuring annotation method permissions, refer to the Java EE 6 Tutorial Specifying Authorized Users by Declaring Security Roles.
@RunAs- Configures the propagated security identity of a component. For information about configuring propagated security identities using annotations, refer to the Java EE 6 Tutorial Propagating a Security Identity (Run-As).
10.2.7. Web Content Security Constraints
web.xml security-constraint element.
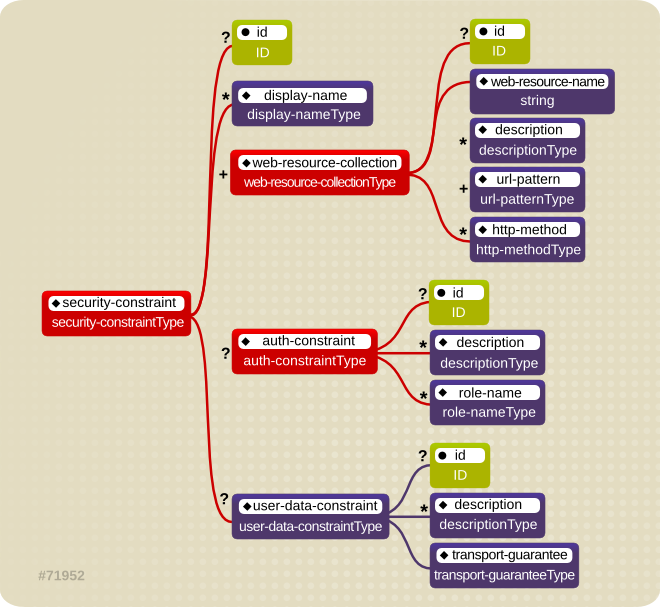
Figure 10.5. Web Content Security Constraints
NONE, INTEGRAL, and CONFIDENTIAL. A value of NONE means that the application does not require any transport guarantees. A value of INTEGRAL means that the application requires the data sent between the client and server to be sent in such a way that it can not be changed in transit. A value of CONFIDENTIAL means that the application requires the data to be transmitted in a fashion that prevents other entities from observing the contents of the transmission. In most cases, the presence of the INTEGRAL or CONFIDENTIAL flag indicates that the use of SSL is required.
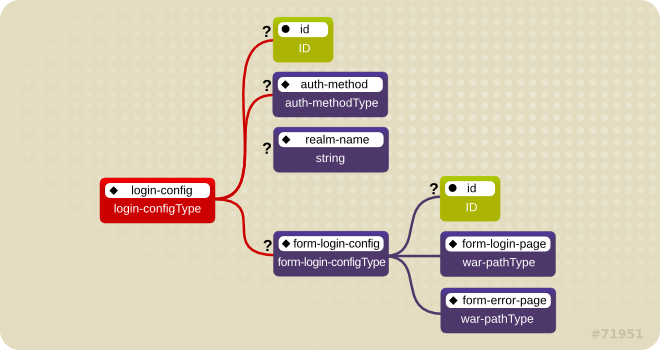
Figure 10.6. Web Login Configuration
BASIC, DIGEST, FORM, SPNEGO, and CLIENT-CERT. The <realm-name> child element specifies the realm name to use in HTTP basic and digest authorization. The <form-login-config> child element specifies the log in as well as error pages that should be used in form-based log in. If the <auth-method> value is not FORM, then form-login-config and its child elements are ignored.
/restricted path requires an AuthorizedUser role. There is no required transport guarantee and the authentication method used for obtaining the user identity is BASIC HTTP authentication.
Example 10.6. web.xml Descriptor Fragment
10.2.8. Enable Form-based Authentication
<auth-method>FORM</auth-method> in the <login-config> element of the deployment descriptor, web.xml. The login and error pages are also defined in <login-config>, as follows:
FormAuthenticator to direct users to the appropriate page. JBoss EAP maintains a session pool so that authentication information does not need to be present for each request. When FormAuthenticator receives a request, it queries org.apache.catalina.session.Manager for an existing session. If no session exists, a new session is created. FormAuthenticator then verifies the credentials of the session.
Note
/dev/urandom (Linux) by default, and hashed with MD5. Checks are performed at session ID creation to ensure that the ID created is unique.
JSESSIONID . Its value is a hex-string of the session ID. This cookie is configured to be non-persistent. This means that on the client side it will be deleted when the browser exits. On the server side, sessions expire after 30 minutes of inactivity, at which time session objects and their credential information are deleted.
FormAuthenticator caches the request, creates a new session if necessary, and redirects the user to the login page defined in login-config. (In the previous example code, the login page is login.html.) The user then enters their user name and password in the HTML form provided. User name and password are passed to FormAuthenticator via the j_security_check form action.
FormAuthenticator then authenticates the user name and password against the realm attached to the web application context. In JBoss Enterprise Application Platform, the realm is JBossWebRealm. When authentication is successful, FormAuthenticator retrieves the saved request from the cache and redirects the user to their original request.
Note
/j_security_check and at least the j_username and j_password parameters exist.
10.2.9. Enable Declarative Security
Chapter 11. Application Security
11.1. Datasource Security
11.1.1. About Datasource Security
- Security domains: Section 12.3.3.1, “About Security Domains”.
- Password vaults: Section 7.1, “Password Vault System”.
Example 11.1. Security Domain Example
Example 11.2. Password Vault Example
<security>
<user-name>admin</user-name>
<password>${VAULT::ds_ExampleDS::password::N2NhZDYzOTMtNWE0OS00ZGQ0LWE4MmEtMWNlMDMyNDdmNmI2TElORV9CUkVBS3ZhdWx0}</password>
</security>
<security>
<user-name>admin</user-name>
<password>${VAULT::ds_ExampleDS::password::N2NhZDYzOTMtNWE0OS00ZGQ0LWE4MmEtMWNlMDMyNDdmNmI2TElORV9CUkVBS3ZhdWx0}</password>
</security>
11.2. EJB Application Security
11.2.1. Security Identity
11.2.1.1. About EJB Security Identity
11.2.1.2. Set the Security Identity of an EJB
<security-identity> tag in the security configuration.
<security-identity> tag is present - the EJB's own caller identity is used.
Example 11.3. Set the security identity of an EJB to be the same as its caller
<security-identity> element declaration.
Example 11.4. Set the security identity of an EJB to a specific role
<run-as> and <role-name> tags inside the <security-identity> tag.
<run-as>, a principal named anonymous is assigned to outgoing calls. To assign a different principal, uses the <run-as-principal>.
Note
<run-as> and <run-as-principal> elements inside a servlet element.
See also:
11.2.2. EJB Method Permissions
11.2.2.1. About EJB Method Permissions
<method-permission> element declaration specifies the roles that can invoke the EJB's interface methods. You can specify permissions for the following combinations:
- All home and component interface methods of the named EJB
- A specified method of the home or component interface of the named EJB
- A specified method within a set of methods with an overloaded name
11.2.2.2. Use EJB Method Permissions
The <method-permission> element defines the logical roles that are allowed to access the EJB methods defined by <method> elements. Several examples demonstrate the syntax of the XML. Multiple method permission statements may be present, and they have a cumulative effect. The <method-permission> element is a child of the <assembly-descriptor> element of the <ejb-jar> descriptor.
Example 11.5. Allow roles to access all methods of an EJB
Example 11.6. Allow roles to access only specific methods of an EJB, and limiting which method parameters can be passed.
Example 11.7. Allow any authenticated user to access methods of EJBs
<unchecked/> element allows any authenticated user to use the specified methods.
Example 11.8. Completely exclude specific EJB methods from being used
Example 11.9. A complete <assembly-descriptor> containing several <method-permission> blocks
11.2.3. EJB Security Annotations
11.2.3.1. About EJB Security Annotations
javax.annotation.security annotations are defined in JSR250.
- @DeclareRoles
- Declares which roles are available.
- @RunAs
- Configures the propagated security identity of a component.
11.2.3.2. Use EJB Security Annotations
You can use either XML descriptors or annotations to control which security roles are able to call methods in your Enterprise JavaBeans (EJBs). For information on using XML descriptors, refer to Section 11.2.2.2, “Use EJB Method Permissions”.
Annotations for Controlling Security Permissions of EJBs
- @DeclareRoles
- Use @DeclareRoles to define which security roles to check permissions against. If no @DeclareRoles is present, the list is built automatically from the @RolesAllowed annotation. For information about configuring roles, refer to the Java EE 6 Tutorial Specifying Authorized Users by Declaring Security Roles.
- @RolesAllowed, @PermitAll, @DenyAll
- Use
@RolesAllowedto list which roles are allowed to access a method or methods. Use@PermitAllor@DenyAllto either permit or deny all roles from using a method or methods. For information about configuring annotation method permissions, refer to the Java EE 6 Tutorial Specifying Authorized Users by Declaring Security Roles. - @RunAs
- Use
@RunAsto specify a role a method uses when making calls from the annotated method. For information about configuring propagated security identities using annotations, refer to the Java EE 6 Tutorial Propagating a Security Identity (Run-As).
Example 11.10. Security Annotations Example
WelcomeEveryone. The GoodBye method uses the tempemployee role when making calls. Only the admin role can access method GoodbyeAdmin, and any other methods with no security annotation.
11.2.4. Remote Access to EJBs
11.2.4.1. About Remote Method Access
Supported Transport Types
- Socket / Secure Socket
- RMI / RMI over SSL
- HTTP / HTTPS
- Servlet / Secure Servlet
- Bisocket / Secure Bisocket
Warning
The Remoting system also provides data marshalling and unmarshalling services. Data marshalling refers to the ability to safely move data across network and platform boundaries, so that a separate system can perform work on it. The work is then sent back to the original system and behaves as though it were handled locally.
When you design a client application which uses Remoting, you direct your application to communicate with the server by configuring it to use a special type of resource locator called an InvokerLocator, which is a simple String with a URL-type format. The server listens for requests for remote resources on a connector, which is configured as part of the remoting subsystem. The connector hands the request off to a configured ServerInvocationHandler. Each ServerInvocationHandler implements a method invoke(InvocationRequest), which knows how to handle the request.
JBoss Remoting Framework Layers
- The user interacts with the outer layer. On the client side, the outer layer is the
Clientclass, which sends invocation requests. On the server side, it is the InvocationHandler, which is implemented by the user and receives invocation requests. - The transport is controlled by the invoker layer.
- The lowest layer contains the marshaller and unmarshaller, which convert data formats to wire formats.
11.2.4.2. About Remoting Callbacks
InvocationRequest to the client. Your server-side code works the same regardless of whether the callback is synchronous or asynchronous. Only the client needs to know the difference. The server's InvocationRequest sends a responseObject to the client. This is the payload that the client has requested. This may be a direct response to a request or an event notification.
m_listeners object. It contains a list of all listeners that have been added to your server handler. The ServerInvocationHandler interface includes methods that allow you to manage this list.
org.jboss.remoting.InvokerCallbackHandler, which processes the callback data. After implementing the callback handler, you either add yourself as a listener for a pull callback, or implement a callback server for a push callback.
For a pull callback, your client adds itself to the server's list of listeners using the Client.addListener() method. It then polls the server periodically for synchronous delivery of callback data. This poll is performed using the Client.getCallbacks().
A push callback requires your client application to run its own InvocationHandler. To do this, you need to run a Remoting service on the client itself. This is referred to as a callback server. The callback server accepts incoming requests asynchronously and processes them for the requester (in this case, the server). To register your client's callback server with the main server, pass the callback server's InvokerLocator as the second argument to the addListener method.
11.2.4.3. About Remoting Server Detection
11.2.4.4. Configure the Remoting Subsystem
JBoss Remoting has three top-level configurable elements: the worker thread pool, one or more connectors, and a series of local and remote connection URIs. This topic presents an explanation of each configurable item, example CLI commands for how to configure each item, and an XML example of a fully-configured subsystem. This configuration only applies to the server. Most people will not need to configure the Remoting subsystem at all, unless they use custom connectors for their own applications. Applications which act as Remoting clients, such as EJBs, need separate configuration to connect to a specific connector.
Note
The CLI commands are formulated for a managed domain, when configuring the default profile. To configure a different profile, substitute its name. For a standalone server, omit the /profile=default part of the command.
There are a few configuration aspects which are outside of the remoting subsystem:
- Network Interface
- The network interface used by the
remotingsubsystem is theunsecureinterface defined in thedomain/configuration/domain.xmlorstandalone/configuration/standalone.xml.Copy to Clipboard Copied! Toggle word wrap Toggle overflow The per-host definition of theunsecureinterface is defined in thehost.xmlin the same directory as thedomain.xmlorstandalone.xml. This interface is also used by several other subsystems. Exercise caution when modifying it.Copy to Clipboard Copied! Toggle word wrap Toggle overflow - socket-binding
- The default socket-binding used by the
remotingsubsystem binds to TCP port 4777. Refer to the documentation about socket bindings and socket binding groups for more information if you need to change this. - Remoting Connector Reference for EJB
- The EJB subsystem contains a reference to the remoting connector for remote method invocations. The following is the default configuration:
<remote connector-ref="remoting-connector" thread-pool-name="default"/>
<remote connector-ref="remoting-connector" thread-pool-name="default"/>Copy to Clipboard Copied! Toggle word wrap Toggle overflow - Secure Transport Configuration
- Remoting transports use StartTLS to use a secure (HTTPS, Secure Servlet, etc) connection if the client requests it. The same socket binding (network port) is used for secured and unsecured connections, so no additional server-side configuration is necessary. The client requests the secure or unsecured transport, as its needs dictate. JBoss EAP 6 components which use Remoting, such as EJBs, the ORB, and the JMS provider, request secured interfaces by default.
Warning
The worker thread pool is the group of threads which are available to process work which comes in through the Remoting connectors. It is a single element <worker-thread-pool>, and takes several attributes. Tune these attributes if you get network timeouts, run out of threads, or need to limit memory usage. Specific recommendations depend on your specific situation. Contact Red Hat Global Support Services for more information.
| Attribute | Description | CLI Command |
|---|---|---|
| read-threads |
The number of read threads to create for the remoting worker. Defaults to
1.
| /profile=default/subsystem=remoting/:write-attribute(name=worker-read-threads,value=1)
|
| write-threads |
The number of write threads to create for the remoting worker. Defaults to
1.
| /profile=default/subsystem=remoting/:write-attribute(name=worker-write-threads,value=1)
|
| task-keepalive |
The number of milliseconds to keep non-core remoting worker task threads alive. Defaults to
60.
| /profile=default/subsystem=remoting/:write-attribute(name=worker-task-keepalive,value=60)
|
| task-max-threads |
The maximum number of threads for the remoting worker task thread pool. Defaults to
16.
| /profile=default/subsystem=remoting/:write-attribute(name=worker-task-max-threads,value=16)
|
| task-core-threads |
The number of core threads for the remoting worker task thread pool. Defaults to
4.
| /profile=default/subsystem=remoting/:write-attribute(name=worker-task-core-threads,value=4)
|
| task-limit |
The maximum number of remoting worker tasks to allow before rejecting. Defaults to
16384.
| /profile=default/subsystem=remoting/:write-attribute(name=worker-task-limit,value=16384)
|
The connector is the main Remoting configuration element. Multiple connectors are allowed. Each consists of a element <connector> element with several sub-elements, as well as a few possible attributes. The default connector is used by several subsystems of JBoss EAP 6. Specific settings for the elements and attributes of your custom connectors depend on your applications, so contact Red Hat Global Support Services for more information.
| Attribute | Description | CLI Command |
|---|---|---|
| socket-binding | The name of the socket binding to use for this connector. | /profile=default/subsystem=remoting/connector=remoting-connector/:write-attribute(name=socket-binding,value=remoting)
|
| authentication-provider |
The Java Authentication Service Provider Interface for Containers (JASPIC) module to use with this connector. The module must be in the classpath.
| /profile=default/subsystem=remoting/connector=remoting-connector/:write-attribute(name=authentication-provider,value=myProvider)
|
| security-realm |
Optional. The security realm which contains your application's users, passwords, and roles. An EJB or Web Application can authenticate against a security realm.
ApplicationRealm is available in a default JBoss EAP 6 installation.
| /profile=default/subsystem=remoting/connector=remoting-connector/:write-attribute(name=security-realm,value=ApplicationRealm)
|
| Attribute | Description | CLI Command |
|---|---|---|
| sasl |
Enclosing element for Simple Authentication and Security Layer (SASL) authentication mechanisms
| N/A
|
| properties |
Contains one or more
<property> elements, each with a name attribute and an optional value attribute.
| /profile=default/subsystem=remoting/connector=remoting-connector/property=myProp/:add(value=myPropValue)
|
You can specify three different types of outbound connection:
- Outbound connection to a URI.
- Local outbound connection – connects to a local resource such as a socket.
- Remote outbound connection – connects to a remote resource and authenticates using a security realm.
<outbound-connections> element. Each of these connection types takes an outbound-socket-binding-ref attribute. The outbound-connection takes a uri attribute. The remote outbound connection takes optional username and security-realm attributes to use for authorization.
| Attribute | Description | CLI Command |
|---|---|---|
| outbound-connection | Generic outbound connection. | /profile=default/subsystem=remoting/outbound-connection=my-connection/:add(uri=http://my-connection)
|
| local-outbound-connection | Outbound connection with a implicit local:// URI scheme. | /profile=default/subsystem=remoting/local-outbound-connection=my-connection/:add(outbound-socket-binding-ref=remoting2)
|
| remote-outbound-connection |
Outbound connections for remote:// URI scheme, using basic/digest authentication with a security realm.
| /profile=default/subsystem=remoting/remote-outbound-connection=my-connection/:add(outbound-socket-binding-ref=remoting,username=myUser,security-realm=ApplicationRealm)
|
Before defining the SASL child elements, you need to create the initial SASL element. Use the following command:
/profile=default/subsystem=remoting/connector=remoting-connector/security=sasl:add
/profile=default/subsystem=remoting/connector=remoting-connector/security=sasl:add| Attribute | Description | CLI Command |
|---|---|---|
| include-mechanisms |
Contains a
value attribute, which is a space-separated list of SASL mechanisms.
|
/profile=default/subsystem=remoting/connector=remoting-connector/security=sasl:write-attribute(name=include-mechanisms,value=["DIGEST","PLAIN","GSSAPI"]) |
| qop |
Contains a
value attribute, which is a space-separated list of SASL Quality of protection values, in decreasing order of preference.
|
/profile=default/subsystem=remoting/connector=remoting-connector/security=sasl:write-attribute(name=qop,value=["auth"]) |
| strength |
Contains a
value attribute, which is a space-separated list of SASL cipher strength values, in decreasing order of preference.
|
/profile=default/subsystem=remoting/connector=remoting-connector/security=sasl:write-attribute(name=strength,value=["medium"]) |
| reuse-session |
Contains a
value attribute which is a boolean value. If true, attempt to reuse sessions.
|
/profile=default/subsystem=remoting/connector=remoting-connector/security=sasl:write-attribute(name=reuse-session,value=false) |
| server-auth |
Contains a
value attribute which is a boolean value. If true, the server authenticates to the client.
|
/profile=default/subsystem=remoting/connector=remoting-connector/security=sasl:write-attribute(name=server-auth,value=false) |
| policy |
An enclosing element which contains zero or more of the following elements, which each take a single
value.
|
/profile=default/subsystem=remoting/connector=remoting-connector/security=sasl/sasl-policy=policy:add /profile=default/subsystem=remoting/connector=remoting-connector/security=sasl/sasl-policy=policy:write-attribute(name=forward-secrecy,value=true) /profile=default/subsystem=remoting/connector=remoting-connector/security=sasl/sasl-policy=policy:write-attribute(name=no-active,value=false) /profile=default/subsystem=remoting/connector=remoting-connector/security=sasl/sasl-policy=policy:write-attribute(name=no-anonymous,value=false) /profile=default/subsystem=remoting/connector=remoting-connector/security=sasl/sasl-policy=policy:write-attribute(name=no-dictionary,value=true) /profile=default/subsystem=remoting/connector=remoting-connector/security=sasl/sasl-policy=policy:write-attribute(name=no-plain-text,value=false) /profile=default/subsystem=remoting/connector=remoting-connector/security=sasl/sasl-policy=policy:write-attribute(name=pass-credentials,value=true) |
| properties |
Contains one or more
<property> elements, each with a name attribute and an optional value attribute.
|
/profile=default/subsystem=remoting/connector=remoting-connector/security=sasl/property=myprop:add(value=1) /profile=default/subsystem=remoting/connector=remoting-connector/security=sasl/property=myprop2:add(value=2) |
Example 11.11. Example Configurations
<subsystem xmlns="urn:jboss:domain:remoting:1.1">
<connector name="remoting-connector" socket-binding="remoting" security-realm="ApplicationRealm"/>
</subsystem>
<subsystem xmlns="urn:jboss:domain:remoting:1.1">
<connector name="remoting-connector" socket-binding="remoting" security-realm="ApplicationRealm"/>
</subsystem>
Configuration Aspects Not Yet Documented
- JNDI and Multicast Automatic Detection
11.2.4.5. Use Security Realms with Remote EJB Clients
- Add a new security realm to the domain controller or standalone server.
- Add the following parameters to the
jboss-ejb-client.propertiesfile, which is in the classpath of the application. This example assumes the connection is referred to asdefaultby the other parameters in the file.remote.connection.default.username=appuser remote.connection.default.password=apppassword
remote.connection.default.username=appuser remote.connection.default.password=apppasswordCopy to Clipboard Copied! Toggle word wrap Toggle overflow - Create a custom Remoting connector on the domain or standalone server, which uses your new security realm.
- Deploy your EJB to the server group which is configured to use the profile with the custom Remoting connector, or to your standalone server if you are not using a managed domain.
11.2.4.6. Add a New Security Realm
Run the Management CLI.
Start thejboss-cli.shorjboss-cli.batcommand and connect to the server.Create the new security realm itself.
Run the following command to create a new security realm namedMyDomainRealmon a domain controller or a standalone server.For a domain instance, use this command:/host=master/core-service=management/security-realm=MyDomainRealm:add()
/host=master/core-service=management/security-realm=MyDomainRealm:add()Copy to Clipboard Copied! Toggle word wrap Toggle overflow For a standalone instance, use this command:/core-service=management/security-realm=MyDomainRealm:add()
/core-service=management/security-realm=MyDomainRealm:add()Copy to Clipboard Copied! Toggle word wrap Toggle overflow Create the references to the properties file which will store information about the new role.
Run the following command to create a pointer a file namedmyfile.properties, which will contain the properties pertaining to the new role.Note
The newly created properties file is not managed by the includedadd-user.shandadd-user.batscripts. It must be managed externally.For a domain instance, use this command:/host=master/core-service=management/security-realm=MyDomainRealm/authentication=properties:add(path=myfile.properties)
/host=master/core-service=management/security-realm=MyDomainRealm/authentication=properties:add(path=myfile.properties)Copy to Clipboard Copied! Toggle word wrap Toggle overflow For a standalone instance, use this command:/core-service=management/security-realm=MyDomainRealm/authentication=properties:add(path=myfile.properties)
/core-service=management/security-realm=MyDomainRealm/authentication=properties:add(path=myfile.properties)Copy to Clipboard Copied! Toggle word wrap Toggle overflow
Your new security realm is created. When you add users and roles to this new realm, the information will be stored in a separate file from the default security realms. You can manage this new file using your own applications or procedures.
11.2.4.7. Add a User to a Security Realm
Run the
add-user.shoradd-user.batcommand.Open a terminal and change directories to theEAP_HOME/bin/directory. If you run Red Hat Enterprise Linux or another UNIX-like operating system, runadd-user.sh. If you run Microsoft Windows Server, runadd-user.bat.Choose whether to add a Management User or Application User.
For this procedure, typebto add an Application User.Choose the realm the user will be added to.
By default, the only available realm isApplicationRealm. If you have added a custom realm, you can type its name instead.Type the username, password, and roles, when prompted.
Type the desired username, password, and optional roles when prompted. Verify your choice by typingyes, or typenoto cancel the changes. The changes are written to each of the properties files for the security realm.
11.2.4.8. About Remote EJB Access Using SSL Encryption
Warning
11.3. JAX-RS Application Security
11.3.1. Enable Role-Based Security for a RESTEasy JAX-RS Web Service
RESTEasy supports the @RolesAllowed, @PermitAll, and @DenyAll annotations on JAX-RS methods. However, it does not recognize these annotations by default. Follow these steps to configure the web.xml file and enable role-based security.
Warning
Procedure 11.1. Enable Role-Based Security for a RESTEasy JAX-RS Web Service
- Open the
web.xmlfile for the application in a text editor. - Add the following <context-param> to the file, within the
web-apptags:<context-param> <param-name>resteasy.role.based.security</param-name> <param-value>true</param-value> </context-param><context-param> <param-name>resteasy.role.based.security</param-name> <param-value>true</param-value> </context-param>Copy to Clipboard Copied! Toggle word wrap Toggle overflow - Declare all roles used within the RESTEasy JAX-RS WAR file, using the <security-role> tags:
Copy to Clipboard Copied! Toggle word wrap Toggle overflow - Authorize access to all URLs handled by the JAX-RS runtime for all roles:
Copy to Clipboard Copied! Toggle word wrap Toggle overflow
Role-based security has been enabled within the application, with a set of defined roles.
Example 11.12. Example Role-Based Security Configuration
11.3.2. Secure a JAX-RS Web Service using Annotations
This topic covers the steps to secure a JAX-RS web service using the supported security annotations
Procedure 11.2. Secure a JAX-RS Web Service using Supported Security Annotations
- Enable role-based security. For more information, refer to: Section 11.3.1, “Enable Role-Based Security for a RESTEasy JAX-RS Web Service”
- Add security annotations to the JAX-RS web service. RESTEasy supports the following annotations:
- @RolesAllowed
- Defines which roles can access the method. All roles should be defined in the
web.xmlfile. - @PermitAll
- Allows all roles defined in the
web.xmlfile to access the method. - @DenyAll
- Denies all access to the method.
Chapter 12. The Security Subsystem
12.1. About the Security Subsystem
security subsystem provides security infrastructure for applications. The subsystem uses a security context associated with the current request to expose the capabilities of the authentication manager, authorization manager, audit manager, and mapping manager to the relevant container.
security subsystem is preconfigured by default, so security elements rarely need to be changed. The only security element that may need to be changed is whether to use deep-copy-subject-mode. In most cases, administrators will focus on the configuration of security domains.
See Section 12.3.2.1, “About Deep Copy Subject Mode” for details about deep copy subject mode.
A security domain is a set of Java Authentication and Authorization Service (JAAS) declarative security configurations which one or more applications use to control authentication, authorization, auditing, and mapping. Three security domains are included by default: jboss-ejb-policy, jboss-web-policy, and other. You can create as many security domains as you need to accommodate your application requirements. See Section 13.9, “Use a Security Domain in Your Application” for details about security domain.
12.2. About the Structure of the Security Subsystem
Example 12.1. Example Security Subsystem Configuration
<security-management>, <subject-factory> and <security-properties> elements are not present in the default configuration. The <subject-factory> and <security-properties> elements have been deprecated in JBoss EAP 6.1 onwards.
12.3. Configuring the Security Subsystem
12.3.1. Configure the Security Subsystem
- <security-management>
- This section overrides high-level behaviors of the security subsystem. It contains an optional setting
deep-copy-subject-mode, that specifies whether to copy or link to security tokens, for additional thread safety. - <security-domains>
- A container element which holds multiple security domains. A security domain may contain information about authentication, authorization, mapping, and auditing modules, as well as JASPI authentication and JSSE configuration. Your application would specify a security domain to manage its security information.
- <security-properties>
- Contains names and values of properties which are set on the java.security.Security class.
12.3.2. Security Management
12.3.2.1. About Deep Copy Subject Mode
12.3.2.2. Enable Deep Copy Subject Mode
Procedure 12.1. Enable Deep Copy Security Mode from the Management Console
Log into the Management Console.
For detailed instructions, see the section entitled The Management Console in the Administration and Configuration Guide for JBoss Enterprise Application Platform 6.x located on the Customer Portal at https://access.redhat.com/site/documentation/JBoss_Enterprise_Application_Platform/.Managed Domain: Select the appropriate profile.
In a managed domain, the security subsystem is configured per profile, and you can enable or disable the deep copy security mode independently in each profile.To select a profile, click Configuration at the top of the screen, and then select a profile from the Profile drop down box at the top left.Open the Security Subsystem configuration menu.
Expand the Security menu, then select Security Subsystem.Enable Deep Copy Subject mode.
Click . Check the box beside Deep Copy Subjects to enable deep copy subject mode.
If you prefer to use the management CLI to enable this option, use one of the following commands.
Example 12.2. Managed Domain
/profile=full/subsystem=security/:write-attribute(name=deep-copy-subject-mode,value=TRUE)
/profile=full/subsystem=security/:write-attribute(name=deep-copy-subject-mode,value=TRUE)Example 12.3. Standalone Server
/subsystem=security/:write-attribute(name=deep-copy-subject-mode,value=TRUE)
/subsystem=security/:write-attribute(name=deep-copy-subject-mode,value=TRUE)12.3.3. Security Domains
12.3.3.1. About Security Domains
12.3.3.2. CLI Operations Related to Security Domains
Example 12.4. flush-cache
/subsystem=security/security-domain=other:read-operation-description(name=flush-cache)
/subsystem=security/security-domain=other:read-operation-description(name=flush-cache)
Example 12.5. list-cached-principals
/subsystem=security/security-domain=other:read-operation-description(name=list-cached-principals)
/subsystem=security/security-domain=other:read-operation-description(name=list-cached-principals)
Chapter 13. Authentication and Authorization
13.1. Kerberos and SPNEGO Integration
13.1.1. About Kerberos and SPNEGO Integration
In a typical setup, the user logs into a desktop which is governed by the Active Directory domain. The user then uses the web browser, either Firebox or Internet Explorer, to access a web application that uses JBoss Negotiation hosted on the JBoss EAP. The web browser transfers the desktop sign on information to the web application. JBoss EAP uses background GSS messages with the Active Directory or any Kerberos Server to validate the user. This enables the user to achieve a seamless SSO into the web application.
13.1.2. Desktop SSO using SPNEGO
- Security Domain
- System Properties
- Web Application
Procedure 13.1. Configure Desktop SSO using SPNEGO
Configure Security Domain
Configure the security domains to represent the identity of the server and to secure the web application.Example 13.1. Security Domain Configuration
Copy to Clipboard Copied! Toggle word wrap Toggle overflow Setup the System Properties
If required, the system properties can be set in the domain model.Example 13.2. Configure System Properties
Copy to Clipboard Copied! Toggle word wrap Toggle overflow Configure Web Application
It is not possible to override the authenticators, but it is possible to add theNegotiationAuthenticatoras a valve to your jboss-web.xml descriptor to configure the web application.Note
The valve requires thesecurity-constraintandlogin-configto be defined in the web.xml file as this is used to decide which resources are secured. However, the chosenauth-methodis overridden by this authenticator.Example 13.3. Configure Web Application
Copy to Clipboard Copied! Toggle word wrap Toggle overflow The web application also requires a dependency defining inMETA-INF/MANIFEST.MFso that the JBoss Negotiation classes can be located.Example 13.4. Define Dependency in
META-INF/MANIFEST.MFCopy to Clipboard Copied! Toggle word wrap Toggle overflow
13.1.3. Configure JBoss Negotiation for Microsoft Windows Domain
{hostname}, realm is referred to as {realm}, domain is referred to as {domain}, and the server hosting the JBoss EAP instance is referred to as {machine_name}.
Procedure 13.2. Configure JBoss Negotiation for Microsoft Windows Domain
Clear Existing Service Principal Mappings
On a Microsoft Windows network some mappings are created automatically. Delete the automatically created mappings to map the identity of the server to the service principal for negotiation to take place correctly. The mapping enables the web browser on the client computer to trust the server and attempt SPNEGO. The client computer verifies with the domain controller for a mapping in the form ofHTTP{hostname}.The following are the steps to delete the existing mappings:- List the mapping registered with the domain for the computer using the command,
setspn -L {machine_name}. - Delete the existing mappings using the commands,
setspn -D HTTP/{hostname} {machine_name}andsetspn -D host/{hostname} {machine_name}.
- Create a host user account.
Note
Ensure the host user name is different from the{machine_name}.In the rest of the section the host user name is referred to as{user_name}. Define the mapping between the
{user_name}and{hostname}.- Run the following command to configure the Service Principal Mapping,
ktpass -princ HTTP/{hostname}@{realm} -pass * -mapuser {domain}\{user_name}. - Enter the password for the user name when prompted.
Note
Reset the password for the user name as it is a prerequisite for exporting the keytab. - Verify the mapping by running the following command,
setspn -L {user_name}
Export the keytab of the user to the server on which EAP JBoss is installed.
Run the following command to export the keytab,ktab -k service.keytab -a HTTP/{hostname}@{realm}.Note
This command exports the ticket for the HTTP/{hostname} principal to the keytabservice.keytab, which is used to configure the host security domain on JBoss.- Define the principal within the security domain as follows:
<module-option name="principal">HTTP/{hostname}@{realm}</module-option><module-option name="principal">HTTP/{hostname}@{realm}</module-option>Copy to Clipboard Copied! Toggle word wrap Toggle overflow
13.1.4. Kerberos Authentication for PicketLink IDP
Procedure 13.3. Install JBoss EAP 6 and setup Kerberos
- Download and install JBoss EAP 6. Refer to installation instructions in the Installation Guide.
- Whether you are using Oracle Java or IBM Java, you must use unlimited JCE. Without unlimited JCE, the JBoss server cannot negotiate on the proper SPNEGO mechanism type (using 1.3.6.1.5.2.5, which is
GSS_IAKERB_MECHANISM). - Use the example below to configure JBoss to use your desired Java version.
export JAVA_HOME=JDK/JRE_directory
export JAVA_HOME=JDK/JRE_directoryCopy to Clipboard Copied! Toggle word wrap Toggle overflow
Procedure 13.4. Test your Kerberos setup using JBoss Negotiation Toolkit
- Use the JBoss Negotiation Toolkit available at Github
- Modify the configuration files and use the
mvn clean installcommand to build the project. - Copy the file
jboss-negotiation-toolkit/target/jboss-negotiation-toolkit.warto$JBOSS_HOME/standalone/deployments/. - Verify that all the three sections pass through the JBoss Negotiation Toolkit.
Procedure 13.5. Set up PicketLink IDP
idp.war
The example provided uses the idp.war and employee.war archives, which can be located in the PicketLink Quickstarts repository. Modify the files in idp.war as described below.
- Add
org.jboss.security.negotiationmodule to$JBOSS_HOME/standalone/deployments/idp.war/META-INF/jboss-deployment-structure.xmlbecause IDP is using the JBoss Negotiation module.Copy to Clipboard Copied! Toggle word wrap Toggle overflow - Add an additional valve
org.jboss.security.negotiation.NegotiationAuthenticatorfor SPNEGO to$JBOSS_HOME/standalone/deployments/idp.war/WEB-INF/jboss-web.xml. - Change
security-domainfromidptoSPNEGOin$JBOSS_HOME/standalone/deployments/idp.war/WEB-INF/jboss-web.xmlas follows:Copy to Clipboard Copied! Toggle word wrap Toggle overflow - Add or change the security-role added to your principal by Kerberos server setup to
$JBOSS_HOME/standalone/deployments/idp.war/WEB-INF/web.xml. - Modify the file
$JBOSS_HOME/standalone/deployments/idp.war/WEB-INF/picketlink.xmlas follows:Copy to Clipboard Copied! Toggle word wrap Toggle overflow - Change
IdentityURLto match the host name of server you are running IDP on. - Change
Trustto contain the domain names trusted by the Identity Provider. - Modify the
employee.war. Add or change security-roles added to your principal by Kerberos server setup to$JBOSS_HOME/standalone/deployments/employee.war/WEB-INF/web.xml. - Modify the
security domainconfiguration in the file$JBOSS_HOME/standalone/configuration/standalone.xml. Role mapping configuration is the same as that in normal security domain configurations.Copy to Clipboard Copied! Toggle word wrap Toggle overflow
Note
jboss.security.disable.secdomain.option to true. Refer to Section 13.2.2, “Configure Authentication in a Security Domain” for details. Update the login module to the following:
Procedure 13.6. Verify Kerberos authentication setup for PicketLink IDP
- Start JBoss EAP server using
$JBOSS_HOME/bin/standalone.sh. - Setup your browser, for example Firefox, to use Kerberos. Follow the instructions provided here: https://access.redhat.com/documentation/en-US/Red_Hat_Enterprise_Linux/5/html/Deployment_Guide/sso-config-firefox.html
- Verify that you are able to access the
http://YOUR_DOMAIN:8080/employeefrom Firefox configured as mentioned above.
13.1.5. Login with Certificate with PicketLink IDP
You can configure the PicketLink IDP to support SSL. The following procedure is an example demonstrating how to configure a web application as an IDP supporting SSL client authentication. There are two ways to configure the IDP to authenticate users:
- If SSL is being used, the server will ask the client for a certificate and use this certificate to authenticate the user.
- If no certificate is provided by the client, a form-based authentication is performed.
13.1.5.1. JBoss EAP 6.3 SSL Configuration
Procedure 13.7. Create the certificate, keystore, and truststore for your server
Create a Certificate for Your Server
Use the following command to create a certificate for your server:The system prompts you for additional information. You must provide the values as required. The CN name of the certificate must be the same as your DNS server name. For example, in case of localhost you could use the following command:keytool -genkey -alias server -keyalg RSA -keystore server.keystore -storepass change_it -validity 365
keytool -genkey -alias server -keyalg RSA -keystore server.keystore -storepass change_it -validity 365Copy to Clipboard Copied! Toggle word wrap Toggle overflow keytool -genkey -alias server -keystore server.keystore -storepass change_it -keypass password -dname "CN=localhost,OU=QE,O=example.com,L=Brno,C=CZ"
keytool -genkey -alias server -keystore server.keystore -storepass change_it -keypass password -dname "CN=localhost,OU=QE,O=example.com,L=Brno,C=CZ"Copy to Clipboard Copied! Toggle word wrap Toggle overflow Create the Client Certificate
You will use this client certificate to authenticate against the server when accessing a resource through SSL.keytool -genkey -alias client -keystore client.keystore -storepass change_it -validity 365 -keyalg RSA -keysize 2048 -storetype pkcs12
keytool -genkey -alias client -keystore client.keystore -storepass change_it -validity 365 -keyalg RSA -keysize 2048 -storetype pkcs12Copy to Clipboard Copied! Toggle word wrap Toggle overflow Create the Truststore
Export the client's certificate and create a truststore by importing this certificate:keytool -exportcert -keystore client.keystore -storetype pkcs12 -storepass change_it -alias client -keypass change_it -file client.keystore keytool -import -file client.keystore -alias client -keystore client.truststore
keytool -exportcert -keystore client.keystore -storetype pkcs12 -storepass change_it -alias client -keypass change_it -file client.keystore keytool -import -file client.keystore -alias client -keystore client.truststoreCopy to Clipboard Copied! Toggle word wrap Toggle overflow Change the JBoss EAP 6.3 Server Installation to Enable SSL
Add the following connector to the web subsystem to enable SSL:Copy to Clipboard Copied! Toggle word wrap Toggle overflow Restart the Server
Restart the server and verify that it is responding on: https://localhost:8443Trust the Certificate
You will be prompted to trust the server certificate.
Before accessing the application, you must import the client.keystore to your browser. This file holds the client certificate. When you access the application, the browser prompts you to select the certificate you need to use to authenticate with the server. Select the desired certificate.
Add the following security domain to your server installation. If you're in standalone mode, you must add it to the JBOSS_HOME/standalone/configuration/standalone.xml:
The Regular Expression User Name Login module can be used after Certificate Login Modules to extract a username, UID or other field from the principal name so that roles can be obtained from LDAP. The module has an option named regex which specifies the regular expression to be applied to the principal name, the result of which is passed on to the subsequent login module.
UID=007, EMAILADDRESS=something@something, CN=James Bond, O=SpyAgency would result in the output UID=007.
Example 13.5. Example of Regular Expression User Name Login Module
java.util.regex.Pattern class documentation at http://docs.oracle.com/javase/7/docs/api/java/util/regex/Pattern.html.
13.2. Authentication
13.2.1. About Authentication
13.2.2. Configure Authentication in a Security Domain
Procedure 13.8. Setup Authentication Settings for a Security Domain
Open the security domain's detailed view.
- Click the Configuration label at the top of the management console.
- Select the profile to modify from the Profile selection box at the top left of the Profile view.
- Expand the Security menu, and select Security Domains.
- Click the View link for the security domain you want to edit.
Navigate to the Authentication subsystem configuration.
Select the Authentication label at the top of the view if it is not already selected.The configuration area is divided into two areas: Login Modules and Details. The login module is the basic unit of configuration. A security domain can include several login modules, each of which can include several attributes and options.Add an authentication module.
Click Add to add a JAAS authentication module. Fill in the details for your module.The Code is the class name of the module. The Flag setting controls how the module relates to other authentication modules within the same security domain.Explanation of the FlagsThe Java Enterprise Edition 6 specification provides the following explanation of the flags for security modules. The following list is taken from http://docs.oracle.com/javase/6/docs/technotes/guides/security/jaas/JAASRefGuide.html#AppendixA. Refer to that document for more detailed information.
Expand Flag Details required The LoginModule is required to succeed. If it succeeds or fails, authentication still continues to proceed down the LoginModule list.requisite LoginModule is required to succeed. If it succeeds, authentication continues down the LoginModule list. If it fails, control immediately returns to the application (authentication does not proceed down the LoginModule list).sufficient The LoginModule is not required to succeed. If it does succeed, control immediately returns to the application (authentication does not proceed down the LoginModule list). If it fails, authentication continues down the LoginModule list.optional The LoginModule is not required to succeed. If it succeeds or fails, authentication still continues to proceed down the LoginModule list.Edit authentication settings
After you have added your module, you can modify its Code or Flags by clicking in the Details section of the screen. Be sure the Attributes tab is selected.Optional: Add or remove module options.
If you need to add options to your module, click its entry in the Login Modules list, and select the Module Options tab in the Details section of the page. Click the button, and provide the key and value for the option. Use the button to remove an option.
Your authentication module is added to the security domain, and is immediately available to applications which use the security domain.
jboss.security.security_domain Module Option
By default, each login module defined in a security domain has the jboss.security.security_domain module option added to it automatically. This option causes problems with login modules which check to make sure that only known options are defined. The IBM Kerberos login module, com.ibm.security.auth.module.Krb5LoginModule is one of these.
true when starting JBoss EAP 6. Add the following to your start-up parameters.
-Djboss.security.disable.secdomain.option=true
-Djboss.security.disable.secdomain.option=true13.3. JAAS - Java Authentication and Authorization Service
13.3.1. About JAAS
13.3.2. JAAS Core Classes
Subject(javax.security.auth.Subject)
Configuration(javax.security.auth.login.Configuration)LoginContext(javax.security.auth.login.LoginContext)
Principal(java.security.Principal)Callback(javax.security.auth.callback.Callback)CallbackHandler(javax.security.auth.callback.CallbackHandler)LoginModule(javax.security.auth.spi.LoginModule)
13.3.3. Subject and Principal classes
Subject class is the central class in JAAS. A Subject represents information for a single entity, such as a person or service. It encompasses the entity's principals, public credentials, and private credentials. The JAAS API uses the existing Java 2 java.security.Principal interface to represent a principal, which is essentially a typed name.
public Set getPrincipals() {...}
public Set getPrincipals(Class c) {...}
public Set getPrincipals() {...}
public Set getPrincipals(Class c) {...}
getPrincipals() returns all principals contained in the subject. getPrincipals(Class c) returns only those principals that are instances of class c or one of its subclasses. An empty set is returned if the subject has no matching principals.
java.security.acl.Group interface is a sub-interface of java.security.Principal, so an instance in the principals set may represent a logical grouping of other principals or groups of principals.
13.3.4. Subject Authentication
- An application instantiates a
LoginContextand passes in the name of the login configuration and aCallbackHandlerto populate theCallbackobjects, as required by the configurationLoginModules. - The
LoginContextconsults aConfigurationto load all theLoginModulesincluded in the named login configuration. If no such named configuration exists theotherconfiguration is used as a default. - The application invokes the
LoginContext.loginmethod. - The login method invokes each loaded
LoginModule. As eachLoginModuleattempts to authenticate the subject, it invokes the handle method on the associatedCallbackHandlerto obtain the information required for the authentication process. The required information is passed to the handle method in the form of an array ofCallbackobjects. Upon success, theLoginModules associate relevant principals and credentials with the subject. - The
LoginContextreturns the authentication status to the application. Success is represented by a return from the login method. Failure is represented through a LoginException being thrown by the login method. - If authentication succeeds, the application retrieves the authenticated subject using the
LoginContext.getSubjectmethod. - After the scope of the subject authentication is complete, all principals and related information associated with the subject by the
loginmethod can be removed by invoking theLoginContext.logoutmethod.
LoginContext class provides the basic methods for authenticating subjects and offers a way to develop an application that is independent of the underlying authentication technology. The LoginContext consults a Configuration to determine the authentication services configured for a particular application. LoginModule classes represent the authentication services. Therefore, you can plug different login modules into an application without changing the application itself. The following code shows the steps required by an application to authenticate a subject.
LoginModule interface. This allows an administrator to plug different authentication technologies into an application. You can chain together multiple LoginModules to allow for more than one authentication technology to participate in the authentication process. For example, one LoginModule may perform user name/password-based authentication, while another may interface to hardware devices such as smart card readers or biometric authenticators.
LoginModule is driven by the LoginContext object against which the client creates and issues the login method. The process consists of two phases. The steps of the process are as follows:
- The
LoginContextcreates each configuredLoginModuleusing its public no-arg constructor. - Each
LoginModuleis initialized with a call to its initialize method. TheSubjectargument is guaranteed to be non-null. The signature of the initialize method is:public void initialize(Subject subject, CallbackHandler callbackHandler, Map sharedState, Map options) - The
loginmethod is called to start the authentication process. For example, a method implementation might prompt the user for a user name and password and then verify the information against data stored in a naming service such as NIS or LDAP. Alternative implementations might interface to smart cards and biometric devices, or simply extract user information from the underlying operating system. The validation of user identity by eachLoginModuleis considered phase 1 of JAAS authentication. The signature of theloginmethod isboolean login() throws LoginException. ALoginExceptionindicates failure. A return value of true indicates that the method succeeded, whereas a return value of false indicates that the login module should be ignored. - If the
LoginContext's overall authentication succeeds,commitis invoked on eachLoginModule. If phase 1 succeeds for aLoginModule, then the commit method continues with phase 2 and associates the relevant principals, public credentials, and/or private credentials with the subject. If phase 1 fails for aLoginModule, thencommitremoves any previously stored authentication state, such as user names or passwords. The signature of thecommitmethod is:boolean commit() throws LoginException. Failure to complete the commit phase is indicated by throwing aLoginException. A return of true indicates that the method succeeded, whereas a return of false indicates that the login module should be ignored. - If the
LoginContext's overall authentication fails, then theabortmethod is invoked on eachLoginModule. Theabortmethod removes or destroys any authentication state created by the login or initialize methods. The signature of theabortmethod isboolean abort() throws LoginException. Failure to complete theabortphase is indicated by throwing aLoginException. A return of true indicates that the method succeeded, whereas a return of false indicates that the login module should be ignored. - To remove the authentication state after a successful login, the application invokes
logouton theLoginContext. This in turn results in alogoutmethod invocation on eachLoginModule. Thelogoutmethod removes the principals and credentials originally associated with the subject during thecommitoperation. Credentials should be destroyed upon removal. The signature of thelogoutmethod is:boolean logout() throws LoginException. Failure to complete the logout process is indicated by throwing aLoginException. A return of true indicates that the method succeeded, whereas a return of false indicates that the login module should be ignored.
LoginModule must communicate with the user to obtain authentication information, it uses a CallbackHandler object. Applications implement the CallbackHandler interface and pass it to the LoginContext, which send the authentication information directly to the underlying login modules.
CallbackHandler both to gather input from users, such as a password or smart card PIN, and to supply information to users, such as status information. By allowing the application to specify the CallbackHandler, underlying LoginModules remain independent from the different ways applications interact with users. For example, a CallbackHandler's implementation for a GUI application might display a window to solicit user input. On the other hand, a CallbackHandler implementation for a non-GUI environment, such as an application server, might simply obtain credential information by using an application server API. The CallbackHandler interface has one method to implement:
void handle(Callback[] callbacks)
throws java.io.IOException,
UnsupportedCallbackException;
void handle(Callback[] callbacks)
throws java.io.IOException,
UnsupportedCallbackException;
Callback interface is the last authentication class we will look at. This is a tagging interface for which several default implementations are provided, including the NameCallback and PasswordCallback used in an earlier example. A LoginModule uses a Callback to request information required by the authentication mechanism. LoginModules pass an array of Callbacks directly to the CallbackHandler.handle method during the authentication's login phase. If a callbackhandler does not understand how to use a Callback object passed into the handle method, it throws an UnsupportedCallbackException to abort the login call.
13.4. Java Authentication SPI for Containers (JASPI)
13.4.1. About Java Authentication SPI for Containers (JASPI) Security
13.4.2. Configure Java Authentication SPI for Containers (JASPI) Security
<authentication-jaspi> element to your security domain. The configuration is similar to a standard authentication module, but login module elements are enclosed in a <login-module-stack> element. The structure of the configuration is:
Example 13.6. Structure of the authentication-jaspi element
EAP_HOME/domain/configuration/domain.xml or EAP_HOME/standalone/configuration/standalone.xml.
13.5. Authorization
13.5.1. About Authorization
13.5.2. Configure Authorization in a Security Domain
Procedure 13.9. Setup Authorization in a Security Domain
Open the security domain's detailed view.
- Click the Configuration label at the top of the management console.
- In a managed domain, select the profile to modify from the Profile drop down box at the top left.
- Expand the Security menu item, and select Security Domains.
- Click the View link for the security domain you want to edit.
Navigate to the Authorization subsystem configuration.
Select the Authorization label at the top of the screen.The configuration area is divided into two areas: Policies and Details. The login module is the basic unit of configuration. A security domain can include several authorization policies, each of which can include several attributes and options.Add a policy.
Click Add to add a JAAS authorization policy module. Fill in the details for your module.The Code is the class name of the module. The Flag controls how the module relates to other authorization policy modules within the same security domain.Explanation of the FlagsThe Java Enterprise Edition 6 specification provides the following explanation of the flags for security modules. The following list is taken from http://docs.oracle.com/javase/6/docs/technotes/guides/security/jaas/JAASRefGuide.html#AppendixA. Refer to that document for more detailed information.
Expand Flag Details required The LoginModule is required to succeed. If it succeeds or fails, authorization still continues to proceed down the LoginModule list.requisite LoginModule is required to succeed. If it succeeds, authorization continues down the LoginModule list. If it fails, control immediately returns to the application (authorization does not proceed down the LoginModule list).sufficient The LoginModule is not required to succeed. If it does succeed, control immediately returns to the application (authorization does not proceed down the LoginModule list). If it fails, authorization continues down the LoginModule list.optional The LoginModule is not required to succeed. If it succeeds or fails, authorization still continues to proceed down the LoginModule list.Edit authorization settings
After you have added your module, you can modify its Code or Flags by clicking in the Details section of the screen. Be sure the Attributes tab is selected.Optional: Add or remove module options.
If you need to add options to your module, click its entry in the Policies list, and select the Module Options tab in the Details section of the page. Click and provide the key and value for the option. Use the button to remove an option.
Your authorization policy module is added to the security domain, and is immediately available to applications which use the security domain.
13.6. Java Authorization Contract for Containers (JACC)
13.6.1. About Java Authorization Contract for Containers (JACC)
13.6.2. Configure Java Authorization Contract for Containers (JACC) Security
jboss-web.xml to include the correct parameters.
To add JACC support to the security domain, add the JACC authorization policy to the authorization stack of the security domain, with the required flag set. The following is an example of a security domain with JACC support. However, the security domain is configured in the Management Console or Management CLI, rather than directly in the XML.
The jboss-web.xml is located in the WEB-INF/ directory of your deployment, and contains overrides and additional JBoss-specific configuration for the web container. To use your JACC-enabled security domain, you need to include the <security-domain> element, and also set the <use-jboss-authorization> element to true. The following application is properly configured to use the JACC security domain above.
<jboss-web>
<security-domain>jacc</security-domain>
<use-jboss-authorization>true</use-jboss-authorization>
</jboss-web>
<jboss-web>
<security-domain>jacc</security-domain>
<use-jboss-authorization>true</use-jboss-authorization>
</jboss-web>
Configuring EJBs to use a security domain and to use JACC differs from Web Applications. For an EJB, you can declare method permissions on a method or group of methods, in the ejb-jar.xml descriptor. Within the <ejb-jar> element, any child <method-permission> elements contain information about JACC roles. Refer to the example configuration for more details. The EJBMethodPermission class is part of the Java Enterprise Edition 6 API, and is documented at http://docs.oracle.com/javaee/6/api/javax/security/jacc/EJBMethodPermission.html.
Example 13.7. Example JACC Method Permissions in an EJB
jboss-ejb3.xml descriptor, in the <security> child element. In addition to the security domain, you can also specify the run-as principal, which changes the principal the EJB runs as.
Example 13.8. Example Security Domain Declaration in an EJB
13.6.3. Fine Grained Authorization Using XACML
13.6.3.1. About Fine Grained Authorization and XACML
- PERMIT - The access is approved.
- DENY - The access is denied.
- INDETERMINATE - There is an error at the PDP.
- NOTAPPLICABLE - There is some attribute missing in the request or there is no policy match.
- Oasis XACML v2.0 library
- JAXB v2.0 based object model
- ExistDB Integration for storing/retrieving XACML Policies and Attributes
13.6.3.2. Configure XACML for Fine Grained Authorization
Procedure 13.10. Configure XACML
- Download the library which is a single jar file.
Create one or more policy files for XACML
- Under the
WEB-INF/classes, create apoliciesdirectory to save all your policies. - Create a
policyConfig.xmlunderWEB-INF/classesdirectory.The following are the two types of policy sets can be defined:- Role Permission Policy Sets (RPS)
- Permission Policy Sets (PPS)
Example 13.9. Role Permission Policy Sets (RPS)
EmployeeCopy to Clipboard Copied! Toggle word wrap Toggle overflow ManagerCopy to Clipboard Copied! Toggle word wrap Toggle overflow Example 13.10. Permission Policy Sets (PPS)
EmployeeCopy to Clipboard Copied! Toggle word wrap Toggle overflow ManagerCopy to Clipboard Copied! Toggle word wrap Toggle overflow Create a configuration file for the XACML engine.
A configuration file is created to configure the locators and mention the directories where the policies are saved.Example 13.11. Configuration File
Configuration File Only Indicating The Directory Of The Policy Files.Copy to Clipboard Copied! Toggle word wrap Toggle overflow Configuration File Defining the Policy SetCopy to Clipboard Copied! Toggle word wrap Toggle overflow - Create a Policy Decision Point (PDP) and pass it in the Configuration File.
- In the Policy Enforcement Point (PEP), create an XACML request based on the context. Pass the XACML request to the PDP to get one of the following access decisions:
- Permit
- Deny
- Indeterminate
- Not Applicable
Example 13.12. Access Decisions
Permit conditionCopy to Clipboard Copied! Toggle word wrap Toggle overflow Deny PermissionCopy to Clipboard Copied! Toggle word wrap Toggle overflow
13.7. Security Auditing
13.7.1. About Security Auditing
13.7.2. Configure Security Auditing
Procedure 13.11. Setup Security Auditing for a Security Domain
Open the security domain's detailed view.
- Click Configuration at the top of the screen.
- In a managed domain, select a profile to modify from the Profile selection box at the top left.
- Expand the Security menu and select Security Domains.
- Click View for the security domain you want to edit.
Navigate to the Auditing subsystem configuration.
Select the Audit tab at the top of the screen.The configuration area is divided into two areas: Provider Modules and Details. The provider module is the basic unit of configuration. A security domain can include several provider modules each of which can include attributes and options.Add a provider module.
Click Add. Fill in the Code section with the classname of the provider module.Verify if your module is working
The goal of an audit module is to provide a way to monitor the events in the security subsystem. This monitoring can be done by means of writing to a log file, email notifications or any other measurable auditing mechanism.For example, JBoss EAP 6 includes theLogAuditProvidermodule by default. If enabled following the steps above, this audit module writes security notifications to aaudit.logfile in thelogsubfolder within theEAP_HOMEdirectory.To verify if the steps above have worked in the context of theLogAuditProvider, perform an action that is likely to trigger a notification and then check the audit log file.For a full list of included security auditing provider modules, see here: Section A.4, “Included Security Auditing Provider Modules”Optional: Add, edit, or remove module options.
To add options to your module, click its entry in the Modules list, and select the Module Options tab in the Details section of the page. Click , and provide the key and value for the option.To edit an option that already exists, click to remove it, and click to add it again with the correct options.
Your security auditing module is added to the security domain, and is immediately available to applications which use the security domain.
13.7.3. New Security Properties
| Name | Description | Possible values | Behavior | Default |
|---|---|---|---|---|
org.jboss.security.web.audit | This property controls the granularity of the security auditing of web requests. | off, headers, cookies, parameters, attributes | Any component (or comma-separated group of components) specified will be audited out of web requests. | headers,parameters |
org.jboss.security.web.audit.mask | This property can be used to specify a list of strings to be matched against headers, parameters, cookies, and attributes of web requests. Any element matching the specified masks will be excluded from security audit logging. | Any comma separated string indicating keys of headers, parameters, cookies, and attributes. | Currently, the matching of the masks is fuzzy rather than strict. For example, a mask of authorization will mask both the header called authorization and the parameter called custom_authorization. A future release may introduce strict masks. | j_password,authorization |
13.8. Security Mapping
13.8.1. About Security Mapping
13.8.2. Configure Security Mapping in a Security Domain
Procedure 13.12. Setup Security Mapping Settings in a Security Domain
Open the security domain's detailed view.
- Click the Configuration label at the top of the management console.
- In a managed domain, select a profile from the Profile selection box at the top left.
- Expand the Security menu, and select Security Domains.
- Click View for the security domain you want to edit.
Navigate to the Mapping subsystem configuration.
Select the Mapping label at the top of the screen.The configuration area is divided into two areas: Modules and Details. The mapping module is the basic unit of configuration. A security domain can include several mapping modules, each of which can include several attributes and options.Add a security mapping module.
Click Add.Fill in the details for your module. The Code is the class name of the module. The Type field refers to the type of mapping this module performs. Allowed values are principal, role, attribute or credential.Edit a security mapping module
After you have added your module, you can modify its Code or Type.- Select the Attributes tab.
- Click in the Details section of the screen.
Optional: Add, edit, or remove module options.
To add options to your module, click its entry in the Modules list, and select the Module Options tab in the Details section of the page. Click , and provide the key and value for the option.To edit an option that already exists, click Remove to remove it, and add it again with the new value.Use the button to remove an option.
Your security mapping module is added to the security domain, and is immediately available to applications which use the security domain.
13.9. Use a Security Domain in Your Application
To use a security domain in your application, first you need to define the security domain in the server's configuration and then enable it for an application in the application's deployment descriptor. Then you must add the required annotations to the EJB that uses it. This topic covers the steps required to use a security domain in your application.
Warning
Procedure 13.13. Configure Your Application to Use a Security Domain
Define the Security Domain
You need to define the security domain in the server's configuration file, and then enable it for an application in the application's descriptor file.Configure the security domain in the server's configuration file
The security domain is configured in thesecuritysubsystem of the server's configuration file. If the JBoss EAP 6 instance is running in a managed domain, this is thedomain/configuration/domain.xmlfile. If the JBoss EAP 6 instance is running as a standalone server, this is thestandalone/configuration/standalone.xmlfile.Theother,jboss-web-policy, andjboss-ejb-policysecurity domains are provided by default in JBoss EAP 6. The following XML example was copied from thesecuritysubsystem in the server's configuration file.Thecache-typeattribute of a security domain specifies a cache for faster authentication checks. Allowed values aredefaultto use a simple map as the cache, orinfinispanto use an Infinispan cache.Copy to Clipboard Copied! Toggle word wrap Toggle overflow You can configure additional security domains as needed using the Management Console or CLI.Enable the security domain in the application's descriptor file
The security domain is specified in the<security-domain>child element of the<jboss-web>element in the application'sWEB-INF/jboss-web.xmlfile. The following example configures a security domain namedmy-domain.<jboss-web> <security-domain>my-domain</security-domain> </jboss-web><jboss-web> <security-domain>my-domain</security-domain> </jboss-web>Copy to Clipboard Copied! Toggle word wrap Toggle overflow This is only one of many settings which you can specify in theWEB-INF/jboss-web.xmldescriptor.
Add the Required Annotation to the EJB
You configure security in the EJB using the@SecurityDomainand@RolesAllowedannotations. The following EJB code example limits access to theothersecurity domain by users in theguestrole.Copy to Clipboard Copied! Toggle word wrap Toggle overflow For more code examples, see theejb-securityquickstart in the JBoss EAP 6 Quickstarts bundle, which is available from the Red Hat Customer Portal.
Chapter 14. Single Sign On (SSO)
14.1. About Single Sign On (SSO) for Web Applications
Single Sign On (SSO) allows authentication to one resource to implicitly authorize access to other resources.
Non-clustered SSO limits the sharing of authorization information to applications on the same virtual host. In addition, there is no resiliency in the event of a host failure. Clustered SSO data can be shared between applications in multiple virtual hosts, and is resilient to failover. In addition, clustered SSO is able to receive requests from a load balancer.
If a resource is unprotected, a user is not challenged to authenticate at all. If a user accesses a protected resource, the user is required to authenticate.
14.2. About Clustered Single Sign On (SSO) for Web Applications
jboss-web.xml.
- Apache Tomcat ClusteredSingleSignOn
- Apache Tomcat IDPWebBrowserSSOValve
- SPNEGO-based SSO provided by PicketLink
14.3. Choose the Right SSO Implementation
web.xml deployment descriptor. Clustered SSO allows for replication of security context and identity information, regardless of whether or not the applications are themselves clustered. Although these technologies may be used together they are separate concepts.
If your organization already uses a Kerberos-based authentication and authorization system, such as Microsoft Active Directory, you can use the same systems to transparently authenticate to your enterprise applications running on JBoss EAP 6.
If you are running multiple applications on a single instance and need to enable SSO session replication for those applications, non-clustered SSO will meet your requirements.
If you are running either a single application, or multiple applications, across a cluster and need to enable SSO session replication for those applications, clustered SSO will meet your requirements.
14.4. Use Single Sign On (SSO) In A Web Application
Single Sign On (SSO) capabilities are provided by the web and Infinispan subsystems. Use this procedure to configure SSO in web applications.
Prerequisites
- A configured security domain which handles authentication and authorization.
- The
infinispansubsystem. It is present in thefull-haprofile for a managed domain, or by using thestandalone-full-ha.xmlconfiguration in a standalone server. - The
webcache-containerand SSO replicated-cache. The initial configuration files already contain thewebcache-container, and some of the configurations already contain the SSO replicated-cache as well. Use the following commands to check for and enable the SSO replicated-cache. Note that these commands modify thehaprofile of a managed domain. You can change the commands to use a different profile, or remove the/profile=haportion of the command, for a standalone server.Example 14.1. Check for the
webcache-containerThe profiles and configurations mentioned above include thewebcache-container by default. Use the following command to verify its presence. If you use a different profile, substitute its name instead ofha./profile=ha/subsystem=infinispan/cache-container=web/:read-resource(recursive=false,proxies=false,include-runtime=false,include-defaults=true)
/profile=ha/subsystem=infinispan/cache-container=web/:read-resource(recursive=false,proxies=false,include-runtime=false,include-defaults=true)Copy to Clipboard Copied! Toggle word wrap Toggle overflow If the result issuccessthe subsystem is present. Otherwise, you need to add it.Example 14.2. Add the
webcache-containerUse the following three commands to enable thewebcache-container to your configuration. Modify the name of the profile as appropriate, as well as the other parameters. The parameters here are the ones used in a default configuration./profile=ha/subsystem=infinispan/cache-container=web:add(aliases=["standard-session-cache"],default-cache="repl",module="org.jboss.as.clustering.web.infinispan")
/profile=ha/subsystem=infinispan/cache-container=web:add(aliases=["standard-session-cache"],default-cache="repl",module="org.jboss.as.clustering.web.infinispan")Copy to Clipboard Copied! Toggle word wrap Toggle overflow /profile=ha/subsystem=infinispan/cache-container=web/transport=TRANSPORT:add(lock-timeout=60000)
/profile=ha/subsystem=infinispan/cache-container=web/transport=TRANSPORT:add(lock-timeout=60000)Copy to Clipboard Copied! Toggle word wrap Toggle overflow /profile=ha/subsystem=infinispan/cache-container=web/replicated-cache=repl:add(mode="ASYNC",batching=true)
/profile=ha/subsystem=infinispan/cache-container=web/replicated-cache=repl:add(mode="ASYNC",batching=true)Copy to Clipboard Copied! Toggle word wrap Toggle overflow Example 14.3. Check for the
SSOreplicated-cacheRun the following Management CLI command:/profile=ha/subsystem=infinispan/cache-container=web/:read-resource(recursive=true,proxies=false,include-runtime=false,include-defaults=true)
/profile=ha/subsystem=infinispan/cache-container=web/:read-resource(recursive=true,proxies=false,include-runtime=false,include-defaults=true)Copy to Clipboard Copied! Toggle word wrap Toggle overflow Look for output like the following:"sso" => {If you do not find it, the SSO replicated-cache is not present in your configuration.Example 14.4. Add the
SSOreplicated-cache/profile=ha/subsystem=infinispan/cache-container=web/replicated-cache=sso:add(mode="SYNC", batching=true)
/profile=ha/subsystem=infinispan/cache-container=web/replicated-cache=sso:add(mode="SYNC", batching=true)Copy to Clipboard Copied! Toggle word wrap Toggle overflow - The
websubsystem needs to be configured to use SSO. The following command enables SSO on the virtual server calleddefault-host, and the cookie domaindomain.com. The cache name issso, and reauthentication is disabled./profile=ha/subsystem=web/virtual-server=default-host/sso=configuration:add(cache-container="web",cache-name="sso",reauthenticate="false",domain="domain.com")
/profile=ha/subsystem=web/virtual-server=default-host/sso=configuration:add(cache-container="web",cache-name="sso",reauthenticate="false",domain="domain.com")Copy to Clipboard Copied! Toggle word wrap Toggle overflow - Each application which will share the SSO information must be configured to use the same <security-domain> in its
jboss-web.xmldeployment descriptor and the same Realm in itsweb.xmlconfiguration file.
Configure sso under the web subsystem in the server profile. The ClusteredSingleSignOn version is used when attribute cache-container is present, otherwise standard SingleSignOn class is used.
Example 14.5. Example Clustered SSO Configuration
/subsystem=web/virtual-server=default-host/sso=configuration:add(cache-container="web",cache-name="sso",reauthenticate="false",domain="domain.com")
/subsystem=web/virtual-server=default-host/sso=configuration:add(cache-container="web",cache-name="sso",reauthenticate="false",domain="domain.com")Example 14.6. Example Non-Clustered SSO Configuration
/subsystem=web/virtual-server=default-host/sso=configuration:add(reauthenticate="false")
/subsystem=web/virtual-server=default-host/sso=configuration:add(reauthenticate="false")
An application can programmatically invalidate a session by invoking method javax.servlet.http.HttpSession.invalidate().
14.5. About Kerberos
14.6. About SPNEGO
14.7. About Microsoft Active Directory
- Lightweight Directory Access Protocol (LDAP), for storing information about users, computers, passwords, and other resources.
- Kerberos, for providing secure authentication over the network.
- Domain Name Service (DNS) for providing mappings between IP addresses and host names of computers and other devices on the network.
14.8. Configure Kerberos or Microsoft Active Directory Desktop SSO for Web Applications
To authenticate your web or EJB applications using your organization's existing Kerberos-based authentication and authorization infrastructure, such as Microsoft Active Directory, you can use the JBoss Negotiation capabilities built into JBoss EAP 6. If you configure your web application properly, a successful desktop or network login is sufficient to transparently authenticate against your web application, so no additional login prompt is required.
There are a few noticeable differences between JBoss EAP 6 and earlier versions:
- Security domains are configured for each profile of a managed domain, or for each standalone server. They are not part of the deployment itself. The security domain a deployment should use is named in the deployment's
jboss-web.xmlorjboss-ejb3.xmlfile. - Security properties are configured as part of a security domain. They are not part of the deployment.
- You can no longer override the authenticators as part of your deployment. However, you can add a NegotiationAuthenticator valve to your
jboss-web.xmldescriptor to achieve the same effect. The valve still requires the<security-constraint>and<login-config>elements to be defined in theweb.xml. These are used to decide which resources are secured. However, the chosen auth-method will be overridden by the NegotiationAuthenticator valve in thejboss-web.xml. - The
CODEattributes in security domains now use a simple name instead of a fully-qualified class name. The following table shows the mappings between the classes used for JBoss Negotiation, and their classes.
| Simple Name | Class Name | Purpose |
|---|---|---|
| Kerberos |
com.sun.security.auth.module.Krb5LoginModule
com.ibm.security.auth.module.Krb5LoginModule
|
Kerberos login module when using the Oracle JDK
Kerberos login module when using the IBM JDK
|
| SPNEGO | org.jboss.security.negotiation.spnego.SPNEGOLoginModule | The mechanism which enables your Web applications to authenticate to your Kerberos authentication server. |
| AdvancedLdap | org.jboss.security.negotiation.AdvancedLdapLoginModule | Used with LDAP servers other than Microsoft Active Directory. |
| AdvancedAdLdap | org.jboss.security.negotiation.AdvancedADLoginModule | Used with Microsoft Active Directory LDAP servers. |
The JBoss Negotiation Toolkit is a debugging tool which is available for download from https://community.jboss.org/servlet/JiveServlet/download/16876-2-34629/jboss-negotiation-toolkit.war. It is provided as an extra tool to help you to debug and test the authentication mechanisms before introducing your application into production. It is an unsupported tool, but is considered to be very helpful, as SPNEGO can be difficult to configure for web applications.
Procedure 14.1. Setup SSO Authentication for your Web or EJB Applications
Configure one security domain to represent the identity of the server. Set system properties if necessary.
The first security domain authenticates the container itself to the directory service. It needs to use a login module which accepts some type of static login mechanism, because a real user is not involved. This example uses a static principal and references a keytab file which contains the credential.The XML code is given here for clarity, but you should use the Management Console or Management CLI to configure your security domains.Copy to Clipboard Copied! Toggle word wrap Toggle overflow Configure a second security domain to secure the web application or applications. Set system properties if necessary.
The second security domain is used to authenticate the individual user to the Kerberos or SPNEGO authentication server. You need at least one login module to authenticate the user, and another to search for the roles to apply to the user. The following XML code shows an example SPNEGO security domain. It includes an authorization module to map roles to individual users. You can also use a module which searches for the roles on the authentication server itself.Copy to Clipboard Copied! Toggle word wrap Toggle overflow Specify the security-constraint and login-config in the
web.xmlTheweb.xmldescriptor contain information about security constraints and login configuration. The following are example values for each.Copy to Clipboard Copied! Toggle word wrap Toggle overflow Specify the security domain and other settings in the
jboss-web.xmldescriptor.Specify the name of the client-side security domain (the second one in this example) in thejboss-web.xmldescriptor of your deployment, to direct your application to use this security domain.You can no longer override authenticators directly. Instead, you can add the NegotiationAuthenticator as a valve to yourjboss-web.xmldescriptor, if you need to. The<jacc-star-role-allow>allows you to use the asterisk (*) character to match multiple role names, and is optional.Copy to Clipboard Copied! Toggle word wrap Toggle overflow Add a dependency to your application's
MANIFEST.MF, to locate the Negotiation classes.The web application needs a dependency on classorg.jboss.security.negotiationto be added to the deployment'sMETA-INF/MANIFEST.MFmanifest, in order to locate the JBoss Negotiation classes. The following shows a properly-formatted entry.Manifest-Version: 1.0 Build-Jdk: 1.6.0_24 Dependencies: org.jboss.security.negotiation
Manifest-Version: 1.0 Build-Jdk: 1.6.0_24 Dependencies: org.jboss.security.negotiationCopy to Clipboard Copied! Toggle word wrap Toggle overflow - As an alternative, add a dependency to your application by editing the
META-INF/jboss-deployment-structure.xmlfile:Copy to Clipboard Copied! Toggle word wrap Toggle overflow
Your web application accepts and authenticates credentials against your Kerberos, Microsoft Active Directory, or other SPNEGO-compatible directory service. If the user runs the application from a system which is already logged into the directory service, and where the required roles are already applied to the user, the web application does not prompt for authentication, and SSO capabilities are achieved.
14.9. Configure SPNEGO Fall Back to Form Authentication
Procedure 14.2. SPNEGO security with fall back to form authentication
Set up SPNEGO
Refer the procedure described in Section 14.8, “Configure Kerberos or Microsoft Active Directory Desktop SSO for Web Applications”Modify
web.xmlAdd alogin-configelement to your application and setup the login and error pages in web.xml:Copy to Clipboard Copied! Toggle word wrap Toggle overflow Add web content
Add references oflogin.htmlanderror.htmltoweb.xml. These files are added to web application archive to the place specified inform-login-configconfiguration. For more information refer Enable Form-based Authentication section in the Security Guide for JBoss EAP 6. A typicallogin.htmllooks like this:Copy to Clipboard Copied! Toggle word wrap Toggle overflow
Note
Chapter 15. Single Sign-On with SAML
15.1. About Security Token Service (STS)
- Type of the request, such as Issue, Renew, and so on.
- Type of the token.
- Lifetime of the issued token.
- Information about the service provider that requested the token.
- Information used to encrypt the generated token.
Note
provider attribute. The value specified in this parameter is passed to the relevant KeyStore.getInstance("PKCS11") calls and the key and trust store are initialized.
java.security policy file. Oracle's Java PKCs#11 Reference Guide document may be a useful resource for this information.
RequestSecurityToken element. The sample request contains two other WS-Trust elements: RequestType, which specifies that this request is an Issue request, and TokenType, which specifies the type of the token to be issued.
Example 15.1. WS-Trust security token request message
Example 15.2. Security token response message
TokenType element specifies the type of the issued token, while the RequestedSecurityToken element contains the token itself. The format of the token depends on the type of the token. The Lifetime element specifies when the token was created and when it expires.
The following are the steps in which the security token requests are processed:
- A client sends a security token request to
PicketLinkSTS.
PicketLinkSTSparses the request message, generating a JAXB object model.
PicketLinkSTSreads the configuration file and creates theSTSConfigurationobject, if needed. Then it obtains a reference to theWSTrustRequestHandlerfrom the configuration and delegates the request processing to the handler instance.
- The request handler uses the
STSConfigurationto set default values when needed (for example, when the request doesn't specify a token lifetime value).
- The
WSTrustRequestHandlercreates theWSTrustRequestContext, setting theJAXBrequest object and the caller principal it received fromPicketLinkSTS.
- The
WSTrustRequestHandleruses theSTSConfigurationto get theSecurityTokenProviderthat must be used to process the request based on the type of the token that is being requested. Then it invokes the provider, passing the constructedWSTrustRequestContextas a parameter.
- The
SecurityTokenProviderinstance process the token request and stores the issued token in the request context.
- The
WSTrustRequestHandlerobtains the token from the context, encrypts it if needed, and constructs the WS-Trust response object containing the security token.
PicketLinkSTSdictates the response generated by the request handler and returns it to the client.
15.2. Configure Security Token Service (STS)
picketlink.xml file, which belongs in the WEB-INF directory of the deployed application. The following are the elements that can be configured in the picketlink.xml file.
Note
PicketLinkSTS: This is the root element. It defines some properties that allows the STS administrator to set a the following default values:STSName: A string representing the name of the security token service. If not specified, the defaultPicketLinkSTSvalue is used.TokenTimeout: The token lifetime value in seconds. If not specified, the default value of 3600 (one hour) is used.EncryptToken: A boolean specifying whether issued tokens are to be encrypted or not. The default value is false.
KeyProvider: This element and all its sub elements are used to configure the keystore that are used by PicketLink STS to sign and encrypt tokens. Properties like the keystore location, its password, and the signing (private key) alias and password are all configured in this section.RequestHandler: This element specifies the fully qualified name of theWSTrustRequestHandlerimplementation to be used. If not specified, the defaultorg.picketlink.identity.federation.core.wstrust.StandardRequestHandleris used.TokenProvider: This section specifies theTokenProviderimplementations that must be used to handle each type of security token. In the example we have two providers - one that handles tokens of typeSpecialTokenand one that handles tokens of typeSAMLV2.0. TheWSTrustRequestHandlercalls thegetProviderForTokenType(String type) method ofSTSConfigurationto obtain a reference to the appropriateTokenProvider.TokenTimeout: This is used by theWSTrustRequestHandlerwhen no Lifetime has been specified in the WS-Trust request. It creates a Lifetime instance that has the current time as the creation time and expires after the specified number of seconds.ServiceProviders: This section specifies the token types that must be used for each service provider (the Web service that requires a security token). When a WS-Trust request does not contain the token type, theWSTrustRequestHandlermust use the service provider endpoint to find out the type of the token that must be issued.EncryptToken: This is used by theWSTrustRequestHandlerto decide if the issued token must be encrypted or not. If true, the public key certificate (PKC) of the service provider is used to encrypt the token.
Example 15.3. STS Configuration
15.3. About PicketLink STS Login Modules
The following are the different types of STS Login Modules.
STSIssuingLoginModule
- Calls the configured STS and requests for a security token. Upon successfully receiving the
RequestedSecurityToken, it marks the authentication as successful. - A call to STS typically requires authentication. This Login Module uses credentials from one of the following sources:
- Its properties file, if the
useOptionsCredentialsmodule option is set totrue. - Previous login module credentials if the
password-stackingmodule option is set touseFirstPass. - From the configured
CallbackHandlerby supplying a Name and Password Callback.
- Upon successful authentication, the
SamlCredentialis inserted in the Subject's public credentials if one with the same Assertion is not found to be already present there.
STSValidatingLoginModule
- Calls the configured STS and validates an available security token.
- A call to STS typically requires authentication. This Login Module uses credentials from one of the following sources:
- Its properties file, if the
useOptionsCredentialsmodule option is set totrue. - Previous login module credentials if the
password-stackingmodule option is set touseFirstPass. - From the configured
CallbackHandlerby supplying a Name and Password Callback.
- Upon successful authentication, the SamlCredential is inserted in the Subject's public credentials if one with the same Assertion is not found to be already present there.
SAML2STSLoginModule
- This Login Module supplies a
ObjectCallbackto the configuredCallbackHandlerand expects aSamlCredentialobject back. The Assertion is validated against the configured STS. - If a user ID and SAML token are shared, this Login Module bypasses validation When stacked on top of another Login Module that is successfully authenticated.
- Upon successful authentication, the
SamlCredentialis inspected for aNameIDand a multi-valued role attribute that is respectively set as the ID and roles of the user.
SAML2LoginModule
- This login module is used in conjunction with other components for SAML authentication and performs no authentication itself.
- The
SPRedirectFormAuthenticatoruses this login module in PicketLink's implementation of the SAML v2 HTTP Redirect Profile. - The Tomcat authenticator valve performs authentication through redirecting to the identity provider and getting a SAML assertion.
- This login module is used to pass the user ID and roles to the JBoss security framework to be populated in the JAAS subject.
15.4. Configure STSIssuingLoginModule
STSIssuingLoginModule uses a user name and password to authenticate the user against an STS by retrieving a token.
Example 15.4. Configure STSIssuingLoginModule
- changing their declared security-domain
- specifying a Principal mapping provider
- specifying a RoleGroup mapping provider
15.5. Configure STSValidatingLoginModule
Example 15.5. Configure STSValidatingLoginModule
15.6. STS Client Pooling
- org.picketlink.identity.federation.core.wstrust.auth.STSIssuingLoginModule
- org.picketlink.identity.federation.core.wstrust.auth.STSValidatingLoginModule
- org.picketlink.trust.jbossws.jaas.JBWSTokenIssuingLoginModule
initialNumberOfClients login module option.
org.picketlink.identity.federation.bindings.stspool.STSClientPoolFactory provides client pool functionality to applications.
Using STSClientPoolFactory
final STSClientPool pool = STSClientPoolFactory.getPoolInstance(); pool.createPool(20, stsClientConfig); final STSClient client = pool.getClient(stsClientConfig);
final STSClientPool pool = STSClientPoolFactory.getPoolInstance();
pool.createPool(20, stsClientConfig);
final STSClient client = pool.getClient(stsClientConfig);
pool.returnClient();
pool.returnClient();if (! pool.configExists(stsClientConfig) {
pool.createPool(stsClientConfig);
}
if (! pool.configExists(stsClientConfig) {
pool.createPool(stsClientConfig);
}
pool.destroyPool(stsClientConfig);
pool.destroyPool(stsClientConfig);15.7. SAML Web Browser Based SSO
15.7.1. About SAML Web Browser Based SSO
Important
15.7.2. Setup SAML v2 based Web SSO
- Identity Provider: The Identity Provider is the authoritative entity responsible for authenticating an end user and asserting the identity for that user in a trusted fashion to trusted partners.
- Service Provider: The Service Provider relies on the Identity Provider to assert information about a user via an electronic user credential, leaving the service provider to manage access control and dissemination based on a trusted set of user credential assertions.
15.7.3. Configure Identity Provider
Procedure 15.1. Configure Identity Provider (IDP)
Configure the web application security for the IDP
Configure a web application as the Identity provider.Note
The use of FORM based web application security is recommended as it gives you the ability to customize the login page.The following is an example of theweb.xmlconfigurationExample 15.6.
web.xmlConfiguration for IDPCopy to Clipboard Copied! Toggle word wrap Toggle overflow Create Security Domain for IDP
Create a Security Domain with authentication and authorization mechanisms defined for the IDP. Refer to Section 13.9, “Use a Security Domain in Your Application” for further details.Configure the IDP Valves
Create ajboss-web.xmlfile in theWEB-INFdirectory of your IDP web application to configure the valves for the IDP. The following is an example ofjboss-web.xmlfile.Example 15.7.
jboss-web.xmlFile Configuration for IDP ValvesCopy to Clipboard Copied! Toggle word wrap Toggle overflow Configure the PicketLink Configuration File (
picketlink.xml)The following is an example ofpicketlink.xmlconfiguration. In this configuration file you provide the URL that gets added as the issuer in the outgoing SAML2 assertions to the service providers and the IDP.Example 15.8.
picketlink.xmlConfigurationCopy to Clipboard Copied! Toggle word wrap Toggle overflow By default,picketlink.xmlis located in theWEB-INFdirectory of your IDP web application. However, you can configure a custom path to apicketlink.xmlthat is external to the application:Optional: Configuring a custom path to
picketlink.xmlAdd two paramaters to the valve element in your application'sWEB-INF/jboss-web.xml:configFilespecifying for the path topicketlink.xml, andtimerIntervalwhich specifies the interval in milliseconds to reload the configuration. For example:Copy to Clipboard Copied! Toggle word wrap Toggle overflow
Declare dependencies on PicketLink module (
META-INF/MANIFEST.MF, orjboss-deployment-structure.xml)The web application also requires a dependency defining inMETA-INF/MANIFEST.MForjboss-deployment-structure.xml, so that the PicketLink classes can be located.Example 15.9. Define Dependency in
META-INF/MANIFEST.MFManifest-Version: 1.0 Build-Jdk: 1.6.0_24 Dependencies: org.picketlinkManifest-Version: 1.0 Build-Jdk: 1.6.0_24 Dependencies: org.picketlinkCopy to Clipboard Copied! Toggle word wrap Toggle overflow Example 15.10. Define Dependency in
META-INF/jboss-deployment-structure.xmlCopy to Clipboard Copied! Toggle word wrap Toggle overflow
15.7.4. Configure Service Provider using HTTP/REDIRECT Binding
Procedure 15.2. Configure Service Provider (SP)
Configure the Web Application Security For the SP
The web application to be configured as a SP should have FORM based security enabled in itsweb.xmlfile.Example 15.11.
web.xmlConfiguration for SPCopy to Clipboard Copied! Toggle word wrap Toggle overflow Create Security Domain for SP
Create a Security Domain that usesSAML2LoginModule. Here is an example configuration:<security-domain name="sp" cache-type="default"> <authentication> <login-module code="org.picketlink.identity.federation.bindings.jboss.auth.SAML2LoginModule" flag="required"/> </authentication> </security-domain><security-domain name="sp" cache-type="default"> <authentication> <login-module code="org.picketlink.identity.federation.bindings.jboss.auth.SAML2LoginModule" flag="required"/> </authentication> </security-domain>Copy to Clipboard Copied! Toggle word wrap Toggle overflow Configure the SP Valve
To configure the valve for the SP, create ajboss-web.xmlin theWEB-INFdirectory of your SP web application.Example 15.12.
jboss-web.xmlFile Configuration for SP ValvesCopy to Clipboard Copied! Toggle word wrap Toggle overflow Configure the PicketLink Configuration File (
picketlink.xml)The following is an example ofpicketlink.xmlconfiguration for the SP. In this configuration file you provide the URL for the SP and for the IDP, with corresponding handlers for the SP.Example 15.13.
picketlink.xmlConfigurationCopy to Clipboard Copied! Toggle word wrap Toggle overflow By default,picketlink.xmlis located in theWEB-INFdirectory of your application. However, you can configure a custom path to apicketlink.xmlthat is external to the application:Optional: Configuring a custom path to
picketlink.xmlAdd two paramaters to the valve element in your application'sWEB-INF/jboss-web.xml:configFilespecifying for the path topicketlink.xml, andtimerIntervalwhich specifies the interval in milliseconds to reload the configuration. For example:Copy to Clipboard Copied! Toggle word wrap Toggle overflow
Declare dependencies on PicketLink module (
META-INF/MANIFEST.MF, orjboss-deployment-structure.xml)The web application also requires a dependency defining inMETA-INF/MANIFEST.MForjboss-deployment-structure.xml, so that the PicketLink classes can be located.Example 15.14. Define Dependency in
META-INF/MANIFEST.MFManifest-Version: 1.0 Build-Jdk: 1.6.0_24 Dependencies: org.picketlinkManifest-Version: 1.0 Build-Jdk: 1.6.0_24 Dependencies: org.picketlinkCopy to Clipboard Copied! Toggle word wrap Toggle overflow Example 15.15. Define Dependency in
META-INF/jboss-deployment-structure.xmlCopy to Clipboard Copied! Toggle word wrap Toggle overflow
15.7.5. Setup SAML v2 based Web SSO using HTTP/POST Binding
Procedure 15.3. Setup SAML v2 based Web SSO using HTTP/POST Binding
Configure the Identity Provider (IDP).
The steps to configure IDP for HTTP/POST Binding are same as that of the HTTP/Redirect Binding. For more information on configuring the IDP, see Section 15.7.2, “Setup SAML v2 based Web SSO”Configure the Service Provider (SP)
The steps to configure SP for HTTP/POST Binding are the same as that of the HTTP/Redirect Binding, except for a single variation in thepicketlink.xmlfile of the SP. ChangeBindingType="REDIRECT"toBindingType="POST".For more information on configuring the SP, see Section 15.7.4, “Configure Service Provider using HTTP/REDIRECT Binding”
15.7.6. Configure Dynamic Account Chooser at a Service Provider
Prerequisites:
Procedure 15.4. Configure Dynamic Account Chooser at a Service Provider
- Configure the account chooser valve in
jboss-web.xmlin theWEB-INFdirectory of your SP web application.Example 15.16.
jboss-web.xmlFile Configuration for SP Account ChooserCopy to Clipboard Copied! Toggle word wrap Toggle overflow AccountChooserValvehas the following configurable options:- DomainName
- The domain name to be used for the cookie that is sent to the user's browser.
- CookieExpiry
- The cookie expiry in seconds. Default is
-1, which means the cookie expires when the browser is closed. - AccountIDPMapProvider
- The fully-qualified name of the implementation for IDP Mapping. Default is a properties file
idpmap.propertiesin theWEB-INFdirectory of your SP web application. This implementation must implementorg.picketlink.identity.federation.bindings.tomcat.sp.AbstractAccountChooserValve.AccountIDPMapProvider. - AccountChooserPage
- The name of the HTML/JSP page for listing the different IDP accounts. Default is
/accountChooser.html.
- Define the mapping for the IDPs. By default, this is a properties file
idpmap.propertiesin theWEB-INFdirectory of your SP web application.Example 15.17.
idpmap.propertiesConfigurationDomainA=http://localhost:8080/idp1/ DomainB=http://localhost:8080/idp2/
DomainA=http://localhost:8080/idp1/ DomainB=http://localhost:8080/idp2/Copy to Clipboard Copied! Toggle word wrap Toggle overflow - Create a HTML page in your SP web application for the user to choose the IDP. By default, this file is
accountChooser.html. The URL to each of IDP must have the parameteridpthat specifies the name of the IDP listed inidpmap.properties.Example 15.18.
accountChooser.htmlConfigurationCopy to Clipboard Copied! Toggle word wrap Toggle overflow
15.7.7. Configuration of IDP-initiated SSO
Prerequisites:
Walkthrough
- User accesses the IDP.
- The IDP seeing that there is neither SAML request nor response, assumes an IDP first scenario using SAML.
- The IDP challenges the user to authenticate.
- Upon authentication, the IDP shows the hosted section where the user gets a page that links to all the SP applications.
- The user chooses an SP application.
- The IDP redirects the user to the service provider with an SAML assertion in the query parameter, SAML response.
- The SP checks the SAML assertion and provides access.
No special configuration is necessary to get Unsolicited Responses supported, you can configure your IDP and SPs as usual. For more information about how to configure IDP and SP, refer to:
Once the user is authenticated, the IDP shows a page with links to all service provider applications. A link will usually look like this:
<a href="http://localhost:8080/idp?SAML_VERSION=2.0&TARGET=http://localhost:8080/sales-post/">Sales</a>
<a href="http://localhost:8080/idp?SAML_VERSION=2.0&TARGET=http://localhost:8080/sales-post/">Sales</a>15.8. Configure SAML Global Logout Profile
Note
Procedure 15.5. Configure Global Logout
Configure picketlink-handlers.xml
Add theSAML2LogOutHandlerin the picketlink-handlers.xml.Configure Service Provider web page
AppendGLO=trueto the link at the end of your web page of the service provider.Example 15.19. Link to Global Logout
<a href="?GLO=true">Click to Globally LogOut</a>
<a href="?GLO=true">Click to Globally LogOut</a>Copy to Clipboard Copied! Toggle word wrap Toggle overflow Create a
logout.jsppageAs part of the logout process, PicketLink will redirect the user to alogout.jsppage located in the root directory of your Service Provider application. Ensure that this page is created.
Chapter 16. Login Modules
16.1. Using Modules
16.1.1. Password Stacking
password-stacking attribute to useFirstPass. If a previous module configured for password stacking has authenticated the user, all the other stacking modules will consider the user authenticated and only attempt to provide a set of roles for the authorization step.
password-stacking option is set to useFirstPass, this module first looks for a shared user name and password under the property names javax.security.auth.login.name and javax.security.auth.login.password respectively in the login module shared state map.
Note
Example 16.1. Password Stacking Sample
16.1.2. Password Hashing
Important
Example 16.2. Password Hashing
nobody and contains based64-encoded, SHA-256 hashes of the passwords in a usersb64.properties file. The usersb64.properties file is part of the deployment classpath.
- hashAlgorithm
- Name of the
java.security.MessageDigestalgorithm to use to hash the password. There is no default so this option must be specified to enable hashing. Typical values areSHA-256,SHA-1andMD5. - hashEncoding
- String that specifies one of three encoding types:
base64,hexorrfc2617. The default isbase64. - hashCharset
- Encoding character set used to convert the clear text password to a byte array. The platform default encoding is the default.
- hashUserPassword
- Specifies the hashing algorithm must be applied to the password the user submits. The hashed user password is compared against the value in the login module, which is expected to be a hash of the password. The default is
true. - hashStorePassword
- Specifies the hashing algorithm must be applied to the password stored on the server side. This is used for digest authentication, where the user submits a hash of the user password along with a request-specific tokens from the server to be compare. The hash algorithm (for digest, this would be
rfc2617) is utilized to compute a server-side hash, which should match the hashed value sent from the client.
org.jboss.security.auth.spi.Util class provides a static helper method that will hash a password using the specified encoding. The following example produces a base64-encoded, MD5 hashed password.
String hashedPassword = Util.createPasswordHash("SHA-256",
Util.BASE64_ENCODING, null, null, "password");
String hashedPassword = Util.createPasswordHash("SHA-256",
Util.BASE64_ENCODING, null, null, "password");
password - is piped into the OpenSSL digest function then piped into another OpenSSL function to convert into base64-encoded format.
echo -n password | openssl dgst -sha256 -binary | openssl base64
echo -n password | openssl dgst -sha256 -binary | openssl base64 XohImNooBHFR0OVvjcYpJ3NgPQ1qq73WKhHvch0VQtg=. This value must be stored in the users' properties file specified in the security domain - usersb64.properties - in the example above.
16.1.3. Unauthenticated Identity
unauthenticatedIdentity is a login module configuration option that assigns a specific identity (guest, for example) to requests that are made with no associated authentication information. This can be used to allow unprotected servlets to invoke methods on EJBs that do not require a specific role. Such a principal has no associated roles and so can only access either unsecured EJBs or EJB methods that are associated with the unchecked permission constraint.
- unauthenticatedIdentity: This defines the principal name that should be assigned to requests that contain no authentication information.
16.1.4. Ldap Login Module
Ldap login module is a LoginModule implementation that authenticates against a Lightweight Directory Access Protocol (LDAP) server. Use the Ldap login module if your user name and credentials are stored in an LDAP server that is accessible using a Java Naming and Directory Interface (JNDI) LDAP provider.
Note
AdvancedLdap login module chained with the SPNEGO login module or only the AdvancedLdap login module.
- Distinguished Name (DN)
- In Lightweight Directory Access Protocol (LDAP), the distinguished name uniquely identifies an object in a directory. Each distinguished name must have a unique name and location from all other objects, which is achieved using a number of attribute-value pairs (AVPs). The AVPs define information such as common names, organization unit, among others. The combination of these values results in a unique string required by the LDAP.
Note
- java.naming.factory.initial
InitialContextFactoryimplementation class name. This defaults to the Sun LDAP provider implementationcom.sun.jndi.ldap.LdapCtxFactory.- java.naming.provider.url
- LDAP URL for the LDAP server.
- java.naming.security.authentication
- Security protocol level to use. The available values include
none,simple, andstrong. If the property is undefined, the behavior is determined by the service provider. - java.naming.security.protocol
- Transport protocol to use for secure access. Set this configuration option to the type of service provider (for example, SSL). If the property is undefined, the behavior is determined by the service provider.
- java.naming.security.principal
- Specifies the identity of the Principal for authenticating the caller to the service. This is built from other properties as described below.
- java.naming.security.credentials
- Specifies the credentials of the Principal for authenticating the caller to the service. Credentials can take the form of a hashed password, a clear-text password, a key, or a certificate. If the property is undefined, the behavior is determined by the service provider.
Note
true.
InitialLdapContext with an environment composed of the LDAP JNDI properties described previously in this section.
InitialLdapContext instance is created), the user's roles are queried by performing a search on the rolesCtxDN location with search attributes set to the roleAttributeName and uidAttributeName option values. The roles names are obtaining by invoking the toString method on the role attributes in the search result set.
Example 16.3. LDAP Login Module Security Domain
java.naming.factory.initial, java.naming.factory.url and java.naming.security options in the testLDAP security domain configuration indicate the following conditions:
- The Sun LDAP JNDI provider implementation will be used
- The LDAP server is located on host
ldaphost.jboss.orgon port 1389 - The LDAP simple authentication method will be use to connect to the LDAP server.
jsmith would map to uid=jsmith,ou=People,dc=jboss,dc=org.
Note
userPassword attribute of the user's entry (theduke in this example). Most LDAP servers operate in this manner, however if your LDAP server handles authentication differently you must ensure LDAP is configured according to your production environment requirements.
rolesCtxDN for entries whose uidAttributeID match the user. If matchOnUserDN is true, the search will be based on the full DN of the user. Otherwise the search will be based on the actual user name entered. In this example, the search is under ou=Roles,dc=jboss,dc=org for any entries that have a member attribute equal to uid=jsmith,ou=People,dc=jboss,dc=org. The search would locate cn=JBossAdmin under the roles entry.
cn. The value returned would be JBossAdmin, so the jsmith user is assigned to the JBossAdmin role.
- LDAP Data Interchange Format (LDIF)
- Plain text data interchange format used to represent LDAP directory content and update requests. Directory content is represented as one record for each object or update request. Content consists of add, modify, delete, and rename requests.
Example 16.4. LDIF File Example
16.1.5. LdapExtended Login Module
- Distinguished Name (DN)
- In Lightweight Directory Access Protocol (LDAP), the distinguished name uniquely identifies an object in a directory. Each distinguished name must have a unique name and location from all other objects, which is achieved using a number of attribute-value pairs (AVPs). The AVPs define information such as common names, organization unit, among others. The combination of these values results in a unique string required by the LDAP.
org.jboss.security.auth.spi.LdapExtLoginModule) searches for the user to bind, as well as the associated roles, for authentication. The roles query recursively follows DNs to navigate a hierarchical role structure.
- Context.INITIAL_CONTEXT_FACTORY = "java.naming.factory.initial"
- Context.SECURITY_PROTOCOL = "java.naming.security.protocol"
- Context.PROVIDER_URL = "java.naming.provider.url"
- Context.SECURITY_AUTHENTICATION = "java.naming.security.authentication"
- Context.REFERRAL = "java.naming.referral"
- The initial LDAP server bind is authenticated using the bindDN and bindCredential properties. The bindDN is a user with permissions to search both the baseCtxDN and rolesCtxDN trees for the user and roles. The user DN to authenticate against is queried using the filter specified by the baseFilter property.
- The resulting userDN is authenticated by binding to the LDAP server using the userDN as the InitialLdapContext environment Context.SECURITY_PRINCIPAL. The Context.SECURITY_CREDENTIALS property is either set to the String password obtained by the callback handler.
- If this is successful, the associated user roles are queried using the rolesCtxDN, roleAttributeID, roleAttributeIsDN, roleNameAttributeID, and roleFilter options.
Figure 16.1. LDAP Structure Example
Example 16.5. Example 2 LDAP Configuration
Example 16.6. Example 3 LDAP Configuration
Example 16.7. Example 4 LDAP Configuration
Example 16.8. Default Active Directory Configuration
Example 16.9. Recursive Roles Active Directory Configuration
16.1.6. UsersRoles Login Module
UsersRoles login module is a simple login module that supports multiple users and user roles loaded from Java properties files. The default username-to-password mapping filename is users.properties and the default username-to-roles mapping filename is roles.properties.
WEB-INF/classes folder in the WAR archive), or into any directory on the server classpath. The primary purpose of this login module is to easily test the security settings of multiple users and roles using properties files deployed with the application.
Example 16.10. UserRoles Login Module
ejb3-sampleapp-users.properties file uses a username=password format with each user entry on a separate line:
username1=password1 username2=password2 ...
username1=password1
username2=password2
...
ejb3-sampleapp-roles.properties file referenced in Example 16.10, “UserRoles Login Module” uses the pattern username=role1,role2, with an optional group name value. For example:
username1=role1,role2,... username1.RoleGroup1=role3,role4,... username2=role1,role3,...
username1=role1,role2,...
username1.RoleGroup1=role3,role4,...
username2=role1,role3,...
ejb3-sampleapp-roles.properties is used to assign the user name roles to a particular named group of roles where the XXX portion of the property name is the group name. The user name=... form is an abbreviation for user name.Roles=..., where the Roles group name is the standard name the JBossAuthorizationManager expects to contain the roles which define the permissions of users.
jduke user name:
jduke=TheDuke,AnimatedCharacter jduke.Roles=TheDuke,AnimatedCharacter
jduke=TheDuke,AnimatedCharacter
jduke.Roles=TheDuke,AnimatedCharacter
16.1.7. Database Login Module
Database login module is a Java Database Connectivity-based (JDBC) login module that supports authentication and role mapping. Use this login module if you have your user name, password and role information stored in a relational database.
Note
Database login module is based on two logical tables:
Table Principals(PrincipalID text, Password text) Table Roles(PrincipalID text, Role text, RoleGroup text)
Table Principals(PrincipalID text, Password text)
Table Roles(PrincipalID text, Role text, RoleGroup text)
Principals table associates the user PrincipalID with the valid password and the Roles table associates the user PrincipalID with its role sets. The roles used for user permissions must be contained in rows with a RoleGroup column value of Roles.
java.sql.ResultSet has the same logical structure as the Principals and Roles tables described previously. The actual names of the tables and columns are not relevant as the results are accessed based on the column index.
Principals and Roles, as already declared. The following statements populate the tables with the following data:
PrincipalIDjavawith aPasswordofechomanin thePrincipalstablePrincipalIDjavawith a role namedEchoin theRolesRoleGroupin theRolestablePrincipalIDjavawith a role namedcaller_javain theCallerPrincipalRoleGroupin theRolestable
INSERT INTO Principals VALUES('java', 'echoman')
INSERT INTO Roles VALUES('java', 'Echo', 'Roles')
INSERT INTO Roles VALUES('java', 'caller_java', 'CallerPrincipal')
INSERT INTO Principals VALUES('java', 'echoman')
INSERT INTO Roles VALUES('java', 'Echo', 'Roles')
INSERT INTO Roles VALUES('java', 'caller_java', 'CallerPrincipal')
Database login module configuration could be constructed as follows:
CREATE TABLE Users(username VARCHAR(64) PRIMARY KEY, passwd VARCHAR(64)) CREATE TABLE UserRoles(username VARCHAR(64), role VARCHAR(32))
CREATE TABLE Users(username VARCHAR(64) PRIMARY KEY, passwd VARCHAR(64))
CREATE TABLE UserRoles(username VARCHAR(64), role VARCHAR(32))
16.1.8. Certificate Login Module
Certificate login module authenticates users based on X509 certificates. A typical use case for this login module is CLIENT-CERT authentication in the web tier.
CertRolesLoginModule and DatabaseCertLoginModule extend the behavior to obtain the authorization roles from either a properties file or database.
Certificate login module options see Section A.1, “Included Authentication Modules”.
Certificate login module needs a KeyStore to perform user validation. This is obtained from a JSSE configuration of linked security domain as shown in the following configuration fragment:
Procedure 16.1. Secure Web Applications with Certificates and Role-based Authorization
user-app.war, using client certificates and role-based authorization. In this example the CertificateRoles login module is used for authentication and authorization. Both the trusted-clients.keystore and the app-roles.properties require an entry that maps to the principal associated with the client certificate.
Declare Resources and Roles
Modifyweb.xmlto declare the resources to be secured along with the allowed roles and security domain to be used for authentication and authorization.Copy to Clipboard Copied! Toggle word wrap Toggle overflow Specify the Security Domain
In thejboss-web.xmlfile, specify the required security domain.<jboss-web> <security-domain>app-sec-domain</security-domain> </jboss-web>
<jboss-web> <security-domain>app-sec-domain</security-domain> </jboss-web>Copy to Clipboard Copied! Toggle word wrap Toggle overflow Configure Login Module
Define the login module configuration for theapp-sec-domaindomain you just specified using the management CLI.Copy to Clipboard Copied! Toggle word wrap Toggle overflow
Example 16.11. Certificate Example
trusted-clients.keystore would need the certificate in Example 16.11, “Certificate Example” stored with an alias of CN=valid-client, OU=Security QE, OU=JBoss, O=Red Hat, C=CZ. The app-roles.properties must have the same entry. Since the DN contains characters that are normally treated as delimiters, you must escape the problem characters using a backslash ('\') as illustrated below.
# A sample app-roles.properties file CN\=valid-client,\ OU\=Security\ QE,\ OU\=JBoss,\ O\=Red\ Hat,\ C\=CZ
# A sample app-roles.properties file
CN\=valid-client,\ OU\=Security\ QE,\ OU\=JBoss,\ O\=Red\ Hat,\ C\=CZ
16.1.9. Identity Login Module
Identity login module is a simple login module that associates a hard-coded user name to any subject authenticated against the module. It creates a SimplePrincipal instance using the name specified by the principal option.
Note
jduke and assigns role names of TheDuke, and AnimatedCharacter:.
16.1.10. RunAs Login Module
RunAs login module is a helper module that pushes a run as role onto the stack for the duration of the login phase of authentication, then pops the run as role from the stack in either the commit or abort phase.
RunAs login module must be configured ahead of the login modules that require a run as role established.
16.1.10.1. RunAsIdentity Creation
javax.security.auth.Subject instance or an org.jboss.security.RunAsIdentity instance. Both these classes store one or more principals that represent the identity and a list of roles that the identity possesses. In the case of the javax.security.auth.Subject a list of credentials is also stored.
ejb-jar.xml deployment descriptor, you specify one or more roles that a user must have to access the various EJB methods. A comparison of these lists reveals whether the user has one of the roles necessary to access the EJB method.
Example 16.12. org.jboss.security.RunAsIdentity Creation
ejb-jar.xml file, you specify a <security-identity> element with a <run-as> role defined as a child of the <session> element.
Admin RunAsIdentity role must be created.
Admin role, you define a <run-as-principal> element in the jboss-ejb3.xml file.
<security-identity> element in both the ejb-jar.xml and <security> element in the jboss-ejb3.xml files are parsed at deployment time. The <run-as> role name and the <run-as-principal> name are then stored in the org.jboss.metadata.ejb.spec.SecurityIdentityMetaData class.
Example 16.13. Assigning multiple roles to a RunAsIdentity
jboss-ejb3.xml deployment descriptor <assembly-descriptor> element group.
<run-as-principal> of John was created. The configuration in this example extends the Admin role, by adding the Support role. The new role contains extra principals, including the originally defined principal John.
<security-role> element in both the ejb-jar.xml and jboss-ejb3.xml files are parsed at deployment time. The <role-name> and the <principal-name> data is stored in the org.jboss.metadata.ejb.spec.SecurityIdentityMetaData class.
16.1.11. Client Login Module
Client login module (org.jboss.security.ClientLoginModule) is an implementation of LoginModule for use by JBoss clients when establishing caller identity and credentials. This creates a new SecurityContext assigns it a principal and a credential and sets the SecurityContext to the ThreadLocal security context.
Client login module is the only supported mechanism for a client to establish the current thread's caller. Both stand-alone client applications, and server environments (acting as JBoss EJB clients where the security environment has not been configured to use the EAP security subsystem transparently) must use Client login module.
Client login module.
16.1.12. SPNEGO Login Module
SPNEGO login module (org.jboss.security.negotiation.spnego.SPNEGOLoginModule) is an implementation of LoginModule that establishes caller identity and credentials with a KDC. The module implements SPNEGO (Simple and Protected GSSAPI Negotiation mechanism) and is a part of the JBoss Negotiation project. This authentication can be used in the chained configuration with the AdvancedLdap login module to allow cooperation with an LDAP server.
SPNEGO or AdvancedLdap login modules in your project, you must add the dependency manually by editing the META-INF/jboss-deployment-structure.xml deployment descriptor file.
Example 16.14. Add JBoss Negotiation Module as a Dependency
16.1.13. RoleMapping Login Module
RoleMapping login module supports mapping roles, that are the end result of the authentication process, to one or more declarative roles. For example, if the authentication process has determined that the user "A" has the roles "ldapAdmin" and "testAdmin", and the declarative role defined in the web.xml or ejb-jar.xml file for access is admin, then this login module maps the admin roles to the user A.
RoleMapping login module options see Section A.1, “Included Authentication Modules”.
RoleMapping login module must be defined as an optional module to a login module configuration as it alters mapping of the previously mapped roles.
Example 16.15. Defining mapped roles
Example 16.16. Preferred method of defining mapped roles
Example 16.17. Properties File used by a RoleMappingLoginModule
ldapAdmin=admin, testAdmin
ldapAdmin=admin, testAdmin
ldapAdmin, then the roles admin and testAdmin are added to or substitute the authenticated subject depending on the replaceRole property value.
16.1.14. bindCredential Module Option
bindCredential module option is used to store the credentials for the DN and can be used by several login and mapping modules. There are several methods for obtaining the password.
- Plaintext in a management CLI command.
- The password for the
bindCredentialmodule may be provided in plaintext, in a management CLI command. For example:("bindCredential"=>"secret1"). For security reasons, the password should be encrypted using the JBoss EAP vault mechanism. - Use an external command.
- To obtain the password from the output of an external command, use the format
{EXT}...where the...is the external command. The first line of the command output is used as the password.To improve performance, the{EXTC[:expiration_in_millis]}variant caches the password for a specified number of milliseconds. By default the cached password does not expire. If the value0(zero) is specified, the cached credentials do not expire.TheEXTCvariant is only supported by theLdapExtendedlogin module.
Example 16.18. Obtain a password from an external command
{EXT}cat /mysecretpasswordfile
{EXT}cat /mysecretpasswordfile
Example 16.19. Obtain a password from an external file and cache it for 500 milliseconds
{EXTC:500}cat /mysecretpasswordfile
{EXTC:500}cat /mysecretpasswordfile
16.2. Custom Modules
AuthenticationManager requires a particular usage pattern of the Subject principals set. You must understand the JAAS Subject class's information storage features and the expected usage of these features to write a login module that works with the AuthenticationManager.
LoginModule implementations that can help you implement custom login modules.
Subject by using the following methods:
Subject identities and roles, EAP has selected the most logical choice: the principals sets obtained via getPrincipals() and getPrincipals(java.lang.Class). The usage pattern is as follows:
- User identities (for example; user name, social security number, employee ID) are stored as
java.security.Principalobjects in theSubjectPrincipalsset. ThePrincipalimplementation that represents the user identity must base comparisons and equality on the name of the principal. A suitable implementation is available as theorg.jboss.security.SimplePrincipalclass. OtherPrincipalinstances may be added to theSubjectPrincipalsset as needed. - Assigned user roles are also stored in the
Principalsset, and are grouped in named role sets usingjava.security.acl.Groupinstances. TheGroupinterface defines a collection ofPrincipals and/orGroups, and is a subinterface ofjava.security.Principal. - Any number of role sets can be assigned to a
Subject.
- The EAP security framework uses two well-known role sets with the names
RolesandCallerPrincipal.- The
Rolesgroup is the collection ofPrincipals for the named roles as known in the application domain under which theSubjecthas been authenticated. This role set is used by methods like theEJBContext.isCallerInRole(String), which EJBs can use to see if the current caller belongs to the named application domain role. The security interceptor logic that performs method permission checks also uses this role set. - The
CallerPrincipalGroupconsists of the singlePrincipalidentity assigned to the user in the application domain. TheEJBContext.getCallerPrincipal()method uses theCallerPrincipalto allow the application domain to map from the operation environment identity to a user identity suitable for the application. If aSubjectdoes not have aCallerPrincipalGroup, the application identity is the same as operational environment identity.
16.2.1. Subject Usage Pattern Support
Subject usage patterns described in Section 16.2, “Custom Modules”, EAP includes login modules that populate the authenticated Subject with a template pattern that enforces correct Subject usage.
The most generic of the two is the org.jboss.security.auth.spi.AbstractServerLoginModule class.
javax.security.auth.spi.LoginModule interface and offers abstract methods for the key tasks specific to an operation environment security infrastructure. The key details of the class are highlighted in Example 16.20, “AbstractServerLoginModule Class Fragment”. The JavaDoc comments detail the responsibilities of subclasses.
Important
loginOk instance variable is pivotal. This must be set to true if the log in succeeds, or false by any subclasses that override the log in method. If this variable is incorrectly set, the commit method will not correctly update the subject.
Example 16.20. AbstractServerLoginModule Class Fragment
The second abstract base login module suitable for custom login modules is the org.jboss.security.auth.spi.UsernamePasswordLoginModule.
char[] password as the authentication credentials. It also supports the mapping of anonymous users (indicated by a null user name and password) to a principal with no roles. The key details of the class are highlighted in the following class fragment. The JavaDoc comments detail the responsibilities of subclasses.
Example 16.21. UsernamePasswordLoginModule Class Fragment
The choice of sub-classing the AbstractServerLoginModule versus UsernamePasswordLoginModule is based on whether a string-based user name and credentials are usable for the authentication technology you are writing the login module for. If the string-based semantic is valid, then subclass UsernamePasswordLoginModule, otherwise subclass AbstractServerLoginModule.
The steps your custom login module must execute depend on which base login module class you choose. When writing a custom login module that integrates with your security infrastructure, you should start by sub-classing AbstractServerLoginModule or UsernamePasswordLoginModule to ensure that your login module provides the authenticated Principal information in the form expected by the EAP security manager.
AbstractServerLoginModule, you must override the following:
void initialize(Subject, CallbackHandler, Map, Map): if you have custom options to parse.boolean login(): to perform the authentication activity. Be sure to set theloginOkinstance variable to true if log in succeeds, false if it fails.Principal getIdentity(): to return thePrincipalobject for the user authenticated by thelog()step.Group[] getRoleSets(): to return at least oneGroupnamedRolesthat contains the roles assigned to thePrincipalauthenticated duringlogin(). A second commonGroupis namedCallerPrincipaland provides the user's application identity rather than the security domain identity.
UsernamePasswordLoginModule, you must override the following:
void initialize(Subject, CallbackHandler, Map, Map): if you have custom options to parse.Group[] getRoleSets(): to return at least oneGroupnamedRolesthat contains the roles assigned to thePrincipalauthenticated duringlogin(). A second commonGroupis namedCallerPrincipaland provides the user's application identity rather than the security domain identity.String getUsersPassword(): to return the expected password for the current user name available via thegetUsername()method. ThegetUsersPassword()method is called from withinlogin()after thecallbackhandlerreturns the user name and candidate password.
16.2.2. Custom LoginModule Example
UsernamePasswordLoginModule and obtains a user's password and role names from a JNDI lookup.
password/<username> (where <username> is the current user being authenticated). Similarly, a lookup of the form roles/<username> returns the requested user's roles. In Example 16.22, “JndiUserAndPassLoginModule Custom Login Module” is the source code for the JndiUserAndPassLoginModule custom login module.
UsernamePasswordLoginModule, the JndiUserAndPassLoginModule obtains the user's password and roles from the JNDI store. The JndiUserAndPassLoginModule does not interact with the JAAS LoginModule operations.
Example 16.22. JndiUserAndPassLoginModule Custom Login Module
Example 16.23. Definition of security-ex2 security domain with the newly-created custom login module
JndiUserAndPassLoginModule custom login module for the server side authentication of the user is determined by the login configuration for the example security domain. The EJB JAR META-INF/jboss-ejb3.xml descriptor sets the security domain. For a web application it is part of the WEB-INF/jboss-web.xml file.
Example 16.24. jboss-ejb3.xml Example
Example 16.25. jboss-web.xml example
<?xml version="1.0"?>
<jboss-web>
<security-domain>security-ex2</security-domain>
</jboss-web>
<?xml version="1.0"?>
<jboss-web>
<security-domain>security-ex2</security-domain>
</jboss-web>
Chapter 17. Role-Based Security in Applications
17.1. Java Authentication and Authorization Service (JAAS)
17.2. About Java Authentication and Authorization Service (JAAS)
Server groups (in a managed domain) and servers (in a standalone server) include the configuration for security domains. A security domain includes information about a combination of authentication, authorization, mapping, and auditing modules, with configuration details. An application specifies which security domain it requires, by name, in its jboss-web.xml.
Application-specific configuration takes place in one or more of the following four files.
| File | Description |
|---|---|
| ejb-jar.xml |
The deployment descriptor for an Enterprise JavaBean (EJB) application, located in the
META-INF directory of the archive. Use the ejb-jar.xml to specify roles and map them to principals, at the application level. You can also limit specific methods and classes to certain roles. It is also used for other EJB-specific configuration not related to security.
|
| web.xml |
The deployment descriptor for a Java Enterprise Edition (EE) web application. Use the
web.xml to declare the resource and transport constraints for the application, such as limiting the type of HTTP requests that are allowed. You can also configure simple web-based authentication in this file. It is also used for other application-specific configuration not related to security. The security domain the application uses for authentication and authorization is defined in jboss-web.xml.
|
| jboss-ejb3.xml |
Contains JBoss-specific extensions to the
ejb-jar.xml descriptor.
|
| jboss-web.xml |
Contains JBoss-specific extensions to the
web.xml descriptor.
|
Note
ejb-jar.xml and web.xml are defined in the Java Enterprise Edition (Java EE) specification. The jboss-ejb3.xml provides JBoss-specific extensions for the ejb-jar.xml, and the jboss-web.xml provides JBoss-specific extensions for the web.xml.
17.3. Use a Security Domain in Your Application
To use a security domain in your application, first you need to define the security domain in the server's configuration and then enable it for an application in the application's deployment descriptor. Then you must add the required annotations to the EJB that uses it. This topic covers the steps required to use a security domain in your application.
Warning
Procedure 17.1. Configure Your Application to Use a Security Domain
Define the Security Domain
You need to define the security domain in the server's configuration file, and then enable it for an application in the application's descriptor file.Configure the security domain in the server's configuration file
The security domain is configured in thesecuritysubsystem of the server's configuration file. If the JBoss EAP 6 instance is running in a managed domain, this is thedomain/configuration/domain.xmlfile. If the JBoss EAP 6 instance is running as a standalone server, this is thestandalone/configuration/standalone.xmlfile.Theother,jboss-web-policy, andjboss-ejb-policysecurity domains are provided by default in JBoss EAP 6. The following XML example was copied from thesecuritysubsystem in the server's configuration file.Thecache-typeattribute of a security domain specifies a cache for faster authentication checks. Allowed values aredefaultto use a simple map as the cache, orinfinispanto use an Infinispan cache.Copy to Clipboard Copied! Toggle word wrap Toggle overflow You can configure additional security domains as needed using the Management Console or CLI.Enable the security domain in the application's descriptor file
The security domain is specified in the<security-domain>child element of the<jboss-web>element in the application'sWEB-INF/jboss-web.xmlfile. The following example configures a security domain namedmy-domain.<jboss-web> <security-domain>my-domain</security-domain> </jboss-web><jboss-web> <security-domain>my-domain</security-domain> </jboss-web>Copy to Clipboard Copied! Toggle word wrap Toggle overflow This is only one of many settings which you can specify in theWEB-INF/jboss-web.xmldescriptor.
Add the Required Annotation to the EJB
You configure security in the EJB using the@SecurityDomainand@RolesAllowedannotations. The following EJB code example limits access to theothersecurity domain by users in theguestrole.Copy to Clipboard Copied! Toggle word wrap Toggle overflow For more code examples, see theejb-securityquickstart in the JBoss EAP 6 Quickstarts bundle, which is available from the Red Hat Customer Portal.
17.4. Use Role-Based Security In Servlets
jboss-web.xml.
Before you use role-based security in a servlet, the security domain used to authenticate and authorize access needs to be configured in the JBoss EAP 6 container.
Procedure 17.2. Add Role-Based Security to Servlets
Add mappings between servlets and URL patterns.
Use<servlet-mapping>elements in theweb.xmlto map individual servlets to URL patterns. The following example maps the servlet calledDisplayOpResultto the URL pattern/DisplayOpResult.Copy to Clipboard Copied! Toggle word wrap Toggle overflow Add security constraints to the URL patterns.
To map the URL pattern to a security constraint, use a<security-constraint>. The following example constrains access from the URL pattern/DisplayOpResultto be accessed by principals with the roleeap_admin. The role needs to be present in the security domain.Copy to Clipboard Copied! Toggle word wrap Toggle overflow You need to specify the authentication method, which can be any of the following:BASIC, FORM, DIGEST, CLIENT-CERT, SPNEGO.This example usesBASICauthentication.Specify the security domain in the WAR's
jboss-web.xmlAdd the security domain to the WAR'sjboss-web.xmlin order to connect the servlets to the configured security domain, which knows how to authenticate and authorize principals against the security constraints. The following example uses the security domain calledacme_domain.Copy to Clipboard Copied! Toggle word wrap Toggle overflow
Example 17.1. Example web.xml with Role-Based Security Configured
17.5. Use A Third-Party Authentication System In Your Application
Note
context.xml deployment descriptor. Valves are configured directly in the jboss-web.xml descriptor instead. The context.xml is now ignored.
Example 17.2. Basic Authentication Valve
Example 17.3. Custom Valve With Header Attributes Set
Writing your own authenticator is out of scope of this document. However, the following Java code is provided as an example.
Example 17.4. GenericHeaderAuthenticator.java
Chapter 18. Migration
18.1. Configure Application Security Changes
In previous versions of JBoss EAP, properties files placed in the EAP_HOME/server/SERVER_NAME/conf/ directory were on classpath and could be easily found by the UsersRolesLoginModule. In JBoss EAP 6, the directory structure has changed. Properties files must be packaged within the application to make them available in the classpath.
Important
security-domains to the standalone/configuration/standalone.xml or the domain/configuration/domain.xml server configuration file:
${jboss.server.config.dir} refers to the EAP_HOME/standalone/configuration/ directory. If the instance is running in a managed domain, ${jboss.server.config.dir} refers to the EAP_HOME/domain/configuration/ directory.
In JBoss EAP 6, security domains no longer use the prefix java:/jaas/ in their names.
- For Web applications, you must remove this prefix from the security domain configurations in the
jboss-web.xml. - For Enterprise applications, you must remove this prefix from the security domain configurations in the
jboss-ejb3.xmlfile. This file has replaced thejboss.xmlin JBoss EAP 6.
Appendix A. Reference
A.1. Included Authentication Modules
Role within the Code name.
Code value or the full (package qualified) name to refer to the module.
Authentication Modules
| Code | RealmDirect
|
| Class | org.jboss.as.security.RealmDirectLoginModule
|
| Description |
A login module implementation to interface directly with the security realm. This login module allows all interactions with the backing store to be delegated to the realm removing the need for any duplicate and synchronized definitions. Used for remoting calls and management interface.
|
| Option | Type | Default | Description |
|---|---|---|---|
realm |
string
| ApplicationRealm
|
Name of the desired realm.
|
| Code | Client
|
| Class | org.jboss.security.ClientLoginModule
|
| Description |
This login module is designed to establish caller identity and credentials when JBoss EAP 6 is acting as a client. It should never be used as part of a security domain used for server authentication.
|
| Option | Type | Default | Description |
|---|---|---|---|
multi-threaded | true or false
| false
|
Set to true if each thread has its own principal and credential storage. Set to false to indicate that all threads in the VM share the same identity and credential.
|
password-stacking
| useFirstPass or false
| false
|
Set to
useFirstPass to indicate that this login module should look for information stored in the LoginContext to use as the identity. This option can be used when stacking other login modules with this one.
|
restore-login-identity
| true or false
| false
|
Set to true if the identity and credential seen at the start of the
login() method should be restored after the logout() method is invoked.
|
| Code | Remoting
|
| Class | org.jboss.as.security.remoting.RemotingLoginModule
|
| Description |
This login module is used to check if the request currently being authenticated is a request received over a Remoting connection, and if so the identity that was created during the Remoting authentication process is used and associated with the current request. If the request did not arrive over a Remoting connection this module does nothing and allows the JAAS based login to continue to the next module.
|
| Option | Type | Default | Description |
|---|---|---|---|
password-stacking | useFirstPass or false
| false
|
A value of
useFirstPass indicates that this login module should first look to the information stored in the LoginContext for the identity. This option can be used when stacking other login modules with this one.
|
principalClass
|
A fully-qualified classname.
|
none
|
A
Principal implementation class which contains a constructor that takes String arguments for the principal name.
|
unauthenticatedIdentity
|
A principal name.
|
none
|
Defines the principal name assigned to requests which contain no authentication information. This can allow unprotected servlets to invoke methods on EJBs that do not require a specific role. Such a principal has no associated roles and can only access unsecured EJBs or EJB methods that are associated with the
unchecked permission constraint.
|
| Code | Certificate
|
| Class | org.jboss.security.auth.spi.BaseCertLoginModule
|
| Description |
This login module is designed to authenticate users based on
X509 Certificates. A use case for this is CLIENT-CERT authentication of a web application.
|
| Option | Type | Default | Description |
|---|---|---|---|
securityDomain
| string | other
|
Name of the security domain that has the JSSE configuration for the truststore holding the trusted certificates.
|
verifier
| class |
none
|
The class name of the
org.jboss.security.auth.certs.X509CertificateVerifier to use for verification of the login certificate.
|
| Code | CertificateRoles
|
| Class | org.jboss.security.auth.spi.CertRolesLoginModule
|
| Description |
This login module extends the Certificate login module to add role mapping capabilities from a properties file. It takes all of the same options as the Certificate login module, and adds the following options.
|
| Option | Type | Default | Description |
|---|---|---|---|
rolesProperties
| string | roles.properties
|
The name of the resource or file containing the roles to assign to each user. The role properties file must be in the format
username=role1,role2 where the username is the DN of the certificate, escaping any = (equals) and space characters. The following example is in the correct format:
CN\=unit-tests-client,\ OU\=Red\ Hat\ Inc.,\ O\=Red\ Hat\ Inc.,\ ST\=North\ Carolina,\ C\=US |
defaultRolesProperties
| string | defaultRoles.properties
|
Name of the resource or file to fall back to if the
rolesProperties file cannot be found.
|
roleGroupSeparator
| A single character. | . (a single period)
|
Which character to use as the role group separator in the
rolesProperties file.
|
| Code | Database |
| Class | org.jboss.security.auth.spi.DatabaseServerLoginModule
|
| Description |
A JDBC-based login module that supports authentication and role mapping. It is based on two logical tables, with the following definitions.
|
| Option | Type | Default | Description |
|---|---|---|---|
digestCallback
| A fully-qualified classname |
none
|
The class name of the
DigestCallback implementation that includes pre/post digest content like salts for hashing the input password. Only used if hashAlgorithm has been specified.
|
dsJndiName
| A JNDI resource | java:/DefaultDS
|
The name of the JNDI resource storing the authentication information. This option is required.
|
hashAlgorithm
| String |
Use plain passwords
|
The message digest algorithm used to hash passwords. Supported algorithms depend on the Java Security Provider, but the following are supported:
MD5, SHA-1, and SHA-256.
|
hashCharset
| String |
The platform's default encoding
|
The name of the charset/encoding to use when converting the password String to a byte array. This includes all supported Java charset names.
|
hashEncoding
| String |
Base64
|
The string encoding format to use.
|
ignorePasswordCase
| boolean |
false
|
A flag indicating if the password comparison should ignore case.
|
inputValidator
| A fully-qualified classname |
none
|
The instance of the InputValidator implementation used to validate the username and password supplied by the client.
|
principalsQuery
| prepared SQL statement | select Password from Principals where PrincipalID=?
|
The prepared SQL query to obtain the information about the principal.
|
rolesQuery
| prepared SQL statement |
none
|
The prepared SQL query to obtain the information about the roles. It should be equivalent to
select Role, RoleGroup from Roles where PrincipalID=?, where Role is the role name and the RoleGroup column value should always be either Roles with a capital R or CallerPrincipal.
|
storeDigestCallback
| A fully-qualified classname |
none
|
The class name of the
DigestCallback implementation that includes pre/post digest content like salts for hashing the store/expected password. Only used if hashStorePassword or hashUserPassword is true and hashAlgorithm has been specified.
|
suspendResume
| boolean |
true
|
Whether any existing JTA transaction should be suspended during database operations.
|
throwValidatorError
| boolean |
false
|
A flag that indicates whether validation errors should be exposed to clients or not
|
transactionManagerJndiName
| JNDI Resource |
java:/TransactionManager
|
The JNDI name of the transaction manager used by the login module.
|
| Code | DatabaseCertificate
|
| Class | org.jboss.security.auth.spi.DatabaseCertLoginModule
|
| Description |
This login module extends the Certificate login module to add role mapping capabilities from a database table. It has the same options plus these additional options:
|
| Option | Type | Default | Description |
|---|---|---|---|
dsJndiName
| A JNDI resource | java:/DefaultDS
|
The name of the JNDI resource storing the authentication information. This option is required.
|
rolesQuery
| prepared SQL statement | select Role,RoleGroup from Roles where PrincipalID=?
|
SQL prepared statement to be executed in order to map roles. It should be an equivalent to
select Role, RoleGroup from Roles where PrincipalID=?, where Role is the role name and the RoleGroup column value should always be either Roles with a capital R or CallerPrincipal.
|
suspendResume
| true or false
| true
|
Whether any existing JTA transaction should be suspended during database operations.
|
| Code | Identity
|
| Class | org.jboss.security.auth.spi.IdentityLoginModule
|
| Description |
Associates the principal specified in the module options with any subject authenticated against the module. The type of Principal class used is
org.jboss.security.SimplePrincipal. If no principal option is specified a principal with the name of guest is used.
|
| Option | Type | Default | Description |
|---|---|---|---|
principal
| String | guest
|
The name to use for the principal.
|
roles
| comma-separated list of strings |
none
|
A comma-delimited list of roles which will be assigned to the subject.
|
| Code | Ldap
|
| Class | org.jboss.security.auth.spi.LdapLoginModule
|
| Description |
Authenticates against an LDAP server, when the username and password are stored in an LDAP server that is accessible using a JNDI LDAP provider. Many of the options are not required, because they are determined by the LDAP provider or the environment.
|
| Option | Type | Default | Description |
|---|---|---|---|
java.naming.factory.initial
| class name | com.sun.jndi.ldap.LdapCtxFactory
| InitialContextFactory implementation class name.
|
java.naming.provider.url
| ldap:// URL
|
If the value of
java.naming.security.protocol is SSL, ldap://localhost:636, otherwise ldap://localhost:389
|
URL for the LDAP server.
|
java.naming.security.authentication
| none, simple, or the name of a SASL mechanism
| simple
|
The security level to use to bind to the LDAP server.
|
java.naming.security.protocol
| transport protocol |
If unspecified, determined by the provider.
|
The transport protocol to use for secure access, such as SSL.
|
java.naming.security.principal
| string |
none
|
The name of the principal for authenticating the caller to the service. This is built from other properties described below.
|
java.naming.security.credentials
| credential type |
none
|
The type of credential used by the authentication scheme. Some examples include hashed password, clear-text password, key, or certificate. If this property is unspecified, the behavior is determined by the service provider.
|
principalDNPrefix
| string | |
Prefix added to the username to form the user DN. You can prompt the user for a username and build the fully-qualified DN by using the
principalDNPrefix and principalDNSuffix.
|
principalDNSuffix
| string | |
Suffix added to the username to form the user DN. You can prompt the user for a username and build the fully-qualified DN by using the
principalDNPrefix and principalDNSuffix.
|
useObjectCredential
| true or false
|
false
|
Whether the credential should be obtained as an opaque Object using the
org.jboss.security.auth.callback.ObjectCallback type of Callback rather than as a char[] password using a JAAS PasswordCallback. This allows for passing non-char[] credential information to the LDAP server.
|
rolesCtxDN
| fully-qualified DN |
none
|
The fully-qualified DN for the context to search for user roles.
|
userRolesCtxDNAttributeName
|
attribute
|
none
|
The attribute in the user object that contains the DN for the context to search for user roles. This differs from
rolesCtxDN in that the context to search for a user's roles may be unique for each user.
|
roleAttributeID
| attribute | roles
|
Name of the attribute containing the user roles.
|
roleAttributeIsDN
| true or false
| false
|
Whether or not the
roleAttributeID contains the fully-qualified DN of a role object. If false, the role name is taken from the value of the roleNameAttributeId attribute of the context name. Certain directory schemas, such as Microsoft Active Directory, require this attribute to be set to true.
|
roleNameAttributeID
| attribute | name
|
Name of the attribute within the
roleCtxDN context which contains the role name. If the roleAttributeIsDN property is set to true, this property is used to find the role object's name attribute.
|
uidAttributeID
| attribute | uid
|
Name of the attribute in the
UserRolesAttributeDN that corresponds to the user ID. This is used to locate the user roles.
|
matchOnUserDN
| true or false
| false
|
Whether or not the search for user roles should match on the user's fully-distinguished DN or the username only. If
true, the full user DN is used as the match value. If false, only the username is used as the match value against the uidAttributeName attribute.
|
allowEmptyPasswords
| true or false
| false
|
Whether to allow empty passwords. Most LDAP servers treat empty passwords as anonymous login attempts. To reject empty passwords, set this to
false.
|
| Code | LdapExtended
|
| Class | org.jboss.security.auth.spi.LdapExtLoginModule
|
| Description |
An alternate LDAP login module implementation that uses searches to locate the bind user and associated roles. The roles query recursively follows DNs to navigate a hierarchical role structure. It uses the same
java.naming options as the Ldap module, and uses the following options instead of the other options of the Ldap module.
The authentication happens in 2 steps:
|
| Option | Type | Default | Description |
|---|---|---|---|
baseCtxDN
| fully-qualified DN |
none
|
The fixed DN of the top-level context to begin the user search.
|
bindCredential
| string, optionally encrypted |
none
|
See Section 16.1.14, “bindCredential Module Option” for details.
|
bindDN
| fully-qualified DN |
none
|
The DN used to bind against the LDAP server for the user and roles queries. This DN needs read and search permissions on the
baseCtxDN and rolesCtxDN values.
|
baseFilter
| LDAP filter string |
none
|
A search filter used to locate the context of the user to authenticate. The input username or
userDN obtained from the login module callback is substituted into the filter anywhere a {0} expression is used. A common example for the search filter is (uid={0}).
|
rolesCtxDN
| fully-qualified DN |
none
|
The fixed DN of the context to search for user roles. This is not the DN where the actual roles are, but the DN where the objects containing the user roles are. For example, in a Microsoft Active Directory server, this is the DN where the user account is.
|
roleFilter
| LDAP filter string |
none
|
A search filter used to locate the roles associated with the authenticated user. The input username or
userDN obtained from the login module callback is substituted into the filter anywhere a {0} expression is used. The authenticated userDN is substituted into the filter anywhere a {1} is used. An example search filter that matches on the input username is (member={0}). An alternative that matches on the authenticated userDN is (member={1}).
|
roleAttributeIsDN | true or false
| false
|
Whether or not the
roleAttributeID contains the fully-qualified DN of a role object. If false, the role name is taken from the value of the roleNameAttributeId attribute of the context name. Certain directory schemas, such as Microsoft Active Directory, require this attribute to be set to true.
|
defaultRole
|
Role name
|
none
|
A role included for all authenticated users
|
parseRoleNameFromDN
| true or false
| false
|
A flag indicating if the DN returned by a query contains the roleNameAttributeID. If set to
true, the DN is checked for the roleNameATtributeID. If set to false, the DN is not checked for the roleNameAttributeID. This flag can improve the performance of LDAP queries.
|
parseUsername
| true or false
| false
|
A flag indicating if the DN is to be parsed for the username. If set to
true, the DN is parsed for the username. If set to false the DN is not parsed for the username. This option is used together with usernameBeginString and usernameEndString.
|
usernameBeginString
|
string
|
none
|
Defines the string which is to be removed from the start of the DN to reveal the username. This option is used together with
usernameEndString.
|
usernameEndString
|
string
|
none
|
Defines the string which is to be removed from the end of the DN to reveal the username. This option is used together with
usernameBeginString.
|
roleNameAttributeID
| attribute | name
|
Name of the attribute within the
roleCtxDN context which contains the role name. If the roleAttributeIsDN property is set to true, this property is used to find the role object's name attribute.
|
distinguishedNameAttribute
| attribute | distinguishedName
|
The name of the attribute in the user entry that contains the DN of the user. This may be necessary if the DN of the user itself contains special characters (backslash for example) that prevent correct user mapping. If the attribute does not exist, the entry's DN is used.
|
roleRecursion
| integer | 0
|
The numbers of levels of recursion the role search will go below a matching context. Disable recursion by setting this to
0.
|
searchTimeLimit
| integer | 10000 (10 seconds)
|
The timeout in milliseconds for user or role searches.
|
searchScope
|
One of:
OBJECT_SCOPE, ONELEVEL_SCOPE, SUBTREE_SCOPE
| SUBTREE_SCOPE
|
The search scope to use.
|
allowEmptyPasswords
| true or false
| false
|
Whether to allow empty passwords. Most LDAP servers treat empty passwords as anonymous login attempts. To reject empty passwords, set this to false.
|
referralUserAttributeIDToCheck
|
attribute
|
none
|
If you are not using referrals, this option can be ignored. When using referrals, this option denotes the attribute name which contains users defined for a certain role (for example,
member), if the role object is inside the referral. Users are checked against the content of this attribute name. If this option is not set, the check will always fail, so role objects cannot be stored in a referral tree.
|
| Code | RoleMapping
|
| Class | org.jboss.security.auth.spi.RoleMappingLoginModule
|
| Description |
Maps a role which is the end result of the authentication process to a declarative role. This module must be flagged as
optional when you add it to the security domain.
|
| Option | Type | Default | Description |
|---|---|---|---|
rolesProperties
| The fully-qualified file path and name of a properties file or resource | none
|
The fully-qualified file path and name of a properties file or resource which maps roles to replacement roles. The format is
original_role=role1,role2,role3
|
replaceRole
| true or false
| false
|
Whether to add to the current roles, or replace the current roles with the mapped ones. Replaces if set to
true.
|
Note
rolesProperties module option is required for RoleMapping.
| Code | RunAs
|
| Class | org.jboss.security.auth.spi.RunAsLoginModule
|
| Description |
A helper module that pushes a
run as role onto the stack for the duration of the login phase of authentication, and pops the run as role off the stack in either the commit or abort phase. This login module provides a role for other login modules that must access secured resources in order to perform their authentication, such as a login module which accesses a secured EJB. RunAsLoginModule must be configured before the login modules that require a run as role to be established.
|
| Option | Type | Default | Description |
|---|---|---|---|
roleName
| role name | nobody
|
The name of the role to use as the
run as role during the login phase.
|
principalName
| principal name | nobody
|
Name of the principal to use as the
run as principal during login phase. If not specified a default of nobody is used.
|
principalClass
| A fully-qualified classname. |
none
|
A
Principal implementation class which contains a constructor that takes String arguments for the principal name.
|
| Code | Simple
|
| Class | org.jboss.security.auth.spi.SimpleServerLoginModule
|
| Description |
A module for quick setup of security for testing purposes. It implements the following simple algorithm:
|
Simple Module Options
The Simple module has no options.
| Code | ConfiguredIdentity
|
| Class | org.picketbox.datasource.security.ConfiguredIdentityLoginModule
|
| Description |
Associates the principal specified in the module options with any subject authenticated against the module. The type of Principal class used is
org.jboss.security.SimplePrincipal.
|
| Option | Type | Default | Description |
|---|---|---|---|
username
| string | none | The username for authentication. |
password
| encrypted string | "" |
The password to use for authentication. To encrypt the password, use the module directly at the command line.
java org.picketbox.datasource.security.SecureIdentityLoginModule password_to_encrypt
Paste the result of this command into the module option's value field. The default value is an empty string.
|
principal
| Name of a principal | none
|
The principal which will be associated with any subject authenticated against the module.
|
| Code | SecureIdentity
|
| Class | org.picketbox.datasource.security.SecureIdentityLoginModule
|
| Description |
This module is provided for legacy purposes. It allows you to encrypt a password and then use the encrypted password with a static principal. If your application uses
SecureIdentity, consider using a password vault mechanism instead.
|
| Option | Type | Default | Description |
|---|---|---|---|
username
| string | none | The username for authentication. |
password
| encrypted string | "" |
The password to use for authentication. To encrypt the password, use the module directly at the command line.
java org.picketbox.datasource.security.SecureIdentityLoginModule password_to_encrypt
Paste the result of this command into the module option's value field. The default value is an empty string.
|
managedConnectionFactoryName
| JCA resource | none |
The name of the JCA connection factory for your datasource.
|
| Code | PropertiesUsers
|
| Class | org.jboss.security.auth.spi.PropertiesUsersLoginModule
|
| Description |
Uses a properties file to store usernames and passwords for authentication. No authorization (role mapping) is provided. This module is only appropriate for testing.
|
| Code | SimpleUsers
|
| Class | org.jboss.security.auth.spi.SimpleUsersLoginModule
|
| Description |
This login module stores the username and clear-text password using
module-option. module-option's name and value attributes specify a username and password. It is included for testing only, and is not appropriate for a production environment.
|
| Code | LdapUsers
|
| Class | org.jboss.security.auth.spi.LdapUsersLoginModule
|
| Description |
The
LdapUsers module is superseded by the ExtendedLDAP and AdvancedLdap modules.
|
| Code | Kerberos
|
| Class | com.sun.security.auth.module.Krb5LoginModule. In the IBM JDK the classname is com.ibm.security.auth.module.Krb5LoginModule.
|
| Description |
Performs Kerberos login authentication, using GSSAPI. This module is part of the security framework from the API provided by Sun Microsystems. Details can be found at http://docs.oracle.com/javase/7/docs/jre/api/security/jaas/spec/com/sun/security/auth/module/Krb5LoginModule.html. This module needs to be paired with another module which handles the authentication and roles mapping.
|
| Option | Type | Default | Description |
|---|---|---|---|
storekey
| true or false
| false |
Whether or not to add the
KerberosKey to the subject's private credentials.
|
doNotPrompt
| true or false
| false |
If set to
true, the user is not prompted for the password.
|
useTicketCache
|
Boolean value of
. true or false
| false |
If
true, the TGT is obtained from the ticket cache. If false, the ticket cache is not used.
|
ticketcache
| A file or resource representing a Kerberos ticket cache. |
The default depends on which operating system you use.
| The location of the ticket cache. |
useKeyTab
| true or false
| false | Whether to obtain the principal's key from a key table file. |
keytab
| A file or resource representing a Kerberos keytab. |
the location in the operating system's Kerberos configuration file, or
/home/user/krb5.keytab
| The location of the key table file. |
principal
| string | none |
The name of the principal. This can either be a simple user name or a service name such as
host/testserver.acme.com. Use this instead of obtaining the principal from the key table, or when the key table contains more than one principal.
|
useFirstPass
| true or false
| false |
Whether to retrieve the username and password from the module's shared state, using
javax.security.auth.login.name and javax.security.auth.login.password as the keys. If authentication fails, no retry attempt is made.
|
tryFirstPass
| true or false
| false |
Same as
useFirstPass, but if authentication fails, the module uses the CallbackHandler to retrieve a new username and password. If the second authentication fails, the failure is reported to the calling application.
|
storePass
| true or false
| false |
Whether to store the username and password in the module's shared state. This does not happen if the keys already exist in the shared state, or if authentication fails.
|
clearPass
| true or false
| false |
Set this to
true to clear the username and password from the shared state after both phases of authentication complete.
|
| Code | SPNEGO
|
| Class | org.jboss.security.negotiation.spnego.SPNEGOLoginModule
|
| Description |
Allows SPNEGO authentication to a Microsoft Active Directory server or other environment which supports SPNEGO. SPNEGO can also carry Kerberos credentials. This module needs to be paired with another module which handles authentication and role mapping.
|
| Option | Type | Default | Description |
|---|---|---|---|
serverSecurityDomain
| string
| null.
|
Defines the domain that is used to retrieve the identity of the server service through the kerberos login module. This property must be set.
|
removeRealmFromPrincipal
| boolean
| false
|
Specifies that the Kerberos realm should be removed from the principal before further processing.
|
usernamePasswordDomain
| string
| null
|
Specifies another security domain within the configuration that should be used as a failover login when Kerberos fails.
|
| Code | AdvancedLdap |
| Class | org.jboss.security.negotiation.AdvancedLdapLoginModule
|
| Description |
A module which provides additional functionality, such as SASL and the use of a JAAS security domain.
|
| Option | Type | Default | Description |
|---|---|---|---|
bindAuthentication
|
string
|
none
|
The type of SASL authentication to use for binding to the directory server.
|
java.naming.provider.url
| string
|
If the value of
java.naming.security.protocol is SSL, ldap://localhost:686, otherwise ldap://localhost:389
|
The URI of the directory server.
|
baseCtxDN
|
fully-qualified DN
|
none
|
The distinguished name to use as the base for searches.
|
baseFilter
|
String representing a LDAP search filter.
|
none
|
The filter to use to narrow down search results.
|
roleAttributeID
|
String value representing an LDAP attribute.
|
none
|
The LDAP attribute which contains the names of authorization roles.
|
roleAttributeIsDN
| true or false
| false
|
Whether the role attribute is a Distinguished Name (DN).
|
roleNameAttributeID
|
String representing an LDAP attribute.
|
none
|
The attribute contained within the
RoleAttributeId which contains the actual role attribute.
|
recurseRoles
| true or false
| false
|
Whether to recursively search the
RoleAttributeId for roles.
|
referralUserAttributeIDToCheck
|
attribute
|
none
|
If you are not using referrals, this option can be ignored. When using referrals, this option denotes the attribute name which contains users defined for a certain role (for example,
member), if the role object is inside the referral. Users are checked against the content of this attribute name. If this option is not set, the check will always fail, so role objects cannot be stored in a referral tree.
|
| Code | AdvancedADLdap |
| Class | org.jboss.security.negotiation.AdvancedADLoginModule
|
| Description |
This module extends the
AdvancedLdap login module, and adds extra parameters that are relevant to Microsoft Active Directory.
|
| Code | UsersRoles |
| Class | org.jboss.security.auth.spi.UsersRolesLoginModul
|
| Description |
A simple login module that supports multiple users and user roles stored in two different properties files.
|
| Option | Type | Default | Description |
|---|---|---|---|
usersProperties
|
Path to a file or resource.
| users.properties
|
The file or resource which contains the user-to-password mappings. The format of the file is
username=password
|
rolesProperties
|
Path to a file or resource.
| roles.properties
|
The file or resource which contains the user-to-role mappings. The format of the file is
username=role1,role2,role3
|
password-stacking
| useFirstPass or false
| false
|
A value of
useFirstPass indicates that this login module should first look to the information stored in the LoginContext for the identity. This option can be used when stacking other login modules with this one.
|
hashAlgorithm
|
String representing a password hashing algorithm.
| none
|
The name of the
java.security.MessageDigest algorithm to use to hash the password. There is no default so this option must be explicitly set to enable hashing. When hashAlgorithm is specified, the clear text password obtained from the CallbackHandler is hashed before it is passed to UsernamePasswordLoginModule.validatePassword as the inputPassword argument. The password stored in the users.properties file must be comparably hashed.
|
hashEncoding
| base64 or hex
| base64
|
The string format for the hashed password, if hashAlgorithm is also set.
|
hashCharset
|
string
|
The default encoding set in the container's runtime environment
|
The encoding used to convert the clear-text password to a byte array.
|
unauthenticatedIdentity
|
principal name
|
none
|
Defines the principal name assigned to requests which contain no authentication information. This can allow unprotected servlets to invoke methods on EJBs that do not require a specific role. Such a principal has no associated roles and can only access unsecured EJBs or EJB methods that are associated with the
unchecked permission constraint.
|
Authentication modules are implementations of javax.security.auth.spi.LoginModule. Refer to the API documentation for more information about creating a custom authentication module.
A.2. Included Authorization Modules
| Code | Class |
|---|---|
| DenyAll | org.jboss.security.authorization.modules.AllDenyAuthorizationModule |
| PermitAll | org.jboss.security.authorization.modules.AllPermitAuthorizationModule |
| Delegating | org.jboss.security.authorization.modules.DelegatingAuthorizationModule |
| Web | org.jboss.security.authorization.modules.web.WebAuthorizationModule |
| JACC | org.jboss.security.authorization.modules.JACCAuthorizationModule |
| XACML | org.jboss.security.authorization.modules.XACMLAuthorizationModule |
This is a simple authorization module that always denies an authorization request. No configuration options are available.
This is a simple authorization module that always permits an authorization request. No configuration options are available.
This is the default authorization module that delegates decision making to the configured delegates.
This is the default web authorization module with the default Tomcat authorization logic (permit all).
This module enforces JACC semantics using two delegates (WebJACCPolicyModuleDelegate for web container authorization requests and EJBJACCPolicyModuleDelegate for EJB container requests). No configuration options available.
This module enforces XACML authorization using two delegates for web and EJB containers (WebXACMLPolicyModuleDelegate and EJBXACMLPolicyModuleDelegate). It creates a PDP object based on registered policies and evaluates web or EJB requests against it.
This is the base authorization module which has to be overridden and provides a facility for delegating to other authorization modules.
A.3. Included Security Mapping Modules
| Code | Class |
|---|---|
| PropertiesRoles | org.jboss.security.mapping.providers.role.PropertiesRolesMappingProvider |
| SimpleRoles | org.jboss.security.mapping.providers.role.SimpleRolesMappingProvider |
| DeploymentRoles | org.jboss.security.mapping.providers.DeploymentRolesMappingProvider |
| DatabaseRoles | org.jboss.security.mapping.providers.role.DatabaseRolesMappingProvider |
| LdapRoles | org.jboss.security.mapping.providers.role.LdapRolesMappingProvider |
| LdapAttributes | org.jboss.security.mapping.providers.attribute.LdapAttributeMappingProvider |
A Role Mapping Module that takes into consideration a principal to roles mapping that can be done in jboss-web.xml and jboss-app.xml deployment descriptors.
Example A.1. Example
A Role to Roles Mapping Module that takes into consideration a principal to roles mapping that can be done in the deployment descriptors jboss-web.xml and jboss-app.xml. In this case principal-name denotes role to map other roles.
Example A.2. Example
Role Mapping Provider that picks up the roles from the options and then appends them to the passed Group. Takes the properties style mapping of role name (key) with a comma separated list of roles (values).
A principal mapping provider that takes in a SimplePrincipal and converts into SimplePrincipal with a different principal name.
A MappingProvider that reads roles from a database.
dsJndiName: JNDI name of data source used to map roles to the user.rolesQuery: This option should be a prepared statement equivalent to "select RoleName from Roles where User=?" ? is substituted with current principal name.suspendResume: Boolean - To suspend and later resume transaction associated with current thread while performing search for roles.transactionManagerJndiName: JNDI name of Transaction mamager (default is java:/TransactionManager)
A mapping provider that assigns roles to an user using a LDAP server to search for the roles.
bindDN: The DN used to bind against the LDAP server for the user and roles queries. This DN needs read and search permissions on the baseCtxDN and rolesCtxDN values.bindCredential: The password for the bindDN. This can be encrypted if the jaasSecurityDomain is specified.rolesCtxDN: The fixed DN of the context to search for user roles. This is not the DN where the actual roles are, but the DN where the objects containing the user roles are. For example, in a Microsoft Active Directory server, this is the DN where the user account is.roleAttributeID: The LDAP attribute which contains the names of authorization roles.roleAttributeIsDN: Whether or not theroleAttributeIDcontains the fully-qualified DN of a role object. If false, the role name is taken from the value of theroleNameAttributeIdattribute of the context name. Certain directory schemas, such as Microsoft Active Directory, require this attribute to be set totrue.roleNameAttributeID: Name of the attribute within theroleCtxDNcontext which contains the role name. If theroleAttributeIsDNproperty is set totrue, this property is used to find the role object's name attribute.parseRoleNameFromDN: A flag indicating if the DN returned by a query contains the roleNameAttributeID. If set totrue, the DN is checked for the roleNameATtributeID. If set tofalse, the DN is not checked for the roleNameAttributeID. This flag can improve the performance of LDAP queries.roleFilter: A search filter used to locate the roles associated with the authenticated user. The input username oruserDNobtained from the login module callback is substituted into the filter anywhere a{0}expression is used. The authenticateduserDNis substituted into the filter anywhere a{1}is used. An example search filter that matches on the input username is(member={0}). An alternative that matches on the authenticateduserDNis(member={1}).roleRecursion: The numbers of levels of recursion the role search will go below a matching context. Disable recursion by setting this to0.searchTimeLimit: The timeout in milliseconds for the user/role searches. Defaults to 10000 (10 seconds).searchScope: The search scope to use.
A MappingProvider that reads roles from a properties file in the following format: username=role1,role2,...
rolesProperties: Properties formatted file name. Expansion of JBoss variables can be used in form of${jboss.variable}.
A simple MappingProvider that reads roles from the options map. The option attribute name is the name of principal to assign roles to and the attribute value is the comma separated role names to assign to the principal.
Example A.3. Example
<module-option name="JavaDuke" value="JBossAdmin,Admin"/> <module-option name="joe" value="Users"/>
<module-option name="JavaDuke" value="JBossAdmin,Admin"/>
<module-option name="joe" value="Users"/>
Checks module and locates principal name from mapping context to create attribute e-mail address from module option named principalName + ".email" and maps it to the given principal.
Maps attributes from LDAP to the subject. The options include whatever options your LDAP JNDI provider supports.
Example A.4. Examples of standard property names include:
Context.INITIAL_CONTEXT_FACTORY = "java.naming.factory.initial" Context.SECURITY_PROTOCOL = "java.naming.security.protocol" Context.PROVIDER_URL = "java.naming.provider.url" Context.SECURITY_AUTHENTICATION = "java.naming.security.authentication"
Context.INITIAL_CONTEXT_FACTORY = "java.naming.factory.initial"
Context.SECURITY_PROTOCOL = "java.naming.security.protocol"
Context.PROVIDER_URL = "java.naming.provider.url"
Context.SECURITY_AUTHENTICATION = "java.naming.security.authentication"
bindDN: The DN used to bind against the LDAP server for the user and roles queries. This DN needs read and search permissions on the baseCtxDN and rolesCtxDN values.bindCredential: The password for the bindDN. This can be encrypted if the jaasSecurityDomain is specified.baseCtxDN: The fixed DN of the context to start the user search from.baseFilter: A search filter used to locate the context of the user to authenticate. The input username oruserDNas obtained from the login module callback is substituted into the filter anywhere a{0}expression is used. This substituion behavior comes from the standard__DirContext.search(Name, String, Object[], SearchControls cons)__method. An common example search filter is(uid={0}).searchTimeLimit: The timeout in milliseconds for the user/role searches. Defaults to 10000 (10 seconds).attributeList: A comma-separated list of attributes for the user. For example, mail,cn,sn,employeeType,employeeNumber.jaasSecurityDomain: The JaasSecurityDomain to use to decrypt thejava.naming.security.principal. The encrypted form of the password is that returned by theJaasSecurityDomain#encrypt64(byte[])method. Theorg.jboss.security.plugins.PBEUtilscan also be used to generate the encrypted form.
A.4. Included Security Auditing Provider Modules
| Code | Class |
|---|---|
| LogAuditProvider | org.jboss.security.audit.providers.LogAuditProvider |
A.5. jboss-web.xml Configuration Reference
The jboss-web.xml is a file within your deployment's WEB-INF directory. It contains configuration information about features the JBoss Web container adds to the Servlet 3.0 specification. Settings specific to the Servlet 3.0 specification are placed into web.xml in the same directory.
jboss-web.xml file is the <jboss-web> element.
Many of the available settings map requirements set in the application's web.xml to local resources. The explanations of the web.xml settings can be found at http://docs.oracle.com/cd/E13222_01/wls/docs81/webapp/web_xml.html.
web.xml requires jdbc/MyDataSource, the jboss-web.xml may map the global datasource java:/DefaultDS to fulfill this need. The WAR uses the global datasource to fill its need for jdbc/MyDataSource.
| Attribute | Description |
|---|---|
| env-entry |
A mapping to an
env-entry required by the web.xml.
|
| ejb-ref |
A mapping to an
ejb-ref required by the web.xml.
|
| ejb-local-ref |
A mapping to an
ejb-local-ref required by the web.xml.
|
| service-ref |
A mapping to a
service-ref required by the web.xml.
|
| resource-ref |
A mapping to a
resource-ref required by the web.xml.
|
| resource-env-ref |
A mapping to a
resource-env-ref required by the web.xml.
|
| message-destination-ref |
A mapping to a
message-destination-ref required by the web.xml.
|
| persistence-context-ref |
A mapping to a
persistence-context-ref required by the web.xml.
|
| persistence-unit-ref |
A mapping to a
persistence-unit-ref required by the web.xml.
|
| post-construct |
A mapping to a
post-context required by the web.xml.
|
| pre-destroy |
A mapping to a
pre-destroy required by the web.xml.
|
| data-source |
A mapping to a
data-source required by the web.xml.
|
| context-root | The root context of the application. The default value is the name of the deployment without the .war suffix. |
| virtual-host | The name of the HTTP virtual-host the application accepts requests from. It refers to the contents of the HTTP Host header. |
| annotation | Describes an annotation used by the application. Refer to <annotation> for more information. |
| listener | Describes a listener used by the application. Refer to <listener> for more information. |
| session-config | This element fills the same function as the <session-config> element of the web.xml and is included for compatibility only. |
| valve | Describes a valve used by the application. Refer to <valve> for more information. |
| overlay | The name of an overlay to add to the application. |
| security-domain | The name of the security domain used by the application. The security domain itself is configured in the web-based management console or the management CLI. |
| security-role | This element fills the same function as the <security-role> element of the web.xml and is included for compatibility only. |
| use-jboss-authorization | If this element is present and contains the case insensitive value "true", the JBoss web authorization stack is used. If it is not present or contains any value that is not "true", then only the authorization mechanisms specified in the Java Enterprise Edition specifications are used. This element is new to JBoss EAP 6. |
| disable-audit | Set this boolean element to false to enable and true to disable web auditing. Web security auditing is not part of the Java EE specification. This element is new to JBoss EAP 6. |
| disable-cross-context | If false, the application is able to call another application context. Defaults to true. |
Describes an annotation used by the application. The following table lists the child elements of an <annotation>.
| Attribute | Description |
|---|---|
| class-name |
Name of the class of the annotation
|
| servlet-security |
The element, such as
@ServletSecurity, which represents servlet security.
|
| run-as |
The element, such as
@RunAs, which represents the run-as information.
|
| multipart-config |
The element, such as
@MultiPart, which represents the multipart-config information.
|
Describes a listener. The following table lists the child elements of a <listener>.
| Attribute | Description |
|---|---|
| class-name |
Name of the class of the listener
|
| listener-type |
List of
condition elements, which indicate what kind of listener to add to the Context of the application. Valid choices are:
|
| module |
The name of the module containing the listener class.
|
| param |
A parameter. Contains two child elements,
<param-name> and <param-value>.
|
Describes a valve of the application. Similar to the <listener>, has class-name, module and param elements.
A.6. EJB Security Parameter Reference
| Element | Description |
|---|---|
<security-identity>
|
Contains child elements pertaining to the security identity of an EJB.
|
<use-caller-identity />
|
Indicates that the EJB uses the same security identity as the caller.
|
<run-as>
|
Contains a
<role-name> element.
|
<run-as-principal>
|
If present, indicates the principal assigned to outgoing calls. If not present, outgoing calls are assigned to a principal named
anonymous.
|
<role-name>
|
Specifies the role the EJB should run as.
|
<description>
|
Describes the role named in
. <role-name>
|
Example A.5. Security identity examples
<session>.
Appendix B. Revision History
| Revision History | |||
|---|---|---|---|
| Revision 6.3.0-50 | Tuesday November 18 2014 | ||
| |||
| Revision 6.3.0-43 | Friday August 8 2014 | ||
| |||
| Revision 6.3.0-42 | Wednesday, July 30 2014 | ||
| |||