OpenShift Container Storage is now OpenShift Data Foundation starting with version 4.9.
Operations Guide
Configuring and Managing Red Hat Openshift Container Storage.
Edition 0
Abstract
Part I. Manage
Chapter 1. Managing Clusters
1.1. Increasing Storage Capacity
- Adding devices
- Increasing cluster size
- Adding an entirely new cluster.
1.1.1. Adding New Devices
1.1.1.1. Using Heketi CLI
/dev/sde to node d6f2c22f2757bf67b1486d868dcb7794:
heketi-cli device add --name=/dev/sde --node=d6f2c22f2757bf67b1486d868dcb7794
OUTPUT:
Device added successfully
# heketi-cli device add --name=/dev/sde --node=d6f2c22f2757bf67b1486d868dcb7794
OUTPUT:
Device added successfully1.1.1.2. Updating Topology File
/dev/sde drive added to the node:
1.1.2. Increasing Cluster Size
Note
1.1.2.1. Adding a Node to OCP Cluster
- Scaleup the OCP cluster to add the new node. For more information see, https://access.redhat.com/documentation/en-us/openshift_container_platform/3.11/html-single/configuring_clusters/#adding-cluster-hosts_adding-hosts-to-cluster
Note
If the new node is already part of OCP cluster then skip this step and proceed with Step 2. - Configure the firewall rules:
Note
For adding a node to be successful, ensure the ports are opened for glusterd communication. For more information about the ports, see https://access.redhat.com/documentation/en-us/red_hat_gluster_storage/3.4/html/installation_guide/port_information- Add the following rules /etc/sysconfig/iptables file of the newly added glusterfs node:
Copy to Clipboard Copied! Toggle word wrap Toggle overflow - Reload/restart the iptables:
systemctl restart iptables
# systemctl restart iptablesCopy to Clipboard Copied! Toggle word wrap Toggle overflow
- Execute the following steps to add labels to the node where the RHGS Container will be deployed:
- Verify that Red Hat Openshift Container Storage is deployed and working as expected in the existing project by executing the following command:
oc get ds
# oc get dsCopy to Clipboard Copied! Toggle word wrap Toggle overflow For example:oc get ds NAME DESIRED CURRENT READY UP-TO-DATE AVAILABLE NODE SELECTOR AGE glusterfs-storage 3 3 3 3 3 glusterfs=storage-host 1d
# oc get ds
NAME                DESIRED   CURRENT   READY     UP-TO-DATE   AVAILABLE   NODE SELECTOR            AGE
glusterfs-storage   3         3         3         3            3           glusterfs=storage-host   1d
Copy to Clipboard Copied! Toggle word wrap Toggle overflow - Add the label for each node which is newly added, where the Red Hat Gluster Storage pods are to be added for the new cluster:
oc label node <NODE_NAME> glusterfs=<node_label>
# oc label node <NODE_NAME> glusterfs=<node_label>Copy to Clipboard Copied! Toggle word wrap Toggle overflow where,- NODE_NAME: is the name of the newly created node.
- node_label: The name that is used in the existing daemonset. This is the value you get in the previous step when you execute
oc get ds.
For example:oc label node 192.168.90.3 glusterfs=storage-host node "192.168.90.3" labeled
# oc label node 192.168.90.3 glusterfs=storage-host
node "192.168.90.3" labeled
Copy to Clipboard Copied! Toggle word wrap Toggle overflow - Verify if the Red Hat Gluster Storage pods are running on the newly added node by executing the following command:Observe additional Gluster Storage pods spawned on these new nodes
oc get pods
# oc get podsCopy to Clipboard Copied! Toggle word wrap Toggle overflow For example:Copy to Clipboard Copied! Toggle word wrap Toggle overflow You should see additional Gluster Storage pods, in this example 4 gluster pods instead of just 3 as before. It will take 1-2 minutes for them to become healthy. (i.e. glusterfs-v759z 0/1 not healthy yet). - Verify if the Red Hat Gluster Storage pods are running
oc get pods -o wide -l glusterfs=storage-pod
# oc get pods -o wide -l glusterfs=storage-podCopy to Clipboard Copied! Toggle word wrap Toggle overflow
1.1.2.2. Using Heketi CLI
zone 1 to 597fceb5d6c876b899e48f599b988f54 cluster using the CLI:
/dev/sdb and /dev/sdc devices for 095d5f26b56dc6c64564a9bc17338cbf node:
1.1.2.3. Updating Topology File
after the existing ones so that the Heketi CLI identifies on which cluster this new node should be part of.
1.1.3. Adding a New Cluster
- Adding a new cluster to the existing Red Hat Openshift Container Storage
- Adding another Red Hat Openshift Container Storage cluster in a new project
1.1.3.1. Adding a New Cluster to the Existing Red Hat Openshift Container Storage
- Verify that Red Hat Openshift Container Storage is deployed and working as expected in the existing project by executing the following command:
oc get ds
# oc get dsCopy to Clipboard Copied! Toggle word wrap Toggle overflow For example:oc get ds NAME DESIRED CURRENT READY UP-TO-DATE AVAILABLE NODE SELECTOR AGE glusterfs-storage 3 3 3 3 3 glusterfs=storage-host 1d
# oc get ds
NAME                DESIRED   CURRENT   READY     UP-TO-DATE   AVAILABLE   NODE SELECTOR            AGE
glusterfs-storage   3         3         3         3            3           glusterfs=storage-host   1d
Copy to Clipboard Copied! Toggle word wrap Toggle overflow - Verify if the Red Hat Gluster Storage pods are running by executing the following command:Observe additional Gluster Storage pods spawned on these new nodes
oc get pods
# oc get podsCopy to Clipboard Copied! Toggle word wrap Toggle overflow For example:Copy to Clipboard Copied! Toggle word wrap Toggle overflow You should see additional Gluster Storage pods, in this example 4 gluster pods instead of just 3 as before. It will take 1-2 minutes for them to become healthy. (i.e. glusterfs-v759z 0/1 not healthy yet). - Add the label for each node, where the Red Hat Gluster Storage pods are to be added for the new cluster to start by executing the following command:
oc label node <NODE_NAME> glusterfs=<node_label>
# oc label node <NODE_NAME> glusterfs=<node_label>Copy to Clipboard Copied! Toggle word wrap Toggle overflow where,- NODE_NAME: is the name of the newly created node
- node_label: The name that is used in the existing daemonset.
For example:oc label node 192.168.90.3 glusterfs=storage-host node "192.168.90.3" labeled
# oc label node 192.168.90.3 glusterfs=storage-host
node "192.168.90.3" labeled
Copy to Clipboard Copied! Toggle word wrap Toggle overflow - Verify if the Red Hat Gluster Storage pods are running by executing the following command:
oc get ds
# oc get dsCopy to Clipboard Copied! Toggle word wrap Toggle overflow For example:oc get ds NAME DESIRED CURRENT READY UP-TO-DATE AVAILABLE NODE SELECTOR AGE glusterfs-storage 3 3 3 3 3 glusterfs=storage-host 1d
# oc get ds
NAME                DESIRED   CURRENT   READY     UP-TO-DATE   AVAILABLE   NODE SELECTOR            AGE
glusterfs-storage   3         3         3         3            3           glusterfs=storage-host   1d
Copy to Clipboard Copied! Toggle word wrap Toggle overflow - Create a new topology file for the new cluster. You must provide a topology file for the new cluster which describes the topology of the Red Hat Gluster Storage nodes and their attached storage devices. As a sample, a formatted topology file (topology-sample.json) is installed with the ‘heketi-client’ package in the /usr/share/heketi/ directory.For example:
Copy to Clipboard Copied! Toggle word wrap Toggle overflow where,- clusters: Array of clusters.Each element on the array is a map which describes the cluster as follows.
- nodes: Array of OpenShift nodes that will host the Red Hat Gluster Storage containerEach element on the array is a map which describes the node as follows
- node: It is a map of the following elements:
- zone: The value represents the zone number that the node belongs to; the zone number is used by heketi for choosing optimum position of bricks by having replicas of bricks in different zones. Hence zone number is similar to a failure domain.
- hostnames: It is a map which lists the manage and storage addresses
- manage: It is the hostname/IP Address that is used by Heketi to communicate with the node
- storage: It is the IP address that is used by other OpenShift nodes to communicate with the node. Storage data traffic will use the interface attached to this IP. This must be the IP address and not the hostname because, in an OpenShift environment, Heketi considers this to be the endpoint too.
- devices: Name of each disk to be added
Edit the topology file based on the Red Hat Gluster Storage pod hostname under thenode.hostnames.managesection andnode.hostnames.storagesection with the IP address. For simplicity, the /usr/share/heketi/topology-sample.json file only sets up 4 nodes with 8 drives each. - For the existing cluster, heketi-cli will be available to load the new topology. Run the command to add the new topology to heketi:
heketi-cli topology load --json=<topology file path>
# heketi-cli topology load --json=<topology file path>Copy to Clipboard Copied! Toggle word wrap Toggle overflow For example:Copy to Clipboard Copied! Toggle word wrap Toggle overflow
1.1.3.2. Adding Another Red Hat Openshift Container Storage Cluster in a New Project
Note
- Create a new project by executing the following command:
oc new-project <new_project_name>
# oc new-project <new_project_name>Copy to Clipboard Copied! Toggle word wrap Toggle overflow For example:oc new-project storage-project-2 Now using project "storage-project-2" on server "https://master.example.com:8443"
# oc new-project storage-project-2

Now using project "storage-project-2" on server "https://master.example.com:8443"
Copy to Clipboard Copied! Toggle word wrap Toggle overflow - After the project is created, execute the following command on the master node to enable the deployment of the privileged containers as Red Hat Gluster Storage container can only run in the privileged mode.
oc adm policy add-scc-to-user privileged -z storage-project-2
oc adm policy add-scc-to-user privileged -z default
# oc adm policy add-scc-to-user privileged -z storage-project-2
# oc adm policy add-scc-to-user privileged -z default
Copy to Clipboard Copied! Toggle word wrap Toggle overflow - Create a new topology file for the new cluster. You must provide a topology file for the new cluster which describes the topology of the Red Hat Gluster Storage nodes and their attached storage devices. As a sample, a formatted topology file (topology-sample.json) is installed with the ‘heketi-client’ package in the /usr/share/heketi/ directory.For example:
Copy to Clipboard Copied! Toggle word wrap Toggle overflow where,- clusters: Array of clusters.Each element on the array is a map which describes the cluster as follows.
- nodes: Array of OpenShift nodes that will host the Red Hat Gluster Storage containerEach element on the array is a map which describes the node as follows
- node: It is a map of the following elements:
- zone: The value represents the zone number that the node belongs to; the zone number is used by heketi for choosing optimum position of bricks by having replicas of bricks in different zones. Hence zone number is similar to a failure domain.
- hostnames: It is a map which lists the manage and storage addresses
- manage: It is the hostname/IP Address that is used by Heketi to communicate with the node
- storage: It is the IP address that is used by other OpenShift nodes to communicate with the node. Storage data traffic will use the interface attached to this IP. This must be the IP address and not the hostname because, in an OpenShift environment, Heketi considers this to be the endpoint too.
- devices: Name of each disk to be added
Edit the topology file based on the Red Hat Gluster Storage pod hostname under thenode.hostnames.managesection andnode.hostnames.storagesection with the IP address. For simplicity, the /usr/share/heketi/topology-sample.json file only sets up 4 nodes with 8 drives each. - Execute the following command on the client to deploy the heketi and Red Hat Gluster Storage pods:
cns-deploy -n <namespace> --daemonset-label <NODE_LABEL> -g topology.json
# cns-deploy -n <namespace> --daemonset-label <NODE_LABEL> -g topology.jsonCopy to Clipboard Copied! Toggle word wrap Toggle overflow For example:Copy to Clipboard Copied! Toggle word wrap Toggle overflow Note
For more information on the cns-deploy commands, see to the man page of the cns-deploy.cns-deploy --help
# cns-deploy --helpCopy to Clipboard Copied! Toggle word wrap Toggle overflow - Verify that Red Hat Openshift Container Storage is deployed and working as expected in the new project with the new daemonSet label by executing the following command:
oc get ds
# oc get dsCopy to Clipboard Copied! Toggle word wrap Toggle overflow For example:oc get ds NAME DESIRED CURRENT READY NODE-SELECTOR AGE glusterfs 3 3 3 storagenode=glusterfs2 8m
# oc get ds
NAME        DESIRED   CURRENT   READY     NODE-SELECTOR            AGE
glusterfs   3         3         3         storagenode=glusterfs2   8m
Copy to Clipboard Copied! Toggle word wrap Toggle overflow
1.2. Reducing Storage Capacity
Note
- The IDs can be retrieved by executing the heketi-cli topology info command.
heketi-cli topology info
# heketi-cli topology infoCopy to Clipboard Copied! Toggle word wrap Toggle overflow - The
heketidbstoragevolume cannot be deleted as it contains the heketi database.
1.2.1. Deleting Volumes
heketi-cli volume delete <volume_id>
# heketi-cli volume delete <volume_id>heketi-cli volume delete 12b2590191f571be9e896c7a483953c3 Volume 12b2590191f571be9e896c7a483953c3 deleted
heketi-cli volume delete 12b2590191f571be9e896c7a483953c3
Volume 12b2590191f571be9e896c7a483953c3 deleted
1.2.2. Deleting Device
1.2.2.1. Disabling and Enabling a Device
heketi-cli device disable <device_id>
# heketi-cli device disable <device_id>heketi-cli device disable f53b13b9de1b5125691ee77db8bb47f4 Device f53b13b9de1b5125691ee77db8bb47f4 is now offline
# heketi-cli device disable f53b13b9de1b5125691ee77db8bb47f4
Device f53b13b9de1b5125691ee77db8bb47f4 is now offlineheketi-cli device enable <device_id>
# heketi-cli device enable <device_id>heketi-cli device enable f53b13b9de1b5125691ee77db8bb47f4 Device f53b13b9de1b5125691ee77db8bb47f4 is now online
# heketi-cli device enable f53b13b9de1b5125691ee77db8bb47f4
Device f53b13b9de1b5125691ee77db8bb47f4 is now online1.2.2.2. Removing and Deleting the Device
- Remove device using the following command:
heketi-cli device remove <device_id>
# heketi-cli device remove <device_id>Copy to Clipboard Copied! Toggle word wrap Toggle overflow For example:heketi-cli device remove e9ef1d9043ed3898227143add599e1f9 Device e9ef1d9043ed3898227143add599e1f9 is now removed
heketi-cli device remove e9ef1d9043ed3898227143add599e1f9 Device e9ef1d9043ed3898227143add599e1f9 is now removedCopy to Clipboard Copied! Toggle word wrap Toggle overflow - Delete the device using the following command:
heketi-cli device delete <device_id>
# heketi-cli device delete <device_id>Copy to Clipboard Copied! Toggle word wrap Toggle overflow For example:heketi-cli device delete 56912a57287d07fad0651ba0003cf9aa Device 56912a57287d07fad0651ba0003cf9aa deleted
heketi-cli device delete 56912a57287d07fad0651ba0003cf9aa Device 56912a57287d07fad0651ba0003cf9aa deletedCopy to Clipboard Copied! Toggle word wrap Toggle overflow The only way to reuse a deleted device is by adding the device to heketi's topology again.
1.2.2.3. Replacing a Device
- Locate the device that has failed using the following command:
heketi-cli topology info
# heketi-cli topology infoCopy to Clipboard Copied! Toggle word wrap Toggle overflow Copy to Clipboard Copied! Toggle word wrap Toggle overflow The example below illustrates the sequence of operations that are required to replace a failed device. The example uses device IDa811261864ee190941b17c72809a5001which belongs to node with id8faade64a9c8669de204b66bc083b10das. - Add a new device preferably to the same node as the device being replaced.
heketi-cli device add --name /dev/vdd --node 8faade64a9c8669de204b66bc083b10d Device added successfully
# heketi-cli device add --name /dev/vdd --node 8faade64a9c8669de204b66bc083b10d Device added successfullyCopy to Clipboard Copied! Toggle word wrap Toggle overflow - Disable the failed device.
heketi-cli device disable a811261864ee190941b17c72809a5001 Device a811261864ee190941b17c72809a5001 is now offline
# heketi-cli device disable a811261864ee190941b17c72809a5001 Device a811261864ee190941b17c72809a5001 is now offlineCopy to Clipboard Copied! Toggle word wrap Toggle overflow - Remove the failed device.
heketi-cli device remove a811261864ee190941b17c72809a5001 Device a811261864ee190941b17c72809a5001 is now removed
# heketi-cli device remove a811261864ee190941b17c72809a5001 Device a811261864ee190941b17c72809a5001 is now removedCopy to Clipboard Copied! Toggle word wrap Toggle overflow At this stage, the bricks are migrated from the failed device. Heketi chooses a suitable device based on the brick allocation algorithm. As a result, there is a possibility that all the bricks might not be migrated to the new added device. - Delete the failed device.
heketi-cli device delete a811261864ee190941b17c72809a5001 Device a811261864ee190941b17c72809a5001 deleted
# heketi-cli device delete a811261864ee190941b17c72809a5001 Device a811261864ee190941b17c72809a5001 deletedCopy to Clipboard Copied! Toggle word wrap Toggle overflow - Before repeating the above sequence of steps on another device, you must wait for the self-heal operation to complete. You can verify that the self-heal operation completed when the Number of entries value returns a 0 value.
oc rsh <any_gluster_pod_name> for each in $(gluster volume list) ; do gluster vol heal $each info | grep "Number of entries:" ; done Number of entries: 0 Number of entries: 0 Number of entries: 0
# oc rsh <any_gluster_pod_name> for each in $(gluster volume list) ; do gluster vol heal $each info | grep "Number of entries:" ; done Number of entries: 0 Number of entries: 0 Number of entries: 0Copy to Clipboard Copied! Toggle word wrap Toggle overflow
1.2.3. Deleting Node
1.2.3.1. Disabling and Enabling a Node
heketi-cli node disable <node_id>
# heketi-cli node disable <node_id>heketi-cli node disable 5f0af88b968ed1f01bf959fe4fe804dc Node 5f0af88b968ed1f01bf959fe4fe804dc is now offline
heketi-cli node disable 5f0af88b968ed1f01bf959fe4fe804dc
Node 5f0af88b968ed1f01bf959fe4fe804dc is now offlineheketi-cli node enable <node_id>
# heketi-cli node enable <node_id>heketi-cli node enable 5f0af88b968ed1f01bf959fe4fe804dc Node 5f0af88b968ed1f01bf959fe4fe804dc is now online
heketi-cli node enable 5f0af88b968ed1f01bf959fe4fe804dc
Node 5f0af88b968ed1f01bf959fe4fe804dc is now online1.2.3.2. Removing and Deleting the Node
- To remove the node execute the following command:
heketi-cli node remove <node_id>
# heketi-cli node remove <node_id>Copy to Clipboard Copied! Toggle word wrap Toggle overflow For example:heketi-cli node remove 5f0af88b968ed1f01bf959fe4fe804dc Node 5f0af88b968ed1f01bf959fe4fe804dc is now removed
heketi-cli node remove 5f0af88b968ed1f01bf959fe4fe804dc Node 5f0af88b968ed1f01bf959fe4fe804dc is now removedCopy to Clipboard Copied! Toggle word wrap Toggle overflow - Delete the devices associated with the node by executing the following command as the nodes that have devices associated with it cannot be deleted:
heketi-cli device delete <device_id>
# heketi-cli device delete <device_id>Copy to Clipboard Copied! Toggle word wrap Toggle overflow For example:heketi-cli device delete 56912a57287d07fad0651ba0003cf9aa Device 56912a57287d07fad0651ba0003cf9aa deleted
heketi-cli device delete 56912a57287d07fad0651ba0003cf9aa
Device 56912a57287d07fad0651ba0003cf9aa deleted
Copy to Clipboard Copied! Toggle word wrap Toggle overflow Execute the command for every device on the node. - Delete the node using the following command:
heketi-cli node delete <node_id>
# heketi-cli node delete <node_id>Copy to Clipboard Copied! Toggle word wrap Toggle overflow For example:heketi-cli node delete 5f0af88b968ed1f01bf959fe4fe804dc Node 5f0af88b968ed1f01bf959fe4fe804dc deleted
heketi-cli node delete 5f0af88b968ed1f01bf959fe4fe804dc Node 5f0af88b968ed1f01bf959fe4fe804dc deletedCopy to Clipboard Copied! Toggle word wrap Toggle overflow Deleting the node deletes the node from the heketi topology. The only way to reuse a deleted node is by adding the node to heketi's topology again
1.2.3.3. Replacing a Node
- Locate the node that has failed using the following command:
Copy to Clipboard Copied! Toggle word wrap Toggle overflow The example below illustrates the sequence of operations that are required to replace a failed node. The example uses node ID 8faade64a9c8669de204b66bc083b10d. - Add a new node, preferably that has the same devices as the node being replaced.
heketi-cli node add --zone=1 --cluster=597fceb5d6c876b899e48f599b988f54 --management-host-name=node4.example.com --storage-host-name=192.168.10.104 heketi-cli device add --name /dev/vdd --node 8faade64a9c8669de204b66bc083b10d Node and device added successfully
# heketi-cli node add --zone=1 --cluster=597fceb5d6c876b899e48f599b988f54 --management-host-name=node4.example.com --storage-host-name=192.168.10.104 # heketi-cli device add --name /dev/vdd --node 8faade64a9c8669de204b66bc083b10d Node and device added successfullyCopy to Clipboard Copied! Toggle word wrap Toggle overflow - Disable the failed node.
heketi-cli node disable 8faade64a9c8669de204b66bc083b10d Node 8faade64a9c8669de204b66bc083b10d is now offline
# heketi-cli node disable 8faade64a9c8669de204b66bc083b10d Node 8faade64a9c8669de204b66bc083b10d is now offlineCopy to Clipboard Copied! Toggle word wrap Toggle overflow - Remove the failed node.
heketi-cli node remove 8faade64a9c8669de204b66bc083b10d Node 8faade64a9c8669de204b66bc083b10d is now removed
# heketi-cli node remove 8faade64a9c8669de204b66bc083b10d Node 8faade64a9c8669de204b66bc083b10d is now removedCopy to Clipboard Copied! Toggle word wrap Toggle overflow At this stage, the bricks are migrated from the failed node. Heketi chooses a suitable device based on the brick allocation algorithm. - Delete the devices associated with the node by executing the following command as the nodes that have devices associated with it cannot be deleted:
heketi-cli device delete <device_id>
# heketi-cli device delete <device_id>Copy to Clipboard Copied! Toggle word wrap Toggle overflow For example:heketi-cli device delete 56912a57287d07fad0651ba0003cf9aa Device 56912a57287d07fad0651ba0003cf9aa deleted
heketi-cli device delete 56912a57287d07fad0651ba0003cf9aa Device 56912a57287d07fad0651ba0003cf9aa deletedCopy to Clipboard Copied! Toggle word wrap Toggle overflow Execute the command for every device on the node. - Delete the failed node.
heketi-cli node delete 8faade64a9c8669de204b66bc083b10d
Node 8faade64a9c8669de204b66bc083b10d deleted
# heketi-cli node delete 8faade64a9c8669de204b66bc083b10d
Node 8faade64a9c8669de204b66bc083b10d deleted
Copy to Clipboard Copied! Toggle word wrap Toggle overflow
1.2.4. Deleting Clusters
Note
heketi-cli cluster delete <cluster_id>
# heketi-cli cluster delete <cluster_id>heketi-cli cluster delete 0e949d91c608d13fd3fc4e96f798a5b1 Cluster 0e949d91c608d13fd3fc4e96f798a5b1 deleted
heketi-cli cluster delete 0e949d91c608d13fd3fc4e96f798a5b1
Cluster 0e949d91c608d13fd3fc4e96f798a5b1 deletedChapter 2. Operations on a Red Hat Gluster Storage Pod in an OpenShift Environment
- To list the pods, execute the following command :
oc get pods -n <storage_project_name>
# oc get pods -n <storage_project_name>Copy to Clipboard Copied! Toggle word wrap Toggle overflow For example:Copy to Clipboard Copied! Toggle word wrap Toggle overflow Following are the gluster pods from the above example:glusterfs-dc-node1.example.com glusterfs-dc-node2.example.com glusterfs-dc-node3.example.com
glusterfs-dc-node1.example.com glusterfs-dc-node2.example.com glusterfs-dc-node3.example.comCopy to Clipboard Copied! Toggle word wrap Toggle overflow Note
The topology.json file will provide the details of the nodes in a given Trusted Storage Pool (TSP) . In the above example all the 3 Red Hat Gluster Storage nodes are from the same TSP. - To enter the gluster pod shell, execute the following command:
oc rsh <gluster_pod_name> -n <storage_project_name>
# oc rsh <gluster_pod_name> -n <storage_project_name>Copy to Clipboard Copied! Toggle word wrap Toggle overflow For example:oc rsh glusterfs-dc-node1.example.com -n storage-project sh-4.2#
# oc rsh glusterfs-dc-node1.example.com -n storage-project

sh-4.2#
Copy to Clipboard Copied! Toggle word wrap Toggle overflow - To get the peer status, execute the following command:
gluster peer status
# gluster peer statusCopy to Clipboard Copied! Toggle word wrap Toggle overflow For example:Copy to Clipboard Copied! Toggle word wrap Toggle overflow - To list the gluster volumes on the Trusted Storage Pool, execute the following command:
gluster volume info
# gluster volume infoCopy to Clipboard Copied! Toggle word wrap Toggle overflow For example:Copy to Clipboard Copied! Toggle word wrap Toggle overflow - To get the volume status, execute the following command:
gluster volume status <volname>
# gluster volume status <volname>Copy to Clipboard Copied! Toggle word wrap Toggle overflow For example:Copy to Clipboard Copied! Toggle word wrap Toggle overflow - To use the snapshot feature, load the snapshot module using the following command on one of the nodes:
modprobe dm_snapshot
# modprobe dm_snapshotCopy to Clipboard Copied! Toggle word wrap Toggle overflow Important
Restrictions for using Snapshot- After a snapshot is created, it must be accessed through the user-serviceable snapshots feature only. This can be used to copy the old versions of files into the required location.Reverting the volume to a snapshot state is not supported and should never be done as it might damage the consistency of the data.
- On a volume with snapshots, volume changing operations, such as volume expansion, must not be performed.
- To take the snapshot of the gluster volume, execute the following command:
gluster snapshot create <snapname> <volname>
# gluster snapshot create <snapname> <volname>Copy to Clipboard Copied! Toggle word wrap Toggle overflow For example:gluster snapshot create snap1 vol_9e86c0493f6b1be648c9deee1dc226a6 snapshot create: success: Snap snap1_GMT-2016.07.29-13.05.46 created successfully
# gluster snapshot create snap1 vol_9e86c0493f6b1be648c9deee1dc226a6

snapshot create: success: Snap snap1_GMT-2016.07.29-13.05.46 created successfully
Copy to Clipboard Copied! Toggle word wrap Toggle overflow - To list the snapshots, execute the following command:
gluster snapshot list
# gluster snapshot listCopy to Clipboard Copied! Toggle word wrap Toggle overflow For example:Copy to Clipboard Copied! Toggle word wrap Toggle overflow - To delete a snapshot, execute the following command:
gluster snap delete <snapname>
# gluster snap delete <snapname>Copy to Clipboard Copied! Toggle word wrap Toggle overflow For example:gluster snap delete snap1_GMT-2016.07.29-13.05.46 Deleting snap will erase all the information about the snap. Do you still want to continue? (y/n) y snapshot delete: snap1_GMT-2016.07.29-13.05.46: snap removed successfully
# gluster snap delete snap1_GMT-2016.07.29-13.05.46

Deleting snap will erase all the information about the snap. Do you still want to continue? (y/n) y
snapshot delete: snap1_GMT-2016.07.29-13.05.46: snap removed successfully
Copy to Clipboard Copied! Toggle word wrap Toggle overflow For more information about managing snapshots, see https://access.redhat.com/documentation/en-us/red_hat_gluster_storage/3.4/html-single/administration_guide/#chap-Managing_Snapshots. - You can set up Red Hat Openshift Container Storage volumes for geo-replication to a non-Red Hat Openshift Container Storage remote site. Geo-replication uses a master–slave model. Here, the Red Hat Openshift Container Storage volume acts as the master volume. To set up geo-replication, you must run the geo-replication commands on gluster pods. To enter the gluster pod shell, execute the following command:
oc rsh <gluster_pod_name> -n <storage_project_name>
# oc rsh <gluster_pod_name> -n <storage_project_name>Copy to Clipboard Copied! Toggle word wrap Toggle overflow For more information about setting up geo-replication, see https://access.redhat.com/documentation/en-us/red_hat_gluster_storage/3.4/html/administration_guide/chap-managing_geo-replication. - Brick multiplexing is a feature that allows including multiple bricks into one process. This reduces resource consumption, allowing you to run more bricks than earlier with the same memory consumption.Brick multiplexing is enabled by default from Container-Native Storage 3.6. If you want to turn it off, execute the following command:
gluster volume set all cluster.brick-multiplex off
# gluster volume set all cluster.brick-multiplex offCopy to Clipboard Copied! Toggle word wrap Toggle overflow - The
auto_unmountoption in glusterfs libfuse, when enabled, ensures that the file system is unmounted at FUSE server termination by running a separate monitor process that performs the unmount.The GlusterFS plugin in Openshift enables theauto_unmountoption for gluster mounts.
Part II. Operations
Chapter 3. Creating Persistent Volumes
Labels are an OpenShift Container Platform feature that support user-defined tags (key-value pairs) as part of an object’s specification. Their primary purpose is to enable the arbitrary grouping of objects by defining identical labels among them. These labels can then be targeted by selectors to match all objects with specified label values. It is this functionality we will take advantage of to enable our PVC to bind to our PV.
3.1. File Storage
3.1.1. Static Provisioning of Volumes
/usr/share/heketi/templates/ directory.
Note
cp /usr/share/heketi/templates/sample-gluster-endpoints.yaml /<path>/gluster-endpoints.yaml
# cp /usr/share/heketi/templates/sample-gluster-endpoints.yaml /<path>/gluster-endpoints.yaml- To specify the endpoints you want to create, update the copied
sample-gluster-endpoints.yamlfile with the endpoints to be created based on the environment. Each Red Hat Gluster Storage trusted storage pool requires its own endpoint with the IP of the nodes in the trusted storage pool.Copy to Clipboard Copied! Toggle word wrap Toggle overflow name: is the name of the endpointip: is the ip address of the Red Hat Gluster Storage nodes. - Execute the following command to create the endpoints:
oc create -f <name_of_endpoint_file>
# oc create -f <name_of_endpoint_file>Copy to Clipboard Copied! Toggle word wrap Toggle overflow For example:oc create -f sample-gluster-endpoints.yaml endpoints "glusterfs-cluster" created
# oc create -f sample-gluster-endpoints.yaml
endpoints "glusterfs-cluster" created
Copy to Clipboard Copied! Toggle word wrap Toggle overflow - To verify that the endpoints are created, execute the following command:
oc get endpoints
# oc get endpointsCopy to Clipboard Copied! Toggle word wrap Toggle overflow For example:Copy to Clipboard Copied! Toggle word wrap Toggle overflow - Execute the following command to create a gluster service:
oc create -f <name_of_service_file>
# oc create -f <name_of_service_file>Copy to Clipboard Copied! Toggle word wrap Toggle overflow For example:Copy to Clipboard Copied! Toggle word wrap Toggle overflow oc create -f sample-gluster-service.yaml service "glusterfs-cluster" created
# oc create -f sample-gluster-service.yaml
service "glusterfs-cluster" created
Copy to Clipboard Copied! Toggle word wrap Toggle overflow - To verify that the service is created, execute the following command:
oc get service
# oc get serviceCopy to Clipboard Copied! Toggle word wrap Toggle overflow For example:Copy to Clipboard Copied! Toggle word wrap Toggle overflow Note
The endpoints and the services must be created for each project that requires a persistent storage. - Create a 100G persistent volume with Replica 3 from GlusterFS and output a persistent volume specification describing this volume to the file pv001.json:
heketi-cli volume create --size=100 --persistent-volume-file=pv001.json
$ heketi-cli volume create --size=100 --persistent-volume-file=pv001.jsonCopy to Clipboard Copied! Toggle word wrap Toggle overflow Copy to Clipboard Copied! Toggle word wrap Toggle overflow Important
You must manually add the Labels information to the .json file.Following is the example YAML file for reference:Copy to Clipboard Copied! Toggle word wrap Toggle overflow name: The name of the volume.storage: The amount of storage allocated to this volumeglusterfs: The volume type being used, in this case the glusterfs plug-inendpoints: The endpoints name that defines the trusted storage pool createdpath: The Red Hat Gluster Storage volume that will be accessed from the Trusted Storage Pool.accessModes: accessModes are used as labels to match a PV and a PVC. They currently do not define any form of access control.labels: Use labels to identify common attributes or characteristics shared among volumes. In this case, we have defined the gluster volume to have a custom attribute (key) named storage-tier with a value of gold assigned. A claim will be able to select a PV with storage-tier=gold to match this PV.Note
- heketi-cli also accepts the endpoint name on the command line (--persistent-volume-endpoint=”TYPE ENDPOINT HERE”). This can then be piped to
oc create -f -to create the persistent volume immediately. - If there are multiple Red Hat Gluster Storage trusted storage pools in your environment, you can check on which trusted storage pool the volume is created using the
heketi-cli volume listcommand. This command lists the cluster name. You can then update the endpoint information in thepv001.jsonfile accordingly. - When creating a Heketi volume with only two nodes with the replica count set to the default value of three (replica 3), an error "No space" is displayed by Heketi as there is no space to create a replica set of three disks on three different nodes.
- If all the heketi-cli write operations (ex: volume create, cluster create..etc) fails and the read operations ( ex: topology info, volume info ..etc) are successful, then the possibility is that the gluster volume is operating in read-only mode.
- Edit the pv001.json file and enter the name of the endpoint in the endpoint's section:
Copy to Clipboard Copied! Toggle word wrap Toggle overflow - Create a persistent volume by executing the following command:
oc create -f pv001.json
# oc create -f pv001.jsonCopy to Clipboard Copied! Toggle word wrap Toggle overflow For example:oc create -f pv001.json persistentvolume "glusterfs-4fc22ff9" created
# oc create -f pv001.json
persistentvolume "glusterfs-4fc22ff9" created
Copy to Clipboard Copied! Toggle word wrap Toggle overflow - To verify that the persistent volume is created, execute the following command:
oc get pv
# oc get pvCopy to Clipboard Copied! Toggle word wrap Toggle overflow For example:oc get pv NAME CAPACITY ACCESSMODES STATUS CLAIM REASON AGE glusterfs-4fc22ff9 100Gi RWX Available 4s
# oc get pv

NAME                 CAPACITY   ACCESSMODES   STATUS      CLAIM     REASON    AGE
glusterfs-4fc22ff9   100Gi      RWX           Available                       4s
Copy to Clipboard Copied! Toggle word wrap Toggle overflow - Create a persistent volume claim file. For example:
Copy to Clipboard Copied! Toggle word wrap Toggle overflow - Bind the persistent volume to the persistent volume claim by executing the following command:
oc create -f pvc.yaml
# oc create -f pvc.yamlCopy to Clipboard Copied! Toggle word wrap Toggle overflow For example:oc create -f pvc.yaml persistentvolumeclaim"glusterfs-claim" created
# oc create -f pvc.yaml
persistentvolumeclaim"glusterfs-claim" created
Copy to Clipboard Copied! Toggle word wrap Toggle overflow - To verify that the persistent volume and the persistent volume claim is bound, execute the following commands:
oc get pv
oc get pvc
# oc get pv
# oc get pvc
Copy to Clipboard Copied! Toggle word wrap Toggle overflow For example:oc get pv NAME CAPACITY ACCESSMODES STATUS CLAIM REASON AGE glusterfs-4fc22ff9 100Gi RWX Bound storage-project/glusterfs-claim 1m
# oc get pv

NAME                 CAPACITY   ACCESSMODES   STATUS    CLAIM                  REASON    AGE
glusterfs-4fc22ff9   100Gi      RWX           Bound     storage-project/glusterfs-claim             1m
Copy to Clipboard Copied! Toggle word wrap Toggle overflow oc get pvc NAME STATUS VOLUME CAPACITY ACCESSMODES AGE glusterfs-claim Bound glusterfs-4fc22ff9 100Gi RWX 11s
# oc get pvc

NAME              STATUS    VOLUME               CAPACITY   ACCESSMODES   AGE
glusterfs-claim   Bound     glusterfs-4fc22ff9   100Gi      RWX           11s
Copy to Clipboard Copied! Toggle word wrap Toggle overflow - The claim can now be used in the application:For example:
Copy to Clipboard Copied! Toggle word wrap Toggle overflow oc create -f app.yaml pod "busybox" created
# oc create -f app.yaml
pod "busybox" created
Copy to Clipboard Copied! Toggle word wrap Toggle overflow For more information about using the glusterfs claim in the application see, https://access.redhat.com/documentation/en-us/openshift_container_platform/3.10/html-single/configuring_clusters/#install-config-storage-examples-gluster-example. - To verify that the pod is created, execute the following command:
oc get pods -n <storage_project_name>
# oc get pods -n <storage_project_name>Copy to Clipboard Copied! Toggle word wrap Toggle overflow For example:Copy to Clipboard Copied! Toggle word wrap Toggle overflow - To verify that the persistent volume is mounted inside the container, execute the following command:
oc rsh busybox
# oc rsh busyboxCopy to Clipboard Copied! Toggle word wrap Toggle overflow Copy to Clipboard Copied! Toggle word wrap Toggle overflow
Note
3.1.2. Dynamic Provisioning of Volumes
3.1.2.1. Configuring Dynamic Provisioning of Volumes
3.1.2.1.1. Creating Secret for Heketi Authentication
Note
admin-key value (secret to access heketi to get the volume details) was not set during the deployment of Red Hat Openshift Container Storage, then the following steps can be omitted.
- Create an encoded value for the password by executing the following command:
echo -n "<key>" | base64
# echo -n "<key>" | base64Copy to Clipboard Copied! Toggle word wrap Toggle overflow where “key” is the value for "admin-key" that was created while deploying Red Hat Openshift Container StorageFor example:echo -n "mypassword" | base64 bXlwYXNzd29yZA==
# echo -n "mypassword" | base64
bXlwYXNzd29yZA==
Copy to Clipboard Copied! Toggle word wrap Toggle overflow - Create a secret file. A sample secret file is provided below:
Copy to Clipboard Copied! Toggle word wrap Toggle overflow - Register the secret on Openshift by executing the following command:
oc create -f glusterfs-secret.yaml
secret "heketi-secret" created
# oc create -f glusterfs-secret.yaml
secret "heketi-secret" created
Copy to Clipboard Copied! Toggle word wrap Toggle overflow
3.1.2.1.2. Registering a Storage Class
- To create a storage class execute the following command:
Copy to Clipboard Copied! Toggle word wrap Toggle overflow where,resturl: Gluster REST service/Heketi service url which provision gluster volumes on demand. The general format must be IPaddress:Port and this is a mandatory parameter for GlusterFS dynamic provisioner. If Heketi service is exposed as a routable service in openshift/kubernetes setup, this can have a format similar to http://heketi-storage-project.cloudapps.mystorage.com where the fqdn is a resolvable heketi service url.restuser : Gluster REST service/Heketi user who has access to create volumes in the trusted storage poolvolumetype: It specifies the volume type that is being used.Note
Distributed-Three-way replication is the only supported volume type.clusterid: It is the ID of the cluster which will be used by Heketi when provisioning the volume. It can also be a list of comma-separated cluster IDs. This is an optional parameter.Note
To get the cluster ID, execute the following command:heketi-cli cluster list
# heketi-cli cluster listCopy to Clipboard Copied! Toggle word wrap Toggle overflow secretNamespace + secretName: Identification of Secret instance that contains the user password that is used when communicating with the Gluster REST service. These parameters are optional. Empty password will be used when both secretNamespace and secretName are omitted.Note
When the persistent volumes are dynamically provisioned, the Gluster plugin automatically creates an endpoint and a headless service in the name gluster-dynamic-<claimname>. This dynamic endpoint and service will be deleted automatically when the persistent volume claim is deleted.volumeoptions: This is an optional parameter. It allows you to create glusterfs volumes with encryption enabled by setting the parameter to "client.ssl on, server.ssl on". For more information on enabling encryption, see Chapter 8, Enabling Encryption.Note
Do not add this parameter in the storageclass if encryption is not enabled.volumenameprefix: This is an optional parameter. It depicts the name of the volume created by heketi. For more information see Section 3.1.2.1.5, “(Optional) Providing a Custom Volume Name Prefix for Persistent Volumes”Note
The value for this parameter cannot contain `_` in the storageclass.allowVolumeExpansion: To increase the PV claim value, ensure to set theallowVolumeExpansionparameter in the storageclass file totrue. For more information, see Section 3.1.2.1.7, “Expanding Persistent Volume Claim”. - To register the storage class to Openshift, execute the following command:
oc create -f glusterfs-storageclass.yaml
storageclass "gluster-container" created
# oc create -f glusterfs-storageclass.yaml
storageclass "gluster-container" created
Copy to Clipboard Copied! Toggle word wrap Toggle overflow - To get the details of the storage class, execute the following command:
Copy to Clipboard Copied! Toggle word wrap Toggle overflow
3.1.2.1.3. Creating a Persistent Volume Claim
- Create a Persistent Volume Claim file. A sample persistent volume claim is provided below:
Copy to Clipboard Copied! Toggle word wrap Toggle overflow persistentVolumeReclaimPolicy:This is an optional parameter. When this parameter is set to "Retain" the underlying persistent volume is retained even after the corresponding persistent volume claim is deleted.Note
When PVC is deleted, the underlying heketi and gluster volumes are not deleted if "persistentVolumeReclaimPolicy:" is set to "Retain". To delete the volume, you must use heketi cli and then delete the PV. - Register the claim by executing the following command:
oc create -f glusterfs-pvc-claim1.yaml
persistentvolumeclaim "claim1" created
# oc create -f glusterfs-pvc-claim1.yaml
persistentvolumeclaim "claim1" created
Copy to Clipboard Copied! Toggle word wrap Toggle overflow - To get the details of the claim, execute the following command:
oc describe pvc <claim_name>
# oc describe pvc <claim_name>Copy to Clipboard Copied! Toggle word wrap Toggle overflow For example:Copy to Clipboard Copied! Toggle word wrap Toggle overflow
3.1.2.1.4. Verifying Claim Creation
- To get the details of the persistent volume claim and persistent volume, execute the following command:
Copy to Clipboard Copied! Toggle word wrap Toggle overflow - To validate if the endpoint and the services are created as part of claim creation, execute the following command:
Copy to Clipboard Copied! Toggle word wrap Toggle overflow
3.1.2.1.5. (Optional) Providing a Custom Volume Name Prefix for Persistent Volumes
- Any string that was provided as the field value of "volnameprefix" in the storageclass file.
- Persistent volume claim name.
- Project / Namespace name.
volumenameprefix to the storage class file. For more information, see Section 3.1.2.1.2, “Registering a Storage Class”
Note
oc describe pv <pv_name>
# oc describe pv <pv_name>Path will have the custom volume name prefix attached to the namespace and the claim name, which is "test-vol" in this case.
3.1.2.1.6. Using the Claim in a Pod
- To use the claim in the application, for example
Copy to Clipboard Copied! Toggle word wrap Toggle overflow oc create -f app.yaml pod "busybox" created
# oc create -f app.yaml
pod "busybox" created
Copy to Clipboard Copied! Toggle word wrap Toggle overflow For more information about using the glusterfs claim in the application see, https://access.redhat.com/documentation/en-us/openshift_container_platform/3.10/html-single/configuring_clusters/#install-config-storage-examples-gluster-example. - To verify that the pod is created, execute the following command:
Copy to Clipboard Copied! Toggle word wrap Toggle overflow - To verify that the persistent volume is mounted inside the container, execute the following command:
oc rsh busybox
# oc rsh busyboxCopy to Clipboard Copied! Toggle word wrap Toggle overflow Copy to Clipboard Copied! Toggle word wrap Toggle overflow
3.1.2.1.7. Expanding Persistent Volume Claim
allowVolumeExpansion parameter in the storageclass file to true. For more information refer, Section 3.1.2.1.2, “Registering a Storage Class”
Note
- If the feature gates
ExpandPersistentVolumes, and the admissionconfigPersistentVolumeClaimResizeare not enabled, then edit the master.conf file located at /etc/origin/master/master-config.yaml on the master to enable them. For example:To enable feature gatesExpandPersistentVolumesCopy to Clipboard Copied! Toggle word wrap Toggle overflow To enable admissionconfigPersistentVolumeClaimResizeadd the following under admission config in the master-config file.Copy to Clipboard Copied! Toggle word wrap Toggle overflow - Restart the OpenShift master by running the following commands:
/usr/local/bin/master-restart api
  # /usr/local/bin/master-restart controllers
  # /usr/local/bin/master-restart api
  # /usr/local/bin/master-restart controllers
Copy to Clipboard Copied! Toggle word wrap Toggle overflow
- To check the existing persistent volume size, execute the following command on the app pod:
oc rsh busybox
# oc rsh busyboxCopy to Clipboard Copied! Toggle word wrap Toggle overflow df -h
# df -hCopy to Clipboard Copied! Toggle word wrap Toggle overflow For example:Copy to Clipboard Copied! Toggle word wrap Toggle overflow In this example the persistent volume size is 2Gi - To edit the persistent volume claim value, execute the following command and edit the following storage parameter:
resources:
    requests:
      storage: <storage_value>
resources: requests: storage: <storage_value>Copy to Clipboard Copied! Toggle word wrap Toggle overflow oc edit pvc <claim_name>
# oc edit pvc <claim_name>Copy to Clipboard Copied! Toggle word wrap Toggle overflow For example, to expand the storage value to 20Gi:Copy to Clipboard Copied! Toggle word wrap Toggle overflow - To verify, execute the following command on the app pod:
oc rsh busybox
# oc rsh busyboxCopy to Clipboard Copied! Toggle word wrap Toggle overflow / # df -h
/ # df -hCopy to Clipboard Copied! Toggle word wrap Toggle overflow For example:Copy to Clipboard Copied! Toggle word wrap Toggle overflow It is observed that the size is changed from 2Gi (earlier) to 20Gi.
3.1.2.1.8. Deleting a Persistent Volume Claim
Note
- To delete a claim, execute the following command:
oc delete pvc <claim-name>
# oc delete pvc <claim-name>Copy to Clipboard Copied! Toggle word wrap Toggle overflow For example:oc delete pvc claim1 persistentvolumeclaim "claim1" deleted
# oc delete pvc claim1
persistentvolumeclaim "claim1" deleted
Copy to Clipboard Copied! Toggle word wrap Toggle overflow - To verify if the claim is deleted, execute the following command:
oc get pvc <claim-name>
# oc get pvc <claim-name>Copy to Clipboard Copied! Toggle word wrap Toggle overflow For example:oc get pvc claim1 No resources found.
# oc get pvc claim1
No resources found.
Copy to Clipboard Copied! Toggle word wrap Toggle overflow When the user deletes a persistent volume claim that is bound to a persistent volume created by dynamic provisioning, apart from deleting the persistent volume claim, Kubernetes will also delete the persistent volume, endpoints, service, and the actual volume. Execute the following commands if this has to be verified:- To verify if the persistent volume is deleted, execute the following command:
oc get pv <pv-name>
# oc get pv <pv-name>Copy to Clipboard Copied! Toggle word wrap Toggle overflow For example:oc get pv pvc-962aa6d1-bddb-11e6-be23-5254009fc65b No resources found.
# oc get pv pvc-962aa6d1-bddb-11e6-be23-5254009fc65b
No resources found.
Copy to Clipboard Copied! Toggle word wrap Toggle overflow - To verify if the endpoints are deleted, execute the following command:
oc get endpoints <endpointname>
# oc get endpoints <endpointname>Copy to Clipboard Copied! Toggle word wrap Toggle overflow For example:oc get endpoints gluster-dynamic-claim1 No resources found.
# oc get endpoints gluster-dynamic-claim1 No resources found.Copy to Clipboard Copied! Toggle word wrap Toggle overflow - To verify if the service is deleted, execute the following command:
oc get service <servicename>
# oc get service <servicename>Copy to Clipboard Copied! Toggle word wrap Toggle overflow For example:oc get service gluster-dynamic-claim1 No resources found.
# oc get service gluster-dynamic-claim1 No resources found.Copy to Clipboard Copied! Toggle word wrap Toggle overflow
3.1.3. Volume Security
To create a statically provisioned volume with a GID, execute the following command:
heketi-cli volume create --size=100 --persistent-volume-file=pv001.json --gid=590
$ heketi-cli volume create --size=100 --persistent-volume-file=pv001.json --gid=590Two new parameters, gidMin and gidMax, are introduced with dynamic provisioner. These values allow the administrator to configure the GID range for the volume in the storage class. To set up the GID values and provide volume security for dynamically provisioned volumes, execute the following commands:
- Create a storage class file with the GID values. For example:
Copy to Clipboard Copied! Toggle word wrap Toggle overflow Note
If the gidMin and gidMax value are not provided, then the dynamic provisioned volumes will have the GID between 2000 and 2147483647. - Create a persistent volume claim. For more information see, Section 3.1.2.1.3, “Creating a Persistent Volume Claim”
- Use the claim in the pod. Ensure that this pod is non-privileged. For more information see, Section 3.1.2.1.6, “Using the Claim in a Pod”
- To verify if the GID is within the range specified, execute the following command:
oc rsh busybox
# oc rsh busyboxCopy to Clipboard Copied! Toggle word wrap Toggle overflow id
$ idCopy to Clipboard Copied! Toggle word wrap Toggle overflow For example:id uid=1000060000 gid=0(root) groups=0(root),2001
$ id uid=1000060000 gid=0(root) groups=0(root),2001Copy to Clipboard Copied! Toggle word wrap Toggle overflow where, 2001 in the above output is the allocated GID for the persistent volume, which is within the range specified in the storage class. You can write to this volume with the allocated GID.Note
When the persistent volume claim is deleted, the GID of the persistent volume is released from the pool.
3.2. Block Storage
Note
3.2.1. Dynamic Provisioning of Volumes for Block Storage
3.2.1.1. Configuring Dynamic Provisioning of Volumes
3.2.1.1.1. Configuring Multipathing on all Initiators
- To install initiator related packages on all the nodes where initiator has to be configured, execute the following command:
yum install iscsi-initiator-utils device-mapper-multipath
# yum install iscsi-initiator-utils device-mapper-multipathCopy to Clipboard Copied! Toggle word wrap Toggle overflow - To enable multipath, execute the following command:
mpathconf --enable
# mpathconf --enableCopy to Clipboard Copied! Toggle word wrap Toggle overflow - Create and add the following content to the multipath.conf file:
Copy to Clipboard Copied! Toggle word wrap Toggle overflow - Execute the following commands to start multipath daemon and [re]load the multipath configuration:
systemctl start multipathd
# systemctl start multipathdCopy to Clipboard Copied! Toggle word wrap Toggle overflow systemctl reload multipathd
# systemctl reload multipathdCopy to Clipboard Copied! Toggle word wrap Toggle overflow
3.2.1.1.2. Creating Secret for Heketi Authentication
Note
admin-key value (secret to access heketi to get the volume details) was not set during the deployment of Red Hat Openshift Container Storage, then the following steps can be omitted.
- Create an encoded value for the password by executing the following command:
echo -n "<key>" | base64
# echo -n "<key>" | base64Copy to Clipboard Copied! Toggle word wrap Toggle overflow where “key” is the value foradmin-keythat was created while deploying CNSFor example:echo -n "mypassword" | base64 bXlwYXNzd29yZA==
# echo -n "mypassword" | base64 bXlwYXNzd29yZA==Copy to Clipboard Copied! Toggle word wrap Toggle overflow - Create a secret file. A sample secret file is provided below:
Copy to Clipboard Copied! Toggle word wrap Toggle overflow - Register the secret on Openshift by executing the following command:
oc create -f glusterfs-secret.yaml secret "heketi-secret" created
# oc create -f glusterfs-secret.yaml secret "heketi-secret" createdCopy to Clipboard Copied! Toggle word wrap Toggle overflow
3.2.1.1.3. Registering a Storage Class
- Create a storage class. A sample storage class file is presented below:
Copy to Clipboard Copied! Toggle word wrap Toggle overflow where,resturl: Gluster REST service/Heketi service url which provision gluster volumes on demand. The general format must be IPaddress:Port and this is a mandatory parameter for GlusterFS dynamic provisioner. If Heketi service is exposed as a routable service in openshift/kubernetes setup, this can have a format similar to http://heketi-storage-project.cloudapps.mystorage.com where the fqdn is a resolvable heketi service url.restuser : Gluster REST service/Heketi user who has access to create volumes in the trusted storage poolrestsecretnamespace + restsecretname : Identification of Secret instance that contains user password to use when talking to Gluster REST service. These parameters are optional. Empty password will be used when bothrestsecretnamespaceandrestsecretnameare omitted.hacount: It is the count of the number of paths to the block target server.hacountprovides high availability via multipathing capability of iSCSI. If there is a path failure, the I/Os will not be interrupted and will be served via another available paths.clusterids: It is the ID of the cluster which will be used by Heketi when provisioning the volume. It can also be a list of comma-separated cluster IDs. This is an optional parameter.Note
To get the cluster ID, execute the following command:heketi-cli cluster list
# heketi-cli cluster listCopy to Clipboard Copied! Toggle word wrap Toggle overflow chapauthenabled: If you want to provision block volume with CHAP authentication enabled, this value has to be set to true. This is an optional parameter.volumenameprefix: This is an optional parameter. It depicts the name of the volume created by heketi. For more information see, Section 3.2.1.1.6, “(Optional) Providing a Custom Volume Name Prefix for Persistent Volumes”Note
The value for this parameter cannot contain `_` in the storageclass. - To register the storage class to Openshift, execute the following command:
oc create -f glusterfs-block-storageclass.yaml storageclass "gluster-block" created
# oc create -f glusterfs-block-storageclass.yaml storageclass "gluster-block" createdCopy to Clipboard Copied! Toggle word wrap Toggle overflow - To get the details of the storage class, execute the following command:
Copy to Clipboard Copied! Toggle word wrap Toggle overflow
3.2.1.1.4. Creating a Persistent Volume Claim
- Create a Persistent Volume Claim file. A sample persistent volume claim is provided below:
Copy to Clipboard Copied! Toggle word wrap Toggle overflow persistentVolumeReclaimPolicy:This is an optional parameter. When this parameter is set to "Retain" the underlying persistent volume is retained even after the corresponding persistent volume claim is deleted.Note
When PVC is deleted, the underlying heketi and gluster volumes are not deleted if "persistentVolumeReclaimPolicy:" is set to "Retain". To delete the volume, you must use heketi cli and then delete the PV. - Register the claim by executing the following command:
oc create -f glusterfs-block-pvc-claim.yaml persistentvolumeclaim "claim1" created
# oc create -f glusterfs-block-pvc-claim.yaml persistentvolumeclaim "claim1" createdCopy to Clipboard Copied! Toggle word wrap Toggle overflow - To get the details of the claim, execute the following command:
oc describe pvc <claim_name>
# oc describe pvc <claim_name>Copy to Clipboard Copied! Toggle word wrap Toggle overflow For example:Copy to Clipboard Copied! Toggle word wrap Toggle overflow
3.2.1.1.5. Verifying Claim Creation
- To get the details of the persistent volume claim and persistent volume, execute the following command:
Copy to Clipboard Copied! Toggle word wrap Toggle overflow
3.2.1.1.6. (Optional) Providing a Custom Volume Name Prefix for Persistent Volumes
- Any string that was provided as the field value of "volnameprefix" in the storageclass file.
- Persistent volume claim name.
- Project / Namespace name.
volumenameprefix to the storage class file. For more information, refer Section 3.2.1.1.3, “Registering a Storage Class”
Note
oc describe pv <pv_name>
# oc describe pv <pv_name>glusterBlockShare will have the custom volume name prefix attached to the namespace and the claim name, which is "test-vol" in this case.
3.2.1.1.7. Using the Claim in a Pod
- To use the claim in the application, for example
Copy to Clipboard Copied! Toggle word wrap Toggle overflow oc create -f app.yaml pod "busybox" created
# oc create -f app.yaml pod "busybox" createdCopy to Clipboard Copied! Toggle word wrap Toggle overflow For more information about using the glusterfs claim in the application see, https://access.redhat.com/documentation/en-us/openshift_container_platform/3.10/html-single/configuring_clusters/#install-config-storage-examples-gluster-example. - To verify that the pod is created, execute the following command:
Copy to Clipboard Copied! Toggle word wrap Toggle overflow - To verify that the persistent volume is mounted inside the container, execute the following command:
oc rsh busybox
# oc rsh busyboxCopy to Clipboard Copied! Toggle word wrap Toggle overflow Copy to Clipboard Copied! Toggle word wrap Toggle overflow
3.2.1.1.8. Deleting a Persistent Volume Claim
Note
- To delete a claim, execute the following command:
oc delete pvc <claim-name>
# oc delete pvc <claim-name>Copy to Clipboard Copied! Toggle word wrap Toggle overflow For example:oc delete pvc claim1 persistentvolumeclaim "claim1" deleted
# oc delete pvc claim1 persistentvolumeclaim "claim1" deletedCopy to Clipboard Copied! Toggle word wrap Toggle overflow - To verify if the claim is deleted, execute the following command:
oc get pvc <claim-name>
# oc get pvc <claim-name>Copy to Clipboard Copied! Toggle word wrap Toggle overflow For example:oc get pvc claim1 No resources found.
# oc get pvc claim1 No resources found.Copy to Clipboard Copied! Toggle word wrap Toggle overflow When the user deletes a persistent volume claim that is bound to a persistent volume created by dynamic provisioning, apart from deleting the persistent volume claim, Kubernetes will also delete the persistent volume, endpoints, service, and the actual volume. Execute the following commands if this has to be verified:- To verify if the persistent volume is deleted, execute the following command:
oc get pv <pv-name>
# oc get pv <pv-name>Copy to Clipboard Copied! Toggle word wrap Toggle overflow For example:oc get pv pvc-962aa6d1-bddb-11e6-be23-5254009fc65b No resources found.
# oc get pv pvc-962aa6d1-bddb-11e6-be23-5254009fc65b No resources found.Copy to Clipboard Copied! Toggle word wrap Toggle overflow
3.2.2. Replacing a Block on Block Storage
- Execute the following command to fetch the zone and cluster info from heketi
heketi-cli topology info --user=<user> --secret=<user key>
# heketi-cli topology info --user=<user> --secret=<user key>Copy to Clipboard Copied! Toggle word wrap Toggle overflow --user - heketi user--secret - Secret key for a specified user - After obtaining the cluster id and zone id add a new node to heketi by executing the following command:
Note
Before adding the node, ensure the node is labeled as a glusterfs storage host by adding the label "glusterfs=storage-host", using the following command;oc label node <NODENAME> glusterfs=storage-host
# oc label node <NODENAME> glusterfs=storage-hostCopy to Clipboard Copied! Toggle word wrap Toggle overflow heketi-cli node add --zone=<zoneid> --cluster=<clusterid> --management-host-name=<new hostname> --storage-host-name=<new node ip> --user=<user> --secret=<user key>
# heketi-cli node add --zone=<zoneid> --cluster=<clusterid> --management-host-name=<new hostname> --storage-host-name=<new node ip> --user=<user> --secret=<user key>Copy to Clipboard Copied! Toggle word wrap Toggle overflow --cluster - The cluster in which the node should reside--management-host-name - Management hostname. This is the new node that has to be added.--storage-host-name - Storage hostname.--zone - The zone in which the node should reside--user - heketi user.--secret - Secret key for a specified userFor example:Copy to Clipboard Copied! Toggle word wrap Toggle overflow - Execute the following command to add the device
heketi-cli device add --name=<device name> --node=<node id> --user=<user> --secret=<user key>
# heketi-cli device add --name=<device name> --node=<node id> --user=<user> --secret=<user key>Copy to Clipboard Copied! Toggle word wrap Toggle overflow --name - Name of device to add--node - Newly added node idFor example:heketi-cli device add --name=/dev/vdc --node=2639c473a2805f6e19d45997bb18cb9c --user=admin --secret=adminkey Device added successfully
# heketi-cli device add --name=/dev/vdc --node=2639c473a2805f6e19d45997bb18cb9c --user=admin --secret=adminkey Device added successfullyCopy to Clipboard Copied! Toggle word wrap Toggle overflow - After the new node and its associated devices are added to heketi, the faulty or unwanted node can be removed from heketiTo remove any node from heketi, follow this workflow:
- node disable (Disallow usage of a node by placing it offline)
- node replace (Removes a node and all its associated devices from Heketi)
- device delete (Deletes a device from Heketi node)
- node delete (Deletes a node from Heketi management)
- Execute the following command to fetch the node list from heketi
#heketi-cli node list --user=<user> --secret=<user key>
#heketi-cli node list --user=<user> --secret=<user key>Copy to Clipboard Copied! Toggle word wrap Toggle overflow For example:Copy to Clipboard Copied! Toggle word wrap Toggle overflow - Execute the following command to fetch the node info of the node, that has to be deleted from heketi:
heketi-cli node info <nodeid> --user=<user> --secret=<user key>
# heketi-cli node info <nodeid> --user=<user> --secret=<user key>Copy to Clipboard Copied! Toggle word wrap Toggle overflow For example:Copy to Clipboard Copied! Toggle word wrap Toggle overflow - Execute the following command to disable the node from heketi. This makes the node go offline:
heketi-cli node disable <node-id> --user=<user> --secret=<user key>
# heketi-cli node disable <node-id> --user=<user> --secret=<user key>Copy to Clipboard Copied! Toggle word wrap Toggle overflow For example:heketi-cli node disable ab37fc5aabbd714eb8b09c9a868163df --user=admin --secret=adminkey Node ab37fc5aabbd714eb8b09c9a868163df is now offline
# heketi-cli node disable ab37fc5aabbd714eb8b09c9a868163df --user=admin --secret=adminkey Node ab37fc5aabbd714eb8b09c9a868163df is now offlineCopy to Clipboard Copied! Toggle word wrap Toggle overflow - Execute the following command to remove a node and all its associated devices from Heketi:
#heketi-cli node remove <node-id> --user=<user> --secret=<user key>
#heketi-cli node remove <node-id> --user=<user> --secret=<user key>Copy to Clipboard Copied! Toggle word wrap Toggle overflow For example:heketi-cli node remove ab37fc5aabbd714eb8b09c9a868163df --user=admin --secret=adminkey Node ab37fc5aabbd714eb8b09c9a868163df is now removed
# heketi-cli node remove ab37fc5aabbd714eb8b09c9a868163df --user=admin --secret=adminkey Node ab37fc5aabbd714eb8b09c9a868163df is now removedCopy to Clipboard Copied! Toggle word wrap Toggle overflow - Execute the following command to delete the devices from heketi node:
heketi-cli device delete <device-id> --user=<user> --secret=<user key>
# heketi-cli device delete <device-id> --user=<user> --secret=<user key>Copy to Clipboard Copied! Toggle word wrap Toggle overflow For example:heketi-cli device delete 0fca78c3a94faabfbe5a5a9eef01b99c --user=admin --secret=adminkey Device 0fca78c3a94faabfbe5a5a9eef01b99c deleted
# heketi-cli device delete 0fca78c3a94faabfbe5a5a9eef01b99c --user=admin --secret=adminkey Device 0fca78c3a94faabfbe5a5a9eef01b99c deletedCopy to Clipboard Copied! Toggle word wrap Toggle overflow - Execute the following command to delete a node from Heketi management:
#heketi-cli node delete <nodeid> --user=<user> --secret=<user key>
#heketi-cli node delete <nodeid> --user=<user> --secret=<user key>Copy to Clipboard Copied! Toggle word wrap Toggle overflow For example:heketi-cli node delete ab37fc5aabbd714eb8b09c9a868163df --user=admin --secret=adminkey Node ab37fc5aabbd714eb8b09c9a868163df deleted
# heketi-cli node delete ab37fc5aabbd714eb8b09c9a868163df --user=admin --secret=adminkey Node ab37fc5aabbd714eb8b09c9a868163df deletedCopy to Clipboard Copied! Toggle word wrap Toggle overflow - Execute the following commands on any one of the gluster pods to replace the faulty node with the new node:
- Execute the following command to get list of blockvolumes hosted under block-hosting-volume
gluster-block list <block-hosting-volume> --json-pretty
# gluster-block list <block-hosting-volume> --json-prettyCopy to Clipboard Copied! Toggle word wrap Toggle overflow - Execute the following command to find out which all blockvolumes are hosted on the old node, with the help of info command
gluster-block info <block-hosting-volume>/<block-volume> --json-pretty
# gluster-block info <block-hosting-volume>/<block-volume> --json-prettyCopy to Clipboard Copied! Toggle word wrap Toggle overflow - Execute the following command to replace the faulty node with the new node:
gluster-block replace <volname/blockname> <old-node> <new-node> [force]
# gluster-block replace <volname/blockname> <old-node> <new-node> [force]Copy to Clipboard Copied! Toggle word wrap Toggle overflow For example:Copy to Clipboard Copied! Toggle word wrap Toggle overflow
Note
The next steps henceforth are to be executed only if the block that is to be replaced is still in use. - Logout of the old portal by executing the following command on the initiator:
iscsiadm -m node -T <targetname> -p <old node> -u
# iscsiadm -m node -T <targetname> -p <old node> -uCopy to Clipboard Copied! Toggle word wrap Toggle overflow For example:iscsiadm -m node -T iqn.2016-12.org.gluster-block:d6d18f43-8a74-4b2c-a5b7-df1fa3f5bc9a -p 192.168.124.63 -u Logging out of session [sid: 8, target: iqn.2016-12.org.gluster-block:d6d18f43-8a74-4b2c-a5b7-df1fa3f5bc9a, portal: 192.168.124.63,3260] Logout of [sid: 8, target: iqn.2016-12.org.gluster-block:d6d18f43-8a74-4b2c-a5b7-df1fa3f5bc9a, portal: 192.168.124.63,3260] successful.
# iscsiadm -m node -T iqn.2016-12.org.gluster-block:d6d18f43-8a74-4b2c-a5b7-df1fa3f5bc9a -p 192.168.124.63 -u Logging out of session [sid: 8, target: iqn.2016-12.org.gluster-block:d6d18f43-8a74-4b2c-a5b7-df1fa3f5bc9a, portal: 192.168.124.63,3260] Logout of [sid: 8, target: iqn.2016-12.org.gluster-block:d6d18f43-8a74-4b2c-a5b7-df1fa3f5bc9a, portal: 192.168.124.63,3260] successful.Copy to Clipboard Copied! Toggle word wrap Toggle overflow - To re-discover the new node execute the following command:
iscsiadm -m discovery -t st -p <new node>
# iscsiadm -m discovery -t st -p <new node>Copy to Clipboard Copied! Toggle word wrap Toggle overflow For example:iscsiadm -m discovery -t st -p 192.168.124.73 192.168.124.79:3260,1 iqn.2016-12.org.gluster-block:d6d18f43-8a74-4b2c-a5b7-df1fa3f5bc9a 192.168.124.73:3260,2 iqn.2016-12.org.gluster-block:d6d18f43-8a74-4b2c-a5b7-df1fa3f5bc9a
# iscsiadm -m discovery -t st -p 192.168.124.73 192.168.124.79:3260,1 iqn.2016-12.org.gluster-block:d6d18f43-8a74-4b2c-a5b7-df1fa3f5bc9a 192.168.124.73:3260,2 iqn.2016-12.org.gluster-block:d6d18f43-8a74-4b2c-a5b7-df1fa3f5bc9aCopy to Clipboard Copied! Toggle word wrap Toggle overflow - Login to the new portal by executing the following command:
iscsiadm -m node -T <targetname> -p <new node ip> -l
# iscsiadm -m node -T <targetname> -p <new node ip> -lCopy to Clipboard Copied! Toggle word wrap Toggle overflow For example:iscsiadm -m node -T iqn.2016-12.org.gluster-block:d6d18f43-8a74-4b2c-a5b7-df1fa3f5bc9a -p 192.168.124.73 -l
# iscsiadm -m node -T iqn.2016-12.org.gluster-block:d6d18f43-8a74-4b2c-a5b7-df1fa3f5bc9a -p 192.168.124.73 -lCopy to Clipboard Copied! Toggle word wrap Toggle overflow - To verify if the enabled hosting volume is replaced and running successfully, execute the following command on the initiator:
ll /dev/disk/by-path/ip-* | grep <targetname> | grep <“new node ip”>
# ll /dev/disk/by-path/ip-* | grep <targetname> | grep <“new node ip”>Copy to Clipboard Copied! Toggle word wrap Toggle overflow
Chapter 4. Shutting Down gluster-block Client Nodes
- Evacuate the pods. For more information, refer https://access.redhat.com/documentation/en-us/openshift_container_platform/3.10/html-single/cluster_administration/#evacuating-pods-on-nodes
- Ensure that no gluster block mounts exist in the system.
- Reboot the nodes. For more information, refer https://access.redhat.com/documentation/en-us/openshift_container_platform/3.10/html-single/cluster_administration/#rebooting-nodes
Chapter 5. S3 Compatible Object Store in a Red Hat Openshift Container Storage Environment
Important
5.1. Setting up S3 Compatible Object Store for Red Hat Openshift Container Storage
Note
- (Optional): If you want to create a secret for heketi, then execute the following command:
oc create secret generic heketi-${NAMESPACE}-admin-secret --from-literal=key=${ADMIN_KEY} --type=kubernetes.io/glusterfs# oc create secret generic heketi-${NAMESPACE}-admin-secret --from-literal=key=${ADMIN_KEY} --type=kubernetes.io/glusterfsCopy to Clipboard Copied! Toggle word wrap Toggle overflow For example:oc create secret generic heketi-storage-project-admin-secret --from-literal=key= --type=kubernetes.io/glusterfs
# oc create secret generic heketi-storage-project-admin-secret --from-literal=key= --type=kubernetes.io/glusterfsCopy to Clipboard Copied! Toggle word wrap Toggle overflow - Execute the following command to label the secret:
oc label --overwrite secret heketi-${NAMESPACE}-admin-secret glusterfs=s3-heketi-${NAMESPACE}-admin-secret gluster-s3=heketi-${NAMESPACE}-admin-secret# oc label --overwrite secret heketi-${NAMESPACE}-admin-secret glusterfs=s3-heketi-${NAMESPACE}-admin-secret gluster-s3=heketi-${NAMESPACE}-admin-secretCopy to Clipboard Copied! Toggle word wrap Toggle overflow For example:oc label --overwrite secret heketi-storage-project-admin-secret glusterfs=s3-heketi-storage-project-admin-secret gluster-s3=heketi-storage-project-admin-secret
# oc label --overwrite secret heketi-storage-project-admin-secret glusterfs=s3-heketi-storage-project-admin-secret gluster-s3=heketi-storage-project-admin-secretCopy to Clipboard Copied! Toggle word wrap Toggle overflow
- Create a GlusterFS StorageClass file. Use the
HEKETI_URLandNAMESPACEfrom the current setup and set aSTORAGE_CLASSname.sed -e 's/${HEKETI_URL}/heketi-storage-project.cloudapps.mystorage.com/g' -e 's/${STORAGE_CLASS}/gluster-s3-store/g' -e 's/${NAMESPACE}/storage-project/g' /usr/share/heketi/templates/gluster-s3-storageclass.yaml | oc create -f -# sed -e 's/${HEKETI_URL}/heketi-storage-project.cloudapps.mystorage.com/g' -e 's/${STORAGE_CLASS}/gluster-s3-store/g' -e 's/${NAMESPACE}/storage-project/g' /usr/share/heketi/templates/gluster-s3-storageclass.yaml | oc create -f -Copy to Clipboard Copied! Toggle word wrap Toggle overflow For example:sed -e 's/${HEKETI_URL}/heketi-storage-project.cloudapps.mystorage.com/g' -e 's/${STORAGE_CLASS}/gluster-s3-store/g' -e 's/${NAMESPACE}/storage-project/g' /usr/share/heketi/templates/gluster-s3-storageclass.yaml | oc create -f -storageclass "gluster-s3-store" created# sed -e 's/${HEKETI_URL}/heketi-storage-project.cloudapps.mystorage.com/g' -e 's/${STORAGE_CLASS}/gluster-s3-store/g' -e 's/${NAMESPACE}/storage-project/g' /usr/share/heketi/templates/gluster-s3-storageclass.yaml | oc create -f -storageclass "gluster-s3-store" createdCopy to Clipboard Copied! Toggle word wrap Toggle overflow Note
- You can run the following command to obtain the HEKETI_URL:
oc get routes --all-namespaces | grep heketi
# oc get routes --all-namespaces | grep heketiCopy to Clipboard Copied! Toggle word wrap Toggle overflow A sample output of the command is as follows:glusterfs heketi-storage heketi-storage-glusterfs.router.default.svc.cluster.local heketi-storage <all> Noneglusterfs heketi-storage heketi-storage-glusterfs.router.default.svc.cluster.local heketi-storage <all> NoneCopy to Clipboard Copied! Toggle word wrap Toggle overflow If there are multiple lines in the output then you can choose the most relevant one. - You can run the following command to obtain the NAMESPACE:
oc get project
oc get projectCopy to Clipboard Copied! Toggle word wrap Toggle overflow A sample output of the command is as follows:oc project Using project "glusterfs" on server "master.example.com:8443"# oc project Using project "glusterfs" on server "master.example.com:8443"Copy to Clipboard Copied! Toggle word wrap Toggle overflow where, glusterfs is the NAMESPACE.
- Create the Persistent Volume Claims using the storage class.
sed -e 's/${VOLUME_CAPACITY}/2Gi/g' -e 's/${STORAGE_CLASS}/gluster-s3-store/g' /usr/share/heketi/templates/gluster-s3-pvcs.yaml | oc create -f -# sed -e 's/${VOLUME_CAPACITY}/2Gi/g' -e 's/${STORAGE_CLASS}/gluster-s3-store/g' /usr/share/heketi/templates/gluster-s3-pvcs.yaml | oc create -f -Copy to Clipboard Copied! Toggle word wrap Toggle overflow For Example:sed -e 's/${VOLUME_CAPACITY}/2Gi/g' -e 's/${STORAGE_CLASS}/gluster-s3-store/g' /usr/share/heketi/templates/gluster-s3-pvcs.yaml | oc create -f - persistentvolumeclaim "gluster-s3-claim" created persistentvolumeclaim "gluster-s3-meta-claim" created# sed -e 's/${VOLUME_CAPACITY}/2Gi/g' -e 's/${STORAGE_CLASS}/gluster-s3-store/g' /usr/share/heketi/templates/gluster-s3-pvcs.yaml | oc create -f - persistentvolumeclaim "gluster-s3-claim" created persistentvolumeclaim "gluster-s3-meta-claim" createdCopy to Clipboard Copied! Toggle word wrap Toggle overflow Use theSTORAGE_CLASScreated from the previous step. Modify theVOLUME_CAPACITYas per the environment requirements. Wait till the PVC is bound. Verify the same using the following command:oc get pvc NAME STATUS VOLUME CAPACITY ACCESSMODES AGE gluster-s3-claim Bound pvc-0b7f75ef-9920-11e7-9309-00151e000016 2Gi RWX 2m gluster-s3-meta-claim Bound pvc-0b87a698-9920-11e7-9309-00151e000016 1Gi RWX 2m
# oc get pvc NAME STATUS VOLUME CAPACITY ACCESSMODES AGE gluster-s3-claim Bound pvc-0b7f75ef-9920-11e7-9309-00151e000016 2Gi RWX 2m gluster-s3-meta-claim Bound pvc-0b87a698-9920-11e7-9309-00151e000016 1Gi RWX 2mCopy to Clipboard Copied! Toggle word wrap Toggle overflow - Start the glusters3 object storage service using the template:
Note
Set theS3_ACCOUNTname,S3_USERname, andS3_PASSWORD.PVCandMETA_PVCare obtained from the previous step.Copy to Clipboard Copied! Toggle word wrap Toggle overflow - Execute the following command to verify if the S3 pod is up:
oc get route NAME HOST/PORT PATH SERVICES PORT TERMINATION WILDCARD gluster-S3-route gluster-s3-route-storage-project.cloudapps.mystorage.com ... 1 more gluster-s3-service <all> None heketi heketi-storage-project.cloudapps.mystorage.com ... 1 more heketi <all>
# oc get route NAME HOST/PORT PATH SERVICES PORT TERMINATION WILDCARD gluster-S3-route gluster-s3-route-storage-project.cloudapps.mystorage.com ... 1 more gluster-s3-service <all> None heketi heketi-storage-project.cloudapps.mystorage.com ... 1 more heketi <all>Copy to Clipboard Copied! Toggle word wrap Toggle overflow
5.2. Object Operations
- Get the URL of the route which provides S3 OS
s3_storage_url=$(oc get routes | grep "gluster.*s3" | awk '{print $2}')# s3_storage_url=$(oc get routes | grep "gluster.*s3" | awk '{print $2}')Copy to Clipboard Copied! Toggle word wrap Toggle overflow Note
Ensure to download the s3curl tool from https://aws.amazon.com/code/128. This tool will be used for verifying the object operations.- s3curl.pl requires Digest::HMAC_SHA1 and Digest::MD5. Install the perl-Digest-HMAC package to get this. You can install the perl-Digest-HMAC package by running this command:
yum install perl-Digest-HMAC
# yum install perl-Digest-HMACCopy to Clipboard Copied! Toggle word wrap Toggle overflow - Update the s3curl.pl perl script with glusters3object url which was retrieved:For example:
my @endpoints = ( 'glusters3object-storage-project.cloudapps.mystorage.com');
my @endpoints = ( 'glusters3object-storage-project.cloudapps.mystorage.com');Copy to Clipboard Copied! Toggle word wrap Toggle overflow
- To perform
PUToperation of the bucket:s3curl.pl --debug --id "testvolume:adminuser" --key "itsmine" --put /dev/null -- -k -v http://$s3_storage_url/bucket1
s3curl.pl --debug --id "testvolume:adminuser" --key "itsmine" --put /dev/null -- -k -v http://$s3_storage_url/bucket1Copy to Clipboard Copied! Toggle word wrap Toggle overflow - To perform
PUToperation of the object inside the bucket:s3curl.pl --debug --id "testvolume:adminuser" --key "itsmine" --put my_object.jpg -- -k -v -s http://$s3_storage_url/bucket1/my_object.jpg
s3curl.pl --debug --id "testvolume:adminuser" --key "itsmine" --put my_object.jpg -- -k -v -s http://$s3_storage_url/bucket1/my_object.jpgCopy to Clipboard Copied! Toggle word wrap Toggle overflow - To verify listing of objects in the bucket:
s3curl.pl --debug --id "testvolume:adminuser" --key "itsmine" -- -k -v -s http://$s3_storage_url/bucket1/
s3curl.pl --debug --id "testvolume:adminuser" --key "itsmine" -- -k -v -s http://$s3_storage_url/bucket1/Copy to Clipboard Copied! Toggle word wrap Toggle overflow
Chapter 6. Cluster Administrator Setup
Set up the authentication using AllowAll Authentication method.
/etc/origin/master/master-config.yaml on the OpenShift master and change the value of DenyAllPasswordIdentityProvider to AllowAllPasswordIdentityProvider. Then restart the OpenShift master.
- Now that the authentication model has been setup, login as a user, for example admin/admin:
oc login openshift master e.g. https://1.1.1.1:8443 --username=admin --password=admin
# oc login openshift master e.g. https://1.1.1.1:8443 --username=admin --password=adminCopy to Clipboard Copied! Toggle word wrap Toggle overflow - Grant the admin user account the
cluster-adminrole.Copy to Clipboard Copied! Toggle word wrap Toggle overflow
Chapter 7. Gluster Block Storage as Backend for Logging and Metrics
Note
7.1. Prerequisites
- In the storageclass file, check if the default storage class is set to the storage class of gluster block. For example:
oc get storageclass NAME TYPE gluster-block gluster.org/glusterblock
# oc get storageclass NAME TYPE gluster-block gluster.org/glusterblockCopy to Clipboard Copied! Toggle word wrap Toggle overflow - If the default is not set to
gluster-block(or any other name that you have provided) then execute the following command. For example:oc patch storageclass gluster-block -p '{"metadata": {"annotations":{"storageclass.kubernetes.io/is-default-class":"true"}}}'# oc patch storageclass gluster-block -p '{"metadata": {"annotations":{"storageclass.kubernetes.io/is-default-class":"true"}}}'Copy to Clipboard Copied! Toggle word wrap Toggle overflow - Execute the following command to verify:
oc get storageclass NAME TYPE gluster-block (default) gluster.org/glusterblock
oc get storageclass NAME TYPE gluster-block (default) gluster.org/glusterblockCopy to Clipboard Copied! Toggle word wrap Toggle overflow
7.2. Enabling Gluster Block Storage as Backend for Logging
- To enable logging in Openshift Container platform, see https://access.redhat.com/documentation/en-us/openshift_container_platform/3.10/html-single/configuring_clusters/#install-config-aggregate-logging
- The
openshift_logging_es_pvc_dynamicansible variable has to be set to true.[OSEv3:vars] openshift_logging_es_pvc_dynamic=true
[OSEv3:vars] openshift_logging_es_pvc_dynamic=trueCopy to Clipboard Copied! Toggle word wrap Toggle overflow For example, a sample set of variables for openshift_logging_ are listed below.Copy to Clipboard Copied! Toggle word wrap Toggle overflow - Run the Ansible playbook. For more information, see .https://access.redhat.com/documentation/en-us/openshift_container_platform/3.10/html-single/configuring_clusters/#install-config-aggregate-logging
- To verify, execute the following command:
oc get pods -n openshift-logging
# oc get pods -n openshift-loggingCopy to Clipboard Copied! Toggle word wrap Toggle overflow
Note
7.3. Enabling Gluster Block Storage as Backend for Metrics
Note
- To enable metrics in Openshift Container platform, see https://access.redhat.com/documentation/en-us/openshift_container_platform/3.10/html-single/configuring_clusters/#install-config-cluster-metrics
- The
openshift_metrics_cassandra_storage_typeansible variable should be set todynamic:[OSEv3:vars]openshift_metrics_cassandra_storage_type=dynamic
[OSEv3:vars]openshift_metrics_cassandra_storage_type=dynamicCopy to Clipboard Copied! Toggle word wrap Toggle overflow For example, a sample set of variables for openshift_metrics_ are listed below.Copy to Clipboard Copied! Toggle word wrap Toggle overflow - Run the Ansible playbook. For more information, see https://access.redhat.com/documentation/en-us/openshift_container_platform/3.10/html-single/configuring_clusters/#install-config-cluster-metrics.
- To verify, execute the following command:
oc get pods --n openshift-infra
# oc get pods --n openshift-infraCopy to Clipboard Copied! Toggle word wrap Toggle overflow It should list the following pods running:heapster-cassandra heapster-metrics hawkular-&*9
heapster-cassandra heapster-metrics hawkular-&*9Copy to Clipboard Copied! Toggle word wrap Toggle overflow
Note
7.4. Verifying if Gluster Block is Setup as Backend
- To get an overview of the infrastructure, execute the following command:
oc get pods -n logging -o jsonpath='{range .items[*].status.containerStatuses[*]}{"Name: "}{.name}{"\n "}{"Image: "}{.image}{"\n"}{" State: "}{.state}{"\n"}{end}'# oc get pods -n logging -o jsonpath='{range .items[*].status.containerStatuses[*]}{"Name: "}{.name}{"\n "}{"Image: "}{.image}{"\n"}{" State: "}{.state}{"\n"}{end}'Copy to Clipboard Copied! Toggle word wrap Toggle overflow - To get the details of all the persistent volume claims, execute the following command:
oc get pvc
# oc get pvcCopy to Clipboard Copied! Toggle word wrap Toggle overflow - To get the details of the pvc, execute the following command:
oc describe pvc <claim_name>
# oc describe pvc <claim_name>Copy to Clipboard Copied! Toggle word wrap Toggle overflow Verify the volume is mountable and that permissions allow read/write. Also, PVC claim name should match the dynamically provisioned gluster block storage class.
Part III. Security
Chapter 8. Enabling Encryption
- I/O encryption - encryption of the I/O connections between the Red Hat Gluster Storage clients and servers.
- Management encryption - encryption of the management (glusterd) connections within a trusted storage pool.
8.1. Prerequisites
Note
- Ensure to perform the steps on all the OpenShift nodes except master.
- All the Red Hat Gluster Storage volumes are mounted on the OpenShift nodes and then bind mounted to the application pods. Hence, it is not required to perform any encryption related operations specifically on the application pods.
8.2. Enabling Encryption for a New Red Hat Openshift Container Storage Setup
8.2.1. Enabling Management Encryption
Perform the following on all the server, ie, the OpenShift nodes on which Red Hat Gluster Storage pods are running.
- Create the /var/lib/glusterd/secure-access file.
touch /var/lib/glusterd/secure-access
# touch /var/lib/glusterd/secure-accessCopy to Clipboard Copied! Toggle word wrap Toggle overflow
Perform the following on the clients, that is, on all the remaining OpenShift nodes on which Red Hat Gluster Storage is not running.
- Create the /var/lib/glusterd/secure-access file.
touch /var/lib/glusterd/secure-access
# touch /var/lib/glusterd/secure-accessCopy to Clipboard Copied! Toggle word wrap Toggle overflow
Note
8.2.2. Enabling I/O encryption for a Volume
Note
- Ensure Red Hat Openshift Container Storage is deployed before proceeding with further steps. For more information see, https://access.redhat.com/documentation/en-us/red_hat_openshift_container_storage/3.10/html-single/deployment_guide/#chap-Documentation-Red_Hat_Gluster_Storage_Container_Native_with_OpenShift_Platform-Setting_the_environment-Deploy_CNS
- You can either create a statically provisioned volume or a dynamically provisioned volume. For more information about static provisioning of volumes, see https://access.redhat.com/documentation/en-us/red_hat_openshift_container_storage/3.10/html-single/operations_guide/#chap-Documentation-Red_Hat_Gluster_Storage_Container_Native_with_OpenShift_Platform-OpenShift_Creating_Persistent_Volumes-Static_Prov. For more information about dynamic provisioning of volumes, see https://access.redhat.com/documentation/en-us/red_hat_openshift_container_storage/3.10/html-single/operations_guide/#chap-Documentation-Red_Hat_Gluster_Storage_Container_Native_with_OpenShift_Platform-OpenShift_Creating_Persistent_Volumes-Dynamic_Prov
Note
To enable encryption during the creation of statically provisioned volume, execute the following command:heketi-cli volume create --size=100 --gluster-volume-options="client.ssl on","server.ssl on"
# heketi-cli volume create --size=100 --gluster-volume-options="client.ssl on","server.ssl on"Copy to Clipboard Copied! Toggle word wrap Toggle overflow - Stop the volume by executing the following command:
oc rsh <gluster_pod_name> gluster volume stop VOLNAME
# oc rsh <gluster_pod_name> gluster volume stop VOLNAMECopy to Clipboard Copied! Toggle word wrap Toggle overflow The gluster pod name is the name of one of the Red Hat Gluster Storage pods of the trusted storage pool to which the volume belongs.Note
To get the VOLNAME, execute the following command:oc describe pv <pv_name>
# oc describe pv <pv_name>Copy to Clipboard Copied! Toggle word wrap Toggle overflow For example:Copy to Clipboard Copied! Toggle word wrap Toggle overflow The VOLNAME is the value of "path" in the above output. - Set the list of common names of all the servers to access the volume. Ensure to include the common names of clients which will be allowed to access the volume.
oc rsh <gluster_pod_name> gluster volume set VOLNAME auth.ssl-allow 'server1,server2,server3,client1,client2,client3'
# oc rsh <gluster_pod_name> gluster volume set VOLNAME auth.ssl-allow 'server1,server2,server3,client1,client2,client3'Copy to Clipboard Copied! Toggle word wrap Toggle overflow Note
If you set auth.ssl-allow option with * as value, any TLS authenticated clients can mount and access the volume from the application side. Hence, you set the option's value to * or provide common names of clients as well as the nodes in the trusted storage pool. - Enable the client.ssl and server.ssl options on the volume.
oc rsh <gluster_pod_name> gluster volume set VOLNAME client.ssl on oc rsh <gluster_pod_name> gluster volume set VOLNAME server.ssl on
# oc rsh <gluster_pod_name> gluster volume set VOLNAME client.ssl on # oc rsh <gluster_pod_name> gluster volume set VOLNAME server.ssl onCopy to Clipboard Copied! Toggle word wrap Toggle overflow - Start the volume.
oc rsh <gluster_pod_name> gluster volume start VOLNAME
# oc rsh <gluster_pod_name> gluster volume start VOLNAMECopy to Clipboard Copied! Toggle word wrap Toggle overflow
8.3. Enabling Encryption for an Existing Red Hat Openshift Container Storage Setup
8.3.1. Enabling I/O encryption for a Volume
Note
- Stop all the application pods that have the Red Hat Gluster Storage volumes.
- Stop the volume.
oc rsh <gluster_pod_name> gluster volume stop VOLNAME
# oc rsh <gluster_pod_name> gluster volume stop VOLNAMECopy to Clipboard Copied! Toggle word wrap Toggle overflow The gluster pod name is the name of one of the Red Hat Gluster Storage pods of the trusted storage pool to which the volume belongs. - Set the list of common names for clients allowed to access the volume. Be sure to include the common names of all the servers.
oc rsh <gluster_pod_name> gluster volume set VOLNAME auth.ssl-allow 'server1,server2,server3,client1,client2,client3'
# oc rsh <gluster_pod_name> gluster volume set VOLNAME auth.ssl-allow 'server1,server2,server3,client1,client2,client3'Copy to Clipboard Copied! Toggle word wrap Toggle overflow Note
If you set auth.ssl-allow option with * as value, any TLS authenticated clients can mount and access the volume from the application side. Hence, you set the option's value to * or provide common names of clients as well as the nodes in the trusted storage pool. - Enable client.ssl and server.ssl on the volume by using the following command:
oc rsh <gluster_pod_name> gluster volume set VOLNAME client.ssl on oc rsh <gluster_pod_name> gluster volume set VOLNAME server.ssl on
# oc rsh <gluster_pod_name> gluster volume set VOLNAME client.ssl on # oc rsh <gluster_pod_name> gluster volume set VOLNAME server.ssl onCopy to Clipboard Copied! Toggle word wrap Toggle overflow - Start the volume.
oc rsh <gluster_pod_name> gluster volume start VOLNAME
# oc rsh <gluster_pod_name> gluster volume start VOLNAMECopy to Clipboard Copied! Toggle word wrap Toggle overflow - Start the application pods to use the I/O encrypted Red Hat Gluster Storage volumes.
8.3.2. Enabling Management Encryption
- Stop all the application pods that have the Red Hat Gluster Storage volumes.
- Stop all the volumes.
oc rsh <gluster_pod_name> gluster volume stop VOLNAME
# oc rsh <gluster_pod_name> gluster volume stop VOLNAMECopy to Clipboard Copied! Toggle word wrap Toggle overflow - Stop the Red Hat Gluster Storage pods.
oc delete daemonset glusterfs
# oc delete daemonset glusterfsCopy to Clipboard Copied! Toggle word wrap Toggle overflow - On deletion of daemon set the pods go down. To verify if the pods are down, execute the following command:
oc get pods
# oc get podsCopy to Clipboard Copied! Toggle word wrap Toggle overflow - Create the /var/lib/glusterd/secure-access file on all OpenShift nodes.
touch /var/lib/glusterd/secure-access
# touch /var/lib/glusterd/secure-accessCopy to Clipboard Copied! Toggle word wrap Toggle overflow - Create the Red Hat Gluster Storage daemonset by executing the following command:
Note
For Ansible deployments, the image name and the version has to be specified in the template, before executing the command.oc process glusterfs | oc create -f -
# oc process glusterfs | oc create -f -Copy to Clipboard Copied! Toggle word wrap Toggle overflow - On creation of daemon set the pods are started. To verify if the pods are started, execute the following command:
oc get pods
# oc get podsCopy to Clipboard Copied! Toggle word wrap Toggle overflow - Start all the volumes.
oc rsh <gluster_pod_name> gluster volume start VOLNAME
# oc rsh <gluster_pod_name> gluster volume start VOLNAMECopy to Clipboard Copied! Toggle word wrap Toggle overflow - Start the application pods to use the management encrypted Red Hat Gluster Storage.
8.4. Disabling Encryption
- Disabling I/O Encryption for a Volume
- Disabling Management Encryption
8.4.1. Disabling I/O Encryption for all the Volumes
Note
- Stop all the application pods that have the Red Hat Gluster Storage volumes.
- Stop all the volumes.
oc rsh <gluster_pod_name> gluster volume stop VOLNAME
# oc rsh <gluster_pod_name> gluster volume stop VOLNAMECopy to Clipboard Copied! Toggle word wrap Toggle overflow - Reset all the encryption options for a volume:
oc rsh <gluster_pod_name> gluster volume reset VOLNAME auth.ssl-allow oc rsh <gluster_pod_name> gluster volume reset VOLNAME client.ssl oc rsh <gluster_pod_name> gluster volume reset VOLNAME server.ssl
# oc rsh <gluster_pod_name> gluster volume reset VOLNAME auth.ssl-allow # oc rsh <gluster_pod_name> gluster volume reset VOLNAME client.ssl # oc rsh <gluster_pod_name> gluster volume reset VOLNAME server.sslCopy to Clipboard Copied! Toggle word wrap Toggle overflow - Delete the files that were used for network encryption using the following command on all the OpenShift nodes:
rm /etc/ssl/glusterfs.pem /etc/ssl/glusterfs.key /etc/ssl/glusterfs.ca
# rm /etc/ssl/glusterfs.pem /etc/ssl/glusterfs.key /etc/ssl/glusterfs.caCopy to Clipboard Copied! Toggle word wrap Toggle overflow Note
Deleting these files in a setup where management encryption is enabled will result in glusterd failing on all gluster pods and hence should be avoided. - Stop the Red Hat Gluster Storage pods.
oc delete daemonset glusterfs
# oc delete daemonset glusterfsCopy to Clipboard Copied! Toggle word wrap Toggle overflow - On deletion of daemon set the pods go down. To verify if the pods are down, execute the following command:
oc get pods
# oc get podsCopy to Clipboard Copied! Toggle word wrap Toggle overflow - Create the Red Hat Gluster Storage daemonset by executing the following command:
Note
For Ansible deployments, the image name and the version has to be specified in the template, before executing the command.oc process glusterfs | oc create -f -
# oc process glusterfs | oc create -f -Copy to Clipboard Copied! Toggle word wrap Toggle overflow - On creation of daemon set the pods are started. To verify if the pods are started, execute the following command:
oc get pods
# oc get podsCopy to Clipboard Copied! Toggle word wrap Toggle overflow - Start the volume.
oc rsh <gluster_pod_name> gluster volume start VOLNAME
# oc rsh <gluster_pod_name> gluster volume start VOLNAMECopy to Clipboard Copied! Toggle word wrap Toggle overflow - Start the application pods to use the I/O encrypted Red Hat Gluster Storage volumes.
8.4.2. Disabling Management Encryption
- Stop all the application pods that have the Red Hat Gluster Storage volumes.
- Stop all the volumes.
oc rsh <gluster_pod_name> gluster volume stop VOLNAME
# oc rsh <gluster_pod_name> gluster volume stop VOLNAMECopy to Clipboard Copied! Toggle word wrap Toggle overflow - Stop the Red Hat Gluster Storage pods.
oc delete daemonset glusterfs
# oc delete daemonset glusterfsCopy to Clipboard Copied! Toggle word wrap Toggle overflow - On deletion of daemon set the pods go down. To verify if the pods are down, execute the following command:
oc get pods
# oc get podsCopy to Clipboard Copied! Toggle word wrap Toggle overflow - Delete the /var/lib/glusterd/secure-access file on all OpenShift nodes to disable management encryption.
rm /var/lib/glusterd/secure-access
# rm /var/lib/glusterd/secure-accessCopy to Clipboard Copied! Toggle word wrap Toggle overflow - Delete the files that were used for network encryption using the following command on all the OpenShift nodes:
rm /etc/ssl/glusterfs.pem /etc/ssl/glusterfs.key /etc/ssl/glusterfs.ca
# rm /etc/ssl/glusterfs.pem /etc/ssl/glusterfs.key /etc/ssl/glusterfs.caCopy to Clipboard Copied! Toggle word wrap Toggle overflow - Create the Red Hat Gluster Storage daemonset by executing the following command:
Note
For Ansible deployments, the image name and the version has to be specified in the template, before executing the command.oc process glusterfs | oc create -f -
# oc process glusterfs | oc create -f -Copy to Clipboard Copied! Toggle word wrap Toggle overflow - On creation of daemon set the pods are started. To verify if the pods are started, execute the following command:
oc get pods
# oc get podsCopy to Clipboard Copied! Toggle word wrap Toggle overflow - Start all the volumes.
oc rsh <gluster_pod_name> gluster volume start VOLNAME
# oc rsh <gluster_pod_name> gluster volume start VOLNAMECopy to Clipboard Copied! Toggle word wrap Toggle overflow - Start the application pods to use the management encrypted Red Hat Gluster Storage.
Part IV. Migration
Chapter 9. Updating the Registry with Red Hat Openshift Container Storage as the Storage Back-end
9.1. Validating the Openshift Container Platform Registry Deployment
- On the master or client, execute the following command to login as the cluster admin user:
oc login
# oc loginCopy to Clipboard Copied! Toggle word wrap Toggle overflow For example:Copy to Clipboard Copied! Toggle word wrap Toggle overflow If you are not automatically logged into project default, then switch to it by executing the following command:oc project default
# oc project defaultCopy to Clipboard Copied! Toggle word wrap Toggle overflow - To verify that the pod is created, execute the following command:
oc get pods
# oc get podsCopy to Clipboard Copied! Toggle word wrap Toggle overflow For example:oc get pods NAME READY STATUS RESTARTS AGE docker-registry-2-mbu0u 1/1 Running 4 6d docker-registry-2-spw0o 1/1 Running 3 6d registry-console-1-rblwo 1/1 Running 3 6d
# oc get pods NAME READY STATUS RESTARTS AGE docker-registry-2-mbu0u 1/1 Running 4 6d docker-registry-2-spw0o 1/1 Running 3 6d registry-console-1-rblwo 1/1 Running 3 6dCopy to Clipboard Copied! Toggle word wrap Toggle overflow - To verify that the endpoints are created, execute the following command:
oc get endpoints
# oc get endpointsCopy to Clipboard Copied! Toggle word wrap Toggle overflow For example:Copy to Clipboard Copied! Toggle word wrap Toggle overflow - To verify that the persistent volume is created, execute the following command:
oc get pv NAME CAPACITY ACCESSMODES RECLAIMPOLICY STATUS CLAIM REASON AGE registry-volume 5Gi RWX Retain Bound default/registry-claim 7d
# oc get pv NAME CAPACITY ACCESSMODES RECLAIMPOLICY STATUS CLAIM REASON AGE registry-volume 5Gi RWX Retain Bound default/registry-claim 7dCopy to Clipboard Copied! Toggle word wrap Toggle overflow - To obtain the details of the persistent volume that was created for the NFS registry, execute the following command:
Copy to Clipboard Copied! Toggle word wrap Toggle overflow
9.2. Converting the Openshift Container Platform Registry with Red Hat Openshift Container Storage
Execute the following commands to create a Red Hat Gluster Storage volume to store the registry data and create a persistent volume.
Note
default project.
- Login to the
defaultproject:oc project default
# oc project defaultCopy to Clipboard Copied! Toggle word wrap Toggle overflow For example:oc project default Now using project "default" on server "https://cns30.rh73:8443"
# oc project default Now using project "default" on server "https://cns30.rh73:8443"Copy to Clipboard Copied! Toggle word wrap Toggle overflow - Execute the following command to create the
gluster-registry-endpoints.yamlfile:oc get endpoints <heketi-db-storage-endpoint-name> -o yaml --namespace=<project-name> > gluster-registry-endpoints.yaml
oc get endpoints <heketi-db-storage-endpoint-name> -o yaml --namespace=<project-name> > gluster-registry-endpoints.yamlCopy to Clipboard Copied! Toggle word wrap Toggle overflow Note
You must create an endpoint for each project from which you want to utilize the Red Hat Gluster Storage registry. Hence, you will have a service and an endpoint in both thedefaultproject and the new project (storage-project) created in earlier steps. - Edit the
gluster-registry-endpoints.yamlfile. Change the name to gluster-registry-endpoints and remove all the other metadata, leaving everything else the same.Copy to Clipboard Copied! Toggle word wrap Toggle overflow - Execute the following command to create the endpoint:
oc create -f gluster-registry-endpoints.yaml endpoints "gluster-registry-endpoints" created
# oc create -f gluster-registry-endpoints.yaml endpoints "gluster-registry-endpoints" createdCopy to Clipboard Copied! Toggle word wrap Toggle overflow - To verify the creation of the endpoint, execute the following command:
Copy to Clipboard Copied! Toggle word wrap Toggle overflow - Execute the following command to create the
gluster-registry-service.yamlfile:oc get services <heketi-storage-endpoint-name> -o yaml --namespace=<project-name> > gluster-registry-service.yaml
oc get services <heketi-storage-endpoint-name> -o yaml --namespace=<project-name> > gluster-registry-service.yamlCopy to Clipboard Copied! Toggle word wrap Toggle overflow - Edit the
gluster-registry-service.yamlfile. Change the name to gluster-registry-service and remove all the other metadata. Also, remove the specific cluster IP addresses:Copy to Clipboard Copied! Toggle word wrap Toggle overflow - Execute the following command to create the service:
oc create -f gluster-registry-service.yaml services "gluster-registry-service" created
# oc create -f gluster-registry-service.yaml services "gluster-registry-service" createdCopy to Clipboard Copied! Toggle word wrap Toggle overflow - Execute the following command to verify if the service are running:
Copy to Clipboard Copied! Toggle word wrap Toggle overflow - Execute the following command to obtain the fsGroup GID of the existing docker-registry pods:
export GID=$(oc get po --selector="docker-registry=default" -o go-template --template='{{printf "%.0f" ((index .items 0).spec.securityContext.fsGroup)}}')# export GID=$(oc get po --selector="docker-registry=default" -o go-template --template='{{printf "%.0f" ((index .items 0).spec.securityContext.fsGroup)}}')Copy to Clipboard Copied! Toggle word wrap Toggle overflow - Execute the following command to create a volume
heketi-cli volume create --size=5 --name=gluster-registry-volume --gid=${GID}# heketi-cli volume create --size=5 --name=gluster-registry-volume --gid=${GID}Copy to Clipboard Copied! Toggle word wrap Toggle overflow - Create the persistent volume file for the Red Hat Gluster Storage volume:
Copy to Clipboard Copied! Toggle word wrap Toggle overflow - Execute the following command to create the persistent volume:
oc create -f gluster-registry-volume.yaml
# oc create -f gluster-registry-volume.yamlCopy to Clipboard Copied! Toggle word wrap Toggle overflow - Execute the following command to verify and get the details of the created persistent volume:
oc get pv/gluster-registry-volume NAME CAPACITY ACCESSMODES RECLAIMPOLICY STATUS CLAIM REASON AGE gluster-registry-volume 5Gi RWX Retain Available 21m
# oc get pv/gluster-registry-volume NAME CAPACITY ACCESSMODES RECLAIMPOLICY STATUS CLAIM REASON AGE gluster-registry-volume 5Gi RWX Retain Available 21mCopy to Clipboard Copied! Toggle word wrap Toggle overflow - Create a new persistent volume claim. Following is a sample Persistent Volume Claim that will be used to replace the existing registry-storage volume claim.
Copy to Clipboard Copied! Toggle word wrap Toggle overflow - Create the persistent volume claim by executing the following command:
oc create -f gluster-registry-claim.yaml
# oc create -f gluster-registry-claim.yamlCopy to Clipboard Copied! Toggle word wrap Toggle overflow For example:oc create -f gluster-registry-claim.yaml persistentvolumeclaim "gluster-registry-claim" created
# oc create -f gluster-registry-claim.yaml persistentvolumeclaim "gluster-registry-claim" createdCopy to Clipboard Copied! Toggle word wrap Toggle overflow - Execute the following command to verify if the claim is bound:
oc get pvc/gluster-registry-claim
# oc get pvc/gluster-registry-claimCopy to Clipboard Copied! Toggle word wrap Toggle overflow For example:oc get pvc/gluster-registry-claim NAME STATUS VOLUME CAPACITY ACCESSMODES AGE gluster-registry-claim Bound gluster-registry-volume 5Gi RWX 22s
# oc get pvc/gluster-registry-claim NAME STATUS VOLUME CAPACITY ACCESSMODES AGE gluster-registry-claim Bound gluster-registry-volume 5Gi RWX 22sCopy to Clipboard Copied! Toggle word wrap Toggle overflow - Make the registry read-only by executing the following command:
oc set env -n default dc/docker-registry 'REGISTRY_STORAGE_MAINTENANCE_READONLY={"enabled":true}'# oc set env -n default dc/docker-registry 'REGISTRY_STORAGE_MAINTENANCE_READONLY={"enabled":true}'Copy to Clipboard Copied! Toggle word wrap Toggle overflow To confirm the value is set to readonly, execute the following command:oc set env -n default dc/docker-registry --list
# oc set env -n default dc/docker-registry --listCopy to Clipboard Copied! Toggle word wrap Toggle overflow - If you want to migrate the data from the old registry to the Red Hat Gluster Storage registry, then execute the following commands:
Note
These steps are optional.- Add the Red Hat Gluster Storage registry to the old registry deployment configuration (dc) by executing the following command:
oc volume dc/docker-registry --add --name=gluster-registry-storage -m /gluster-registry -t pvc --claim-name=gluster-registry-claim
# oc volume dc/docker-registry --add --name=gluster-registry-storage -m /gluster-registry -t pvc --claim-name=gluster-registry-claimCopy to Clipboard Copied! Toggle word wrap Toggle overflow - Save the Registry pod name by executing the following command:
export REGISTRY_POD=$(oc get po --selector="docker-registry=default" -o go-template --template='{{printf "%s" ((index .items 0).metadata.name)}}')# export REGISTRY_POD=$(oc get po --selector="docker-registry=default" -o go-template --template='{{printf "%s" ((index .items 0).metadata.name)}}')Copy to Clipboard Copied! Toggle word wrap Toggle overflow - Copy the data from the old registry directory to the Red Hat Gluster Storage registry directory by executing the following command:
oc rsh $REGISTRY_POD cp -a /registry/ /gluster-registry/
# oc rsh $REGISTRY_POD cp -a /registry/ /gluster-registry/Copy to Clipboard Copied! Toggle word wrap Toggle overflow - Remove the Red Hat Gluster Storage registry from the old dc registry by executing the following command:
oc volume dc/docker-registry --remove --name=gluster-registry-storage
# oc volume dc/docker-registry --remove --name=gluster-registry-storageCopy to Clipboard Copied! Toggle word wrap Toggle overflow
- Replace the existing registry-storage volume with the new gluster-registry-claim PVC:
oc volume dc/docker-registry --add --name=registry-storage -t pvc --claim-name=gluster-registry-claim --overwrite
# oc volume dc/docker-registry --add --name=registry-storage -t pvc --claim-name=gluster-registry-claim --overwriteCopy to Clipboard Copied! Toggle word wrap Toggle overflow - Make the registry read write by executing the following command:
oc set env dc/docker-registry REGISTRY_STORAGE_MAINTENANCE_READONLY-
# oc set env dc/docker-registry REGISTRY_STORAGE_MAINTENANCE_READONLY-Copy to Clipboard Copied! Toggle word wrap Toggle overflow To validate if the setting is set to read write, execute the following command:oc set env -n default dc/docker-registry --list
# oc set env -n default dc/docker-registry --listCopy to Clipboard Copied! Toggle word wrap Toggle overflow
Part V. Monitoring
Chapter 10. Enabling Volume Metrics
10.1. Enabling Volume Metrics for File Storage and Block Storage
kubelet_volume_stats_available_bytes: Number of available bytes in the volume.kubelet_volume_stats_capacity_bytes: Capacity in bytes of the volume.kubelet_volume_stats_inodes: Maximum number of inodes in the volume.kubelet_volume_stats_inodes_free: Number of free inodes in the volume.kubelet_volume_stats_inodes_used: Number of used inodes in the volume.kubelet_volume_stats_used_bytes: Number of used bytes in the volume.heketi_cluster_count: Number of clusters.heketi_device_brick_count: Number of bricks on device.heketi_device_count: Number of devices on host.heketi_device_free: Amount of free space available on the device.heketi_device_size: Total size of the device.heketi_device_used: Amount of space used on the device.heketi_nodes_count: Number of nodes on the cluster.heketi_up: Verifies if heketi is running.heketi_volumes_count: Number of volumes on cluster.
To view any metrics:
- Add the metrics name in Prometheus, and click Execute.
- In the Graph tab, the value for the metrics for the volume is displayed as a graph.For example, in the following image, to check the available bytes,
kubelet_volume_stats_available_bytesmetric is added to the search bar on Prometheus. On clickingExecute, the available bytes value is depicted as a graph. You can hover the mouse on the line to get more details. (To view the image in detail, right-click and select View Image.)
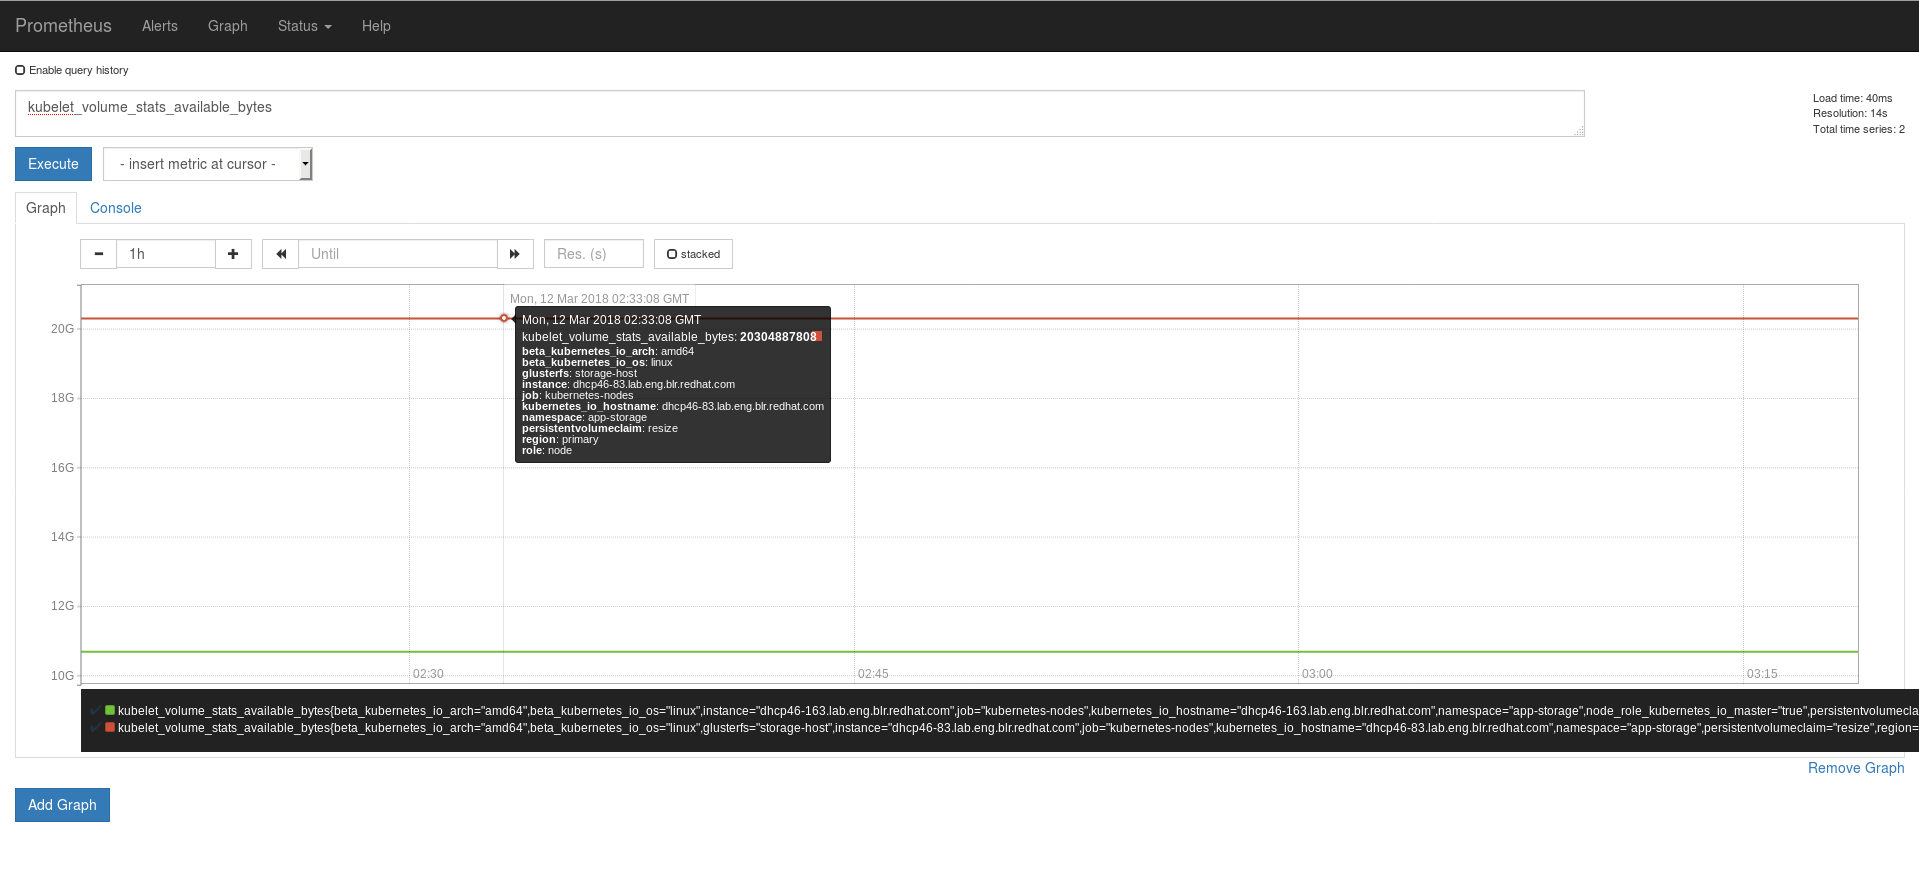
To view Heketi metrics on Prometheus, execute the following commands:
- Add annotations to the
heketi-storage.oc annotate svc heketi-storage prometheus.io/scheme=http oc annotate svc heketi-storage prometheus.io/scrape=true
# oc annotate svc heketi-storage prometheus.io/scheme=http # oc annotate svc heketi-storage prometheus.io/scrape=trueCopy to Clipboard Copied! Toggle word wrap Toggle overflow Copy to Clipboard Copied! Toggle word wrap Toggle overflow - Add the
app-storagenamespace for the heketi service in the Prometheus configmap.Copy to Clipboard Copied! Toggle word wrap Toggle overflow - Restart the
prometheus-0pod to query the Heketi metrics in Prometheus.
Part VI. Troubleshoot
Chapter 11. Troubleshooting
- What to do if a Red Hat Openshift Container Storage node FailsIf a Red Hat Openshift Container Storage node fails, and you want to delete it, then, disable the node before deleting it. For more information, see Section 1.2.3, “Deleting Node”.If a Red Hat Openshift Container Storage node fails and you want to replace it, see Section 1.2.3.3, “Replacing a Node”.
- What to do if a Red Hat Openshift Container Storage device failsIf a Red Hat Openshift Container Storage device fails, and you want to delete it, then, disable the device before deleting it. For more information, see Section 1.2.2, “Deleting Device ”.If a Red Hat Openshift Container Storage device fails, and you want to replace it, see Section 1.2.2.3, “Replacing a Device”.
- What to do if Red Hat Openshift Container Storage volumes require more capacity:You can increase the storage capacity by either adding devices, increasing the cluster size, or adding an entirely new cluster. For more information, see Section 1.1, “Increasing Storage Capacity”.
- How to upgrade Openshift when Red Hat Openshift Container Storage is installedTo upgrade Openshift Container Platform, see https://access.redhat.com/documentation/en-us/openshift_container_platform/3.10/html/upgrading_clusters/install-config-upgrading-automated-upgrades#upgrading-to-ocp-3-10.
- Viewing Log Files
- Viewing Red Hat Gluster Storage Container LogsDebugging information related to Red Hat Gluster Storage containers is stored on the host where the containers are started. Specifically, the logs and configuration files can be found at the following locations on the openshift nodes where the Red Hat Gluster Storage server containers run:
- /etc/glusterfs
- /var/lib/glusterd
- /var/log/glusterfs
- Viewing Heketi LogsDebugging information related to Heketi is stored locally in the container or in the persisted volume that is provided to Heketi container.You can obtain logs for Heketi by running the
docker logs container-idcommand on the openshift node where the container is being run.
- Heketi command returns with no error or empty error
Sometimes, running heketi-cli command returns with no error or empty error like Error. It is mostly due to heketi server not properly configured. You must first ping to validate that the Heketi server is available and later verify with a curl command and /hello endpoint.
curl http://deploy-heketi-storage-project.cloudapps.mystorage.com/hello
# curl http://deploy-heketi-storage-project.cloudapps.mystorage.com/helloCopy to Clipboard Copied! Toggle word wrap Toggle overflow - Heketi reports an error while loading the topology file
Running heketi-cli reports : Error "Unable to open topology file" error while loading the topology file. This could be due to the use of old syntax of single hyphen (-) as a prefix for JSON option. You must use the new syntax of double hyphens and reload the topology file.
- cURL command to heketi server fails or does not respond
If the router or heketi is not configured properly, error messages from the heketi may not be clear. To troubleshoot, ping the heketi service using the endpoint and also using the IP address. If ping by the IP address succeeds and ping by the endpoint fails, it indicates a router configuration error.
After the router is setup properly, run a simple curl command like the following:curl http://deploy-heketi-storage-project.cloudapps.mystorage.com/hello
# curl http://deploy-heketi-storage-project.cloudapps.mystorage.com/helloCopy to Clipboard Copied! Toggle word wrap Toggle overflow If heketi is configured correctly, a welcome message from heketi is displayed. If not, check the heketi configuration. - Heketi fails to start when Red Hat Gluster Storage volume is used to store heketi.db file
Sometimes Heketi fails to start when Red Hat Gluster Storage volume is used to store heketi.db and reports the following error:
[heketi] INFO 2016/06/23 08:33:47 Loaded kubernetes executor [heketi] ERROR 2016/06/23 08:33:47 /src/github.com/heketi/heketi/apps/glusterfs/app.go:149: write /var/lib/heketi/heketi.db: read-only file system ERROR: Unable to start application
[heketi] INFO 2016/06/23 08:33:47 Loaded kubernetes executor [heketi] ERROR 2016/06/23 08:33:47 /src/github.com/heketi/heketi/apps/glusterfs/app.go:149: write /var/lib/heketi/heketi.db: read-only file system ERROR: Unable to start applicationCopy to Clipboard Copied! Toggle word wrap Toggle overflow The read-only file system error as shown above could be seen while using a Red Hat Gluster Storage volume as backend. This could be when the quorum is lost for the Red Hat Gluster Storage volume. In a replica-3 volume, this would be seen if 2 of the 3 bricks are down. You must ensure the quorum is met for heketi gluster volume and it is able to write to heketi.db file again.Even if you see a different error, it is a recommended practice to check if the Red Hat Gluster Storage volume serving heketi.db file is available or not. Access deny to heketi.db file is the most common reason for it to not start.
Chapter 12. Client Configuration using Port Forwarding
- Obtain the Heketi service pod name by running the following command:
oc get pods
# oc get podsCopy to Clipboard Copied! Toggle word wrap Toggle overflow - To forward the port on your local system to the pod, execute the following command on another terminal of your local system:
oc port-forward <heketi pod name> 8080:8080
# oc port-forward <heketi pod name> 8080:8080Copy to Clipboard Copied! Toggle word wrap Toggle overflow - On the original terminal execute the following command to test the communication with the server:
curl http://localhost:8080/hello
# curl http://localhost:8080/helloCopy to Clipboard Copied! Toggle word wrap Toggle overflow This will forward the local port 8080 to the pod port 8080. - Setup the Heketi server environment variable by running the following command:
export HEKETI_CLI_SERVER=http://localhost:8080
# export HEKETI_CLI_SERVER=http://localhost:8080Copy to Clipboard Copied! Toggle word wrap Toggle overflow - Get information from Heketi by running the following command:
heketi-cli topology info
# heketi-cli topology infoCopy to Clipboard Copied! Toggle word wrap Toggle overflow
Appendix A. Revision History
| Revision History | |||||||
|---|---|---|---|---|---|---|---|
| Revision 1.0-02 | Wed Sep 12 2018 | ||||||
| |||||||
| Revision 1.0-01 | Tue Sep 11 2018 | ||||||
| |||||||