Deploying OpenShift Container Storage
How to install and set up your environment
Abstract
Chapter 1. Deploying OpenShift Container Storage
OpenShift Container Storage 4.2 installation is supported only on existing Red Hat OpenShift Container Platform worker nodes. Follow the instructions in Section 1.1, “Installing Red Hat OpenShift Container Storage on an existing Red Hat OpenShift Container Platform” to deploy OpenShift Container Storage.
When you install OpenShift Container Storage in a restricted network environment, you need to apply a custom Network Time Protocol (NTP) configuration to the nodes, because by default, internet connectivity is assumed in OpenShift Container Platform and chronyd is configured to use *.rhel.pool.ntp.org servers. See https://access.redhat.com/solutions/4828941 and Configuring chrony time service for more details.
1.1. Installing Red Hat OpenShift Container Storage on an existing Red Hat OpenShift Container Platform
The deployment process consists of two main parts:
- Install the OpenShift Container Storage Operator by following the instructions in Section 1.1.1, “Installing Red Hat OpenShift Container Storage Operator using the Operator Hub”.
- Create the OpenShift Container Storage service by following the instructions in Section 1.1.2, “Creating an OpenShift Container Storage service”.
For Red Hat Enterprise Linux based hosts in a user provisioned infrastructure (UPI), you need to enable container access to the underlying file system by following the instructions in Section 1.1.3, “Enabling file system access for containers on Red Hat Enterprise Linux based nodes”.
1.1.1. Installing Red Hat OpenShift Container Storage Operator using the Operator Hub
You can install Red Hat OpenShift Container Storage using the Red Hat OpenShift Container Platform (OCP) Operator Hub on Amazon Web Services (AWS) and VMware vSphere platforms. For information about the hardware and software requirements, see Planning your deployment.
Prerequisites
- You must be logged into a latest OpenShift Container Platform cluster.
- You must have at least three worker nodes in OCP cluster.
You must create a namespace called
openshift-storageas follows:- Click Administration → Namespaces in the left pane of the OpenShift Web Console.
- Click Create Namespace.
-
In the Create Namespace dialog box, enter
openshift-storagefor Name andopenshift.io/cluster-monitoring=truefor Labels. This label is required to get the dashboards. - Select No restrictions option for Default Network Policy.
- Click Create.
When you need to override the cluster-wide default node selector for OpenShift Container Storage, you can use the following command in command line interface to specify a blank node selector for the openshift-storage namespace:
$ oc annotate namespace openshift-storage openshift.io/node-selector=Procedure
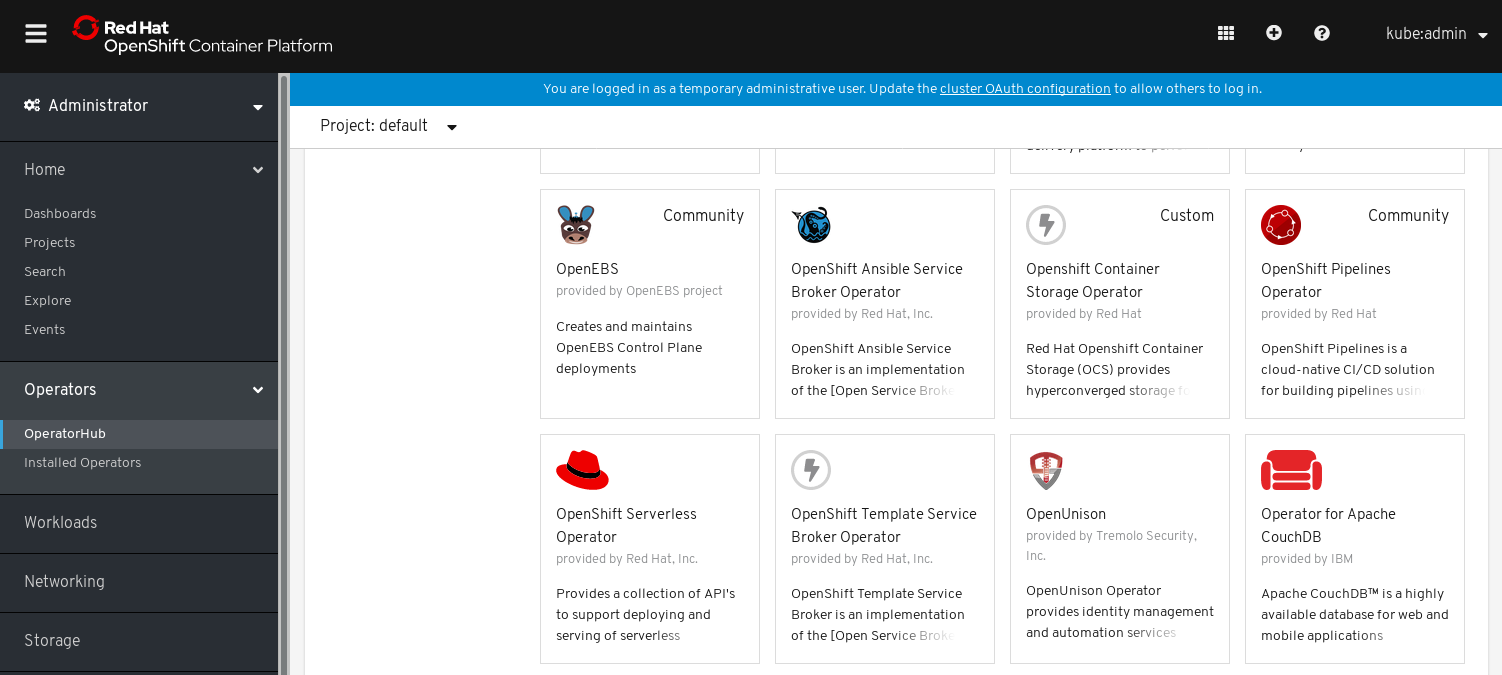
Click Operators → OperatorHub in the left pane of the OpenShift Web Console.
Figure 1.1. List of operators in the Operator Hub
- Search for OpenShift Container Storage Operator from the list of operators and click on it.
- On the OpenShift Container Storage Operator page, click Install.
On the Create Operator Subscription page, you can set the Installation Mode, Update Channel, and Approval Strategy options.
Figure 1.2. Create Operator Subscription page

Select A specific namespace on the cluster for the Installation Mode option.
-
Select
openshift-storagenamespace from the drop down menu.
-
Select
- stable-4.2 channel is selected by default for the Update Channel option.
Select an Approval Strategy:
- Automatic specifies that you want OpenShift Container Platform to upgrade OpenShift Container Storage automatically.
- Manual specifies that you want to have control to upgrade OpenShift Container Storage manually.
Click Subscribe.
Figure 1.3. Installed operators
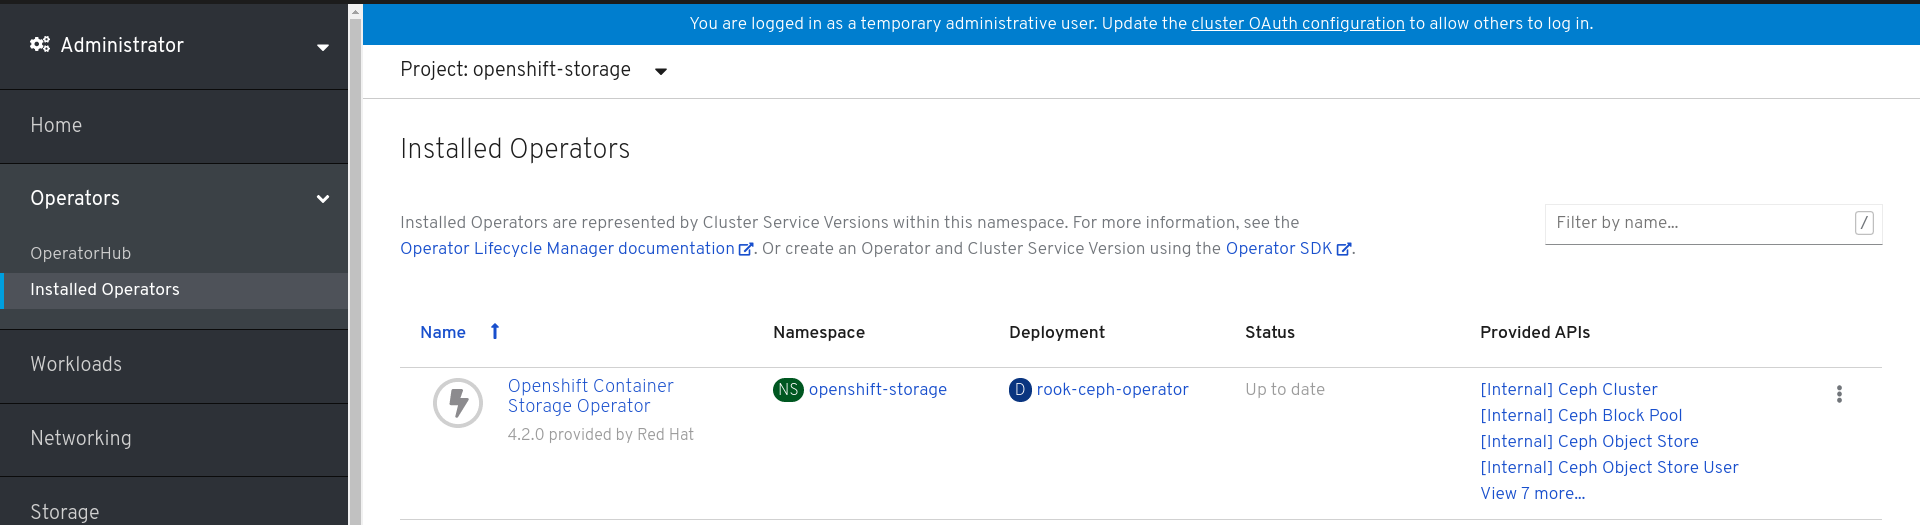
The Installed Operators page is displayed with the status of the operator.
Verification steps
-
Verify that the OpenShift Container Storage Operator show the Status as
Up-to-date.
1.1.2. Creating an OpenShift Container Storage service
You need to create a new OpenShift Container Storage service after you install OpenShift Container Storage operator on a user provisioned cloud for both Amazon Web Services (AWS) and VMware vSphere platforms.
Prerequisites
- OpenShift Container Storage operator must be installed from the Operator Hub. For more information, see Installing OpenShift Container Storage Operator using the Operator Hub.
Procedure
- Click Operators → Installed Operators from the left pane of the OpenShift Web Console to view the installed operators.
- On the Installed Operator page, select openshift-storage from the Project drop down list to switch to the openshift-storage project.
Click OpenShift Container Storage Operator.
OpenShift Container Storage operator creates a OCSInitialization resource automatically.
On the OpenShift Container Storage Operator page, scroll right and click the Storage Cluster tab.
Figure 1.4. OpenShift Container Storage Operator page
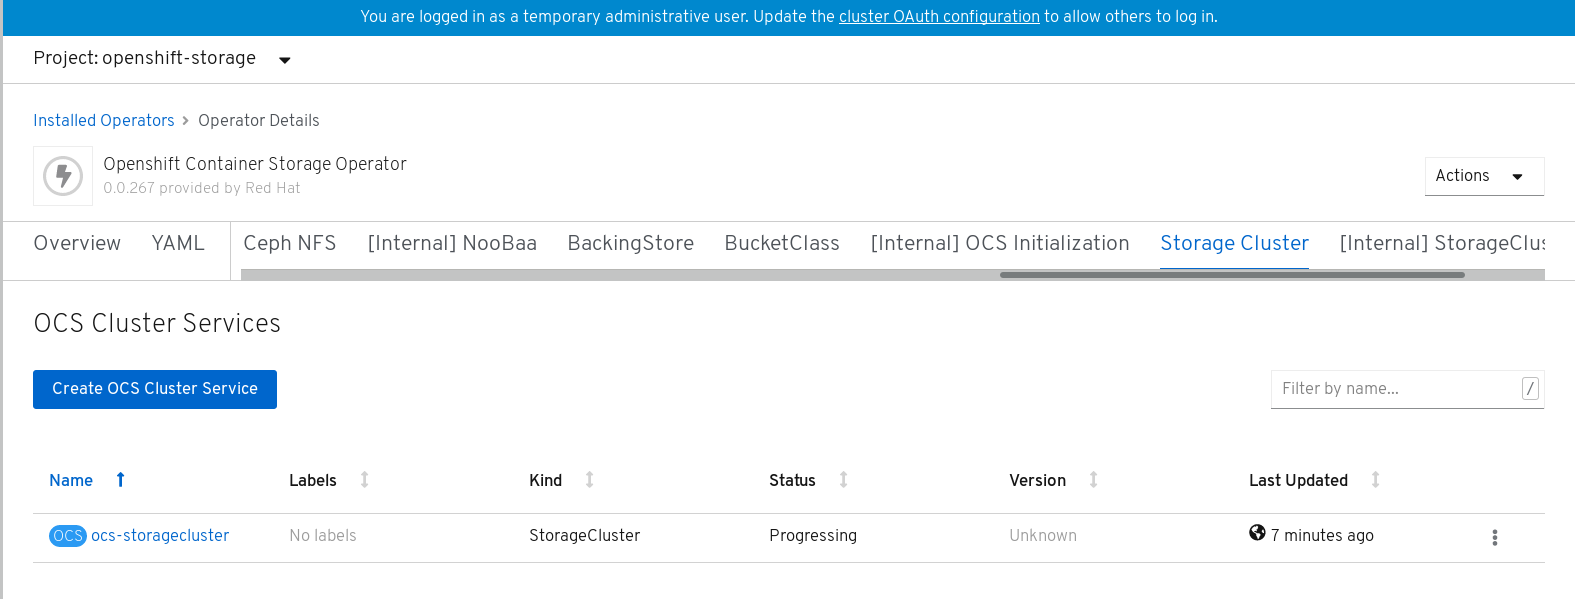
- On the OCS Cluster Services page, click Create OCS Cluster Service.
On the Create New OCS Service page, perform the following:
Figure 1.5. Create New OCS Service page

Select at least three worker nodes from the available list of nodes for the use of OpenShift Container Storage service.
Note- Ensure that the nodes are in different Location (AWS only).
-
Ensure that the selected nodes do not have the
NoSchedulelabel (for example the selected nodes should not be master nodes).
Click Create.
The Create button is enabled only after you select three nodes. A new storage cluster of three 2 TiB volumes will be created with one volume per worker node. The default configuration uses a replication factor of 3 providing approximately 2 TiB of usable storage.
Verification steps
- To verify that OpenShift Container Storage is successfully installed, see Verifying your OpenShift Container Storage installation.
1.1.3. Enabling file system access for containers on Red Hat Enterprise Linux based nodes
Deploying OpenShift Container Platform on a Red Hat Enterprise Linux base in a user provisioned infrastructure (UPI) does not automatically provide container access to the underlying Ceph file system. This is a bug tracked by RHSTOR-787.
This process is not necessary for hosts based on Red Hat Enterprise Linux CoreOS.
Procedure
Perform the following steps on each node in your cluster.
- Log in to the Red Hat Enterprise Linux based node and open a terminal.
Verify that the node has access to the rhel-7-server-extras-rpms repository.
# subscription-manager repos --list-enabled | grep rhel-7-serverIf you do not see both
rhel-7-server-rpmsandrhel-7-server-extras-rpmsin the output, or if there is no output, run the following commands to enable each repository.# subscription-manager repos --enable=rhel-7-server-rpms # subscription-manager repos --enable=rhel-7-server-extras-rpmsInstall the required packages.
# yum install -y policycoreutils container-selinuxPersistently enable container use of the Ceph file system in SELinux.
# setsebool -P container_use_cephfs on- Verify that containers can now access OpenShift Container Storage hosted on this node.
Chapter 2. Verifying your OpenShift Container Storage installation
Use this section to verify that OpenShift Container Storage is deployed correctly.
2.1. Verify that the pods are in running state
- Click Workloads → Pods from the left pane of the OpenShift Web Console.
Select openshift-storage from the Project drop down list.
The number of pods varies depending on the number of worker nodes deployed on OpenShift Container Platform.
When you need to override the cluster-wide default node selector for OpenShift Container Storage, you can perform the following steps in command line interface:
Specify a blank node selector for the
openshift-storagenamespace.$ oc annotate namespace openshift-storage openshift.io/node-selector=Delete the original pods generated by the
DaemonSets.oc delete pod -l app=csi-cephfsplugin -n openshift-storage oc delete pod -l app=csi-rbdplugin -n openshift-storage
Verify that the following pods are in running and completed state by clicking on the Running and the Completed tabs:
| Component | No. of pods | Name of the pod |
|---|---|---|
| OpenShift Container Storage Operator | 1 |
|
| Rook-ceph Operator | 1 |
|
| NooBaa | 2 |
|
| Mon | 3 |
|
| CSI | 10 |
|
| OSD | 3 |
|
| rook-ceph-mgr | 1 |
|
| mds | 2 |
|
| rook-ceph-drain-canary | 3 |
|
| rgw (listed only in VMware) | 1 |
|
2.2. Verify that the OpenShift Container Storage cluster is healthy
You can verify health of OpenShift Container Storage cluster using the persistent storage dashboard. For more information, see Monitoring OpenShift Container Storage.
Click Home → Dashboards from the left pane of the OpenShift Web Console and click the Persistent Storage tab.
In the Health card, verify that the cluster health is displayed as ocs-storagecluster is healthy as shown in the following image:
Figure 2.1. Health card in Persistent Storage dashboard

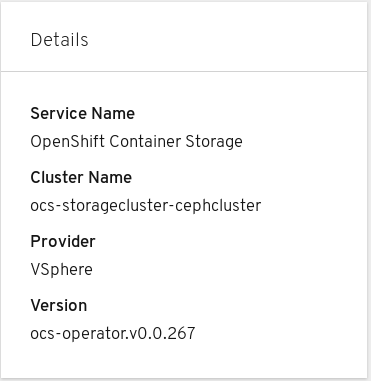
In the Details card, verify that the cluster information is displayed appropriately as follows:
Figure 2.2. Details card in Persistent Storage dashboard
2.3. Verify that the Multicloud Object Gateway is healthy
You can verify health of OpenShift Container Storage cluster using the object service dashboard. For more information, see Monitoring OpenShift Container Storage.
Click Home → Dashboards from the left pane of the OpenShift Web Console and click the Object Service tab.
In the Health card, verify that the Multicloud Object Gateway (MCG) storage health is displayed as Object Storage is healthy as shown in the following image:
Figure 2.3. Health card in Object Service dashboard

In the Details card, verify that the MCG information is displayed appropriately as follows:
Figure 2.4. Details card in Object Service dashboard

2.4. Verify that the storage classes are created and listed
Click Storage → Storage Classes from the left pane of the OpenShift Web Console.
Verify that the following three storage classes are created with the OpenShift Container Storage cluster creation:
-
ocs-storagecluster-ceph-rbd -
ocs-storagecluster-cephfs -
openshift-storage.noobaa.io

-
Chapter 3. Uninstalling OpenShift Container Storage
Use the steps in this section to uninstall OpenShift Container Storage instead of the Uninstall option from the user interface.
Prerequisites
- Make sure that there are no consumers of OpenShift Container Storage.
- Make sure that the OpenShift Container Storage cluster is in healthy state. The deletion might fail if some of the pods are not terminated successfully due to insufficient resources or nodes. In case the cluster is in unhealthy state, you should contact Red Hat Customer Support before uninstalling OpenShift Container Storage.
- Delete any applications that are consuming persistent volume claims (PVCs) or object bucket claims (OBCs) based on the OpenShift Container Storage storage classes and then delete PVCs and OBCs that are using OpenShift Container Storage storage classes.
Procedure
List the storage classes and take a note of the storage classes with the following storage class provisioners:
-
openshift-storage.rbd.csi.ceph.com -
openshift-storage.cephfs.csi.ceph.com openshift-storage.noobaa.io/obcFor example
$ oc get storageclasses
NAME                         PROVISIONER                             AGE
gp2 (default)                kubernetes.io/aws-ebs                   23h
ocs-storagecluster-ceph-rbd  openshift-storage.rbd.csi.ceph.com      22h
ocs-storagecluster-cephfs    openshift-storage.cephfs.csi.ceph.com   22h
openshift-storage.noobaa.io  openshift-storage.noobaa.io/obc         22h
-
Query for PVCs and OBCs that are using the storage class provisioners listed in the previous step.
$ oc get pvc -o=jsonpath='{range .items[?(@.spec.storageClassName=="ocs-storagecluster-ceph-rbd")]}{"Name: "}{@.metadata.name}{" Namespace: "}{@.metadata.namespace}{"\n"}{end}' --all-namespaces|grep -v db-noobaa-core-0$ oc get pvc -o=jsonpath='{range .items[?(@.spec.storageClassName=="ocs-storagecluster-cephfs")]}{"Name: "}{@.metadata.name}{" Namespace: "}{@.metadata.namespace}{"\n"}{end}' --all-namespaces$ oc get obc -o=jsonpath='{range .items[?(@.spec.storageClassName=="openshift-storage.noobaa.io")]}{"Name: "}{@.metadata.name}{" Namespace: "}{@.metadata.namespace}{"\n"}{end}' --all-namespacesFollow these instructions to ensure that the PVCs listed in the previous step are deleted:
- Determine the pod that is consuming the PVC.
Identify the controlling object such as a
Deployment,StatefulSet,DeamonSet,Job, or a custom controller.Each object has a metadata field known as
OwnerReference. This is a list of associated objects. TheOwnerReferencewith thecontrollerfield set totruewill point to controlling objects such asReplicaSet,StatefulSet,DaemonSetand so on.- Ensure that the object is safe to delete by asking the owner of the project and then delete it.
Delete the PVCs.
If you have created any PVCs as a part of configuring the monitoring stack, cluster logging operator, or prometheus registry, then you must perform the clean up steps provided in the following sections as required:
Delete the
StorageClusterobject without deleting its dependents.$ oc delete storagecluster --all -n openshift-storage --wait=true --timeout=5m --cascade=falseDelete
noobaaresource and allow NooBaa PVC to be automatically deleted.Delete the
noobaaresource.$ oc delete -n openshift-storage noobaa noobaa --wait=true --timeout=5mWait for the NooBaa PVC to be automatically deleted.
$ oc wait --for delete pvc -l noobaa-core=noobaa -n openshift-storage --timeout=5m
Delete the
CephClusterresource and wait till the deletion is complete.$ oc delete -n openshift-storage cephcluster --all --wait=true --timeout=5mDelete the namespaces and wait till the deletion is complete.
$ oc delete project openshift-storage --wait=true --timeout=5mDelete the storage classes with an
openshift-storageprovisioner listed in step 1.$ oc delete storageclass <storageclass-name> --wait=true --timeout=5mFor example:
$ oc delete storageclass ocs-storagecluster-ceph-rbd ocs-storagecluster-cephfs openshift-storage.noobaa.io --wait=true --timeout=5mRemove the taint from the storage nodes.
$ oc adm taint nodes --all node.ocs.openshift.io/storage-Unlabel the storage nodes.
$ oc label nodes  --all cluster.ocs.openshift.io/openshift-storage-
$ oc label nodes  --all topology.rook.io/rack-
Remove
CustomResourceDefinitions.$ oc delete crd backingstores.noobaa.io bucketclasses.noobaa.io cephblockpools.ceph.rook.io cephclusters.ceph.rook.io cephfilesystems.ceph.rook.io cephnfses.ceph.rook.io cephobjectstores.ceph.rook.io cephobjectstoreusers.ceph.rook.io noobaas.noobaa.io ocsinitializations.ocs.openshift.io storageclusterinitializations.ocs.openshift.io storageclusters.ocs.openshift.io --wait=true --timeout=5m
3.1. Removing monitoring stack from OpenShift Container Storage
Use this section to clean up monitoring stack from OpenShift Container Storage.
The PVCs that are created as a part of configuring the monitoring stack are in the openshift-monitoring namespace.
Prerequisites
PVCs are configured to use OpenShift Container Platform monitoring stack.
For information about configuring monitoring stack, see https://access.redhat.com/documentation/en-us/openshift_container_platform/4.2/html-single/monitoring/cluster-monitoring/configuring-the-monitoring-stack.html#configuring-the-cluster-monitoring-stack_configuring-monitoring.
Procedure
List the pods and PVCs that are currently running in the
openshift-monitoringnamespace.$ oc get pod,pvc -n openshift-monitoring NAME READY STATUS RESTARTS AGE pod/alertmanager-main-0 3/3 Running 0 8d pod/alertmanager-main-1 3/3 Running 0 8d pod/alertmanager-main-2 3/3 Running 0 8d pod/cluster-monitoring- operator-84457656d-pkrxm 1/1 Running 0 8d pod/grafana-79ccf6689f-2ll28 2/2 Running 0 8d pod/kube-state-metrics- 7d86fb966-rvd9w 3/3 Running 0 8d pod/node-exporter-25894 2/2 Running 0 8d pod/node-exporter-4dsd7 2/2 Running 0 8d pod/node-exporter-6p4zc 2/2 Running 0 8d pod/node-exporter-jbjvg 2/2 Running 0 8d pod/node-exporter-jj4t5 2/2 Running 0 6d18h pod/node-exporter-k856s 2/2 Running 0 6d18h pod/node-exporter-rf8gn 2/2 Running 0 8d pod/node-exporter-rmb5m 2/2 Running 0 6d18h pod/node-exporter-zj7kx 2/2 Running 0 8d pod/openshift-state-metrics- 59dbd4f654-4clng 3/3 Running 0 8d pod/prometheus-adapter- 5df5865596-k8dzn 1/1 Running 0 7d23h pod/prometheus-adapter- 5df5865596-n2gj9 1/1 Running 0 7d23h pod/prometheus-k8s-0 6/6 Running 1 8d pod/prometheus-k8s-1 6/6 Running 1 8d pod/prometheus-operator- 55cfb858c9-c4zd9 1/1 Running 0 6d21h pod/telemeter-client- 78fc8fc97d-2rgfp 3/3 Running 0 8d NAME STATUS VOLUME CAPACITY ACCESS MODES STORAGECLASS AGE persistentvolumeclaim/my-alertmanager-claim-alertmanager-main-0 Bound pvc-0d519c4f-15a5-11ea-baa0-026d231574aa 40Gi RWO ocs-storagecluster-ceph-rbd 8d persistentvolumeclaim/my-alertmanager-claim-alertmanager-main-1 Bound pvc-0d5a9825-15a5-11ea-baa0-026d231574aa 40Gi RWO ocs-storagecluster-ceph-rbd 8d persistentvolumeclaim/my-alertmanager-claim-alertmanager-main-2 Bound pvc-0d6413dc-15a5-11ea-baa0-026d231574aa 40Gi RWO ocs-storagecluster-ceph-rbd 8d persistentvolumeclaim/my-prometheus-claim-prometheus-k8s-0 Bound pvc-0b7c19b0-15a5-11ea-baa0-026d231574aa 40Gi RWO ocs-storagecluster-ceph-rbd 8d persistentvolumeclaim/my-prometheus-claim-prometheus-k8s-1 Bound pvc-0b8aed3f-15a5-11ea-baa0-026d231574aa 40Gi RWO ocs-storagecluster-ceph-rbd 8dEdit the monitoring
configmap.$ oc -n openshift-monitoring edit configmap cluster-monitoring-configRemove any
configsections that reference the OpenShift Container Storage storage classes as shown in the following example and save it.Expand Before editing
.
.
.
apiVersion: v1
data:
  config.yaml: |
    alertmanagerMain:
      volumeClaimTemplate:
        metadata:
          name: my-alertmanager-claim
        spec:
          resources:
            requests:
              storage: 40Gi
          storageClassName: ocs-storagecluster-ceph-rbd
    prometheusK8s:
      volumeClaimTemplate:
        metadata:
          name: my-prometheus-claim
        spec:
          resources:
            requests:
              storage: 40Gi
          storageClassName: ocs-storagecluster-ceph-rbd
kind: ConfigMap
metadata:
  creationTimestamp: "2019-12-02T07:47:29Z"
  name: cluster-monitoring-config
  namespace: openshift-monitoring
  resourceVersion: "22110"
  selfLink: /api/v1/namespaces/openshift-monitoring/configmaps/cluster-monitoring-config
  uid: fd6d988b-14d7-11ea-84ff-066035b9efa8


.
.
.
After editing
. . . apiVersion: v1 data: config.yaml: | kind: ConfigMap metadata: creationTimestamp: "2019-11-21T13:07:05Z" name: cluster-monitoring-config namespace: openshift-monitoring resourceVersion: "404352" selfLink: /api/v1/namespaces/openshift-monitoring/configmaps/cluster-monitoring-config uid: d12c796a-0c5f-11ea-9832-063cd735b81c . . .In this example,
alertmanagerMainandprometheusK8smonitoring components are using the OpenShift Container Storage PVCs.List the pods consuming the PVC.
In this example, the
alertmanagerMainandprometheusK8spods that are consuming the PVCs are in theTerminatingstate. You can delete the PVCs only after they are completely terminated.$ oc get pod,pvc -n openshift-monitoring NAME READY STATUS RESTARTS AGE pod/alertmanager-main-0 3/3 Terminating 0 10h pod/alertmanager-main-1 3/3 Terminating 0 10h pod/alertmanager-main-2 3/3 Terminating 0 10h pod/cluster-monitoring-operator-84cd9df668-zhjfn 1/1 Running 0 18h pod/grafana-5db6fd97f8-pmtbf 2/2 Running 0 10h pod/kube-state-metrics-895899678-z2r9q 3/3 Running 0 10h pod/node-exporter-4njxv 2/2 Running 0 18h pod/node-exporter-b8ckz 2/2 Running 0 11h pod/node-exporter-c2vp5 2/2 Running 0 18h pod/node-exporter-cq65n 2/2 Running 0 18h pod/node-exporter-f5sm7 2/2 Running 0 11h pod/node-exporter-f852c 2/2 Running 0 18h pod/node-exporter-l9zn7 2/2 Running 0 11h pod/node-exporter-ngbs8 2/2 Running 0 18h pod/node-exporter-rv4v9 2/2 Running 0 18h pod/openshift-state-metrics-77d5f699d8-69q5x 3/3 Running 0 10h pod/prometheus-adapter-765465b56-4tbxx 1/1 Running 0 10h pod/prometheus-adapter-765465b56-s2qg2 1/1 Running 0 10h pod/prometheus-k8s-0 6/6 Terminating 1 9m47s pod/prometheus-k8s-1 6/6 Terminating 1 9m47s pod/prometheus-operator-cbfd89f9-ldnwc 1/1 Running 0 43m pod/telemeter-client-7b5ddb4489-2xfpz 3/3 Running 0 10h NAME STATUS VOLUME CAPACITY ACCESS MODES STORAGECLASS AGE persistentvolumeclaim/ocs-alertmanager-claim-alertmanager-main-0 Bound pvc-2eb79797-1fed-11ea-93e1-0a88476a6a64 40Gi RWO ocs-storagecluster-ceph-rbd 19h persistentvolumeclaim/ocs-alertmanager-claim-alertmanager-main-1 Bound pvc-2ebeee54-1fed-11ea-93e1-0a88476a6a64 40Gi RWO ocs-storagecluster-ceph-rbd 19h persistentvolumeclaim/ocs-alertmanager-claim-alertmanager-main-2 Bound pvc-2ec6a9cf-1fed-11ea-93e1-0a88476a6a64 40Gi RWO ocs-storagecluster-ceph-rbd 19h persistentvolumeclaim/ocs-prometheus-claim-prometheus-k8s-0 Bound pvc-3162a80c-1fed-11ea-93e1-0a88476a6a64 40Gi RWO ocs-storagecluster-ceph-rbd 19h persistentvolumeclaim/ocs-prometheus-claim-prometheus-k8s-1 Bound pvc-316e99e2-1fed-11ea-93e1-0a88476a6a64 40Gi RWO ocs-storagecluster-ceph-rbd 19hDelete relevant PVCs. Make sure you delete all the PVCs that are consuming the storage classes.
$ oc delete -n openshift-monitoring <pvc-name> --wait=true --timeout=5m
3.2. Removing OpenShift Container Platform registry from OpenShift Container Storage
Use this section to clean up OpenShift Container Platform registry from OpenShift Container Storage. If you want to configure an alternative storage, see: https://access.redhat.com/documentation/en-us/openshift_container_platform/4.2/html-single/registry/architecture-component-imageregistry
The PVCs that are created as a part of configuring OpenShift Container Platform registry are in the openshift-image-registry namespace.
Prerequisites
- The image registry should have been configured to use an OpenShift Container Storage PVC.
Procedure
Edit the
configs.imageregistry.operator.openshift.ioobject and remove the content in the storage section.$ oc edit configs.imageregistry.operator.openshift.ioFor AWS:
Expand Before editing
.
.
.
storage:
    pvc:
        claim: registry-cephfs-rwx-pvc
.
.
.
After editing
. . . storage: . . .In this example, the PVC is called
registry-cephfs-rwx-pvc, which is now safe to delete.For VMware:
Expand Before editing
.
.
.
storage:
    pvc:
        claim: registry-cephfs-rwx-pvc
.
.
.
After editing
. . . storage: emptyDir: {} . . .In this example, the PVC is called
registry-cephfs-rwx-pvc, which is now safe to delete.
Delete the PVC.
$ oc delete pvc <pvc-name> -n openshift-image-registry --wait=true --timeout=5m
3.3. Removing the cluster logging operator from OpenShift Container Storage
Use this section to clean up the cluster logging operator from OpenShift Container Storage.
The PVCs that are created as a part of configuring cluster logging operator are in openshift-logging namespace.
Prerequisites
- The cluster logging instance should have been configured to use OpenShift Container Storage PVCs.
Procedure
Remove the
ClusterLogginginstance in the namespace.$ oc delete clusterlogging instance -n openshift-logging --wait=true --timeout=5mThe PVCs in the
openshift-loggingnamespace are now safe to delete.Delete PVCs.
$ oc delete pvc <pvc-name> -n openshift-logging --wait=true --timeout=5m