Creating CI/CD pipelines
Getting started with creating and running tasks and pipelines in OpenShift Pipelines
Abstract
Chapter 1. Creating CI/CD solutions for applications using OpenShift Pipelines
With Red Hat OpenShift Pipelines, you can create a customized CI/CD solution to build, test, and deploy your application.
To create a full-fledged, self-serving CI/CD pipeline for an application, perform the following tasks:
- Create custom tasks, or install existing reusable tasks.
- Create and define the delivery pipeline for your application.
Provide a storage volume or filesystem that is attached to a workspace for the pipeline execution, using one of the following approaches:
- Specify a volume claim template that creates a persistent volume claim
- Specify a persistent volume claim
-
Create a
PipelineRunobject to instantiate and invoke the pipeline. - Add triggers to capture events in the source repository.
This section uses the pipelines-tutorial example to demonstrate the preceding tasks. The example uses a simple application which consists of:
-
A front-end interface,
pipelines-vote-ui, with the source code in thepipelines-vote-uiGit repository. -
A back-end interface,
pipelines-vote-api, with the source code in thepipelines-vote-apiGit repository. -
The
apply-manifestsandupdate-deploymenttasks in thepipelines-tutorialGit repository.
1.1. Prerequisites
- You have access to an OpenShift Container Platform cluster.
- You have installed OpenShift Pipelines using the Red Hat OpenShift Pipelines Operator listed in the OpenShift OperatorHub. After it is installed, it is applicable to the entire cluster.
- You have installed OpenShift Pipelines CLI.
-
You have forked the front-end
pipelines-vote-uiand back-endpipelines-vote-apiGit repositories using your GitHub ID, and have administrator access to these repositories. -
Optional: You have cloned the
pipelines-tutorialGit repository.
1.2. Creating a project and checking your pipeline service account
Procedure
Log in to your OpenShift Container Platform cluster:
$ oc login -u <login> -p <password> https://openshift.example.com:6443Create a project for the sample application. For this example workflow, create the
pipelines-tutorialproject:$ oc new-project pipelines-tutorialNoteIf you create a project with a different name, be sure to update the resource URLs used in the example with your project name.
View the
pipelineservice account:Red Hat OpenShift Pipelines Operator adds and configures a service account named
pipelinethat has sufficient permissions to build and push an image. This service account is used by thePipelineRunobject.$ oc get serviceaccount pipeline
1.3. Creating pipeline tasks
Procedure
Install the
apply-manifestsandupdate-deploymenttask resources from thepipelines-tutorialrepository, which contains a list of reusable tasks for pipelines:$ oc create -f https://raw.githubusercontent.com/openshift/pipelines-tutorial/pipelines-1.14/01_pipeline/01_apply_manifest_task.yaml $ oc create -f https://raw.githubusercontent.com/openshift/pipelines-tutorial/pipelines-1.14/01_pipeline/02_update_deployment_task.yamlUse the
tkn task listcommand to list the tasks you created:$ tkn task listThe output verifies that the
apply-manifestsandupdate-deploymenttask resources were created:NAME DESCRIPTION AGE apply-manifests 1 minute ago update-deployment 48 seconds agoUse the
tkn clustertasks listcommand to list the Operator-installed additional cluster tasks such asbuildahands2i-python:NoteTo use the
buildahcluster task in a restricted environment, you must ensure that the Dockerfile uses an internal image stream as the base image.$ tkn clustertasks listThe output lists the Operator-installed
ClusterTaskresources:NAME DESCRIPTION AGE buildah 1 day ago git-clone 1 day ago s2i-python 1 day ago tkn 1 day ago
In Red Hat OpenShift Pipelines 1.10, cluster task functionality is deprecated and is planned to be removed in a future release.
1.4. Assembling a pipeline
A pipeline represents a CI/CD flow and is defined by the tasks to be executed. It is designed to be generic and reusable in multiple applications and environments.
A pipeline specifies how the tasks interact with each other and their order of execution using the from and runAfter parameters. It uses the workspaces field to specify one or more volumes that each task in the pipeline requires during execution.
In this section, you will create a pipeline that takes the source code of the application from GitHub, and then builds and deploys it on OpenShift Container Platform.
The pipeline performs the following tasks for the back-end application pipelines-vote-api and front-end application pipelines-vote-ui:
-
Clones the source code of the application from the Git repository by referring to the
git-urlandgit-revisionparameters. -
Builds the container image using the
buildahcluster task. -
Pushes the image to the OpenShift image registry by referring to the
imageparameter. -
Deploys the new image on OpenShift Container Platform by using the
apply-manifestsandupdate-deploymenttasks.
Procedure
Copy the contents of the following sample pipeline YAML file and save it:
apiVersion: tekton.dev/v1
kind: Pipeline
metadata:
  name: build-and-deploy
spec:
  workspaces:
  - name: shared-workspace
  params:
  - name: deployment-name
    type: string
    description: name of the deployment to be patched
  - name: git-url
    type: string
    description: url of the git repo for the code of deployment
  - name: git-revision
    type: string
    description: revision to be used from repo of the code for deployment
    default: "pipelines-1.14"
  - name: IMAGE
    type: string
    description: image to be built from the code
  tasks:
  - name: fetch-repository
    taskRef:
      name: git-clone
      kind: ClusterTask
    workspaces:
    - name: output
      workspace: shared-workspace
    params:
    - name: url
      value: $(params.git-url)
    - name: subdirectory
      value: ""
    - name: deleteExisting
      value: "true"
    - name: revision
      value: $(params.git-revision)
  - name: build-image
    taskRef:
      name: buildah
      kind: ClusterTask
    params:
    - name: IMAGE
      value: $(params.IMAGE)
    workspaces:
    - name: source
      workspace: shared-workspace
    runAfter:
    - fetch-repository
  - name: apply-manifests
    taskRef:
      name: apply-manifests
    workspaces:
    - name: source
      workspace: shared-workspace
    runAfter:
    - build-image
  - name: update-deployment
    taskRef:
      name: update-deployment
    params:
    - name: deployment
      value: $(params.deployment-name)
    - name: IMAGE
      value: $(params.IMAGE)
    runAfter:
    - apply-manifests
The pipeline definition abstracts away the specifics of the Git source repository and image registries. These details are added as
paramswhen a pipeline is triggered and executed.Create the pipeline:
$ oc create -f <pipeline-yaml-file-name.yaml>Alternatively, you can also execute the YAML file directly from the Git repository:
$ oc create -f https://raw.githubusercontent.com/openshift/pipelines-tutorial/pipelines-1.14/01_pipeline/04_pipeline.yamlUse the
tkn pipeline listcommand to verify that the pipeline is added to the application:$ tkn pipeline listThe output verifies that the
build-and-deploypipeline was created:NAME AGE LAST RUN STARTED DURATION STATUS build-and-deploy 1 minute ago --- --- --- ---
1.5. Mirroring images to run pipelines in a restricted environment
To run OpenShift Pipelines in a disconnected cluster or a cluster provisioned in a restricted environment, ensure that either the Samples Operator is configured for a restricted network, or a cluster administrator has created a cluster with a mirrored registry.
The following procedure uses the pipelines-tutorial example to create a pipeline for an application in a restricted environment using a cluster with a mirrored registry. To ensure that the pipelines-tutorial example works in a restricted environment, you must mirror the respective builder images from the mirror registry for the front-end interface, pipelines-vote-ui; back-end interface, pipelines-vote-api; and the cli.
Procedure
Mirror the builder image from the mirror registry for the front-end interface,
pipelines-vote-ui.Verify that the required images tag is not imported:
$ oc describe imagestream python -n openshiftExample output
Name:			python
Namespace:		openshift
[...]

3.8-ubi9 (latest)
  tagged from registry.redhat.io/ubi9/python-38:latest
    prefer registry pullthrough when referencing this tag

  Build and run Python 3.8 applications on UBI 8. For more information about using this builder image, including OpenShift considerations, see https://github.com/sclorg/s2i-python-container/blob/master/3.8/README.md.
  Tags: builder, python
  Supports: python:3.8, python
  Example Repo: https://github.com/sclorg/django-ex.git

[...]
Mirror the supported image tag to the private registry:
$ oc image mirror registry.redhat.io/ubi9/python-39:latest <mirror-registry>:<port>/ubi9/python-39Import the image:
$ oc tag <mirror-registry>:<port>/ubi9/python-39 python:latest --scheduled -n openshiftYou must periodically re-import the image. The
--scheduledflag enables automatic re-import of the image.Verify that the images with the given tag have been imported:
$ oc describe imagestream python -n openshiftExample output
Name:			python
Namespace:		openshift
[...]

latest
  updates automatically from registry  <mirror-registry>:<port>/ubi9/python-39

  *  <mirror-registry>:<port>/ubi9/python-39@sha256:3ee...

[...]
Mirror the builder image from the mirror registry for the back-end interface,
pipelines-vote-api.Verify that the required images tag is not imported:
$ oc describe imagestream golang -n openshiftExample output
Name:			golang
Namespace:		openshift
[...]

1.14.7-ubi8 (latest)
  tagged from registry.redhat.io/ubi8/go-toolset:1.14.7
    prefer registry pullthrough when referencing this tag

  Build and run Go applications on UBI 8. For more information about using this builder image, including OpenShift considerations, see https://github.com/sclorg/golang-container/blob/master/README.md.
  Tags: builder, golang, go
  Supports: golang
  Example Repo: https://github.com/sclorg/golang-ex.git

[...]
Mirror the supported image tag to the private registry:
$ oc image mirror registry.redhat.io/ubi9/go-toolset:latest <mirror-registry>:<port>/ubi9/go-toolsetImport the image:
$ oc tag <mirror-registry>:<port>/ubi9/go-toolset golang:latest --scheduled -n openshiftYou must periodically re-import the image. The
--scheduledflag enables automatic re-import of the image.Verify that the images with the given tag have been imported:
$ oc describe imagestream golang -n openshiftExample output
Name:			golang
Namespace:		openshift
[...]

latest
  updates automatically from registry <mirror-registry>:<port>/ubi9/go-toolset

  * <mirror-registry>:<port>/ubi9/go-toolset@sha256:59a74d581df3a2bd63ab55f7ac106677694bf612a1fe9e7e3e1487f55c421b37

[...]
Mirror the builder image from the mirror registry for the
cli.Verify that the required images tag is not imported:
$ oc describe imagestream cli -n openshiftExample output
Name:                   cli
Namespace:              openshift
[...]

latest
  updates automatically from registry quay.io/openshift-release-dev/ocp-v4.0-art-dev@sha256:65c68e8c22487375c4c6ce6f18ed5485915f2bf612e41fef6d41cbfcdb143551

  * quay.io/openshift-release-dev/ocp-v4.0-art-dev@sha256:65c68e8c22487375c4c6ce6f18ed5485915f2bf612e41fef6d41cbfcdb143551

[...]
Mirror the supported image tag to the private registry:
$ oc image mirror quay.io/openshift-release-dev/ocp-v4.0-art-dev@sha256:65c68e8c22487375c4c6ce6f18ed5485915f2bf612e41fef6d41cbfcdb143551 <mirror-registry>:<port>/openshift-release-dev/ocp-v4.0-art-dev:latestImport the image:
$ oc tag <mirror-registry>:<port>/openshift-release-dev/ocp-v4.0-art-dev cli:latest --scheduled -n openshiftYou must periodically re-import the image. The
--scheduledflag enables automatic re-import of the image.Verify that the images with the given tag have been imported:
$ oc describe imagestream cli -n openshiftExample output
Name:                   cli
Namespace:              openshift
[...]

latest
  updates automatically from registry <mirror-registry>:<port>/openshift-release-dev/ocp-v4.0-art-dev

  * <mirror-registry>:<port>/openshift-release-dev/ocp-v4.0-art-dev@sha256:65c68e8c22487375c4c6ce6f18ed5485915f2bf612e41fef6d41cbfcdb143551

[...]
1.6. Running a pipeline
A PipelineRun resource starts a pipeline and ties it to the Git and image resources that should be used for the specific invocation. It automatically creates and starts the TaskRun resources for each task in the pipeline.
Procedure
Start the pipeline for the back-end application:
$ tkn pipeline start build-and-deploy \
    -w name=shared-workspace,volumeClaimTemplateFile=https://raw.githubusercontent.com/openshift/pipelines-tutorial/pipelines-1.14/01_pipeline/03_persistent_volume_claim.yaml \
    -p deployment-name=pipelines-vote-api \
    -p git-url=https://github.com/openshift/pipelines-vote-api.git \
    -p IMAGE='image-registry.openshift-image-registry.svc:5000/pipelines-tutorial/pipelines-vote-api' \
    --use-param-defaults
The previous command uses a volume claim template, which creates a persistent volume claim for the pipeline execution.
To track the progress of the pipeline run, enter the following command::
$ tkn pipelinerun logs <pipelinerun_id> -fThe <pipelinerun_id> in the above command is the ID for the
PipelineRunthat was returned in the output of the previous command.Start the pipeline for the front-end application:
$ tkn pipeline start build-and-deploy \
    -w name=shared-workspace,volumeClaimTemplateFile=https://raw.githubusercontent.com/openshift/pipelines-tutorial/pipelines-1.14/01_pipeline/03_persistent_volume_claim.yaml \
    -p deployment-name=pipelines-vote-ui \
    -p git-url=https://github.com/openshift/pipelines-vote-ui.git \
    -p IMAGE='image-registry.openshift-image-registry.svc:5000/pipelines-tutorial/pipelines-vote-ui' \
    --use-param-defaults
To track the progress of the pipeline run, enter the following command:
$ tkn pipelinerun logs <pipelinerun_id> -fThe <pipelinerun_id> in the above command is the ID for the
PipelineRunthat was returned in the output of the previous command.After a few minutes, use
tkn pipelinerun listcommand to verify that the pipeline ran successfully by listing all the pipeline runs:$ tkn pipelinerun listThe output lists the pipeline runs:
 NAME                         STARTED      DURATION     STATUS
 build-and-deploy-run-xy7rw   1 hour ago   2 minutes    Succeeded
 build-and-deploy-run-z2rz8   1 hour ago   19 minutes   Succeeded
Get the application route:
$ oc get route pipelines-vote-ui --template='http://{{.spec.host}}'Note the output of the previous command. You can access the application using this route.
To rerun the last pipeline run, using the pipeline resources and service account of the previous pipeline, run:
$ tkn pipeline start build-and-deploy --last
1.7. Adding triggers to a pipeline
Triggers enable pipelines to respond to external GitHub events, such as push events and pull requests. After you assemble and start a pipeline for the application, add the TriggerBinding, TriggerTemplate, Trigger, and EventListener resources to capture the GitHub events.
Procedure
Copy the content of the following sample
TriggerBindingYAML file and save it:apiVersion: triggers.tekton.dev/v1beta1 kind: TriggerBinding metadata: name: vote-app spec: params: - name: git-repo-url value: $(body.repository.url) - name: git-repo-name value: $(body.repository.name) - name: git-revision value: $(body.head_commit.id)Create the
TriggerBindingresource:$ oc create -f <triggerbinding-yaml-file-name.yaml>Alternatively, you can create the
TriggerBindingresource directly from thepipelines-tutorialGit repository:$ oc create -f https://raw.githubusercontent.com/openshift/pipelines-tutorial/pipelines-1.14/03_triggers/01_binding.yamlCopy the content of the following sample
TriggerTemplateYAML file and save it:apiVersion: triggers.tekton.dev/v1beta1 kind: TriggerTemplate metadata: name: vote-app spec: params: - name: git-repo-url description: The git repository url - name: git-revision description: The git revision default: pipelines-1.14 - name: git-repo-name description: The name of the deployment to be created / patched resourcetemplates: - apiVersion: tekton.dev/v1 kind: PipelineRun metadata: generateName: build-deploy-$(tt.params.git-repo-name)- spec: taskRunTemplate: serviceAccountName: pipeline pipelineRef: name: build-and-deploy params: - name: deployment-name value: $(tt.params.git-repo-name) - name: git-url value: $(tt.params.git-repo-url) - name: git-revision value: $(tt.params.git-revision) - name: IMAGE value: image-registry.openshift-image-registry.svc:5000/pipelines-tutorial/$(tt.params.git-repo-name) workspaces: - name: shared-workspace volumeClaimTemplate: spec: accessModes: - ReadWriteOnce resources: requests: storage: 500MiThe template specifies a volume claim template to create a persistent volume claim for defining the storage volume for the workspace. Therefore, you do not need to create a persistent volume claim to provide data storage.
Create the
TriggerTemplateresource:$ oc create -f <triggertemplate-yaml-file-name.yaml>Alternatively, you can create the
TriggerTemplateresource directly from thepipelines-tutorialGit repository:$ oc create -f https://raw.githubusercontent.com/openshift/pipelines-tutorial/pipelines-1.14/03_triggers/02_template.yamlCopy the contents of the following sample
TriggerYAML file and save it:apiVersion: triggers.tekton.dev/v1beta1 kind: Trigger metadata: name: vote-trigger spec: serviceAccountName: pipeline bindings: - ref: vote-app template: ref: vote-appCreate the
Triggerresource:$ oc create -f <trigger-yaml-file-name.yaml>Alternatively, you can create the
Triggerresource directly from thepipelines-tutorialGit repository:$ oc create -f https://raw.githubusercontent.com/openshift/pipelines-tutorial/pipelines-1.14/03_triggers/03_trigger.yamlCopy the contents of the following sample
EventListenerYAML file and save it:apiVersion: triggers.tekton.dev/v1beta1 kind: EventListener metadata: name: vote-app spec: serviceAccountName: pipeline triggers: - triggerRef: vote-triggerAlternatively, if you have not defined a trigger custom resource, add the binding and template spec to the
EventListenerYAML file, instead of referring to the name of the trigger:apiVersion: triggers.tekton.dev/v1beta1 kind: EventListener metadata: name: vote-app spec: serviceAccountName: pipeline triggers: - bindings: - ref: vote-app template: ref: vote-appCreate the
EventListenerresource by performing the following steps:To create an
EventListenerresource using a secure HTTPS connection:Add a label to enable the secure HTTPS connection to the
Eventlistenerresource:$ oc label namespace <ns-name> operator.tekton.dev/enable-annotation=enabledCreate the
EventListenerresource:$ oc create -f <eventlistener-yaml-file-name.yaml>Alternatively, you can create the
EvenListenerresource directly from thepipelines-tutorialGit repository:$ oc create -f https://raw.githubusercontent.com/openshift/pipelines-tutorial/pipelines-1.14/03_triggers/04_event_listener.yamlCreate a route with the re-encrypt TLS termination:
$ oc create route reencrypt --service=<svc-name> --cert=tls.crt --key=tls.key --ca-cert=ca.crt --hostname=<hostname>Alternatively, you can create a re-encrypt TLS termination YAML file to create a secured route.
Example Re-encrypt TLS Termination YAML of the Secured Route
apiVersion: route.openshift.io/v1
kind: Route
metadata:
  name: route-passthrough-secured
1 spec: host: <hostname> to: kind: Service name: frontend2 tls: termination: reencrypt3 key: [as in edge termination] certificate: [as in edge termination] caCertificate: [as in edge termination] destinationCACertificate: |-4 -----BEGIN CERTIFICATE----- [...] -----END CERTIFICATE------ 1 2
- The name of the object, which is limited to 63 characters.
- 3
- The
terminationfield is set toreencrypt. This is the only requiredtlsfield. - 4
- Required for re-encryption.
destinationCACertificatespecifies a CA certificate to validate the endpoint certificate, securing the connection from the router to the destination pods. If the service is using a service signing certificate, or the administrator has specified a default CA certificate for the router and the service has a certificate signed by that CA, this field can be omitted.
See
oc create route reencrypt --helpfor more options.
To create an
EventListenerresource using an insecure HTTP connection:-
Create the
EventListenerresource. Expose the
EventListenerservice as an OpenShift Container Platform route to make it publicly accessible:$ oc expose svc el-vote-app
-
Create the
1.8. Configuring event listeners to serve multiple namespaces
You can skip this section if you want to create a basic CI/CD pipeline. However, if your deployment strategy involves multiple namespaces, you can configure event listeners to serve multiple namespaces.
To increase reusability of EvenListener objects, cluster administrators can configure and deploy them as multi-tenant event listeners that serve multiple namespaces.
Procedure
Configure cluster-wide fetch permission for the event listener.
Set a service account name to be used in the
ClusterRoleBindingandEventListenerobjects. For example,el-sa.Example
ServiceAccount.yamlapiVersion: v1 kind: ServiceAccount metadata: name: el-sa ---In the
rulessection of theClusterRole.yamlfile, set appropriate permissions for every event listener deployment to function cluster-wide.Example
ClusterRole.yamlkind: ClusterRole apiVersion: rbac.authorization.k8s.io/v1 metadata: name: el-sel-clusterrole rules: - apiGroups: ["triggers.tekton.dev"] resources: ["eventlisteners", "clustertriggerbindings", "clusterinterceptors", "triggerbindings", "triggertemplates", "triggers"] verbs: ["get", "list", "watch"] - apiGroups: [""] resources: ["configmaps", "secrets"] verbs: ["get", "list", "watch"] - apiGroups: [""] resources: ["serviceaccounts"] verbs: ["impersonate"] ...Configure cluster role binding with the appropriate service account name and cluster role name.
Example
ClusterRoleBinding.yamlapiVersion: rbac.authorization.k8s.io/v1 kind: ClusterRoleBinding metadata: name: el-mul-clusterrolebinding subjects: - kind: ServiceAccount name: el-sa namespace: default roleRef: apiGroup: rbac.authorization.k8s.io kind: ClusterRole name: el-sel-clusterrole ...
In the
specparameter of the event listener, add the service account name, for exampleel-sa. Fill thenamespaceSelectorparameter with names of namespaces where event listener is intended to serve.Example
EventListener.yamlapiVersion: triggers.tekton.dev/v1beta1 kind: EventListener metadata: name: namespace-selector-listener spec: taskRunTemplate: serviceAccountName: el-sa namespaceSelector: matchNames: - default - foo ...Create a service account with the necessary permissions, for example
foo-trigger-sa. Use it for role binding the triggers.Example
ServiceAccount.yamlapiVersion: v1 kind: ServiceAccount metadata: name: foo-trigger-sa namespace: foo ...Example
RoleBinding.yamlapiVersion: rbac.authorization.k8s.io/v1 kind: RoleBinding metadata: name: triggercr-rolebinding namespace: foo subjects: - kind: ServiceAccount name: foo-trigger-sa namespace: foo roleRef: apiGroup: rbac.authorization.k8s.io kind: ClusterRole name: tekton-triggers-eventlistener-roles ...Create a trigger with the appropriate trigger template, trigger binding, and service account name.
Example
Trigger.yamlapiVersion: triggers.tekton.dev/v1beta1 kind: Trigger metadata: name: trigger namespace: foo spec: taskRunTemplate: serviceAccountName: foo-trigger-sa interceptors: - ref: name: "github" params: - name: "secretRef" value: secretName: github-secret secretKey: secretToken - name: "eventTypes" value: ["push"] bindings: - ref: vote-app template: ref: vote-app ...
1.9. Creating webhooks
Webhooks are HTTP POST messages that are received by the event listeners whenever a configured event occurs in your repository. The event payload is then mapped to trigger bindings, and processed by trigger templates. The trigger templates eventually start one or more pipeline runs, leading to the creation and deployment of Kubernetes resources.
In this section, you will configure a webhook URL on your forked Git repositories pipelines-vote-ui and pipelines-vote-api. This URL points to the publicly accessible EventListener service route.
Adding webhooks requires administrative privileges to the repository. If you do not have administrative access to your repository, contact your system administrator for adding webhooks.
Procedure
Get the webhook URL:
For a secure HTTPS connection:
$ echo "URL: $(oc get route el-vote-app --template='https://{{.spec.host}}')"For an HTTP (insecure) connection:
$ echo "URL: $(oc get route el-vote-app --template='http://{{.spec.host}}')"Note the URL obtained in the output.
Configure webhooks manually on the front-end repository:
-
Open the front-end Git repository
pipelines-vote-uiin your browser. - Click Settings → Webhooks → Add Webhook
On the Webhooks/Add Webhook page:
- Enter the webhook URL from step 1 in Payload URL field
- Select application/json for the Content type
- Specify the secret in the Secret field
- Ensure that the Just the push event is selected
- Select Active
- Click Add Webhook
-
Open the front-end Git repository
-
Repeat step 2 for the back-end repository
pipelines-vote-api.
1.10. Triggering a pipeline run
Whenever a push event occurs in the Git repository, the configured webhook sends an event payload to the publicly exposed EventListener service route. The EventListener service of the application processes the payload, and passes it to the relevant TriggerBinding and TriggerTemplate resource pairs. The TriggerBinding resource extracts the parameters, and the TriggerTemplate resource uses these parameters and specifies the way the resources must be created. This may rebuild and redeploy the application.
In this section, you push an empty commit to the front-end pipelines-vote-ui repository, which then triggers the pipeline run.
Procedure
From the terminal, clone your forked Git repository
pipelines-vote-ui:$ git clone git@github.com:<your GitHub ID>/pipelines-vote-ui.git -b pipelines-1.14Push an empty commit:
$ git commit -m "empty-commit" --allow-empty && git push origin pipelines-1.14Check if the pipeline run was triggered:
$ tkn pipelinerun listNotice that a new pipeline run was initiated.
1.11. Enabling monitoring of event listeners for Triggers for user-defined projects
As a cluster administrator, to gather event listener metrics for the Triggers service in a user-defined project and display them in the OpenShift Container Platform web console, you can create a service monitor for each event listener. On receiving an HTTP request, event listeners for the Triggers service return three metrics — eventlistener_http_duration_seconds, eventlistener_event_count, and eventlistener_triggered_resources.
Prerequisites
- You have logged in to the OpenShift Container Platform web console.
- You have installed the Red Hat OpenShift Pipelines Operator.
- You have enabled monitoring for user-defined projects.
Procedure
For each event listener, create a service monitor. For example, to view the metrics for the
github-listenerevent listener in thetestnamespace, create the following service monitor:apiVersion: monitoring.coreos.com/v1 kind: ServiceMonitor metadata: labels: app.kubernetes.io/managed-by: EventListener app.kubernetes.io/part-of: Triggers eventlistener: github-listener annotations: networkoperator.openshift.io/ignore-errors: "" name: el-monitor namespace: test spec: endpoints: - interval: 10s port: http-metrics jobLabel: name namespaceSelector: matchNames: - test selector: matchLabels: app.kubernetes.io/managed-by: EventListener app.kubernetes.io/part-of: Triggers eventlistener: github-listener ...Test the service monitor by sending a request to the event listener. For example, push an empty commit:
$ git commit -m "empty-commit" --allow-empty && git push origin main- On the OpenShift Container Platform web console, navigate to Administrator → Observe → Metrics.
-
To view a metric, search by its name. For example, to view the details of the
eventlistener_http_resourcesmetric for thegithub-listenerevent listener, search using theeventlistener_http_resourceskeyword.
1.12. Configuring pull request capabilities in GitHub Interceptor
With GitHub Interceptor, you can create logic that validates and filters GitHub webhooks. For example, you can validate the webhook’s origin and filter incoming events based on specified criteria. When you use GitHub Interceptor to filter event data, you can specify the event types that Interceptor can accept in a field. In Red Hat OpenShift Pipelines, you can use the following capabilities of GitHub Interceptor:
- Filter pull request events based on the files that have been changed
- Validate pull requests based on configured GitHub owners
1.12.1. Filtering pull requests using GitHub Interceptor
You can filter GitHub events based on the files that have been changed for push and pull events. This helps you to execute a pipeline for only relevant changes in your Git repository. GitHub Interceptor adds a comma delimited list of all files that have been changed and uses the CEL Interceptor to filter incoming events based on the changed files. The list of changed files is added to the changed_files property of the event payload in the top-level extensions field.
Prerequisites
- You have installed the Red Hat OpenShift Pipelines Operator.
Procedure
Perform one of the following steps:
For a public GitHub repository, set the value of the
addChangedFilesparameter totruein the YAML configuration file shown below:apiVersion: triggers.tekton.dev/v1beta1 kind: EventListener metadata: name: github-add-changed-files-pr-listener spec: triggers: - name: github-listener interceptors: - ref: name: "github" kind: ClusterInterceptor apiVersion: triggers.tekton.dev params: - name: "secretRef" value: secretName: github-secret secretKey: secretToken - name: "eventTypes" value: ["pull_request", "push"] - name: "addChangedFiles" value: enabled: true - ref: name: cel params: - name: filter value: extensions.changed_files.matches('controllers/') ...For a private GitHub repository, set the value of the
addChangedFilesparameter totrueand provide the access token details,secretNameandsecretKeyin the YAML configuration file shown below:apiVersion: triggers.tekton.dev/v1beta1 kind: EventListener metadata: name: github-add-changed-files-pr-listener spec: triggers: - name: github-listener interceptors: - ref: name: "github" kind: ClusterInterceptor apiVersion: triggers.tekton.dev params: - name: "secretRef" value: secretName: github-secret secretKey: secretToken - name: "eventTypes" value: ["pull_request", "push"] - name: "addChangedFiles" value: enabled: true personalAccessToken: secretName: github-pat secretKey: token - ref: name: cel params: - name: filter value: extensions.changed_files.matches('controllers/') ...
- Save the configuration file.
1.12.2. Validating pull requests using GitHub Interceptors
You can use GitHub Interceptor to validate the processing of pull requests based on the GitHub owners configured for a repository. This validation helps you to prevent unnecessary execution of a PipelineRun or TaskRun object. GitHub Interceptor processes a pull request only if the user name is listed as an owner or if a configurable comment is issued by an owner of the repository. For example, when you comment /ok-to-test on a pull request as an owner, a PipelineRun or TaskRun is triggered.
Owners are configured in an OWNERS file at the root of the repository.
Prerequisites
- You have installed the Red Hat OpenShift Pipelines Operator.
Procedure
- Create a secret string value.
- Configure the GitHub webhook with that value.
-
Create a Kubernetes secret named
secretRefthat contains your secret value. - Pass the Kubernetes secret as a reference to your GitHub Interceptor.
-
Create an
ownersfile and add the list of approvers into theapproverssection. Perform one of the following steps:
For a public GitHub repository, set the value of the
githubOwnersparameter totruein the YAML configuration file shown below:apiVersion: triggers.tekton.dev/v1beta1 kind: EventListener metadata: name: github-owners-listener spec: triggers: - name: github-listener interceptors: - ref: name: "github" kind: ClusterInterceptor apiVersion: triggers.tekton.dev params: - name: "secretRef" value: secretName: github-secret secretKey: secretToken - name: "eventTypes" value: ["pull_request", "issue_comment"] - name: "githubOwners" value: enabled: true checkType: none ...For a private GitHub repository, set the value of the
githubOwnersparameter totrueand provide the access token details,secretNameandsecretKeyin the YAML configuration file shown below:apiVersion: triggers.tekton.dev/v1beta1 kind: EventListener metadata: name: github-owners-listener spec: triggers: - name: github-listener interceptors: - ref: name: "github" kind: ClusterInterceptor apiVersion: triggers.tekton.dev params: - name: "secretRef" value: secretName: github-secret secretKey: secretToken - name: "eventTypes" value: ["pull_request", "issue_comment"] - name: "githubOwners" value: enabled: true personalAccessToken: secretName: github-token secretKey: secretToken checkType: all ...NoteThe
checkTypeparameter is used to specify the GitHub owners who need authentication. You can set its value toorgMembers,repoMembers, orall.
- Save the configuration file.
Chapter 2. Working with Red Hat OpenShift Pipelines in the web console
You can use the Administrator or Developer perspective to create and modify Pipeline, PipelineRun, and Repository objects from the Pipelines page in the OpenShift Container Platform web console. You can also use the +Add page in the Developer perspective of the web console to create CI/CD pipelines for your software delivery process.
In OpenShift Container Platform versions 4.12 and 4.13, the tekton.dev/v1 API version is not supported when using the web console to enter YAML manifests for . For example, when creating pipelines and tasks using the YAML view in the web console, the API version in the data does not match the expected API version error message displays. Use the apiVersion: tekton.dev/v1beta1 setting instead. OpenShift Container Platform versions 4.14 and later support the tekton.dev/v1 API version when using the web console to enter YAML manifests.
2.1. Working with Red Hat OpenShift Pipelines in the Developer perspective
In the Developer perspective, you can access the following options for creating pipelines from the +Add page:
- Use the +Add → Pipelines → Pipeline builder option to create customized pipelines for your application.
- Use the +Add → From Git option to create pipelines using pipeline templates and resources while creating an application.
After you create the pipelines for your application, you can view and visually interact with the deployed pipelines in the Pipelines view. You can also use the Topology view to interact with the pipelines created using the From Git option. You must apply custom labels to pipelines created using the Pipeline builder to see them in the Topology view.
Prerequisites
- You have access to an OpenShift Container Platform cluster and have switched to the Developer perspective.
- You have the OpenShift Pipelines Operator installed in your cluster.
- You are a cluster administrator or a user with create and edit permissions.
- You have created a project.
2.1.1. Constructing pipelines using the Pipeline builder
In the Developer perspective of the console, you can use the +Add → Pipeline → Pipeline builder option to:
- Configure pipelines using either the Pipeline builder or the YAML view.
- Construct a pipeline flow using existing tasks and cluster tasks. When you install the OpenShift Pipelines Operator, it adds reusable pipeline cluster tasks to your cluster.
In Red Hat OpenShift Pipelines 1.10, cluster task functionality is deprecated and is planned to be removed in a future release.
- Specify the type of resources required for the pipeline run, and if required, add additional parameters to the pipeline.
- Reference these pipeline resources in each of the tasks in the pipeline as input and output resources.
- If required, reference any additional parameters added to the pipeline in the task. The parameters for a task are prepopulated based on the specifications of the task.
- Use the Operator-installed, reusable snippets and samples to create detailed pipelines.
- Search and add tasks from your configured local Tekton Hub instance.
In the developer perspective, you can create a customized pipeline using your own set of curated tasks. To search, install, and upgrade your tasks directly from the developer console, your cluster administrator needs to install and deploy a local Tekton Hub instance and link that hub to the OpenShift Container Platform cluster. For more details, see Using Tekton Hub with OpenShift Pipelines in the Additional resources section. If you do not deploy any local Tekton Hub instance, by default, you can only access the cluster tasks, namespace tasks and public Tekton Hub tasks.
Procedure
- In the +Add view of the Developer perspective, click the Pipeline tile to see the Pipeline builder page.
Configure the pipeline using either the Pipeline builder view or the YAML view.
NoteThe Pipeline builder view supports a limited number of fields whereas the YAML view supports all available fields. Optionally, you can also use the Operator-installed, reusable snippets and samples to create detailed pipelines.
Figure 2.1. YAML view

Configure your pipeline by using Pipeline builder:
- In the Name field, enter a unique name for the pipeline.
In the Tasks section:
- Click Add task.
- Search for a task using the quick search field and select the required task from the displayed list.
Click Add or Install and add. In this example, use the s2i-nodejs task.
NoteThe search list contains all the Tekton Hub tasks and tasks available in the cluster. Also, if a task is already installed it will show Add to add the task whereas it will show Install and add to install and add the task. It will show Update and add when you add the same task with an updated version.
To add sequential tasks to the pipeline:
- Click the plus icon to the right or left of the task → click Add task.
- Search for a task using the quick search field and select the required task from the displayed list.
Click Add or Install and add.
Figure 2.2. Pipeline builder

To add a final task:
- Click the Add finally task → Click Add task.
- Search for a task using the quick search field and select the required task from the displayed list.
- Click Add or Install and add.
In the Resources section, click Add Resources to specify the name and type of resources for the pipeline run. These resources are then used by the tasks in the pipeline as inputs and outputs. For this example:
-
Add an input resource. In the Name field, enter
Source, and then from the Resource Type drop-down list, select Git. Add an output resource. In the Name field, enter
Img, and then from the Resource Type drop-down list, select Image.NoteA red icon appears next to the task if a resource is missing.
-
Add an input resource. In the Name field, enter
- Optional: The Parameters for a task are pre-populated based on the specifications of the task. If required, use the Add Parameters link in the Parameters section to add additional parameters.
- In the Workspaces section, click Add workspace and enter a unique workspace name in the Name field. You can add multiple workspaces to the pipeline.
In the Tasks section, click the s2i-nodejs task to see the side panel with details for the task. In the task side panel, specify the resources and parameters for the s2i-nodejs task:
- If required, in the Parameters section, add more parameters to the default ones, by using the $(params.<param-name>) syntax.
-
In the Image section, enter
Imgas specified in the Resources section. - Select a workspace from the source drop-down under Workspaces section.
- Add resources, parameters, and workspaces to the openshift-client task.
- Click Create to create and view the pipeline in the Pipeline Details page.
- Click the Actions drop-down menu then click Start, to see the Start Pipeline page.
- The Workspaces section lists the workspaces you created earlier. Use the respective drop-down to specify the volume source for your workspace. You have the following options: Empty Directory, Config Map, Secret, PersistentVolumeClaim, or VolumeClaimTemplate.
2.1.2. Creating OpenShift Pipelines along with applications
To create pipelines along with applications, use the From Git option in the Add+ view of the Developer perspective. You can view all of your available pipelines and select the pipelines you want to use to create applications while importing your code or deploying an image.
The Tekton Hub Integration is enabled by default and you can see tasks from the Tekton Hub that are supported by your cluster. Administrators can opt out of the Tekton Hub Integration and the Tekton Hub tasks will no longer be displayed. You can also check whether a webhook URL exists for a generated pipeline. Default webhooks are added for the pipelines that are created using the +Add flow and the URL is visible in the side panel of the selected resources in the Topology view.
2.1.3. Adding a GitHub repository containing pipelines
In the Developer perspective, you can add your GitHub repository containing pipelines to the OpenShift Container Platform cluster. This allows you to run pipelines and tasks from your GitHub repository on the cluster when relevant Git events, such as push or pull requests, are triggered.
You can add both public and private GitHub repositories.
Prerequisites
- Ensure that your cluster administrator has configured the required GitHub applications in the administrator perspective.
Procedure
- In the Developer perspective, choose the namespace or project in which you want to add your GitHub repository.
- Navigate to Pipelines using the left navigation pane.
- Click Create → Repository on the right side of the Pipelines page.
- Enter your Git Repo URL and the console automatically fetches the repository name.
Click Show configuration options. By default, you see only one option Setup a webhook. If you have a GitHub application configured, you see two options:
- Use GitHub App: Select this option to install your GitHub application in your repository.
- Setup a webhook: Select this option to add a webhook to your GitHub application.
Set up a webhook using one of the following options in the Secret section:
Setup a webhook using Git access token:
- Enter your personal access token.
Click Generate corresponding to the Webhook secret field to generate a new webhook secret.
 Note
NoteYou can click the link below the Git access token field if you do not have a personal access token and want to create a new one.
Setup a webhook using Git access token secret:
Select a secret in your namespace from the dropdown list. Depending on the secret you selected, a webhook secret is automatically generated.

Add the webhook secret details to your GitHub repository:
- Copy the webhook URL and navigate to your GitHub repository settings.
- Click Webhooks → Add webhook.
- Copy the Webhook URL from the developer console and paste it in the Payload URL field of the GitHub repository settings.
- Select the Content type.
- Copy the Webhook secret from the developer console and paste it in the Secret field of the GitHub repository settings.
- Select one of the SSL verification options.
- Select the events to trigger this webhook.
- Click Add webhook.
- Navigate back to the developer console and click Add.
- Read the details of the steps that you have to perform and click Close.
- View the details of the repository you just created.
When importing an application using Import from Git and the Git repository has a .tekton directory, you can configure pipelines-as-code for your application.
2.1.4. Interacting with pipelines using the Developer perspective
The Pipelines view in the Developer perspective lists all the pipelines in a project, along with the following details:
- The namespace in which the pipeline was created
- The last pipeline run
- The status of the tasks in the pipeline run
- The status of the pipeline run
- The creation time of the last pipeline run
Procedure
- In the Pipelines view of the Developer perspective, select a project from the Project drop-down list to see the pipelines in that project.
Click the required pipeline to see the Pipeline details page.
By default, the Details tab displays a visual representation of all the
serialtasks,paralleltasks,finallytasks, andwhenexpressions in the pipeline. The tasks and thefinallytasks are listed in the lower right portion of the page.To view the task details, click the listed Tasks and Finally tasks. In addition, you can do the following:
- Use the zoom in, zoom out, fit to screen, and reset view features using the standard icons displayed in the lower left corner of the Pipeline details visualization.
- Change the zoom factor of the pipeline visualization using the mouse wheel.
Hover over the tasks and see the task details.
Figure 2.3. Pipeline details

Optional: On the Pipeline details page, click the Metrics tab to see the following information about pipelines:
- Pipeline Success Ratio
- Number of Pipeline Runs
- Pipeline Run Duration
Task Run Duration
You can use this information to improve the pipeline workflow and eliminate issues early in the pipeline lifecycle.
- Optional: Click the YAML tab to edit the YAML file for the pipeline.
Optional: Click the Pipeline Runs tab to see the completed, running, or failed runs for the pipeline.
The Pipeline Runs tab provides details about the pipeline run, the status of the task, and a link to debug failed pipeline runs. Use the Options menu
 to stop a running pipeline, to rerun a pipeline using the same parameters and resources as that of the previous pipeline execution, or to delete a pipeline run.
Click the required pipeline run to see the Pipeline Run details page. By default, the Details tab displays a visual representation of all the serial tasks, parallel tasks,
finallytasks, and when expressions in the pipeline run. The results for successful runs are displayed under the Pipeline Run results pane at the bottom of the page. Additionally, you would only be able to see tasks from Tekton Hub which are supported by the cluster. While looking at a task, you can click the link beside it to jump to the task documentation.NoteThe Details section of the Pipeline Run Details page displays a Log Snippet of the failed pipeline run. Log Snippet provides a general error message and a snippet of the log. A link to the Logs section provides quick access to the details about the failed run.
On the Pipeline Run details page, click the Task Runs tab to see the completed, running, and failed runs for the task.
The Task Runs tab provides information about the task run along with the links to its task and pod, and also the status and duration of the task run. Use the Options menu
to delete a task run.
NoteThe TaskRuns list page features a Manage columns button, which you can also use to add a Duration column.
Click the required task run to see the Task Run details page. The results for successful runs are displayed under the Task Run results pane at the bottom of the page.
NoteThe Details section of the Task Run details page displays a Log Snippet of the failed task run. Log Snippet provides a general error message and a snippet of the log. A link to the Logs section provides quick access to the details about the failed task run.
- Click the Parameters tab to see the parameters defined in the pipeline. You can also add or edit additional parameters, as required.
- Click the Resources tab to see the resources defined in the pipeline. You can also add or edit additional resources, as required.
2.1.5. Starting pipelines from Pipelines view
After you create a pipeline, you need to start it to execute the included tasks in the defined sequence. You can start a pipeline from the Pipelines view, the Pipeline Details page, or the Topology view.
Procedure
To start a pipeline using the Pipelines view:
-
In the Pipelines view of the Developer perspective, click the Options
menu adjoining a pipeline, and select Start.
The Start Pipeline dialog box displays the Git Resources and the Image Resources based on the pipeline definition.
NoteFor pipelines created using the From Git option, the Start Pipeline dialog box also displays an
APP_NAMEfield in the Parameters section, and all the fields in the dialog box are prepopulated by the pipeline template.- If you have resources in your namespace, the Git Resources and the Image Resources fields are prepopulated with those resources. If required, use the drop-downs to select or create the required resources and customize the pipeline run instance.
Optional: Modify the Advanced Options to add the credentials that authenticate the specified private Git server or the image registry.
- Under Advanced Options, click Show Credentials Options and select Add Secret.
In the Create Source Secret section, specify the following:
- A unique Secret Name for the secret.
- In the Designated provider to be authenticated section, specify the provider to be authenticated in the Access to field, and the base Server URL.
Select the Authentication Type and provide the credentials:
For the Authentication Type
Image Registry Credentials, specify the Registry Server Address that you want to authenticate, and provide your credentials in the Username, Password, and Email fields.Select Add Credentials if you want to specify an additional Registry Server Address.
-
For the Authentication Type
Basic Authentication, specify the values for the UserName and Password or Token fields. For the Authentication Type
SSH Keys, specify the value of the SSH Private Key field.NoteFor basic authentication and SSH authentication, you can use annotations such as:
-
tekton.dev/git-0: https://github.com -
tekton.dev/git-1: https://gitlab.com.
-
- Select the check mark to add the secret.
You can add multiple secrets based upon the number of resources in your pipeline.
- Click Start to start the pipeline.
The PipelineRun details page displays the pipeline being executed. After the pipeline starts, the tasks and steps within each task are executed. You can:
- Use the zoom in, zoom out, fit to screen, and reset view features using the standard icons, which are in the lower left corner of the PipelineRun details page visualization.
- Change the zoom factor of the pipelinerun visualization using the mouse wheel. At specific zoom factors, the background color of the tasks changes to indicate the error or warning status.
- Hover over the tasks to see the details, such as the time taken to execute each step, task name, and task status.
- Hover over the tasks badge to see the total number of tasks and tasks completed.
- Click on a task to see the logs for each step in the task.
- Click the Logs tab to see the logs relating to the execution sequence of the tasks. You can also expand the pane and download the logs individually or in bulk, by using the relevant button.
Click the Events tab to see the stream of events generated by a pipeline run.
You can use the Task Runs, Logs, and Events tabs to assist in debugging a failed pipeline run or a failed task run.
Figure 2.4. Pipeline run details

2.1.6. Starting pipelines from Topology view
For pipelines created using the From Git option, you can use the Topology view to interact with pipelines after you start them:
To see the pipelines created using Pipeline builder in the Topology view, customize the pipeline labels to link the pipeline with the application workload.
Procedure
- Click Topology in the left navigation panel.
- Click the application to display Pipeline Runs in the side panel.
In Pipeline Runs, click Start Last Run to start a new pipeline run with the same parameters and resources as the previous one. This option is disabled if a pipeline run has not been initiated. You can also start a pipeline run when you create it.
Figure 2.5. Pipelines in Topology view
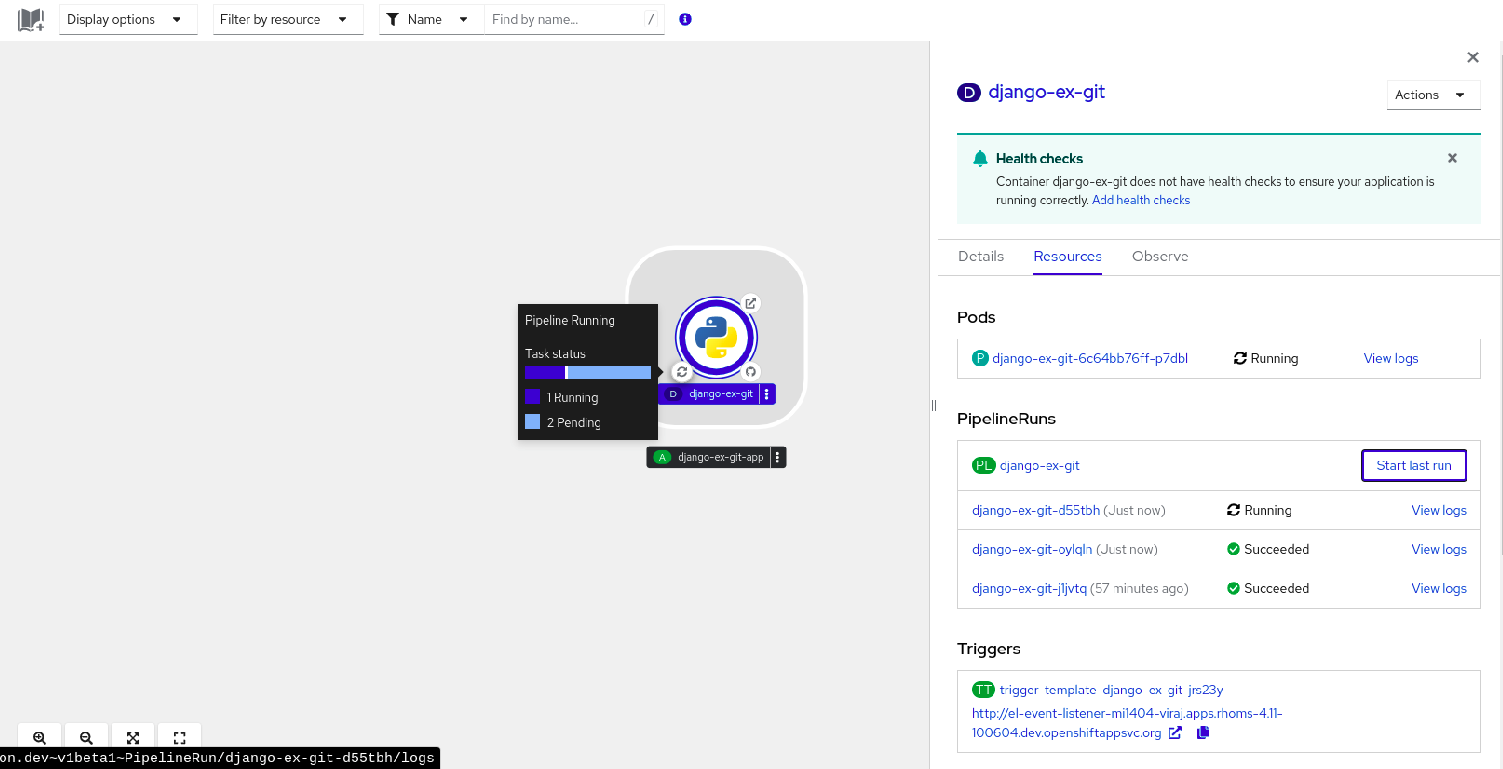
In the Topology page, hover to the left of the application to see the status of its pipeline run. After a pipeline is added, a bottom left icon indicates that there is an associated pipeline.
2.1.7. Interacting with pipelines from Topology view
The side panel of the application node in the Topology page displays the status of a pipeline run and you can interact with it.
- If a pipeline run does not start automatically, the side panel displays a message that the pipeline cannot be automatically started, hence it would need to be started manually.
- If a pipeline is created but the user has not started the pipeline, its status is not started. When the user clicks the Not started status icon, the start dialog box opens in the Topology view.
- If the pipeline has no build or build config, the Builds section is not visible. If there is a pipeline and build config, the Builds section is visible.
- The side panel displays a Log Snippet when a pipeline run fails on a specific task run. You can view the Log Snippet in the Pipeline Runs section, under the Resources tab. It provides a general error message and a snippet of the log. A link to the Logs section provides quick access to the details about the failed run.
2.1.8. Editing pipelines
You can edit the pipelines in your cluster using the Developer perspective of the web console:
Procedure
- In the Pipelines view of the Developer perspective, select the pipeline you want to edit to see the details of the pipeline. In the Pipeline Details page, click Actions and select Edit Pipeline.
On the Pipeline builder page, you can perform the following tasks:
- Add additional tasks, parameters, or resources to the pipeline.
- Click the task you want to modify to see the task details in the side panel and modify the required task details, such as the display name, parameters, and resources.
- Alternatively, to delete the task, click the task, and in the side panel, click Actions and select Remove Task.
- Click Save to save the modified pipeline.
2.1.9. Deleting pipelines
You can delete the pipelines in your cluster using the Developer perspective of the web console.
Procedure
-
In the Pipelines view of the Developer perspective, click the Options
menu adjoining a Pipeline, and select Delete Pipeline.
- In the Delete Pipeline confirmation prompt, click Delete to confirm the deletion.
2.3. Creating pipeline templates in the Administrator perspective
As a cluster administrator, you can create pipeline templates that developers can reuse when they create a pipeline on the cluster.
Prerequisites
- You have access to an OpenShift Container Platform cluster with cluster administrator permissions, and have switched to the Administrator perspective.
- You have installed the OpenShift Pipelines Operator in your cluster.
Procedure
- Navigate to the Pipelines page to view existing pipeline templates.
-
Click the
 icon to go to the Import YAML page.
Add the YAML for your pipeline template. The template must include the following information:
apiVersion: tekton.dev/v1
kind: Pipeline
metadata:
# ...
  namespace: openshift
1 labels: pipeline.openshift.io/runtime: <runtime>2 pipeline.openshift.io/type: <pipeline-type>3 # ...- 1
- The template must be created in the
openshiftnamespace. - 2
- The template must contain the
pipeline.openshift.io/runtimelabel. The accepted runtime values for this label arenodejs,golang,dotnet,java,php,ruby,perl,python,nginx, andhttpd. - 3
- The template must contain the
pipeline.openshift.io/type:label. The accepted type values for this label areopenshift,knative, andkubernetes.
- Click Create. After the pipeline has been created, you are taken to the Pipeline details page, where you can view information about or edit your pipeline.
2.4. Pipeline execution statistics in the web console
You can view statistics related to execution of pipelines in the web console.
To view the statistic information, you must complete the following steps:
- Install Tekton Results. For more information about installing Tekton Results, see Using Tekton Results for OpenShift Pipelines observability in the Additional resources section.
- Enable the OpenShift Pipelines console plugin.
Statistic information is available for all pipelines together and for each individual pipeline.
The OpenShift Pipelines Pipelines console plugin is a Technology Preview feature only. Technology Preview features are not supported with Red Hat production service level agreements (SLAs) and might not be functionally complete. Red Hat does not recommend using them in production. These features provide early access to upcoming product features, enabling customers to test functionality and provide feedback during the development process.
For more information about the support scope of Red Hat Technology Preview features, see Technology Preview Features Support Scope.
2.4.1. Enabling the OpenShift Pipelines console plugin
To view the statistic information, you must first enable the OpenShift Pipelines console plugin.
Prerequisites
- You installed the Red Hat OpenShift Pipelines Operator in your cluster.
- You are logged on to the web console with cluster administrator permissions.
Procedure
- In the Administrator perspective of the web console, select Operators → Installed Operators.
- Click Red Hat OpenShift Pipelines in the table of Operators.
- In the right pane on the screen, check the status label under Console plugin. The label is either Enabled or Disabled.
- If the label is Disabled, click this label. In the window that displays, select Enable and then click Save.
2.4.2. Viewing the statistics for all pipelines together
You can view consolidated statistic information related to all pipelines on the system.
Prerequisites
- You installed the Red Hat OpenShift Pipelines Operator in your cluster.
- You installed Tekton Results.
- You installed the OpenShift Pipelines web console plugin.
Procedure
In the Administrator perspective of the web console, select Pipelines → Overview.
A statistics overview displays. This overview includes the following information: A graph reflecting the number and status of pipeline runs over a time period The total, average, and maximum durations of pipeline execution over the same period. ** The total number of pipeline runs over the same period.
A table of pipelines also displays. This table lists all pipelines that were run in the time period, showing their duration and success rate.
Optional: Change the settings of the statistics display as necessary:
- Project: The project or namespace to display statistics for.
- Time range: The time period to display statistics for.
- Refresh interval: How often Red Hat OpenShift Pipelines must update the data in the window while you are viewing it.
2.4.3. Viewing the statistics for a specific pipeline
You can view statistic information related to a particular pipeline.
Prerequisites
- You installed the Red Hat OpenShift Pipelines Operator in your cluster.
- You installed Tekton Results.
- You installed the OpenShift Pipelines web console plugin.
Procedure
- In the Administrator perspective of the web console, select Pipelines → Pipelines.
- Click a pipeline in the list of pipelines. The Pipeline details view displays.
Click the Metrics tab.
A statistics overview displays. This overview includes the following information: A graph reflecting the number and status of pipeline runs over a time period The total, average, and maximum durations of pipeline execution over the same period. ** The total number of pipeline runs over the same period.
Optional: Change the settings of the statistics display as necessary:
- Project: The project or namespace to display statistics for.
- Time range: The time period to display statistics for.
- Refresh interval: How often Red Hat OpenShift Pipelines must update the data in the window while you are viewing it.
Chapter 3. Specifying remote pipelines and tasks using resolvers
Pipelines and tasks are reusable blocks for your CI/CD processes. You can reuse pipelines or tasks that you previously developed, or that were developed by others, without having to copy and paste their definitions. These pipelines or tasks can be available from several types of sources, from other namespaces on your cluster to public catalogs.
In a pipeline run resource, you can specify a pipeline from an existing source. In a pipeline resource or a task run resource, you can specify a task from an existing source.
In these cases, the resolvers in Red Hat OpenShift Pipelines retrieve the pipeline or task definition from the specified source at run time.
The following resolvers are available in a default installaton of Red Hat OpenShift Pipelines:
- Hub resolver
- Retrieves a task or pipeline from the Pipelines Catalog available on Artifact Hub or Tekton Hub.
- Bundles resolver
- Retrieves a task or pipeline from a Tekton bundle, which is an OCI image available from any OCI repository, such as an OpenShift container repository.
- Cluster resolver
- Retrieves a task or pipeline that is already created on the same OpenShift Container Platform cluster in a specific namespace.
- Git resolver
- Retrieves a task or pipeline binding from a Git repository. You must specify the repository, the branch, and the path.
- HTTP resolver
- Retrieves a task or pipeline from a remote HTTP or HTTPS URL. You must specify the URL for authentication.
3.1. Specifying a remote pipeline or task from a Tekton catalog
You can use the hub resolver to specify a remote pipeline or task that is defined either in a public Tekton catalog of Artifact Hub or in an instance of Tekton Hub.
The Artifact Hub project is not supported with Red Hat OpenShift Pipelines. Only the configuration of Artifact Hub is supported.
3.1.1. Configuring the hub resolver
You can change the default hub for pulling a resource, and the default catalog settings, by configuring the hub resolver.
Procedure
To edit the
TektonConfigcustom resource, enter the following command:$ oc edit TektonConfig configIn the
TektonConfigcustom resource, edit thepipeline.hub-resolver-configspec:apiVersion: operator.tekton.dev/v1alpha1 kind: TektonConfig metadata: name: config spec: pipeline: hub-resolver-config: default-tekton-hub-catalog: Tekton1 default-artifact-hub-task-catalog: tekton-catalog-tasks2 default-artifact-hub-pipeline-catalog: tekton-catalog-pipelines3 defailt-kind: pipeline4 default-type: tekton5 tekton-hub-api: "https://my-custom-tekton-hub.example.com"6 artifact-hub-api: "https://my-custom-artifact-hub.example.com"7 - 1
- The default Tekton Hub catalog for pulling a resource.
- 2
- The default Artifact Hub catalog for pulling a task resource.
- 3
- The default Artifact Hub catalog for pulling a pipeline resource.
- 4
- The default object kind for references.
- 5
- The default hub for pulling a resource, either
artifactfor Artifact Hub ortektonfor Tekton Hub. - 6
- The Tekton Hub API used, if the
default-typeoption is set totekton. - 7
- Optional: The Artifact Hub API used, if the
default-typeoption is set toartifact.
ImportantIf you set the
default-typeoption totekton, you must configure your own instance of the Tekton Hub by setting thetekton-hub-apivalue.If you set the
default-typeoption toartifactthen the resolver uses the public hub API at https://artifacthub.io/ by default. You can configure your own Artifact Hub API by setting theartifact-hub-apivalue.
3.1.2. Specifying a remote pipeline or task using the hub resolver
When creating a pipeline run, you can specify a remote pipeline from Artifact Hub or Tekton Hub. When creating a pipeline or a task run, you can specify a remote task from Artifact Hub or Tekton Hub.
Procedure
To specify a remote pipeline or task from Artifact Hub or Tekton Hub, use the following reference format in the
pipelineRefortaskRefspec:# ... resolver: hub params: - name: catalog value: <catalog> - name: type value: <catalog_type> - name: kind value: [pipeline|task] - name: name value: <resource_name> - name: version value: <resource_version> # ...Expand Table 3.1. Supported parameters for the hub resolver Parameter Description Example value catalogThe catalog for pulling the resource.
Default:
tekton-catalog-tasks(for thetaskkind);tekton-catalog-pipelines(for thepipelinekind).typeThe type of the catalog for pulling the resource. Either
artifactfor Artifact Hub ortektonfor Tekton Hub.Default:
artifactkindEither
taskorpipeline.Default:
tasknameThe name of the task or pipeline to fetch from the hub.
golang-buildversionThe version of the task or pipeline to fetch from the hub. You must use quotes (
") around the number."0.5.0"If the pipeline or task requires additional parameters, specify values for these parameters in the
paramssection of the specification of the pipeline, pipeline run, or task run. Theparamssection of thepipelineRefortaskRefspecification must contain only the parameters that the resolver supports.
The following example pipeline run references a remote pipeline from a catalog:
apiVersion: tekton.dev/v1
kind: PipelineRun
metadata:
  name: hub-pipeline-reference-demo
spec:
  pipelineRef:
    resolver: hub
    params:
    - name: catalog
      value: tekton-catalog-pipelines
    - name: type
      value: artifact
    - name: kind
      value: pipeline
    - name: name
      value: example-pipeline
    - name: version
      value: "0.1"
  params:
  - name: sample-pipeline-parameter
    value: test
The following example pipeline that references a remote task from a catalog:
apiVersion: tekton.dev/v1
kind: Pipeline
metadata:
  name: pipeline-with-cluster-task-reference-demo
spec:
  tasks:
  - name: "cluster-task-reference-demo"
    taskRef:
      resolver: hub
      params:
      - name: catalog
        value: tekton-catalog-tasks
      - name: type
        value: artifact
      - name: kind
        value: task
      - name: name
        value: example-task
      - name: version
        value: "0.6"
    params:
    - name: sample-task-parameter
      value: test
The following example task run that references a remote task from a catalog:
apiVersion: tekton.dev/v1
kind: TaskRun
metadata:
  name: cluster-task-reference-demo
spec:
  taskRef:
    resolver: hub
    params:
    - name: catalog
      value: tekton-catalog-tasks
    - name: type
      value: artifact
    - name: kind
      value: task
    - name: name
      value: example-task
    - name: version
      value: "0.6"
  params:
  - name: sample-task-parameter
    value: test
3.2. Specifying a remote pipeline or task from a Tekton bundle
You can use the bundles resolver to specify a remote pipeline or task from a Tekton bundle. A Tekton bundle is an OCI image available from any OCI repository, such as an OpenShift container repository.
3.2.1. Configuring the bundles resolver
You can change the default service account name and the default kind for pulling resources from a Tekton bundle by configuring the bundles resolver.
Procedure
To edit the
TektonConfigcustom resource, enter the following command:$ oc edit TektonConfig configIn the
TektonConfigcustom resource, edit thepipeline.bundles-resolver-configspec:apiVersion: operator.tekton.dev/v1alpha1 kind: TektonConfig metadata: name: config spec: pipeline: bundles-resolver-config: default-service-account: pipelines1 default-kind: task2
3.2.2. Specifying a remote pipeline or task using the bundles resolver
When creating a pipeline run, you can specify a remote pipeline from a Tekton bundle. When creating a pipeline or a task run, you can specify a remote task from a Tekton bundle.
Procedure
To specify a remote pipeline or task from a Tekton bundle, use the following reference format in the
pipelineRefortaskRefspec:# ... resolver: bundles params: - name: bundle value: <fully_qualified_image_name> - name: name value: <resource_name> - name: kind value: [pipeline|task] # ...Expand Table 3.2. Supported parameters for the bundles resolver Parameter Description Example value serviceAccountThe name of the service account to use when constructing registry credentials.
defaultbundleThe bundle URL pointing at the image to fetch.
gcr.io/tekton-releases/catalog/upstream/golang-build:0.1nameThe name of the resource to pull out of the bundle.
golang-buildkindThe kind of the resource to pull out of the bundle.
taskIf the pipeline or task requires additional parameters, specify values for these parameters in the
paramssection of the specification of the pipeline, pipeline run, or task run. Theparamssection of thepipelineRefortaskRefspecification must contain only the parameters that the resolver supports.
The following example pipeline run references a remote pipeline from a Tekton bundle:
apiVersion: tekton.dev/v1
kind: PipelineRun
metadata:
  name: bundle-pipeline-reference-demo
spec:
  pipelineRef:
    resolver: bundles
    params:
    - name: bundle
      value: registry.example.com:5000/simple/pipeline:latest
    - name: name
      value: hello-pipeline
    - name: kind
      value: pipeline
  params:
  - name: sample-pipeline-parameter
    value: test
  - name: username
    value: "pipelines"
The following example pipeline references a remote task from a Tekton bundle:
apiVersion: tekton.dev/v1
kind: Pipeline
metadata:
  name: pipeline-with-bundle-task-reference-demo
spec:
  tasks:
  - name: "bundle-task-demo"
    taskRef:
      resolver: bundles
      params:
      - name: bundle
        value: registry.example.com:5000/advanced/task:latest
      - name: name
        value: hello-world
      - name: kind
        value: task
    params:
    - name: sample-task-parameter
      value: test
The following example task run references a remote task from a Tekton bundle:
apiVersion: tekton.dev/v1
kind: TaskRun
metadata:
  name: bundle-task-reference-demo
spec:
  taskRef:
    resolver: bundles
    params:
    - name: bundle
      value: registry.example.com:5000/simple/new_task:latest
    - name: name
      value: hello-world
    - name: kind
      value: task
  params:
  - name: sample-task-parameter
    value: test
3.3. Specifying a pipeline or task from the same cluster
You can use the cluster resolver to specify a pipeline or task that is defined in a namespace on the OpenShift Container Platform cluster where Red Hat OpenShift Pipelines is running.
3.3.1. Configuring the cluster resolver
You can change the default kind and namespace for the cluster resolver, or limit the namespaces that the cluster resolver can use.
Procedure
To edit the
TektonConfigcustom resource, enter the following command:$ oc edit TektonConfig configIn the
TektonConfigcustom resource, edit thepipeline.cluster-resolver-configspec:apiVersion: operator.tekton.dev/v1alpha1 kind: TektonConfig metadata: name: config spec: pipeline: cluster-resolver-config: default-kind: pipeline1 default-namespace: namespace12 allowed-namespaces: namespace1, namespace23 blocked-namespaces: namespace3, namespace44 - 1
- The default resource kind to fetch, if not specified in parameters.
- 2
- The default namespace for fetching resources, if not specified in parameters.
- 3
- A comma-separated list of namespaces that the resolver is allowed to access. If this key is not defined, all namespaces are allowed.
- 4
- An optional comma-separated list of namespaces which the resolver is blocked from accessing. If this key is not defined, all namespaces are allowed.
3.3.2. Specifying a pipeline or task from the same cluster using the cluster resolver
When creating a pipeline run, you can specify a pipeline that exists on the same cluster. When creating a pipeline or a task run, you can specify a task that exists on the the same cluster.
Procedure
To specify a pipeline or task from the same cluster, use the following reference format in the
pipelineRefortaskRefspec:# ... resolver: cluster params: - name: name value: <name> - name: namespace value: <namespace> - name: kind value: [pipeline|task] # ...Expand Table 3.3. Supported parameters for the cluster resolver Parameter Description Example value nameThe name of the resource to fetch.
some-pipelinenamespaceThe namespace in the cluster containing the resource.
other-namespacekindThe kind of the resource to fetch.
pipelineIf the pipeline or task requires additional parameters, provide these parameters in
params.
The following example pipeline run references a pipeline from the same cluster:
apiVersion: tekton.dev/v1
kind: PipelineRun
metadata:
  name: cluster-pipeline-reference-demo
spec:
  pipelineRef:
    resolver: cluster
    params:
    - name: name
      value: some-pipeline
    - name: namespace
      value: test-namespace
    - name: kind
      value: pipeline
  params:
  - name: sample-pipeline-parameter
    value: test
The following example pipeline references a task from the same cluster:
apiVersion: tekton.dev/v1
kind: Pipeline
metadata:
  name: pipeline-with-cluster-task-reference-demo
spec:
  tasks:
  - name: "cluster-task-reference-demo"
    taskRef:
      resolver: cluster
      params:
      - name: name
        value: some-task
      - name: namespace
        value: test-namespace
      - name: kind
        value: task
    params:
    - name: sample-task-parameter
      value: test
The following example task run references a task from the same cluster:
apiVersion: tekton.dev/v1
kind: TaskRun
metadata:
  name: cluster-task-reference-demo
spec:
  taskRef:
    resolver: cluster
    params:
    - name: name
      value: some-task
    - name: namespace
      value: test-namespace
    - name: kind
      value: task
  params:
  - name: sample-task-parameter
    value: test
3.4. Specifying a remote pipeline or task with anonymous Git cloning
You can use the Git resolver to access a remote pipeline or task from a Git repository. The repository must include a YAML file that defines the pipeline or task. For anonymous access, you can clone repositories with the resolver without needing authentication credentials.
3.4.1. Configuring the Git resolver for anonymous Git cloning
If you want to use anonymous Git cloning, you can configure the default Git revision, fetch timeout, and default repository URL for pulling remote pipelines and tasks from a Git repository.
Procedure
To edit the
TektonConfigcustom resource, enter the following command:$ oc edit TektonConfig configIn the
TektonConfigcustom resource, edit thepipeline.git-resolver-configspec:apiVersion: operator.tekton.dev/v1alpha1 kind: TektonConfig metadata: name: config spec: pipeline: git-resolver-config: default-revision: main1 fetch-timeout: 1m2 default-url: https://github.com/tektoncd/catalog.git3 - 1
- The default Git revision to use if none is specified.
- 2
- The maximum time any single Git clone resolution may take, for example,
1m,2s,700ms. Red Hat OpenShift Pipelines also enforces a global maximum timeout of 1 minute on all resolution requests. - 3
- The default Git repository URL for anonymous cloning if none is specified.
3.4.2. Specifying a remote pipeline or task by using the Git resolver for anonymous cloning
When creating a pipeline run, you can specify a remote pipeline from a Git repository by using anonymous cloning. When creating a pipeline or a task run, you can specify a remote task from a Git repository.
Procedure
To specify a remote pipeline or task from a Git repository, use the following reference format in the
pipelineRefortaskRefspec:# ... resolver: git params: - name: url value: <git_repository_url> - name: revision value: <branch_name> - name: pathInRepo value: <path_in_repository> # ...Expand Table 3.4. Supported parameters for the Git resolver Parameter Description Example value urlThe URL of the repository, when using anonymous cloning.
https://github.com/tektoncd/catalog.gitrevisionThe Git revision in the repository. You can specify a branch name, a tag name, or a commit SHA hash.
aeb957601cf41c012be462827053a21a420befcamainv0.38.2pathInRepoThe path name of the YAML file in the repository.
task/golang-build/0.3/golang-build.yamlNoteTo clone and fetch the repository anonymously, use the
urlparameter. Do not specify theurlparameter and therepoparameter together.If the pipeline or task requires additional parameters, provide these parameters in
params.
The following example pipeline run references a remote pipeline from a Git repository:
apiVersion: tekton.dev/v1beta1
kind: PipelineRun
metadata:
  name: git-pipeline-reference-demo
spec:
  pipelineRef:
    resolver: git
    params:
      - name: url
        value: https://github.com/tektoncd/catalog.git
      - name: revision
        value: main
      - name: pathInRepo
        value: pipeline/simple/0.1/simple.yaml
  params:
    - name: name
      value: "testPipelineRun"
    - name: sample-pipeline-parameter
      value: test
The following example pipeline references a remote task from a Git repository:
apiVersion: tekton.dev/v1
kind: Pipeline
metadata:
  name: pipeline-with-git-task-reference-demo
spec:
  tasks:
    - name: "git-task-reference-demo"
      taskRef:
        resolver: git
        params:
          - name: url
            value: https://github.com/tektoncd/catalog.git
          - name: revision
            value: main
          - name: pathInRepo
            value: task/git-clone/0.6/git-clone.yaml
      params:
      - name: sample-task-parameter
        value: test
The following example task run references a remote task from a Git repository:
apiVersion: tekton.dev/v1beta1
kind: TaskRun
metadata:
  name: git-task-reference-demo
spec:
  taskRef:
    resolver: git
    params:
      - name: url
        value: https://github.com/tektoncd/catalog.git
      - name: revision
        value: main
      - name: pathInRepo
        value: task/git-clone/0.6/git-clone.yaml
  params:
  - name: sample-task-parameter
    value: test
3.5. Specifying a remote pipeline or task with an authenticated API
You can specify a remote pipeline or task from a Git repository by using the Git resolver. The repository must contain a YAML file that defines the pipeline or task. You can securely access repositories by using an authenticated API, which supports user authentication.
3.5.1. Configuring the Git resolver for an authenticated API
For an authenticated Source Control Management (SCM) API, you must set the configuration for the authenticated Git connection.
You can use Git repository providers that are supported by the go-scm library. Not all go-scm implementations have been tested with the Git resolver, but the following providers are known to work:
-
github.comand GitHub Enterprise -
gitlab.comand self-hosted Gitlab - Gitea
- BitBucket Server
- BitBucket Cloud
- You can configure Git connections by using the authenticated SCM API. You can provide a security token that enables all users on your cluster to access one repository. Additionally, you can specify different SCM providers and tokens for specific pipelines or tasks.
- If you configure the Git resolver to use the authenticated SCM API, you can also use anonymous Git clone references to retrieve pipelines and tasks.
Procedure
To edit the
TektonConfigcustom resource, enter the following command:$ oc edit TektonConfig configIn the
TektonConfigcustom resource, edit thepipeline.git-resolver-configspec:apiVersion: operator.tekton.dev/v1alpha1 kind: TektonConfig metadata: name: config spec: pipeline: git-resolver-config: default-revision: main1 fetch-timeout: 1m2 scm-type: github3 server-url: api.internal-github.com4 api-token-secret-name: github-auth-secret5 api-token-secret-key: github-auth-key6 api-token-secret-namespace: github-auth-namespace7 default-org: tektoncd8 - 1
- The default Git revision to use if none is specified.
- 2
- The maximum time any single Git clone resolution may take, for example,
1m,2s,700ms. Red Hat OpenShift Pipelines also enforces a global maximum timeout of 1 minute on all resolution requests. - 3
- The SCM provider type.
- 4
- The base URL for use with the authenticated SCM API. This setting is not required if you are using
github.com,gitlab.com, or BitBucket Cloud. - 5
- The name of the secret that contains the SCM provider API token.
- 6
- The key within the token secret that contains the token.
- 7
- The namespace containing the token secret, if not
default. - 8
- Optional: The default organization for the repository, when using the authenticated API. This organization is used if you do not specify an organization in the resolver parameters.
The scm-type, api-token-secret-name, and api-token-secret-key settings are required to use the authenticated SCM API.
3.5.2. Specifying a remote pipeline or task using the Git resolver with the authenticated SCM API
When creating a pipeline run, you can specify a remote pipeline from a Git repository using the authenticated SCM API. When creating a pipeline or a task run, you can specify a remote task from a Git repository.
Prerequisites
- If you want to use the authenticated SCM API, you must configure the authenticated Git connection for the Git resolver.
Procedure
To specify a remote pipeline or task from a Git repository, use the following reference format in the
pipelineRefortaskRefspec:# ... resolver: git params: - name: org value: <git_organization_name> - name: repo value: <git_repository_name> - name: revision value: <branch_name> - name: pathInRepo value: <path_in_repository> # ...Expand Table 3.5. Supported parameters for the Git resolver Parameter Description Example value orgThe organization for the repository, when using the authenticated SCM API.
tektoncdrepoThe repository name, when using the authenticated SCM API.
test-infrarevisionThe Git revision in the repository. You can specify a branch name, a tag name, or a commit SHA hash.
aeb957601cf41c012be462827053a21a420befcamainv0.38.2pathInRepoThe path name of the YAML file in the repository.
task/golang-build/0.3/golang-build.yamlNoteTo clone and fetch the repository anonymously, use the
urlparameter. To use the authenticated SCM API, use therepoparameter. Do not specify theurlparameter and therepoparameter together.If the pipeline or task requires additional parameters, specify values for these parameters in the
paramssection of the specification of the pipeline, pipeline run, or task run. Theparamssection of thepipelineRefortaskRefspecification must contain only the parameters that the resolver supports.
The following example pipeline run references a remote pipeline from a Git repository:
apiVersion: tekton.dev/v1
kind: PipelineRun
metadata:
  name: git-pipeline-reference-demo
spec:
  pipelineRef:
    resolver: git
    params:
    - name: org
      value: tektoncd
    - name: repo
      value: catalog
    - name: revision
      value: main
    - name: pathInRepo
      value: pipeline/simple/0.1/simple.yaml
  params:
  - name: name
    value: "testPipelineRun"
  - name: sample-pipeline-parameter
    value: test
The following example pipeline references a remote task from a Git repository:
apiVersion: tekton.dev/v1
kind: Pipeline
metadata:
  name: pipeline-with-git-task-reference-demo
spec:
  tasks:
  - name: "git-task-reference-demo"
    taskRef:
      resolver: git
      params:
      - name: org
        value: tektoncd
      - name: repo
        value: catalog
      - name: revision
        value: main
      - name: pathInRepo
        value: task/git-clone/0.6/git-clone.yaml
    params:
    - name: sample-task-parameter
      value: test
The following example task run references a remote task from a Git repository:
apiVersion: tekton.dev/v1
kind: TaskRun
metadata:
  name: git-task-reference-demo
spec:
  taskRef:
    resolver: git
    params:
    - name: org
      value: tektoncd
    - name: repo
      value: catalog
    - name: revision
      value: main
    - name: pathInRepo
      value: task/git-clone/0.6/git-clone.yaml
  params:
  - name: sample-task-parameter
value: testWhen creating a pipeline run, you can specify a remote pipeline from a Git repository by using the authenticated SCM API. When creating a pipeline or a task run, you can specify a remote task from a Git repository. You can override the initial configuration settings in specific pipeline runs or tasks to customize the behavior according to different use cases.
The following example task run references a remote task from a Git repository that overrides the previous resolver configuration:
apiVersion: tekton.dev/v1beta1
kind: TaskRun
metadata:
  name: git-task-reference-demo
spec:
  taskRef:
    resolver: git
    params:
    - name: org
      value: tektoncd
    - name: repo
      value: catalog
    - name: revision
      value: main
    - name: pathInRepo
      value: task/git-clone/0.6/git-clone.yaml
    - name: token
      value: my-secret-token
    - name: tokenKey
      value: token
    - name: scmType
      value: github
    - name: serverURL
value: https://ghe.mycompany.com| Parameter | Description | Example value |
|---|---|---|
|
| The organization for the repository. |
|
| repo | The repository name. | catalog |
| revision | The Git revision in the repository. You can specify a branch name, a tag name, or a commit SHA hash. | main |
| pathInRepo | The path name of the YAML file in the repository. | task/git-clone/0.6/git-clone.yaml |
| token | The secret name used for authentication. | my-secret-token |
| tokenKey | The key name for the token. | token |
| scmType | The type of SCM (Source Control Management) system. | github |
| serverURL | The URL of the server hosting the repository. |
|
3.6. Specifying a remote pipeline or task by using the HTTP resolver
You can specify a remote pipeline or task from an HTTP or HTTPS URL by using the HTTP resolver. The URL must point to a YAML file that defines the pipeline or task.
3.6.1. Configuring the HTTP resolver
You can use the HTTP resolver to fetch pipelines or tasks from an HTTP or HTTPS URL. You can configure the default values for the HTTP resolver by editing the TektonConfig custom resource (CR).
Procedure
Edit the
TektonConfigCR by entering the following command:$ oc edit TektonConfig configIn the
TektonConfigCR, edit thepipeline.http-resolver-configspec:apiVersion: operator.tekton.dev/v1alpha1 kind: TektonConfig metadata: name: config spec: pipeline: http-resolver-config: fetch-timeout: "1m"1 - 1
- The maximum amount of time the HTTP resolver waits for a response from the server.
3.6.2. Specifying a remote pipeline or task with the HTTP Resolver
When creating a pipeline run or task run, you can specify a remote pipeline or task from an HTTP or HTTPS URL.
Procedure
Specify a remote pipeline or task from an HTTP or HTTPS URL, using the following format in the
pipelineRefortaskRefspec:# ... resolver: http params: - name: url value: <fully_qualified_http_url> # ...Expand Table 3.7. Supported parameters for the HTTP Resolver Parameter Description Example Value urlThe HTTP URL pointing to the Tekton resource to fetch.
The following example pipeline run references a remote pipeline from the same cluster:
apiVersion: tekton.dev/v1beta1
kind: PipelineRun
metadata:
  name: http-pipeline-reference-demo
spec:
  pipelineRef:
    resolver: http
    params:
    - name: url
      value: https://raw.githubusercontent.com/tektoncd/catalog/main/pipeline/build-push-gke-deploy/0.1/build-push-gke-deploy.yaml
  params:
  - name: sample-pipeline-parameter
    value: test
  - name: username
    value: "pipelines"
The following example pipeline defines a task that references a remote task from an HTTPS URL:
apiVersion: tekton.dev/v1beta1
kind: Pipeline
metadata:
  name: pipeline-with-http-task-reference-demo
spec:
  tasks:
  - name: "http-task-demo"
    taskRef:
      resolver: http
      params:
      - name: url
        value: https://raw.githubusercontent.com/openshift-pipelines/tektoncd-catalog/p/tasks/task-git-clone/0.4.0/task-git-clone.yaml
    params:
    - name: sample-task-parameter
      value: test
The following example task run references a remote task from an HTTPS URL:
apiVersion: tekton.dev/v1beta1
kind: TaskRun
metadata:
  name: http-task-reference-demo
spec:
  taskRef:
    resolver: http
    params:
    - name: url
      value: https://raw.githubusercontent.com/openshift-pipelines/tektoncd-catalog/p/tasks/task-git-clone/0.4.0/task-git-clone.yaml
  params:
  - name: sample-task-parameter
value: testChapter 4. Using Red Hat entitlements in pipelines
If you have Red Hat Enterprise Linux (RHEL) entitlements, you can use these entitlements to build container images in your pipelines.
The Insight Operator automatically manages your entitlements after you import them into this operator from Simple Common Access (SCA). This operator provides a secret named etc-pki-entitlement in the openshift-config-managed namespace.
You can use Red Hat entitlements in your pipelines in one of the following two ways:
- Manually copy the secret into the namespace of the pipeline. This method is least complex if you have a limited number of pipeline namespaces.
- Use the Shared Resources Container Storage Interface (CSI) Driver Operator to share the secret between namespaces automatically.
4.1. Prerequisites
-
You logged on to your OpenShift Container Platform cluster using the
occommand line tool. You enabled the Insights Operator feature on your OpenShift Container Platform cluster. If you want to use the Shared Resources CSI Driver operator to share the secret between namespaces, you must also enable the Shared Resources CSI driver. For information about enabling features, including the Insights Operator and Shared Resources CSI Driver, see Enabling features using feature gates.
NoteAfter you enable the Insights Operator, you must wait for some time to ensure that the cluster updates all the nodes with this operator. You can monitor the status of all nodes by entering the following command:
$ oc get nodes -wTo verify that the Insights Operator is active, check that the
insights-operatorpod is running in theopenshift-insightsnamespace by entering the following command:$ oc get pods -n openshift-insightsYou configured the importing of your Red Hat entitlements into the Insights Operator. For information about importing the entitlements, see Importing simple content access entitlements with Insights Operator.
NoteTo verify that the Insights Operator made your entitlements available, is active, check that the
etc-pki-entitlementsecret is present in theopenshift-config-managednamespace by entering the following command:$ oc get secret etc-pki-entitlement -n openshift-config-managed
4.2. Using Red Hat entitlements by manually copying the etc-pki-entitlement secret
You can copy the etc-pki-entitlement secret from the openshift-config-managed namespace into the namespace of your pipeline. You can then configure your pipeline to use this secret for the Buildah task.
Prerequisites
-
You installed the
jqpackage on your system. This package is available in Red Hat Enterprise Linux (RHEL).
Procedure
Copy the
etc-pki-entitlementsecret from theopenshift-config-managednamespace into the namespace of your pipeline by running the following command:$ oc get secret etc-pki-entitlement -n openshift-config-managed -o json | \ jq 'del(.metadata.resourceVersion)' | jq 'del(.metadata.creationTimestamp)' | \ jq 'del(.metadata.uid)' | jq 'del(.metadata.namespace)' | \ oc -n <pipeline_namespace> create -f -1 - 1
- Replace
<pipeline_namespace>with the namespace of your pipeline.
-
In your Buildah task definition, use the
buildahcluster task or a copy of this cluster task and define therhel-entitlementworkspace, as in the following example. -
In your task run or pipeline run that runs the Buildah task, assign the
etc-pki-entitlementsecret to therhel-entitlementworkspace, as in the following example.
Example pipeline run definition, including the pipeline and task definitions, that uses Red Hat entitlements
apiVersion: tekton.dev/v1
kind: PipelineRun
metadata:
  name: buildah-pr-test
spec:
  workspaces:
    - name: shared-workspace
      volumeClaimTemplate:
        spec:
          accessModes:
            - ReadWriteOnce
          resources:
            requests:
              storage: 1Gi
    - name: dockerconfig
      secret:
        secretName: regred
    - name: rhel-entitlement
      secret:
        secretName: etc-pki-entitlement
  pipelineSpec:
    workspaces:
      - name: shared-workspace
      - name: dockerconfig
      - name: rhel-entitlement
    tasks:
# ...
      - name: buildah
        taskRef:
          name: buildah
          kind: ClusterTask
        workspaces:
        - name: source
          workspace: shared-workspace
        - name: dockerconfig
          workspace: dockerconfig
        - name: rhel-entitlement
          workspace: rhel-entitlement
        params:
        - name: IMAGE
value: <image_where_you_want_to_push>Chapter 5. Managing non-versioned and versioned cluster tasks
As a cluster administrator, installing the Red Hat OpenShift Pipelines Operator creates variants of each default cluster task known as versioned cluster tasks (VCT) and non-versioned cluster tasks (NVCT). For example, installing the Red Hat OpenShift Pipelines Operator v1.7 creates a buildah-1-7-0 VCT and a buildah NVCT.
Both NVCT and VCT have the same metadata, behavior, and specifications, including params, workspaces, and steps. However, they behave differently when you disable them or upgrade the Operator.
In Red Hat OpenShift Pipelines 1.10, cluster task functionality is deprecated and is planned to be removed in a future release.
5.1. Differences between non-versioned and versioned cluster tasks
Non-versioned and versioned cluster tasks have different naming conventions. And, the Red Hat OpenShift Pipelines Operator upgrades them differently.
| Non-versioned cluster task | Versioned cluster task | |
|---|---|---|
| Nomenclature |
The NVCT only contains the name of the cluster task. For example, the name of the NVCT of Buildah installed with Operator v1.7 is |
The VCT contains the name of the cluster task, followed by the version as a suffix. For example, the name of the VCT of Buildah installed with Operator v1.7 is |
| Upgrade | When you upgrade the Operator, it updates the non-versioned cluster task with the latest changes. The name of the NVCT remains unchanged. |
Upgrading the Operator installs the latest version of the VCT and retains the earlier version. The latest version of a VCT corresponds to the upgraded Operator. For example, installing Operator 1.7 installs |
5.2. Advantages and disadvantages of non-versioned and versioned cluster tasks
Before adopting non-versioned or versioned cluster tasks as a standard in production environments, cluster administrators might consider their advantages and disadvantages.
| Cluster task | Advantages | Disadvantages |
|---|---|---|
| Non-versioned cluster task (NVCT) |
| If you deploy pipelines that use NVCT, they might break after an Operator upgrade if the automatically upgraded cluster tasks are not backward-compatible. |
| Versioned cluster task (VCT) |
|
|
5.3. Disabling non-versioned and versioned cluster tasks
As a cluster administrator, you can disable cluster tasks that the OpenShift Pipelines Operator installed.
Procedure
To delete all non-versioned cluster tasks and latest versioned cluster tasks, edit the
TektonConfigcustom resource definition (CRD) and set theclusterTasksparameter inspec.addon.paramstofalse.Example
TektonConfigCRapiVersion: operator.tekton.dev/v1alpha1 kind: TektonConfig metadata: name: config spec: params: - name: createRbacResource value: "false" profile: all targetNamespace: openshift-pipelines addon: params: - name: clusterTasks value: "false" ...When you disable cluster tasks, the Operator removes all the non-versioned cluster tasks and only the latest version of the versioned cluster tasks from the cluster.
NoteRe-enabling cluster tasks installs the non-versioned cluster tasks.
Optional: To delete earlier versions of the versioned cluster tasks, use any one of the following methods:
To delete individual earlier versioned cluster tasks, use the
oc delete clustertaskcommand followed by the versioned cluster task name. For example:$ oc delete clustertask buildah-1-6-0To delete all versioned cluster tasks created by an old version of the Operator, you can delete the corresponding installer set. For example:
$ oc delete tektoninstallerset versioned-clustertask-1-6-k98asImportantIf you delete an old versioned cluster task, you cannot restore it. You can only restore versioned and non-versioned cluster tasks that the current version of the Operator has created.