Pipelines as Code
Configuring and using Pipelines as Code
Abstract
Chapter 1. About Pipelines as Code
With Pipelines as Code, cluster administrators and users with the required privileges can define pipeline templates as part of source code Git repositories. When triggered by a source code push or a pull request for the configured Git repository, Pipelines as Code runs the pipeline and reports the status.
1.1. Key features
Pipelines as Code supports the following features:
- Pull request status and control on the platform hosting the Git repository.
- GitHub Checks API to set the status of a pipeline run, including rechecks.
- GitHub pull request and commit events.
-
Pull request actions in comments, such as
/retest. - Git events filtering and a separate pipeline for each event.
- Automatic task resolution in OpenShift Pipelines, including local tasks, Tekton Hub, and remote URLs.
- Retrieval of configurations using GitHub blobs and objects API.
-
Access Control List (ACL) over a GitHub organization or using a Prow style
OWNERSfile. -
The
tkn pacCLI plugin for managing bootstrapping and Pipelines as Code repositories. - Support for GitHub App, GitHub Webhook, Bitbucket Server, and Bitbucket Cloud.
Chapter 2. Installing and configuring Pipelines as Code
You can install Pipelines as Code as a part of Red Hat OpenShift Pipelines installation.
2.1. Installing Pipelines as Code on an OpenShift Container Platform
Pipelines as Code is installed in the openshift-pipelines namespace when you install the Red Hat OpenShift Pipelines Operator. For more details, see Installing OpenShift Pipelines in the Additional resources section.
To disable the default installation of Pipelines as Code with the Operator, set the value of the enable parameter to false in the TektonConfig custom resource.
apiVersion: operator.tekton.dev/v1alpha1
kind: TektonConfig
metadata:
  name: config
spec:
  platforms:
    openshift:
      pipelinesAsCode:
        enable: false
        settings:
          application-name: Pipelines as Code CI
          auto-configure-new-github-repo: "false"
          bitbucket-cloud-check-source-ip: "true"
          hub-catalog-name: tekton
          hub-url: https://api.hub.tekton.dev/v1
          remote-tasks: "true"
          secret-auto-create: "true"
# ...
Optionally, you can run the following command:
$ oc patch tektonconfig config --type="merge" -p '{"spec": {"platforms": {"openshift":{"pipelinesAsCode": {"enable": false}}}}}'
To enable the default installation of Pipelines as Code with the Red Hat OpenShift Pipelines Operator, set the value of the enable parameter to true in the TektonConfig custom resource:
apiVersion: operator.tekton.dev/v1alpha1
kind: TektonConfig
metadata:
  name: config
spec:
  platforms:
    openshift:
      pipelinesAsCode:
        enable: true
        settings:
          application-name: Pipelines as Code CI
          auto-configure-new-github-repo: "false"
          bitbucket-cloud-check-source-ip: "true"
          hub-catalog-name: tekton
          hub-url: https://api.hub.tekton.dev/v1
          remote-tasks: "true"
          secret-auto-create: "true"
# ...
Optionally, you can run the following command:
$ oc patch tektonconfig config --type="merge" -p '{"spec": {"platforms": {"openshift":{"pipelinesAsCode": {"enable": true}}}}}'2.2. Installing Pipelines as Code CLI
Cluster administrators can use the tkn pac and opc CLI tools on local machines or as containers for testing. The tkn pac and opc CLI tools are installed automatically when you install the tkn CLI for Red Hat OpenShift Pipelines.
You can install the tkn pac and opc version 1.16.0 binaries for the supported platforms:
2.3. Customizing Pipelines as Code configuration
To customize Pipelines as Code, cluster administrators can configure the following parameters in the TektonConfig custom resource, in the platforms.openshift.pipelinesAsCode.settings spec:
| Parameter | Description | Default |
|---|---|---|
|
| The name of the application. For example, the name displayed in the GitHub Checks labels. |
|
|
| Indicates whether or not a secret should be automatically created using the token generated in the GitHub application. This secret can then be used with private repositories. |
|
|
| When enabled, allows remote tasks from pipeline run annotations. |
|
|
| The base URL for the Tekton Hub API. | |
|
| The Tekton Hub catalog name. |
|
|
|
The URL of the Tekton Hub dashboard. Pipelines as Code uses this URL to generate a | NA |
|
| Indicates whether to secure the service requests by querying IP ranges for a public Bitbucket. Changing the parameter’s default value might result into a security issue. |
|
|
| Indicates whether to provide an additional set of IP ranges or networks, which are separated by commas. | NA |
|
|
A maximum limit for the | NA |
|
|
A default limit for the | NA |
|
| Configures new GitHub repositories automatically. Pipelines as Code sets up a namespace and creates a custom resource for your repository. This parameter is only supported with GitHub applications. |
|
|
|
Configures a template to automatically generate the namespace for your new repository, if |
|
|
| Enables or disables the view of a log snippet for the failed tasks, with an error in a pipeline. You can disable this parameter in the case of data leakage from your pipeline. |
|
|
| Enables or disables the inspection of container logs to detect error message and expose them as annotations on the pull request. This setting applies only if you are using the GitHub app. |
|
|
|
The maximum number of lines inspected in the container logs to search for error messages. Set to | 50 |
|
|
If set to |
|
|
| Additional repositories for scoping the generated GitHub access token. |
2.4. Configuring additional Pipelines as Code controllers to support additional GitHub apps
By default, you can configure Pipelines as Code to interact with one GitHub app. In some cases you might need to use more than one GitHub app, for example, if you need to use different GitHub accounts or different GitHub instances such as GitHub Enterprise or GitHub SaaS. If you want to use more than one GitHub app, you must configure an additional Pipelines as Code controller for every additional GitHub app.
Procedure
In the
TektonConfigcustom resource, add theadditionalPACControllerssection to theplatforms.openshift.pipelinesAsCodespec, as in the following example:Example
additionalPACControllerssectionapiVersion: operator.tekton.dev/v1 kind: TektonConfig metadata: name: config spec: platforms: openshift: pipelinesAsCode: additionalPACControllers: pac_controller_2:1 enable: true2 secretName: pac_secret_23 settings: #4 # ...- 1
- The name of the controller. This name must be unique and not exceed 25 characters in length.
- 2
- This parameter is optional. Set this parameter to
trueto enable the additional controller or tofalseto disable the additional controller. The default vaule istrue. - 3
- Set this parameter to the name of a secret that you must create for the GitHub app.
- 4
- This section is optional. In this section, you can set any Pipelines as Code settings for this controller if the settings must be different from the main Pipelines as Code controller.
-
Optional: If you want to use more than two GitHub apps, create additional sections under the
pipelinesAsCode.additionalPACControllersspec to configure a Pipelines as Code controller for every GitHub instance. Use a unique name for every controller.
Chapter 3. Using Pipelines as Code with a Git repository hosting service provider
After installing Pipelines as Code, cluster administrators can configure a Git repository hosting service provider. Currently, the following services are supported:
- GitHub App
- GitHub Webhook
- GitLab
- Bitbucket Server
- Bitbucket Cloud
GitHub App is the recommended service for using with Pipelines as Code.
3.1. Using Pipelines as Code with a GitHub App
GitHub Apps act as a point of integration with Red Hat OpenShift Pipelines and bring the advantage of Git-based workflows to OpenShift Pipelines. Cluster administrators can configure a single GitHub App for all cluster users. For GitHub Apps to work with Pipelines as Code, ensure that the webhook of the GitHub App points to the Pipelines as Code controller route (or ingress endpoint) that listens for GitHub events.
There are three ways to set up a GitHub app for Pipelines as Code:
-
Use the
tkncommand line utility. - Use the Administrator perspective of the web console.
- Set up the app manually in GitHub and then create a secret for Pipelines as Code.
By default, Pipelines as Code can communicate with one GitHub app. If you configured additional Pipelines as Code controllers to communicate with additional GitHub apps, configure each of the GitHub apps separately. You must set up GitHub apps for any additional controllers manually.
3.1.1. Configuring a GitHub App using the command line interface
You can use the tkn command line utility to create a GitHub app and configure the Pipelines as Code controller for the GitHub app.
If you created additional Pipelines as Code controllers to support additional GitHub apps, you can use this procedure only for the main controller. To create a GitHub app for an additional controller, use the manual procedure.
Prerequisites
- You are logged on to the OpenShift Container Platform cluster as a cluster administrator.
-
You installed the
tkncommand line utility with thetkn pacplugin.
Procedure
Enter the following command:
$ tkn pac bootstrap github-appThis command assumes that your account uses a standard github.com API endpoint. If you use a different GitHub API endpoint, for example, if you use GitHub Enterprise, use the
--github-api-urloption to specify the endpoint, as in the following example:Example command
$ tkn pac bootstrap github-app --github-api-url https://github.com/enterprises/example-enterprise
3.1.2. Creating a GitHub App in administrator perspective
As a cluster administrator, you can configure your GitHub App with the OpenShift Container Platform cluster to use Pipelines as Code. This configuration allows you to execute a set of tasks required for build deployment.
If you created additional Pipelines as Code controllers to support additional GitHub apps, you can use this procedure only for the main controller. To create a GitHub app for an additional controller, use the manual procedure.
Prerequisites
You have installed the Red Hat OpenShift Pipelines pipelines-1.16 operator from the Operator Hub.
Procedure
- In the administrator perspective, navigate to Pipelines using the navigation pane.
- Click Setup GitHub App on the Pipelines page.
-
Enter your GitHub App name. For example,
pipelines-ci-clustername-testui. - Click Setup.
- Enter your Git password when prompted in the browser.
-
Click Create GitHub App for <username>, where
<username>is your GitHub user name.
Verification
After successful creation of the GitHub App, the OpenShift Container Platform web console opens and displays the details about the application.
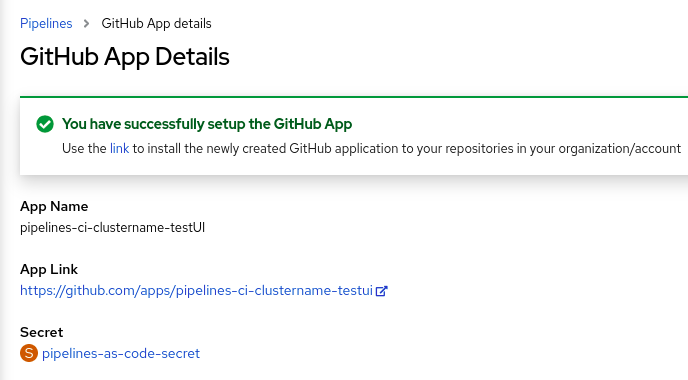
The details of the GitHub App are saved as a secret in the openShift-pipelines namespace.
To view details such as name, link, and secret associated with the GitHub applications, navigate to Pipelines and click View GitHub App.
3.1.3. Configuring a GitHub App manually and creating a secret for Pipelines as Code
You can use the GitHub user interface to create a GitHub app. Then you must create a secret that configures Pipelines as Code to connect to GitHub app.
If you created additional Pipelines as Code controllers to support additional GitHub apps, you must use this procedure for the additional controllers.
Procedure
- Sign in to your GitHub account.
- In the GitHub menu, select Settings → Developer settings → GitHub Apps, then click New GitHub App.
Provide the following information in the GitHub App form:
-
GitHub Application Name:
OpenShift Pipelines - Homepage URL: OpenShift Console URL
Webhook URL: The Pipelines as Code route or ingress URL. You can find it by running the following command:
$ echo https://$(oc get route -n openshift-pipelines pipelines-as-code-controller -o jsonpath='{.spec.host}')Alternatively, to configure the GitHub app for an additional Pipelines as Code controller, replace
pipelines-as-code-controllerwith the name of the controller that you configured, as in the following example:Example command
$ echo https://$(oc get route -n openshift-pipelines pac_controller_2 -o jsonpath='{.spec.host}')Webhook secret: An arbitrary secret. You can generate a secret by running the following command:
$ openssl rand -hex 20
-
GitHub Application Name:
Select the following items in the Repository permissions section:
-
Checks:
Read & Write -
Contents:
Read & Write -
Issues:
Read & Write -
Metadata:
Read-only -
Pull request:
Read & Write
-
Checks:
Select the following items in the Organization permissions section:
-
Members:
Read-only -
Plan:
Read-only
-
Members:
Subscribe to the following events:
- Check run
- Check suite
- Commit comment
- Issue comment
- Pull request
- Push
- Click Create GitHub App.
- On the Details page of the newly created GitHub App, note the App ID displayed at the top.
- In the Private keys section, click Generate Private key to automatically generate and download a private key for the GitHub app. Securely store the private key for future reference and usage.
- Install the created App on a repository that you want to use with Pipelines as Code.
Configure Pipelines as Code to access the newly created GitHub App by entering the following command:
$ oc -n openshift-pipelines create secret generic pipelines-as-code-secret \1 --from-literal github-private-key="$(cat <PATH_PRIVATE_KEY>)" \2 --from-literal github-application-id="<APP_ID>" \3 --from-literal webhook.secret="<WEBHOOK_SECRET>"4 - 1
- If you created additional Pipelines as Code controllers to support additional GitHub apps and you are configuring the app for an additional controller, replace
pipelines-as-code-secretwith the name that you configured in thesecretNameparameter for the controller. - 2
- The path to the private key you downloaded while configuring the GitHub App.
- 3
- The App ID of the GitHub App.
- 4
- The webhook secret provided when you created the GitHub App.
Pipelines as Code works automatically with GitHub Enterprise by detecting the header set from GitHub Enterprise and using it for the GitHub Enterprise API authorization URL.
3.1.4. Scoping the GitHub token to additional repositories
Pipelines as Code uses the GitHub app to generate a GitHub access token. Pipelines as Code uses this token to retrieve the pipeline payload from the repository and to enable the CI/CD processes to interact with GitHub repositories.
By default, the access token is scoped only to the repository from which Pipelines as Code retrieves the pipeline definition. In some cases, you might want the token to have access to additional repositories. For example, there might be a CI repository where the .tekton/pr.yaml file and source payload are located, but the build process defined in pr.yaml fetches tasks from a separate private CD repository.
You can extend the scope of the GitHub token in two ways:
- Global configuration: You can extend the GitHub token to a list of repositories in different namespaces. You must have administrative permissions to set this configuration.
- Repository level configuration: You can extend the GitHub token to a list of repositories that exist in the same namespace as the original repository. You do not need administrative permissions to set this configuration.
Procedure
-
In the
TektonConfigcustom resource (CR), in thepipelinesAsCode.settingsspec, set thesecret-github-app-token-scopedparameter tofalse. This setting enables scoping the GitHub token to private and public repositories listed in the global and repository level configuration. To set global configuration for scoping the GitHub token, in the
TektonConfigCR, in thepipelinesAsCode.settingsspec, specify the additional repositories in thesecret-github-app-scope-extra-reposparameter, as in the following example:apiVersion: operator.tekton.dev/v1alpha1 kind: TektonConfig metadata: name: config spec: platforms: openshift: pipelinesAsCode: enable: true settings: secret-github-app-token-scoped: false secret-github-app-scope-extra-repos: "owner2/project2, owner3/project3"To set repository level configuration for scoping the GitHub token, specify the additional repositories in the
github_app_token_scope_reposparameter of theRepositoryCR, as in the following example:apiVersion: "pipelinesascode.tekton.dev/v1alpha1" kind: Repository metadata: name: test namespace: test-repo spec: url: "https://github.com/linda/project" settings: github_app_token_scope_repos: - "owner/project" - "owner1/project1"In this example, the
Repositorycustom resource is associated with thelinda/projectrepository in thetest-reponamespace. The scope of the generated GitHub token is extended to theowner/projectandowner1/project1repositories, as well as thelinda/projectrepository. These repositories must exist under thetest-reponamespace.NoteThe additional repositories can be public or private, but must reside in the same namespace as the repository with which the
Repositoryresource is associated.If any of the repositories do not exist in the namespace, the scoping of the GitHub token fails with an error message:
failed to scope GitHub token as repo owner1/project1 does not exist in namespace test-repo
Result
The generated GitHub token enables access to the additional repositories that you configured in the global and repository level configuration, as well as the original repository where the Pipelines as Code payload files are located.
If you provide both global configuration and repository level configuration, the token is scoped to all the repositories from both configurations, as in the following example.
TektonConfig custom resource
apiVersion: operator.tekton.dev/v1alpha1
kind: TektonConfig
metadata:
  name: config
spec:
  platforms:
    openshift:
      pipelinesAsCode:
        enable: true
        settings:
          secret-github-app-token-scoped: false
secret-github-app-scope-extra-repos: "owner2/project2, owner3/project3"Repository custom resource
apiVersion: "pipelinesascode.tekton.dev/v1alpha1"
kind: Repository
metadata:
  name: test
  namespace: test-repo
spec:
  url: "https://github.com/linda/project"
  settings:
    github_app_token_scope_repos:
    - "owner/project"
    - "owner1/project1"
The GitHub token is scoped to the owner/project, owner1/project1, owner2/project2, owner3/project3, and linda/project respositories.
3.2. Using Pipelines as Code with GitHub Webhook
Use Pipelines as Code with GitHub Webhook on your repository if you cannot create a GitHub App. However, using Pipelines as Code with GitHub Webhook does not give you access to the GitHub Check Runs API. The status of the tasks is added as comments on the pull request and is unavailable under the Checks tab.
Pipelines as Code with GitHub Webhook does not support GitOps comments such as /retest and /ok-to-test. To restart the continuous integration (CI), create a new commit to the repository. For example, to create a new commit without any changes, you can use the following command:
$ git --amend -a --no-edit && git push --force-with-lease <origin> <branchname>Prerequisites
- Ensure that Pipelines as Code is installed on the cluster.
For authorization, create a personal access token on GitHub.
To generate a secure and fine-grained token, restrict its scope to a specific repository and grant the following permissions:
Expand Table 3.1. Permissions for fine-grained tokens Name Access Administration
Read-only
Metadata
Read-only
Content
Read-only
Commit statuses
Read and Write
Pull request
Read and Write
Webhooks
Read and Write
To use classic tokens, set the scope as
public_repofor public repositories andrepofor private repositories. In addition, provide a short token expiration period and note the token in an alternate location.NoteIf you want to configure the webhook using the
tkn pacCLI, add theadmin:repo_hookscope.
Procedure
Configure the webhook and create a
Repositorycustom resource (CR).To configure a webhook and create a
RepositoryCR automatically using thetkn pacCLI tool, use the following command:$ tkn pac create repoSample interactive output
? Enter the Git repository url (default: https://github.com/owner/repo):
? Please enter the namespace where the pipeline should run (default: repo-pipelines):
! Namespace repo-pipelines is not found
? Would you like me to create the namespace repo-pipelines? Yes
✓ Repository owner-repo has been created in repo-pipelines namespace
✓ Setting up GitHub Webhook for Repository https://github.com/owner/repo
👀 I have detected a controller url: https://pipelines-as-code-controller-openshift-pipelines.apps.example.com
? Do you want me to use it? Yes
? Please enter the secret to configure the webhook for payload validation (default: sJNwdmTifHTs):  sJNwdmTifHTs
ℹ ️You now need to create a GitHub personal access token, please checkout the docs at https://docs.github.com/en/authentication/keeping-your-account-and-data-secure/creating-a-personal-access-token for the required scopes
? Please enter the GitHub access token:  ****************************************
✓ Webhook has been created on repository owner/repo
🔑 Webhook Secret owner-repo has been created in the repo-pipelines namespace.
🔑 Repository CR owner-repo has been updated with webhook secret in the repo-pipelines namespace
ℹ Directory .tekton has been created.
✓ We have detected your repository using the programming language Go.
✓ A basic template has been created in /home/Go/src/github.com/owner/repo/.tekton/pipelinerun.yaml, feel free to customize it.
To configure a webhook and create a
RepositoryCR manually, perform the following steps:On your OpenShift cluster, extract the public URL of the Pipelines as Code controller.
$ echo https://$(oc get route -n openshift-pipelines pipelines-as-code-controller -o jsonpath='{.spec.host}')On your GitHub repository or organization, perform the following steps:
- Go to Settings –> Webhooks and click Add webhook.
- Set the Payload URL to the Pipelines as Code controller public URL.
- Select the content type as application/json.
Add a webhook secret and note it in an alternate location. With
opensslinstalled on your local machine, generate a random secret.$ openssl rand -hex 20- Click Let me select individual events and select these events: Commit comments, Issue comments, Pull request, and Pushes.
- Click Add webhook.
On your OpenShift cluster, create a
Secretobject with the personal access token and webhook secret.$ oc -n target-namespace create secret generic github-webhook-config \ --from-literal provider.token="<GITHUB_PERSONAL_ACCESS_TOKEN>" \ --from-literal webhook.secret="<WEBHOOK_SECRET>"Create a
RepositoryCR.Example:
RepositoryCRapiVersion: "pipelinesascode.tekton.dev/v1alpha1" kind: Repository metadata: name: my-repo namespace: target-namespace spec: url: "https://github.com/owner/repo" git_provider: secret: name: "github-webhook-config" key: "provider.token" # Set this if you have a different key in your secret webhook_secret: name: "github-webhook-config" key: "webhook.secret" # Set this if you have a different key for your secretNotePipelines as Code assumes that the OpenShift
Secretobject and theRepositoryCR are in the same namespace.
Optional: For an existing
RepositoryCR, add multiple GitHub Webhook secrets or provide a substitute for a deleted secret.Add a webhook using the
tkn pacCLI tool.Example: Additional webhook using the
tkn pacCLI$ tkn pac webhook add -n repo-pipelinesSample interactive output
✓ Setting up GitHub Webhook for Repository https://github.com/owner/repo 👀 I have detected a controller url: https://pipelines-as-code-controller-openshift-pipelines.apps.example.com ? Do you want me to use it? Yes ? Please enter the secret to configure the webhook for payload validation (default: AeHdHTJVfAeH): AeHdHTJVfAeH ✓ Webhook has been created on repository owner/repo 🔑 Secret owner-repo has been updated with webhook secert in the repo-pipelines namespace.-
Update the
webhook.secretkey in the existing OpenShiftSecretobject.
Optional: For an existing
RepositoryCR, update the personal access token.Update the personal access token using the
tkn pacCLI tool.Example: Updating personal access token using the
tkn pacCLI$ tkn pac webhook update-token -n repo-pipelinesSample interactive output
? Please enter your personal access token:  ****************************************
🔑 Secret owner-repo has been updated with new personal access token in the repo-pipelines namespace.
Alternatively, update the personal access token by modifying the
RepositoryCR.Find the name of the secret in the
RepositoryCR.apiVersion: "pipelinesascode.tekton.dev/v1alpha1" kind: Repository metadata: name: my-repo namespace: target-namespace spec: # ... git_provider: secret: name: "github-webhook-config" # ...Use the
oc patchcommand to update the values of the$NEW_TOKENin the$target_namespacenamespace.$ oc -n $target_namespace patch secret github-webhook-config -p "{\"data\": {\"provider.token\": \"$(echo -n $NEW_TOKEN|base64 -w0)\"}}"
3.3. Using Pipelines as Code with GitLab
If your organization or project uses GitLab as the preferred platform, you can use Pipelines as Code for your repository with a webhook on GitLab.
Prerequisites
- Ensure that Pipelines as Code is installed on the cluster.
For authorization, generate a personal access token as the manager of the project or organization on GitLab.
Note-
If you want to configure the webhook using the
tkn pacCLI, add theadmin:repo_hookscope to the token. - Using a token scoped for a specific project cannot provide API access to a merge request (MR) sent from a forked repository. In such cases, Pipelines as Code displays the result of a pipeline as a comment on the MR.
-
If you want to configure the webhook using the
Procedure
Configure the webhook and create a
Repositorycustom resource (CR).To configure a webhook and create a
RepositoryCR automatically using thetkn pacCLI tool, use the following command:$ tkn pac create repoSample interactive output
? Enter the Git repository url (default: https://gitlab.com/owner/repo):
? Please enter the namespace where the pipeline should run (default: repo-pipelines):
! Namespace repo-pipelines is not found
? Would you like me to create the namespace repo-pipelines? Yes
✓ Repository repositories-project has been created in repo-pipelines namespace
✓ Setting up GitLab Webhook for Repository https://gitlab.com/owner/repo
? Please enter the project ID for the repository you want to be configured,
  project ID refers to an unique ID (e.g. 34405323) shown at the top of your GitLab project : 17103
👀 I have detected a controller url: https://pipelines-as-code-controller-openshift-pipelines.apps.example.com
? Do you want me to use it? Yes
? Please enter the secret to configure the webhook for payload validation (default: lFjHIEcaGFlF):  lFjHIEcaGFlF
ℹ ️You now need to create a GitLab personal access token with `api` scope
ℹ ️Go to this URL to generate one https://gitlab.com/-/profile/personal_access_tokens, see https://is.gd/rOEo9B for documentation
? Please enter the GitLab access token:  **************************
? Please enter your GitLab API URL::  https://gitlab.com
✓ Webhook has been created on your repository
🔑 Webhook Secret repositories-project has been created in the repo-pipelines namespace.
🔑 Repository CR repositories-project has been updated with webhook secret in the repo-pipelines namespace
ℹ Directory .tekton has been created.
✓ A basic template has been created in /home/Go/src/gitlab.com/repositories/project/.tekton/pipelinerun.yaml, feel free to customize it.
To configure a webhook and create a
RepositoryCR manually, perform the following steps:On your OpenShift cluster, extract the public URL of the Pipelines as Code controller.
$ echo https://$(oc get route -n openshift-pipelines pipelines-as-code-controller -o jsonpath='{.spec.host}')On your GitLab project, perform the following steps:
- Use the left sidebar to go to Settings –> Webhooks.
- Set the URL to the Pipelines as Code controller public URL.
Add a webhook secret and note it in an alternate location. With
opensslinstalled on your local machine, generate a random secret.$ openssl rand -hex 20- Click Let me select individual events and select these events: Commit comments, Issue comments, Pull request, and Pushes.
- Click Save changes.
On your OpenShift cluster, create a
Secretobject with the personal access token and webhook secret.$ oc -n target-namespace create secret generic gitlab-webhook-config \ --from-literal provider.token="<GITLAB_PERSONAL_ACCESS_TOKEN>" \ --from-literal webhook.secret="<WEBHOOK_SECRET>"Create a
RepositoryCR.Example:
RepositoryCRapiVersion: "pipelinesascode.tekton.dev/v1alpha1" kind: Repository metadata: name: my-repo namespace: target-namespace spec: url: "https://gitlab.com/owner/repo" # The repository URL git_provider: #url: "https://gitlab.example.com/"1 secret: name: "gitlab-webhook-config" key: "provider.token" # Set this if you have a different key in your secret webhook_secret: name: "gitlab-webhook-config" key: "webhook.secret" # Set this if you have a different key for your secret- 1
- If you are using a private instance of GitLab and not GitLab.com, uncomment this field and set it to the URL of your GitLab API. The GitLab API is the same host as the repository. For example, if the repository is
https://gitlab.example.com/owner/repo, the API URL ishttps://gitlab.example.com/.
Note-
Pipelines as Code assumes that the OpenShift
Secretobject and theRepositoryCR are in the same namespace.
Optional: For an existing
RepositoryCR, add multiple GitLab Webhook secrets or provide a substitute for a deleted secret.Add a webhook using the
tkn pacCLI tool.Example: Adding additional webhook using the
tkn pacCLI$ tkn pac webhook add -n repo-pipelinesSample interactive output
✓ Setting up GitLab Webhook for Repository https://gitlab.com/owner/repo 👀 I have detected a controller url: https://pipelines-as-code-controller-openshift-pipelines.apps.example.com ? Do you want me to use it? Yes ? Please enter the secret to configure the webhook for payload validation (default: AeHdHTJVfAeH): AeHdHTJVfAeH ✓ Webhook has been created on repository owner/repo 🔑 Secret owner-repo has been updated with webhook secert in the repo-pipelines namespace.-
Update the
webhook.secretkey in the existing OpenShiftSecretobject.
Optional: For an existing
RepositoryCR, update the personal access token.Update the personal access token using the
tkn pacCLI tool.Example: Updating personal access token using the
tkn pacCLI$ tkn pac webhook update-token -n repo-pipelinesSample interactive output
? Please enter your personal access token:  ****************************************
🔑 Secret owner-repo has been updated with new personal access token in the repo-pipelines namespace.
Alternatively, update the personal access token by modifying the
RepositoryCR.Find the name of the secret in the
RepositoryCR.... spec: git_provider: secret: name: "gitlab-webhook-config" ...Use the
oc patchcommand to update the values of the$NEW_TOKENin the$target_namespacenamespace.$ oc -n $target_namespace patch secret gitlab-webhook-config -p "{\"data\": {\"provider.token\": \"$(echo -n $NEW_TOKEN|base64 -w0)\"}}"
Additional resources
3.4. Using Pipelines as Code with Bitbucket Cloud
If your organization or project uses Bitbucket Cloud as the preferred platform, you can use Pipelines as Code for your repository with a webhook on Bitbucket Cloud.
Prerequisites
- Ensure that Pipelines as Code is installed on the cluster.
Create an app password on Bitbucket Cloud.
Check the following boxes to add appropriate permissions to the token:
-
Account:
Email,Read -
Workspace membership:
Read,Write -
Projects:
Read,Write -
Issues:
Read,Write Pull requests:
Read,WriteNote-
If you want to configure the webhook using the
tkn pacCLI, add theWebhooks:ReadandWritepermission to the token. - Once generated, save a copy of the password or token in an alternate location.
-
If you want to configure the webhook using the
-
Account:
Procedure
Configure the webhook and create a
RepositoryCR.To configure a webhook and create a
RepositoryCR automatically using thetkn pacCLI tool, use the following command:$ tkn pac create repoSample interactive output
? Enter the Git repository url (default: https://bitbucket.org/workspace/repo):
? Please enter the namespace where the pipeline should run (default: repo-pipelines):
! Namespace repo-pipelines is not found
? Would you like me to create the namespace repo-pipelines? Yes
✓ Repository workspace-repo has been created in repo-pipelines namespace
✓ Setting up Bitbucket Webhook for Repository https://bitbucket.org/workspace/repo
? Please enter your bitbucket cloud username:  <username>
ℹ ️You now need to create a Bitbucket Cloud app password, please checkout the docs at https://is.gd/fqMHiJ for the required permissions
? Please enter the Bitbucket Cloud app password:  ************************************
👀 I have detected a controller url: https://pipelines-as-code-controller-openshift-pipelines.apps.example.com
? Do you want me to use it? Yes
✓ Webhook has been created on repository workspace/repo
🔑 Webhook Secret workspace-repo has been created in the repo-pipelines namespace.
🔑 Repository CR workspace-repo has been updated with webhook secret in the repo-pipelines namespace
ℹ Directory .tekton has been created.
✓ A basic template has been created in /home/Go/src/bitbucket/repo/.tekton/pipelinerun.yaml, feel free to customize it.
To configure a webhook and create a
RepositoryCR manually, perform the following steps:On your OpenShift cluster, extract the public URL of the Pipelines as Code controller.
$ echo https://$(oc get route -n openshift-pipelines pipelines-as-code-controller -o jsonpath='{.spec.host}')On Bitbucket Cloud, perform the following steps:
- Use the left navigation pane of your Bitbucket Cloud repository to go to Repository settings –> Webhooks and click Add webhook.
- Set a Title. For example, "Pipelines as Code".
- Set the URL to the Pipelines as Code controller public URL.
- Select these events: Repository: Push, Pull Request: Created, Pull Request: Updated, and Pull Request: Comment created.
- Click Save.
On your OpenShift cluster, create a
Secretobject with the app password in the target namespace.$ oc -n target-namespace create secret generic bitbucket-cloud-token \ --from-literal provider.token="<BITBUCKET_APP_PASSWORD>"Create a
RepositoryCR.Example:
RepositoryCRapiVersion: "pipelinesascode.tekton.dev/v1alpha1" kind: Repository metadata: name: my-repo namespace: target-namespace spec: url: "https://bitbucket.com/workspace/repo" branch: "main" git_provider: user: "<BITBUCKET_USERNAME>"1 secret: name: "bitbucket-cloud-token"2 key: "provider.token" # Set this if you have a different key in your secret
Note-
The
tkn pac createandtkn pac bootstrapcommands are not supported on Bitbucket Cloud. Bitbucket Cloud does not support webhook secrets. To secure the payload and prevent hijacking of the CI, Pipelines as Code fetches the list of Bitbucket Cloud IP addresses and ensures that the webhook receptions come only from those IP addresses.
-
To disable the default behavior, set the
bitbucket-cloud-check-source-ipparameter tofalsein theTektonConfigcustom resource, in thepipelinesAsCode.settingsspec. -
To allow additional safe IP addresses or networks, add them as comma separated values to the
bitbucket-cloud-additional-source-ipparameter in theTektonConfigcustom resource, in thepipelinesAsCode.settingsspec.
-
To disable the default behavior, set the
Optional: For an existing
RepositoryCR, add multiple Bitbucket Cloud Webhook secrets or provide a substitute for a deleted secret.Add a webhook using the
tkn pacCLI tool.Example: Adding additional webhook using the
tkn pacCLI$ tkn pac webhook add -n repo-pipelinesSample interactive output
✓ Setting up Bitbucket Webhook for Repository https://bitbucket.org/workspace/repo ? Please enter your bitbucket cloud username: <username> 👀 I have detected a controller url: https://pipelines-as-code-controller-openshift-pipelines.apps.example.com ? Do you want me to use it? Yes ✓ Webhook has been created on repository workspace/repo 🔑 Secret workspace-repo has been updated with webhook secret in the repo-pipelines namespace.NoteUse the
[-n <namespace>]option with thetkn pac webhook addcommand only when theRepositoryCR exists in a namespace other than the default namespace.-
Update the
webhook.secretkey in the existing OpenShiftSecretobject.
Optional: For an existing
RepositoryCR, update the personal access token.Update the personal access token using the
tkn pacCLI tool.Example: Updating personal access token using the
tkn pacCLI$ tkn pac webhook update-token -n repo-pipelinesSample interactive output
? Please enter your personal access token: **************************************** 🔑 Secret owner-repo has been updated with new personal access token in the repo-pipelines namespace.NoteUse the
[-n <namespace>]option with thetkn pac webhook update-tokencommand only when theRepositoryCR exists in a namespace other than the default namespace.Alternatively, update the personal access token by modifying the
RepositoryCR.Find the name of the secret in the
RepositoryCR.... spec: git_provider: user: "<BITBUCKET_USERNAME>" secret: name: "bitbucket-cloud-token" key: "provider.token" ...Use the
oc patchcommand to update the values of the$passwordin the$target_namespacenamespace.$ oc -n $target_namespace patch secret bitbucket-cloud-token -p "{\"data\": {\"provider.token\": \"$(echo -n $NEW_TOKEN|base64 -w0)\"}}"
Additional resources
3.5. Using Pipelines as Code with Bitbucket Server
If your organization or project uses Bitbucket Server as the preferred platform, you can use Pipelines as Code for your repository with a webhook on Bitbucket Server.
Prerequisites
- Ensure that Pipelines as Code is installed on the cluster.
Generate a personal access token as the manager of the project on Bitbucket Server, and save a copy of it in an alternate location.
Note-
The token must have the
PROJECT_ADMINandREPOSITORY_ADMINpermissions. - The token must have access to forked repositories in pull requests.
-
The token must have the
Procedure
On your OpenShift cluster, extract the public URL of the Pipelines as Code controller.
$ echo https://$(oc get route -n openshift-pipelines pipelines-as-code-controller -o jsonpath='{.spec.host}')On Bitbucket Server, perform the following steps:
- Use the left navigation pane of your Bitbucket Data Center repository to go to Repository settings –> Webhooks and click Add webhook.
- Set a Title. For example, "Pipelines as Code".
- Set the URL to the Pipelines as Code controller public URL.
Add a webhook secret and save a copy of it in an alternate location. If you have
opensslinstalled on your local machine, generate a random secret using the following command:$ openssl rand -hex 20Select the following events:
- Repository: Push
- Repository: Modified
- Pull Request: Opened
- Pull Request: Source branch updated
- Pull Request: Comment added
- Click Save.
On your OpenShift cluster, create a
Secretobject with the app password in the target namespace.$ oc -n target-namespace create secret generic bitbucket-server-webhook-config \ --from-literal provider.token="<PERSONAL_TOKEN>" \ --from-literal webhook.secret="<WEBHOOK_SECRET>"Create a
RepositoryCR.Example:
RepositoryCRapiVersion: "pipelinesascode.tekton.dev/v1alpha1" kind: Repository metadata: name: my-repo namespace: target-namespace spec: url: "https://bitbucket.com/workspace/repo" git_provider: url: "https://bitbucket.server.api.url/rest"1 user: "<BITBUCKET_USERNAME>"2 secret:3 name: "bitbucket-server-webhook-config" key: "provider.token" # Set this if you have a different key in your secret webhook_secret: name: "bitbucket-server-webhook-config" key: "webhook.secret" # Set this if you have a different key for your secret- 1
- Ensure that you have the right Bitbucket Server API URL without the
/api/v1.0suffix. Usually, the default install has a/restsuffix. - 2
- You can only reference a user by the
ACCOUNT_IDin an owner file. - 3
- Pipelines as Code assumes that the secret referred in the
git_provider.secretspec and theRepositoryCR is in the same namespace.
NoteThe
tkn pac createandtkn pac bootstrapcommands are not supported on Bitbucket Server.
Additional resources
3.6. Interfacing Pipelines as Code with custom certificates
To configure Pipelines as Code with a Git repository that is accessible with a privately signed or custom certificate, you can expose the certificate to Pipelines as Code.
Procedure
-
If you have installed Pipelines as Code using the Red Hat OpenShift Pipelines Operator, you can add your custom certificate to the cluster using the
Proxyobject. The Operator exposes the certificate in all Red Hat OpenShift Pipelines components and workloads, including Pipelines as Code.
Additional resources
3.7. Using private repositories with Pipelines as Code
Pipelines as Code supports private repositories by creating or updating a secret in the target namespace with the user token. The git-clone task from Tekton Hub uses the user token to clone private repositories.
Whenever Pipelines as Code creates a new pipeline run in the target namespace, it creates or updates a secret with the pac-gitauth-<REPOSITORY_OWNER>-<REPOSITORY_NAME>-<RANDOM_STRING> format.
You must reference the secret with the basic-auth workspace in your pipeline run and pipeline definitions, which is then passed on to the git-clone task.
...
  workspace:
  - name: basic-auth
    secret:
      secretName: "{{ git_auth_secret }}"
...
In the pipeline, you can reference the basic-auth workspace for the git-clone task to reuse:
...
workspaces:
  - name basic-auth
params:
    - name: repo_url
    - name: revision
...
tasks:
  workspaces:
    - name: basic-auth
      workspace: basic-auth
  ...
  tasks:
  - name: git-clone-from-catalog
      taskRef:
        name: git-clone
      params:
        - name: url
          value: $(params.repo_url)
        - name: revision
          value: $(params.revision)
...- 1
- The
git-clonetask picks up thebasic-authworkspace and uses it to clone the private repository.
You can modify this configuration by setting the secret-auto-create parameter to either a false or true value, as required, in the TektonConfig custom resource, in the pipelinesAsCode.settings spec.
Chapter 4. Using the Repository custom resource
The Repository custom resource (CR) has the following primary functions:
- Inform Pipelines as Code about processing an event from a URL.
- Inform Pipelines as Code about the namespace for the pipeline runs.
- Reference an API secret, username, or an API URL necessary for Git provider platforms when using webhook methods.
- Provide the last pipeline run status for a repository.
4.1. Creating the Repository custom resource
You can use the tkn pac CLI or other alternative methods to create a Repository custom resource (CR) inside the target namespace. For example:
cat <<EOF|kubectl create -n my-pipeline-ci -f-
apiVersion: "pipelinesascode.tekton.dev/v1alpha1"
kind: Repository
metadata:
  name: project-repository
spec:
  url: "https://github.com/<repository>/<project>"
EOF- 1
my-pipeline-ciis the target namespace.
Whenever there is an event coming from the URL such as https://github.com/<repository>/<project>, Pipelines as Code matches it and then starts checking out the content of the <repository>/<project> repository for the pipeline run to match the content in the .tekton/ directory.
-
You must create the
RepositoryCR in the same namespace where pipelines associated with the source code repository will be executed; it cannot target a different namespace. -
If multiple
RepositoryCRs match the same event, Pipelines as Code processes only the oldest one. If you need to match a specific namespace, add thepipelinesascode.tekton.dev/target-namespace: "<mynamespace>"annotation. Such explicit targeting prevents a malicious actor from executing a pipeline run in a namespace to which they do not have access.
4.2. Creating the global Repository custom resource
Optionally, you can create a global Repository custom resource (CR) in the namespace where OpenShift Pipelines is installed, normally openshift-pipelines. If you create this CR, the settings that you specify in it apply by default to all Repository CRs that you create.
The global Repository CR is a Technology Preview feature only. Technology Preview features are not supported with Red Hat production service level agreements (SLAs) and might not be functionally complete. Red Hat does not recommend using them in production. These features provide early access to upcoming product features, enabling customers to test functionality and provide feedback during the development process.
For more information about the support scope of Red Hat Technology Preview features, see Technology Preview Features Support Scope.
Prerequisites
-
You have administrator access to the
openshift-pipelinesnamespace. -
You logged on to the OpenShift cluster using the
occommand line utility.
Procedure
Create a
RepositoryCR namedpipeline-as-codein theopenshift-pipelinesnamespace. Specify all the required default settings in this CR.Example command to create the CR
$ cat <<EOF|oc create -n openshift-pipelines -f -

apiVersion: "pipelinesascode.tekton.dev/v1alpha1"
kind: Repository
metadata:
  name: pipelines-as-code
spec:
  git_provider:
    secret:
      name: "gitlab-webhook-config"
      key: "provider.token"
    webhook_secret:
      name: "gitlab-webhook-config"
      key: "webhook.secret"
EOF
In this example, all
RepositoryCRs that you create include the common secrets for accessing your GitLab repositories. You can set different repository URLs and other settings in the CRs.
4.3. Setting concurrency limits
You can use the concurrency_limit spec in the Repository custom resource definition (CRD) to define the maximum number of pipeline runs running simultaneously for a repository.
apiVersion: "pipelinesascode.tekton.dev/v1alpha1"
kind: Repository
metadata:
  name: my-repo
  namespace: target-namespace
spec:
# ...
  concurrency_limit: <number>
# ...
If there are multiple pipeline runs matching an event, the pipeline runs that match the event start in an alphabetical order.
For example, if you have three pipeline runs in the .tekton directory and you create a pull request with a concurrency_limit of 1 in the repository configuration, then all the pipeline runs are executed in an alphabetical order. At any given time, only one pipeline run is in the running state while the rest are queued.
4.4. Changing the source branch for the pipeline definition
By default, when processing a push event or a pull request event, Pipelines as Code fetches the pipeline definition from the branch that triggered the event. You can use the pipelinerun_provenance setting in the Repository custom resource definition (CRD) to fetch the definition from the default branch configured on the Git repository provider, such as main, master, or trunk.
apiVersion: "pipelinesascode.tekton.dev/v1alpha1"
kind: Repository
metadata:
  name: my-repo
  namespace: target-namespace
spec:
# ...
  settings:
    pipelinerun_provenance: "default_branch"
# ...
You can use this setting as a security precaution. With the default behaviour, Pipelines as Code uses the pipeline definition in the submitted pull request. With the default-branch setting, the pipeline definition must be merged into the default branch before it is run. This requirement ensures maximum possible verification of any changes during merge review.
4.5. Custom parameter expansion
You can use Pipelines as Code to expand a custom parameter within your PipelineRun resource by using the params field. You can specify a value for the custom parameter inside the template of the Repository custom resource (CR). The specified value replaces the custom parameter in your pipeline run.
You can use custom parameters in the following scenarios:
- To define a URL parameter, such as a registry URL that varies based on a push or a pull request.
-
To define a parameter, such as an account UUID that an administrator can manage without necessitating changes to the
PipelineRunexecution in the Git repository.
Use the custom parameter expansion feature only when you cannot use the Tekton PipelineRun parameters because Tekton parameters are defined in a Pipeline resource and customized alongside it inside a Git repository. However, custom parameters are defined and customized where the Repository CR is located. Therefore, you cannot manage your CI/CD pipeline from a single point.
The following example shows a custom parameter named company in the Repository CR:
...
spec:
  params:
    - name: company
      value: "ABC Company"
...
The value ABC Company replaces the parameter name company in your pipeline run and in the remotely fetched tasks.
You can also retrieve the value for a custom parameter from a Kubernetes secret, as shown in the following example:
...
spec:
  params:
    - name: company
      secret_ref:
        name: my-secret
        key: companyname
...
Pipelines as Code parses and uses custom parameters in the following manner:
-
If you have a
valueand asecret_refdefined, Pipelines as Code uses thevalue. -
If you do not have a
namein theparamssection, Pipelines as Code does not parse the parameter. -
If you have multiple
paramswith the samename, Pipelines as Code uses the last parameter.
You can also define a custom parameter and use its expansion only when specified conditions were matched for a CEL filter. The following example shows a CEL filter applicable on a custom parameter named company when a pull request event is triggered:
...
spec:
  params:
    - name: company
      value: "ABC Company"
      filter: pac.event_type == "pull_request"
...When you have multiple parameters with the same name and different filters, Pipelines as Code uses the first parameter that matches the filter. So, Pipelines as Code allows you to expand parameters according to different event types. For example, you can combine a push and a pull request event.
Chapter 5. Using the Pipelines as Code resolver
The Pipelines as Code resolver ensures that a running pipeline run does not conflict with others.
5.1. About the Pipelines as Code resolver
To split your pipeline and pipeline run, store the files in the .tekton/ directory or its subdirectories.
If Pipelines as Code observes a pipeline run with a reference to a task or a pipeline in any YAML file located in the .tekton/ directory, Pipelines as Code automatically resolves the referenced task to provide a single pipeline run with an embedded spec in a PipelineRun object.
If Pipelines as Code cannot resolve the referenced tasks in the Pipeline or PipelineSpec definition, the run fails before applying any changes to the cluster. You can see the issue on your Git provider platform and inside the events of the target namespace where the Repository CR is located.
The resolver skips resolving if it observes the following type of tasks:
- A reference to a cluster task.
- A task or pipeline bundle.
-
A custom task with an API version that does not have a
tekton.dev/prefix.
The resolver uses such tasks literally, without any transformation.
To test your pipeline run locally before sending it in a pull request, use the tkn pac resolve command.
You can also reference remote pipelines and tasks.
5.2. Using remote task annotations with Pipelines as Code
Pipelines as Code supports fetching remote tasks or pipelines by using annotations in a pipeline run. If you reference a remote task in a pipeline run, or a pipeline in a PipelineRun or a PipelineSpec object, the Pipelines as Code resolver automatically includes it. If there is any error while fetching the remote tasks or parsing them, Pipelines as Code stops processing the tasks.
To include remote tasks, refer to the following examples of annotation:
Reference remote tasks in Tekton Hub
Reference a single remote task in Tekton Hub.
...
  pipelinesascode.tekton.dev/task: "git-clone"
1 ...- 1
- Pipelines as Code includes the latest version of the task from the Tekton Hub.
Reference multiple remote tasks from Tekton Hub
...
  pipelinesascode.tekton.dev/task: "[git-clone, golang-test, tkn]"
...
Reference multiple remote tasks from Tekton Hub using the
-<NUMBER>suffix.... pipelinesascode.tekton.dev/task: "git-clone" pipelinesascode.tekton.dev/task-1: "golang-test" pipelinesascode.tekton.dev/task-2: "tkn"1 ...- 1
- By default, Pipelines as Code interprets the string as the latest task to fetch from Tekton Hub.
Reference a specific version of a remote task from Tekton Hub.
...
  pipelinesascode.tekton.dev/task: "[git-clone:0.1]"
1 ...- 1
- Refers to the
0.1version of thegit-cloneremote task from Tekton Hub.
Remote tasks using URLs
...
  pipelinesascode.tekton.dev/task: "<https://remote.url/task.yaml>"
...- 1
- The public URL to the remote task.Note
If you use GitHub and the remote task URL uses the same host as the
Repositorycustom resource definition (CRD), Pipelines as Code uses the GitHub token and fetches the URL using the GitHub API.For example, if you have a repository URL similar to
https://github.com/<organization>/<repository>and the remote HTTP URL references a GitHub blob similar tohttps://github.com/<organization>/<repository>/blob/<mainbranch>/<path>/<file>, Pipelines as Code fetches the task definition files from that private repository with the GitHub App token.When you work on a public GitHub repository, Pipelines as Code acts similarly for a GitHub raw URL such as
https://raw.githubusercontent.com/<organization>/<repository>/<mainbranch>/<path>/<file>.- GitHub App tokens are scoped to the owner or organization where the repository is located. When you use the GitHub webhook method, you can fetch any private or public repository on any organization where the personal token is allowed.
Reference a task from a YAML file inside your repository
...
pipelinesascode.tekton.dev/task: "<share/tasks/git-clone.yaml>"
...- 1
- Relative path to the local file containing the task definition.
5.3. Using remote pipeline annotations with Pipelines as Code
You can share a pipeline definition across multiple repositories by using the remote pipeline annotation.
...
    pipelinesascode.tekton.dev/pipeline: "<https://git.provider/raw/pipeline.yaml>"
...- 1
- URL to the remote pipeline definition. You can also provide locations for files inside the same repository.
You can reference only one pipeline definition using the annotation.
5.3.1. Overriding a task in a remote pipeline
By default, if you use a remote pipeline annotation in a pipeline run, Pipelines as Code uses all the tasks that are a part of the remote pipeline.
You can override a task in a remote pipeline by adding a task annotation to the pipeline run. The added task must have the same name as a task in the remote pipeline.
For example, you might use the following pipeline run definition:
Example pipeline run definition referencing a remote pipeline and overriding a task
apiVersion: tekton.dev/v1
kind: PipelineRun
metadata:
  annotations:
    pipelinesascode.tekton.dev/pipeline: "https://git.provider/raw/pipeline.yaml"
    pipelinesascode.tekton.dev/task: "./my-git-clone-task.yaml"
For this example, assume the remote task found at https://git.provider/raw/pipeline.yaml includes a task named git-clone and the task that the my-git-clone-task.yaml file defines is also named git-clone.
In this case, the pipeline run executes the remote pipeline, but replaces the task named git-clone in the pipeline with the task you defined.
Chapter 6. Managing pipeline runs
Using Pipelines as Code, you can create pipelines in your code repository and run these pipelines.
6.1. Creating a pipeline run using Pipelines as Code
To run pipelines using Pipelines as Code, you can create pipeline run definitions or templates as YAML files in the .tekton/ directory of the repository. You can reference YAML files in other repositories using remote URLs, but pipeline runs are only triggered by events in the repository containing the .tekton/ directory.
The Pipelines as Code resolver bundles the pipeline runs with all tasks as a single pipeline run without external dependencies.
-
For pipelines, use at least one pipeline run with a spec, or a separated
Pipelineobject. - For tasks, embed task spec inside a pipeline, or define it separately as a Task object.
Parameterizing commits and URLs
You can specify the parameters of your commit and URL by using dynamic, expandable variables with the {{<var>}} format. Currently, you can use the following variables:
-
{{repo_owner}}: The repository owner. -
{{repo_name}}: The repository name. -
{{repo_url}}: The repository full URL. -
{{revision}}: Full SHA revision of a commit. -
{{sender}}: The username or account id of the sender of the commit. -
{{source_branch}}: The branch name where the event originated. -
{{target_branch}}: The branch name that the event targets. For push events, it’s the same as thesource_branch. -
{{pull_request_number}}: The pull or merge request number, defined only for apull_requestevent type. -
{{git_auth_secret}}: The secret name that is generated automatically with Git provider’s token for checking out private repos.
Matching an event to a pipeline run
You can match different Git provider events with each pipeline run by using special annotations on the pipeline run. If there are multiple pipeline runs matching an event, Pipelines as Code runs them in parallel and posts the results to the Git provider as soon a pipeline run finishes.
Matching a pull event to a pipeline run
You can use the following example to match the pipeline-pr-main pipeline run with a pull_request event that targets the main branch:
apiVersion: tekton.dev/v1
kind: PipelineRun
metadata:
  name: pipeline-pr-main
annotations:
  pipelinesascode.tekton.dev/on-target-branch: "[main]"
  pipelinesascode.tekton.dev/on-event: "[pull_request]"
# ...- 1
- You can specify multiple branches by adding comma-separated entries. For example,
"[main, release-nightly]". In addition, you can specify the following:-
Full references to branches such as
"refs/heads/main" -
Globs with pattern matching such as
"refs/heads/\*" -
Tags such as
"refs/tags/1.\*"
-
Full references to branches such as
Matching a push event to a pipeline run
You can use the following example to match the pipeline-push-on-main pipeline run with a push event targeting the refs/heads/main branch:
apiVersion: tekton.dev/v1
kind: PipelineRun
metadata:
  name: pipeline-push-on-main
annotations:
  pipelinesascode.tekton.dev/on-target-branch: "[refs/heads/main]"
  pipelinesascode.tekton.dev/on-event: "[push]"
# ...- 1
- You can specify multiple branches by adding comma-separated entries. For example,
"[main, release-nightly]". In addition, you can specify the following:-
Full references to branches such as
"refs/heads/main" -
Globs with pattern matching such as
"refs/heads/\*" -
Tags such as
"refs/tags/1.\*"
-
Full references to branches such as
Matching a comment event to a pipeline run
You can use the following example to match the pipeline-comment pipeline run with a comment on a pull request, when the text of the comment matches the ^/merge-pr regular expression:
apiVersion: tekton.dev/v1
kind: PipelineRun
metadata:
  name: pipeline-comment
annotations:
  pipelinesascode.tekton.dev/on-comment: "^/merge-pr"
# ...
The pipeline run starts only if the comment author meets one of the following requirements:
- The author is the owner of the repository.
- The author is a collaborator on the repository.
- The author is a public member on the organization of the repository.
-
The comment author is listed in the
approversorreviewerssection of theOWNERSfile in the root of the repository, as defined in the Kubernetes documentation. Pipelines as Code supports the specification for theOWNERSandOWNERS_ALIASESfiles. If theOWNERSfile includes a filters section, Pipelines as Code matches approvers and reviewers only against the.*filter.
Matching a comment event to a pipeline run is a Technology Preview feature only. Technology Preview features are not supported with Red Hat production service level agreements (SLAs) and might not be functionally complete. Red Hat does not recommend using them in production. These features provide early access to upcoming product features, enabling customers to test functionality and provide feedback during the development process.
For more information about the support scope of Red Hat Technology Preview features, see Technology Preview Features Support Scope.
Advanced event matching
Pipelines as Code supports using Common Expression Language (CEL) based filtering for advanced event matching. If you have the pipelinesascode.tekton.dev/on-cel-expression annotation in your pipeline run, Pipelines as Code uses the CEL expression and skips the on-target-branch annotation. Compared to the simple on-target-branch annotation matching, the CEL expressions allow complex filtering and negation.
To use CEL-based filtering with Pipelines as Code, consider the following examples of annotations:
To match a
pull_requestevent targeting themainbranch and coming from thewipbranch:apiVersion: tekton.dev/v1 kind: PipelineRun metadata: name: pipeline-advanced-pr annotations: pipelinesascode.tekton.dev/on-cel-expression: | event == "pull_request" && target_branch == "main" && source_branch == "wip" ...To run a pipeline only if a path has changed, you can use the
.pathChangedsuffix function with a glob pattern:apiVersion: tekton.dev/v1 kind: PipelineRun metadata: name: pipeline-advanced-pr-pathchanged annotations: pipelinesascode.tekton.dev/on-cel-expression: | event == "pull_request" && "docs/\*.md".pathChanged()1 # ...- 1
- Matches all markdown files in the
docsdirectory.
To match all pull requests starting with the title
[DOWNSTREAM]:apiVersion: tekton.dev/v1 kind: PipelineRun metadata: name: pipeline-advanced-pr-downstream annotations: pipelinesascode.tekton.dev/on-cel-expression: | event == "pull_request && event_title.startsWith("[DOWNSTREAM]") # ...To run a pipeline on a
pull_requestevent, but skip theexperimentalbranch:apiVersion: tekton.dev/v1 kind: PipelineRun metadata: name: pipeline-advanced-pr-not-experimental annotations: pipelinesascode.tekton.dev/on-cel-expression: | event == "pull_request" && target_branch != experimental" # ...
For advanced CEL-based filtering while using Pipelines as Code, you can use the following fields and suffix functions:
-
event: Apushorpull_requestevent. -
target_branch: The target branch. -
source_branch: The branch of origin of apull_requestevent. Forpushevents, it is same as thetarget_branch. -
event_title: Matches the title of the event, such as the commit title for apushevent, and the title of a pull or merge request for apull_requestevent. Currently, only GitHub, Gitlab, and Bitbucket Cloud are the supported providers. -
.pathChanged: A suffix function to a string. The string can be a glob of a path to check if the path has changed. Currently, only GitHub and Gitlab are supported as providers.
In addition, you can access the full payload as passed by the Git repository provider. Use the headers field to access the headers of the payload, for example, headers['x-github-event']. Use the body field to access the body of the payload, for example, body.pull_request.state.
Using the header and body of the payload for CEL-based filtering with Pipelines as Code is a Technology Preview feature only. Technology Preview features are not supported with Red Hat production service level agreements (SLAs) and might not be functionally complete. Red Hat does not recommend using them in production. These features provide early access to upcoming product features, enabling customers to test functionality and provide feedback during the development process.
For more information about the support scope of Red Hat Technology Preview features, see Technology Preview Features Support Scope.
In the following example, the pipeline run starts only if all of the following conditions are true:
-
The pull request is targeting the
mainbranch. -
The author of the pull request is
superuser. -
The action is
synchronize; this action triggers when an update occurs on a pull request.
apiVersion: tekton.dev/v1
kind: PipelineRun
metadata:
  annotations:
    pipelinesascode.tekton.dev/on-cel-expression: |
      body.pull_request.base.ref == "main" &&
        body.pull_request.user.login == "superuser" &&
        body.action == "synchronize"
# ...
If you use the header or body field for event matching, you might be unable to trigger the pipeline run using Git commands such as retest. If you use a Git command, the payload body is the comment that contains this command and not the original payload.
If you want to trigger the pipeline run again when using the body field for event matching, you can close and reopen the pull request or merge request, or alternatively add a new SHA commit, for example using the following command:
git commit --amend --no-edit && git push --force-with-leaseUsing the temporary GitHub App token for Github API operations
You can use the temporary installation token generated by Pipelines as Code from GitHub App to access the GitHub API. The token value is stored in the temporary {{git_auth_secret}} dynamic variable generated for private repositories in the git-provider-token key.
For example, to add a comment to a pull request, you can use the github-add-comment task from Tekton Hub using a Pipelines as Code annotation:
...
  pipelinesascode.tekton.dev/task: "github-add-comment"
...
You can then add a task to the tasks section or finally tasks in the pipeline run definition:
[...]
tasks:
  - name:
      taskRef:
        name: github-add-comment
      params:
        - name: REQUEST_URL
          value: "{{ repo_url }}/pull/{{ pull_request_number }}"
        - name: COMMENT_OR_FILE
          value: "Pipelines as Code IS GREAT!"
        - name: GITHUB_TOKEN_SECRET_NAME
          value: "{{ git_auth_secret }}"
        - name: GITHUB_TOKEN_SECRET_KEY
          value: "git-provider-token"
...- 1
- By using the dynamic variables, you can reuse this snippet template for any pull request from any repository.
On GitHub Apps, the generated installation token is available for 8 hours and scoped to the repository from where the events originate unless configured differently on the cluster.
Additional resources
6.2. Running a pipeline run using Pipelines as Code
With default configuration, Pipelines as Code runs any pipeline run in the .tekton/ directory of the default branch of repository, when specified events such as pull request or push occurs on the repository. For example, if a pipeline run on the default branch has the annotation pipelinesascode.tekton.dev/on-event: "[pull_request]", it will run whenever a pull request event occurs.
In the event of a pull request or a merge request, Pipelines as Code also runs pipelines from branches other than the default branch, if the following conditions are met by the author of the pull request:
- The author is the owner of the repository.
- The author is a collaborator on the repository.
- The author is a public member on the organization of the repository.
-
The pull request author is listed in the
approversorreviewerssection of theOWNERSfile in the root of the repository, as defined in the Kubernetes documentation. Pipelines as Code supports the specification for theOWNERSandOWNERS_ALIASESfiles. If theOWNERSfile includes a filters section, Pipelines as Code matches approvers and reviewers only against the.*filter.
If the pull request author does not meet the requirements, another user who meets the requirements can comment /ok-to-test on the pull request, and start the pipeline run.
Pipeline run execution
A pipeline run always runs in the namespace of the Repository custom resource definition (CRD) associated with the repository that generated the event.
You can observe the execution of your pipeline runs using the tkn pac CLI tool.
To follow the execution of the last pipeline run, use the following example:
$ tkn pac logs -n <my-pipeline-ci> -L1 - 1
my-pipeline-ciis the namespace for theRepositoryCRD.
To follow the execution of any pipeline run interactively, use the following example:
$ tkn pac logs -n <my-pipeline-ci>1 - 1
my-pipeline-ciis the namespace for theRepositoryCRD. If you need to view a pipeline run other than the last one, you can use thetkn pac logscommand to select aPipelineRunattached to the repository:
If you have configured Pipelines as Code with a GitHub App, Pipelines as Code posts a URL in the Checks tab of the GitHub App. You can click the URL and follow the pipeline execution.
6.3. Restarting or canceling a pipeline run using Pipelines as Code
You can restart or cancel a pipeline run with no events, such as sending a new commit to your branch or raising a pull request. To restart all pipeline runs, use the Re-run all checks feature in the GitHub App.
To restart all or specific pipeline runs, use the following comments:
-
The
/testand/retestcomment restarts all pipeline runs. -
The
/test <pipeline_run_name>and/retest <pipeline_run_name>comment starts or restarts a specific pipeline run. You can use this command to start any Pipelines as Code pipeline run on the repository, whether or not it was triggered by an event for this pipeline run.
To cancel all or specific pipeline runs, use the following comments:
-
The
/cancelcomment cancels all pipeline runs. -
The
/cancel <pipeline_run_name>comment cancels a specific pipeline run.
The results of the comments are visible under the Checks tab of the GitHub App.
The comment starts, restarts, or cancels any pipeline runs only if the comment author meets one of the following requirements:
- The author is the owner of the repository.
- The author is a collaborator on the repository.
- The author is a public member on the organization of the repository.
-
The comment author is listed in the
approversorreviewerssection of theOWNERSfile in the root of the repository, as defined in the Kubernetes documentation. Pipelines as Code supports the specification for theOWNERSandOWNERS_ALIASESfiles. If theOWNERSfile includes a filters section, Pipelines as Code matches approvers and reviewers only against the.*filter.
Using a comment to start a pipeline run that does not match an event is a Technology Preview feature only. Technology Preview features are not supported with Red Hat production service level agreements (SLAs) and might not be functionally complete. Red Hat does not recommend using them in production. These features provide early access to upcoming product features, enabling customers to test functionality and provide feedback during the development process.
For more information about the support scope of Red Hat Technology Preview features, see Technology Preview Features Support Scope.
Procedure
- If you target a pull request and you use the GitHub App, go to the Checks tab and click Re-run all checks.
If you target a pull or merge request, use the comments inside your pull request:
Example comment that cancels all pipeline runs
This is a comment inside a pull request.
/cancel
If you target a push request, include the comments within your commit messages.
NoteThis feature is supported for the GitHub provider only.
- Go to your GitHub repository.
- Click the Commits section.
- Click the commit where you want to restart a pipeline run.
Click on the line number where you want to add a comment.
Example comment that starts or restarts a specific pipeline run
This is a comment inside a commit. /retest example_pipeline_runNoteIf you run a command on a commit that exists in multiple branches within a push request, the branch with the latest commit is used.
This results in two situations:
-
If you run a command on a commit without any argument, such as
/test, the test is automatically performed on themainbranch. -
If you include a branch specification, such as
/test branch:user-branch, the test is performed on the commit where the comment is located with the context of theuser-branchbranch.
-
If you run a command on a commit without any argument, such as
6.4. Monitoring pipeline run status using Pipelines as Code
Depending on the context and supported tools, you can monitor the status of a pipeline run in different ways.
Status on GitHub Apps
When a pipeline run finishes, the status is added in the Check tabs with limited information on how long each task of your pipeline took, and the output of the tkn pipelinerun describe command.
Log error snippet
When Pipelines as Code detects an error in one of the tasks of a pipeline, a small snippet consisting of the last 3 lines in the task breakdown of the first failed task is displayed.
Pipelines as Code avoids leaking secrets by looking into the pipeline run and replacing secret values with hidden characters. However, Pipelines as Code cannot hide secrets coming from workspaces and envFrom source.
Annotations for log error snippets
In the TektonConfig custom resource, in the pipelinesAsCode.settings spec, you can set the error-detection-from-container-logs parameter to true. In this case, Pipelines as Code detects the errors from the container logs and adds them as annotations on the pull request where the error occurred.
Adding annotations for log error snippets is a Technology Preview feature only. Technology Preview features are not supported with Red Hat production service level agreements (SLAs) and might not be functionally complete. Red Hat does not recommend using them in production. These features provide early access to upcoming product features, enabling customers to test functionality and provide feedback during the development process.
For more information about the support scope of Red Hat Technology Preview features, see Technology Preview Features Support Scope.
Currently, Pipelines as Code supports only the simple cases where the error looks like makefile or grep output of the following format:
<filename>:<line>:<column>: <error message>
You can customize the regular expression used to detect the errors with the error-detection-simple-regexp parameter. The regular expression uses named groups to give flexibility on how to specify the matching. The groups needed to match are filename, line, and error. You can view the Pipelines as Code config map for the default regular expression.
By default, Pipelines as Code scans only the last 50 lines of the container logs. You can increase this value in the error-detection-max-number-of-lines field or set -1 for an unlimited number of lines. However, such configurations may increase the memory usage of the watcher.
Status for webhook
For webhook, when the event is a pull request, the status is added as a comment on the pull or merge request.
Failures
If a namespace is matched to a Repository custom resource definition (CRD), Pipelines as Code emits its failure log messages in the Kubernetes events inside the namespace.
Status associated with Repository CRD
The last 5 status messages for a pipeline run is stored inside the Repository custom resource.
$ oc get repo -n <pipelines-as-code-ci>NAME URL NAMESPACE SUCCEEDED REASON STARTTIME COMPLETIONTIME
pipelines-as-code-ci https://github.com/openshift-pipelines/pipelines-as-code pipelines-as-code-ci True Succeeded 59m 56m
Using the tkn pac describe command, you can extract the status of the runs associated with your repository and its metadata.
Notifications
Pipelines as Code does not manage notifications. If you need to have notifications, use the finally feature of pipelines.
Additional resources
Additional resources
6.5. Cleaning up pipeline run using Pipelines as Code
There can be many pipeline runs in a user namespace. By setting the max-keep-runs annotation, you can configure Pipelines as Code to retain a limited number of pipeline runs that matches an event. For example:
...
  pipelinesascode.tekton.dev/max-keep-runs: "<max_number>"
...- 1
- Pipelines as Code starts cleaning up right after it finishes a successful execution, retaining only the maximum number of pipeline runs configured using the annotation.Note
- Pipelines as Code skips cleaning the running pipelines but cleans up the pipeline runs with an unknown status.
- Pipelines as Code skips cleaning a failed pull request.
6.6. Using incoming webhook with Pipelines as Code
Using an incoming webhook URL and a shared secret, you can start a pipeline run in a repository.
To use incoming webhooks, specify the following within the spec section of the Repository custom resource definition (CRD):
- The incoming webhook URL that Pipelines as Code matches.
The Git provider and the user token. Currently, Pipelines as Code supports
github,gitlab, andbitbucket-cloud.NoteWhen using incoming webhook URLs in the context of GitHub app, you must specify the token.
- The target branches and a secret for the incoming webhook URL.
Example: Repository CRD with incoming webhook
apiVersion: "pipelinesascode.tekton.dev/v1alpha1"
kind: Repository
metadata:
  name: repo
  namespace: ns
spec:
  url: "https://github.com/owner/repo"
  git_provider:
    type: github
    secret:
      name: "owner-token"
  incoming:
    - targets:
      - main
      secret:
        name: repo-incoming-secret
      type: webhook-url
Example: The repo-incoming-secret secret for incoming webhook
apiVersion: v1
kind: Secret
metadata:
  name: repo-incoming-secret
  namespace: ns
type: Opaque
stringData:
  secret: <very-secure-shared-secret>
To trigger a pipeline run located in the .tekton directory of a Git repository, use the following command:
$ curl -X POST 'https://control.pac.url/incoming?secret=very-secure-shared-secret&repository=repo&branch=main&pipelinerun=target_pipelinerun'
Pipelines as Code matches the incoming URL and treats it as a push event. However, Pipelines as Code does not report status of the pipeline runs triggered by this command.
To get a report or a notification, add it directly with a finally task to your pipeline. Alternatively, you can inspect the Repository CRD with the tkn pac CLI tool.
Chapter 7. Pipelines as Code command reference
You can use the tkn pac CLI tool to control Pipelines as Code. You can also configure Pipelines as Code logging with the TektonConfig custom resource and use the oc command to view Pipelines as Code logs.
7.1. Pipelines as Code command reference
The tkn pac CLI tool offers the following capabilities:
- Bootstrap Pipelines as Code installation and configuration.
- Create a new Pipelines as Code repository.
- List all Pipelines as Code repositories.
- Describe a Pipelines as Code repository and the associated runs.
- Generate a simple pipeline run to get started.
- Resolve a pipeline run as if it was executed by Pipelines as Code.
You can use the commands corresponding to the capabilities for testing and experimentation, so that you don’t have to make changes to the Git repository containing the application source code.
7.1.1. Basic syntax
$ tkn pac [command or options] [arguments]7.1.2. Global options
$ tkn pac --help7.1.3. Utility commands
7.1.3.1. bootstrap
| Command | Description |
|---|---|
|
| Installs and configures Pipelines as Code for Git repository hosting service providers, such as GitHub and GitHub Enterprise. |
|
| Installs the nightly build of Pipelines as Code. |
|
| Overrides the OpenShift route URL.
By default, If you do not have an OpenShift Container Platform cluster, it asks you for the public URL that points to the ingress endpoint. |
|
|
Create a GitHub application and secrets in the |
7.1.3.2. repository
| Command | Description |
|---|---|
|
| Creates a new Pipelines as Code repository and a namespace based on the pipeline run template. |
|
| Lists all the Pipelines as Code repositories and displays the last status of the associated runs. |
|
| Describes a Pipelines as Code repository and the associated runs. |
7.1.3.3. generate
| Command | Description |
|---|---|
|
| Generates a simple pipeline run. When executed from the directory containing the source code, it automatically detects current Git information. In addition, it uses basic language detection capability and adds extra tasks depending on the language.
For example, if it detects a |
7.1.3.4. resolve
| Command | Description |
|---|---|
|
| Executes a pipeline run as if it is owned by the Pipelines as Code on service. |
|
|
Displays the status of a live pipeline run that uses the template in Combined with a Kubernetes installation running on your local machine, you can observe the pipeline run without generating a new commit. If you run the command from a source code repository, it attempts to detect the current Git information and automatically resolve parameters such as current revision or branch. |
|
| Executes a pipeline run by overriding default parameter values derived from the Git repository.
The
You can override the default information gathered from the Git repository by specifying parameter values using the |
7.2. Configuring Pipelines as Code logging
You can configure Pipelines as Code logging by editing the pac-config-logging config map in the TektonConfig custom resource (CR).
Prerequisites
- You have Pipelines as Code installed on your cluster.
Procedure
- In the Administrator perspective of the web console, go to Administration → CustomResourceDefinitions.
-
Use the Search by name field to search for the
tektonconfigs.operator.tekton.devcustom resource definition (CRD) and click TektonConfig to view the CRD Details page. - Click the Instances tab.
-
Click the config instance to view the
TektonConfigCR details. - Click the YAML tab.
Edit the
loglevel.fields under the.options.configMaps.pac-config-logging.dataparameter based on your requirements.Example
TektonConfigCR with the Pipelines as Code log level fields set towarnapiVersion: operator.tekton.dev/v1alpha1 kind: TektonConfig metadata: name: config spec: platforms: openshift: pipelinesAsCode: options: configMaps: pac-config-logging: data: loglevel.pac-watcher: warn1 loglevel.pipelines-as-code-webhook: warn2 loglevel.pipelinesascode: warn3 zap-logger-config: | { "level": "info", "development": false, "sampling": { "initial": 100, "thereafter": 100 }, "outputPaths": ["stdout"], "errorOutputPaths": ["stderr"], "encoding": "json", "encoderConfig": { "timeKey": "ts", "levelKey": "level", "nameKey": "logger", "callerKey": "caller", "messageKey": "msg", "stacktraceKey": "stacktrace", "lineEnding": "", "levelEncoder": "", "timeEncoder": "iso8601", "durationEncoder": "", "callerEncoder": "" } }Optional: Create a custom logging config map for the Pipelines as Code components by changing the
.env.valuefor each component under the.options.deploymentsfield. The example below shows the configuration with the custom config map calledcustom-pac-config-logging.Example
TektonConfigCR with the Pipelines as Code custom logging config mapapiVersion: operator.tekton.dev/v1alpha1 kind: TektonConfig metadata: name: config spec: platforms: openshift: pipelinesAsCode: enable: true options: configMaps: custom-pac-config-logging: data: loglevel.pac-watcher: warn loglevel.pipelines-as-code-webhook: warn loglevel.pipelinesascode: warn zap-logger-config: | { "level": "info", "development": false, "sampling": { "initial": 100, "thereafter": 100 }, "outputPaths": ["stdout"], "errorOutputPaths": ["stderr"], "encoding": "json", "encoderConfig": { "timeKey": "ts", "levelKey": "level", "nameKey": "logger", "callerKey": "caller", "messageKey": "msg", "stacktraceKey": "stacktrace", "lineEnding": "", "levelEncoder": "", "timeEncoder": "iso8601", "durationEncoder": "", "callerEncoder": "" } } deployments: pipelines-as-code-controller: spec: template: spec: containers: - name: pac-controller env: - name: CONFIG_LOGGING_NAME value: custom-pac-config-logging pipelines-as-code-watcher: spec: template: spec: containers: - name: pac-watcher env: - name: CONFIG_LOGGING_NAME value: custom-pac-config-logging pipelines-as-code-webhook: spec: template: spec: containers: - name: pac-webhook env: - name: CONFIG_LOGGING_NAME value: custom-pac-config-logging
7.3. Splitting Pipelines as Code logs by namespace
Pipelines as Code logs contain the namespace information to make it possible to filter logs or split the logs by a particular namespace. For example, to view the Pipelines as Code logs related to the mynamespace namespace, enter the following command:
$ oc logs pipelines-as-code-controller-<unique-id> -n openshift-pipelines | grep mynamespace - 1
- Replace
pipelines-as-code-controller-<unique-id>with the Pipelines as Code controller name.