Ce contenu n'est pas disponible dans la langue sélectionnée.
Kaoto
Create and edit integrations based on Apache Camel with Kaoto
Abstract
Chapter 1. Overview of Kaoto
The VS Code extensions for Apache Camel are listed as development support. For more information about the scope of development support, see Development Support Scope of Coverage for Red Hat Build of Apache Camel.
Kaoto is an acronym for Kamel Orchestration Tool. It is a low code and no code integration designer to create and edit integrations based on Apache Camel. Kaoto is extendable, flexible, and adaptable to different use cases. For more information about the history of Kaoto, see Statistics and History of Kaoto.
Kaoto offers a rich catalog of building blocks for use in graphical design. By default, Kaoto loads the official upstream Camel Catalog and Kamelet Catalog.
Benefits of using Kaoto can be listed as follows:
Enhanced Visual Development Experience
By leveraging Kaoto’s visual designing capabilities, users can intuitively create, view, and edit Camel integrations through the user interface. This low-code/no-code approach significantly reduces the learning curve for new users and accelerates the development process for seasoned developers.
Comprehensive Component Catalog Accessibility
Kaoto provides immediate access to a rich catalog of Camel components, enterprise integration patterns (EIPs), and Kamelets. This extensive Catalog enables developers to easily find and implement the necessary components for their integration solutions. By having these resources readily available, developers can focus more on solving business problems rather than spending time searching for and learning about different components.
Streamlined Integration Development Process
The platform is designed with an efficient user experience in mind, optimizing the steps required to create comprehensive integrations. This efficiency is achieved through features like auto-completion, configuration forms, and interactive feedback mechanisms. As a result, developers can quickly assemble and configure integrations, reducing the overall development time. This streamlined process encourages experimentation and innovation by making it easier to prototype and test different approaches.
1.1. Why Kaoto?
Camel at Heart
Using the power of Apache Camel: Kaoto utilizes the Apache Camel models and schemas to always offer you all available Camel features.
Local Development
VS Code Extension: We provide Kaoto as an extension you can install from the Microsoft Marketplace and also from the Open VSX Marketplace.
LCNC: Low Code and No Code
Care about developers: You can seamlessly switch between any IDE and Kaoto, allowing mixed teams and converting low-code integrators to developers.
FLOSS heart
Free Libre and Open Source Forever: Truly open with no vendor lock-in. Use, reuse, share, modify, and resell to the users' needs.
Chapter 2. Installing Kaoto
It is recommended to install the Extension Pack for Apache Camel by Red Hat. It will provide a set of tools to manage, edit, run, and debug Camel integrations in various contexts.
The following procedure explains how to install VS Code and other essential extensions required to get started with Kaoto.
- If you do not have Visual Studio Code installed, install it from here.
- Launch VS Code.
- Install the Extension Pack for Apache Camel by Red Hat into your Visual Studio Code instance.
- To run and debug Camel integrations using VS Code UI, install JBang CLI. Optionally, to run Camel integrations from the command line, install Camel CLI.
Create and select a workspace folder where all the integration will be stored. Selecting a workspace is important to ensure all required commands will be available and behave correctly.
Chapter 3. Getting started with Kaoto
The following procedure explains how to create and store integrations with Kaoto.
Open VS Code and select "Open Folder".
- In the folder selection dialog select the folder to store your integrations or create a new folder and select it.
Open Command Palette (
Ctrl+Shift+P), paste the following command, and press enter.Create a Camel route using YAML DSL
Create a Camel route using YAML DSLCopy to Clipboard Copied! Toggle word wrap Toggle overflow Provide a name for the new file without extension and press enter.
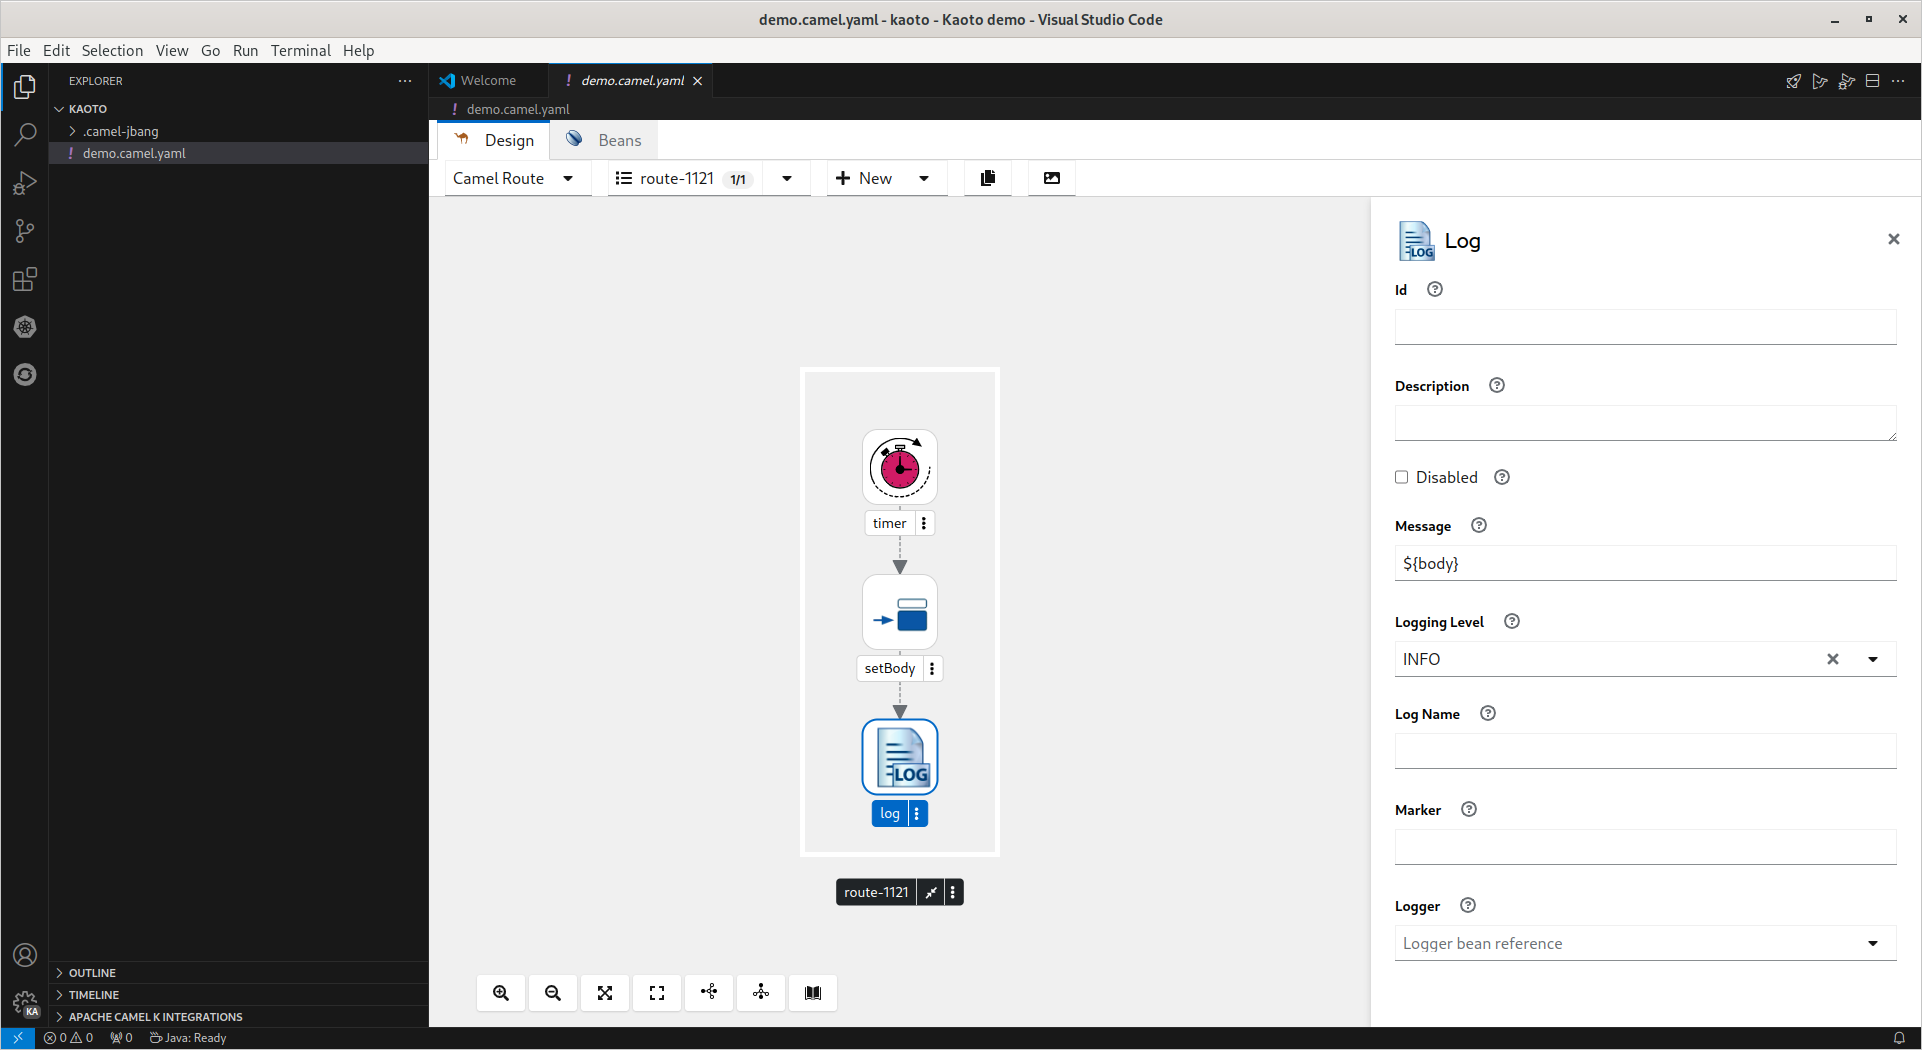
The file is created with extension
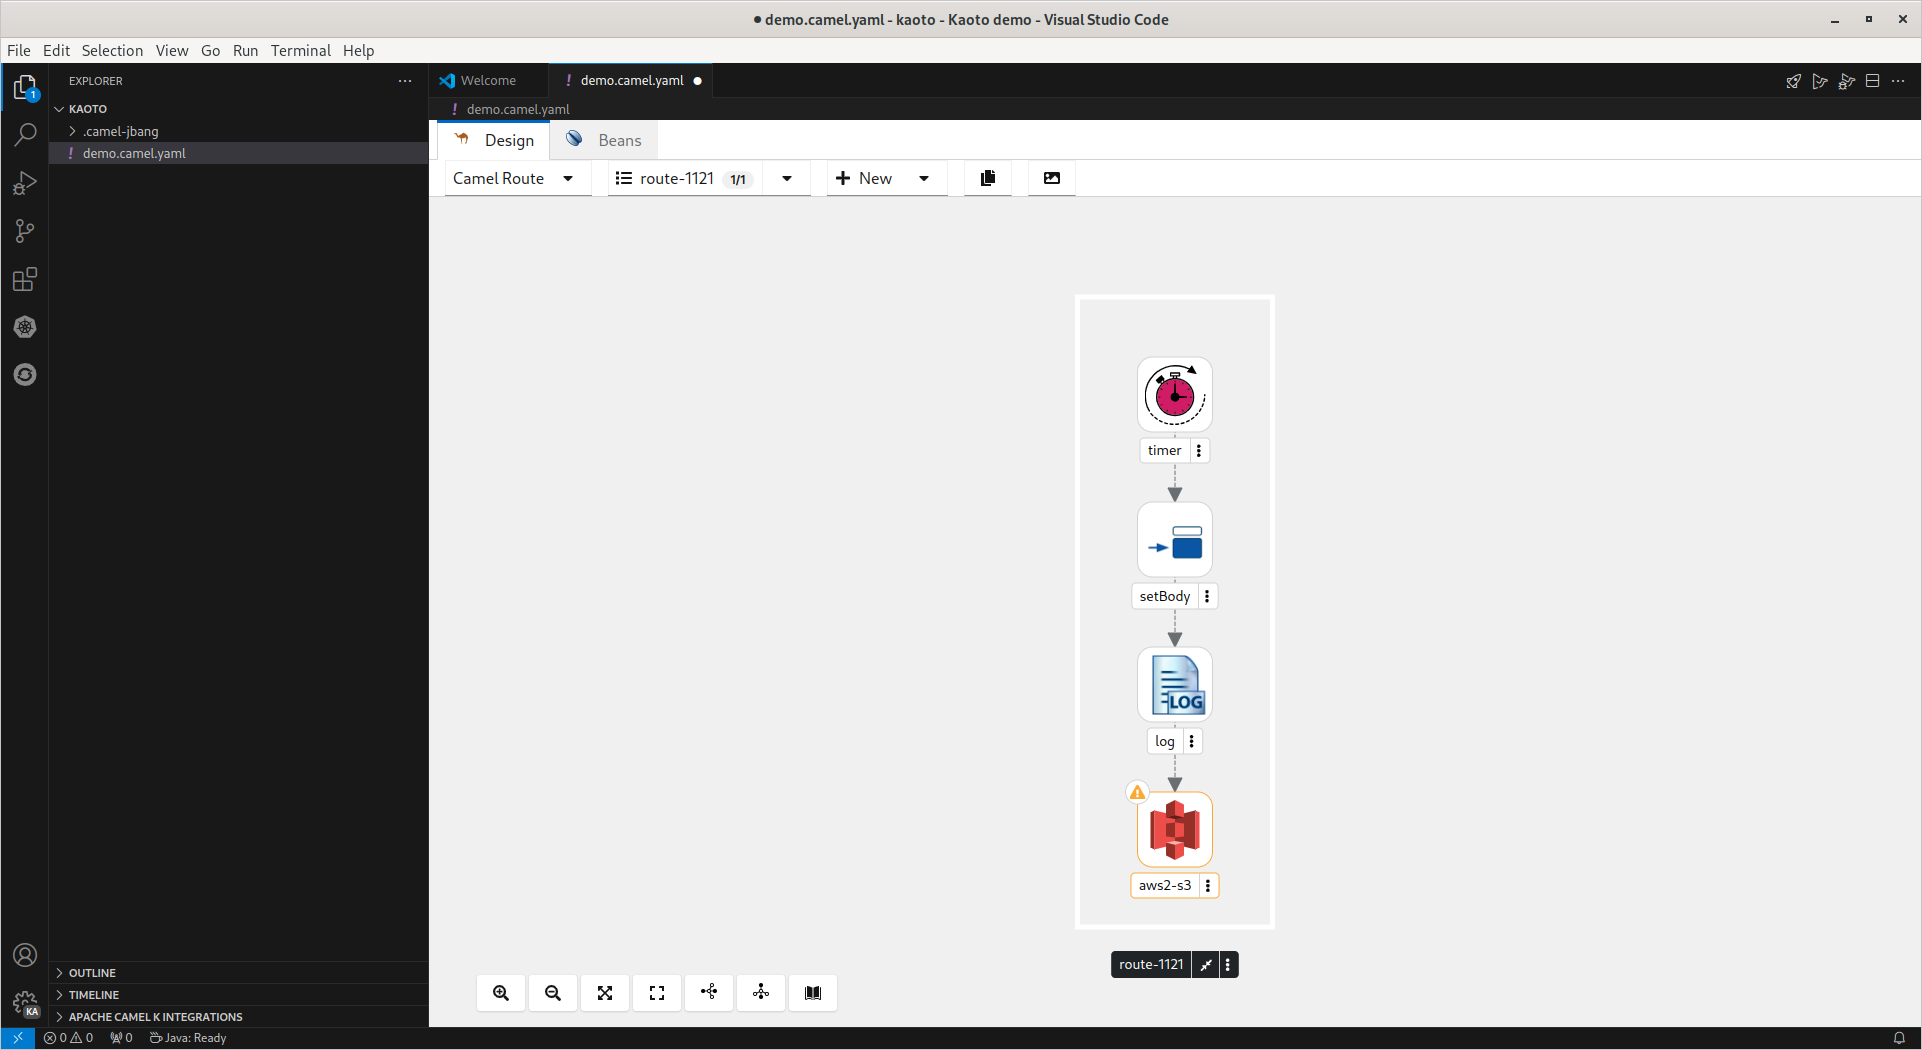
camel.yaml. (Here:demo.camel.yaml).Select the log step to configure the
Messagein the configuration panel.-
Using the icons below the route image, you can choose between a vertical/horizontal layout of the route, zoom in/out, etc.
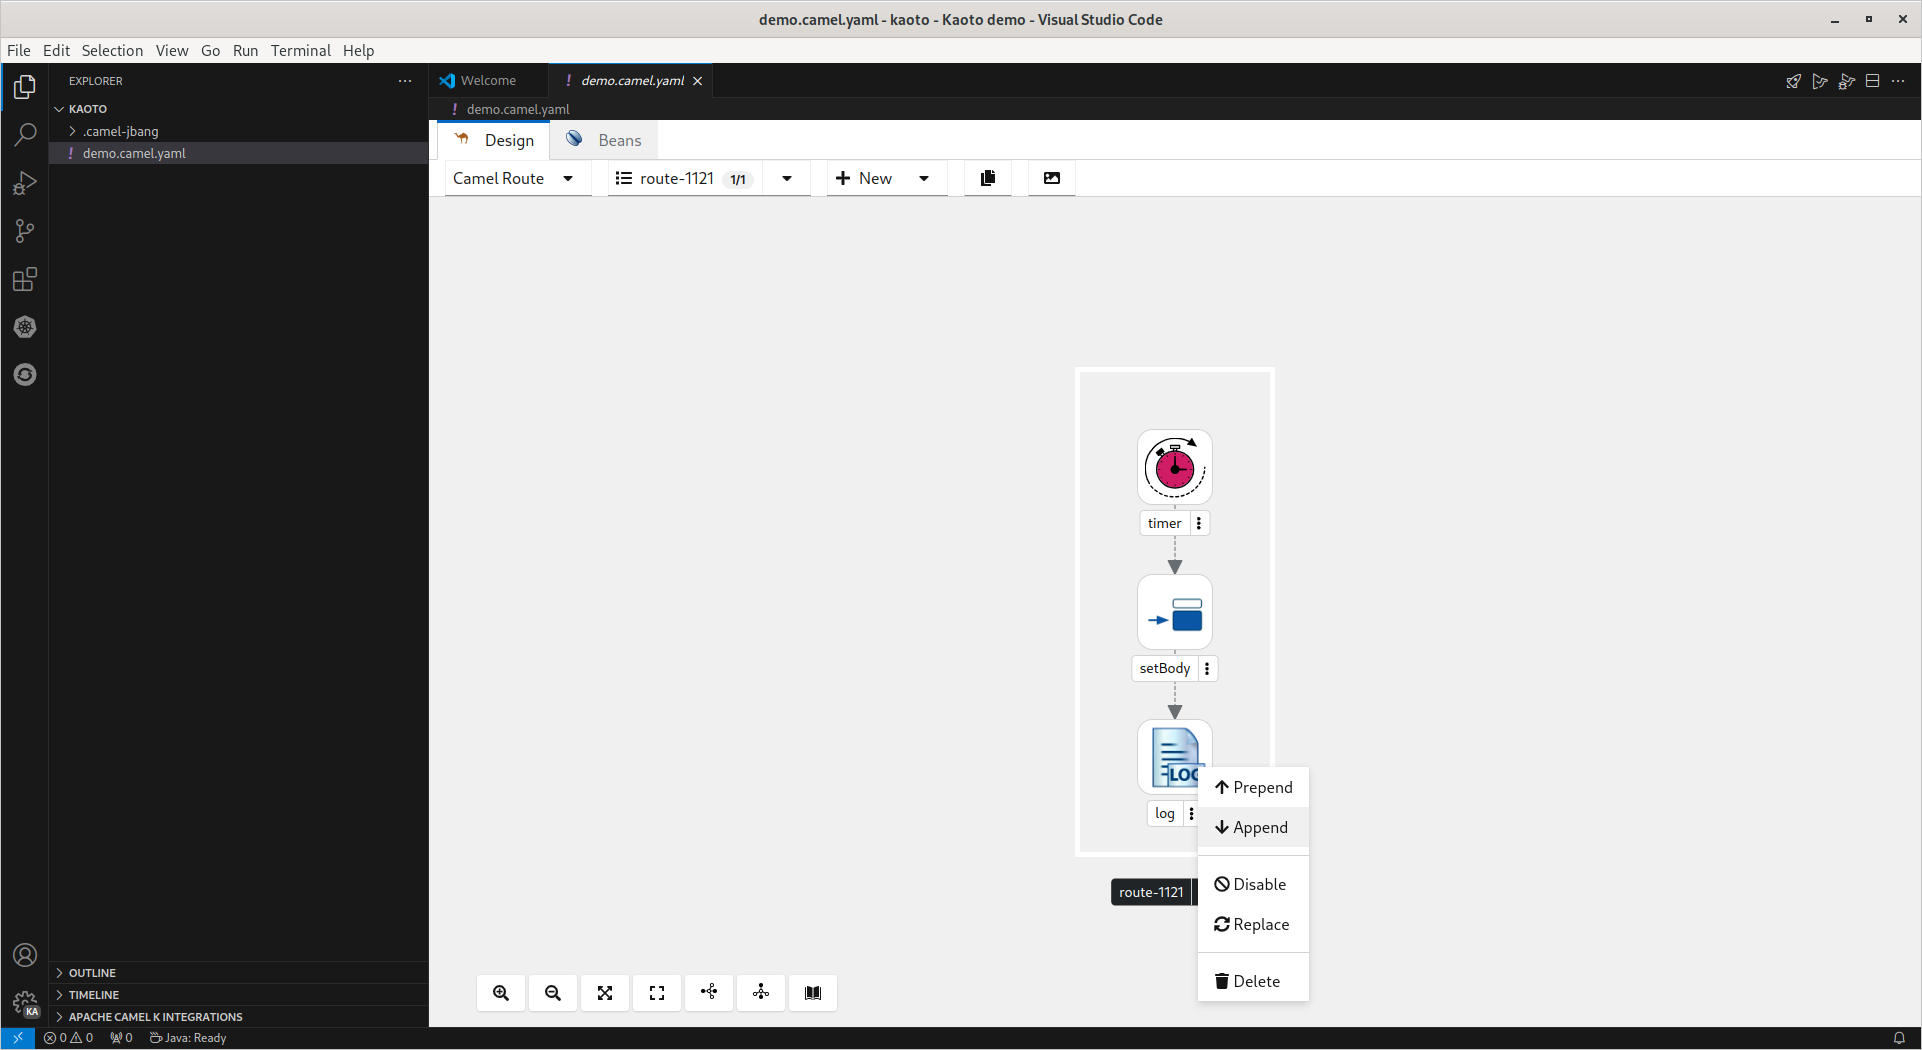
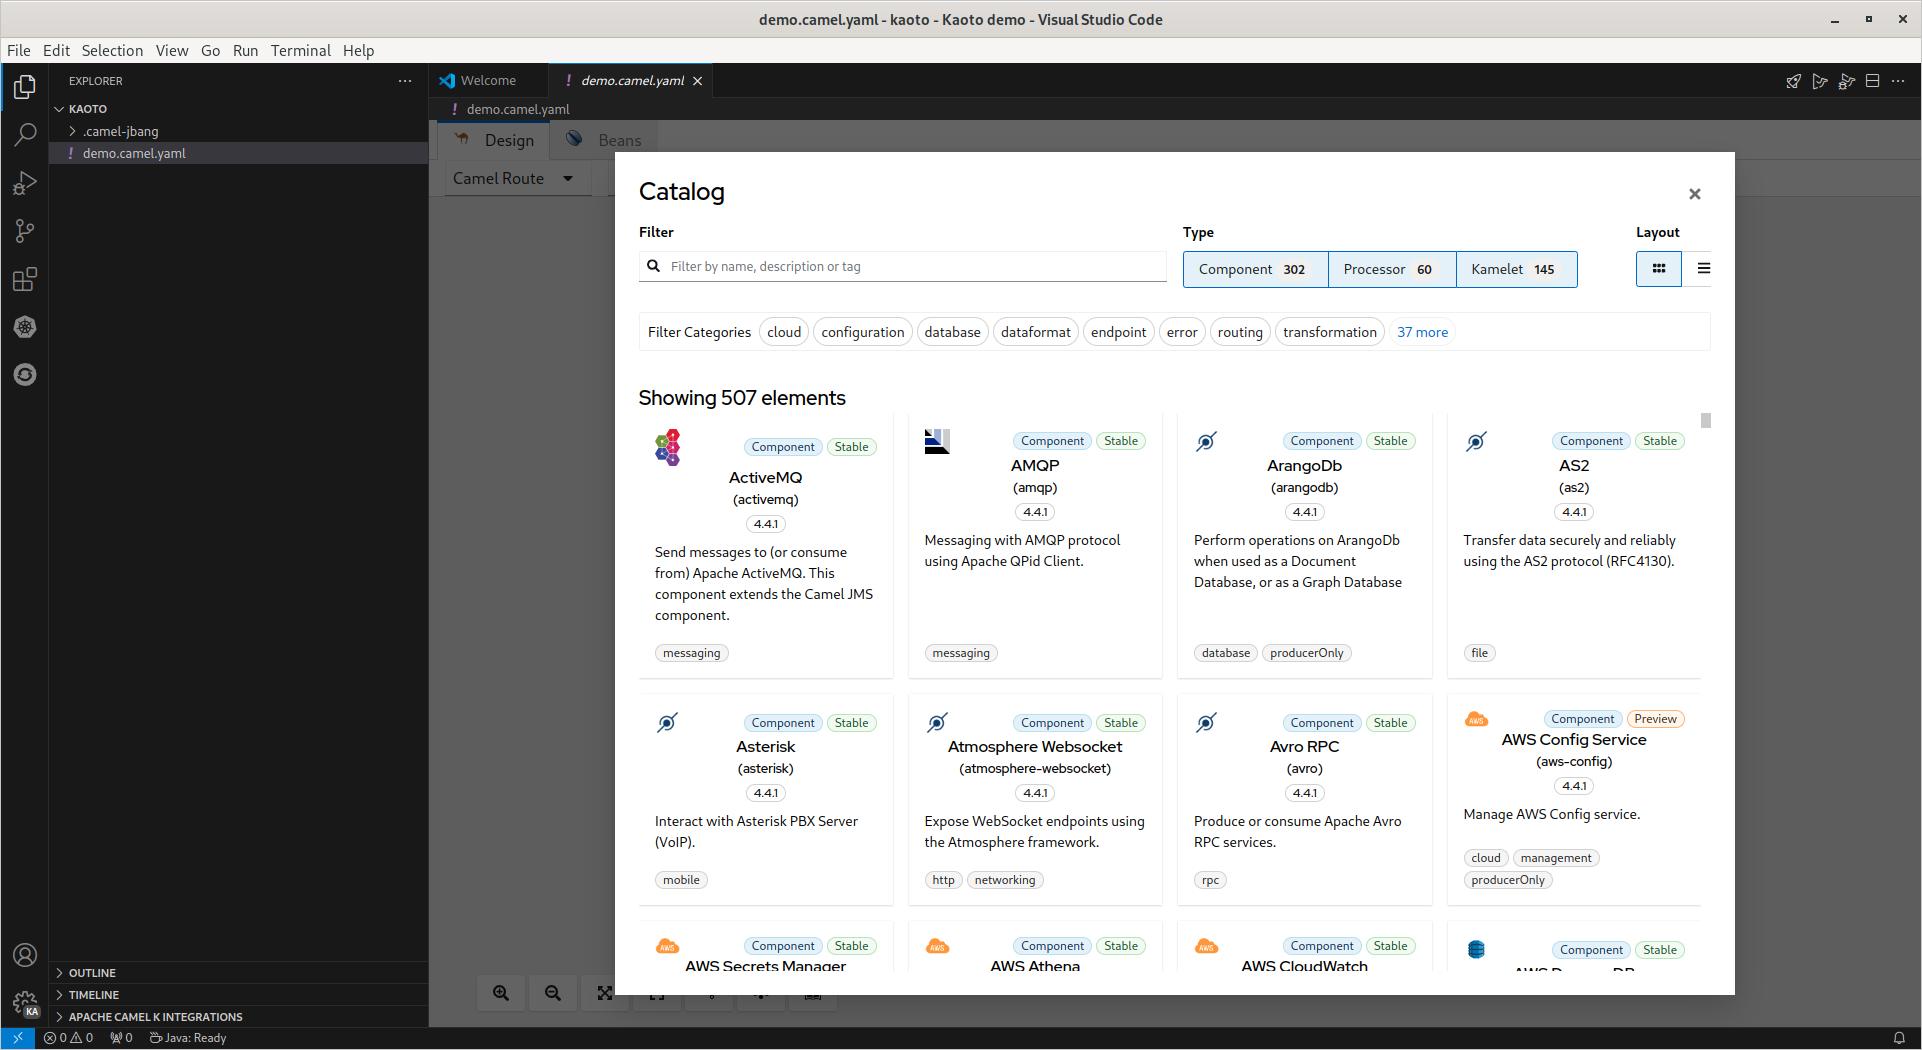
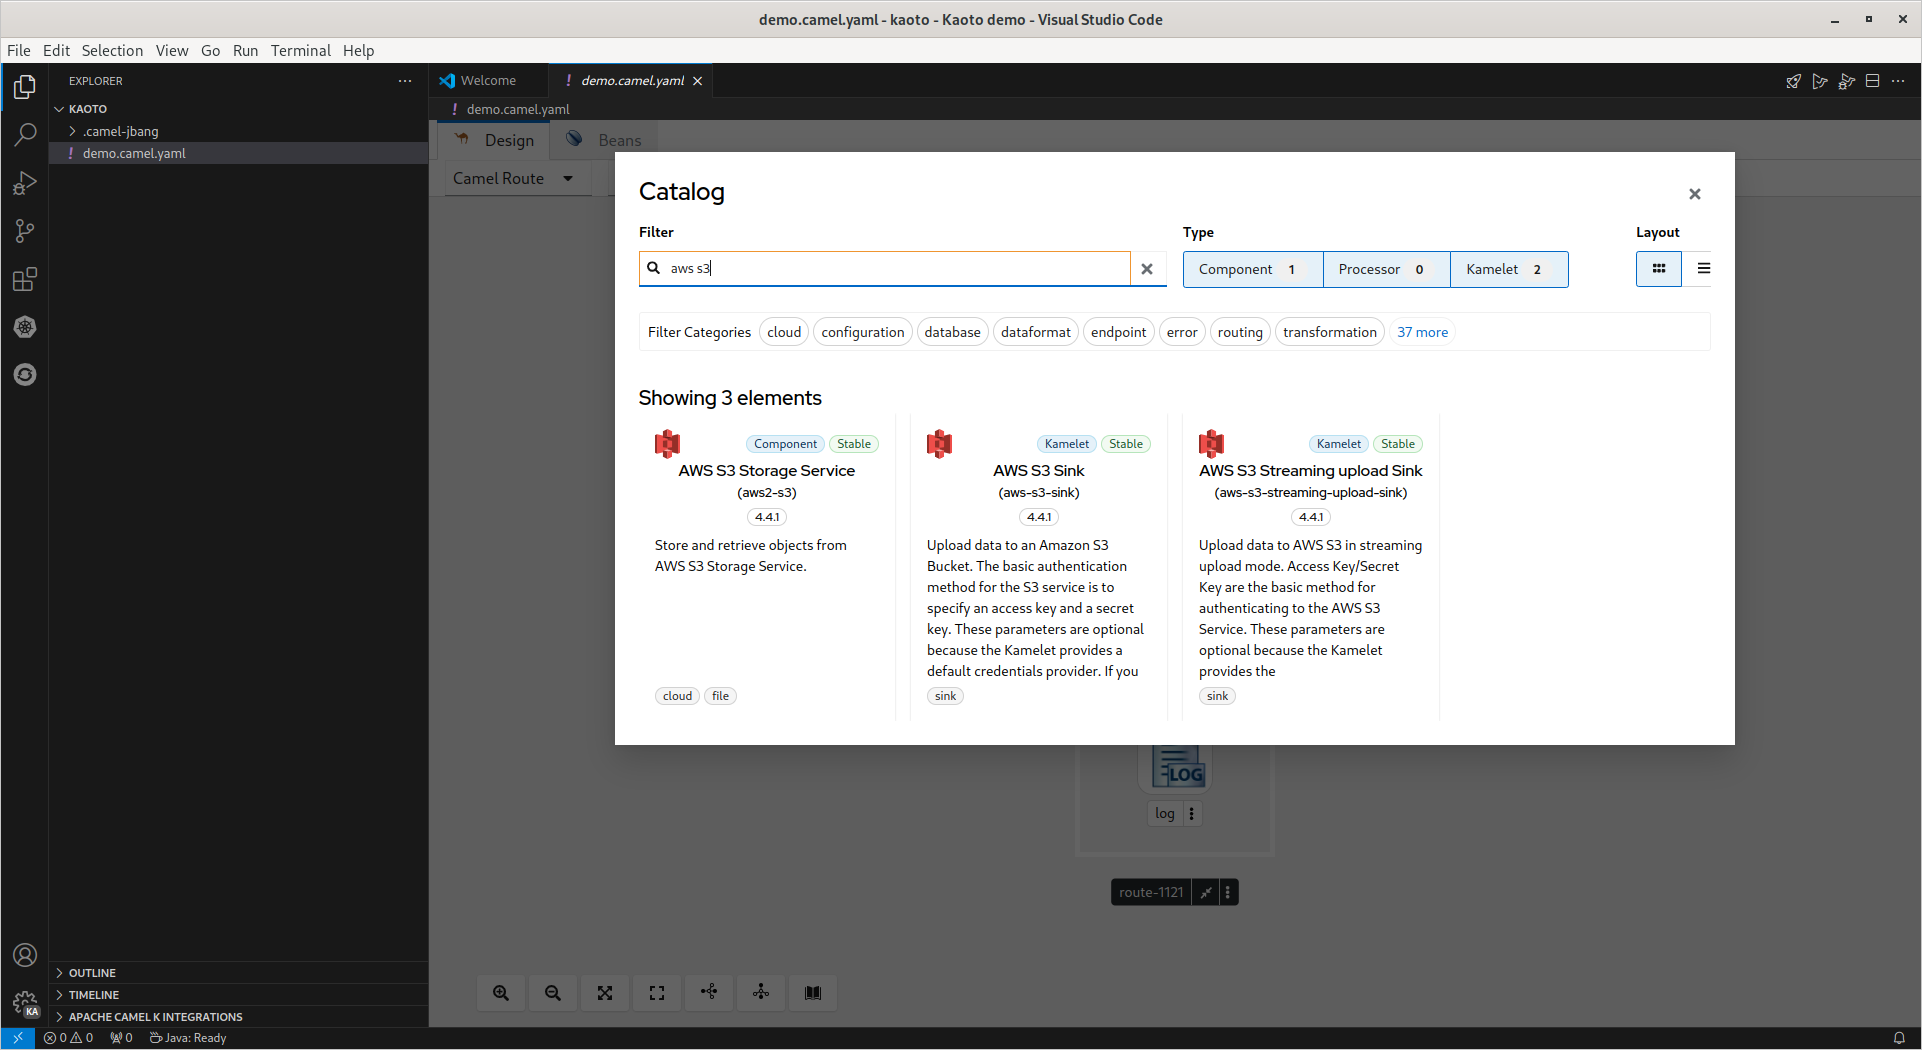
Open Catalogon the far right displays the Camel catalog. There are also several filtering options in the Catalog, which greatly simplifies finding what you need. To add a component to the Camel route, click on the dot pattern of an existing component or invoke the right-click context menu on the step and select "Append".
The camel component Catalog will be displayed, click on the additional component and it will be added to the route.
To remove the added component from the Camel route, click on the dot pattern of the existing component or invoke the right-click context menu on the step and select "Delete".
The existing component will be removed from the route.


3.1. Running the Camel Route
To get started with simple routes, they can be launched with Camel JBang.
With
demo.camel.yamlopen, click the buttonRun Camel Application with JBangin the editor quick action menu at the top right of the editor.The terminal will open with the running Camel route. It can take several seconds the first time for Camel JBang to initialize.

