このコンテンツは選択した言語では利用できません。
10.5. Deploy and Run the Transactional Route
Overview
リンクのコピーリンクがクリップボードにコピーされました!
After creating the Derby database instance, you are ready to deploy the OSGi bundles into the container and test the route, as described here.
Steps to deploy and run the transactional route
リンクのコピーリンクがクリップボードにコピーされました!
Perform the following steps to deploy and run the transactional route in the Red Hat JBoss Fuse OSGi container:
- Create the Derby database instance for the tutorial and create the
accountstable, as follows:- Open a command prompt and change directory to the Derby system directory that you specified earlier (that is, the value of the
derby.system.homesystem property). - Start the Derby database client utility,
ij, by entering the following command:ijNoteBy default,ijtakes the current working directory to be the Derby system directory. - Create the
txXaTutorialdatabase instance, by entering the followingijcommand:ij> CONNECT 'jdbc:derby:txXaTutorial;create=true'; - Create the
accountstable and create two sample row entries, by entering the following sequence ofijcommands:ij> CREATE TABLE accounts (name VARCHAR(50), amount INT); ij> INSERT INTO accounts (name,amount) VALUES ('Major Clanger',2000); ij> INSERT INTO accounts (name,amount) VALUES ('Tiny Clanger',100); - Exit
ij, by entering the following command (don't forget the semicolon):ij> EXIT;
- Open a new command prompt and start the JBoss Fuse OSGi container by entering the following command:
./fuse - Install the
transactionfeature into the OSGi container. Enter the following console command:JBossFuse:karaf@root> features:install transaction - Install the
connectorfeature, which provides automatic XA datasource enlisting (Aries datasource wrapper). Enter the following console command:JBossFuse:karaf@root> features:install connector - Install the
spring-jdbcfeature into the OSGi container. Enter the following console command:JBossFuse:karaf@root> features:install spring-jdbc - Install the
derbybundle into the OSGi container. Enter the following console command, replacing the bundle version with whatever version of Derby you are using:JBossFuse:karaf@root> install mvn:org.apache.derby/derby/10.10.1.1 - Install and start the
derby-dsbundle (assuming that you have already built the bundle, as described in Section 10.3, “Define a Derby Datasource”) by entering the following console command:JBossFuse:karaf@root> install -s mvn:org.fusesource.example/derby-ds/1.0-SNAPSHOT - To check that the datasources have been successfully exported from the
derby-dsbundle, list thederby-dsservices using theosgi:lscommand. For example, given that BundleID is the bundle ID for thederby-dsbundle, you would enter the following console command:JBossFuse:karaf@root> osgi:ls BundleIDAmongst the exported services, you should see an entry like the following:---- aries.managed = true aries.xa.aware = true aries.xa.name = derbyDS datasource.name = derbyXADB objectClass = [javax.sql.DataSource] osgi.service.blueprint.compname = derbyXADataSource service.id = 609 service.ranking = 1000 ----This is the wrapped XA datasource (recognizable from thearies.xa.aware = truesetting), which is automatically created by the Aries wrapper feature (see Apache Aries Auto-Enlisting XA Wrapper). - Install and start the
tx-xabundle, by entering the following console command:JBossFuse:karaf@root> install -s mvn:org.fusesource.example/tx-xa - Create a file called
giro1.xmlin any convenient directory and use a text editor to add the following message contents to it:<transaction> <transfer> <sender>Major Clanger</sender> <receiver>Tiny Clanger</receiver> <amount>90</amount> </transfer> </transaction>Now copygiro1.xmlinto the PathNameToMsgDir directory you created earlier (see Section 10.4, “Define a Transactional Route”). Thegiro1.xmlfile should disappear immediately after it is copied, because the PathNameToMsgDir is being monitored by the feeder route. - Use the Fuse Management Console to see what has happened to the message from
giro1.xml. User your browser to navigate to the following URL: http://localhost:8181/hawtio. Login to the console using any valid JAAS username/password credentials (which are normally defined in theetc/users.propertiesfile). - On the main menu bar, click on the ActiveMQ tab. In the left-hand pane of this view, drill down to the
statusLogqueue, as shown.Figure 10.1. View of the statusLog Queue in Hawtio

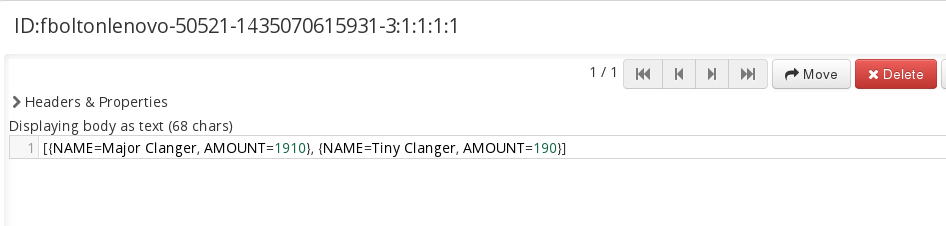
- On the menu bar above the right-hand pane, click Browse to browse the messages in the
statusLogqueue and click on the first message to view its contents. The body contains the most recent result of calling theAccountService.dumpTable()method (which is called in the last step of the transactional route).Figure 10.2. Browsing Message Contents in the statusLog Queue
- You can also force a transaction rollback by sending a message that exceeds the
AccountService.debit()limit (withdrawal limit) of 100. For example, create the filegiro2.xmland add the following message contents to it:<transaction> <transfer> <sender>Major Clanger</sender> <receiver>Tiny Clanger</receiver> <amount>150</amount> </transfer> </transaction>When you copy this file into the PathNameToMsgDir directory, the message never propagates through to thestatusLogqueue, because the transaction gets rolled back.