此内容没有您所选择的语言版本。
System Administration Guide
For Red Hat Enterprise Linux 4
Edition 2
Copyright © 2008 Red Hat, Inc
Abstract
Introduction
- Setting up a network interface card (NIC)
- Performing a Kickstart installation
- Configuring Samba shares
- Managing your software with RPM
- Determining information about your system
- Upgrading your kernel
- Installation-Related Reference
- File Systems Reference
- Package Management
- Network Configuration
- System Configuration
- System Monitoring
1. Changes To This Manual
- Updated
Kernel ModulesandManually Updating the KernelChapters - The
Kernel Modulesand theUpgrading the Kernel Manuallychapters include updated information in regards to the 2.6 kernel. Special thanks to Arjan van de Ven for his hard work in helping to complete this chapter. - An Updated Network File System (NFS) Chapter
- The Network File System (NFS) chapter has been revised and reorganized to include NFSv4. Special thanks to Steve Dickson for his hard work in helping to complete this chapter.
- An Updated OProfile Chapter
- The OProfile chapter has been revised and reorganized to include updated information in regards to the 2.6 kernel. Special thanks to Will Cohen for his hard work in helping to complete this chapter.
- An Updated X Window System Chapter
- The X Window System chapter has been revised to include information on the X11R6.8 release developed by the X.Org team.
2. More to Come
2.1. Send in Your Feedback
rh-sag.
rh-sag
Part I. Installation-Related Information
Chapter 1. Kickstart Installations
1.1. What are Kickstart Installations?
1.2. How Do You Perform a Kickstart Installation?
- Create a kickstart file.
- Create a boot media with the kickstart file or make the kickstart file available on the network.
- Make the installation tree available.
- Start the kickstart installation.
1.3. Creating the Kickstart File
sample.ks file found in the RH-DOCS directory of the Red Hat Enterprise Linux Documentation CD, using the Kickstart Configurator application, or writing it from scratch. The Red Hat Enterprise Linux installation program also creates a sample kickstart file based on the options that you selected during installation. It is written to the file /root/anaconda-ks.cfg. You should be able to edit it with any text editor or word processor that can save files as ASCII text.
- Sections must be specified in order. Items within the sections do not have to be in a specific order unless otherwise specified. The section order is:
- Command section — Refer to Section 1.4, “Kickstart Options” for a list of kickstart options. You must include the required options.
- The
%packagessection — Refer to Section 1.5, “Package Selection” for details. - The
%preand%postsections — These two sections can be in any order and are not required. Refer to Section 1.6, “Pre-installation Script” and Section 1.7, “Post-installation Script” for details.
- Items that are not required can be omitted.
- Omitting any required item results in the installation program prompting the user for an answer to the related item, just as the user would be prompted during a typical installation. Once the answer is given, the installation continues unattended (unless it finds another missing item).
- Lines starting with a pound (or hash) sign (#) are treated as comments and are ignored.
- For kickstart upgrades, the following items are required:
- Language
- Language support
- Installation method
- Device specification (if device is needed to perform the installation)
- Keyboard setup
- The
upgradekeyword - Boot loader configuration
If any other items are specified for an upgrade, those items are ignored (note that this includes package selection).
1.4. Kickstart Options
Note
autopart(optional)- Automatically create partitions — 1 GB or more root (
/) partition, a swap partition, and an appropriate boot partition for the architecture. One or more of the default partition sizes can be redefined with thepartdirective. ignoredisk(optional)- Causes the installer to ignore the specified disks. This is useful if you use autopartition and want to be sure that some disks are ignored. For example, without
ignoredisk, attempting to deploy on a SAN-cluster the kickstart would fail, as the installer detects passive paths to the SAN that return no partition table.Theignorediskoption is also useful if you have multiple paths to your disks.The syntax is:ignoredisk --drives=drive1,drive2,...
where driveN is one ofsda,sdb,...,hda,... etc. autostep(optional)- Similar to
interactiveexcept it goes to the next screen for you. It is used mostly for debugging. authorauthconfig(required)- Sets up the authentication options for the system. It is similar to the
authconfigcommand, which can be run after the install. By default, passwords are normally encrypted and are not shadowed.--enablemd5- Use md5 encryption for user passwords.
--enablenis- Turns on NIS support. By default,
--enablenisuses whatever domain it finds on the network. A domain should almost always be set by hand with the--nisdomain=option. --nisdomain=- NIS domain name to use for NIS services.
--nisserver=- Server to use for NIS services (broadcasts by default).
--useshadowor--enableshadow- Use shadow passwords.
--enableldap- Turns on LDAP support in
/etc/nsswitch.conf, allowing your system to retrieve information about users (UIDs, home directories, shells, etc.) from an LDAP directory. To use this option, you must install thenss_ldappackage. You must also specify a server and a base DN (distinguished name) with--ldapserver=and--ldapbasedn=. --enableldapauth- Use LDAP as an authentication method. This enables the
pam_ldapmodule for authentication and changing passwords, using an LDAP directory. To use this option, you must have thenss_ldappackage installed. You must also specify a server and a base DN with--ldapserver=and--ldapbasedn=. --ldapserver=- If you specified either
--enableldapor--enableldapauth, use this option to specify the name of the LDAP server to use. This option is set in the/etc/ldap.conffile. --ldapbasedn=- If you specified either
--enableldapor--enableldapauth, use this option to specify the DN in your LDAP directory tree under which user information is stored. This option is set in the/etc/ldap.conffile. --enableldaptls- Use TLS (Transport Layer Security) lookups. This option allows LDAP to send encrypted usernames and passwords to an LDAP server before authentication.
--enablekrb5- Use Kerberos 5 for authenticating users. Kerberos itself does not know about home directories, UIDs, or shells. If you enable Kerberos, you must make users' accounts known to this workstation by enabling LDAP, NIS, or Hesiod or by using the
/usr/sbin/useraddcommand to make their accounts known to this workstation. If you use this option, you must have thepam_krb5package installed. --krb5realm=- The Kerberos 5 realm to which your workstation belongs.
--krb5kdc=- The KDC (or KDCs) that serve requests for the realm. If you have multiple KDCs in your realm, separate their names with commas (,).
--krb5adminserver=- The KDC in your realm that is also running kadmind. This server handles password changing and other administrative requests. This server must be run on the master KDC if you have more than one KDC.
--enablehesiod- Enable Hesiod support for looking up user home directories, UIDs, and shells. More information on setting up and using Hesiod on your network is in
/usr/share/doc/glibc-2.x.x/README.hesiod, which is included in theglibcpackage. Hesiod is an extension of DNS that uses DNS records to store information about users, groups, and various other items. --hesiodlhs- The Hesiod LHS ("left-hand side") option, set in
/etc/hesiod.conf. This option is used by the Hesiod library to determine the name to search DNS for when looking up information, similar to LDAP's use of a base DN. --hesiodrhs- The Hesiod RHS ("right-hand side") option, set in
/etc/hesiod.conf. This option is used by the Hesiod library to determine the name to search DNS for when looking up information, similar to LDAP's use of a base DN.Note
To look up user information for "jim", the Hesiod library looks up jim.passwd<LHS><RHS>, which should resolve to a TXT record that looks like what his passwd entry would look like (jim:*:501:501:Jungle Jim:/home/jim:/bin/bash). For groups, the situation is identical, except jim.group<LHS><RHS> would be used.Looking up users and groups by number is handled by making "501.uid" a CNAME for "jim.passwd", and "501.gid" a CNAME for "jim.group". Note that the LHS and RHS do not have periods . put in front of them when the library determines the name for which to search, so the LHS and RHS usually begin with periods. --enablesmbauth- Enables authentication of users against an SMB server (typically a Samba or Windows server). SMB authentication support does not know about home directories, UIDs, or shells. If you enable SMB, you must make users' accounts known to the workstation by enabling LDAP, NIS, or Hesiod or by using the
/usr/sbin/useraddcommand to make their accounts known to the workstation. To use this option, you must have thepam_smbpackage installed. --smbservers=- The name of the server(s) to use for SMB authentication. To specify more than one server, separate the names with commas (,).
--smbworkgroup=- The name of the workgroup for the SMB servers.
--enablecache- Enables the
nscdservice. Thenscdservice caches information about users, groups, and various other types of information. Caching is especially helpful if you choose to distribute information about users and groups over your network using NIS, LDAP, or hesiod.
bootloader(required)- Specifies how the GRUB boot loader should be installed. This option is required for both installations and upgrades. For upgrades, if GRUB is not the current boot loader, the boot loader is changed to GRUB. To preserve other boot loaders, use
bootloader --upgrade.--append=- Specifies kernel parameters. To specify multiple parameters, separate them with spaces. For example:
bootloader --location=mbr --append="hdd=ide-scsi ide=nodma" --driveorder- Specify which drive is first in the BIOS boot order. For example:
bootloader --driveorder=sda,hda --location=- Specifies where the boot record is written. Valid values are the following:
mbr(the default),partition(installs the boot loader on the first sector of the partition containing the kernel), ornone(do not install the boot loader). --password=- Sets the GRUB boot loader password to the one specified with this option. This should be used to restrict access to the GRUB shell, where arbitrary kernel options can be passed.
--md5pass=- Similar to
--password=except the password should already be encrypted. --upgrade- Upgrade the existing boot loader configuration, preserving the old entries. This option is only available for upgrades.
clearpart(optional)- Removes partitions from the system, prior to creation of new partitions. By default, no partitions are removed.
Note
If theclearpartcommand is used, then the--onpartcommand cannot be used on a logical partition.--all- Erases all partitions from the system.
--drives=- Specifies which drives to clear partitions from. For example, the following clears all the partitions on the first two drives on the primary IDE controller:
clearpart --drives=hda,hdb --all --initlabel- Initializes the disk label to the default for your architecture (for example
msdosfor x86 andgptfor Itanium). It is useful so that the installation program does not ask if it should initialize the disk label if installing to a brand new hard drive. --linux- Erases all Linux partitions.
--none(default)- Do not remove any partitions.
cmdline(optional)- Perform the installation in a completely non-interactive command line mode. Any prompts for interaction halts the install. This mode is useful on S/390 systems with the x3270 console.
device(optional)- On most PCI systems, the installation program autoprobes for Ethernet and SCSI cards properly. On older systems and some PCI systems, however, kickstart needs a hint to find the proper devices. The
devicecommand, which tells the installation program to install extra modules, is in this format:device <type><moduleName> --opts=<options>
- <type>
- Replace with either
scsioreth - <moduleName>
- Replace with the name of the kernel module which should be installed.
--opts=- Mount options to use for mounting the NFS export. Any options that can be specified in
/etc/fstabfor an NFS mount are allowed. The options are listed in thenfs(5)man page. Multiple options are separated with a comma.
driverdisk(optional)- Driver diskettes can be used during kickstart installations. You must copy the driver diskettes's contents to the root directory of a partition on the system's hard drive. Then you must use the
driverdiskcommand to tell the installation program where to look for the driver disk.driverdisk <partition> [--type=<fstype>]
Alternatively, a network location can be specified for the driver diskette:driverdisk --source=ftp://path/to/dd.imgdriverdisk --source=http://path/to/dd.imgdriverdisk --source=nfs:host:/path/to/img- <partition>
- Partition containing the driver disk.
--type=- File system type (for example, vfat or ext2).
firewall(optional)- This option corresponds to the Firewall Configuration screen in the installation program:
firewall --enabled|--disabled [--trust=] <device> [--port=]
--enabled- Reject incoming connections that are not in response to outbound requests, such as DNS replies or DHCP requests. If access to services running on this machine is needed, you can choose to allow specific services through the firewall.
--disabled- Do not configure any iptables rules.
--trust=- Listing a device here, such as eth0, allows all traffic coming from that device to go through the firewall. To list more than one device, use
--trust eth0 --trust eth1. Do NOT use a comma-separated format such as--trust eth0, eth1. - <incoming>
- Replace with one or more of the following to allow the specified services through the firewall.
--ssh--telnet--smtp--http--ftp
--port=- You can specify that ports be allowed through the firewall using the port:protocol format. For example, to allow IMAP access through your firewall, specify
imap:tcp. Numeric ports can also be specified explicitly; for example, to allow UDP packets on port 1234 through, specify1234:udp. To specify multiple ports, separate them by commas.
firstboot(optional)- Determine whether the Setup Agent starts the first time the system is booted. If enabled, the
firstbootpackage must be installed. If not specified, this option is disabled by default.--enable- The Setup Agent is started the first time the system boots.
--disable- The Setup Agent is not started the first time the system boots.
--reconfig- Enable the Setup Agent to start at boot time in reconfiguration mode. This mode enables the language, mouse, keyboard, root password, security level, time zone, and networking configuration options in addition to the default ones.
halt(optional)- Halt the system after the installation has successfully completed. This is similar to a manual installation, where anaconda displays a message and waits for the user to press a key before rebooting. During a kickstart installation, if no completion method is specified, the
rebootoption is used as default.Thehaltoption is roughly equivalent to theshutdown -hcommand.For other completion methods, refer to thepoweroff,reboot, andshutdownkickstart options. install(optional)- Tells the system to install a fresh system rather than upgrade an existing system. This is the default mode. For installation, you must specify the type of installation from
cdrom,harddrive,nfs, orurl(for FTP or HTTP installations). Theinstallcommand and the installation method command must be on separate lines.cdrom- Install from the first CD-ROM drive on the system.
harddrive- Install from a Red Hat installation tree on a local drive, which must be either vfat or ext2.
--partition=Partition to install from (such as, sdb2).--dir=Directory containing theRedHatdirectory of the installation tree.
For example:harddrive --partition=hdb2 --dir=/tmp/install-tree
nfs- Install from the NFS server specified.
--server=Server from which to install (hostname or IP).--dir=Directory containing theRedHatdirectory of the installation tree.
For example:nfs --server=nfsserver.example.com --dir=/tmp/install-tree
url- Install from an installation tree on a remote server via FTP or HTTP.For example:
url --url http://<server>/<dir>
or:url --url ftp://<username>:<password>@<server>/<dir>
interactive(optional)- Uses the information provided in the kickstart file during the installation, but allow for inspection and modification of the values given. You are presented with each screen of the installation program with the values from the kickstart file. Either accept the values by clicking or change the values and click to continue. Refer to the
autostepcommand. keyboard(required)- Sets system keyboard type. Here is the list of available keyboards on i386, Itanium, and Alpha machines:
be-latin1, bg, br-abnt2, cf, cz-lat2, cz-us-qwertz, de,
de-latin1, de-latin1-nodeadkeys, dk, dk-latin1, dvorak, es, et,
fi, fi-latin1, fr, fr-latin0, fr-latin1, fr-pc, fr_CH, fr_CH-latin1,
gr, hu, hu101, is-latin1, it, it-ibm, it2, jp106, la-latin1, mk-utf,
no, no-latin1, pl, pt-latin1, ro_win, ru, ru-cp1251, ru-ms, ru1, ru2,
ru_win, sg, sg-latin1, sk-qwerty, slovene, speakup,
speakup-lt, sv-latin1, sg, sg-latin1, sk-querty, slovene, trq, ua,
uk, us, us-acentos
The file/usr/lib/python2.2/site-packages/rhpl/keyboard_models.pyalso contains this list and is part of therhplpackage. lang(required)- Sets the language to use during installation. For example, to set the language to English, the kickstart file should contain the following line:
lang en_USThe file/usr/share/system-config-language/locale-listprovides a list of the valid language codes in the first column of each line and is part of thesystem-config-languagepackage. langsupport(required)- Sets the language(s) to install on the system. The same language codes used with
langcan be used withlangsupport.To install one language, specify it. For example, to install and use the French languagefr_FR:langsupport fr_FR--default=- If language support for more than one language is specified, a default must be identified.
For example, to install English and French and use English as the default language:langsupport --default=en_US fr_FRIf you use--defaultwith only one language, all languages are installed with the specified language set to the default. logvol(optional)- Create a logical volume for Logical Volume Management (LVM) with the syntax:
logvol <mntpoint> --vgname=<name> --size=<size> --name=<name><options>The options are as follows:- --noformat
- Use an existing logical volume and do not format it.
- --useexisting
- Use an existing logical volume and reformat it.
- --pesize
- Set the size of the physical extents.
Create the partition first, create the logical volume group, and then create the logical volume. For example:part pv.01 --size 3000 volgroup myvg pv.01 logvol / --vgname=myvg --size=2000 --name=rootvolFor a detailed example oflogvolin action, refer to Section 1.4.1, “Advanced Partitioning Example”. mouse(required)- Configures the mouse for the system, both in GUI and text modes. Options are:
--device=- Device the mouse is on (such as
--device=ttyS0). --emulthree- If present, simultaneous clicks on the left and right mouse buttons are recognized as the middle mouse button by the X Window System. This option should be used if you have a two button mouse.
After options, the mouse type may be specified as one of the following:alpsps/2, ascii, asciips/2, atibm, generic, generic3, genericps/2, generic3ps/2, genericwheelps/2, genericusb, generic3usb, genericwheelusb, geniusnm, geniusnmps/2, geniusprops/2, geniusscrollps/2, geniusscrollps/2+, thinking, thinkingps/2, logitech, logitechcc, logibm, logimman, logimmanps/2, logimman+, logimman+ps/2, logimmusb, microsoft, msnew, msintelli, msintellips/2, msintelliusb, msbm, mousesystems, mmseries, mmhittab, sun, none
This list can also be found in the/usr/lib/python2.2/site-packages/rhpl/mouse.pyfile, which is part of therhplpackage.If the mouse command is given without any arguments, or it is omitted, the installation program attempts to automatically detect the mouse. This procedure works for most modern mice. network(optional)- Configures network information for the system. If the kickstart installation does not require networking (in other words, it is not installed over NFS, HTTP, or FTP), networking is not configured for the system. If the installation does require networking and network information is not provided in the kickstart file, the installation program assumes that the installation should be done over eth0 via a dynamic IP address (BOOTP/DHCP), and configures the final, installed system to determine its IP address dynamically. The
networkoption configures networking information for kickstart installations via a network as well as for the installed system.--bootproto=- One of
dhcp,bootp, orstatic.It defaults todhcp.bootpanddhcpare treated the same.The DHCP method uses a DHCP server system to obtain its networking configuration. As you might guess, the BOOTP method is similar, requiring a BOOTP server to supply the networking configuration. To direct a system to use DHCP:network --bootproto=dhcp
To direct a machine to use BOOTP to obtain its networking configuration, use the following line in the kickstart file:network --bootproto=bootp
The static method requires that you enter all the required networking information in the kickstart file. As the name implies, this information is static and are used during and after the installation. The line for static networking is more complex, as you must include all network configuration information on one line. You must specify the IP address, netmask, gateway, and nameserver. For example: (the "\" indicates that this should be read as one continuous line):network --bootproto=static --ip=10.0.2.15 --netmask=255.255.255.0 \ --gateway=10.0.2.254 --nameserver=10.0.2.1
If you use the static method, be aware of the following two restrictions:- All static networking configuration information must be specified on one line; you cannot wrap lines using a backslash, for example.
- You can also configure multiple nameservers here. To do so, specify them as a comma-delimited list in the command line. For example:
network --bootproto=static --ip=10.0.2.15 --netmask=255.255.255.0 \
										--gateway=10.0.2.254 --nameserver 192.168.2.1,192.168.3.1
--device=- Used to select a specific Ethernet device for installation. Note that using
--device=is not effective unless the kickstart file is a local file (such asks=floppy), since the installation program configures the network to find the kickstart file. For example:network --bootproto=dhcp --device=eth0
--ip=- IP address for the machine to be installed.
--gateway=- Default gateway as an IP address.
--nameserver=- Primary nameserver, as an IP address.
--nodns- Do not configure any DNS server.
--netmask=- Netmask for the installed system.
--hostname=- Hostname for the installed system.
--nostorage- Do not auto-probe storage devices such as ISCI, IDE or RAID.
partorpartition(required for installs, ignored for upgrades)- Creates a partition on the system.If more than one Red Hat Enterprise Linux installation exists on the system on different partitions, the installation program prompts the user and asks which installation to upgrade.
Warning
All partitions created are formatted as part of the installation process unless--noformatand--onpartare used.For a detailed example ofpartin action, refer to Section 1.4.1, “Advanced Partitioning Example”.- <mntpoint>
- The <mntpoint> is where the partition is mounted and must be of one of the following forms:
/<path>For example,/,/usr,/homeswapThe partition is used as swap space.To determine the size of the swap partition automatically, use the--recommendedoption:swap --recommendedThe minimum size of the automatically-generated swap partition is no smaller than the amount of RAM in the system and no larger than twice the amount of RAM in the system.Using therecommendedoption yields a limitation of 8GB for the swap partition. If you want to create a larger swap partition, specify the correct size in the kickstart file or create the partitions manually.raid.<id>The partition is used for software RAID (refer toraid).pv.<id>The partition is used for LVM (refer tologvol).
--size=- The minimum partition size in megabytes. Specify an integer value here such as 500. Do not append the number with MB.
--grow- Tells the partition to grow to fill available space (if any), or up to the maximum size setting.
--maxsize=- The maximum partition size in megabytes when the partition is set to grow. Specify an integer value here, and do not append the number with MB.
--noformat- Tells the installation program not to format the partition, for use with the
--onpartcommand. --onpart=or--usepart=- Put the partition on the already existing device. For example:
partition /home --onpart=hda1puts/homeon/dev/hda1, which must already exist. --ondisk=or--ondrive=- Forces the partition to be created on a particular disk. For example,
--ondisk=sdbputs the partition on the second SCSI disk on the system. --asprimary- Forces automatic allocation of the partition as a primary partition, or the partitioning fails.
--type=(replaced byfstype)- This option is no longer available. Use
fstype. --fstype=- Sets the file system type for the partition. Valid values are
ext2,ext3,swap, andvfat. --start=- Specifies the starting cylinder for the partition. It requires that a drive be specified with
--ondisk=orondrive=. It also requires that the ending cylinder be specified with--end=or the partition size be specified with--size=. --end=- Specifies the ending cylinder for the partition. It requires that the starting cylinder be specified with
--start=.
Note
If partitioning fails for any reason, diagnostic messages appear on virtual console 3. poweroff(optional)- Shut down and power off the system after the installation has successfully completed. Normally during a manual installation, anaconda displays a message and waits for the user to press a key before rebooting. During a kickstart installation, if no completion method is specified, the
rebootoption is used as default.Thepoweroffoption is roughly equivalent to theshutdown -pcommand.Note
Thepoweroffoption is highly dependent on the system hardware in use. Specifically, certain hardware components such as the BIOS, APM (advanced power management), and ACPI (advanced configuration and power interface) must be able to interact with the system kernel. Contact your manufacturer for more information on you system's APM/ACPI abilities.For other completion methods, refer to thehalt,reboot, andshutdownkickstart options. raid(optional)- Assembles a software RAID device. This command is of the form:
raid <mntpoint> --level=<level> --device=<mddevice><partitions*>- <mntpoint>
- Location where the RAID file system is mounted. If it is
/, the RAID level must be 1 unless a boot partition (/boot) is present. If a boot partition is present, the/bootpartition must be level 1 and the root (/) partition can be any of the available types. The <partitions*> (which denotes that multiple partitions can be listed) lists the RAID identifiers to add to the RAID array. --level=- RAID level to use (0, 1, or 5).
--device=- Name of the RAID device to use (such as md0 or md1). RAID devices range from md0 to md7, and each may only be used once.
--spares=- Specifies the number of spare drives allocated for the RAID array. Spare drives are used to rebuild the array in case of drive failure.
--fstype=- Sets the file system type for the RAID array. Valid values are ext2, ext3, swap, and vfat.
--noformat- Use an existing RAID device and do not format the RAID array.
--useexisting- Use an existing RAID device and reformat it.
The following example shows how to create a RAID level 1 partition for/, and a RAID level 5 for/usr, assuming there are three SCSI disks on the system. It also creates three swap partitions, one on each drive.part raid.01 --size=60 --ondisk=sda part raid.02 --size=60 --ondisk=sdb part raid.03 --size=60 --ondisk=sdc
part swap --size=128 --ondisk=sda
part swap --size=128 --ondisk=sdb
part swap --size=128 --ondisk=sdc
part raid.11 --size=1 --grow --ondisk=sda
part raid.12 --size=1 --grow --ondisk=sdb
part raid.13 --size=1 --grow --ondisk=sdc
raid / --level=1 --device=md0 raid.01 raid.02 raid.03
raid /usr --level=5 --device=md1 raid.11 raid.12 raid.13
For a detailed example ofraidin action, refer to Section 1.4.1, “Advanced Partitioning Example”. reboot(optional)- Reboot after the installation is successfully completed (no arguments). Normally during a manual installation, anaconda displays a message and waits for the user to press a key before rebooting.The
rebootoption is roughly equivalent to theshutdown -rcommand.Note
Use of therebootoption may result in an endless installation loop, depending on the installation media and method.Therebootoption is the default completion method if no other methods are explicitly specified in the kickstart file.For other completion methods, refer to thehalt,poweroff, andshutdownkickstart options. rootpw(required)- Sets the system's root password to the <password> argument.
rootpw [--iscrypted] <password>--iscrypted- If this is present, the password argument is assumed to already be encrypted.
selinux(optional)- Sets the system's SELinux mode to one of the following arguments:
--enforcing- Enables SELinux with the default targeted policy being enforced.
Note
If theselinuxoption is not present in the kickstart file, SELinux is enabled and set to--enforcingby default. --permissive- Outputs warnings only based on the SELinux policy, but does not actually enforce the policy.
--disabled- Disables SELinux completely on the system.
For complete information regarding SELinux for Red Hat Enterprise Linux, refer to the Red Hat, Inc. shutdown(optional)- Shut down the system after the installation has successfully completed. During a kickstart installation, if no completion method is specified, the
rebootoption is used as default.Theshutdownoption is roughly equivalent to theshutdowncommand.For other completion methods, refer to thehalt,poweroff, andrebootkickstart options. skipx(optional)- If present, X is not configured on the installed system.
text(optional)- Perform the kickstart installation in text mode. Kickstart installations are performed in graphical mode by default.
timezone(required)- Sets the system time zone to <timezone> which may be any of the time zones listed by
timeconfig.timezone [--utc] <timezone>--utc- If present, the system assumes the hardware clock is set to UTC (Greenwich Mean) time.
upgrade(optional)- Tells the system to upgrade an existing system rather than install a fresh system. You must specify one of
cdrom,harddrive,nfs, orurl(for FTP and HTTP) as the location of the installation tree. Refer toinstallfor details. xconfig(optional)- Configures the X Window System. If this option is not given, the user must configure X manually during the installation, if X was installed; this option should not be used if X is not installed on the final system.
--noprobe- Do not probe the monitor.
--card=- Use specified card; this card name should be from the list of cards in
/usr/share/hwdata/Cardsfrom thehwdatapackage. The list of cards can also be found on the X Configuration screen of the Kickstart Configurator. If this argument is not provided, the installation program probes the PCI bus for the card. Since AGP is part of the PCI bus, AGP cards are detected if supported. The probe order is determined by the PCI scan order of the motherboard. --videoram=- Specifies the amount of video RAM the video card has.
--monitor=- Use specified monitor; monitor name should be from the list of monitors in
/usr/share/hwdata/MonitorsDBfrom thehwdatapackage. The list of monitors can also be found on the X Configuration screen of the Kickstart Configurator. This is ignored if--hsyncor--vsyncis provided. If no monitor information is provided, the installation program tries to probe for it automatically. --hsync=- Specifies the horizontal sync frequency of the monitor.
--vsync=- Specifies the vertical sync frequency of the monitor.
--defaultdesktop=- Specify either GNOME or KDE to set the default desktop (assumes that GNOME Desktop Environment and/or KDE Desktop Environment has been installed through
%packages). --startxonboot- Use a graphical login on the installed system.
--resolution=- Specify the default resolution for the X Window System on the installed system. Valid values are 640x480, 800x600, 1024x768, 1152x864, 1280x1024, 1400x1050, 1600x1200. Be sure to specify a resolution that is compatible with the video card and monitor.
--depth=- Specify the default color depth for the X Window System on the installed system. Valid values are 8, 16, 24, and 32. Be sure to specify a color depth that is compatible with the video card and monitor.
volgroup(optional)- Use to create a Logical Volume Management (LVM) group with the syntax:
volgroup <name><partition><options>The options are as follows:- --noformat
- Use an existing volume group and do not format it.
- --useexisting
- Use an existing volume group and reformat it.
Create the partition first, create the logical volume group, and then create the logical volume. For example:part pv.01 --size 3000 volgroup myvg pv.01 logvol / --vgname=myvg --size=2000 --name=rootvolFor a detailed example ofvolgroupin action, refer to Section 1.4.1, “Advanced Partitioning Example”. zerombr(optional)- If
zerombris specified, andyesis its sole argument, any invalid partition tables found on disks are initialized. This destroys all of the contents of disks with invalid partition tables. This command should be in the following format:zerombr yesNo other format is effective. %include- Use the
%include /path/to/filecommand to include the contents of another file in the kickstart file as though the contents were at the location of the%includecommand in the kickstart file.
1.4.1. Advanced Partitioning Example
clearpart, raid, part, volgroup, and logvol kickstart options in action:
clearpart --drives=hda,hdc --initlabel

# Raid 1 IDE config
part raid.11    --size 1000     --asprimary     --ondrive=hda
part raid.12    --size 1000     --asprimary     --ondrive=hda
part raid.13    --size 2000     --asprimary     --ondrive=hda
part raid.14    --size 8000                     --ondrive=hda
part raid.15    --size 1 --grow                 --ondrive=hda

part raid.21    --size 1000     --asprimary     --ondrive=hdc
part raid.22    --size 1000     --asprimary     --ondrive=hdc
part raid.23    --size 2000     --asprimary     --ondrive=hdc
part raid.24    --size 8000                     --ondrive=hdc
part raid.25    --size 1 --grow                 --ondrive=hdc

# You can add --spares=x
raid /          --fstype ext3 --device md0 --level=RAID1 raid.11 raid.21
raid /safe      --fstype ext3 --device md1 --level=RAID1 raid.12 raid.22
raid swap       --fstype swap --device md2 --level=RAID1 raid.13 raid.23
raid /usr       --fstype ext3 --device md3 --level=RAID1 raid.14 raid.24
raid pv.01      --fstype ext3 --device md4 --level=RAID1 raid.15 raid.25

# LVM configuration so that we can resize /var and /usr/local later
volgroup sysvg pv.01
logvol /var             --vgname=sysvg  --size=8000     --name=var
logvol /var/freespace   --vgname=sysvg  --size=8000     --name=freespacetouse
logvol /usr/local       --vgname=sysvg  --size=1 --grow --name=usrlocal
1.5. Package Selection
%packages command to begin a kickstart file section that lists the packages you would like to install (this is for installations only, as package selection during upgrades is not supported).
RedHat/base/comps.xml file on the first Red Hat Enterprise Linux CD-ROM for a list of groups. Each group has an id, user visibility value, name, description, and package list. In the package list, the packages marked as mandatory are always installed if the group is selected, the packages marked default are selected by default if the group is selected, and the packages marked optional must be specifically selected even if the group is selected to be installed.
Core and Base groups are always selected by default, so it is not necessary to specify them in the %packages section.
%packages selection:
%packages @ X Window System @ GNOME Desktop Environment @ Graphical Internet @ Sound and Video dhcp @ symbol, a space, and then the full group name as given in the comps.xml file. Groups can also be specified using the id for the group, such as gnome-desktop. Specify individual packages with no additional characters (the dhcp line in the example above is an individual package).
-autofs
%packages option:
--resolvedeps- Install the listed packages and automatically resolve package dependencies. If this option is not specified and there are package dependencies, the automated installation pauses and prompts the user. For example:
%packages --resolvedeps
--ignoredeps- Ignore the unresolved dependencies and install the listed packages without the dependencies. For example:
%packages --ignoredeps
--ignoremissing- Ignore the missing packages and groups instead of halting the installation to ask if the installation should be aborted or continued. For example:
%packages --ignoremissing
1.6. Pre-installation Script
ks.cfg has been parsed. This section must be at the end of the kickstart file (after the commands) and must start with the %pre command. You can access the network in the %pre section; however, name service has not been configured at this point, so only IP addresses work.
Note
--interpreter /usr/bin/python- Allows you to specify a different scripting language, such as Python. Replace /usr/bin/python with the scripting language of your choice.
1.6.1. Example
%pre section:
%pre

#!/bin/sh

hds=""
mymedia=""

for file in /proc/ide/h*
do
  mymedia=`cat $file/media`
  if [ $mymedia == "disk" ] ; then
      hds="$hds `basename $file`"
  fi
done

set $hds
numhd=`echo $#`

drive1=`echo $hds | cut -d' ' -f1`
drive2=`echo $hds | cut -d' ' -f2`

#Write out partition scheme based on whether there are 1 or 2 hard drives

if [ $numhd == "2" ] ; then
  #2 drives
  echo "#partitioning scheme generated in %pre for 2 drives" > /tmp/part-include
  echo "clearpart --all" >> /tmp/part-include
  echo "part /boot --fstype ext3 --size 75 --ondisk hda" >> /tmp/part-include
  echo "part / --fstype ext3 --size 1 --grow --ondisk hda" >> /tmp/part-include
  echo "part swap --recommended --ondisk $drive1" >> /tmp/part-include
  echo "part /home --fstype ext3 --size 1 --grow --ondisk hdb" >> /tmp/part-include
else
  #1 drive
  echo "#partitioning scheme generated in %pre for 1 drive" > /tmp/part-include
  echo "clearpart --all" >> /tmp/part-include
  echo "part /boot --fstype ext3 --size 75" >> /tmp/part-includ
  echo "part swap --recommended" >> /tmp/part-include
  echo "part / --fstype ext3 --size 2048" >> /tmp/part-include
  echo "part /home --fstype ext3 --size 2048 --grow" >> /tmp/part-include
fi
%include /tmp/part-includeNote
1.7. Post-installation Script
%post command. This section is useful for functions such as installing additional software and configuring an additional nameserver.
Note
%post section. If you configured the network for DHCP, the /etc/resolv.conf file has not been completed when the installation executes the %post section. You can access the network, but you can not resolve IP addresses. Thus, if you are using DHCP, you must specify IP addresses in the %post section.
Note
--nochroot- Allows you to specify commands that you would like to run outside of the chroot environment.The following example copies the file
/etc/resolv.confto the file system that was just installed.%post --nochroot cp /etc/resolv.conf /mnt/sysimage/etc/resolv.conf
--interpreter /usr/bin/python- Allows you to specify a different scripting language, such as Python. Replace /usr/bin/python with the scripting language of your choice.
1.7.1. Examples
/sbin/chkconfig --level 345 telnet off /sbin/chkconfig --level 345 finger off /sbin/chkconfig --level 345 lpd off /sbin/chkconfig --level 345 httpd on runme from an NFS share:
mkdir /mnt/temp mount -o nolock 10.10.0.2:/usr/new-machines /mnt/temp open -s -w -- /mnt/temp/runme umount /mnt/temp Note
-o nolock is required when mounting an NFS mount.
/usr/sbin/useradd bob /usr/bin/chfn -f "Bob Smith" bob /usr/sbin/usermod -p 'kjdf$04930FTH/ ' bob 1.8. Making the Kickstart File Available
- On a boot diskette
- On a boot CD-ROM
- On a network
1.8.1. Creating Kickstart Boot Media
ks.cfg.
ks.cfg and must be located in the boot CD-ROM's top-level directory. Since a CD-ROM is read-only, the file must be added to the directory used to create the image that is written to the CD-ROM. Refer to the Installation Guide for instructions on creating boot media; however, before making the file.iso image file, copy the ks.cfg kickstart file to the isolinux/ directory.
ks.cfg and must be located in the flash memory's top-level directory. Create the boot image first, and then copy the ks.cfg file.
/dev/sda) using the dd command:
dd if=diskboot.img of=/dev/sda bs=1M Note
1.8.2. Making the Kickstart File Available on the Network
dhcpd.conf file for the DHCP server:
filename"/usr/new-machine/kickstart/";
next-server blarg.redhat.com;filename with the name of the kickstart file (or the directory in which the kickstart file resides) and the value after next-server with the NFS server name.
<ip-addr>-kickstart<ip-addr> section of the file name should be replaced with the client's IP address in dotted decimal notation. For example, the file name for a computer with an IP address of 10.10.0.1 would be 10.10.0.1-kickstart.
/kickstart from the BOOTP/DHCP server and tries to find the kickstart file using the same <ip-addr>-kickstart file name as described above.
1.9. Making the Installation Tree Available
1.10. Starting a Kickstart Installation
ks command line argument is passed to the kernel.
- CD-ROM #1 and Diskette
- The
linux ks=floppycommand also works if theks.cfgfile is located on a vfat or ext2 file system on a diskette and you boot from the Red Hat Enterprise Linux CD-ROM #1.An alternate boot command is to boot off the Red Hat Enterprise Linux CD-ROM #1 and have the kickstart file on a vfat or ext2 file system on a diskette. To do so, enter the following command at theboot:prompt:linux ks=hd:fd0:/ks.cfg
- With Driver Disk
- If you need to use a driver disk with kickstart, specify the
ddoption as well. For example, to boot off a boot diskette and use a driver disk, enter the following command at theboot:prompt:linux ks=floppy dd - Boot CD-ROM
- If the kickstart file is on a boot CD-ROM as described in Section 1.8.1, “Creating Kickstart Boot Media”, insert the CD-ROM into the system, boot the system, and enter the following command at the
boot:prompt (whereks.cfgis the name of the kickstart file):linux ks=cdrom:/ks.cfg
ks=nfs:<server>:/<path>- The installation program looks for the kickstart file on the NFS server <server>, as file <path>. The installation program uses DHCP to configure the Ethernet card. For example, if your NFS server is server.example.com and the kickstart file is in the NFS share
/mydir/ks.cfg, the correct boot command would beks=nfs:server.example.com:/mydir/ks.cfg. ks=http://<server>/<path>- The installation program looks for the kickstart file on the HTTP server <server>, as file <path>. The installation program uses DHCP to configure the Ethernet card. For example, if your HTTP server is server.example.com and the kickstart file is in the HTTP directory
/mydir/ks.cfg, the correct boot command would beks=http://server.example.com/mydir/ks.cfg. ks=floppy- The installation program looks for the file
ks.cfgon a vfat or ext2 file system on the diskette in/dev/fd0. ks=floppy:/<path>- The installation program looks for the kickstart file on the diskette in
/dev/fd0, as file <path>. ks=hd:<device>:/<file>- The installation program mounts the file system on <device> (which must be vfat or ext2), and look for the kickstart configuration file as <file> in that file system (for example,
ks=hd:sda3:/mydir/ks.cfg). ks=file:/<file>- The installation program tries to read the file <file> from the file system; no mounts are done. This is normally used if the kickstart file is already on the
initrdimage. ks=cdrom:/<path>- The installation program looks for the kickstart file on CD-ROM, as file <path>.
ks- If
ksis used alone, the installation program configures the Ethernet card to use DHCP. The kickstart file is read from the "bootServer" from the DHCP response as if it is an NFS server sharing the kickstart file. By default, the bootServer is the same as the DHCP server. The name of the kickstart file is one of the following:- If DHCP is specified and the boot file begins with a
/, the boot file provided by DHCP is looked for on the NFS server. - If DHCP is specified and the boot file begins with something other then a
/, the boot file provided by DHCP is looked for in the/kickstartdirectory on the NFS server. - If DHCP did not specify a boot file, then the installation program tries to read the file
/kickstart/1.2.3.4-kickstart, where 1.2.3.4 is the numeric IP address of the machine being installed.
ksdevice=<device>- The installation program uses this network device to connect to the network. For example, to start a kickstart installation with the kickstart file on an NFS server that is connected to the system through the eth1 device, use the command
ks=nfs:<server>:/<path> ksdevice=eth1at theboot:prompt.
Chapter 2. Kickstart Configurator
/usr/sbin/system-config-kickstart.
2.1. Basic Configuration

Figure 2.1. Basic Configuration
system-config-language) after installation.
2.2. Installation Method

Figure 2.2. Installation Method
- CD-ROM — Choose this option to install or upgrade from the Red Hat Enterprise Linux CD-ROMs.
- NFS — Choose this option to install or upgrade from an NFS shared directory. In the text field for the the NFS server, enter a fully-qualified domain name or IP address. For the NFS directory, enter the name of the NFS directory that contains the
RedHatdirectory of the installation tree. For example, if the NFS server contains the directory/mirrors/redhat/i386/RedHat/, enter/mirrors/redhat/i386/for the NFS directory. - FTP — Choose this option to install or upgrade from an FTP server. In the FTP server text field, enter a fully-qualified domain name or IP address. For the FTP directory, enter the name of the FTP directory that contains the
RedHatdirectory. For example, if the FTP server contains the directory/mirrors/redhat/i386/RedHat/, enter/mirrors/redhat/i386/for the FTP directory. If the FTP server requires a username and password, specify them as well. - HTTP — Choose this option to install or upgrade from an HTTP server. In the text field for the HTTP server, enter the fully-qualified domain name or IP address. For the HTTP directory, enter the name of the HTTP directory that contains the
RedHatdirectory. For example, if the HTTP server contains the directory/mirrors/redhat/i386/RedHat/, enter/mirrors/redhat/i386/for the HTTP directory. - Hard Drive — Choose this option to install or upgrade from a hard drive. Hard drive installations require the use of ISO (or CD-ROM) images. Be sure to verify that the ISO images are intact before you start the installation. To verify them, use an
md5sumprogram as well as thelinux mediacheckboot option as discussed in the Installation Guide. Enter the hard drive partition that contains the ISO images (for example,/dev/hda1) in the Hard Drive Partition text box. Enter the directory that contains the ISO images in the Hard Drive Directory text box.
2.3. Boot Loader Options

/boot partition). Install the boot loader on the MBR if you plan to use it as your boot loader.
cdrecord by configuring hdd=ide-scsi as a kernel parameter (where hdd is the CD-ROM device).
2.4. Partition Information

Figure 2.4. Partition Information
msdos for x86 and gpt for Itanium), select Initialize the disk label if you are installing on a brand new hard drive.
2.4.1. Creating Partitions
- In the Additional Size Options section, choose to make the partition a fixed size, up to a chosen size, or fill the remaining space on the hard drive. If you selected swap as the file system type, you can select to have the installation program create the swap partition with the recommended size instead of specifying a size.
- Force the partition to be created as a primary partition.
- Create the partition on a specific hard drive. For example, to make the partition on the first IDE hard disk (
/dev/hda), specifyhdaas the drive. Do not include/devin the drive name. - Use an existing partition. For example, to make the partition on the first partition on the first IDE hard disk (
/dev/hda1), specifyhda1as the partition. Do not include/devin the partition name. - Format the partition as the chosen file system type.

Figure 2.5. Creating Partitions
2.4.1.1. Creating Software RAID Partitions
- Click the button.
- Select Create a software RAID partition.
- Configure the partitions as previously described, except select Software RAID as the file system type. Also, you must specify a hard drive on which to make the partition or specify an existing partition to use.

Figure 2.6. Creating a Software RAID Partition
- Click the button.
- Select Create a RAID device.
- Select a mount point, file system type, RAID device name, RAID level, RAID members, number of spares for the software RAID device, and whether to format the RAID device.

Figure 2.7. Creating a Software RAID Device
- Click to add the device to the list.
2.5. Network Configuration

Figure 2.8. Network Configuration
system-config-network). Refer to Chapter 17, Network Configuration for details.
2.6. Authentication

Figure 2.9. Authentication
- NIS
- LDAP
- Kerberos 5
- Hesiod
- SMB
- Name Switch Cache
2.7. Firewall Configuration

Figure 2.10. Firewall Configuration
port:protocol. For example, to allow IMAP access through the firewall, specify imap:tcp. Specify numeric ports can also be specified; to allow UDP packets on port 1234 through the firewall, enter 1234:udp. To specify multiple ports, separate them with commas.
2.8. Display Configuration
skipx option is written to the kickstart file.
2.8.1. General

Figure 2.11. X Configuration - General
/etc/inittab configuration file.
2.8.2. Video Card

Figure 2.12. X Configuration - Video Card
2.8.3. Monitor

Figure 2.13. X Configuration - Monitor
2.9. Package Selection

Figure 2.14. Package Selection
%packages section of the kickstart file after you save it. Refer to Section 1.5, “Package Selection” for details.
2.10. Pre-Installation Script

Figure 2.15. Pre-Installation Script
/usr/bin/python2.2 can be specified for a Python script. This option corresponds to using %pre --interpreter /usr/bin/python2.2 in your kickstart file.
Warning
%pre command. It is added for you.
2.11. Post-Installation Script

Figure 2.16. Post-Installation Script
Warning
%post command. It is added for you.
%post section:
echo "Hackers will be punished!" > /etc/motd Note
2.11.1. Chroot Environment
--nochroot option in the %post section.
/mnt/sysimage/.
echo "Hackers will be punished!" > /mnt/sysimage/etc/motd 2.11.2. Use an Interpreter
/usr/bin/python2.2 can be specified for a Python script. This option corresponds to using %post --interpreter /usr/bin/python2.2 in your kickstart file.
2.12. Saving the File

Figure 2.17. Preview
Chapter 3. PXE Network Installations
askmethod boot option with the Red Hat Enterprise Linux CD #1. Alternatively, if the system to be installed contains a network interface card (NIC) with Pre-Execution Environment (PXE) support, it can be configured to boot from files on another networked system rather than local media such as a CD-ROM.
tftp server (which provides the files necessary to start the installation program), and the location of the files on the tftp server. This is possible because of PXELINUX, which is part of the syslinux package.
- Configure the network (NFS, FTP, HTTP) server to export the installation tree.
- Configure the files on the
tftpserver necessary for PXE booting. - Configure which hosts are allowed to boot from the PXE configuration.
- Start the
tftpservice. - Configure DHCP.
- Boot the client, and start the installation.
3.1. Setting up the Network Server
3.2. PXE Boot Configuration
tftp server so they can be found when the client requests them. The tftp server is usually the same server as the network server exporting the installation tree.
system-config-netboot RPM package installed. To start the Network Booting Tool from the desktop, go to (the main menu on the
panel) => => => . Or, type the command system-config-netboot at a shell prompt (for example, in an XTerm or a GNOME terminal).

Figure 3.1. Network Installation Setup
- Operating system identifier — Provide a unique name using one word to identify the Red Hat Enterprise Linux version and variant. It is used as the directory name in the
/tftpboot/linux-install/directory. - Description — Provide a brief description of the Red Hat Enterprise Linux version and variant.
- Selects protocol for installation — Selects NFS, FTP, or HTTP as the network installation type depending on which one was configured previously. If FTP is selected and anonymous FTP is not being used, uncheck Anonymous FTP and provide a valid username and password combination.
- Kickstart — Specify the location of the kickstart file. The file can be a URL or a file stored locally (diskette). The kickstart file can be created with the Kickstart Configurator. Refer to Chapter 2, Kickstart Configurator for details.
- Server — Provide the IP address or domain name of the NFS, FTP, or HTTP server.
- Location — Provide the directory shared by the network server. If FTP or HTTP was selected, the directory must be relative to the default directory for the FTP server or the document root for the HTTP server. For all network installations, the directory provided must contain the
RedHat/directory of the installation tree.
initrd.img and vmlinuz files necessary to boot the installation program are transfered from images/pxeboot/ in the provided installation tree to /tftpboot/linux-install/<os-identifier>/ on the tftp server (the one you are running the Network Booting Tool on).
3.2.1. Command Line Configuration
pxeos command line utility, which is part of the system-config-netboot package, can be used to configure the tftp server files :
pxeos -a -i "<description>" -p <NFS|HTTP|FTP> -D 0 -s client.example.com \ -L <net-location> -k <kernel> -K <kickstart><os-identifer>-a— Specifies that an OS instance is being added to the PXE configuration.-i"<description>" — Replace "<description>" with a description of the OS instance. This corresponds to the Description field in Figure 3.1, “Network Installation Setup”.-p<NFS|HTTP|FTP> — Specify which of the NFS, FTP, or HTTP protocols to use for installation. Only one may be specified. This corresponds to the Select protocol for installation menu in Figure 3.1, “Network Installation Setup”.-D<0|1> — Specify "0" which indicates that it is not a diskless configuration sincepxeoscan be used to configure a diskless environment as well.-sclient.example.com — Provide the name of the NFS, FTP, or HTTP server after the-soption. This corresponds to the Server field in Figure 3.1, “Network Installation Setup”.-L<net-location> — Provide the location of the installation tree on that server after the-Loption. This corresponds to the Location field in Figure 3.1, “Network Installation Setup”.-k<kernel> — Provide the specific kernel version of the server installation tree for booting.-K<kickstart> — Provide the location of the kickstart file, if available.- <os-identifer> — Specify the OS identifier, which is used as the directory name in the
/tftpboot/linux-install/directory. This corresponds to the Operating system identifier field in Figure 3.1, “Network Installation Setup”.
-A 0 -u <username> -p <password>pxeos command, refer to the pxeos man page.
3.3. Adding PXE Hosts

Figure 3.2. Add Hosts

Figure 3.3. Add a Host
- Hostname or IP Address/Subnet — The IP address, fully qualified hostname, or a subnet of systems that should be allowed to connect to the PXE server for installations.
- Operating System — The operating system identifier to install on this client. The list is populated from the network install instances created from the Network Installation Dialog.
- Serial Console — This option allows use of a serial console.
- Kickstart File — The location of a kickstart file to use, such as
http://server.example.com/kickstart/ks.cfg. This file can be created with the Kickstart Configurator. Refer to Chapter 2, Kickstart Configurator for details.
3.3.1. Command Line Configuration
pxeboot utility, a part of the system-config-netboot package, can be used to add hosts which are allowed to connect to the PXE server:
pxeboot -a -K <kickstart> -O <os-identifier> -r <value><host>-a— Specifies that a host is to be added.-K<kickstart> — The location of the kickstart file, if available.-O<os-identifier> — Specifies the operating system identifier as defined in Section 3.2, “PXE Boot Configuration”.-r<value> — Specifies the ram disk size.- <host> — Specifies the IP address or hostname of the host to add.
pxeboot command, refer to the pxeboot man page.
Chapter 4. Diskless Environments
- Install Red Hat Enterprise Linux on a system so that the files can be copied to the NFS server. (Refer to the Installation Guide for details.) Any software to be used on the clients must be installed on this system and the
busybox-anacondapackage must be installed. - Create a directory on the NFS server to contain the diskless environment such as
/diskless/i386/RHEL4-AS/. For example:mkdir -p /diskless/i386/RHEL4-AS/This directory is referred to as thediskless directory. - Create a subdirectory of this directory named
root/:mkdir -p /diskless/i386/RHEL4-AS/root/ - Copy Red Hat Enterprise Linux from the client system to the server using
rsync. For example:rsync -a -e ssh installed-system.example.com:/ /diskless/i386/RHEL4-AS/root/The length of this operation depends on the network connection speed as well as the size of the file system on the installed system. Depending on these factors, this operation may take a while. - Start the
tftpserver - Configure the DHCP server
- Finish creating the diskless environment as discussed in Section 4.2, “Finish Configuring the Diskless Environment”.
- Configure the diskless clients as discussed in Section 4.3, “Adding Hosts”.
- Configure each diskless client to boot via PXE and boot them.
4.1. Configuring the NFS Server
root/ and snapshot/ directories by adding them to /etc/exports. For example:
/diskless/i386/RHEL4-AS/root/     *(ro,sync,no_root_squash)
/diskless/i386/RHEL4-AS/snapshot/ *(rw,sync,no_root_squash)
* with one of the hostname formats discussed in Section 21.3.2, “Hostname Formats”. Make the hostname declaration as specific as possible, so unwanted systems can not access the NFS mount.
service nfs start service nfs reload 4.2. Finish Configuring the Diskless Environment
system-config-netboot RPM package installed. To start the Network Booting Tool from the desktop, go to (the main menu on the
panel) => => => . Or, type the command system-config-netboot at a shell prompt (for example, in an XTerm or a GNOME terminal).
- Click on the first page.
- On the Diskless Identifier page, enter a Name and Description for the diskless environment. Click .
- Enter the IP address or domain name of the NFS server configured in Section 4.1, “Configuring the NFS Server” as well as the directory exported as the diskless environment. Click .
- The kernel versions installed in the diskless environment are listed. Select the kernel version to boot on the diskless system.
- Click to finish the configuration.
/tftpboot/linux-install/<os-identifier>/. The directory snapshot/ is created in the same directory as the root/ directory (for example, /diskless/i386/RHEL4-AS/snapshot/) with a file called files in it. This file contains a list of files and directories that must be read/write for each diskless system. Do not modify this file. If additional entries must be added to the list, create a files.custom file in the same directory as the files file, and add each additional file or directory on a separate line.
4.3. Adding Hosts
- Hostname or IP Address/Subnet — Specify the hostname or IP address of a system to add it as a host for the diskless environment. Enter a subnet to specify a group of systems.
- Operating System — Select the diskless environment for the host or subnet of hosts.
- Serial Console — Select this checkbox to perform a serial installation.
- Snapshot name — Provide a subdirectory name to be used to store all of the read/write content for the host.
- Ethernet — Select the Ethernet device on the host to use to mount the diskless environment. If the host only has one Ethernet card, select eth0.

Figure 4.1. Add Diskless Host
snapshot/ directory in the diskless directory, a subdirectory is created with the Snapshot name specified as the file name. Then, all of the files listed in snapshot/files and snapshot/files.custom are copied copy from the root/ directory to this new directory.
4.4. Booting the Hosts
root/ directory in the diskless directory as read-only. It also mounts its individual snapshot directory as read/write. Then it mounts all the files and directories in the files and files.custom files using the mount -o bind over the read-only diskless directory to allow applications to write to the root directory of the diskless environment if they need to.
Chapter 5. Basic System Recovery
5.1. Common Problems
- You are unable to boot normally into Red Hat Enterprise Linux (runlevel 3 or 5).
- You are having hardware or software problems, and you want to get a few important files off of your system's hard drive.
- You forgot the root password.
5.1.1. Unable to Boot into Red Hat Enterprise Linux
/ partition changes, the boot loader might not be able to find it to mount the partition. To fix this problem, boot in rescue mode and modify the /boot/grub/grub.conf file.
5.1.2. Hardware/Software Problems
5.2. Booting into Rescue Mode
- By booting the system from an installation boot CD-ROM.
- By booting the system from other installation boot media, such as USB flash devices.
- By booting the system from the Red Hat Enterprise Linux CD-ROM #1.
rescue as a kernel parameter. For example, for an x86 system, type the following command at the installation boot prompt:
linux rescueThe rescue environment will now attempt to find your Linux installation and mount it under the directory /mnt/sysimage. You can then make any changes required to your system. If you want to proceed with this step choose 'Continue'. You can also choose to mount your file systems read-only instead of read-write by choosing 'Read-only'. If for some reason this process fails you can choose 'Skip' and this step will be skipped and you will go directly to a command shell.
/mnt/sysimage/. If it fails to mount a partition, it notifies you. If you select , it attempts to mount your file system under the directory /mnt/sysimage/, but in read-only mode. If you select , your file system is not mounted. Choose if you think your file system is corrupted.
sh-3.00b#
chroot /mnt/sysimagerpm that require your root partition to be mounted as /. To exit the chroot environment, type exit to return to the prompt.
/foo, and typing the following command:
mount -t ext3 /dev/mapper/VolGroup00-LogVol02 /foo/foo is a directory that you have created and /dev/mapper/VolGroup00-LogVol02 is the LVM2 logical volume you want to mount. If the partition is of type ext2, replace ext3 with ext2.
fdisk -l
pvdisplay
vgdisplay
lvdisplayssh,scp, andpingif the network is starteddumpandrestorefor users with tape drivespartedandfdiskfor managing partitionsrpmfor installing or upgrading softwarejoefor editing configuration filesNote
If you try to start other popular editors such asemacs,pico, orvi, thejoeeditor is started.
5.2.1. Reinstalling the Boot Loader
- Boot the system from an installation boot medium.
- Type
linux rescueat the installation boot prompt to enter the rescue environment. - Type
chroot /mnt/sysimageto mount the root partition. - Type
/sbin/grub-install /dev/hdato reinstall the GRUB boot loader, where/dev/hdais the boot partition. - Review the
/boot/grub/grub.conffile, as additional entries may be needed for GRUB to control additional operating systems. - Reboot the system.
5.3. Booting into Single-User Mode
- At the GRUB splash screen at boot time, press any key to enter the GRUB interactive menu.
- Select Red Hat Enterprise Linux with the version of the kernel that you wish to boot and type
ato append the line. - Go to the end of the line and type
singleas a separate word (press the Spacebar and then typesingle). Press Enter to exit edit mode.
5.4. Booting into Emergency Mode
init files are not loaded. If init is corrupted or not working, you can still mount file systems to recover data that could be lost during a re-installation.
single with the keyword emergency.
Part II. File Systems
parted utility to manage partitions and access control lists (ACLs) to customize file permissions.
Chapter 6. The ext3 File System
6.1. Features of ext3
- Availability
- After an unexpected power failure or system crash (also called an unclean system shutdown), each mounted ext2 file system on the machine must be checked for consistency by the
e2fsckprogram. This is a time-consuming process that can delay system boot time significantly, especially with large volumes containing a large number of files. During this time, any data on the volumes is unreachable.The journaling provided by the ext3 file system means that this sort of file system check is no longer necessary after an unclean system shutdown. The only time a consistency check occurs using ext3 is in certain rare hardware failure cases, such as hard drive failures. The time to recover an ext3 file system after an unclean system shutdown does not depend on the size of the file system or the number of files; rather, it depends on the size of the journal used to maintain consistency. The default journal size takes about a second to recover, depending on the speed of the hardware. - Data Integrity
- The ext3 file system provides stronger data integrity in the event that an unclean system shutdown occurs. The ext3 file system allows you to choose the type and level of protection that your data receives. By default, the ext3 volumes are configured to keep a high level of data consistency with regard to the state of the file system.
- Speed
- Despite writing some data more than once, ext3 has a higher throughput in most cases than ext2 because ext3's journaling optimizes hard drive head motion. You can choose from three journaling modes to optimize speed, but doing so means trade-offs in regards to data integrity.
- Easy Transition
- It is easy to migrate from ext2 to ext3 and gain the benefits of a robust journaling file system without reformatting. Refer to Section 6.3, “Converting to an ext3 File System” for more on how to perform this task.
6.2. Creating an ext3 File System
- Create the partition using
partedorfdisk. - Format the partition with the ext3 file system using
mkfs. - Label the partition using
e2label. - Create the mount point.
- Add the partition to the
/etc/fstabfile.
6.3. Converting to an ext3 File System
tune2fs program can add a journal to an existing ext2 file system without altering the data already on the partition. If the file system is already mounted while it is being transitioned, the journal is visible as the file .journal in the root directory of the file system. If the file system is not mounted, the journal is hidden and does not appear in the file system at all.
Note
/sbin/tune2fs -j <file_system>- A mapped device — A logical volume in a volume group, for example,
/dev/mapper/VolGroup00-LogVol02. - A static device — A traditional storage volume, for example,
/dev/hdbX, where hdb is a storage device name and X is the partition number.
df command to display mounted file systems. For more detailed information on the LVM file system, refer to Chapter 8, LVM Configuration.
/dev/mapper/VolGroup00-LogVol02 /etc/fstab file.
initrd image (or RAM disk) to boot. To create this, run the mkinitrd program. For information on using the mkinitrd command, type man mkinitrd. Also, make sure your GRUB configuration loads the initrd.
6.4. Reverting to an ext2 File System
resize2fs, which does not yet support ext3. In this situation, it may be necessary to temporarily revert a file system to ext2.
umount /dev/mapper/VolGroup00-LogVol02 /sbin/tune2fs -O ^has_journal /dev/mapper/VolGroup00-LogVol02/sbin/e2fsck -y /dev/mapper/VolGroup00-LogVol02mount -t ext2 /dev/mapper/VolGroup00-LogVol02/mount/point.journal file at the root level of the partition by changing to the directory where it is mounted and typing:
rm -f .journal/etc/fstab file.
Note
ext2online. ext2online allows you to increase the size of an ext3 file system once it is mounted (online) and on a resizable logical volume. The root file system is set up by default on LVM2 logical volumes during installation.
ext2online will only work on ext3 file systems. For more information, refer to man ext2online.
Chapter 7. Logical Volume Manager (LVM)
7.1. What is LVM?
/boot/ partition. The /boot/ partition cannot be on a logical volume group because the boot loader cannot read it. If the root (/) partition is on a logical volume, create a separate /boot/ partition which is not a part of a volume group.

Figure 7.1. Logical Volume Group
/home and / m and file system types, such as ext2 or ext3. When "partitions" reach their full capacity, free space from the logical volume group can be added to the logical volume to increase the size of the partition. When a new hard drive is added to the system, it can be added to the logical volume group, and partitions that are logical volumes can be expanded.

Figure 7.2. Logical Volumes
7.2. What is LVM2?
7.3. Additional Resources
7.3.1. Installed Documentation
rpm -qd lvm— This command shows all the documentation available from thelvmpackage, including man pages.lvm help— This command shows all LVM commands available.
7.3.2. Useful Websites
- http://sourceware.org/lvm2 — LVM2 webpage, which contains an overview, link to the mailing lists, and more.
- http://tldp.org/HOWTO/LVM-HOWTO/ — LVM HOWTO from the Linux Documentation Project.
Chapter 8. LVM Configuration
lvm package to create your own LVM configuration post-installation, but these instructions focus on using Disk Druid during installation to complete this task.
- Creating physical volumes from the hard drives.
- Creating volume groups from the physical volumes.
- Creating logical volumes from the volume groups and assign the logical volumes mount points.
Note
/dev/sda and /dev/sdb) are used in the following examples. They detail how to create a simple configuration using a single LVM volume group with associated logical volumes during installation.
8.1. Automatic Partitioning
- The
/boot/partition resides on its own non-LVM partition. In the following example, it is the first partition on the first drive (/dev/sda1). Bootable partitions cannot reside on LVM logical volumes. - A single LVM volume group (
VolGroup00) is created, which spans all selected drives and all remaining space available. In the following example, the remainder of the first drive (/dev/sda2), and the entire second drive (/dev/sdb1) are allocated to the volume group. - Two LVM logical volumes (
LogVol00andLogVol01) are created from the newly created spanned volume group. In the following example, the recommended swap space is automatically calculated and assigned toLogVol01, and the remainder is allocated to the root file system,LogVol00.

Figure 8.1. Automatic LVM Configuration With Two SCSI Drives
Note
/home/ or /var/, so that each file system has its own independent quota configuration limits.
Note
8.2. Manual LVM Partitioning
8.2.1. Creating the /boot/ Partition

Figure 8.2. Two Blank Drives, Ready For Configuration
Warning
/boot/ partition cannot reside on an LVM volume group because the GRUB boot loader cannot read it.
- Select .
- Select /boot from the Mount Point pulldown menu.
- Select ext3 from the File System Type pulldown menu.
- Select only the sda checkbox from the Allowable Drives area.
- Leave 100 (the default) in the Size (MB) menu.
- Leave the Fixed size (the default) radio button selected in the Additional Size Options area.
- Select Force to be a primary partition to make the partition be a primary partition. A primary partition is one of the first four partitions on the hard drive. If unselected, the partition is created as a logical partition. If other operating systems are already on the system, unselecting this option should be considered. For more information on primary versus logical/extended partitions, refer to the appendix section of the Installation Guide.

Figure 8.3. Creation of the Boot Partition

Figure 8.4. The /boot/ Partition Displayed
8.2.2. Creating the LVM Physical Volumes
- Select .
- Select physical volume (LVM) from the File System Type pulldown menu as shown in Figure 8.5, “Creating a Physical Volume”.

Figure 8.5. Creating a Physical Volume
- You cannot enter a mount point yet (you can once you have created all your physical volumes and then all volume groups).
- A physical volume must be constrained to one drive. For , select the drive on which the physical volume are created. If you have multiple drives, all drives are selected, and you must deselect all but one drive.
- Enter the size that you want the physical volume to be.
- Select Fixed size to make the physical volume the specified size, select Fill all space up to (MB) and enter a size in MBs to give range for the physical volume size, or select Fill to maximum allowable size to make it grow to fill all available space on the hard disk. If you make more than one growable, they share the available free space on the disk.
- Select Force to be a primary partition if you want the partition to be a primary partition.
- Click to return to the main screen.

Figure 8.6. Two Physical Volumes Created
8.2.3. Creating the LVM Volume Groups
- Click the button to collect the physical volumes into volume groups. A volume group is basically a collection of physical volumes. You can have multiple logical volume groups, but a physical volume can only be in one volume group.
Note
There is overhead disk space reserved in the logical volume group. The summation of the physical volumes may not equal the size of the volume group; however, the size of the logical volumes shown is correct.
Figure 8.7. Creating an LVM Volume Group
- Change the Volume Group Name if desired.
- All logical volumes inside the volume group must be allocated in physical extent units. By default, the physical extent is set to 32 MB; thus, logical volume sizes must be divisible by 32 MBs. If you enter a size that is not a unit of 32 MBs, the installation program automatically selects the closest size in units of 32 MBs. It is not recommended that you change this setting.
- Select which physical volumes to use for the volume group.
8.2.4. Creating the LVM Logical Volumes
/, /home/, and swap space. Remember that /boot cannot be a logical volume. To add a logical volume, click the button in the Logical Volumes section. A dialog window as shown in Figure 8.8, “Creating a Logical Volume” appears.

Figure 8.8. Creating a Logical Volume
Note

Figure 8.9. Pending Logical Volumes

Figure 8.10. Final Manual Configuration
Chapter 9. Redundant Array of Independent Disks (RAID)
9.1. What is RAID?
9.2. Who Should Use RAID?
- Enhanced speed
- Increased storage capacity using a single virtual disk
- Lessened impact of a disk failure
9.3. Hardware RAID versus Software RAID
9.3.1. Hardware RAID
9.3.2. Software RAID
- Threaded rebuild process
- Kernel-based configuration
- Portability of arrays between Linux machines without reconstruction
- Backgrounded array reconstruction using idle system resources
- Hot-swappable drive support
- Automatic CPU detection to take advantage of certain CPU optimizations
9.4. RAID Levels and Linear Support
- Level 0 — RAID level 0, often called "striping," is a performance-oriented striped data mapping technique. This means the data being written to the array is broken down into strips and written across the member disks of the array, allowing high I/O performance at low inherent cost but provides no redundancy. The storage capacity of a level 0 array is equal to the total capacity of the member disks in a Hardware RAID or the total capacity of member partitions in a Software RAID.
- Level 1 — RAID level 1, or "mirroring," has been used longer than any other form of RAID. Level 1 provides redundancy by writing identical data to each member disk of the array, leaving a "mirrored" copy on each disk. Mirroring remains popular due to its simplicity and high level of data availability. Level 1 operates with two or more disks that may use parallel access for high data-transfer rates when reading but more commonly operate independently to provide high I/O transaction rates. Level 1 provides very good data reliability and improves performance for read-intensive applications but at a relatively high cost. [3] The storage capacity of the level 1 array is equal to the capacity of one of the mirrored hard disks in a Hardware RAID or one of the mirrored partitions in a Software RAID.
- Level 4 — Level 4 uses parity [4] concentrated on a single disk drive to protect data. It is better suited to transaction I/O rather than large file transfers. Because the dedicated parity disk represents an inherent bottleneck, level 4 is seldom used without accompanying technologies such as write-back caching. Although RAID level 4 is an option in some RAID partitioning schemes, it is not an option allowed in Red Hat Enterprise Linux RAID installations. [5] The storage capacity of Hardware RAID level 4 is equal to the capacity of member disks, minus the capacity of one member disk. The storage capacity of Software RAID level 4 is equal to the capacity of the member partitions, minus the size of one of the partitions if they are of equal size.
- Level 5 — This is the most common type of RAID. By distributing parity across some or all of an array's member disk drives, RAID level 5 eliminates the write bottleneck inherent in level 4. The only performance bottleneck is the parity calculation process. With modern CPUs and Software RAID, that usually is not a very big problem. As with level 4, the result is asymmetrical performance, with reads substantially outperforming writes. Level 5 is often used with write-back caching to reduce the asymmetry. The storage capacity of Hardware RAID level 5 is equal to the capacity of member disks, minus the capacity of one member disk. The storage capacity of Software RAID level 5 is equal to the capacity of the member partitions, minus the size of one of the partitions if they are of equal size.
- Linear RAID — Linear RAID is a simple grouping of drives to create a larger virtual drive. In linear RAID, the chunks are allocated sequentially from one member drive, going to the next drive only when the first is completely filled. This grouping provides no performance benefit, as it is unlikely that any I/O operations will be split between member drives. Linear RAID also offers no redundancy and, in fact, decreases reliability — if any one member drive fails, the entire array cannot be used. The capacity is the total of all member disks.
/) partition exists on two 40G drives, you have 80G total but are only able to access 40G of that 80G. The other 40G acts like a mirror of the first 40G.
Chapter 10. Software RAID Configuration
- Applying software RAID partitions to the physical hard drives.If you wish to have the boot partition (
/boot/) reside on a RAID parition, it must be on a RAID 1 partition. - Creating RAID devices from the software RAID partitions.
- Optional: Configuring LVM from the RAID devices. Refer to Chapter 8, LVM Configuration for more information on configuring LVM after first configuring RAID.
- Creating file systems from the RAID devices.
Note
/dev/sda and /dev/sdb) are used in the following examples. They detail how to create a simple RAID 1 configuration by implementing multiple RAID devices.
10.1. Creating the RAID Partitions

Figure 10.1. Two Blank Drives, Ready For Configuration
- In Disk Druid, choose to enter the software RAID creation screen.
- Choose to create a RAID partition as shown in Figure 10.2, “RAID Partition Options”. Note that no other RAID options (such as entering a mount point) are available until RAID partitions, as well as RAID devices, are created.

Figure 10.2. RAID Partition Options
- A software RAID partition must be constrained to one drive. For , select the drive on which RAID is to be created. If you have multiple drives, all drives are selected, and you must deselect all but one drive.

Figure 10.3. Adding a RAID Partition
- Enter the size that you want the partition to be.
- Select Fixed size to make the partition the specified size, select Fill all space up to (MB) and enter a size in MBs to give range for the partition size, or select Fill to maximum allowable size to make it grow to fill all available space on the hard disk. If you make more than one partition growable, they share the available free space on the disk.
- Select Force to be a primary partition if you want the partition to be a primary partition. A primary partition is one of the first four partitions on the hard drive. If unselected, the partition is created as a logical partition. If other operating systems are already on the system, unselecting this option should be considered. For more information on primary versus logical/extended partitions, refer to the appendix section of the Installation Guide.
- Click to return to the main screen.
/boot/ partition as a software RAID device, leaving the root partition (/), /home/, and swap as regular file systems. Figure 10.4, “RAID 1 Partitions Ready, Pre-Device and Mount Point Creation” shows successfully allocated space for the RAID 1 configuration (for /boot/), which is now ready for RAID device and mount point creation:

Figure 10.4. RAID 1 Partitions Ready, Pre-Device and Mount Point Creation
10.2. Creating the RAID Devices and Mount Points
- Select the button on the Disk Druid main partitioning screen (refer to Figure 10.5, “RAID Options”).
- Figure 10.5, “RAID Options” appears. Select Create a RAID device.

Figure 10.5. RAID Options
- Next, Figure 10.6, “Making a RAID Device and Assigning a Mount Point” appears, where you can make a RAID device and assign a mount point.

Figure 10.6. Making a RAID Device and Assigning a Mount Point
- Enter a mount point.
- Choose the file system type for the partition. At this point you can either configure a dynamic LVM file system or a traditional static ext2/ext3 file system. For more information on configuring LVM on a RAID device, select physical volume (LVM) and then refer to Chapter 8, LVM Configuration. If LVM is not required, continue on with the following instructions.
- Select a device name such as md0 for the RAID device.
- Choose your RAID level. You can choose from RAID 0, RAID 1, and RAID 5. If you need assistance in determining which RAID level to implement, refer to Chapter 9, Redundant Array of Independent Disks (RAID).
Note
If you are making a RAID partition of/boot/, you must choose RAID level 1, and it must use one of the first two drives (IDE first, SCSI second). If you are not creating a seperate RAID partition of/boot/, and you are making a RAID partition for the root file system (/), it must be RAID level 1 and must use one of the first two drives (IDE first, SCSI second).
Figure 10.7. The
/boot/Mount Error - The RAID partitions created appear in the RAID Members list. Select which of these partitions should be used to create the RAID device.
- If configuring RAID 1 or RAID 5, specify the number of spare partitions. If a software RAID partition fails, the spare is automatically used as a replacement. For each spare you want to specify, you must create an additional software RAID partition (in addition to the partitions for the RAID device). Select the partitions for the RAID device and the partition(s) for the spare(s).
- After clicking , the RAID device appears in the Drive Summary list.
- Repeat this chapter's entire process for configuring additional partitions, devices, and mount points, such as the root partition (
/),/home/, or swap.

Figure 10.8. Final Sample RAID Configuration

Figure 10.9. Final Sample RAID With LVM Configuration
Chapter 11. Swap Space
11.1. What is Swap Space?
Note
Important
free and cat /proc/swaps commands to verify how much and where swap is in use.
11.2. Adding Swap Space
11.2.1. Extending Swap on an LVM2 Logical Volume
/dev/VolGroup00/LogVol01 is the volume you want to extend):
- Disable swapping for the associated logical volume:
# swapoff -v /dev/VolGroup00/LogVol01 - Resize the LVM2 logical volume by 256 MB:
# lvm lvresize /dev/VolGroup00/LogVol01 -L +256M - Format the new swap space:
# mkswap /dev/VolGroup00/LogVol01 - Enable the extended logical volume:
# swapon -va - Test that the logical volume has been extended properly:
# cat /proc/swaps # free
11.2.2. Creating an LVM2 Logical Volume for Swap
/dev/VolGroup00/LogVol02 is the swap volume you want to add):
- Create the LVM2 logical volume of size 256 MB:
# lvm lvcreate VolGroup00 -n LogVol02 -L 256M - Format the new swap space:
# mkswap /dev/VolGroup00/LogVol02 - Add the following entry to the
/etc/fstabfile:/dev/VolGroup00/LogVol02 swap swap defaults 0 0 - Enable the extended logical volume:
# swapon -va - Test that the logical volume has been extended properly:
# cat /proc/swaps # free
11.2.3. Creating a Swap File
- Determine the size of the new swap file in megabytes and multiply by 1024 to determine the number of blocks. For example, the block size of a 64 MB swap file is 65536.
- At a shell prompt as root, type the following command with
countbeing equal to the desired block size:dd if=/dev/zero of=/swapfile bs=1024 count=65536 - Setup the swap file with the command:
mkswap /swapfile - To enable the swap file immediately but not automatically at boot time:
swapon /swapfile - To enable it at boot time, edit
/etc/fstabto include the following entry:/swapfile swap swap defaults 0 0
The next time the system boots, it enables the new swap file. - After adding the new swap file and enabling it, verify it is enabled by viewing the output of the command
cat /proc/swapsorfree.
11.3. Removing Swap Space
11.3.1. Reducing Swap on an LVM2 Logical Volume
/dev/VolGroup00/LogVol01 is the volume you want to extend):
- Disable swapping for the associated logical volume:
# swapoff -v /dev/VolGroup00/LogVol01 - Reduce the LVM2 logical volume by 512 MB:
# lvm lvreduce /dev/VolGroup00/LogVol01 -L -512M - Format the new swap space:
# mkswap /dev/VolGroup00/LogVol01 - Enable the extended logical volume:
# swapon -va - Test that the logical volume has been reduced properly:
# cat /proc/swaps # free
11.3.2. Removing an LVM2 Logical Volume for Swap
/dev/VolGroup00/LogVol02 is the swap volume you want to remove):
- Disable swapping for the associated logical volume:
# swapoff -v /dev/VolGroup00/LogVol02 - Remove the LVM2 logical volume of size 512 MB:
# lvm lvremove /dev/VolGroup00/LogVol02 - Remove the following entry from the
/etc/fstabfile:/dev/VolGroup00/LogVol02 swap swap defaults 0 0 - Test that the logical volume has been extended properly:
# cat /proc/swaps # free
Chapter 12. Managing Disk Storage
12.1. Standard Partitions using parted
parted allows users to perform these tasks. This chapter discusses how to use parted to perform file system tasks.
parted package installed to use the parted utility. To start parted, at a shell prompt as root, type the command parted /dev/sda, where /dev/sda is the device name for the drive you want to configure. The (parted) prompt is displayed. Type help to view a list of available commands.
umount command and turn off all the swap space on the hard drive with the swapoff command.
parted commands” contains a list of commonly used parted commands. The sections that follow explain some of them in more detail.
| Command | Description |
|---|---|
check minor-num | Perform a simple check of the file system |
cp fromto | Copy file system from one partition to another; from and to are the minor numbers of the partitions |
help | Display list of available commands |
mklabel label | Create a disk label for the partition table |
mkfs minor-numfile-system-type | Create a file system of type file-system-type |
mkpart part-typefs-typestart-mbend-mb | Make a partition without creating a new file system |
mkpartfs part-typefs-typestart-mbend-mb | Make a partition and create the specified file system |
move minor-numstart-mbend-mb | Move the partition |
name minor-numname | Name the partition for Mac and PC98 disklabels only |
print | Display the partition table |
quit | Quit parted |
rescuestart-mbend-mb | Rescue a lost partition from start-mb to end-mb |
resize minor-numstart-mbend-mb | Resize the partition from start-mb to end-mb |
rm minor-num | Remove the partition |
select device | Select a different device to configure |
set minor-numflagstate | Set the flag on a partition; state is either on or off |
12.1.1. Viewing the Partition Table
parted, type the following command to view the partition table:
printDisk geometry for /dev/sda: 0.000-8678.789 megabytes Disk label type: msdos Minor Start End Type Filesystem Flags 1 0.031 101.975 primary ext3 boot 2 101.975 5098.754 primary ext3 3 5098.755 6361.677 primary linux-swap 4 6361.677 8675.727 extended 5 6361.708 7357.895 logical ext3 Disk geometry for /dev/hda: 0.000-9765.492 megabytes Disk label type: msdos Minor Start End Type Filesystem Flags 1 0.031 101.975 primary ext3 boot 2 101.975 611.850 primary linux-swap 3 611.851 760.891 primary ext3 4 760.891 9758.232 extended lba 5 760.922 9758.232 logical ext3
/dev/sda1. The Start and End values are in megabytes. The Type is one of primary, extended, or logical. The Filesystem is the file system type, which can be one of ext2, ext3, fat16, fat32, hfs, jfs, linux-swap, ntfs, reiserfs, hp-ufs, sun-ufs, or xfs. The Flags column lists the flags set for the partition. Available flags are boot, root, swap, hidden, raid, lvm, or lba.
/boot/ file system, minor number 2 refers to the root file system (/), minor number 3 refers to the swap, and minor number 5 refers to the /home/ file system.
12.1.2. Creating a Partition
Warning
parted, where /dev/sda is the device on which to create the partition:
parted /dev/sdaprint12.1.2.1. Making the Partition
mkpart primary ext3 1024 2048Note
mkpartfs command instead, the file system is created after the partition is created. However, parted does not support creating an ext3 file system. Thus, if you wish to create an ext3 file system, use mkpart and create the file system with the mkfs command as described later. mkpartfs works for file system type linux-swap.
print command to confirm that it is in the partition table with the correct partition type, file system type, and size. Also remember the minor number of the new partition so that you can label it. You should also view the output of
cat /proc/partitions12.1.2.2. Formating the Partition
/sbin/mkfs -t ext3 /dev/sda6Warning
12.1.2.3. Labeling the Partition
/dev/sda6 and you want to label it /work:
e2label /dev/sda6 /work12.1.2.4. Creating the Mount Point
mkdir /work12.1.2.5. Add to /etc/fstab
/etc/fstab file to include the new partition. The new line should look similar to the following:
LABEL=/work /work ext3 defaults 1 2
LABEL= followed by the label you gave the partition. The second column should contain the mount point for the new partition, and the next column should be the file system type (for example, ext3 or swap). If you need more information about the format, read the man page with the command man fstab.
defaults, the partition is mounted at boot time. To mount the partition without rebooting, as root, type the command:
mount /work12.1.3. Removing a Partition
Warning
parted, where /dev/sda is the device on which to remove the partition:
parted /dev/sdaprintrm. For example, to remove the partition with minor number 3:
rm 3print command to confirm that it is removed from the partition table. You should also view the output of
cat /proc/partitions/etc/fstab file. Find the line that declares the removed partition, and remove it from the file.
12.1.4. Resizing a Partition
Warning
parted, where /dev/sda is the device on which to resize the partition:
parted /dev/sdaprintWarning
resize command followed by the minor number for the partition, the starting place in megabytes, and the end place in megabytes. For example:
resize 3 1024 2048print command to confirm that the partition has been resized correctly, is the correct partition type, and is the correct file system type.
df to make sure the partition was mounted and is recognized with the new size.
12.2. LVM Partition Management
lvm help at a command prompt.
| Command | Description |
|---|---|
dumpconfig | Dump the active configuration |
formats | List the available metadata formats |
help | Display the help commands |
lvchange | Change the attributes of logical volume(s) |
lvcreate | Create a logical volume |
lvdisplay | Display information about a logical volume |
lvextend | Add space to a logical volume |
lvmchange | Due to use of the device mapper, this command has been deprecated |
lvmdiskscan | List devices that may be used as physical volumes |
lvmsadc | Collect activity data |
lvmsar | Create activity report |
lvreduce | Reduce the size of a logical volume |
lvremove | Remove logical volume(s) from the system |
lvrename | Rename a logical volume |
lvresize | Resize a logical volume |
lvs | Display information about logical volumes |
lvscan | List all logical volumes in all volume groups |
pvchange | Change attributes of physical volume(s) |
pvcreate | Initialize physical volume(s) for use by LVM |
pvdata | Display the on-disk metadata for physical volume(s) |
pvdisplay | Display various attributes of physical volume(s) |
pvmove | Move extents from one physical volume to another |
pvremove | Remove LVM label(s) from physical volume(s) |
pvresize | Resize a physical volume in use by a volume group |
pvs | Display information about physical volumes |
pvscan | List all physical volumes |
segtypes | List available segment types |
vgcfgbackup | Backup volume group configuration |
vgcfgrestore | Restore volume group configuration |
vgchange | Change volume group attributes |
vgck | Check the consistency of a volume group |
vgconvert | Change volume group metadata format |
vgcreate | Create a volume group |
vgdisplay | Display volume group information |
vgexport | Unregister a volume group from the system |
vgextend | Add physical volumes to a volume group |
vgimport | Register exported volume group with system |
vgmerge | Merge volume groups |
vgmknodes | Create the special files for volume group devices in /dev/ |
vgreduce | Remove a physical volume from a volume group |
vgremove | Remove a volume group |
vgrename | Rename a volume group |
vgs | Display information about volume groups |
vgscan | Search for all volume groups |
vgsplit | Move physical volumes into a new volume group |
version | Display software and driver version information |
Chapter 13. Implementing Disk Quotas
quota RPM must be installed to implement disk quotas.
13.1. Configuring Disk Quotas
- Enable quotas per file system by modifying the
/etc/fstabfile. - Remount the file system(s).
- Create the quota database files and generate the disk usage table.
- Assign quota policies.
13.1.1. Enabling Quotas
/etc/fstab file. Add the usrquota and/or grpquota options to the file systems that require quotas:
/dev/VolGroup00/LogVol00 /         ext3    defaults        1 1
LABEL=/boot              /boot     ext3    defaults        1 2
none                     /dev/pts  devpts  gid=5,mode=620  0 0
none                     /dev/shm  tmpfs   defaults        0 0
none                     /proc     proc    defaults        0 0
none                     /sys      sysfs   defaults        0 0
/dev/VolGroup00/LogVol02 /home     ext3    defaults,usrquota,grpquota  1 2
/dev/VolGroup00/LogVol01 swap      swap    defaults        0 0
.
.
.
/home file system has both user and group quotas enabled.
Note
/home partition was created during the installation of Red Hat Enterprise Linux. Although not ideal, the root (/) partition (the installation default created partition) can be used for setting quota policies in the /etc/fstab file.
13.1.2. Remounting the File Systems
usrquota and/or grpquota options, remount each file system whose fstab entry has been modified. If the file system is not in use by any process, use one of the following methods:
- Issue the
umountcommand followed by themountcommand to remount the file system. - Issue the
mount -o remount /homecommand to remount the file system.
13.1.3. Creating the Quota Database Files
quotacheck command.
quotacheck command examines quota-enabled file systems and builds a table of the current disk usage per file system. The table is then used to update the operating system's copy of disk usage. In addition, the file system's disk quota files are updated.
aquota.user and aquota.group) on the file system, use the -c option of the quotacheck command. For example, if user and group quotas are enabled for the /home file system, create the files in the /home directory:
quotacheck -cug /home-c option specifies that the quota files should be created for each file system with quotas enabled, the -u option specifies to check for user quotas, and the -g option specifies to check for group quotas.
-u or -g options are specified, only the user quota file is created. If only -g is specified, only the group quota file is created.
quotacheck -avuga— Check all quota-enabled, locally-mounted file systemsv— Display verbose status information as the quota check proceedsu— Check user disk quota informationg— Check group disk quota information
quotacheck has finished running, the quota files corresponding to the enabled quotas (user and/or group) are populated with data for each quota-enabled locally-mounted file system such as /home.
13.1.4. Assigning Quotas per User
edquota command.
edquota username/etc/fstab for the /home partition (/dev/VolGroup00/LogVol02) and the command edquota testuser is executed, the following is shown in the editor configured as the default for the system:
Disk quotas for user testuser (uid 501):
  Filesystem                blocks     soft     hard    inodes   soft   hard
  /dev/VolGroup00/LogVol02  440436        0        0     37418      0      0
Note
EDITOR environment variable is used by edquota. To change the editor, set the EDITOR environment variable in your ~/.bash_profile file to the full path of the editor of your choice.
inodes column shows how many inodes the user is currently using. The last two columns are used to set the soft and hard inode limits for the user on the file system.
Disk quotas for user testuser (uid 501):
  Filesystem                blocks     soft     hard   inodes   soft   hard
  /dev/VolGroup00/LogVol02  440436   500000   550000    37418      0      0
quota testuser13.1.5. Assigning Quotas per Group
devel group (the group must exist prior to setting the group quota), use the command:
edquota -g devel Disk quotas for group devel (gid 505): Filesystem blocks soft hard inodes soft hard /dev/VolGroup00/LogVol02 440400 0 0 37418 0 0
quota -g devel13.1.6. Assigning Quotas per File System
edquota -t edquota commands, this one opens the current quotas for the file system in the text editor:
Grace period before enforcing soft limits for users:
Time units may be: days, hours, minutes, or seconds
  Filesystem                       Block grace period  Inode grace period
  /dev/mapper/VolGroup00-LogVol02       7days                7days
13.2. Managing Disk Quotas
13.2.1. Enabling and Disabling
quotaoff -vaug-u or -g options are specified, only the user quotas are disabled. If only -g is specified, only group quotas are disabled.
quotaon command with the same options.
quotaon -vaug/home, use the following command:
quotaon -vug /home-u or -g options are specified, only the user quotas are enabled. If only -g is specified, only group quotas are enabled.
13.2.2. Reporting on Disk Quotas
repquota utility. For example, the command repquota /home produces this output:
*** Report for user quotas on device /dev/mapper/VolGroup00-LogVol02
Block grace time: 7days; Inode grace time: 7days
                        Block limits                File limits
User            used    soft    hard  grace    used  soft  hard  grace
----------------------------------------------------------------------
root      --      36       0       0              4     0     0
kristin   --     540       0       0            125     0     0
testuser  --  440400  500000  550000          37418     0     0
-a) quota-enabled file systems, use the command:
repquota -a-- displayed after each user is a quick way to determine whether the block or inode limits have been exceeded. If either soft limit is exceeded, a + appears in place of the corresponding -; the first - represents the block limit, and the second represents the inode limit.
grace columns are normally blank. If a soft limit has been exceeded, the column contains a time specification equal to the amount of time remaining on the grace period. If the grace period has expired, none appears in its place.
13.2.3. Keeping Quotas Accurate
quotacheck. However, quotacheck can be run on a regular basis, even if the system has not crashed. Running the following command periodically keeps the quotas more accurate (the options used have been described in Section 13.1.1, “Enabling Quotas”):
quotacheck -avugcron. As root, either use the crontab -e command to schedule a periodic quotacheck or place a script that runs quotacheck in any one of the following directories (using whichever interval best matches your needs):
/etc/cron.hourly/etc/cron.daily/etc/cron.weekly/etc/cron.monthly
quotacheck for each file system at different times with multiple cron tasks.
cron.
13.3. Additional Resources
13.3.1. Installed Documentation
- The
quotacheck,edquota,repquota,quota,quotaon, andquotaoffman pages
13.3.2. Related Books
- Introduction to System Administration ; Red Hat, Inc — Available at http://www.redhat.com/docs/ and on the Documentation CD, this manual contains background information on storage management (including disk quotas) for new Red Hat Enterprise Linux system administrators.
Chapter 14. Access Control Lists
acl package is required to implement ACLs. It contains the utilities used to add, modify, remove, and retrieve ACL information.
cp and mv commands copy or move any ACLs associated with files and directories.
14.1. Mounting File Systems
mount -t ext3 -o acl <device-name><partition> mount -t ext3 -o acl /dev/VolGroup00/LogVol02 /work /etc/fstab file, the entry for the partition can include the acl option:
LABEL=/work /work ext3 acl 1 2
--with-acl-support option. No special flags are required when accessing or mounting a Samba share.
14.1.1. NFS
no_acl option in the /etc/exports file. To disable ACLs on an NFS share when mounting it on a client, mount it with the no_acl option via the command line or the /etc/fstab file.
14.2. Setting Access ACLs
- Per user
- Per group
- Via the effective rights mask
- For users not in the user group for the file
setfacl utility sets ACLs for files and directories. Use the -m option to add or modify the ACL of a file or directory:
setfacl -m <rules><files>u:<uid>:<perms>- Sets the access ACL for a user. The user name or UID may be specified. The user may be any valid user on the system.
g:<gid>:<perms>- Sets the access ACL for a group. The group name or GID may be specified. The group may be any valid group on the system.
m:<perms>- Sets the effective rights mask. The mask is the union of all permissions of the owning group and all of the user and group entries.
o:<perms>- Sets the access ACL for users other than the ones in the group for the file.
r, w, and x for read, write, and execute.
setfacl command is used, the additional rules are added to the existing ACL or the existing rule is modified.
setfacl -m u:andrius:rw /project/somefile-x option and do not specify any permissions:
setfacl -x <rules><files>setfacl -x u:500 /project/somefile14.3. Setting Default ACLs
d: before the rule and specify a directory instead of a file name.
/share/ directory to read and execute for users not in the user group (an access ACL for an individual file can override it):
setfacl -m d:o:rx /share14.4. Retrieving ACLs
getfacl command:
getfacl <filename># file: file # owner: andrius # group: andrius user::rw- user:smoore:r-- group::r-- mask::r-- other::r--
# file: file # owner: andrius # group: andrius user::rw- user:smoore:r-- group::r-- mask::r-- other::r-- default:user::rwx default:user:andrius:rwx default:group::r-x default:mask::rwx default:other::r-x
14.5. Archiving File Systems With ACLs
Warning
tar and dump commands do not backup ACLs.
star utility is similar to the tar utility in that it can be used to generate archives of files; however, some of its options are different. Refer to Table 14.1, “Command Line Options for star” for a listing of more commonly used options. For all available options, refer to the star man page. The star package is required to use this utility.
| Option | Description |
|---|---|
-c | Creates an archive file. |
-n | Do not extract the files; use in conjunction with -x to show what extracting the files does. |
-r | Replaces files in the archive. The files are written to the end of the archive file, replacing any files with the same path and file name. |
-t | Displays the contents of the archive file. |
-u | Updates the archive file. The files are written to the end of the archive if they do not exist in the archive or if the files are newer than the files of the same name in the archive. This option only work if the archive is a file or an unblocked tape that may backspace. |
-x | Extracts the files from the archive. If used with -U and a file in the archive is older than the corresponding file on the file system, the file is not extracted. |
-help | Displays the most important options. |
-xhelp | Displays the least important options. |
-/ | Do not strip leading slashes from file names when extracting the files from an archive. By default, they are striped when files are extracted. |
-acl | When creating or extracting, archive or restore any ACLs associated with the files and directories. |
14.6. Compatibility with Older Systems
ext_attr attribute. This attribute can be seen using the following command:
tune2fs -l <filesystem-device>ext_attr attribute can be mounted with older kernels, but those kernels do not enforce any ACLs which have been set.
e2fsck utility included in version 1.22 and higher of the e2fsprogs package (including the versions in Red Hat Enterprise Linux 2.1 and 4) can check a file system with the ext_attr attribute. Older versions refuse to check it.
14.7. Additional Resources
14.7.1. Installed Documentation
aclman page — Description of ACLsgetfaclman page — Discusses how to get file access control listssetfaclman page — Explains how to set file access control listsstarman page — Explains more about thestarutility and its many options
14.7.2. Useful Websites
- http://acl.bestbits.at/ — Website for ACLs
Part III. Package Management
Chapter 15. Package Management with RPM
.tar.gz files.
Note
15.1. RPM Design Goals
- Upgradability
- Using RPM, you can upgrade individual components of your system without completely reinstalling. When you get a new release of an operating system based on RPM (such as Red Hat Enterprise Linux), you do not need to reinstall on your machine (as you do with operating systems based on other packaging systems). RPM allows intelligent, fully-automated, in-place upgrades of your system. Configuration files in packages are preserved across upgrades, so you do not lose your customizations. There are no special upgrade files needed to upgrade a package because the same RPM file is used to install and upgrade the package on your system.
- Powerful Querying
- RPM is designed to provide powerful querying options. You can do searches through your entire database for packages or just for certain files. You can also easily find out what package a file belongs to and from where the package came. The files an RPM package contains are in a compressed archive, with a custom binary header containing useful information about the package and its contents, allowing you to query individual packages quickly and easily.
- System Verification
- Another powerful feature is the ability to verify packages. If you are worried that you deleted an important file for some package, verify the package. You are notified of any anomalies. At that point, you can reinstall the package if necessary. Any configuration files that you modified are preserved during reinstallation.
- Pristine Sources
- A crucial design goal was to allow the use of "pristine" software sources, as distributed by the original authors of the software. With RPM, you have the pristine sources along with any patches that were used, plus complete build instructions. This is an important advantage for several reasons. For instance, if a new version of a program comes out, you do not necessarily have to start from scratch to get it to compile. You can look at the patch to see what you might need to do. All the compiled-in defaults, and all of the changes that were made to get the software to build properly, are easily visible using this technique.The goal of keeping sources pristine may only seem important for developers, but it results in higher quality software for end users, too.
15.2. Using RPM
rpm --help or refer to Section 15.5, “Additional Resources” for more information on RPM.
15.2.1. Finding RPM Packages
- The Red Hat Enterprise Linux CD-ROMs
- The Red Hat Errata Page available at http://www.redhat.com/apps/support/errata/
- A Red Hat FTP Mirror Site available at http://www.redhat.com/download/mirror.html
- Red Hat Network — Refer to Chapter 16, Red Hat Network for more details on Red Hat Network
15.2.2. Installing
foo-1.0-1.i386.rpm. The file name includes the package name (foo), version (1.0), release (1), and architecture (i386). To install a package, log in as root and type the following command at a shell prompt:
rpm -Uvh foo-1.0-1.i386.rpmPreparing... ########################################### [100%] 1:foo ########################################### [100%]
error: V3 DSA signature: BAD, key ID 0352860f
error: Header V3 DSA signature: BAD, key ID 0352860f
NOKEY such as:
warning: V3 DSA signature: NOKEY, key ID 0352860f
Warning
rpm -ivh instead. Refer to Chapter 36, Manually Upgrading the Kernel for details.
15.2.2.1. Package Already Installed
Preparing...                ########################################### [100%]
package foo-1.0-1 is already installed
--replacepkgs option, which tells RPM to ignore the error:
rpm -ivh --replacepkgs foo-1.0-1.i386.rpm15.2.2.2. Conflicting Files
Preparing...                ########################################### [100%]
file /usr/bin/foo from install of foo-1.0-1 conflicts with file from package bar-2.0.20
--replacefiles option:
rpm -ivh --replacefiles foo-1.0-1.i386.rpm15.2.2.3. Unresolved Dependency
error: Failed dependencies:
        bar.so.2 is needed by foo-1.0-1
    Suggested resolutions:
        bar-2.0.20-3.i386.rpm
rpm -ivh foo-1.0-1.i386.rpm bar-2.0.20-3.i386.rpmPreparing... ########################################### [100%] 1:foo ########################################### [ 50%] 2:bar ########################################### [100%]
--redhatprovides option to determine which package contains the required file. You need the rpmdb-redhat package installed to use this option.
rpm -q --redhatprovides bar.so.2bar.so.2 is in the installed database from the rpmdb-redhat package, the name of the package is displayed:
bar-2.0.20-3.i386.rpm
--nodeps option.
15.2.3. Uninstalling
rpm -e fooNote
foo, not the name of the original package filefoo-1.0-1.i386.rpm. To uninstall a package, replace foo with the actual package name of the original package.
error: Failed dependencies:
        foo is needed by (installed) bar-2.0.20-3.i386.rpm
--nodeps option.
15.2.4. Upgrading
rpm -Uvh foo-2.0-1.i386.rpmfoo package. In fact, you may want to always use -U to install packages which works even when there are no previous versions of the package installed.
Note
-U option for installing kernel packages because RPM replaces the previous kernel package. This does not affect a running system, but if the new kernel is unable to boot during your next restart, there would be no other kernel to boot instead.
-i option adds the kernel to your GRUB boot menu (/etc/grub.conf). Similarly, removing an old, unneeded kernel removes the kernel from GRUB.
saving /etc/foo.conf as /etc/foo.conf.rpmsave
package foo-2.0-1 (which is newer than foo-1.0-1) is already installed
--oldpackage option:
rpm -Uvh --oldpackage foo-1.0-1.i386.rpm15.2.5. Freshening
rpm -Fvh foo-1.2-1.i386.rpmrpm -Fvh *.rpm15.2.6. Querying
rpm -q command to query the database of installed packages. The rpm -q foo command displays the package name, version, and release number of the installed package foo:
foo-2.0-1
Note
foo with the actual package name.
-q to specify the package(s) you want to query. These are called Package Selection Options.
-aqueries all currently installed packages.-fqueries the package which owns<file><file>. When specifying a file, you must specify the full path of the file (for example,/bin/ls).-pqueries the package<packagefile><packagefile>.
-idisplays package information including name, description, release, size, build date, install date, vendor, and other miscellaneous information.-ldisplays the list of files that the package contains.-sdisplays the state of all the files in the package.-ddisplays a list of files marked as documentation (man pages, info pages, READMEs, etc.).-cdisplays a list of files marked as configuration files. These are the files you change after installation to adapt the package to your system (for example,sendmail.cf,passwd,inittab, etc.).
-v to the command to display the lists in a familiar ls -l format.
15.2.7. Verifying
rpm -V verifies a package. You can use any of the Package Verify Options listed for querying to specify the packages you wish to verify. A simple use of verifying is rpm -V foo, which verifies that all the files in the foo package are as they were when they were originally installed. For example:
- To verify a package containing a particular file:
rpm -Vf /usr/bin/vim - To verify ALL installed packages:
rpm -Va - To verify an installed package against an RPM package file:
rpm -Vp foo-1.0-1.i386.rpmThis command can be useful if you suspect that your RPM databases are corrupt.
c denotes a configuration file) and then the file name. Each of the eight characters denotes the result of a comparison of one attribute of the file to the value of that attribute recorded in the RPM database. A single period (.) means the test passed. The following characters denote failure of certain tests:
5— MD5 checksumS— file sizeL— symbolic linkT— file modification timeD— deviceU— userG— groupM— mode (includes permissions and file type)?— unreadable file
15.3. Checking a Package's Signature
rpm -K --nosignature <rpm-file><rpm-file>: md5 OK is displayed. This brief message means that the file was not corrupted by the download. To see a more verbose message, replace -K with -Kvv in the command.
15.3.1. Importing Keys
rpm --import /usr/share/rhn/RPM-GPG-KEYrpm -qa gpg-pubkey*gpg-pubkey-db42a60e-37ea5438
rpm -qi followed by the output from the previous command:
rpm -qi gpg-pubkey-db42a60e-37ea543815.3.2. Verifying Signature of Packages
rpm -K <rpm-file>md5 gpg OK. That means that the signature of the package has been verified and that it is not corrupt.
15.4. Impressing Your Friends with RPM
- Perhaps you have deleted some files by accident, but you are not sure what you deleted. To verify your entire system and see what might be missing, you could try the following command:
rpm -VaIf some files are missing or appear to have been corrupted, you should probably either re-install the package or uninstall and then re-install the package. - At some point, you might see a file that you do not recognize. To find out which package owns it, enter:
rpm -qf /usr/bin/ggvThe output would look like the following:ggv-2.6.0-2
- We can combine the above two examples in the following scenario. Say you are having problems with
/usr/bin/paste. You would like to verify the package that owns that program, but you do not know which package ownspaste. Enter the following command,rpm -Vf /usr/bin/pasteand the appropriate package is verified. - Do you want to find out more information about a particular program? You can try the following command to locate the documentation which came with the package that owns that program:
rpm -qdf /usr/bin/freeThe output would be similar to the following:/usr/share/doc/procps-3.2.3/BUGS /usr/share/doc/procps-3.2.3/FAQ /usr/share/doc/procps-3.2.3/NEWS /usr/share/doc/procps-3.2.3/TODO /usr/share/man/man1/free.1.gz /usr/share/man/man1/pgrep.1.gz /usr/share/man/man1/pkill.1.gz /usr/share/man/man1/pmap.1.gz /usr/share/man/man1/ps.1.gz /usr/share/man/man1/skill.1.gz /usr/share/man/man1/slabtop.1.gz /usr/share/man/man1/snice.1.gz /usr/share/man/man1/tload.1.gz /usr/share/man/man1/top.1.gz /usr/share/man/man1/uptime.1.gz /usr/share/man/man1/w.1.gz /usr/share/man/man1/watch.1.gz /usr/share/man/man5/sysctl.conf.5.gz /usr/share/man/man8/sysctl.8.gz /usr/share/man/man8/vmstat.8.gz
- You may find a new RPM, but you do not know what it does. To find information about it, use the following command:
rpm -qip crontabs-1.10-7.noarch.rpmThe output would be similar to the following:Name : crontabs Relocations: (not relocatable) Version : 1.10 Vendor: Red Hat, Inc Release : 7 Build Date: Mon 20 Sep 2004 05:58:10 PM EDT Install Date: (not installed) Build Host: tweety.build.redhat.com Group : System Environment/Base Source RPM: crontabs-1.10-7.src.rpm Size : 1004 License: Public Domain Signature : DSA/SHA1, Wed 05 Jan 2005 06:05:25 PM EST, Key ID 219180cddb42a60e Packager : Red Hat, Inc <http://bugzilla.redhat.com/bugzilla> Summary : Root crontab files used to schedule the execution of programs. Description : The crontabs package contains root crontab files. Crontab is the program used to install, uninstall, or list the tables used to drive the cron daemon. The cron daemon checks the crontab files to see when particular commands are scheduled to be executed. If commands are scheduled, then it executes them.
- Perhaps you now want to see what files the
crontabsRPM installs. You would enter the following:rpm -qlp crontabs-1.10-5.noarch.rpmThe output is similar to the following:/etc/cron.daily /etc/cron.hourly /etc/cron.monthly /etc/cron.weekly /etc/crontab /usr/bin/run-parts
15.5. Additional Resources
15.5.1. Installed Documentation
rpm --help— This command displays a quick reference of RPM parameters.man rpm— The RPM man page gives more detail about RPM parameters than therpm --helpcommand.
15.5.2. Useful Websites
- http://www.rpm.org/ — The RPM website.
- http://www.redhat.com/mailman/listinfo/rpm-list/ — The RPM mailing list is archived here. To subscribe, send mail to
rpm-list-request@redhat.comwith the wordsubscribein the subject line.
Chapter 16. Red Hat Network
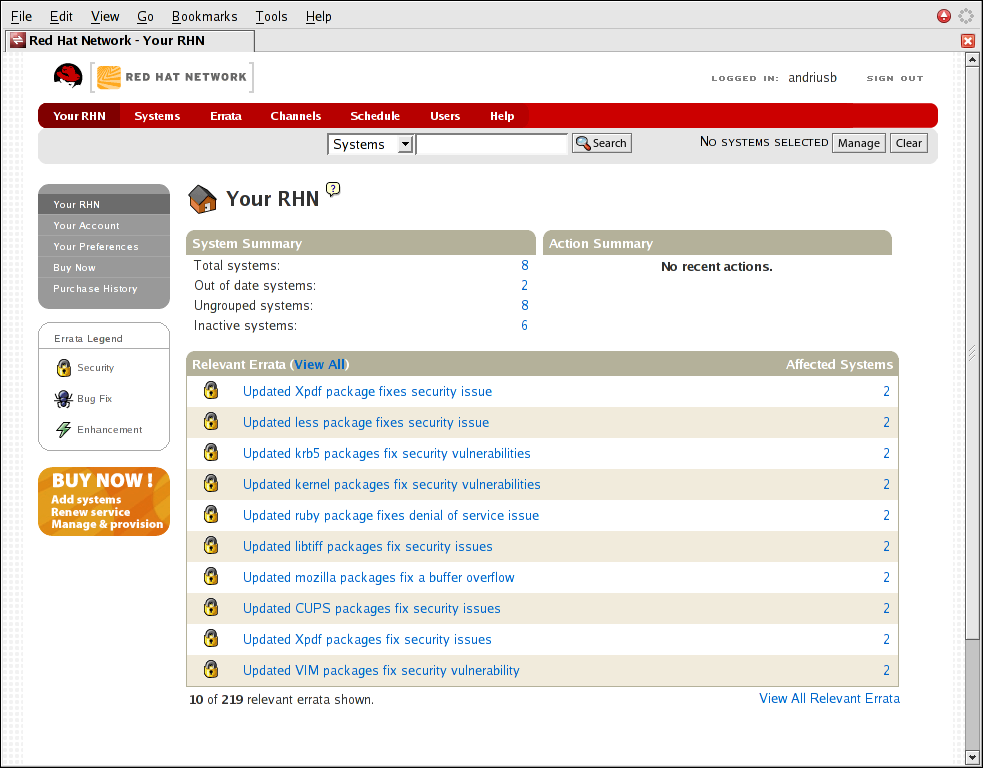
Figure 16.1. Your RHN
- Errata Alerts — learn when Security Alerts, Bug Fix Alerts, and Enhancement Alerts are issued for all the systems in your network
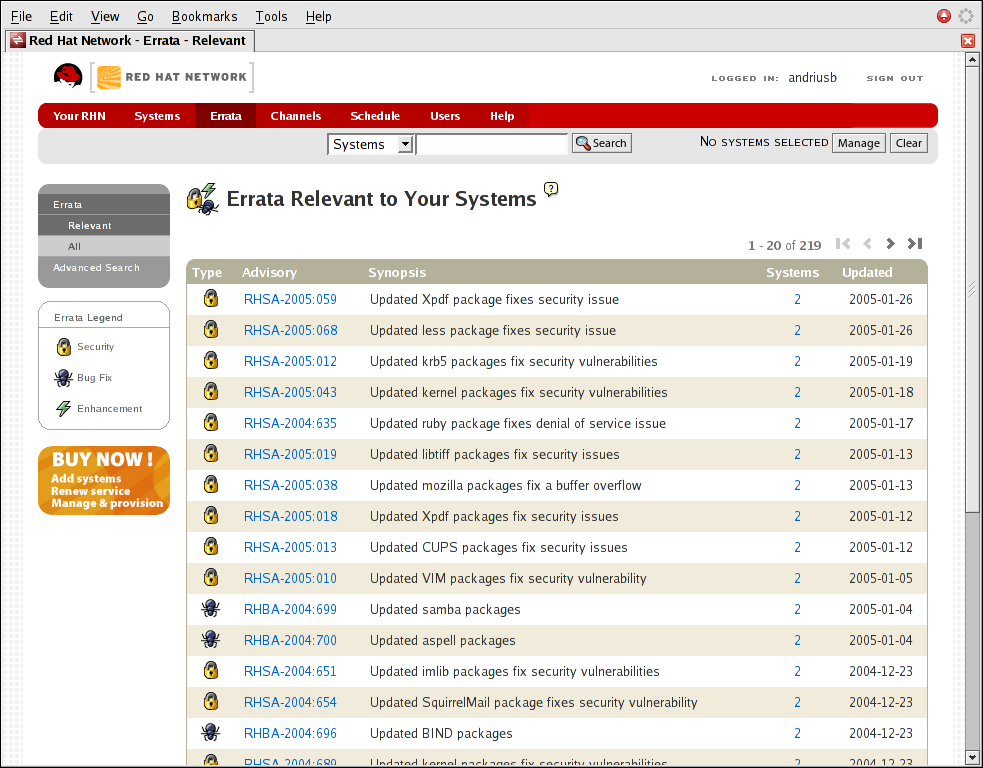
Figure 16.2. Relevant Errata
- Automatic email notifications — Receive an email notification when an Errata Alert is issued for your system(s)
- Scheduled Errata Updates — Schedule delivery of Errata Updates
- Package installation — Schedule package installation on one or more systems with the click of a button
- Package Updater — Use the Package Updater to download the latest software packages for your system (with optional package installation)
- Red Hat Network website — Manage multiple systems, downloaded individual packages, and schedule actions such as Errata Updates through a secure Web browser connection from any computer
Warning
http://www.redhat.com/apps/activate/
yum update from a shell prompt.
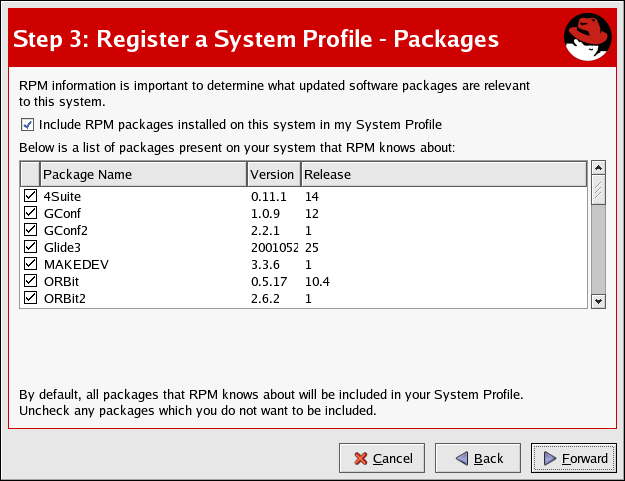
Figure 16.3. Registering with RHN
- Select (the main menu on the panel) => => on your desktop
- Execute the command
yumfrom a shell prompt - Use the RHN website at https://rhn.redhat.com/
- Click on the package icon when it appears in the panel to launch the Package Updater.
http://www.redhat.com/docs/manuals/RHNetwork/
Note
Part IV. Network-Related Configuration
Chapter 17. Network Configuration
- Ethernet
- ISDN
- modem
- xDSL
- token ring
- CIPE
- wireless devices
/etc/hosts file used to store additional hostnames and IP address combinations.
system-config-network at a shell prompt (for example, in an XTerm or a GNOME terminal). If you type the command, the graphical version is displayed if X is running; otherwise, the text-based version is displayed.
system-config-network-cmd --help as root to view all of the options.
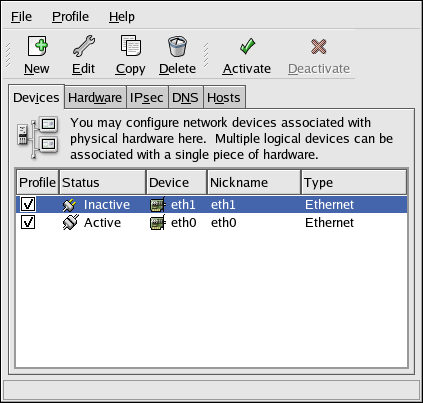
Figure 17.1. Network Administration Tool
Note
17.1. Overview
- Add a network device associated with the physical hardware device.
- Add the physical hardware device to the hardware list, if it does not already exist.
- Configure the hostname and DNS settings.
- Configure any hosts that cannot be looked up through DNS.
17.2. Establishing an Ethernet Connection
- Click the Devices tab.
- Click the button on the toolbar.
- Select Ethernet connection from the Device Type list, and click .
- If you have already added the network interface card to the hardware list, select it from the Ethernet card list. Otherwise, select Other Ethernet Card to add the hardware device.
Note
The installation program detects supported Ethernet devices and prompts you to configure them. If you configured any Ethernet devices during the installation, they are displayed in the hardware list on the Hardware tab. - If you selected Other Ethernet Card, the Select Ethernet Adapter window appears. Select the manufacturer and model of the Ethernet card. Select the device name. If this is the system's first Ethernet card, select eth0 as the device name; if this is the second Ethernet card, select eth1 (and so on). The Network Administration Tool also allows you to configure the resources for the NIC. Click to continue.
- In the Configure Network Settings window shown in Figure 17.2, “Ethernet Settings”, choose between DHCP and a static IP address. If the device receives a different IP address each time the network is started, do not specify a hostname. Click to continue.
- Click on the Create Ethernet Device page.
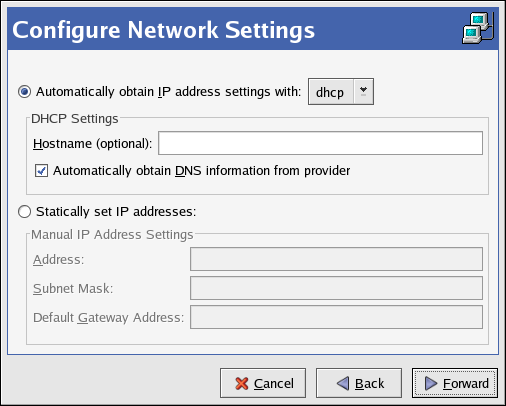
Figure 17.2. Ethernet Settings
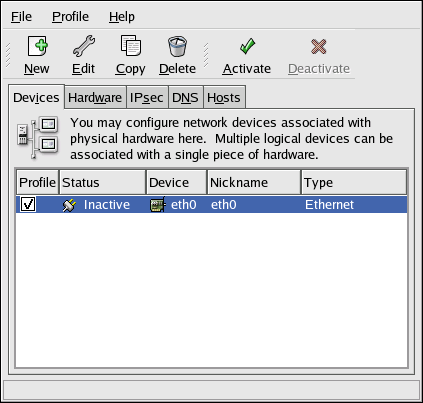
Figure 17.3. Ethernet Device
17.3. Establishing an ISDN Connection
- Click the Devices tab.
- Click the button on the toolbar.
- Select ISDN connection from the Device Type list, and click .
- Select the ISDN adapter from the pulldown menu. Then configure the resources and D channel protocol for the adapter. Click to continue.
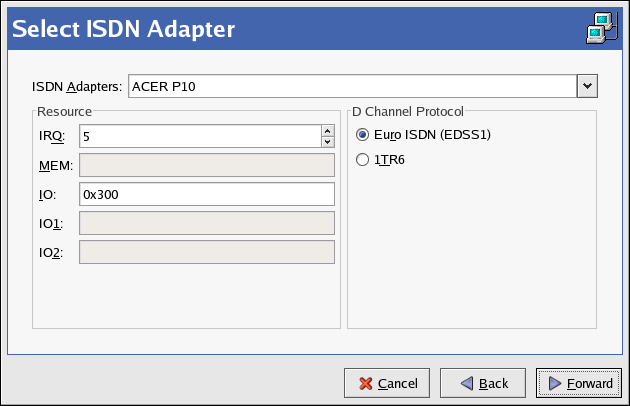
Figure 17.4. ISDN Settings
- If your Internet Service Provider (ISP) is in the pre-configured list, select it. Otherwise, enter the required information about your ISP account. If you do not know the values, contact your ISP. Click .
- In the IP Settings window, select the Encapsulation Mode and whether to obtain an IP address automatically or to set a static IP instead. Click when finished.
- On the Create Dialup Connection page, click .
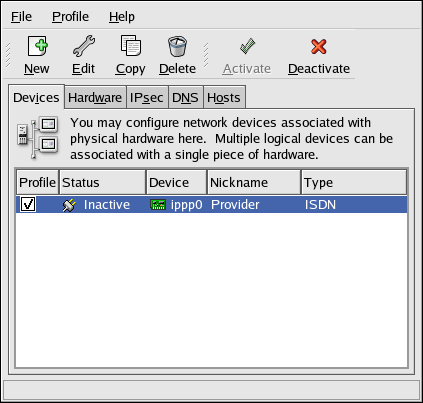
Figure 17.5. ISDN Device
17.4. Establishing a Modem Connection
- Click the Devices tab.
- Click the button on the toolbar.
- Select Modem connection from the Device Type list, and click .
- If there is a modem already configured in the hardware list (on the Hardware tab), the Network Administration Tool assumes you want to use it to establish a modem connection. If there are no modems already configured, it tries to detect any modems in the system. This probe might take a while. If a modem is not found, a message is displayed to warn you that the settings shown are not values found from the probe.
- After probing, the window in Figure 17.6, “Modem Settings” appears.

Figure 17.6. Modem Settings
- Configure the modem device, baud rate, flow control, and modem volume. If you do not know these values, accept the defaults if the modem was probed successfully. If you do not have touch tone dialing, uncheck the corresponding checkbox. Click .
- If your ISP is in the pre-configured list, select it. Otherwise, enter the required information about your ISP account. If you do not know these values, contact your ISP. Click .
- On the IP Settings page, select whether to obtain an IP address automatically or whether to set one statically. Click when finished.
- On the Create Dialup Connection page, click .
Modem as shown in Figure 17.7, “Modem Device”.

Figure 17.7. Modem Device
17.5. Establishing an xDSL Connection
- Click the Devices tab.
- Click the button.
- Select xDSL connection from the Device Type list, and click .
- If your Ethernet card is in the hardware list, select the Ethernet Device from the pulldown menu from the page shown in Figure 17.8, “xDSL Settings”. Otherwise, the Select Ethernet Adapter window appears.
Note
The installation program detects supported Ethernet devices and prompts you to configure them. If you configured any Ethernet devices during the installation, they are displayed in the hardware list on the Hardware tab.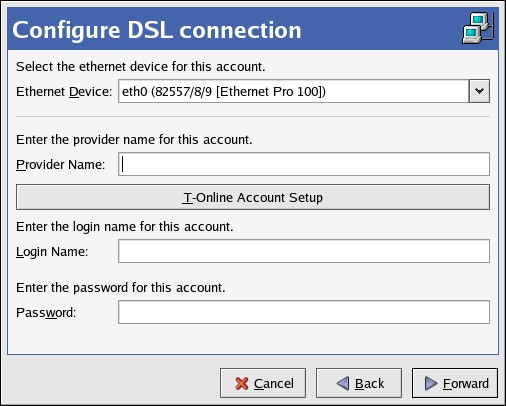
Figure 17.8. xDSL Settings
- If the Select Ethernet Adapter window appears, select the manufacturer and model of the Ethernet card. Select the device name. If this is the system's first Ethernet card, select eth0 as the device name; if this is the second Ethernet card, select eth1 (and so on). The Network Administration Tool also allows you to configure the resources for the NIC. Click to continue.
- Enter the Provider Name, Login Name, and Password. If you have a T-Online account, instead of entering a Login Name and Password in the default window, click the button and enter the required information. Click to continue.
- On the Create DSL Connection page, click .
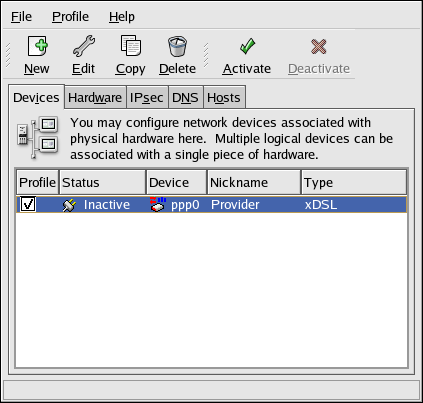
Figure 17.9. xDSL Device
17.6. Establishing a Token Ring Connection
Note
- Click the Devices tab.
- Click the button on the toolbar.
- Select Token Ring connection from the Device Type list and click .
- If you have already added the token ring card to the hardware list, select it from the Tokenring card list. Otherwise, select Other Tokenring Card to add the hardware device.
- If you selected Other Tokenring Card, the Select Token Ring Adapter window as shown in Figure 17.10, “Token Ring Settings” appears. Select the manufacturer and model of the adapter. Select the device name. If this is the system's first token ring card, select tr0; if this is the second token ring card, select tr1 (and so on). The Network Administration Tool also allows the user to configure the resources for the adapter. Click to continue.
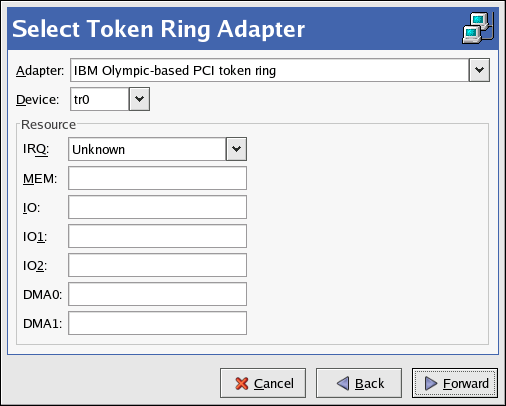
Figure 17.10. Token Ring Settings
- On the Configure Network Settings page, choose between DHCP and static IP address. You may specify a hostname for the device. If the device receives a dynamic IP address each time the network is started, do not specify a hostname. Click to continue.
- Click on the Create Tokenring Device page.
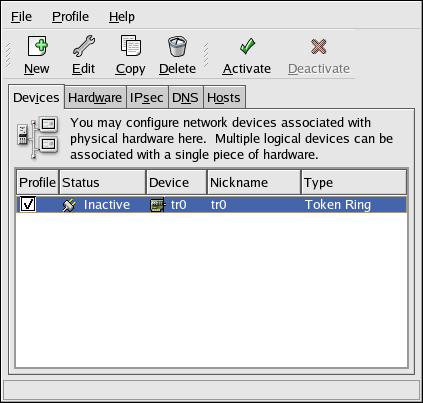
Figure 17.11. Token Ring Device
17.7. Establishing a Wireless Connection
- Click the Devices tab.
- Click the button on the toolbar.
- Select Wireless connection from the Device Type list and click .
- If you have already added the wireless network interface card to the hardware list, select it from the Wireless card list. Otherwise, select Other Wireless Card to add the hardware device.
Note
The installation program usually detects supported wireless Ethernet devices and prompts you to configure them. If you configured them during the installation, they are displayed in the hardware list on the Hardware tab. - If you selected Other Wireless Card, the Select Ethernet Adapter window appears. Select the manufacturer and model of the Ethernet card and the device. If this is the first Ethernet card for the system, select eth0; if this is the second Ethernet card for the system, select eth1 (and so on). The Network Administration Tool also allows the user to configure the resources for the wireless network interface card. Click to continue.
- On the Configure Wireless Connection page as shown in Figure 17.12, “Wireless Settings”, configure the settings for the wireless device.

Figure 17.12. Wireless Settings
- On the Configure Network Settings page, choose between DHCP and static IP address. You may specify a hostname for the device. If the device receives a dynamic IP address each time the network is started, do not specify a hostname. Click to continue.
- Click on the Create Wireless Device page.
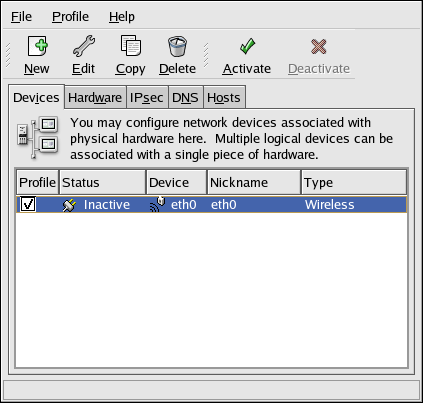
Figure 17.13. Wireless Device
17.8. Managing DNS Settings
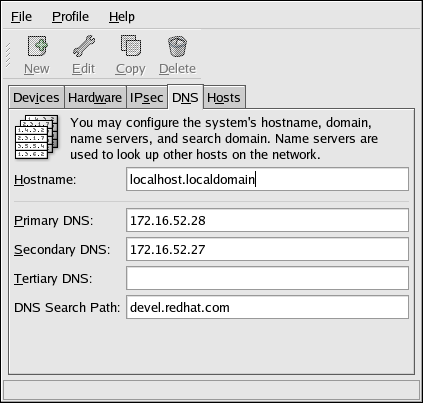
Figure 17.14. DNS Configuration
Note
Warning
system-config-network is started on the local host, you may not be able to start another X11 application. As such, you may have to re-login to a new desktop session.
17.9. Managing Hosts
/etc/hosts file. This file contains IP addresses and their corresponding hostnames.
/etc/hosts file before using the name servers (if you are using the default Red Hat Enterprise Linux configuration). If the IP address is listed in the /etc/hosts file, the name servers are not used. If your network contains computers whose IP addresses are not listed in DNS, it is recommended that you add them to the /etc/hosts file.
/etc/hosts file, go to the Hosts tab, click the button on the toolbar, provide the requested information, and click OK. Select => or press Ctrl+S to save the changes to the /etc/hosts file. The network or network services do not need to be restarted since the current version of the file is referred to each time an address is resolved.
Warning
localhost entry. Even if the system does not have a network connection or have a network connection running constantly, some programs need to connect to the system via the localhost loopback interface.
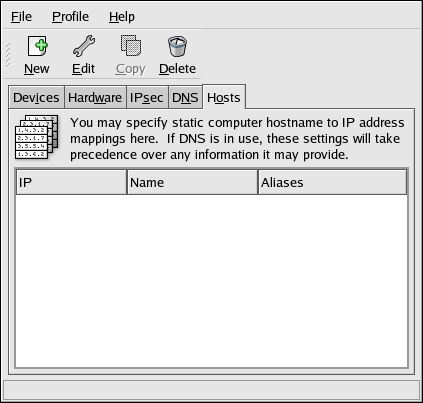
Figure 17.15. Hosts Configuration
Note
/etc/host.conf file. The line order hosts, bind specifies that /etc/hosts takes precedence over the name servers. Changing the line to order bind, hosts configures the system to resolve hostnames and IP addresses using the name servers first. If the IP address cannot be resolved through the name servers, the system then looks for the IP address in the /etc/hosts file.
17.10. Working with Profiles
eth0_office, so that it can be recognized more easily.
eth0_office in a profile called Office and want to activate the logical device if the profile is selected, uncheck the eth0 device and check the eth0_office device.
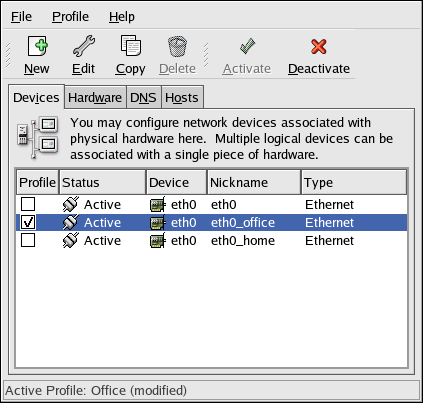
Figure 17.16. Office Profile
eth0.
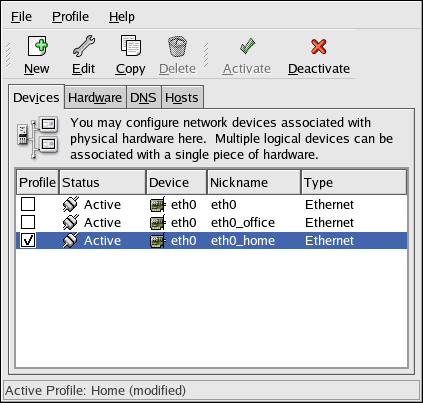
Figure 17.17. Home Profile
eth0 to activate in the Office profile only and to activate a PPP (modem) device in the Home profile only. Another example is to have the Common profile activate eth0 and an Away profile activate a PPP device for use while traveling.
netprofile=<profilename> option. For example, if the system uses GRUB as the boot loader and /boot/grub/grub.conf contains:
title Red Hat Enterprise Linux (2.6.9-5.EL)
         root (hd0,0)
	 kernel /vmlinuz-2.6.9-5.EL ro root=/dev/VolGroup00/LogVol00 rhgb quiet
	 initrd /initrd-2.6.9-5.EL.img
title Red Hat Enterprise Linux (2.6.9-5.EL)
         root (hd0,0)
	 kernel /vmlinuz-2.6.9-5.EL ro root=/dev/VolGroup00/LogVol00 \
	 	netprofile=<profilename> \ 	  rhgb quiet
	 initrd /initrd-2.6.9-5.EL.img
system-control-network) to select a profile and activate it. The activate profile section only appears in the Network Device Control interface if more than the default Common interface exists.
system-config-network-cmd --profile <profilename> --activate17.11. Device Aliases
eth0 —to use a static IP address (DHCP does not work with aliases), go to the Devices tab and click . Select the Ethernet card to configure with an alias, set the static IP address for the alias, and click to create it. Since a device already exists for the Ethernet card, the one just created is the alias, such as eth0:1.
Warning
eth0 device. Notice the eth0:1 device — the first alias for eth0. The second alias for eth0 would have the device name eth0:2, and so on. To modify the settings for the device alias, such as whether to activate it at boot time and the alias number, select it from the list and click the button.
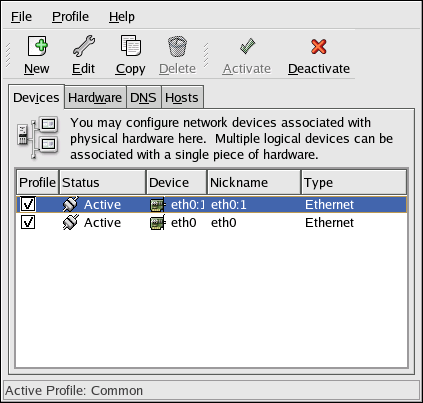
Figure 17.18. Network Device Alias Example
/sbin/ifconfig. The output should show the device and the device alias with different IP addresses:
eth0      Link encap:Ethernet
	HWaddr 00:A0:CC:60:B7:G4
	inet addr:192.168.100.5  Bcast:192.168.100.255  Mask:255.255.255.0
	UP BROADCAST RUNNING MULTICAST  MTU:1500  Metric:1
	RX packets:161930 errors:1 dropped:0 overruns:0 frame:0
	TX packets:244570 errors:0 dropped:0 overruns:0 carrier:0
	collisions:475 txqueuelen:100
	RX bytes:55075551 (52.5 Mb)  TX bytes:178108895 (169.8 Mb)
	Interrupt:10 Base address:0x9000  eth0:1    Link encap:Ethernet  HWaddr 00:A0:CC:60:B7:G4
	inet addr:192.168.100.42  Bcast:192.168.100.255  Mask:255.255.255.0
	UP BROADCAST RUNNING MULTICAST  MTU:1500  Metric:1
	Interrupt:10 Base address:0x9000  lo
	Link encap:Local Loopback
	inet addr:127.0.0.1  Mask:255.0.0.0
	UP LOOPBACK RUNNING  MTU:16436  Metric:1
	RX packets:5998 errors:0 dropped:0 overruns:0 frame:0
	TX packets:5998 errors:0 dropped:0 overruns:0 carrier:0
	collisions:0 txqueuelen:0
	RX bytes:1627579 (1.5 Mb)  TX bytes:1627579 (1.5 Mb)
17.12. Saving and Restoring the Network Configuration
/tmp/network-config, execute the following command as root:
system-config-network-cmd -e > /tmp/network-config
system-config-network-cmd -i -c -f /tmp/network-config-i option means to import the data, the -c option means to clear the existing configuration prior to importing, and the -f option specifies that the file to import is as follows.
Chapter 18. Firewalls
| Method | Description | Advantages | Disadvantages | ||||||
|---|---|---|---|---|---|---|---|---|---|
| NAT | Network Address Translation (NAT) places private IP subnetworks behind one or a small pool of public IP addresses, masquerading all requests to one source rather than several. The Linux kernel has built-in NAT functionality through the Netfilter kernel subsystem. |
|
| ||||||
| Packet Filter | A packet filtering firewall reads each data packet that passes through a LAN. It can read and process packets by header information and filters the packet based on sets of programmable rules implemented by the firewall administrator. The Linux kernel has built-in packet filtering functionality through the Netfilter kernel subsystem. |
|
| ||||||
| Proxy | Proxy firewalls filter all requests of a certain protocol or type from LAN clients to a proxy machine, which then makes those requests to the Internet on behalf of the local client. A proxy machine acts as a buffer between malicious remote users and the internal network client machines. |
|
|
18.1. Netfilter and IPTables
iptables tool.
18.1.1. IPTables Overview
iptables administration tool, a command line tool similar in syntax to its predecessor, ipchains.
ipchains requires intricate rule sets for: filtering source paths; filtering destination paths; and filtering both source and destination connection ports.
iptables uses the Netfilter subsystem to enhance network connection, inspection, and processing. iptables features advanced logging, pre- and post-routing actions, network address translation, and port forwarding, all in one command line interface.
iptables.
18.2. Basic Firewall Configuration
18.2.1. Security Level Configuration Tool
[root@myServer ~] # system-config-selinux

Figure 18.1. Security Level Configuration Tool
Note
18.2.2. Enabling and Disabling the Firewall
- Disabled — Disabling the firewall provides complete access to your system and does no security checking. This should only be selected if you are running on a trusted network (not the Internet) or need to configure a custom firewall using the iptables command line tool.
Warning
Firewall configurations and any customized firewall rules are stored in the/etc/sysconfig/iptablesfile. If you choose Disabled and click , these configurations and firewall rules will be lost. - Enabled — This option configures the system to reject incoming connections that are not in response to outbound requests, such as DNS replies or DHCP requests. If access to services running on this machine is needed, you can choose to allow specific services through the firewall.If you are connecting your system to the Internet, but do not plan to run a server, this is the safest choice.
18.2.3. Trusted Services
- WWW (HTTP)
- The HTTP protocol is used by Apache (and by other Web servers) to serve web pages. If you plan on making your Web server publicly available, select this check box. This option is not required for viewing pages locally or for developing web pages. This service requires that the
httpdpackage be installed.Enabling WWW (HTTP) will not open a port for HTTPS, the SSL version of HTTP. If this service is required, select the Secure WWW (HTTPS) check box. - FTP
- The FTP protocol is used to transfer files between machines on a network. If you plan on making your FTP server publicly available, select this check box. This service requires that the
vsftpdpackage be installed. - SSH
- Secure Shell (SSH) is a suite of tools for logging into and executing commands on a remote machine. To allow remote access to the machine via ssh, select this check box. This service requires that the
openssh-serverpackage be installed. - Telnet
- Telnet is a protocol for logging into remote machines. Telnet communications are unencrypted and provide no security from network snooping. Allowing incoming Telnet access is not recommended. To allow remote access to the machine via telnet, select this check box. This service requires that the
telnet-serverpackage be installed. - Mail (SMTP)
- SMTP is a protocol that allows remote hosts to connect directly to your machine to deliver mail. You do not need to enable this service if you collect your mail from your ISP's server using POP3 or IMAP, or if you use a tool such as
fetchmail. To allow delivery of mail to your machine, select this check box. Note that an improperly configured SMTP server can allow remote machines to use your server to send spam. - NFS4
- The Network File System (NFS) is a file sharing protocol commonly used on *NIX systems. Version 4 of this protocol is more secure than its predecessors. If you want to share files or directories on your system with other network users, select this check box.
- Samba
- Samba is an implementation of Microsoft's proprietary SMB networking protocol. If you need to share files, directories, or locally-connected printers with Microsoft Windows machines, select this check box.
18.2.4. Other Ports
iptables. For example, to allow IRC and Internet printing protocol (IPP) to pass through the firewall, add the following to the Other ports section:
194:tcp,631:tcp
18.2.5. Saving the Settings
iptables commands and written to the /etc/sysconfig/iptables file. The iptables service is also started so that the firewall is activated immediately after saving the selected options. If Disable firewall was selected, the /etc/sysconfig/iptables file is removed and the iptables service is stopped immediately.
/etc/sysconfig/system-config-selinux file so that the settings can be restored the next time the application is started. Do not edit this file by hand.
iptables service is not configured to start automatically at boot time. Refer to Section 18.2.6, “Activating the IPTables Service” for more information.
18.2.6. Activating the IPTables Service
iptables service is running. To manually start the service, use the following command:
[root@myServer ~] # service iptables restart
iptables starts when the system is booted, use the following command:
[root@myServer ~] # chkconfig --level 345 iptables on
ipchains service is not included in Red Hat Enterprise Linux. However, if ipchains is installed (for example, an upgrade was performed and the system had ipchains previously installed), the ipchains and iptables services should not be activated simultaneously. To make sure the ipchains service is disabled and configured not to start at boot time, use the following two commands:
[root@myServer ~] # service ipchains stop
[root@myServer ~] # chkconfig --level 345 ipchains off
18.3. Using IPTables
iptables is to start the iptables service. Use the following command to start the iptables service:
[root@myServer ~] # service iptables start
Note
ip6tables service can be turned off if you intend to use the iptables service only. If you deactivate the ip6tables service, remember to deactivate the IPv6 network also. Never leave a network device active without the matching firewall.
iptables to start by default when the system is booted, use the following command:
[root@myServer ~] # chkconfig --level 345 iptables on
iptables to start whenever the system is booted into runlevel 3, 4, or 5.
18.3.1. IPTables Command Syntax
iptables command illustrates the basic command syntax:
[root@myServer ~ ] # iptables -A <chain> -j <target>
-A option specifies that the rule be appended to <chain>. Each chain is comprised of one or more rules, and is therefore also known as a ruleset.
-j <target> option specifies the target of the rule; i.e., what to do if the packet matches the rule. Examples of built-in targets are ACCEPT, DROP, and REJECT.
iptables man page for more information on the available chains, options, and targets.
18.3.2. Basic Firewall Policies
iptables chain is comprised of a default policy, and zero or more rules which work in concert with the default policy to define the overall ruleset for the firewall.
[root@myServer ~ ] # iptables -P INPUT DROP
[root@myServer ~ ] # iptables -P OUTPUT DROP
[root@myServer ~ ] # iptables -P FORWARD DROP
18.3.3. Saving and Restoring IPTables Rules
iptables are transitory; if the system is rebooted or if the iptables service is restarted, the rules are automatically flushed and reset. To save the rules so that they are loaded when the iptables service is started, use the following command:
[root@myServer ~ ] # service iptables save
/etc/sysconfig/iptables and are applied whenever the service is started or the machine is rebooted.
18.4. Common IPTables Filtering
[root@myServer ~ ] # iptables -A INPUT -p tcp -m tcp --dport 80 -j ACCEPT
[root@myServer ~ ] # iptables -A INPUT -p tcp -m tcp --dport 443 -j ACCEPT
Important
iptables ruleset, order is important.
-I option. For example:
[root@myServer ~ ] # iptables -I INPUT 1 -i lo -p all -j ACCEPT
iptables to accept connections from remote SSH clients. For example, the following rules allow remote SSH access:
[root@myServer ~ ] # iptables -A INPUT -p tcp --dport 22 -j ACCEPT
[root@myServer ~ ] # iptables -A OUTPUT -p tcp --sport 22 -j ACCEPT
iptables filtering rules.
18.5. FORWARD and NAT Rules
iptables provides routing and forwarding policies that can be implemented to prevent abnormal usage of network resources.
FORWARD chain allows an administrator to control where packets can be routed within a LAN. For example, to allow forwarding for the entire LAN (assuming the firewall/gateway is assigned an internal IP address on eth1), use the following rules:
[root@myServer ~ ] # iptables -A FORWARD -i eth1 -j ACCEPT
[root@myServer ~ ] # iptables -A FORWARD -o eth1 -j ACCEPT
eth1 device.
Note
[root@myServer ~ ] # sysctl -w net.ipv4.ip_forward=1
/etc/sysctl.conf file as follows:
net.ipv4.ip_forward = 0
net.ipv4.ip_forward = 1
sysctl.conf file:
[root@myServer ~ ] # sysctl -p /etc/sysctl.conf
18.5.1. Postrouting and IP Masquerading
[root@myServer ~ ] # iptables -t nat -A POSTROUTING -o eth0 -j MASQUERADE
-t nat) and specifies the built-in POSTROUTING chain for NAT (-A POSTROUTING) on the firewall's external networking device (-o eth0).
-j MASQUERADE target is specified to mask the private IP address of a node with the external IP address of the firewall/gateway.
18.5.2. Prerouting
-j DNAT target of the PREROUTING chain in NAT to specify a destination IP address and port where incoming packets requesting a connection to your internal service can be forwarded.
[root@myServer ~ ] # iptables -t nat -A PREROUTING -i eth0 -p tcp --dport 80 -j DNAT --to 172.31.0.23:80
Note
[root@myServer ~ ] # iptables -A FORWARD -i eth0 -p tcp --dport 80 -d 172.31.0.23 -j ACCEPT
18.5.3. DMZs and IPTables
iptables rules to route traffic to certain machines, such as a dedicated HTTP or FTP server, in a demilitarized zone (DMZ). A DMZ is a special local subnetwork dedicated to providing services on a public carrier, such as the Internet.
PREROUTING table to forward the packets to the appropriate destination:
[root@myServer ~ ] # iptables -t nat -A PREROUTING -i eth0 -p tcp --dport 80 -j DNAT --to-destination 10.0.4.2:80
18.6. Malicious Software and Spoofed IP Addresses
[root@myServer ~ ] # iptables -A OUTPUT -o eth0 -p tcp --dport 31337 --sport 31337 -j DROP
[root@myServer ~ ] # iptables -A FORWARD -o eth0 -p tcp --dport 31337 --sport 31337 -j DROP
[root@myServer ~ ] # iptables -A FORWARD -s 192.168.1.0/24 -i eth0 -j DROP
Note
DROP and REJECT targets when dealing with appended rules.
REJECT target denies access and returns a connection refused error to users who attempt to connect to the service. The DROP target, as the name implies, drops the packet without any warning.
REJECT target is recommended.
18.7. IPTables and Connection Tracking
iptables uses a method called connection tracking to store information about incoming connections. You can allow or deny access based on the following connection states:
NEW— A packet requesting a new connection, such as an HTTP request.ESTABLISHED— A packet that is part of an existing connection.RELATED— A packet that is requesting a new connection but is part of an existing connection. For example, FTP uses port 21 to establish a connection, but data is transferred on a different port (typically port 20).INVALID— A packet that is not part of any connections in the connection tracking table.
iptables connection tracking with any network protocol, even if the protocol itself is stateless (such as UDP). The following example shows a rule that uses connection tracking to forward only the packets that are associated with an established connection:
[root@myServer ~ ] # iptables -A FORWARD -m state --state ESTABLISHED,RELATED -j ACCEPT
18.8. IPv6
ip6tables command. In Red Hat Enterprise Linux 5, both IPv4 and IPv6 services are enabled by default.
ip6tables command syntax is identical to iptables in every aspect except that it supports 128-bit addresses. For example, use the following command to enable SSH connections on an IPv6-aware network server:
[root@myServer ~ ] # ip6tables -A INPUT -i eth0 -p tcp -s 3ffe:ffff:100::1/128 --dport 22 -j ACCEPT
18.9. Additional Resources
18.9.1. Installed Documentation
- The
iptablesman page contains a brief summary of the various options.
18.9.2. Useful Websites
- http://www.netfilter.org/ — The official homepage of the Netfilter and
iptablesproject. - http://www.tldp.org/ — The Linux Documentation Project contains several useful guides relating to firewall creation and administration.
- http://www.iana.org/assignments/port-numbers — The official list of registered and common service ports as assigned by the Internet Assigned Numbers Authority.
18.9.3. Related Documentation
- Red Hat Linux Firewalls, by Bill McCarty; Red Hat Press — a comprehensive reference to building network and server firewalls using open source packet filtering technology such as Netfilter and
iptables. It includes topics that cover analyzing firewall logs, developing firewall rules, and customizing your firewall using various graphical tools. - Linux Firewalls, by Robert Ziegler; New Riders Press — contains a wealth of information on building firewalls using both 2.2 kernel
ipchainsas well as Netfilter andiptables. Additional security topics such as remote access issues and intrusion detection systems are also covered.
Chapter 19. Controlling Access to Services
httpd if you are running a Web server). However, if you do not need to provide a service, you should turn it off to minimize your exposure to possible bug exploits.
xinetd and the services in the /etc/rc.d/init.d hierarchy (also known as SysV services) can be configured to start or stop using three different applications:
- Services Configuration Tool — a graphical application that displays a description of each service, displays whether each service is started at boot time (for runlevels 3, 4, and 5), and allows services to be started, stopped, and restarted.
- ntsysv — a text-based application that allows you to configure which services are started at boot time for each runlevel. Non-
xinetdservices can not be started, stopped, or restarted using this program. chkconfig— a command line utility that allows you to turn services on and off for the different runlevels. Non-xinetdservices can not be started, stopped, or restarted using this utility.
/etc/rc.d by hand or editing the xinetd configuration files in /etc/xinetd.d.
iptables to configure an IP firewall. If you are a new Linux user, please realize that iptables may not be the best solution for you. Setting up iptables can be complicated and is best tackled by experienced Linux system administrators.
iptables is flexibility. For example, if you need a customized solution which provides certain hosts access to certain services, iptables can provide it for you. Refer to the Reference Guide and the Security Guide for more information about iptables.
system-config-securitylevel), which allows you to select the security level for your system, similar to the Firewall Configuration screen in the installation program.
iptables chapter in the Reference Guide.
19.1. Runlevels
/etc/rc.d/rc<x>.d, where <x> is the number of the runlevel.
- 0 — Halt
- 1 — Single-user mode
- 2 — Not used (user-definable)
- 3 — Full multi-user mode
- 4 — Not used (user-definable)
- 5 — Full multi-user mode (with an X-based login screen)
- 6 — Reboot
/etc/inittab file, which contains a line near the top of the file similar to the following:
id:5:initdefault:
telinit followed by the runlevel number. You must be root to use this command. The telinit command does not change the /etc/inittab file; it only changes the runlevel currently running. When the system is rebooted, it continues to boot the runlevel as specified in /etc/inittab.
19.2. TCP Wrappers
xinetd (as well as any program with built-in support for libwrap) can use TCP wrappers to manage access. xinetd can use the /etc/hosts.allow and /etc/hosts.deny files to configure access to system services. As the names imply, hosts.allow contains a list of rules that allow clients to access the network services controlled by xinetd, and hosts.deny contains rules to deny access. The hosts.allow file takes precedence over the hosts.deny file. Permissions to grant or deny access can be based on individual IP address (or hostnames) or on a pattern of clients. Refer to the Reference Guide and hosts_access in section 5 of the man pages (man 5 hosts_access) for details.
19.2.1. xinetd
xinetd, which is a secure replacement for inetd. The xinetd daemon conserves system resources, provides access control and logging, and can be used to start special-purpose servers. xinetd can be used to provide access only to particular hosts, to deny access to particular hosts, to provide access to a service at certain times, to limit the rate of incoming connections and/or the load created by connections, and more
xinetd runs constantly and listens on all ports for the services it manages. When a connection request arrives for one of its managed services, xinetd starts up the appropriate server for that service.
xinetd is /etc/xinetd.conf, but the file only contains a few defaults and an instruction to include the /etc/xinetd.d directory. To enable or disable an xinetd service, edit its configuration file in the /etc/xinetd.d directory. If the disable attribute is set to yes, the service is disabled. If the disable attribute is set to no, the service is enabled. You can edit any of the xinetd configuration files or change its enabled status using the Services Configuration Tool, ntsysv, or chkconfig. For a list of network services controlled by xinetd, review the contents of the /etc/xinetd.d directory with the command ls /etc/xinetd.d.
19.3. Services Configuration Tool
/etc/rc.d/init.d directory are started at boot time (for runlevels 3, 4, and 5) and which xinetd services are enabled. It also allows you to start, stop, and restart SysV services as well as restart xinetd.
system-config-services at a shell prompt (for example, in an XTerm or a GNOME terminal).

Figure 19.1. Services Configuration Tool
/etc/rc.d/init.d directory as well as the services controlled by xinetd. Click on the name of the service from the list on the left-hand side of the application to display a brief description of that service as well as the status of the service. If the service is not an xinetd service, the status window shows whether the service is currently running. If the service is controlled by xinetd, the status window displays the phrase xinetd service.
xinetd service, the action buttons are disabled because they can not be started or stopped individually.
xinetd service by checking or unchecking the checkbox next to the service name, you must select => from the pulldown menu to restart xinetd and immediately enable/disable the xinetd service that you changed. xinetd is also configured to remember the setting. You can enable/disable multiple xinetd services at a time and save the changes when you are finished.
rsync to enable it in runlevel 3 and then save the changes. The rsync service is immediately enabled. The next time xinetd is started, rsync is still enabled.
Warning
xinetd services, xinetd is restarted, and the changes take place immediately. When you save changes to other services, the runlevel is reconfigured, but the changes do not take effect immediately.
xinetd service to start at boot time for the currently selected runlevel, check the checkbox beside the name of the service in the list. After configuring the runlevel, apply the changes by selecting => from the pulldown menu. The runlevel configuration is changed, but the runlevel is not restarted; thus, the changes do not take place immediately.
httpd service from checked to unchecked and then select , the runlevel 3 configuration changes so that httpd is not started at boot time. However, runlevel 3 is not reinitialized, so httpd is still running. Select one of following options at this point:
- Stop the
httpdservice — Stop the service by selecting it from the list and clicking the button. A message appears stating that the service was stopped successfully. - Reinitialize the runlevel — Reinitialize the runlevel by going to a shell prompt and typing the command
telinit 3(where 3 is the runlevel number). This option is recommended if you change the Start at Boot value of multiple services and want to activate the changes immediately. - Do nothing else — You do not have to stop the
httpdservice. You can wait until the system is rebooted for the service to stop. The next time the system is booted, the runlevel is initialized without thehttpdservice running.
19.4. ntsysv
xinetd-managed service on or off. You can also use ntsysv to configure runlevels. By default, only the current runlevel is configured. To configure a different runlevel, specify one or more runlevels with the --level option. For example, the command ntsysv --level 345 configures runlevels 3, 4, and 5.
Warning
xinetd are immediately affected by ntsysv. For all other services, changes do not take effect immediately. You must stop or start the individual service with the command service daemon stop. In the previous example, replace daemon with the name of the service you want to stop; for example, httpd. Replace stop with start or restart to start or restart the service.
19.5. chkconfig
chkconfig command can also be used to activate and deactivate services. The chkconfig --list command displays a list of system services and whether they are started (on) or stopped (off) in runlevels 0-6. At the end of the list is a section for the services managed by xinetd.
chkconfig --list command is used to query a service managed by xinetd, it displays whether the xinetd service is enabled (on) or disabled (off). For example, the command chkconfig --list finger returns the following output:
finger on
finger is enabled as an xinetd service. If xinetd is running, finger is enabled.
chkconfig --list to query a service in /etc/rc.d, service's settings for each runlevel are displayed. For example, the command chkconfig --list httpd returns the following output:
httpd 0:off 1:off 2:on 3:on 4:on 5:on 6:off
chkconfig can also be used to configure a service to be started (or not) in a specific runlevel. For example, to turn nscd off in runlevels 3, 4, and 5, use the following command:
chkconfig --level 345 nscd offWarning
xinetd are immediately affected by chkconfig. For example, if xinetd is running, finger is disabled, and the command chkconfig finger on is executed, finger is immediately enabled without having to restart xinetd manually. Changes for other services do not take effect immediately after using chkconfig. You must stop or start the individual service with the command service daemon stop. In the previous example, replace daemon with the name of the service you want to stop; for example, httpd. Replace stop with start or restart to start or restart the service.
19.6. Additional Resources
19.6.1. Installed Documentation
- The man pages for
ntsysv,chkconfig,xinetd, andxinetd.conf. man 5 hosts_access— The man page for the format of host access control files (in section 5 of the man pages).
19.6.2. Useful Websites
- http://www.xinetd.org — The
xinetdwebpage. It contains a more detailed list of features and sample configuration files.
19.6.3. Related Books
- Reference Guide , Red Hat, Inc — This companion manual contains detailed information about how TCP wrappers and
xinetdallow or deny access as well as how to configure network access using them. It also provides instructions for creatingiptablesfirewall rules. - Security Guide Red Hat, Inc — This manual discusses securing services with TCP wrappers and
xinetdsuch as logging denied connection attempts.
Chapter 20. OpenSSH
telnet, ftp, rlogin, rsh, and rcp with secure, encrypted network connectivity tools. OpenSSH supports versions 1.3, 1.5, and 2 of the SSH protocol. Since OpenSSH version 2.9, the default protocol is version 2, which uses RSA keys as the default.
20.1. Why Use OpenSSH?
Telnet and ftp use plain text passwords and send all information unencrypted. The information can be intercepted, the passwords can be retrieved, and your system could be compromised by an unauthorized person logging in to your system using one of the intercepted passwords. The OpenSSH set of utilities should be used whenever possible to avoid these security problems.
DISPLAY variable to the client machine. In other words, if you are running the X Window System on your local machine, and you log in to a remote machine using the ssh command, when you run a program on the remote machine that requires X, it will be displayed on your local machine. This feature is convenient if you prefer graphical system administration tools but do not always have physical access to your server.
20.2. Configuring an OpenSSH Server
openssh-server package is required and depends on the openssh package.
/etc/ssh/sshd_config. The default configuration file should be sufficient for most purposes. If you want to configure the daemon in ways not provided by the default sshd_config, read the sshd man page for a list of the keywords that can be defined in the configuration file.
/sbin/service sshd start. To stop the OpenSSH server, use the command /sbin/service sshd stop. If you want the daemon to start automatically at boot time, refer to Chapter 19, Controlling Access to Services for information on how to manage services.
@@@@@@@@@@@@@@@@@@@@@@@@@@@@@@@@@@@@@@@@@@@@@@@@@@@@@@@@@@@
@    WARNING: REMOTE HOST IDENTIFICATION HAS CHANGED!     @
@@@@@@@@@@@@@@@@@@@@@@@@@@@@@@@@@@@@@@@@@@@@@@@@@@@@@@@@@@@
IT IS POSSIBLE THAT SOMEONE IS DOING SOMETHING NASTY!
Someone could be eavesdropping on you right now (man-in-the-middle attack)!
It is also possible that the RSA host key has just been changed.
/etc/ssh/ssh_host*key* files and restore them after the reinstall. This process retains the system's identity, and when clients try to connect to the system after the reinstall, they will not receive the warning message.
20.3. Configuring an OpenSSH Client
openssh-clients and openssh packages installed on the client machine.
20.3.1. Using the ssh Command
ssh command is a secure replacement for the rlogin, rsh, and telnet commands. It allows you to log in to a remote machine as well as execute commands on a remote machine.
ssh is similar to using telnet. To log in to a remote machine named penguin.example.net, type the following command at a shell prompt:
ssh penguin.example.net ssh to a remote machine, you will see a message similar to the following:
The authenticity of host 'penguin.example.net' can't be established.
DSA key fingerprint is 94:68:3a:3a:bc:f3:9a:9b:01:5d:b3:07:38:e2:11:0c.
Are you sure you want to continue connecting (yes/no)?
yes to continue. This will add the server to your list of known hosts (~/.ssh/known_hosts/) as seen in the following message:
Warning: Permanently added 'penguin.example.net' (RSA) to the list of known hosts.
ssh username@penguin.example.net ssh -l username penguin.example.net.
ssh command can be used to execute a command on the remote machine without logging in to a shell prompt. The syntax is ssh hostnamecommand. For example, if you want to execute the command ls /usr/share/doc on the remote machine penguin.example.net, type the following command at a shell prompt:
ssh penguin.example.net ls /usr/share/doc /usr/share/doc will be displayed, and you will return to your local shell prompt.
20.3.2. Using the scp Command
scp command can be used to transfer files between machines over a secure, encrypted connection. It is similar to rcp.
scp <localfile>username@tohostname:<remotefile>/var/log/maillog. The <remotefile> specifies the destination, which can be a new filename such as /tmp/hostname-maillog. For the remote system, if you do not have a preceding /, the path will be relative to the home directory of username, typically /home/username/.
shadowman to the home directory of your account on penguin.example.net, type the following at a shell prompt (replace username with your username):
scp shadowman username@penguin.example.net:shadowman shadowman to /home/username/shadowman on penguin.example.net. Alternately, you can leave off the final shadowman in the scp command.
scp username@tohostname:<remotefile><newlocalfile>downloads/ to an existing directory called uploads/ on the remote machine penguin.example.net, type the following at a shell prompt:
scp downloads/* username@penguin.example.net:uploads/ 20.3.3. Using the sftp Command
sftp utility can be used to open a secure, interactive FTP session. It is similar to ftp except that it uses a secure, encrypted connection. The general syntax is sftp username@hostname.com. Once authenticated, you can use a set of commands similar to those used by FTP. Refer to the sftp man page for a list of these commands. To read the man page, execute the command man sftp at a shell prompt. The sftp utility is only available in OpenSSH version 2.5.0p1 and higher.
20.3.4. Generating Key Pairs
ssh, scp, or sftp to connect to a remote machine, you can generate an authorization key pair.
~/.ssh/authorized_keys2, ~/.ssh/known_hosts2, and /etc/ssh_known_hosts2 are obsolete. SSH Protocol 1 and 2 share the ~/.ssh/authorized_keys, ~/.ssh/known_hosts, and /etc/ssh/ssh_known_hosts files.
Note
.ssh directory in your home directory. After reinstalling, copy this directory back to your home directory. This process can be done for all users on your system, including root.
20.3.4.1. Generating an RSA Key Pair for Version 2
- To generate an RSA key pair to work with version 2 of the protocol, type the following command at a shell prompt:
ssh-keygen -t rsaAccept the default file location of~/.ssh/id_rsa. Enter a passphrase different from your account password and confirm it by entering it again.The public key is written to~/.ssh/id_rsa.pub. The private key is written to~/.ssh/id_rsa. Never distribute your private key to anyone. - Change the permissions of the
.sshdirectory using the following command:chmod 755 ~/.ssh - Copy the contents of
~/.ssh/id_rsa.pubinto the file~/.ssh/authorized_keyson the machine to which you want to connect. If the file~/.ssh/authorized_keysexist, append the contents of the file~/.ssh/id_rsa.pubto the file~/.ssh/authorized_keyson the other machine. - Change the permissions of the
authorized_keysfile using the following command:chmod 644 ~/.ssh/authorized_keys - If you are running GNOME, skip to Section 20.3.4.4, “Configuring
ssh-agentwith GNOME”. If you are not running the X Window System, skip to Section 20.3.4.5, “Configuringssh-agent”.
20.3.4.2. Generating a DSA Key Pair for Version 2
- To generate a DSA key pair to work with version 2 of the protocol, type the following command at a shell prompt:
ssh-keygen -t dsaAccept the default file location of~/.ssh/id_dsa. Enter a passphrase different from your account password and confirm it by entering it again.Note
A passphrase is a string of words and characters used to authenticate a user. Passphrases differ from passwords in that you can use spaces or tabs in the passphrase. Passphrases are generally longer than passwords because they are usually phrases instead of a single word.The public key is written to~/.ssh/id_dsa.pub. The private key is written to~/.ssh/id_dsa. It is important never to give anyone the private key. - Change the permissions of the
.sshdirectory with the following command:chmod 755 ~/.ssh - Copy the contents of
~/.ssh/id_dsa.pubinto the file~/.ssh/authorized_keyson the machine to which you want to connect. If the file~/.ssh/authorized_keysexist, append the contents of the file~/.ssh/id_dsa.pubto the file~/.ssh/authorized_keyson the other machine. - Change the permissions of the
authorized_keysfile using the following command:chmod 644 ~/.ssh/authorized_keys - If you are running GNOME, skip to Section 20.3.4.4, “Configuring
ssh-agentwith GNOME”. If you are not running the X Window System, skip to Section 20.3.4.5, “Configuringssh-agent”.
20.3.4.3. Generating an RSA Key Pair for Version 1.3 and 1.5
- To generate an RSA (for version 1.3 and 1.5 protocol) key pair, type the following command at a shell prompt:
ssh-keygen -t rsa1Accept the default file location (~/.ssh/identity). Enter a passphrase different from your account password. Confirm the passphrase by entering it again.The public key is written to~/.ssh/identity.pub. The private key is written to~/.ssh/identity. Do not give anyone the private key. - Change the permissions of your
.sshdirectory and your key with the commandschmod 755 ~/.sshandchmod 644 ~/.ssh/identity.pub. - Copy the contents of
~/.ssh/identity.pubinto the file~/.ssh/authorized_keyson the machine to which you wish to connect. If the file~/.ssh/authorized_keysdoes not exist, you can copy the file~/.ssh/identity.pubto the file~/.ssh/authorized_keyson the remote machine. - If you are running GNOME, skip to Section 20.3.4.4, “Configuring
ssh-agentwith GNOME”. If you are not running GNOME, skip to Section 20.3.4.5, “Configuringssh-agent”.
20.3.4.4. Configuring ssh-agent with GNOME
ssh-agent utility can be used to save your passphrase so that you do not have to enter it each time you initiate an ssh or scp connection. If you are using GNOME, the openssh-askpass-gnome package contains the application used to prompt you for your passphrase when you log in to GNOME and save it until you log out of GNOME. You will not have to enter your password or passphrase for any ssh or scp connection made during that GNOME session. If you are not using GNOME, refer to Section 20.3.4.5, “Configuring ssh-agent”.
- You will need to have the package
openssh-askpass-gnomeinstalled; you can use the commandrpm -q openssh-askpass-gnometo determine if it is installed or not. If it is not installed, install it from your Red Hat Enterprise Linux CD-ROM set, from a Red Hat FTP mirror site, or using Red Hat Network. - Select (on the Panel) => => => Sessions, and click on the Startup Programs tab. Click and enter
/usr/bin/ssh-addin the Startup Command text area. Set it a priority to a number higher than any existing commands to ensure that it is executed last. A good priority number forssh-addis 70 or higher. The higher the priority number, the lower the priority. If you have other programs listed, this one should have the lowest priority. Click to exit the program. - Log out and then log back into GNOME; in other words, restart X. After GNOME is started, a dialog box will appear prompting you for your passphrase(s). Enter the passphrase requested. If you have both DSA and RSA key pairs configured, you will be prompted for both. From this point on, you should not be prompted for a password by
ssh,scp, orsftp.
20.3.4.5. Configuring ssh-agent
ssh-agent can be used to store your passphrase so that you do not have to enter it each time you make a ssh or scp connection. If you are not running the X Window System, follow these steps from a shell prompt. If you are running GNOME but you do not want to configure it to prompt you for your passphrase when you log in (refer to Section 20.3.4.4, “Configuring ssh-agent with GNOME”), this procedure will work in a terminal window, such as an XTerm. If you are running X but not GNOME, this procedure will work in a terminal window. However, your passphrase will only be remembered for that terminal window; it is not a global setting.
- At a shell prompt, type the following command:
exec /usr/bin/ssh-agent $SHELL - Then type the command:
ssh-addand enter your passphrase(s). If you have more than one key pair configured, you will be prompted for each one. - When you log out, your passphrase(s) will be forgotten. You must execute these two commands each time you log in to a virtual console or open a terminal window.
20.4. Additional Resources
20.4.1. Installed Documentation
- The
ssh,scp,sftp,sshd, andssh-keygenman pages — These man pages include information on how to use these commands as well as all the parameters that can be used with them.
20.4.2. Useful Websites
- http://www.openssh.com/ — The OpenSSH FAQ page, bug reports, mailing lists, project goals, and a more technical explanation of the security features.
- http://www.openssl.org/ — The OpenSSL FAQ page, mailing lists, and a description of the project goal.
- http://www.freessh.org/ — SSH client software for other platforms.
20.4.3. Related Books
- Reference Guide — Learn the event sequence of an SSH connection, review a list of configuration files, and discover how SSH can be used for X forwarding.
Chapter 21. Network File System (NFS)
21.1. Why Use NFS?
/myproject. To access the shared files, the user goes into the /myproject directory on his machine. There are no passwords to enter or special commands to remember. Users work as if the directory is on their local machines.
21.2. Mounting NFS File Systems
mount command to mount a shared NFS directory from another machine:
mount shadowman.example.com:/misc/export/misc/localWarning
/misc/local in the above example) must exist before this command can be executed.
shadowman.example.com is the hostname of the NFS file server, /misc/export is the directory that shadowman is exporting, and /misc/local is the location to mount the file system on the local machine. After the mount command runs (and if the client has proper permissions from the shadowman.example.com NFS server) the client user can execute the command ls /misc/local to display a listing of the files in /misc/export on shadowman.example.com.
21.2.1. Mounting NFS File Systems using /etc/fstab
/etc/fstab file. The line must state the hostname of the NFS server, the directory on the server being exported, and the directory on the local machine where the NFS share is to be mounted. You must be root to modify the /etc/fstab file.
/etc/fstab is as follows:
server:/usr/local/pub /pub nfs rsize=8192,wsize=8192,timeo=14,intr
/pub must exist on the client machine before this command can be executed. After adding this line to /etc/fstab on the client system, type the command mount /pub at a shell prompt, and the mount point /pub is mounted from the server.
21.2.2. Mounting NFS File Systems using autofs
/etc/auto.master to determine which mount points are defined. It then starts an automount process with the appropriate parameters for each mount point. Each line in the master map defines a mount point and a separate map file that defines the file systems to be mounted under this mount point. For example, the /etc/auto.misc file might define mount points in the /misc directory; this relationship would be defined in the /etc/auto.master file.
auto.master has three fields. The first field is the mount point. The second field is the location of the map file, and the third field is optional. The third field can contain information such as a timeout value.
/proj52 on the remote machine penguin.example.net at the mount point /misc/myproject on your machine, add the following line to auto.master:
/misc /etc/auto.misc --timeout 60
/etc/auto.misc:
myproject -rw,soft,intr,rsize=8192,wsize=8192 penguin.example.net:/proj52
/etc/auto.misc is the name of the /misc subdirectory. This subdirectory is created dynamically by automount. It should not actually exist on the client machine. The second field contains mount options such as rw for read and write access. The third field is the location of the NFS export including the hostname and directory.
Note
/misc must exist on the local file system. There should be no subdirectories in /misc on the local file system.
/sbin/service autofs restart /sbin/service autofs status /etc/auto.master configuration file while autofs is running, you must tell the automount daemon(s) to reload by typing the following command at a shell prompt:
/sbin/service autofs reload 21.2.3. Using TCP
-o udp option to mount when mounting the NFS-exported file system on the client system.
/etc/fstab file (client side), and automatically via autofs configuration files, such as /etc/auto.master and /etc/auto.misc (server side with NIS).
mount -o udp shadowman.example.com:/misc/export /misc/local /etc/fstab (client side):
server:/usr/local/pub /pub nfs rsize=8192,wsize=8192,timeo=14,intr,udp
myproject -rw,soft,intr,rsize=8192,wsize=8192,udp penguin.example.net:/proj52
-o udp option is not specified, the NFS-exported file system is accessed via TCP.
- Improved connection durability, thus less
NFS stale file handlesmessages. - Performance gain on heavily loaded networks because TCP acknowledges every packet, unlike UDP which only acknowledges completion.
- TCP has better congestion control than UDP (which has none). On a very congested network, UDP packets are the first packets that are dropped. This means that if NFS is writing data (in 8K chunks) all of that 8K must be retransmitted over UDP. Because of TCP's reliability, only parts of that 8K data are transmitted at a time.
- Error detection. When a TCP connection breaks (due to the server being unavailable) the client stops sending data and restarts the connection process once the server becomes available. With UDP, since it's connection-less, the client continues to pound the network with data until the server reestablishes a connection.
21.2.4. Preserving ACLs
21.3. Exporting NFS File Systems
system-config-nfs RPM package installed. To start the application, select the (on the Panel) => => => , or type the command system-config-nfs.

Figure 21.1. NFS Server Configuration Tool
- Directory — Specify the directory to share, such as
/tmp. - Host(s) — Specify the host(s) with which to share the directory. Refer to Section 21.3.2, “Hostname Formats” for an explanation of possible formats.
- Basic permissions — Specify whether the directory should have read-only or read/write permissions.

Figure 21.2. Add Share
- Allow connections from port 1024 and higher — Services started on port numbers less than 1024 must be started as root. Select this option to allow the NFS service to be started by a user other than root. This option corresponds to
insecure. - Allow insecure file locking — Do not require a lock request. This option corresponds to
insecure_locks. - Disable subtree checking — If a subdirectory of a file system is exported, but the entire file system is not exported, the server checks to see if the requested file is in the subdirectory exported. This check is called subtree checking. Select this option to disable subtree checking. If the entire file system is exported, selecting to disable subtree checking can increase the transfer rate. This option corresponds to
no_subtree_check. - Sync write operations on request — Enabled by default, this option does not allow the server to reply to requests before the changes made by the request are written to the disk. This option corresponds to
sync. If this is not selected, theasyncoption is used.- Force sync of write operations immediately — Do not delay writing to disk. This option corresponds to
no_wdelay.
- Treat remote root user as local root — By default, the user and group IDs of the root user are both 0. Root squashing maps the user ID 0 and the group ID 0 to the user and group IDs of anonymous so that root on the client does not have root privileges on the NFS server. If this option is selected, root is not mapped to anonymous, and root on a client has root privileges to exported directories. Selecting this option can greatly decrease the security of the system. Do not select it unless it is absolutely necessary. This option corresponds to
no_root_squash. - Treat all client users as anonymous users — If this option is selected, all user and group IDs are mapped to the anonymous user. This option corresponds to
all_squash.- Specify local user ID for anonymous users — If Treat all client users as anonymous users is selected, this option lets you specify a user ID for the anonymous user. This option corresponds to
anonuid. - Specify local group ID for anonymous users — If Treat all client users as anonymous users is selected, this option lets you specify a group ID for the anonymous user. This option corresponds to
anongid.
/etc/exports.bak. The new configuration is written to /etc/exports.
/etc/exports configuration file. Thus, the file can be modified manually after using the tool, and the tool can be used after modifying the file manually (provided the file was modified with correct syntax).
21.3.1. Command Line Configuration
/etc/exports file controls what directories the NFS server exports. Its format is as follows:
directoryhostname(options)sync or async (sync is recommended). If sync is specified, the server does not reply to requests before the changes made by the request are written to the disk.
/misc/export speedy.example.com(sync)speedy.example.com to mount /misc/export with the default read-only permissions, but,
/misc/export speedy.example.com(rw,sync)speedy.example.com to mount /misc/export with read/write privileges.
Warning
/etc/exports file. If there are no spaces between the hostname and the options in parentheses, the options apply only to the hostname. If there is a space between the hostname and the options, the options apply to the rest of the world. For example, examine the following lines:
/misc/export speedy.example.com(rw,sync)
/misc/export speedy.example.com (rw,sync)
speedy.example.com read-write access and denies all other users. The second line grants users from speedy.example.com read-only access (the default) and allows the rest of the world read-write access.
/etc/exports, you must inform the NFS daemon of the change, or reload the configuration file with the following command:
/sbin/service nfs reload21.3.2. Hostname Formats
- Single machine — A fully qualified domain name (that can be resolved by the server), hostname (that can be resolved by the server), or an IP address.
- Series of machines specified with wildcards — Use the * or ? character to specify a string match. Wildcards are not to be used with IP addresses; however, they may accidentally work if reverse DNS lookups fail. When specifying wildcards in fully qualified domain names, dots (.) are not included in the wildcard. For example,
*.example.comincludes one.example.com but does not include one.two.example.com. - IP networks — Use a.b.c.d/z, where a.b.c.d is the network and z is the number of bits in the netmask (for example 192.168.0.0/24). Another acceptable format is a.b.c.d/netmask, where a.b.c.d is the network and netmask is the netmask (for example, 192.168.100.8/255.255.255.0).
- Netgroups — In the format @group-name, where group-name is the NIS netgroup name.
21.3.3. Starting and Stopping the Server
nfs service must be running.
/sbin/service nfs status/sbin/service nfs start/sbin/service nfs stopnfs service at boot time, use the command:
/sbin/chkconfig --level 345 nfs onchkconfig, ntsysv or the Services Configuration Tool to configure which services start at boot time. Refer to Chapter 19, Controlling Access to Services for details.
21.4. Additional Resources
21.4.1. Installed Documentation
- The man pages for
nfsd,mountd,exports,auto.master, andautofs(in manual sections 5 and 8) — These man pages show the correct syntax for the NFS and autofs configuration files.
21.4.2. Useful Websites
- http://nfs.sourceforge.net/ — the NFS webpage, includes links to the mailing lists and FAQs.
- http://www.tldp.org/HOWTO/NFS-HOWTO/index.html — The Linux NFS-HOWTO from the Linux Documentation Project.
Chapter 22. Samba
22.1. Why Use Samba?
22.2. Configuring a Samba Server
/etc/samba/smb.conf) allows users to view their home directories as a Samba share. It also shares all printers configured for the system as Samba shared printers. In other words, you can attach a printer to the system and print to it from the Windows machines on your network.
22.2.1. Graphical Configuration
/etc/samba/ directory. Any changes to these files not made using the application are preserved.
system-config-samba RPM package installed. To start the Samba Server Configuration Tool from the desktop, go to the (on the Panel) => => => or type the command system-config-samba at a shell prompt (for example, in an XTerm or a GNOME terminal).

Figure 22.1. Samba Server Configuration Tool
Note
22.2.1.1. Configuring Server Settings

Figure 22.2. Configuring Basic Server Settings
workgroup and server string options in smb.conf.

Figure 22.3. Configuring Security Server Settings
- Authentication Mode — This corresponds to the
securityoption. Select one of the following types of authentication.- ADS — The Samba server acts as a domain member in an Active Directory Domain (ADS) realm. For this option, Kerberos must be installed and configured on the server, and Samba must become a member of the ADS realm using the
netutility, which is part of thesamba-clientpackage. Refer to thenetman page for details. This option does not configure Samba to be an ADS Controller. Specify the realm of the Kerberos server in the Kerberos Realm field.Note
The Kerberos Realm field must be supplied in all uppercase letters, such asEXAMPLE.COM.Use of your Samba server as a domain member in an ADS realm assumes proper configuration of Kerberos, including the/etc/krb5.conffile. - Domain — The Samba server relies on a Windows NT Primary or Backup Domain Controller to verify the user. The server passes the username and password to the Controller and waits for it to return. Specify the NetBIOS name of the Primary or Backup Domain Controller in the Authentication Server field.The Encrypted Passwords option must be set to Yes if this is selected.
- Server — The Samba server tries to verify the username and password combination by passing them to another Samba server. If it can not, the server tries to verify using the user authentication mode. Specify the NetBIOS name of the other Samba server in the Authentication Server field.
- Share — Samba users do not have to enter a username and password combination on a per Samba server basis. They are not prompted for a username and password until they try to connect to a specific shared directory from a Samba server.
- User — (Default) Samba users must provide a valid username and password on a per Samba server basis. Select this option if you want the Windows Username option to work. Refer to Section 22.2.1.2, “Managing Samba Users” for details.
- Encrypt Passwords — This option must be enabled if the clients are connecting from a system with Windows 98, Windows NT 4.0 with Service Pack 3, or other more recent versions of Microsoft Windows. The passwords are transfered between the server and the client in an encrypted format instead of as a plain-text word that can be intercepted. This corresponds to the
encrypted passwordsoption. Refer to Section 22.2.3, “Encrypted Passwords” for more information about encrypted Samba passwords. - Guest Account — When users or guest users log into a Samba server, they must be mapped to a valid user on the server. Select one of the existing usernames on the system to be the guest Samba account. When guests log in to the Samba server, they have the same privileges as this user. This corresponds to the
guest accountoption.
22.2.1.2. Managing Samba Users

Figure 22.4. Managing Samba Users
22.2.1.3. Adding a Share

Figure 22.5. Adding a Share
- Directory — The directory to share via Samba. The directory must exist before it can be entered here.
- Share name — The actual name of the share that is seen from remote machines. By default, it is the same value as Directory, but can be configured.
- Descriptions — A brief description of the share.
- Basic Permissions — Whether users should only be able to read the files in the shared directory or whether they should be able to read and write to the shared directory.
22.2.2. Command Line Configuration
/etc/samba/smb.conf as its configuration file. If you change this configuration file, the changes do not take effect until you restart the Samba daemon with the command service smb restart.
smb.conf file:
workgroup = WORKGROUPNAME
server string = BRIEF COMMENT ABOUT SERVER
smb.conf file (after modifying it to reflect your needs and your system):
[sharename]
comment = Insert a comment here
path = /home/share/
valid users = tfox carole
public = no
writable = yes
printable = no
create mask = 0765
/home/share, on the Samba server, from a Samba client.
22.2.3. Encrypted Passwords
- Create a separate password file for Samba. To create one based on your existing
/etc/passwdfile, at a shell prompt, type the following command:cat /etc/passwd | mksmbpasswd.sh > /etc/samba/smbpasswdIf the system uses NIS, type the following command:ypcat passwd | mksmbpasswd.sh > /etc/samba/smbpasswdThemksmbpasswd.shscript is installed in your/usr/bindirectory with thesambapackage. - Change the permissions of the Samba password file so that only root has read and write permissions:
chmod 600 /etc/samba/smbpasswd - The script does not copy user passwords to the new file, and a Samba user account is not active until a password is set for it. For higher security, it is recommended that the user's Samba password be different from the user's system password. To set each Samba user's password, use the following command (replace username with each user's username):
smbpasswd username - Encrypted passwords must be enabled. Since they are enabled by default, they do not have to be specifically enabled in the configuration file. However, they can not be disabled in the configuration file either. In the file
/etc/samba/smb.conf, verify that the following line does not exist:encrypt passwords = no
If it does exist but is commented out with a semi-colon (;) at the beginning of the line, then the line is ignored, and encrypted passwords are enabled. If this line exists but is not commented out, either remove it or comment it out.To specifically enable encrypted passwords in the configuration file, add the following lines toetc/samba/smb.conf:encrypt passwords = yes smb passwd file = /etc/samba/smbpasswd
- Make sure the
smbservice is started by typing the commandservice smb restartat a shell prompt. - If you want the
smbservice to start automatically, use ntsysv,chkconfig, or the Services Configuration Tool to enable it at runtime. Refer to Chapter 19, Controlling Access to Services for details.
pam_smbpass PAM module can be used to sync users' Samba passwords with their system passwords when the passwd command is used. If a user invokes the passwd command, the password he uses to log in to the Red Hat Enterprise Linux system as well as the password he must provide to connect to a Samba share are changed.
/etc/pam.d/system-auth below the pam_cracklib.so invocation:
password required /lib/security/pam_smbpass.so nullok use_authtok try_first_pass
22.2.4. Starting and Stopping the Server
smb service must be running.
/sbin/service smb status/sbin/service smb start/sbin/service smb stopsmb service at boot time, use the command:
/sbin/chkconfig --level 345 smb onchkconfig, ntsysv, or the Services Configuration Tool to configure which services start at boot time. Refer to Chapter 19, Controlling Access to Services for details.
22.3. Connecting to a Samba Share
smb: in the Location: bar of Nautilus to view the workgroups.

Figure 22.6. SMB Workgroups in Nautilus

Figure 22.7. SMB Machines in Nautilus
smb://<servername>/<sharename>/ 22.4. Additional Resources
22.4.1. Installed Documentation
smb.confman page — explains how to configure the Samba configuration filesmbdman page — describes how the Samba daemon workssmbclientandfindsmbman pages — learn more about these client tools/usr/share/doc/samba-<version-number>/docs/— help files included with thesambapackage
22.4.2. Useful Websites
- http://www.samba.org/ — The Samba webpage contains useful documentation, information about mailing lists, and a list of GUI interfaces.
- http://www.samba.org/samba/docs/using_samba/toc.html — an online version of Using Samba, 2nd Edition by Jay Ts, Robert Eckstein, and David Collier-Brown; O'Reilly &Associates
Chapter 23. Dynamic Host Configuration Protocol (DHCP)
23.1. Why Use DHCP?
23.2. Configuring a DHCP Server
/etc/dhcpd.conf configuration file must be created. A sample file can be found at /usr/share/doc/dhcp-<version>/dhcpd.conf.sample.
/var/lib/dhcp/dhcpd.leases to store the client lease database. Refer to Section 23.2.2, “Lease Database” for more information.
23.2.1. Configuration File
ddns-update-style ad-hoc;
ddns-update-style interim;
dhcpd.conf man page for details about the different modes.
- Parameters — State how to perform a task, whether to perform a task, or what network configuration options to send to the client.
- Declarations — Describe the topology of the network, describe the clients, provide addresses for the clients, or apply a group of parameters to a group of declarations.
option keyword and are referred to as options. Options configure DHCP options; whereas, parameters configure values that are not optional or control how the DHCP server behaves.
Important
service dhcpd restart.
Note
omshell command provides an interactive way to connect to, query, and change the configuration of a DHCP server. By using omshell, all changes can be made while the server is running. For more information on omshell, refer to the omshell man page.
routers, subnet-mask, domain-name, domain-name-servers, and time-offset options are used for any host statements declared below it.
subnet can be declared, a subnet declaration must be included for every subnet in the network. If it is not, the DHCP server fails to start.
range declared. Clients are assigned an IP address within the range.
Example 23.1. Subnet Declaration
subnet 192.168.1.0 netmask 255.255.255.0 {
        option routers                  192.168.1.254;
        option subnet-mask              255.255.255.0;

        option domain-name              "example.com";
        option domain-name-servers       192.168.1.1;

        option time-offset              -18000;     # Eastern Standard Time

range 192.168.1.10 192.168.1.100;
}
shared-network declaration as shown in Example 23.2, “Shared-network Declaration”. Parameters within the shared-network, but outside the enclosed subnet declarations, are considered to be global parameters. The name of the shared-network should be a descriptive title for the network, such as using the title 'test-lab' to describe all the subnets in a test lab environment.
group declaration can be used to apply global parameters to a group of declarations. For example, shared networks, subnets, and hosts can be grouped.
Example 23.3. Group Declaration
group {
   option routers                  192.168.1.254;
   option subnet-mask              255.255.255.0;

   option domain-name              "example.com";
   option domain-name-servers       192.168.1.1;

   option time-offset              -18000;     # Eastern Standard Time

   host apex {
      option host-name "apex.example.com";
      hardware ethernet 00:A0:78:8E:9E:AA;
      fixed-address 192.168.1.4;
   }

   host raleigh {
      option host-name "raleigh.example.com";
      hardware ethernet 00:A1:DD:74:C3:F2;
      fixed-address 192.168.1.6;
   }
}
range 192.168.1.10 and 192.168.1.100 to client systems.
Example 23.4. Range Parameter
default-lease-time 600;
max-lease-time 7200;
option subnet-mask 255.255.255.0;
option broadcast-address 192.168.1.255;
option routers 192.168.1.254;
option domain-name-servers 192.168.1.1, 192.168.1.2;
option domain-name "example.com";

subnet 192.168.1.0 netmask 255.255.255.0 {
   range 192.168.1.10 192.168.1.100;
}
hardware ethernet parameter within a host declaration. As demonstrated in Example 23.5, “Static IP Address using DHCP”, the host apex declaration specifies that the network interface card with the MAC address 00:A0:78:8E:9E:AA always receives the IP address 192.168.1.4.
host-name can also be used to assign a host name to the client.
Example 23.5. Static IP Address using DHCP
host apex {
   option host-name "apex.example.com";
   hardware ethernet 00:A0:78:8E:9E:AA;
   fixed-address 192.168.1.4;
}
Note
cp /usr/share/doc/dhcp-<version-number>/dhcpd.conf.sample /etc/dhcpd.conf dhcp-options man page.
23.2.2. Lease Database
/var/lib/dhcp/dhcpd.leases stores the DHCP client lease database. This file should not be modified by hand. DHCP lease information for each recently assigned IP address is automatically stored in the lease database. The information includes the length of the lease, to whom the IP address has been assigned, the start and end dates for the lease, and the MAC address of the network interface card that was used to retrieve the lease.
dhcpd.leases file is renamed dhcpd.leases~ and the temporary lease database is written to dhcpd.leases.
dhcpd.leases file does not exist, but it is required to start the service. Do not create a new lease file. If you do, all old leases are lost which causes many problems. The correct solution is to rename the dhcpd.leases~ backup file to dhcpd.leases and then start the daemon.
23.2.3. Starting and Stopping the Server
Important
dhcpd.leases file exists. Use the command touch /var/lib/dhcp/dhcpd.leases to create the file if it does not exist.
named service automatically checks for a dhcpd.leases file.
/sbin/service dhcpd start. To stop the DHCP server, use the command /sbin/service dhcpd stop.
/etc/sysconfig/dhcpd, add the name of the interface to the list of DHCPDARGS:
# Command line options here
DHCPDARGS=eth0
/etc/sysconfig/dhcpd include:
-p <portnum>— Specify the UDP port number on whichdhcpdshould listen. The default is port 67. The DHCP server transmits responses to the DHCP clients at a port number one greater than the UDP port specified. For example, if the default port 67 is used, the server listens on port 67 for requests and responses to the client on port 68. If a port is specified here and the DHCP relay agent is used, the same port on which the DHCP relay agent should listen must be specified. Refer to Section 23.2.4, “DHCP Relay Agent” for details.-f— Run the daemon as a foreground process. This is mostly used for debugging.-d— Log the DHCP server daemon to the standard error descriptor. This is mostly used for debugging. If this is not specified, the log is written to/var/log/messages.-cf <filename>— Specify the location of the configuration file. The default location is/etc/dhcpd.conf.-lf <filename>— Specify the location of the lease database file. If a lease database file already exists, it is very important that the same file be used every time the DHCP server is started. It is strongly recommended that this option only be used for debugging purposes on non-production machines. The default location is/var/lib/dhcp/dhcpd.leases.-q— Do not print the entire copyright message when starting the daemon.
23.2.4. DHCP Relay Agent
dhcrelay) allows for the relay of DHCP and BOOTP requests from a subnet with no DHCP server on it to one or more DHCP servers on other subnets.
/etc/sysconfig/dhcrelay with the INTERFACES directive.
service dhcrelay start.
23.3. Configuring a DHCP Client
/etc/sysconfig/network file to enable networking and the configuration file for each network device in the /etc/sysconfig/network-scripts directory. In this directory, each device should have a configuration file named ifcfg-eth0, where eth0 is the network device name.
/etc/sysconfig/network file should contain the following line:
NETWORKING=yes
NETWORKING variable must be set to yes if you want networking to start at boot time.
/etc/sysconfig/network-scripts/ifcfg-eth0 file should contain the following lines:
DEVICE=eth0
BOOTPROTO=dhcp
ONBOOT=yes
DHCP_HOSTNAME— Only use this option if the DHCP server requires the client to specify a hostname before receiving an IP address. (The DHCP server daemon in Red Hat Enterprise Linux does not support this feature.)PEERDNS=<answer>, where<answer>is one of the following:yes— Modify/etc/resolv.confwith information from the server. If using DHCP, thenyesis the default.no— Do not modify/etc/resolv.conf.
SRCADDR=<address>, where<address>is the specified source IP address for outgoing packets.USERCTL=<answer>, where<answer>is one of the following:yes— Non-root users are allowed to control this device.no— Non-root users are not allowed to control this device.
Note
dhclient and dhclient.conf man pages.
23.4. Additional Resources
23.4.1. Installed Documentation
dhcpdman page — Describes how the DHCP daemon works.dhcpd.confman page — Explains how to configure the DHCP configuration file; includes some examples.dhcpd.leasesman page — Explains how to configure the DHCP leases file; includes some examples.dhcp-optionsman page — Explains the syntax for declaring DHCP options indhcpd.conf; includes some examples.dhcrelayman page — Explains the DHCP Relay Agent and its configuration options./usr/share/doc/dhcp-<version>/— Contains sample files, README files, and release notes for the specific version of the DHCP service.
Chapter 24. Apache HTTP Server Configuration
/usr/share/doc/httpd-<ver>/migration.html or the Reference Guide for details.
httpd and system-config-httpd RPM packages need to be installed to use the HTTP Configuration Tool. It also requires the X Window System and root access. To start the application, go to the => => => or type the command system-config-httpd at a shell prompt (for example, in an XTerm or GNOME Terminal).
/etc/httpd/conf/httpd.conf configuration file for the Apache HTTP Server. It does not use the old srm.conf or access.conf configuration files; leave them empty. Through the graphical interface, you can configure directives such as virtual hosts, logging attributes, and maximum number of connections.
Warning
/etc/httpd/conf/httpd.conf configuration file by hand if you wish to use this tool. The HTTP Configuration Tool generates this file after you save your changes and exit the program. If you want to add additional modules or configuration options that are not available in HTTP Configuration Tool, you cannot use this tool.
- Configure the basic settings under the Main tab.
- Click on the Virtual Hosts tab and configure the default settings.
- Under the Virtual Hosts tab, configure the Default Virtual Host.
- To serve more than one URL or virtual host, add any additional virtual hosts.
- Configure the server settings under the Server tab.
- Configure the connections settings under the Performance Tuning tab.
- Copy all necessary files to the
DocumentRootandcgi-bindirectories. - Exit the application and select to save your settings.
24.1. Basic Settings

Figure 24.1. Basic Settings
ServerName directive in httpd.conf. The ServerName directive sets the hostname of the Web server. It is used when creating redirection URLs. If you do not define a server name, the Web server attempts to resolve it from the IP address of the system. The server name does not have to be the domain name resolved from the IP address of the server. For example, you might set the server name to www.example.com while the server's real DNS name is foo.example.com.
ServerAdmin directive in httpd.conf. If you configure the server's error pages to contain an email address, this email address is used so that users can report a problem to the server's administrator. The default value is root@localhost.
Listen directive in httpd.conf. By default, Red Hat configures the Apache HTTP Server to listen to port 80 for non-secure Web communications.
Note
httpd can be started as a regular user.

Figure 24.2. Available Addresses
24.2. Default Settings
24.2.1. Site Configuration

Figure 24.3. Site Configuration
DirectoryIndex directive. The DirectoryIndex is the default page served by the server when a user requests an index of a directory by specifying a forward slash (/) at the end of the directory name.
http://www.example.com/this_directory/, they are going to get either the DirectoryIndex page, if it exists, or a server-generated directory list. The server tries to find one of the files listed in the DirectoryIndex directive and returns the first one it finds. If it does not find any of these files and if Options Indexes is set for that directory, the server generates and returns a list, in HTML format, of the subdirectories and files in the directory.
ErrorDocument directive. If a problem or error occurs when a client tries to connect to the Apache HTTP Server, the default action is to display the short error message shown in the Error Code column. To override this default configuration, select the error code and click the Edit button. Choose to display the default short error message. Choose to redirect the client to an external URL and enter a complete URL, including the http://, in the Location field. Choose to redirect the client to an internal URL and enter a file location under the document root for the Web server. The location must begin the a slash (/) and be relative to the Document Root.
404.html, copy 404.html to DocumentRoot/../error/404.html. In this case, DocumentRoot is the Document Root directory that you have defined (the default is /var/www/html/). If the Document Root is left as the default location, the file should be copied to /var/www/error/404.html. Then, choose as the Behavior for 404 - Not Found error code and enter /error/404.html as the .
- Show footer with email address — Display the default footer at the bottom of all error pages along with the email address of the website maintainer specified by the
ServerAdmindirective. Refer to Section 24.3.1.1, “General Options” for information about configuring theServerAdmindirective. - Show footer — Display just the default footer at the bottom of error pages.
- No footer — Do not display a footer at the bottom of error pages.
24.2.2. Logging
/var/log/httpd/access_log file and the error log to the /var/log/httpd/error_log file.
TransferLog directive.

Figure 24.4. Logging
LogFormat directive. Refer to http://httpd.apache.org/docs-2.0/mod/mod_log_config.html#formats for details on the format of this directive.
ErrorLog directive.
LogLevel directive.
HostnameLookups directive. Choosing No Reverse Lookup sets the value to off. Choosing Reverse Lookup sets the value to on. Choosing Double Reverse Lookup sets the value to double.
24.2.3. Environment Variables
mod_env module to configure the environment variables which are passed to CGI scripts and SSI pages. Use the Environment Variables page to configure the directives for this module.
MAXNUM to 50, click the button inside the Set for CGI Script section, as shown in Figure 24.5, “Environment Variables”, and type MAXNUM in the Environment Variable text field and 50 in the Value to set text field. Click to add it to the list. The Set for CGI Scripts section configures the SetEnv directive.
env at a shell prompt. Click the button inside the Pass to CGI Scripts section and enter the name of the environment variable in the resulting dialog box. Click to add it to the list. The Pass to CGI Scripts section configures the PassEnv directive.

Figure 24.5. Environment Variables
UnsetEnv directive.
http://httpd.apache.org/docs-2.0/env.html
24.2.4. Directories
<Directory> directive.

Figure 24.6. Directories
Options directive within the <Directory> directive. You can configure the following options:
- ExecCGI — Allow execution of CGI scripts. CGI scripts are not executed if this option is not chosen.
- FollowSymLinks — Allow symbolic links to be followed.
- Includes — Allow server-side includes.
- IncludesNOEXEC — Allow server-side includes, but disable the
#execand#includecommands in CGI scripts. - Indexes — Display a formatted list of the directory's contents, if no
DirectoryIndex(such asindex.html) exists in the requested directory. - Multiview — Support content-negotiated multiviews; this option is disabled by default.
- SymLinksIfOwnerMatch — Only follow symbolic links if the target file or directory has the same owner as the link.
Order directive with the left-hand side options. The Order directive controls the order in which allow and deny directives are evaluated. In the Allow hosts from and Deny hosts from text field, you can specify one of the following:
- Allow all hosts — Type
allto allow access to all hosts. - Partial domain name — Allow all hosts whose names match or end with the specified string.
- Full IP address — Allow access to a specific IP address.
- A subnet — Such as
192.168.1.0/255.255.255.0 - A network CIDR specification — such as
10.3.0.0/16

Figure 24.7. Directory Settings
.htaccess file take precedence.
24.3. Virtual Hosts Settings
<NameVirtualHost> directive for a name based virtual host.

Figure 24.8. Virtual Hosts
24.3.1. Adding and Editing a Virtual Host
24.3.1.1. General Options
DocumentRoot directive within the <VirtualHost> directive. The default DocumentRoot is /var/www/html.
ServerAdmin directive within the VirtualHost directive. This email address is used in the footer of error pages if you choose to show a footer with an email address on the error pages.
- Default Virtual Host
- You should only configure one default virtual host (remember that there is one setup by default). The default virtual host settings are used when the requested IP address is not explicitly listed in another virtual host. If there is no default virtual host defined, the main server settings are used.
- IP based Virtual Host
- If you choose IP based Virtual Host, a window appears to configure the <VirtualHost> directive based on the IP address of the server. Specify this IP address in the IP address field. To specify multiple IP addresses, separate each IP address with spaces. To specify a port, use the syntax IP Address:Port. Use "colon, asterisk" (
:*) to configure all ports for the IP address. Specify the host name for the virtual host in the Server Host Name field. - Name based Virtual Host
- If you choose Name based Virtual Host, a window appears to configure the
NameVirtualHostdirective based on the host name of the server. Specify the IP address in the IP address field. To specify multiple IP addresses, separate each IP address with spaces. To specify a port, use the syntax IP Address:Port. Use "colon, asterisk" (:*) to configure all ports for the IP address. Specify the host name for the virtual host in the Server Host Name field. In the Aliases section, click to add a host name alias. Adding an alias here adds aServerAliasdirective within theNameVirtualHostdirective.
24.3.1.2. SSL
Note

Figure 24.9. SSL Support
mod_ssl security module. To enable it through the HTTP Configuration Tool, you must allow access through port 443 under the Main tab => Available Addresses. Refer to Section 24.1, “Basic Settings” for details. Then, select the virtual host name in the Virtual Hosts tab, click the button, choose SSL from the left-hand menu, and check the Enable SSL Support option as shown in Figure 24.9, “SSL Support”. The SSL Configuration section is pre-configured with the dummy digital certificate. The digital certificate provides authentication for your secure Web server and identifies the secure server to client Web browsers. You must purchase your own digital certificate. Do not use the dummy one provided for your website. For details on purchasing a CA-approved digital certificate, refer to the Chapter 25, Apache HTTP Secure Server Configuration.
24.3.1.3. Additional Virtual Host Options
24.4. Server Settings

Figure 24.10. Server Configuration
LockFile directive. This directive sets the path to the lockfile used when the server is compiled with either USE_FCNTL_SERIALIZED_ACCEPT or USE_FLOCK_SERIALIZED_ACCEPT. It must be stored on the local disk. It should be left to the default value unless the logs directory is located on an NFS share. If this is the case, the default value should be changed to a location on the local disk and to a directory that is readable only by root.
PidFile directive. This directive sets the file in which the server records its process ID (pid). This file should only be readable by root. In most cases, it should be left to the default value.
CoreDumpDirectory directive. The Apache HTTP Server tries to switch to this directory before executing a core dump. The default value is the ServerRoot. However, if the user that the server runs as can not write to this directory, the core dump can not be written. Change this value to a directory writable by the user the server runs as, if you want to write the core dumps to disk for debugging purposes.
User directive. It sets the userid used by the server to answer requests. This user's settings determine the server's access. Any files inaccessible to this user are also inaccessible to your website's visitors. The default for User is apache.
Warning
User directive to root. Using root as the User creates large security holes for your Web server.
httpd process first runs as root during normal operations, but is then immediately handed off to the apache user. The server must start as root because it needs to bind to a port below 1024. Ports below 1024 are reserved for system use, so they can not be used by anyone but root. Once the server has attached itself to its port, however, it hands the process off to the apache user before it accepts any connection requests.
Group directive. The Group directive is similar to the User directive. Group sets the group under which the server answers requests. The default group is also apache.
24.5. Performance Tuning

Figure 24.11. Performance Tuning
httpd process is created. After this maximum number of processes is reached, no one else can connect to the Web server until a child server process is freed. You can not set this value to higher than 256 without recompiling. This option corresponds to the MaxClients directive.
TimeOut directive.
MaxRequestsPerChild directive.
MaxKeepAliveRequests directive is set to 0 and unlimited requests are allowed.
KeepAlive directive is set to false. If you check it, the KeepAlive directive is set to true, and the KeepAliveTimeout directive is set to the number that is selected as the Timeout for next Connection value. This directive sets the number of seconds your server waits for a subsequent request, after a request has been served, before it closes the connection. Once a request has been received, the Connection Timeout value applies instead.
24.6. Saving Your Settings
/etc/httpd/conf/httpd.conf. Remember that your original configuration file is overwritten with your new settings.
httpd.conf configuration file has been manually modified, it saves the manually modified file as /etc/httpd/conf/httpd.conf.bak.
Important
httpd daemon with the command service httpd restart. You must be logged in as root to execute this command.
24.7. Additional Resources
24.7.1. Installed Documentation
/usr/share/docs/httpd-<version>/migration.html— The Apache Migration HOWTO document contains a list of changes from version 1.3 to version 2.0 as well as information about how to migration the configuration file manually.
24.7.2. Useful Websites
- http://www.apache.org/ — The Apache Software Foundation.
- http://httpd.apache.org/docs-2.0/ — The Apache Software Foundation's documentation on Apache HTTP Server version 2.0, including the Apache HTTP Server Version 2.0 User's Guide.
24.7.3. Related Books
- Apache: The Definitive Guide by Ben Laurie and Peter Laurie; O'Reilly & Associates, Inc.
- Reference Guide ; Red Hat, Inc — This companion manual includes instructions for migrating from Apache HTTP Server version 1.3 to Apache HTTP Server version 2.0 manually, more details about the Apache HTTP Server directives, and instructions for adding modules to the Apache HTTP Server.
Chapter 25. Apache HTTP Secure Server Configuration
25.1. Introduction
mod_ssl security module enabled to use the OpenSSL library and toolkit. The combination of these three components are referred to in this chapter as the secure Web server or just as the secure server.
mod_ssl module is a security module for the Apache HTTP Server. The mod_ssl module uses the tools provided by the OpenSSL Project to add a very important feature to the Apache HTTP Server — the ability to encrypt communications. In contrast, regular HTTP communications between a browser and a Web server are sent in plain text, which could be intercepted and read by someone along the route between the browser and the server.
mod_ssl configuration file is located at /etc/httpd/conf.d/ssl.conf. For this file to be loaded, and hence for mod_ssl to work, you must have the statement Include conf.d/*.conf in the /etc/httpd/conf/httpd.conf file. This statement is included by default in the default Apache HTTP Server configuration file.
25.2. An Overview of Security-Related Packages
httpd- The
httpdpackage contains thehttpddaemon and related utilities, configuration files, icons, Apache HTTP Server modules, man pages, and other files used by the Apache HTTP Server. mod_ssl- The
mod_sslpackage includes themod_sslmodule, which provides strong cryptography for the Apache HTTP Server via the Secure Sockets Layer (SSL) and Transport Layer Security (TLS) protocols. openssl- The
opensslpackage contains the OpenSSL toolkit. The OpenSSL toolkit implements the SSL and TLS protocols, and also includes a general purpose cryptography library.
httpd-devel- The
httpd-develpackage contains the Apache HTTP Server include files, header files, and the APXS utility. You need all of these if you intend to load any extra modules, other than the modules provided with this product. Refer to the Reference Guide for more information on loading modules onto your secure server using Apache's dynamic shared object (DSO) functionality.If you do not intend to load other modules onto your Apache HTTP Server, you do not need to install this package. - OpenSSH packages
- The OpenSSH packages provide the OpenSSH set of network connectivity tools for logging into and executing commands on a remote machine. OpenSSH tools encrypt all traffic (including passwords), so you can avoid eavesdropping, connection hijacking, and other attacks on the communications between your machine and the remote machine.The
opensshpackage includes core files needed by both the OpenSSH client programs and the OpenSSH server. Theopensshpackage also containsscp, a secure replacement forrcp(for securely copying files between machines).Theopenssh-askpasspackage supports the display of a dialog window which prompts for a password during use of the OpenSSH agent.Theopenssh-askpass-gnomepackage can be used in conjunction with the GNOME desktop environment to display a graphical dialog window when OpenSSH programs prompt for a password. If you are running GNOME and using OpenSSH utilities, you should install this package.Theopenssh-serverpackage contains thesshdsecure shell daemon and related files. The secure shell daemon is the server side of the OpenSSH suite and must be installed on your host to allow SSH clients to connect to your host.Theopenssh-clientspackage contains the client programs needed to make encrypted connections to SSH servers, including the following:ssh, a secure replacement forrsh;sftp, a secure replacement forftp(for transferring files between machines); andslogin, a secure replacement forrlogin(for remote login) andtelnet(for communicating with another host via the Telnet protocol).For more information about OpenSSH, see Chapter 20, OpenSSH, the Reference Guide, and the OpenSSH website at http://www.openssh.com/. openssl-devel- The
openssl-develpackage contains the static libraries and the include file needed to compile applications with support for various cryptographic algorithms and protocols. You need to install this package only if you are developing applications which include SSL support — you do not need this package to use SSL. stunnel- The
stunnelpackage provides the Stunnel SSL wrapper. Stunnel supports the SSL encryption of TCP connections. It provides encryption for non-SSL aware daemons and protocols (such as POP, IMAP, and LDAP) without requiring any changes to the daemon's code.Note
Newer implementations of various daemons now provide their services natively over SSL, such asdovecotor OpenLDAP'sslapdserver, which may be more desirable than usingstunnel.For example, use ofstunnelonly provides wrapping of protocols, while the native support in OpenLDAP'sslapdcan also handle in-band upgrades for using encryption in response to aStartTLSclient request.
| Package Name | Optional? |
|---|---|
httpd | no |
mod_ssl | no |
openssl | no |
httpd-devel | yes |
openssh | yes |
openssh-askpass | yes |
openssh-askpass-gnome | yes |
openssh-clients | yes |
openssh-server | yes |
openssl-devel | yes |
stunnel | yes |
25.3. An Overview of Certificates and Security
https:// prefix is used at the beginning of the Uniform Resource Locator (URL) in the navigation bar.
25.4. Using Pre-Existing Keys and Certificates
- If you are changing your IP address or domain name — Certificates are issued for a particular IP address and domain name pair. You must get a new certificate if you are changing your IP address or domain name.
- If you have a certificate from VeriSign and you are changing your server software — VeriSign is a widely used CA. If you already have a VeriSign certificate for another purpose, you may have been considering using your existing VeriSign certificate with your new secure server. However, you are not be allowed to because VeriSign issues certificates for one specific server software and IP address/domain name combination.If you change either of those parameters (for example, if you previously used a different secure server product), the VeriSign certificate you obtained to use with the previous configuration will not work with the new configuration. You must obtain a new certificate.
/etc/httpd/conf/ssl.key/server.key/etc/httpd/conf/ssl.crt/server.crthttpsd.key) and certificate (httpsd.crt) are located in /etc/httpd/conf/. Move and rename your key and certificate so that the secure server can use them. Use the following two commands to move and rename your key and certificate files:
mv /etc/httpd/conf/httpsd.key /etc/httpd/conf/ssl.key/server.key mv /etc/httpd/conf/httpsd.crt /etc/httpd/conf/ssl.crt/server.crt /sbin/service httpd start25.5. Types of Certificates
- Browsers (usually) automatically recognize the certificate and allow a secure connection to be made, without prompting the user.
- When a CA issues a signed certificate, they are guaranteeing the identity of the organization that is providing the webpages to the browser.
- Create an encryption private and public key pair.
- Create a certificate request based on the public key. The certificate request contains information about your server and the company hosting it.
- Send the certificate request, along with documents proving your identity, to a CA. Red Hat does not make recommendations on which certificate authority to choose. Your decision may be based on your past experiences, on the experiences of your friends or colleagues, or purely on monetary factors.Once you have decided upon a CA, you need to follow the instructions they provide on how to obtain a certificate from them.
- When the CA is satisfied that you are indeed who you claim to be, they provide you with a digital certificate.
- Install this certificate on your secure server and begin handling secure transactions.
25.6. Generating a Key
cd command to change to the /etc/httpd/conf/ directory. Remove the fake key and certificate that were generated during the installation with the following commands:
rm ssl.key/server.keyrm ssl.crt/server.crt
/usr/share/ssl/certs/ directory and type in the following command:
make genkey umask 77 ; \ /usr/bin/openssl genrsa -des3 1024 > /etc/httpd/conf/ssl.key/server.key Generating RSA private key, 1024 bit long modulus .......++++++ ................................................................++++++ e is 65537 (0x10001) Enter pass phrase:
Note
/etc/httpd/conf/ssl.key/server.key, the file containing your key, is created.
make genkey to create the key.
/usr/bin/openssl genrsa 1024 > /etc/httpd/conf/ssl.key/server.keychmod go-rwx /etc/httpd/conf/ssl.key/server.keyWarning
server.key file). The key could be used to serve webpages that appear to be from your secure server.
server.key file should be owned by the root user on your system and should not be accessible to any other user. Make a backup copy of this file and keep the backup copy in a safe, secure place. You need the backup copy because if you ever lose the server.key file after using it to create your certificate request, your certificate no longer works and the CA is not able to help you. Your only option is to request (and pay for) a new certificate.
25.7. Generating a Certificate Request to Send to a CA
/usr/share/ssl/certs/ directory, and type the following command:
make certreq umask 77 ; \ /usr/bin/openssl req -new -key -set_serial num /etc/httpd/conf/ssl.key/server.key -out /etc/httpd/conf/ssl.csr/server.csr Using configuration from /usr/share/ssl/openssl.cnf Enter pass phrase:
You are about to be asked to enter information that will be incorporated
into your certificate request.
What you are about to enter is what is called a Distinguished Name or a
DN.
There are quite a few fields but you can leave some blank
For some fields there will be a default value,
If you enter '.', the field will be left blank.
-----
Country Name (2 letter code) [GB]:USState or Province Name (full name) [Berkshire]:North CarolinaLocality Name (eg, city) [Newbury]:RaleighOrganization Name (eg, company) [My Company Ltd]:Test CompanyOrganizational Unit Name (eg, section) []:TestingCommon Name (your name or server's hostname) []:test.example.comEmail Address []:admin@example.comPlease enter the following 'extra' attributes
to be sent with your certificate request
A challenge password []:
An optional company name []:
[]) immediately after each request for input. For example, the first information required is the name of the country where the certificate is to be used, shown like the following:
Country Name (2 letter code) [GB]:
GB. Accept the default by pressing Enter or fill in your country's two letter code.
- Do not abbreviate the locality or state. Write them out (for example, St. Louis should be written out as Saint Louis).
- If you are sending this CSR to a CA, be very careful to provide correct information for all of the fields, but especially for the
Organization Nameand theCommon Name. CAs check the information provided in the CSR to determine whether your organization is responsible for what you provided as theCommon Name. CAs rejects CSRs which include information they perceive as invalid. - For
Common Name, make sure you type in the real name of your secure server (a valid DNS name) and not any aliases which the server may have. - The
Email Addressshould be the email address for the webmaster or system administrator. - Avoid special characters like @, #, & !, and etc. Some CAs reject a certificate request which contains a special character. If your company name includes an ampersand (&), spell it out as "and" instead of "&."
- Do not use either of the extra attributes (
A challenge passwordandAn optional company name). To continue without entering these fields, just press Enter to accept the blank default for both inputs.
/etc/httpd/conf/ssl.csr/server.csr is created when you have finished entering your information. This file is your certificate request, ready to send to your CA.
/etc/httpd/conf/ssl.crt/server.crt. Be sure to keep a backup of this file.
25.8. Creating a Self-Signed Certificate
/usr/share/ssl/certs/ directory, and type the following command:
make testcertumask 77 ; \ /usr/bin/openssl req -new -key -set_serial num /etc/httpd/conf/ssl.key/server.key -x509 -days 365 -out /etc/httpd/conf/ssl.crt/server.crt Using configuration from /usr/share/ssl/openssl.cnf Enter pass phrase:
You are about to be asked to enter information that will be incorporated into your certificate request. What you are about to enter is what is called a Distinguished Name or a DN. There are quite a few fields but you can leave some blank For some fields there will be a default value, If you enter '.', the field will be left blank. ----- Country Name (2 letter code) [GB]:USState or Province Name (full name) [Berkshire]:North CarolinaLocality Name (eg, city) [Newbury]:RaleighOrganization Name (eg, company) [My Company Ltd]:My Company, Inc.Organizational Unit Name (eg, section) []:DocumentationCommon Name (your name or server's hostname) []:myhost.example.comEmail Address []:myemail@example.com
/etc/httpd/conf/ssl.crt/server.crt. Restart the secure server after generating the certificate with following the command:
/sbin/service httpd restart25.9. Testing The Certificate
https://server.example.com
Note
s after http. The https: prefix is used for secure HTTP transactions.
25.10. Accessing The Server
https://server.example.com
http://server.example.com
http://server.example.com:12331
25.11. Additional Resources
25.11.1. Useful Websites
- http://www.modssl.org/ — The
mod_sslwebsite is the definitive source for information aboutmod_ssl. The website includes a wealth of documentation, including a User Manual at http://www.modssl.org/docs/.
Chapter 26. Authentication Configuration
Note
system-config-authentication at a shell prompt (for example, in an XTerm or a GNOME terminal). To start the text-based version, type the command authconfig as root at a shell prompt.
Important
26.1. User Information

Figure 26.1. User Information
- Enable NIS Support — Select this option to configure the system as an NIS client which connects to an NIS server for user and password authentication. Click the button to specify the NIS domain and NIS server. If the NIS server is not specified, the daemon attempts to find it via broadcast.The
ypbindpackage must be installed for this option to work. If NIS support is enabled, theportmapandypbindservices are started and are also enabled to start at boot time. - Enable LDAP Support — Select this option to configure the system to retrieve user information via LDAP. Click the button to specify the LDAP Search Base DN and LDAP Server. If Use TLS to encrypt connections is selected, Transport Layer Security is used to encrypt passwords sent to the LDAP server.The
openldap-clientspackage must be installed for this option to work.For more information about LDAP, refer to the Reference Guide. - Enable Hesiod Support — Select this option to configure the system to retrieve information from a remote Hesiod database, including user information.The
hesiodpackage must be installed. - Winbind — Select this option to configure the system to connect to a Windows Active Directory or a Windows domain controller. User information can be accessed, as well as server authentication options can be configured.
- Cache User Information — Select this option to enable the name service cache daemon (
nscd) and configure it to start at boot time.Thenscdpackage must be installed for this option to work.
26.2. Authentication

Figure 26.2. Authentication
- Enable Kerberos Support — Select this option to enable Kerberos authentication. Click the button to configure:
- Realm — Configure the realm for the Kerberos server. The realm is the network that uses Kerberos, composed of one or more KDCs and a potentially large number of clients.
- KDC — Define the Key Distribution Center (KDC), which is the server that issues Kerberos tickets.
- Admin Servers — Specify the administration server(s) running
kadmind.
Thekrb5-libsandkrb5-workstationpackages must be installed for this option to work. Refer to the Reference Guide for more information on Kerberos. - Enable LDAP Support — Select this option to have standard PAM-enabled applications use LDAP for authentication. Click the button to specify the following:
- Use TLS to encrypt connections — Use Transport Layer Security to encrypt passwords sent to the LDAP server.
- LDAP Search Base DN — Retrieve user information by its Distinguished Name (DN).
- LDAP Server — Specify the IP address of the LDAP server.
Theopenldap-clientspackage must be installed for this option to work. Refer to the Reference Guide for more information about LDAP. - Use Shadow Passwords — Select this option to store passwords in shadow password format in the
/etc/shadowfile instead of/etc/passwd. Shadow passwords are enabled by default during installation and are highly recommended to increase the security of the system.Theshadow-utilspackage must be installed for this option to work. For more information about shadow passwords, refer to the Users and Groups chapter in the Reference Guide. - Enable SMB Support — This option configures PAM to use an SMB server to authenticate users. Click the button to specify:
- Workgroup — Specify the SMB workgroup to use.
- Domain Controllers — Specify the SMB domain controllers to use.
- Winbind — Select this option to configure the system to connect to a Windows Active Directory or a Windows domain controller. User information can be accessed, as well as server authentication options can be configured.
- Use MD5 Passwords — Select this option to enable MD5 passwords, which allows passwords to be up to 256 characters instead of eight characters or less. It is selected by default during installation and is highly recommended for increased security.
26.3. Command Line Version
Note
authconfig man page or by typing authconfig --help at a shell prompt.
| Option | Description |
|---|---|
--enableshadow | Enable shadow passwords |
--disableshadow | Disable shadow passwords |
--enablemd5 | Enable MD5 passwords |
--disablemd5 | Disable MD5 passwords |
--enablenis | Enable NIS |
--disablenis | Disable NIS |
--nisdomain=<domain> | Specify NIS domain |
--nisserver=<server> | Specify NIS server |
--enableldap | Enable LDAP for user information |
--disableldap | Disable LDAP for user information |
--enableldaptls | Enable use of TLS with LDAP |
--disableldaptls | Disable use of TLS with LDAP |
--enableldapauth | Enable LDAP for authentication |
--disableldapauth | Disable LDAP for authentication |
--ldapserver=<server> | Specify LDAP server |
--ldapbasedn=<dn> | Specify LDAP base DN |
--enablekrb5 | Enable Kerberos |
--disablekrb5 | Disable Kerberos |
--krb5kdc=<kdc> | Specify Kerberos KDC |
--krb5adminserver=<server> | Specify Kerberos administration server |
--krb5realm=<realm> | Specify Kerberos realm |
--enablekrb5kdcdns | Enable use of DNS to find Kerberos KDCs |
--disablekrb5kdcdns | Disable use of DNS to find Kerberos KDCs |
--enablekrb5realmdns | Enable use of DNS to find Kerberos realms |
--disablekrb5realmdns | Disable use of DNS to find Kerberos realms |
--enablesmbauth | Enable SMB |
--disablesmbauth | Disable SMB |
--smbworkgroup=<workgroup> | Specify SMB workgroup |
--smbservers=<server> | Specify SMB servers |
--enablewinbind | Enable winbind for user information by default |
--disablewinbind | Disable winbind for user information by default |
--enablewinbindauth | Enable winbindauth for authentication by default |
--disablewinbindauth | Disable winbindauth for authentication by default |
--smbsecurity=<user|server|domain|ads> | Security mode to use for Samba and winbind |
--smbrealm=<STRING> | Default realm for Samba and winbind when security=ads |
--smbidmapuid=<lowest-highest> | UID range winbind assigns to domain or ADS users |
--smbidmapgid=<lowest-highest> | GID range winbind assigns to domain or ADS users |
--winbindseparator=<\> | Character used to separate the domain and user part of winbind usernames if winbindusedefaultdomain is not enabled |
--winbindtemplatehomedir=</home/%D/%U> | Directory that winbind users have as their home |
--winbindtemplateprimarygroup=<nobody> | Group that winbind users have as their primary group |
--winbindtemplateshell=</bin/false> | Shell that winbind users have as their default login shell |
--enablewinbindusedefaultdomain | Configures winbind to assume that users with no domain in their usernames are domain users |
--disablewinbindusedefaultdomain | Configures winbind to assume that users with no domain in their usernames are not domain users |
--winbindjoin=<Administrator> | Joins the winbind domain or ADS realm now as this administrator |
--enablewins | Enable WINS for hostname resolution |
--disablewins | Disable WINS for hostname resolution |
--enablehesiod | Enable Hesiod |
--disablehesiod | Disable Hesiod |
--hesiodlhs=<lhs> | Specify Hesiod LHS |
--hesiodrhs=<rhs> | Specify Hesiod RHS |
--enablecache | Enable nscd |
--disablecache | Disable nscd |
--nostart | Do not start or stop the portmap, ypbind, or nscd services even if they are configured |
--kickstart | Do not display the user interface |
--probe | Probe and display network defaults |
Part V. System Configuration
Chapter 27. Console Access
- They can run certain programs that they would not otherwise be able to run
- They can access certain files (normally special device files used to access diskettes, CD-ROMs, and so on) that they would not otherwise be able to access
halt, poweroff, and reboot.
27.1. Disabling Shutdown Via Ctrl+Alt+Del
/etc/inittab specifies that your system is set to shutdown and reboot in response to a Ctrl+Alt+Del key combination used at the console. To completely disable this ability, comment out the following line in /etc/inittab by putting a hash mark (#) in front of it:
ca::ctrlaltdel:/sbin/shutdown -t3 -r now
- Add the
-aoption to the/etc/inittabline shown above, so that it reads:ca::ctrlaltdel:/sbin/shutdown -a -t3 -r now
The-aflag tellsshutdownto look for the/etc/shutdown.allowfile. - Create a file named
shutdown.allowin/etc. Theshutdown.allowfile should list the usernames of any users who are allowed to shutdown the system using Ctrl+Alt+Del. The format of theshutdown.allowfile is a list of usernames, one per line, like the following:stephen jack sophie
shutdown.allow file, the users stephen, jack, and sophie are allowed to shutdown the system from the console using Ctrl+Alt+Del. When that key combination is used, the shutdown -a command in /etc/inittab checks to see if any of the users in /etc/shutdown.allow (or root) are logged in on a virtual console. If one of them is, the shutdown of the system continues; if not, an error message is written to the system console instead.
shutdown.allow, refer to the shutdown man page.
27.2. Disabling Console Program Access
rm -f /etc/security/console.apps/*
poweroff, halt, and reboot, which are accessible from the console by default.
rm -f /etc/security/console.apps/poweroffrm -f /etc/security/console.apps/haltrm -f /etc/security/console.apps/reboot
27.3. Defining the Console
pam_console.so module uses the /etc/security/console.perms file to determine the permissions for users at the system console. The syntax of the file is very flexible; you can edit the file so that these instructions no longer apply. However, the default file has a line that looks like this:
<console>=tty[0-9][0-9]* vc/[0-9][0-9]* :[0-9]\.[0-9] :[0-9]:0 or mymachine.example.com:1.0, or a device like /dev/ttyS0 or /dev/pts/2. The default is to define that local virtual consoles and local X servers are considered local, but if you want to consider the serial terminal next to you on port /dev/ttyS1 to also be local, you can change that line to read:
<console>=tty[0-9][0-9]* vc/[0-9][0-9]* :[0-9]\.[0-9] :[0-9] /dev/ttyS127.4. Making Files Accessible From the Console
/etc/security/console.perms, there is a section with lines like:
<floppy>=/dev/fd[0-1]* \
         /dev/floppy/* /mnt/floppy*
<sound>=/dev/dsp* /dev/audio* /dev/midi* \
        /dev/mixer* /dev/sequencer \
        /dev/sound/* /dev/beep \
/dev/snd/*
<cdrom>=/dev/cdrom* /dev/cdroms/* /dev/cdwriter* /mnt/cdrom*
<scanner>=/dev/scanner /dev/usb/scanner*
/dev/scanner is really your scanner and not, say, your hard drive.)
/etc/security/console.perms for lines similar to:
<console> 0660 <floppy> 0660 root.floppy
<console> 0600 <sound>  0640 root
<console> 0600 <cdrom>  0600 root.disk
<console> 0600 <scanner> 0600 root/dev/scanner device with the permissions of 0600 (readable and writable by you only). When you log out, the device is owned by root and still has the permissions 0600 (now readable and writable by root only).
27.5. Enabling Console Access for Other Applications
/sbin/ or /usr/sbin/, so the application that you wish to run must be there. After verifying that, do the following steps:
- Create a link from the name of your application, such as our sample
fooprogram, to the/usr/bin/consolehelperapplication:cd /usr/binln -sconsolehelper foo - Create the file
/etc/security/console.apps/foo:touch /etc/security/console.apps/foo - Create a PAM configuration file for the
fooservice in/etc/pam.d/. An easy way to do this is to start with a copy of the halt service's PAM configuration file, and then modify the file if you want to change the behavior:cp /etc/pam.d/halt /etc/pam.d/foo
/usr/bin/foo is executed, consolehelper is called, which authenticates the user with the help of /usr/sbin/userhelper. To authenticate the user, consolehelper asks for the user's password if /etc/pam.d/foo is a copy of /etc/pam.d/halt (otherwise, it does precisely what is specified in /etc/pam.d/foo) and then runs /usr/sbin/foo with root permissions.
pam_timestamp and run from the same session is automatically authenticated for the user — the user does not have to enter the root password again.
pam package. To enable this feature, the PAM configuration file in etc/pam.d/ must include the following lines:
auth sufficient /lib/security/pam_timestamp.so
session optional /lib/security/pam_timestamp.so
auth should be after any other auth sufficient lines, and the line that begins with session should be after any other session optional lines.
pam_timestamp is successfully authenticated from the (on the Panel), the
27.6. The floppy Group
floppy group. Add the user(s) to the floppy group using the tool of your choice. For example, the gpasswd command can be used to add user fred to the floppy group:
gpasswd -a fred floppyChapter 28. Date and Time Configuration
- From the desktop, go to (the main menu on the panel) => =>
- From the desktop, right-click on the time in the toolbar and select .
- Type the command
system-config-date,system-config-time, ordateconfigat a shell prompt (for example, in an XTerm or a GNOME terminal).
28.1. Time and Date Properties
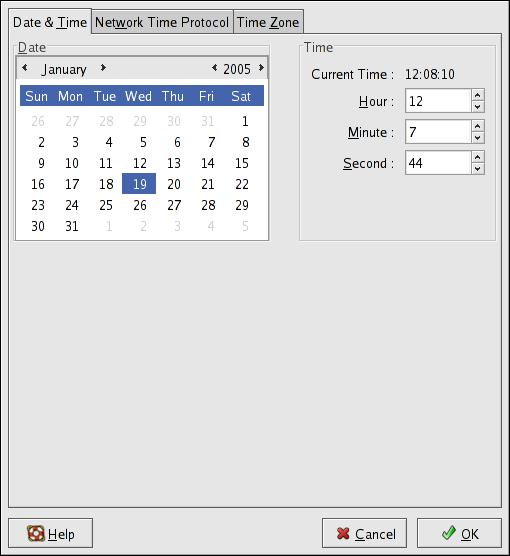
Figure 28.1. Time and Date Properties
28.2. Network Time Protocol (NTP) Properties
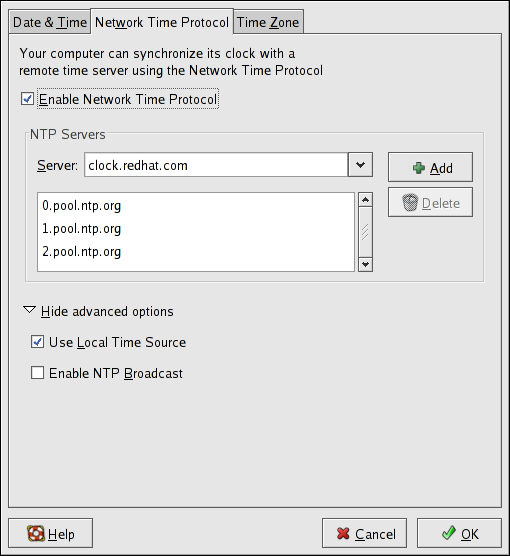
Figure 28.2. NTP Properties
28.3. Time Zone Configuration
Chapter 29. Keyboard Configuration
system-config-keyboard at a shell prompt.

Figure 29.1. Keyboard Configuration
Chapter 30. Mouse Configuration
system-config-mouse at a shell prompt (for example, in an XTerm or GNOME terminal). If the X Window System is not running, the text-based version of the tool is started.

Figure 30.1. Mouse Configuration
Note
/dev/ttyS0 for the mouse.
/etc/sysconfig/mouse, and the console mouse service, gpm is restarted. The changes are also written to the X Window System configuration file /etc/X11/xorg.conf; however, the mouse type change is not automatically applied to the current X session. To enable the new mouse type, log out of the graphical desktop and log back in.
Note
Chapter 31. X Window System Configuration
system-config-display at a shell prompt (for example, in an XTerm or GNOME terminal). If the X Window System is not running, a small version of X is started to run the program.
31.1. Display Settings
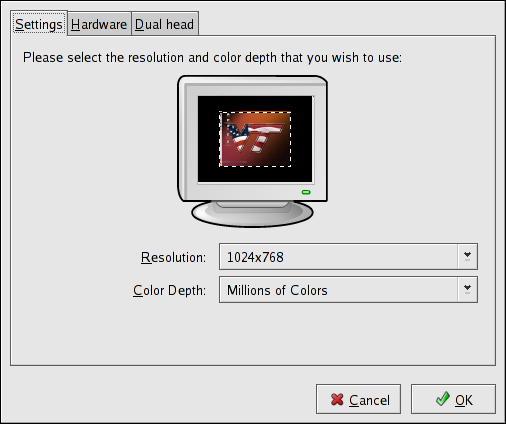
Figure 31.1. Display Settings
31.2. Display Hardware Settings
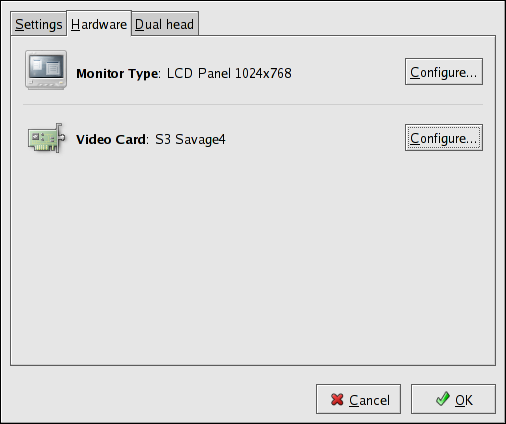
Figure 31.2. Display Hardware Settings
31.3. Dual Head Display Settings
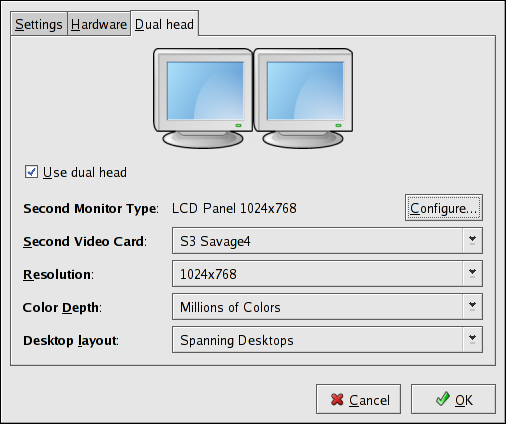
Figure 31.3. Dual Head Display Settings
Chapter 32. Users and Groups
32.1. User and Group Configuration
system-config-users RPM package installed. To start the User Manager from the desktop, go to (the main menu on the
panel) => => . You can also type the command system-config-users at a shell prompt (for example, in an XTerm or a GNOME terminal).
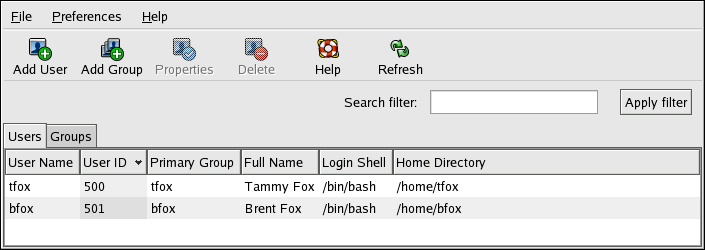
Figure 32.1. User Manager
32.1.1. Adding a New User
Note
/bin/bash. The default home directory is /home/<username>/. You can change the home directory that is created for the user, or you can choose not to create the home directory by unselecting Create home directory.
/etc/skel/ directory into the new home directory.

Figure 32.2. New User
32.1.2. Modifying User Properties
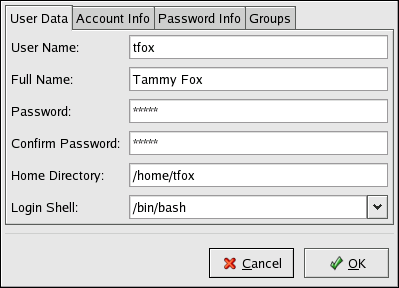
Figure 32.3. User Properties
- User Data — Shows the basic user information configured when you added the user. Use this tab to change the user's full name, password, home directory, or login shell.
- Password Info — Displays the date that the user's password last changed. To force the user to change passwords after a certain number of days, select Enable password expiration and enter a desired value in the Days before change required: field. The number of days before the user's password expires, the number of days before the user is warned to change passwords, and days before the account becomes inactive can also be changed.
32.1.3. Adding a New Group
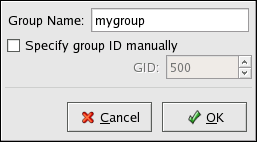
Figure 32.4. New Group
32.1.4. Modifying Group Properties

Figure 32.5. Group Properties
32.2. User and Group Management Tools
system-config-users). For more information on User Manager, refer to Section 32.1, “User and Group Configuration”.
useradd,usermod, anduserdel— Industry-standard methods of adding, deleting and modifying user accountsgroupadd,groupmod, andgroupdel— Industry-standard methods of adding, deleting, and modifying user groupsgpasswd— Industry-standard method of administering the/etc/groupfilepwck,grpck— Tools used for the verification of the password, group, and associated shadow filespwconv,pwunconv— Tools used for the conversion of passwords to shadow passwords and back to standard passwords
32.2.1. Command Line Configuration
32.2.2. Adding a User
useradd are detailed in Table 32.1, “useradd Command Line Options”.
| Option | Description |
|---|---|
-c '<comment>' | <comment> can be replaced with any string. This option is generally used to specify the full name of a user. |
-d <home-dir> | Home directory to be used instead of default /home/<username>/ |
-e <date> | Date for the account to be disabled in the format YYYY-MM-DD |
-f <days> | Number of days after the password expires until the account is disabled. If 0 is specified, the account is disabled immediately after the password expires. If -1 is specified, the account is not be disabled after the password expires. |
-g <group-name> | Group name or group number for the user's default group. The group must exist prior to being specified here. |
-G <group-list> | List of additional (other than default) group names or group numbers, separated by commas, of which the user is a member. The groups must exist prior to being specified here. |
-m | Create the home directory if it does not exist. |
-M | Do not create the home directory. |
-n | Do not create a user private group for the user. |
-r | Create a system account with a UID less than 500 and without a home directory |
-p <password> | The password encrypted with crypt |
-s | User's login shell, which defaults to /bin/bash |
-u <uid> | User ID for the user, which must be unique and greater than 499 |
32.2.3. Adding a Group
groupadd:
groupadd <group-name>groupadd are detailed in Table 32.2, “groupadd Command Line Options”.
| Option | Description |
|---|---|
-g <gid> | Group ID for the group, which must be unique and greater than 499 |
-r | Create a system group with a GID less than 500 |
-f | When used with -g <gid> and <gid> already exists, groupadd will choose another unique <gid> for the group. |
32.2.4. Password Aging
chage command, followed by an option from Table 32.3, “chage Command Line Options”, followed by the username of the user.
Important
chage command.
| Option | Description |
|---|---|
-m <days> | Specifies the minimum number of days between which the user must change passwords. If the value is 0, the password does not expire. |
-M <days> | Specifies the maximum number of days for which the password is valid. When the number of days specified by this option plus the number of days specified with the -d option is less than the current day, the user must change passwords before using the account. |
-d <days> | Specifies the number of days since January 1, 1970 the password was changed |
-I <days> | Specifies the number of inactive days after the password expiration before locking the account. If the value is 0, the account is not locked after the password expires. |
-E <date> | Specifies the date on which the account is locked, in the format YYYY-MM-DD. Instead of the date, the number of days since January 1, 1970 can also be used. |
-W <days> | Specifies the number of days before the password expiration date to warn the user. |
Note
chage command is followed directly by a username (with no options), it displays the current password aging values and allows them to be changed.
Note
- Lock the user password — If the user does not exist, use the
useraddcommand to create the user account, but do not give it a password so that it remains locked.If the password is already enabled, lock it with the command:usermod -L username - Force immediate password expiration — Type the following command:
chage -d 0 username
This command sets the value for the date the password was last changed to the epoch (January 1, 1970). This value forces immediate password expiration no matter what password aging policy, if any, is in place. - Unlock the account — There are two common approaches to this step. The administrator can assign an initial password or assign a null password.
Warning
Do not use thepasswdcommand to set the password as it disables the immediate password expiration just configured.To assign an initial password, use the following steps:- Start the command line Python interpreter with the
pythoncommand. It displays the following:Python 2.4.3 (#1, Jul 21 2006, 08:46:09) [GCC 4.1.1 20060718 (Red Hat 4.1.1-9)] on linux2 Type "help", "copyright", "credits" or "license" for more information. >>>
- At the prompt, type the following commands. Replace <password> with the password to encrypt and <salt> with a random combination of at least 2 of the following: any alphanumeric character, the slash (/) character or a dot (.):
import crypt; print crypt.crypt("<password>","<salt>")The output is the encrypted password, similar to'12CsGd8FRcMSM'. - Press Ctrl-D to exit the Python interpreter.
- At the shell, enter the following command (replacing <encrypted-password> with the encrypted output of the Python interpreter):
usermod -p "<encrypted-password>" <username>
Alternatively, you can assign a null password instead of an initial password. To do this, use the following command:usermod -p "" username
Warning
Using a null password, while convenient, is a highly unsecure practice, as any third party can log in first an access the system using the unsecure username. Always make sure that the user is ready to log in before unlocking an account with a null password.In either case, upon initial log in, the user is prompted for a new password.
32.2.5. Explaining the Process
useradd juan is issued on a system that has shadow passwords enabled:
- A new line for
juanis created in/etc/passwd. The line has the following characteristics:- It begins with the username
juan. - There is an
xfor the password field indicating that the system is using shadow passwords. - A UID greater than 499 is created. (Under Red Hat Enterprise Linux, UIDs and GIDs below 500 are reserved for system use.)
- A GID greater than 499 is created.
- The optional GECOS information is left blank.
- The home directory for
juanis set to/home/juan/. - The default shell is set to
/bin/bash.
- A new line for
juanis created in/etc/shadow. The line has the following characteristics:- It begins with the username
juan. - Two exclamation points (
!!) appear in the password field of the/etc/shadowfile, which locks the account.Note
If an encrypted password is passed using the-pflag, it is placed in the/etc/shadowfile on the new line for the user. - The password is set to never expire.
- A new line for a group named
juanis created in/etc/group. A group with the same name as a user is called a user private group. For more information on user private groups, refer to Section 32.1.1, “Adding a New User”.The line created in/etc/grouphas the following characteristics:- It begins with the group name
juan. - An
xappears in the password field indicating that the system is using shadow group passwords. - The GID matches the one listed for user
juanin/etc/passwd.
- A new line for a group named
juanis created in/etc/gshadow. The line has the following characteristics:- It begins with the group name
juan. - An exclamation point (
!) appears in the password field of the/etc/gshadowfile, which locks the group. - All other fields are blank.
- A directory for user
juanis created in the/home/directory. This directory is owned by userjuanand groupjuan. However, it has read, write, and execute privileges only for the userjuan. All other permissions are denied. - The files within the
/etc/skel/directory (which contain default user settings) are copied into the new/home/juan/directory.
juan exists on the system. To activate it, the administrator must next assign a password to the account using the passwd command and, optionally, set password aging guidelines.
32.3. Standard Users
/etc/passwd file by an Everything installation. The groupid (GID) in this table is the primary group for the user. See Section 32.4, “Standard Groups” for a listing of standard groups.
| User | UID | GID | Home Directory | Shell |
|---|---|---|---|---|
| root | 0 | 0 | /root | /bin/bash |
| bin | 1 | 1 | /bin | /sbin/nologin |
| daemon | 2 | 2 | /sbin | /sbin/nologin |
| adm | 3 | 4 | /var/adm | /sbin/nologin |
| lp | 4 | 7 | /var/spool/lpd | /sbin/nologin |
| sync | 5 | 0 | /sbin | /bin/sync |
| shutdown | 6 | 0 | /sbin | /sbin/shutdown |
| halt | 7 | 0 | /sbin | /sbin/halt |
| 8 | 12 | /var/spool/mail | /sbin/nologin | |
| news | 9 | 13 | /etc/news | |
| uucp | 10 | 14 | /var/spool/uucp | /sbin/nologin |
| operator | 11 | 0 | /root | /sbin/nologin |
| games | 12 | 100 | /usr/games | /sbin/nologin |
| gopher | 13 | 30 | /var/gopher | /sbin/nologin |
| ftp | 14 | 50 | /var/ftp | /sbin/nologin |
| nobody | 99 | 99 | / | /sbin/nologin |
| rpm | 37 | 37 | /var/lib/rpm | /sbin/nologin |
| vcsa | 69 | 69 | /dev | /sbin/nologin |
| dbus | 81 | 81 | / | /sbin/nologin |
| ntp | 38 | 38 | /etc/ntp | /sbin/nologin |
| canna | 39 | 39 | /var/lib/canna | /sbin/nologin |
| nscd | 28 | 28 | / | /sbin/nologin |
| rpc | 32 | 32 | / | /sbin/nologin |
| postfix | 89 | 89 | /var/spool/postfix | /sbin/nologin |
| mailman | 41 | 41 | /var/mailman | /sbin/nologin |
| named | 25 | 25 | /var/named | /bin/false |
| amanda | 33 | 6 | var/lib/amanda/ | /bin/bash |
| postgres | 26 | 26 | /var/lib/pgsql | /bin/bash |
| exim | 93 | 93 | /var/spool/exim | /sbin/nologin |
| sshd | 74 | 74 | /var/empty/sshd | /sbin/nologin |
| rpcuser | 29 | 29 | /var/lib/nfs | /sbin/nologin |
| nsfnobody | 65534 | 65534 | /var/lib/nfs | /sbin/nologin |
| pvm | 24 | 24 | /usr/share/pvm3 | /bin/bash |
| apache | 48 | 48 | /var/www | /sbin/nologin |
| xfs | 43 | 43 | /etc/X11/fs | /sbin/nologin |
| gdm | 42 | 42 | /var/gdm | /sbin/nologin |
| htt | 100 | 101 | /usr/lib/im | /sbin/nologin |
| mysql | 27 | 27 | /var/lib/mysql | /bin/bash |
| webalizer | 67 | 67 | /var/www/usage | /sbin/nologin |
| mailnull | 47 | 47 | /var/spool/mqueue | /sbin/nologin |
| smmsp | 51 | 51 | /var/spool/mqueue | /sbin/nologin |
| squid | 23 | 23 | /var/spool/squid | /sbin/nologin |
| ldap | 55 | 55 | /var/lib/ldap | /bin/false |
| netdump | 34 | 34 | /var/crash | /bin/bash |
| pcap | 77 | 77 | /var/arpwatch | /sbin/nologin |
| radiusd | 95 | 95 | / | /bin/false |
| radvd | 75 | 75 | / | /sbin/nologin |
| quagga | 92 | 92 | /var/run/quagga | /sbin/login |
| wnn | 49 | 49 | /var/lib/wnn | /sbin/nologin |
| dovecot | 97 | 97 | /usr/libexec/dovecot | /sbin/nologin |
32.4. Standard Groups
/etc/group file.
| Group | GID | Members |
|---|---|---|
| root | 0 | root |
| bin | 1 | root, bin, daemon |
| daemon | 2 | root, bin, daemon |
| sys | 3 | root, bin, adm |
| adm | 4 | root, adm, daemon |
| tty | 5 | |
| disk | 6 | root |
| lp | 7 | daemon, lp |
| mem | 8 | |
| kmem | 9 | |
| wheel | 10 | root |
| 12 | mail, postfix, exim | |
| news | 13 | news |
| uucp | 14 | uucp |
| man | 15 | |
| games | 20 | |
| gopher | 30 | |
| dip | 40 | |
| ftp | 50 | |
| lock | 54 | |
| nobody | 99 | |
| users | 100 | |
| rpm | 37 | |
| utmp | 22 | |
| floppy | 19 | |
| vcsa | 69 | |
| dbus | 81 | |
| ntp | 38 | |
| canna | 39 | |
| nscd | 28 | |
| rpc | 32 | |
| postdrop | 90 | |
| postfix | 89 | |
| mailman | 41 | |
| exim | 93 | |
| named | 25 | |
| postgres | 26 | |
| sshd | 74 | |
| rpcuser | 29 | |
| nfsnobody | 65534 | |
| pvm | 24 | |
| apache | 48 | |
| xfs | 43 | |
| gdm | 42 | |
| htt | 101 | |
| mysql | 27 | |
| webalizer | 67 | |
| mailnull | 47 | |
| smmsp | 51 | |
| squid | 23 | |
| ldap | 55 | |
| netdump | 34 | |
| pcap | 77 | |
| quaggavt | 102 | |
| quagga | 92 | |
| radvd | 75 | |
| slocate | 21 | |
| wnn | 49 | |
| dovecot | 97 | |
| radiusd | 95 |
32.5. User Private Groups
/etc/bashrc file. Traditionally on UNIX systems, the umask is set to 022, which allows only the user who created the file or directory to make modifications. Under this scheme, all other users, including members of the creator's group, are not allowed to make any modifications. However, under the UPG scheme, this "group protection" is not necessary since every user has their own private group.
32.5.1. Group Directories
/usr/share/emacs/site-lisp/ directory. Some people are trusted to modify the directory, but certainly not everyone is trusted. First create an emacs group, as in the following command:
/usr/sbin/groupadd emacsemacs group, type:
chown -R root.emacs /usr/share/emacs/site-lispgpasswd command:
/usr/bin/gpasswd -a <username> emacs
chmod 775 /usr/share/emacs/site-lispemacs). Use the following command:
chmod 2775 /usr/share/emacs/site-lispemacs group can create and edit files in the /usr/share/emacs/site-lisp/ directory without the administrator having to change file permissions every time users write new files.
32.6. Shadow Passwords
shadow-utils package). Doing so enhances the security of system authentication files. For this reason, the installation program enables shadow passwords by default.
- Improves system security by moving encrypted password hashes from the world-readable
/etc/passwdfile to/etc/shadow, which is readable only by the root user. - Stores information about password aging.
- Allows the use the
/etc/login.defsfile to enforce security policies.
shadow-utils package work properly whether or not shadow passwords are enabled. However, since password aging information is stored exclusively in the /etc/shadow file, any commands which create or modify password aging information do not work.
chagegpasswd/usr/sbin/usermod-eor-foptions/usr/sbin/useradd-eor-foptions
32.7. Additional Resources
32.7.1. Installed Documentation
- Related man pages — There are a number of man pages for the various applications and configuration files involved with managing users and groups. Some of the more important man pages have been listed here:
- User and Group Administrative Applications
man chage— A command to modify password aging policies and account expiration.man gpasswd— A command to administer the/etc/groupfile.man groupadd— A command to add groups.man grpck— A command to verify the/etc/groupfile.man groupdel— A command to remove groups.man groupmod— A command to modify group membership.man pwck— A command to verify the/etc/passwdand/etc/shadowfiles.man pwconv— A tool to convert standard passwords to shadow passwords.man pwunconv— A tool to convert shadow passwords to standard passwords.man useradd— A command to add users.man userdel— A command to remove users.man usermod— A command to modify users.
- Configuration Files
man 5 group— The file containing group information for the system.man 5 passwd— The file containing user information for the system.man 5 shadow— The file containing passwords and account expiration information for the system.
Chapter 33. Printer Configuration
system-config-printer at a shell prompt.
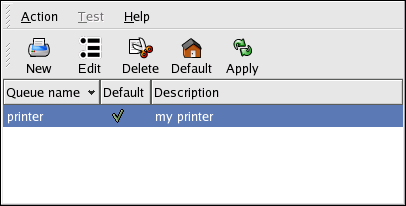
Figure 33.1. Printer Configuration Tool
- — a printer connected directly to the network through HP JetDirect or Appsocket interface instead of a computer.
- — a printer that can be accessed over a TCP/IP network via the Internet Printing Protocol (for example, a printer attached to another Red Hat Enterprise Linux system running CUPS on the network).
- — a printer attached to a different UNIX system that can be accessed over a TCP/IP network (for example, a printer attached to another Red Hat Enterprise Linux system running LPD on the network).
- — a printer attached to a different system which is sharing a printer over an SMB network (for example, a printer attached to a Microsoft Windows™ machine).
- — a printer connected directly to the network through HP JetDirect instead of a computer.
Important
33.1. Adding a Local Printer

Figure 33.2. Adding a Printer
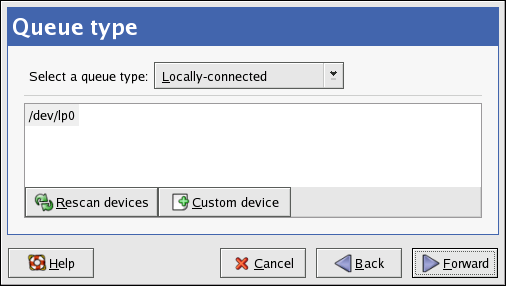
Figure 33.3. Adding a Local Printer
33.2. Adding an IPP Printer
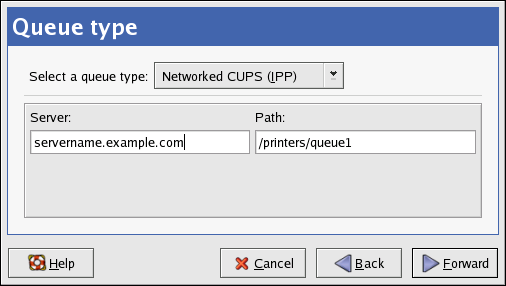
Figure 33.4. Adding an IPP Printer
33.3. Adding a Samba (SMB) Printer
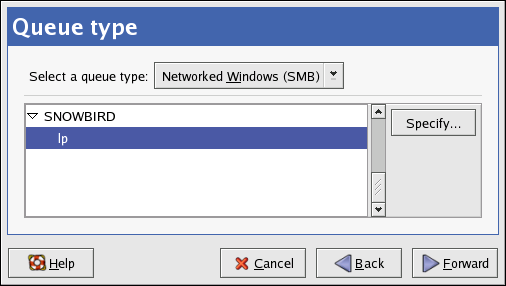
Figure 33.5. Adding a SMB Printer
dellbox, while the printer share is r2.
guest for Windows servers, or nobody for Samba servers.
Warning
33.4. Adding a JetDirect Printer
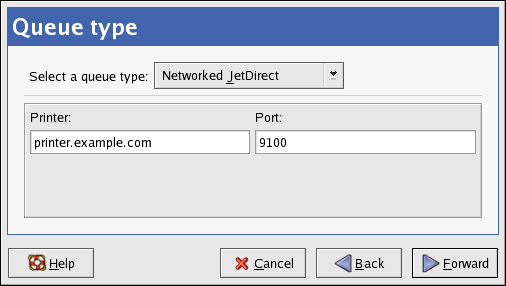
Figure 33.6. Adding a JetDirect Printer
- Hostname — The hostname or IP address of the JetDirect printer.
- Port Number — The port on the JetDirect printer that is listening for print jobs. The default port is 9100.
33.5. Selecting the Printer Model and Finishing
- Select a Printer from database - If you select this option, choose the make of your printer from the list of Makes. If your printer make is not listed, choose Generic.
- Provide PPD file - A PostScript Printer Description (PPD) file may also be provided with your printer. This file is normally provided by the manufacturer. If you are provided with a PPD file, you can choose this option and use the browser bar below the option description to select the PPD file.
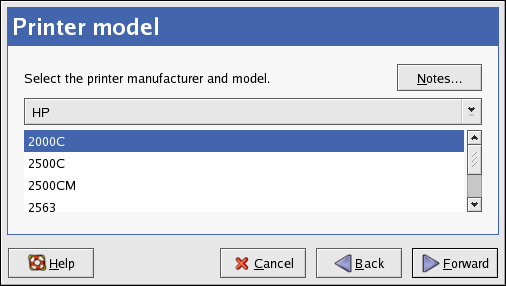
Figure 33.7. Selecting a Printer Model
33.5.1. Confirming Printer Configuration
33.6. Printing a Test Page
33.7. Modifying Existing Printers
33.7.1. The Settings Tab
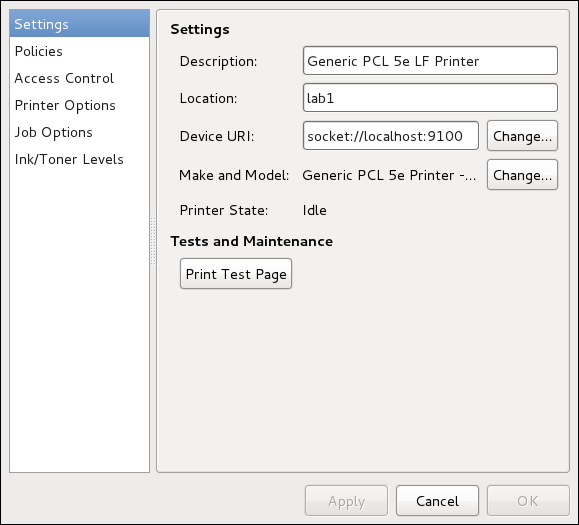
Figure 33.8. Settings Tab
33.7.2. The Policies Tab
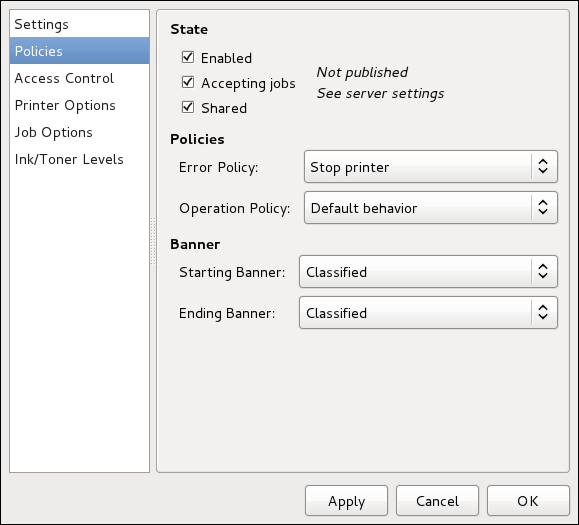
Figure 33.9. Policies Tab
33.7.3. The Access Control Tab
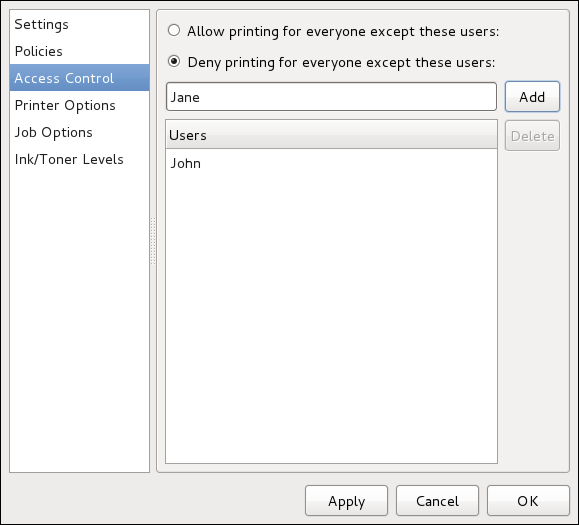
Figure 33.10. Access Control Tab
33.7.4. The Printer and Job OptionsTab
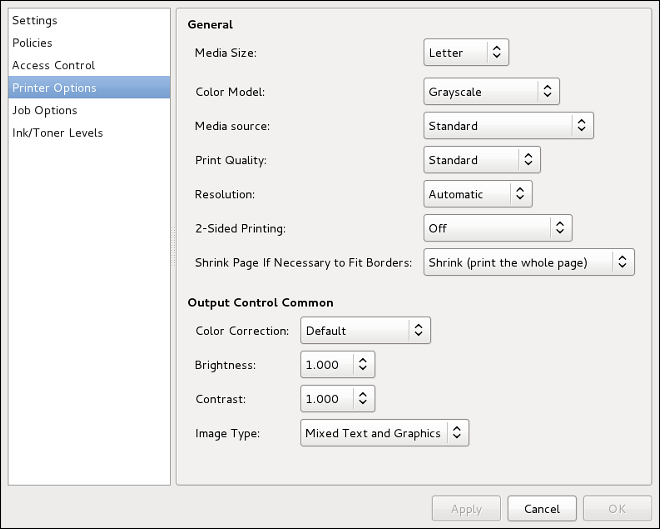
Figure 33.11. Printer Options Tab
- Page Size — Allows the paper size to be selected. The options include US Letter, US Legal, A3, and A4
- Media Source — set to Automatic by default. Change this option to use paper from a different tray.
- Media Type — Allows you to change paper type. Options include: Plain, thick, bond, and transparency.
- Resolution — Configure the quality and detail of the printout (default is 300 dots per inch (dpi).
- Toner Saving — Choose whether the printer uses less toner to conserve resources.
33.8. Managing Print Jobs
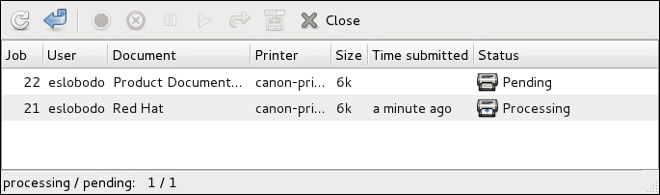
Figure 33.12. GNOME Print Status
lpq. The last few lines look similar to the following:
Example 33.1. Example of lpq output
Rank   Owner/ID              Class  Job Files       Size Time
active user@localhost+902    A      902 sample.txt  2050 01:20:46
lpq and then use the command lprm job number. For example, lprm 902 would cancel the print job in Example 33.1, “Example of lpq output”. You must have proper permissions to cancel a print job. You can not cancel print jobs that were started by other users unless you are logged in as root on the machine to which the printer is attached.
lpr sample.txt prints the text file sample.txt. The print filter determines what type of file it is and converts it into a format the printer can understand.
33.9. Additional Resources
33.9.1. Installed Documentation
map lpr— The manual page for thelprcommand that allows you to print files from the command line.man lprm— The manual page for the command line utility to remove print jobs from the print queue.man mpage— The manual page for the command line utility to print multiple pages on one sheet of paper.man cupsd— The manual page for the CUPS printer daemon.man cupsd.conf— The manual page for the CUPS printer daemon configuration file.man classes.conf— The manual page for the class configuration file for CUPS.
33.9.2. Useful Websites
- http://www.linuxprinting.org — GNU/Linux Printing contains a large amount of information about printing in Linux.
- http://www.cups.org/ — Documentation, FAQs, and newsgroups about CUPS.
Chapter 34. Automated Tasks
locate command is updated daily. A system administrator can use automated tasks to perform periodic backups, monitor the system, run custom scripts, and more.
cron, at, and batch.
34.1. Cron
vixie-cron RPM package must be installed and the crond service must be running. To determine if the package is installed, use the rpm -q vixie-cron command. To determine if the service is running, use the command /sbin/service crond status.
34.1.1. Configuring Cron Tasks
/etc/crontab, contains the following lines:
SHELL=/bin/bash
PATH=/sbin:/bin:/usr/sbin:/usr/bin
MAILTO=root
HOME=/

# run-parts
01 * * * * root run-parts /etc/cron.hourly
02 4 * * * root run-parts /etc/cron.daily
22 4 * * 0 root run-parts /etc/cron.weekly
42 4 1 * * root run-parts /etc/cron.monthly
SHELL variable tells the system which shell environment to use (in this example the bash shell), while the PATH variable defines the path used to execute commands. The output of the cron tasks are emailed to the username defined with the MAILTO variable. If the MAILTO variable is defined as an empty string (MAILTO=""), email is not sent. The HOME variable can be used to set the home directory to use when executing commands or scripts.
/etc/crontab file represents a task and has the following format:
minute hour day month dayofweek command
minute— any integer from 0 to 59hour— any integer from 0 to 23day— any integer from 1 to 31 (must be a valid day if a month is specified)month— any integer from 1 to 12 (or the short name of the month such as jan or feb)dayofweek— any integer from 0 to 7, where 0 or 7 represents Sunday (or the short name of the week such as sun or mon)command— the command to execute (the command can either be a command such asls /proc >> /tmp/procor the command to execute a custom script)
1-4 means the integers 1, 2, 3, and 4.
3, 4, 6, 8 indicates those four specific integers.
/<integer>. For example, 0-59/2 can be used to define every other minute in the minute field. Step values can also be used with an asterisk. For instance, the value */3 can be used in the month field to run the task every third month.
/etc/crontab file, the run-parts script executes the scripts in the /etc/cron.hourly/, /etc/cron.daily/, /etc/cron.weekly/, and /etc/cron.monthly/ directories on an hourly, daily, weekly, or monthly basis respectively. The files in these directories should be shell scripts.
/etc/cron.d/ directory. All files in this directory use the same syntax as /etc/crontab. Refer to Example 34.1, “Crontab Examples” for examples.
Example 34.1. Crontab Examples
# record the memory usage of the system every monday
# at 3:30AM in the file /tmp/meminfo
30 3 * * mon cat /proc/meminfo >> /tmp/meminfo
# run custom script the first day of every month at 4:10AM
10 4 1 * * /root/scripts/backup.sh
crontab utility. All user-defined crontabs are stored in the /var/spool/cron/ directory and are executed using the usernames of the users that created them. To create a crontab as a user, login as that user and type the command crontab -e to edit the user's crontab using the editor specified by the VISUAL or EDITOR environment variable. The file uses the same format as /etc/crontab. When the changes to the crontab are saved, the crontab is stored according to username and written to the file /var/spool/cron/username.
/etc/crontab file, the /etc/cron.d/ directory, and the /var/spool/cron/ directory every minute for any changes. If any changes are found, they are loaded into memory. Thus, the daemon does not need to be restarted if a crontab file is changed.
34.1.2. Controlling Access to Cron
/etc/cron.allow and /etc/cron.deny files are used to restrict access to cron. The format of both access control files is one username on each line. Whitespace is not permitted in either file. The cron daemon (crond) does not have to be restarted if the access control files are modified. The access control files are read each time a user tries to add or delete a cron task.
cron.allow exists, only users listed in it are allowed to use cron, and the cron.deny file is ignored.
cron.allow does not exist, users listed in cron.deny are not allowed to use cron.
34.1.3. Starting and Stopping the Service
/sbin/service crond start. To stop the service, use the command /sbin/service crond stop. It is recommended that you start the service at boot time. Refer to Chapter 19, Controlling Access to Services for details on starting the cron service automatically at boot time.
34.2. At and Batch
at command is used to schedule a one-time task at a specific time and the batch command is used to schedule a one-time task to be executed when the systems load average drops below 0.8.
at or batch, the at RPM package must be installed, and the atd service must be running. To determine if the package is installed, use the rpm -q at command. To determine if the service is running, use the command /sbin/service atd status.
34.2.1. Configuring At Jobs
at time, where time is the time to execute the command.
- HH:MM format — For example, 04:00 specifies 4:00 a.m. If the time is already past, it is executed at the specified time the next day.
- midnight — Specifies 12:00 a.m.
- noon — Specifies 12:00 p.m.
- teatime — Specifies 4:00 p.m.
- month-name day year format — For example, January 15 2002 specifies the 15th day of January in the year 2002. The year is optional.
- MMDDYY, MM/DD/YY, or MM.DD.YY formats — For example, 011502 for the 15th day of January in the year 2002.
- now + time — time is in minutes, hours, days, or weeks. For example, now + 5 days specifies that the command should be executed at the same time five days from now.
/usr/share/doc/at-<version>/timespec text file.
at command with the time argument, the at> prompt is displayed. Type the command to execute, press Enter, and type Ctrl+D. Multiple commands can be specified by typing each command followed by the Enter key. After typing all the commands, press Enter to go to a blank line and type Ctrl+D. Alternatively, a shell script can be entered at the prompt, pressing Enter after each line in the script, and typing Ctrl+D on a blank line to exit. If a script is entered, the shell used is the shell set in the user's SHELL environment, the user's login shell, or /bin/sh (whichever is found first).
atq to view pending jobs. Refer to Section 34.2.3, “Viewing Pending Jobs” for more information.
at command can be restricted. For more information, refer to Section 34.2.5, “Controlling Access to At and Batch” for details.
34.2.2. Configuring Batch Jobs
batch command.
batch command, the at> prompt is displayed. Type the command to execute, press Enter, and type Ctrl+D. Multiple commands can be specified by typing each command followed by the Enter key. After typing all the commands, press Enter to go to a blank line and type Ctrl+D. Alternatively, a shell script can be entered at the prompt, pressing Enter after each line in the script, and typing Ctrl+D on a blank line to exit. If a script is entered, the shell used is the shell set in the user's SHELL environment, the user's login shell, or /bin/sh (whichever is found first). As soon as the load average is below 0.8, the set of commands or script is executed.
atq to view pending jobs. Refer to Section 34.2.3, “Viewing Pending Jobs” for more information.
batch command can be restricted. For more information, refer to Section 34.2.5, “Controlling Access to At and Batch” for details.
34.2.3. Viewing Pending Jobs
at and batch jobs, use the atq command. The atq command displays a list of pending jobs, with each job on a line. Each line follows the job number, date, hour, job class, and username format. Users can only view their own jobs. If the root user executes the atq command, all jobs for all users are displayed.
34.2.4. Additional Command Line Options
at and batch include:
| Option | Description |
|---|---|
-f | Read the commands or shell script from a file instead of specifying them at the prompt. |
-m | Send email to the user when the job has been completed. |
-v | Display the time that the job is executed. |
34.2.5. Controlling Access to At and Batch
/etc/at.allow and /etc/at.deny files can be used to restrict access to the at and batch commands. The format of both access control files is one username on each line. Whitespace is not permitted in either file. The at daemon (atd) does not have to be restarted if the access control files are modified. The access control files are read each time a user tries to execute the at or batch commands.
at and batch commands, regardless of the access control files.
at.allow exists, only users listed in it are allowed to use at or batch, and the at.deny file is ignored.
at.allow does not exist, users listed in at.deny are not allowed to use at or batch.
34.2.6. Starting and Stopping the Service
at service, use the command /sbin/service atd start. To stop the service, use the command /sbin/service atd stop. It is recommended that you start the service at boot time. Refer to Chapter 19, Controlling Access to Services for details on starting the cron service automatically at boot time.
34.3. Additional Resources
34.3.1. Installed Documentation
cronman page — overview of cron.crontabman pages in sections 1 and 5 — The man page in section 1 contains an overview of thecrontabfile. The man page in section 5 contains the format for the file and some example entries./usr/share/doc/at-<version>/timespeccontains more detailed information about the times that can be specified for cron jobs.atman page — description ofatandbatchand their command line options.
Chapter 35. Log Files
syslogd. A list of log messages maintained by syslogd can be found in the /etc/syslog.conf configuration file.
35.1. Locating Log Files
/var/log/ directory. Some applications such as httpd and samba have a directory within /var/log/ for their log files.
logrotate package contains a cron task that automatically rotates log files according to the /etc/logrotate.conf configuration file and the configuration files in the /etc/logrotate.d/ directory. By default, it is configured to rotate every week and keep four weeks worth of previous log files.
35.2. Viewing Log Files
Vi or Emacs. Some log files are readable by all users on the system; however, root privileges are required to read most log files.
system-logviewer at a shell prompt.

Figure 35.1. Log Viewer

Figure 35.2. Log File Locations
35.3. Adding a Log File

Figure 35.3. Adding a Log File
35.4. Examining Log Files

Figure 35.4. Alerts

Figure 35.5. Warning
Chapter 36. Manually Upgrading the Kernel
up2date command. The Red Hat User Agent automatically queries the Red Hat Network servers and determines which packages need to be updated on your machine, including the kernel. This chapter is only useful for those individuals that require manual updating of kernel packages, without using the up2date command.
Warning
Note
up2date is highly recommended by Red Hat for installing upgraded kernels.
up2date, refer to Chapter 16, Red Hat Network.
36.1. Overview of Kernel Packages
kernel— Contains the kernel and the following key features:- Uniprocessor support for x86 and Athlon systems (can be run on a multi-processor system, but only one processor is utilized)
- Multi-processor support for all other architectures
- For x86 systems, only the first 4 GB of RAM is used; use the
kernel-hugemempackage for x86 systems with over 4 GB of RAM
kernel-devel— Contains the kernel headers and makefiles sufficient to build modules against thekernelpackage.kernel-hugemem— (only for i686 systems) In addition to the options enabled for thekernelpackage, the key configuration options are as follows:- Support for more than 4 GB of RAM (up to 64 GB for x86)
Note
kernel-hugememis required for memory configurations higher than 16 GB. - PAE (Physical Address Extension) or 3 level paging on x86 processors that support PAE
- Support for multiple processors
- 4GB/4GB split — 4GB of virtual address space for the kernel and almost 4GB for each user process on x86 systems
kernel-hugemem-devel— Contains the kernel headers and makefiles sufficient to build modules against thekernel-hugemempackage.kernel-smp— Contains the kernel for multi-processor systems. The following are the key features:- Multi-processor support
- Support for more than 4 GB of RAM (up to 16 GB for x86)
- PAE (Physical Address Extension) or 3 level paging on x86 processors that support PAE
kernel-smp-devel— Contains the kernel headers and makefiles sufficient to build modules against thekernel-smppackage.kernel-utils— Contains utilities that can be used to control the kernel or system hardware.kernel-doc— Contains documentation files from the kernel source. Various portions of the Linux kernel and the device drivers shipped with it are documented in these files. Installation of this package provides a reference to the options that can be passed to Linux kernel modules at load time.By default, these files are placed in the/usr/share/doc/kernel-doc-<version>/directory.
Note
kernel-source package has been removed and replaced with an RPM that can only be retrieved from Red Hat Network. This *.src.rpm must then be rebuilt locally using the rpmbuild command. Refer to the latest distribution Release Notes, including all updates, at https://www.redhat.com/docs/manuals/enterprise/ for more information on obtaining and installing the kernel source package.
36.2. Preparing to Upgrade
/sbin/mkbootdisk `uname -r` Note
mkbootdisk man page for more options. Creating bootable media via CD-Rs, CD-RWs, and USB flash drives are also supported given the system BIOS also supports it.
rpm -qa | grep kernel kernel-2.6.9-5.EL kernel-devel-2.6.9-5.EL kernel-utils-2.6.9-5.EL kernel-doc-2.6.9-5.EL kernel-smp-2.6.9-5.EL kernel-smp-devel-2.6.9-5.EL kernel-hugemem-devel-2.6.9-5.EL kernel package. Refer to Section 36.1, “Overview of Kernel Packages” for descriptions of the different packages.
smp, utils, or so forth. The <arch> is one of the following:
x86_64for the AMD64 architectureia64for the Intel®Itanium™ architectureppc64for the IBM®eServer™pSeries™ architectureppc64for the IBM®eServer™iSeries™ architectures390for the IBM®S/390® architectures390xfor the IBM®eServer™zSeries® architecture- x86 variant: The x86 kernels are optimized for different x86 versions. The options are as follows:
i686for Intel®Pentium® II, Intel®Pentium® III, Intel®Pentium® 4, AMD Athlon®, and AMD Duron® systems
36.3. Downloading the Upgraded Kernel
- Security Errata — Go to the following location for information on security errata, including kernel upgrades that fix security issues:
http://www.redhat.com/apps/support/errata/
- Via Quarterly Updates — Refer to the following location for details:
http://www.redhat.com/apps/support/errata/rhlas_errata_policy.html
- Via Red Hat Network — Download and install the kernel RPM packages. Red Hat Network can download the latest kernel, upgrade the kernel on the system, create an initial RAM disk image if needed, and configure the boot loader to boot the new kernel. For more information, refer to http://www.redhat.com/docs/manuals/RHNetwork/.
36.4. Performing the Upgrade
Important
-i argument with the rpm command to keep the old kernel. Do not use the -U option, since it overwrites the currently installed kernel, which creates boot loader problems. Issue the following command (the kernel version may vary):
rpm -ivh kernel-2.6.9-5.EL.<arch>.rpm kernel-smp packages as well (the kernel version may vary):
rpm -ivh kernel-smp-2.6.9-5.EL.<arch>.rpm i686-based and contains more than 4 GB of RAM, install the kernel-hugemem package built for the i686 architecture as well (the kernel version might vary):
rpm -ivh kernel-hugemem-2.6.9-5.EL.i686.rpm 36.5. Verifying the Initial RAM Disk Image
/etc/fstab, an initial RAM disk is needed. The initial RAM disk allows a modular kernel to have access to modules that it might need to boot from before the kernel has access to the device where the modules normally reside.
mkinitrd command. However, this step is performed automatically if the kernel and its associated packages are installed or upgraded from the RPM packages distributed by Red Hat, Inc; thus, it does not need to be executed manually. To verify that it was created, use the command ls -l /boot to make sure the initrd-<version>.img file was created (the version should match the version of the kernel just installed).
vmlinux file are combined into one file, which is created with the addRamDisk command. This step is performed automatically if the kernel and its associated packages are installed or upgraded from the RPM packages distributed by Red Hat, Inc; thus, it does not need to be executed manually. To verify that it was created, use the command ls -l /boot to make sure the /boot/vmlinitrd-<kernel-version> file was created (the version should match the version of the kernel just installed).
36.6. Verifying the Boot Loader
kernel RPM package configures the boot loader to boot the newly installed kernel (except for IBM eServer iSeries systems). However, it does not configure the boot loader to boot the new kernel by default.
36.6.1. x86 Systems
36.6.1.1. GRUB
/boot/grub/grub.conf contains a title section with the same version as the kernel package just installed (if the kernel-smp or kernel-hugemem package was installed, a section exists for it as well):
# Note that you do not have to rerun grub after making changes to this file
# NOTICE:  You have a /boot partition.  This means that
#          all kernel and initrd paths are relative to /boot/, eg.
#          root (hd0,0)
#          kernel /vmlinuz-version ro root=/dev/hda2
#          initrd /initrd-version.img
#boot=/dev/hda
default=1
timeout=10
splashimage=(hd0,0)/grub/splash.xpm.gz
title Red Hat Enterprise Linux (2.6.9-5.EL)
        root (hd0,0)
        kernel /vmlinuz-2.6.9-5.EL ro root=LABEL=/
        initrd /initrd-2.6.9-5.EL.img
title Red Hat Enterprise Linux (2.6.9-1.906_EL)
        root (hd0,0)
        kernel /vmlinuz-2.6.9-1.906_EL ro root=LABEL=/
        initrd /initrd-2.6.9-1.906_EL.img
/boot/ partition was created, the paths to the kernel and initrd image are relative to /boot/.
default variable to the title section number for the title section that contains the new kernel. The count starts with 0. For example, if the new kernel is the first title section, set default to 0.
36.6.2. Itanium Systems
/boot/efi/EFI/redhat/elilo.conf as the configuration file. Confirm that this file contains an image section with the same version as the kernel package just installed:
prompt
timeout=50
default=old

image=vmlinuz-2.6.9-5.EL
        label=linux
        initrd=initrd-2.6.9-5.EL.img
        read-only
        append="root=LABEL=/"
image=vmlinuz-2.6.9-1.906_EL
        label=old
        initrd=initrd-2.6.9-1.906.img
        read-only
        append="root=LABEL=/"
default variable to the value of the label for the image section that contains the new kernel.
36.6.3. IBM S/390 and IBM eServer zSeries Systems
/etc/zipl.conf as the configuration file. Confirm that the file contains a section with the same version as the kernel package just installed:
[defaultboot]
default=old
target=/boot/
[linux]
        image=/boot/vmlinuz-2.6.9-5.EL
        ramdisk=/boot/initrd-2.6.9-5.EL.img
        parameters="root=LABEL=/"
[old]
        image=/boot/vmlinuz-2.6.9-1.906_EL
        ramdisk=/boot/initrd-2.6.9-1.906_EL.img
        parameters="root=LABEL=/"
default variable to the name of the section that contains the new kernel. The first line of each section contains the name in brackets.
/sbin/zipl36.6.4. IBM eServer iSeries Systems
/boot/vmlinitrd-<kernel-version> file is installed when you upgrade the kernel. However, you must use the dd command to configure the system to boot the new kernel:
- As root, issue the command
cat /proc/iSeries/mf/sideto determine the default side (either A, B, or C). - As root, issue the following command, where <kernel-version> is the version of the new kernel and <side> is the side from the previous command:
dd if=/boot/vmlinitrd-<kernel-version> of=/proc/iSeries/mf/<side>/vmlinux bs=8k
36.6.5. IBM eServer pSeries Systems
/etc/aboot.conf as the configuration file. Confirm that the file contains an image section with the same version as the kernel package just installed:
boot=/dev/sda1
init-message=Welcome to Red Hat Enterprise Linux!
Hit <TAB> for boot options

partition=2
timeout=30
install=/usr/lib/yaboot/yaboot
delay=10
nonvram

image=/vmlinux--2.6.9-5.EL
        label=old
        read-only
        initrd=/initrd--2.6.9-5.EL.img
        append="root=LABEL=/"

image=/vmlinux-2.6.9-5.EL
        label=linux
        read-only
        initrd=/initrd-2.6.9-5.EL.img
        append="root=LABEL=/"
default and set it to the label of the image stanza that contains the new kernel.
Chapter 37. Kernel Modules
/etc/modprobe.conf.
Note
xorg-X11 packages, not the kernel; thus, this chapter does not apply to them.
alias eth0 tulip
/etc/modprobe.conf:
alias eth1 tulip
37.1. Kernel Module Utilities
module-init-tools package is installed. Use these commands to determine if a module has been loaded successfully or when trying different modules for a piece of new hardware.
/sbin/lsmod displays a list of currently loaded modules. For example:
Module                  Size  Used by
nfs                   218437  1
lockd                  63977  2 nfs
parport_pc             24705  1
lp                     12077  0
parport                37129  2 parport_pc,lp
autofs4                23237  2
i2c_dev                11329  0
i2c_core               22081  1 i2c_dev
sunrpc                157093  5 nfs,lockd
button                  6481  0
battery                 8901  0
ac                      4805  0
md5                     4033  1
ipv6                  232833  16
ohci_hcd               21713  0
e100                   39493  0
mii                     4673  1 e100
floppy                 58481  0
sg                     33377  0
dm_snapshot            17029  0
dm_zero                 2369  0
dm_mirror              22957  2
ext3                  116809  2
jbd                    71257  1 ext3
dm_mod                 54741  6 dm_snapshot,dm_zero,dm_mirror
ips                    46173  2
aic7xxx               148121  0
sd_mod                 17217  3
scsi_mod              121421  4 sg,ips,aic7xxx,sd_mod
/sbin/lsmod output is less verbose and easier to read than the output from viewing /proc/modules.
/sbin/modprobe command followed by the kernel module name. By default, modprobe attempts to load the module from the /lib/modules/<kernel-version>/kernel/drivers/ subdirectories. There is a subdirectory for each type of module, such as the net/ subdirectory for network interface drivers. Some kernel modules have module dependencies, meaning that other modules must be loaded first for it to load. The /sbin/modprobe command checks for these dependencies and loads the module dependencies before loading the specified module.
/sbin/modprobe e100 e100 module.
/sbin/modprobe executes them, use the -v option. For example:
/sbin/modprobe -v e100 /sbin/insmod /lib/modules/2.6.9-5.EL/kernel/drivers/net/e100.ko Using /lib/modules/2.6.9-5.EL/kernel/drivers/net/e100.ko Symbol version prefix 'smp_' /sbin/insmod command also exists to load kernel modules; however, it does not resolve dependencies. Thus, it is recommended that the /sbin/modprobe command be used.
/sbin/rmmod command followed by the module name. The rmmod utility only unloads modules that are not in use and that are not a dependency of other modules in use.
/sbin/rmmod e100 e100 kernel module.
modinfo. Use the command /sbin/modinfo to display information about a kernel module. The general syntax is:
/sbin/modinfo [options]<module>-d, which displays a brief description of the module, and -p, which lists the parameters the module supports. For a complete list of options, refer to the modinfo man page (man modinfo).
37.2. Persistent Module Loading
/etc/modprobe.conf file. However, it is sometimes necessary to explicitly force the loading of a module at boot time.
/etc/rc.modules file at boot time, which contains various commands to load modules. The rc.modules should be used, and notrc.local because rc.modules is executed earlier in the boot process.
foo module at boot time (as root):
# echo modprobe foo >> /etc/rc.modules
# chmod +x /etc/rc.modules
Note
37.3. Additional Resources
37.3.1. Installed Documentation
lsmodman page — description and explanation of its output.insmodman page — description and list of command line options.modprobeman page — description and list of command line options.rmmodman page — description and list of command line options.modinfoman page — description and list of command line options./usr/share/doc/kernel-doc-<version>/Documentation/kbuild/modules.txt— how to compile and use kernel modules.
37.3.2. Useful Websites
- http://www.redhat.com/mirrors/LDP/HOWTO/Module-HOWTO/index.html — Linux Loadable Kernel Module HOWTO from the Linux Documentation Project.
Chapter 38. Mail Transport Agent (MTA) Configuration
/bin/mail command to send email containing log messages to the root user of the local system.
sendmail is the default MTA. The Mail Transport Agent Switcher allows for the selection of either sendmail, postfix, or exim as the default MTA for the system.
system-switch-mail RPM package must be installed to use the text-based version of the Mail Transport Agent Switcher program. If you want to use the graphical version, the system-switch-mail-gnome package must also be installed.
system-switch-mail at a shell prompt (for example, in an XTerm or GNOME terminal).
system-switch-mail-nox.

Figure 38.1. Mail Transport Agent Switcher
Part VI. System Monitoring
Chapter 39. Gathering System Information
39.1. System Processes
ps ax command displays a list of current system processes, including processes owned by other users. To display the owner alongside each process, use the ps aux command. This list is a static list; in other words, it is a snapshot of what was running when you invoked the command. If you want a constantly updated list of running processes, use top as described below.
ps output can be long. To prevent it from scrolling off the screen, you can pipe it through less:
ps aux | lessps command in combination with the grep command to see if a process is running. For example, to determine if Emacs is running, use the following command:
ps ax | grep emacstop command displays currently running processes and important information about them including their memory and CPU usage. The list is both real-time and interactive. An example of output from the top command is provided as follows:
top - 15:02:46 up 35 min,  4 users,  load average: 0.17, 0.65, 1.00
Tasks: 110 total,   1 running, 107 sleeping,   0 stopped,   2 zombie
Cpu(s): 41.1% us,  2.0% sy,  0.0% ni, 56.6% id,  0.0% wa,  0.3% hi,  0.0% si
Mem:    775024k total,   772028k used,     2996k free,    68468k buffers
Swap:  1048568k total,      176k used,  1048392k free,   441172k cached

  PID USER      PR  NI  VIRT  RES  SHR S %CPU %MEM    TIME+  COMMAND
 4624 root      15   0 40192  18m 7228 S 28.4  2.4   1:23.21 X
 4926 mhideo    15   0 55564  33m 9784 S 13.5  4.4   0:25.96 gnome-terminal
 6475 mhideo    16   0  3612  968  760 R  0.7  0.1   0:00.11 top
 4920 mhideo    15   0 20872  10m 7808 S  0.3  1.4   0:01.61 wnck-applet
    1 root      16   0  1732  548  472 S  0.0  0.1   0:00.23 init
    2 root      34  19     0    0    0 S  0.0  0.0   0:00.00 ksoftirqd/0
    3 root       5 -10     0    0    0 S  0.0  0.0   0:00.03 events/0
    4 root       6 -10     0    0    0 S  0.0  0.0   0:00.02 khelper
    5 root       5 -10     0    0    0 S  0.0  0.0   0:00.00 kacpid
   29 root       5 -10     0    0    0 S  0.0  0.0   0:00.00 kblockd/0
   47 root      16   0     0    0    0 S  0.0  0.0   0:01.74 pdflush
   50 root      11 -10     0    0    0 S  0.0  0.0   0:00.00 aio/0
   30 root      15   0     0    0    0 S  0.0  0.0   0:00.05 khubd
   49 root      16   0     0    0    0 S  0.0  0.0   0:01.44 kswapd0
top, press the q key.
top commands” contains useful interactive commands that you can use with top. For more information, refer to the top(1) manual page.
| Command | Description |
|---|---|
| Space | Immediately refresh the display |
| h | Display a help screen |
| k | Kill a process. You are prompted for the process ID and the signal to send to it. |
| n | Change the number of processes displayed. You are prompted to enter the number. |
| u | Sort by user. |
| M | Sort by memory usage. |
| P | Sort by CPU usage. |
top, you can use the GNOME System Monitor. To start it from the desktop, select => => or type gnome-system-monitor at a shell prompt (such as an XTerm). Select the Process Listing tab.
- Stop a process.
- Continue or start a process.
- End a processes.
- Kill a process.
- Change the priority of a selected process.
- Edit the System Monitor preferences. These include changing the interval seconds to refresh the list and selecting process fields to display in the System Monitor window.
- View only active processes.
- View all processes.
- View my processes.
- View process dependencies.
- Hide a process.
- View hidden processes.
- View memory maps.
- View the files opened by the selected process.

Figure 39.1. GNOME System Monitor
39.2. Memory Usage
free command displays the total amount of physical memory and swap space for the system as well as the amount of memory that is used, free, shared, in kernel buffers, and cached.
             total       used       free     shared    buffers     cached
 Mem:        645712     549720      95992          0     176248     224452
 -/+ buffers/cache:     149020     496692
 Swap:      1310712          0    1310712
free -m shows the same information in megabytes, which are easier to read.
             total       used       free     shared    buffers     cached
Mem:           630        536         93          0        172        219
-/+ buffers/cache:        145        485
Swap:         1279          0       1279
free, you can use the GNOME System Monitor. To start it from the desktop, go to => => or type gnome-system-monitor at a shell prompt (such as an XTerm). Click on the Resources tab.
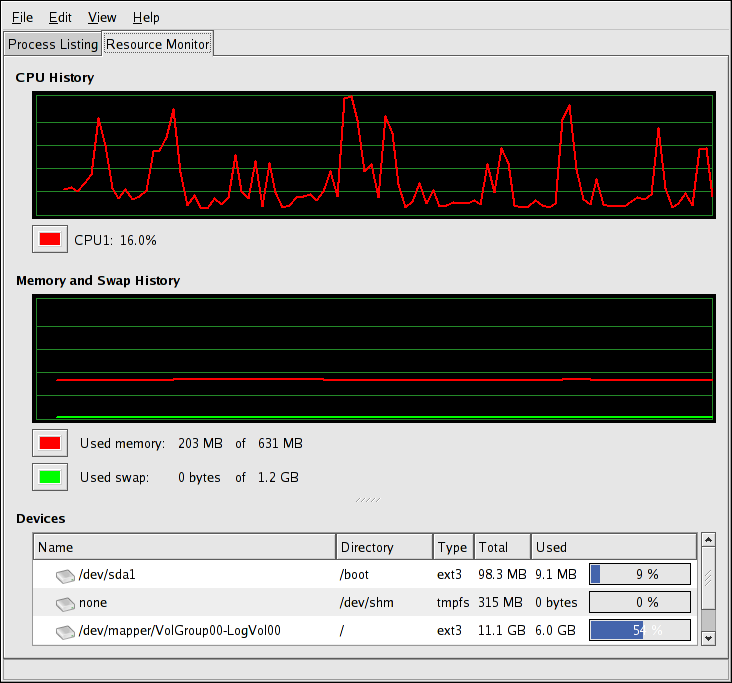
Figure 39.2. GNOME System Monitor - Resources tab
39.3. File Systems
df command reports the system's disk space usage. If you type the command df at a shell prompt, the output looks similar to the following:
Filesystem           1K-blocks      Used Available Use% Mounted on
/dev/mapper/VolGroup00-LogVol00
                       11675568   6272120   4810348  57% / /dev/sda1
	                 100691      9281     86211  10% /boot
none                     322856         0    322856   0% /dev/shm
df -h. The -h argument stands for human-readable format. The output looks similar to the following:
Filesystem            Size  Used Avail Use% Mounted on
/dev/mapper/VolGroup00-LogVol00
                        12G  6.0G  4.6G  57% / /dev/sda1
			99M  9.1M   85M  10% /boot
none 			316M     0  316M   0% /dev/shm
/dev/shm. This entry represents the system's virtual memory file system.
du command displays the estimated amount of space being used by files in a directory. If you type du at a shell prompt, the disk usage for each of the subdirectories is displayed in a list. The grand total for the current directory and subdirectories are also shown as the last line in the list. If you do not want to see the totals for all the subdirectories, use the command du -hs to see only the grand total for the directory in human-readable format. Use the du --help command to see more options.
gnome-system-monitor at a shell prompt (such as an XTerm). Select the File Systems tab to view the system's partitions. The figure below illustrates the File Systems tab.
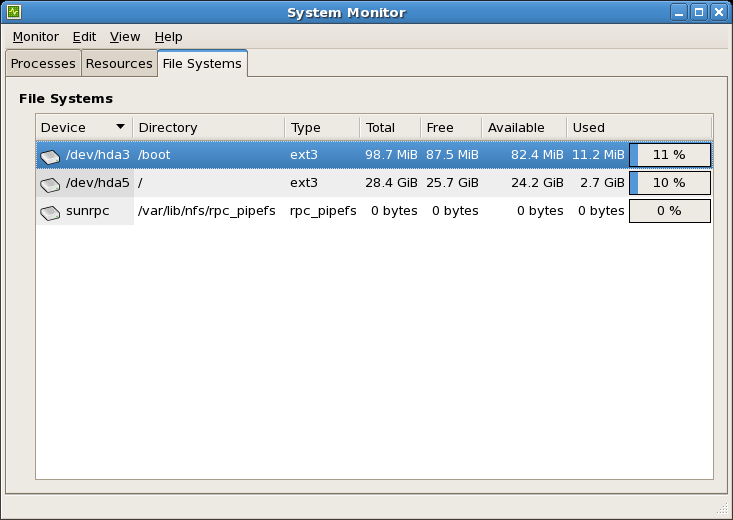
Figure 39.3. GNOME System Monitor - File Systems
39.4. Hardware
hwbrowser at a shell prompt. As shown in Figure 39.4, “Hardware Browser”, it displays your CD-ROM devices, diskette drives, hard drives and their partitions, network devices, pointing devices, system devices, and video cards. Click on the category name in the left menu, and the information is displayed.
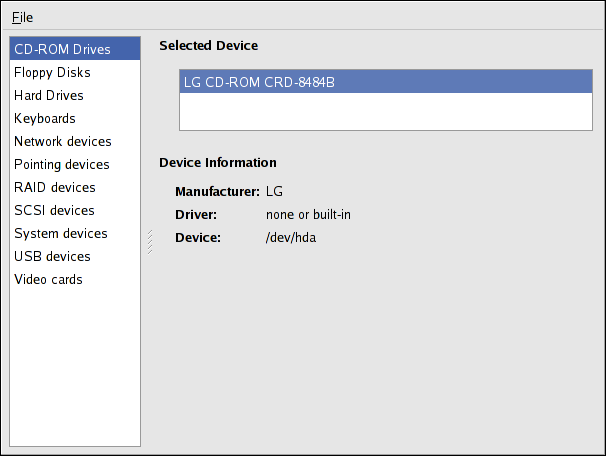
Figure 39.4. Hardware Browser
hal-device-manager. Depending on your installation preferences, the graphical menu above may start this application or the Hardware Browser when clicked. The figure below illustrates the Device Manager window.
Figure 39.5. Device Manager
lspci command to list all PCI devices. Use the command lspci -v for more verbose information or lspci -vv for very verbose output.
lspci can be used to determine the manufacturer, model, and memory size of a system's video card:
00:00.0 Host bridge: ServerWorks CNB20LE Host Bridge (rev 06)
00:00.1 Host bridge: ServerWorks CNB20LE Host Bridge (rev 06)
00:01.0 VGA compatible controller: S3 Inc. Savage 4 (rev 04)
00:02.0 Ethernet controller: Intel Corp. 82557/8/9 [Ethernet Pro 100] (rev 08)
00:0f.0 ISA bridge: ServerWorks OSB4 South Bridge (rev 50)
00:0f.1 IDE interface: ServerWorks OSB4 IDE Controller
00:0f.2 USB Controller: ServerWorks OSB4/CSB5 OHCI USB Controller (rev 04)
01:03.0 SCSI storage controller: Adaptec AIC-7892P U160/m (rev 02)
01:05.0 RAID bus controller: IBM ServeRAID Controller
lspci is also useful to determine the network card in your system if you do not know the manufacturer or model number.
39.5. Additional Resources
39.5.1. Installed Documentation
ps --help— Displays a list of options that can be used withps.topmanual page — Typeman topto learn more abouttopand its many options.freemanual page — typeman freeto learn more aboutfreeand its many options.dfmanual page — Typeman dfto learn more about thedfcommand and its many options.dumanual page — Typeman duto learn more about theducommand and its many options.lspcimanual page — Typeman lspcito learn more about thelspcicommand and its many options.
Chapter 40. OProfile
oprofile RPM package must be installed to use this tool.
- Use of shared libraries — Samples for code in shared libraries are not attributed to the particular application unless the
--separate=libraryoption is used. - Performance monitoring samples are inexact — When a performance monitoring register triggers a sample, the interrupt handling is not precise like a divide by zero exception. Due to the out-of-order execution of instructions by the processor, the sample may be recorded on a nearby instruction.
opreportdoes not associate samples for inline functions' properly —opreportuses a simple address range mechanism to determine which function an address is in. Inline function samples are not attributed to the inline function but rather to the function the inline function was inserted into.- OProfile accumulates data from multiple runs — OProfile is a system-wide profiler and expects processes to start up and shut down multiple times. Thus, samples from multiple runs accumulate. Use the command
opcontrol --resetto clear out the samples from previous runs. - Non-CPU-limited performance problems — OProfile is oriented to finding problems with CPU-limited processes. OProfile does not identify processes that are asleep because they are waiting on locks or for some other event to occur (for example an I/O device to finish an operation).
40.1. Overview of Tools
oprofile package.
| Command | Description |
|---|---|
op_help |
Displays available events for the system's processor along with a brief description of each.
|
op_import |
Converts sample database files from a foreign binary format to the native format for the system. Only use this option when analyzing a sample database from a different architecture.
|
opannotate | Creates annotated source for an executable if the application was compiled with debugging symbols. Refer to Section 40.5.3, “Using opannotate” for details. |
opcontrol |
Configures what data is collected. Refer to Section 40.2, “Configuring OProfile” for details.
|
opreport |
Retrieves profile data. Refer to Section 40.5.1, “Using
opreport” for details.
|
oprofiled |
Runs as a daemon to periodically write sample data to disk.
|
40.2. Configuring OProfile
opcontrol utility to configure OProfile. As the opcontrol commands are executed, the setup options are saved to the /root/.oprofile/daemonrc file.
40.2.1. Specifying the Kernel
opcontrol --setup --vmlinux=/usr/lib/debug/lib/modules/`uname -r`/vmlinuxNote
debuginfo package must be installed (which contains the uncompressed kernel) in order to monitor the kernel.
opcontrol --setup --no-vmlinuxoprofile kernel module, if it is not already loaded, and creates the /dev/oprofile/ directory, if it does not already exist. Refer to Section 40.6, “Understanding /dev/oprofile/” for details about this directory.
Note
oprofile module can be loaded from it.
40.2.2. Setting Events to Monitor
| Processor | cpu_type | Number of Counters |
|---|---|---|
| Pentium Pro | i386/ppro | 2 |
| Pentium II | i386/pii | 2 |
| Pentium III | i386/piii | 2 |
| Pentium 4 (non-hyper-threaded) | i386/p4 | 8 |
| Pentium 4 (hyper-threaded) | i386/p4-ht | 4 |
| Athlon | i386/athlon | 4 |
| AMD64 | x86-64/hammer | 4 |
| Itanium | ia64/itanium | 4 |
| Itanium 2 | ia64/itanium2 | 4 |
| TIMER_INT | timer | 1 |
| IBM eServer iSeries and pSeries | timer | 1 |
| ppc64/power4 | 8 | |
| ppc64/power5 | 6 | |
| ppc64/970 | 8 | |
| IBM eServer S/390 and S/390x | timer | 1 |
| IBM eServer zSeries | timer | 1 |
timer is used as the processor type if the processor does not have supported performance monitoring hardware.
timer is used, events cannot be set for any processor because the hardware does not have support for hardware performance counters. Instead, the timer interrupt is used for profiling.
timer is not used as the processor type, the events monitored can be changed, and counter 0 for the processor is set to a time-based event by default. If more than one counter exists on the processor, the counters other than counter 0 are not set to an event by default. The default events monitored are shown in Table 40.3, “Default Events”.
| Processor | Default Event for Counter | Description |
|---|---|---|
| Pentium Pro, Pentium II, Pentium III, Athlon, AMD64 | CPU_CLK_UNHALTED | The processor's clock is not halted |
| Pentium 4 (HT and non-HT) | GLOBAL_POWER_EVENTS | The time during which the processor is not stopped |
| Itanium 2 | CPU_CYCLES | CPU Cycles |
| TIMER_INT | (none) | Sample for each timer interrupt |
| ppc64/power4 | CYCLES | Processor Cycles |
| ppc64/power5 | CYCLES | Processor Cycles |
| ppc64/970 | CYCLES | Processor Cycles |
cat /dev/oprofile/cpu_typeop_helpopcontrol:
opcontrol --event=<event-name>:<sample-rate>op_help, and replace <sample-rate> with the number of events between samples.
40.2.2.1. Sampling Rate
cpu_type is not timer, each event can have a sampling rate set for it. The sampling rate is the number of events between each sample snapshot.
opcontrol --event=<event-name>:<sample-rate>Warning
40.2.2.2. Unit Masks
cpu_type is not timer, unit masks may also be required to further define the event.
op_help command. The values for each unit mask are listed in hexadecimal format. To specify more than one unit mask, the hexadecimal values must be combined using a bitwise or operation.
opcontrol --event=<event-name>:<sample-rate>:<unit-mask>40.2.3. Separating Kernel and User-space Profiles
opcontrol --event=<event-name>:<sample-rate>:<unit-mask>:0opcontrol --event=<event-name>:<sample-rate>:<unit-mask>:1opcontrol --event=<event-name>:<sample-rate>:<unit-mask>:<kernel>:0opcontrol --event=<event-name>:<sample-rate>:<unit-mask>:<kernel>:1 opcontrol --separate=<choice>none— do not separate the profiles (default)library— generate per-application profiles for librarieskernel— generate per-application profiles for the kernel and kernel modulesall— generate per-application profiles for libraries and per-application profiles for the kernel and kernel modules
--separate=library is used, the sample file name includes the name of the executable as well as the name of the library.
40.3. Starting and Stopping OProfile
opcontrol --startUsing log file /var/lib/oprofile/oprofiled.log Daemon started. Profiler running.
/root/.oprofile/daemonrc are used.
oprofiled, is started; it periodically writes the sample data to the /var/lib/oprofile/samples/ directory. The log file for the daemon is located at /var/lib/oprofile/oprofiled.log.
opcontrol --shutdown40.4. Saving Data
opcontrol --save=<name>/var/lib/oprofile/samples/name/ is created and the current sample files are copied to it.
40.5. Analyzing the Data
oprofiled, collects the samples and writes them to the /var/lib/oprofile/samples/ directory. Before reading the data, make sure all data has been written to this directory by executing the following command as root:
opcontrol --dump/bin/bash becomes:
\{root\}/bin/bash/\{dep\}/\{root\}/bin/bash/CPU_CLK_UNHALTED.100000
opreportopannotate
Warning
40.5.1. Using opreport
opreport tool provides an overview of all the executables being profiled.
Profiling through timer interrupt
          TIMER:0|
  samples|      %|
------------------
    25926 97.5212 no-vmlinux
      359  1.3504 pi
       65  0.2445 Xorg
       62  0.2332 libvte.so.4.4.0
       56  0.2106 libc-2.3.4.so
       34  0.1279 libglib-2.0.so.0.400.7
       19  0.0715 libXft.so.2.1.2
       17  0.0639 bash
        8  0.0301 ld-2.3.4.so
        8  0.0301 libgdk-x11-2.0.so.0.400.13
        6  0.0226 libgobject-2.0.so.0.400.7
        5  0.0188 oprofiled
        4  0.0150 libpthread-2.3.4.so
        4  0.0150 libgtk-x11-2.0.so.0.400.13
        3  0.0113 libXrender.so.1.2.2
        3  0.0113 du
        1  0.0038 libcrypto.so.0.9.7a
        1  0.0038 libpam.so.0.77
        1  0.0038 libtermcap.so.2.0.8
        1  0.0038 libX11.so.6.2
        1  0.0038 libgthread-2.0.so.0.400.7
        1  0.0038 libwnck-1.so.4.9.0
opreport man page for a list of available command line options, such as the -r option used to sort the output from the executable with the smallest number of samples to the one with the largest number of samples.
40.5.2. Using opreport on a Single Executable
opreport:
opreport <mode><executable>-l- List sample data by symbols. For example, the following is part of the output from running the command
opreport -l /lib/tls/libc-<version>.so:samples % symbol name 12 21.4286 __gconv_transform_utf8_internal 5 8.9286 _int_malloc 4 7.1429 malloc 3 5.3571 __i686.get_pc_thunk.bx 3 5.3571 _dl_mcount_wrapper_check 3 5.3571 mbrtowc 3 5.3571 memcpy 2 3.5714 _int_realloc 2 3.5714 _nl_intern_locale_data 2 3.5714 free 2 3.5714 strcmp 1 1.7857 __ctype_get_mb_cur_max 1 1.7857 __unregister_atfork 1 1.7857 __write_nocancel 1 1.7857 _dl_addr 1 1.7857 _int_free 1 1.7857 _itoa_word 1 1.7857 calc_eclosure_iter 1 1.7857 fopen@@GLIBC_2.1 1 1.7857 getpid 1 1.7857 memmove 1 1.7857 msort_with_tmp 1 1.7857 strcpy 1 1.7857 strlen 1 1.7857 vfprintf 1 1.7857 write
The first column is the number of samples for the symbol, the second column is the percentage of samples for this symbol relative to the overall samples for the executable, and the third column is the symbol name.To sort the output from the largest number of samples to the smallest (reverse order), use-rin conjunction with the-loption. -i <symbol-name>- List sample data specific to a symbol name. For example, the following output is from the command
opreport -l -i __gconv_transform_utf8_internal /lib/tls/libc-<version>.so:samples % symbol name 12 100.000 __gconv_transform_utf8_internal
The first line is a summary for the symbol/executable combination.The first column is the number of samples for the memory symbol. The second column is the percentage of samples for the memory address relative to the total number of samples for the symbol. The third column is the symbol name. -d- List sample data by symbols with more detail than
-l. For example, the following output is from the commandopreport -l -d __gconv_transform_utf8_internal /lib/tls/libc-<version>.so:vma samples % symbol name 00a98640 12 100.000 __gconv_transform_utf8_internal 00a98640 1 8.3333 00a9868c 2 16.6667 00a9869a 1 8.3333 00a986c1 1 8.3333 00a98720 1 8.3333 00a98749 1 8.3333 00a98753 1 8.3333 00a98789 1 8.3333 00a98864 1 8.3333 00a98869 1 8.3333 00a98b08 1 8.3333
The data is the same as the-loption except that for each symbol, each virtual memory address used is shown. For each virtual memory address, the number of samples and percentage of samples relative to the number of samples for the symbol is displayed. -x<symbol-name>- Exclude the comma-separated list of symbols from the output.
session:<name>- Specify the full path to the session or a directory relative to the
/var/lib/oprofile/samples/directory.
40.5.3. Using opannotate
opannotate tool tries to match the samples for particular instructions to the corresponding lines in the source code. The resulting files generated should have the samples for the lines at the left. It also puts in a comment at the beginning of each function listing the total samples for the function.
-g option. By default, Red Hat Enterprise Linux packages are not compiled with this option.
opannotate is as follows:
opannotate --search-dirs <src-dir> --source <executable>opannotate man page for a list of additional command line options.
40.6. Understanding /dev/oprofile/
/dev/oprofile/ directory contains the file system for OProfile. Use the cat command to display the values of the virtual files in this file system. For example, the following command displays the type of processor OProfile detected:
cat /dev/oprofile/cpu_type/dev/oprofile/ for each counter. For example, if there are 2 counters, the directories /dev/oprofile/0/ and dev/oprofile/1/ exist.
count— The interval between samples.enabled— If 0, the counter is off and no samples are collected for it; if 1, the counter is on and samples are being collected for it.event— The event to monitor.kernel— If 0, samples are not collected for this counter event when the processor is in kernel-space; if 1, samples are collected even if the processor is in kernel-space.unit_mask— Defines which unit masks are enabled for the counter.user— If 0, samples are not collected for the counter event when the processor is in user-space; if 1, samples are collected even if the processor is in user-space.
cat command. For example:
cat /dev/oprofile/0/count40.7. Example Usage
- Determine which applications and services are used the most on a system —
opreportcan be used to determine how much processor time an application or service uses. If the system is used for multiple services but is under performing, the services consuming the most processor time can be moved to dedicated systems. - Determine processor usage — The
CPU_CLK_UNHALTEDevent can be monitored to determine the processor load over a given period of time. This data can then be used to determine if additional processors or a faster processor might improve system performance.
40.8. Graphical Interface
oprof_start command as root at a shell prompt.
/root/.oprofile/daemonrc, and the application exits. Exiting the application does not stop OProfile from sampling.

Figure 40.1. OProfile Setup
vmlinux file for the kernel to monitor in the Kernel image file text field. To configure OProfile not to monitor the kernel, select No kernel image.

Figure 40.2. OProfile Configuration
oprofiled daemon log includes more information.
opcontrol --separate=kernel command. If Per-application shared libs samples files is selected, OProfile generates per-application profiles for libraries. This is equivalent to the opcontrol --separate=library command.
opcontrol --dump command.
40.9. Additional Resources
40.9.1. Installed Docs
/usr/share/doc/oprofile-<version>/oprofile.html— OProfile Manualoprofileman page — Discussesopcontrol,opreport,opannotate, andop_help
40.9.2. Useful Websites
Part VII. Appendix
Appendix A. Revision History
| Revision History | |||
|---|---|---|---|
| Revision 1.0-1.33.402 | Fri Oct 25 2013 | ||
| |||
| Revision 1.0-1.33 | July 24 2012 | ||
| |||
| Revision 1.0-1 | Thu Sep 18 2008 | ||
| |||
Index
Symbols
- /dev/oprofile/, Understanding /dev/oprofile/
- /dev/shm, File Systems
- /etc/auto.master, Mounting NFS File Systems using autofs
- /etc/exports, Exporting NFS File Systems
- /etc/fstab, Converting to an ext3 File System, Mounting NFS File Systems using /etc/fstab
- /etc/fstab file
- enabling disk quotas with, Enabling Quotas
- /etc/hosts, Managing Hosts
- /etc/httpd/conf/httpd.conf, Apache HTTP Server Configuration
- /etc/sysconfig/dhcpd, Starting and Stopping the Server
- /proc/ directory, Installed Documentation
- /var/spool/cron, Configuring Cron Tasks
A
- Access Control Lists (see ACLs)
- ACLs
- access ACLs, Setting Access ACLs
- additional resources, Additional Resources
- archiving with, Archiving File Systems With ACLs
- default ACLs, Setting Default ACLs
- getfacl, Retrieving ACLs
- mounting file systems with, Mounting File Systems
- mounting NFS shares with, NFS
- on ext3 file systems, Access Control Lists
- retrieving, Retrieving ACLs
- setfacl, Setting Access ACLs
- setting
- access ACLs, Setting Access ACLs
- with Samba, Access Control Lists
- adding
- group, Adding a Group
- user, Command Line Configuration
- Apache HTTP Server (see HTTP Configuration Tool)
- additional resources, Additional Resources
- related books, Related Books
- securing, An Overview of Certificates and Security
- APXS, An Overview of Security-Related Packages
- at, At and Batch
- additional resources, Additional Resources
- authconfig (see Authentication Configuration Tool)
- authentication, Authentication Configuration
- Authentication Configuration Tool, Authentication Configuration
- authentication, Authentication
- Kerberos support, Authentication
- LDAP support, Authentication
- MD5 passwords, Authentication
- shadow passwords, Authentication
- SMB support, Authentication
- Winbind, Authentication
- command line version, Command Line Version
- user information, User Information
- cache, User Information
- Hesiod, User Information
- LDAP, User Information
- NIS, User Information
- Winbind, User Information
- autofs, Mounting NFS File Systems using autofs
- /etc/auto.master, Mounting NFS File Systems using autofs
- Automated Tasks, Automated Tasks
B
- batch, At and Batch
- additional resources, Additional Resources
- boot media, Preparing to Upgrade
- boot partition, Creating the /boot/ Partition
- booting
- emergency mode, Booting into Emergency Mode
- rescue mode, Booting into Rescue Mode
- single-user mode, Booting into Single-User Mode
C
- CA (see secure server)
- chage command
- forcing password expiration with, Password Aging
- chkconfig, chkconfig
- color depth, Display Settings
- command line options
- printing from, Managing Print Jobs
- configuration
- console access, Console Access
- NFS, Network File System (NFS)
- console
- making files accessible from, Making Files Accessible From the Console
- console access
- configuring, Console Access
- defining, Defining the Console
- disabling, Disabling Console Program Access
- enabling, Enabling Console Access for Other Applications
- Cron, Automated Tasks
- cron
- additional resources, Additional Resources
- configuration file, Configuring Cron Tasks
- example crontabs, Configuring Cron Tasks
- user-defined tasks, Configuring Cron Tasks
- crontab, Configuring Cron Tasks
- CtrlAltDel
- shutdown, disabling, Disabling Shutdown Via Ctrl+Alt+Del
- CUPS, Printer Configuration
D
- date configuration, Time and Date Properties
- dateconfig (see Time and Date Properties Tool)
- Demilitarized Zone, DMZs and IPTables
- devel package, An Overview of Security-Related Packages
- df, File Systems
- DHCP, Dynamic Host Configuration Protocol (DHCP)
- additional resources, Additional Resources
- client configuration, Configuring a DHCP Client
- command line options, Starting and Stopping the Server
- connecting to, Configuring a DHCP Client
- dhcpd.conf, Configuration File
- dhcpd.leases, Starting and Stopping the Server
- dhcrelay, DHCP Relay Agent
- global parameters, Configuration File
- group, Configuration File
- options, Configuration File
- reasons for using, Why Use DHCP?
- Relay Agent, DHCP Relay Agent
- server configuration, Configuring a DHCP Server
- shared-network, Configuration File
- starting the server, Starting and Stopping the Server
- stopping the server, Starting and Stopping the Server
- subnet, Configuration File
- dhcpd.conf, Configuration File
- dhcpd.leases, Starting and Stopping the Server
- dhcrelay, DHCP Relay Agent
- disk quotas, Implementing Disk Quotas
- additional resources, Additional Resources
- assigning per file system, Assigning Quotas per File System
- assigning per group, Assigning Quotas per Group
- assigning per user, Assigning Quotas per User
- disabling, Enabling and Disabling
- enabling, Configuring Disk Quotas, Enabling and Disabling
- /etc/fstab, modifying, Enabling Quotas
- creating quota files, Creating the Quota Database Files
- quotacheck, running, Creating the Quota Database Files
- grace period, Assigning Quotas per User
- hard limit, Assigning Quotas per User
- management of, Managing Disk Quotas
- quotacheck command, using to check, Keeping Quotas Accurate
- reporting, Reporting on Disk Quotas
- soft limit, Assigning Quotas per User
- disk storage (see disk quotas)
- parted (see parted)
- diskless environment, Diskless Environments
- adding hosts, Adding Hosts
- Network Booting Tool, Finish Configuring the Diskless Environment
- NFS configuration, Configuring the NFS Server
- overview, Diskless Environments
- display
- settings for X, Display Settings
- DMZ (see Demilitarized Zone)
- documentation
- finding installed, Impressing Your Friends with RPM
- DSA keys
- generating, Generating a DSA Key Pair for Version 2
- DSOs
- du, File Systems
- Dynamic Host Configuration Protocol (see DHCP)
E
- e2fsck, Reverting to an ext2 File System
- e2label, Labeling the Partition
- emergency mode, Booting into Emergency Mode
- Ethernet connection (see network configuration)
- exim, Mail Transport Agent (MTA) Configuration
- expiration of password, forcing, Password Aging
- exporting NFS file Systems, Exporting NFS File Systems
- exports, Exporting NFS File Systems
- ext2
- reverting from ext3, Reverting to an ext2 File System
- ext2online, Reverting to an ext2 File System
- ext3
- converting from ext2, Converting to an ext3 File System
- creating, Creating an ext3 File System
- features, Features of ext3
- ext3 file system
- resizing, Reverting to an ext2 File System
F
- feedback, Send in Your Feedback
- file systems, File Systems
- ext2 (see ext2)
- ext3 (see ext3)
- LVM (see LVM)
- NFS (see NFS)
- findsmb, Command Line
- firewall configuration (see Security Level Configuration Tool)
- firewall types, Firewalls
- firewalls, Firewalls
- additional resources, Additional Resources
- and connection tracking, IPTables and Connection Tracking
- and malicious software, Malicious Software and Spoofed IP Addresses
- policies, Basic Firewall Policies
- stateful, IPTables and Connection Tracking
- types, Firewalls
- Firewalls
- iptables, Netfilter and IPTables
- floppy group, use of, The floppy Group
- free, Memory Usage
- ftp, Why Use OpenSSH?
G
- getfacl, Retrieving ACLs
- GNOME System Monitor, System Processes
- gnome-system-monitor, System Processes
- GnuPG
- checking RPM package signatures, Checking a Package's Signature
- group configuration
- adding groups, Adding a New Group
- filtering list of groups, User and Group Configuration
- groupadd, Adding a Group
- modify users in groups, Modifying Group Properties
- modifying group properties, Modifying Group Properties
- viewing list of groups, User and Group Configuration
- groups (see group configuration)
- additional resources, Additional Resources
- installed documentation, Installed Documentation
- floppy, use of, The floppy Group
- GID, Users and Groups
- introducing, Users and Groups
- shared directories, Group Directories
- standard, Standard Groups
- tools for management of
- groupadd, User and Group Management Tools, User Private Groups
- system-config-users, User Private Groups
- User Manager, User and Group Management Tools
- user private, User Private Groups
H
- hardware
- viewing, Hardware
- Hardware Browser, Hardware
- Hardware RAID (see RAID)
- hesiod, User Information
- HTTP Configuration Tool
- directives (see HTTP directives)
- error log, Logging
- modules, Apache HTTP Server Configuration
- transfer log, Logging
- HTTP directives
- DirectoryIndex, Site Configuration
- ErrorDocument, Site Configuration
- ErrorLog, Logging
- Group, Server Settings
- HostnameLookups, Logging
- KeepAlive, Performance Tuning
- KeepAliveTimeout, Performance Tuning
- Listen, Basic Settings
- LogFormat, Logging
- LogLevel, Logging
- MaxClients, Performance Tuning
- MaxKeepAliveRequests, Performance Tuning
- Options, Site Configuration
- ServerAdmin, Basic Settings
- ServerName, Basic Settings
- TimeOut, Performance Tuning
- TransferLog, Logging
- User, Server Settings
- httpd, Apache HTTP Server Configuration
- hwbrowser, Hardware
I
- information
- about your system, Gathering System Information
- insmod, Kernel Module Utilities
- installation
- kickstart (see kickstart installations)
- LVM, LVM Configuration
- PXE (see PXE installations)
- software RAID, Software RAID Configuration
- Internet connection (see network configuration)
- introduction, Introduction
- ip6tables, IPv6
- iptables, Netfilter and IPTables, Activating the IPTables Service
- additional resources, Additional Resources
- and DMZs, DMZs and IPTables
- and malicious software, Malicious Software and Spoofed IP Addresses
- chains, IPTables Command Syntax
- FORWARD, FORWARD and NAT Rules
- INPUT, Common IPTables Filtering
- OUTPUT, Common IPTables Filtering
- POSTROUTING, Postrouting and IP Masquerading
- PREROUTING, Prerouting, DMZs and IPTables
- connection tracking, IPTables and Connection Tracking
- states, IPTables and Connection Tracking
- policies, Basic Firewall Policies
- rules, Saving and Restoring IPTables Rules
- common, Common IPTables Filtering
- forwarding, FORWARD and NAT Rules
- NAT, Postrouting and IP Masquerading, DMZs and IPTables
- restoring, Saving and Restoring IPTables Rules
- saving, Saving and Restoring IPTables Rules
- stateful inspection, IPTables and Connection Tracking
- states, IPTables and Connection Tracking
- using, Using IPTables
- ISDN connection (see network configuration)
K
- Kerberos, Authentication
- kernel
- downloading, Downloading the Upgraded Kernel
- large memory support, Overview of Kernel Packages
- modules, Kernel Modules
- multiple processor support, Overview of Kernel Packages
- upgrading, Manually Upgrading the Kernel
- kernel modules
- /etc/rc.modules, Persistent Module Loading
- listing, Kernel Module Utilities
- loading, Kernel Module Utilities
- persistent loading, Persistent Module Loading
- unload, Kernel Module Utilities
- keyboard
- configuring, Keyboard Configuration
- Keyboard Configuration Tool, Keyboard Configuration
- keyboards, Keyboard Configuration
- configuration, Keyboard Configuration
- kickstart
- how the file is found, Starting a Kickstart Installation
- Kickstart Configurator, Kickstart Configurator
- %post script, Post-Installation Script
- %pre script, Pre-Installation Script
- authentication options, Authentication
- basic options, Basic Configuration
- boot loader, Boot Loader Options
- boot loader options, Boot Loader Options
- Display configuration, Display Configuration
- firewall configuration, Firewall Configuration
- installation method selection, Installation Method
- interactive, Basic Configuration
- keyboard, Basic Configuration
- language, Basic Configuration
- language support, Basic Configuration
- mouse, Basic Configuration
- network configuration, Network Configuration
- package selection, Package Selection
- partitioning, Partition Information
- software RAID, Creating Software RAID Partitions
- preview, Kickstart Configurator
- reboot, Basic Configuration
- root password, Basic Configuration
- encrypt, Basic Configuration
- saving, Saving the File
- SELinux configuration, SELinux Configuration
- text mode installation, Basic Configuration
- time zone, Basic Configuration
- kickstart file
- %include, Kickstart Options
- %post, Post-installation Script
- %pre, Pre-installation Script
- auth, Kickstart Options
- authconfig, Kickstart Options
- autopart, Kickstart Options
- autostep, Kickstart Options
- bootloader, Kickstart Options
- CD-ROM-based, Creating Kickstart Boot Media
- clearpart, Kickstart Options
- cmdline, Kickstart Options
- creating, Kickstart Options
- device, Kickstart Options
- diskette-based, Creating Kickstart Boot Media
- driverdisk, Kickstart Options
- firewall, Kickstart Options
- firstboot, Kickstart Options
- flash-based, Creating Kickstart Boot Media
- format of, Creating the Kickstart File
- halt, Kickstart Options
- ignoredisk, Kickstart Options
- include contents of another file, Kickstart Options
- install, Kickstart Options
- installation methods, Kickstart Options
- interactive, Kickstart Options
- keyboard, Kickstart Options
- lang, Kickstart Options
- langsupport, Kickstart Options
- logvol, Kickstart Options
- mouse, Kickstart Options
- network, Kickstart Options
- network-based, Making the Kickstart File Available on the Network, Making the Installation Tree Available
- options, Kickstart Options
- partitioning examples, Advanced Partitioning Example
- package selection specification, Package Selection
- part, Kickstart Options
- partition, Kickstart Options
- post-installation configuration, Post-installation Script
- poweroff, Kickstart Options
- pre-installation configuration, Pre-installation Script
- raid, Kickstart Options
- reboot, Kickstart Options
- rootpw, Kickstart Options
- selinux, Kickstart Options
- shutdown, Kickstart Options
- skipx, Kickstart Options
- text, Kickstart Options
- timezone, Kickstart Options
- upgrade, Kickstart Options
- volgroup, Kickstart Options
- what it looks like, Creating the Kickstart File
- xconfig, Kickstart Options
- zerombr, Kickstart Options
- kickstart installations, Kickstart Installations
- CD-ROM-based, Creating Kickstart Boot Media
- diskette-based, Creating Kickstart Boot Media
- file format, Creating the Kickstart File
- file locations, Making the Kickstart File Available
- flash-based, Creating Kickstart Boot Media
- installation tree, Making the Installation Tree Available
- LVM, Kickstart Options
- network-based, Making the Kickstart File Available on the Network, Making the Installation Tree Available
- starting, Starting a Kickstart Installation
- from a boot CD-ROM, Starting a Kickstart Installation
- from CD-ROM #1 with a diskette, Starting a Kickstart Installation
L
- LDAP, User Information, Authentication
- loading kernel modules, Kernel Modules
- log files, Log Files
- (see also Log Viewer)
- description, Log Files
- examining, Examining Log Files
- locating, Locating Log Files
- rotating, Locating Log Files
- syslogd, Log Files
- viewing, Viewing Log Files
- Log Viewer
- alerts, Examining Log Files
- filtering, Viewing Log Files
- log file locations, Viewing Log Files
- refresh rate, Viewing Log Files
- searching, Viewing Log Files
- logical volume, What is LVM?, Creating the LVM Logical Volumes
- logical volume group, What is LVM?
- Logical Volume Manager (see LVM)
- logrotate, Locating Log Files
- lpd, Printer Configuration
- lsmod, Kernel Module Utilities
- lspci, Hardware
- LVM, Logical Volume Manager (LVM)
- additional resources, Additional Resources
- configuring LVM during installation, LVM Configuration
- explanation of, What is LVM?
- installing
- automatic partitioning, Automatic Partitioning, Manual LVM Partitioning
- creating a logical volume, Creating the LVM Logical Volumes
- creating physical volumes, Creating the LVM Physical Volumes
- creating the boot partition, Creating the /boot/ Partition
- creating volume groups, Creating the LVM Volume Groups
- logical volume, What is LVM?, Creating the LVM Logical Volumes
- logical volume group, What is LVM?
- physical extent, Creating the LVM Volume Groups
- physical volume, What is LVM?, Creating the LVM Physical Volumes
- volume groups, Creating the LVM Volume Groups
- with kickstart, Kickstart Options
- lvm
- LVM tools and utilities, LVM Partition Management
- LVM2
- explanation of, What is LVM2?
M
- Mail Transport Agent (see MTA)
- Mail Transport Agent Switcher, Mail Transport Agent (MTA) Configuration
- starting in text mode, Mail Transport Agent (MTA) Configuration
- Mail User Agent, Mail Transport Agent (MTA) Configuration
- Master Boot Record, Unable to Boot into Red Hat Enterprise Linux
- reinstalling, Reinstalling the Boot Loader
- MD5 passwords, Authentication
- memory usage, Memory Usage
- mkfs, Formating the Partition
- mkpart, Making the Partition
- modem connection (see network configuration)
- modprobe, Kernel Module Utilities
- modprobe.conf, Kernel Modules
- monitor
- settings for dual head, Dual Head Display Settings
- settings for X, Display Hardware Settings
- mounting
- NFS file systems, Mounting NFS File Systems
- MTA
- setting default, Mail Transport Agent (MTA) Configuration
- switching with Mail Transport Agent Switcher, Mail Transport Agent (MTA) Configuration
- MUA, Mail Transport Agent (MTA) Configuration
N
- NAT (see Network Address Translation)
- neat (see network configuration)
- Netfilter, Netfilter and IPTables
- additional resources, Additional Resources
- Netfilter 6, IPv6
- Network Address Translation, FORWARD and NAT Rules
- with iptables, FORWARD and NAT Rules
- Network Administration Tool (see network configuration)
- Network Booting Tool, PXE Boot Configuration
- pxeboot, Command Line Configuration
- pxeos, Command Line Configuration
- using with diskless environments, Finish Configuring the Diskless Environment
- using with PXE installations, PXE Boot Configuration
- network configuration
- device aliases, Device Aliases
- DHCP, Establishing an Ethernet Connection
- Ethernet connection, Establishing an Ethernet Connection
- activating, Establishing an Ethernet Connection
- ISDN connection, Establishing an ISDN Connection
- activating, Establishing an ISDN Connection
- logical network devices, Working with Profiles
- managing /etc/hosts, Managing Hosts
- managing DNS Settings, Managing DNS Settings
- managing hosts, Managing Hosts
- modem connection, Establishing a Modem Connection
- activating, Establishing a Modem Connection
- overview, Overview
- PPPoE connection, Establishing an xDSL Connection
- profiles, Working with Profiles
- activating, Working with Profiles
- restoring from file, Saving and Restoring the Network Configuration
- saving to file, Saving and Restoring the Network Configuration
- static IP, Establishing an Ethernet Connection
- token ring connection, Establishing a Token Ring Connection
- activating, Establishing a Token Ring Connection
- wireless connection, Establishing a Wireless Connection
- activating, Establishing a Wireless Connection
- xDSL connection, Establishing an xDSL Connection
- activating, Establishing an xDSL Connection
- Network Device Control, Working with Profiles
- Network File System (see NFS)
- Network Time Protocol (see NTP)
- NFS
- /etc/fstab, Mounting NFS File Systems using /etc/fstab
- additional resources, Additional Resources
- autofs (see autofs)
- command line configuration, Command Line Configuration
- configuration, Network File System (NFS)
- diskless environment, configuring for, Configuring the NFS Server
- exporting, Exporting NFS File Systems
- hostname formats, Hostname Formats
- mounting, Mounting NFS File Systems
- over TCP, Using TCP
- starting the server, Starting and Stopping the Server
- status of the server, Starting and Stopping the Server
- stopping the server, Starting and Stopping the Server
- NFS Server Configuration Tool, Exporting NFS File Systems
- NIS, User Information
- NTP
- configuring, Network Time Protocol (NTP) Properties
- ntpd, Network Time Protocol (NTP) Properties
- ntpd, Network Time Protocol (NTP) Properties
- ntsysv, ntsysv
O
- O'Reilly & Associates, Inc., Related Books
- O'Reilly &Associates, Inc., Related Books
- opannotate (see OProfile)
- opcontrol (see OProfile)
- OpenLDAP, User Information, Authentication
- openldap-clients, User Information
- OpenSSH, OpenSSH
- additional resources, Additional Resources
- client, Configuring an OpenSSH Client
- scp, Using the scp Command
- sftp, Using the sftp Command
- ssh, Using the ssh Command
- DSA keys
- generating, Generating a DSA Key Pair for Version 2
- generating key pairs, Generating Key Pairs
- RSA keys
- generating, Generating an RSA Key Pair for Version 2
- RSA Version 1 keys
- server, Configuring an OpenSSH Server
- /etc/ssh/sshd_config, Configuring an OpenSSH Server
- starting and stopping, Configuring an OpenSSH Server
- ssh-add, Configuring ssh-agent
- ssh-agent, Configuring ssh-agent
- with GNOME, Configuring ssh-agent with GNOME
- ssh-keygen
- OpenSSL
- additional resources, Additional Resources
- opreport (see OProfile)
- OProfile, OProfile
- /dev/oprofile/, Understanding /dev/oprofile/
- additional resources, Additional Resources
- configuring, Configuring OProfile
- separating profiles, Separating Kernel and User-space Profiles
- events
- sampling rate, Sampling Rate
- setting, Setting Events to Monitor
- monitoring the kernel, Specifying the Kernel
- opannotate, Using opannotate
- opcontrol, Configuring OProfile
- --no-vmlinux, Specifying the Kernel
- --start, Starting and Stopping OProfile
- --vmlinux=, Specifying the Kernel
- opreport, Using opreport
- on a single executable, Using opreport on a Single Executable
- oprofiled, Starting and Stopping OProfile
- log file, Starting and Stopping OProfile
- op_help, Setting Events to Monitor
- overview of tools, Overview of Tools
- reading data, Analyzing the Data
- saving data, Saving Data
- starting, Starting and Stopping OProfile
- unit mask, Unit Masks
- oprofiled (see OProfile)
- oprof_start, Graphical Interface
- op_help, Setting Events to Monitor
P
- Package Updater, Red Hat Network
- packages
- dependencies, Unresolved Dependency
- determining file ownership with, Impressing Your Friends with RPM
- finding deleted files from, Impressing Your Friends with RPM
- freshening with RPM, Freshening
- installing, Installing
- locating documentation for, Impressing Your Friends with RPM
- obtaining list of files, Impressing Your Friends with RPM
- preserving configuration files, Upgrading
- querying, Querying
- querying uninstalled, Impressing Your Friends with RPM
- removing, Uninstalling
- tips, Impressing Your Friends with RPM
- upgrading, Upgrading
- verifying, Verifying
- pam_smbpass, Encrypted Passwords
- pam_timestamp, Enabling Console Access for Other Applications
- parted, Standard Partitions using parted
- creating partitions, Creating a Partition
- overview, Standard Partitions using parted
- removing partitions, Removing a Partition
- resizing partitions, Resizing a Partition
- selecting device, Viewing the Partition Table
- table of commands, Standard Partitions using parted
- viewing partition table, Viewing the Partition Table
- partition table
- viewing, Viewing the Partition Table
- partitions
- creating, Creating a Partition
- formating
- mkfs, Formating the Partition
- labeling
- e2label, Labeling the Partition
- making
- mkpart, Making the Partition
- removing, Removing a Partition
- resizing, Resizing a Partition
- viewing list, Viewing the Partition Table
- password
- aging, Password Aging
- forcing expiration of, Password Aging
- passwords
- shadow, Shadow Passwords
- PCI devices
- listing, Hardware
- physical extent, Creating the LVM Volume Groups
- physical volume, What is LVM?, Creating the LVM Physical Volumes
- pixels, Display Settings
- postfix, Mail Transport Agent (MTA) Configuration
- PPPoE, Establishing an xDSL Connection
- Pre-Execution Environment, PXE Network Installations
- printconf (see printer configuration)
- printer configuration, Printer Configuration
- adding
- CUPS (IPP) printer, Adding an IPP Printer
- IPP printer, Adding an IPP Printer
- JetDirect printer, Adding a JetDirect Printer
- local printer, Adding a Local Printer
- Samba (SMB) printer, Adding a Samba (SMB) Printer
- cancel print job, Managing Print Jobs
- CUPS, Printer Configuration
- default printer, Modifying Existing Printers
- delete existing printer, Modifying Existing Printers
- IPP printer, Adding an IPP Printer
- JetDirect printer, Adding a JetDirect Printer
- local printer, Adding a Local Printer
- managing print jobs, Managing Print Jobs
- networked CUPS (IPP) printer, Adding an IPP Printer
- printing from the command line, Managing Print Jobs
- Samba (SMB) printer, Adding a Samba (SMB) Printer
- test page, Printing a Test Page
- viewing print spool, command line, Managing Print Jobs
- Printer Configuration Tool (see printer configuration)
- printtool (see printer configuration)
- processes, System Processes
- ps, System Processes
- PXE, PXE Network Installations
- PXE installations, PXE Network Installations
- adding hosts, Adding PXE Hosts
- boot message, custom, Adding a Custom Boot Message
- configuration, PXE Boot Configuration
- Network Booting Tool, PXE Boot Configuration
- overview, PXE Network Installations
- performing, Performing the PXE Installation
- setting up the network server, Setting up the Network Server
- pxeboot, Command Line Configuration
- pxeos, Command Line Configuration
Q
- quotacheck, Creating the Quota Database Files
- quotacheck command
- checking quota accuracy with, Keeping Quotas Accurate
- quotaoff, Enabling and Disabling
- quotaon, Enabling and Disabling
R
- RAID, Redundant Array of Independent Disks (RAID)
- configuring software RAID during installation, Software RAID Configuration
- explanation of, What is RAID?
- Hardware RAID, Hardware RAID versus Software RAID
- installing
- creating the boot partition, Creating the RAID Partitions
- creating the mount points, Creating the RAID Devices and Mount Points
- creating the RAID devices, Creating the RAID Devices and Mount Points
- creating the RAID partitions, Creating the RAID Partitions
- level 0, RAID Levels and Linear Support
- level 1, RAID Levels and Linear Support
- level 4, RAID Levels and Linear Support
- level 5, RAID Levels and Linear Support
- levels, RAID Levels and Linear Support
- reasons to use, Who Should Use RAID?
- Software RAID, Hardware RAID versus Software RAID
- RAM, Memory Usage
- rcp, Using the scp Command
- Red Hat Network, Red Hat Network
- Red Hat Package Manager (see RPM)
- Red Hat RPM Guide, Related Books
- rescue mode
- definition of, Booting into Rescue Mode
- utilities available, Booting into Rescue Mode
- resize2fs, Reverting to an ext2 File System
- resolution, Display Settings
- RHN (see Red Hat Network)
- rmmod, Kernel Module Utilities
- RPM, Package Management with RPM
- additional resources, Additional Resources
- book about, Related Books
- checking package signatures, Checking a Package's Signature
- dependencies, Unresolved Dependency
- design goals, RPM Design Goals
- determining file ownership with, Impressing Your Friends with RPM
- documentation with, Impressing Your Friends with RPM
- file conflicts
- resolving, Conflicting Files
- finding deleted files with, Impressing Your Friends with RPM
- freshen, Freshening
- freshening packages, Freshening
- GnuPG, Checking a Package's Signature
- installing, Installing
- md5sum, Checking a Package's Signature
- preserving configuration files, Upgrading
- querying, Querying
- querying for file list, Impressing Your Friends with RPM
- querying uninstalled packages, Impressing Your Friends with RPM
- tips, Impressing Your Friends with RPM
- uninstalling, Uninstalling
- upgrading, Upgrading
- using, Using RPM
- verifying, Verifying
- website, Useful Websites
- RSA keys
- generating, Generating an RSA Key Pair for Version 2
- RSA Version 1 keys
- runlevel 1, Booting into Single-User Mode
- runlevels, Runlevels
S
- Samba, Samba
- additional resources, Additional Resources
- configuration, Configuring a Samba Server, Command Line Configuration
- default, Configuring a Samba Server
- smb.conf, Samba
- encrypted passwords, Encrypted Passwords
- findsmb, Command Line
- graphical configuration, Graphical Configuration
- adding a share, Adding a Share
- configuring server settings, Configuring Server Settings
- managing Samba users, Managing Samba Users
- list of active connections, Starting and Stopping the Server
- pam_smbpass, Encrypted Passwords
- reasons for using, Why Use Samba?
- share
- connecting to via the command line, Command Line
- connecting to with Nautilus, Connecting to a Samba Share
- mounting, Mounting the Share
- smbclient, Command Line
- starting the server, Starting and Stopping the Server
- status of the server, Starting and Stopping the Server
- stopping the server, Starting and Stopping the Server
- syncing passwords with passwd, Encrypted Passwords
- with Windows NT 4.0, 2000, ME, and XP, Encrypted Passwords
- scp (see OpenSSH)
- secure server
- accessing, Accessing The Server
- books, Related Books
- certificate
- authorities, Types of Certificates
- choosing a CA, Types of Certificates
- creation of request, Generating a Certificate Request to Send to a CA
- moving it after an upgrade, Using Pre-Existing Keys and Certificates
- pre-existing, Using Pre-Existing Keys and Certificates
- self-signed, Creating a Self-Signed Certificate
- test vs. signed vs. self-signed, Types of Certificates
- testing, Testing The Certificate
- connecting to, Accessing The Server
- explanation of security, An Overview of Certificates and Security
- installing, Apache HTTP Secure Server Configuration
- key
- generating, Generating a Key
- packages, An Overview of Security-Related Packages
- port numbers, Accessing The Server
- providing a certificate for, An Overview of Certificates and Security
- security
- explanation of, An Overview of Certificates and Security
- upgrading from, Using Pre-Existing Keys and Certificates
- URLs, Accessing The Server
- URLs for, Accessing The Server
- websites, Useful Websites
- security, Controlling Access to Services
- security level (see Security Level Configuration Tool)
- Security Level Configuration Tool
- enabling and disabling, Enabling and Disabling the Firewall
- iptables service, Activating the IPTables Service
- saving, Saving the Settings
- setting custom ports, Other Ports
- trusted services, Trusted Services
- sendmail, Mail Transport Agent (MTA) Configuration
- services
- controlling access to, Controlling Access to Services
- Services Configuration Tool, Services Configuration Tool
- setfacl, Setting Access ACLs
- Setup Agent
- via Kickstart, Kickstart Options
- sftp (see OpenSSH)
- shadow passwords, Authentication
- overview of, Shadow Passwords
- shutdown
- disablingCtrlAltDel, Disabling Shutdown Via Ctrl+Alt+Del
- single-user mode, Booting into Single-User Mode
- SMB, Samba, Authentication
- smb.conf, Samba
- smbclient, Command Line
- smbstatus, Starting and Stopping the Server
- Software RAID (see RAID)
- ssh (see OpenSSH)
- ssh-add, Configuring ssh-agent
- ssh-agent, Configuring ssh-agent
- with GNOME, Configuring ssh-agent with GNOME
- star, Archiving File Systems With ACLs
- striping
- RAID fundamentals, What is RAID?
- swap space, Swap Space
- creating, Adding Swap Space
- expanding, Adding Swap Space
- explanation of, What is Swap Space?
- file
- creating, Creating a Swap File, Removing a Swap File
- LVM2
- creating, Creating an LVM2 Logical Volume for Swap
- extending, Extending Swap on an LVM2 Logical Volume
- reducing, Reducing Swap on an LVM2 Logical Volume
- removing, Removing an LVM2 Logical Volume for Swap
- moving, Moving Swap Space
- recommended size, What is Swap Space?
- removing, Removing Swap Space
- syslogd, Log Files
- system analysis
- OProfile (see OProfile)
- system information
- file systems, File Systems
- /dev/shm, File Systems
- gathering, Gathering System Information
- hardware, Hardware
- memory usage, Memory Usage
- processes, System Processes
- currently running, System Processes
- system recovery, Basic System Recovery
- common problems, Common Problems
- forgetting the root password, Root Password
- hardware/software problems, Hardware/Software Problems
- reinstalling the boot loader, Reinstalling the Boot Loader
- unable to boot into Red Hat Enterprise Linux, Unable to Boot into Red Hat Enterprise Linux
- system-config-authentication (see Authentication Configuration Tool)
- system-config-date (see Time and Date Properties Tool)
- system-config-display (see X Configuration Tool)
- system-config-httpd (see HTTP Configuration Tool)
- system-config-keyboard, Keyboard Configuration
- system-config-kickstart (see Kickstart Configurator)
- system-config-mouse (see Mouse Configuration Tool)
- system-config-netboot, PXE Boot Configuration
- system-config-network (see network configuration)
- system-config-network-cmd, Network Configuration, Working with Profiles, Saving and Restoring the Network Configuration
- system-config-printer (see printer configuration)
- system-config-selinux (see Security Level Configuration Tool)
- system-config-time (see Time and Date Properties Tool)
- system-config-users (see user configuration and group configuration)
- system-logviewer (see Log Viewer)
- system-switch-mail (see Mail Transport Agent Switcher)
- system-switch-mail-nox (see Mail Transport Agent Switcher)
T
- TCP wrappers, TCP Wrappers
- telinit, Runlevels
- telnet, Why Use OpenSSH?
- tftp, PXE Network Installations
- time configuration, Time and Date Properties
- synchronize with NTP server, Network Time Protocol (NTP) Properties
- time zone configuration, Time Zone Configuration
- timetool (see Time and Date Properties Tool)
- token ring connection (see network configuration)
- top, System Processes
- tune2fs
- converting to ext3 with, Converting to an ext3 File System
- reverting to ext2 with, Reverting to an ext2 File System
U
- user configuration
- adding users, Adding a New User
- adding users to groups, Modifying User Properties
- changing full name, Modifying User Properties
- changing home directory, Modifying User Properties
- changing login shell, Modifying User Properties
- changing password, Modifying User Properties
- command line configuration, Command Line Configuration
- passwd, Adding a User
- useradd, Adding a User
- filtering list of users, User and Group Configuration
- locking user accounts, Modifying User Properties
- modify groups for a user, Modifying User Properties
- modifying users, Modifying User Properties
- password
- forcing expiration of, Password Aging
- password expiration, Modifying User Properties
- setting user account expiration, Modifying User Properties
- viewing list of users, User and Group Configuration
- User Manager (see user configuration)
- user private groups (see groups)
- and shared directories, Group Directories
- useradd command
- user account creation using, Command Line Configuration
- users (see user configuration)
- /etc/passwd, Standard Users
- additional resources, Additional Resources
- installed documentation, Installed Documentation
- introducing, Users and Groups
- standard, Standard Users
- tools for management of
- User Manager, User and Group Management Tools
- useradd, User and Group Management Tools
- UID, Users and Groups
V
- VeriSign
- using existing certificate, Using Pre-Existing Keys and Certificates
- video card
- settings for dual head, Dual Head Display Settings
- settings for X, Display Hardware Settings
- volume group, What is LVM?
- volume groups, Creating the LVM Volume Groups
W
- Windows
- file and print sharing, Samba
- Windows 2000
- connecting to shares using Samba, Encrypted Passwords
- Windows 98
- connecting to shares using Samba, Encrypted Passwords
- Windows ME
- connecting to shares using Samba, Encrypted Passwords
- Windows NT 4.0
- connecting to shares using Samba, Encrypted Passwords
- Windows XP
- connecting to shares using Samba, Encrypted Passwords
X
- X Configuration Tool
- display settings, Display Settings
- dual head display settings, Dual Head Display Settings
- hardware settings, Display Hardware Settings
- X Window System
- configuration, X Window System Configuration
- xDSL connection (see network configuration)
- xinetd, xinetd
Y
- ypbind, User Information