集成
将 OpenShift Serverless 与 Service Mesh 集成,并与成本管理服务集成
摘要
第 1 章 将 Service Mesh 与 OpenShift Serverless 集成
OpenShift Serverless Operator 提供 Kourier 作为 Knative 的默认入口。但是,无论是否启用了 Kourier,您都可以在 OpenShift Serverless 中使用 Service Mesh。禁用 Kourier 集成后,您可以配置 Kourier ingress 不支持的额外网络和路由选项,如 mTLS 功能。
请注意以下假设和限制:
- 所有 Knative 内部组件以及 Knative Services 都属于 Service Mesh,并启用了 sidecar 注入功能。这意味着整个网格中强制执行严格的 mTLS。对 Knative Services 的所有请求都需要 mTLS 连接,客户端必须发送其证书,除了来自 OpenShift 路由的调用除外。
- 带有 Service Mesh 集成的 OpenShift Serverless 只能 针对一个 服务网格。集群中可以存在多个网格,但 OpenShift Serverless 只存在于其中之一。
-
不支持更改 OpenShift Serverless 的目标
ServiceMeshMemberRoll,这意味着将 OpenShift Serverless 移到另一个网格中。更改目标服务网格的唯一方法是卸载和重新安装 OpenShift Serverless。
1.1. 先决条件
- 您可以使用集群管理员访问权限访问 Red Hat OpenShift Serverless 帐户。
-
已安装 OpenShift CLI(
oc)。 - 已安装 Serverless Operator。
- 已安装 Red Hat OpenShift Service Mesh Operator。
以下流程中的示例使用域
example.com。这个域的示例证书被用作为子域证书签名的证书颁发机构(CA)。要在部署中完成并验证这些步骤,您需要由广泛信任的公共 CA 签名的证书或您的机构提供的 CA。根据您的域、子域和 CA 调整命令示例。
-
您必须配置通配符证书,以匹配 OpenShift Container Platform 集群的域。例如,如果您的 OpenShift Container Platform 控制台地址是
https://console-openshift-console.apps.openshift.example.com,您必须配置通配符证书,以便域为*.apps.openshift.example.com。有关配置通配符证书的更多信息,请参阅创建证书来加密传入的外部流量。 - 如果要使用任何域名,包括不是默认 OpenShift Container Platform 集群域子域的域名,您必须为这些域设置域映射。如需更多信息,请参阅有关创建自定义域映射的 OpenShift Serverless 文档。
OpenShift Serverless 只支持使用本指南中明确记录的 Red Hat OpenShift Service Mesh 功能,且不支持其他未记录的功能。
只有在 Service Mesh 版本 2.2 或更高版本才支持在 Service Mesh 中使用 Serverless 1.31。有关 1.31 以外的版本的详情和信息,请参阅 "Red Hat OpenShift Serverless 支持的配置" 页面。
1.2. 其他资源
1.3. 创建证书来加密传入的外部流量
默认情况下,Service Mesh mTLS 功能只会保护 Service Mesh 本身内部的流量,在 ingress 网关和带有 sidecar 的独立 pod 间的安全。要在流向 OpenShift Container Platform 集群时对流量进行加密,您必须先生成证书,然后才能启用 OpenShift Serverless 和 Service Mesh 集成。
先决条件
- 在 OpenShift Container Platform 上具有集群管理员权限,或者对 Red Hat OpenShift Service on AWS 或 OpenShift Dedicated 有集群或专用管理员权限。
- 安装了 OpenShift Serverless Operator 和 Knative Serving。
-
安装 OpenShift CLI (
oc) 。 - 您已创建了一个项目,或者具有适当的角色和权限访问项目,以创建应用程序和其他工作负载。
流程
创建为 Knative 服务签名的 root 证书和私钥:
$ openssl req -x509 -sha256 -nodes -days 365 -newkey rsa:2048 \
    -subj '/O=Example Inc./CN=example.com' \
    -keyout root.key \
    -out root.crt
创建通配符证书:
$ openssl req -nodes -newkey rsa:2048 \
    -subj "/CN=*.apps.openshift.example.com/O=Example Inc." \
    -keyout wildcard.key \
    -out wildcard.csr
为通配符证书签名:
$ openssl x509 -req -days 365 -set_serial 0 \
    -CA root.crt \
    -CAkey root.key \
    -in wildcard.csr \
    -out wildcard.crt
使用通配符证书创建 secret:
$ oc create -n istio-system secret tls wildcard-certs \
    --key=wildcard.key \
    --cert=wildcard.crt
此证书由 OpenShift Serverless 与 Service Mesh 集成时创建的网关获取,以便入口网关使用此证书提供流量。
1.4. 将 Service Mesh 与 OpenShift Serverless 集成
1.4.1. 验证安装先决条件
在安装和配置 Service Mesh 与 Serverless 集成前,请验证是否已满足先决条件。
流程
检查冲突网关:
示例命令
$ oc get gateway -A -o jsonpath='{range .items[*]}{@.metadata.namespace}{"/"}{@.metadata.name}{" "}{@.spec.servers}{"\n"}{end}' | column -t输出示例
knative-serving/knative-ingress-gateway  [{"hosts":["*"],"port":{"name":"https","number":443,"protocol":"HTTPS"},"tls":{"credentialName":"wildcard-certs","mode":"SIMPLE"}}]
knative-serving/knative-local-gateway    [{"hosts":["*"],"port":{"name":"http","number":8081,"protocol":"HTTP"}}]
此命令不应返回绑定
port和:443hosts: ["*"]的网关,除了作为另一个 Service Mesh 实例一部分的knative-serving和Gateways注意Serverless 的网格必须是不同的,最好只为 Serverless 工作负载保留。这是因为额外的配置(如
Gateways)可能会影响 Serverless 网关knative-local-gateway和knative-ingress-gateway。Red Hat OpenShift Service Mesh 只允许一个网关声明同一端口(端口: 443)上的通配符主机绑定(hosts: ["*"])。如果另一个网关已绑定此配置,必须为 Serverless 工作负载创建单独的网格。检查 Red Hat OpenShift Service Mesh
istio-ingressgateway是否作为NodePort或LoadBalancer公开:示例命令
$ oc get svc -A | grep istio-ingressgateway
输出示例
istio-system istio-ingressgateway ClusterIP 172.30.46.146 none> 15021/TCP,80/TCP,443/TCP 9m50s
此命令不应返回类型为
NodePort或LoadBalancer的Service对象。注意集群外部 Knative Services 期望使用 OpenShift 路由通过 OpenShift Ingress 调用。不支持直接访问 Service Mesh,比如使用类型为
NodePort或LoadBalancer的Service对象公开istio-ingressgateway。
1.4.2. 安装和配置 Service Mesh
要将 Serverless 与 Service Mesh 集成,您需要使用特定的配置安装 Service Mesh。
流程
使用以下配置在
istio-system命名空间中创建ServiceMeshControlPlane资源:重要如果您有一个现有的
ServiceMeshControlPlane对象,请确保应用了相同的配置。apiVersion: maistra.io/v2 kind: ServiceMeshControlPlane metadata: name: basic namespace: istio-system spec: profiles: - default security: dataPlane: mtls: true 1 techPreview: meshConfig: defaultConfig: terminationDrainDuration: 35s 2 gateways: ingress: service: metadata: labels: knative: ingressgateway 3 proxy: networking: trafficControl: inbound: excludedPorts: 4 - 8444 # metrics - 8022 # serving: wait-for-drain k8s pre-stop hook将您要与 Service Mesh 集成的命名空间作为成员添加到
ServiceMeshMemberRoll对象中:servicemesh-member-roll.yaml配置文件示例apiVersion: maistra.io/v1 kind: ServiceMeshMemberRoll metadata: name: default namespace: istio-system spec: members: 1 - knative-serving - knative-eventing - your-OpenShift-projects- 1
- 要与 Service Mesh 集成的命名空间列表。
重要此命名空间列表必须包含
knative-serving和knative-eventing命名空间。应用
ServiceMeshMemberRoll资源:$ oc apply -f servicemesh-member-roll.yaml
创建必要的网关,以便 Service Mesh 可以接受流量。以下示例使用带有
ISTIO_MUTUAL模式的knative-local-gateway对象(mTLS):istio-knative-gateways.yaml配置文件示例apiVersion: networking.istio.io/v1alpha3 kind: Gateway metadata: name: knative-ingress-gateway namespace: knative-serving spec: selector: knative: ingressgateway servers: - port: number: 443 name: https protocol: HTTPS hosts: - "*" tls: mode: SIMPLE credentialName: <wildcard_certs> 1 --- apiVersion: networking.istio.io/v1alpha3 kind: Gateway metadata: name: knative-local-gateway namespace: knative-serving spec: selector: knative: ingressgateway servers: - port: number: 8081 name: https protocol: HTTPS 2 tls: mode: ISTIO_MUTUAL 3 hosts: - "*" --- apiVersion: v1 kind: Service metadata: name: knative-local-gateway namespace: istio-system labels: experimental.istio.io/disable-gateway-port-translation: "true" spec: type: ClusterIP selector: istio: ingressgateway ports: - name: http2 port: 80 targetPort: 8081应用
Gateway资源:$ oc apply -f istio-knative-gateways.yaml
1.4.3. 安装和配置 Serverless
安装 Service Mesh 后,您需要使用特定的配置安装 Serverless。
流程
使用以下
KnativeServing自定义资源安装 Knative Serving,这样可启用 Istio 集成:knative-serving-config.yaml配置文件示例apiVersion: operator.knative.dev/v1beta1 kind: KnativeServing metadata: name: knative-serving namespace: knative-serving spec: ingress: istio: enabled: true 1 deployments: 2 - name: activator annotations: "sidecar.istio.io/inject": "true" "sidecar.istio.io/rewriteAppHTTPProbers": "true" - name: autoscaler annotations: "sidecar.istio.io/inject": "true" "sidecar.istio.io/rewriteAppHTTPProbers": "true" config: istio: 3 gateway.knative-serving.knative-ingress-gateway: istio-ingressgateway.<your-istio-namespace>.svc.cluster.local local-gateway.knative-serving.knative-local-gateway: knative-local-gateway.<your-istio-namespace>.svc.cluster.local应用
KnativeServing资源:$ oc apply -f knative-serving-config.yaml
使用以下 KnativeEventing 对象安装
Knative Eventing,它启用了 Istio 集成:knative-eventing-config.yaml配置文件示例apiVersion: operator.knative.dev/v1beta1 kind: KnativeEventing metadata: name: knative-eventing namespace: knative-eventing spec: config: features: istio: enabled 1 workloads: 2 - name: pingsource-mt-adapter annotations: "sidecar.istio.io/inject": "true" "sidecar.istio.io/rewriteAppHTTPProbers": "true" - name: imc-dispatcher annotations: "sidecar.istio.io/inject": "true" "sidecar.istio.io/rewriteAppHTTPProbers": "true" - name: mt-broker-ingress annotations: "sidecar.istio.io/inject": "true" "sidecar.istio.io/rewriteAppHTTPProbers": "true" - name: mt-broker-filter annotations: "sidecar.istio.io/inject": "true" "sidecar.istio.io/rewriteAppHTTPProbers": "true"应用
KnativeEventing资源:$ oc apply -f knative-eventing-config.yaml
使用以下 KnativeKafka 自定义资源安装
Knative Kafka,它启用了 Istio 集成:knative-kafka-config.yaml配置文件示例apiVersion: operator.serverless.openshift.io/v1alpha1 kind: KnativeKafka metadata: name: knative-kafka namespace: knative-eventing spec: channel: enabled: true bootstrapServers: <bootstrap_servers> 1 source: enabled: true broker: enabled: true defaultConfig: bootstrapServers: <bootstrap_servers> 2 numPartitions: <num_partitions> replicationFactor: <replication_factor> sink: enabled: true workloads: 3 - name: kafka-controller annotations: "sidecar.istio.io/inject": "true" "sidecar.istio.io/rewriteAppHTTPProbers": "true" - name: kafka-broker-receiver annotations: "sidecar.istio.io/inject": "true" "sidecar.istio.io/rewriteAppHTTPProbers": "true" - name: kafka-broker-dispatcher annotations: "sidecar.istio.io/inject": "true" "sidecar.istio.io/rewriteAppHTTPProbers": "true" - name: kafka-channel-receiver annotations: "sidecar.istio.io/inject": "true" "sidecar.istio.io/rewriteAppHTTPProbers": "true" - name: kafka-channel-dispatcher annotations: "sidecar.istio.io/inject": "true" "sidecar.istio.io/rewriteAppHTTPProbers": "true" - name: kafka-source-dispatcher annotations: "sidecar.istio.io/inject": "true" "sidecar.istio.io/rewriteAppHTTPProbers": "true" - name: kafka-sink-receiver annotations: "sidecar.istio.io/inject": "true" "sidecar.istio.io/rewriteAppHTTPProbers": "true"应用
KnativeEventing对象:$ oc apply -f knative-kafka-config.yaml
安装
ServiceEntry以告知 Service MeshKnativeKafka组件和 Apache Kafka 集群之间的通信:kafka-cluster-serviceentry.yaml配置文件示例apiVersion: networking.istio.io/v1alpha3 kind: ServiceEntry metadata: name: kafka-cluster namespace: knative-eventing spec: hosts: 1 - <bootstrap_servers_without_port> exportTo: - "." ports: 2 - number: 9092 name: tcp-plain protocol: TCP - number: 9093 name: tcp-tls protocol: TCP - number: 9094 name: tcp-sasl-tls protocol: TCP - number: 9095 name: tcp-sasl-tls protocol: TCP - number: 9096 name: tcp-tls protocol: TCP location: MESH_EXTERNAL resolution: NONE
注意spec.ports中列出的端口为 example requirement 端口。实际值取决于 Apache Kafka 集群的配置方式。应用
ServiceEntry资源:$ oc apply -f kafka-cluster-serviceentry.yaml
1.4.4. 验证集成
安装 Service Mesh 和启用了 Istio 的 Serverless 后,您可以验证集成是否正常工作。
流程
创建一个启用了 sidecar 注入并使用 pass-through 路由的 Knative Service:
knative-service.yaml配置文件示例apiVersion: serving.knative.dev/v1 kind: Service metadata: name: <service_name> namespace: <namespace> 1 annotations: serving.knative.openshift.io/enablePassthrough: "true" 2 spec: template: metadata: annotations: sidecar.istio.io/inject: "true" 3 sidecar.istio.io/rewriteAppHTTPProbers: "true" spec: containers: - image: <image_url>
重要始终将注解添加到所有 Knative Service 中,使其可用于 Service Mesh。
应用
Service资源:$ oc apply -f knative-service.yaml
使用 CA 信任的安全连接访问无服务器应用程序:
$ curl --cacert root.crt <service_url>
例如,运行:
示例命令
$ curl --cacert root.crt https://hello-default.apps.openshift.example.com
输出示例
Hello Openshift!
1.5. 在使用带有 mTLS 的 Service Mesh 时启用 Knative Serving 指标
如果启用了 mTLS 的 Service Mesh,则默认禁用 Knative Serving 的指标,因为 Service Mesh 会防止 Prometheus 提取指标。本节介绍在使用 Service Mesh 和 mTLS 时如何启用 Knative Serving 指标。
先决条件
- 您已在集群中安装了 OpenShift Serverless Operator 和 Knative Serving。
- 已安装了启用了 mTLS 功能的 Red Hat OpenShift Service Mesh。
- 在 OpenShift Container Platform 上具有集群管理员权限,或者对 Red Hat OpenShift Service on AWS 或 OpenShift Dedicated 有集群或专用管理员权限。
-
安装 OpenShift CLI (
oc) 。 - 您已创建了一个项目,或者具有适当的角色和权限访问项目,以创建应用程序和其他工作负载。
流程
在 Knative Serving 自定义资源 (CR) 的
observabilityspec 中将prometheus指定为metrics.backend-destination:apiVersion: operator.knative.dev/v1beta1 kind: KnativeServing metadata: name: knative-serving spec: config: observability: metrics.backend-destination: "prometheus" ...此步骤可防止默认禁用指标。
应用以下网络策略来允许来自 Prometheus 命名空间中的流量:
apiVersion: networking.k8s.io/v1
kind: NetworkPolicy
metadata:
  name: allow-from-openshift-monitoring-ns
  namespace: knative-serving
spec:
  ingress:
  - from:
    - namespaceSelector:
        matchLabels:
          name: "openshift-monitoring"
  podSelector: {}
...
修改并重新应用
istio-system命名空间中的默认 Service Mesh control plane,使其包含以下 spec:... spec: proxy: networking: trafficControl: inbound: excludedPorts: - 8444 ...
1.6. 在启用了 Kourier 时将 Service Mesh 与 OpenShift Serverless 集成
即使已经启用了 Kourier,您也可以在 OpenShift Serverless 中使用 Service Mesh。如果您已在启用了 Kourier 的情况下安装了 Knative Serving,但决定在以后添加 Service Mesh 集成,这个过程可能会很有用。
先决条件
- 在 OpenShift Container Platform 上具有集群管理员权限,或者对 Red Hat OpenShift Service on AWS 或 OpenShift Dedicated 有集群或专用管理员权限。
- 您已创建了一个项目,或者具有适当的角色和权限访问项目,以创建应用程序和其他工作负载。
-
安装 OpenShift CLI (
oc) 。 - 在集群上安装 OpenShift Serverless Operator 和 Knative Serving。
- 安装 Red Hat OpenShift Service Mesh。带有 Service Mesh 和 Kourier 的 OpenShift Serverless 支持与 Red Hat OpenShift Service Mesh 1.x 和 2.x 版本搭配使用。
流程
将您要与 Service Mesh 集成的命名空间作为成员添加到
ServiceMeshMemberRoll对象中:apiVersion: maistra.io/v1 kind: ServiceMeshMemberRoll metadata: name: default namespace: istio-system spec: members: - <namespace> 1 ...- 1
- 要与 Service Mesh 集成的命名空间列表。
应用
ServiceMeshMemberRoll资源:$ oc apply -f <filename>
创建允许 Knative 系统 Pod 到 Knative 服务流量的网络策略:
对于您要与 Service Mesh 集成的每个命名空间,创建一个
NetworkPolicy资源:apiVersion: networking.k8s.io/v1 kind: NetworkPolicy metadata: name: allow-from-serving-system-namespace namespace: <namespace> 1 spec: ingress: - from: - namespaceSelector: matchLabels: knative.openshift.io/part-of: "openshift-serverless" podSelector: {} policyTypes: - Ingress ...- 1
- 添加您要与 Service Mesh 集成的命名空间。
注意knative.openshift.io/part-of: "openshift-serverless"标签添加到 OpenShift Serverless 1.22.0 中。如果使用 OpenShift Serverless 1.21.1 或更早版本,请将knative.openshift.io/part-of标签添加到knative-serving和knative-serving-ingress命名空间。将标签添加到
knative-serving命名空间:$ oc label namespace knative-serving knative.openshift.io/part-of=openshift-serverless
将标签添加到
knative-serving-ingress命名空间:$ oc label namespace knative-serving-ingress knative.openshift.io/part-of=openshift-serverless
应用
NetworkPolicy资源:$ oc apply -f <filename>
1.7. 为 Service Mesh 使用 secret 过滤来提高 net-istio 内存用量
默认情况下,Kubernetes client-go 库的 informers 实施会获取特定类型的所有资源。当有很多资源可用时,这可能会导致大量资源出现大量开销,这可能会导致 Knative net-istio 入口控制器因为内存泄漏而在大型集群中失败。但是,Knative net-istio ingress 控制器可以使用过滤机制,它允许控制器只获取 Knative 相关的 secret。
在 OpenShift Serverless Operator 端默认启用 secret 过滤。默认情况下,在 net-istio 控制器 pod 中添加环境变量 ENABLE_SECRET_INFORMER_FILTERING_BY_CERT_UID=true。
如果启用 secret 过滤,则必须使用 networking.internal.knative.dev/certificate-uid: "<id>" 标记所有 secret。否则,Knative Serving 不会检测到它们,这会导致失败。您必须标记新的和现有的 secret。
先决条件
- 在 OpenShift Container Platform 上具有集群管理员权限,或者对 Red Hat OpenShift Service on AWS 或 OpenShift Dedicated 有集群或专用管理员权限。
- 您已创建了一个项目,或者具有适当的角色和权限访问项目,以创建应用程序和其他工作负载。
- 安装 Red Hat OpenShift Service Mesh。带有 Service Mesh 的 OpenShift Serverless 仅支持与 Red Hat OpenShift Service Mesh 2.0.5 或更高版本搭配使用。
- 安装 OpenShift Serverless Operator 和 Knative Serving。
-
安装 OpenShift CLI (
oc) 。
您可以使用 KnativeServing 自定义资源(CR)中的 workload 字段将 ENABLE_SECRET_INFORMER_FILTERING_BY_CERT_UID 变量设为 false 来禁用 secret 过滤。
KnativeServing CR 示例
apiVersion: operator.knative.dev/v1beta1
kind: KnativeServing
metadata:
  name: knative-serving
  namespace: knative-serving
spec:
...
  workloads:
    - env:
        - container: controller
          envVars:
            - name: ENABLE_SECRET_INFORMER_FILTERING_BY_CERT_UID
              value: 'false'
      name: net-istio-controller
第 2 章 使用 Service Mesh 将网络流量与 OpenShift Serverless 隔离
使用 Service Mesh 将网络流量与 OpenShift Serverless 隔离只是一个技术预览功能。技术预览功能不受红帽产品服务等级协议(SLA)支持,且功能可能并不完整。红帽不推荐在生产环境中使用它们。这些技术预览功能可以使用户提早试用新的功能,并有机会在开发阶段提供反馈意见。
有关红帽技术预览功能支持范围的更多信息,请参阅技术预览功能支持范围。
Service Mesh 可用于使用 Service Mesh AuthorizationPolicy 资源在共享 Red Hat OpenShift Serverless 集群上的租户之间隔离网络流量。Serverless 还可使用几个 Service Mesh 资源来利用此目的。租户是一个或多个项目组成的组,它们可以通过共享集群上的网络相互访问。
2.1. 先决条件
- 您可以使用集群管理员访问权限访问 Red Hat OpenShift Serverless 帐户。
- 您已设置 Service Mesh 和 Serverless 集成。
- 您已为每个租户创建一个或多个 OpenShift 项目。
2.2. 高级架构
Service Mesh 提供的 Serverless 流量隔离的高级架构由 knative-serving、knative-eventing 和租户命名空间中的 AuthorizationPolicy 对象组成,所有组件都属于 Service Mesh 的一部分。注入的 Service Mesh sidecar 会强制这些规则在租户之间隔离网络流量。
2.3. 保护 Service Mesh
授权策略和 mTLS 允许您保护 Service Mesh。
流程
确保租户的所有 Red Hat OpenShift Serverless 项目都是与成员相同的
ServiceMeshMemberRoll对象的一部分:apiVersion: maistra.io/v1 kind: ServiceMeshMemberRoll metadata: name: default namespace: istio-system spec: members: - knative-serving # static value, needs to be here, see setup page - knative-eventing # static value, needs to be here, see setup page - team-alpha-1 # example OpenShift project that belongs to the team-alpha tenant - team-alpha-2 # example OpenShift project that belongs th the team-alpha tenant - team-bravo-1 # example OpenShift project that belongs to the team-bravo tenant - team-bravo-2 # example OpenShift project that belongs th the team-bravo tenant
属于网格的所有项目都必须以严格模式强制 mTLS。这会强制 Istio 只接受与 client-certificate 存在的连接,并允许 Service Mesh sidecar 使用
AuthorizationPolicy对象验证原始源。在
knative-serving和knative-eventing命名空间中创建带有AuthorizationPolicy对象的配置:knative-default-authz-policies.yaml配置文件示例apiVersion: security.istio.io/v1beta1 kind: AuthorizationPolicy metadata: name: deny-all-by-default namespace: knative-eventing spec: { } --- apiVersion: security.istio.io/v1beta1 kind: AuthorizationPolicy metadata: name: deny-all-by-default namespace: knative-serving spec: { } --- apiVersion: security.istio.io/v1beta1 kind: AuthorizationPolicy metadata: name: allow-mt-channel-based-broker-ingress-to-imc-dispatcher namespace: knative-eventing spec: action: ALLOW selector: matchLabels: app.kubernetes.io/component: "imc-dispatcher" rules: - from: - source: namespaces: [ "knative-eventing" ] principals: [ "cluster.local/ns/knative-eventing/sa/mt-broker-ingress" ] to: - operation: methods: [ "POST" ] --- apiVersion: security.istio.io/v1beta1 kind: AuthorizationPolicy metadata: name: allow-mt-channel-based-broker-ingress-to-kafka-channel namespace: knative-eventing spec: action: ALLOW selector: matchLabels: app.kubernetes.io/component: "kafka-channel-receiver" rules: - from: - source: namespaces: [ "knative-eventing" ] principals: [ "cluster.local/ns/knative-eventing/sa/mt-broker-ingress" ] to: - operation: methods: [ "POST" ] --- apiVersion: security.istio.io/v1beta1 kind: AuthorizationPolicy metadata: name: allow-kafka-channel-to-mt-channel-based-broker-filter namespace: knative-eventing spec: action: ALLOW selector: matchLabels: app.kubernetes.io/component: "broker-filter" rules: - from: - source: namespaces: [ "knative-eventing" ] principals: [ "cluster.local/ns/knative-eventing/sa/knative-kafka-channel-data-plane" ] to: - operation: methods: [ "POST" ] --- apiVersion: security.istio.io/v1beta1 kind: AuthorizationPolicy metadata: name: allow-imc-to-mt-channel-based-broker-filter namespace: knative-eventing spec: action: ALLOW selector: matchLabels: app.kubernetes.io/component: "broker-filter" rules: - from: - source: namespaces: [ "knative-eventing" ] principals: [ "cluster.local/ns/knative-eventing/sa/imc-dispatcher" ] to: - operation: methods: [ "POST" ] --- apiVersion: security.istio.io/v1beta1 kind: AuthorizationPolicy metadata: name: allow-probe-kafka-broker-receiver namespace: knative-eventing spec: action: ALLOW selector: matchLabels: app.kubernetes.io/component: "kafka-broker-receiver" rules: - from: - source: namespaces: [ "knative-eventing" ] principals: [ "cluster.local/ns/knative-eventing/sa/kafka-controller" ] to: - operation: methods: [ "GET" ] --- apiVersion: security.istio.io/v1beta1 kind: AuthorizationPolicy metadata: name: allow-probe-kafka-sink-receiver namespace: knative-eventing spec: action: ALLOW selector: matchLabels: app.kubernetes.io/component: "kafka-sink-receiver" rules: - from: - source: namespaces: [ "knative-eventing" ] principals: [ "cluster.local/ns/knative-eventing/sa/kafka-controller" ] to: - operation: methods: [ "GET" ] --- apiVersion: security.istio.io/v1beta1 kind: AuthorizationPolicy metadata: name: allow-probe-kafka-channel-receiver namespace: knative-eventing spec: action: ALLOW selector: matchLabels: app.kubernetes.io/component: "kafka-channel-receiver" rules: - from: - source: namespaces: [ "knative-eventing" ] principals: [ "cluster.local/ns/knative-eventing/sa/kafka-controller" ] to: - operation: methods: [ "GET" ] --- apiVersion: security.istio.io/v1beta1 kind: AuthorizationPolicy metadata: name: allow-traffic-to-activator namespace: knative-serving spec: selector: matchLabels: app: activator action: ALLOW rules: - from: - source: namespaces: [ "knative-serving", "istio-system" ] --- apiVersion: security.istio.io/v1beta1 kind: AuthorizationPolicy metadata: name: allow-traffic-to-autoscaler namespace: knative-serving spec: selector: matchLabels: app: autoscaler action: ALLOW rules: - from: - source: namespaces: [ "knative-serving" ]这些策略限制了 Serverless 系统组件之间的网络通信的访问规则。具体来说,它们强制执行以下规则:
-
拒绝
knative-serving和knative-eventing命名空间中未明确允许的所有流量 -
允许来自
istio-system和knative-serving命名空间的流量来激活器 -
允许从
knative-serving命名空间到自动扩展的流量 -
在
knative-eventing命名空间中允许 Apache Kafka 组件的健康探测 -
在
knative-eventing命名空间中允许基于频道的代理的内部流量
-
拒绝
应用授权策略配置:
$ oc apply -f knative-default-authz-policies.yaml
定义哪些 OpenShift 项目可以相互通信。对于此通信,租户的每个 OpenShift 项目都需要以下内容:
-
一个
AuthorizationPolicy对象将直接传入的流量限制到租户的项目 -
一个
AuthorizationPolicy对象使用knative-serving项目中运行的 Serverless 的激活器组件限制传入的流量 -
一个
AuthorizationPolicy对象,允许 Kubernetes 在 Knative Services 上调用PreStopHooks
安装
helm工具并为每个租户创建所需资源,而不是手动创建这些策略:安装
helm工具$ helm repo add openshift-helm-charts https://charts.openshift.io/
为
team alpha创建配置示例$ helm template openshift-helm-charts/redhat-knative-istio-authz --version 1.31.0 --set "name=team-alpha" --set "namespaces={team-alpha-1,team-alpha-2}" > team-alpha.yaml为
团队 bravo创建示例配置$ helm template openshift-helm-charts/redhat-knative-istio-authz --version 1.31.0 --set "name=team-bravo" --set "namespaces={team-bravo-1,team-bravo-2}" > team-bravo.yaml-
一个
应用授权策略配置:
$ oc apply -f team-alpha.yaml team-bravo.yaml
2.4. 验证配置
您可以使用 curl 命令验证网络流量隔离的配置。
以下示例假定有两个租户,每个租户都有一个命名空间,以及 ServiceMeshMemberRoll 对象的所有部分,使用 team-alpha.yaml 和 team-bravo.yaml 文件中的资源进行配置。
流程
在两个租户的命名空间中部署 Knative Services:
team-alpha的命令示例$ kn service create test-webapp -n team-alpha-1 \ --annotation-service serving.knative.openshift.io/enablePassthrough=true \ --annotation-revision sidecar.istio.io/inject=true \ --env RESPONSE="Hello Serverless" \ --image docker.io/openshift/hello-openshiftteam-bravo的命令示例$ kn service create test-webapp -n team-bravo-1 \ --annotation-service serving.knative.openshift.io/enablePassthrough=true \ --annotation-revision sidecar.istio.io/inject=true \ --env RESPONSE="Hello Serverless" \ --image docker.io/openshift/hello-openshift或者,使用以下 YAML 配置:
apiVersion: serving.knative.dev/v1
kind: Service
metadata:
  name: test-webapp
  namespace: team-alpha-1
  annotations:
    serving.knative.openshift.io/enablePassthrough: "true"
spec:
  template:
    metadata:
      annotations:
        sidecar.istio.io/inject: 'true'
    spec:
      containers:
        - image: docker.io/openshift/hello-openshift
          env:
            - name: RESPONSE
              value: "Hello Serverless!"
---
apiVersion: serving.knative.dev/v1
kind: Service
metadata:
  name: test-webapp
  namespace: team-bravo-1
  annotations:
    serving.knative.openshift.io/enablePassthrough: "true"
spec:
  template:
    metadata:
      annotations:
        sidecar.istio.io/inject: 'true'
    spec:
      containers:
        - image: docker.io/openshift/hello-openshift
          env:
            - name: RESPONSE
              value: "Hello Serverless!"
部署
curlpod 来测试连接:$ cat <<EOF | oc apply -f - apiVersion: apps/v1 kind: Deployment metadata: name: curl namespace: team-alpha-1 labels: app: curl spec: replicas: 1 selector: matchLabels: app: curl template: metadata: labels: app: curl annotations: sidecar.istio.io/inject: 'true' spec: containers: - name: curl image: curlimages/curl command: - sleep - "3600" EOF使用
curl命令验证配置。通过集群本地域测试
team-alpha-1 → team-alpha-1,这是允许的:示例命令
$ oc exec deployment/curl -n team-alpha-1 -it -- curl -v http://test-webapp.team-alpha-1:80
输出示例
HTTP/1.1 200 OK
content-length: 18
content-type: text/plain; charset=utf-8
date: Wed, 26 Jul 2023 12:49:59 GMT
server: envoy
x-envoy-upstream-service-time: 9

Hello Serverless!
通过外部域测试
team-alpha-1示例命令
$ EXTERNAL_URL=$(oc get ksvc -n team-alpha-1 test-webapp -o custom-columns=:.status.url --no-headers) && \
oc exec deployment/curl -n team-alpha-1 -it -- curl -ik $EXTERNAL_URL
输出示例
HTTP/2 200
content-length: 18
content-type: text/plain; charset=utf-8
date: Wed, 26 Jul 2023 12:55:30 GMT
server: istio-envoy
x-envoy-upstream-service-time: 3629

Hello Serverless!
通过集群的本地域测试
team-alpha-1到team-bravo-1连接,这是不允许的:示例命令
$ oc exec deployment/curl -n team-alpha-1 -it -- curl -v http://test-webapp.team-bravo-1:80
输出示例
* processing: http://test-webapp.team-bravo-1:80
*   Trying 172.30.73.216:80...
* Connected to test-webapp.team-bravo-1 (172.30.73.216) port 80
> GET / HTTP/1.1
> Host: test-webapp.team-bravo-1
> User-Agent: curl/8.2.0
> Accept: */*
>
< HTTP/1.1 403 Forbidden
< content-length: 19
< content-type: text/plain
< date: Wed, 26 Jul 2023 12:55:49 GMT
< server: envoy
< x-envoy-upstream-service-time: 6
<
* Connection #0 to host test-webapp.team-bravo-1 left intact
RBAC: access denied
通过外部域测试
team-alpha-1到team-bravo-1连接,允许:示例命令
$ EXTERNAL_URL=$(oc get ksvc -n team-bravo-1 test-webapp -o custom-columns=:.status.url --no-headers) && \
oc exec deployment/curl -n team-alpha-1 -it -- curl -ik $EXTERNAL_URL
输出示例
HTTP/2 200
content-length: 18
content-type: text/plain; charset=utf-8
date: Wed, 26 Jul 2023 12:56:22 GMT
server: istio-envoy
x-envoy-upstream-service-time: 2856

Hello Serverless!
删除为验证创建的资源:
$ oc delete deployment/curl -n team-alpha-1 && \
oc delete ksvc/test-webapp -n team-alpha-1 && \
oc delete ksvc/test-webapp -n team-bravo-1
OpenShift Container Platform 的其他资源
第 3 章 将 Serverless 与成本管理服务集成
Cost management 是一种 OpenShift Container Platform 服务,可让您更好地了解和跟踪云和容器的成本。它基于开源 Koku 项目。
3.1. 先决条件
- 有集群管理员权限。
- 您已设置成本管理,并添加了 OpenShift Container Platform 源。
3.2. 使用标签进行成本管理查询
标签(label)(在成本管理中也称为 tag )可用于节点、命名空间或 pod。每个标签都是键和值对。您可以使用多个标签的组合来生成报告。您可以使用红帽混合控制台访问成本的相关报告。
标签从节点继承到命名空间,并从命名空间继承到 pod。但是,如果标签已在资源中已存在,则标签不会被覆盖。例如,Knative 服务具有默认的 app=<revision_name> 标签:
Knative 服务默认标签示例
apiVersion: serving.knative.dev/v1
kind: Service
metadata:
  name: showcase
spec:
...
      labels:
        app: <revision_name>
...
如果您为命名空间定义标签,如 app=my-domain,在查询使用 app=my-domain 标签的应用程序时,成本管理服务不会考虑带有 app=<revision_name> 标签的 Knative 服务的成本。具有此标签的 Knative 服务的成本必须在 app=<revision_name> 标签下查询。
3.3. 其他资源
第 4 章 将 Serverless 与 OpenShift Pipelines 集成
将 Serverless 与 OpenShift Pipelines 集成,为 Serverless 服务启用 CI/CD 管道管理。使用这个集成,您可以自动部署 Serverless 服务。
4.1. 先决条件
-
您可以使用
cluster-admin权限访问集群。 - 在集群中安装了 OpenShift Serverless Operator 和 Knative Serving。
- 在集群中安装了 OpenShift Pipelines Operator。
4.2. 创建 OpenShift Pipelines 部署的服务
使用 OpenShift Container Platform Web 控制台,您可以创建一个 OpenShift Pipelines 部署的服务。
流程
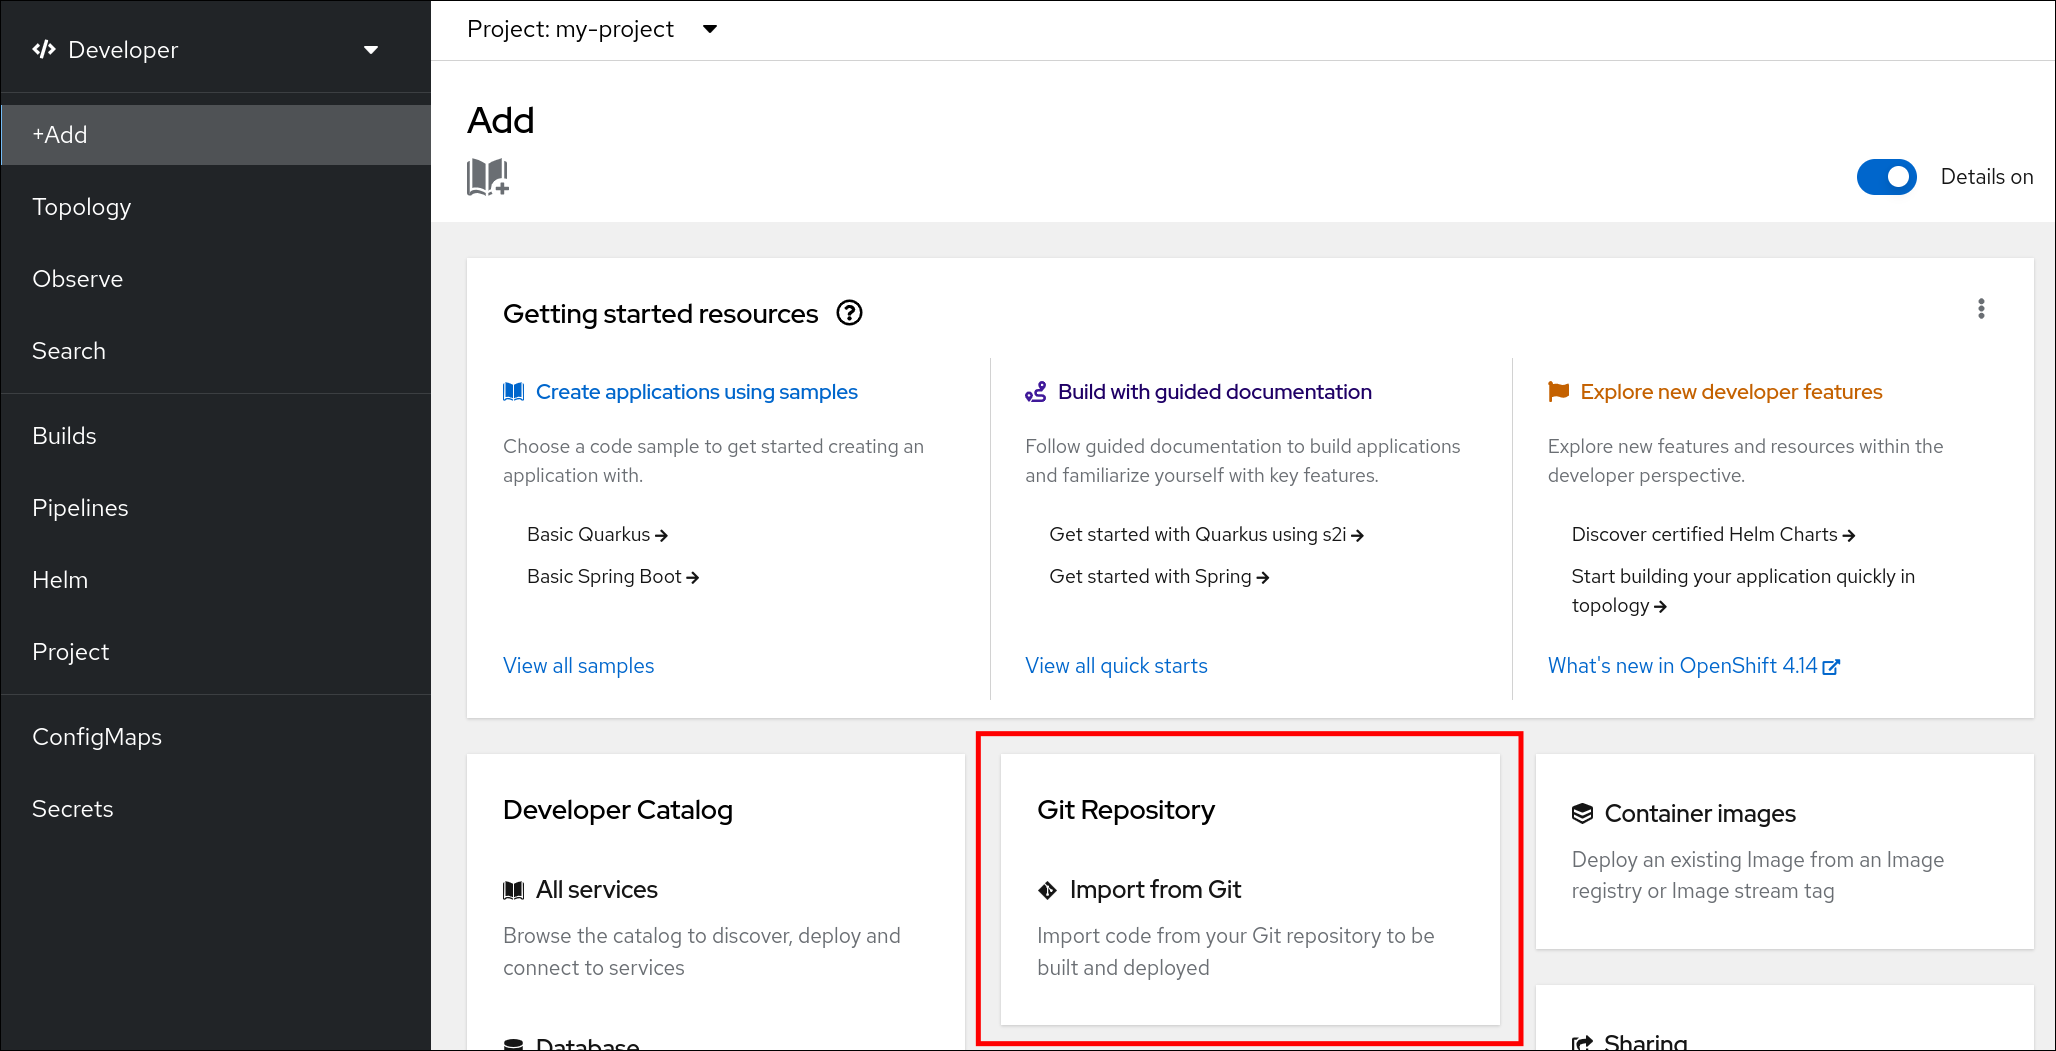
在 OpenShift Container Platform web 控制台 Developer 视角中,导航到 +Add 并选择 Import from Git 选项。
在 Import from Git 对话框中,执行以下操作来指定项目元数据:
- 指定 Git 存储库 URL。
- 如有必要,指定上下文目录。这是包含应用源代码根目录的存储库内的子目录。
- 可选:指定应用程序名称。默认情况下使用存储库名称。
- 选择 Serverless Deployment 资源类型。
- 选择 Add pipeline 复选框。管道根据源代码自动选择,其视觉化显示在方案中。
指定任何其他相关设置。
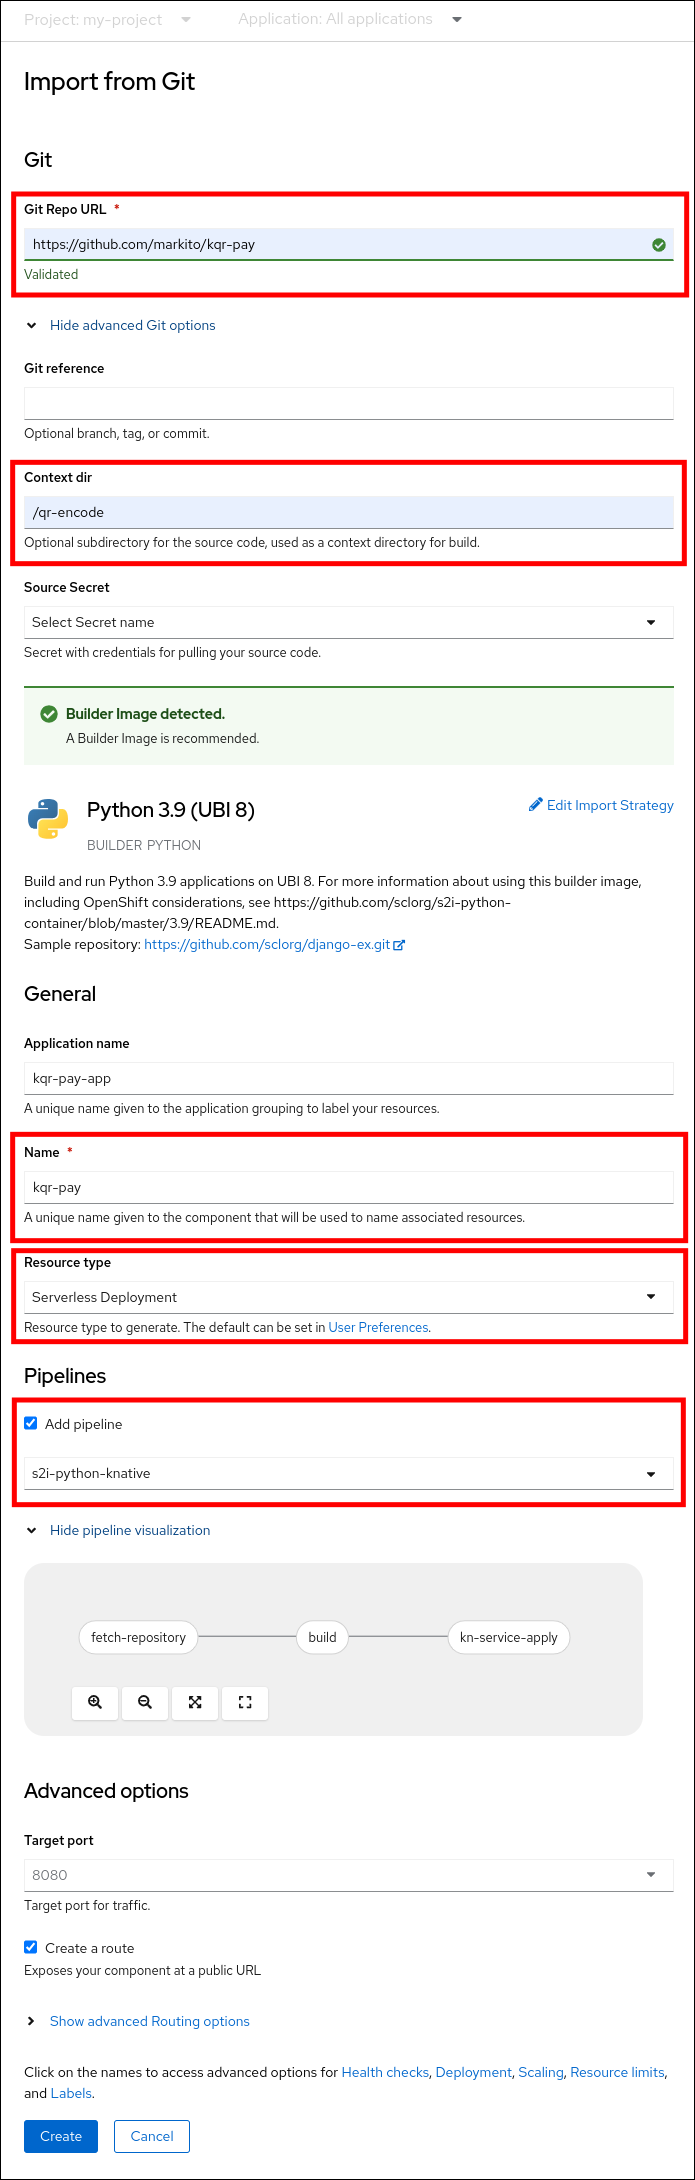
- 点 Create 创建服务。
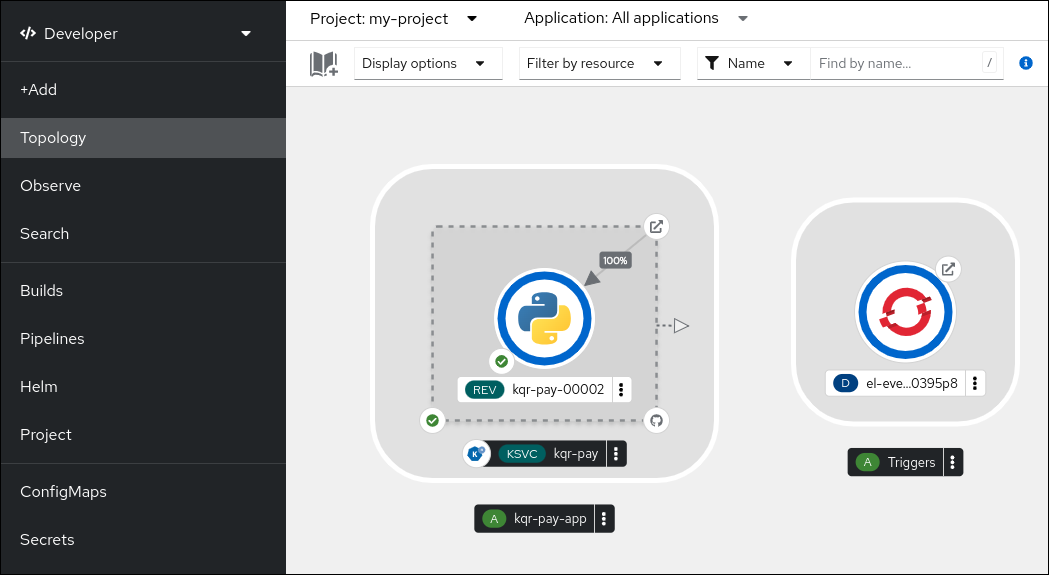
在服务创建启动后,您将进入 Topology 屏幕,其中会视觉化您的服务和相关触发器,以及您可以与之交互的位置。
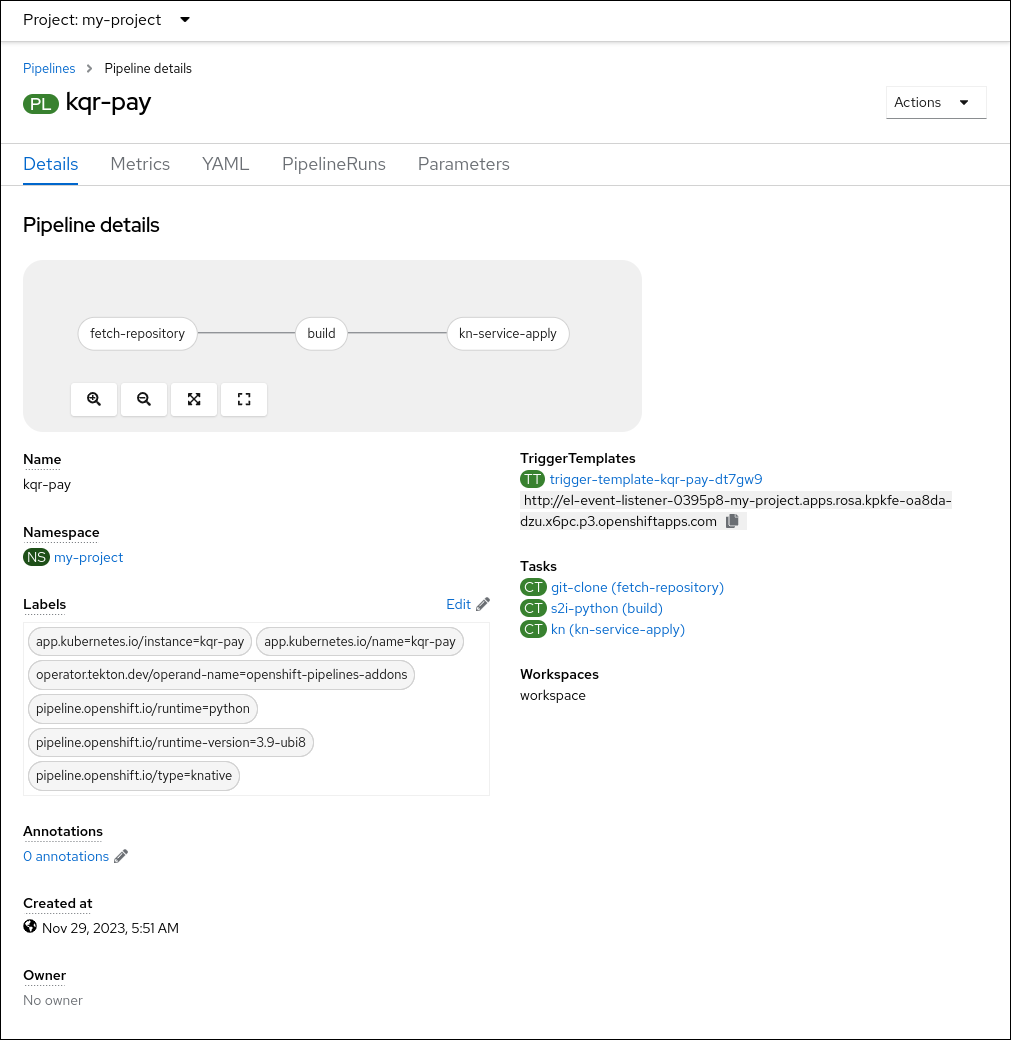
可选:通过进入到 Pipelines 页面来验证管道是否已创建并部署了该服务:
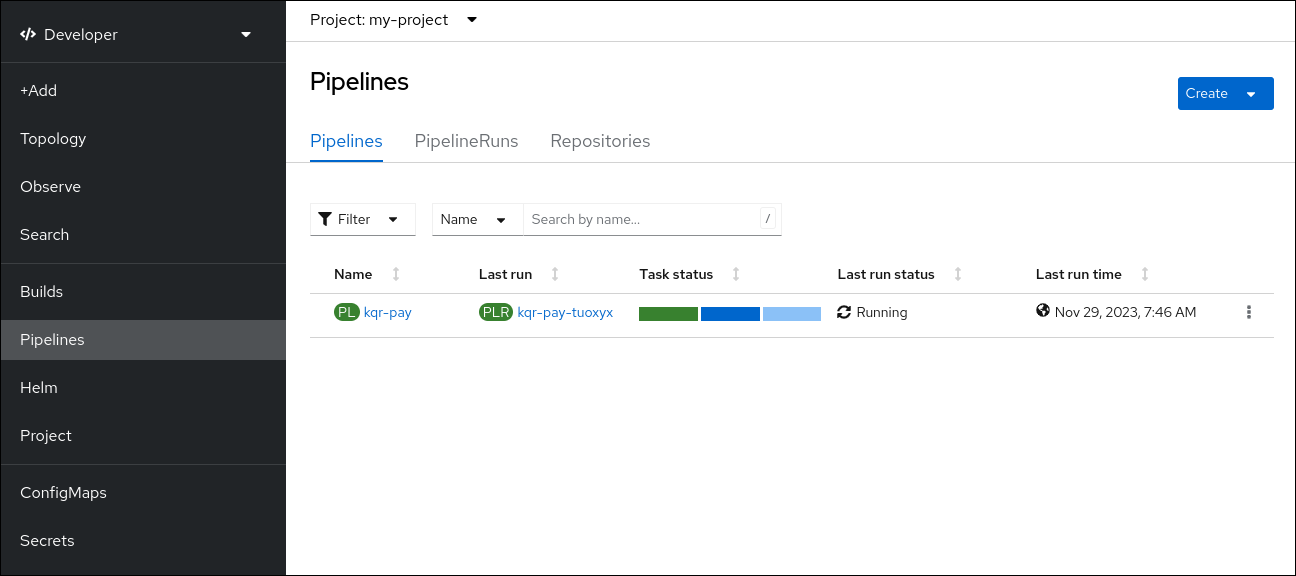
要查看管道的详情,点 Pipelines 页面中的管道。
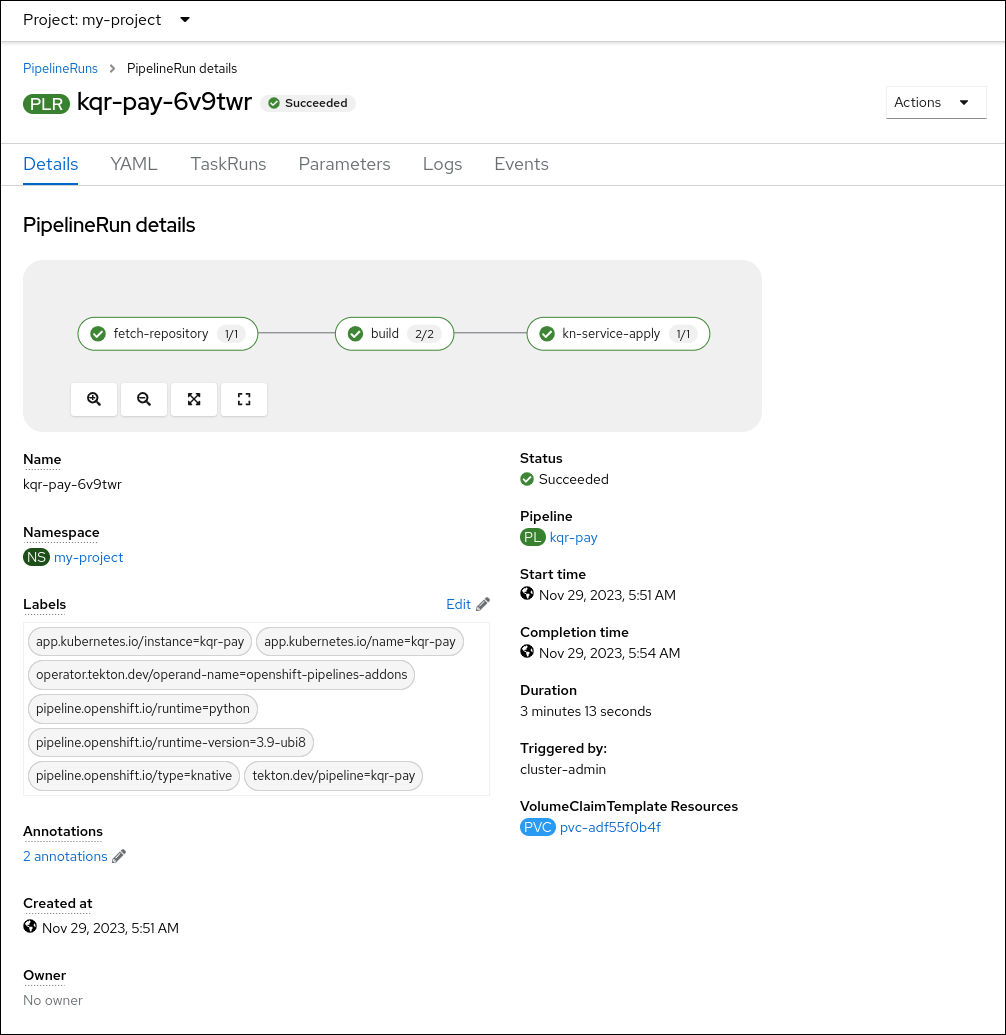
要查看当前管道运行的详情,请点 Pipelines 页面中运行的名称。
4.3. 其他资源
第 5 章 使用无服务器应用程序的 NVIDIA GPU 资源
NVIDIA 支持在 OpenShift Container Platform 上使用 GPU 资源。如需有关在 OpenShift Container Platform 中设置 GPU 资源的更多信息,请参阅 OpenShift 上的 GPU Operator。
5.1. 为服务指定 GPU 要求
为 OpenShift Container Platform 集群启用 GPU 资源后,您可以使用 Knative (kn) CLI 为 Knative 服务指定 GPU 要求。
先决条件
- 在集群中安装了 OpenShift Serverless Operator、Knative Serving 和 Knative Eventing。
-
已安装 Knative (
kn) CLI。 - 为 OpenShift Container Platform 集群启用 GPU 资源。
- 您已创建了一个项目,或者具有适当的角色和权限访问项目,以便在 OpenShift Container Platform 中创建应用程序和其他工作负载。
在 OpenShift Container Platform 或 OpenShift Dedicated 上的 IBM zSystems 和 IBM Power 不支持使用 NVIDIA GPU 资源。
流程
创建 Knative 服务并使用
--limit nvidia.com/gpu=1标志将 GPU 资源要求限制设置为1:$ kn service create hello --image <service-image> --limit nvidia.com/gpu=1
GPU 资源要求限制为
1表示该服务有 1 个专用的 GPU 资源。服务不共享 GPU 资源。所有需要 GPU 资源的其他服务都必须等待 GPU 资源不再被使用为止。限值为 1 个 GPU 意味着超过使用 1 个 GPU 资源的应用程序会受到限制。如果服务请求超过 1 个 GPU 资源,它将部署到可以满足 GPU 资源要求的节点。
可选。对于现有服务,您可以使用
--limit nvidia.com/gpu=3标志将 GPU 资源要求限制改为3:$ kn service update hello --limit nvidia.com/gpu=3