3.6. 用户和角色
3.6.1. 用户简介
在 Red Hat Virtualization 中,有两种类型的用户域:本地域和外部域。在 Manager 安装过程中,会创建一个称为 内部域 的默认本地域,默认的用户 admin。
您可以使用 ovirt-aaa-jdbc-tool 在 interna 域中创建其他用户。在本地域中创建的用户帐户称为本地用户。您还可以将外部目录服务器(如 Red Hat Directory、Active Directory、OpenLDAP 和许多其他支持选项)附加到 Red Hat Virtualization 环境中,并将其用作外部域。在外部域中创建的用户帐户称为目录用户。
本地用户和目录用户都需要通过管理门户分配适当的角色和权限,然后才能在环境中正常工作。用户角色主要有两种:最终用户和管理员。最终用户角色使用和管理虚拟机门户中的虚拟资源。管理员角色使用管理门户维护系统基础架构。可以为虚拟机和主机等独立资源为用户分配角色,或者分配到集群和数据中心的某一对象层次结构。
3.6.2. Directory 服务器介绍
在安装过程中,Red Hat Virtualization Manager 在内部 域中创建一个 admin 用户。用户也称为 admin@internal。此帐户供初始配置环境和故障排除时使用。附加外部目录服务器后,添加目录用户,并为他们分配适当的角色和权限,则可以禁用 admin@internal 用户(如果不需要)。
- 389ds
- 389ds RFC-2307 Schema
- Active Directory
- IBM Security Directory Server
- IBM Security Directory Server RFC-2307 Schema
- FreeIPA
- iDM
- Novell eDirectory RFC-2307 Schema
- OpenLDAP RFC-2307 Schema
- OpenLDAP 标准架构
- Oracle Unified Directory RFC-2307 Schema
- RFC-2307 Schema (Generic)
- Red Hat Directory Server (RHDS)
- Red Hat Directory Server (RHDS) RFC-2307 Schema
- iPlanet
无法在同一系统中安装 Red Hat Virtualization Manager (rhevm)和 IdM (ipa-server)。IdM 与 Red Hat Virtualization Manager 所需的 mod_ssl 软件包不兼容。
如果您要将 Active Directory 用作目录服务器,并且您希望在创建模板和虚拟机时使用 sysprep,那么Red Hat Virtualization 管理用户必须委托给域:
- 将计算机加入到域中
- 修改组成员资格
有关在 Active Directory 中 创建用户帐户的详情,请参考创建新用户帐户。
有关 Active Directory 中委托控制的详情,请参考 机构单元的控制。
3.6.3. 配置外部 LDAP 供应商
3.6.3.1. 配置外部 LDAP 提供程序(活动设置)
ovirt-engine-extension-aaa-ldap 已被弃用。对于新安装,请使用 Red Hat Single Sign On。如需更多信息,请参阅 《管理指南》 中的 安装和配置 Red Hat Single Sign-On。
ovirt-engine-extension-aaa-ldap 扩展允许用户轻松自定义其外部目录设置。ovirt-engine-extension-aaa-ldap 扩展支持许多不同的 LDAP 服务器类型,还提供了交互式设置脚本,以帮助您设置大多数 LDAP 类型。
如果交互式设置脚本中没有列出 LDAP 服务器类型,或者您希望进行更多自定义,您可以手动编辑配置文件。如需更多信息 ,请参阅配置外部 LDAP 供应商。
有关 Active Directory 示例,请参阅 附加 Active Directory。
前提条件
- 您必须知道 DNS 或 LDAP 服务器的域名。
- 要在 LDAP 服务器和 Manager 间设置安全连接,请确保已准备好 PEM 编码的 CA 证书。
- 至少有一组帐户名称和密码已准备好对 LDAP 服务器执行搜索和登录查询。
流程
在 Red Hat Virtualization Manager 中,安装 LDAP 扩展软件包:
dnf install ovirt-engine-extension-aaa-ldap-setup
# dnf install ovirt-engine-extension-aaa-ldap-setupCopy to Clipboard Copied! Toggle word wrap Toggle overflow 运行
ovirt-engine-extension-aaa-ldap-setup来启动交互式设置:ovirt-engine-extension-aaa-ldap-setup
# ovirt-engine-extension-aaa-ldap-setupCopy to Clipboard Copied! Toggle word wrap Toggle overflow 输入对应数字来选择 LDAP 类型。如果您不确定 LDAP 服务器是哪个 schema,请选择您的 LDAP 服务器类型的标准模式。对于 Active Directory,请按照 Attaching_an_Active_Directory 中的步骤进行操作。
Copy to Clipboard Copied! Toggle word wrap Toggle overflow 按
Enter接受默认值,并为 LDAP 服务器名称配置域名:It is highly recommended to use DNS resolution for LDAP server. If for some reason you intend to use hosts or plain address disable DNS usage. Use DNS (Yes, No) [Yes]:
It is highly recommended to use DNS resolution for LDAP server. If for some reason you intend to use hosts or plain address disable DNS usage. Use DNS (Yes, No) [Yes]:Copy to Clipboard Copied! Toggle word wrap Toggle overflow 选择 DNS 策略方法:
- 对于选项 1,使用 /etc/resolv.conf 中列出的 DNS 服务器来解决 IP 地址。检查 /etc/resolv.conf 文件是否已使用正确的 DNS 服务器更新。
对于选项 2,请输入完全限定域名(FQDN)或 LDAP 服务器的 IP 地址。您可以使用
dig命令和 SRV 记录来查找域名。SRV 记录采用以下格式:_service._protocol.domain_name
_service._protocol.domain_nameCopy to Clipboard Copied! Toggle word wrap Toggle overflow 示例:
dig _ldap._tcp.redhat.com SRV.- 对于选项 3,请输入以空格分隔的 LDAP 服务器列表。使用服务器的 FQDN 或 IP 地址。此策略在 LDAP 服务器之间提供负载平衡。根据循环算法,查询在所有 LDAP 服务器中分发。
对于选项 4,请输入以空格分隔的 LDAP 服务器列表。使用服务器的 FQDN 或 IP 地址。此策略定义了第一个 LDAP 服务器作为响应查询的默认 LDAP 服务器。如果第一个服务器不可用,则查询将进入列表中的下一个 LDAP 服务器。
1 - Single server
2 - DNS domain LDAP SRV record
3 - Round-robin between multiple hosts
4 - Failover between multiple hosts
Please select:
1 - Single server
2 - DNS domain LDAP SRV record
3 - Round-robin between multiple hosts
4 - Failover between multiple hosts
Please select:
Copy to Clipboard Copied! Toggle word wrap Toggle overflow
选择 LDAP 服务器支持的安全连接方法,并指定获取 PEM 编码的 CA 证书的方法:
-
文件允许您提供证书的完整路径。 -
URL允许您指定证书的 URL。 -
内联允许您在终端中粘贴证书的内容。 -
系统允许您指定所有 CA 文件的默认位置。 不安全的跳过证书验证,但连接仍然使用 TLS 加密。Copy to Clipboard Copied! Toggle word wrap Toggle overflow 注意LDAPS 代表覆盖安全套接字链接的轻量级目录访问协议。对于 SSL 连接,请选择
ldaps选项。
-
输入搜索用户可分辨名称(DN)。用户必须具有权限才能浏览目录服务器上的所有用户和组。搜索用户必须在 LDAP 注解中指定。如果允许匿名搜索,请按
Enter键,无需输入。Enter search user DN (for example uid=username,dc=example,dc=com or leave empty for anonymous): uid=user1,ou=Users,ou=department-1,dc=example,dc=com Enter search user password:
Enter search user DN (for example uid=username,dc=example,dc=com or leave empty for anonymous): uid=user1,ou=Users,ou=department-1,dc=example,dc=com Enter search user password:Copy to Clipboard Copied! Toggle word wrap Toggle overflow 输入基本 DN:
Please enter base DN (dc=redhat,dc=com) [dc=redhat,dc=com]: ou=department-1,dc=redhat,dc=com
Please enter base DN (dc=redhat,dc=com) [dc=redhat,dc=com]: ou=department-1,dc=redhat,dc=comCopy to Clipboard Copied! Toggle word wrap Toggle overflow 如果您想要为虚拟机配置单点登录,请选择"是"。请注意,这个功能不能用于管理门户功能的单点登录。该脚本提醒您配置集名称必须与域名匹配。在虚拟机管理指南中,您仍需要遵循 为虚拟机配置单点登录 的说明 。Are you going to use Single Sign-On for Virtual Machines (Yes, No) [Yes]:
Are you going to use Single Sign-On for Virtual Machines (Yes, No) [Yes]:Copy to Clipboard Copied! Toggle word wrap Toggle overflow 指定配置集名称。配置集名称对登录页面上的用户可见。这个示例使用
redhat.com。注意要在域配置后重命名配置集,编辑 /etc/ovirt-engine/extensions.d/redhat.com-authn.properties 文件中的
ovirt.engine.aaa.authn.profile.name属性。重启ovirt-engine服务以使更改生效。Please specify profile name that will be visible to users: redhat.com
Please specify profile name that will be visible to users: redhat.comCopy to Clipboard Copied! Toggle word wrap Toggle overflow 图 3.1. 管理门户登录页面
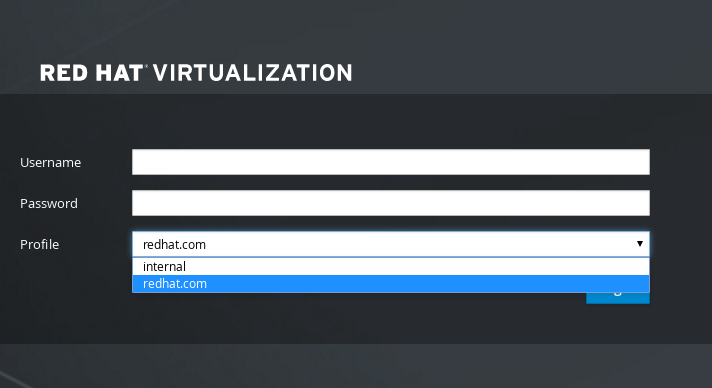 注意
注意首次登录时,用户必须从下拉菜单中选择配置集。这些信息存储在浏览器 Cookie 中,并在用户下一次登录时预选择。
测试登录功能,以确保您的 LDAP 服务器已正确地连接到您的 Red Hat Virtualization 环境。对于登录查询,请输入您的
用户名和密码:Copy to Clipboard Copied! Toggle word wrap Toggle overflow 检查用户详情是否正确。如果用户详情不正确,请选择
Abort:Please make sure that user details are correct and group membership meets expectations (search for PrincipalRecord and GroupRecord titles). Abort if output is incorrect. Select test sequence to execute (Done, Abort, Login, Search) [Abort]:
Please make sure that user details are correct and group membership meets expectations (search for PrincipalRecord and GroupRecord titles). Abort if output is incorrect. Select test sequence to execute (Done, Abort, Login, Search) [Abort]:Copy to Clipboard Copied! Toggle word wrap Toggle overflow 建议手动测试搜索功能。对于搜索查询,请为用户帐户选择
Principal,或者为组帐户选择Group。如果您希望返回用户帐户的组信息,对于Resolve Groups选择Yes。会创建三个配置文件,并显示在屏幕输出中。Select test sequence to execute (Done, Abort, Login, Search) [Search]: Search Select entity to search (Principal, Group) [Principal]: Term to search, trailing '*' is allowed: testuser1 Resolve Groups (Yes, No) [No]:
Select test sequence to execute (Done, Abort, Login, Search) [Search]: Search Select entity to search (Principal, Group) [Principal]: Term to search, trailing '*' is allowed: testuser1 Resolve Groups (Yes, No) [No]:Copy to Clipboard Copied! Toggle word wrap Toggle overflow 选择
Done以完成设置:Copy to Clipboard Copied! Toggle word wrap Toggle overflow 重新启动
ovirt-engine服务。您所创建的配置集现在包括在管理门户和虚拟机门户中。要在 LDAP 服务器上分配适当的角色和权限,如要登录虚拟机门户,请参阅 Manager User Tasks。systemctl restart ovirt-engine.service
# systemctl restart ovirt-engine.serviceCopy to Clipboard Copied! Toggle word wrap Toggle overflow
如需更多信息,请参阅 /usr/share/doc/ovirt-engine-extension-aaa-ldap-version 中的 LDAP 身份验证和授权扩展 README 文件。
3.6.3.2. 附加 Active Directory
ovirt-engine-extension-aaa-ldap 已被弃用。对于新安装,请使用 Red Hat Single Sign On。如需更多信息,请参阅 《管理指南》 中的 安装和配置 Red Hat Single Sign-On。
前提条件
您需要知道 Active Directory 林名称。林名称也称为根域名。
注意/
usr/share/ovirt-engine-extension-aaa-ldap-setup 工具中提供了最常见的 Active Directory 配置示例,它不能使用 ovirt-engine-extension-aaa-ldap/examples/README.md提供。- 您需要将可解析 Active Directory 林名称的 DNS 服务器添加到 Manager 上的 /etc/resolv.conf 文件,或者记下 Active Directory DNS 服务器,并在交互式设置脚本提示时输入它们。
- 要在 LDAP 服务器和 Manager 间设置安全连接,请确保已准备了 PEM 编码的 CA 证书。如需更多信息,请参阅在 Manager 和 LDAP 服务器间设置 SSL 或 TLS 连接。
- 除非支持匿名搜索,否则具有可浏览所有用户和组权限的用户必须可用于 Active Directory,才能用作搜索用户。请注意搜索用户的可识别名称(DN)。不要将管理员用户用于 Active Directory。
- 您必须至少有一个帐户名称和密码已就绪,才能对 Active Directory 执行搜索和登录查询。
-
如果您的 Active Directory 部署跨越多个域,请注意
/usr/share/ovirt-engine-extension-aaa-ldap/profiles/ad.properties文件中所描述的限制。
流程
在 Red Hat Virtualization Manager 中,安装 LDAP 扩展软件包:
dnf install ovirt-engine-extension-aaa-ldap-setup
# dnf install ovirt-engine-extension-aaa-ldap-setupCopy to Clipboard Copied! Toggle word wrap Toggle overflow 运行
ovirt-engine-extension-aaa-ldap-setup来启动交互式设置:ovirt-engine-extension-aaa-ldap-setup
# ovirt-engine-extension-aaa-ldap-setupCopy to Clipboard Copied! Toggle word wrap Toggle overflow 输入对应数字来选择 LDAP 类型。此步骤后 LDAP 相关问题对于不同的 LDAP 类型是不同的。
Copy to Clipboard Copied! Toggle word wrap Toggle overflow 输入 Active Directory 林名称。如果 Manager 的 DNS 无法解析林名称,该脚本会提示您输入一个空格分隔的 Active Directory DNS 服务器名称列表。
Please enter Active Directory Forest name: ad-example.redhat.com
[ INFO  ] Resolving Global Catalog SRV record for ad-example.redhat.com
[ INFO  ] Resolving LDAP SRV record for ad-example.redhat.com
Please enter Active Directory Forest name: ad-example.redhat.com
[ INFO  ] Resolving Global Catalog SRV record for ad-example.redhat.com
[ INFO  ] Resolving LDAP SRV record for ad-example.redhat.com
Copy to Clipboard Copied! Toggle word wrap Toggle overflow 选择 LDAP 服务器支持的安全连接方法,并指定获取 PEM 编码的 CA 证书的方法。file 选项允许您提供证书的完整路径。URL 选项允许您指定证书的 URL。使用 inline 选项,将证书的内容粘贴到终端中。system 选项允许您指定所有 CA 文件的位置。insecure 选项允许您在不安全模式中使用 startTLS。
Copy to Clipboard Copied! Toggle word wrap Toggle overflow 注意LDAPS 代表覆盖安全套接字链接的轻量级目录访问协议。对于 SSL 连接,请选择
ldaps选项。有关创建 PEM 编码的 CA 证书的更多信息,请参阅在 Manager 和 LDAP 服务器 间设置 SSL 或 TLS 连接。
输入搜索用户可分辨名称(DN)。用户必须具有权限才能浏览目录服务器上的所有用户和组。搜索用户必须是 LDAP 注解。如果允许匿名搜索,请按
Enter键,无需输入。Enter search user DN (empty for anonymous): cn=user1,ou=Users,dc=test,dc=redhat,dc=com Enter search user password:
Enter search user DN (empty for anonymous): cn=user1,ou=Users,dc=test,dc=redhat,dc=com Enter search user password:Copy to Clipboard Copied! Toggle word wrap Toggle overflow 指定是否为虚拟机使用单点登录。此功能默认是启用的,但如果启用了对管理门户的单点登录,则无法使用。该脚本提醒您配置集名称必须与域名匹配。在虚拟机管理指南中,您仍需要遵循 为虚拟机配置单点登录 的说明 。
Are you going to use Single Sign-On for Virtual Machines (Yes, No) [Yes]:
Are you going to use Single Sign-On for Virtual Machines (Yes, No) [Yes]:Copy to Clipboard Copied! Toggle word wrap Toggle overflow 指定配置集名称。配置集名称对登录页面上的用户可见。这个示例使用
redhat.com。Please specify profile name that will be visible to users:redhat.com
Please specify profile name that will be visible to users:redhat.comCopy to Clipboard Copied! Toggle word wrap Toggle overflow 图 3.2. 管理门户登录页面
注意第一次登录时,用户需要从下拉列表中选择所需的配置集。然后,信息会存储在浏览器 Cookie 中,并在用户下一次登录时预选择。
测试搜索和登录功能,以确保您的 LDAP 服务器已正确地连接到您的 Red Hat Virtualization 环境。对于登录查询,请输入帐户名称和密码。对于搜索查询,为用户帐户选择
Principal,然后选择Groupfor group for group。如果您希望返回用户帐户的组帐户信息,对于Resolve Groups选择Yes。选择Done以完成设置。会创建三个配置文件,并显示在屏幕输出中。Copy to Clipboard Copied! Toggle word wrap Toggle overflow - 您所创建的配置集现在包括在管理门户和虚拟机门户中。要在 LDAP 服务器上分配适当的角色和权限,如要登录虚拟机门户,请参阅 Manager User Tasks。
如需更多信息,请参阅 /usr/share/doc/ovirt-engine-extension-aaa-ldap-version 中的 LDAP 身份验证和授权扩展 README 文件。
3.6.3.3. 配置外部 LDAP 提供程序(Manual Method)
ovirt-engine-extension-aaa-ldap 已被弃用。对于新安装,请使用 Red Hat Single Sign On。如需更多信息,请参阅 《管理指南》 中的 安装和配置 Red Hat Single Sign-On。
ovirt-engine-extension-aaa-ldap 扩展使用 LDAP 协议访问目录服务器并可完全自定义。除非您要启用对虚拟机门户的单点登录或管理门户功能,否则不需要 Kerberos 身份验证。
如果上一节中的交互式设置方法没有涵盖您的用例,您可以手动修改配置文件以附加 LDAP 服务器。以下流程使用通用详情。具体值取决于您的设置。
流程
在 Red Hat Virtualization Manager 中,安装 LDAP 扩展软件包:
dnf install ovirt-engine-extension-aaa-ldap
# dnf install ovirt-engine-extension-aaa-ldapCopy to Clipboard Copied! Toggle word wrap Toggle overflow 将 LDAP 配置模板文件文件复制到 /etc/ovirt-engine 目录中。模板文件可用于活动目录(ad)和其他目录类型(简单)。这个示例使用简单的配置模板。
cp -r /usr/share/ovirt-engine-extension-aaa-ldap/examples/simple/. /etc/ovirt-engine
# cp -r /usr/share/ovirt-engine-extension-aaa-ldap/examples/simple/. /etc/ovirt-engineCopy to Clipboard Copied! Toggle word wrap Toggle overflow 重命名配置文件,以匹配您希望对管理门户和虚拟机门户中用户可见的配置集名称:
mv /etc/ovirt-engine/aaa/profile1.properties /etc/ovirt-engine/aaa/example.properties
mv /etc/ovirt-engine/extensions.d/profile1-authn.properties /etc/ovirt-engine/extensions.d/example-authn.properties
mv /etc/ovirt-engine/extensions.d/profile1-authz.properties /etc/ovirt-engine/extensions.d/example-authz.properties
# mv /etc/ovirt-engine/aaa/profile1.properties /etc/ovirt-engine/aaa/example.properties
# mv /etc/ovirt-engine/extensions.d/profile1-authn.properties /etc/ovirt-engine/extensions.d/example-authn.properties
# mv /etc/ovirt-engine/extensions.d/profile1-authz.properties /etc/ovirt-engine/extensions.d/example-authz.properties
Copy to Clipboard Copied! Toggle word wrap Toggle overflow 通过取消注释 LDAP 服务器类型并更新域和密码字段来编辑 LDAP 属性配置文件:
vi /etc/ovirt-engine/aaa/example.properties
# vi /etc/ovirt-engine/aaa/example.propertiesCopy to Clipboard Copied! Toggle word wrap Toggle overflow 例 3.5. 示例配置集:LDAP server 部分
Copy to Clipboard Copied! Toggle word wrap Toggle overflow 要使用 TLS 或 SSL 协议与 LDAP 服务器交互,请获取 LDAP 服务器的 root CA 证书,并使用它来创建公共密钥存储文件。取消注释以下行,并指定 public 密钥存储文件的完整路径,以及用于访问该文件的密码。
注意有关创建公共密钥存储文件的更多信息,请参阅在 Manager 和 LDAP 服务器 之间设置 SSL 或 TLS 连接。
例 3.6. profile: keystore 部分示例
# Create keystore, import certificate chain and uncomment
# if using tls.
pool.default.ssl.startTLS = true
pool.default.ssl.truststore.file = /full/path/to/myrootca.jks
pool.default.ssl.truststore.password = password
# Create keystore, import certificate chain and uncomment
# if using tls.
pool.default.ssl.startTLS = true
pool.default.ssl.truststore.file = /full/path/to/myrootca.jks
pool.default.ssl.truststore.password = password
Copy to Clipboard Copied! Toggle word wrap Toggle overflow 检查身份验证配置文件。该配置集在管理门户中对用户可见,并且虚拟机门户登录页面由 ovirt.engine.aaa.authn.profile.name 定义。配置配置文件位置必须与 LDAP 配置文件位置匹配。所有字段都可保留为默认值。
vi /etc/ovirt-engine/extensions.d/example-authn.properties
# vi /etc/ovirt-engine/extensions.d/example-authn.propertiesCopy to Clipboard Copied! Toggle word wrap Toggle overflow 例 3.7. 身份验证配置文件示例
Copy to Clipboard Copied! Toggle word wrap Toggle overflow 检查授权配置文件。配置配置文件位置必须与 LDAP 配置文件位置匹配。所有字段都可保留为默认值。
vi /etc/ovirt-engine/extensions.d/example-authz.properties
# vi /etc/ovirt-engine/extensions.d/example-authz.propertiesCopy to Clipboard Copied! Toggle word wrap Toggle overflow 例 3.8. 授权配置文件示例
Copy to Clipboard Copied! Toggle word wrap Toggle overflow 确保配置配置集的所有权和权限是适当的:
chown ovirt:ovirt /etc/ovirt-engine/aaa/example.properties
chmod 600 /etc/ovirt-engine/aaa/example.properties
# chown ovirt:ovirt /etc/ovirt-engine/aaa/example.properties
# chmod 600 /etc/ovirt-engine/aaa/example.properties
Copy to Clipboard Copied! Toggle word wrap Toggle overflow 重启引擎服务:
systemctl restart ovirt-engine.service
# systemctl restart ovirt-engine.serviceCopy to Clipboard Copied! Toggle word wrap Toggle overflow - 您所创建的示例 配置集现在包括在管理门户和虚拟机门户中。要为 LDAP 服务器上的用户帐户提供适当的权限,例如,要登录到虚拟机门户,请参阅 Manager User Tasks。
如需更多信息,请参阅 /usr/share/doc/ovirt-engine-extension-aaa-ldap-version 中的 LDAP 身份验证和授权扩展 README 文件。
3.6.3.4. 删除外部 LDAP 供应商
此流程演示了如何删除外部配置的 LDAP 供应商及其用户。
流程
删除 LDAP 供应商配置文件,替换默认名称 profile1 :
rm /etc/ovirt-engine/extensions.d/profile1-authn.properties
rm /etc/ovirt-engine/extensions.d/profile1-authz.properties
rm /etc/ovirt-engine/aaa/profile1.properties
# rm /etc/ovirt-engine/extensions.d/profile1-authn.properties
# rm /etc/ovirt-engine/extensions.d/profile1-authz.properties
# rm /etc/ovirt-engine/aaa/profile1.properties
Copy to Clipboard Copied! Toggle word wrap Toggle overflow 重启
ovirt-engine服务:systemctl restart ovirt-engine
# systemctl restart ovirt-engineCopy to Clipboard Copied! Toggle word wrap Toggle overflow -
在管理门户中,在 Users 资源选项卡中,选择此提供程序的用户(
授权提供程序是 profile1-authz),然后单击 Remove。
3.6.4. 为单点登录配置 LDAP 和 Kerberos
单点登录允许用户在不重新输入密码的情况下登录到虚拟机门户或管理门户。从 Kerberos 服务器获取身份验证凭据。要将单点登录配置为管理门户和虚拟机门户,您需要配置两个扩展: ovirt-engine-extension-aaa-misc 和 ovirt-engine-extension-aaa-ldap; 和两个 Apache 模块: mod_auth_gssapi 和 mod_session。您可以配置不涉及 Kerberos 的单点登录,但这超出了本文档的范围。
如果启用了对虚拟机门户的单点登录,则无法对虚拟机的单点登录。启用虚拟机门户的单点登录后,虚拟机门户不需要接受密码,因此您就无法将密码委派至虚拟机。
本例假定以下几项:
- 现有密钥分发中心(KDC)服务器使用 MIT 版本的 Kerberos 5。
- 您有 KDC 服务器的管理权限。
- Kerberos 客户端安装在 Red Hat Virtualization Manager 和用户机器上。
-
kadmin工具用于创建 Kerberos 服务主体和 keytab 文件。
这个过程涉及以下组件:
在 KDC 服务器中
- 在 Red Hat Virtualization Manager 上为 Apache 服务创建服务主体和 keytab 文件。
On the Red Hat Virtualization Manager
- 安装身份验证和授权扩展软件包和 Apache Kerberos 身份验证模块。
- 配置扩展文件。
3.6.4.1. 为 Apache 服务配置 Kerberos
在 KDC 服务器中,使用
kadmin实用程序在 Red Hat Virtualization Manager 中为 Apache 服务创建服务主体。服务主体是 Apache 服务的 KDC 的引用 ID。kadmin kadmin> addprinc -randkey HTTP/fqdn-of-rhevm@REALM.COM
# kadmin
kadmin> addprinc -randkey HTTP/fqdn-of-rhevm@REALM.COM
Copy to Clipboard Copied! Toggle word wrap Toggle overflow 为 Apache 服务生成 keytab 文件。keytab 文件存储共享 secret 密钥。
注意engine-backup命令在备份和恢复时包括文件/etc/httpd/http.keytab。如果您在 keytab 文件中使用不同的名称,请确保备份和恢复它。kadmin> ktadd -k /tmp/http.keytab HTTP/fqdn-of-rhevm@REALM.COM kadmin> quit
kadmin> ktadd -k /tmp/http.keytab HTTP/fqdn-of-rhevm@REALM.COM kadmin> quitCopy to Clipboard Copied! Toggle word wrap Toggle overflow 将 keytab 文件从 KDC 服务器复制到 Red Hat Virtualization Manager:
scp /tmp/http.keytab root@rhevm.example.com:/etc/httpd
# scp /tmp/http.keytab root@rhevm.example.com:/etc/httpdCopy to Clipboard Copied! Toggle word wrap Toggle overflow == 将单点登录配置为虚拟机门户或管理门户
在 Red Hat Virtualization Manager 中,确保 keytab 的所有权和权限是适当的:
chown apache /etc/httpd/http.keytab
chmod 400 /etc/httpd/http.keytab
# chown apache /etc/httpd/http.keytab
# chmod 400 /etc/httpd/http.keytab
Copy to Clipboard Copied! Toggle word wrap Toggle overflow 安装身份验证扩展软件包、LDAP 扩展软件包以及
mod_auth_gssapi和mod_sessionApache 模块:dnf install ovirt-engine-extension-aaa-misc ovirt-engine-extension-aaa-ldap mod_auth_gssapi mod_session
# dnf install ovirt-engine-extension-aaa-misc ovirt-engine-extension-aaa-ldap mod_auth_gssapi mod_sessionCopy to Clipboard Copied! Toggle word wrap Toggle overflow 注意ovirt-engine-extension-aaa-ldap已被弃用。对于新安装,请使用 Red Hat Single Sign On。如需更多信息,请参阅 《管理指南》 中的 安装和配置 Red Hat Single Sign-On。将 SSO 配置模板文件文件复制到 /etc/ovirt-engine 目录中。模板文件可用于 Active Directory (ad-sso)和其他目录类型(simple-sso)。本例使用简单的 SSO 配置模板。
cp -r /usr/share/ovirt-engine-extension-aaa-ldap/examples/simple-sso/. /etc/ovirt-engine
# cp -r /usr/share/ovirt-engine-extension-aaa-ldap/examples/simple-sso/. /etc/ovirt-engineCopy to Clipboard Copied! Toggle word wrap Toggle overflow 将 ovirt-sso.conf 移到 Apache 配置目录中。
注意engine-backup命令在备份和恢复时包含文件/etc/httpd/conf.d/ovirt-sso.conf。如果您对此文件使用不同的名称,请确保备份和恢复它。mv /etc/ovirt-engine/aaa/ovirt-sso.conf /etc/httpd/conf.d
# mv /etc/ovirt-engine/aaa/ovirt-sso.conf /etc/httpd/conf.dCopy to Clipboard Copied! Toggle word wrap Toggle overflow 检查 验证方法文件。您不需要编辑此文件,因为域会自动从 keytab 文件中获取。
vi /etc/httpd/conf.d/ovirt-sso.conf
# vi /etc/httpd/conf.d/ovirt-sso.confCopy to Clipboard Copied! Toggle word wrap Toggle overflow 例 3.9. 身份验证方法文件示例
Copy to Clipboard Copied! Toggle word wrap Toggle overflow 重命名配置文件,以匹配您希望对管理门户和虚拟机门户中用户可见的配置集名称:
mv /etc/ovirt-engine/aaa/profile1.properties /etc/ovirt-engine/aaa/example.properties
# mv /etc/ovirt-engine/aaa/profile1.properties /etc/ovirt-engine/aaa/example.propertiesCopy to Clipboard Copied! Toggle word wrap Toggle overflow mv /etc/ovirt-engine/extensions.d/profile1-http-authn.properties /etc/ovirt-engine/extensions.d/example-http-authn.properties
# mv /etc/ovirt-engine/extensions.d/profile1-http-authn.properties /etc/ovirt-engine/extensions.d/example-http-authn.propertiesCopy to Clipboard Copied! Toggle word wrap Toggle overflow mv /etc/ovirt-engine/extensions.d/profile1-http-mapping.properties /etc/ovirt-engine/extensions.d/example-http-mapping.properties
# mv /etc/ovirt-engine/extensions.d/profile1-http-mapping.properties /etc/ovirt-engine/extensions.d/example-http-mapping.propertiesCopy to Clipboard Copied! Toggle word wrap Toggle overflow mv /etc/ovirt-engine/extensions.d/profile1-authz.properties /etc/ovirt-engine/extensions.d/example-authz.properties
# mv /etc/ovirt-engine/extensions.d/profile1-authz.properties /etc/ovirt-engine/extensions.d/example-authz.propertiesCopy to Clipboard Copied! Toggle word wrap Toggle overflow 通过取消注释 LDAP 服务器类型并更新域和密码字段来编辑 LDAP 属性配置文件:
vi /etc/ovirt-engine/aaa/example.properties
# vi /etc/ovirt-engine/aaa/example.propertiesCopy to Clipboard Copied! Toggle word wrap Toggle overflow 例 3.10. 示例配置集:LDAP server 部分
Copy to Clipboard Copied! Toggle word wrap Toggle overflow 要使用 TLS 或 SSL 协议与 LDAP 服务器交互,请获取 LDAP 服务器的 root CA 证书,并使用它来创建公共密钥存储文件。取消注释以下行,并指定 public 密钥存储文件的完整路径,以及用于访问该文件的密码。
注意有关创建公共密钥存储文件的更多信息,请参阅在 Manager 和 LDAP 服务器 之间设置 SSL 或 TLS 连接。
例 3.11. profile: keystore 部分示例
# Create keystore, import certificate chain and uncomment
# if using ssl/tls.
pool.default.ssl.startTLS = true
pool.default.ssl.truststore.file = /full/path/to/myrootca.jks
pool.default.ssl.truststore.password = password
# Create keystore, import certificate chain and uncomment
# if using ssl/tls.
pool.default.ssl.startTLS = true
pool.default.ssl.truststore.file = /full/path/to/myrootca.jks
pool.default.ssl.truststore.password = password
Copy to Clipboard Copied! Toggle word wrap Toggle overflow 检查身份验证配置文件。该配置集在管理门户中对用户可见,并且虚拟机门户登录页面由 ovirt.engine.aaa.authn.profile.name 定义。配置配置文件位置必须与 LDAP 配置文件位置匹配。所有字段都可保留为默认值。
vi /etc/ovirt-engine/extensions.d/example-http-authn.properties
# vi /etc/ovirt-engine/extensions.d/example-http-authn.propertiesCopy to Clipboard Copied! Toggle word wrap Toggle overflow 例 3.12. 身份验证配置文件示例
Copy to Clipboard Copied! Toggle word wrap Toggle overflow 检查授权配置文件。配置配置文件位置必须与 LDAP 配置文件位置匹配。所有字段都可保留为默认值。
vi /etc/ovirt-engine/extensions.d/example-authz.properties
# vi /etc/ovirt-engine/extensions.d/example-authz.propertiesCopy to Clipboard Copied! Toggle word wrap Toggle overflow 例 3.13. 授权配置文件示例
Copy to Clipboard Copied! Toggle word wrap Toggle overflow 检查验证映射配置文件。配置配置文件位置必须与 LDAP 配置文件位置匹配。配置配置集扩展名称必须与身份验证配置文件中的
ovirt.engine.aaa.authn.mapping.plugin值匹配。所有字段都可保留为默认值。vi /etc/ovirt-engine/extensions.d/example-http-mapping.properties
# vi /etc/ovirt-engine/extensions.d/example-http-mapping.propertiesCopy to Clipboard Copied! Toggle word wrap Toggle overflow 例 3.14. 身份验证映射文件示例
Copy to Clipboard Copied! Toggle word wrap Toggle overflow 确保配置文件的所有权和权限是适当的:
chown ovirt:ovirt /etc/ovirt-engine/aaa/example.properties
# chown ovirt:ovirt /etc/ovirt-engine/aaa/example.propertiesCopy to Clipboard Copied! Toggle word wrap Toggle overflow chown ovirt:ovirt /etc/ovirt-engine/extensions.d/example-http-authn.properties
# chown ovirt:ovirt /etc/ovirt-engine/extensions.d/example-http-authn.propertiesCopy to Clipboard Copied! Toggle word wrap Toggle overflow chown ovirt:ovirt /etc/ovirt-engine/extensions.d/example-http-mapping.properties
# chown ovirt:ovirt /etc/ovirt-engine/extensions.d/example-http-mapping.propertiesCopy to Clipboard Copied! Toggle word wrap Toggle overflow chown ovirt:ovirt /etc/ovirt-engine/extensions.d/example-authz.properties
# chown ovirt:ovirt /etc/ovirt-engine/extensions.d/example-authz.propertiesCopy to Clipboard Copied! Toggle word wrap Toggle overflow chmod 600 /etc/ovirt-engine/aaa/example.properties
# chmod 600 /etc/ovirt-engine/aaa/example.propertiesCopy to Clipboard Copied! Toggle word wrap Toggle overflow chmod 640 /etc/ovirt-engine/extensions.d/example-http-authn.properties
# chmod 640 /etc/ovirt-engine/extensions.d/example-http-authn.propertiesCopy to Clipboard Copied! Toggle word wrap Toggle overflow chmod 640 /etc/ovirt-engine/extensions.d/example-http-mapping.properties
# chmod 640 /etc/ovirt-engine/extensions.d/example-http-mapping.propertiesCopy to Clipboard Copied! Toggle word wrap Toggle overflow chmod 640 /etc/ovirt-engine/extensions.d/example-authz.properties
# chmod 640 /etc/ovirt-engine/extensions.d/example-authz.propertiesCopy to Clipboard Copied! Toggle word wrap Toggle overflow 重启 Apache 服务和
ovirt-engine服务:systemctl restart httpd.service systemctl restart ovirt-engine.service
# systemctl restart httpd.service
# systemctl restart ovirt-engine.service
Copy to Clipboard Copied! Toggle word wrap Toggle overflow
3.6.5. 安装和配置红帽单点登录
要使用 Red Hat Single Sign-On 作为您的授权方法,您需要:
- 安装 Red Hat SSO。
- 配置 LDAP 组映射程序.
- 在 Manager 中配置 Apache。
- 配置 OVN 提供程序凭据。
- 配置监控门户(Grafana)
如果配置了 Red Hat SSO,之前的 LDAP 符号将无法正常工作,因为一次只能使用单个授权协议。
3.6.5.1. Installing Red Hat SSO
您可以通过下载 ZIP 文件并解包它,或使用 RPM 文件来安装 Red Hat Single Sign-On。
按照 Red Hat SSO安装中的安装说明
准备以下信息:
-
Open ID Connect服务器的路径/位置. - 正确的仓库的订阅频道。
- 有效的红帽订阅登录凭证。
3.6.5.2. 配置 LDAP 组映射器
流程
使用以下信息添加 LDAP 组映射程序:
-
名称:ldapgroups -
映射器类型:group-ldap-mapper -
LDAP 组 DN: ou=groups,dc=example,dc=com -
组对象类:组ofuniquenames (根据您的 LDAP 服务器设置调整本课程) -
成员资格 LDAP属性:唯一的成员(根据您的 LDAP 服务器设置 调整这个类)
-
-
点
Save。 -
单击
Sync LDAP Groups to KeyCloak。 -
在
User Federation Provider页面的底部,单击Synchronize all users。 -
在
Clients选项卡中,在Add Client下,添加ovirt-engine作为客户端 ID,并输入 engine url 作为Root URL。 -
修改
客户端协议,以openid-connect和Access Typeto机密。 -
在
Clients选项卡中,在Ovirt-engine>Advanced Settings下,增大Access Token Lifespan。 -
添加
https://rhvm.example.com:443/*作为有效的重定向 URI。 - 已生成客户端 secret,可以在 Credentials 选项卡中查看。
在"
创建映射程序协议"下的"客户端"选项卡中,使用以下设置创建一个映射程序:-
名称:组 -
映射器类型:Group Membership -
令牌声明名称:组 -
完整组路径:ON -
添加到 ID 令牌:ON -
添加到访问令牌:ON -
添加到 userinfo:ON
-
-
为
用户名添加内置协议映射程序。 -
创建
ovirt-engine、ovirt-app-api、ovirt-app-admin和ovirt-ext=auth:sequence-priority=~所需的范围。 - 使用上一步中创建的范围来为 ovirt-engine 客户端设置可选客户端范围。
3.6.5.3. 在 Manager 中配置 Apache
启用
mod_auth_openidc模块。dnf module enable mod_auth_openidc:2.3 -y
# dnf module enable mod_auth_openidc:2.3 -yCopy to Clipboard Copied! Toggle word wrap Toggle overflow 在 Manager 中配置 Apache
dnf install mod_auth_openidc
# dnf install mod_auth_openidcCopy to Clipboard Copied! Toggle word wrap Toggle overflow 使用以下内容,在 /etc/httpd/conf.d/ 中数据一个新的
httpd配置文件ovirt-openidc.conf:Copy to Clipboard Copied! Toggle word wrap Toggle overflow 要保存配置更改,请重启 httpd 和 ovirt-engine :
systemctl restart httpd
systemctl restart ovirt-engine
# systemctl restart httpd
# systemctl restart ovirt-engine
Copy to Clipboard Copied! Toggle word wrap Toggle overflow 在 /etc/ovirt-engine/extensions.d/ 中创建文件
openidc-authn.properties,其内容如下:Copy to Clipboard Copied! Toggle word wrap Toggle overflow 在 /etc/ovirt-engine/extensions.d/ 中创建文件
openidc-http-mapping.properties,其内容如下:Copy to Clipboard Copied! Toggle word wrap Toggle overflow 在 /etc/ovirt-engine/extensions.d/ 中创建文件
openidc-authz.properties,其内容如下:Copy to Clipboard Copied! Toggle word wrap Toggle overflow 在 /etc/ovirt-engine/engine.conf.d/ 中创建文件
99-enable-external-auth.conf,其内容如下:Copy to Clipboard Copied! Toggle word wrap Toggle overflow
3.6.5.4. 配置 OVN
如果您在 Manager 中配置了 ovirt-ovn-provider,则需要配置 OVN 供应商凭证。
流程
使用以下内容在 /etc/ovirt-provider-ovn/conf.d/ 中创建文件
20-setup-ovirt-provider-ovn.conf,其中 user1 属于 LDAP 组 ovirt-administrator,openidchttp 是为 aaa-ldap-misc 配置的配置集。[OVIRT] ovirt-admin-user-name=user1@openidchttp
[OVIRT] ovirt-admin-user-name=user1@openidchttpCopy to Clipboard Copied! Toggle word wrap Toggle overflow 重启
ovirt-provider-ovn:systemctl restart ovirt-provider-ovn
# systemctl restart ovirt-provider-ovnCopy to Clipboard Copied! Toggle word wrap Toggle overflow -
登录管理门户,导航到
,选择 ovirt-provider-ovn,然后单击 以更新 ovn 提供程序的密码。
3.6.5.5. 配置监控门户(Grafana)
流程
配置客户端的有效重定向 URL:
- 选择前面步骤中配置的客户端(例如 ovirt-engine)
-
为 Monitoring Portal (Grafana)添加额外的有效的重定向 URI。有效的 Redirect URI:
https://rhvm.example.com:443/ovirt-engine-grafana/login/generic_oauth/ - 选择" 映射程序 "选项卡。
点击 以创建新映射程序,并填写以下字段:
-
Name:
realm 角色 -
映射器类型:
User Realm Role -
令牌声明名称:
realm_access.roles - claim JSON Type: String
-
Name:
配置特定于 Grafana 的角色:
- 从主菜单中选择 Roles。
-
添加以下角色:
管理员、编辑器查看器。
为所需组分配 Grafana 特定角色:
- 从主菜单中选择 组,然后选择所需组。
- 选择 Role 映射。
- 将所需的角色从 Available Roles 移到 Assigned Roles 中。
配置 Grafana - 修改
/etc/grafana/grafana.ini中的auth.generic_oauth部分,如下所示。根据需要替换箭头方括号 < > 中的值。Copy to Clipboard Copied! Toggle word wrap Toggle overflow
3.6.6. 用户授权
3.6.6.1. 用户授权模型
Red Hat Virtualization 根据三个组件的组合应用授权控制:
- 执行操作的用户
- 正在执行的操作类型
- 操作要对其执行的对象
3.6.6.2. 用户操作
要成功执行某个操作,用户必须具有正在操作的对象的适当权限。每种类型的操作都具有 相应的权限。
在多个对象上执行一些操作。例如,将模板复制到另一个存储域将影响模板和目标存储域。执行操作的用户必须具有操作所影响的所有对象的适当权限。
3.6.7. 从管理门户管理用户任务
3.6.7.1. 帐户设置窗口
常规 标签:
- 用户名 - 只读.
- 电子邮件 - 只读.
主页 :
默认 -
#dashboard-main。自定义主页 - 仅输入 URL 的最后一部分,包括 hash 标记(
#)。例如:#vms-snapshots;name-testVM。串行控制台
用户的公钥 - 输入用于使用串行控制台访问 Manager 的 SSH 公钥。
表
永久网格设置 - 保存服务器上的网格列设置。
确认 标签页:
在 Suspend VM 上显示确认对话框 - 在虚拟机被暂停时启用确认对话框。
3.6.7.2. 添加用户和分配虚拟机门户权限
用户必须创建好,然后才能添加和分配角色和权限。此流程中分配的角色和权限授予用户登录到虚拟机门户的权限,并开始创建虚拟机。该流程也适用于组帐户。
流程
-
在标题栏中,单击
。这将打开 Configure 窗口。 - 点 System Permissions。
- 点 Add。此时将打开 Add System Permission to User 窗口。
- 在搜索 下选择一个配置集。该配置集是您要搜索的域。在搜索文本字段中输入名称或部分,然后点 GO。或者,单击 "运行"以查看所有用户和组的列表。
- 为适当的用户或组选中复选框。
- 选择要分配在 Role to Assign 下的相应角色。UserRole 角色授予用户登录虚拟机门户的权限。
- 点击 。
登录虚拟机门户,以验证用户帐户是否具有登录的权限。
3.6.7.3. 查看用户信息
流程
-
单击
以显示授权用户列表。 - 点用户名。这会打开详情视图,通常使用 常规选项卡 显示常规信息,如用户名、电子邮件和状态。
- 其他标签页允许您为用户查看组、权限、配额和事件。
例如,要查看用户所属的组,请单击 Directory Groups 选项卡。
3.6.7.4. 查看用户权限资源
可以为用户分配特定资源的权限或资源层次结构。您可以查看分配的用户及其对每个资源的权限。
流程
- 查找并单击资源名称。这会打开详情视图。
- 单击 Permissions 选项卡,以列出分配的用户、用户的角色以及所选资源的继承权限。
3.6.7.5. 删除用户
当不再需要用户帐户时,将其从 Red Hat Virtualization 中删除。
流程
-
单击
以显示授权用户列表。 - 选择要删除的用户。确保用户没有运行任何虚拟机。
- 单击 Remove,。
用户已从 Red Hat Virtualization 中删除,但不从外部目录中删除。
3.6.7.6. 查看 Logged-In 用户
您可以查看当前登录的用户,以及会话时间和其他详情。点
3.6.7.7. 终止用户会话
您可以终止当前登录的用户会话。
终止用户会话
-
单击
。 - 选择要终止的用户会话。
- 点 Terminate Session。
- 点击 。
3.6.8. 从命令行管理用户任务
您可以使用 ovirt-aaa-jdbc-tool 工具管理内部域中的用户帐户。使用 工具所做的更改立即生效,不需要您重新启动 ovirt-engine 服务。如需用户选项的完整列表,请运行 ovirt-aaa-jdbc-tool user --help。本节中提供了常见示例。
您必须登录到 Manager 机器。
3.6.8.1. 创建新用户
您可以创建新用户帐户。可选的 --attribute 命令指定帐户详情。如需完整的选项列表,请运行 ovirt-aaa-jdbc-tool user add --help。
ovirt-aaa-jdbc-tool user add test1 --attribute=firstName=John --attribute=lastName=Doe
adding user test1...
user added successfully
# ovirt-aaa-jdbc-tool user add test1 --attribute=firstName=John --attribute=lastName=Doe
adding user test1...
user added successfully您可以在管理门户中添加新创建的用户,并为用户分配相应的角色和权限。如需更多信息 , 请参阅添加用户。
3.6.8.2. 设置用户密码
您可以创建密码。您必须为 --password-valid-to 设置一个值,否则密码到期时间默认为当前时间。
+ 日期格式为 yyyy-MM-dd HH:mm:ssX。其中 X 是 UTC 中的时区偏移。在这个示例中,-0800 代表 GMT minus 8 小时。对于零偏移,请使用值 Z。
+ 如需了解更多选项,请运行 ovirt-aaa-jdbc-tool user password-reset --help。
ovirt-aaa-jdbc-tool user password-reset test1 --password-valid-to="2025-08-01 12:00:00-0800"
Password:
updating user test1...
user updated successfully
# ovirt-aaa-jdbc-tool user password-reset test1 --password-valid-to="2025-08-01 12:00:00-0800"
Password:
updating user test1...
user updated successfully默认情况下,内部域中用户帐户的密码策略有以下限制:
- 至少 6 个字符。
- 密码更改时,不能再次设置先前使用的密码。
如需有关密码策略和其他默认设置的更多信息,请运行 ovirt-aaa-jdbc-tool 设置可显示。
更新 admin 密码后,必须手动将更改传播到 ovirt-provider-ovn。否则,admin 用户将被锁定,因为 Red Hat Virtualization Manager 将继续使用旧密码来同步来自 ovirt-provider-ovn 的网络。要将新密码检查为 ovirt-provider-ovn,请执行以下操作:
-
在管理门户中,单击
。 - 选择 ovirt-provider-ovn。
- 单击 Edit,然后在 Password 字段中输入新密码。
- 单击 以测试身份验证是否使用您提供的凭证成功。
- 身份验证测试成功后,单击 。
3.6.8.3. 设置用户超时
您可以设置用户超时时间:
engine-config --set UserSessionTimeOutInterval=integer
# engine-config --set UserSessionTimeOutInterval=integer3.6.8.4. 预加密用户密码
您可以使用 ovirt-engine-crypto-tool 脚本创建预加密用户密码。如果您要通过脚本将用户和密码添加到数据库,则此选项很有用。
密码以加密的形式存储在 Manager 数据库中。使用 ovirt-engine-crypto-tool 脚本,因为所有密码都必须使用相同的算法加密。
如果预加密密码,则无法执行密码有效期测试。即使密码不符合密码验证策略,也会接受密码。
运行以下命令:
/usr/share/ovirt-engine/bin/ovirt-engine-crypto-tool.sh pbe-encode
# /usr/share/ovirt-engine/bin/ovirt-engine-crypto-tool.sh pbe-encodeCopy to Clipboard Copied! Toggle word wrap Toggle overflow 该脚本将提示您输入密码。
或者,您可以使用
--password=file: file选项来加密显示为文件的第一行的单个密码。这个选项对自动化非常有用。在以下示例中,文件是包含单个密码用于加密的文本文件:/usr/share/ovirt-engine/bin/ovirt-engine-crypto-tool.sh pbe-encode --password=file:file
# /usr/share/ovirt-engine/bin/ovirt-engine-crypto-tool.sh pbe-encode --password=file:fileCopy to Clipboard Copied! Toggle word wrap Toggle overflow 使用
--encrypted选项,使用ovirt-aaa-jdbc-tool脚本设置新密码:ovirt-aaa-jdbc-tool user password-reset test1 --password-valid-to="2025-08-01 12:00:00-0800" --encrypted
# ovirt-aaa-jdbc-tool user password-reset test1 --password-valid-to="2025-08-01 12:00:00-0800" --encryptedCopy to Clipboard Copied! Toggle word wrap Toggle overflow 输入并确认加密的密码:
Password:
Reenter password:
updating user test1...
user updated successfully
Password:
Reenter password:
updating user test1...
user updated successfully
Copy to Clipboard Copied! Toggle word wrap Toggle overflow
3.6.8.5. 查看用户信息
您可以查看详细的用户帐户信息:
ovirt-aaa-jdbc-tool user show test1
# ovirt-aaa-jdbc-tool user show test1
此命令显示比
3.6.8.6. 编辑用户信息
您可以更新用户信息,如电子邮件地址:
ovirt-aaa-jdbc-tool user edit test1 --attribute=email=jdoe@example.com
# ovirt-aaa-jdbc-tool user edit test1 --attribute=email=jdoe@example.com3.6.8.7. 删除用户
您可以删除用户帐户:
ovirt-aaa-jdbc-tool user delete test1
# ovirt-aaa-jdbc-tool user delete test1从管理门户中删除用户。如需更多信息,请参阅 删除用户。
3.6.8.8. 禁用内部管理用户
您可以禁用本地域中的用户,包括 engine-setup 中创建的 admin@internal 用户。在禁用默认的 admin 用户前,请确保至少有一个用户具有完整管理权限。
流程
- 登录到安装 Red Hat Virtualization Manager 的机器。
- 确保将拥有 SuperUser 角色的用户添加到环境中。如需更多信息 , 请参阅添加用户。
禁用默认的 admin 用户:
ovirt-aaa-jdbc-tool user edit admin --flag=+disabled
# ovirt-aaa-jdbc-tool user edit admin --flag=+disabledCopy to Clipboard Copied! Toggle word wrap Toggle overflow
要启用禁用的用户,请运行 ovirt-aaa-jdbc-tool user edit username --flag=-disabled
3.6.8.9. 管理组
您可以使用 ovirt-aa-jdbc-tool 工具管理内部域中的组帐户。管理组帐户与管理用户帐户类似。如需组选项的完整列表,请运行 ovirt-aaa-jdbc-tool group --help。本节中提供了常见示例。
创建组
此流程演示了如何创建组帐户,将用户添加到组中,以及查看组的详情。
- 登录到安装 Red Hat Virtualization Manager 的机器。
创建新组:
ovirt-aaa-jdbc-tool group add group1
# ovirt-aaa-jdbc-tool group add group1Copy to Clipboard Copied! Toggle word wrap Toggle overflow 将用户添加到组中。用户必须已创建。
ovirt-aaa-jdbc-tool group-manage useradd group1 --user=test1
# ovirt-aaa-jdbc-tool group-manage useradd group1 --user=test1Copy to Clipboard Copied! Toggle word wrap Toggle overflow 注意如需 group-manage 选项的完整列表,请运行
ovirt-aaa-jdbc-tool group-manage --help。查看组帐户详情:
ovirt-aaa-jdbc-tool group show group1
# ovirt-aaa-jdbc-tool group show group1Copy to Clipboard Copied! Toggle word wrap Toggle overflow - 在管理门户中添加新创建的组,并分配相应的角色和权限。组中的用户继承组的角色和权限。如需更多信息 , 请参阅添加用户。
创建嵌套组
此流程演示了如何在组内创建组。
- 登录到安装 Red Hat Virtualization Manager 的机器。
创建第一个组:
ovirt-aaa-jdbc-tool group add group1
# ovirt-aaa-jdbc-tool group add group1Copy to Clipboard Copied! Toggle word wrap Toggle overflow 创建第二个组:
ovirt-aaa-jdbc-tool group add group1-1
# ovirt-aaa-jdbc-tool group add group1-1Copy to Clipboard Copied! Toggle word wrap Toggle overflow 将第二个组添加到第一个组中:
ovirt-aaa-jdbc-tool group-manage groupadd group1 --group=group1-1
# ovirt-aaa-jdbc-tool group-manage groupadd group1 --group=group1-1Copy to Clipboard Copied! Toggle word wrap Toggle overflow - 在管理门户中添加第一个组,并分配相应的角色和权限。如需更多信息 , 请参阅添加用户。
3.6.8.10. 查询用户和组
query 模块允许您查询用户和组信息。如需完整的选项列表,请运行 ovirt-aaa-jdbc-tool query --help。
列出所有用户或组帐户详情
此步骤显示如何列出所有帐户信息。
- 登录到安装 Red Hat Virtualization Manager 的机器。
列出帐户详细信息。
所有用户帐户详情:
ovirt-aaa-jdbc-tool query --what=user
# ovirt-aaa-jdbc-tool query --what=userCopy to Clipboard Copied! Toggle word wrap Toggle overflow 所有组帐户详情:
ovirt-aaa-jdbc-tool query --what=group
# ovirt-aaa-jdbc-tool query --what=groupCopy to Clipboard Copied! Toggle word wrap Toggle overflow
列出过滤的帐户详情
此流程演示了如何在列出帐户信息时应用过滤器。
- 登录到安装 Red Hat Virtualization Manager 的机器。
使用
--pattern参数过滤帐户详情。使用以字符 j 开头的名称列出用户帐户详细信息。
ovirt-aaa-jdbc-tool query --what=user --pattern="name=j*"
# ovirt-aaa-jdbc-tool query --what=user --pattern="name=j*"Copy to Clipboard Copied! Toggle word wrap Toggle overflow 列出将部门属性设置为 marketing 的组:
ovirt-aaa-jdbc-tool query --what=group --pattern="department=marketing"
# ovirt-aaa-jdbc-tool query --what=group --pattern="department=marketing"Copy to Clipboard Copied! Toggle word wrap Toggle overflow
3.6.8.11. 管理帐户设置
若要更改默认帐户设置,可使用 ovirt-aaa-jdbc-tool 设置 模块。
更新帐户设置
此流程演示了如何更新默认帐户设置。
- 登录到安装 Red Hat Virtualization Manager 的机器。
运行以下命令以显示所有可用的设置:
ovirt-aaa-jdbc-tool settings show
# ovirt-aaa-jdbc-tool settings showCopy to Clipboard Copied! Toggle word wrap Toggle overflow 更改所需设置:
本例为所有用户帐户将默认登录会话时间更新为 60 分钟。默认值为 10080 分钟。
ovirt-aaa-jdbc-tool settings set --name=MAX_LOGIN_MINUTES --value=60
# ovirt-aaa-jdbc-tool settings set --name=MAX_LOGIN_MINUTES --value=60Copy to Clipboard Copied! Toggle word wrap Toggle overflow 本例更新了用户在用户帐户锁定前可以执行的失败登录尝试次数。默认值为 5。
ovirt-aaa-jdbc-tool settings set --name=MAX_FAILURES_SINCE_SUCCESS --value=3
# ovirt-aaa-jdbc-tool settings set --name=MAX_FAILURES_SINCE_SUCCESS --value=3Copy to Clipboard Copied! Toggle word wrap Toggle overflow 注意要解锁锁定的用户帐户,请运行
ovirt-aaa-jdbc-tool 用户 unlock test1。
3.6.9. 配置附加本地域
也支持创建除默认内部域以外的其他本地域。这可以使用 ovirt-engine-extension-aaa-jdbc 扩展进行,并允许您创建多个域而无需附加外部目录服务器,但用例可能不适用于企业环境。
另外,在标准 Red Hat Virtualization 升级过程中不会自动升级本地域,需要为每个将来的版本手动升级。有关创建其他本地域以及如何升级域的更多信息,请参阅 /usr/share/doc/ovirt-engine-extension-aaa-jdbc-版本/README.admin 中的 README 文件。
ovirt-engine-extension-aaa-jdbc 扩展已弃用。对于新安装,请使用 Red Hat Single Sign On。如需更多信息,请参阅 《管理指南》 中的 安装和配置 Red Hat Single Sign-On。