Dieser Inhalt ist in der von Ihnen ausgewählten Sprache nicht verfügbar.
11.2. Adding Services and Certificates for Services
While services can use keytabs, some services require certificates for access. In that case, a service can be added (or modified) to include a certificate with its service entry.
11.2.1. Adding Services and Certificates from the Web UI
Link kopierenLink in die Zwischenablage kopiert!
- Open the Identity tab, and select the Services subtab.
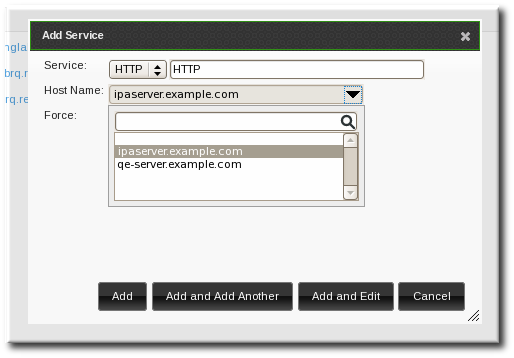
- Click the Add link at the top of the services list.
- Select the service type from the drop-down menu, and give it a name.
- Select the hostname of the IdM host on which the service is running. The hostname is used to construct the full service principal name.
- Click the Add and Edit button to go directly to the service entry page.
- Scroll to the bottom of the page, to the Service Certificate section.
- Click the New Certificate button to create the service certificate.
11.2.2. Adding Services and Certificates from the Command Line
Link kopierenLink in die Zwischenablage kopiert!
- Create the service principal. The service is recognized through a name like service/FQDN:
kinit admin
ipa service-add serviceName/hostname
[jsmith@ipaserver ~]$ kinit admin
[jsmith@ipaserver ~]$ ipa service-add serviceName/hostname
Copy to Clipboard Copied! Toggle word wrap Toggle overflow For example:Copy to Clipboard Copied! Toggle word wrap Toggle overflow - Create a certificate for the service. Be sure to copy the keytab to the appropriate directory for the service.For example:
ipa cert-request --principal=HTTP/web.example.com example.csr
$ ipa cert-request --principal=HTTP/web.example.com example.csrCopy to Clipboard Copied! Toggle word wrap Toggle overflow Note
Use the--addoption to create the service automatically when requesting the certificate.Alternatively, use thegetcertcommand, which creates and manages the certificate throughcertmonger. The options are described more in Section B.1, “Requesting a Certificate with certmonger”.ipa-getcert request -d /etc/httpd/alias -n Server-Cert -K HTTP/client1.example.com -N 'CN=client1.example.com,O=EXAMPLE.COM'
$ ipa-getcert request -d /etc/httpd/alias -n Server-Cert -K HTTP/client1.example.com -N 'CN=client1.example.com,O=EXAMPLE.COM'Copy to Clipboard Copied! Toggle word wrap Toggle overflow


