Dieser Inhalt ist in der von Ihnen ausgewählten Sprache nicht verfügbar.
Chapter 4. Deploying Red Hat Hyperconverged Infrastructure for Cloud using the Red Hat OpenStack Platform Director
As a technician, you can deploy and manage the Red Hat Hyperconverged Infrastructure for Cloud solution using the Red Hat OpenStack Platform Director interface. Also, you should have a basic understanding of resource isolation, so there is not resource contention between Red Hat OpenStack Platform and Red Hat Ceph Storage.
4.1. Prerequisites
- Verify that all the requirements are met.
- Installing the undercloud
4.2. Exporting an overcloud plan using the Red Hat OpenStack Platform Director
This procedure is for exporting a deployment plan using the OpenStack Platform Director. The default deployment plan contains a common, and exportable overcloud configuration.
Prerequisites
- Verify that all the requirements are met.
- Installation of the undercloud.
Procedure
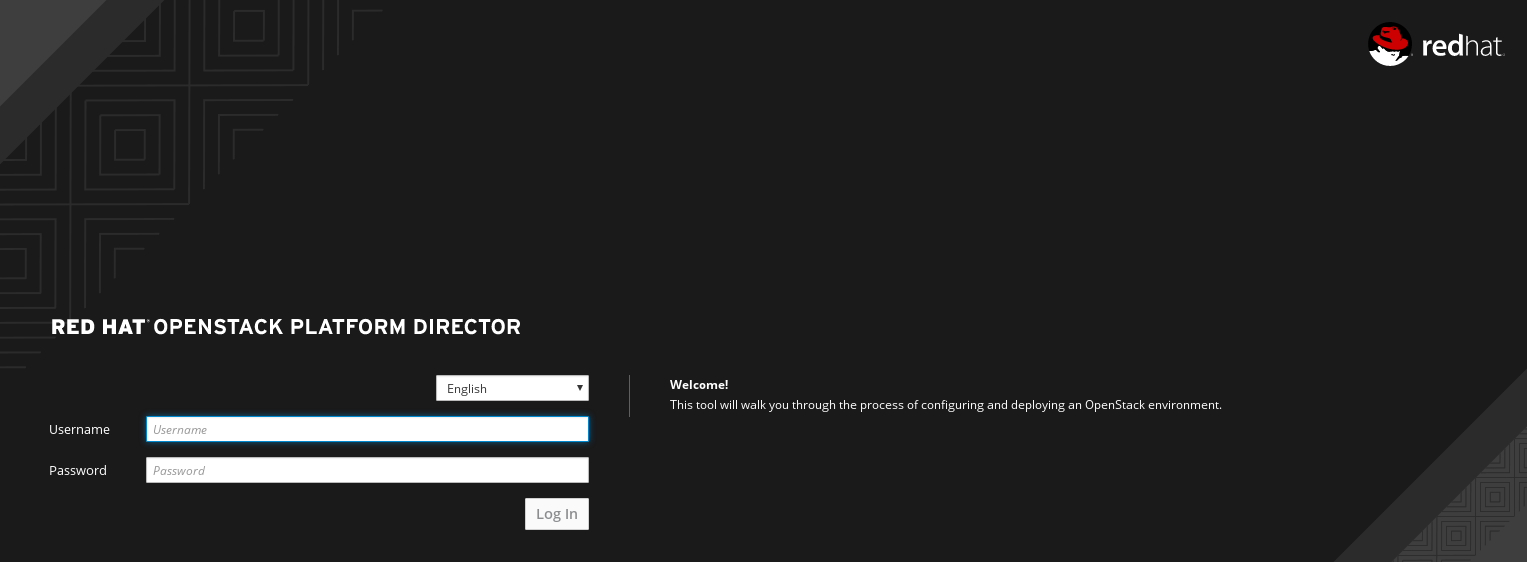
Enter the IP address or host name of the undercloud into a web browser.
NoteIf not using SSL, then the undercloud URL will need to use port 3000. For example:
http://192.168.0.4:3000Login to the Red Hat OpenStack Platform Director user interface using the correct credentials.
NoteThe default user name is
admin. You can obtain the admin password by running the following command:sudo hiera admin_password
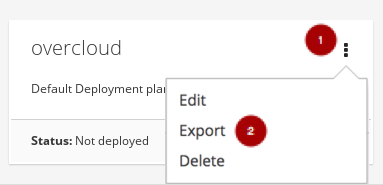
[stack@director ~]$ sudo hiera admin_passwordCopy to Clipboard Copied! Toggle word wrap Toggle overflow On the Plans tab, select the drop-down menu
 from the Overcloud plan, and select Export
  .
.
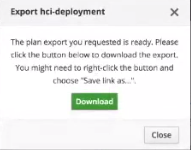
Click on the Download button.
This will download a compressed tarball file to the local hard drive, which includes all the plan files.
ImportantIf you need to add or modify the files contained within the tarball file, then before importing the tarball file you must recreate the tarball file, as follows:
Example
tar -czf my-deployment-plan.tar.gz -C my-deployment-plan-local-files/ .
tar -czf my-deployment-plan.tar.gz -C my-deployment-plan-local-files/ .Copy to Clipboard Copied! Toggle word wrap Toggle overflow NoteCurrently, the OpenStack Platform Director interface does not support advance configuration of the plan, such as a custom network configuration. Advance configuration must be done manually by editing the files directly.
4.3. Importing an overcloud plan using the Red Hat OpenStack Platform Director
This procedure is for importing a deployment plan using the OpenStack Platform Director that has previously been exported.
Prerequisites
- Verify that all the requirements are met.
- Installation of the undercloud.
Procedure
Enter the IP address or host name of the undercloud into a web browser.
NoteIf not using SSL, then the undercloud URL will need to use port 3000. For example:
http://192.168.0.4:3000Login to the Red Hat OpenStack Platform Director user interface using the correct credentials.
NoteThe default user name is
admin. You can obtain the admin password by running the following command:sudo hiera admin_password
[stack@director ~]$ sudo hiera admin_passwordCopy to Clipboard Copied! Toggle word wrap Toggle overflow On the Plans tab, select the Import Plan button.

Enter Plan Name
and click on the Choose File button
. Browse to the location of the tarball file, and select it for import. Once the file is selected, click on the Upload Files and Create Plan button
 .
.

4.4. Deploying the overcloud using the Red Hat OpenStack Platform Director
This procedure deploys the overcloud using the Red Hat OpenStack Platform Director.
Prerequisites
- Verify that all the requirements are met.
- Installation of the undercloud.
Procedure
Enter the IP address or host name of the undercloud into a web browser.
NoteIf not using SSL, then the undercloud URL will need to include port 3000. For example:
http://192.168.0.4:3000Login to the Red Hat OpenStack Platform Director user interface using the correct credentials.
NoteThe default user name is
admin. You can obtain the admin password by running the following command:sudo hiera admin_password
[stack@director ~]$ sudo hiera admin_passwordCopy to Clipboard Copied! Toggle word wrap Toggle overflow Select the default overcloud plan
or select the Import Plan
.
For more information on importing a plan, see Section 4.3, “Importing an overcloud plan using the Red Hat OpenStack Platform Director”
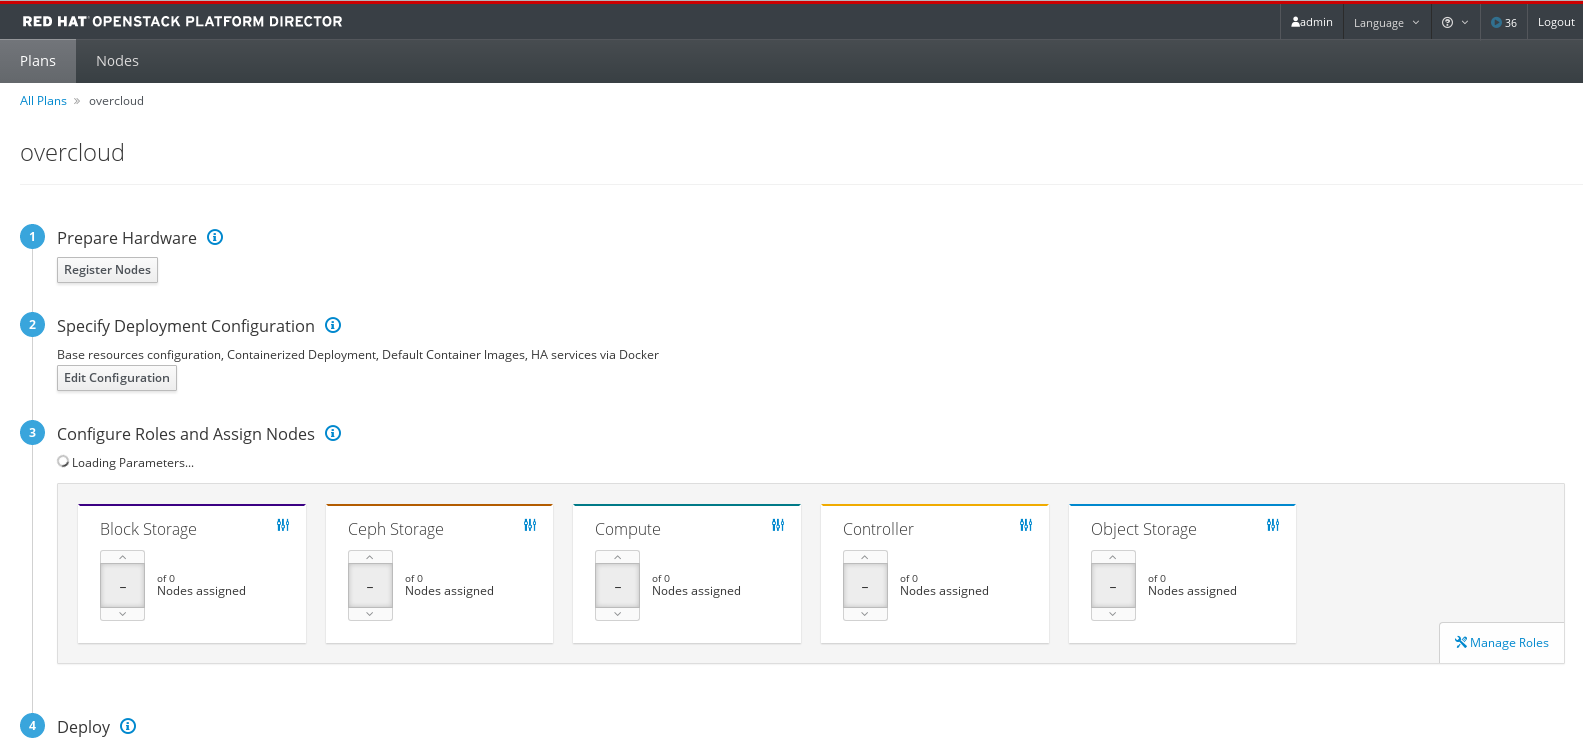
From the plan configuration page, prepare the hardware by adding registered nodes.
Figure 4.1. Example Plan Configuration Page
Click on the Register Nodes button
to registered the nodes.
Click on the Add New Node button
.
Alternatively, you can prepare the nodes by customizing the
instackenv.jsonhost definition file and uploading it. To create a custominstackenv.jsonhost definition file, see Section 5.2.2, “Registering and introspecting the hardware” and Section 5.2.3, “Setting the root device” to prepare the nodes.- Fill out all the required fields, denoted by a small red asterisks, on the register node page.
After all the required field are filled out, click on the Register Node button
.

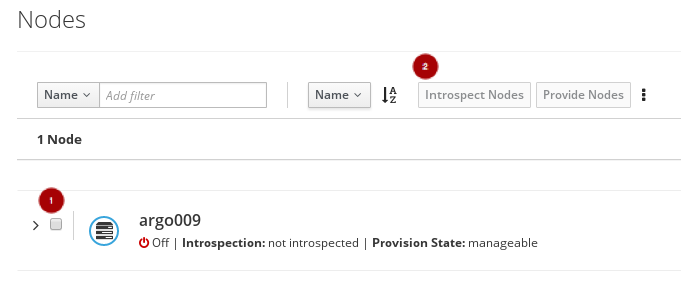
Once the node is registered, select the node
, and click on the Introspect Nodes
button.
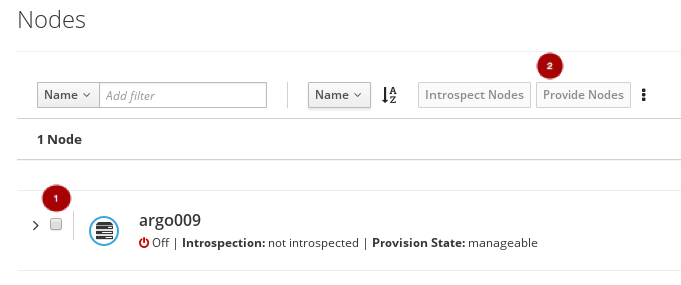
Once the introspection is done, select the node
, and click on the Provide Nodes
button.
From the plan configuration page, edit the deployment configuration.
Click on the Edit Configuration button
.
On the Overall Settings tab
, click on the General Deployment Options section
, and enable the HA services via Docker, Containerized Deployment, and Default Container Images.
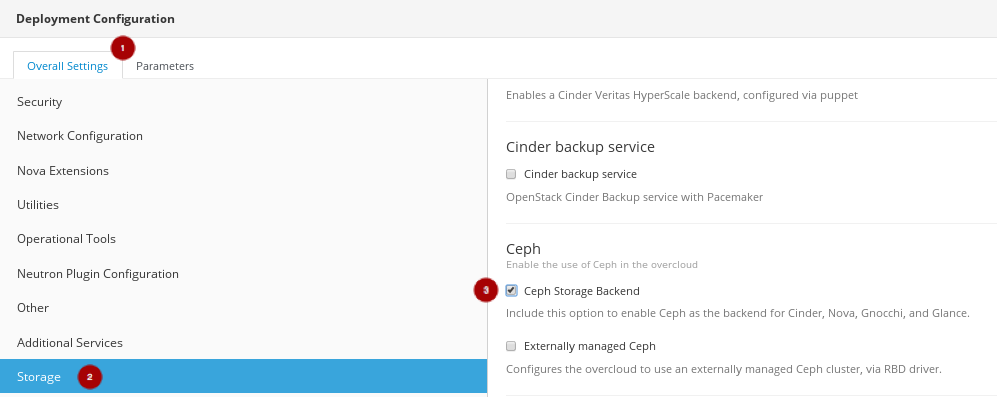
On the Overall Settings tab
, click on the Storage section
, and enable the Ceph Storage Backend
.
Click on the Save Changes button.
Click on the Parameters tab
, then click on the Ceph Storage Backend section
to edit additional Ceph parameters.
Update the CephAnsibleExtraConfig field with the following values:
{"ceph_osd_docker_memory_limit": "5g", "ceph_osd_docker_cpu_limit": 1, "ceph_mds_docker_memory_limit": "4g", "ceph_mds_docker_cpu_limit": 1}{"ceph_osd_docker_memory_limit": "5g", "ceph_osd_docker_cpu_limit": 1, "ceph_mds_docker_memory_limit": "4g", "ceph_mds_docker_cpu_limit": 1}Copy to Clipboard Copied! Toggle word wrap Toggle overflow Update the CephConfigOverrides field with the following values.
{"osd_recovery_op_priority": 3, "osd_recovery_max_active": 3, "osd_max_backfills": 1}{"osd_recovery_op_priority": 3, "osd_recovery_max_active": 3, "osd_max_backfills": 1}Copy to Clipboard Copied! Toggle word wrap Toggle overflow Update the CephConfigOverrides field with the following values.
{"osd_recovery_op_priority": 3, "osd_recovery_max_active": 3, "osd_max_backfills": 1}{"osd_recovery_op_priority": 3, "osd_recovery_max_active": 3, "osd_max_backfills": 1}Copy to Clipboard Copied! Toggle word wrap Toggle overflow Set the CephPoolDefaultSize value to
3.Update the CephAnsibleDisksConfig field with a disk list.
Example
{"devices":["/dev/sda","/dev/sdb","/dev/sdc","/dev/sdd","/dev/sde","/dev/sdf","/dev/sdg","/dev/sdh","/dev/sdi","/dev/sdj","/dev/sdk","/dev/sdl"],"dedicated_devices":["/dev/sdm","/dev/sdm","/dev/sdm","/dev/sdm","/dev/sdn","/dev/sdn","/dev/sdn","/dev/sdn","/dev/sdo","/dev/sdo","/dev/sdo","/dev/sdo"],"journal_size":5120}{"devices":["/dev/sda","/dev/sdb","/dev/sdc","/dev/sdd","/dev/sde","/dev/sdf","/dev/sdg","/dev/sdh","/dev/sdi","/dev/sdj","/dev/sdk","/dev/sdl"],"dedicated_devices":["/dev/sdm","/dev/sdm","/dev/sdm","/dev/sdm","/dev/sdn","/dev/sdn","/dev/sdn","/dev/sdn","/dev/sdo","/dev/sdo","/dev/sdo","/dev/sdo"],"journal_size":5120}Copy to Clipboard Copied! Toggle word wrap Toggle overflow NoteThis disk listing is for block devices (
devices) being used as OSDs, and the block devices dedicated (dedicated_devices) as OSD journals. See Section 5.5.5, “Setting the Red Hat Ceph Storage parameters” for more information.Click on the Save And Close button.
Back on the plan configuration page, the saved configuration changes will appear under the Specify Deployment Configuration step.
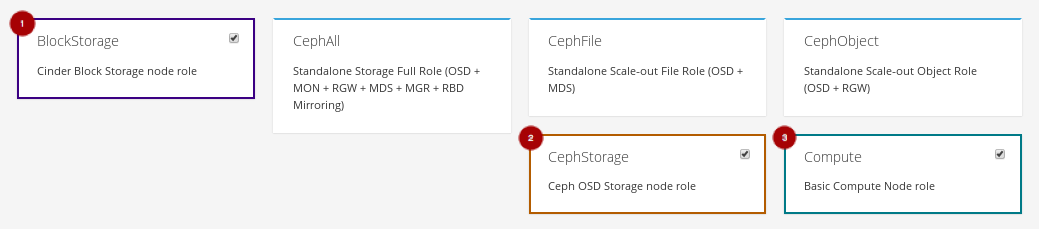
Configure the roles for the hyperconverged nodes by clicking on the Manage Roles link
.
Unselect the BlockStorage
, CephStorage
, and Compute
roles by clicking on them.
Select the ComputeHCI
role by clicking on it.
Back on the plan configuration page, configure the Compute HCI role by clicking on the levers icon
.
On the Parameters tab, update the following parameters:
The ExtraConfig field with the calculated resource allocation values.
See Appendix E, Tuning the Nova reserved memory and CPU allocation manually for how to calculate the appropriate values.
The ComputeHCIIPs field with all the relevant IP addresses for the environment.
Example
{"storage_mgmt":["172.16.2.203","172.16.2.204","172.16.2.205"],"storage":["172.16.1.203","172.16.1.204","172.16.1.205"],"tenant":["192.168.3.203","192.168.3.204","192.168.3.205"],"internal_api":["192.168.2.203","192.168.2.204","192.168.2.205"]}{"storage_mgmt":["172.16.2.203","172.16.2.204","172.16.2.205"],"storage":["172.16.1.203","172.16.1.204","172.16.1.205"],"tenant":["192.168.3.203","192.168.3.204","192.168.3.205"],"internal_api":["192.168.2.203","192.168.2.204","192.168.2.205"]}Copy to Clipboard Copied! Toggle word wrap Toggle overflow The OvercloudComputeHCIFlavor field with the following value:
osd-compute
osd-computeCopy to Clipboard Copied! Toggle word wrap Toggle overflow The ComputeHCISchedulerHints field with the following value:
{"capabilities:node":"hci-%index%"}{"capabilities:node":"hci-%index%"}Copy to Clipboard Copied! Toggle word wrap Toggle overflow
Click on the Save And Close button.
Back on the plan configuration page, configure the Controller role by clicking on the levers icon
.
On the Parameters tab
, update the ControllerIPs field with the relevant IP addresses.
Example
{"storage_mgmt":["172.16.2.200","172.16.2.201","172.16.2.202"],"storage":["172.16.1.200","172.16.1.201","172.16.1.202"],"tenant":["192.168.3.200","192.168.3.201","192.168.3.202"],"internal_api":["192.168.2.200","192.168.2.201","192.168.2.202"]}{"storage_mgmt":["172.16.2.200","172.16.2.201","172.16.2.202"],"storage":["172.16.1.200","172.16.1.201","172.16.1.202"],"tenant":["192.168.3.200","192.168.3.201","192.168.3.202"],"internal_api":["192.168.2.200","192.168.2.201","192.168.2.202"]}Copy to Clipboard Copied! Toggle word wrap Toggle overflow On the Services tab
, in the Ntp section
, update the NtpServer field
with the relevant NTP server name.
Click on the Save And Close button.
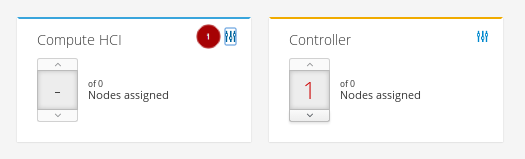
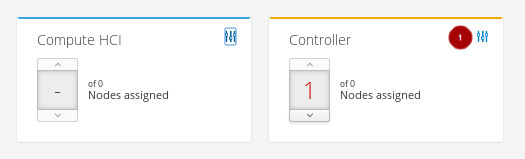
Assign the number of nodes needed in the environment for each role.
Figure 4.2. Example
From the plan configuration page, click on the Edit Configuration button
.
Edit the network configuration by clicking on the Network Configuration section
, and select Network Isolation
.

Select one of the NIC configuration templates or use a custom plan.

To customize the NICs in the environment, first you need to export the plan.
See Section 4.2, “Exporting an overcloud plan using the Red Hat OpenStack Platform Director” on how to export a plan.
Download the plan tarball file and make the necessary additions or modifications locally.
Example
After updating the plan tarball file, click the drop down menu and select Edit.

Import the plan. Enter Plan Name
and click on the Choose File button
. Browse to the location of the tarball file, and select it for import. Once the file is selected, click on the Upload Files and Create Plan button
.
Click on the Edit Configuration button.

-
On the Overall Settings tab
, click on the Other section
.
- Select the Others section and include the custom templates.
Select any new or modified files from the file list.
Example

- Click on the Parameters tab and update any of the values accordingly.
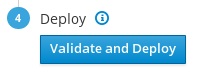
Now, it is time to deploy the plan. From the plan configuration page, click on the Validate and Deploy button to deploy the overcloud plan.
- Wait for the overcloud deployment to finish.


4.5. Additional Resources
- For more details on resource isolation, see Appendix E, Tuning the Nova reserved memory and CPU allocation manually.