Dieser Inhalt ist in der von Ihnen ausgewählten Sprache nicht verfügbar.
Chapter 3. Managing SCAP security policies in the Insights for RHEL compliance service
Create and manage your SCAP security policies entirely within the compliance service UI. Define new policies and select the rules and systems you want to associate with them, and edit existing policies as your requirements change.
Unlike most other Red Hat Insights for Red Hat Enterprise Linux services, the compliance service does not run automatically on a default schedule. In order to upload OpenSCAP data to the Insights for Red Hat Enterprise Linux application, you must run insights-client --compliance, either on-demand or on a scheduled job that you set.
Additional resources
3.1. Creating new SCAP policies
You must add each Insights for Red Hat Enterprise Linux-registered system to one or more security policies before you can perform a scan or see results for that scan in the compliance service UI. To create a new policy, and include specific systems and rules, complete the following steps:
If your RHEL servers span across multiple major releases of RHEL, you must create a separate policy for each major release. For example, all of your RHEL 7 servers would be on one Standard System Security Profile for RHEL policy and all of your RHEL 8 servers will be on another.
Procedure
- Navigate to the Security > Compliance > SCAP Policies page.
- Click the Create new policy button.
On the Create SCAP policy page of the wizard, select the RHEL major version of the systems you will include in the policy.
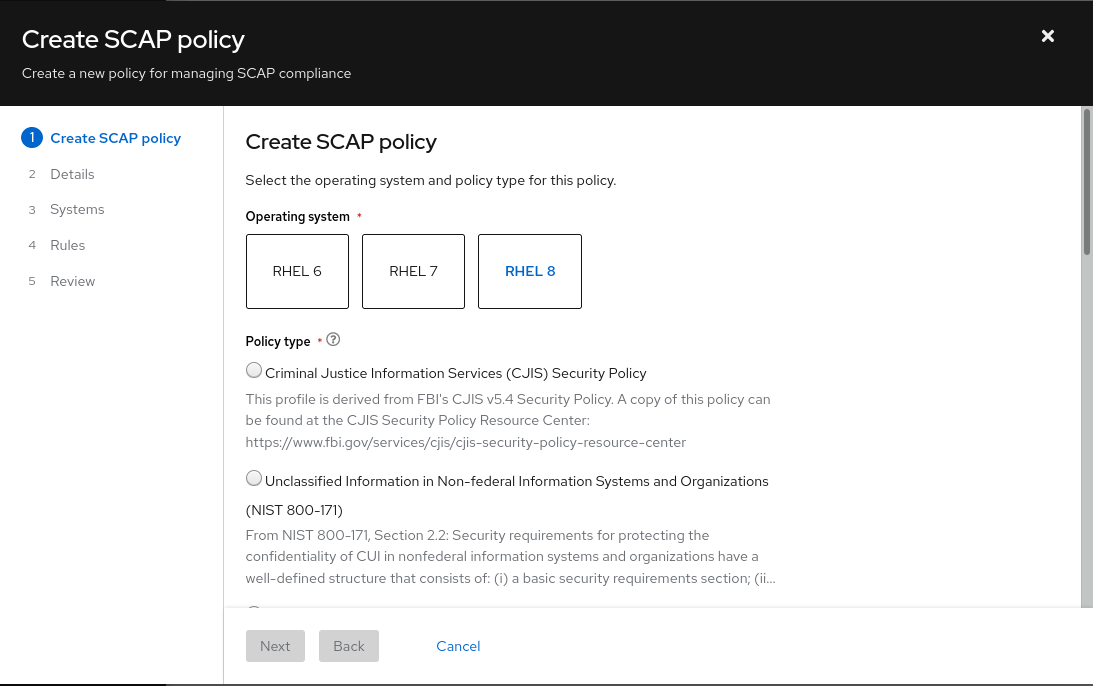
- Select one of the policy types available for that RHEL major version, then click Next.
- On the Details page, accept the name and description already provided or provide your own more meaningful entries.
- Optionally, add a Business objective to give context, for example, “CISO mandate.”
- Define a compliance threshold acceptable for your requirements and click Next.
- Select the Systems to include on this policy and click Next. Your selection of a RHEL major version in the first step automatically determines which systems can be added to this policy.
Select which Rules to include with each policy. Because each minor version of RHEL supports the use of a specific SCAP Security Guide (SSG) version (sometimes more than one, in which case we use the latest), the rule set for each RHEL minor version is slightly different and must be selected separately.

Optionally, use the filtering and search capabilities to refine the list of rules.
For example, to show only the highest severity rules, click the primary filter dropdown and select Severity. In the secondary filter, check the boxes for High and Medium.
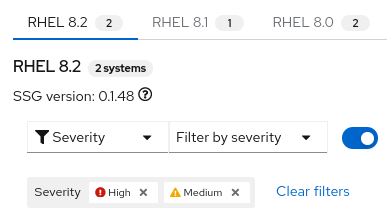
- The rules shown by default are those designated for that policy type and that version of SSG. By default, the Selected only toggle next to the filter boxes is enabled. You may remove this toggle if so desired.
- Repeat this process as needed for each RHEL minor version tab.
- After you select rules for each Red Hat Enterprise Linux minor version SSG, click Next.
- On the Review page, verify that the information shown is correct, then click Finish.
- Give the app a minute to create the policy, then click the Return to application button to view your new policy.
You have to go to the system and run the compliance scan before results will be shown in the compliance service UI.
3.2. Editing compliance policies
After creating a compliance policy, you can later edit the policy to change the policy details, or which rules or systems are included.
Use the following procedures to edit a policy to suit the needs of your organization.
User Access Note
Editing the included rules and systems in a policy requires that a user be a member of a User Access Group with the Compliance adminstrator role. The Compliance admistrator role includes enhanced permissions that are not granted by default to all Insights for Red Hat Enterprise Linux users.
3.2.1. Editing policy details
Prerequisites
- You are logged in to the Red Hat Hybrid Cloud Console.
Procedure
- Navigate to the Security > Compliance > SCAP policies page.
- Locate the policy you want to edit.
- Click on the policy name. This opens the policy details view.
Wherever you see a pencil icon, you can click on the icon to edit the details in that field. Editable fields include
- Compliance threshold
- Business objective
- Policy description
- After you edit a field, click the blue checkmark to the right of the field to save your input.
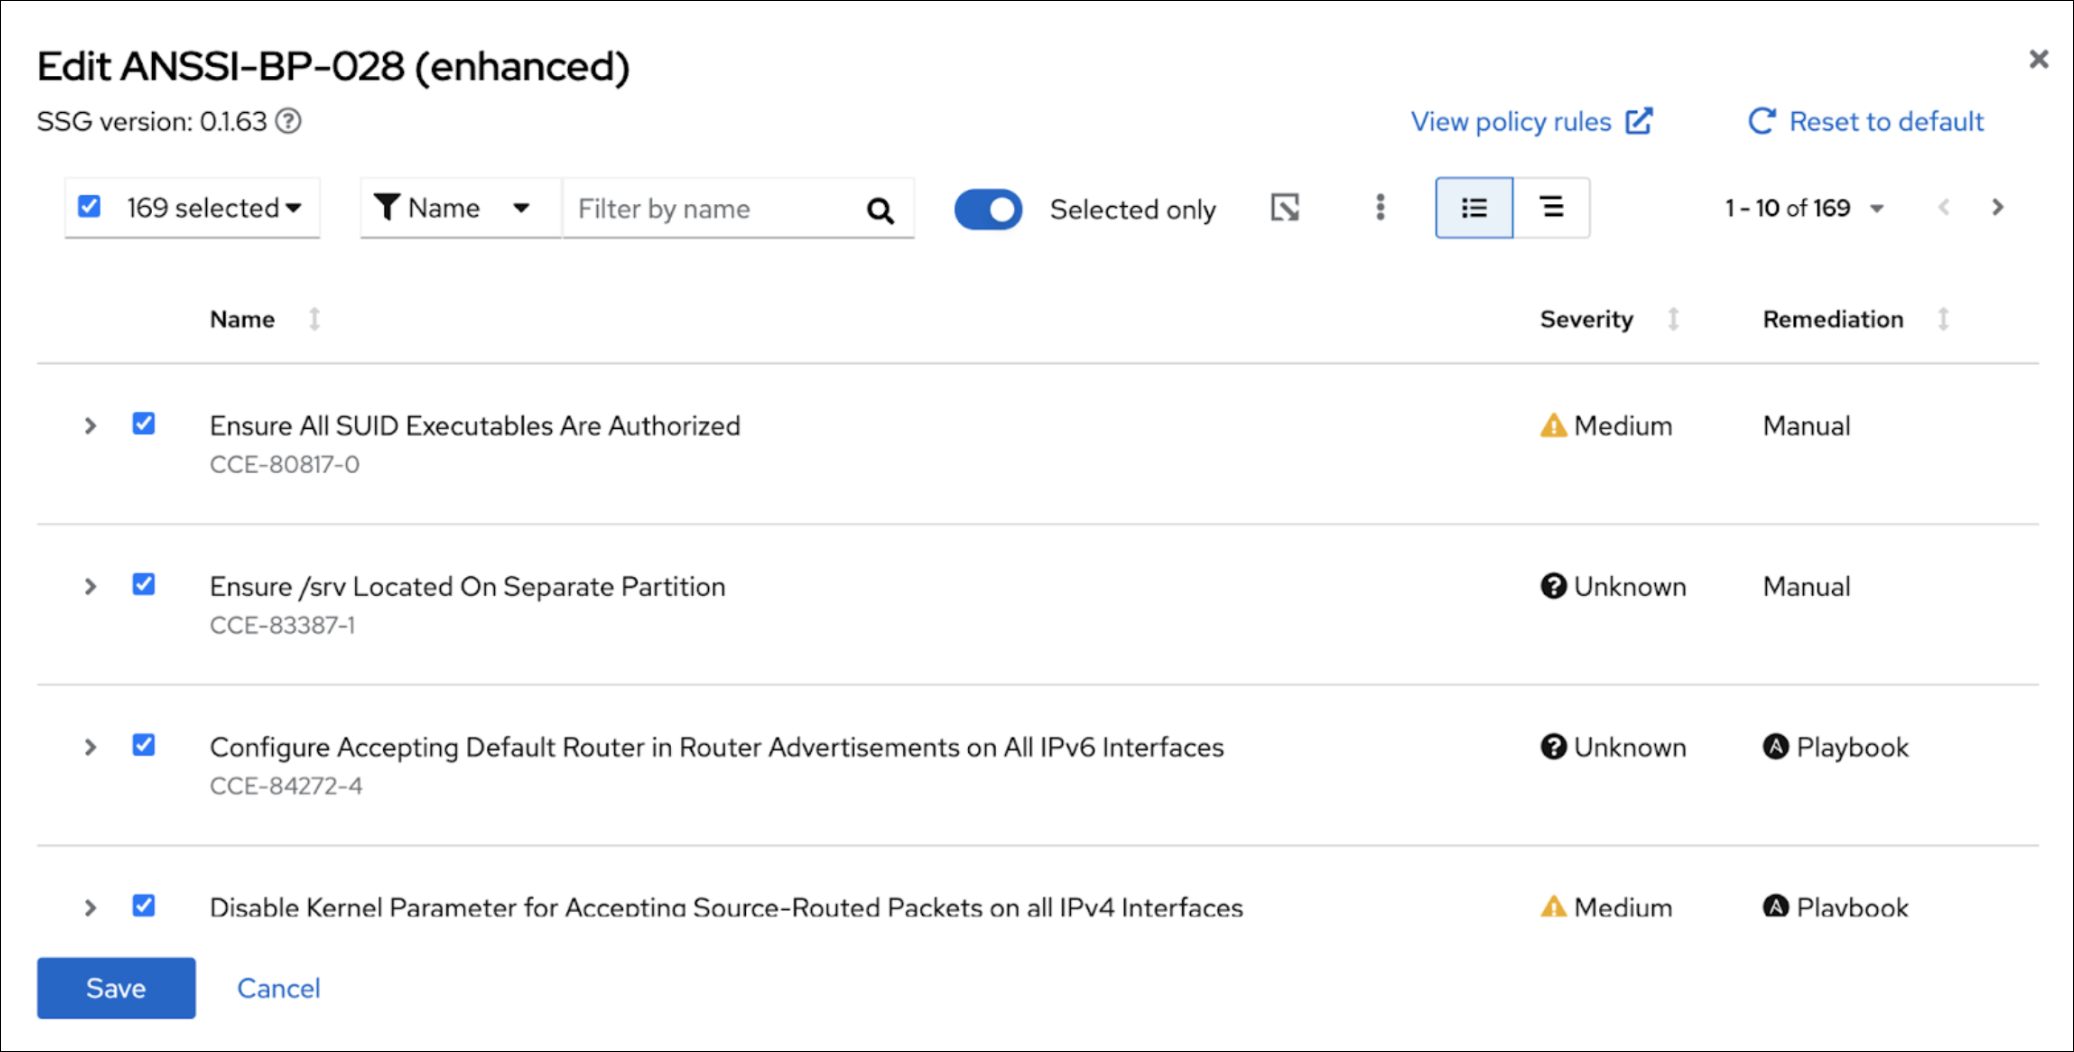
3.2.2. Editing included rules
Prerequisites
- You are logged in to the Red Hat Hybrid Cloud Console.
- You have Compliance administrator User Access permissions.
Procedure
- Navigate to the Security > Compliance > SCAP policies page.
- Locate the policy you want to edit.
-
On the right side of the policy row, click the More actions icon,
 , and click Edit policy.
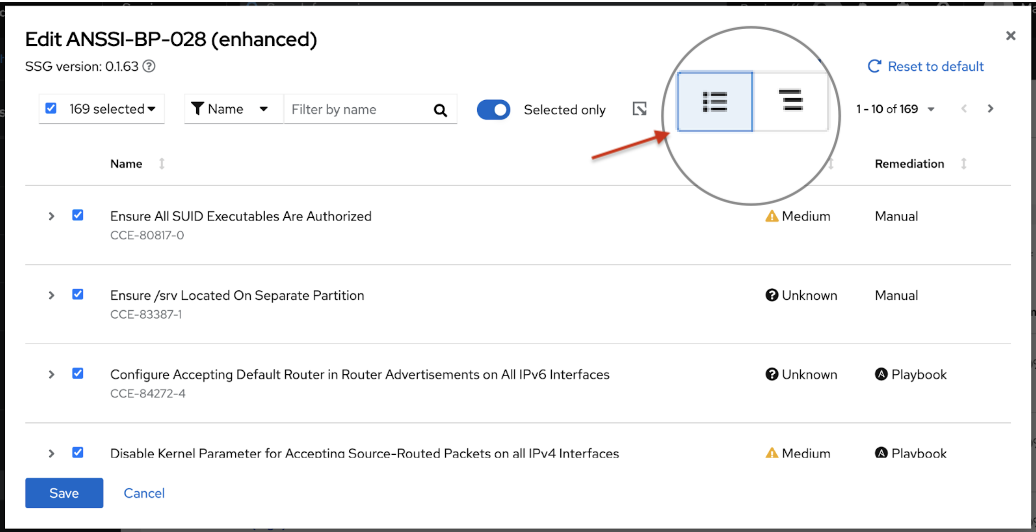
- In the Edit popup, click the Rules tab.
Click on a RHEL minor version.
ImportantBecause a different SCAP Style Guide (SSG) version exists for each minor version of RHEL, you must edit the rules for each minor version of RHEL separately.
Use the Name filter and search function to locate the rules to remove.
NoteWith the Name primary filter selected, you can search by the rule name or its identifier.
Uncheck the box next to any rule you want to remove.
Or, check the box next to any rule you want to add.
- Repeat these steps for each RHEL minor version tab.
- Click Save.
Verification
- Navigate to the Security > Compliance > SCAP policies page and locate the edited policy.
- Click on the policy and verify that the included rules are consistent with the edits you made.
3.2.3. Editing included systems
- Navigate to the Security > Compliance > SCAP policies page.
- Locate the policy you want to edit.
-
On the right side of the policy row, click the More actions icon,
, and click Edit policy.
In the Edit popup, click the Systems tab.
A list of all available systems is displayed.
Systems that are already included in the policy have a checkmark in the box to the left side of the system name.
Systems without a checkmark next to the system name are not included in this policy.
Search for a system by name. To include that system in the policy, check the box next to the system name.
Or, to remove the system from the policy, uncheck the box next to the system name.
- Click Save to save your changes.
Verification
- Navigate to the Security > Compliance > SCAP policies page and locate the edited policy.
- Click on the policy and verify that the included systems are consistent with the edits you made.
3.3. Viewing policy rules
Insights Compliance displays rules in categorized groups, so that similar rules are close together. You can see rules grouped according to category or classification for the compliance checks that will take place for a policy. The nested group structure (or tree view) is the default view. The tree view provides additional contextual information that allows you to see categories of rules, and at times, multiple rules for a policy. The tree view also allows you to see rules that have editable values (for more information about editable rule values, see “Editing values for policy rules”).
You can view rules in the tree view or the classic view. In the classic view, rules appear in a linear list.
You can switch from the tree view to the classic view by toggling between the two buttons under View policy rules.
To see rules listed in tree view format, click the tree view icon (
![]() ).
).
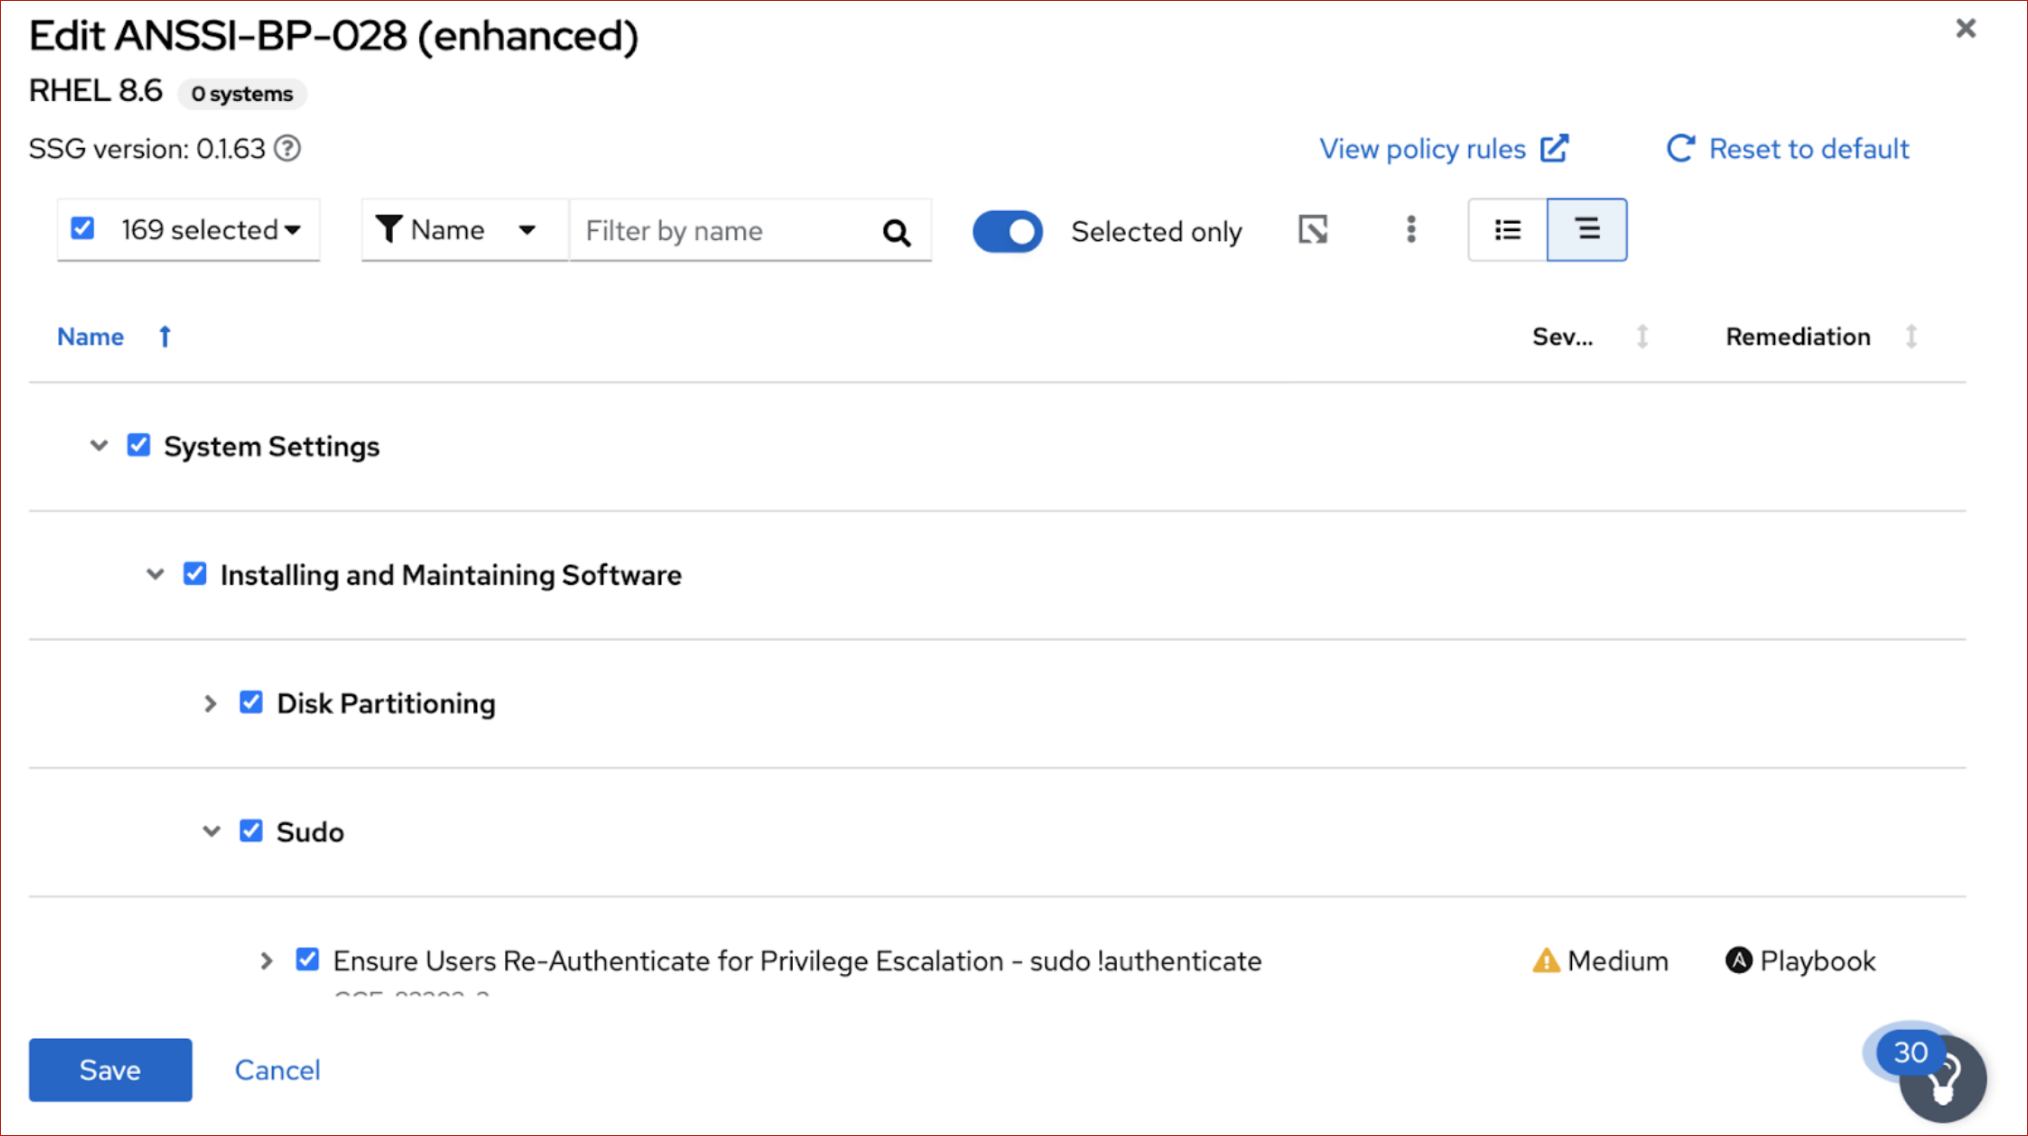
To see rules listed in the classic view format, click the classic view icon (
![]() ).
).
- When you use the filter feature to search for a specific rule, the view automatically switches to the classic view.
- After you expand a rule to show additional information, it will stay in the expanded view, even if you switch to a different view.
You can switch views when you are:
- Editing compliance policies
- Creating new SCAP policies
- Generating Compliance Service Reports (see "Exporting reports" topics)