6.9. Snapshots
6.9.1. Creating a Snapshot of a Virtual Machine
Note
Procedure 6.11. Creating a Snapshot of a Virtual Machine
- Click the Virtual Machines tab and select a virtual machine.
- Click the Snapshots tab in the details pane and click .
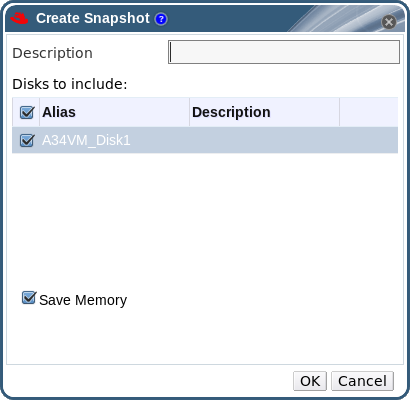
Figure 6.1. Create snapshot
- Enter a description for the snapshot.
- Select Disks to include using the check boxes.
- Use the Save Memory check box to denote whether to include the virtual machine's memory in the snapshot.
- Click .
Locked, which changes to Ok. When you click on the snapshot, its details are shown on the General, Disks, Network Interfaces, and Installed Applications tabs in the right side-pane of the details pane.
6.9.2. Using a Snapshot to Restore a Virtual Machine
Procedure 6.12. Using Snapshots to Restore Virtual Machines
- Click the Virtual Machines tab and select a virtual machine.
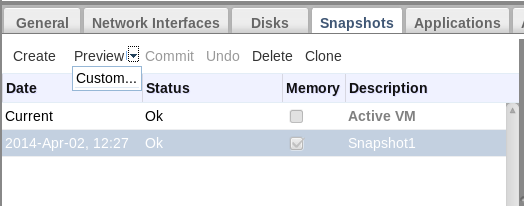
- Click the Snapshots tab in the details pane to list the available snapshots.
- Select a snapshot to restore in the left side-pane. The snapshot details display in the right side-pane.
- Click the drop-down menu beside to open the Custom Preview Snapshot window.
Figure 6.2. Custom Preview Snapshot
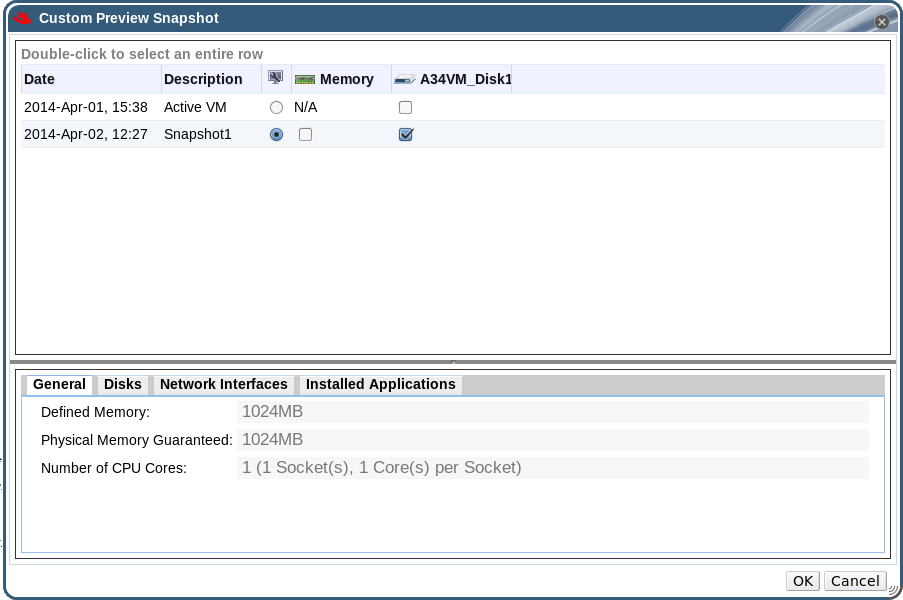
- Use the check boxes to select the VM Configuration, Memory, and disk(s) you want to restore, then click . This allows you to create and restore from a customized snapshot using the configuration and disk(s) from multiple snapshots.
Figure 6.3. The Custom Preview Snapshot Window
The status of the snapshot changes toPreview Mode. The status of the virtual machine briefly changes toImage Lockedbefore returning toDown. - Start the virtual machine; it runs using the disk image of the snapshot.
- Click Commit to permanently restore the virtual machine to the condition of the snapshot. Any subsequent snapshots are erased.Alternatively, click the Undo button to deactivate the snapshot and return the virtual machine to its previous state.
6.9.3. Creating a Virtual Machine from a Snapshot
Procedure 6.13. Creating a virtual machine from a snapshot
- Click the Virtual Machines tab and select a virtual machine.
- Click the Snapshots tab in the details pane to list the available snapshots.
- Select a snapshot in the list displayed and click .
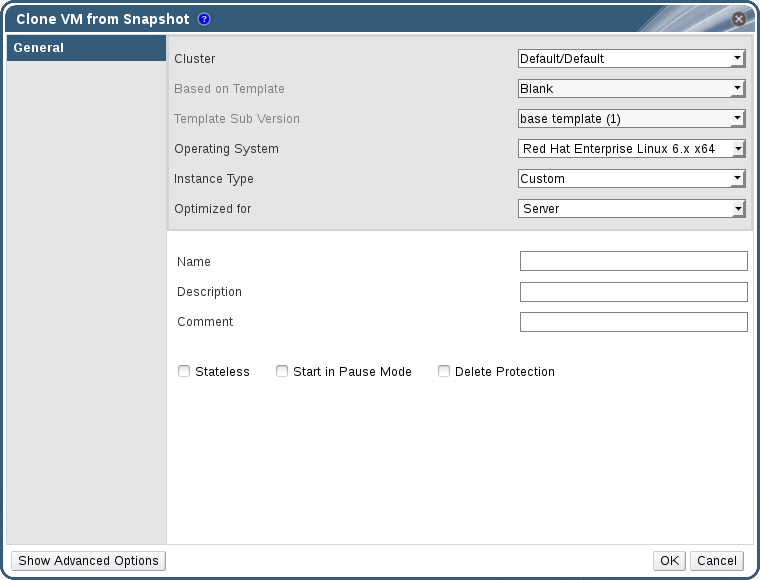
- Enter the Name and Description for the virtual machine.
Figure 6.4. Clone a Virtual Machine from a Snapshot
- Click .
Image Locked. The virtual machine will remain in this state until Red Hat Enterprise Virtualization completes the creation of the virtual machine. A virtual machine with a preallocated 20 GB hard drive takes about fifteen minutes to create. Sparsely-allocated virtual disks take less time to create than do preallocated virtual disks.
Image Locked to Down in the Virtual Machines tab in the navigation pane.
6.9.4. Deleting a Snapshot
Important
- If the snapshot being deleted is contained in a RAW (preallocated) base image, a new volume is created that is the same size as the base image.
- If the snapshot being deleted is contained in a QCOW2 (thin provisioned) base image, the volume subsequent to the volume containing the snapshot being deleted is extended to the cumulative size of the successor volume and the base volume.
- If the snapshot being deleted is contained in a QCOW2 (thin provisioned), non-base image hosted on internal storage, the successor volume is extended to the cumulative size of the successor volume and the volume containing the snapshot being deleted.
Procedure 6.14. Deleting a Snapshot
- Click the Virtual Machines tab and select a virtual machine.
- Click the Snapshots tab in the details pane to list the snapshots for that virtual machine.
Figure 6.5. Snapshot List
- Select the snapshot to delete.
- Optionally shut down the running virtual machine associated with the snapshot to be deleted.
- Click .
- Click .


