8.3. Add User Entries to the Directory Server
Overview
Copy linkLink copied to clipboard!
The basic prerequisite for using LDAP authentication with the OSGi container is to have an X.500 directory server running and configured with a collection of user entries. For many use cases, you will also want to configure a number of groups to manage user roles.
Goals
Copy linkLink copied to clipboard!
In this portion of the tutorial you will
Adding user entries
Copy linkLink copied to clipboard!
Perform the following steps to add user entries to the directory server:
- Ensure that the LDAP server and browser are running.
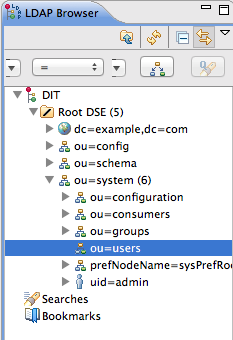
- In the LDAP Browser view, drill down to the ou=users node.
- Select the ou=users node.
- Open the context menu.
- Select
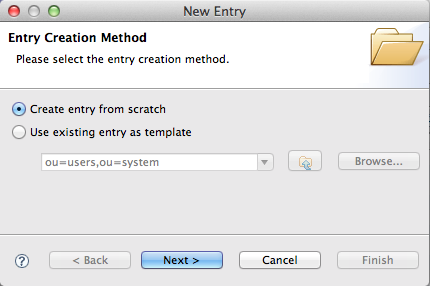
to open the Entry Creation Method pane. - Check Create entry from scratch.
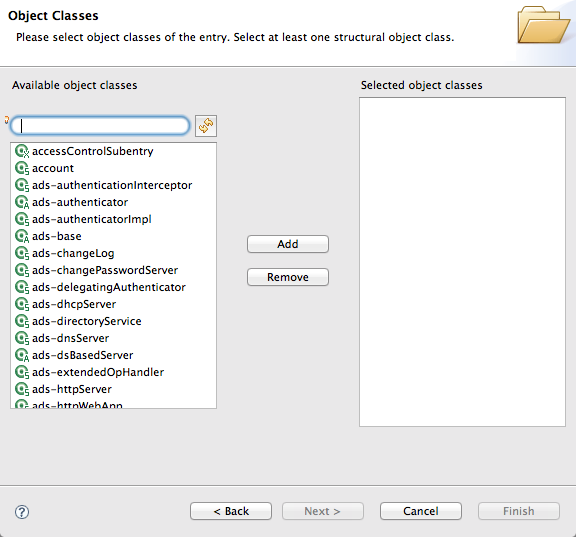
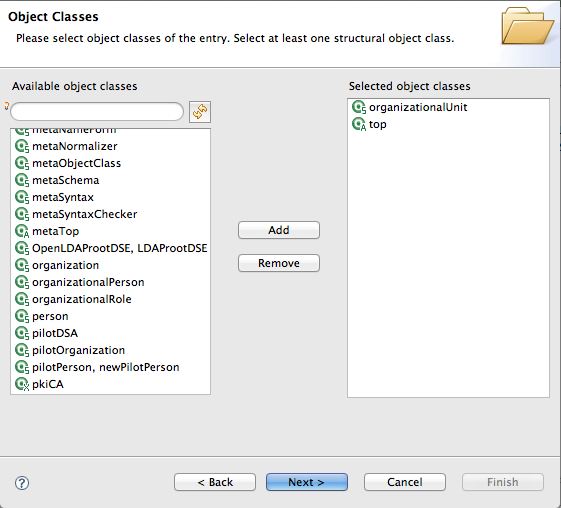
- Click Next to open the Object Classes pane.
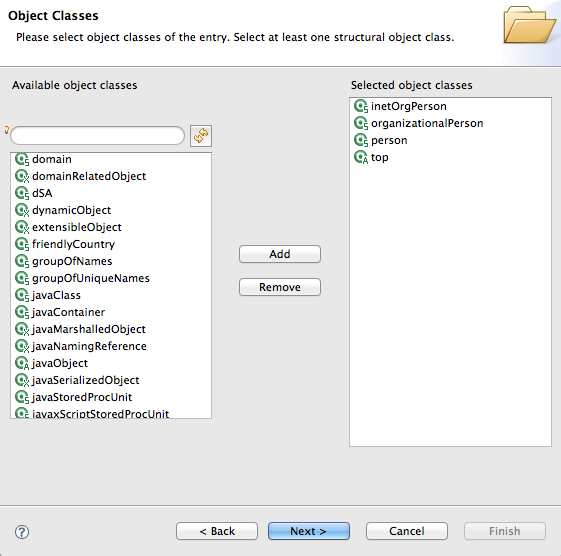
- Select
inetOrgPersonfrom the list of Available object classes. - Click Add to populate the list of Selected object classes.
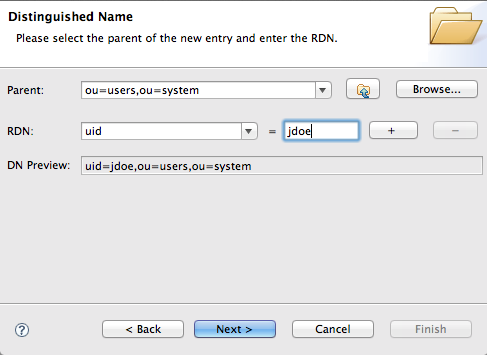
- Click to open the Distinguished Name pane.
- In the the RDN field, enter
uidin front andjdoeafter the equals sign. - Click to open the Attributes pane.
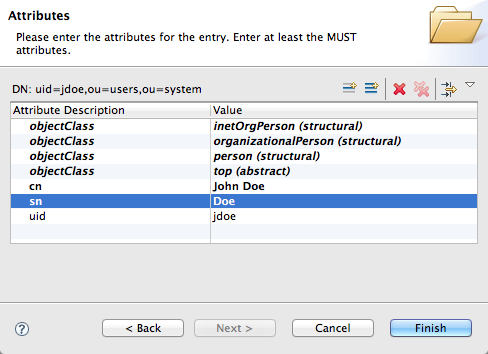
- Fill in the remaining mandatory attributes in the Attributes pane.
- Set the cn (common name) attribute to
John Doe - Set the sn (surname) attribute to
Doe.
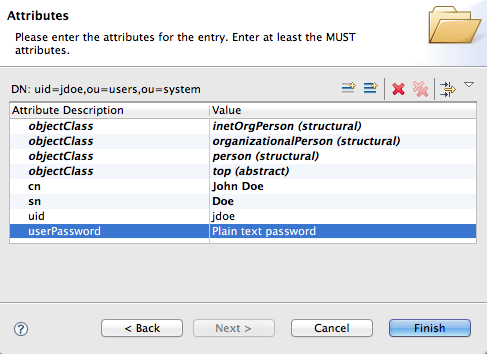
- Add a
userPasswordattribute to the user entry.- Open the context menu in the Attributes pane.
- Select to open the New Attribute wizard.
- From the Attribute type drop-down list, select .
- Click .The Password Editor dialog opens.
- In the Enter New Password field, enter the password,
secret. - Click OK.The userPassword attribute appears in the Attributes editor.
- Click .
Adding groups for the roles
Copy linkLink copied to clipboard!
To add the groups that define the roles:
- Create a new organizational unit to contain the role groups.
- In the LDAP Browser view, select the ou=system node.
- Open the context menu.
- Select
to open the Entry Creation Method pane. - Check Create entry from scratch.
- Click Next to open the Object Classes pane.
- Select
organizationalUnitfrom the list of Available object classes. - Click Add to populate the list of Selected object classes.
- Click to open the Distinguished Name pane.
- In the the RDN field, enter
ouin front androlesafter the equals sign. - Click to open the Attributes pane.
- Click .
NoteThis step is required because Apache DS allows only administrators access to entries inou=system,ou=groups. - In the LDAP Browser view, drill down to the ou=roles node.
- Select the ou=roles node.
- Open the context menu.
- Select
to open the Entry Creation Method pane. - Check Create entry from scratch.
- Click Next to open the Object Classes pane.
- Select
groupOfNamesfrom the list of Available object classes. - Click Add to populate the list of Selected object classes.
- Click to open the Distinguished Name pane.
- In the the RDN field, enter
cnin front andadminafter the equals sign. - Click to open the Attributes pane.The message
Attribute "member" has an empty value, please insert a valid value.displays, and a DN Editor opens for you to enter a value. - Enter
uid=jdoe. - Click .
- Click .
- In Step 13, use
uid=janedoe. - In Step 13, use
uid=janedoe. - In Step 13, use
uid=crider.
