Chapter 16. Troubleshooting
There are cases where the Assisted Installer cannot begin the installation or the cluster fails to install properly. In these events, it is helpful to understand the likely failure modes as well as how to troubleshoot the failure.
16.1. Troubleshooting discovery ISO issues
The Assisted Installer uses an ISO image to run an agent that registers the host to the cluster and performs hardware and network validations before attempting to install OpenShift. You can follow these procedures to troubleshoot problems related to the host discovery.
Once you start the host with the discovery ISO image, the Assisted Installer discovers the host and presents it in the Assisted Service web console. See Configuring the discovery image for additional details.
16.1.1. Verify the discovery agent is running
Prerequisites
- You have created an infrastructure environment by using the API or have created a cluster by using the web console.
- You booted a host with the Infrastructure Environment discovery ISO and the host failed to register.
- You have SSH access to the host.
- You provided an SSH public key in the "Add hosts" dialog before generating the Discovery ISO so that you can SSH into your machine without a password.
Procedure
- Verify that your host machine is powered on.
- If you selected DHCP networking, check that the DHCP server is enabled.
- If you selected Static IP, bridges and bonds networking, check that your configurations are correct.
Verify that you can access your host machine using SSH, a console such as the BMC, or a virtual machine console:
$ ssh core@<host_ip_address>
You can specify private key file using the
-iparameter if it isn’t stored in the default directory.$ ssh -i <ssh_private_key_file> core@<host_ip_address>
If you fail to ssh to the host, the host failed during boot or it failed to configure the network.
Upon login you should see this message:
Example login
 If you are not seeing this message it means that the host didn’t boot with the assisted-installer ISO. Make sure you configured the boot order properly (The host should boot once from the live-ISO).
Check the agent service logs:
$ sudo journalctl -u agent.service
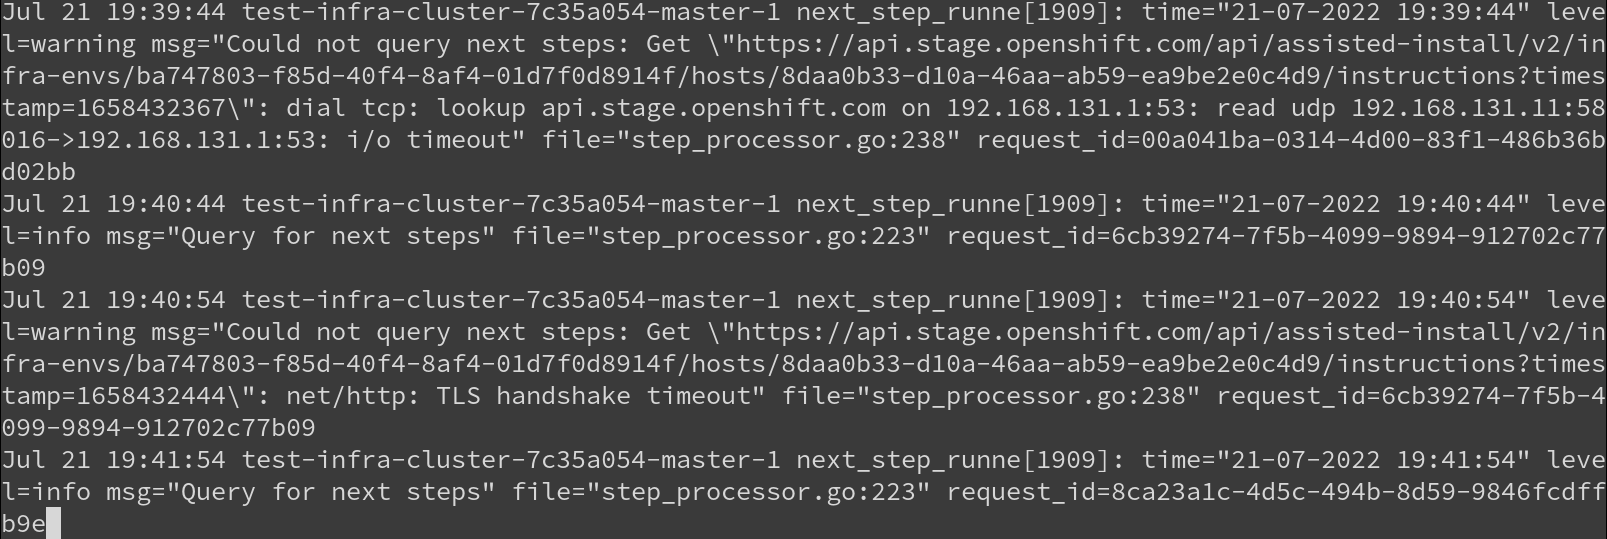
In the following example, the errors indicate there is a network issue:
Example agent service log screenshot of agent service log

If there is an error pulling the agent image, check the proxy settings. Verify that the host is connected to the network. You can use
nmclito get additional information about your network configuration.
16.1.2. Verify the agent can access the assisted-service
Prerequisites
- You have created an Infrastructure Environment by using the API or have created a cluster by using the web console.
- You booted a host with the Infrastructure Environment discovery ISO and the host failed to register.
- You verified the discovery agent is running.
Procedure
Check the agent logs to verify the agent can access the Assisted Service:
$ sudo journalctl TAG=agent
The errors in the following example indicate that the agent failed to access the Assisted Service.
Example agent log
Check the proxy settings you configured for the cluster. If configured, the proxy must allow access to the Assisted Service URL.
16.2. Troubleshooting minimal discovery ISO issues
The minimal ISO image should be used when bandwidth over the virtual media connection is limited. It includes only what is required to boot a host with networking. The majority of the content is downloaded upon boot. The resulting ISO image is about 100MB in size compared to 1GB for the full ISO image.
16.2.1. Troubleshooting minimal ISO boot failure by interrupting the boot process
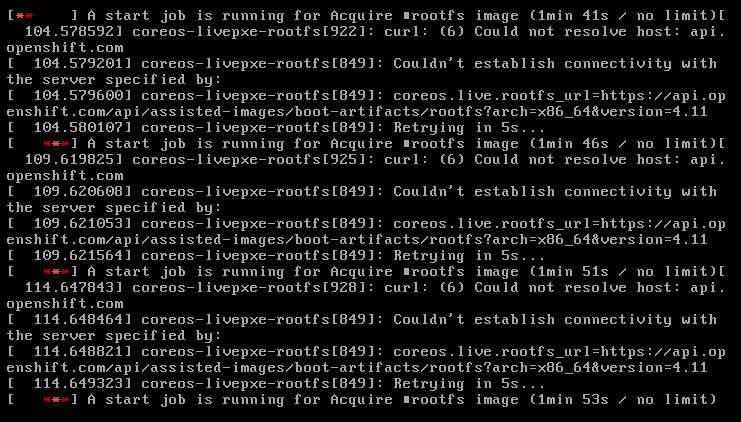
If your environment requires static network configuration to access the Assisted Installer service, any issues with that configuration might prevent the minimal ISO from booting properly. If the boot screen shows that the host has failed to download the root file system image, the network might not be configured correctly.
You can interrupt the kernel boot early in the bootstrap process, before the root file system image is downloaded. This allows you to access the root console and review the network configurations.
Example rootfs download failure
Procedure
Add the
.spec.kernelArgumentsstanza to theinfraEnvobject of the cluster you are deploying:NoteFor details on modifying an infrastructure environment, see Additional Resources.
# ... spec: clusterRef: name: sno1 namespace: sno1 cpuArchitecture: x86_64 ipxeScriptType: DiscoveryImageAlways kernelArguments: - operation: append value: rd.break=initqueue 1 nmStateConfigLabelSelector: matchLabels: nmstate-label: sno1 pullSecretRef: name: assisted-deployment-pull-secret- 1
rd.break=initqueueinterrupts the boot at thedracutmain loop. See rd.break options for debugging kernel boot for details.
-
Wait for the related nodes to reboot automatically and for the boot to abort at the
iniqueuestage, beforerootfsis downloaded. You will be redirected to the root console. Identify and change the incorrect network configurations. Here are some useful diagnostic commands:
View system logs by using
journalctl, for example:# journalctl -p err //Sorts logs by errors # journalctl -p crit //Sorts logs by critical errors # journalctl -p warning //Sorts logs by warnings
View network connection information by using
nmcli, as follows:# nmcli conn show
Check the configuration files for incorrect network connections, for example:
# cat /etc/assisted/network/host0/eno3.nmconnection
-
Press
control+dto resume the bootstrap process. The server downloadsrootfsand completes the process. -
Reopen the
infraEnvobject and remove the.spec.kernelArgumentsstanza.
Additional resources
16.3. Correcting a host’s boot order
Once the installation that runs as part of the Discovery Image completes, the Assisted Installer reboots the host. The host must boot from its installation disk to continue forming the cluster. If you have not correctly configured the host’s boot order, it will boot from another disk instead, interrupting the installation.
If the host boots the discovery image again, the Assisted Installer will immediately detect this event and set the host’s status to Installing Pending User Action. Alternatively, if the Assisted Installer does not detect that the host has booted the correct disk within the allotted time, it will also set this host status.
Procedure
- Reboot the host and set its boot order to boot from the installation disk. If you didn’t select an installation disk, the Assisted Installer selected one for you. To view the selected installation disk, click to expand the host’s information in the host inventory, and check which disk has the “Installation disk” role.
16.4. Rectifying partially-successful installations
There are cases where the Assisted Installer declares an installation to be successful even though it encountered errors:
- If you requested to install OLM operators and one or more failed to install, log into the cluster’s console to remediate the failures.
- If you requested to install more than two worker nodes and at least one failed to install, but at least two succeeded, add the failed workers to the installed cluster.
16.5. API connectivity failure when adding nodes to a cluster
When you add a node to an existing cluster as part of day 2 operations, the node downloads the ignition configuration file from the day 1 cluster. If the download fails and the node is unable to connect to the cluster, the status of the host in the Host discovery step changes to Insufficient. Clicking this status displays the following error message:
The host failed to download the ignition file from <URL>. You must ensure the host can reach the URL. Check your DNS and network configuration or update the IP address or domain used to reach the cluster.

error: ignition file download failed.... no route to host
There are a number of possible reasons for the connectivity failure. Here are some recommended actions.
Procedure
Check the IP address and domain name of the cluster:
- Click the set the IP or domain used to reach the cluster hyperlink.
- In the Update cluster hostname window, enter the correct IP address or domain name for the cluster.
- Check your DNS settings to ensure that the DNS can resolve the domain that you provided.
-
Ensure that port
22624is open in all firewalls. Check the agent logs of the host to verify that the agent can access the Assisted Service via SSH:
$ sudo journalctl TAG=agent
NoteFor more details, see Verify the agent can access the Assisted Service.