Chapter 14. Provisioning paid plans
One of the most popular ways to monetize an API is by defining subscription fees based on usage. This section focuses on how to use application plans to provision pricing tiers. It’s also possible to apply pricing rules at the account and the service level – these topics are covered in advanced guides.
Below you’ll learn about the pricing options for application plans and how to set up a paid plan.
14.1. Make decisions about your pricing model
The first decision to make is how to differentiate between the tiers in your pricing model. Will the tiers be driven by volume/usage, API functionality, access to other resources, or a combination?
- Volume / Usage. The most common way to differentiate between tiers is based on volume because volume usually has a strong correlation to value to the customer as well as cost to serve. You can apply a global hit count for calls on the API or a more granular measurement at the method level.
- Functionality. You can enable or disable access to parts of your API depending on the tier. This is a good approach to distinguish between standard and premium levels.
- Resources. You can also create tiers based on access to any other resources that provide value to the customer or drive costs in your infrastructure – for example, GB’s of bandwidth consumed, number of users, or transaction values.
Once you have decided on your pricing drivers, you must decide whether the tiers will be based on a flat rate subscription, a variable rate, or a one-off upfront charge. All three of the pricing drivers above are compatible with the one off, or monthly flat rate subscriptions. If you decide your pricing will be based on volume of hits or resource consumption, there will of course be a variable element to your pricing.
14.2. Set up an application plan with your pricing rules
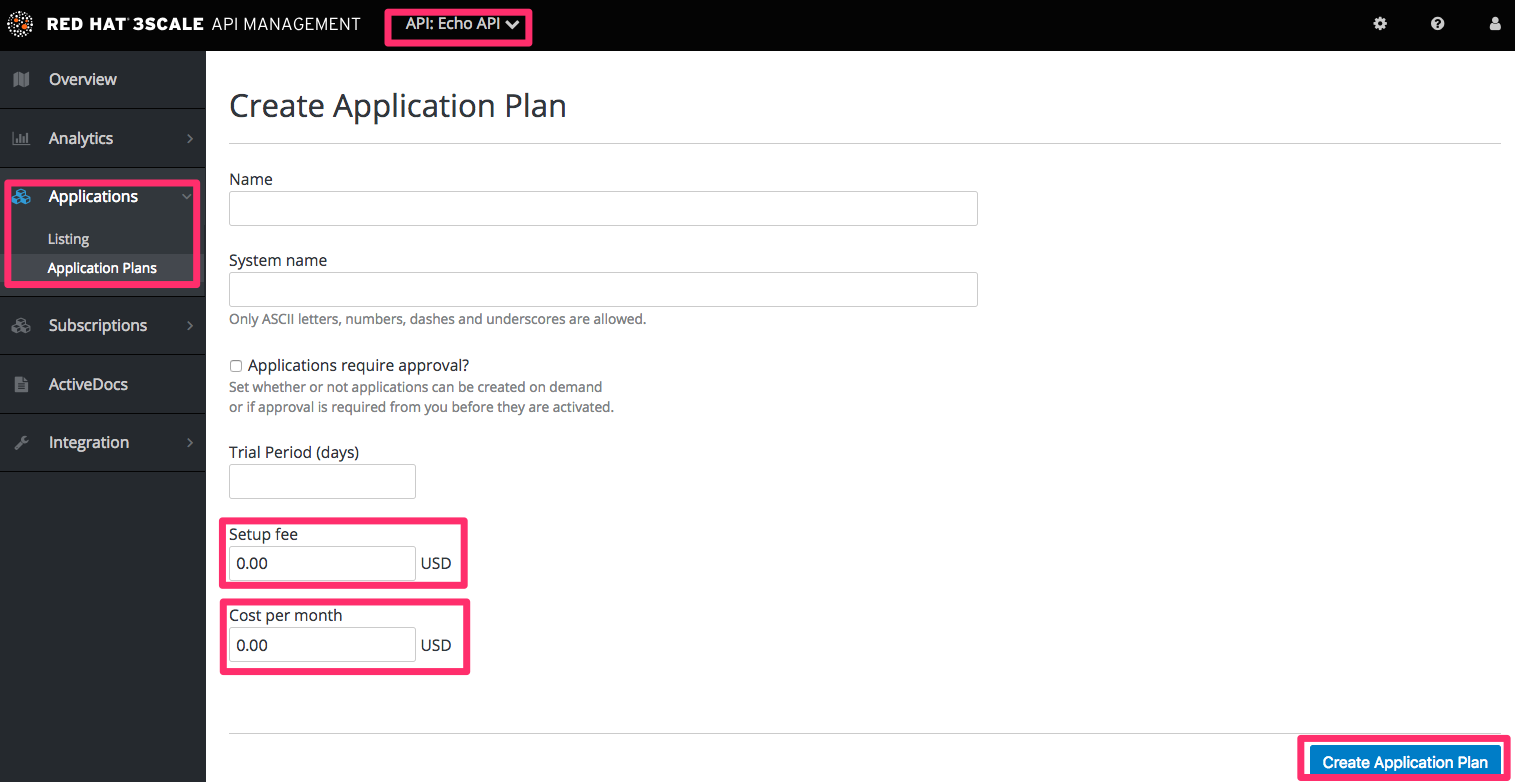
You can either create a new application plan or edit an existing one. When creating a new application plan, you can enter any upfront charges or flat rate subscriptions.
In the edit application view, you can enter or modify the upfront charges and subscriptions.
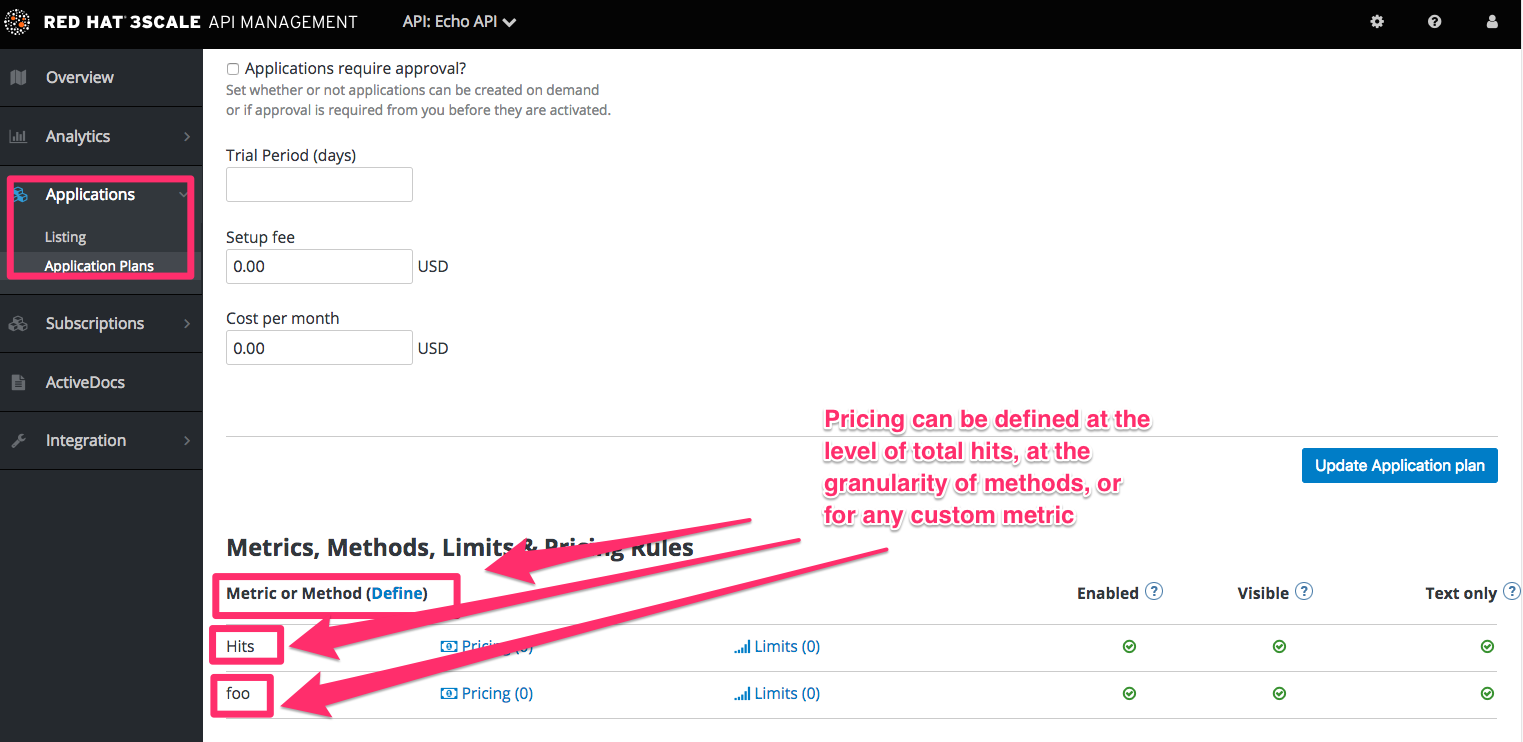
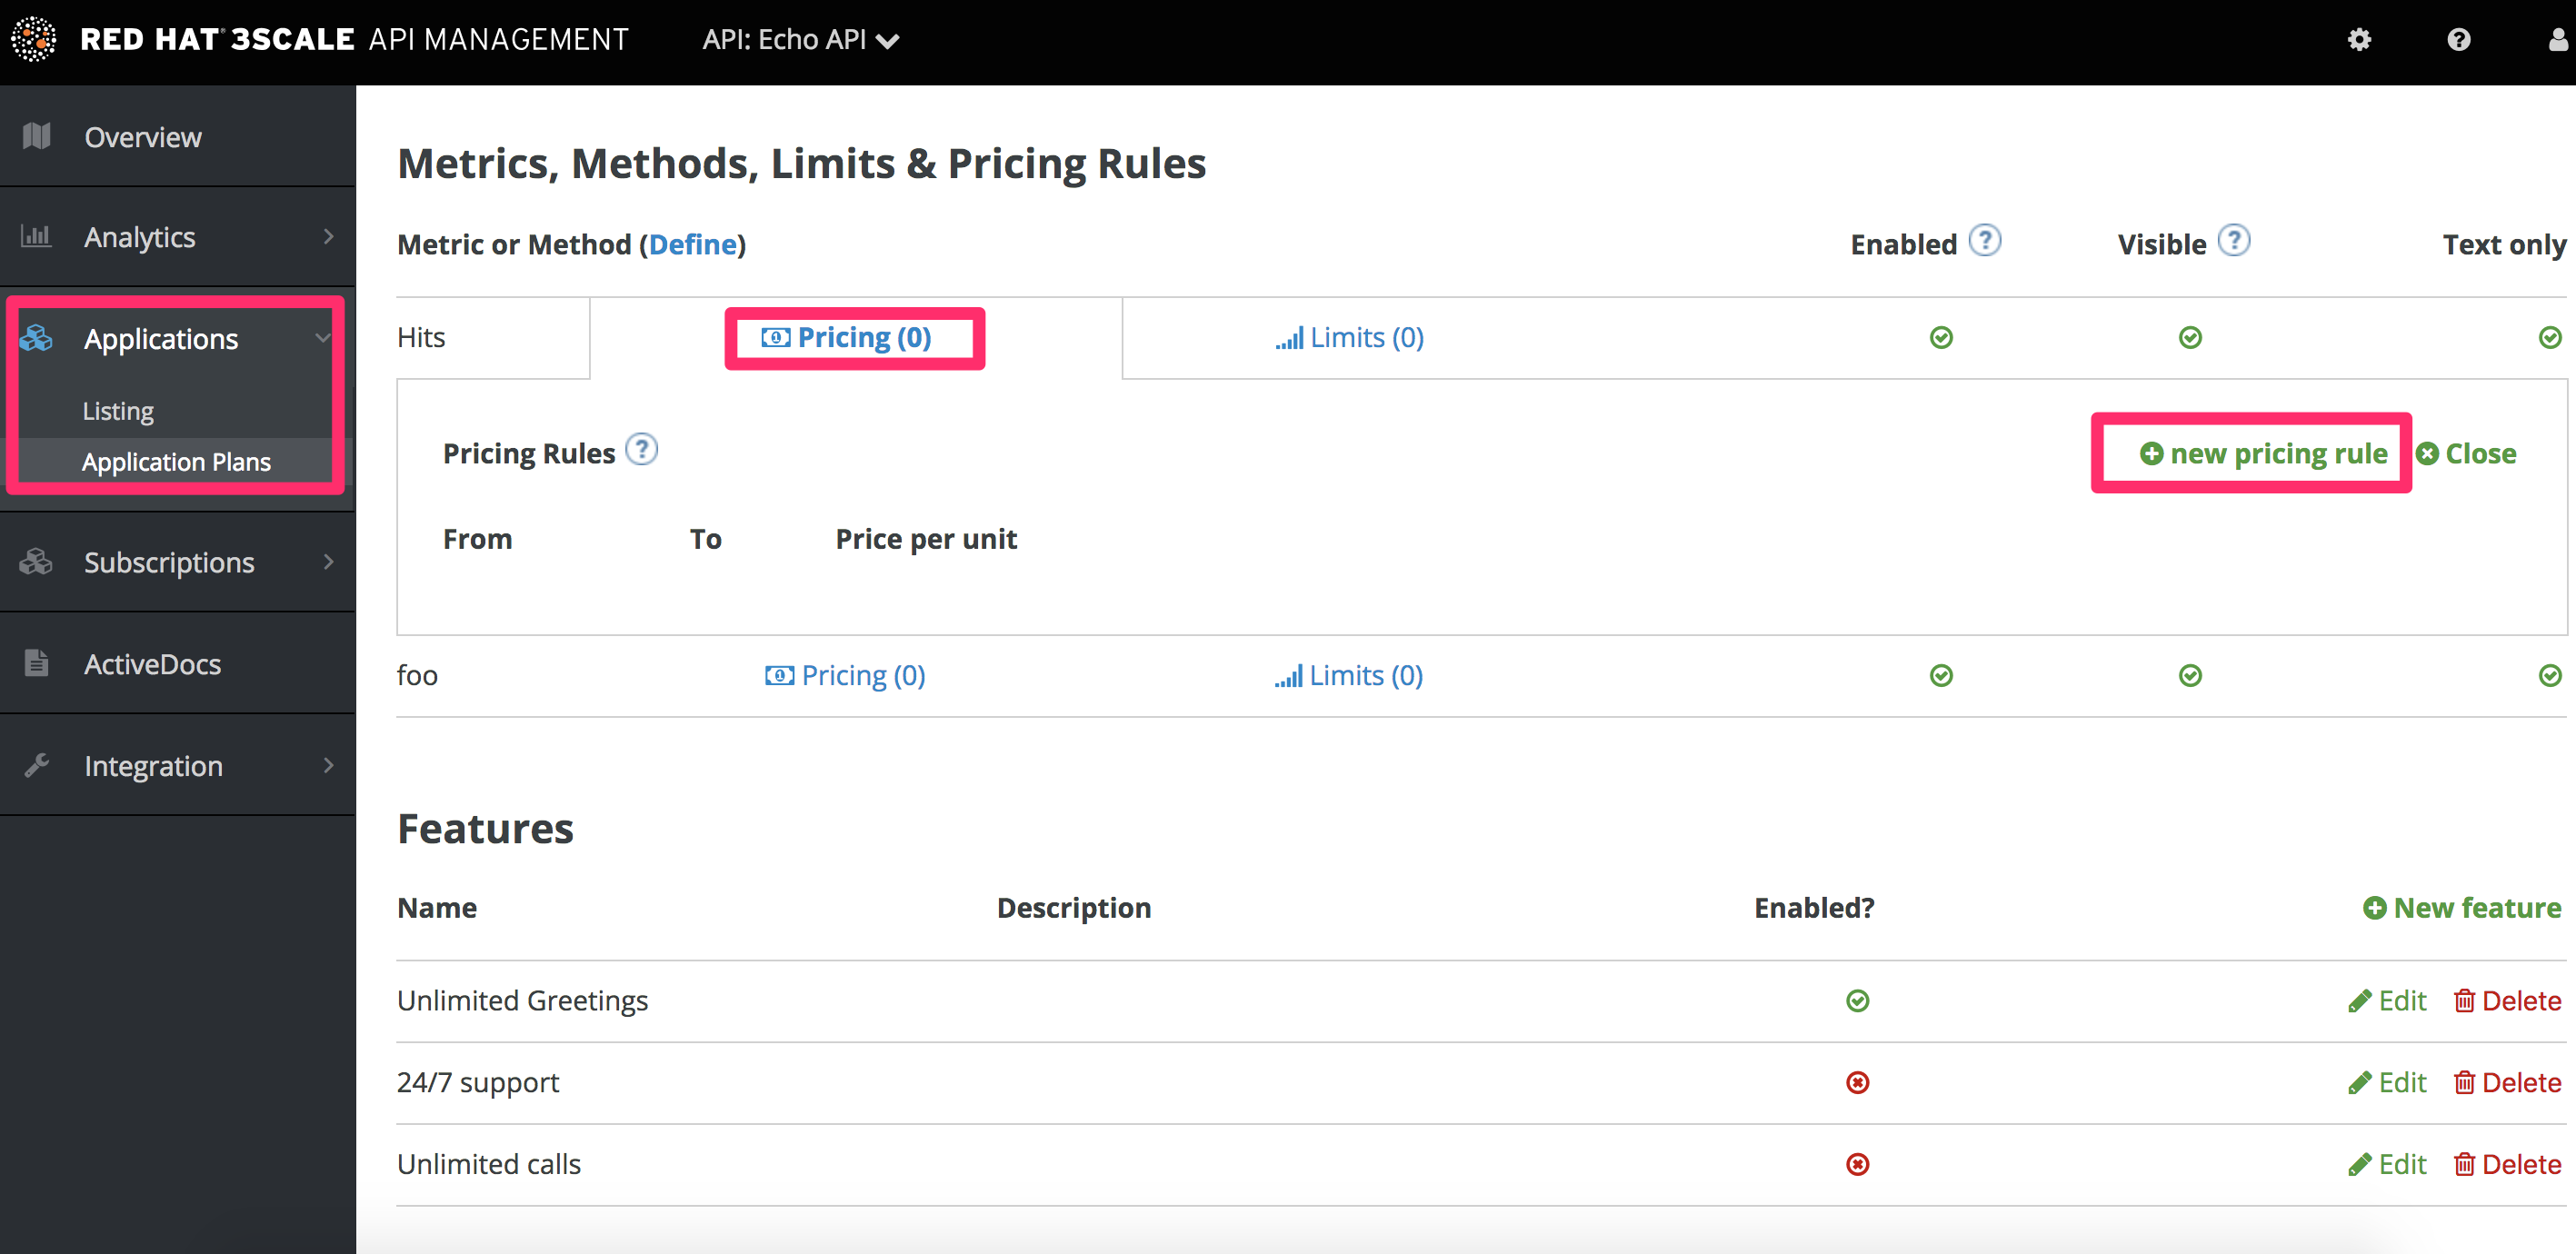
Next, set up the pricing drivers you decided on in step 1. If some of them already exist as metrics, you can simply edit the item.
- Volume drivers: are applied at the level of the global hits metric, or for individual methods under hits. Multiple pricing rules can be applied to any metric. Note that the hits calculation is cumulated over a one-month billing cycle.
- Functionality drivers are set by enabling or disabling the metric for this plan.
- Resource drivers are similar to volume drivers but are applied on custom metrics.
Once you’re finished setting up your pricing rules, be sure to click “update application plan”.
14.3. Create further pricing tiers
It’s ok to define an API paid plan with a single application plan. Usually this would be the case if all your pricing rules are defined by volume or resource drivers. However if you want to offer separate plans for different segments of your developer community, you’ll need to add more application plans.
The easiest way to do this is to copy the first application plan from the application plan overview page. This way, it will be pre-populated with all the existing metrics and pricing rules. The more care you take to create a full plan the first time, the more time you will save with the plan copy feature.
14.4. Provision the paid plans
In order to provision the plans, your developers must create new applications and select one of the new paid plans. You can also do this on their behalf from the admin console. For any existing applications, it’s also possible to change from an existing plan to one of the new paid plans.
14.5. More information
In conjunction with flat-rate pricing plans it’s common to differentiate between tiers using rate limits. This is explained in provision rate limits


