Chapter 5. Kaoto DataMapper
Currently Kaoto DataMapper is only supported inside the Visual Studio Code extension as a technical preview feature. In the future we will aim to bring this functionality also to the pure web version of Kaoto.
At the moment the DataMapper only supports XML schema for rendering the data structure and it internally generates a single XSLT step to perform configured data mappings at runtime. While you can consume multiple XML documents with using Camel Variables and/or Message Headers which are mapped to XSLT parameters, the output is only a Camel Message Body.
In addition to the regular Camel steps, Kaoto now supports a Kaoto DataMapper step to be placed in the Camel route. The Kaoto DataMapper step provides a graphical user interface to create data mappings inside the Camel route.
5.1. Adding a DataMapper step
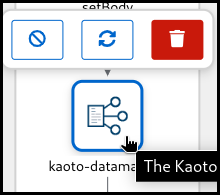
Add a Kaoto DataMapper step in your Camel route. When you
Append,Prepend, orReplacea step in the Kaoto Design view, you can find the Kaoto DataMapper step in the catalog.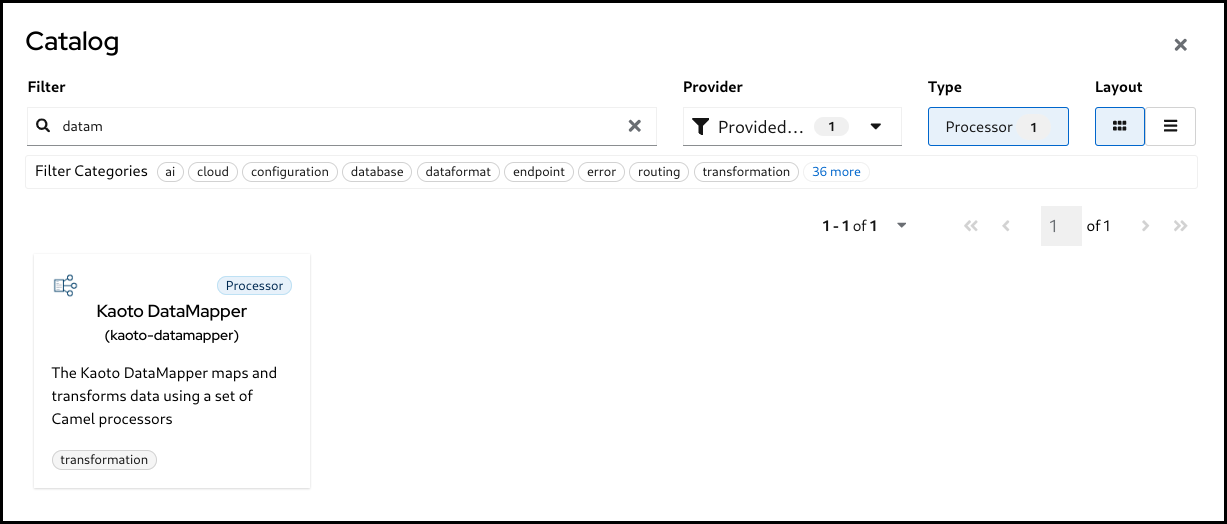
Click the added Kaoto DataMapper step in the Kaoto Design to open the config form.
In the Kaoto DataMapper config form, click the
Configurebutton.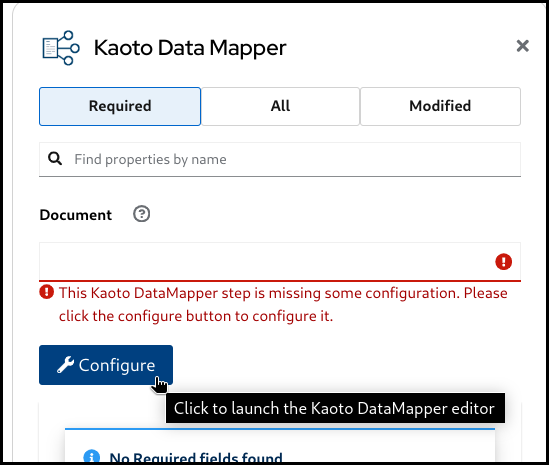
This will open the visual DataMapper editor.
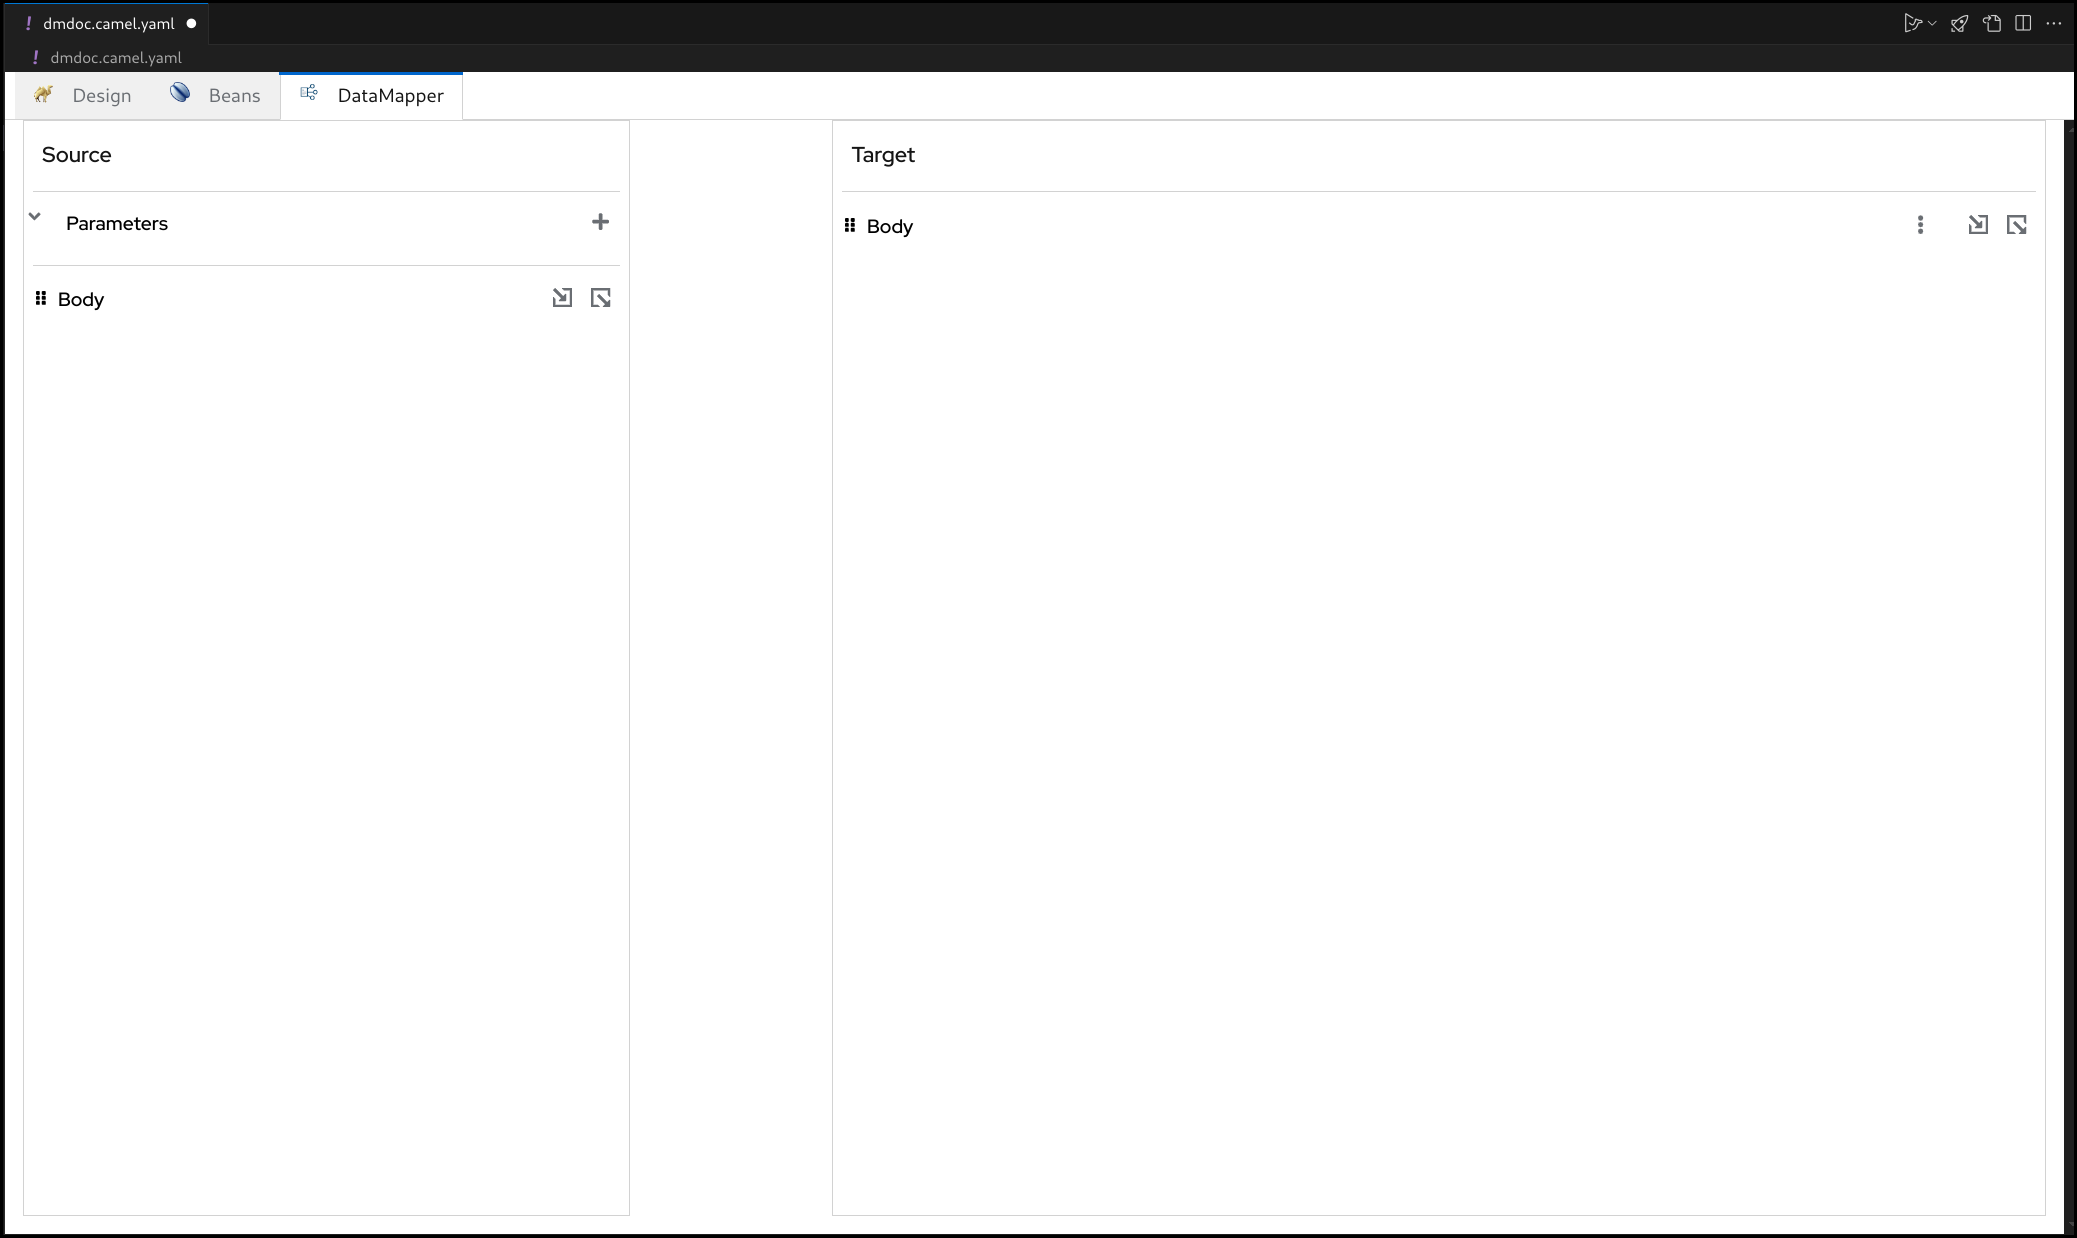
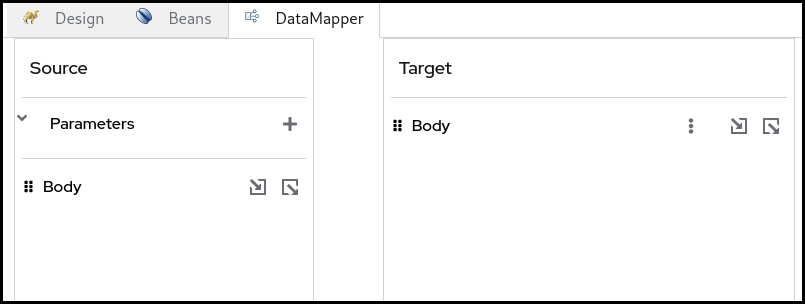
5.2. Source and Target
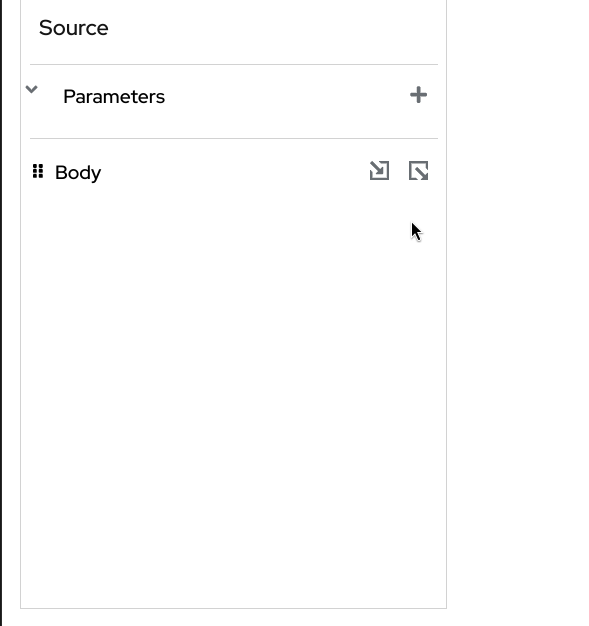
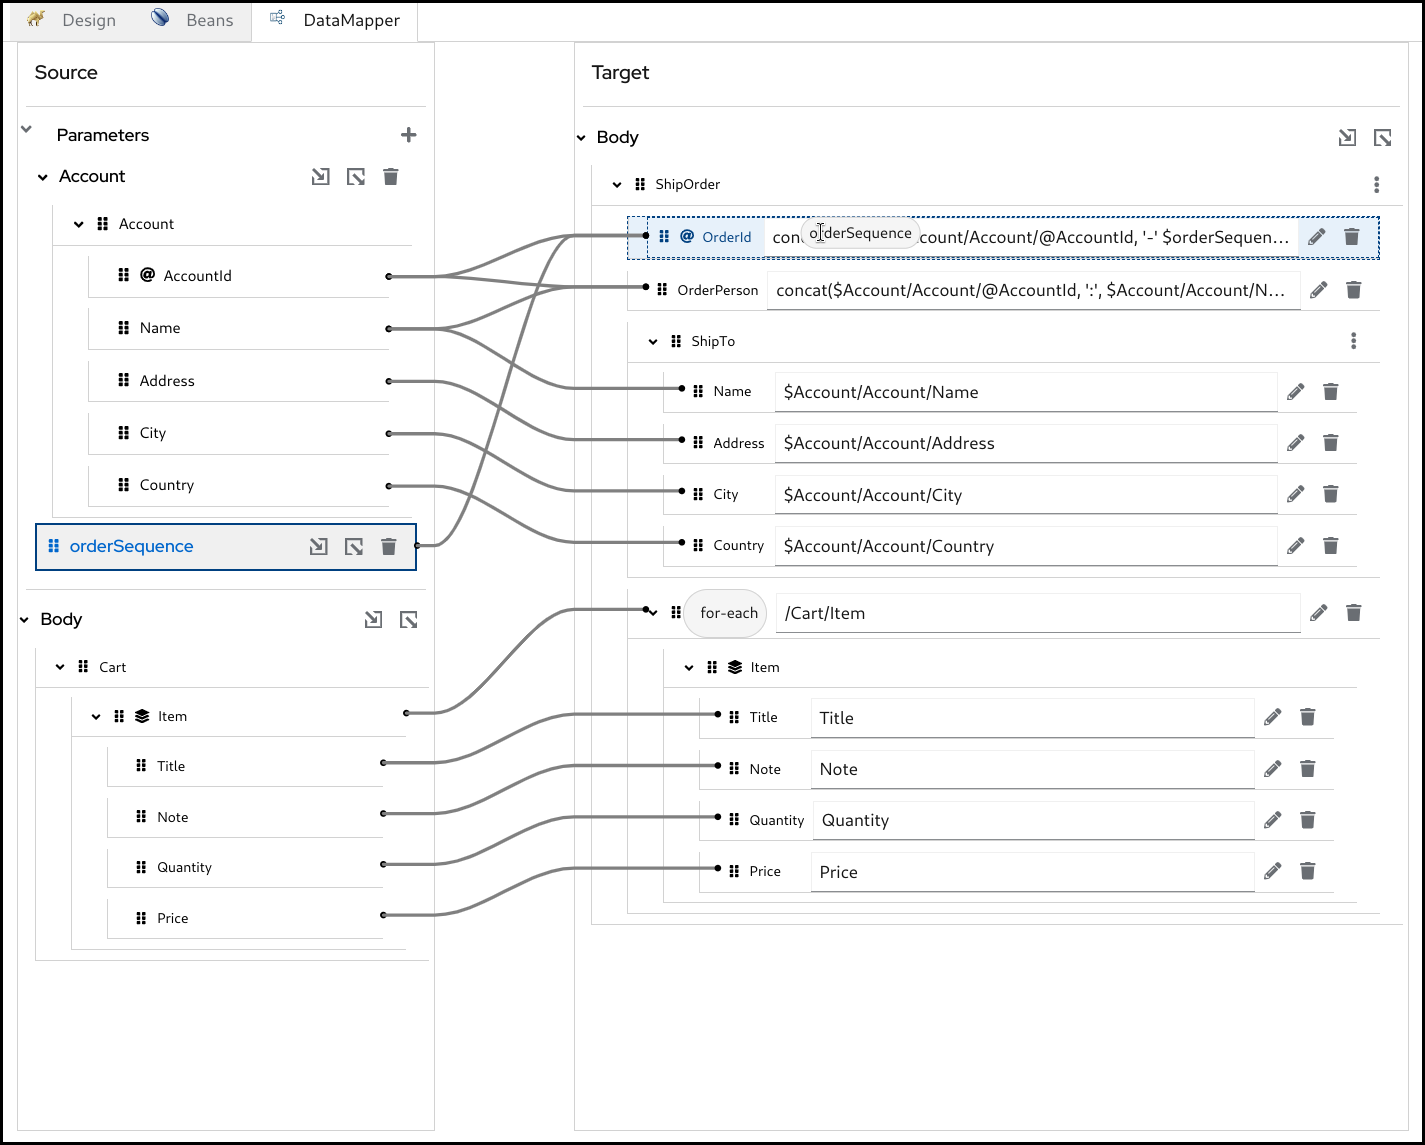
In the DataMapper canvas, you can see Source at the left and Target section at the right side.
The Source section represents the input side of your mappings, where the DataMapper step reads the data from. This is mapped to the incoming Camel Message as well as possible Camel Variables.
The Target section represents the output side of your mappings, where the DataMapper step writes the data to. This is mapped to the outgoing Camel Message.
5.3. Parameters
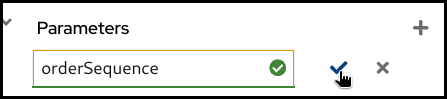
The Parameters section inside the Source is mapped to any of incoming Camel Variables and Message Headers. For example, if there is an incoming Camel Variable orderSequence, you can consume it by adding a Parameter orderSequence in the DataMapper Source/Parameters section.
Follow the below steps to add a parameter:
Click the plus (+) button on the right side of the
Parameterstitle.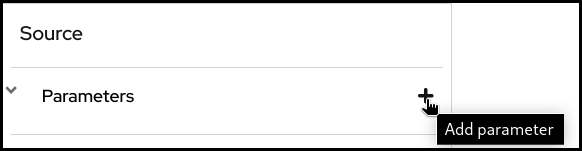
Now type the parameter name and click the check button on the right.
 Note
NoteWhile Camel Exchange Properties are also mapped to Parameters in current
camel-xslt-saxonimplementation, after the Camel Variables has been introduced, it is no longer recommended to store application data into Camel Exchange Properties. We encourage to use Camel Variables instead.
5.4. Attaching Document schema files
If any of Source Body, Target Body and/or Parameter(s) are structured data, you can attach a schema file and visualize the data structure in a tree style view.
If the data is not structured and just a primitive value, you don’t need to attach a schema file.
Follow the below steps to attach a schema file:
- Place schema file(s) inside the workspace directory.
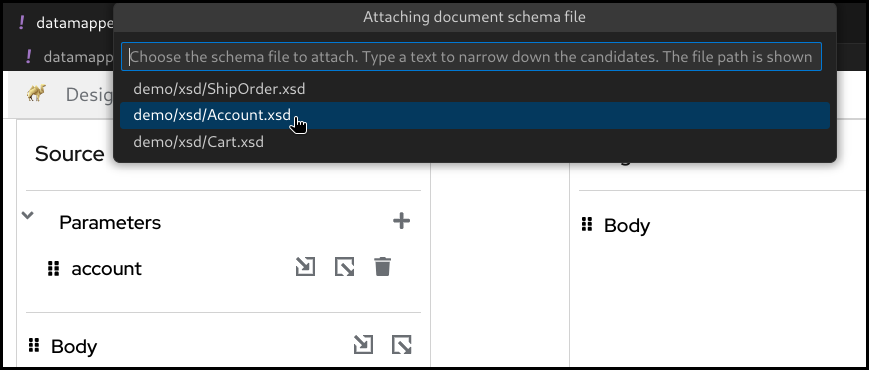
Click
Attach a schemabutton in one of theSource Body,Target BodyorParameterssections.
Select the schema file to attach
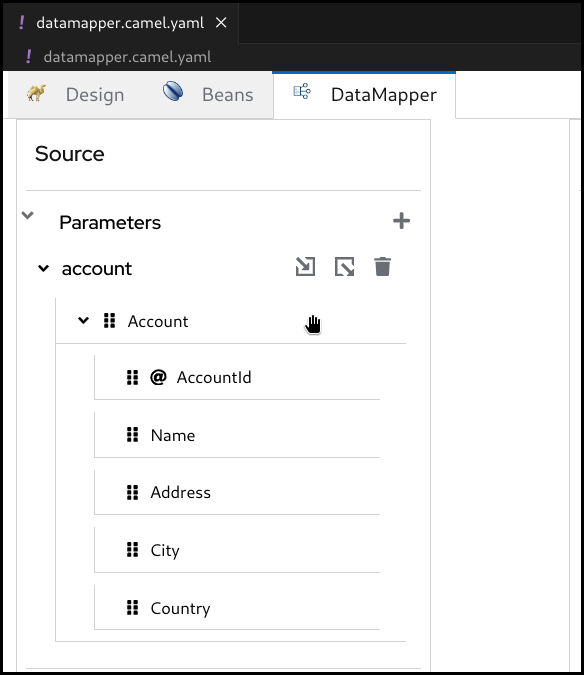
Now the document structure is rendered inside a tree.
5.5. Creating simple mappings
5.5.1. Creating a mapping by dragging and dropping a field
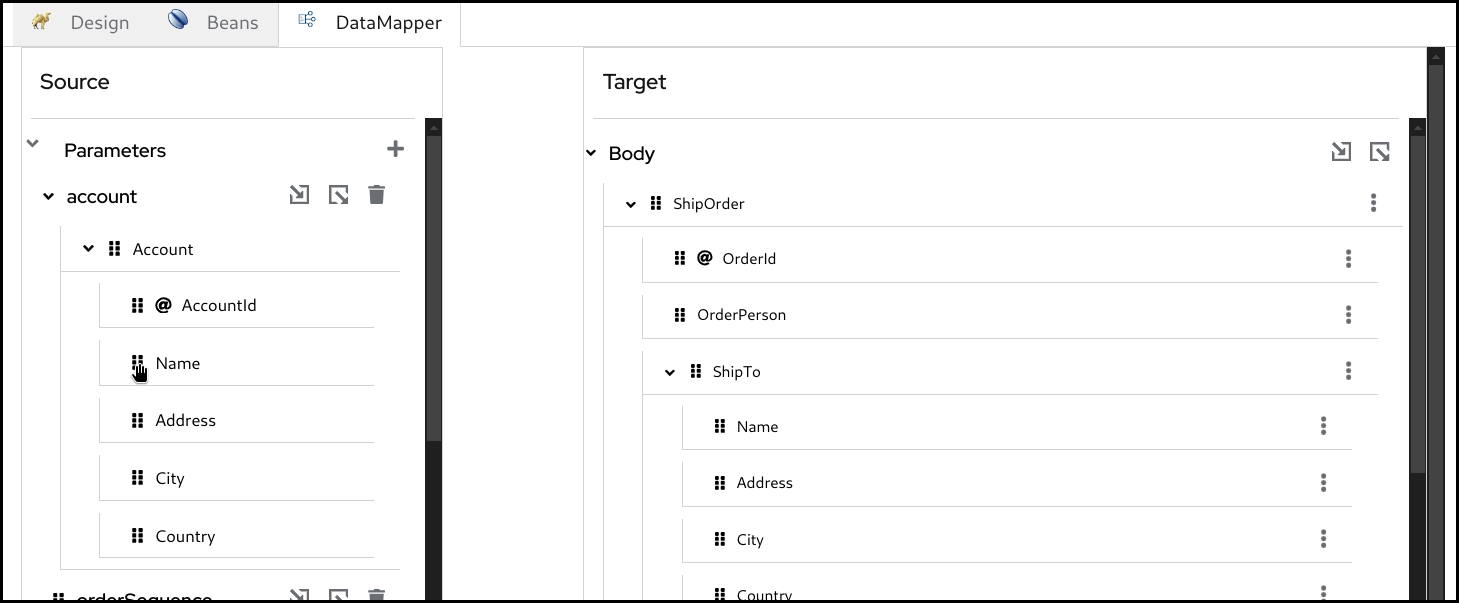
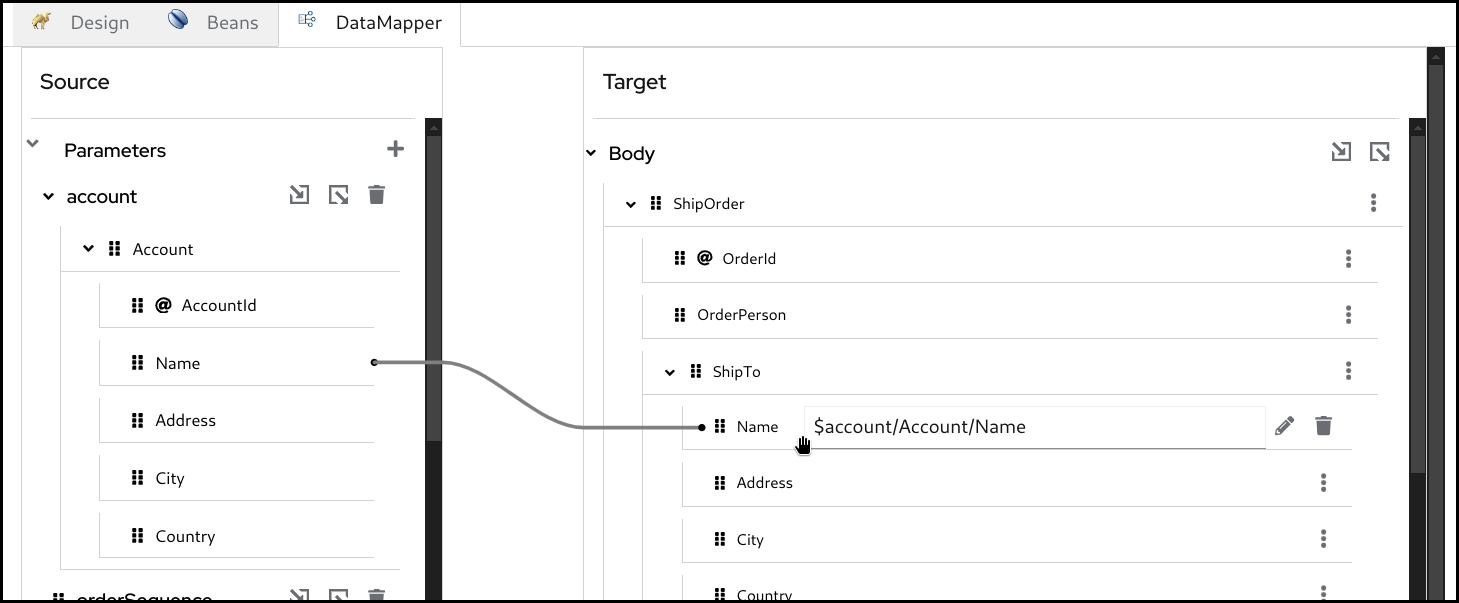
When you perform drag and drop between the source and the target, a mapping is created and a line is drawn between the fields.
Example: Mapping the Name fields by dragging and dropping the source Name field on the target Name field.
Before:
After:
5.5.2. Creating a mapping by typing XPath expression
You can also create a mapping by entering a XPath expression.
Click the 3 dots context menu and selecton the target field and choose
Add selector expression.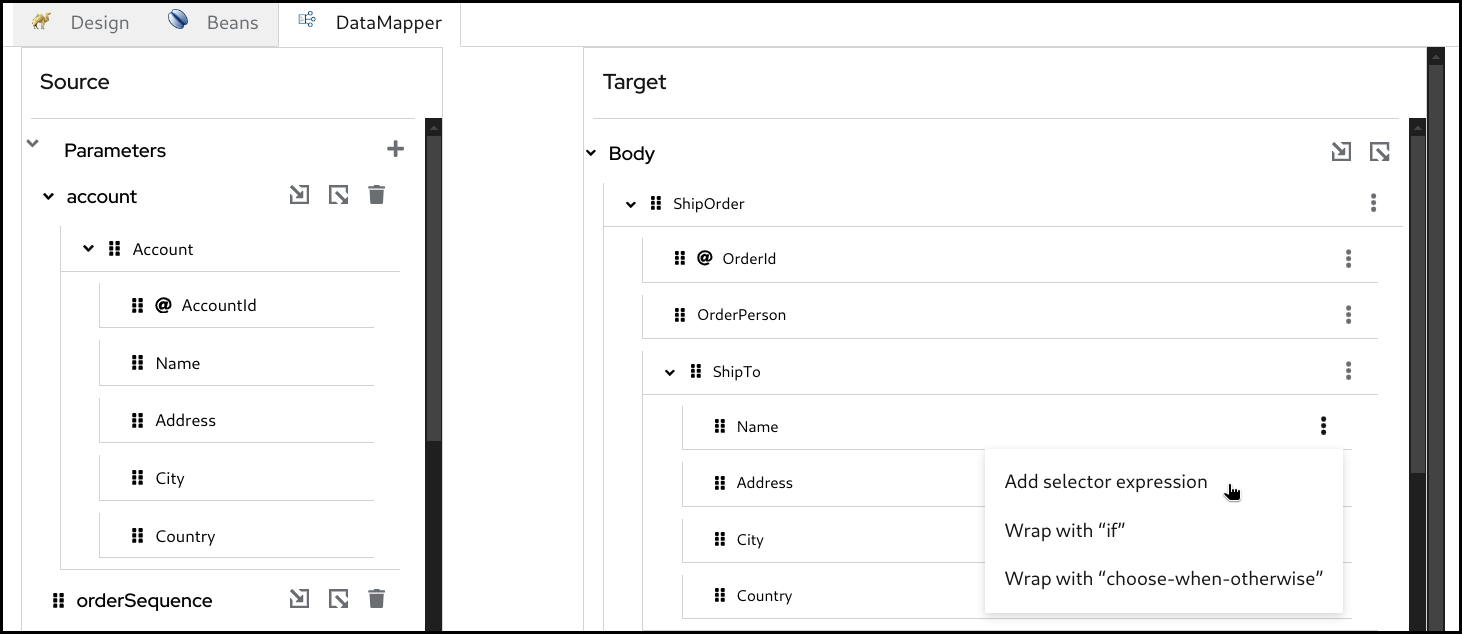
Then enter the
XPathexpression
5.6. Creating conditional mappings
The DataMapper supports creating 3 types of conditional mappings:
-
if- The mapping is created only when the specified condition is met. -
choose-when-otherwise- The mapping is created depending on how the condition is satisfied. If thewhenbranch condition is satisfied, thewhenbranch mapping is .created. If nowhenbranch condition is satisfied, then theotherwisebranch mapping is created. -
for-each- The mapping is created for each item in the collection. Collection means multiple occurrences, which is often represented as an array.
5.6.1. Creating an if mapping
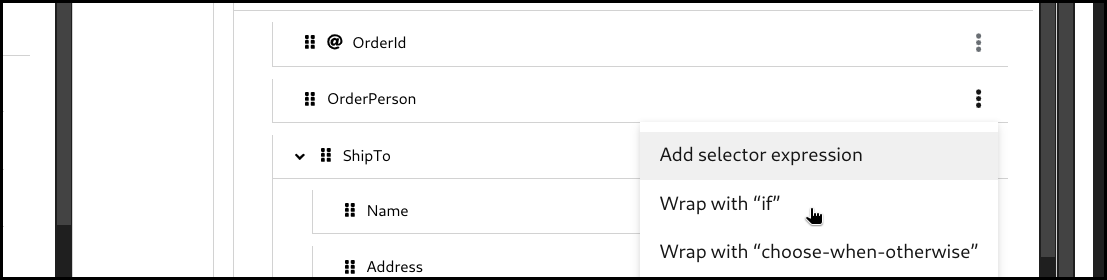
Click the 3 dots context menu on the target section’s field. Then select
wrap with "if"to create a mapping.
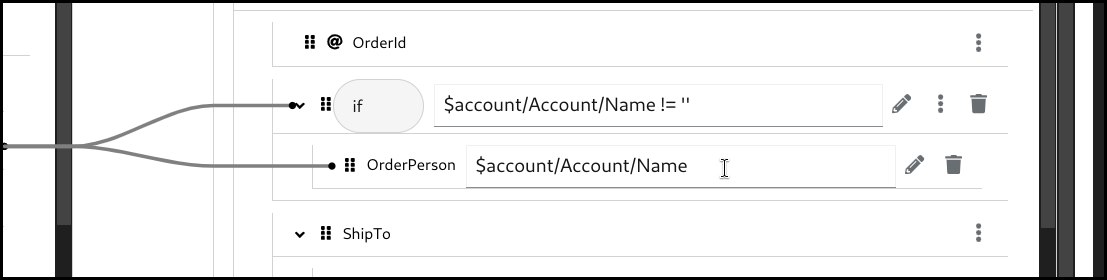
Configure the
ifcondition. You can drag the source field and drop it into the input field to build a condition, or alternatively type everything manually.
Configure the mapping by using drag and drop or by typing it manually.
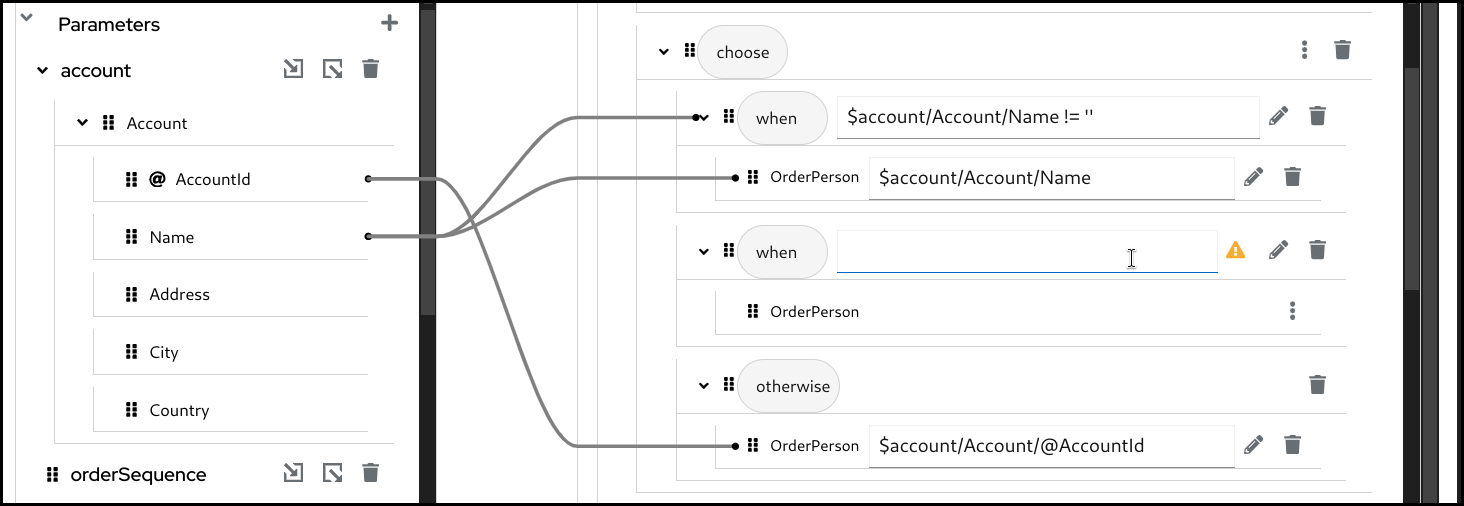
5.6.2. Creating a choose-when-otherwise mapping
Click the 3 dots context menu on the target section’s field. Then select
wrap with "choose-when-otherwise"to create a mapping.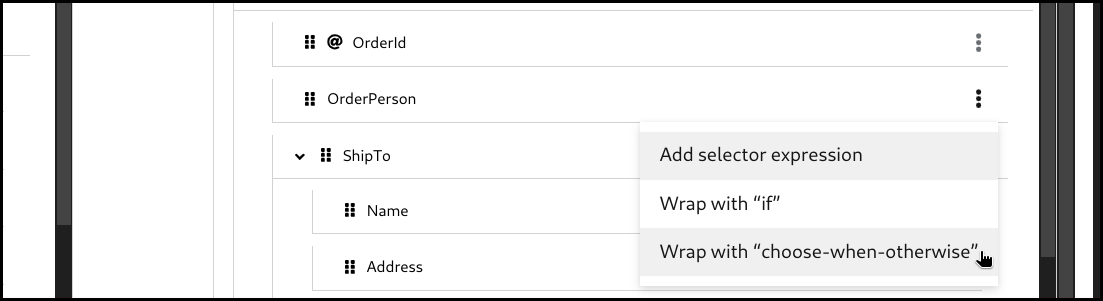
Configure the
whencondition.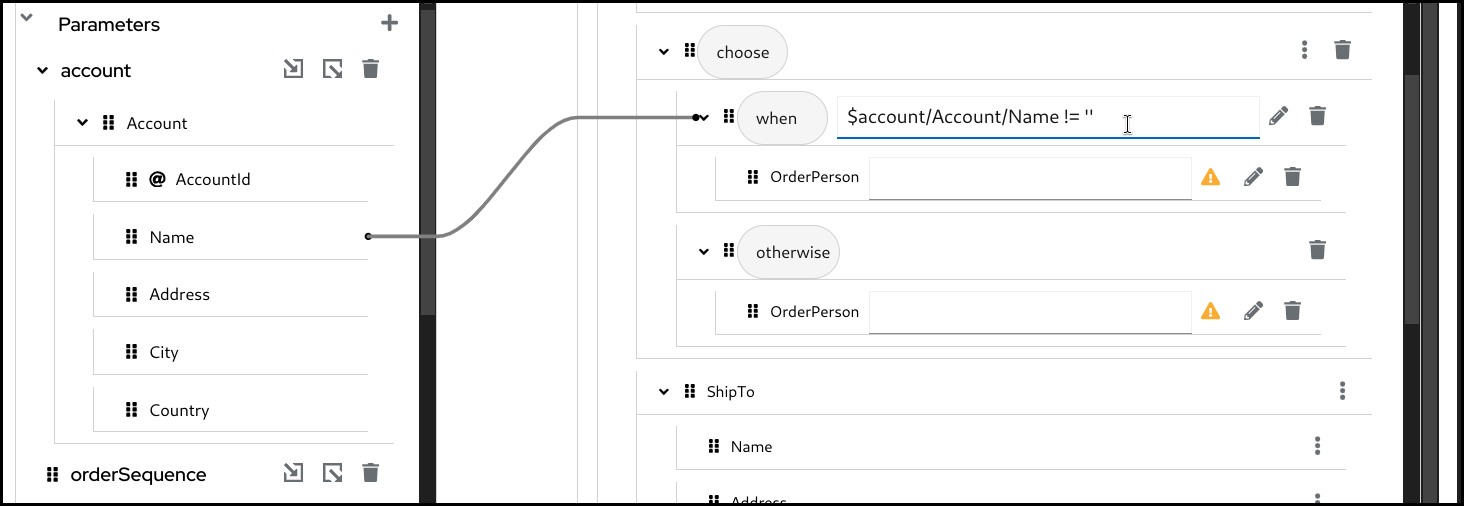
Configure the mapping for the
whenbranch.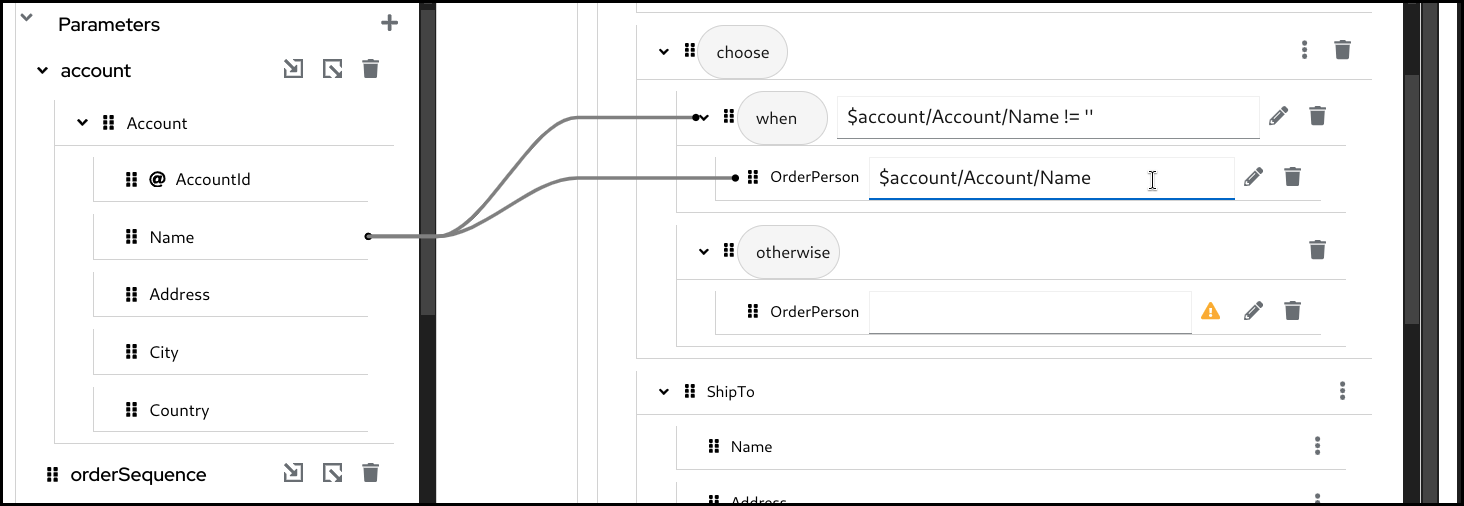
Configure the mapping for the
otherwisebranch.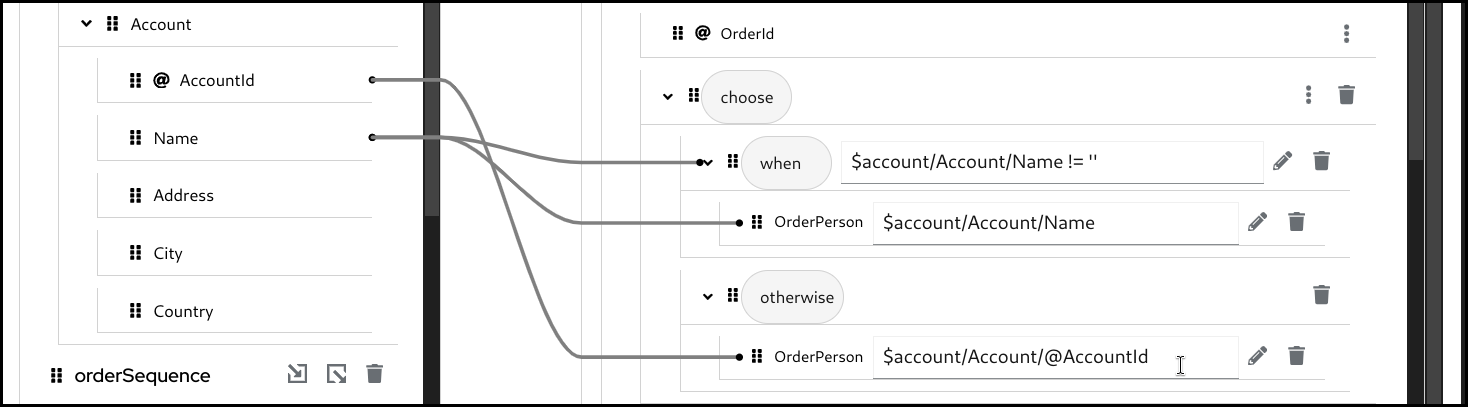
If required, you can add one or more
whenbranches. To add anotherwhenbranch you can click the 3 dots menu on thechoosefield in theTargetsection and then selectAdd "when".
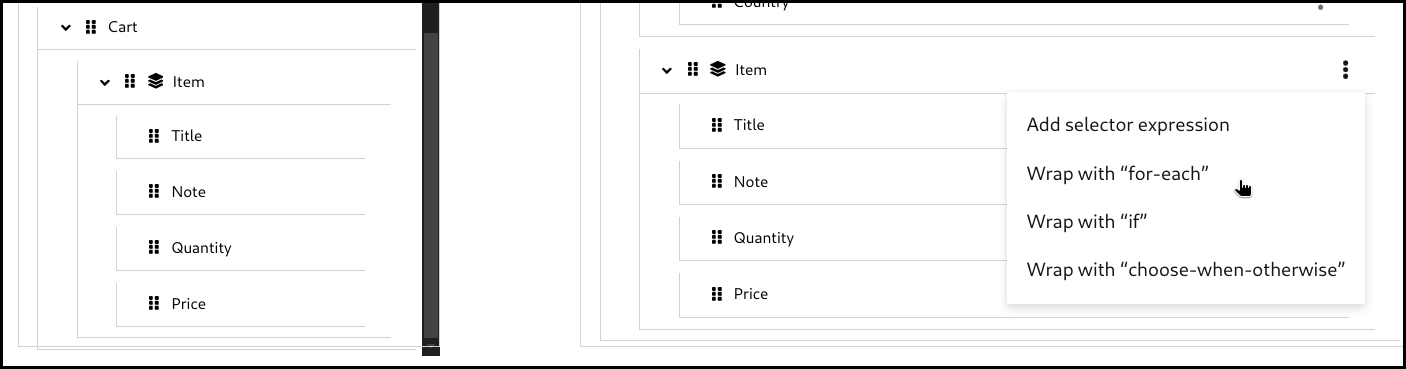
5.6.3. Creating a for-each mapping
When a field is a collection field (means multiple occurrences, often represented as an array), you can create a for-each mapping. The layer icon on the field indicates that it is a collection field.

Click the 3 dots context menu on the target section’s collection field. Then select wrap with "for-each" to create a mapping.
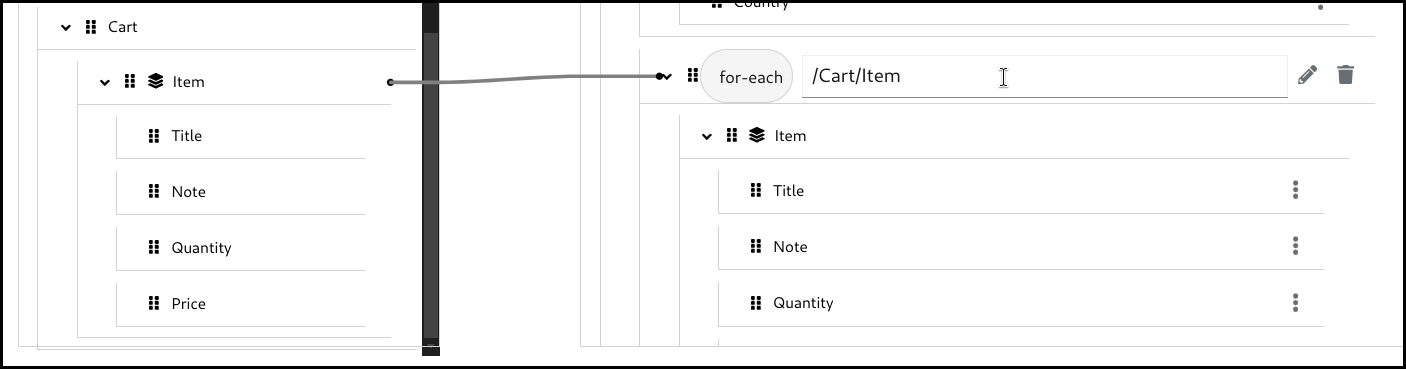
Configure the for-each condition by specifying the source collection field to iterate over.
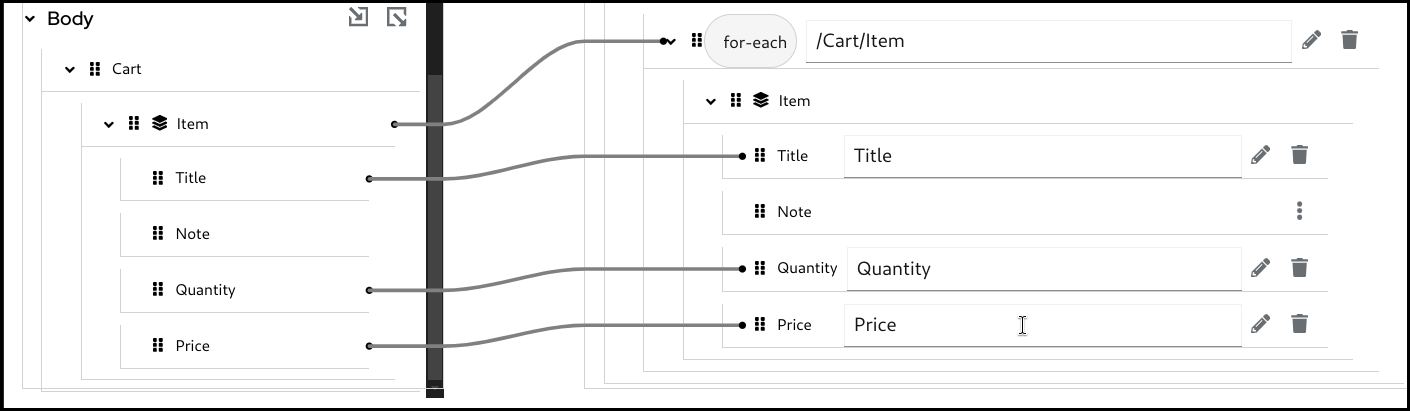
Configure the mappings below. Note that the mapping field path is now a relative path from the collection field specified in the for-each condition.
5.7. Using XPath expression editor
The XPath editor is still under initial development and it currently supports only limited drag and drop. In future releases, more syntax assisting features will be added.
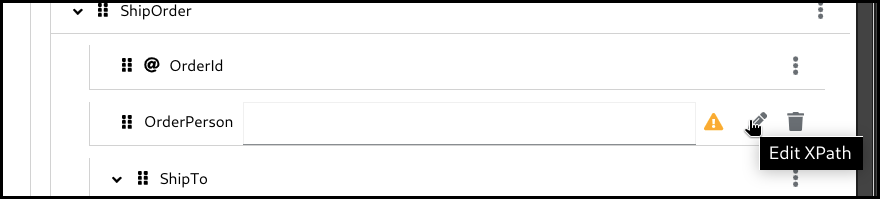
If you want to write something more in XPath expression rather than just a field path, you can launch the XPath expression editor and work with it. There is a pencil icon on the target field which launches the XPath expression editor when you click it.
Click the pencil button on a target field which has a mapping.
This will open up the
XPatheditor.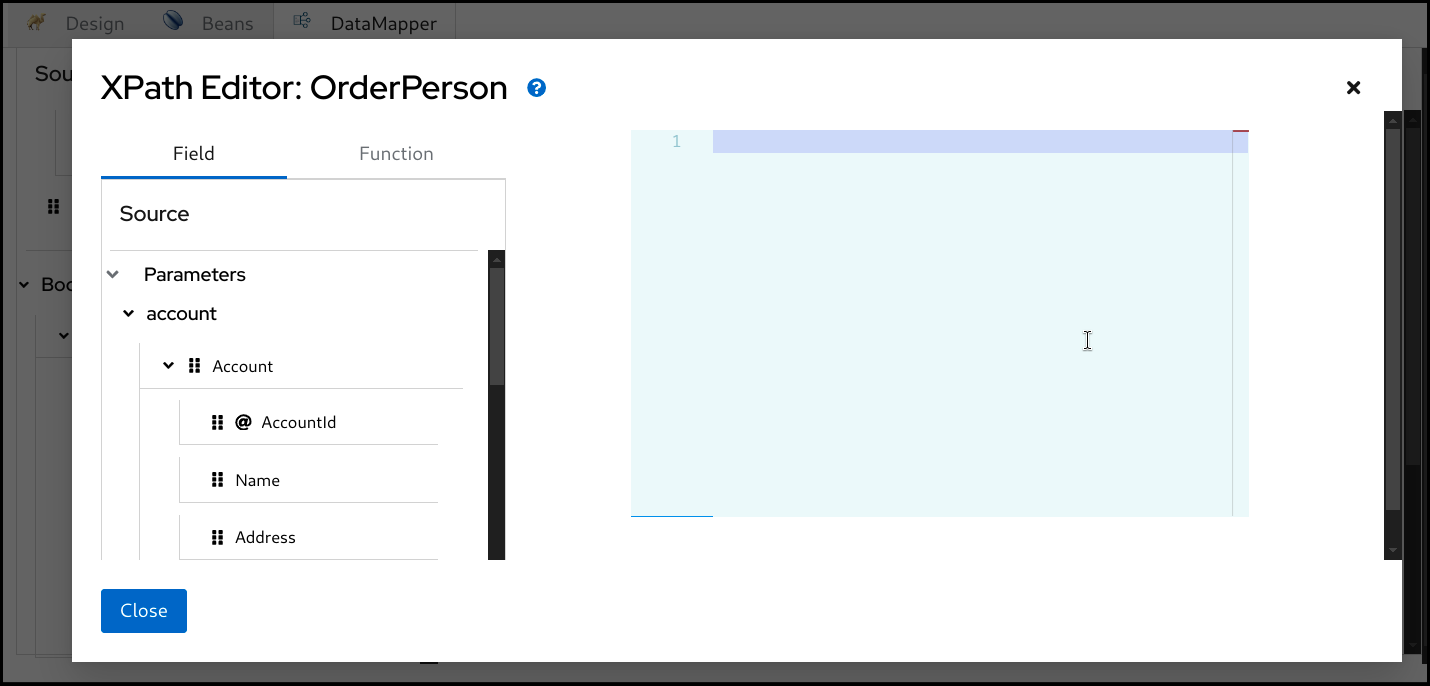
You can then type in the editor at the right or drag a
Fieldfrom the left and drop onto the editor.
You can also drag and drop
XPathfunctions from theFunctiontab on the left side.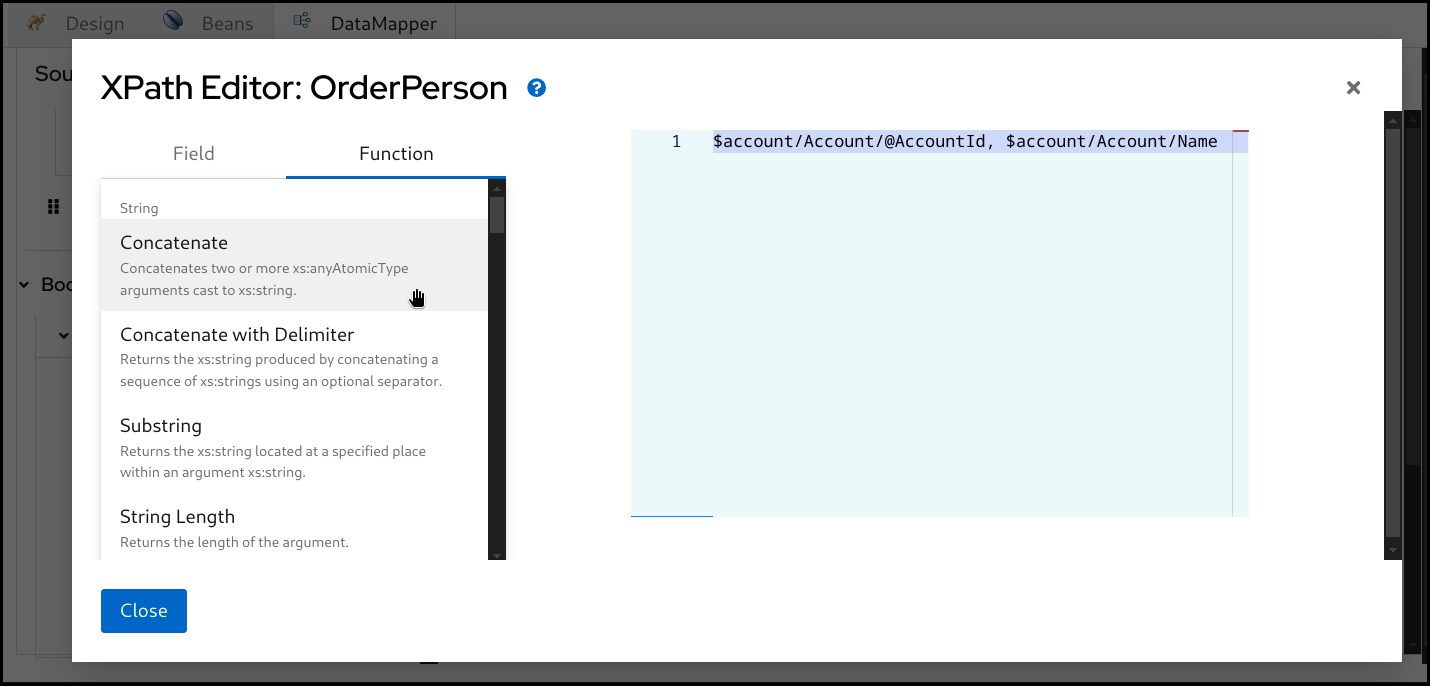
Drag the function and drop it onto the editor.
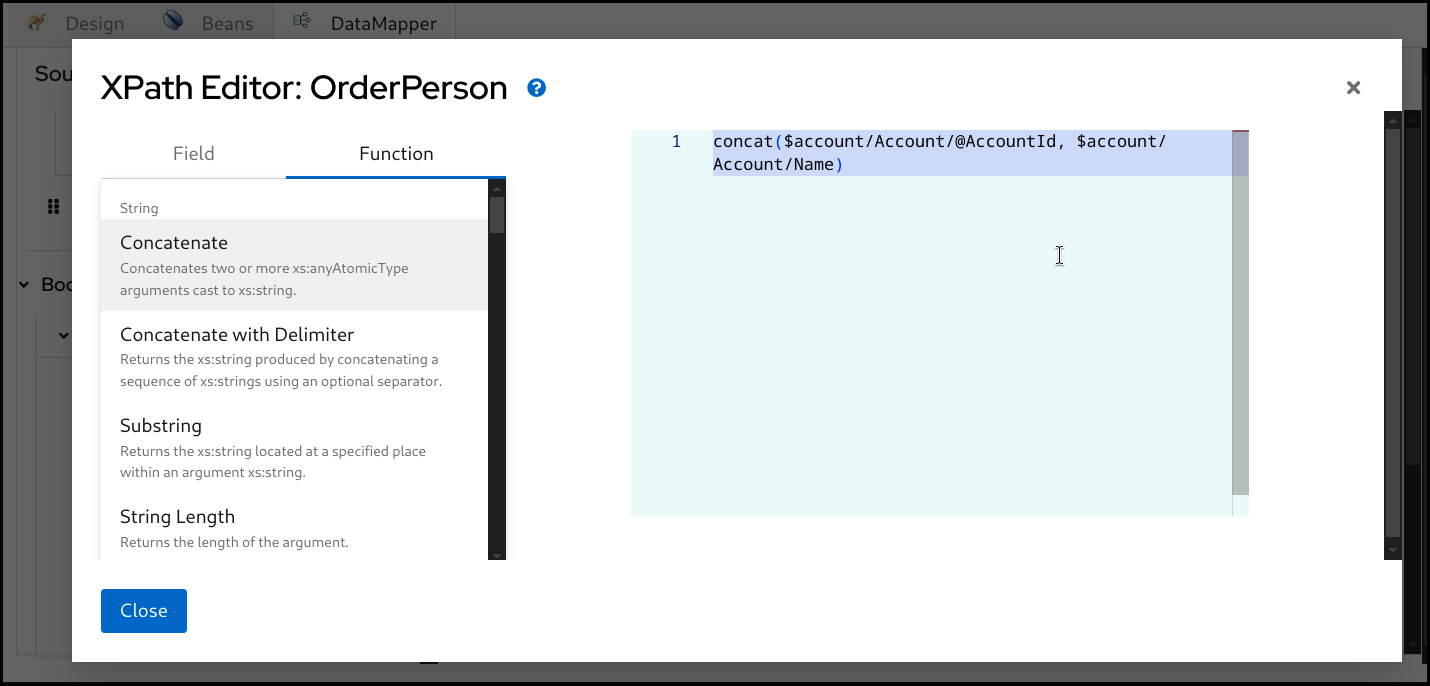
Once it’s completed, click the
Closebutton at the bottom left.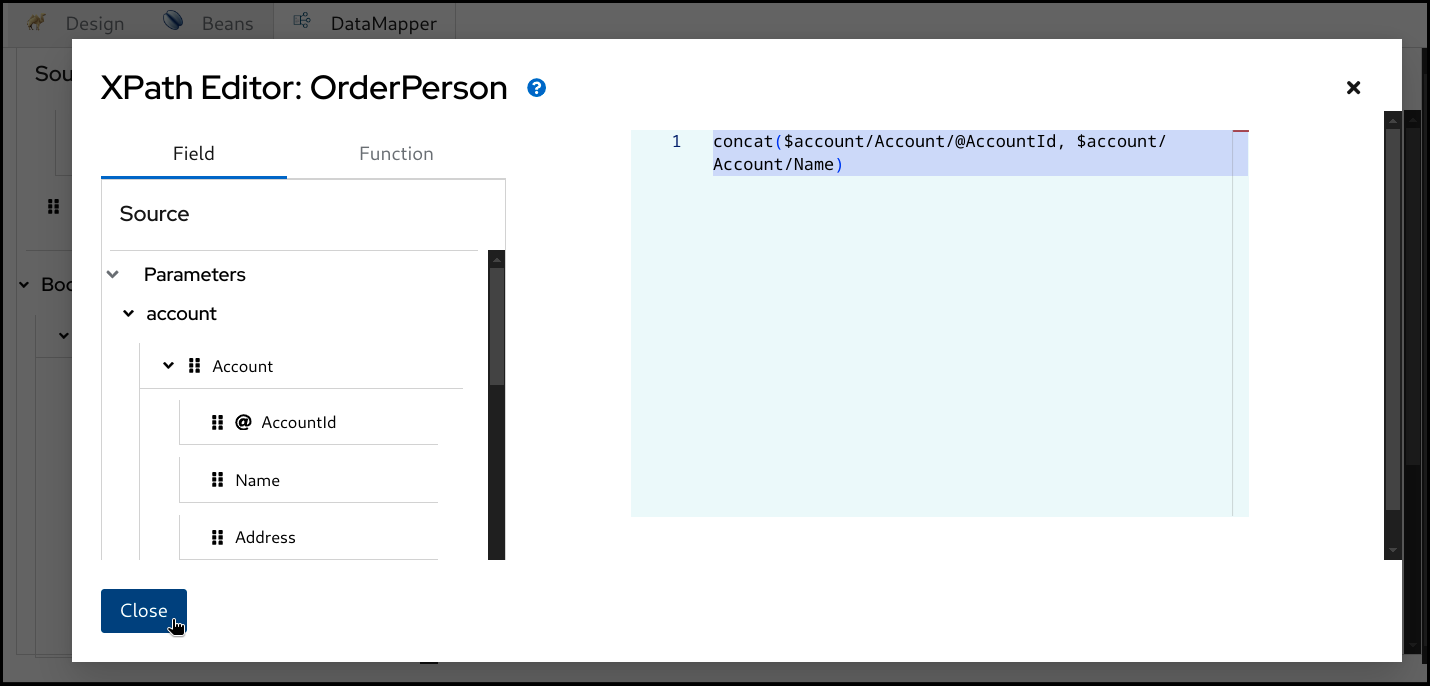
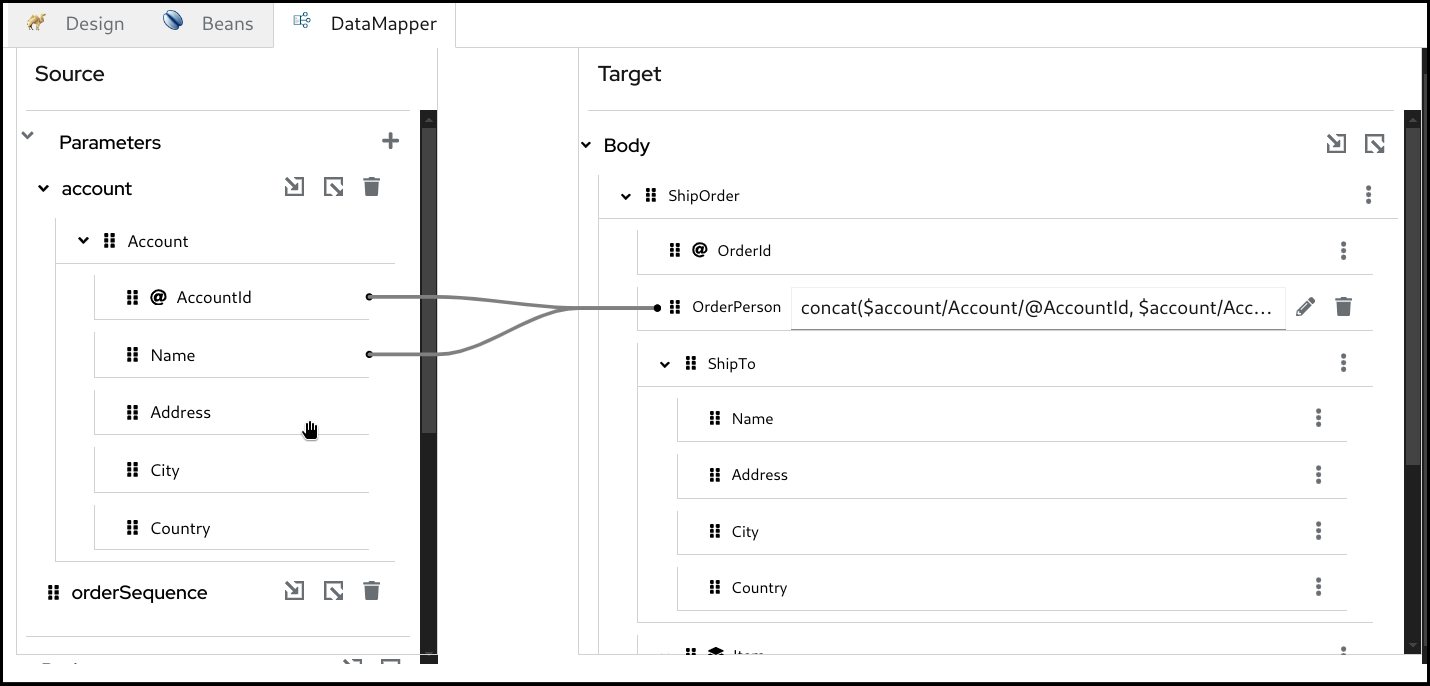
Now you can see the new mapping in the tree view.
5.8. Deleting a mapping
To delete a mapping you can click the dustbin button next to the target field.

You then have to confirm the deletion by clicking the
Confirmbutton.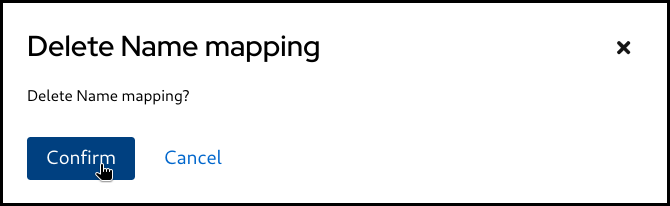
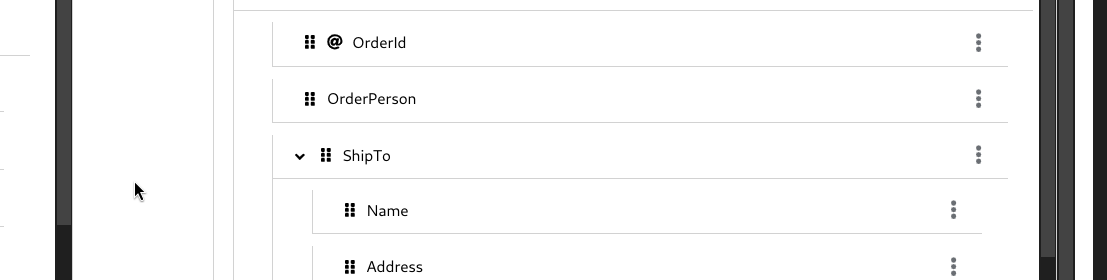
Mapping is deleted.
5.9. Deleting a parameter
To delete a parameter, click the dustbin button next to the parameter.
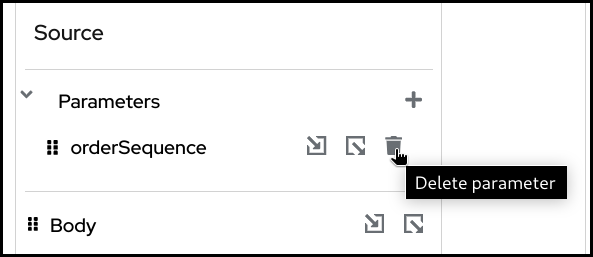
You then have to confirm the deletion by clicking the
Confirmbutton.
The parameter is deleted.
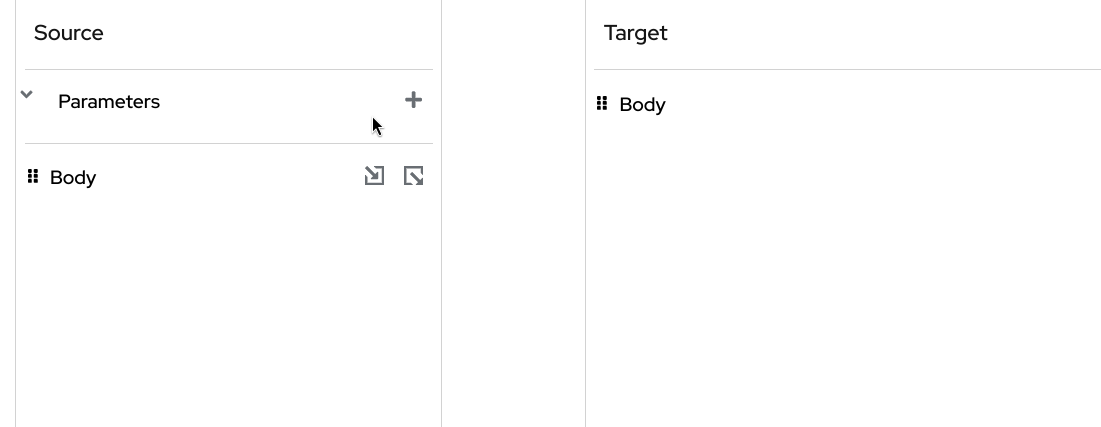
5.10. Detaching a schema
Similar to attaching a schema you can also remove / detach a schema.
Click the
Detach schemabutton.
Click the
Confirmbutton.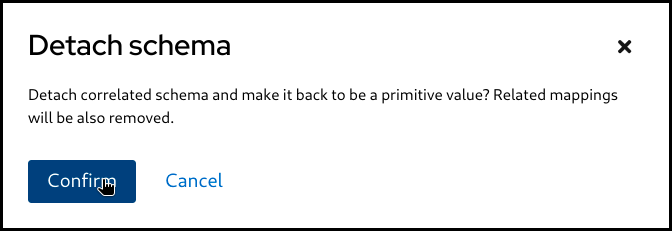
Now the Document got back to be a primitive value.