Chapter 3. Managing resource servers
According to the OAuth2 specification, a resource server is a server hosting the protected resources and capable of accepting and responding to protected resource requests.
In Red Hat build of Keycloak, resource servers are provided with a rich platform for enabling fine-grained authorization for their protected resources, where authorization decisions can be made based on different access control mechanisms.
Any client application can be configured to support fine-grained permissions. In doing so, you are conceptually turning the client application into a resource server.
3.1. Creating a client application
The first step to enable Red Hat build of Keycloak Authorization Services is to create the client application that you want to turn into a resource server.
Procedure
Click Clients.
Clients
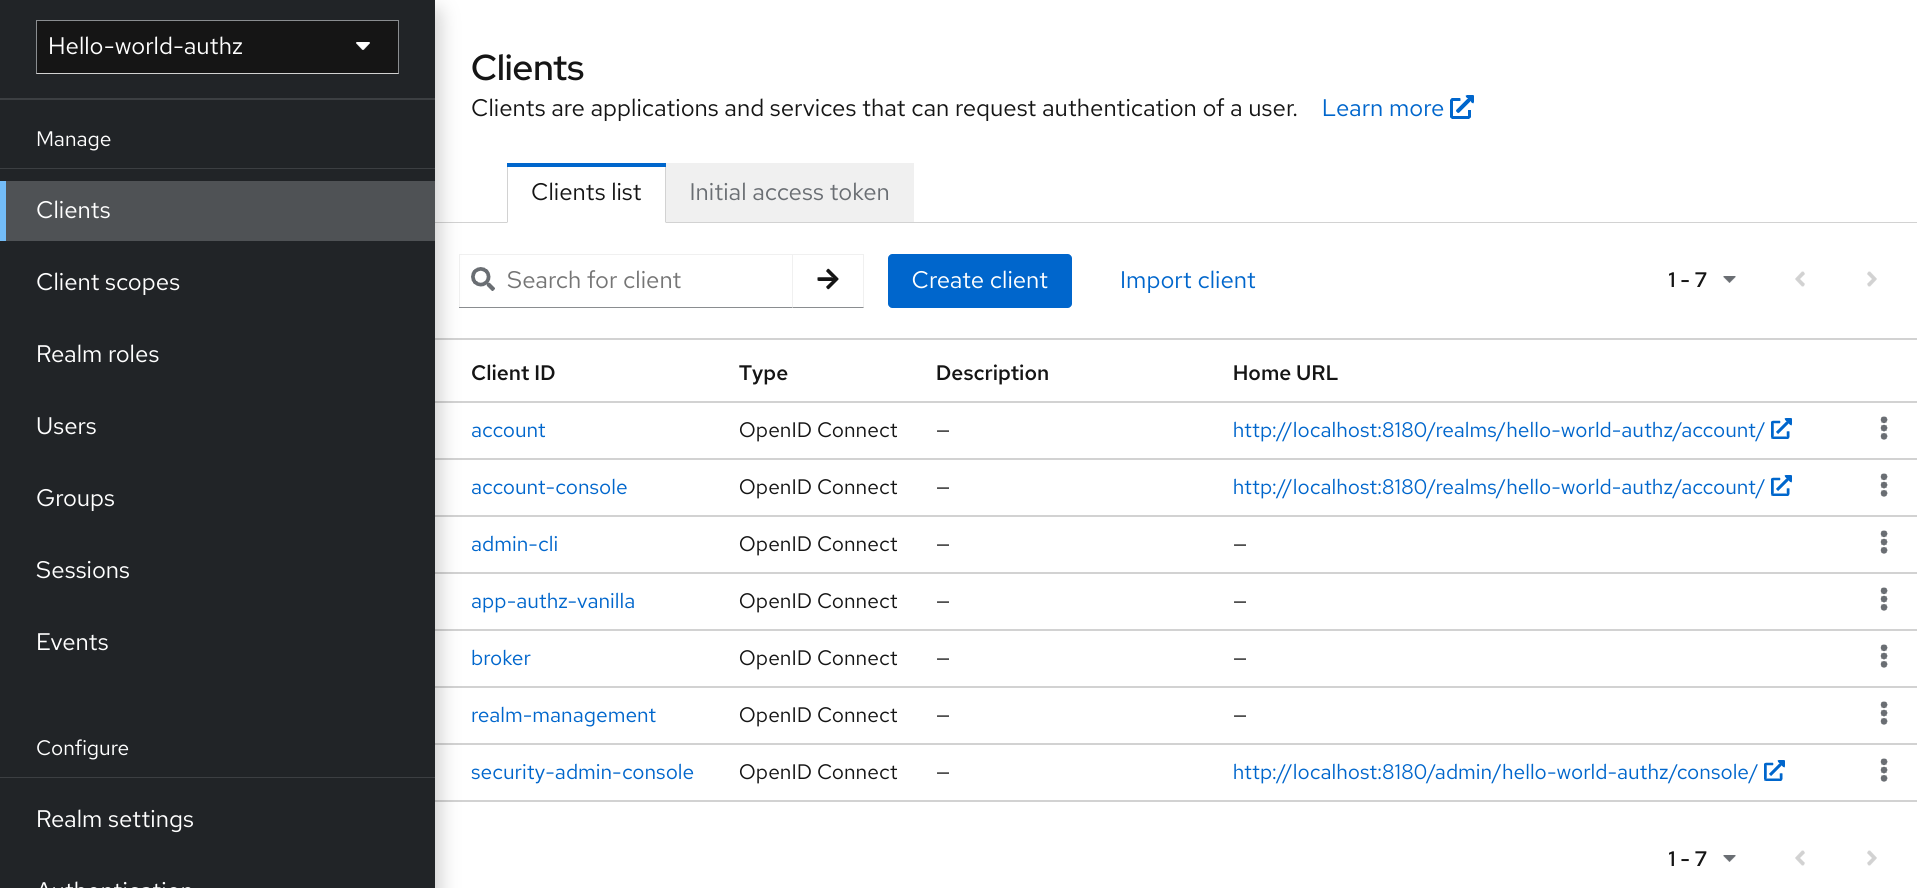
On this page, click Create.
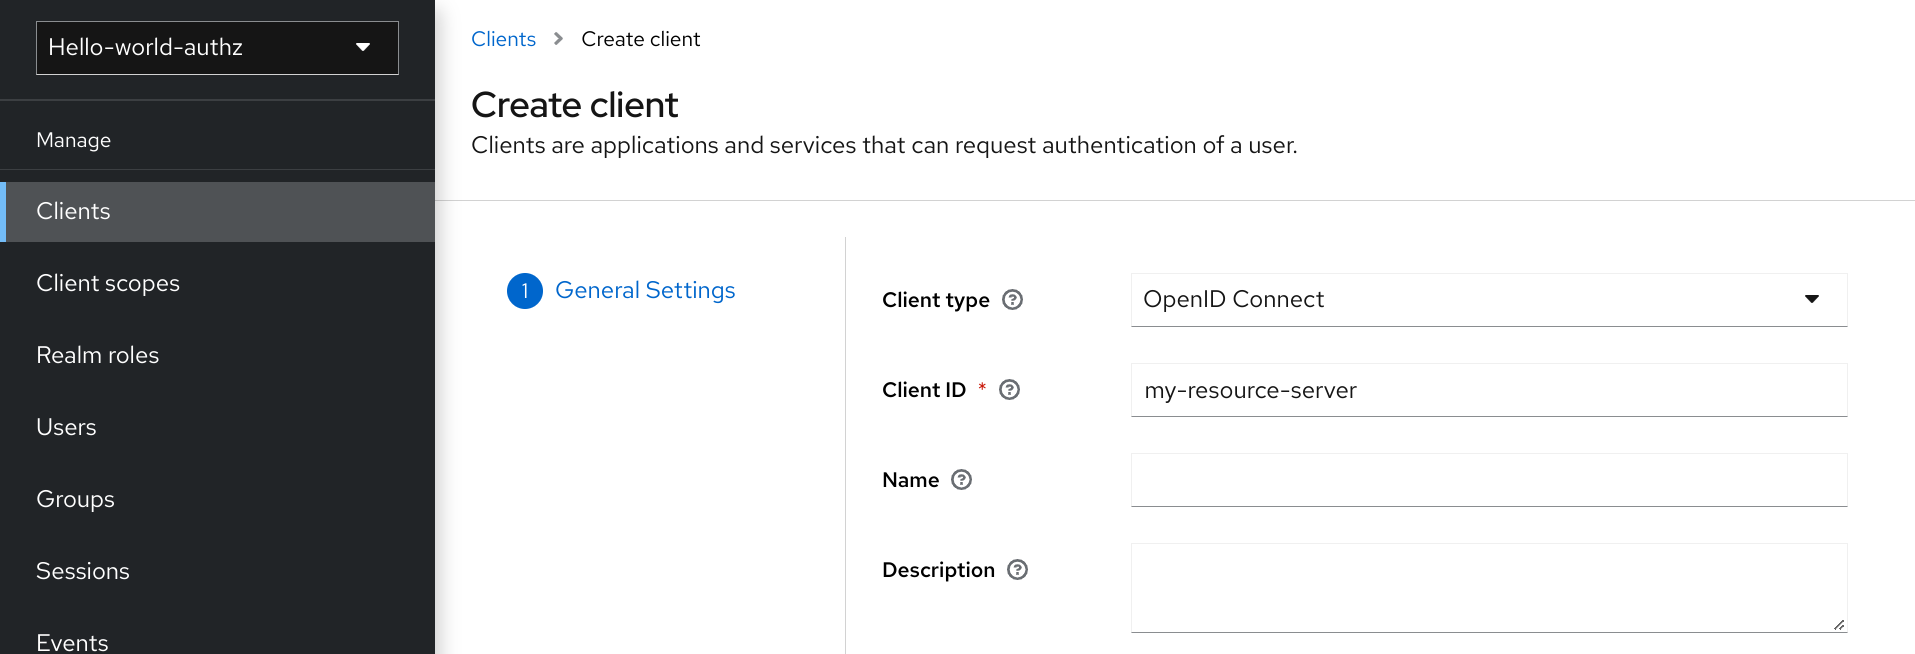
Add Client
-
Type the
Client IDof the client. For example, my-resource-server. Type the
Root URLfor your application. For example:http://${host}:${port}/my-resource-serverClick Save. The client is created and the client Settings page opens. A page similar to the following is displayed:
Client Settings
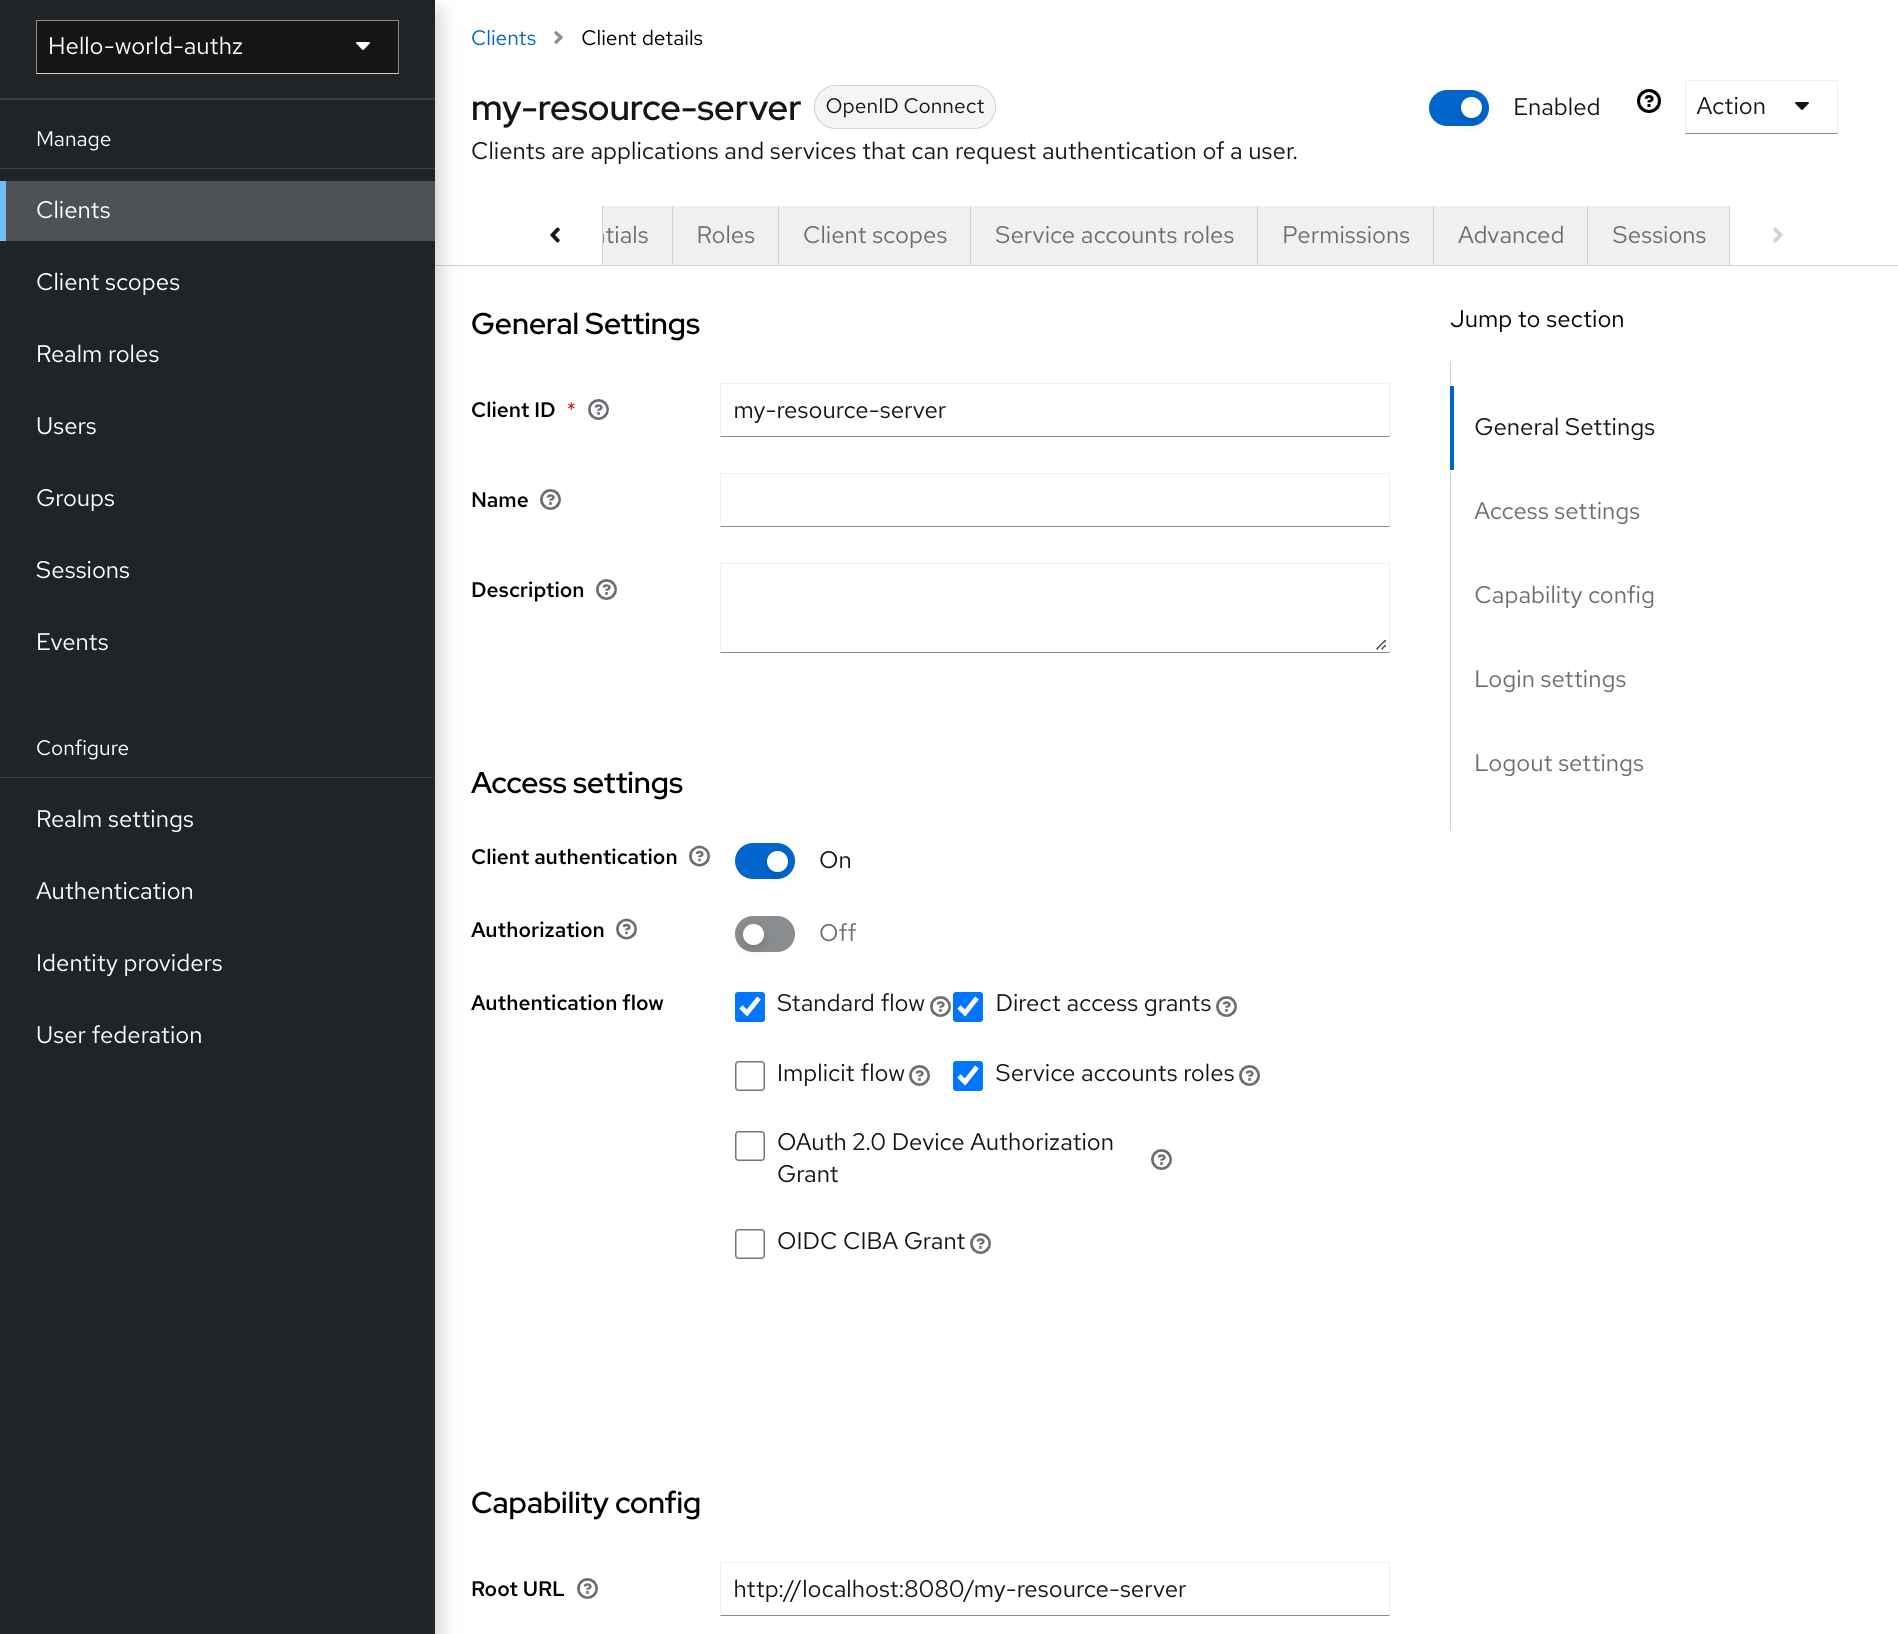
3.2. Enabling authorization services
You can turn your OIDC client into a resource server and enable fine-grained authorization.
Procedure
- Toggle Authorization Enabled to `On.
Click Save.
Enabling authorization services
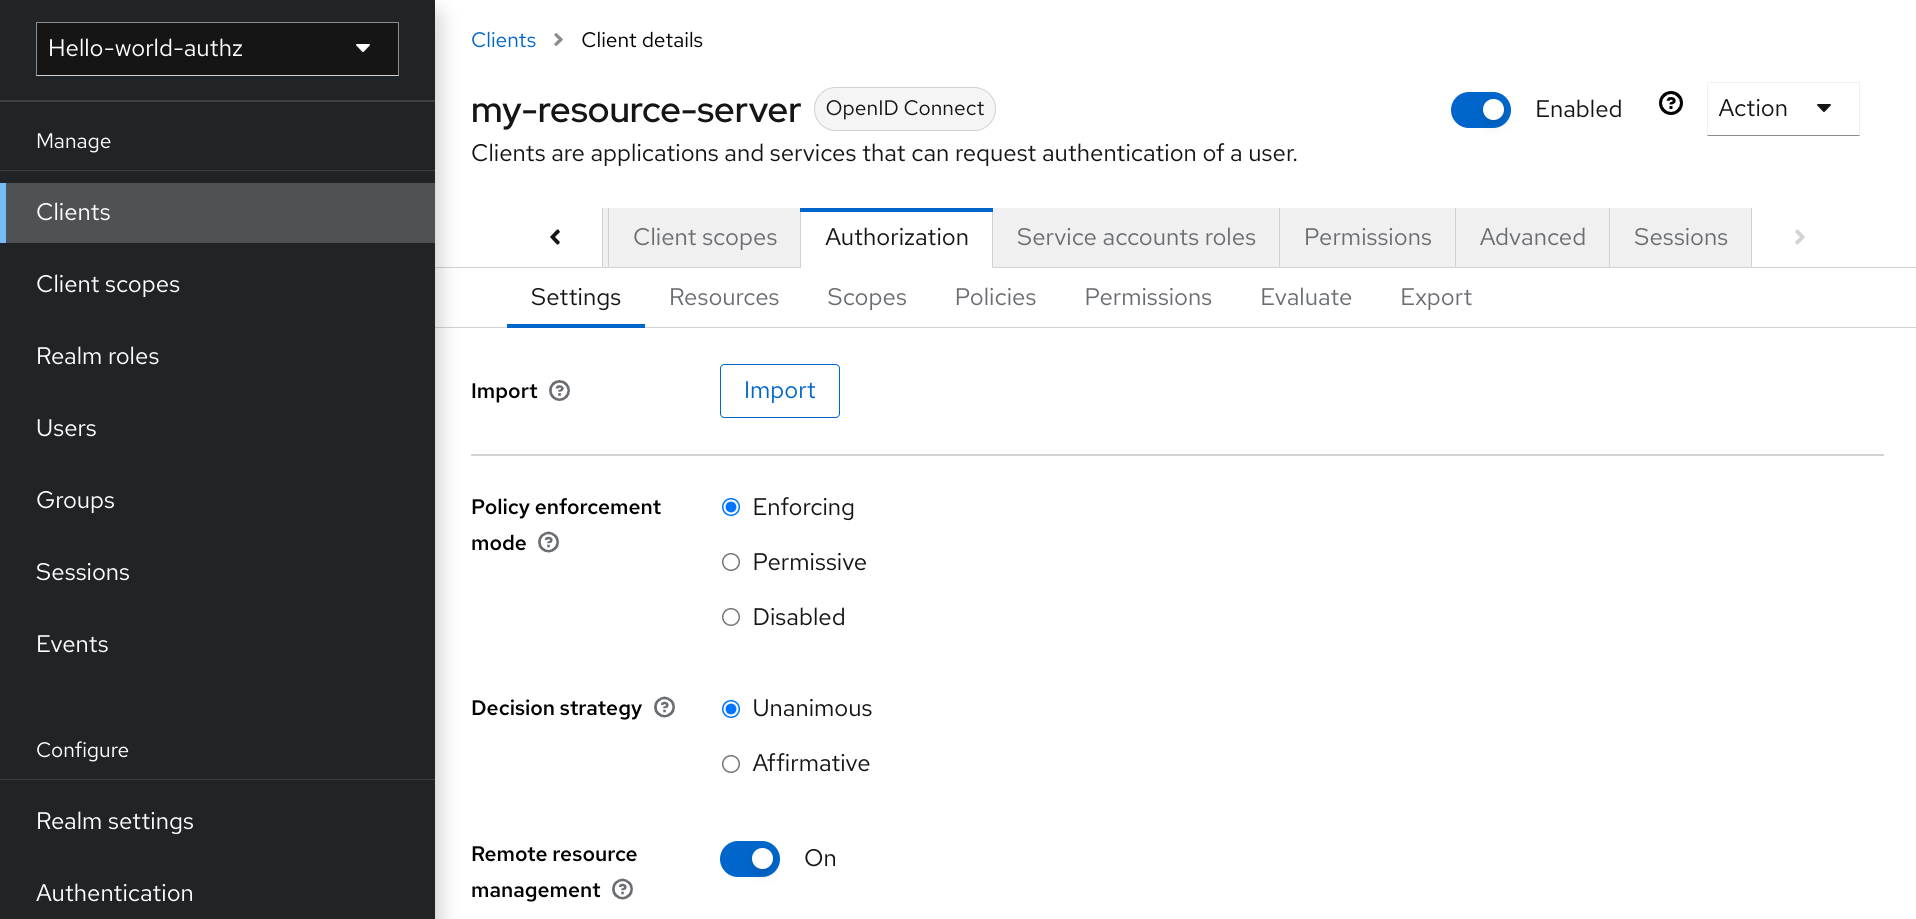
A new Authorization tab is displayed for this client. Click the Authorization tab and a page similar to the following is displayed:
Resource server settings
The Authorization tab contains additional sub-tabs covering the different steps that you must follow to actually protect your application’s resources. Each tab is covered separately by a specific topic in this documentation. But here is a quick description about each one:
Settings
General settings for your resource server. For more details about this page see the Resource Server Settings section.
Resource
From this page, you can manage your application’s resources.
Authorization Scopes
From this page, you can manage scopes.
Policies
From this page, you can manage authorization policies and define the conditions that must be met to grant a permission.
Permissions
From this page, you can manage the permissions for your protected resources and scopes by linking them with the policies you created.
Evaluate
From this page, you can simulate authorization requests and view the result of the evaluation of the permissions and authorization policies you have defined.
Export Settings
From this page, you can export the authorization settings to a JSON file.
3.2.1. Resource server settings
On the Resource Server Settings page, you can configure the policy enforcement mode, allow remote resource management, and export the authorization configuration settings.
Policy Enforcement Mode
Specifies how policies are enforced when processing authorization requests sent to the server.
Enforcing
(default mode) Requests are denied by default even when there is no policy associated with a given resource.
Permissive
Requests are allowed even when there is no policy associated with a given resource.
Disabled
Disables the evaluation of all policies and allows access to all resources.
Decision Strategy
This configurations changes how the policy evaluation engine decides whether or not a resource or scope should be granted based on the outcome from all evaluated permissions.
Affirmativemeans that at least one permission must evaluate to a positive decision in order grant access to a resource and its scopes.Unanimousmeans that all permissions must evaluate to a positive decision in order for the final decision to be also positive. As an example, if two permissions for a same resource or scope are in conflict (one of them is granting access and the other is denying access), the permission to the resource or scope will be granted if the chosen strategy isAffirmative. Otherwise, a single deny from any permission will also deny access to the resource or scope.Remote Resource Management
Specifies whether resources can be managed remotely by the resource server. If false, resources can be managed only from the administration console.
3.3. Default Configuration
When you create a resource server, Red Hat build of Keycloak creates a default configuration for your newly created resource server.
The default configuration consists of:
- A default protected resource representing all resources in your application.
- A policy that always grants access to the resources protected by this policy.
- A permission that governs access to all resources based on the default policy.
The default protected resource is referred to as the default resource and you can view it if you navigate to the Resources tab.
Default resource
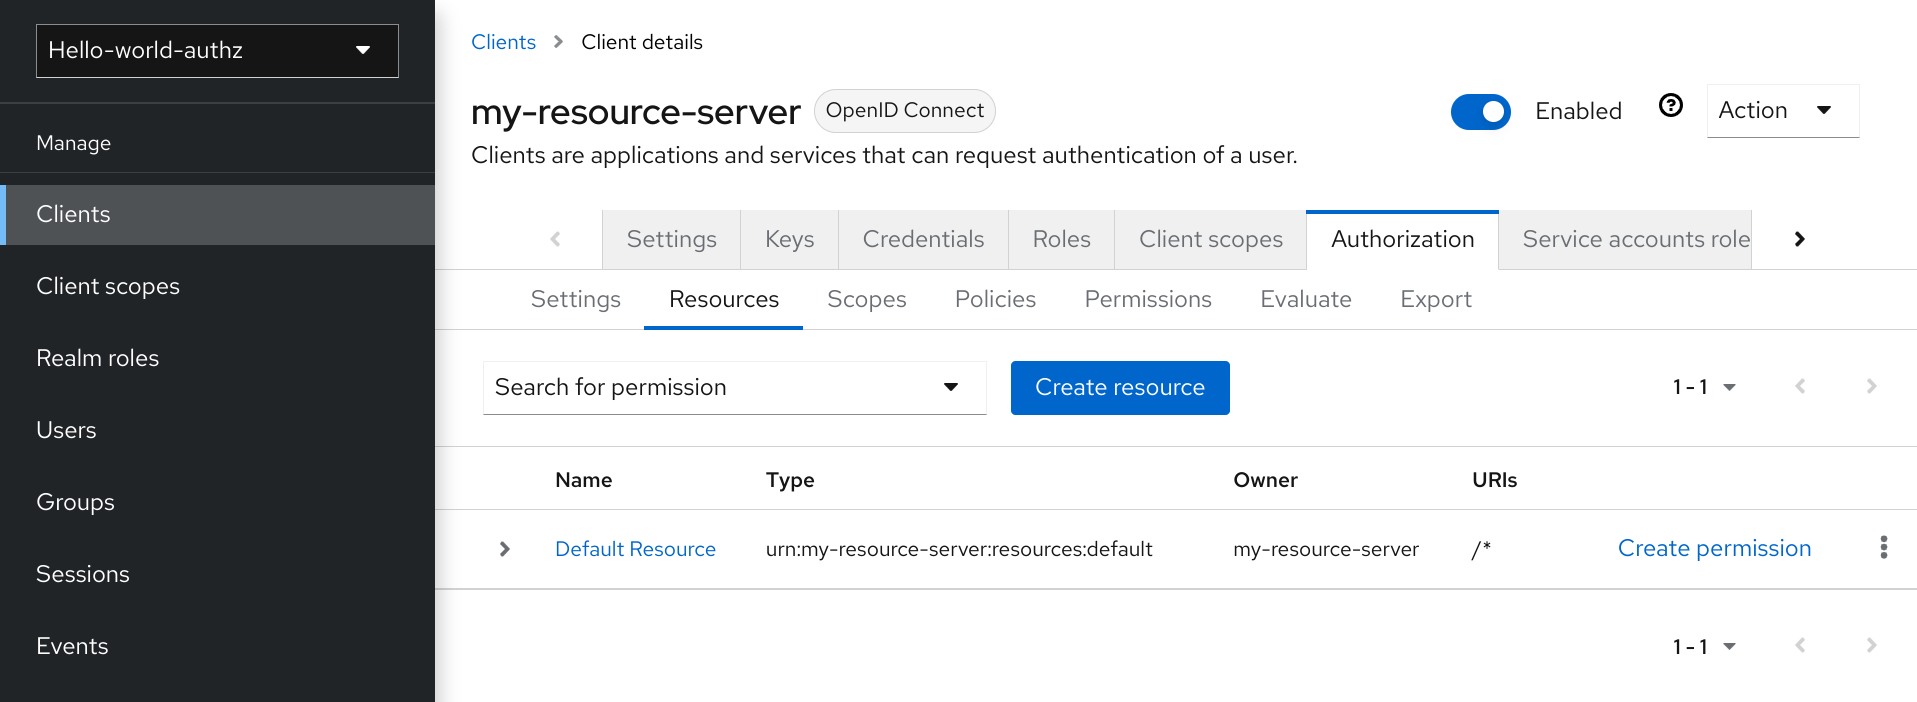
This resource defines a Type, namely urn:my-resource-server:resources:default and a URI /*. Here, the URI field defines a wildcard pattern that indicates to Red Hat build of Keycloak that this resource represents all the paths in your application. In other words, when enabling policy enforcement for your application, all the permissions associated with the resource will be examined before granting access.
The Type mentioned previously defines a value that can be used to create typed resource permissions that must be applied to the default resource or any other resource you create using the same type.
The default policy is referred to as the only from realm policy and you can view it if you navigate to the Policies tab.
Default policy

This policy is a JavaScript-based policy defining a condition that always grants access to the resources protected by this policy. If you click this policy you can see that it defines a rule as follows:
// by default, grants any permission associated with this policy
$evaluation.grant();
Lastly, the default permission is referred to as the default permission and you can view it if you navigate to the Permissions tab.
Default Permission
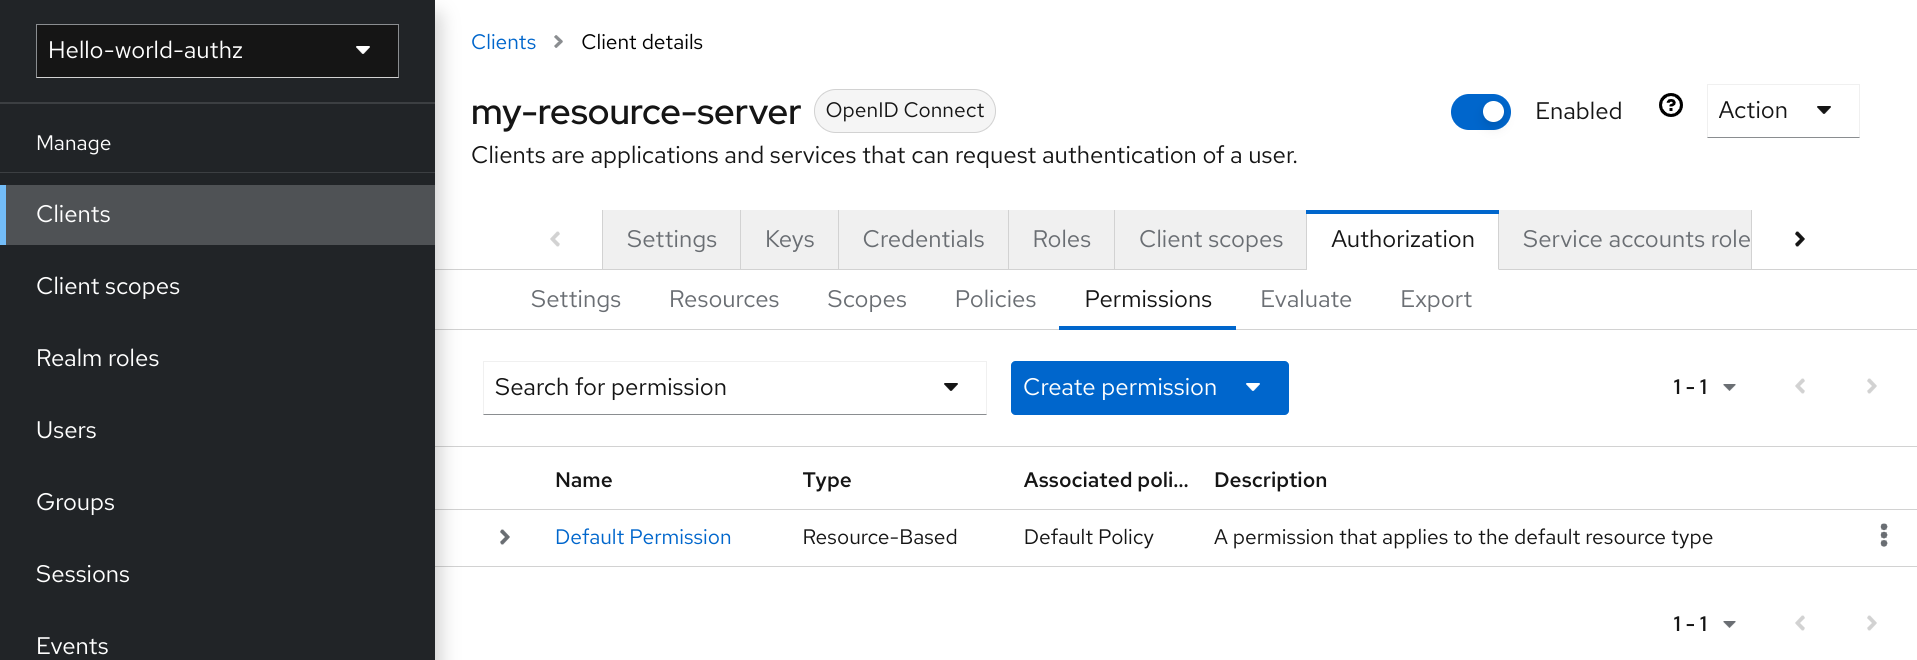
This permission is a resource-based permission, defining a set of one or more policies that are applied to all resources with a given type.
3.3.1. Changing the default configuration
You can change the default configuration by removing the default resource, policy, or permission definitions and creating your own.
The default resource is created with a URI that maps to any resource or path in your application using a /* pattern. Before creating your own resources, permissions and policies, make sure the default configuration doesn’t conflict with your own settings.
The default configuration defines a resource that maps to all paths in your application. If you are about to write permissions to your own resources, be sure to remove the Default Resource or change its URIS
3.4. Export and import authorization configuration
The configuration settings for a resource server (or client) can be exported and downloaded. You can also import an existing configuration file for a resource server. Importing and exporting a configuration file is helpful when you want to create an initial configuration for a resource server or to update an existing configuration. The configuration file contains definitions for:
- Protected resources and scopes
- Policies
- Permissions
3.4.1. Exporting a configuration file
Procedure
- Click Clients in the menu.
- Click the client you created as a resource server.
Click the Export tab.
Export Settings
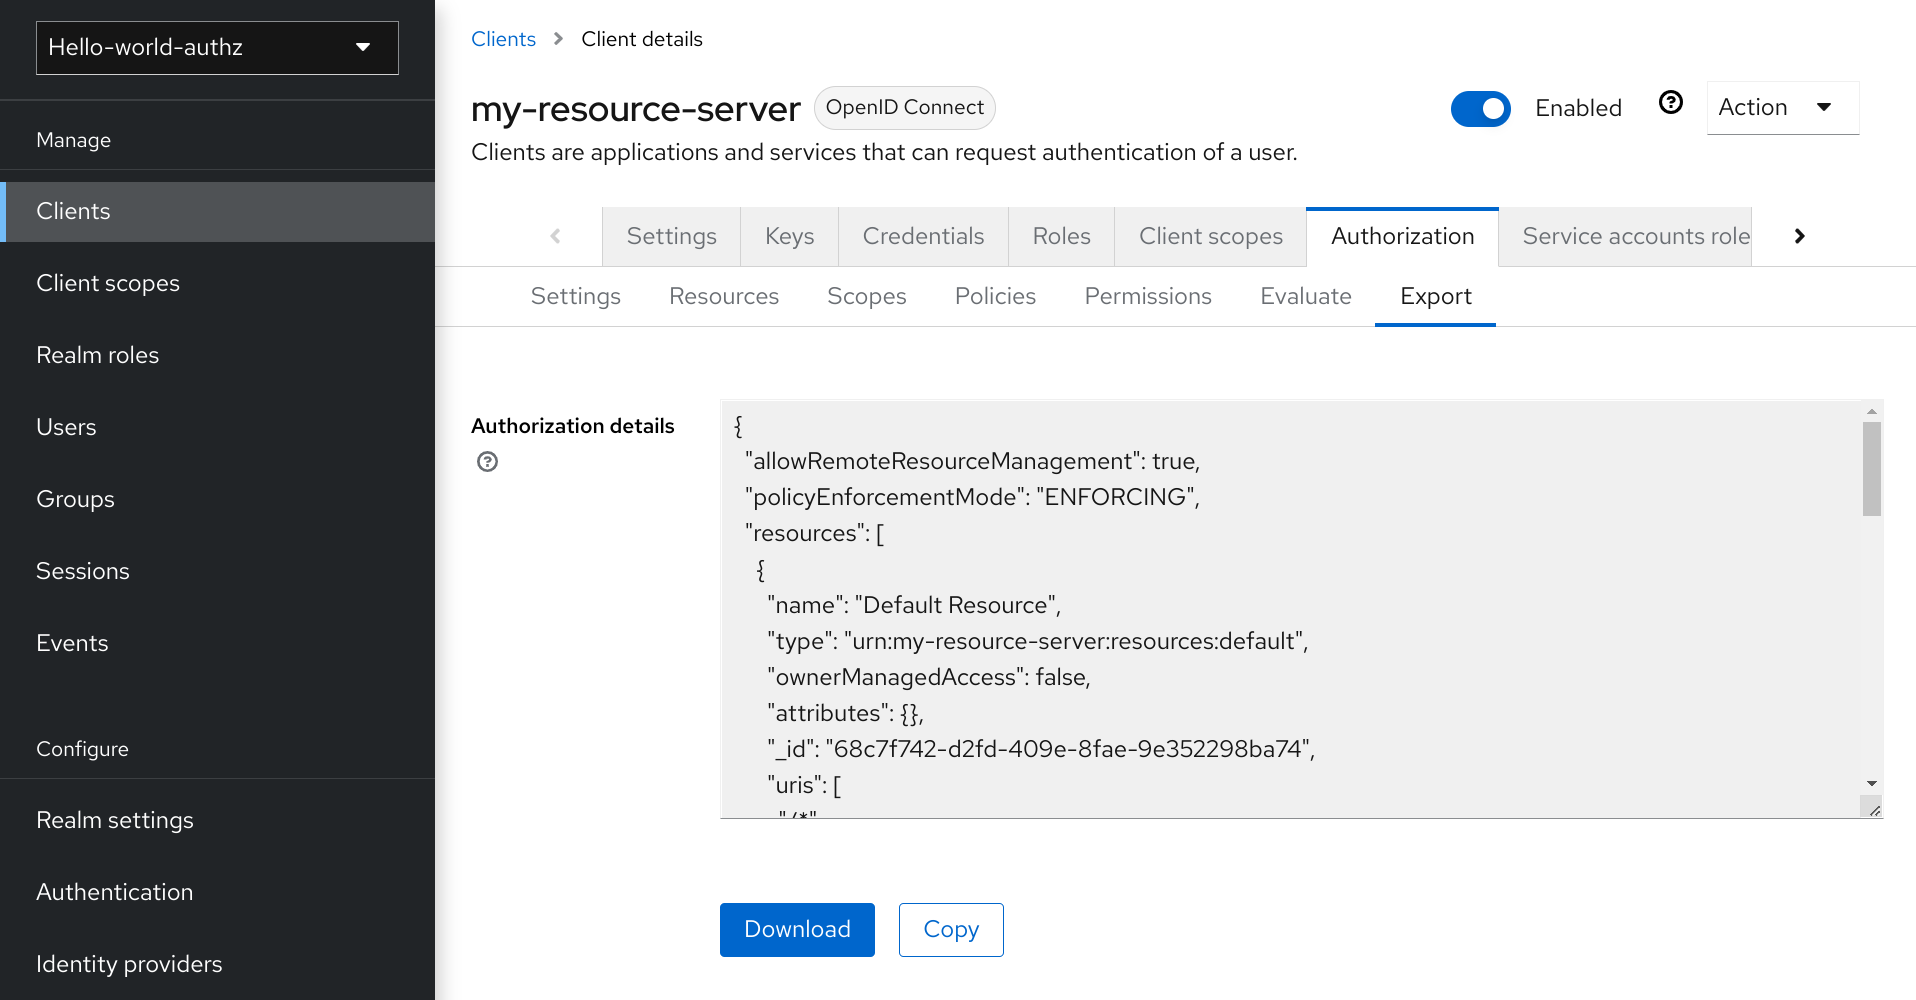
The configuration file is exported in JSON format and displayed in a text area, from which you can copy and paste. You can also click Download to download the configuration file and save it.
3.4.2. Importing a configuration file
You can import a configuration file for a resource server.
Procedure
Navigate to the Resource Server Settings page.
Import Settings
- Click Import and choose a file containing the configuration that you want to import.