Chapter 1. Overview
Designed for cloud infrastructures and web-scale object storage, Red Hat® Ceph Storage is a massively scalable, open, software-defined storage platform that combines the most stable version of Ceph with a Ceph management platform, deployment tools and support services. Providing the tools to flexibly and cost-effectively manage petabyte-scale data deployments in the enterprise, Red Hat Ceph Storage manages cloud data so enterprises can focus on managing their businesses.
This document provides procedures for installing Red Hat Ceph Storage v1.3 for x86_64 architecture on Red Hat Enterprise Linux (RHEL) 7.
Red Hat® Ceph Storage clusters consist of the following types of nodes:
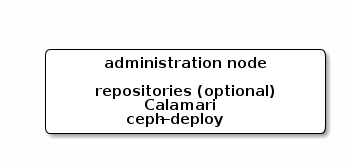
- Administration node: We expect that you will have a dedicated administration node that will host the Calamari monitoring and administration server, your cluster’s configuration files and keys, and optionally local repositories for installing Ceph on nodes that cannot access the internet for security reasons.
- Monitor nodes: Ceph can run with one monitor; however, for high availability, we expect that you will have at least three monitor nodes to ensure high availability in a production cluster.
- OSD nodes: Ceph can run with very few OSDs (3, by default), but production clusters realize better performance beginning at modest scales (e.g., 50 OSDs). Ideally, a Ceph cluster will have multiple OSD nodes, allowing you to create a CRUSH map to isolate failure domains.
For minimum recommended hardware, see the Hardware Guide.
1.1. Prerequisites
Before installing Red Hat Ceph Storage, review the following prerequisites first and prepare the cluster nodes.
1.1.1. Operating System
Red Hat Ceph Storage 1.3 and later requires Red Hat Enterprise Linux 7 Server with a homogeneous version, for example, Red Hat Enterprise Linux 7.2 running on AMD64 and Intel 64 architectures for all Ceph nodes, including the Red Hat Storage Console node.
Red Hat does not support clusters with heterogeneous operating systems and versions.
1.1.2. Registering to CDN
Ceph relies on packages in the Red Hat Enterprise Linux 7 Base content set. Each Ceph node must be able to access the full Red Hat Enterprise Linux 7 Base content.
To do so, register Ceph nodes that can connect to the Internet to the Red Hat Content Delivery Network (CDN) and attach appropriate Ceph subscriptions to the nodes:
Registering Ceph Nodes to CDN
Run all commands in this procedure as root.
Register a node with the Red Hat Subscription Manager. Run the following command and when prompted, enter your Red Hat Customer Portal credentials:
subscription-manager register
# subscription-manager registerCopy to Clipboard Copied! Toggle word wrap Toggle overflow Pull the latest subscription data from the CDN server:
subscription-manager refresh
# subscription-manager refreshCopy to Clipboard Copied! Toggle word wrap Toggle overflow List all available subscriptions and find the appropriate Red Hat Ceph Storage subscription and determine its Pool ID.
subscription-manager list --available
# subscription-manager list --availableCopy to Clipboard Copied! Toggle word wrap Toggle overflow Attach the subscriptions:
subscription-manager attach --pool=<pool-id>
# subscription-manager attach --pool=<pool-id>Copy to Clipboard Copied! Toggle word wrap Toggle overflow Replace
<pool-id>with the Pool ID determined in the previous step.Enable the Red Hat Enterprise Linux 7 Server Base repository:
subscription-manager repos --enable=rhel-7-server-rpms
# subscription-manager repos --enable=rhel-7-server-rpmsCopy to Clipboard Copied! Toggle word wrap Toggle overflow Update the node:
yum udpate
# yum udpateCopy to Clipboard Copied! Toggle word wrap Toggle overflow
Once you register the nodes, enable repositories that provide the Red Hat Ceph Storage packages.
For nodes that cannot access the Internet during the installation, provide the Base content by other means. Either use the Red Hat Satellite server in your environment or mount a local Red Hat Enterprise Linux 7 Server ISO image and point the Ceph cluster nodes to it. For additional details, contact the Red Hat Support.
For more information on registering Ceph nodes with the Red Hat Satellite server, see the How to Register Ceph with Satellite 6 and How to Register Ceph with Satellite 5 articles on the Customer Portal.
1.1.3. Enable Ceph Repositories
Red Hat Ceph Storage supports two installation methods:
- Content Delivery Network (CDN): For Ceph Storage clusters with Ceph nodes that can connect directly to the internet, you may use Red Hat Subscription Manager on each node to enable the required Ceph repositories for Calamari, Ceph CLI tools, monitors and OSDs as needed.
-
Local Repository: For Ceph Storage clusters where security measures preclude nodes from accessing the internet, you may install Red Hat Ceph Storage v1.3 from a single software build delivered as an ISO with the
ice_setuppackage, which installs theice_setupprogram. When you execute theice_setupprogram, it will install local repositories, the Calamari monitoring and administration server and the Ceph installation scripts, including a hidden.cephdeploy.conffile pointingceph-deployto the local repositories.
For CDN-based installations, enable the appropriate repository(ies) for each node.
For your administration node, enable the Calamari, installer (
ceph-deploy) and tools repositories:subscription-manager repos --enable=rhel-7-server-rhceph-1.3-calamari-rpms --enable=rhel-7-server-rhceph-1.3-installer-rpms --enable=rhel-7-server-rhceph-1.3-tools-rpms
# subscription-manager repos --enable=rhel-7-server-rhceph-1.3-calamari-rpms --enable=rhel-7-server-rhceph-1.3-installer-rpms --enable=rhel-7-server-rhceph-1.3-tools-rpmsCopy to Clipboard Copied! Toggle word wrap Toggle overflow yum update
# yum updateCopy to Clipboard Copied! Toggle word wrap Toggle overflow For Ceph monitor nodes, enable the monitor repository:
subscription-manager repos --enable=rhel-7-server-rhceph-1.3-mon-rpms
# subscription-manager repos --enable=rhel-7-server-rhceph-1.3-mon-rpmsCopy to Clipboard Copied! Toggle word wrap Toggle overflow yum update
# yum updateCopy to Clipboard Copied! Toggle word wrap Toggle overflow For OSD nodes, enable the OSD repository:
subscription-manager repos --enable=rhel-7-server-rhceph-1.3-osd-rpms
# subscription-manager repos --enable=rhel-7-server-rhceph-1.3-osd-rpmsCopy to Clipboard Copied! Toggle word wrap Toggle overflow yum update
# yum updateCopy to Clipboard Copied! Toggle word wrap Toggle overflow
For ISO-based installations, enable ALL repositories on the administration node ONLY.
subscription-manager repos --enable=rhel-7-server-rpms --enable=rhel-7-server-rhceph-1.3-calamari-rpms --enable=rhel-7-server-rhceph-1.3-installer-rpms --enable=rhel-7-server-rhceph-1.3-mon-rpms --enable=rhel-7-server-rhceph-1.3-osd-rpms --enable=rhel-7-server-rhceph-1.3-tools-rpms
# subscription-manager repos --enable=rhel-7-server-rpms --enable=rhel-7-server-rhceph-1.3-calamari-rpms --enable=rhel-7-server-rhceph-1.3-installer-rpms --enable=rhel-7-server-rhceph-1.3-mon-rpms --enable=rhel-7-server-rhceph-1.3-osd-rpms --enable=rhel-7-server-rhceph-1.3-tools-rpmsyum update
# yum updateFinally, disconnect your admin node from the internet.
With ISO-based installations, ceph-deploy accesses local repositories on your administration node, so the Ceph Storage nodes can retrieve all the required packages without a need to access the internet. If the admin node can access the internet, you can receive online updates and publish them to the rest of the cluster from your admin node with ice_setup update. If the admin node cannot access the internet, you must use ISOs to handle any updates. So, the above step to enable all Ceph repositories to receive online updates is optional but it is mandatory to enable the rhel-7-server-rhceph-1.3-tools-rpms repo to get ceph-common package. The ISO doesn’t include the tools repo.
1.1.4. DNS Name Resolution
Ceph nodes must be able to resolve short host names, not just fully qualified domain names. Set up a default search domain to resolve short host names. To retrieve a Ceph node’s short host name, execute:
hostname -s
hostname -sEach Ceph node MUST be able to ping every other Ceph node in the cluster by its short host name.
1.1.5. Network Interface Cards
All Ceph clusters require a public network. You MUST have a network interface card configured to a public network where Ceph clients can reach Ceph Monitors and Ceph OSDs. You SHOULD have a network interface card for a cluster network so that Ceph can conduct heart-beating, peering, replication and recovery on a network separate from the public network.
We DO NOT RECOMMEND using a single NIC for both a public and private network.
1.1.6. Network
Ensure that you configure your network interfaces and make them persistent so that the settings are identical on reboot. For example:
-
BOOTPROTOwill usually benonefor static IP addresses. -
IPV6{opt}settings MUST be set toyesexcept forFAILURE_FATALif you intend to use IPv6. You must also set your Ceph configuration file to tell Ceph to use IPv6 if you intend to use it. Otherwise, Ceph will use IPv4. -
ONBOOTMUST be set toyes.If it is set tono, Ceph may fail to peer on reboot.
Navigate to /etc/sysconfig/network-scripts and ensure that the ifcfg-<iface> settings for your public and cluster interfaces (assuming you will use a cluster network too [RECOMMENDED]) are properly configured.
For details on configuring network interface scripts for RHEL 7, see Configuring a Network Interface Using ifcfg Files.
1.1.7. Firewall
Red Hat® Ceph Storage v1.3 uses firewalld. Start the firewall and ensure that you enable it to run on boot.
systemctl start firewalld
systemctl enable firewalld
# systemctl start firewalld
# systemctl enable firewalld
Ensure firewalld is running:
systemctl status firewalld.service
# systemctl status firewalld.service
The default firewall configuration for RHEL is fairly strict. You MUST adjust your firewall settings on the Calamari node to allow inbound requests on port 80 so that clients in your network can access the Calamari web user interface.
Calamari also communicates with Ceph nodes via ports 2003, 4505 and 4506. For firewalld, add port 80, 4505, 4506 and 2003 to the public zone of your Calamari administration node and ensure that you make the setting permanent so that it is enabled on reboot.
You MUST open ports 80, 2003, and 4505-4506 on your Calamari node. First, open the port to ensure it opens immediately at runtime. Then, rerun the command with --permanent to ensure that the port opens on reboot.
You MUST open port 6789 on your public network on ALL Ceph monitor nodes.
firewall-cmd --zone=public --add-port=6789/tcp
firewall-cmd --zone=public --add-port=6789/tcp --permanent
# firewall-cmd --zone=public --add-port=6789/tcp
# firewall-cmd --zone=public --add-port=6789/tcp --permanent
Finally, you MUST also open ports for OSD traffic (6800-7300). Each OSD on each Ceph node needs a few ports: one for talking to clients and monitors (public network); one for sending data to other OSDs (cluster network, if available; otherwise, public network); and, one for heartbeating (cluster network, if available; otherwise, public network). To get started quickly, open up the default port range. For example:
firewall-cmd --zone=public --add-port=6800-7300/tcp
firewall-cmd --zone=public --add-port=6800-7300/tcp --permanent
# firewall-cmd --zone=public --add-port=6800-7300/tcp
# firewall-cmd --zone=public --add-port=6800-7300/tcp --permanent
For additional details on firewalld, see Using Firewalls.
1.1.8. Network Time Protocol
You MUST install Network Time Protocol (NTP) on all Ceph monitor nodes and admin nodes. Ensure that ceph nodes are NTP peers. You SHOULD consider installing NTP on Ceph OSD nodes, but it is not required. NTP helps preempt issues that arise from clock drift.
Install NTP
yum install ntp
# yum install ntpCopy to Clipboard Copied! Toggle word wrap Toggle overflow Make sure NTP starts on reboot.
systemctl enable ntpd.service
# systemctl enable ntpd.serviceCopy to Clipboard Copied! Toggle word wrap Toggle overflow Start the NTP service and ensure it’s running.
systemctl start ntpd
# systemctl start ntpdCopy to Clipboard Copied! Toggle word wrap Toggle overflow Then, check its status.
systemctl status ntpd
# systemctl status ntpdCopy to Clipboard Copied! Toggle word wrap Toggle overflow Ensure that NTP is synchronizing Ceph monitor node clocks properly.
ntpq -p
ntpq -pCopy to Clipboard Copied! Toggle word wrap Toggle overflow
For additional details on NTP for RHEL 7, see Configuring NTP Using ntpd.
1.1.9. Install SSH Server
For ALL Ceph Nodes perform the following steps:
Install an SSH server (if necessary) on each Ceph Node:
yum install openssh-server
# yum install openssh-serverCopy to Clipboard Copied! Toggle word wrap Toggle overflow - Ensure the SSH server is running on ALL Ceph Nodes.
1.1.10. Create a Ceph Deploy User
The ceph-deploy utility must login to a Ceph node as a user that has passwordless sudo privileges, because it needs to install software and configuration files without prompting for passwords.
ceph-deploy supports a --username option so you can specify any user that has password-less sudo (including root, although this is NOT recommended). To use ceph-deploy --username <username>, the user you specify must have password-less SSH access to the Ceph node, because ceph-deploy will not prompt you for a password.
We recommend creating a Ceph Deploy user on ALL Ceph nodes in the cluster. Please do NOT use "ceph" as the user name. A uniform user name across the cluster may improve ease of use (not required), but you should avoid obvious user names, because hackers typically use them with brute force hacks (for example, root, admin, or <productname>). The following procedure, substituting <username> for the user name you define, describes how to create a Ceph Deploy user with passwordless sudo on a Ceph node.
In a future Ceph release, the "ceph" user name will be reserved for the Ceph daemons. If the "ceph" user already exists on the Ceph nodes, removing this user must be done before attempting an upgrade to future Ceph releases.
Create a Ceph Deploy user on each Ceph Node.
ssh root@<hostname>
adduser <username>
passwd <username>
ssh root@<hostname>
adduser <username>
passwd <username>
Copy to Clipboard Copied! Toggle word wrap Toggle overflow Replace
<hostname>with the hostname of your Ceph node.For the Ceph Deploy user you added to each Ceph node, ensure that the user has
sudoprivileges and disablerequiretty.cat << EOF >/etc/sudoers.d/<username> <username> ALL = (root) NOPASSWD:ALL Defaults:<username> !requiretty EOF
cat << EOF >/etc/sudoers.d/<username> <username> ALL = (root) NOPASSWD:ALL Defaults:<username> !requiretty EOFCopy to Clipboard Copied! Toggle word wrap Toggle overflow Ensure the correct file permissions.
chmod 0440 /etc/sudoers.d/<username>
# chmod 0440 /etc/sudoers.d/<username>Copy to Clipboard Copied! Toggle word wrap Toggle overflow
1.1.11. Enable Password-less SSH
Since ceph-deploy will not prompt for a password, you must generate SSH keys on the admin node and distribute the public key to each Ceph node. ceph-deploy will attempt to generate the SSH keys for initial monitors.
Generate the SSH keys, but do not use
sudoor therootuser. Leave the passphrase empty:Copy to Clipboard Copied! Toggle word wrap Toggle overflow Copy the key to each Ceph Node, replacing
<username>with the user name you created with Create a Ceph Deploy User.ssh-copy-id <username>@node1 ssh-copy-id <username>@node2 ssh-copy-id <username>@node3
ssh-copy-id <username>@node1 ssh-copy-id <username>@node2 ssh-copy-id <username>@node3Copy to Clipboard Copied! Toggle word wrap Toggle overflow (Recommended) Modify the
~/.ssh/configfile of yourceph-deployadmin node so thatceph-deploycan log in to Ceph nodes as the user you created without requiring you to specify--username <username>each time you executeceph-deploy. This has the added benefit of streamliningsshandscpusage. Replace<username>with the user name you created:Copy to Clipboard Copied! Toggle word wrap Toggle overflow After editing the
~/.ssh/configfile on theadmin node, execute the following to ensure the permissions are correct:chmod 600 ~/.ssh/config
chmod 600 ~/.ssh/configCopy to Clipboard Copied! Toggle word wrap Toggle overflow
1.1.12. Adjust ulimit on Large Clusters
For users that will run Ceph administrator commands on large clusters (for example, 1024 OSDs or more), create an /etc/security/limits.d/50-ceph.conf file on your admin node with the following contents:
<username> soft nproc unlimited
<username> soft nproc unlimited
Replace <username> with the name of the non-root account that you will use to run Ceph administrator commands.
The root user’s ulimit is already set to "unlimited" by default on RHEL.
1.1.13. Configuring RAID Controllers
If a RAID controller with 1-2 GB of cache is installed on a host, then enabling write-back caches might result in increased small I/O write throughput. In order for this to be done safely, the cache must be non-volatile.
Modern RAID controllers usually have super capacitors that provide enough power to drain volatile memory to non-volatile NAND memory during a power loss event. It is important to understand how a particular controller and firmware behave after power is restored.
Some of them might require manual intervention. Hard drives typically advertise to the operating system whether their disk caches should be enabled or disabled by default. However, certain RAID controllers or some firmware might not provide such information, so verify that disk level caches are disabled to avoid file system corruption.
Create a single RAID 0 volume with write-back for each OSD data drive with write-back cache enabled.
If SAS or SATA connected SSDs are also present on the controller, it is worth investigating whether your controller and firmware support passthrough mode. This will avoid the caching logic, and generally result in much lower latencies for fast media.
1.1.14. Adjust PID Count
Hosts with high numbers of OSDs (more than 12) may spawn a lot of threads, especially during recovery and re-balancing. The standard RHEL 7 kernel defaults to a relatively small maximum number of threads (32768). Check your default settings to see if they are suitable.
cat /proc/sys/kernel/pid_max
cat /proc/sys/kernel/pid_max
Consider setting kernel.pid_max to a higher number of threads. The theoretical maximum is 4,194,303 threads. For example, you could add the following to the /etc/sysctl.conf file to set it to the maximum:
kernel.pid_max = 4194303
kernel.pid_max = 4194303To see the changes you made without a reboot, execute:
sysctl -p
# sysctl -pTo verify the changes, execute:
sysctl -a | grep kernel.pid_max
# sysctl -a | grep kernel.pid_max1.1.15. Adjust Netfilter conntrack Limits
When using a firewall and running several OSDs on a single host, busy clusters might create a lot of network connections and overflow the kernel nf_conntrack table on the OSD and monitor hosts. To find the current values, execute the following commands:
cat /proc/sys/net/netfilter/nf_conntrack_buckets
cat /proc/sys/net/netfilter/nf_conntrack_max
cat /proc/sys/net/netfilter/nf_conntrack_buckets
cat /proc/sys/net/netfilter/nf_conntrack_max
The nf_conntrack_max value defaults to the nf_conntrack_buckets value multiplied by 8. Consider setting nf_conntrack_buckets to a higher number on the OSD and monitor hosts. To do so, create a new /etc/modprobe.d/ceph.conf file with the following content:
options nf_conntrack hashsize=<size>
options nf_conntrack hashsize=<size>
Where <size> specifies the new size of the nf_conntrack_buckets value. For example:
options nf_conntrack hashsize=128000
options nf_conntrack hashsize=128000
Having this option specified loads the nf_conntrack module with a maximum table size of 1024000 (128000 * 8).
To see the changes you made without a reboot, execute the following commands as root:
systemctl stop firewalld
modprobe -rv nf_conntrack
systemctl start firewalld
# systemctl stop firewalld
# modprobe -rv nf_conntrack
# systemctl start firewalld
To verify the changes, execute the following commands as root:
sysctl -a | grep conntrack_buckets
sysctl -a | grep conntrack_max
# sysctl -a | grep conntrack_buckets
# sysctl -a | grep conntrack_max1.1.16. SELinux
SELinux is set to enforcing mode by default. For Red Hat Ceph Storage 1.3 and 1.3.1, set SELinux to permissive mode, or disable it entirely and ensure that your installation and cluster are working properly. To set SELinux to permissive, execute the following command:
setenforce 0
# setenforce 0
To configure SELinux persistently, modify the /etc/selinux/config configuration file.
With Red Hat Ceph Storage 1.3.2 or later, a new ceph-selinux package can be installed on Ceph nodes. This package provides SELinux support for Ceph, and SELinux therefore no longer needs to be in permissive or disabled mode. See the Install ceph-selinux section for detailed information on installing ceph-selinux and enabling SELinux.
1.1.17. Disable EPEL on Cluster Nodes
Some Ceph package dependencies require versions that differ from the package versions from EPEL. Disable EPEL to ensure that you install the packages required for use with Ceph.
To disable epel, execute:
yum-config-manager --disable epel
# yum-config-manager --disable epel
The above command will disable epel.repo in /etc/yum.repos.d/.
1.2. Setting Up the Administration Server
You are supposed to have a dedicated administration node that hosts the Calamari monitoring and administration server.
The administration server hardware requirements vary with the size of the cluster. A minimum recommended hardware configuration for a Calamari server includes:
- at least 4 GB of RAM,
- a dual core CPU on AMD64 or Intel 64 architecture,
- enough network throughput to handle communication with Ceph hosts.
The hardware requirements scale linearly with the number of Ceph servers, so if you intend to run a fairly large cluster, ensure that you have enough RAM, processing power, and network throughput for the administration node.
Red Hat Ceph Storage uses an administration server for the Calamari monitoring and administration server, and the cluster’s Ceph configuration file and authentication keys. If you install Red Hat Ceph Storage from an ISO image and require local repositories for the Ceph packages, the administration server will also contain the Red Hat Ceph Storage repositories.
To use the HTTPS protocol with Calamari, set up the Apache web server first. See the Setting Up an SSL Server chapter in the System Administrator’s Guide for Red Hat Enterprise Linux 7.
1.2.1. Create a Working Directory
Create a working directory for the Ceph cluster configuration files and keys. Then, navigate to that directory. For example:
mkdir ~/ceph-config
cd ~/ceph-config
mkdir ~/ceph-config
cd ~/ceph-config
The ice-setup and ceph-deploy utilities must be executed within this working directory. See the Installation by ISO and Executing ceph-deploy sections for details.
1.2.2. Installation by CDN
To install the ceph-deploy utility and the Calamari server by using the Red Hat Content Delivery Network (CDN), execute the following command as root:
yum install ceph-deploy calamari-server calamari-clients
# yum install ceph-deploy calamari-server calamari-clients1.2.3. Installation by ISO
To install the ceph-deploy utility and the Calamari server by using the ISO image, perform the following steps:
- Log in to the Red Hat Customer Portal.
- Click Downloads to visit the Software & Download center.
- In the Red Hat Ceph Storage area, click Download Software to download the latest version of the software.
As
root, mount the downloaded ISO image to the/mnt/directory, for example:mount <path_to_iso>/rhceph-1.3.2-rhel-7-x86_64-dvd.iso /mnt
# mount <path_to_iso>/rhceph-1.3.2-rhel-7-x86_64-dvd.iso /mntCopy to Clipboard Copied! Toggle word wrap Toggle overflow As
root, install theice_setupprogram:yum install /mnt/Installer/ice_setup-*.rpm
# yum install /mnt/Installer/ice_setup-*.rpmCopy to Clipboard Copied! Toggle word wrap Toggle overflow Navigate to the working directory that you created in the Create a Working Directory section, for example:
cd ~/ceph-config
$ cd ~/ceph-configCopy to Clipboard Copied! Toggle word wrap Toggle overflow Withing this directory, run
ice_setupasroot:ice_setup -d /mnt
# ice_setup -d /mntCopy to Clipboard Copied! Toggle word wrap Toggle overflow The
ice_setupprogram performs the following operations:-
moves the RPM packages to the
/opt/calamari/directory -
creates a local repository for the
ceph-deployandcalamaripackages - installs the Calamari server on the administration node
-
installs the
ceph-deploypackage on the administration node -
writes the
.cephdeploy.conffile to the/root/directory and to the current working directory, for example,~/ceph-config -
prints further instructions regarding
ceph-deployto the console
-
moves the RPM packages to the
1.2.4. Initialize Calamari
Once you have installed the Calamari package by using either the Content Delivery Network or the ISO image, initialize the Calamari monitoring and administration server:
calamari-ctl initialize
# calamari-ctl initialize
As root, update existing cluster nodes that report to Calamari.
salt '*' state.highstate
# salt '*' state.highstateAt this point, you should be able to access the Calamari web server using a web browser. Proceed to the Storage Cluster Quick Start.
The initialization program implies that you can only execute ceph-deploy when pointing to a remote site. You may also direct ceph-deploy to your Calamari administration node for example, ceph-deploy admin <admin-hostname>. You can also use the Calamari administration node to run a Ceph daemon, although this is not recommended.
1.3. Updating the Administration Server
Red Hat provides updated packages for Red Hat Ceph Storage periodically. For CDN-based installations, execute:
yum update
# yum update
For ISO-based installations, get the latest version of ice_setup and upgrade the administration server with the latest packages. To update the administration server, perform the following steps:
As
root, update the Calamari administration node to the latest version ofice_setup. Note to have at least version 0.3.0:yum update ice_setup
# yum update ice_setupCopy to Clipboard Copied! Toggle word wrap Toggle overflow As
root, runice_setupwith theupdate allsubcommand. Theice_setuputility synchronizes the new packages from the Red Hat CDN onto the local repositories on the Calamari administration node.ice_setup update all
# ice_setup update allCopy to Clipboard Copied! Toggle word wrap Toggle overflow The updated packages are now available to the nodes in the cluster with
yum update:yum update
# yum updateCopy to Clipboard Copied! Toggle word wrap Toggle overflow
If the updates contain new packages for the Ceph cluster, upgrade the cluster too. See Upgrading Ceph Storage for details.
1.3.1. Notes for Update After Upgrading Red Hat Enterprise Linux 6 to 7
Upgrading from Red Hat Enterprise Linux 6 to 7 requires either removing the PostgreSQL data or migrating it. Consider migrating this data if you have services other than Calamari using PostgreSQL. See the How to Migrate PostgreSQL Databases from RHEL6 to RHEL7 article for details.
If you do not have services other than Calamari using the PostgreSQL database, proceed as follows. In Red Hat Ceph Storage 1.2, Calamari stores only crash-recovery data in PostgreSQL. All that data will be rebuilt when first connected to the Ceph cluster. It is harmless to delete the data during this transition.
Ensure to recreate the Calamari account when running the calamari-ctl initialize command.
All the commands in the following steps must be run as root.
On the Calamari node perform these steps:
Remove the PostgreSQL data:
rm -rf /var/lib/pgsql/*
# rm -rf /var/lib/pgsql/*Copy to Clipboard Copied! Toggle word wrap Toggle overflow Proceed with Calamari installation as described in Section 1.3, “Updating the Administration Server”. Note that during updating of the
calamari-serverpackage, errors similar to the following can appear:Copy to Clipboard Copied! Toggle word wrap Toggle overflow Reload all services:
systemctl daemon-reload
# systemctl daemon-reloadCopy to Clipboard Copied! Toggle word wrap Toggle overflow Ensure that the
salt-masterservice is not running:killall salt-master
# killall salt-masterCopy to Clipboard Copied! Toggle word wrap Toggle overflow Start the
salt-masterservice:systemctl start salt-master.service
# systemctl start salt-master.serviceCopy to Clipboard Copied! Toggle word wrap Toggle overflow Restart the
supervisordservice:systemctl restart supervisord.service
# systemctl restart supervisord.serviceCopy to Clipboard Copied! Toggle word wrap Toggle overflow Identify cluster nodes previously connected to Calamari:
salt-key -L
# salt-key -LCopy to Clipboard Copied! Toggle word wrap Toggle overflow Delete all keys:
salt-key -D
# salt-key -DCopy to Clipboard Copied! Toggle word wrap Toggle overflow
On nodes that were previously connected to Calamari and that you identified in step 7, perform the following steps:
Check if the old
/var/lock/subsys/diamondlock file exists and if so, delete the file and restart thediamondservice:rm /var/lock/subsys/diamond systemctl restart diamond.service
# rm /var/lock/subsys/diamond
# systemctl restart diamond.service
Copy to Clipboard Copied! Toggle word wrap Toggle overflow Remove the old
salt-masterpublic key:rm /etc/salt/pki/minion/minion_master.pub
# rm /etc/salt/pki/minion/minion_master.pubCopy to Clipboard Copied! Toggle word wrap Toggle overflow Disable all repositories and enable the
rhel-7-server-rhceph-1.3-calamari-rpmsrepository. Then, update the node:yum --disablerepo=* --enablerepo=rhel-7-server-rhceph-1.3-calamari-rpms update
# yum --disablerepo=* --enablerepo=rhel-7-server-rhceph-1.3-calamari-rpms updateCopy to Clipboard Copied! Toggle word wrap Toggle overflow Reload all services:
systemctl daemon-reload
# systemctl daemon-reloadCopy to Clipboard Copied! Toggle word wrap Toggle overflow Restart the
salt-minionservice:systemctl restart salt-minion
# systemctl restart salt-minionCopy to Clipboard Copied! Toggle word wrap Toggle overflow
On the Calamari node, perform the following steps:
Add the
saltminions to Calamari:salt-key -A
# salt-key -ACopy to Clipboard Copied! Toggle word wrap Toggle overflow Update the Ceph module:
salt '*' state.highstate
# salt '*' state.highstateCopy to Clipboard Copied! Toggle word wrap Toggle overflow