Chapter 1. Remotely accessing the desktop
You can remotely connect to the desktop on a RHEL server by using graphical GNOME applications. The connection depends on how the server is configured.
You can use one or more of the following options:
- Desktop sharing
- Allows remote clients to connect to the desktop session of the Linux user that is currently logged in on the server.
- Remote login
- Allows remote clients to open the GNOME login screen, where they can login as a Linux user with the correct credentials.
1.1. Enabling desktop sharing on the server by using GNOME
You can enable a remote desktop connection from a single client by configuring the Red Hat Enterprise Linux server.
Prerequisites
-
The
gnome-remote-desktoppackage is installed.
Procedure
Configure a firewall rule to enable access to the server:
$ sudo firewall-cmd --permanent --add-port=3389/tcp successNoteIf you also configure remote login on the server, the port number for desktop sharing changes. In that case, modify the firewall rule to add port number
3390instead.Reload firewall rules:
$ sudo firewall-cmd --reload success- Open Settings in GNOME.
- Open the System screen.
Select Remote Desktop.
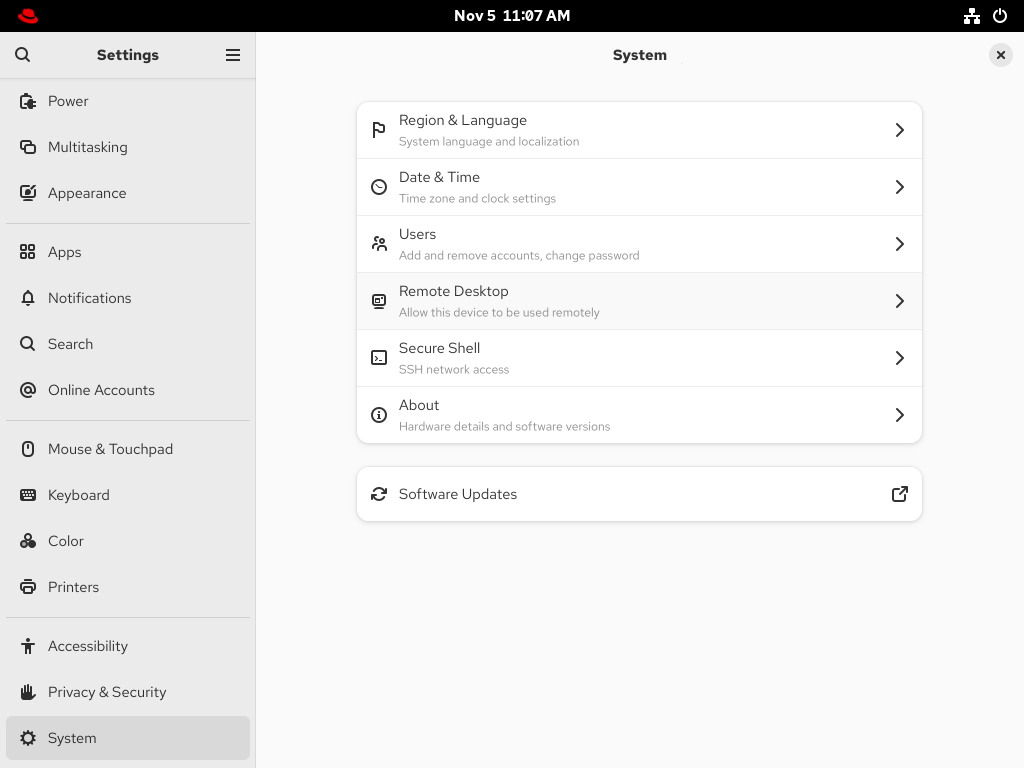
- Set Desktop Sharing to On.
- Optional: To allow the remote user to control your screen, set Remote Control to On.
Set a user name and a password in the Login Details section. Remote clients must enter these credentials when connecting to your desktop from a remote client.

1.2. Configuring GNOME remote login
By activating Remote Login in GNOME, you can allow remote clients to log in to the GNOME session as the Linux users on your system.
Prerequisites
-
The
gnome-remote-desktoppackage is installed.
Procedure
Configure a firewall rule to enable access to the server:
$ sudo firewall-cmd --permanent --add-port=3389/tcp
success
Reload firewall rules:
$ sudo firewall-cmd --reload success- Open Settings in GNOME.
- Open the System screen.
Select Remote Desktop.
- Click the Remote Login tab in the menu header.
Set Remote Login to On to enable screen sharing.

- Set a user name and a password in the Login Details section. Remote clients must enter these credentials when connecting to this system’s login screen from a remote client.
1.3. Connecting to a remote desktop by using GNOME
You can connect from a Red Hat Enterprise Linux client to a remote desktop server by using the Connections application. The connection depends on the remote server configuration.
Prerequisites
- Desktop sharing or remote login is enabled on the server. For more information, see Enabling desktop sharing on the server by using GNOME or Configuring GNOME remote login.
- For desktop sharing, a user is logged in to the GNOME graphical session on the server.
-
The
gnome-connectionspackage is installed on the client.
Procedure
- On the client, launch the Connections application.
Click the button in the top bar to open a new connection.

- Enter the IP address of the server.
Choose the connection type based on the operating system you want to connect to:
- Remote Desktop Protocol (RDP)
- Use RDP for connecting to Windows and RHEL 10 servers.
- Virtual Network Computing (VNC)
- Use VNC for connecting to servers with RHEL 9 and previous versions.
- Click .
Verification
- On the client, check that you can see the shared server desktop.
On the server, a screen sharing indicator appears on the right side of the top panel:

You can control screen sharing in the System menu of the server.
1.4. Connecting to a remote desktop session on a headless server for a single user
You can connect to a remote desktop session on a headless server for a single user through RDP (Remote Desktop Protocol).
A headless server is a system that operates without a connected monitor. You can initiate and manage a GNOME desktop session to manage servers securely in environments where direct physical access is not available.
Run the setup as a non-root user with sudo privileges. Attempting to run it as the root user causes the setup to fail. The credentials used to access this type of session are different from the system credentials of the user. For example, changing the user password on the host does not update the password used for RDP access.
Connecting to a remote desktop through RDP protocol requires setting up a TLS key and a TLS certificate.
Prerequisites
-
gnome-remote-desktoppackage is installed. -
gdmpackage is installed. -
freerdppackage is installed. - The session, such as the kiosk session or the workstation session, is installed. For more information, see How to install a graphical user internface (GUI) for Red Hat Enterprise Linux?
- SELinux is running in permissive mode. For more information, see Changing SELinux to permissive mode
Procedure
Configure a firewall rule to enable access to the server:
$ sudo firewall-cmd --permanent --add-port=3389/tcp
success
Reload firewall rules:
$ sudo firewall-cmd --reload
success
Create a directory for the self-signed TLS certificate:
$ mkdir -p ~/.local/share/gnome-remote-desktopGenerate a self-signed TLS certificate for the RDP service:
$ winpr-makecert -silent -rdp -path ~/.local/share/gnome-remote-desktop tlsConfigure GNOME Remote Desktop by using RDP:
$ grdctl --headless rdp set-tls-key ~/.local/share/gnome-remote-desktop/tls.key
$ grdctl --headless rdp set-tls-cert ~/.local/share/gnome-remote-desktop/tls.crt
$ grdctl --headless rdp set-credentials
$ grdctl --headless rdp enable
Refer
gdrctlman page for more information.Enable a headless server for single-user service:
$ systemctl --user enable --now gnome-remote-desktop-headless.serviceStart the headless GNOME session persistently for a single user as root:
$ sudo systemctl enable --now gnome-headless-session@<your_username>.serviceReplace
<your_username>with the username of the user for whom you want to start the headless GNOME session.Make
<your_username>.servicepersistent across system reboot:$ sudo systemctl set-default graphical.target
Verification
Verify that the session started successfully:
$ sudo systemctl status gnome-headless-session@<your_username>.service
1.5. Connecting to a remote desktop session on a headless server for multiple users
Integrate GNOME Remote Desktop with the GNOME Display Manager (GDM) to provide remote login functionality for multiple users by using the Remote Desktop Protocol (RDP).
Remote users authenticate by using a system-wide password, which grants access to the graphical login screen. Then they log in with their individual credentials, enabling remote access to the desktop environment.
Connecting to a remote desktop through RDP for multiple users requires setting up a TLS key and a TLS certificate.
Prerequisites
The
gnome-remote-desktop,gdm, andfreerdppackages are installed.NoteYou must reboot your system after installing the
gnome-remote-desktoppackage.- The session, such as the kiosk session or the workstation session, is installed. For more information, see How to install a graphical user interface (GUI) for Red Hat Enterprise Linux?
Procedure
Create a directory for the self-signed TLS certificate as the
gnome-remote-desktopuser:$ sudo -u gnome-remote-desktop mkdir -p ~gnome-remote-desktop/.local/share/gnome-remote-desktopGenerate a self-signed TLS certificate for the RDP service as the
gnome-remote-desktopuser:$ sudo -u gnome-remote-desktop winpr-makecert -silent -rdp -path ~gnome-remote-desktop/.local/share/gnome-remote-desktop tlsConnecting to a remote desktop through RDP for multiple users:
$ sudo grdctl --system rdp set-tls-key ~gnome-remote-desktop/.local/share/gnome-remote-desktop/tls.key
$ sudo grdctl --system rdp set-tls-cert ~gnome-remote-desktop/.local/share/gnome-remote-desktop/tls.crt
$ sudo grdctl --system rdp set-credentials
$ sudo grdctl --system rdp enable
Refer
gdrctlman page for more information.Enable the system remote login service and GDM:
$ sudo systemctl enable --now gdm
$ sudo systemctl enable --now gnome-remote-desktop.service
Make
gnome-remote-desktop.servicepersistent across system reboot:$ sudo systemctl set-default graphical.target
Verification
Verify that the session started successfully:
$ sudo systemctl status gnome-remote-desktop.service