Chapter 3. Managing user accounts using the IdM Web UI
Identity Management (IdM) provides several stages that can help you to manage various user life cycle situations:
- Creating a user account
Creating a stage user account before an employee starts their career in your company and be prepared in advance for the day when the employee appears in the office and want to activate the account.
You can omit this step and create the active user account directly. The procedure is similar to creating a stage user account.
- Activating a user account
- Activating the account the first working day of the employee.
- Disabling a user account
- If the user go to a parental leave for couple of months, you will need to disable the account temporarily.
- Enabling a user account
- When the user returns, you will need to re-enable the account.
- Preserving a user account
- If the user wants to leave the company, you will need to delete the account with a possibility to restore it because people can return to the company after some time.
- Restoring a user account
- Two years later, the user is back and you need to restore the preserved account.
- Deleting a user account
- If the employee is dismissed, delete the account without a backup.
3.1. User life cycle
Identity Management (IdM) supports three user account states:
- Stage users are not allowed to authenticate. This is an initial state. Some of the user account properties required for active users cannot be set, for example, group membership.
- Active users are allowed to authenticate. All required user account properties must be set in this state.
- Preserved users are former active users that are considered inactive and cannot authenticate to IdM. Preserved users retain most of the account properties they had as active users, but they are not part of any user groups.
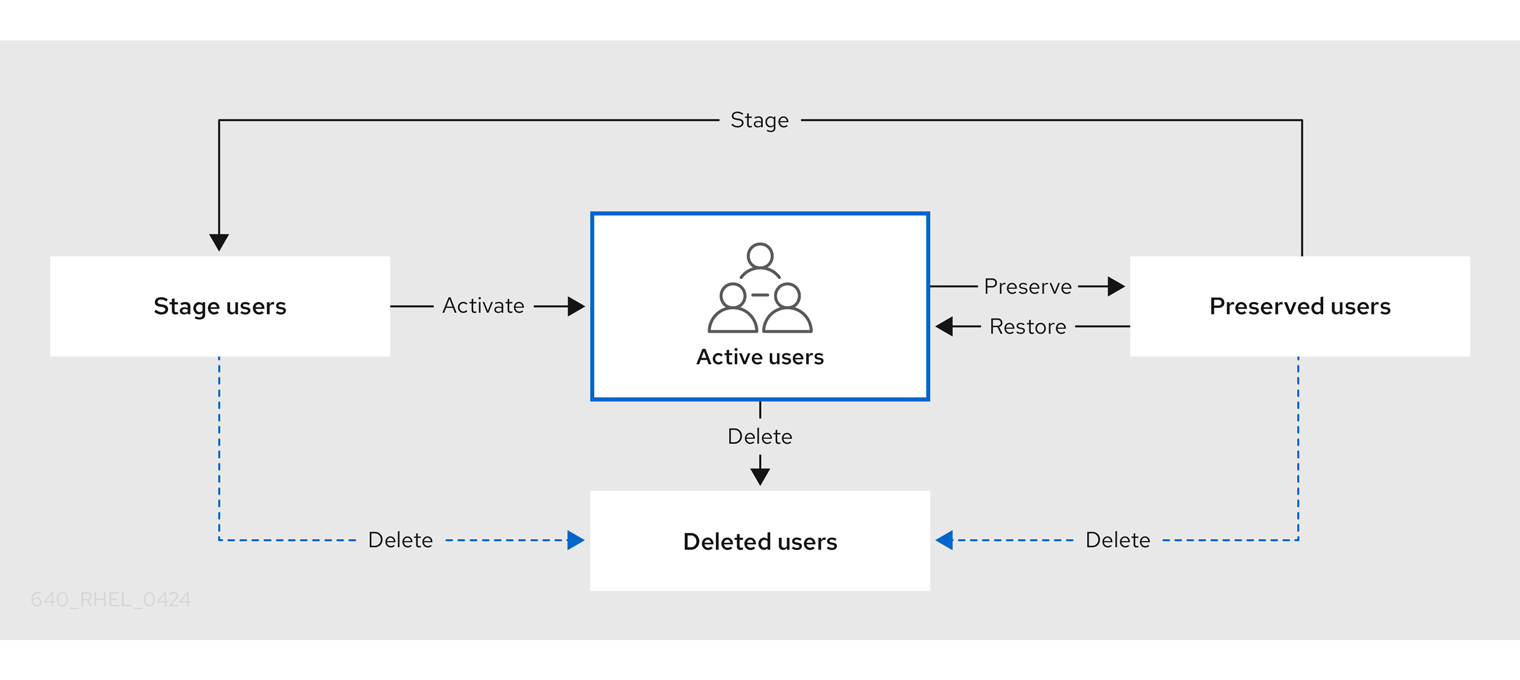
You can delete user entries permanently from the IdM database.
Deleted user accounts cannot be restored. When you delete a user account, all the information associated with the account is permanently lost.
A new administrator can only be created by a user with administrator rights, such as the default admin user. If you accidentally delete all administrator accounts, the Directory Manager must create a new administrator manually in the Directory Server.
Do not delete the admin user. As admin is a pre-defined user required by IdM, this operation causes problems with certain commands. If you want to define and use an alternative admin user, disable the pre-defined admin user with ipa user-disable admin after you granted admin permissions to at least one different user.
Do not add local users to IdM. The Name Service Switch (NSS) always resolves IdM users and groups before resolving local users and groups. This means that, for example, IdM group membership does not work for local users.
3.2. Adding users in the Web UI
Usually, you need to create a new user account before a new employee starts to work. Such a stage account is not accessible and you need to activate it later.
Alternatively, you can create an active user account directly. For adding active user, follow the procedure below and add the user account in the Active users tab.
Prerequisites
- Administrator privileges for managing IdM or User Administrator role.
Procedure
- Log in to the IdM Web UI.
Go to Users
Stage Users tab. Alternatively, you can add the user account in the Users
Active users, however, you cannot add user groups to the account. - Click the + Add icon.
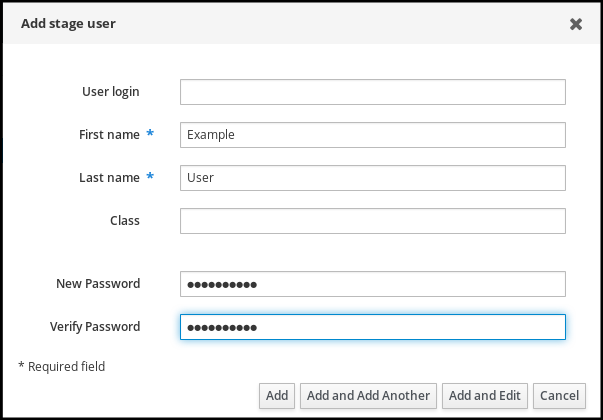
- In the Add stage user dialog box, enter First name and Last name of the new user.
Optional: In the User login field, add a login name.
If you leave it empty, the IdM server creates the login name in the following pattern: The first letter of the first name and the surname. The whole login name can have up to 32 characters.
- Optional: In the GID drop down menu, select groups in which the user should be included.
- Optional: In the Password and Verify password fields, enter your password and confirm it, ensuring they both match.
Click on the Add button.
At this point, you can see the user account in the Stage Users table.

If you click on the user name, you can edit advanced settings, such as adding a phone number, address, or occupation.
IdM automatically assigns a unique user ID (UID) to new user accounts. You can assign a UID manually, or even modify an already existing UID. However, the server does not validate whether the new UID number is unique. Consequently, multiple user entries might have the same UID number assigned. A similar problem can occur with user private group IDs (GIDs) if you assign GIDs to user accounts manually. You can use the ipa user-find --uid=<uid> or ipa user-find --gidnumber=<gidnumber> commands on the IdM CLI to check if you have multiple user entries with the same ID.
Red Hat recommends you do not have multiple entries with the same UIDs or GIDs. If you have objects with duplicate IDs, security identifiers (SIDs) are not generated correctly. SIDs are crucial for trusts between IdM and Active Directory and for Kerberos authentication to work correctly.
3.3. Activating stage users in the IdM Web UI
You must follow this procedure to activate a stage user account, before the user can log in to IdM and before the user can be added to an IdM group.
Prerequisites
- Administrator privileges for managing the IdM Web UI or User Administrator role.
- At least one staged user account in IdM.
Procedure
- Log in to the IdM Web UI.
-
Go to Users
Stage users tab. - Click the check-box of the user account you want to activate.
Click on the Activate button.

- On the Confirmation dialog box, click OK.
If the activation is successful, the IdM Web UI displays a green confirmation that the user has been activated and the user account has been moved to Active users. The account is active and the user can authenticate to the IdM domain and IdM Web UI. The user is prompted to change their password on the first login.
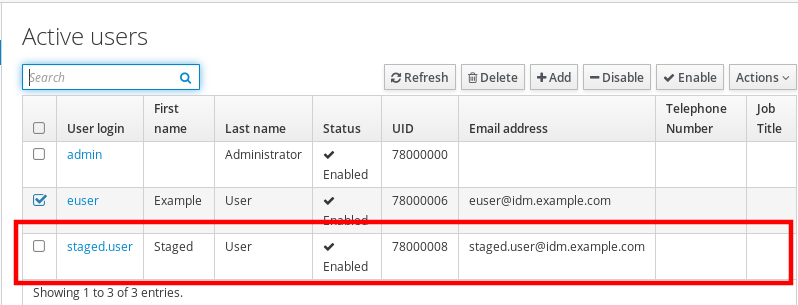
At this stage, you can add the active user account to user groups.
3.4. Disabling user accounts in the Web UI
You can disable active user accounts. Disabling a user account deactivates the account, therefore, user accounts cannot be used to authenticate and using IdM services, such as Kerberos, or perform any tasks.
Disabled user accounts still exist within IdM and all of the associated information remains unchanged. Unlike preserved user accounts, disabled user accounts remain in the active state and can be a member of user groups.
After disabling a user account, any existing connections remain valid until the user’s Kerberos TGT and other tickets expire. After the ticket expires, the user will not be able to renew it.
Prerequisites
- Administrator privileges for managing the IdM Web UI or User Administrator role.
Procedure
- Log in to the IdM Web UI.
-
Go to Users
Active users tab. - Click the check-box of the user accounts you want to disable.
Click on the Disable button.
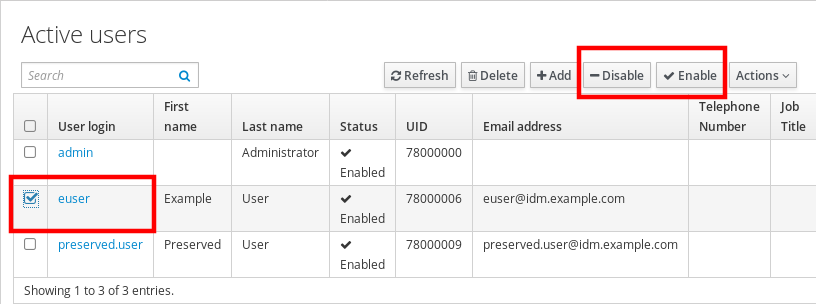
- In the Confirmation dialog box, click on the OK button.
If the disabling procedure has been successful, you can verify in the Status column in the Active users table.

3.5. Enabling user accounts in the Web UI
With IdM you can enable disabled active user accounts. Enabling a user account activates the disabled account.
Prerequisites
- Administrator privileges for managing the IdM Web UI or User Administrator role.
Procedure
- Log in to the IdM Web UI.
-
Go to Users
Active users tab. - Click the check-box of the user accounts you want to enable.
Click on the Enable button.

- In the Confirmation dialog box, click on the OK button.
If the change has been successful, you can verify in the Status column in the Active users table.
3.6. Preserving active users in the IdM Web UI
Preserving user accounts enables you to remove accounts from the Active users tab, yet keeping these accounts in IdM.
Preserve the user account if the employee leaves the company. If you want to disable user accounts for a couple of weeks or months (parental leave, for example), disable the account. For details, see Disabling user accounts in the Web UI. The preserved accounts are not active and users cannot use them to access your internal network, however, the account stays in the database with all the data.
You can move the restored accounts back to the active mode.
The list of users in the preserved state can provide a history of past user accounts.
Prerequisites
- Administrator privileges for managing the IdM (Identity Management) Web UI or User Administrator role.
Procedure
- Log in to the IdM Web UI.
-
Go to Users
Active users tab. - Click the check-box of the user accounts you want to preserve.
Click on the Delete button.

- In the Remove users dialog box, switch the Delete mode radio button to preserve.
Click on the Delete button.
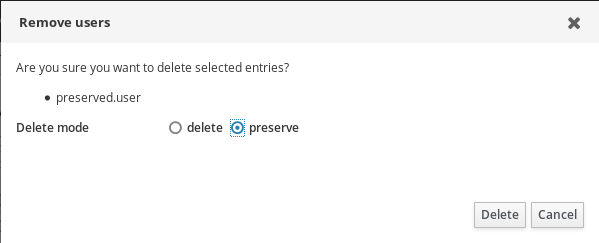
As a result, the user account is moved to Preserved users.
If you need to restore preserved users, see the Restoring users in the IdM Web UI.
3.7. Restoring users in the IdM Web UI
IdM (Identity Management) enables you to restore preserved user accounts back to the active state. You can restore a preserved user to an active user or a stage user.
Prerequisites
- Administrator privileges for managing the IdM Web UI or User Administrator role.
Procedure
- Log in to the IdM Web UI.
-
Go to Users
Preserved users tab. - Click the check-box at the user accounts you want to restore.
Click on the Restore button.

- In the Confirmation dialog box, click on the OK button.
The IdM Web UI displays a green confirmation and moves the user accounts to the Active users tab.
3.8. Deleting users in the IdM Web UI
Deleting users is an irreversible operation, causing the user accounts to be permanently deleted from the IdM database, including group memberships and passwords. Any external configuration for the user, such as the system account and home directory, is not deleted, but is no longer accessible through IdM.
You can delete:
Active users — the IdM Web UI offers you with the options:
Preserving users temporarily
For details, see the Preserving active users in the IdM Web UI.
- Deleting them permanently
- Stage users — you can just delete stage users permanently.
- Preserved users — you can delete preserved users permanently.
The following procedure describes deleting active users. Similarly, you can delete user accounts on:
- The Stage users tab
- The Preserved users tab
Prerequisites
- Administrator privileges for managing the IdM Web UI or User Administrator role.
Procedure
- Log in to the IdM Web UI.
Go to Users
Active users tab. Alternatively, you can delete the user account in the Users
Stage users or Users Preserved users. - Click the Delete icon.
- In the Remove users dialog box, switch the Delete mode radio button to delete.
- Click on the Delete button.
The users accounts have been permanently deleted from IdM.