Chapter 3. Installing JBoss EAP
3.1. ZIP Installation
3.1.1. Downloading JBoss EAP (ZIP Installation)
Prerequisites
The JBoss EAP ZIP file is available from the Red Hat Customer Portal. The ZIP file installation is platform-independent.
Downloading the JBoss EAP ZIP File
- Open a browser and log in to the Red Hat Customer Portal at https://access.redhat.com.
- Click Downloads.
- Click Red Hat JBoss Enterprise Application Platform in the Product Downloads list.
- Select the correct JBoss EAP version from the Version drop-down menu.
- Find Red Hat JBoss Enterprise Application Platform 7.x.x in the list and click the Download link.
3.1.2. Installing JBoss EAP (ZIP Installation)
Once the JBoss EAP ZIP installation file has been downloaded, it can be installed by extracting the package contents.
If necessary, move the ZIP file to the server and location where JBoss EAP should be installed.
- The user who will be running JBoss EAP must have read and write access to this directory.
Extract the ZIP archive.
$ unzip jboss-eap-7.x.x.zipNoteFor Windows Server, right-click the ZIP file and select Extract All.
The directory created by extracting the ZIP archive is the top-level directory for the JBoss EAP installation. This is referred to as EAP_HOME.
3.2. Installer Installation
3.2.1. Downloading JBoss EAP (Installer Installation)
Prerequisites
The JBoss EAP JAR installer is available from the Red Hat Customer Portal. The .jar archive can be used to run either the graphical or text-based installers. The installer is the preferred way to install JBoss EAP on all supported platforms.
Downloading the JBoss EAP Installer
- Open a browser and log in to the Red Hat Customer Portal at https://access.redhat.com.
- Click Downloads.
- Click Red Hat JBoss Enterprise Application in the Product Downloads list.
- Select the correct JBoss EAP version from the Version drop-down menu.
- Find Red Hat JBoss Enterprise Application 7.x.x Installer in the list and click the Download link.
3.2.2. Running the JBoss EAP Installer
You can run the JBoss EAP JAR installer in either graphical or text mode.
Running the JBoss EAP Graphical Installer
- Open a terminal and navigate to the directory containing the downloaded JBoss EAP Installer JAR file.
Run the graphical installer using the following command:
java -jar jboss-eap-7.x.x-installer.jarNoteIn Hewlett-Packard HP-UX or Solaris environments, you can specify the required architecture by using the
-d32or-d64switch. Launch the installer by executing either of these commands:java -jar -d32 jboss-eap-7.x.x-installer.jaror
java -jar -d64 jboss-eap-7.x.x-installer.jarFollow the instructions in the table below.
Expand Table 3.1. JBoss EAP Installer Screens Screen Name When it Appears Description Langauge Selection
Always
Choose the desired language for the installer and click OK.
License Agreement
Always
The EULA for RED HAT JBOSS MIDDLEWARE.
Select "I accept the terms of this license agreement.", and click Next.
Installation Path
Always
Select the installation path for JBoss EAP, and click Next.
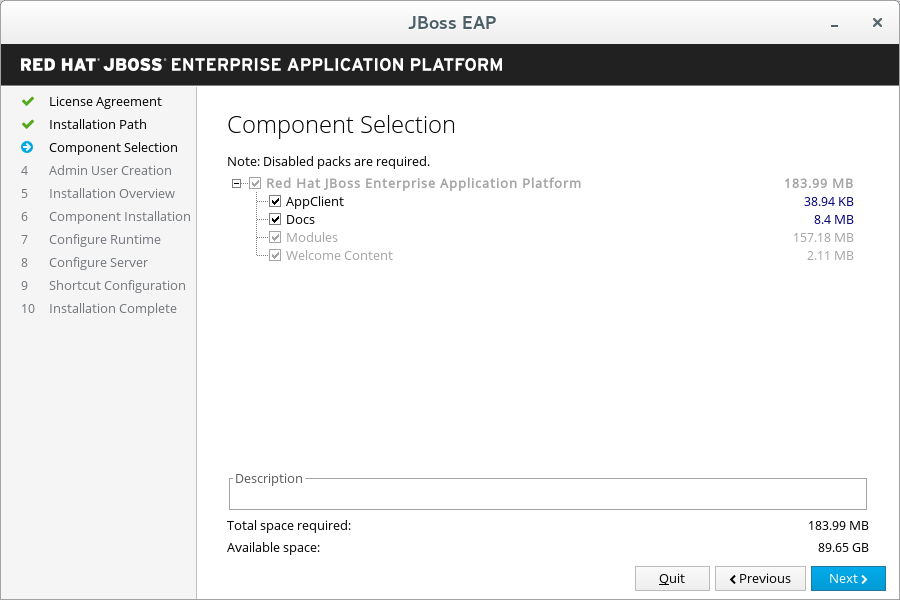
Component Selection
Always
Select the components to install. Required components are disabled for deselection.
Admin User Creation
Always
Create an administrative user and assign a password. Then click Next.
Installation Overview
Always
Review your installation options, then click Next.
Component Installation
Always
When the installation progress completes, click Next.
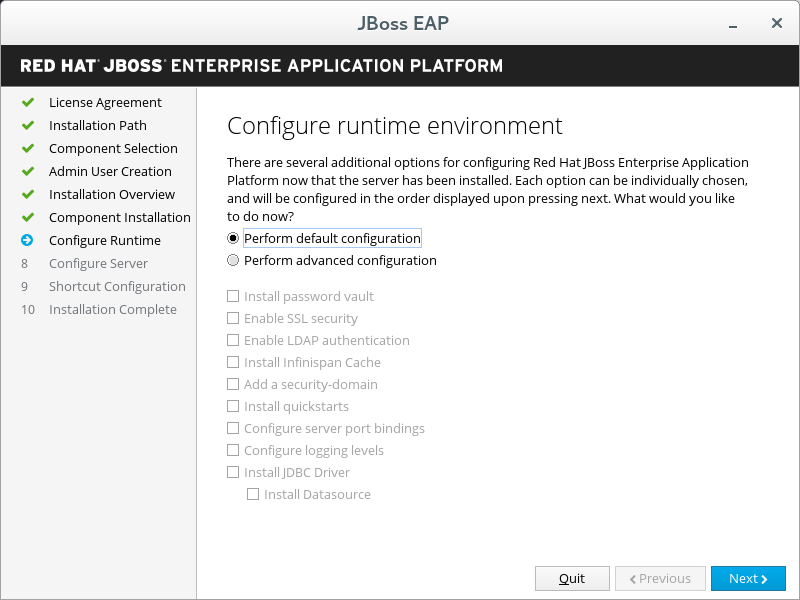
Configure Runtime Environment
Always
You can choose a default configuration for your JBoss EAP installation, or choose to perform an advanced configuration with the installer. Note that even if you choose a default configuration, you can still alter your configuration using the JBoss EAP management interfaces at a later time.
Select Perform default configuration, or select Perform advanced configuration and select the items to configure, then click Next.
Configure Password Vault
If you choose to install a password vault in the advanced configuration of the runtime environment.
Configure a password vault to store all your sensitive passwords in an encrypted keystore, then click Next. For more information, see the password vault documentation in the How To Configure Server Security guide.

SSL Security
If you choose to enable SSL Security in the advanced configuration of the runtime environment.
Specify an SSL keystore and the keystore password for securing the JBoss EAP management interfaces, then click Next. For more information, see the documentation on securing the management interfaces in the How To Configure Server Security guide.
WarningRed Hat recommends that SSLv2, SSLv3, and TLSv1.0 be explicitly disabled in favor of TLSv1.1 or TLSv1.2 in all affected packages.
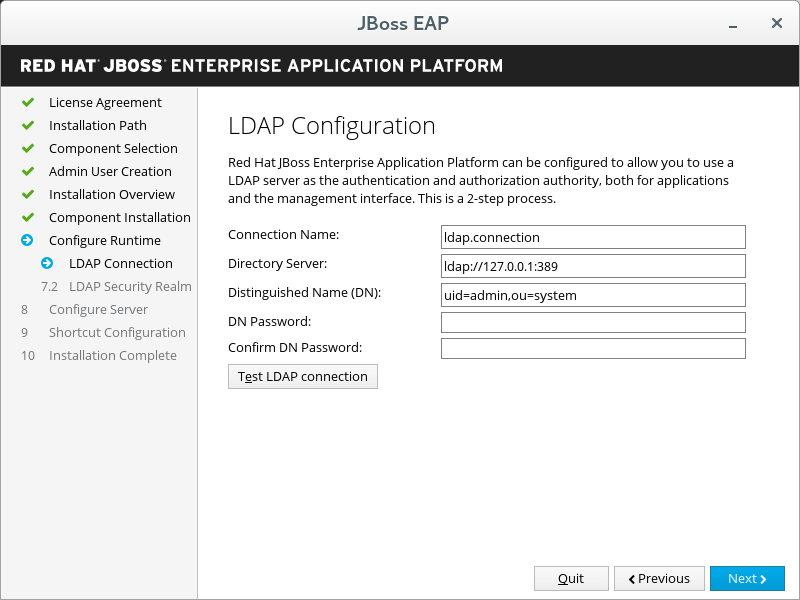
LDAP Configuration
If you choose to enable LDAP authentication in the advanced configuration of the runtime environment.
Enable LDAP authentication to use an LDAP directory server as the authentication source for the management console, management CLI, and management API. When you are done, click Next. For more information, see the LDAP documentation in the How to Configure Identity Management guide.
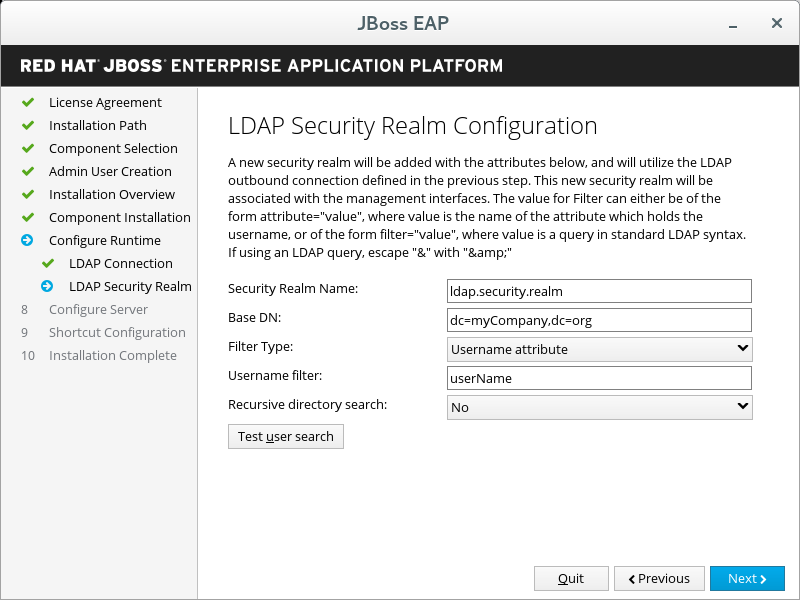
LDAP Security Realm Configuration
If you choose to enable LDAP authentication in the advanced configuration of the runtime environment.
A new security realm will be created and associated with the management interfaces, using the LDAP connection defined in the previous step.
Specify the values for your LDAP environment, then click Next. For more information, see the LDAP documentation in the How to Configure Identity Management guide.
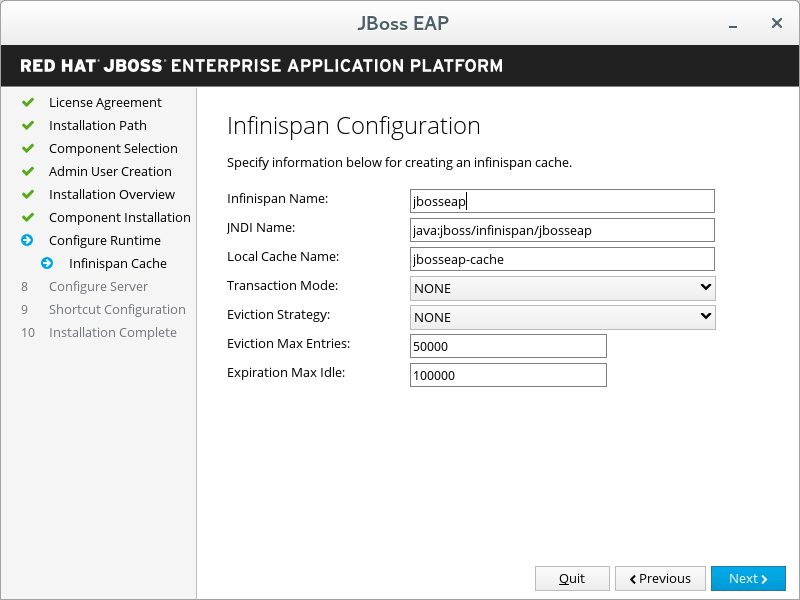
Infinispan Configuration
If you choose to install an Infinispan cache in the advanced configuration of the runtime environment.
Create an Infinispan cache for managing cached data. Give an Infinispan name and configure the other fields, then click Next. For more information, see the Infinispan documentation in the Configuration Guide.
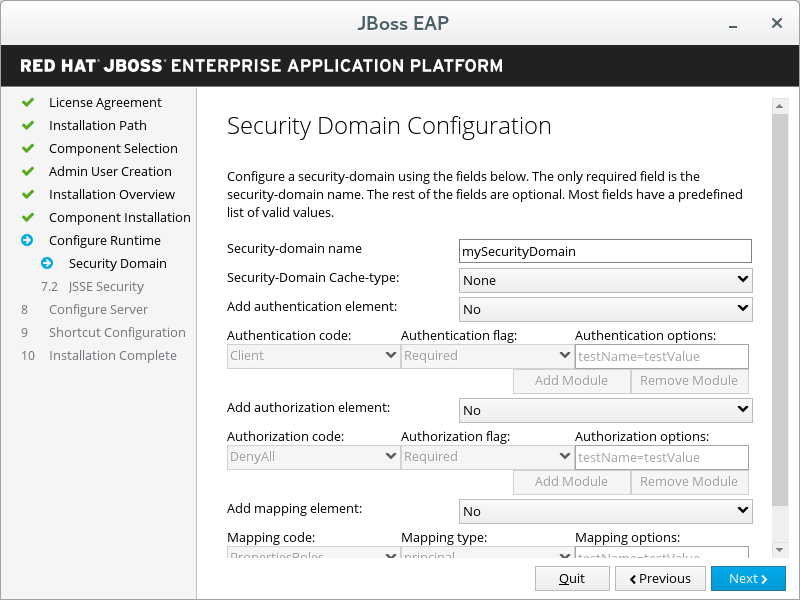
Security Domain Configuration
If you choose to add a security domain in the advanced configuration of the runtime environment.
Configure a security domain for the JBoss EAP server instance. Most of the fields are already populated with default values and do not need modification. When you are done, click Next. For more information, see Security Domains in the Security Architecture Guide.
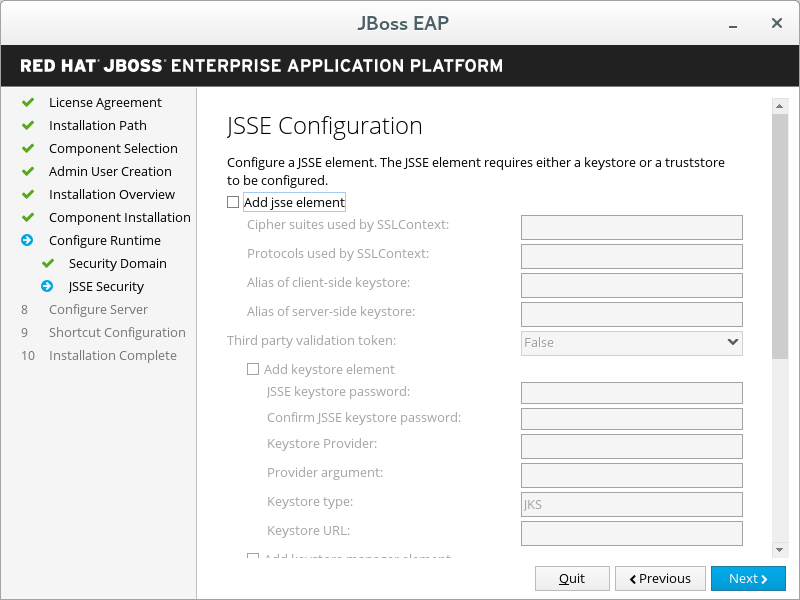
JSSE Configuration
If you choose to add a security domain in the advanced configuration of the runtime environment.
Configure Java Secure Socket Extension (JSSE) for the security domain defined in the previous step, using either a keystore or a truststore. When you are done, click Next.
Quickstarts
If you choose to install quickstarts in the advanced configuration of the runtime environment.
Select the quickstart installation path, then click Next.
Maven Repository Setup
If you choose to install quickstarts in the advanced configuration of the runtime environment.
Select your Maven repository and settings file.

Socket Bindings
If you choose to configure server port bindings in the advanced configuration of the runtime environment.
Determine whether the installation will use the default port bindings, configure port offsets for all default bindings, or configure custom port bindings.
If you choose to configure port offsets, choose the offset number.
If you choose to configure custom bindings, select whether to configure the ports for standalone mode, domain mode, or both.
If the host is configured for IPv6 only, select the Enable pure IPv6 configuration check box and the installer will make the required configuration changes.
Click Next.

Custom Socket Bindings for Standalone Configurations
If you choose to configure custom port bindings for standalone mode.
Configure the ports and system properties for each of the standalone configurations (
standalone,standalone ha,standalone full,standalone full-ha), then click Next.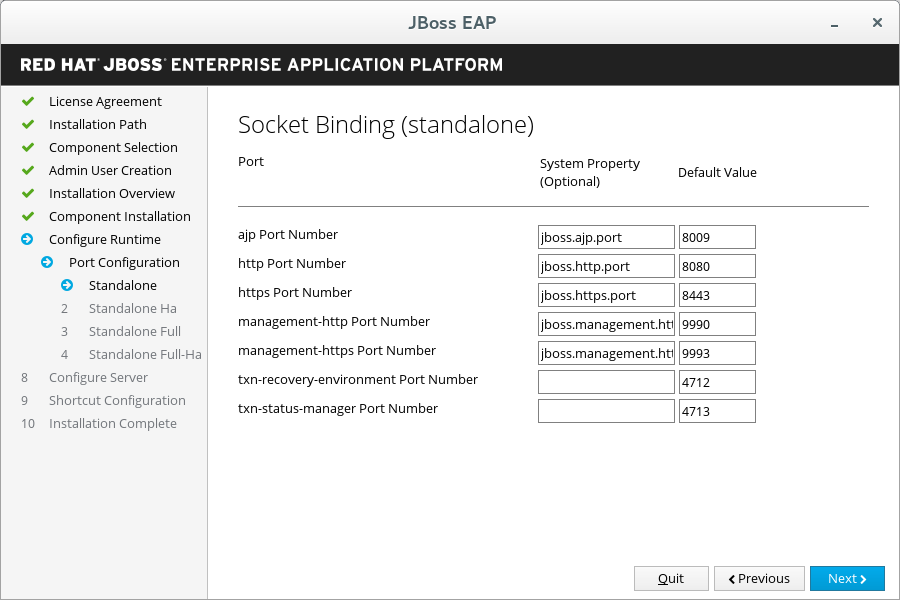
Custom Socket Bindings for Domain Configurations
If you choose to configure custom port bindings for domain mode.
Configure the ports and system properties for the host configuration (
domain host) and each of the domain profiles (domain default,domain ha,domain full,domain full-ha), then click Next.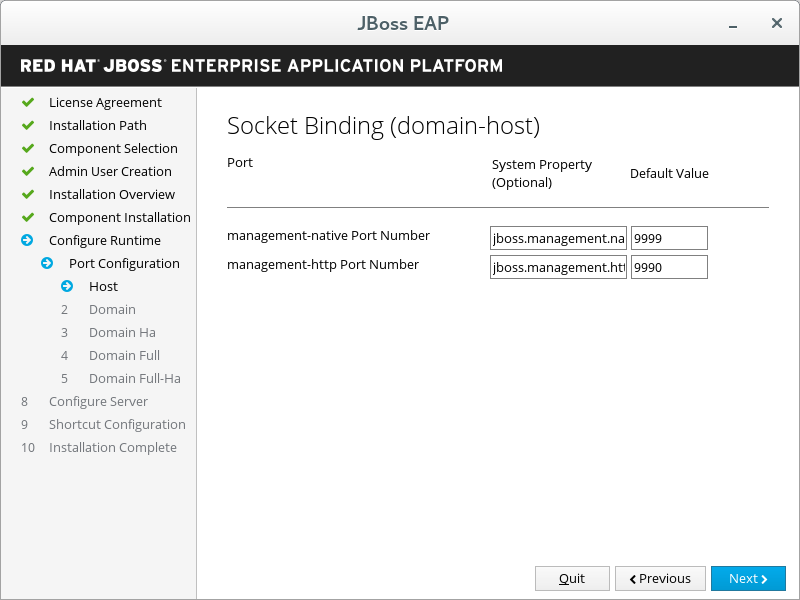
Logging Options
If you choose to configure logging levels in the advanced configuration of the runtime environment.
Select the desired logging levels, then click Next.
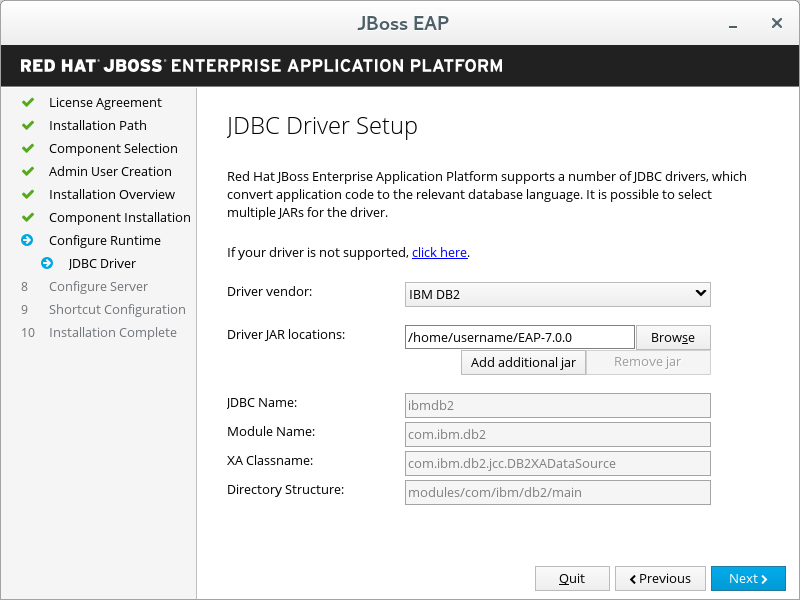
JDBC Driver Setup
If you choose to install a JDBC driver in the advanced configuration of the runtime environment.
Install and setup a JDBC driver. Choose the appropriate driver vendor from the drop down list and specify the driver JAR location(s). When you are done, click Next. For more information, see the datasource JDBC driver section in the Configuration Guide.
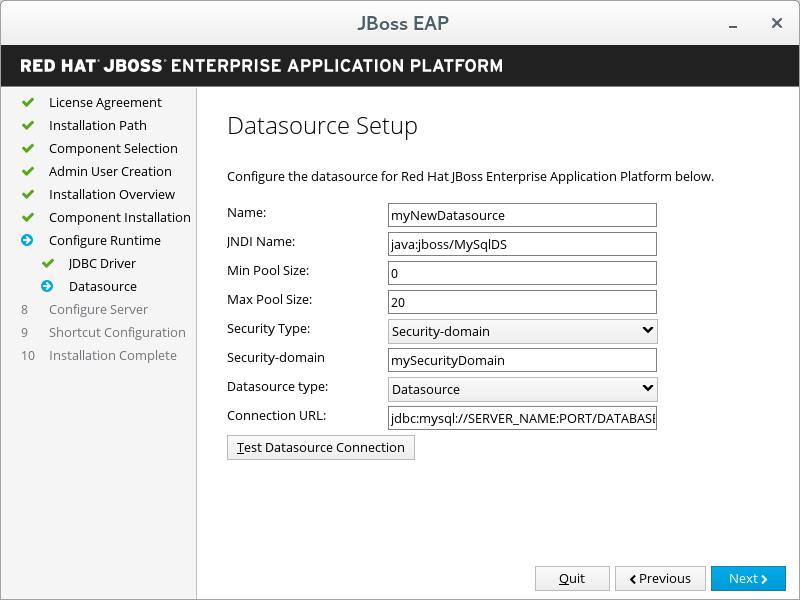
Datasource Setup
If you choose to install a JDBC driver and install a datasource in the advanced configuration of the runtime environment.
Configure a datasource which can be used by applications. Provide a datasource name and configure the other options, then click Next. For more information, see the details of datasource management in the Configuration Guide.
Configure Server
Always
When the configuration progress completes, click Next.
Shortcut Configuration
Always
Select the Create shortcuts in the Start-Menu check box to create shortcuts. Only alphanumeric characters, em dash (-) and underscore (_) characters are allowed. On Microsoft Windows, the slash (/) and backslash (\) characters are also allowed. Click Next.
Installation Complete
Always
Click Generate installation script and properties file if you want to capture the selected installation options for a future automated installation, then click Done.
Installation is now complete. The directory created by the installer is the top-level directory for the server. This is referred to as
EAP_HOME.
Running the JBoss EAP Text-based Installer
- Open a terminal and navigate to the directory containing the downloaded JBoss EAP Installer JAR.
Run the text-based installer using the following command:
java -jar jboss-eap-7.x.x-installer.jar -console-
Follow the prompts to install JBoss EAP. The directory created by the installer is the top-level directory for the server. This is referred to as
EAP_HOME.
3.3. RPM Installation
For users wanting to manage JBoss EAP installations using Red Hat Satellite: although Red Hat Satellite 6 is recommended for managing JBoss EAP 7 installations, the following Red Hat Network (RHN) channels are also provided specifically for Satellite 5 users:
For Red Hat Enterprise Linux 6:
- jbappplatform-7.0-i386-server-6-rpm
- jbappplatform-7.0-x86_64-server-6-rpm
For Red Hat Enterprise Linux 7:
- jbappplatform-7.0-x86_64-server-7-rpm
Red Hat Satellite 6 users can use the repositories shown in Choosing a Repository.
From Red Hat Enterprise Linux 7, the term channel was replaced with the term repository. In these instructions only the term repository is used.
3.3.1. Choosing a Repository
Installing JBoss EAP via RPM requires a subscription to both the Red Hat Enterprise Linux Server base software repository, as well as a specific JBoss EAP repository.
For the JBoss EAP repository, you must subscribe to either the current JBoss EAP repository, or a minor JBoss EAP repository.
- Current JBoss EAP Repository
The current repository provides the latest JBoss EAP 7 release. When updating your JBoss EAP installation, you will receive all updates for JBoss EAP 7, including minor upgrades.
For example, updating from this repository will include upgrades from JBoss EAP 7.0 to JBoss EAP 7.1, if it is released.
- Minor JBoss EAP Repository
A minor repository provides a specific minor release of JBoss EAP 7 and all applicable patches. This allows you to maintain the same minor version of JBoss EAP, while staying current with high severity and security patches.
For example, updating from this repository will include patches and security updates for the minor JBoss EAP version, but will not include upgrades from JBoss EAP 7.0 to JBoss EAP 7.1, if it is released.
For production environments, we recommend that you use the minor JBoss EAP repository. This reduces the risk of unexpected changes in subsystem modules or necessary configuration changes caused by unexpected JBoss EAP upgrades. You can always change repositories at a later date if you want to receive an upgrade.
3.3.1.1. Subscribing to the Current JBoss EAP 7 Repository
- Ensure that your Red Hat Enterprise Linux system is registered to your account using Red Hat Subscription Manager. For more information, see the Red Hat Subscription Management documentation.
Using Red Hat Subscription Manager, subscribe to the 'current' JBoss EAP 7 repository using the following command. Replace
RHEL_VERSIONwith either6or7depending on your Red Hat Enterprise Linux version.subscription-manager repos --enable=jb-eap-7-for-rhel-RHEL_VERSION-server-rpms
3.3.1.2. Subscribing to a Minor JBoss EAP 7 Repository
- Ensure that your Red Hat Enterprise Linux system is registered to your account using Red Hat Subscription Manager. For more information, see the Red Hat Subscription Management documentation.
Using Red Hat Subscription Manager, subscribe to a minor JBoss EAP 7 repository using the following command. Ensure that you:
-
Replace
EAP_MINOR_VERSIONwith your intended JBoss EAP minor version. For example, for this release’s minor version, enter:7.0. -
Replace
RHEL_VERSIONwith either6or7depending on your Red Hat Enterprise Linux version.
subscription-manager repos --enable=jb-eap-EAP_MINOR_VERSION-for-rhel-RHEL_VERSION-server-rpms-
Replace
3.3.2. Installing JBoss EAP (RPM Installation)
Install JBoss EAP from your subscribed repository using the following command:
yum groupinstall jboss-eap7
Your installation is complete. The default EAP_HOME path for the RPM installation is /opt/rh/eap7/root/usr/share/wildfly.
It is not supported to configure multiple domain or host controllers on the same machine when using the RPM installation method to install JBoss EAP.
3.3.3. Changing Repositories
Over the lifespan of a JBoss EAP installation, you may want to change the software subscription from one JBoss EAP repository to another. Changing repositories is supported, but only within the following conditions:
- Changing from the 'current' repository to a minor repository
- Supported if changing to the latest minor repository.
- Changing from a minor repository to another minor repository
- Supported if changing to the next minor JBoss EAP version. For example, changing from JBoss EAP 7.0 to JBoss EAP 7.1 is supported, but changing from JBoss EAP 7.0 to JBoss EAP 7.2 is not supported.
- Changing from a minor repository to the 'current' repository
- Supported if changing from the latest minor repository.
Prerequisites
- Install JBoss EAP as an RPM installation.
- Choose a repository to change to, and ensure that you comply with the supported change conditions shown above.
Changing the JBoss EAP Repository
Before changing the repository, ensure that the JBoss EAP installation has all applicable updates applied:
yum updateUsing Red Hat Subscription Manager, unsubscribe from the existing repository and subscribe to the new repository you want to change to. In the command below, replace
EXISTING_REPOSITORYandNEW_REPOSITORYwith the respective repository names.subscription-manager repos --disable=EXISTING_REPOSITORY --enable=NEW_REPOSITORY
3.4. Automated Installer Installation
If you use the JAR installer to install JBoss EAP, you can use an installation script generated from a previous install to automate future installations with the same configuration.
The automated installer is not backwards compatible. You cannot use an installation script generated from a previous version of JBoss EAP with the automated installer. You should only use installation scripts generated by the same minor version of JBoss EAP, for example JBoss EAP 7.0.
Prerequisites
- Use the JAR installer to generate an automatic installation script. The automatic installation script is an XML file.
Automated Installer Installation
- Open a terminal and navigate to the directory containing the downloaded JBoss EAP Installer JAR file.
Run the following command to install JBoss EAP using the automatic installation script XML file:
java -jar jboss-eap-7.x.x-installer.jar auto.xmlBy default, the installer will prompt you to enter any passwords required for the JBoss EAP configuration. You can do an unattended install by pre-setting the passwords for the installation.
NoteYou can store the automatic installation script XML file on a network host, and use HTTP or FTP to point the installer to use it for an installation. For example:
java -jar jboss-eap-7.x.x-installer.jar http://network-host.local/auto.xmljava -jar jboss-eap-7.x.x-installer.jar ftp://network-host.local/auto.xml
3.4.1. Unattended Automated Installer Installation
Prerequisites
- Use the JAR installer to generate an automatic installation script. The automatic installation script is an XML file.
To do an unattended automated installer installation, you must preset the passwords required for the JBoss EAP installation.
When the installation script XML file is generated from a previous installer installation, an incomplete installation script variables file is also generated. It has the same file name as the installation script file, but with a .variables suffix.
This variables file contains a list of key and password parameters needed for an unattended automated installation.
You can provide the required passwords as a completed variables file, or as an argument when running the installer command.
Unattended Automated Installer Installation Using a Variables File
Open the
.variablesfile in a text editor and provide a password value for each key. For example:adminPassword = password#2 vault.keystorepwd = vaultkeystorepw ssl.password = user12345Run the installer using the automatic installation script XML file. The installer detects the variables file automatically if the completed variables file is in the same directory as the installation script XML file, and you haven’t modified its file name.
java -jar jboss-eap-7.x.x-installer.jar auto.xml

Checking for corresponding .variables file
Variables file detected: auto.xml.variables
[ Starting automated installation ]
...
Alternatively, you can specify the path to the variables file using
-variablefile:java -jar jboss-eap-7.x.x-installer.jar auto.xml -variablefile auto.xml.variables
Unattended Automated Installer Installation Using the -variables Argument
Run the installer using the automatic installation script XML file, and specify the required passwords as key/value pairs using the
-variablesargument. For example:java -jar jboss-eap-7.x.x-installer.jar auto.xml -variables adminPassword=password#2,vault.keystorepwd=vaultkeystorepw,ssl.password=user12345NoteIt is important that you do not have any spaces when specifying the
-variableskey/value pairs.