Chapter 2. To Create a New Route
This tutorial walks you through the process of creating a Fuse Integration project, adding a route to it, and adding two endpoints to the route. It assumes that you have already set up your workspace and that Red Hat JBoss Fuse Tooling is running inside Red Hat JBoss Developer Studio.
Goals
In this tutorial you will:
- Create a Fuse Integration project
- Create a new routing context
Create a route
- Add file endpoints to the route
- Connect the endpoints
- Configure the endpoints
- Create a folder in your project to store test messages that you create for your route
- Create the test messages
Prerequisites
- JBoss Developer Studio 11.2 installed
- Red Hat JBoss Fuse Tooling 10.2 installed in JBoss Developer Studio 11.2
- In Developer Studio, select menu:Window[ > > Preferences > > Fuse Tooling > > Editor > ] and confirm selection of this option: If enabled the ID values will be used for labels if existing. This ensures that the label of the patterns and components that you place on the canvas will be the same as the labels shown in these tutorials.
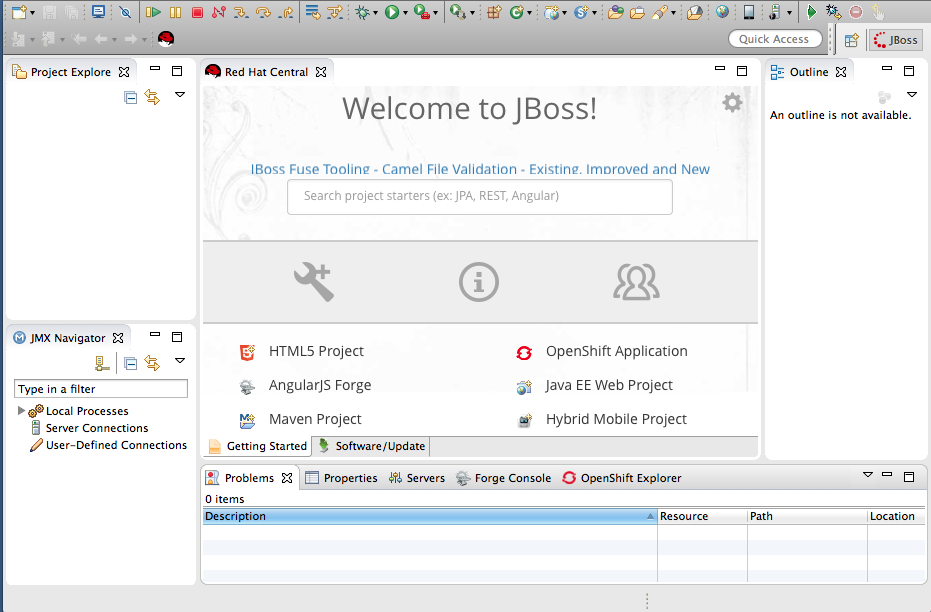
When you start Developer Studio for the first time, it opens in the JBoss perspective:
You can start this tutorial in the JBoss perspective or in the Fuse Integration perspective. If you start it in the JBoss perspective, the tooling will ask to switch you to the Fuse Integration perspective at the appropriate point in the tutorial.
Creating the Fuse Integration project
To create a Fuse Integration project:
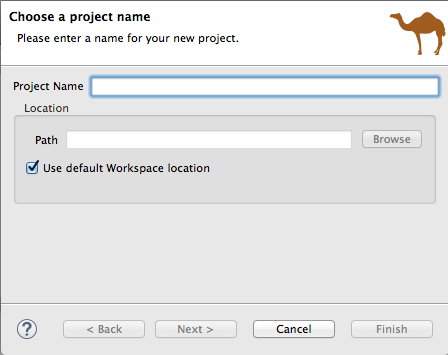
From the menu bar, select menu:File[ > > New > > Other > > JBoss Fuse > > Fuse Integration Project > ] and click to open the New Fuse Integration Project wizard:
-
In the Project Name field, enter
CBRroute. - Leave the Use default workspace location option as is.
Click to open the Select a Target Runtime page:
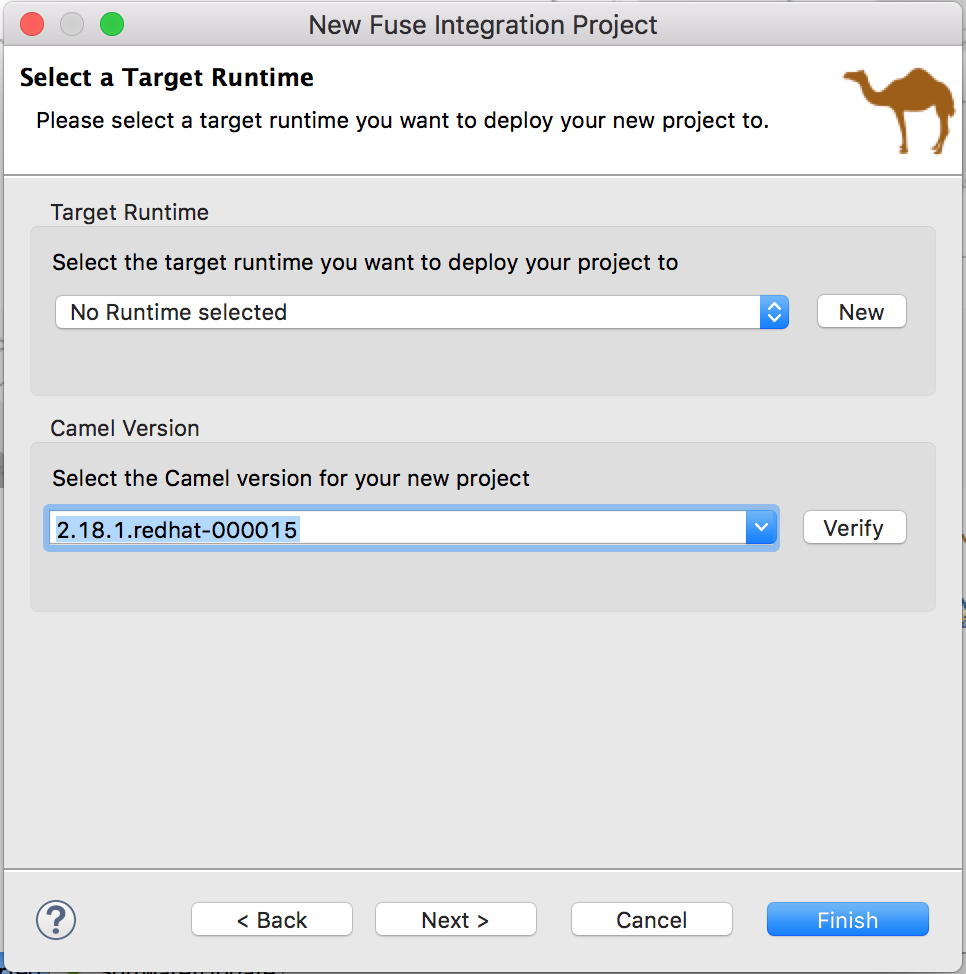
Accept No Runtime selected for Target Runtime, and 2.18.1.redhat-000015 for Camel Version.
NoteYou will add the runtime later in the tutorial Chapter 9, To Publish a Fuse Project to JBoss Fuse.
Click to open the Advanced Project Setup page:
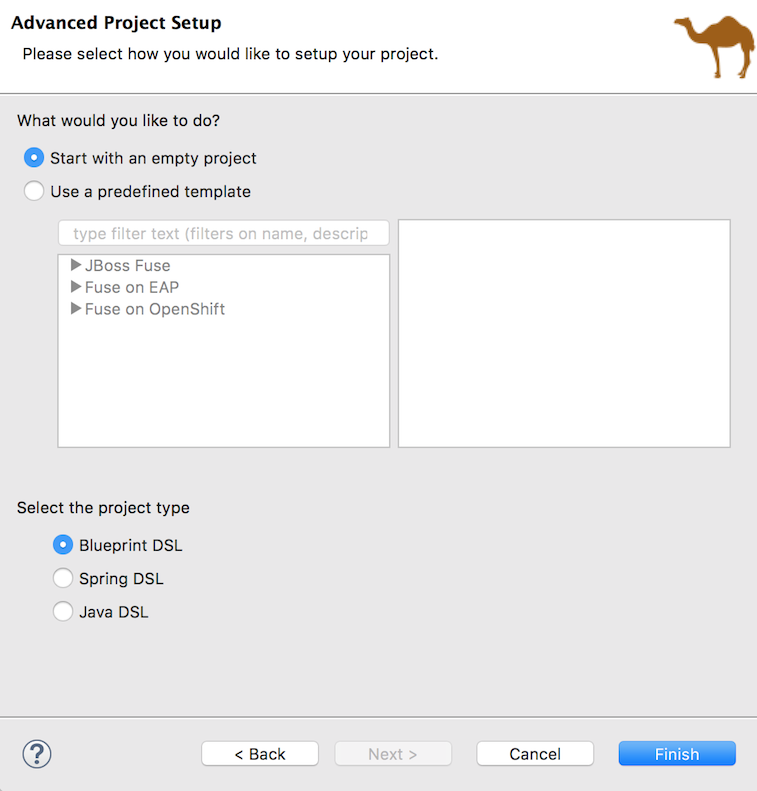
- Leave the Start with an empty project and Blueprint DSL options selected.
Click .
Fuse Tooling starts downloading from the Maven repository all of the files it needs to build the project, and then adds the new project to Project Explorer.
If you are not in the Fuse Integration perspective, the tooling asks whether you want to switch to it now:

Click to open the new
CBRrouteproject in the Fuse Integration perspective: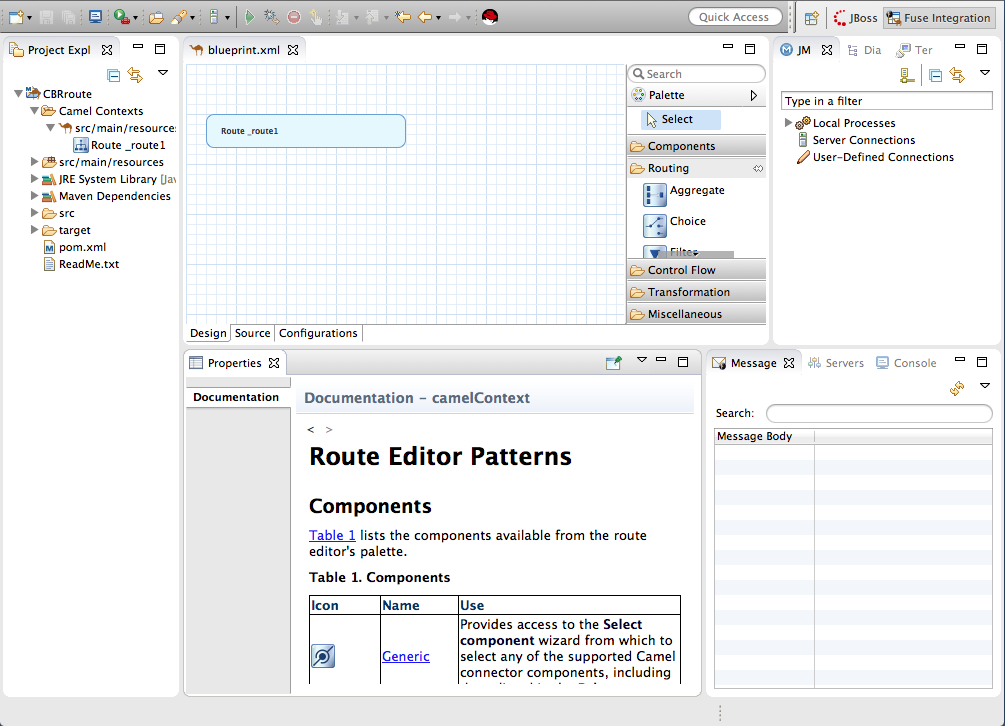
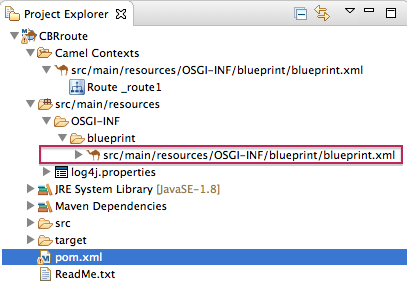
The new
CBRrouteproject contains everything needed to create and run routes. As shown in Figure 2.1, “Generated project files”, the files generated forCBRrouteinclude:-
CBRroute/pom.xml(Maven project file) CBRroute/src/main/resources/OSGI-INF/blueprint/blueprint.xml(Blueprint XML file containing the routing rules)Figure 2.1. Generated project files
 Note
NoteNotice that the
pom.xmlentry in Project Explorer is decorated wth a warning symbol.You can safely ignore this warning or eliminate it by opening the
pom.xmlfile in the tooling’s XML editor, and delete the<version>element from each dependency:camel-core,camel-blueprint, andcamel-test-blueprint. Save thepom.xmlfile.
-
Creating the route
To create the route:
- Click the Design tab at the bottom, left of the canvas to return to the graphic display of the route.
Drag a File component (
 ) from the Palette's Components drawer to the canvas, and drop it in the
 Route_route1container node.The File component changes to a
From _from1node inside theRoute_route1container node.On the canvas, select the
From _from1node.The Properties view, located below the canvas, displays the node’s property fields for editing.
In the Properties view, click the Advanced tab:

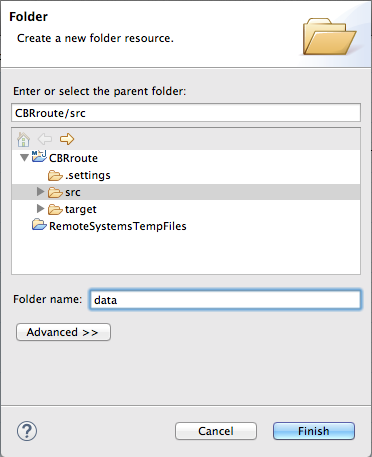
You need to create a folder for the project’s source data and enter that folder’s name in the Directory Name field.
-
In Project Explorer, right-click
CBRroute/src/to open the context menu. Select menu:[ > New > > Folder > ] to open the New Folder wizard:
-
Check that
CBRroute/srcappears in the Enter or select the parent folder field. Otherwise enter it manually, or select it from the graphical representation of the project’s hierarchy. In the Folder name field, enter
data, and then click Finish.The new
datafolder appears in Project Explorer, under thesrcfolder:
-
In Project Explorer, right-click
-
In the Properties view, return to the
From _from1node’s Advanced tab. In the Directory Name field, enter
src/data:
The path
src/datais relative to the project’s directory.On the Consumer tab, enable the Noop option by clicking its check box.
The Noop option prevents the
message#.xmlfiles being deleted from thesrc/datafolder, and it enables idempotency to ensure that eachmessage#.xmlfile is consumed only once.Select the Details tab to open the file node’s Details page.
The tooling automatically populates the Uri field with the Directory Name and Noop properties you configured on the Advanced tab. It also populates the Id field with an autogenerated ID (
_from1):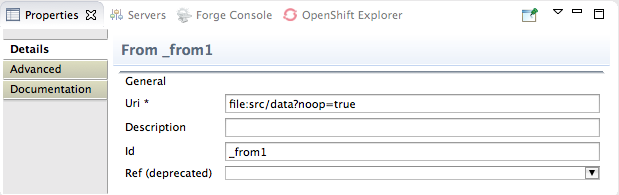
- Leave the autogenerated Id as is.
Drag another File component from the Palette's Components drawer and drop it in the
Route_route1container node.The File component changes to a
To _to1node inside theRoute_route1container node.On the canvas, select the
To _to1node.The Properties view, located below the canvas, displays the node’s property fields for editing.
On the Details tab, enter
file:target/messages/othersin the Uri field, and_Othersin the Id field: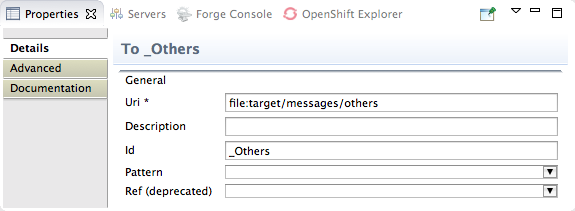 Note
NoteThe tooling will create the
target/messages/othersfolder at runtime.In the
Route_route1container, select the From _from1 node and drag it’s connector arrow ( ) over the To_Others node, then release it:
 Note
NoteThe two file nodes are connected and aligned on the canvas according to the route editor’s layout direction preference setting. The choices are Right and Down (default).
NoteIf you do not connect the nodes before you close the project, the tooling automatically connects them when you reopen it.
-
Select
to save the route. Click the Source tab at bottom, left of the canvas to display the XML for the route. The camelContext element will look like Example 2.1, “XML for CBRroute”:
Example 2.1. XML for CBRroute
<?xml version="1.0" encoding="UTF-8"?>

<blueprint xmlns="http://www.osgi.org/xmlns/blueprint/v1.0.0"
    xmlns:xsi="http://www.w3.org/2001/XMLSchema-instance"
    xsi:schemaLocation="http://www.osgi.org/xmlns/blueprint/v1.0.0
    https://www.osgi.org/xmlns/blueprint/v1.0.0/blueprint.xsd
    http://camel.apache.org/schema/blueprint
    http://camel.apache.org/schema/blueprint/camel-blueprint.xsd">

    <camelContext id="_context1" xmlns="http://camel.apache.org/schema/blueprint">
        <route id="_route1">
            <from id="_from1" uri="file:src/data?noop=true"/>
            <to id="_Others" uri="file:target/messages/others"/>
        </route>
    </camelContext>
</blueprint>
Creating test messages
Before you can run your route, you need to create test messages to send through it.
-
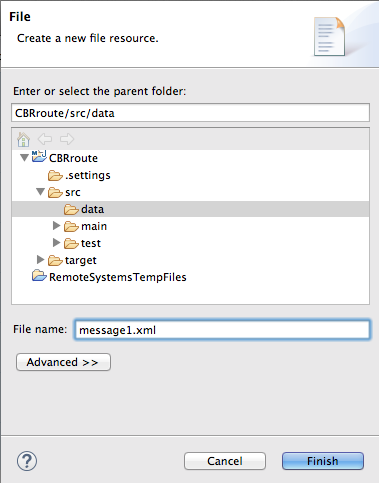
In Project Explorer, right-click
CBRrouteto open the context menu. Click menu:New[ > > Fuse Message > ] to open the New File wizard:
-
Check that
CBRroute/src/dataappears in the Enter or select the parent folder field. Otherwise enter it manually, or select it from the graphical representation of the project’s hierarchy. -
In the field, enter
message1.xml. Click to open the test message,
message1.xmlin the Design tab: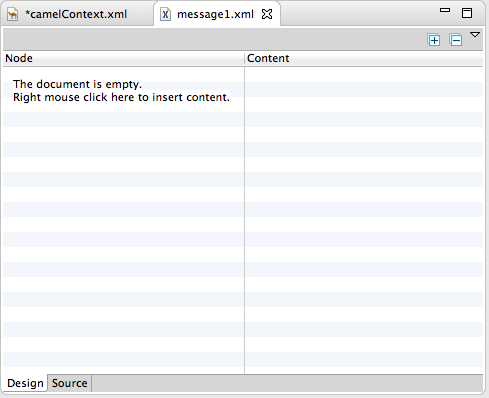
Click the tab at the bottom of the canvas:
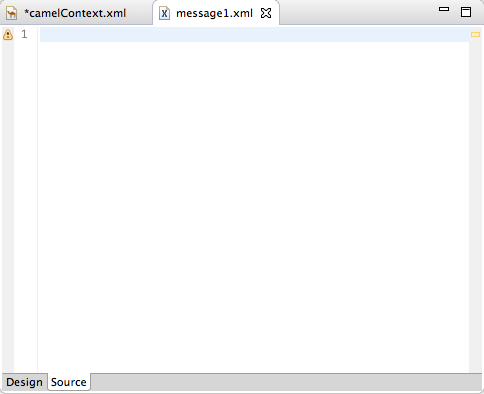
In the tab, enter this text:
<?xml version="1.0" encoding="UTF-8"?> <order> <customer> <name>Brooklyn Zoo</name> <city>Brooklyn</city> <country>USA</country> </customer> <orderline> <animal>wombat</animal> <quantity>15</quantity> <maxAllowed>25</maxAllowed> </orderline> </order>NoteYou can safely ignore the
 on the last line of the newly created
 message1.xmlfile, which advises you that there are no grammar constraints (DTD or XML Schema) referenced by the document.- Save the file, and close it.
If you haven’t already done so, download the prefabricated test message files (see Chapter 1, Using the Fuse Tooling Resource Files for instructions). Copy
message2.xmlthroughmessage6.xmlinto the newly createdCBRroute/src/datafolder. You will use all six test messages in the remaining Fuse Tooling tutorials.Table 2.1, “Preconstructed test messages” shows the contents of each remaining prefabricated message file.
Expand Table 2.1. Preconstructed test messages msg# <name> <city> <country> <animal> <quantity> <maxAllowed> 2
San Diego Zoo
San Diego
USA
giraffe
3
2
3
London Zoo
London
Great Britain
penguin
12
20
4
Bristol Zoo
Bristol
Great Britain
emu
5
4
5
Paris Zoo
Paris
France
giraffe
2
2
6
Hellabrunn Gardens
Munich
Germany
penguin
18
20
Next steps
After you have created and designed your route, you can run it by deploying it into your local Apache Camel runtime, as described in Chapter 3, To Run a Route.
Further reading
To learn more about using the editor, see the Editing a routing context in the route editor section in "Tooling User Guide".