Chapter 4. Knative Eventing CLI commands
4.1. kn source commands
You can use the following commands to list, create, and manage Knative event sources.
4.1.1. Listing available event source types by using the Knative CLI
You can list event source types that can be created and used on your cluster by using the kn source list-types CLI command.
Prerequisites
- The OpenShift Serverless Operator and Knative Eventing are installed on the cluster.
-
You have installed the Knative (
kn) CLI.
Procedure
List the available event source types in the terminal:
$ kn source list-typesExample output
TYPE              NAME                                            DESCRIPTION
ApiServerSource   apiserversources.sources.knative.dev            Watch and send Kubernetes API events to a sink
PingSource        pingsources.sources.knative.dev                 Periodically send ping events to a sink
SinkBinding       sinkbindings.sources.knative.dev                Binding for connecting a PodSpecable to a sink
Optional: On OpenShift Container Platform, you can also list the available event source types in YAML format:
$ kn source list-types -o yaml
4.1.2. Knative CLI sink flag
When you create an event source by using the Knative (kn) CLI, you can specify a sink where events are sent to from that resource by using the --sink flag. The sink can be any addressable or callable resource that can receive incoming events from other resources.
The following example creates a sink binding that uses a service, http://event-display.svc.cluster.local, as the sink:
Example command using the sink flag
$ kn source binding create bind-heartbeat \
  --namespace sinkbinding-example \
  --subject "Job:batch/v1:app=heartbeat-cron" \
  --sink http://event-display.svc.cluster.local \
--ce-override "sink=bound"- 1
svcinhttp://event-display.svc.cluster.localdetermines that the sink is a Knative service. Other default sink prefixes includechannel, andbroker.
4.1.3. Creating and managing container sources by using the Knative CLI
You can use the kn source container commands to create and manage container sources by using the Knative (kn) CLI. Using the Knative CLI to create event sources provides a more streamlined and intuitive user interface than modifying YAML files directly.
Create a container source
$ kn source container create <container_source_name> --image <image_uri> --sink <sink>Delete a container source
$ kn source container delete <container_source_name>Describe a container source
$ kn source container describe <container_source_name>List existing container sources
$ kn source container listList existing container sources in YAML format
$ kn source container list -o yamlUpdate a container source
This command updates the image URI for an existing container source:
$ kn source container update <container_source_name> --image <image_uri>4.1.4. Creating an API server source by using the Knative CLI
You can use the kn source apiserver create command to create an API server source by using the kn CLI. Using the kn CLI to create an API server source provides a more streamlined and intuitive user interface than modifying YAML files directly.
Prerequisites
- The OpenShift Serverless Operator and Knative Eventing are installed on the cluster.
- You have created a project or have access to a project with the appropriate roles and permissions to create applications and other workloads in OpenShift Container Platform.
-
You have installed the OpenShift CLI (
oc). -
You have installed the Knative (
kn) CLI.
If you want to re-use an existing service account, you can modify your existing ServiceAccount resource to include the required permissions instead of creating a new resource.
Create a service account, role, and role binding for the event source as a YAML file:
apiVersion: v1
kind: ServiceAccount
metadata:
  name: events-sa
  namespace: default
1 --- apiVersion: rbac.authorization.k8s.io/v1 kind: Role metadata: name: event-watcher namespace: default2 rules: - apiGroups: - "" resources: - events verbs: - get - list - watch --- apiVersion: rbac.authorization.k8s.io/v1 kind: RoleBinding metadata: name: k8s-ra-event-watcher namespace: default3 roleRef: apiGroup: rbac.authorization.k8s.io kind: Role name: event-watcher subjects: - kind: ServiceAccount name: events-sa namespace: default4 Apply the YAML file:
$ oc apply -f <filename>Create an API server source that has an event sink. In the following example, the sink is a broker:
$ kn source apiserver create <event_source_name> --sink broker:<broker_name> --resource "event:v1" --service-account <service_account_name> --mode ResourceTo check that the API server source is set up correctly, create a Knative service that dumps incoming messages to its log:
$ kn service create event-display --image quay.io/openshift-knative/showcaseIf you used a broker as an event sink, create a trigger to filter events from the
defaultbroker to the service:$ kn trigger create <trigger_name> --sink ksvc:event-displayCreate events by launching a pod in the default namespace:
$ oc create deployment event-origin --image quay.io/openshift-knative/showcaseCheck that the controller is mapped correctly by inspecting the output generated by the following command:
$ kn source apiserver describe <source_name>Example output
Name:                mysource
Namespace:           default
Annotations:         sources.knative.dev/creator=developer, sources.knative.dev/lastModifier=developer
Age:                 3m
ServiceAccountName:  events-sa
Mode:                Resource
Sink:
  Name:       default
  Namespace:  default
  Kind:       Broker (eventing.knative.dev/v1)
Resources:
  Kind:        event (v1)
  Controller:  false
Conditions:
  OK TYPE                     AGE REASON
  ++ Ready                     3m
  ++ Deployed                  3m
  ++ SinkProvided              3m
  ++ SufficientPermissions     3m
  ++ EventTypesProvided        3m
Verification
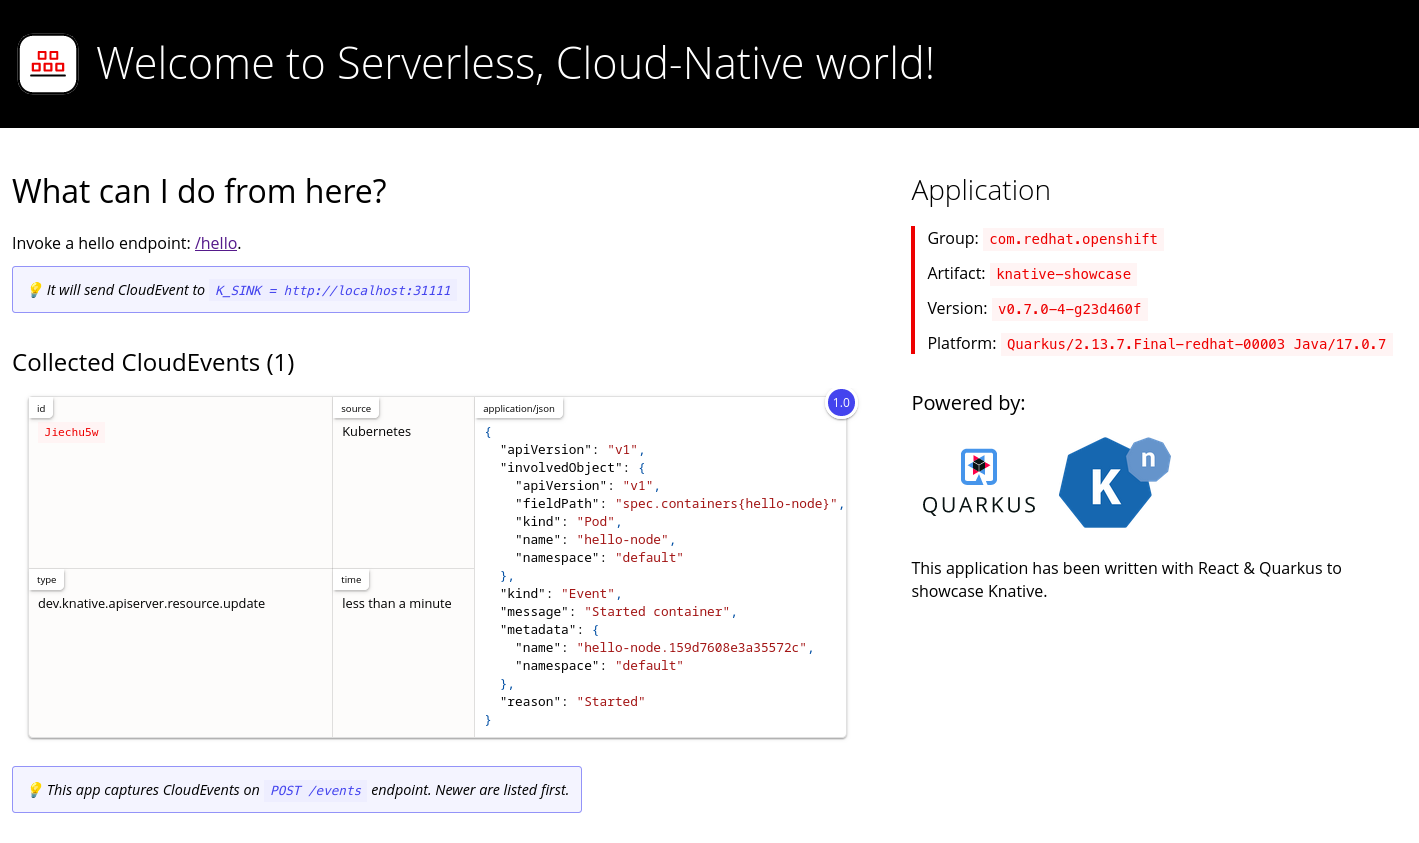
To verify that the Kubernetes events were sent to Knative, look at the event-display logs or use web browser to see the events.
To view the events in a web browser, open the link returned by the following command:
$ kn service describe event-display -o urlFigure 4.1. Example browser page
Alternatively, to see the logs in the terminal, view the event-display logs for the pods by entering the following command:
$ oc logs $(oc get pod -o name | grep event-display) -c user-containerExample output
☁️  cloudevents.Event
Validation: valid
Context Attributes,
  specversion: 1.0
  type: dev.knative.apiserver.resource.update
  datacontenttype: application/json
  ...
Data,
  {
    "apiVersion": "v1",
    "involvedObject": {
      "apiVersion": "v1",
      "fieldPath": "spec.containers{event-origin}",
      "kind": "Pod",
      "name": "event-origin",
      "namespace": "default",
       .....
    },
    "kind": "Event",
    "message": "Started container",
    "metadata": {
      "name": "event-origin.159d7608e3a3572c",
      "namespace": "default",
      ....
    },
    "reason": "Started",
    ...
  }
Deleting the API server source
Delete the trigger:
$ kn trigger delete <trigger_name>Delete the event source:
$ kn source apiserver delete <source_name>Delete the service account, cluster role, and cluster binding:
$ oc delete -f authentication.yaml
4.1.5. Creating a ping source by using the Knative CLI
You can use the kn source ping create command to create a ping source by using the Knative (kn) CLI. Using the Knative CLI to create event sources provides a more streamlined and intuitive user interface than modifying YAML files directly.
Prerequisites
- The OpenShift Serverless Operator, Knative Serving and Knative Eventing are installed on the cluster.
-
You have installed the Knative (
kn) CLI. - You have created a project or have access to a project with the appropriate roles and permissions to create applications and other workloads in OpenShift Container Platform.
-
Optional: If you want to use the verification steps for this procedure, install the OpenShift CLI (
oc).
Procedure
To verify that the ping source is working, create a simple Knative service that dumps incoming messages to the service logs:
$ kn service create event-display \
    --image quay.io/openshift-knative/showcase
For each set of ping events that you want to request, create a ping source in the same namespace as the event consumer:
$ kn source ping create test-ping-source \
    --schedule "*/2 * * * *" \
    --data '{"message": "Hello world!"}' \
    --sink ksvc:event-display
Check that the controller is mapped correctly by entering the following command and inspecting the output:
$ kn source ping describe test-ping-sourceExample output
Name:         test-ping-source
Namespace:    default
Annotations:  sources.knative.dev/creator=developer, sources.knative.dev/lastModifier=developer
Age:          15s
Schedule:     */2 * * * *
Data:         {"message": "Hello world!"}

Sink:
  Name:       event-display
  Namespace:  default
  Resource:   Service (serving.knative.dev/v1)

Conditions:
  OK TYPE                 AGE REASON
  ++ Ready                 8s
  ++ Deployed              8s
  ++ SinkProvided         15s
  ++ ValidSchedule        15s
  ++ EventTypeProvided    15s
  ++ ResourcesCorrect     15s
Verification
You can verify that the Kubernetes events were sent to the Knative event sink by looking at the logs of the sink pod.
By default, Knative services terminate their pods if no traffic is received within a 60 second period. The example shown in this guide creates a ping source that sends a message every 2 minutes, so each message should be observed in a newly created pod.
Watch for new pods created:
$ watch oc get podsCancel watching the pods using Ctrl+C, then look at the logs of the created pod:
$ oc logs $(oc get pod -o name | grep event-display) -c user-containerExample output
☁️  cloudevents.Event
Validation: valid
Context Attributes,
  specversion: 1.0
  type: dev.knative.sources.ping
  source: /apis/v1/namespaces/default/pingsources/test-ping-source
  id: 99e4f4f6-08ff-4bff-acf1-47f61ded68c9
  time: 2020-04-07T16:16:00.000601161Z
  datacontenttype: application/json
Data,
  {
    "message": "Hello world!"
  }
Deleting the ping source
Delete the ping source:
$ kn delete pingsources.sources.knative.dev <ping_source_name>
4.1.6. Creating an Apache Kafka event source by using the Knative CLI
You can use the kn source kafka create command to create a Kafka source by using the Knative (kn) CLI. Using the Knative CLI to create event sources provides a more streamlined and intuitive user interface than modifying YAML files directly.
Prerequisites
-
The OpenShift Serverless Operator, Knative Eventing, Knative Serving, and the
KnativeKafkacustom resource (CR) are installed on your cluster. - You have created a project or have access to a project with the appropriate roles and permissions to create applications and other workloads in OpenShift Container Platform.
- You have access to a Red Hat AMQ Streams (Kafka) cluster that produces the Kafka messages you want to import.
-
You have installed the Knative (
kn) CLI. -
Optional: You have installed the OpenShift CLI (
oc) if you want to use the verification steps in this procedure.
Procedure
To verify that the Kafka event source is working, create a Knative service that dumps incoming events into the service logs:
$ kn service create event-display \
    --image quay.io/openshift-knative/showcase
Create a
KafkaSourceCR:$ kn source kafka create <kafka_source_name> \ --servers <cluster_kafka_bootstrap>.kafka.svc:9092 \ --topics <topic_name> --consumergroup my-consumer-group \ --sink event-displayNoteReplace the placeholder values in this command with values for your source name, bootstrap servers, and topics.
The
--servers,--topics, and--consumergroupoptions specify the connection parameters to the Kafka cluster. The--consumergroupoption is optional.Optional: View details about the
KafkaSourceCR you created:$ kn source kafka describe <kafka_source_name>Example output
Name:              example-kafka-source
Namespace:         kafka
Age:               1h
BootstrapServers:  example-cluster-kafka-bootstrap.kafka.svc:9092
Topics:            example-topic
ConsumerGroup:     example-consumer-group

Sink:
  Name:       event-display
  Namespace:  default
  Resource:   Service (serving.knative.dev/v1)

Conditions:
  OK TYPE            AGE REASON
  ++ Ready            1h
  ++ Deployed         1h
  ++ SinkProvided     1h
Verification steps
Trigger the Kafka instance to send a message to the topic:
$ oc -n kafka run kafka-producer \
    -ti --image=quay.io/strimzi/kafka:latest-kafka-2.7.0 --rm=true \
    --restart=Never -- bin/kafka-console-producer.sh \
    --broker-list <cluster_kafka_bootstrap>:9092 --topic my-topic
Enter the message in the prompt. This command assumes that:
-
The Kafka cluster is installed in the
kafkanamespace. -
The
KafkaSourceobject has been configured to use themy-topictopic.
-
The Kafka cluster is installed in the
Verify that the message arrived by viewing the logs:
$ oc logs $(oc get pod -o name | grep event-display) -c user-containerExample output
☁️  cloudevents.Event
Validation: valid
Context Attributes,
  specversion: 1.0
  type: dev.knative.kafka.event
  source: /apis/v1/namespaces/default/kafkasources/example-kafka-source#example-topic
  subject: partition:46#0
  id: partition:46/offset:0
  time: 2021-03-10T11:21:49.4Z
Extensions,
  traceparent: 00-161ff3815727d8755848ec01c866d1cd-7ff3916c44334678-00
Data,
  Hello!