Chapter 4. Installing Knative Serving
Installing Knative Serving allows you to create Knative services and functions on your cluster. It also allows you to use additional functionality such as autoscaling and networking options for your applications.
After you install the OpenShift Serverless Operator, you can install Knative Serving by using the default settings, or configure more advanced settings in the KnativeServing custom resource (CR). For more information about configuration options for the KnativeServing CR, see Global configuration.
If you want to use Red Hat OpenShift distributed tracing with OpenShift Serverless, you must install and configure Red Hat OpenShift distributed tracing before you install Knative Serving.
4.1. Installing Knative Serving by using the web console
After you install the OpenShift Serverless Operator, install Knative Serving by using the OpenShift Container Platform web console. You can install Knative Serving by using the default settings or configure more advanced settings in the KnativeServing custom resource (CR).
Prerequisites
- You have cluster administrator permissions on OpenShift Container Platform, or you have cluster or dedicated administrator permissions on Red Hat OpenShift Service on AWS or OpenShift Dedicated.
- You have logged in to the OpenShift Container Platform web console.
- You have installed the OpenShift Serverless Operator.
Procedure
-
In the Administrator perspective of the OpenShift Container Platform web console, navigate to Operators
Installed Operators. - Check that the Project dropdown at the top of the page is set to Project: knative-serving.
- Click Knative Serving in the list of Provided APIs for the OpenShift Serverless Operator to go to the Knative Serving tab.
- Click Create Knative Serving.
In the Create Knative Serving page, you can install Knative Serving using the default settings by clicking Create.
You can also modify settings for the Knative Serving installation by editing the
KnativeServingobject using either the form provided, or by editing the YAML.-
Using the form is recommended for simpler configurations that do not require full control of
KnativeServingobject creation. Editing the YAML is recommended for more complex configurations that require full control of
KnativeServingobject creation. You can access the YAML by clicking the edit YAML link in the top right of the Create Knative Serving page.After you complete the form, or have finished modifying the YAML, click Create.
NoteFor more information about configuration options for the KnativeServing custom resource definition, see the documentation on Advanced installation configuration options.
-
Using the form is recommended for simpler configurations that do not require full control of
-
After you have installed Knative Serving, the
KnativeServingobject is created, and you are automatically directed to the Knative Serving tab. You will see theknative-servingcustom resource in the list of resources.
Verification
-
Click on
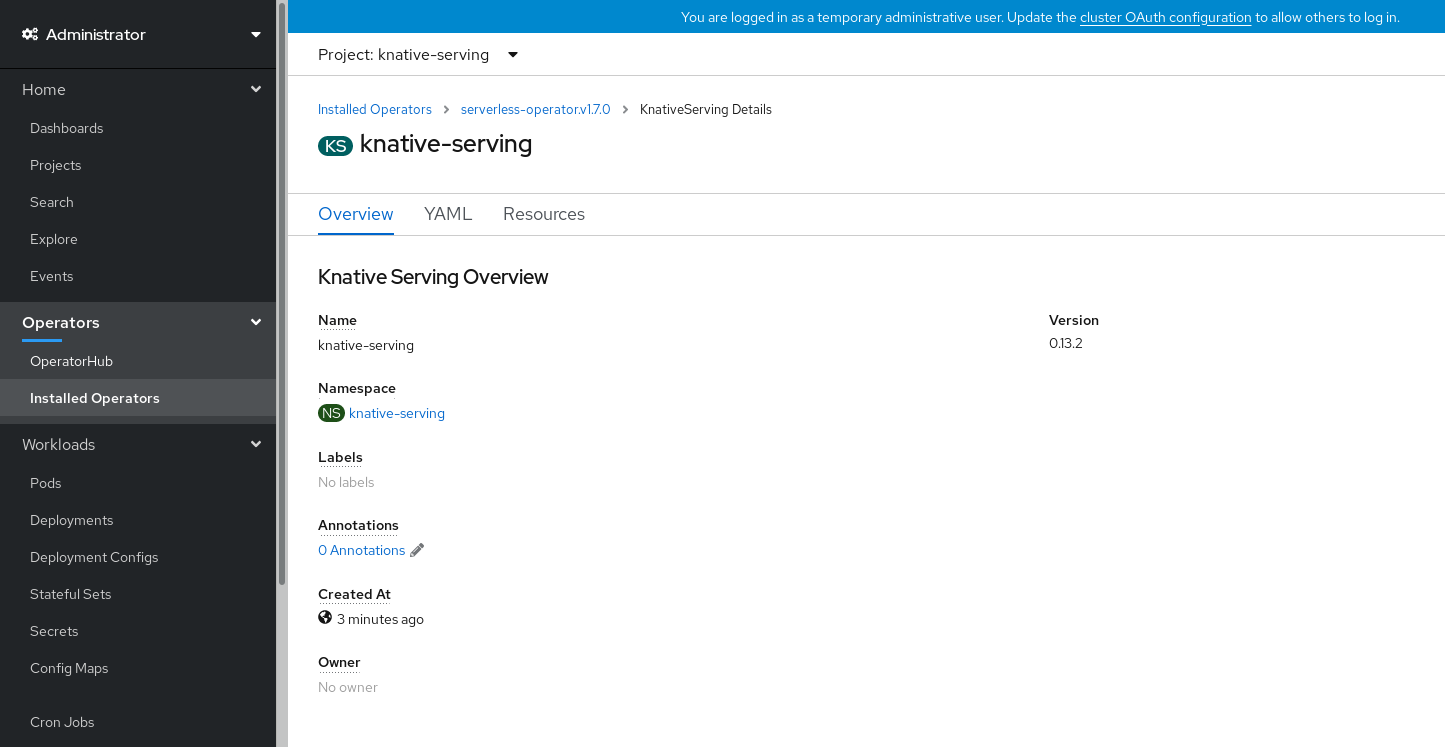
knative-servingcustom resource in the Knative Serving tab. You will be automatically directed to the Knative Serving Overview page.
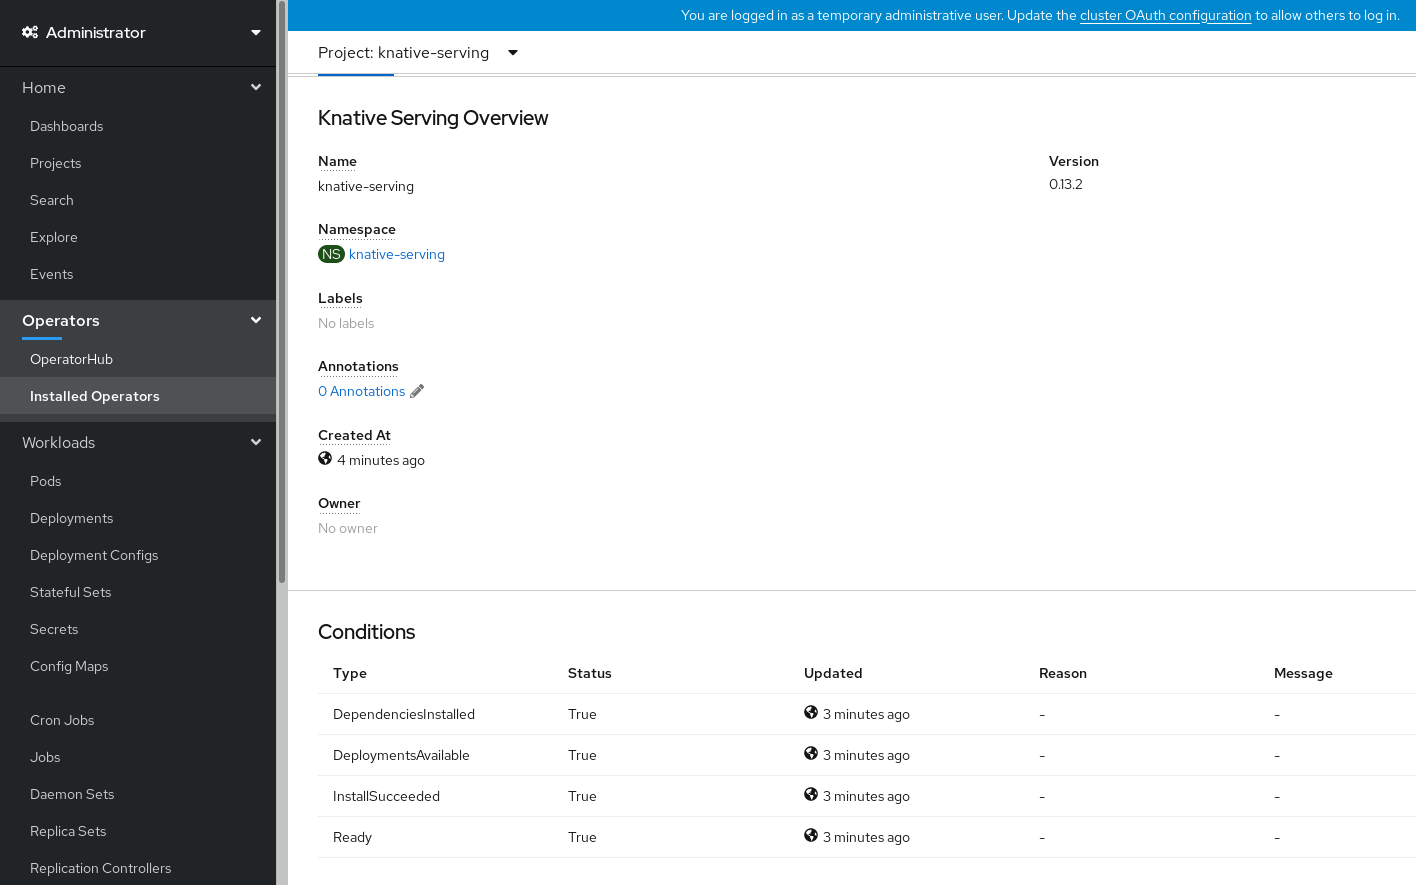
- Scroll down to look at the list of Conditions.
You should see a list of conditions with a status of True, as shown in the example image.
NoteIt may take a few seconds for the Knative Serving resources to be created. You can check their status in the Resources tab.
- If the conditions have a status of Unknown or False, wait a few moments and then check again after you have confirmed that the resources have been created.
4.2. Installing Knative Serving by using YAML
After you install the OpenShift Serverless Operator, you can install Knative Serving by using the default settings, or configure more advanced settings in the KnativeServing custom resource (CR). You can use the following procedure to install Knative Serving by using YAML files and the oc CLI.
Prerequisites
- You have cluster administrator permissions on OpenShift Container Platform, or you have cluster or dedicated administrator permissions on Red Hat OpenShift Service on AWS or OpenShift Dedicated.
- You have installed the OpenShift Serverless Operator.
-
Install the OpenShift CLI (
oc).
Procedure
Create a file named
serving.yamland copy the following example YAML into it:apiVersion: operator.knative.dev/v1beta1 kind: KnativeServing metadata: name: knative-serving namespace: knative-servingapiVersion: operator.knative.dev/v1beta1 kind: KnativeServing metadata: name: knative-serving namespace: knative-servingCopy to Clipboard Copied! Toggle word wrap Toggle overflow Apply the
serving.yamlfile:oc apply -f serving.yaml
$ oc apply -f serving.yamlCopy to Clipboard Copied! Toggle word wrap Toggle overflow
Verification
To verify the installation is complete, enter the following command:
oc get knativeserving.operator.knative.dev/knative-serving -n knative-serving --template='{{range .status.conditions}}{{printf "%s=%s\n" .type .status}}{{end}}'$ oc get knativeserving.operator.knative.dev/knative-serving -n knative-serving --template='{{range .status.conditions}}{{printf "%s=%s\n" .type .status}}{{end}}'Copy to Clipboard Copied! Toggle word wrap Toggle overflow Example output
DependenciesInstalled=True
DeploymentsAvailable=True
InstallSucceeded=True
Ready=True
DependenciesInstalled=True
DeploymentsAvailable=True
InstallSucceeded=True
Ready=True
Copy to Clipboard Copied! Toggle word wrap Toggle overflow NoteIt may take a few seconds for the Knative Serving resources to be created.
If the conditions have a status of
UnknownorFalse, wait a few moments and then check again after you have confirmed that the resources have been created.Check that the Knative Serving resources have been created:
oc get pods -n knative-serving
$ oc get pods -n knative-servingCopy to Clipboard Copied! Toggle word wrap Toggle overflow Example output
Copy to Clipboard Copied! Toggle word wrap Toggle overflow Check that the necessary networking components have been installed to the automatically created
knative-serving-ingressnamespace:oc get pods -n knative-serving-ingress
$ oc get pods -n knative-serving-ingressCopy to Clipboard Copied! Toggle word wrap Toggle overflow Example output
NAME                                      READY   STATUS    RESTARTS   AGE
net-kourier-controller-7d4b6c5d95-62mkf   1/1     Running   0          76s
net-kourier-controller-7d4b6c5d95-qmgm2   1/1     Running   0          76s
3scale-kourier-gateway-6688b49568-987qz   1/1     Running   0          75s
3scale-kourier-gateway-6688b49568-b5tnp   1/1     Running   0          75s
NAME                                      READY   STATUS    RESTARTS   AGE
net-kourier-controller-7d4b6c5d95-62mkf   1/1     Running   0          76s
net-kourier-controller-7d4b6c5d95-qmgm2   1/1     Running   0          76s
3scale-kourier-gateway-6688b49568-987qz   1/1     Running   0          75s
3scale-kourier-gateway-6688b49568-b5tnp   1/1     Running   0          75s
Copy to Clipboard Copied! Toggle word wrap Toggle overflow
4.4. Next steps
- After installing Knative Serving, you can start creating serverless applications.
- If you want to use Knative event-driven architecture, see Installing Knative Eventing.

