Install ROSA Classic clusters
Installing, accessing, and deleting Red Hat OpenShift Service on AWS (ROSA) clusters.
Abstract
Chapter 1. Creating a ROSA cluster with STS using the default options
Create a Red Hat OpenShift Service on AWS classic architecture cluster quickly by using the default options and automatic AWS Identity and Access Management (IAM) resource creation. You can deploy your cluster by using Red Hat OpenShift Cluster Manager or the ROSA command-line interface (CLI) (rosa).
If you are looking for a quickstart guide for ROSA, see Red Hat OpenShift Service on AWS classic architecture quickstart guide.
The procedures in this document use the auto modes in the ROSA CLI (rosa) and OpenShift Cluster Manager to immediately create the required IAM resources using the current AWS account. The required resources include the account-wide IAM roles and policies, cluster-specific Operator roles and policies, and OpenID Connect (OIDC) identity provider.
Alternatively, you can use manual mode, which outputs the aws commands needed to create the IAM resources instead of deploying them automatically. For steps to deploy a Red Hat OpenShift Service on AWS classic architecture cluster by using manual mode or with customizations, see Creating a cluster using customizations.
ROSA CLI 1.2.7 introduces changes to the OIDC provider endpoint URL format for new clusters. Red Hat OpenShift Service on AWS classic architecture cluster OIDC provider URLs are no longer regional. The AWS CloudFront implementation provides improved access speed and resiliency and reduces latency.
Because this change is only available to new clusters created by using ROSA CLI 1.2.7 or later, existing OIDC-provider configurations do not have any supported migration paths.
1.1. Prerequisites
- Ensure that you have completed the AWS prerequisites.
1.2. Overview of the default cluster specifications
You can quickly create a Red Hat OpenShift Service on AWS classic architecture cluster by using the default installation options.
The following summary describes the default cluster specifications.
| Component | Default specifications |
|---|---|
| Accounts and roles |
|
| Cluster settings |
|
| Control plane node configuration |
|
| Compute node machine pool |
|
| Networking configuration |
|
| Classless Inter-Domain Routing (CIDR) ranges |
|
| Cluster roles and policies |
|
| Storage |
|
| Cluster update strategy |
|
1.3. Understanding AWS account association
Before you can use Red Hat OpenShift Cluster Manager on the Red Hat Hybrid Cloud Console to create Red Hat OpenShift Service on AWS classic architecture (ROSA) clusters that use the AWS Security Token Service (STS), you must associate your AWS account with your Red Hat organization. You can associate your account by creating and linking the following IAM roles.
- OpenShift Cluster Manager role
Create an OpenShift Cluster Manager IAM role and link it to your Red Hat organization.
You can apply basic or administrative permissions to the OpenShift Cluster Manager role. The basic permissions enable cluster maintenance using OpenShift Cluster Manager. The administrative permissions enable automatic deployment of the cluster-specific Operator roles and the OpenID Connect (OIDC) provider using OpenShift Cluster Manager.
You can use the administrative permissions with the OpenShift Cluster Manager role to deploy a cluster quickly.
- User role
Create a user IAM role and link it to your Red Hat user account. The Red Hat user account must exist in the Red Hat organization that is linked to your OpenShift Cluster Manager role.
The user role is used by Red Hat to verify your AWS identity when you use the OpenShift Cluster Manager Hybrid Cloud Console to install a cluster and the required STS resources.
1.4. Amazon VPC Requirements for non-PrivateLink ROSA clusters
To create an Amazon VPC, you must have the following:
- An internet gateway,
- An NAT gateway,
- Private and public subnets that have internet connectivity provided to install required components.
You must have at least one single private and public subnet for Single-AZ clusters, and you need at least three private and public subnets for Multi-AZ clusters.
1.4.1. Troubleshooting VPC configuration for ROSA clusters
If your cluster fails to install, check common VPC configuration issues.
Consider the following troubleshooting items:
- Make sure your DHCP option set includes a domain name, and ensure that the domain name does not include any spaces or capital letters.
-
If your VPC uses a custom DNS resolver (the
domain name serversfield of your DHCP option set is notAmazonProvideDNS), make sure it is able to properly resolve the private hosted zones configured in Route53.
For more information about troubleshooting Red Hat OpenShift Service on AWS classic architecture cluster installations, see Troubleshooting Red Hat OpenShift Service on AWS classic architecture installations.
1.4.1.1. Getting support
If you need additional support, visit the Red Hat Customer Portal to review knowledge base articles, submit a support case, and review additional product documentation and resources.
1.5. Creating a cluster quickly using OpenShift Cluster Manager
When using Red Hat OpenShift Cluster Manager to create a Red Hat OpenShift Service on AWS classic architecture cluster that uses the AWS Security Token Service (STS), you can select the default options to create the cluster quickly.
Before you can use OpenShift Cluster Manager to deploy ROSA with STS clusters, you must associate your AWS account with your Red Hat organization and create the required account-wide STS roles and policies.
1.5.1. Associating your AWS account with your Red Hat organization
Before using Red Hat OpenShift Cluster Manager on the Red Hat Hybrid Cloud Console to create ROSA (classic) clusters that use the AWS Security Token Service (STS), create an OpenShift Cluster Manager IAM role and link it to your Red Hat organization. Then, create a user IAM role and link it to your Red Hat user account in the same Red Hat organization.
Prerequisites
- You have completed the AWS prerequisites for ROSA with STS.
- You have available AWS service quotas.
- You have enabled the ROSA service in the AWS Console.
You have installed and configured the latest ROSA CLI (
rosa) on your installation host.NoteTo successfully install ROSA clusters, use the latest version of the ROSA CLI.
- You have logged in to your Red Hat account by using the ROSA CLI.
- You have organization administrator privileges in your Red Hat organization.
Procedure
Create an OpenShift Cluster Manager role and link it to your Red Hat organization:
NoteTo enable automatic deployment of the cluster-specific Operator roles and the OpenID Connect (OIDC) provider using the OpenShift Cluster Manager Hybrid Cloud Console, you must apply the administrative privileges to the role by choosing the Admin OCM role command in the Accounts and roles step of creating a ROSA cluster. For more information about the basic and administrative privileges for the OpenShift Cluster Manager role, see Understanding AWS account association.
NoteIf you choose the Basic OCM role command in the Accounts and roles step of creating a ROSA cluster in the OpenShift Cluster Manager Hybrid Cloud Console, you must deploy a ROSA cluster using manual mode. You will be prompted to configure the cluster-specific Operator roles and the OpenID Connect (OIDC) provider in a later step.
$ rosa create ocm-roleSelect the default values at the prompts to quickly create and link the role.
Create a user role and link it to your Red Hat user account:
$ rosa create user-roleSelect the default values at the prompts to quickly create and link the role.
NoteThe Red Hat user account must exist in the Red Hat organization that is linked to your OpenShift Cluster Manager role.
1.5.2. Creating the account-wide STS roles and policies
Before using the Red Hat Hybrid Cloud Console to create Red Hat OpenShift Service on AWS classic architecture clusters that use the AWS Security Token Service (STS), create the required account-wide STS roles and policies, including the Operator policies.
Prerequisites
- You have completed the AWS prerequisites for ROSA with STS.
- You have available AWS service quotas.
- You have enabled the ROSA service in the AWS Console.
-
You have installed and configured the latest ROSA CLI on your installation host. Run
rosa versionto see your currently installed version of the ROSA CLI. If a newer version is available, the CLI provides a link to download this upgrade. - You have logged in to your Red Hat account by using the ROSA CLI.
Procedure
Check your AWS account for existing roles and policies:
$ rosa list account-rolesIf they do not exist in your AWS account, create the required account-wide AWS IAM STS roles and policies:
$ rosa create account-rolesSelect the default values at the prompts to quickly create the roles and policies.
1.5.3. Creating an OpenID Connect configuration
Red Hat OpenShift Service on AWS classic architecture clusters use OIDC and the AWS Security Token Service (STS) to authenticate Operator access to AWS resources they require to perform their functions. Each production cluster requires its own OIDC configuration. When creating a Red Hat OpenShift Service on AWS classic architecture cluster, you can create the OpenID Connect (OIDC) configuration before creating your cluster.
Prerequisites
- You have completed the AWS prerequisites for Red Hat OpenShift Service on AWS classic architecture.
-
You have installed and configured the latest ROSA command-line interface (CLI) (
rosa) on your installation host.
Procedure
To create your OIDC configuration alongside the AWS resources, run the following command:
$ rosa create oidc-config --mode=auto --yesThis command returns the following information.
For example:
? Would you like to create a Managed (Red Hat hosted) OIDC Configuration Yes
I: Setting up managed OIDC configuration
I: To create Operator Roles for this OIDC Configuration, run the following command and remember to replace <user-defined> with a prefix of your choice:
	rosa create operator-roles --prefix <user-defined> --oidc-config-id 13cdr6b
If you are going to create a Hosted Control Plane cluster please include '--hosted-cp'
I: Creating OIDC provider using 'arn:aws:iam::4540112244:user/userName'
? Create the OIDC provider? Yes
I: Created OIDC provider with ARN 'arn:aws:iam::4540112244:oidc-provider/dvbwgdztaeq9o.cloudfront.net/13cdr6b'
When creating your cluster, you must supply the OIDC config ID. The CLI output provides this value for
--mode auto, otherwise you must determine these values based onawsCLI output for--mode manual.Optional: you can save the OIDC configuration ID as a variable to use later. Run the following command to save the variable:
$ export OIDC_ID=<oidc_config_id><oidc_config_id>-
In this example output, the OIDC configuration ID is
13cdr6b.
View the value of the variable by running the following command:
$ echo $OIDC_IDFor example:
13cdr6b
Verification
You can list the possible OIDC configurations available for your clusters that are associated with your user organization. Run the following command:
$ rosa list oidc-configFor example:
ID                                MANAGED  ISSUER URL                                                             SECRET ARN
2330dbs0n8m3chkkr25gkkcd8pnj3lk2  true     https://dvbwgdztaeq9o.cloudfront.net/2330dbs0n8m3chkkr25gkkcd8pnj3lk2
233hvnrjoqu14jltk6lhbhf2tj11f8un  false    https://oidc-r7u1.s3.us-east-1.amazonaws.com                           aws:secretsmanager:us-east-1:242819244:secret:rosa-private-key-oidc-r7u1-tM3MDN
1.5.4. Creating a cluster with the default options using OpenShift Cluster Manager
When using Red Hat OpenShift Cluster Manager on the Red Hat Hybrid Cloud Console to create a Red Hat OpenShift Service on AWS classic architecture cluster that uses the AWS Security Token Service (STS), you can select the default options to create the cluster quickly. You can also use the admin OpenShift Cluster Manager IAM role to enable automatic deployment of the cluster-specific Operator roles and the OpenID Connect (OIDC) provider.
Prerequisites
- You have completed the AWS prerequisites for ROSA with STS.
- You have available AWS service quotas.
- You have enabled the ROSA service in the AWS Console.
-
You have installed and configured the latest ROSA CLI (
rosa) on your installation host. Runrosa versionto see your currently installed version of the ROSA CLI. If a newer version is available, the CLI provides a link to download this upgrade. - You have verified that the AWS Elastic Load Balancing (ELB) service role exists in your AWS account.
- You have associated your AWS account with your Red Hat organization. When you associated your account, you applied the administrative permissions to the OpenShift Cluster Manager role. For detailed steps, see Associating your AWS account with your Red Hat organization.
- You have created the required account-wide STS roles and policies. For detailed steps, see Creating the account-wide STS roles and policies.
Procedure
- Navigate to OpenShift Cluster Manager and select Create cluster.
- On the Create an OpenShift cluster page, select Create cluster in the Red Hat OpenShift Service on AWS classic architecture (ROSA) row.
Verify that your AWS account ID is listed in the Associated AWS accounts drop-down menu and that the installer, support, worker, and control plane account role Amazon Resource Names (ARNs) are listed on the Accounts and roles page.
NoteIf your AWS account ID is not listed, check that you have successfully associated your AWS account with your Red Hat organization. If your account role ARNs are not listed, check that the required account-wide STS roles exist in your AWS account.
- Click Next.
On the Cluster details page, provide a name for your cluster in the Cluster name field. Leave the default values in the remaining fields and click Next.
NoteCluster creation generates a domain prefix as a subdomain for your provisioned cluster on
openshiftapps.com. If the cluster name is less than or equal to 15 characters, that name is used for the domain prefix. If the cluster name is longer than 15 characters, the domain prefix is randomly generated as a 15-character string. To customize the subdomain, select the Create custom domain prefix checkbox, and enter your domain prefix name in the Domain prefix field.- To deploy a cluster quickly, leave the default options in the Cluster settings, Networking, Cluster roles and policies, and Cluster updates pages and click Next on each page.
- On the Review your ROSA cluster page, review the summary of your selections and click Create cluster to start the installation.
Optional: On the Overview tab, you can enable the delete protection feature by selecting Enable, which is located directly under Delete Protection: Disabled. This will prevent your cluster from being deleted. To disable delete protection, select Disable. By default, clusters are created with the delete protection feature disabled.
Verification
You can check the progress of the installation in the Overview page for your cluster. You can view the installation logs on the same page. Your cluster is ready when the Status in the Details section of the page is listed as Ready.
NoteIf the installation fails or the cluster State does not change to Ready after about 40 minutes, check the installation troubleshooting documentation for details. For more information, see Troubleshooting installations. For steps to contact Red Hat Support for assistance, see Getting support for Red Hat OpenShift Service on AWS.
1.6. Creating a cluster quickly using the CLI
When using the ROSA command-line interface (CLI) (rosa), to create a cluster that uses the AWS Security Token Service (STS), you can select the default options to create the cluster quickly.
Prerequisites
- You have completed the AWS prerequisites for ROSA with STS.
- You have available AWS service quotas.
- You have enabled the ROSA service in the AWS Console.
-
You have installed and configured the latest ROSA CLI on your installation host. Run
rosa versionto see your currently installed version of the ROSA CLI. If a newer version is available, the CLI provides a link to download this upgrade. - You have logged in to your Red Hat account by using the ROSA CLI.
- You have verified that the AWS Elastic Load Balancing (ELB) service role exists in your AWS account.
Procedure
Create the required account-wide roles and policies, including the Operator policies:
$ rosa create account-roles --mode autoNoteWhen using
automode, you can optionally specify the-yargument to bypass the interactive prompts and automatically confirm operations.Create a cluster with STS using the defaults. When you use the defaults, the latest stable OpenShift version is installed:
$ rosa create cluster --cluster-name <cluster_name> \ --sts --mode auto-
Replace
<cluster_name>with the name of your cluster. -
When you specify
--mode auto, therosa create clustercommand creates the cluster-specific Operator IAM roles and the OIDC provider automatically. The Operators use the OIDC provider to authenticate.
NoteIf your cluster name is longer than 15 characters, it will contain an autogenerated domain prefix as a sub-domain for your provisioned cluster on
*.openshiftapps.com.To customize the subdomain, use the
--domain-prefixflag. The domain prefix cannot be longer than 15 characters, must be unique, and cannot be changed after cluster creation.-
Replace
Check the status of your cluster:
$ rosa describe cluster --cluster <cluster_name|cluster_id>The following
Statefield changes are listed in the output as the cluster installation progresses:-
waiting (Waiting for OIDC configuration) -
pending (Preparing account) -
installing (DNS setup in progress) -
installing readyNoteIf the installation fails or the
Statefield does not change toreadyafter about 40 minutes, check the installation troubleshooting documentation for details. For more information, see Troubleshooting installations. For steps to contact Red Hat Support for assistance, see Getting support for Red Hat OpenShift Service on AWS.
-
Track the progress of the cluster creation by watching the OpenShift installer logs:
$ rosa logs install --cluster <cluster_name|cluster_id> --watchSpecify the
--watchflag to watch for new log messages as the installation progresses. This argument is optional.
Chapter 2. Creating a ROSA cluster with STS using customizations
Create a Red Hat OpenShift Service on AWS classic architecture cluster with the AWS Security Token Service (STS) using customizations. You can deploy your cluster by using Red Hat OpenShift Cluster Manager or the ROSA command-line interface (CLI) (rosa).
With the procedures in this document, you can also choose between the auto and manual modes when creating the required AWS Identity and Access Management (IAM) resources.
2.1. Understanding the auto and manual deployment modes
When installing a Red Hat OpenShift Service on AWS classic architecture cluster that uses the AWS Security Token Service (STS), you can choose between the auto and manual modes to create the required AWS Identity and Access Management (IAM) resources.
automode-
With this mode, the ROSA CLI (
rosa) immediately creates the required IAM roles and policies, and an OpenID Connect (OIDC) provider in your AWS account. manualmode-
With this mode,
rosaoutputs theawscommands needed to create the IAM resources. The corresponding policy JSON files are also saved to the current directory. By usingmanualmode, you can review the generatedawscommands before running them manually.manualmode also enables you to pass the commands to another administrator or group in your organization so that they can create the resources.
If you opt to use manual mode, the cluster installation waits until you create the cluster-specific Operator roles and OIDC provider manually. After you create the resources, the installation proceeds. For more information, see Creating the Operator roles and OIDC provider using OpenShift Cluster Manager.
For more information about the AWS IAM resources required to install ROSA with STS, see About IAM resources for clusters that use STS.
2.1.1. Creating the Operator roles and OIDC provider using OpenShift Cluster Manager
If you use Red Hat OpenShift Cluster Manager to install your cluster and opt to create the required AWS IAM Operator roles and the OIDC provider using manual mode, you are prompted to select one of the following methods to install the resources. The options are provided to enable you to choose a resource creation method that suits the needs of your organization:
- AWS CLI (
aws) -
With this method, you can download and extract an archive file that contains the
awscommands and policy files required to create the IAM resources. Run the provided CLI commands from the directory that contains the policy files to create the Operator roles and the OIDC provider. - The Red Hat OpenShift Service on AWS classic architecture (ROSA) CLI,
rosa -
You can run the commands provided by this method to create the Operator roles and the OIDC provider for your cluster using
rosa.
If you use auto mode, OpenShift Cluster Manager creates the Operator roles and the OIDC provider automatically, using the permissions provided through the OpenShift Cluster Manager IAM role. To use this feature, you must apply admin privileges to the role.
2.2. Understanding AWS account association
Before you can use Red Hat OpenShift Cluster Manager on the Red Hat Hybrid Cloud Console to create Red Hat OpenShift Service on AWS classic architecture (ROSA) clusters that use the AWS Security Token Service (STS), you must associate your AWS account with your Red Hat organization. You can associate your account by creating and linking the following IAM roles.
- OpenShift Cluster Manager role
Create an OpenShift Cluster Manager IAM role and link it to your Red Hat organization.
You can apply basic or administrative permissions to the OpenShift Cluster Manager role. The basic permissions enable cluster maintenance using OpenShift Cluster Manager. The administrative permissions enable automatic deployment of the cluster-specific Operator roles and the OpenID Connect (OIDC) provider using OpenShift Cluster Manager.
You can use the administrative permissions with the OpenShift Cluster Manager role to deploy a cluster quickly.
- User role
Create a user IAM role and link it to your Red Hat user account. The Red Hat user account must exist in the Red Hat organization that is linked to your OpenShift Cluster Manager role.
The user role is used by Red Hat to verify your AWS identity when you use the OpenShift Cluster Manager Hybrid Cloud Console to install a cluster and the required STS resources.
2.3. ARN path customization for IAM roles and policies
When you create the AWS IAM roles and policies required for Red Hat OpenShift Service on AWS classic architecture clusters that use the AWS Security Token Service (STS), you can specify custom Amazon Resource Name (ARN) paths. This enables you to use role and policy ARN paths that meet the security requirements of your organization.
You can specify custom ARN paths when you create your OCM role, user role, and account-wide roles and policies.
If you define a custom ARN path when you create a set of account-wide roles and policies, the same path is applied to all of the roles and policies in the set. The following example shows the ARNs for a set of account-wide roles and policies. In the example, the ARNs use the custom path /test/path/dev/ and the custom role prefix test-env:
-
arn:aws:iam::<account_id>:role/test/path/dev/test-env-Worker-Role -
arn:aws:iam::<account_id>:role/test/path/dev/test-env-Support-Role -
arn:aws:iam::<account_id>:role/test/path/dev/test-env-Installer-Role -
arn:aws:iam::<account_id>:role/test/path/dev/test-env-ControlPlane-Role -
arn:aws:iam::<account_id>:policy/test/path/dev/test-env-Worker-Role-Policy -
arn:aws:iam::<account_id>:policy/test/path/dev/test-env-Support-Role-Policy -
arn:aws:iam::<account_id>:policy/test/path/dev/test-env-Installer-Role-Policy -
arn:aws:iam::<account_id>:policy/test/path/dev/test-env-ControlPlane-Role-Policy
When you create the cluster-specific Operator roles, the ARN path for the relevant account-wide installer role is automatically detected and applied to the Operator roles.
For more information about ARN paths, see Amazon Resource Names (ARNs) in the AWS documentation.
2.4. Support considerations for ROSA clusters with STS
The supported way of creating a Red Hat OpenShift Service on AWS classic architecture cluster that uses the AWS Security Token Service (STS) is by using the steps described in this product documentation.
You can use manual mode with the ROSA command-line interface (CLI) (rosa) to generate the AWS Identity and Access Management (IAM) policy files and aws commands that are required to install the STS resources.
The files and aws commands are generated for review purposes only and must not be modified in any way. Red Hat cannot provide support for Red Hat OpenShift Service on AWS classic architecture clusters that have been deployed by using modified versions of the policy files or aws commands.
2.5. Amazon VPC Requirements for non-PrivateLink ROSA clusters
To create an Amazon VPC, you must have the following:
- An internet gateway,
- An NAT gateway,
- Private and public subnets that have internet connectivity provided to install required components.
You must have at least one single private and public subnet for Single-AZ clusters, and you need at least three private and public subnets for Multi-AZ clusters.
2.5.1. Troubleshooting VPC configuration for ROSA clusters
If your cluster fails to install, check common VPC configuration issues.
Consider the following troubleshooting items:
- Make sure your DHCP option set includes a domain name, and ensure that the domain name does not include any spaces or capital letters.
-
If your VPC uses a custom DNS resolver (the
domain name serversfield of your DHCP option set is notAmazonProvideDNS), make sure it is able to properly resolve the private hosted zones configured in Route53.
For more information about troubleshooting Red Hat OpenShift Service on AWS classic architecture cluster installations, see Troubleshooting Red Hat OpenShift Service on AWS classic architecture installations.
2.5.1.1. Getting support
If you need additional support, visit the Red Hat Customer Portal to review knowledge base articles, submit a support case, and review additional product documentation and resources.
2.6. Creating an OpenID Connect configuration
Red Hat OpenShift Service on AWS classic architecture clusters use OIDC and the AWS Security Token Service (STS) to authenticate Operator access to AWS resources they require to perform their functions. Each production cluster requires its own OIDC configuration. When creating a Red Hat OpenShift Service on AWS classic architecture cluster, you can create the OpenID Connect (OIDC) configuration before creating your cluster.
Prerequisites
- You have completed the AWS prerequisites for Red Hat OpenShift Service on AWS classic architecture.
-
You have installed and configured the latest ROSA command-line interface (CLI) (
rosa) on your installation host.
Procedure
To create your OIDC configuration alongside the AWS resources, run the following command:
$ rosa create oidc-config --mode=auto --yesThis command returns the following information.
For example:
? Would you like to create a Managed (Red Hat hosted) OIDC Configuration Yes
I: Setting up managed OIDC configuration
I: To create Operator Roles for this OIDC Configuration, run the following command and remember to replace <user-defined> with a prefix of your choice:
	rosa create operator-roles --prefix <user-defined> --oidc-config-id 13cdr6b
If you are going to create a Hosted Control Plane cluster please include '--hosted-cp'
I: Creating OIDC provider using 'arn:aws:iam::4540112244:user/userName'
? Create the OIDC provider? Yes
I: Created OIDC provider with ARN 'arn:aws:iam::4540112244:oidc-provider/dvbwgdztaeq9o.cloudfront.net/13cdr6b'
When creating your cluster, you must supply the OIDC config ID. The CLI output provides this value for
--mode auto, otherwise you must determine these values based onawsCLI output for--mode manual.Optional: you can save the OIDC configuration ID as a variable to use later. Run the following command to save the variable:
$ export OIDC_ID=<oidc_config_id><oidc_config_id>-
In this example output, the OIDC configuration ID is
13cdr6b.
View the value of the variable by running the following command:
$ echo $OIDC_IDFor example:
13cdr6b
Verification
You can list the possible OIDC configurations available for your clusters that are associated with your user organization. Run the following command:
$ rosa list oidc-configFor example:
ID                                MANAGED  ISSUER URL                                                             SECRET ARN
2330dbs0n8m3chkkr25gkkcd8pnj3lk2  true     https://dvbwgdztaeq9o.cloudfront.net/2330dbs0n8m3chkkr25gkkcd8pnj3lk2
233hvnrjoqu14jltk6lhbhf2tj11f8un  false    https://oidc-r7u1.s3.us-east-1.amazonaws.com                           aws:secretsmanager:us-east-1:242819244:secret:rosa-private-key-oidc-r7u1-tM3MDN
2.7. Creating a cluster using customizations
Deploy a Red Hat OpenShift Service on AWS classic architecture (ROSA) with AWS Security Token Service (STS) cluster with a configuration that suits the needs of your environment. You can deploy your cluster with customizations by using Red Hat OpenShift Cluster Manager or the ROSA command-line interface (CLI) (rosa).
2.7.1. Creating a cluster with customizations by using OpenShift Cluster Manager
When you create a Red Hat OpenShift Service on AWS classic architecture cluster that uses the AWS Security Token Service (STS), you can customize your installation interactively by using Red Hat OpenShift Cluster Manager.
Only public and AWS PrivateLink clusters are supported with STS. Regular private clusters (non-PrivateLink) are not available for use with STS.
Prerequisites
- You have completed the AWS prerequisites for Red Hat OpenShift Service on AWS classic architecture with STS.
- You have available AWS service quotas.
- You have enabled the Red Hat OpenShift Service on AWS classic architecture service in the AWS Console.
-
You have installed and configured the latest ROSA command-line interface (CLI) (
rosa) on your installation host. Runrosa versionto see your currently installed version of the ROSA CLI. If a newer version is available, the CLI provides a link to download this upgrade. - You have verified that the AWS Elastic Load Balancing (ELB) service role exists in your AWS account.
- If you are configuring a cluster-wide proxy, you have verified that the proxy is accessible from the VPC that the cluster is being installed into. The proxy must also be accessible from the private subnets of the VPC.
Procedure
- Navigate to OpenShift Cluster Manager and select Create cluster.
- On the Create an OpenShift cluster page, select Create cluster in the Red Hat OpenShift Service on AWS classic architecture (ROSA) row.
If an AWS account is automatically detected, the account ID is listed in the Associated AWS accounts drop-down menu. If no AWS accounts are automatically detected, click Select an account → Associate AWS account and follow these steps:
On the Authenticate page, click the copy button next to the
rosa logincommand. The command includes your OpenShift Cluster Manager API login token.NoteYou can also load your API token on the OpenShift Cluster Manager API Token page on OpenShift Cluster Manager.
Run the copied command in the CLI to log in to your ROSA account.
$ rosa login --token=<api_login_token>Replace
<api_login_token>with the token that is provided in the copied command.The following example shows sample output:
I: Logged in as '<username>' on 'https://api.openshift.com'- On the Authenticate page in OpenShift Cluster Manager, click Next.
On the OCM role page, click the copy button next to the Basic OCM role or the Admin OCM role commands.
The basic role enables OpenShift Cluster Manager to detect the AWS IAM roles and policies required by ROSA. The admin role also enables the detection of the roles and policies. In addition, the admin role enables automatic deployment of the cluster-specific Operator roles and the OpenID Connect (OIDC) provider by using OpenShift Cluster Manager.
Run the copied command in the CLI and follow the prompts to create the OpenShift Cluster Manager IAM role. The following example creates a basic OpenShift Cluster Manager IAM role using the default options:
$ rosa create ocm-roleThe following example shows sample output:
I: Creating ocm role
? Role prefix: ManagedOpenShift
? Enable admin capabilities for the OCM role (optional): No
? Permissions boundary ARN (optional):
? Role Path (optional):
? Role creation mode: auto
I: Creating role using 'arn:aws:iam::<aws_account_id>:user/<aws_username>'
? Create the 'ManagedOpenShift-OCM-Role-<red_hat_organization_external_id>' role? Yes
I: Created role 'ManagedOpenShift-OCM-Role-<red_hat_organization_external_id>' with ARN 'arn:aws:iam::<aws_account_id>:role/ManagedOpenShift-OCM-Role-<red_hat_organization_external_id>'
I: Linking OCM role
? OCM Role ARN: arn:aws:iam::<aws_account_id>:role/ManagedOpenShift-OCM-Role-<red_hat_organization_external_id>
? Link the 'arn:aws:iam::<aws_account_id>:role/ManagedOpenShift-OCM-Role-<red_hat_organization_external_id>' role with organization '<red_hat_organization_id>'? Yes
I: Successfully linked role-arn 'arn:aws:iam::<aws_account_id>:role/ManagedOpenShift-OCM-Role-<red_hat_organization_external_id>' with organization account '<red_hat_organization_id>'
The prompts in this output include the following options:
- Role prefix
-
Specify the prefix to include in the OCM IAM role name. The default is
ManagedOpenShift. You can create only one OCM role per AWS account for your Red Hat organization. - Enable admin capabilities
-
Enable the admin OpenShift Cluster Manager IAM role, which is equivalent to specifying the
--adminargument. The admin role is required if you want to use Auto mode to automatically provision the cluster-specific Operator roles and the OIDC provider by using OpenShift Cluster Manager. - Permissions boundary ARN
- Optional. Specify a permissions boundary Amazon Resource Name (ARN) for the role. For more information, see Permissions boundaries for IAM entities in the AWS documentation.
- Role Path
-
Specify a custom ARN path for your OCM role. The path must contain alphanumeric characters only and start and end with
/, for example/test/path/dev/. For more information, see ARN path customization for IAM roles and policies. - Role creation mode
-
Select the role creation mode. You can use
automode to automatically create the OpenShift Cluster Manager IAM role and link it to your Red Hat organization account. Inmanualmode, the ROSA CLI generates theawscommands needed to create and link the role. Inmanualmode, the corresponding policy JSON files are also saved to the current directory.manualmode enables you to review the details before running theawscommands manually. - Link role prompt
- Link the OpenShift Cluster Manager IAM role to your Red Hat organization account.
If you opted not to link the OpenShift Cluster Manager IAM role to your Red Hat organization account in the preceding command, copy the
rosa linkcommand from the OpenShift Cluster Manager OCM role page and run it:$ rosa link ocm-role <arn>Replace
<arn>with the ARN of the OpenShift Cluster Manager IAM role that is included in the output of the preceding command.- Select Next on the OpenShift Cluster Manager OCM role page.
On the User role page, click the copy button for the User role command and run the command in the CLI. Red Hat uses the user role to verify your AWS identity when you install a cluster and the required resources with OpenShift Cluster Manager.
Follow the prompts to create the user role:
$ rosa create user-roleThe following example shows sample output:
I: Creating User role
? Role prefix: ManagedOpenShift
? Permissions boundary ARN (optional):
? Role Path (optional): [? for help]
? Role creation mode: auto
I: Creating ocm user role using 'arn:aws:iam::<aws_account_id>:user/<aws_username>'
? Create the 'ManagedOpenShift-User-<red_hat_username>-Role' role? Yes
I: Created role 'ManagedOpenShift-User-<red_hat_username>-Role' with ARN 'arn:aws:iam::<aws_account_id>:role/ManagedOpenShift-User-<red_hat_username>-Role'
I: Linking User role
? User Role ARN: arn:aws:iam::<aws_account_id>:role/ManagedOpenShift-User-<red_hat_username>-Role
? Link the 'arn:aws:iam::<aws_account_id>:role/ManagedOpenShift-User-<red_hat_username>-Role' role with account '<red_hat_user_account_id>'? Yes
I: Successfully linked role ARN 'arn:aws:iam::<aws_account_id>:role/ManagedOpenShift-User-<red_hat_username>-Role' with account '<red_hat_user_account_id>'
The prompts in this output include the following options:
- Role prefix
-
Specify the prefix to include in the user role name. The default is
ManagedOpenShift. - Permissions boundary ARN
- Optional. Specify a permissions boundary Amazon Resource Name (ARN) for the role. For more information, see Permissions boundaries for IAM entities in the AWS documentation.
- Role Path
-
Specify a custom ARN path for your user role. The path must contain alphanumeric characters only and start and end with
/, for example/test/path/dev/. For more information, see ARN path customization for IAM roles and policies. - Role creation mode
-
Select the role creation mode. You can use
automode to automatically create the user role and link it to your OpenShift Cluster Manager user account. Inmanualmode, the ROSA CLI generates theawscommands needed to create and link the role. Inmanualmode, the corresponding policy JSON files are also saved to the current directory.manualmode enables you to review the details before running theawscommands manually. - Link role prompt
- Link the user role to your OpenShift Cluster Manager user account.
If you opted not to link the user role to your OpenShift Cluster Manager user account in the preceding command, copy the
rosa linkcommand from the OpenShift Cluster Manager User role page and run it:$ rosa link user-role <arn>Replace
<arn>with the ARN of the user role that is included in the output of the preceding command.- On the OpenShift Cluster Manager User role page, click Ok.
- Verify that the AWS account ID is listed in the Associated AWS accounts drop-down menu on the Accounts and roles page.
If the required account roles do not exist, a notification is provided stating that Some account roles ARNs were not detected. You can create the AWS account-wide roles and policies, including the Operator policies, by clicking the copy buffer next to the
rosa create account-rolescommand and running the command in the CLI:$ rosa create account-rolesThe following example shows sample output:
I: Logged in as '<red_hat_username>' on 'https://api.openshift.com'
I: Validating AWS credentials...
I: AWS credentials are valid!
I: Validating AWS quota...
I: AWS quota ok. If cluster installation fails, validate actual AWS resource usage against https://docs.openshift.com/rosa/rosa_getting_started/rosa-required-aws-service-quotas.html
I: Verifying whether OpenShift command-line tool is available...
I: Current OpenShift Client Version: 4.0
I: Creating account roles
? Role prefix: ManagedOpenShift
? Permissions boundary ARN (optional):
? Path (optional): [? for help]
? Role creation mode: auto
I: Creating roles using 'arn:aws:iam::<aws_account_number>:user/<aws_username>'
? Create the 'ManagedOpenShift-Installer-Role' role? Yes
I: Created role 'ManagedOpenShift-Installer-Role' with ARN 'arn:aws:iam::<aws_account_number>:role/ManagedOpenShift-Installer-Role'
? Create the 'ManagedOpenShift-ControlPlane-Role' role? Yes
I: Created role 'ManagedOpenShift-ControlPlane-Role' with ARN 'arn:aws:iam::<aws_account_number>:role/ManagedOpenShift-ControlPlane-Role'
? Create the 'ManagedOpenShift-Worker-Role' role? Yes
I: Created role 'ManagedOpenShift-Worker-Role' with ARN 'arn:aws:iam::<aws_account_number>:role/ManagedOpenShift-Worker-Role'
? Create the 'ManagedOpenShift-Support-Role' role? Yes
I: Created role 'ManagedOpenShift-Support-Role' with ARN 'arn:aws:iam::<aws_account_number>:role/ManagedOpenShift-Support-Role'
I: To create a cluster with these roles, run the following command:
rosa create cluster --sts
The prompts in this output include the following options:
- Role prefix
Specify the prefix to include in the OpenShift Cluster Manager IAM role name. The default is
ManagedOpenShift.ImportantYou must specify an account-wide role prefix that is unique across your AWS account, even if you use a custom ARN path for your account roles.
- Permissions boundary ARN
- Optional. Specify a permissions boundary Amazon Resource Name (ARN) for the role. For more information, see Permissions boundaries for IAM entities in the AWS documentation.
- Path
-
Specify a custom ARN path for your account-wide roles. The path must contain alphanumeric characters only and start and end with
/, for example/test/path/dev/. For more information, see ARN path customization for IAM roles and policies. - Role creation mode
-
Select the role creation mode. You can use
automode to automatically create the account wide roles and policies. Inmanualmode, the ROSA CLI generates theawscommands needed to create the roles and policies. Inmanualmode, the corresponding policy JSON files are also saved to the current directory.manualmode enables you to review the details before running theawscommands manually. - Create role prompts
- Creates the account-wide installer, control plane, worker and support roles and corresponding IAM policies. For more information, see Account-wide IAM role and policy reference.
NoteIn this step, the ROSA CLI also automatically creates the account-wide Operator IAM policies that are used by the cluster-specific Operator policies to permit the ROSA cluster Operators to carry out core OpenShift functionality. For more information, see Account-wide IAM role and policy reference.
On the Accounts and roles page, click Refresh ARNs and verify that the installer, support, worker, and control plane account role ARNs are listed.
If you have more than one set of account roles in your AWS account for your cluster version, a drop-down list of Installer role ARNs is provided. Select the ARN for the installer role that you want to use with your cluster. The cluster uses the account-wide roles and policies that relate to the selected installer role.
Click Next.
NoteIf the Accounts and roles page was refreshed, you might need to select the checkbox again to acknowledge that you have read and completed all of the prerequisites.
On the Cluster details page, provide a name for your cluster and specify the cluster details:
- Add a Cluster name.
Optional: Cluster creation generates a domain prefix as a subdomain for your provisioned cluster on
openshiftapps.com. If the cluster name is less than or equal to 15 characters, that name is used for the domain prefix. If the cluster name is longer than 15 characters, the domain prefix is randomly generated to a 15 character string.To customize the subdomain, select the Create custom domain prefix checkbox, and enter your domain prefix name in the Domain prefix field. The domain prefix cannot be longer than 15 characters, must be unique within your organization, and cannot be changed after cluster creation.
- Select a cluster version from the Version drop-down menu.
Select a channel group from the Channel group drop-down menu.
NoteChannel group options include Stable (default option) and EUS. For more information about the Stable and EUS channel group options, see Understanding update channels and releases.
- Select a cloud provider region from the Region drop-down menu.
- Select a Single zone or Multi-zone configuration.
- Leave Enable user workload monitoring selected to monitor your own projects in isolation from Red Hat Site Reliability Engineer (SRE) platform metrics. This option is enabled by default.
Optional: Expand Advanced Encryption to make changes to encryption settings.
Accept the default setting Use default KMS Keys to use your default AWS KMS key, or select Use Custom KMS keys to use a custom KMS key.
- With Use Custom KMS keys selected, enter the AWS Key Management Service (KMS) custom key Amazon Resource Name (ARN) ARN in the Key ARN field. The key is used for encrypting all control plane, infrastructure, worker node root volumes, and persistent volumes in your cluster.
Optional: To create a customer managed KMS key, follow the procedure for Creating symmetric encryption KMS keys.
ImportantThe EBS Operator role is required in addition to the account roles to successfully create your cluster.
This role must be attached with the
ManagedOpenShift-openshift-cluster-csi-drivers-ebs-cloud-credentialspolicy, an IAM policy required by ROSA to manage back-end storage through the Container Storage Interface (CSI).For more information about the policies and permissions that the cluster Operators require, see Methods of account-wide role creation.
The following example shows an EBS Operator role:
"arn:aws:iam::<aws_account_id>:role/<cluster_name>-xxxx-openshift-cluster-csi-drivers-ebs-cloud-credent"After you create your Operator roles, you must edit the Key Policy in the Key Management Service (KMS) page of the AWS Console to add the roles.
Optional: Select Enable FIPS cryptography if you require your cluster to be FIPS validated.
NoteIf Enable FIPS cryptography is selected, Enable additional etcd encryption is enabled by default and cannot be disabled. You can select Enable additional etcd encryption without selecting Enable FIPS cryptography.
Optional: Select Enable additional etcd encryption if you require etcd key value encryption. With this option, the etcd key values are encrypted, but the keys are not. This option is in addition to the control plane storage encryption that encrypts the etcd volumes in Red Hat OpenShift Service on AWS classic architecture clusters by default.
NoteBy enabling etcd encryption for the key values in etcd, you will incur a performance overhead of approximately 20%. The overhead is a result of introducing this second layer of encryption, in addition to the default control plane storage encryption that encrypts the etcd volumes. Consider enabling etcd encryption only if you specifically require it for your use case.
- Click Next.
On the Default machine pool page, select a Compute node instance type.
NoteAfter your cluster is created, you can change the number of compute nodes in your cluster, but you cannot change the compute node instance type in the default machine pool. The number and types of nodes available to you depend on whether you use single or multiple availability zones. They also depend on what is enabled and available in your AWS account and the selected region.
Optional: Configure autoscaling for the default machine pool:
- Select Enable autoscaling to automatically scale the number of machines in your default machine pool to meet the deployment needs.
Set the minimum and maximum node count limits for autoscaling. The cluster autoscaler does not reduce or increase the default machine pool node count beyond the limits that you specify.
- If you deployed your cluster using a single availability zone, set the Minimum node count and Maximum node count. This defines the minimum and maximum compute node limits in the availability zone.
- If you deployed your cluster using multiple availability zones, set the Minimum nodes per zone and Maximum nodes per zone. This defines the minimum and maximum compute node limits per zone.
NoteAlternatively, you can set your autoscaling preferences for the default machine pool after the machine pool is created.
If you did not enable autoscaling, select a compute node count for your default machine pool:
- If you deployed your cluster using a single availability zone, select a Compute node count from the drop-down menu. This defines the number of compute nodes to provision to the machine pool for the zone.
- If you deployed your cluster using multiple availability zones, select a Compute node count (per zone) from the drop-down menu. This defines the number of compute nodes to provision to the machine pool per zone.
Optional: Select an EC2 Instance Metadata Service (IMDS) configuration -
optional(default) orrequired- to enforce use of IMDSv2. For more information regarding IMDS, see Instance metadata and user data in the AWS documentation.ImportantThe Instance Metadata Service settings cannot be changed after your cluster is created.
- Optional: Expand Edit node labels to add labels to your nodes. Click Add label to add more node labels and select Next.
In the Cluster privacy section of the Network configuration page, select Public or Private to use either public or private API endpoints and application routes for your cluster.
ImportantThe API endpoint cannot be changed between public and private after your cluster is created.
- Public API endpoint
- Select Public if you do not want to restrict access to your cluster. You can access the Kubernetes API endpoint and application routes from the internet.
- Private API endpoint
Select Private if you want to restrict network access to your cluster. The Kubernetes API endpoint and application routes are accessible from direct private connections only.
ImportantIf you are using private API endpoints, you cannot access your cluster until you update the network settings in your cloud provider account.
Optional: If you opted to use public API endpoints, by default a new VPC is created for your cluster. If you want to install your cluster in an existing VPC instead, select Install into an existing VPC.
WarningYou cannot install a ROSA cluster into an existing VPC that was created by the OpenShift installer. These VPCs are created during the cluster deployment process and must only be associated with a single cluster to ensure that cluster provisioning and deletion operations work correctly.
To verify whether a VPC was created by the OpenShift installer, check for the
ownedvalue on thekubernetes.io/cluster/<infra-id>tag. For example, when viewing the tags for the VPC namedmycluster-12abc-34def, thekubernetes.io/cluster/mycluster-12abc-34deftag has a value ofowned. Therefore, the VPC was created by the installer and must not be modified by the administrator.NoteIf you opted to use private API endpoints, you must use an existing VPC and PrivateLink and the Install into an existing VPC and Use a PrivateLink options are automatically selected. With these options, the Red Hat Site Reliability Engineering (SRE) team can connect to the cluster to assist with support by using only AWS PrivateLink endpoints.
- Optional: If you are installing your cluster into an existing VPC, select Configure a cluster-wide proxy to enable an HTTP or HTTPS proxy to deny direct access to the internet from your cluster.
- Click Next.
If you opted to install the cluster in an existing AWS VPC, provide your Virtual Private Cloud (VPC) subnet settings.
NoteYou must ensure that your VPC is configured with a public and a private subnet for each availability zone that you want the cluster installed into. If you opted to use PrivateLink, only private subnets are required.
Optional: Expand Additional security groups and select additional custom security groups to apply to nodes in the machine pools created by default. You must have already created the security groups and associated them with the VPC you selected for this cluster. You cannot add or edit security groups to the default machine pools after you create the cluster.
By default, the security groups you specify will be added for all node types. Uncheck the Apply the same security groups to all node types (control plane, infrastructure and worker) checkbox to select different security groups for each node type.
For more information, see the requirements for Security groups under Additional resources.
If you opted to configure a cluster-wide proxy, provide your proxy configuration details on the Cluster-wide proxy page:
Enter a value in at least one of the following fields:
- Specify a valid HTTP proxy URL.
- Specify a valid HTTPS proxy URL.
-
In the Additional trust bundle field, provide a PEM encoded X.509 certificate bundle. The bundle is added to the trusted certificate store for the cluster nodes. An additional trust bundle file is required if you use a TLS-inspecting proxy unless the identity certificate for the proxy is signed by an authority from the Red Hat Enterprise Linux CoreOS (RHCOS) trust bundle. This requirement applies regardless of whether the proxy is transparent or requires explicit configuration using the
http-proxyandhttps-proxyarguments.
Click Next.
For more information about configuring a proxy with Red Hat OpenShift Service on AWS classic architecture, see Configuring a cluster-wide proxy.
In the CIDR ranges dialog, configure custom classless inter-domain routing (CIDR) ranges or use the defaults that are provided and click Next.
NoteIf you are installing into a VPC, the Machine CIDR range must match the VPC subnets.
ImportantCIDR configurations cannot be changed later. Confirm your selections with your network administrator before proceeding.
Under the Cluster roles and policies page, select your preferred cluster-specific Operator IAM role and OIDC provider creation mode.
With Manual mode, you can use either the
rosaCLI commands or theawsCLI commands to generate the required Operator roles and OIDC provider for your cluster. Manual mode enables you to review the details before using your preferred option to create the IAM resources manually and complete your cluster installation.Alternatively, you can use Auto mode to automatically create the Operator roles and OIDC provider. To enable Auto mode, the OpenShift Cluster Manager IAM role must have administrator capabilities.
NoteIf you specified custom ARN paths when you created the associated account-wide roles, the custom path is automatically detected and applied to the Operator roles. The custom ARN path is applied when the Operator roles are created by using either Manual or Auto mode.
Optional: Specify a Custom operator roles prefix for your cluster-specific Operator IAM roles.
NoteBy default, the cluster-specific Operator role names are prefixed with the cluster name and random 4-digit hash. You can optionally specify a custom prefix to replace
<cluster_name>-<hash>in the role names. The prefix is applied when you create the cluster-specific Operator IAM roles. For information about the prefix, see About custom Operator IAM role prefixes.- Select Next.
On the Cluster update strategy page, configure your update preferences:
Choose a cluster update method:
- Select Individual updates if you want to schedule each update individually. This is the default option.
Select Recurring updates to update your cluster on your preferred day and start time, when updates are available.
ImportantEven when you opt for recurring updates, you must update the account-wide and cluster-specific IAM resources before you upgrade your cluster between minor releases.
NoteYou can review the end-of-life dates in the update life cycle documentation for Red Hat OpenShift Service on AWS classic architecture. For more information, see Red Hat OpenShift Service on AWS classic architecture update life cycle.
- If you opted for recurring updates, select a preferred day of the week and upgrade start time in UTC from the drop-down menus.
- Optional: You can set a grace period for Node draining during cluster upgrades. A 1 hour grace period is set by default.
Click Next.
NoteIf there are critical security concerns that significantly impact the security or stability of a cluster, Red Hat Site Reliability Engineering (SRE) might schedule automatic updates to the latest z-stream version that is not impacted. The updates are applied within 48 hours after customer notifications are provided. For a description of the critical impact security rating, see Understanding Red Hat security ratings.
- Review the summary of your selections and click Create cluster to start the cluster installation.
If you opted to use Manual mode, create the cluster-specific Operator roles and OIDC provider manually to continue the installation:
In the Action required to continue installation dialog, select either the AWS CLI or the ROSA CLI tab and manually create the resources:
If you opted to use the AWS CLI method, click Download .zip, save the file, and then extract the AWS CLI command and policy files. Then, run the provided
awscommands in the CLI.NoteYou must run the
awscommands in the directory that contains the policy files.If you opted to use the ROSA CLI method, click the copy button next to the
rosa createcommands and run them in the CLI.NoteIf you specified custom ARN paths when you created the associated account-wide roles, the custom path is automatically detected and applied to the Operator roles when you create them by using these manual methods.
- In the Action required to continue installation dialog, click x to return to the Overview page for your cluster.
- Verify that the cluster Status in the Details section of the Overview page for your cluster has changed from Waiting to Installing. There might be a short delay of approximately two minutes before the status changes.
NoteIf you opted to use Auto mode, OpenShift Cluster Manager creates the Operator roles and the OIDC provider automatically.
ImportantThe EBS Operator role is required in addition to the account roles to successfully create your cluster.
This role must be attached with the
ManagedOpenShift-openshift-cluster-csi-drivers-ebs-cloud-credentialspolicy, an IAM policy required by ROSA to manage back-end storage through the Container Storage Interface (CSI).For more information about the policies and permissions that the cluster Operators require, see Methods of account-wide role creation.
The following example shows an EBS Operator role:
"arn:aws:iam::<aws_account_id>:role/<cluster_name>-xxxx-openshift-cluster-csi-drivers-ebs-cloud-credent"After you create your Operator roles, you must edit the Key Policy in the Key Management Service (KMS) page of the AWS Console to add the roles.
Verification
You can monitor the progress of the installation in the Overview page for your cluster. You can view the installation logs on the same page. Your cluster is ready when the Status in the Details section of the page is listed as Ready.
NoteIf the installation fails or the cluster State does not change to Ready after about 40 minutes, check the installation troubleshooting documentation for details. For more information, see Troubleshooting installations. For steps to contact Red Hat Support for assistance, see Getting support for Red Hat OpenShift Service on AWS.
2.7.2. Creating a cluster with customizations using the CLI
When you create a Red Hat OpenShift Service on AWS classic architecture (ROSA) cluster that uses the AWS Security Token Service (STS), you can customize your installation interactively.
When you run the rosa create cluster --interactive command at cluster creation time, you are presented with a series of interactive prompts that enable you to customize your deployment. For more information, see Interactive cluster creation mode reference.
After a cluster installation using the interactive mode completes, a single command is provided in the output that enables you to deploy further clusters using the same custom configuration.
Only public and AWS PrivateLink clusters are supported with STS. Regular private clusters (non-PrivateLink) are not available for use with STS.
Prerequisites
- You have completed the AWS prerequisites for ROSA with STS.
- You have available AWS service quotas.
- You have enabled the ROSA service in the AWS Console.
-
You have installed and configured the latest ROSA CLI,
rosa, on your installation host. Runrosa versionto see your currently installed version of the ROSA CLI. If a newer version is available, the CLI provides a link to download this upgrade. If you want to use a customer managed AWS Key Management Service (KMS) key for encryption, you must create a symmetric KMS key. You must provide the Amazon Resource Name (ARN) when creating your cluster. To create a customer managed KMS key, follow the procedure for Creating symmetric encryption KMS keys.
ImportantThe EBS Operator role is required in addition to the account roles to successfully create your cluster.
This role must be attached with the
ManagedOpenShift-openshift-cluster-csi-drivers-ebs-cloud-credentialspolicy, an IAM policy required by ROSA to manage back-end storage through the Container Storage Interface (CSI).For more information about the policies and permissions that the cluster Operators require, see Methods of account-wide role creation.
For example:
"arn:aws:iam::<aws_account_id>:role/<cluster_name>-xxxx-openshift-cluster-csi-drivers-ebs-cloud-credent"After you create your Operator roles, you must edit the Key Policy in the Key Management Service (KMS) page of the AWS Console to add the roles.
Procedure
Create the required account-wide roles and policies, including the Operator policies:
Generate the IAM policy JSON files in the current working directory and output the
awsCLI commands for review:$ rosa create account-roles --interactive \ --mode manual-
The
--interactiveoption enables you to specify configuration options at the interactive prompts. For more information, see Interactive cluster creation mode reference. -
The
--mode manualoption generates theawsCLI commands and JSON files needed to create the account-wide roles and policies. After review, you must run the commands manually to create the resources.
The following example shows sample output:
I: Logged in as '<red_hat_username>' on 'https://api.openshift.com'
I: Validating AWS credentials...
I: AWS credentials are valid!
I: Validating AWS quota...
I: AWS quota ok. If cluster installation fails, validate actual AWS resource usage against https://docs.openshift.com/rosa/rosa_getting_started/rosa-required-aws-service-quotas.html
I: Verifying whether OpenShift command-line tool is available...
I: Current OpenShift Client Version: 4.0
I: Creating account roles
? Role prefix: ManagedOpenShift
? Permissions boundary ARN (optional):
? Path (optional): [? for help]
? Role creation mode: auto
I: Creating roles using 'arn:aws:iam::<aws_account_number>:user/<aws_username>'
? Create the 'ManagedOpenShift-Installer-Role' role? Yes
I: Created role 'ManagedOpenShift-Installer-Role' with ARN 'arn:aws:iam::<aws_account_number>:role/ManagedOpenShift-Installer-Role'
? Create the 'ManagedOpenShift-ControlPlane-Role' role? Yes
I: Created role 'ManagedOpenShift-ControlPlane-Role' with ARN 'arn:aws:iam::<aws_account_number>:role/ManagedOpenShift-ControlPlane-Role'
? Create the 'ManagedOpenShift-Worker-Role' role? Yes
I: Created role 'ManagedOpenShift-Worker-Role' with ARN 'arn:aws:iam::<aws_account_number>:role/ManagedOpenShift-Worker-Role'
? Create the 'ManagedOpenShift-Support-Role' role? Yes
I: Created role 'ManagedOpenShift-Support-Role' with ARN 'arn:aws:iam::<aws_account_number>:role/ManagedOpenShift-Support-Role'
I: To create a cluster with these roles, run the following command:
rosa create cluster --sts
where:
Role prefixSpecify the prefix to include in the OpenShift Cluster Manager IAM role name. The default is
ManagedOpenShift.ImportantYou must specify an account-wide role prefix that is unique across your AWS account, even if you use a custom ARN path for your account roles.
Permissions boundary ARN (optional)- Optional: Specifies a permissions boundary Amazon Resource Name (ARN) for the role. For more information, see Permissions boundaries for IAM entities in the AWS documentation.
Path (optional)-
Specify a custom ARN path for your account-wide roles. The path must contain alphanumeric characters only and start and end with
/, for example/test/path/dev/. For more information, see ARN path customization for IAM roles and policies. Role creation mode-
Select the role creation mode. You can use
automode to automatically create the account wide roles and policies. Inmanualmode, therosaCLI generates theawscommands needed to create the roles and policies. Inmanualmode, the corresponding policy JSON files are also saved to the current directory.manualmode enables you to review the details before running theawscommands manually.
After specifying the configuration options, the account-wide installer, control plane, worker and support roles and corresponding IAM policies are created. For more information, see Account-wide IAM role and policy reference.
NoteIn this step, the ROSA CLI also automatically creates the account-wide Operator IAM policies that are used by the cluster-specific Operator policies to permit the ROSA cluster Operators to run core OpenShift functionality. For more information, see Account-wide IAM role and policy reference.
-
The
-
After review, run the
awscommands manually to create the roles and policies. Alternatively, you can run the preceding command using--mode autoto run theawscommands immediately.
Optional: If you are using your own AWS KMS key to encrypt the control plane, infrastructure, worker node root volumes, and persistent volumes (PVs), add the ARN for the account-wide installer role to your KMS key policy.
ImportantOnly persistent volumes (PVs) created from the default storage class are encrypted with this specific key.
PVs created by using any other storage class are still encrypted, but the PVs are not encrypted with this key unless the storage class is specifically configured to use this key.
Save the key policy for your KMS key to a file on your local machine. The following example saves the output to
kms-key-policy.jsonin the current working directory:$ aws kms get-key-policy --key-id <key_id_or_arn> --policy-name default --output text > kms-key-policy.jsonAdd the ARN for the account-wide installer role that you created in the preceding step to the
Statement.Principal.AWSsection in the file. In the following example, the ARN for the defaultManagedOpenShift-Installer-Rolerole is added:{ "Version": "2012-10-17", "Id": "key-rosa-policy-1", "Statement": [ { "Sid": "Enable IAM User Permissions", "Effect": "Allow", "Principal": { "AWS": "arn:aws:iam::<aws_account_id>:root" }, "Action": "kms:*", "Resource": "*" }, { "Sid": "Allow ROSA use of the key", "Effect": "Allow", "Principal": { "AWS": [ "arn:aws:iam::<aws_account_id>:role/ManagedOpenShift-Support-Role", "arn:aws:iam::<aws_account_id>:role/ManagedOpenShift-Installer-Role", "arn:aws:iam::<aws_account_id>:role/ManagedOpenShift-Worker-Role", "arn:aws:iam::<aws_account_id>:role/ManagedOpenShift-ControlPlane-Role", "arn:aws:iam::<aws_account_id>:role/<cluster_name>-xxxx-openshift-cluster-csi-drivers-ebs-cloud-credent" ] }, "Action": [ "kms:Encrypt", "kms:Decrypt", "kms:ReEncrypt*", "kms:GenerateDataKey*", "kms:DescribeKey" ], "Resource": "*" }, { "Sid": "Allow attachment of persistent resources", "Effect": "Allow", "Principal": { "AWS": [ "arn:aws:iam::<aws_account_id>:role/ManagedOpenShift-Support-Role", "arn:aws:iam::<aws_account_id>:role/ManagedOpenShift-Installer-Role", "arn:aws:iam::<aws_account_id>:role/ManagedOpenShift-Worker-Role", "arn:aws:iam::<aws_account_id>:role/ManagedOpenShift-ControlPlane-Role", "arn:aws:iam::<aws_account_id>:role/<cluster_name>-xxxx-openshift-cluster-csi-drivers-ebs-cloud-credent" ] }, "Action": [ "kms:CreateGrant", "kms:ListGrants", "kms:RevokeGrant" ], "Resource": "*", "Condition": { "Bool": { "kms:GrantIsForAWSResource": "true" } } } ] }-
In the
Sid: "Allow ROSA use of the key"andSid: "Allow attachment of persistent resources"statements, add the ARN for the account-wide role that will be used when you create the Red Hat OpenShift Service on AWS classic architecture cluster (for example,arn:aws:iam::<aws_account_id>:role/ManagedOpenShift-Installer-Role). -
In the
Sid: "Allow ROSA use of the key"andSid: "Allow attachment of persistent resources"statements, add the ARN for the operator role that will be used when you create the Red Hat OpenShift Service on AWS classic architecture cluster (for example,arn:aws:iam::<aws_account_id>:role/<cluster_name>-xxxx-openshift-cluster-csi-drivers-ebs-cloud-credent).
-
In the
Apply the changes to your KMS key policy:
$ aws kms put-key-policy --key-id <key_id_or_arn> \
    --policy file://kms-key-policy.json \
    --policy-name default
You can reference the ARN of your KMS key when you create the cluster in the next step.
Create a cluster with STS using custom installation options. You can use the
--interactivemode to interactively specify custom settings:WarningYou cannot install a ROSA cluster into an existing VPC that was created by the OpenShift installer. These VPCs are created during the cluster deployment process and must only be associated with a single cluster to ensure that cluster provisioning and deletion operations work correctly.
To verify whether a VPC was created by the OpenShift installer, check for the
ownedvalue on thekubernetes.io/cluster/<infra-id>tag. For example, when viewing the tags for the VPC namedmycluster-12abc-34def, thekubernetes.io/cluster/mycluster-12abc-34deftag has a value ofowned. Therefore, the VPC was created by the installer and must not be modified by the administrator.$ rosa create cluster --interactive --stsExample output
I: Interactive mode enabled.
Any optional fields can be left empty and a default will be selected.
? Cluster name: <cluster_name>
? Domain prefix: <domain_prefix>
? Deploy cluster with Hosted Control Plane (optional): No
? Create cluster admin user: Yes
? Create custom password for cluster admin: No
I: cluster admin user is cluster-admin
I: cluster admin password is password
? OpenShift version: <openshift_version>
? Configure the use of IMDSv2 for ec2 instances optional/required (optional):
I: Using arn:aws:iam::<aws_account_id>:role/ManagedOpenShift-Installer-Role for the Installer role
I: Using arn:aws:iam::<aws_account_id>:role/ManagedOpenShift-ControlPlane-Role for the ControlPlane role
I: Using arn:aws:iam::<aws_account_id>:role/ManagedOpenShift-Worker-Role for the Worker role
I: Using arn:aws:iam::<aws_account_id>:role/ManagedOpenShift-Support-Role for the Support role
? External ID (optional):
? Operator roles prefix: <cluster_name>-<random_string>
? Deploy cluster using pre registered OIDC Configuration ID:
? Tags (optional)
? Multiple availability zones (optional): No
? AWS region: us-east-1
? PrivateLink cluster (optional): No
? Machine CIDR: 10.0.0.0/16
? Service CIDR: 172.30.0.0/16
? Pod CIDR: 10.128.0.0/14
? Install into an existing VPC (optional): Yes
? Subnet IDs (optional):
? Select availability zones (optional): No
? Enable Customer Managed key (optional): No
? Compute nodes instance type (optional):
? Enable autoscaling (optional): No
? Compute nodes: 2
? Worker machine pool labels (optional):
? Host prefix: 23
? Additional Security Group IDs (optional):
? > [*]  sg-0e375ff0ec4a6cfa2 ('sg-1')
? > [ ]  sg-0e525ef0ec4b2ada7 ('sg-2')
? Enable FIPS support: No
? Encrypt etcd data: No
? Disable Workload monitoring (optional): No
I: Creating cluster '<cluster_name>'
I: To create this cluster again in the future, you can run:
   rosa create cluster --cluster-name <cluster_name> --role-arn arn:aws:iam::<aws_account_id>:role/ManagedOpenShift-Installer-Role --support-role-arn arn:aws:iam::<aws_account_id>:role/ManagedOpenShift-Support-Role --master-iam-role arn:aws:iam::<aws_account_id>:role/ManagedOpenShift-ControlPlane-Role --worker-iam-role arn:aws:iam::<aws_account_id>:role/ManagedOpenShift-Worker-Role --operator-roles-prefix <cluster_name>-<random_string> --region us-east-1 --version 4.21.0 --additional-compute-security-group-ids sg-0e375ff0ec4a6cfa2 --additional-infra-security-group-ids sg-0e375ff0ec4a6cfa2 --additional-control-plane-security-group-ids sg-0e375ff0ec4a6cfa2 --replicas 2 --machine-cidr 10.0.0.0/16 --service-cidr 172.30.0.0/16 --pod-cidr 10.128.0.0/14 --host-prefix 23
I: To view a list of clusters and their status, run 'rosa list clusters'
I: Cluster '<cluster_name>' has been created.
I: Once the cluster is installed you will need to add an Identity Provider before you can login into the cluster. See 'rosa create idp --help' for more information.
...
For more information about the customization options, see Interactive cluster creation mode options in Interactive cluster creation mode reference.
The output includes a custom command that you can run to create another cluster with the same configuration.
As an alternative to using the
--interactivemode, you can specify the customization options directly when you run therosa create clustercommand. Run therosa create cluster --helpcommand to view a list of available CLI options.ImportantYou must complete the following steps to create the Operator IAM roles and the OpenID Connect (OIDC) provider to move the state of the cluster to
ready.Create the cluster-specific Operator IAM roles:
Generate the Operator IAM policy JSON files in the current working directory and output the
awsCLI commands for review:$ rosa create operator-roles --mode manual --cluster <cluster_name|cluster_id>The
manualmode generates theawsCLI commands and JSON files needed to create the Operator roles. After review, you must run the commands manually to create the resources.After review, run the
awscommands manually to create the Operator IAM roles and attach the managed Operator policies to them. Alternatively, you can run the preceding command again using--mode autoto run theawscommands immediately.NoteA custom prefix is applied to the Operator role names if you specified the prefix in the preceding step.
If you specified custom ARN paths when you created the associated account-wide roles, the custom path is automatically detected and applied to the Operator roles.
ImportantThe EBS Operator role is required in addition to the account roles to successfully create your cluster.
This role must be attached with the
ManagedOpenShift-openshift-cluster-csi-drivers-ebs-cloud-credentialspolicy, an IAM policy required by ROSA to manage back-end storage through the Container Storage Interface (CSI).For more information about the policies and permissions that the cluster Operators require, see Methods of account-wide role creation.
For example:
"arn:aws:iam::<aws_account_id>:role/<cluster_name>-xxxx-openshift-cluster-csi-drivers-ebs-cloud-credent"After you create your Operator roles, you must edit the Key Policy in the Key Management Service (KMS) page of the AWS Console to add the roles.
Create the OpenID Connect (OIDC) provider that the cluster Operators use to authenticate:
$ rosa create oidc-provider --mode auto --cluster <cluster_name|cluster_id>The
automode immediately runs theawsCLI command that creates the OIDC provider.Check the status of your cluster:
$ rosa describe cluster --cluster <cluster_name|cluster_id>Example output
Name:                       <cluster_name>
ID:                         <cluster_id>
External ID:                <external_id>
OpenShift Version:          <version>
Channel Group:              stable
DNS:                        <cluster_name>.xxxx.p1.openshiftapps.com
AWS Account:                <aws_account_id>
API URL:                    https://api.<cluster_name>.xxxx.p1.openshiftapps.com:6443
Console URL:                https://console-openshift-console.apps.<cluster_name>.xxxx.p1.openshiftapps.com
Region:                     <aws_region>
Multi-AZ:                   false
Nodes:
 - Master:                  3
 - Infra:                   2
 - Compute:                 2
Network:
 - Service CIDR:            172.30.0.0/16
 - Machine CIDR:            10.0.0.0/16
 - Pod CIDR:                10.128.0.0/14
 - Host Prefix:             /23
STS Role ARN:               arn:aws:iam::<aws_account_id>:role/ManagedOpenShift-Installer-Role
Support Role ARN:           arn:aws:iam::<aws_account_id>:role/ManagedOpenShift-Support-Role
Instance IAM Roles:
 - Master:                  arn:aws:iam::<aws_account_id>:role/ManagedOpenShift-ControlPlane-Role
 - Worker:                  arn:aws:iam::<aws_account_id>:role/ManagedOpenShift-Worker-Role
Operator IAM Roles:
 - arn:aws:iam::<aws_account_id>:role/<cluster_name>-xxxx-openshift-ingress-operator-cloud-credentials
 - arn:aws:iam::<aws_account_id>:role/<cluster_name>-xxxx-openshift-cluster-csi-drivers-ebs-cloud-credent
 - arn:aws:iam::<aws_account_id>:role/<cluster_name>-xxxx-openshift-machine-api-aws-cloud-credentials
 - arn:aws:iam::<aws_account_id>:role/<cluster_name>-xxxx-openshift-cloud-credential-operator-cloud-crede
 - arn:aws:iam::<aws_account_id>:role/<cluster_name>-xxxx-openshift-image-registry-installer-cloud-creden
Ec2 Metadata Http Tokens:   optional
State:                      ready
Private:                    No
Created:                    Oct  1 2021 08:12:25 UTC
Details Page:               https://console.redhat.com/openshift/details/s/<subscription_id>
OIDC Endpoint URL:          https://oidc.op1.openshiftapps.com/<cluster_id>|<oidc_config_id>
The
OIDC Endpoint URLdepends on the BYO OIDC configuration. If you are pre-creating the OIDC configuration, the URL ends with the<oidc_config_id>value; otherwise, the URL ends with the<cluster-ID>value.The following
Statefield changes are listed in the output as the cluster installation progresses:-
waiting (Waiting for OIDC configuration) -
pending (Preparing account) -
installing (DNS setup in progress) -
installing readyNoteIf the installation fails or the
Statefield does not change toreadyafter about 40 minutes, check the installation troubleshooting documentation for details. For more information, see Troubleshooting installations. For steps to contact Red Hat Support for assistance, see Getting support for Red Hat OpenShift Service on AWS.
-
Track the progress of the cluster creation by watching the OpenShift installer logs:
$ rosa logs install --cluster <cluster_name|cluster_id> --watchSpecify the
--watchflag to watch for new log messages as the installation progresses. This argument is optional.
Chapter 3. Creating a Red Hat OpenShift Service on AWS (classic architecture) cluster with Terraform
3.1. Creating a default Red Hat OpenShift Service on AWS classic architecture cluster using Terraform
Create a Red Hat OpenShift Service on AWS classic architecture cluster quickly by using a Terraform cluster template that is configured with the default cluster options.
The cluster creation process described below uses a Terraform configuration that prepares a Red Hat OpenShift Service on AWS classic architecture AWS Security Token Service (STS) cluster with the following resources:
-
An OIDC provider with a managed
oidc-configconfiguration - Prerequisite IAM Operator roles with associated AWS Managed Policies
- IAM account roles with associated AWS Managed ROSA Policies
- All other AWS resources required to create a Red Hat OpenShift Service on AWS classic architecture with STS cluster
3.1.1. Overview of Terraform
Terraform is an infrastructure-as-code tool that provides a way to configure your resources once and replicate those resources as desired. Terraform accomplishes the creation tasks by using declarative language. You declare what you want the final state of the infrastructure resource to be, and Terraform creates these resources to your specifications.
3.1.2. Prerequisites
To use the Red Hat Cloud Services provider inside your Terraform configuration, you must meet the following prerequisites:
- You have installed the ROSA CLI tool.
- You have your offline Red Hat OpenShift Cluster Manager token.
- You have installed Terraform version 1.4.6 or newer.
You have created your AWS account-wide IAM roles.
The specific account-wide IAM roles and policies provide the STS permissions required for Red Hat OpenShift Service on AWS classic architecture support, installation, control plane, and compute functionality. This includes account-wide Operator policies. See the Additional resources for more information on the AWS account roles.
- You have an AWS account and associated credentials that allow you to create resources. The credentials are configured for the AWS provider. See the Authentication and Configuration section in AWS Terraform provider documentation.
You have, at minimum, the following permissions in your AWS IAM role policy that is operating Terraform. Check for these permissions in the AWS console.
{
  "Version": "2012-10-17",
  "Statement": [
    {
      "Sid": "VisualEditor0",
      "Effect": "Allow",
      "Action": [
        "iam:GetPolicyVersion",
        "iam:DeletePolicyVersion",
        "iam:CreatePolicyVersion",
        "iam:UpdateAssumeRolePolicy",
        "secretsmanager:DescribeSecret",
        "iam:ListRoleTags",
        "secretsmanager:PutSecretValue",
        "secretsmanager:CreateSecret",
        "iam:TagRole",
        "secretsmanager:DeleteSecret",
        "iam:UpdateOpenIDConnectProviderThumbprint",
        "iam:DeletePolicy",
        "iam:CreateRole",
        "iam:AttachRolePolicy",
        "iam:ListInstanceProfilesForRole",
        "secretsmanager:GetSecretValue",
        "iam:DetachRolePolicy",
        "iam:ListAttachedRolePolicies",
        "iam:ListPolicyTags",
        "iam:ListRolePolicies",
        "iam:DeleteOpenIDConnectProvider",
        "iam:DeleteInstanceProfile",
        "iam:GetRole",
        "iam:GetPolicy",
        "iam:ListEntitiesForPolicy",
        "iam:DeleteRole",
        "iam:TagPolicy",
        "iam:CreateOpenIDConnectProvider",
        "iam:CreatePolicy",
        "secretsmanager:GetResourcePolicy",
        "iam:ListPolicyVersions",
        "iam:UpdateRole",
        "iam:GetOpenIDConnectProvider",
        "iam:TagOpenIDConnectProvider",
        "secretsmanager:TagResource",
        "sts:AssumeRoleWithWebIdentity",
        "iam:ListRoles"
      ],
      "Resource": [
        "arn:aws:secretsmanager:*:<ACCOUNT_ID>:secret:*",
        "arn:aws:iam::<ACCOUNT_ID>:instance-profile/*",
        "arn:aws:iam::<ACCOUNT_ID>:role/*",
        "arn:aws:iam::<ACCOUNT_ID>:oidc-provider/*",
        "arn:aws:iam::<ACCOUNT_ID>:policy/*"
      ]
    },
    {
      "Sid": "VisualEditor1",
      "Effect": "Allow",
      "Action": [
        "s3:*"
        ],
      "Resource": "*"
    }
  ]
}
3.1.3. Considerations when using Terraform
In general, using Terraform to manage cloud resources should be done with the expectation that any changes should be done using the Terraform methodology. Use caution when using tools outside of Terraform, such as the AWS console or Red Hat console, to modify cloud resources created by Terraform. Using tools outside Terraform to manage cloud resources that are already managed by Terraform introduces configuration drift from your declared Terraform configuration.
For example, if you upgrade your Terraform-created cluster by using the Red Hat Hybrid Cloud Console, you need to reconcile your Terraform state before applying any forthcoming configuration changes. For more information, see Manage resources in Terraform state in the HashiCorp Developer documentation.
3.1.4. Overview of the default cluster specifications
You can quickly create a Red Hat OpenShift Service on AWS classic architecture cluster by using the default installation options.
The following summary describes the default cluster specifications.
| Component | Default specifications |
|---|---|
| Accounts and roles |
|
| Cluster settings |
|
| Control plane node configuration |
|
| Compute node machine pool |
|
| Networking configuration |
|
| Classless Inter-Domain Routing (CIDR) ranges |
|
| Cluster roles and policies |
|
| Storage |
|
| Cluster update strategy |
|
3.1.5. Creating a default Red Hat OpenShift Service on AWS classic architecture cluster using Terraform
Terraform provisions account-wide IAM roles and a Red Hat OpenShift Service on AWS classic architecture cluster with a managed OIDC configuration.
3.1.5.1. Preparing your environment for Terraform
Before you can create your Red Hat OpenShift Service on AWS classic architecture cluster by using Terraform, you need to export your offline Red Hat OpenShift Cluster Manager token.
Procedure
Optional: Because the Terraform files get created in your current directory during this procedure, you can create a new directory to store these files and navigate into it by running the following command:
$ mkdir terraform-cluster && cd terraform-cluster- Grant permissions to your account by using an offline Red Hat OpenShift Cluster Manager token.
Copy your offline token, and set the token as an environmental variable by running the following command:
$ export RHCS_TOKEN=<your_offline_token>NoteThis environmental variable resets at the end of each session, such as restarting your machine or closing the terminal.
Verification
After you export your token, verify the value by running the following command:
$ echo $RHCS_TOKEN
3.1.5.2. Creating your Terraform files locally
After you set up your offline Red Hat OpenShift Cluster Manager token, you need to create the Terraform files locally to build your cluster. You can create these files by using the following code templates.
Procedure
Create the
main.tffile by running the following command:$ cat<<-EOF>main.tf # # Copyright (c) 2023 Red Hat, Inc. # # Licensed under the Apache License, Version 2.0 (the "License"); # you may not use this file except in compliance with the License. # You may obtain a copy of the License at # # http://www.apache.org/licenses/LICENSE-2.0 # # Unless required by applicable law or agreed to in writing, software # distributed under the License is distributed on an "AS IS" BASIS, # WITHOUT WARRANTIES OR CONDITIONS OF ANY KIND, either express or implied. # See the License for the specific language governing permissions and # limitations under the License. # terraform { required_providers { aws = { source = "hashicorp/aws" version = ">= 4.21.0" } rhcs = { version = ">= 1.6.2" source = "terraform-redhat/rhcs" } } } # Export token using the RHCS_TOKEN environment variable provider "rhcs" {} provider "aws" { region = var.aws_region ignore_tags { key_prefixes = ["kubernetes.io/"] } default_tags { tags = var.default_aws_tags } } data "aws_availability_zones" "available" {} locals { # The default setting creates 3 availability zones. Set to "false" to create a single availability zones. region_azs = var.multi_az ? slice([for zone in data.aws_availability_zones.available.names : format("%s", zone)], 0, 3) : slice([for zone in data.aws_availability_zones.available.names : format("%s", zone)], 0, 1) } resource "random_string" "random_name" { length = 6 special = false upper = false } locals { path = coalesce(var.path, "/") worker_node_replicas = try(var.worker_node_replicas, var.multi_az ? 3 : 2) # If cluster_name is not null, use that, otherwise generate a random cluster name cluster_name = coalesce(var.cluster_name, "rosa-\${random_string.random_name.result}") } # The network validator requires an additional 60 seconds to validate Terraform clusters. resource "time_sleep" "wait_60_seconds" { count = var.create_vpc ? 1 : 0 depends_on = [module.vpc] create_duration = "60s" } module "rosa-classic" { source = "terraform-redhat/rosa-classic/rhcs" version = "1.5.0" cluster_name = local.cluster_name openshift_version = var.openshift_version account_role_prefix = local.cluster_name operator_role_prefix = local.cluster_name replicas = local.worker_node_replicas aws_availability_zones = local.region_azs create_oidc = true private = var.private_cluster aws_private_link = var.private_cluster aws_subnet_ids = var.create_vpc ? var.private_cluster ? module.vpc[0].private_subnets : concat(module.vpc[0].public_subnets, module.vpc[0].private_subnets) : var.aws_subnet_ids multi_az = var.multi_az create_account_roles = true create_operator_roles = true # Optional: Configure a cluster administrator user \ # # Option 1: Default cluster-admin user # Create an administrator user (cluster-admin) and automatically # generate a password by uncommenting the following parameter: # create_admin_user = true # Generated administrator credentials are displayed in terminal output. # # Option 2: Specify administrator username and password # Create an administrator user and define your own password # by uncommenting and editing the values of the following parameters: # admin_credentials_username = <username> # admin_credentials_password = <password> depends_on = [time_sleep.wait_60_seconds] } EOFNoteYou can optionally create an administrator user during cluster creation by uncommenting the appropriate parameters in the
main.tffile and editing their values.Create the
variables.tffile by running the following command:NoteCopy and edit this file before running the command to build your cluster.
$ cat<<-EOF>variables.tf
#
# Copyright (c) 2023 Red Hat, Inc.
#
# Licensed under the Apache License, Version 2.0 (the "License");
# you may not use this file except in compliance with the License.
# You may obtain a copy of the License at
#
#   http://www.apache.org/licenses/LICENSE-2.0
#
# Unless required by applicable law or agreed to in writing, software
# distributed under the License is distributed on an "AS IS" BASIS,
# WITHOUT WARRANTIES OR CONDITIONS OF ANY KIND, either express or implied.
# See the License for the specific language governing permissions and
# limitations under the License.
#
variable "openshift_version" {
  type        = string
  default     = "4.14.20"
  description = "Desired version of OpenShift for the cluster, for example '4.14.20'. If version is greater than the currently running version, an upgrade will be scheduled."
}

variable "create_vpc" {
  type        = bool
  description = "If you would like to create a new VPC, set this value to 'true'. If you do not want to create a new VPC, set this value to 'false'."
}

# ROSA Cluster info
variable "cluster_name" {
  default     = null
  type        = string
  description = "The name of the ROSA cluster to create"
}

variable "additional_tags" {
  default = {
    Terraform   = "true"
    Environment = "dev"
  }
  description = "Additional AWS resource tags"
  type        = map(string)
}

variable "path" {
  description = "(Optional) The arn path for the account/operator roles as well as their policies."
  type        = string
  default     = null
}

variable "multi_az" {
  type        = bool
  description = "Multi AZ Cluster for High Availability"
  default     = true
}

variable "worker_node_replicas" {
  default     = 3
  description = "Number of worker nodes to provision. Single zone clusters need at least 2 nodes, multizone clusters need at least 3 nodes"
  type        = number
}

variable "aws_subnet_ids" {
  type        = list(any)
  description = "A list of either the public or public + private subnet IDs to use for the cluster blocks to use for the cluster"
  default     = ["subnet-01234567890abcdef", "subnet-01234567890abcdef", "subnet-01234567890abcdef"]
}

variable "private_cluster" {
  type        = bool
  description = "If you want to create a private cluster, set this value to 'true'. If you want a publicly available cluster, set this value to 'false'."
}

#VPC Info
variable "vpc_name" {
  type        = string
  description = "VPC Name"
  default     = "tf-qs-vpc"
}

variable "vpc_cidr_block" {
  type        = string
  description = "value of the CIDR block to use for the VPC"
  default     = "10.0.0.0/16"
}

variable "private_subnet_cidrs" {
  type        = list(any)
  description = "The CIDR blocks to use for the private subnets"
  default     = ["10.0.1.0/24", "10.0.2.0/24", "10.0.3.0/24"]
}

variable "public_subnet_cidrs" {
  type        = list(any)
  description = "The CIDR blocks to use for the public subnets"
  default     = ["10.0.101.0/24", "10.0.102.0/24", "10.0.103.0/24"]
}

variable "single_nat_gateway" {
  type        = bool
  description = "Single NAT or per NAT for subnet"
  default     = false
}

#AWS Info
variable "aws_region" {
  type    = string
  default = "us-east-2"
}

variable "default_aws_tags" {
  type        = map(string)
  description = "Default tags for AWS"
  default     = {}
}
EOF
Create the
vpc.tffile by running the following command:$ cat<<-EOF>vpc.tf # # Copyright (c) 2023 Red Hat, Inc. # # Licensed under the Apache License, Version 2.0 (the "License"); # you may not use this file except in compliance with the License. # You may obtain a copy of the License at # # http://www.apache.org/licenses/LICENSE-2.0 # # Unless required by applicable law or agreed to in writing, software # distributed under the License is distributed on an "AS IS" BASIS, # WITHOUT WARRANTIES OR CONDITIONS OF ANY KIND, either express or implied. # See the License for the specific language governing permissions and # limitations under the License. # module "vpc" { source = "terraform-aws-modules/vpc/aws" version = "5.1.2" count = var.create_vpc ? 1 : 0 name = var.vpc_name cidr = var.vpc_cidr_block azs = local.region_azs private_subnets = var.private_subnet_cidrs public_subnets = var.public_subnet_cidrs enable_nat_gateway = true single_nat_gateway = var.single_nat_gateway enable_dns_hostnames = true enable_dns_support = true tags = var.additional_tags } EOFYou are ready to initiate Terraform.
3.1.5.3. Using Terraform to create your Red Hat OpenShift Service on AWS classic architecture cluster
After you create the Terraform files, you must initiate Terraform to provide all of the required dependencies. Then apply the Terraform plan.
Do not modify Terraform state files. For more information, see Considerations when using Terraform
Procedure
Set up Terraform to create your resources based on your Terraform files, run the following command:
$ terraform initOptional: Verify that the Terraform you copied is correct by running the following command:
$ terraform validateExample output
Success! The configuration is valid.Create your cluster with Terraform by running the following command:
$ terraform applyThe Terraform interface asks two questions to create your cluster, similar to the following:
var.create_vpc
  If you would like to create a new VPC, set this value to 'true'. If you do not want to create a new VPC, set this value to 'false'.

  Enter a value:

var.private_cluster
  If you want to create a private cluster, set this value to 'true'. If you want a publicly available cluster, set this value to 'false'.

  Enter a value:
Enter
yesto proceed ornoto cancel when the Terraform interface lists the resources to be created or changed and prompts for confirmation:Example output
Plan: 74 to add, 0 to change, 0 to destroy.

Do you want to perform these actions?
  Terraform will perform the actions described above.
  Only 'yes' will be accepted to approve.

  Enter a value: yes
If you enter
yes, your Terraform plan starts, creating your AWS account roles, Operator roles, and your Red Hat OpenShift Service on AWS classic architecture cluster.
Verification
Verify that your cluster was created by running the following command:
$ rosa list clustersThis example shows a cluster in the
readystate:ID NAME STATE TOPOLOGY 27c3snjsupa9obua74ba8se5kcj11269 rosa-tf-demo ready Classic (STS)Verify that your account roles were created by running the following command:
$ rosa list account-rolesThis example shows the account roles that were created:
I: Fetching account roles
ROLE NAME                                   ROLE TYPE      ROLE ARN                                                           OPENSHIFT VERSION  AWS Managed
ROSA-demo-ControlPlane-Role                 Control plane  arn:aws:iam::<ID>:role/ROSA-demo-ControlPlane-Role                 4.14               No
ROSA-demo-Installer-Role                    Installer      arn:aws:iam::<ID>:role/ROSA-demo-Installer-Role                    4.14               No
ROSA-demo-Support-Role                      Support        arn:aws:iam::<ID>:role/ROSA-demo-Support-Role                      4.14               No
ROSA-demo-Worker-Role                       Worker         arn:aws:iam::<ID>:role/ROSA-demo-Worker-Role                       4.14               No
Verify that your Operator roles were created by running the following command:
$ rosa list operator-rolesThis example shows the Terraform-created Operator roles:
I: Fetching operator roles
ROLE PREFIX    AMOUNT IN BUNDLE
rosa-demo      6
3.1.5.4. Deleting your Red Hat OpenShift Service on AWS classic architecture cluster with Terraform
Use the terraform destroy command to remove all resources you create with the terraform apply command.
Keep your Terraform .tf files unchanged before destroying your resources. These variables are matched to resources to delete.
Procedure
In the directory where you ran the
terraform applycommand to create your cluster, run the following command to delete the cluster:$ terraform destroyThe Terraform interface prompts you for two variables. These should match the answers you provided when creating a cluster:
var.create_vpc
  If you would like to create a new VPC, set this value to 'true.' If you do not want to create a new VPC, set this value to 'false.'

  Enter a value:

var.private_cluster
  If you want to create a private cluster, set this value to 'true.' If you want a publicly available cluster, set this value to 'false.'

  Enter a value:
Enter
yesto start the role and cluster deletion:Example output
Plan: 0 to add, 0 to change, 74 to destroy.

Do you really want to destroy all resources?
  Terraform will destroy all your managed infrastructure, as shown above.
  There is no undo. Only 'yes' will be accepted to confirm.

  Enter a value: yes
Verification
Verify that your cluster was destroyed by running the following command:
$ rosa list clustersExample output showing no cluster
I: No clusters availableVerify that the account roles were destroyed by running the following command:
$ rosa list account-rolesExample output showing no Terraform-created account roles
I: Fetching account roles
I: No account roles available
Verify that the Operator roles were destroyed by running the following command:
$ rosa list operator-rolesExample output showing no Terraform-created Operator roles
I: Fetching operator roles
I: No operator roles available
Chapter 4. Interactive cluster creation mode reference
This section provides an overview of the options that are presented when you use the interactive mode to create the OCM role, the user role, and Red Hat OpenShift Service on AWS classic architecture clusters by using the ROSA command-line interface (CLI) (rosa).
4.1. Interactive OCM and user role creation mode options
Before you can use Red Hat OpenShift Cluster Manager to create Red Hat OpenShift Service on AWS classic architecture clusters that use the AWS Security Token Service (STS), you must associate your AWS account with your Red Hat organization by creating and linking the OCM and user roles. You can enable interactive mode by specifying the --interactive option when you run the rosa create ocm-role command or the rosa create user-role command.
The following tables describe the interactive OCM role creation mode options:
| Field | Description |
|---|---|
|
|
Specify the prefix to include in the OCM IAM role name. The default is |
|
|
Enable the admin OCM IAM role, which is equivalent to specifying the |
|
| Specify a permissions boundary Amazon Resource Name (ARN) for the OCM role. For more information, see Permissions boundaries for IAM entities in the AWS documentation. |
|
|
Specify a custom ARN path for your OCM role. The path must contain alphanumeric characters only and start and end with |
|
|
Select the role creation mode. You can use |
|
| Confirm if you want to create the OCM role. |
|
| Confirm if you want to link the OCM role with your Red Hat organization. |
The following tables describe the interactive user role creation mode options:
| Field | Description |
|---|---|
|
|
Specify the prefix to include in the user role name. The default is |
|
| Specify a permissions boundary Amazon Resource Name (ARN) for the user role. For more information, see Permissions boundaries for IAM entities in the AWS documentation. |
|
|
Specify a custom ARN path for your user role. The path must contain alphanumeric characters only and start and end with |
|
|
Selects the role creation mode. You can use |
|
| Confirm if you want to create the user role. |
|
| Confirm if you want to link the user role with your Red Hat user account. |
4.2. Interactive cluster creation mode options
You can create a Red Hat OpenShift Service on AWS classic architecture cluster with the AWS Security Token Service (STS) by using the interactive mode. You can enable the mode by specifying the --interactive option when you run the rosa create cluster command.
The following table describes the interactive cluster creation mode options:
| Field | Description |
|---|---|
|
|
Enter a name for your cluster, for example |
|
|
When creating your cluster, you can customize the subdomain for your cluster on |
|
| Enable the use of Hosted Control Planes. |
|
|
Create a local administrator user ( |
|
|
Create a custom password for the |
|
|
Create an OpenShift cluster that uses the AWS Security Token Service (STS) to allocate temporary, limited-privilege credentials for component-specific AWS Identity and Access Management (IAM) roles. The service enables cluster components to make AWS API calls using secure cloud resource management practices. The default is |
|
|
Select the version of OpenShift to install, for example 4. The default is the latest version. The listed |
|
|
Specify Important The Instance Metadata Service settings cannot be changed after your cluster is created. |
|
| If you have more than one set of account roles in your AWS account for your cluster version, a list of installer role ARNs are provided. Select the ARN for the installer role that you want to use with your cluster. The cluster uses the account-wide roles and policies that relate to the selected installer role. |
|
| Specify an unique identifier that is passed by OpenShift Cluster Manager and the OpenShift installer when an account role is assumed. This option is only required for custom account roles that expect an external ID. |
|
|
By default, the cluster-specific Operator role names are prefixed with the cluster name and a random 4-digit hash. You can optionally specify a custom prefix to replace Note If you specified custom ARN paths when you created the associated account-wide roles, the custom path is automatically detected. The custom path is applied to the cluster-specific Operator roles when you create them in a later step. |
|
| Specify if you want to use a preconfigured OIDC configuration or if you want to create a new OIDC configuration as part of the cluster creation process. |
|
|
Specify a tag that is used on all resources created by Red Hat OpenShift Service on AWS classic architecture in AWS. Tags can help you manage, identify, organize, search for, and filter resources within AWS. Tags are comma separated, for example: Important Red Hat OpenShift Service on AWS classic architecture only supports custom tags to Red Hat OpenShift resources during cluster creation. Once added, the tags cannot be removed or edited. Tags that are added by Red Hat are required for clusters to stay in compliance with Red Hat production service level agreements (SLAs). These tags must not be removed. Red Hat OpenShift Service on AWS classic architecture does not support adding additional tags outside of ROSA cluster-managed resources. These tags can be lost when AWS resources are managed by the ROSA cluster. In these cases, you might need custom solutions or tools to reconcile the tags and keep them intact. |
|
|
Deploy the cluster to multiple availability zones in the AWS region. The default is |
|
|
Specify the AWS region to deploy the cluster in. This overrides the |
|
|
Create a cluster using AWS PrivateLink. This option provides private connectivity between Virtual Private Clouds (VPCs), AWS services, and your on-premise networks, without exposing your traffic to the public internet. To provide support, Red Hat Site Reliability Engineering (SRE) can connect to the cluster by using AWS PrivateLink Virtual Private Cloud (VPC) endpoints. This option cannot be changed after a cluster is created. The default is |
|
|
Specify the IP address range for machines (cluster nodes), which must encompass all CIDR address ranges for your VPC subnets. Subnets must be contiguous. A minimum IP address range of 128 addresses, using the subnet prefix |
|
|
Specify the IP address range for services. It is recommended, but not required, that the address block is the same between clusters. This will not create IP address conflicts. The range must be large enough to accommodate your workload. The address block must not overlap with any external service accessed from within the cluster. The default is |
|
|
Specify the IP address range for pods. It is recommended, but not required, that the address block is the same between clusters. This will not create IP address conflicts. The range must be large enough to accommodate your workload. The address block must not overlap with any external service accessed from within the cluster. The default is |
|
|
Install a cluster into an existing AWS VPC. To use this option, your VPC must have 2 subnets for each availability zone that you are installing the cluster into. The default is Warning You cannot install a Red Hat OpenShift Service on AWS classic architecture cluster into an existing VPC that was created by the OpenShift installer. These VPCs are created during the cluster deployment process and must only be associated with a single cluster to ensure that cluster provisioning and deletion operations work correctly.
To verify whether a VPC was created by the OpenShift installer, check for the |
|
|
Specify the availability zones that are used when installing into an existing AWS VPC. Use a comma-separated list to provide the availability zones. If you specify |
|
| Enable this option if you are using your own AWS Key Management Service (KMS) key to encrypt the control plane, infrastructure, worker node root volumes, and PVs. Specify the ARN for the KMS key that you added to the account-wide role ARN in the preceding step. Important Only persistent volumes (PVs) created from the default storage class are encrypted with this specific key. PVs created by using any other storage class are still encrypted, but the PVs are not encrypted with this key unless the storage class is specifically configured to use this key. |
|
|
Select a compute node instance type. The default is |
|
|
Enable compute node autoscaling. The autoscaler adjusts the size of the cluster to meet your deployment demands. The default is |
|
| Select the additional custom security group IDs that are used with the standard machine pool created along side the cluster. The default is none selected. Only security groups associated with the selected VPC are displayed. You can select a maximum of 5 additional security groups. |
|
| Select the additional custom security group IDs that are used with the infra nodes created along side the cluster. The default is none selected. Only security groups associated with the selected VPC are displayed. You can select a maximum of 5 additional security groups. |
|
| Select the additional custom security group IDs that are used with the control plane nodes created along side the cluster. The default is none selected. Only security groups associated with the selected VPC are displayed. You can select a maximum of 5 additional security groups. |
|
|
Specify the number of compute nodes to provision into each availability zone. Clusters deployed in a single availability zone require at least 2 nodes. Clusters deployed in multiple zones must have at least 3 nodes. The maximum number of worker nodes is 249 nodes. The default value is |
|
| Specify the labels for the default machine pool. The label format should be a comma-separated list of key-value pairs. This list will overwrite any modifications made to node labels on an ongoing basis. |
|
|
Specify the subnet prefix length assigned to pods scheduled to individual machines. The host prefix determines the pod IP address pool for each machine. For example, if the host prefix is set to |
|
|
Specify the size of the machine pool root disk. This value must include a unit suffix like GiB or TiB, for example the default value of |
|
| Enable this option if you require your cluster to be FIPS validated. Selecting this option means the encrypt etcd data option is enabled by default and cannot be disabled. You can encrypt etcd data without enabling FIPS support. Important To enable FIPS mode for your cluster, you must run the installation program from a Red Hat Enterprise Linux (RHEL) computer configured to operate in FIPS mode. For more information about configuring FIPS mode on RHEL, see Switching RHEL to FIPS mode. When running Red Hat Enterprise Linux (RHEL) or Red Hat Enterprise Linux CoreOS (RHCOS) booted in FIPS mode, Red Hat OpenShift Service on AWS classic architecture core components use the RHEL cryptographic libraries that have been submitted to NIST for FIPS 140-2/140-3 Validation on only the x86_64, ppc64le, and s390x architectures. |
|
| Enable this option if your use case only requires etcd key value encryption in addition to the control plane storage encryption that encrypts the etcd volumes by default. With this option, the etcd key values are encrypted but not the keys. Important By enabling etcd encryption for the key values in etcd, you will incur a performance overhead of approximately 20%. The overhead is a result of introducing this second layer of encryption, in addition to the default control plane storage encryption that encrypts the etcd volumes. Red Hat recommends that you enable etcd encryption only if you specifically require it for your use case. |
|
| Disable monitoring for user-defined projects. Monitoring for user-defined projects is enabled by default. |
|
| Specify the route selector for your ingress. The format should be a comma-separated list of key-value pairs. If you do not specify a label, all routes will be exposed on both routers. For legacy ingress support, these labels are inclusion labels; otherwise, they are treated as exclusion labels. |
|
|
Specify the excluded namespaces for your ingress. The format should be a comma-separated list |
|
|
Choose the wildcard policy for your ingress. The options are |
|
|
Choose the namespace ownership policy for your ingress. The options are |
Chapter 5. Creating an AWS PrivateLink cluster on ROSA
This document describes how to create a ROSA cluster using AWS PrivateLink.
5.1. Understanding AWS PrivateLink
AWS PrivateLink enables private connectivity for Red Hat OpenShift Service on AWS classic architecture clusters without requiring public networking infrastructure.
A Red Hat OpenShift Service on AWS classic architecture cluster can be created without any requirements on public subnets, internet gateways, or network address translation (NAT) gateways. In this configuration, Red Hat uses AWS PrivateLink to manage and monitor a cluster to avoid all public ingress network traffic. Without a public subnet, it is not possible to configure an application router as public. Configuring private application routers is the only option.
For more information, see AWS PrivateLink on the AWS website.
You can only make a PrivateLink cluster at installation time. You cannot change a cluster to PrivateLink after installation.
5.2. Requirements for using AWS PrivateLink clusters
AWS PrivateLink clusters require specific AWS resources including VPC, private subnets, and network access controls.
For AWS PrivateLink clusters, internet gateways, NAT gateways, and public subnets are not required, but the private subnets must have internet connectivity provided to install required components. At least one single private subnet is required for Single-AZ clusters and at least 3 private subnets are required for Multi-AZ clusters. The following table shows the AWS resources that are required for a successful installation:
| Component | AWS Type | Description | ||||||||||||
|---|---|---|---|---|---|---|---|---|---|---|---|---|---|---|
| VPC |
| You must provide a VPC for the cluster to use. | ||||||||||||
| Network access control |
| You must allow access to the following ports:
| ||||||||||||
| Private subnets |
| Your VPC must have private subnets in 1 availability zone for Single-AZ deployments or 3 availability zones for Multi-AZ deployments. You must provide appropriate routes and route tables. |
5.3. Creating an AWS PrivateLink cluster
Creating a Red Hat OpenShift Service on AWS classic architecture cluster with AWS PrivateLink establishes a private connection for cluster management and operations.
AWS PrivateLink is supported on existing VPCs only.
Prerequisites
- You have available AWS service quotas.
- You have enabled the Red Hat OpenShift Service on AWS classic architecture service in the AWS Console.
- You have installed and configured the latest ROSA CLI, on your installation host.
Procedure
With AWS PrivateLink, you can create a cluster with a single availability zone (Single-AZ) or multiple availability zones (Multi-AZ). In either case, your machine’s classless inter-domain routing (CIDR) must match your virtual private cloud’s CIDR. See Requirements for using your own VPC and VPC Validation for more information.
ImportantIf you use a firewall, you must configure it so that Red Hat OpenShift Service on AWS classic architecture can access the sites that it requires to function.
For more information, see the AWS PrivateLink firewall prerequisites section.
NoteIf your cluster name is longer than 15 characters, it will contain an autogenerated domain prefix as a sub-domain for your provisioned cluster on
*.openshiftapps.com.To customize the subdomain, use the
--domain-prefixflag. The domain prefix cannot be longer than 15 characters, must be unique, and cannot be changed after cluster creation.To create a Single-AZ cluster:
$ rosa create cluster --private-link --cluster-name=<cluster-name> [--machine-cidr=<VPC CIDR>/16] --subnet-ids=<private-subnet-id>To create a Multi-AZ cluster:
$ rosa create cluster --private-link --multi-az --cluster-name=<cluster-name> [--machine-cidr=<VPC CIDR>/16] --subnet-ids=<private-subnet-id1>,<private-subnet-id2>,<private-subnet-id3>
Enter the following command to check the status of your cluster. During cluster creation, the
Statefield from the output will transition frompendingtoinstalling, and finally toready.$ rosa describe cluster --cluster=<cluster_name>NoteIf installation fails or the
Statefield does not change toreadyafter 40 minutes, check the installation troubleshooting documentation for more details.Enter the following command to follow the OpenShift installer logs to track the progress of your cluster:
$ rosa logs install --cluster=<cluster_name> --watch
5.4. Configuring AWS PrivateLink DNS forwarding
Configure DNS forwarding to enable resolution of cluster DNS records from outside the VPC.
With AWS PrivateLink clusters, a public hosted zone and a private hosted zone are created in Route 53. With the private hosted zone, records within the zone are resolvable only from within the VPC to which it is assigned.
The Let’s Encrypt DNS-01 validation requires a public zone so that valid, publicly trusted certificates can be issued for the domain. The validation records are deleted after Let’s Encrypt validation is complete; however, the zone is still required for issuing and renewing these certificates, which are typically required every 60 days. While these zones usually appear empty, it is serving a critical role in the validation process.
For more information about private hosted zones, see AWS private hosted zones documentation. For more information about public hosted zones, see AWS public hosted zones documentation.
Prerequisites
- Your corporate network or other VPC has connectivity
- UDP port 53 and TCP port 53 ARE enabled across your networks to allow for DNS queries
- You have created an AWS PrivateLink cluster using Red Hat OpenShift Service on AWS classic architecture
Procedure
-
To allow for records such as
api.<cluster_domain>and*.apps.<cluster_domain>to resolve outside of the VPC, configure a Route 53 Resolver Inbound Endpoint. - When you configure the inbound endpoint, select the VPC and private subnets that were used when you created the cluster.
-
After the endpoints are operational and associated, configure your corporate network to forward DNS queries to those IP addresses for the top-level cluster domain, such as
drow-pl-01.htno.p1.openshiftapps.com. - If you are forwarding DNS queries from one VPC to another VPC, configure forwarding rules.
- If you are configuring your remote network DNS server, see your specific DNS server documentation to configure selective DNS forwarding for the installed cluster domain.
Chapter 6. Configuring a shared VPC for ROSA clusters
You can create Red Hat OpenShift Service on AWS classic architecture clusters in shared, centrally-managed AWS virtual private clouds (VPCs).
Installing a new Red Hat OpenShift Service on AWS classic architecture cluster into a VPC that was automatically created by the installer for a different cluster is not supported.
This process requires two separate AWS accounts that belong to the same AWS organization. One account functions as the VPC-owning AWS account (VPC Owner), while the other account creates the cluster in the cluster-creating AWS account (Cluster Creator).

6.1. Prerequisites for the VPC Owner
- You have an AWS account with the proper permissions to create roles and share resources.
- The Cluster Creator’s AWS account is separate from the VPC Owner’s AWS account.
- Both AWS accounts belong to the same AWS organization.
- You enabled resource sharing from the management account for your organization.
- You have access to the AWS console.
6.2. Prerequisites for the Cluster Creator
-
You installed the ROSA CLI (
rosa) 1.2.26 or later. - You created all of the required account-wide roles and policies for creating a cluster.
- The Cluster Creator’s AWS account is separate from the VPC Owner’s AWS account.
- Both AWS accounts belong to the same AWS organization.
Installing a cluster in a shared VPC is supported only for OpenShift 4.12.34 and later, 4.13.10 and later, and all future 4.y-streams.
6.3. Step One - VPC Owner: Configuring a VPC to share within your AWS organization
You can share subnets within a configured VPC with another AWS user account if that account is within your current AWS organization.

Procedure
- Create or modify a VPC to your specifications in the VPC section of the AWS console.
Create a custom policy file to allow for necessary shared VPC permissions that uses the name
SharedVPCPolicy:$ cat <<EOF > /tmp/shared-vpc-policy.json { "Version": "2012-10-17", "Statement": [ { "Effect": "Allow", "Action": [ "route53:ChangeResourceRecordSets", "route53:ListHostedZones", "route53:ListHostedZonesByName", "route53:ListResourceRecordSets", "route53:ChangeTagsForResource", "route53:GetAccountLimit", "route53:GetChange", "route53:GetHostedZone", "route53:ListTagsForResource", "route53:UpdateHostedZoneComment", "tag:GetResources", "tag:UntagResources" ], "Resource": "*" } ] } EOFCreate the policy in AWS:
$ aws iam create-policy \
    --policy-name SharedVPCPolicy \
    --policy-document file:///tmp/shared-vpc-policy.json
You will attach this policy to a role necessary for the shared VPC permissions.
Create a custom trust policy file that grants permission to assume roles. Replace
<Account-ID>with the Cluster Creator’s AWS account ID. The principal will be scoped down after the Cluster Creator creates the necessary cluster roles. On creation, you must create a root user placeholder by using the Cluster Creator’s AWS account ID asarn:aws:iam::{Account}:root.$ cat <<EOF > /tmp/shared-vpc-role.json { "Version": "2012-10-17", "Statement": [ { "Effect": "Allow", "Principal": { "AWS": "arn:aws:iam::<Account-ID>:root" }, "Action": "sts:AssumeRole" } ] } EOFCreate the IAM role. Replace
<role_name>with the name of the role you want to create.$ aws iam create-role --role-name <role_name> \ --assume-role-policy-document file:///tmp/shared-vpc-role.jsonAttach the custom
SharedVPCPolicypermissions policy.$ aws iam attach-role-policy --role-name <role_name> --policy-arn \ arn:aws:iam::<AWS_account_ID>:policy/SharedVPCPolicywhere:
<role_name>- Replace with the name of the role you created.
<AWS_account_ID>- Replace with the VPC Owner’s AWS account ID.
-
Provide the
SharedVPCRoleARN to the Cluster Creator to continue configuration.
6.5. Step Two - Cluster Creator: Reserving your DNS and creating cluster operator roles
After the VPC Owner creates a virtual private cloud, subnets, and an IAM role for sharing the VPC resources, reserve an openshiftapps.com DNS domain and create Operator roles to communicate back to the VPC Owner.
For shared VPC clusters, you can choose to create the Operator roles after the cluster creation steps. The cluster will be in a waiting state until the Ingress Operator role ARN is added to the shared VPC role trusted relationships.

Prerequisites
-
You have the
SharedVPCRoleARN for the IAM role from the VPC Owner.
Procedure
Reserve an
openshiftapps.comDNS domain with the following command:$ rosa create dns-domainThe command creates a reserved
openshiftapps.comDNS domain.I: DNS domain '14eo.p1.openshiftapps.com' has been created. I: To view all DNS domains, run 'rosa list dns-domains'Create an OIDC configuration.
Review this article for more information on the OIDC configuration process. The following command produces the OIDC configuration ID that you need:
$ rosa create oidc-configYou receive confirmation that the command created an OIDC configuration:
I: To create Operator Roles for this OIDC Configuration, run the following command and remember to replace <user-defined> with a prefix of your choice:
	rosa create operator-roles --prefix <user-defined> --oidc-config-id 25tu67hq45rto1am3slpf5lq6jargg
Create the Operator roles by entering the following command. Provide the OIDC configuration ID from the previous step, your installer ARN that was created as part of the
rosa create account-rolesprocess, the ARN for the role that the VPC Owner created, and a prefix for the Operator roles.$ rosa create operator-roles --oidc-config-id <oidc-config-ID> \ --installer-role-arn <Installer_Role> \ --shared-vpc-role-arn <Created_VPC_Role_Arn> \ --prefix <operator-prefix>NoteThe Installer account role and the shared VPC role must have a one-to-one relationship. If you want to create multiple shared VPC roles, you should create one set of account roles per shared VPC role.
After creating the Operator roles, share the following information with the VPC Owner to proceed with the configuration:
-
The full domain name,
<intended_cluster_domain_prefix>.<reserved_dns_domain>(for example,my-rosa-cluster.14eo.p1.openshiftapps.com) -
The ARN for your Installer role (for example,
arn:aws:iam::111122223333:role/ManagedOpenShift-Installer-Role) -
The ARN for your Ingress Operator Cloud Credentials role (for example,
arn:aws:iam::111122223333:role/my-rosa-cluster-openshift-ingress-operator-cloud-credentials)
-
The full domain name,
6.6. Step Three - VPC Owner: Updating the shared VPC role and creating hosted zones
After the Cluster Creator provides the DNS domain and the IAM roles, create a private hosted zone and update the trust policy on the IAM role that was created for sharing the VPC.
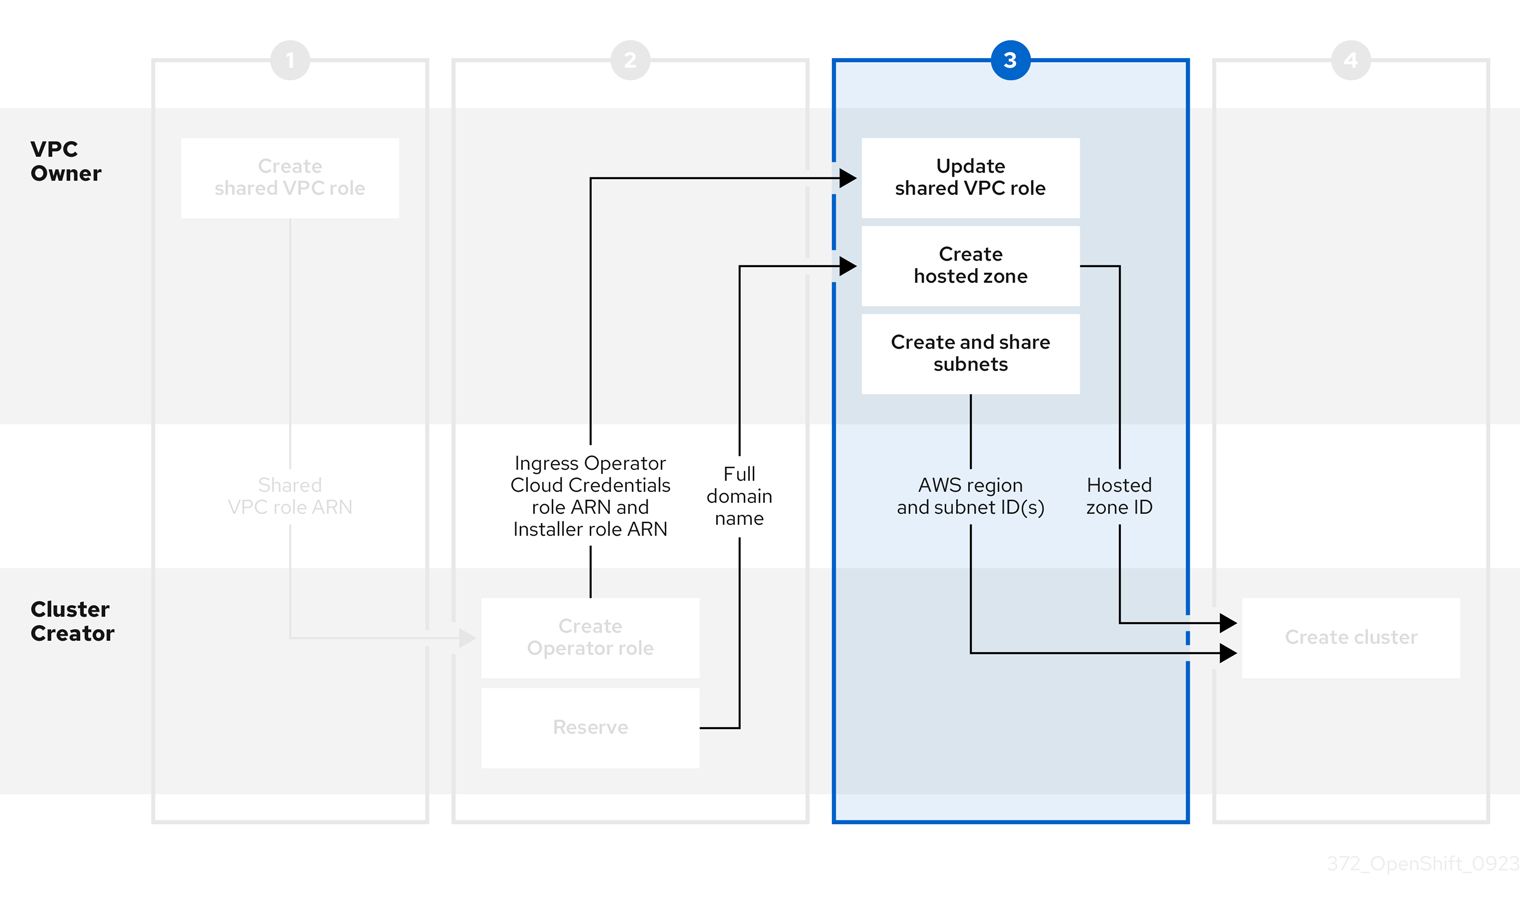
Prerequisites
- You have the full domain name from the Cluster Creator.
- You have the Ingress Operator Cloud Credentials role’s ARN from the Cluster Creator.
- You have the Installer role’s ARN from the Cluster Creator.
Procedure
- In the Resource Access Manager of the AWS console, create a resource share that shares the previously created public and private subnets with the Cluster Creator’s AWS account ID.
Update the VPC sharing IAM role and add the Installer and Ingress Operator Cloud Credentials roles to the principal section of the trust policy.
{ "Version": "2012-10-17", "Statement": [ { "Sid": "Statement1", "Effect": "Allow", "Principal": { "AWS": [ "arn:aws:iam::<Cluster-Creator's-AWS-Account-ID>:role/<prefix>-ingress-operator-cloud-credentials", "arn:aws:iam::<Cluster-Creator's-AWS-Account-ID>:role/<prefix>-Installer-Role" ] }, "Action": "sts:AssumeRole" } ] }-
Create a private hosted zone in the Route 53 section of the AWS console. In the hosted zone configuration, the domain name is
<cluster_domain_prefix>.<reserved_dns_domain>. The private hosted zone must be associated with the created VPC. After the hosted zone is created and associated with the VPC, provide the following to the Cluster Creator to continue configuration:
- Hosted zone ID
- AWS region
- Subnet IDs
6.7. Step Four - Cluster Creator: Creating your cluster in a shared VPC
To create a cluster in a shared VPC, complete the following steps.
Installing a cluster in a shared VPC is supported only for OpenShift 4.12.34 and later, 4.13.10 and later, and all future 4.y-streams.

Prerequisites
- You have the hosted zone ID from the VPC Owner.
- You have the AWS region from the VPC Owner.
- You have the subnet IDs from the VPC Owner.
-
You have the
SharedVPCRoleARN from the VPC Owner.
Procedure
In a terminal, enter the following command to create the shared VPC:
$ rosa create cluster --cluster-name <cluster_name> --sts \
  --operator-roles-prefix <prefix> \
  --oidc-config-id <oidc_config_id> \
  --region us-east-1 \
  --subnet-ids <subnet_ids> \
  --private-hosted-zone-id <hosted_zone_ID> \
  --shared-vpc-role-arn <vpc-role-arn> \
  --base-domain <dns-domain>
If your cluster name is longer than 15 characters, it will contain an autogenerated domain prefix as a sub-domain for your provisioned cluster on *.openshiftapps.com.
To customize the subdomain, use the --domain-prefix flag. The domain prefix cannot be longer than 15 characters, must be unique, and cannot be changed after cluster creation.
Chapter 7. Accessing a ROSA cluster
It is recommended that you access your Red Hat OpenShift Service on AWS classic architecture cluster using an identity provider (IDP) account. However, the cluster administrator who created the cluster can access it using the quick access procedure.
This document describes how to access a cluster and set up an IDP using the ROSA CLI (rosa). Alternatively, you can create an IDP account using OpenShift Cluster Manager console.
7.1. Accessing your cluster quickly
Access your cluster by using the required administrative credentials and the OpenShift CLI (oc).
As a best practice, access your cluster with an IDP account instead.
Procedure
Enter the following command:
$ rosa create admin --cluster=<cluster_name>Example output
W: It is recommended to add an identity provider to login to this cluster. See 'rosa create idp --help' for more information.
I: Admin account has been added to cluster 'cluster_name'. It may take up to a minute for the account to become active.
I: To login, run the following command:
oc login https://api.cluster-name.t6k4.i1.organization.org:6443 \
--username cluster-admin \
--password FWGYL-2mkJI-3ZTTZ-rINns
Enter the
oc logincommand, username, and password from the output of the previous command:Example output
$ oc login https://api.cluster_name.t6k4.i1.organization.org:6443 \
>  --username cluster-admin \
>  --password FWGYL-2mkJI-3ZTTZ-rINns
Login successful.

You have access to 77 projects, the list has been suppressed. You can list all projects with 'projects'
Using the default project, enter this
occommand to verify that the cluster administrator access is created:$ oc whoamiExample output
cluster-admin
7.2. Accessing your cluster with an IDP account
To log in to your cluster, you can configure an identity provider (IDP). This procedure uses GitHub as an example IDP. To view other supported IDPs, run the rosa create idp --help command.
Alternatively, as the user who created the cluster, you can use the quick access procedure.
Procedure
Add an IDP.
The following command creates an IDP backed by GitHub. After running the command, follow the interactive prompts from the output to access your GitHub developer settings and configure a new OAuth application.
$ rosa create idp --cluster=<cluster_name> --interactiveEnter the following values:
-
Type of identity provider:
github -
Restrict to members of:
organizations(if you do not have a GitHub Organization, you can create one now) -
GitHub organizations:
rh-test-org(enter the name of your organization)
Example output
I: Interactive mode enabled. Any optional fields can be left empty and a default will be selected. ? Type of identity provider: github ? Restrict to members of: organizations ? GitHub organizations: rh-test-org ? To use GitHub as an identity provider, you must first register the application: - Open the following URL: https://github.com/organizations/rh-rosa-test-cluster/settings/applications/new?oauth_application%5Bcallback_url%5D=https%3A%2F%2Foauth-openshift.apps.rh-rosa-test-cluster.z7v0.s1.devshift.org%2Foauth2callback%2Fgithub-1&oauth_application%5Bname%5D=rh-rosa-test-cluster-stage&oauth_application%5Burl%5D=https%3A%2F%2Fconsole-openshift-console.apps.rh-rosa-test-cluster.z7v0.s1.devshift.org - Click on 'Register application' ...-
Type of identity provider:
Follow the URL in the output and select Register application to register a new OAuth application in your GitHub organization. By registering the application, you enable the OAuth server that is built into ROSA to authenticate members of your GitHub organization into your cluster.
NoteThe fields in the Register a new OAuth application GitHub form are automatically filled with the required values through the URL that is defined by the Red Hat OpenShift Service on AWS classic architecture (ROSA) CLI,
rosa.Use the information from the GitHub application you created and continue the prompts. Enter the following values:
-
Client ID:
<my_github_client_id> -
Client Secret: [? for help]
<my_github_client_secret> - Hostname: (optional, you can leave it blank for now)
-
Mapping method:
claim
Continued example output
...
? Client ID: <my_github_client_id>
? Client Secret: [? for help] <my_github_client_secret>
? Hostname:
? Mapping method: claim
I: Configuring IDP for cluster 'rh_rosa_test_cluster'
I: Identity Provider 'github-1' has been created. You need to ensure that there is a list of cluster administrators defined. See 'rosa create user --help' for more information. To login into the console, open https://console-openshift-console.apps.rh-test-org.z7v0.s1.devshift.org and click on github-1
The IDP can take 1-2 minutes to be configured within your cluster.
-
Client ID:
Enter the following command to verify that your IDP has been configured correctly:
$ rosa list idps --cluster=<cluster_name>Example output
NAME        TYPE      AUTH URL
github-1    GitHub    https://oauth-openshift.apps.rh-rosa-test-cluster1.j9n4.s1.devshift.org/oauth2callback/github-1
Log in to your cluster.
Enter the following command to get the
Console URLof your cluster:$ rosa describe cluster --cluster=<cluster_name>Example output
Name: rh-rosa-test-cluster1 ID: 1de87g7c30g75qechgh7l5b2bha6r04e External ID: 34322be7-b2a7-45c2-af39-2c684ce624e1 API URL: https://api.rh-rosa-test-cluster1.j9n4.s1.devshift.org:6443 Console URL: https://console-openshift-console.apps.rh-rosa-test-cluster1.j9n4.s1.devshift.org Nodes: Master: 3, Infra: 3, Compute: 4 Region: us-east-2 State: ready Created: May 27, 2020-
Navigate to the
Console URL, and log in using your Github credentials. - In the top right of the OpenShift console, click your name and click Copy Login Command.
- Select the name of the IDP you added (in our case github-1), and click Display Token.
Copy and paste the
oclogin command into your terminal.$ oc login --token=z3sgOGVDk0k4vbqo_wFqBQQTnT-nA-nQLb8XEmWnw4X --server=https://api.rh-rosa-test-cluster1.j9n4.s1.devshift.org:6443For a ROSA with HCP cluster, use the port number
443.Example output
Logged into "https://api.rh-rosa-cluster1.j9n4.s1.devshift.org:6443" as "rh-rosa-test-user" using the token provided.

You have access to 67 projects, the list has been suppressed. You can list all projects with 'oc projects'

Using project "default".
For a ROSA with HCP cluster, the port number should be
443.Enter a simple
occommand to verify everything is setup properly and that you are logged in.$ oc versionExample output
Client Version: 4.4.0-202005231254-4a4cd75
Server Version: 4.3.18
Kubernetes Version: v1.16.2
7.3. Granting cluster-admin access
As the user who created the cluster, add the cluster-admin user role to your account to have the maximum administrator privileges. These privileges are not automatically assigned to your user account when you create the cluster.
Additionally, only the user who created the cluster can grant cluster access to other cluster-admin or dedicated-admin users. Users with dedicated-admin access have fewer privileges. As a best practice, limit the number of cluster-admin users to as few as possible.
Prerequisites
- You have added an identity provider (IDP) to your cluster.
- You have the IDP user name for the user you are creating.
- You are logged in to the cluster.
Procedure
Give your user
cluster-adminprivileges:$ rosa grant user cluster-admin --user=<idp_user_name> --cluster=<cluster_name>Verify your user is listed as a cluster administrator:
$ rosa list users --cluster=<cluster_name>Example output
GROUP             NAME
cluster-admins    rh-rosa-test-user
dedicated-admins  rh-rosa-test-user
Enter the following command to verify that your user now has
cluster-adminaccess. A cluster administrator can run this command without errors, but a dedicated administrator cannot.$ oc get all -n openshift-apiserverExample output
NAME                  READY   STATUS    RESTARTS   AGE
pod/apiserver-6ndg2   1/1     Running   0          17h
pod/apiserver-lrmxs   1/1     Running   0          17h
pod/apiserver-tsqhz   1/1     Running   0          17h
NAME          TYPE        CLUSTER-IP      EXTERNAL-IP   PORT(S)   AGE
service/api   ClusterIP   172.30.23.241   <none>        443/TCP   18h
NAME                       DESIRED   CURRENT   READY   UP-TO-DATE   AVAILABLE   NODE SELECTOR                     AGE
daemonset.apps/apiserver   3         3         3       3            3           node-role.kubernetes.io/master=   18h
7.4. Granting dedicated-admin access
Only the user who created the cluster can grant cluster access to other cluster-admin or dedicated-admin users. Users with dedicated-admin access have fewer privileges. As a best practice, grant dedicated-admin access to most of your administrators.
Prerequisites
- You have added an identity provider (IDP) to your cluster.
- You have the IDP user name for the user you are creating.
- You are logged in to the cluster.
Procedure
Enter the following command to promote your user to a
dedicated-admin:$ rosa grant user dedicated-admin --user=<idp_user_name> --cluster=<cluster_name>Enter the following command to verify that your user now has
dedicated-adminaccess:$ oc get groups dedicated-adminsExample output
NAME USERS dedicated-admins rh-rosa-test-userNoteA
Forbiddenerror displays if user withoutdedicated-adminprivileges runs this command.
Chapter 8. Configuring identity providers for STS
After your Red Hat OpenShift Service on AWS classic architecture cluster is created, you must configure identity providers to determine how users log in to access the cluster.
The following topics describe how to configure an identity provider using OpenShift Cluster Manager console. Alternatively, you can use the ROSA command-line interface (CLI) (rosa) to configure an identity provider and access the cluster.
8.1. Understanding identity providers
Red Hat OpenShift Service on AWS classic architecture includes a built-in OAuth server. Developers and administrators obtain OAuth access tokens to authenticate themselves to the API. As an administrator, you can configure OAuth to specify an identity provider after you install your cluster. Configuring identity providers allows users to log in and access the cluster.
8.1.1. Supported identity providers
You can configure the following types of identity providers:
| Identity provider | Description |
|---|---|
| GitHub or GitHub Enterprise | Configure a GitHub identity provider to validate usernames and passwords against GitHub or GitHub Enterprise’s OAuth authentication server. |
| GitLab | Configure a GitLab identity provider to use GitLab.com or any other GitLab instance as an identity provider. |
| | Configure a Google identity provider using Google’s OpenID Connect integration. |
| LDAP | Configure an LDAP identity provider to validate usernames and passwords against an LDAPv3 server, using simple bind authentication. |
| OpenID Connect | Configure an OpenID Connect (OIDC) identity provider to integrate with an OIDC identity provider using an Authorization Code Flow. |
| htpasswd | Configure an htpasswd identity provider for a single, static administration user. You can log in to the cluster as the user to troubleshoot issues. |
8.1.2. Identity provider parameters
The following parameters are common to all identity providers:
| Parameter | Description |
|---|---|
|
| The provider name is prefixed to provider user names to form an identity name. |
|
| Defines how new identities are mapped to users when they log in. Enter one of the following values:
|
When adding or changing identity providers, you can map identities from the new provider to existing users by setting the mappingMethod parameter to add.
8.2. Configuring a GitHub identity provider
Configure a GitHub identity provider to validate user names and passwords against GitHub or GitHub Enterprise’s OAuth authentication server and access your Red Hat OpenShift Service on AWS classic architecture cluster. OAuth facilitates a token exchange flow between Red Hat OpenShift Service on AWS classic architecture and GitHub or GitHub Enterprise.
Configuring GitHub authentication allows users to log in to Red Hat OpenShift Service on AWS classic architecture with their GitHub credentials. To prevent anyone with any GitHub user ID from logging in to your Red Hat OpenShift Service on AWS classic architecture cluster, you must restrict access to only those in specific GitHub organizations or teams.
Prerequisites
- The OAuth application must be created directly within the GitHub organization settings by the GitHub organization administrator.
- GitHub organizations or teams are set up in your GitHub account.
Procedure
- From OpenShift Cluster Manager, navigate to the Cluster List page and select the cluster that you need to configure identity providers for.
- Click the Access control tab.
Click Add identity provider.
NoteYou can also click the Add Oauth configuration link in the warning message displayed after cluster creation to configure your identity providers.
- Select GitHub from the drop-down menu.
Enter a unique name for the identity provider. This name cannot be changed later.
An OAuth callback URL is automatically generated in the provided field. You will use this to register the GitHub application.
https://oauth-openshift.apps.<cluster_name>.<cluster_domain>/oauth2callback/<idp_provider_name>For example:
https://oauth-openshift.apps.openshift-cluster.example.com/oauth2callback/github
- Register an application on GitHub.
- Return to Red Hat OpenShift Service on AWS classic architecture and select a mapping method from the drop-down menu. Claim is recommended in most cases.
- Enter the Client ID and Client secret provided by GitHub.
- Enter a hostname. A hostname must be entered when using a hosted instance of GitHub Enterprise.
- Optional: You can use a certificate authority (CA) file to validate server certificates for the configured GitHub Enterprise URL. Click Browse to locate and attach a CA file to the identity provider.
- Select Use organizations or Use teams to restrict access to a particular GitHub organization or a GitHub team.
- Enter the name of the organization or team you want to restrict access to. Click Add more to specify multiple organizations or teams that users can be a member of.
- Click Confirm.
Verification
- The configured identity provider is now visible on the Access control tab of the Cluster List page.
8.3. Configuring a GitLab identity provider
Configure a GitLab identity provider to use GitLab.com or any other GitLab instance as an identity provider.
Prerequisites
- If you use GitLab version 7.7.0 to 11.0, you connect using the OAuth integration. If you use GitLab version 11.1 or later, you can use OpenID Connect (OIDC) to connect instead of OAuth.
Procedure
- From OpenShift Cluster Manager, navigate to the Cluster List page and select the cluster that you need to configure identity providers for.
- Click the Access control tab.
Click Add identity provider.
NoteYou can also click the Add Oauth configuration link in the warning message displayed after cluster creation to configure your identity providers.
- Select GitLab from the drop-down menu.
Enter a unique name for the identity provider. This name cannot be changed later.
An OAuth callback URL is automatically generated in the provided field. You will provide this URL to GitLab.
https://oauth-openshift.apps.<cluster_name>.<cluster_domain>/oauth2callback/<idp_provider_name>For example:
https://oauth-openshift.apps.openshift-cluster.example.com/oauth2callback/gitlab
- Add a new application in GitLab.
- Return to Red Hat OpenShift Service on AWS classic architecture and select a mapping method from the drop-down menu. Claim is recommended in most cases.
- Enter the Client ID and Client secret provided by GitLab.
- Enter the URL of your GitLab provider.
- Optional: You can use a certificate authority (CA) file to validate server certificates for the configured GitLab URL. Click Browse to locate and attach a CA file to the identity provider.
- Click Confirm.
Verification
- The configured identity provider is now visible on the Access control tab of the Cluster List page.
8.4. Configuring a Google identity provider
Configure a Google identity provider to allow users to authenticate with their Google credentials.
Using Google as an identity provider allows any Google user to authenticate to your server. You can limit authentication to members of a specific hosted domain with the hostedDomain configuration attribute.
Procedure
- From OpenShift Cluster Manager, navigate to the Cluster List page and select the cluster that you need to configure identity providers for.
- Click the Access control tab.
Click Add identity provider.
NoteYou can also click the Add Oauth configuration link in the warning message displayed after cluster creation to configure your identity providers.
- Select Google from the drop-down menu.
Enter a unique name for the identity provider. This name cannot be changed later.
An OAuth callback URL is automatically generated in the provided field. You will provide this URL to Google.
https://oauth-openshift.apps.<cluster_name>.<cluster_domain>/oauth2callback/<idp_provider_name>For example:
https://oauth-openshift.apps.openshift-cluster.example.com/oauth2callback/google
- Configure a Google identity provider using Google’s OpenID Connect integration.
- Return to Red Hat OpenShift Service on AWS classic architecture and select a mapping method from the drop-down menu. Claim is recommended in most cases.
- Enter the Client ID of a registered Google project and the Client secret issued by Google.
- Enter a hosted domain to restrict users to a Google Apps domain.
- Click Confirm.
Verification
- The configured identity provider is now visible on the Access control tab of the Cluster List page.
8.5. Configuring a LDAP identity provider
Configure the LDAP identity provider to validate user names and passwords against an LDAPv3 server, using simple bind authentication.
Prerequisites
When configuring a LDAP identity provider, you will need to enter a configured LDAP URL. The configured URL is an RFC 2255 URL, which specifies the LDAP host and search parameters to use. The syntax of the URL is:
ldap://host:port/basedn?attribute?scope?filterExpand URL component Description ldapFor regular LDAP, use the string
ldap. For secure LDAP (LDAPS), useldapsinstead.host:portThe name and port of the LDAP server. Defaults to
localhost:389for ldap andlocalhost:636for LDAPS.basednThe DN of the branch of the directory where all searches should start from. At the very least, this must be the top of your directory tree, but it could also specify a subtree in the directory.
attributeThe attribute to search for. Although RFC 2255 allows a comma-separated list of attributes, only the first attribute will be used, no matter how many are provided. If no attributes are provided, the default is to use
uid. It is recommended to choose an attribute that will be unique across all entries in the subtree you will be using.scopeThe scope of the search. Can be either
oneorsub. If the scope is not provided, the default is to use a scope ofsub.filterA valid LDAP search filter. If not provided, defaults to
(objectClass=*)When doing searches, the attribute, filter, and provided user name are combined to create a search filter that looks like:
(&(<filter>)(<attribute>=<username>))ImportantIf the LDAP directory requires authentication to search, specify a
bindDNandbindPasswordto use to perform the entry search.
Procedure
- From OpenShift Cluster Manager, navigate to the Cluster List page and select the cluster that you need to configure identity providers for.
- Click the Access control tab.
Click Add identity provider.
NoteYou can also click the Add Oauth configuration link in the warning message displayed after cluster creation to configure your identity providers.
- Select LDAP from the drop-down menu.
- Enter a unique name for the identity provider. This name cannot be changed later.
- Select a mapping method from the drop-down menu. Claim is recommended in most cases.
- Enter a LDAP URL to specify the LDAP search parameters to use.
- Optional: Enter a Bind DN and Bind password.
Enter the attributes that will map LDAP attributes to identities.
- Enter an ID attribute whose value should be used as the user ID. Click Add more to add multiple ID attributes.
- Optional: Enter a Preferred username attribute whose value should be used as the display name. Click Add more to add multiple preferred username attributes.
- Optional: Enter an Email attribute whose value should be used as the email address. Click Add more to add multiple email attributes.
- Optional: Click Show advanced Options to add a certificate authority (CA) file to your LDAP identity provider to validate server certificates for the configured URL. Click Browse to locate and attach a CA file to the identity provider.
Optional: Under the advanced options, you can choose to make the LDAP provider Insecure. If you select this option, a CA file cannot be used.
ImportantIf you are using an insecure LDAP connection (ldap:// or port 389), then you must check the Insecure option in the configuration wizard.
- Click Confirm.
Verification
- The configured identity provider is now visible on the Access control tab of the Cluster List page.
8.6. Configuring an OpenID identity provider
Configure an OpenID identity provider to integrate with an OpenID Connect identity provider using an Authorization Code Flow.
The Authentication Operator in Red Hat OpenShift Service on AWS classic architecture requires that the configured OpenID Connect identity provider implements the OpenID Connect Discovery specification.
Claims are read from the JWT id_token returned from the OpenID identity provider and, if specified, from the JSON returned by the Issuer URL.
At least one claim must be configured to use as the user’s identity.
You can also indicate which claims to use as the user’s preferred user name, display name, and email address. If multiple claims are specified, the first one with a non-empty value is used. The standard claims are:
| Claim | Description |
|---|---|
|
|
The preferred user name when provisioning a user. A shorthand name that the user wants to be referred to as, such as |
|
| Email address. |
|
| Display name. |
See the OpenID claims documentation for more information.
Prerequisites
- Before you configure OpenID Connect, check the installation prerequisites for any Red Hat product or service you want to use with your Red Hat OpenShift Service on AWS classic architecture cluster.
Procedure
- From OpenShift Cluster Manager, navigate to the Cluster List page and select the cluster that you need to configure identity providers for.
- Click the Access control tab.
Click Add identity provider.
NoteYou can also click the Add Oauth configuration link in the warning message displayed after cluster creation to configure your identity providers.
- Select OpenID from the drop-down menu.
Enter a unique name for the identity provider. This name cannot be changed later.
An OAuth callback URL is automatically generated in the provided field.
https://oauth-openshift.apps.<cluster_name>.<cluster_domain>/oauth2callback/<idp_provider_name>For example:
https://oauth-openshift.apps.openshift-cluster.example.com/oauth2callback/openid
- Register a new OpenID Connect client in the OpenID identity provider by following the steps to create an authorization request.
- Return to Red Hat OpenShift Service on AWS classic architecture and select a mapping method from the drop-down menu. Claim is recommended in most cases.
- Enter a Client ID and Client secret provided from OpenID.
- Enter an Issuer URL. This is the URL that the OpenID provider asserts as the Issuer Identifier. It must use the https scheme with no URL query parameters or fragments.
- Enter an Email attribute whose value should be used as the email address. Click Add more to add multiple email attributes.
- Enter a Name attribute whose value should be used as the preferred username. Click Add more to add multiple preferred usernames.
- Enter a Preferred username attribute whose value should be used as the display name. Click Add more to add multiple display names.
- Optional: Click Show advanced Options to add a certificate authority (CA) file to your OpenID identity provider.
-
Optional: Under the advanced options, you can add Additional scopes. By default, the
OpenIDscope is requested. - Click Confirm.
Verification
- The configured identity provider is now visible on the Access control tab of the Cluster List page.
8.7. Configuring an htpasswd identity provider
Configure an htpasswd identity provider to create a single, static user with cluster administration privileges. You can log in to your cluster as the user to troubleshoot problems. You can use the web user interface (UI) or your command-line interface (CLI) to create an htpasswd identity provider.
Chapter 9. Revoking access to a ROSA cluster
An identity provider (IDP) controls access to a Red Hat OpenShift Service on AWS classic architecture cluster. To revoke access of a user to a cluster, you must configure that within the IDP that was set up for authentication.
9.1. Revoking administrator access using the ROSA CLI
You can revoke the administrator access of users so that they can access the cluster without administrator privileges. To remove the administrator access for a user, you must revoke the dedicated-admin or cluster-admin privileges. You can revoke the administrator privileges using the ROSA command-line interface (CLI) (rosa), or using OpenShift Cluster Manager console.
9.1.1. Revoking dedicated-admin access using the ROSA CLI
You can revoke access for a dedicated-admin user if you are the user who created the cluster, the organization administrator user, or the super administrator user.
Prerequisites
- You have added an Identity Provider (IDP) to your cluster.
- You have the IDP user name for the user whose privileges you are revoking.
- You are logged in to the cluster.
Procedure
Enter the following command to revoke the
dedicated-adminaccess of a user:$ rosa revoke user dedicated-admin --user=<idp_user_name> --cluster=<cluster_name>Enter the following command to verify that your user no longer has
dedicated-adminaccess. The output does not list the revoked user.$ oc get groups dedicated-admins
9.1.2. Revoking cluster-admin access using the ROSA CLI
Only the user who created the cluster can revoke access for cluster-admin users.
Prerequisites
- You have added an Identity Provider (IDP) to your cluster.
- You have the IDP user name for the user whose privileges you are revoking.
- You are logged in to the cluster.
Procedure
Enter the following command to revoke the
cluster-adminaccess of a user:$ rosa revoke user cluster-admins --user=myusername --cluster=myclusterEnter the following command to verify that the user no longer has
cluster-adminaccess. The output does not list the revoked user.$ oc get groups cluster-admins
9.2. Revoking administrator access using OpenShift Cluster Manager console
You can revoke the dedicated-admin or cluster-admin access of users through OpenShift Cluster Manager console. Users will be able to access the cluster without administrator privileges.
Prerequisites
- You have added an Identity Provider (IDP) to your cluster.
- You have the IDP user name for the user whose privileges you are revoking.
- You are logged in to OpenShift Cluster Manager console using an OpenShift Cluster Manager account that you used to create the cluster, the organization administrator user, or the super administrator user.
Procedure
- On the Cluster List tab of OpenShift Cluster Manager, select the name of your cluster to view the cluster details.
- Select Access control > Cluster Roles and Access.
-
For the user that you want to remove, click the Options menu
 to the right of the user and group combination and click Delete.
Chapter 10. Deleting a ROSA cluster
This document provides steps to delete a Red Hat OpenShift Service on AWS classic architecture cluster that uses the AWS Security Token Service (STS). After deleting your cluster, you can also delete the AWS Identity and Access Management (IAM) resources that are used by the cluster.
10.1. Prerequisites
If Red Hat OpenShift Service on AWS classic architecture created a VPC, you must remove the following items from your cluster before you can successfully delete your cluster:
- Network configurations, such as VPN configurations and VPC peering connections
- Any additional services that were added to the VPC
If these configurations and services remain, the cluster does not delete properly.
10.2. Deleting a ROSA cluster and the cluster-specific IAM resources
You can delete a Red Hat OpenShift Service on AWS classic architecture (ROSA) with AWS Security Token Service (STS) cluster by using the ROSA CLI (rosa) or Red Hat OpenShift Cluster Manager.
After deleting the cluster, you can clean up the cluster-specific Identity and Access Management (IAM) resources in your AWS account by using the ROSA CLI (rosa). The cluster-specific resources include the Operator roles and the OpenID Connect (OIDC) provider.
The cluster deletion must complete before you remove the IAM resources, because the resources are used in the cluster deletion and clean-up processes.
If add-ons are installed, the cluster deletion takes longer because add-ons are uninstalled before the cluster is deleted. The amount of time depends on the number and size of the add-ons.
If the cluster that created the VPC during the installation is deleted, the associated installation program-created VPC will also be deleted, resulting in the failure of all the clusters that are using the same VPC. Additionally, any resources created with the same tagSet key-value pair of the resources created by the installation program and labeled with a value of owned will also be deleted.
Prerequisites
- You have installed a ROSA cluster.
-
You have installed and configured the latest ROSA CLI (
rosa) on your installation host.
Procedure
Obtain the cluster ID, the Amazon Resource Names (ARNs) for the cluster-specific Operator roles and the endpoint URL for the OIDC provider:
$ rosa describe cluster --cluster=<cluster_name>Example output
Name: mycluster ID: 1s3v4x39lhs8sm49m90mi0822o34544a ... Operator IAM Roles: - arn:aws:iam::<aws_account_id>:role/mycluster-x4q9-openshift-machine-api-aws-cloud-credentials - arn:aws:iam::<aws_account_id>:role/mycluster-x4q9-openshift-cloud-credential-operator-cloud-crede - arn:aws:iam::<aws_account_id>:role/mycluster-x4q9-openshift-image-registry-installer-cloud-creden - arn:aws:iam::<aws_account_id>:role/mycluster-x4q9-openshift-ingress-operator-cloud-credentials - arn:aws:iam::<aws_account_id>:role/mycluster-x4q9-openshift-cluster-csi-drivers-ebs-cloud-credent - arn:aws:iam::<aws_account_id>:role/mycluster-x4q9-openshift-cloud-network-config-controller-cloud State: ready Private: No Created: May 13 2022 11:26:15 UTC Details Page: https://console.redhat.com/openshift/details/s/296kyEFwzoy1CREQicFRdZybrc0 OIDC Endpoint URL: https://oidc.op1.openshiftapps.com/<oidc_config_id>-
The
IDfield lists the cluster ID. -
The
Operator IAM Rolesfield specifies the ARNs for the cluster-specific Operator roles. For example, in the sample output the ARN for the role required by the Machine Config Operator isarn:aws:iam::<aws_account_id>:role/mycluster-x4q9-openshift-machine-api-aws-cloud-credentials. -
The
OIDC Endpoint URLfield displays the endpoint URL for the cluster-specific OIDC provider.
ImportantYou require the cluster ID to delete the cluster-specific STS resources using the ROSA CLI (
rosa) after the cluster is deleted.-
The
Delete the cluster:
To delete the cluster by using Red Hat OpenShift Cluster Manager:
- Navigate to OpenShift Cluster Manager.
-
Click the Options menu
next to your cluster and select Delete cluster.
- Type the name of your cluster at the prompt and click Delete.
To delete the cluster using the ROSA CLI (
rosa):Enter the following command to delete the cluster and watch the logs, replacing
<cluster_name>with the name or ID of your cluster:$ rosa delete cluster --cluster=<cluster_name> --watchImportantYou must wait for the cluster deletion to complete before you remove the Operator roles and the OIDC provider. The cluster-specific Operator roles are required to clean-up the resources created by the OpenShift Operators. The Operators use the OIDC provider to authenticate.
Delete the OIDC provider that the cluster Operators use to authenticate:
$ rosa delete oidc-provider -c <cluster_id> --mode autoNoteYou can use the
-yoption to automatically answer yes to the prompts.Optional. Delete the cluster-specific Operator IAM roles:
ImportantThe account-wide IAM roles can be used by other ROSA clusters in the same AWS account. Only remove the roles if they are not required by other clusters.
$ rosa delete operator-roles -c <cluster_id> --mode auto
10.3. Troubleshooting cluster deletion
Troubleshooting issues that prevent cluster deletion involves verifying IAM configurations and confirming the removal of resource dependencies.
Procedure
- If the cluster cannot be deleted because of missing IAM roles, see Repairing a cluster that cannot be deleted.
If the cluster cannot be deleted for other reasons:
- Check that there are no Add-ons for your cluster pending in the Hybrid Cloud Console.
- Check that all AWS resources and dependencies have been deleted in the Amazon Web Console.
10.4. Deleting the account-wide IAM resources
After you have deleted all Red Hat OpenShift Service on AWS classic architecture clusters that depend on the account-wide AWS Identity and Access Management (IAM) resources, you can delete the account-wide resources.
If you no longer need to install a Red Hat OpenShift Service on AWS classic architecture cluster by using Red Hat OpenShift Cluster Manager, you can also delete the OpenShift Cluster Manager and user IAM roles.
The account-wide IAM roles and policies might be used by other Red Hat OpenShift Service on AWS classic architecture clusters in the same AWS account. Only remove the resources if they are not required by other clusters.
The OpenShift Cluster Manager and user IAM roles are required if you want to install, manage, and delete other Red Hat OpenShift Service on AWS classic architecture clusters in the same AWS account by using OpenShift Cluster Manager. Only remove the roles if you no longer need to install Red Hat OpenShift Service on AWS classic architecture clusters in your account by using OpenShift Cluster Manager. For more information about repairing your cluster if these roles are removed before deletion, see "Repairing a cluster that cannot be deleted" in Troubleshooting cluster deployments.
10.4.1. Deleting the account-wide IAM roles and policies
This section provides steps to delete the account-wide IAM roles and policies that you created for Red Hat OpenShift Service on AWS classic architecture deployments, along with the account-wide Operator policies. You can delete the account-wide AWS Identity and Access Management (IAM) roles and policies only after deleting all of the Red Hat OpenShift Service on AWS classic architecture clusters that depend on them.
The account-wide IAM roles and policies might be used by other Red Hat OpenShift Service on AWS classic architecture clusters in the same AWS account. Only remove the roles if they are not required by other clusters.
Prerequisites
- You have account-wide IAM roles that you want to delete.
-
You have installed and configured the latest ROSA CLI (
rosa) on your installation host.
Procedure
Delete the account-wide roles:
List the account-wide roles in your AWS account by using the ROSA CLI (
rosa):$ rosa list account-rolesExample output
I: Fetching account roles
ROLE NAME                           ROLE TYPE      ROLE ARN                                                           OPENSHIFT VERSION
ManagedOpenShift-ControlPlane-Role  Control plane  arn:aws:iam::<aws_account_id>:role/ManagedOpenShift-ControlPlane-Role  4.21
ManagedOpenShift-Installer-Role     Installer      arn:aws:iam::<aws_account_id>:role/ManagedOpenShift-Installer-Role     4.21
ManagedOpenShift-Support-Role       Support        arn:aws:iam::<aws_account_id>:role/ManagedOpenShift-Support-Role       4.21
ManagedOpenShift-Worker-Role        Worker         arn:aws:iam::<aws_account_id>:role/ManagedOpenShift-Worker-Role        4.21
I: Fetching account roles ROLE NAME ROLE TYPE ROLE ARN OPENSHIFT VERSION AWS Managed ManagedOpenShift-HCP-ROSA-Installer-Role Installer arn:aws:iam::<aws_account_id>:role/ManagedOpenShift-HCP-ROSA-Installer-Role 4.21 Yes ManagedOpenShift-HCP-ROSA-Support-Role Support arn:aws:iam::<aws_account_id>:role/ManagedOpenShift-HCP-ROSA-Support-Role 4.21 Yes ManagedOpenShift-HCP-ROSA-Worker-Role Worker arn:aws:iam::<aws_account_id>:role/ManagedOpenShift-HCP-ROSA-Worker-Role 4.21 YesDelete the account-wide roles by running one of the following commands:
For clusters without a shared Virtual Private Cloud (VPC):
$ rosa delete account-roles --prefix <prefix> --mode autoYou must include the
--<prefix>argument. Replace<prefix>with the prefix of the account-wide roles to delete. If you did not specify a custom prefix when you created the account-wide roles, specify the default prefix,ManagedOpenShift.For clusters with a shared VPC:
$ rosa delete account-roles --prefix <prefix> --delete-hosted-shared-vpc-policies --mode autoYou must include the
--<prefix>argument. Replace<prefix>with the prefix of the account-wide roles to delete. If you did not specify a custom prefix when you created the account-wide roles, specify the default prefix,ManagedOpenShift.ImportantThe account-wide IAM roles might be used by other Red Hat OpenShift Service on AWS classic architecture clusters in the same AWS account. Only remove the roles if they are not required by other clusters.
Example output
W: There are no classic account roles to be deleted
I: Deleting hosted CP account roles
? Delete the account role 'delete-rosa-HCP-ROSA-Installer-Role'? Yes
I: Deleting account role 'delete-rosa-HCP-ROSA-Installer-Role'
? Delete the account role 'delete-rosa-HCP-ROSA-Support-Role'? Yes
I: Deleting account role 'delete-rosa-HCP-ROSA-Support-Role'
? Delete the account role 'delete-rosa-HCP-ROSA-Worker-Role'? Yes
I: Deleting account role 'delete-rosa-HCP-ROSA-Worker-Role'
I: Successfully deleted the hosted CP account roles
Delete the account-wide in-line and Operator policies:
Under the Policies page in the AWS IAM Console, filter the list of policies by the prefix that you specified when you created the account-wide roles and policies.
NoteIf you did not specify a custom prefix when you created the account-wide roles, search for the default prefix,
ManagedOpenShift.Delete the account-wide policies and Operator policies by using the AWS IAM Console. For more information about deleting IAM policies by using the AWS IAM Console, see Deleting IAM policies in the AWS documentation.
ImportantThe account-wide and Operator IAM policies might be used by other Red Hat OpenShift Service on AWS classic architecture clusters in the same AWS account. Only remove the roles if they are not required by other clusters.
10.4.2. Unlinking and deleting the OpenShift Cluster Manager and user IAM roles
When you install a Red Hat OpenShift Service on AWS classic architecture cluster by using Red Hat OpenShift Cluster Manager, you also create OpenShift Cluster Manager and user Identity and Access Management (IAM) roles that link to your Red Hat organization. After deleting your cluster, you can unlink and delete the roles by using the ROSA CLI (rosa).
The OpenShift Cluster Manager and user IAM roles are required if you want to use OpenShift Cluster Manager to install and manage other Red Hat OpenShift Service on AWS classic architecture clusters in the same AWS account. Only remove the roles if you no longer need to use the OpenShift Cluster Manager to install Red Hat OpenShift Service on AWS classic architecture clusters.
Prerequisites
- You created OpenShift Cluster Manager and user IAM roles and linked them to your Red Hat organization.
-
You have installed and configured the latest ROSA CLI (
rosa) on your installation host. - You have organization administrator privileges in your Red Hat organization.
Procedure
Unlink the OpenShift Cluster Manager IAM role from your Red Hat organization and delete the role:
List the OpenShift Cluster Manager IAM roles in your AWS account:
$ rosa list ocm-rolesExample output
I: Fetching ocm roles
ROLE NAME                                                     ROLE ARN                                                                                         LINKED  ADMIN  AWS Managed
ManagedOpenShift-OCM-Role-<red_hat_organization_external_id>  arn:aws:iam::<aws_account_id>:role/ManagedOpenShift-OCM-Role-<red_hat_organization_external_id>  Yes      Yes     Yes
If your OpenShift Cluster Manager IAM role is listed as linked in the output of the preceding command, unlink the role from your Red Hat organization by running the following command:
$ rosa unlink ocm-role --role-arn <arn>Replace
<arn>with the Amazon Resource Name (ARN) for your OpenShift Cluster Manager IAM role. The ARN is specified in the output of the preceding command. In the preceding example, the ARN is in the formatarn:aws:iam::<aws_account_id>:role/ManagedOpenShift-OCM-Role-<red_hat_organization_external_id>.Example output
I: Unlinking OCM role
? Unlink the 'arn:aws:iam::<aws_account_id>:role/ManagedOpenShift-OCM-Role-<red_hat_organization_external_id>' role from organization '<red_hat_organization_id>'? Yes
I: Successfully unlinked role-arn 'arn:aws:iam::<aws_account_id>:role/ManagedOpenShift-OCM-Role-<red_hat_organization_external_id>' from organization account '<red_hat_organization_id>'
Delete the OpenShift Cluster Manager IAM role and policies:
$ rosa delete ocm-role --role-arn <arn>Example output
I: Deleting OCM role
? OCM Role ARN: arn:aws:iam::<aws_account_id>:role/ManagedOpenShift-OCM-Role-<red_hat_organization_external_id>
? Delete 'arn:aws:iam::<aws_account_id>:role/ManagedOpenShift-OCM-Role-<red_hat_organization_external_id>' ocm role? Yes
? OCM role deletion mode: auto
I: Successfully deleted the OCM role
The
OCM role deletion modefield specifies the deletion mode. You can useautomode to automatically delete the OpenShift Cluster Manager IAM role and policies. Inmanualmode, the ROSA CLI generates theawscommands needed to delete the role and policies.manualmode enables you to review the details before running theawscommands manually.
Unlink the user IAM role from your Red Hat organization and delete the role:
List the user IAM roles in your AWS account:
$ rosa list user-rolesExample output
I: Fetching user roles
ROLE NAME                                  ROLE ARN                                                                  LINKED
ManagedOpenShift-User-<ocm_user_name>-Role  arn:aws:iam::<aws_account_id>:role/ManagedOpenShift-User-<ocm_user_name>-Role  Yes
If your user IAM role is listed as linked in the output of the preceding command, unlink the role from your Red Hat organization:
$ rosa unlink user-role --role-arn <arn>Replace
<arn>with the Amazon Resource Name (ARN) for your user IAM role. The ARN is specified in the output of the preceding command. In the preceding example, the ARN is in the formatarn:aws:iam::<aws_account_id>:role/ManagedOpenShift-User-<ocm_user_name>-Role.Example output
I: Unlinking user role
? Unlink the 'arn:aws:iam::<aws_account_id>:role/ManagedOpenShift-User-<ocm_user_name>-Role' role from the current account '<ocm_user_account_id>'? Yes
I: Successfully unlinked role ARN 'arn:aws:iam::<aws_account_id>:role/ManagedOpenShift-User-<ocm_user_name>-Role' from account '<ocm_user_account_id>'
Delete the user IAM role:
$ rosa delete user-role --role-arn <arn>Example output
I: Deleting user role
? User Role ARN: arn:aws:iam::<aws_account_id>:role/ManagedOpenShift-User-<ocm_user_name>-Role
? Delete the 'arn:aws:iam::<aws_account_id>:role/ManagedOpenShift-User-<ocm_user_name>-Role' role from the AWS account? Yes
? User role deletion mode: auto
I: Successfully deleted the user role
The
User role deletion modefield specifies the deletion mode. You can useautomode to automatically delete the user IAM role. Inmanualmode, the ROSA CLI generates theawscommand needed to delete the role.manualmode enables you to review the details before running theawscommand manually.
Chapter 11. Deploying ROSA without AWS STS
11.1. AWS prerequisites for Red Hat OpenShift Service on AWS classic architecture
Red Hat OpenShift Service on AWS classic architecture provides a model that allows Red Hat to deploy clusters into a customer’s existing Amazon Web Service (AWS) account.
You must ensure that the prerequisites are met before installing Red Hat OpenShift Service on AWS classic architecture. This requirements document does not apply to AWS Security Token Service (STS). If you are using STS, see the STS-specific requirements.
AWS Security Token Service (STS) is the recommended credential mode for installing and interacting with clusters on Red Hat OpenShift Service on AWS classic architecture because it provides enhanced security.
11.1.1. Customer Requirements
You must complete several prerequisites before deploying a Red Hat OpenShift Service on AWS classic architecture cluster.
In order to create the cluster, you must be logged in as an IAM user and not an assumed role or STS user.
11.1.1.1. Account
- The customer ensures that the AWS limits are sufficient to support Red Hat OpenShift Service on AWS classic architecture provisioned within the customer’s AWS account.
The customer’s AWS account should be in the customer’s AWS Organizations with the applicable service control policy (SCP) applied.
NoteIt is not a requirement that the customer’s account be within the AWS Organizations or for the SCP to be applied, however Red Hat must be able to perform all the actions listed in the SCP without restriction.
- The customer’s AWS account should not be transferable to Red Hat.
- The customer may not impose AWS usage restrictions on Red Hat activities. Imposing restrictions will severely hinder Red Hat’s ability to respond to incidents.
The customer may deploy native AWS services within the same AWS account.
NoteCustomers are encouraged, but not mandated, to deploy resources in a Virtual Private Cloud (VPC) separate from the VPC hosting Red Hat OpenShift Service on AWS classic architecture and other Red Hat supported services.
11.1.1.2. Access requirements
To appropriately manage the Red Hat OpenShift Service on AWS classic architecture service, Red Hat must have the
AdministratorAccesspolicy applied to the administrator role at all times. This requirement does not apply if you are using AWS Security Token Service (STS).NoteThis policy only provides Red Hat with permissions and capabilities to change resources in the customer-provided AWS account.
- Red Hat must have AWS console access to the customer-provided AWS account. This access is protected and managed by Red Hat.
- The customer must not utilize the AWS account to elevate their permissions within the Red Hat OpenShift Service on AWS classic architecture cluster.
-
Actions available in the Red Hat OpenShift Service on AWS classic architecture (ROSA) CLI,
rosa, or OpenShift Cluster Manager console must not be directly performed in the customer’s AWS account.
11.1.1.3. Support requirements
- Red Hat recommends that the customer have at least Business Support from AWS.
- Red Hat has authority from the customer to request AWS support on their behalf.
- Red Hat has authority from the customer to request AWS resource limit increases on the customer’s account.
- Red Hat manages the restrictions, limitations, expectations, and defaults for all Red Hat OpenShift Service on AWS classic architecture clusters in the same manner, unless otherwise specified in this requirements section.
11.1.1.4. Security requirements
- Volume snapshots will remain within the customer’s AWS account and customer-specified region.
- Red Hat must have ingress access to EC2 hosts and the API server from allow-listed IP addresses.
- Red Hat must have egress allowed to forward system and audit logs to a Red Hat managed central logging stack.
11.1.2. Required customer procedure
Complete these steps before deploying Red Hat OpenShift Service on AWS classic architecture.
Procedure
- If you, as the customer, are utilizing AWS Organizations, then you must use an AWS account within your organization or create a new one.
- To ensure that Red Hat can perform necessary actions, you must either create a service control policy (SCP) or ensure that none is applied to the AWS account.
- Attach the SCP to the AWS account.
- Follow the ROSA procedures for setting up the environment.
11.1.2.1. Minimum set of effective permissions for service control policies (SCP)
Service control policies (SCP) are a type of organization policy that manages permissions within your organization. SCPs ensure that accounts within your organization stay within your defined access control guidelines. These policies are maintained in AWS organizations and control the services that are available within the attached AWS accounts. SCP management is the responsibility of the customer.
The minimum SCP requirement does not apply when using AWS Security Token Service (STS). For more information about STS, see AWS prerequisites for ROSA with STS.
Verify that your service control policy (SCP) does not restrict any of these required permissions.
| Service | Actions | Effect | |
|---|---|---|---|
| Required | Amazon EC2 | All | Allow |
| Amazon EC2 Auto Scaling | All | Allow | |
| Amazon S3 | All | Allow | |
| Identity And Access Management | All | Allow | |
| Elastic Load Balancing | All | Allow | |
| Elastic Load Balancing V2 | All | Allow | |
| Amazon CloudWatch | All | Allow | |
| Amazon CloudWatch Events | All | Allow | |
| Amazon CloudWatch Logs | All | Allow | |
| AWS EC2 Instance Connect | SendSerialConsoleSSHPublicKey | Allow | |
| AWS Support | All | Allow | |
| AWS Key Management Service | All | Allow | |
| AWS Security Token Service | All | Allow | |
| AWS Tiro | CreateQuery GetQueryAnswer GetQueryExplanation | Allow | |
| AWS Marketplace | Subscribe Unsubscribe View Subscriptions | Allow | |
| AWS Resource Tagging | All | Allow | |
| AWS Route53 DNS | All | Allow | |
| AWS Service Quotas | ListServices GetRequestedServiceQuotaChange GetServiceQuota RequestServiceQuotaIncrease ListServiceQuotas | Allow | |
| Optional | AWS Billing | ViewAccount Viewbilling ViewUsage | Allow |
| AWS Cost and Usage Report | All | Allow | |
| AWS Cost Explorer Services | All | Allow |
11.1.3. Red Hat managed IAM references for AWS
Red Hat is responsible for creating and managing the following Amazon Web Services (AWS) resources: IAM policies, IAM users, and IAM roles.
11.1.3.1. IAM Policies
IAM policies are subject to modification as the capabilities of Red Hat OpenShift Service on AWS classic architecture change.
The
AdministratorAccesspolicy is used by the administration role. This policy provides Red Hat the access necessary to administer the Red Hat OpenShift Service on AWS classic architecture (ROSA) cluster in the customer’s AWS account.{ "Version": "2012-10-17", "Statement": [ { "Action": "*", "Resource": "*", "Effect": "Allow" } ] }
11.1.3.2. IAM users
The osdManagedAdmin user is created immediately after installing ROSA into the customer’s AWS account.
11.1.4. Provisioned AWS Infrastructure
This is an overview of the provisioned Amazon Web Services (AWS) components on a deployed Red Hat OpenShift Service on AWS classic architecture cluster.
11.1.4.1. EC2 instances
AWS EC2 instances are required to deploy the control plane and data plane functions for Red Hat OpenShift Service on AWS classic architecture. Instance types can vary for control plane and infrastructure nodes, depending on the worker node count.
At a minimum, the following EC2 instances are deployed:
-
Three
m5.2xlargecontrol plane nodes -
Two
r5.xlargeinfrastructure nodes -
Two
m5.xlargeworker nodes
The instance type shown for worker nodes is the default value, but you can customize the instance type for worker nodes according to the needs of your workload.
11.1.4.2. Amazon Elastic Block Store storage
Amazon Elastic Block Store (Amazon EBS) block storage is used for both local node storage and persistent volume storage. By default, the following storage is provisioned for each EC2 instance:
Control Plane Volume
- Size: 350GB
- Type: gp3
- Input/Output Operations Per Second: 1000
Infrastructure Volume
- Size: 300GB
- Type: gp3
- Input/Output Operations Per Second: 900
Worker Volume
- Default size: 300 GiB (adjustable at creation time)
- Minimum size: 128GB
- Type: gp3
- Input/Output Operations Per Second: 900
Clusters deployed before the release of OpenShift Container Platform 4.11 use gp2 type storage by default.
11.1.4.3. Elastic Load Balancing
Each cluster can use up to two Classic Load Balancers for application router and up to two Network Load Balancers for API.
For more information, see the ELB documentation for AWS.
11.1.4.4. S3 storage
The image registry is backed by AWS S3 storage. Resources are pruned regularly to optimize S3 usage and cluster performance.
Two buckets are required with a typical size of 2TB each.
11.1.4.5. VPC
Configure your VPC according to the following requirements:
Subnets: Every cluster requires a minimum of one private subnet for every availability zone. For example, 1 private subnet is required for a single-zone cluster, and 3 private subnets are required for a cluster with 3 availability zones.
If your cluster needs direct access to a network that is external to the cluster, including the public internet, you require at least one public subnet.
Red Hat strongly recommends using unique subnets for each cluster. Sharing subnets between multiple clusters is not recommended.
NoteA public subnet connects directly to the internet through an internet gateway.
A private subnet connects to the internet through a network address translation (NAT) gateway.
- Route tables: One route table per private subnet, and one additional table per cluster.
- Internet gateways: One Internet Gateway per cluster.
- NAT gateways: One NAT Gateway per public subnet.
Figure 11.1. Sample VPC Architecture

11.1.4.6. Security groups
AWS security groups provide security at the protocol and port access level; they are associated with EC2 instances and Elastic Load Balancing (ELB) load balancers. Each security group contains a set of rules that filter traffic coming in and out of one or more EC2 instances.
Ensure that the ports required for cluster installation and operation are open on your network and configured to allow access between hosts. The requirements for the default security groups are listed in Required ports for default security groups.
| Group | Type | IP Protocol | Port range |
|---|---|---|---|
| MasterSecurityGroup |
|
|
|
|
|
| ||
|
|
| ||
|
|
| ||
| WorkerSecurityGroup |
|
|
|
|
|
| ||
| BootstrapSecurityGroup |
|
|
|
|
|
|
11.1.5. Networking prerequisites
During cluster deployment, Red Hat OpenShift Service on AWS classic architecture requires a minimum bandwidth of 120 Mbps between cluster infrastructure and the public internet or private network locations that give deployment resources. When network connectivity is slower than 120 Mbps, the cluster installation process times out, and deployment fails. After cluster deployment, your workloads determine network requirements. A minimum bandwidth of 120 Mbps helps to ensure timely cluster and Operator upgrades.
11.1.5.1. Firewall AllowList requirements for Red Hat OpenShift Service on AWS classic architecture clusters using STS
You must AllowList several URLs to download required packages and tools for your cluster.
Only Red Hat OpenShift Service on AWS classic architecture clusters deployed with PrivateLink can use a firewall to control egress traffic.
| Domain | Port | Function |
|---|---|---|
|
| 443 | Provides core container images. |
|
| 443 | Provides core container images. |
|
| 443 | Provides core container images. |
|
| 443 | Provides core container images. |
|
| 443 | Provides core container images. |
|
| 443 | Provides core container images. |
|
| 443 | Provides core container images. |
|
| 443 | Provides core container images. |
|
| 443 |
Required. The |
|
| 443 | Provides core container images. |
|
| 443 | Provides core container images. |
|
| 443 |
Hosts all the container images that are stored on the Red Hat Ecosytem Catalog. Additionally, the registry provides access to the |
|
| 443 |
Required. Hosts a signature store that a container client requires for verifying images when pulling them from |
|
| 443 | Required for all third-party images and certified Operators. |
|
| 443 | Required. Allows interactions between the cluster and OpenShift Console Manager to enable functionality, such as scheduling upgrades. |
|
| 443 |
The |
|
| 443 | Provides core container images as a fallback when quay.io is not available. |
|
| 443 |
The |
|
| 443 | Used by Red Hat OpenShift Service on AWS classic architecture for STS implementation with managed OIDC configuration. |
|
| 443 | This is for GovCloud only. |
|
| 443 | This is for GovCloud only. |
|
| 443 | This is for GovCloud only. |
|
| 443 | This is for GovCloud only. |
| Domain | Port | Function |
|---|---|---|
|
| 443 | Required for telemetry. |
|
| 443 | Required for telemetry. |
|
| 443 | Required for telemetry. |
|
| 443 | Required for telemetry and Red Hat Lightspeed. |
|
| 443 | Required for managed OpenShift-specific telemetry. |
|
| 443 | Required for managed OpenShift-specific telemetry. |
|
| 443 | This is for GovCloud only. |
|
| 443 | This is for GovCloud only. |
|
| 443 | This is for GovCloud only. |
|
| 443 | This is for GovCloud only. |
Managed clusters require enabling telemetry to allow Red Hat to react more quickly to problems, better support the customers, and better understand how product upgrades impact clusters. For more information about how remote health monitoring data is used by Red Hat, see About remote health monitoring in the Additional resources section.
| Domain | Port | Function |
|---|---|---|
|
| 443 | Required to access AWS services and resources. |
Alternatively, if you choose to not use a wildcard for Amazon Web Services (AWS) APIs, you must allowlist the following URLs:
| Domain | Port | Function |
|---|---|---|
|
| 443 | Used to install and manage clusters in an AWS environment. |
|
| 443 | Used to install and manage clusters in an AWS environment. |
|
| 443 | Used to install and manage clusters in an AWS environment. |
|
| 443 | Used to install and manage clusters in an AWS environment. |
|
| 443 | Used to install and manage clusters in an AWS environment, for clusters configured to use the global endpoint for AWS STS. |
|
| 443 | Used to install and manage clusters in an AWS environment, for clusters configured to use regionalized endpoints for AWS STS. See AWS STS regionalized endpoints for more information. |
|
| 443 | Used to install and manage clusters in an AWS environment. This endpoint is always us-east-1, regardless of the region the cluster is deployed in. |
|
| 443 | Used to install and manage clusters in an AWS environment. |
|
| 443 | Used to install and manage clusters in an AWS environment. |
|
| 443 | Allows the assignment of metadata about AWS resources in the form of tags. |
| Domain | Port | Function |
|---|---|---|
|
| 443 | Used to access mirrored installation content and images. This site is also a source of release image signatures. |
|
| 443 | Used to check if updates are available for the cluster. |
| Domain | Port | Function |
|---|---|---|
|
| 443 | This alerting service is used by the in-cluster alertmanager to send alerts notifying Red Hat SRE of an event to take action on. |
|
| 443 | This alerting service is used by the in-cluster alertmanager to send alerts notifying Red Hat SRE of an event to take action on. |
|
| 443 | Alerting service used by Red Hat OpenShift Service on AWS classic architecture to send periodic pings that indicate whether the cluster is available and running. |
|
| 443 | Alerting service used by Red Hat OpenShift Service on AWS classic architecture to send periodic pings that indicate whether the cluster is available and running. |
|
| 443 |
Required. Used by the |
|
| 22 |
The SFTP server used by |
11.2. Understanding the ROSA deployment workflow
Before you create a Red Hat OpenShift Service on AWS classic architecture cluster, you must complete the AWS prerequisites, verify that the required AWS service quotas are available, and set up your environment.
The Red Hat OpenShift Service on AWS classic architecture workflow consists of several stages, with detailed resources available for each phase of the process.
AWS Security Token Service (STS) is the recommended credential mode for installing and interacting with clusters on Red Hat OpenShift Service on AWS classic architecture because it provides enhanced security.
11.2.1. Overview of the Red Hat OpenShift Service on AWS classic architecture deployment workflow
You can follow the workflow stages outlined in this section to set up and access a Red Hat OpenShift Service on AWS classic architecture cluster.
- Perform the AWS prerequisites. To deploy a Red Hat OpenShift Service on AWS classic architecture cluster, your AWS account must meet the prerequisite requirements.
- Review the required AWS service quotas. To prepare for your cluster deployment, review the AWS service quotas that are required to run a Red Hat OpenShift Service on AWS classic architecture cluster.
-
Configure your AWS account. Before you create a Red Hat OpenShift Service on AWS classic architecture cluster, you must enable Red Hat OpenShift Service on AWS classic architecture in your AWS account, install and configure the AWS CLI (
aws) tool, and verify the AWS CLI tool configuration. -
Install the Red Hat OpenShift Service on AWS classic architecture and OpenShift CLI tools and verify the AWS servce quotas. Install and configure the ROSA command-line interface (CLI) (
rosa) and the OpenShift CLI (oc). You can verify if the required AWS resource quotas are available by using the ROSA CLI. -
Create a Red Hat OpenShift Service on AWS classic architecture cluster or Create a ROSA cluster using AWS PrivateLink. Use the ROSA CLI (
rosa) to create a cluster. You can optionally create a ROSA cluster with AWS PrivateLink. -
Access a cluster. You can configure an identity provider and grant cluster administrator privileges to the identity provider users as required. You can also access a newly deployed cluster quickly by configuring a
cluster-adminuser. - Revoke access to a ROSA cluster for a user. You can revoke access to a Red Hat OpenShift Service on AWS classic architecture cluster from a user by using the ROSA CLI or the web console.
- Delete a ROSA cluster. You can delete a Red Hat OpenShift Service on AWS classic architecture cluster by using the ROSA CLI.
11.3. Required AWS service quotas
Review this list of the required Amazon Web Service (AWS) service quotas that are required to run an Red Hat OpenShift Service on AWS classic architecture cluster.
AWS Security Token Service (STS) is the recommended credential mode for installing and interacting with clusters on Red Hat OpenShift Service on AWS classic architecture because it provides enhanced security.
11.3.1. Required AWS service quotas
The table below describes the AWS service quotas and levels required to create and run one Red Hat OpenShift Service on AWS classic architecture cluster. Although most default values are suitable for most workloads, you might need to request additional quota for the following cases:
-
Red Hat OpenShift Service on AWS classic architecture clusters require a minimum AWS EC2 service quota of 100 vCPUs to provide for cluster creation, availability, and upgrades. The default maximum value for vCPUs assigned to Running On-Demand Standard Amazon EC2 instances is
5. Therefore if you have not created a Red Hat OpenShift Service on AWS classic architecture cluster using the same AWS account previously, you must request additional EC2 quota forRunning On-Demand Standard (A, C, D, H, I, M, R, T, Z) instances.
-
Some optional cluster configuration features, such as custom security groups, might require you to request additional quota. For example, because Red Hat OpenShift Service on AWS classic architecture associates 1 security group with network interfaces in worker machine pools by default, and the default quota for
Security groups per network interfaceis5, if you want to add 5 custom security groups, you must request additional quota, because this would bring the total number of security groups on worker network interfaces to 6.
The AWS SDK allows Red Hat OpenShift Service on AWS classic architecture to check quotas, but the AWS SDK calculation does not account for your existing usage. Therefore, it is possible for cluster creation to fail because of a lack of available quota even though the AWS SDK quota check passes. To fix this issue, increase your quota.
If you need to modify or increase a specific AWS quota, see Amazon’s documentation on requesting a quota increase. Large quota requests are submitted to Amazon Support for review, and can take some time to be approved. If your quota request is urgent, contact AWS Support.
| Quota name | Service code | Quota code | AWS default | Minimum required | Description |
|---|---|---|---|---|---|
| Running On-Demand Standard (A, C, D, H, I, M, R, T, Z) instances | ec2 | L-1216C47A | 5 | 100 | Maximum number of vCPUs assigned to the Running On-Demand Standard (A, C, D, H, I, M, R, T, Z) instances. The default value of 5 vCPUs is not sufficient to create Red Hat OpenShift Service on AWS classic architecture clusters. |
| Storage for General Purpose SSD (gp2) volume storage in TiB | ebs | L-D18FCD1D | 50 | 300 | The maximum aggregated amount of storage, in TiB, that can be provisioned across General Purpose SSD (gp2) volumes in this Region. |
| Storage for General Purpose SSD (gp3) volume storage in TiB | ebs | L-7A658B76 | 50 | 300 | The maximum aggregated amount of storage, in TiB, that can be provisioned across General Purpose SSD (gp3) volumes in this Region. 300 TiB of storage is the required minimum for optimal performance. |
| Storage for Provisioned IOPS SSD (io1) volumes in TiB | ebs | L-FD252861 | 50 | 300 | The maximum aggregated amount of storage, in TiB, that can be provisioned across Provisioned IOPS SSD (io1) volumes in this Region. 300 TiB of storage is the required minimum for optimal performance. |
| Quota name | Service code | Quota code | AWS default | Minimum required | Description |
|---|---|---|---|---|---|
| EC2-VPC Elastic IPs | ec2 | L-0263D0A3 | 5 | 5 | The maximum number of Elastic IP addresses that you can allocate for EC2-VPC in this Region. |
| VPCs per Region | vpc | L-F678F1CE | 5 | 5 | The maximum number of VPCs per Region. This quota is directly tied to the maximum number of internet gateways per Region. |
| Internet gateways per Region | vpc | L-A4707A72 | 5 | 5 | The maximum number of internet gateways per Region. This quota is directly tied to the maximum number of VPCs per Region. To increase this quota, increase the number of VPCs per Region. |
| Network interfaces per Region | vpc | L-DF5E4CA3 | 5,000 | 5,000 | The maximum number of network interfaces per Region. |
| Security groups per network interface | vpc | L-2AFB9258 | 5 | 5 | The maximum number of security groups per network interface. This quota, multiplied by the quota for rules per security group, cannot exceed 1000. |
| Snapshots per Region | ebs | L-309BACF6 | 10,000 | 10,000 | The maximum number of snapshots per Region |
| IOPS for Provisioned IOPS SSD (Io1) volumes | ebs | L-B3A130E6 | 300,000 | 300,000 | The maximum aggregated number of IOPS that can be provisioned across Provisioned IOPS SDD (io1) volumes in this Region. |
| Application Load Balancers per Region | elasticloadbalancing | L-53DA6B97 | 50 | 50 | The maximum number of Application Load Balancers that can exist in each region. |
| Classic Load Balancers per Region | elasticloadbalancing | L-E9E9831D | 20 | 20 | The maximum number of Classic Load Balancers that can exist in each region. |
11.4. Configuring your AWS account
After you complete the AWS prerequisites, configure your AWS account and enable the Red Hat OpenShift Service on AWS classic architecture service.
AWS Security Token Service (STS) is the recommended credential mode for installing and interacting with clusters on Red Hat OpenShift Service on AWS classic architecture because it provides enhanced security.
11.4.1. Configuring your AWS account
To configure your AWS account to use the Red Hat OpenShift Service on AWS classic architecture service, complete the following steps.
Prerequisites
- Review and complete the deployment prerequisites and policies.
- Create a Red Hat account, if you do not already have one. Then, check your email for a verification link. You will need these credentials to install ROSA.
Procedure
Log in to the Amazon Web Services (AWS) account that you want to use.
A dedicated AWS account is recommended to run production clusters. If you are using AWS Organizations, you can use an AWS account within your organization or create a new one.
If you are using AWS Organizations and you need to have a service control policy (SCP) applied to the AWS account you plan to use, see AWS Prerequisites for details on the minimum required SCP.
As part of the cluster creation process,
rosaestablishes anosdCcsAdminIAM user. This user uses the IAM credentials you provide when configuring the AWS CLI.NoteThis user has
Programmaticaccess enabled and theAdministratorAccesspolicy attached to it.Enable the ROSA service in the AWS Console.
- Sign in to your AWS account.
- To enable ROSA, go to the ROSA service and select Enable OpenShift.
Install and configure the AWS CLI.
Follow the AWS command-line interface documentation to install and configure the AWS CLI for your operating system.
Specify the correct
aws_access_key_idandaws_secret_access_keyin the.aws/credentialsfile. See AWS Configuration basics in the AWS documentation.Set a default AWS region.
NoteIt is recommended to set the default AWS region by using the environment variable.
The Red Hat OpenShift Service on AWS classic architecture service evaluates regions in the following priority order:
-
The region specified when running the
rosacommand with the--regionflag. -
The region set in the
AWS_DEFAULT_REGIONenvironment variable. See Environment variables to configure the AWS CLI in the AWS documentation. - The default region set in your AWS configuration file. See Quick configuration with aws configure in the AWS documentation.
-
The region specified when running the
Optional: Configure your AWS CLI settings and credentials by using an AWS named profile.
rosaevaluates AWS named profiles in the following priority order:-
The profile specified when running the
rosacommand with the--profileflag. -
The profile set in the
AWS_PROFILEenvironment variable. See Named profiles in the AWS documentation.
-
The profile specified when running the
Verify the AWS CLI is installed and configured correctly by running the following command to query the AWS API:
$ aws sts get-caller-identity --output textExample output
<aws_account_id> arn:aws:iam::<aws_account_id>:user/<username> <aws_user_id>After completing these steps, install Red Hat OpenShift Service on AWS classic architecture.
11.5. Installing the ROSA CLI (rosa)
After you configure your AWS account, install and configure the ROSA command-line interface (CLI) (rosa).
AWS Security Token Service (STS) is the recommended credential mode for installing and interacting with clusters on Red Hat OpenShift Service on AWS classic architecture because it provides enhanced security.
11.5.1. Installing and configuring the ROSA CLI
Install and configure the ROSA command-line interface (CLI) (rosa). You can also install the OpenShift CLI (oc) and verify if the required AWS resource quotas are available by using the ROSA CLI.
Prerequisites
- Review and complete the AWS prerequisites and Red Hat OpenShift Service on AWS classic architecture policies.
- Create a Red Hat account, if you do not already have one. Then, check your email for a verification link. You will need these credentials to install Red Hat OpenShift Service on AWS classic architecture.
- Configure your AWS account and enable the Red Hat OpenShift Service on AWS classic architecture service in your AWS account.
Procedure
Install
rosa, the ROSA CLI.- Download the latest release of the ROSA CLI for your operating system.
-
Optional: Rename the executable file you downloaded to
rosa. This documentation usesrosato refer to the executable file. Optional: Add
rosato your path.Example
$ mv rosa /usr/local/bin/rosaEnter the following command to verify your installation:
$ rosaExample output
Command-line tool for Red Hat OpenShift Service on AWS.
For further documentation visit https://access.redhat.com/documentation/en-us/red_hat_openshift_service_on_aws

Usage:
  rosa [command]

Available Commands:
  completion  Generates completion scripts
  create      Create a resource from stdin
  delete      Delete a specific resource
  describe    Show details of a specific resource
  download    Download necessary tools for using your cluster
  edit        Edit a specific resource
  grant       Grant role to a specific resource
  help        Help about any command
  init        Applies templates to support Red Hat OpenShift Service on AWS
  install     Installs a resource into a cluster
  link        Link a ocm/user role from stdin
  list        List all resources of a specific type
  login       Log in to your Red Hat account
  logout      Log out
  logs        Show installation or uninstallation logs for a cluster
  revoke      Revoke role from a specific resource
  uninstall   Uninstalls a resource from a cluster
  unlink      UnLink a ocm/user role from stdin
  upgrade     Upgrade a resource
  verify      Verify resources are configured correctly for cluster install
  version     Prints the version of the tool
  whoami      Displays user account information

Flags:
      --color string   Surround certain characters with escape sequences to display them in color on the terminal. Allowed options are [auto never always] (default "auto")
      --debug          Enable debug mode.
  -h, --help           help for rosa

Use "rosa [command] --help" for more information about a command.
Optional: Generate the command completion scripts for the ROSA CLI. The following example generates the Bash completion scripts for a Linux machine:
$ rosa completion bash | sudo tee /etc/bash_completion.d/rosaOptional: Enable command completion for the ROSA CLI from your existing terminal. The following example enables Bash completion for
rosain an existing terminal on a Linux machine:$ source /etc/bash_completion.d/rosa
Log in to your Red Hat account with
rosa.Enter the following command.
$ rosa loginReplace
<my_offline_access_token>with your token.Example output
To login to your Red Hat account, get an offline access token at https://console.redhat.com/openshift/token/rosa
? Copy the token and paste it here: <my-offline-access-token>
Example output continued
I: Logged in as 'rh-rosa-user' on 'https://api.openshift.com'
Enter the following command to verify that your AWS account has the necessary permissions.
$ rosa verify permissionsExample output
I: Validating SCP policies... I: AWS SCP policies okNoteThis command verifies permissions only for Red Hat OpenShift Service on AWS classic architecture clusters that do not use the AWS Security Token Service (STS).
Verify that your AWS account has the necessary quota to deploy a Red Hat OpenShift Service on AWS classic architecture cluster.
$ rosa verify quota --region=us-west-2Example output
I: Validating AWS quota... I: AWS quota okNoteSometimes your AWS quota varies by region. If you receive any errors, try a different region.
If you need to increase your quota, go to your AWS console, and request a quota increase for the service that failed.
After both the permissions and quota checks pass, proceed to the next step.
Prepare your AWS account for cluster deployment:
Run the following command to verify your Red Hat and AWS credentials are setup correctly. Check that your AWS Account ID, Default Region and ARN match what you expect. You can safely ignore the rows beginning with
OCMfor now.$ rosa whoamiExample output
AWS Account ID:               000000000000
AWS Default Region:           us-east-2
AWS ARN:                      arn:aws:iam::000000000000:user/hello
OCM API:                      https://api.openshift.com
OCM Account ID:               1DzGIdIhqEWyt8UUXQhSoWaaaaa
OCM Account Name:             Your Name
OCM Account Username:         you@domain.com
OCM Account Email:            you@domain.com
OCM Organization ID:          1HopHfA2hcmhup5gCr2uH5aaaaa
OCM Organization Name:        Red Hat
OCM Organization External ID: 0000000
Initialize your AWS account. This step runs a CloudFormation template that prepares your AWS account for cluster deployment and management. This step typically takes 1-2 minutes to complete.
$ rosa initExample output
I: Logged in as 'rh-rosa-user' on 'https://api.openshift.com'
I: Validating AWS credentials...
I: AWS credentials are valid!
I: Validating SCP policies...
I: AWS SCP policies ok
I: Validating AWS quota...
I: AWS quota ok
I: Ensuring cluster administrator user 'osdCcsAdmin'...
I: Admin user 'osdCcsAdmin' created successfully!
I: Verifying whether OpenShift command-line tool is available...
E: OpenShift command-line tool is not installed.
Run 'rosa download oc' to download the latest version, then add it to your PATH.
Install the OpenShift CLI (
oc) from the ROSA CLI.Enter this command to download the latest version of the OpenShift CLI:
$ rosa download oc- After downloading the OpenShift CLI, extract it and add it to your path.
Enter this command to verify that the OpenShift CLI is installed correctly:
$ rosa verify oc
Next steps
- Create a Red Hat OpenShift Service on AWS classic architecture cluster.
11.6. Creating a ROSA cluster without AWS STS
After you set up your environment and install Red Hat OpenShift Service on AWS classic architecture, create a cluster.
This document describes how to set up a Red Hat OpenShift Service on AWS classic architecture cluster. Alternatively, you can create a Red Hat OpenShift Service on AWS classic architecture cluster with AWS PrivateLink.
AWS Security Token Service (STS) is the recommended credential mode for installing and interacting with clusters on Red Hat OpenShift Service on AWS classic architecture because it provides enhanced security.
11.6.1. Creating your cluster
You can create a Red Hat OpenShift Service on AWS classic architecture cluster using the Red Hat OpenShift Service on AWS classic architecture CLI (rosa).
Prerequisites
-
You have installed the ROSA command-line interface (CLI) (
rosa).
AWS Shared VPCs are not currently supported for ROSA installs.
Procedure
You can create a cluster using the default settings or by specifying custom settings using the interactive mode. To view other options when creating a cluster, enter the
rosa create cluster --helpcommand.Creating a cluster can take up to 40 minutes.
NoteMultiple availability zones (AZ) are recommended for production workloads. The default is a single availability zone. Use
--helpfor an example of how to set this option manually or use interactive mode to be prompted for this setting.To create your cluster with the default cluster settings:
$ rosa create cluster --cluster-name=<cluster_name>Example output
I: Creating cluster with identifier '1de87g7c30g75qechgh7l5b2bha6r04e' and name 'rh-rosa-test-cluster1'
I: To view list of clusters and their status, run `rosa list clusters`
I: Cluster 'rh-rosa-test-cluster1' has been created.
I: Once the cluster is 'Ready' you will need to add an Identity Provider and define the list of cluster administrators. See `rosa create idp --help` and `rosa create user --help` for more information.
I: To determine when your cluster is Ready, run `rosa describe cluster rh-rosa-test-cluster1`.
To create a cluster using interactive prompts:
$ rosa create cluster --interactiveTo configure your networking IP ranges, you can use the following default ranges. For more information when using manual mode, use the
rosa create cluster --help | grep cidrcommand. In interactive mode, you are prompted for the settings.- Node CIDR: 10.0.0.0/16
- Service CIDR: 172.30.0.0/16
- Pod CIDR: 10.128.0.0/14
Enter the following command to check the status of your cluster. During cluster creation, the
Statefield from the output will transition frompendingtoinstalling, and finally toready.$ rosa describe cluster --cluster=<cluster_name>Example output
Name: rh-rosa-test-cluster1 OpenShift Version: 4.6.8 DNS: *.example.com ID: uniqueidnumber External ID: uniqueexternalidnumber AWS Account: 123456789101 API URL: https://api.rh-rosa-test-cluster1.example.org:6443 Console URL: https://console-openshift-console.apps.rh-rosa-test-cluster1.example.or Nodes: Master: 3, Infra: 2, Compute: 2 Region: us-west-2 Multi-AZ: false State: ready Channel Group: stable Private: No Created: Jan 15 2021 16:30:55 UTC Details Page: https://console.redhat.com/examplename/details/idnumberNoteIf installation fails or the
Statefield does not change toreadyafter 40 minutes, check the installation troubleshooting documentation for more details.Track the progress of the cluster creation by watching the OpenShift installer logs:
$ rosa logs install --cluster=<cluster_name> --watch
Next steps
- Configure identity providers.
11.7. Configuring a private cluster
A Red Hat OpenShift Service on AWS classic architecture cluster can be made private so that internal applications can be hosted inside a corporate network. In addition, private clusters can be configured to have only internal API endpoints for increased security.
Privacy settings can be configured during cluster creation or after a cluster is established.
11.7.1. Enabling private cluster on a new cluster
You can enable the private cluster setting when creating a new Red Hat OpenShift Service on AWS classic architecture cluster.
Private clusters cannot be used with AWS security token service (STS). However, STS supports AWS PrivateLink clusters.
Prerequisites
You have configured one of the following to allow private access:
- AWS VPC Peering
- VPN
- DirectConnect
- TransitGateway
Procedure
Enter the following command to create a new private cluster.
$ rosa create cluster --cluster-name=<cluster_name> --privateNoteAlternatively, use
--interactiveto be prompted for each cluster option.
11.7.2. Enabling private cluster on an existing cluster
After a cluster has been created, you can enable the cluster to be private.
Private clusters cannot be used with AWS security token service (STS). However, STS supports AWS PrivateLink clusters.
Prerequisites
You have configured one of the following to allow private access:
- AWS VPC Peering
- VPN
- DirectConnect
- TransitGateway
Procedure
Enter the following command to enable the
--privateoption on an existing cluster.$ rosa edit cluster --cluster=<cluster_name> --privateNoteTransitioning your cluster between private and public can take several minutes to complete.
11.8. Deleting access to a ROSA cluster
Delete access to a Red Hat OpenShift Service on AWS classic architecture cluster using the ROSA CLI.
AWS Security Token Service (STS) is the recommended credential mode for installing and interacting with clusters on Red Hat OpenShift Service on AWS classic architecture because it provides enhanced security.
11.8.1. Revoking dedicated-admin access using the ROSA CLI
You can revoke access for a dedicated-admin user if you are the user who created the cluster, the organization administrator user, or the super administrator user.
Prerequisites
- You have added an Identity Provider (IDP) to your cluster.
- You have the IDP user name for the user whose privileges you are revoking.
- You are logged in to the cluster.
Procedure
Enter the following command to revoke the
dedicated-adminaccess of a user:$ rosa revoke user dedicated-admin --user=<idp_user_name> --cluster=<cluster_name>Enter the following command to verify that your user no longer has
dedicated-adminaccess. The output does not list the revoked user.$ oc get groups dedicated-admins
11.8.2. Revoking cluster-admin access using the ROSA CLI
Only the user who created the cluster can revoke access for cluster-admin users.
Prerequisites
- You have added an Identity Provider (IDP) to your cluster.
- You have the IDP user name for the user whose privileges you are revoking.
- You are logged in to the cluster.
Procedure
Enter the following command to revoke the
cluster-adminaccess of a user:$ rosa revoke user cluster-admins --user=myusername --cluster=myclusterEnter the following command to verify that the user no longer has
cluster-adminaccess. The output does not list the revoked user.$ oc get groups cluster-admins
11.9. Deleting a ROSA cluster
Delete a Red Hat OpenShift Service on AWS classic architecture cluster using the ROSA CLI.
AWS Security Token Service (STS) is the recommended credential mode for installing and interacting with clusters on Red Hat OpenShift Service on AWS classic architecture because it provides enhanced security.
11.9.1. Prerequisites
If Red Hat OpenShift Service on AWS classic architecture created a VPC, you must remove the following items from your cluster before you can successfully delete your cluster:
- Network configurations, such as VPN configurations and VPC peering connections
- Any additional services that were added to the VPC
If these configurations and services remain, the cluster does not delete properly.
11.9.2. Deleting a ROSA cluster and the cluster-specific IAM resources
You can delete a Red Hat OpenShift Service on AWS classic architecture (ROSA) with AWS Security Token Service (STS) cluster by using the ROSA CLI (rosa) or Red Hat OpenShift Cluster Manager.
After deleting the cluster, you can clean up the cluster-specific Identity and Access Management (IAM) resources in your AWS account by using the ROSA CLI (rosa). The cluster-specific resources include the Operator roles and the OpenID Connect (OIDC) provider.
The cluster deletion must complete before you remove the IAM resources, because the resources are used in the cluster deletion and clean-up processes.
If add-ons are installed, the cluster deletion takes longer because add-ons are uninstalled before the cluster is deleted. The amount of time depends on the number and size of the add-ons.
If the cluster that created the VPC during the installation is deleted, the associated installation program-created VPC will also be deleted, resulting in the failure of all the clusters that are using the same VPC. Additionally, any resources created with the same tagSet key-value pair of the resources created by the installation program and labeled with a value of owned will also be deleted.
Prerequisites
- You have installed a ROSA cluster.
-
You have installed and configured the latest ROSA CLI (
rosa) on your installation host.
Procedure
Obtain the cluster ID, the Amazon Resource Names (ARNs) for the cluster-specific Operator roles and the endpoint URL for the OIDC provider:
$ rosa describe cluster --cluster=<cluster_name>Example output
Name: mycluster ID: 1s3v4x39lhs8sm49m90mi0822o34544a ... Operator IAM Roles: - arn:aws:iam::<aws_account_id>:role/mycluster-x4q9-openshift-machine-api-aws-cloud-credentials - arn:aws:iam::<aws_account_id>:role/mycluster-x4q9-openshift-cloud-credential-operator-cloud-crede - arn:aws:iam::<aws_account_id>:role/mycluster-x4q9-openshift-image-registry-installer-cloud-creden - arn:aws:iam::<aws_account_id>:role/mycluster-x4q9-openshift-ingress-operator-cloud-credentials - arn:aws:iam::<aws_account_id>:role/mycluster-x4q9-openshift-cluster-csi-drivers-ebs-cloud-credent - arn:aws:iam::<aws_account_id>:role/mycluster-x4q9-openshift-cloud-network-config-controller-cloud State: ready Private: No Created: May 13 2022 11:26:15 UTC Details Page: https://console.redhat.com/openshift/details/s/296kyEFwzoy1CREQicFRdZybrc0 OIDC Endpoint URL: https://oidc.op1.openshiftapps.com/<oidc_config_id>-
The
IDfield lists the cluster ID. -
The
Operator IAM Rolesfield specifies the ARNs for the cluster-specific Operator roles. For example, in the sample output the ARN for the role required by the Machine Config Operator isarn:aws:iam::<aws_account_id>:role/mycluster-x4q9-openshift-machine-api-aws-cloud-credentials. -
The
OIDC Endpoint URLfield displays the endpoint URL for the cluster-specific OIDC provider.
ImportantYou require the cluster ID to delete the cluster-specific STS resources using the ROSA CLI (
rosa) after the cluster is deleted.-
The
Delete the cluster:
To delete the cluster by using Red Hat OpenShift Cluster Manager:
- Navigate to OpenShift Cluster Manager.
-
Click the Options menu
next to your cluster and select Delete cluster.
- Type the name of your cluster at the prompt and click Delete.
To delete the cluster using the ROSA CLI (
rosa):Enter the following command to delete the cluster and watch the logs, replacing
<cluster_name>with the name or ID of your cluster:$ rosa delete cluster --cluster=<cluster_name> --watchImportantYou must wait for the cluster deletion to complete before you remove the Operator roles and the OIDC provider. The cluster-specific Operator roles are required to clean-up the resources created by the OpenShift Operators. The Operators use the OIDC provider to authenticate.
Delete the OIDC provider that the cluster Operators use to authenticate:
$ rosa delete oidc-provider -c <cluster_id> --mode autoNoteYou can use the
-yoption to automatically answer yes to the prompts.Optional. Delete the cluster-specific Operator IAM roles:
ImportantThe account-wide IAM roles can be used by other ROSA clusters in the same AWS account. Only remove the roles if they are not required by other clusters.
$ rosa delete operator-roles -c <cluster_id> --mode auto
11.9.3. Troubleshooting cluster deletion
Troubleshooting issues that prevent cluster deletion involves verifying IAM configurations and confirming the removal of resource dependencies.
Procedure
- If the cluster cannot be deleted because of missing IAM roles, see Repairing a cluster that cannot be deleted.
If the cluster cannot be deleted for other reasons:
- Check that there are no Add-ons for your cluster pending in the Hybrid Cloud Console.
- Check that all AWS resources and dependencies have been deleted in the Amazon Web Console.
11.10. Command quick reference for creating clusters and users
If you have already created your first cluster and users, this list can serve as a command quick reference list when creating additional clusters and users.
AWS Security Token Service (STS) is the recommended credential mode for installing and interacting with clusters on Red Hat OpenShift Service on AWS classic architecture because it provides enhanced security.
11.10.1. Command quick reference list
If you have already created your first cluster and users, this list can serve as a command quick reference list when creating additional clusters and users.
## Configures your AWS account and ensures everything is setup correctly
$ rosa init
## Starts the cluster creation process (~30-40minutes)
$ rosa create cluster --cluster-name=<cluster_name>## Connect your IDP to your cluster
$ rosa create idp --cluster=<cluster_name> --interactive## Promotes a user from your IDP to dedicated-admin level
$ rosa grant user dedicated-admin --user=<idp_user_name> --cluster=<cluster_name>## Checks if your install is ready (look for State: Ready),
## and provides your Console URL to login to the web console.
$ rosa describe cluster --cluster=<cluster_name>
Legal Notice
Copyright © Red Hat
OpenShift documentation is licensed under the Apache License 2.0 (https://www.apache.org/licenses/LICENSE-2.0).
Modified versions must remove all Red Hat trademarks.
Portions adapted from https://github.com/kubernetes-incubator/service-catalog/ with modifications by Red Hat.
Red Hat, Red Hat Enterprise Linux, the Red Hat logo, the Shadowman logo, JBoss, OpenShift, Fedora, the Infinity logo, and RHCE are trademarks of Red Hat, Inc., registered in the United States and other countries.
Linux® is the registered trademark of Linus Torvalds in the United States and other countries.
Java® is a registered trademark of Oracle and/or its affiliates.
XFS® is a trademark of Silicon Graphics International Corp. or its subsidiaries in the United States and/or other countries.
MySQL® is a registered trademark of MySQL AB in the United States, the European Union and other countries.
Node.js® is an official trademark of the OpenJS Foundation.
The OpenStack® Word Mark and OpenStack logo are either registered trademarks/service marks or trademarks/service marks of the OpenStack Foundation, in the United States and other countries and are used with the OpenStack Foundation’s permission. We are not affiliated with, endorsed or sponsored by the OpenStack Foundation, or the OpenStack community.
All other trademarks are the property of their respective owners.