Chapter 1. Advanced Red Hat Quay configuration
You can configure your Red Hat Quay after initial deployment using one of the following methods:
-
Using the Red Hat Quay Config Tool. With this tool, a web-based interface for configuring the Red Hat Quay cluster is provided when running the
Quaycontainer inconfigmode. This method is recommended for configuring the Red Hat Quay service. -
Editing the
config.yamlfile. Theconfig.yamlfile contains most configuration information for the Red Hat Quay cluster. Editing theconfig.yamlfile directly is possible, but it is only recommended for advanced tuning and performance features that are not available through the Config Tool. - Using the Red Hat Quay API. Some Red Hat Quay features can be configured through the API.
This content in this section describes how to use each of the aforementioned interfaces and how to configure your deployment with advanced features.
1.1. Using Red Hat Quay Config Tool to modify Red Hat Quay
The Red Hat Quay Config Tool is made available by running a Quay container in config mode alongside the regular Red Hat Quay service.
Use the following sections to run the Config Tool from the Red Hat Quay Operator, or to run the Config Tool on host systems from the command line interface (CLI).
1.1.1. Running the Config Tool from the command line
If you are running Red Hat Quay from a host system, you can use the following procedure to make changes to your configuration after the initial deployment.
Prerequisites
-
You have installed either
podmanordocker.
-
You have installed either
- Start Red Hat Quay in configuration mode.
On the first
Quaynode, enter the following command:$ podman run --rm -it --name quay_config -p 8080:8080 \ -v path/to/config-bundle:/conf/stack \ registry.redhat.io/quay/quay-rhel8:v3.10.17 config <my_secret_password>NoteTo modify an existing config bundle, you can mount your configuration directory into the
Quaycontainer.-
When the Red Hat Quay configuration tool starts, open your browser and navigate to the URL and port used in your configuration file, for example,
quay-server.example.com:8080. - Enter your username and password.
- Modify your Red Hat Quay cluster as desired.
1.1.2. Deploying the config tool using TLS certificates
You can deploy the config tool with secured SSL/TLS certificates by passing environment variables to the runtime variable. This ensures that sensitive data like credentials for the database and storage backend are protected.
The public and private keys must contain valid Subject Alternative Names (SANs) for the route that you deploy the config tool on.
The paths can be specified using CONFIG_TOOL_PRIVATE_KEY and CONFIG_TOOL_PUBLIC_KEY.
If you are running your deployment from a container, the CONFIG_TOOL_PRIVATE_KEY and CONFIG_TOOL_PUBLIC_KEY values the locations of the certificates inside of the container. For example:
$ podman run --rm -it --name quay_config -p 7070:8080 \

-v ${PRIVATE_KEY_PATH}:/tls/localhost.key \
-v ${PUBLIC_KEY_PATH}:/tls/localhost.crt \
-e CONFIG_TOOL_PRIVATE_KEY=/tls/localhost.key \
-e CONFIG_TOOL_PUBLIC_KEY=/tls/localhost.crt \
-e DEBUGLOG=true \
-ti config-app:dev
1.2. Using the API to modify Red Hat Quay
See the Red Hat Quay API Guide for information on how to access Red Hat Quay API.
1.3. Editing the config.yaml file to modify Red Hat Quay
Advanced features that are not available through the Red Hat Quay Config Tool can be implemented by editing the config.yaml file directly. All configuration fields for Red Hat Quay features and settings are available in the Red Hat Quay configuration guide.
The following example is one setting that you can change directly in the config.yaml file. Use this example as a reference when editing your config.yaml file for other features and settings.
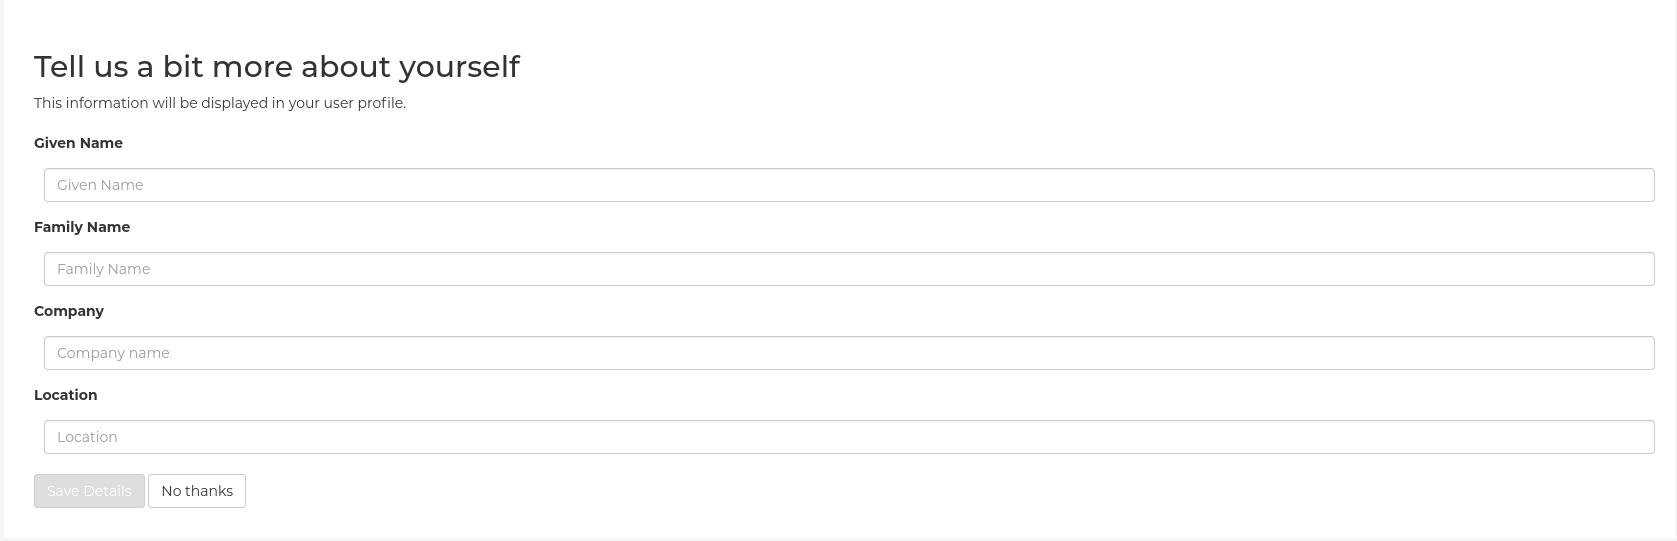
1.3.1. Adding name and company to Red Hat Quay sign-in
By setting the FEATURE_USER_METADATA field to True, users are prompted for their name and company when they first sign in. This is an optional field, but can provide your with extra data about your Red Hat Quay users.
Use the following procedure to add a name and a company to the Red Hat Quay sign-in page.
Procedure
-
Add, or set, the
FEATURE_USER_METADATAconfiguration field toTruein yourconfig.yamlfile. For example:
# ...
FEATURE_USER_METADATA: true
# ...- Redeploy Red Hat Quay.
Now, when prompted to log in, users are requested to enter the following information: