Chapter 3. Get Started
3.1. Using the Red Hat Single Sign-On for OpenShift Image Streams and Application Templates
Red Hat JBoss Middleware for OpenShift images are pulled on demand from the secured Red Hat Registry: registry.redhat.io, which requires authentication. To retrieve content, you will need to log into the registry using the Red Hat account.
To consume container images from registry.redhat.io in shared environments such as OpenShift, it is recommended for an administrator to use a Registry Service Account, also referred to as authentication tokens, in place of an individual person’s Red Hat Customer Portal credentials.
To create a Registry Service Account, navigate to the Registry Service Account Management Application, and log in if necessary.
- From the Registry Service Accounts page, click Create Service Account.
Provide a name for the Service Account, for example registry.redhat.io-sa. It will be prepended with a fixed, random string.
- Enter a description for the Service Account, for example Service account to consume container images from registry.redhat.io..
- Click Create.
- After the Service Account was created, click the registry.redhat.io-sa link in the Account name column of the table presented on the Registry Service Accounts page.
- Finally, click the OpenShift Secret tab, and perform all steps listed on that page.
See the Red Hat Container Registry Authentication article for more information.
- Ensure that you are logged in as a cluster administrator or a user with project administrator access to the global openshift project:
Choose a command based on your version of OpenShift Container Platform.
If you are running an OpenShift Container Platform v3 based cluster instance on (some) of your master host(s), perform the following:
oc login -u system:admin
$ oc login -u system:adminCopy to Clipboard Copied! Toggle word wrap Toggle overflow If you are running an OpenShift Container Platform v4 based cluster instance, log in to the CLI as the kubeadmin user:
oc login -u kubeadmin -p password https://openshift.example.com:6443
$ oc login -u kubeadmin -p password https://openshift.example.com:6443Copy to Clipboard Copied! Toggle word wrap Toggle overflow
Run the following commands to update the core set of Red Hat Single Sign-On 7.4.10.GA resources for OpenShift in the
openshiftproject:Copy to Clipboard Copied! Toggle word wrap Toggle overflow Run the following command to install the Red Hat Single Sign-On 7.4.10.GA OpenShift image streams in the
openshiftproject:oc -n openshift import-image rh-sso-7/sso74-openshift-rhel8:7.4 --from=registry.redhat.io/rh-sso-7/sso74-openshift-rhel8:7.4 --confirm
$ oc -n openshift import-image rh-sso-7/sso74-openshift-rhel8:7.4 --from=registry.redhat.io/rh-sso-7/sso74-openshift-rhel8:7.4 --confirmCopy to Clipboard Copied! Toggle word wrap Toggle overflow
3.2. Deploying the Red Hat Single Sign-On Image
3.2.1. Preparing the Deployment
Log in to the OpenShift CLI with a user that holds the cluster:admin role.
Create a new project:
oc new-project sso-app-demo
$ oc new-project sso-app-demoCopy to Clipboard Copied! Toggle word wrap Toggle overflow Add the
viewrole to thedefaultservice account. This enables the service account to view all the resources in the sso-app-demo namespace, which is necessary for managing the cluster.oc policy add-role-to-user view system:serviceaccount:$(oc project -q):default
$ oc policy add-role-to-user view system:serviceaccount:$(oc project -q):defaultCopy to Clipboard Copied! Toggle word wrap Toggle overflow
3.2.2. Deploying the Red Hat Single Sign-On Image using the Application Template
3.2.2.1. Deploying the Template using OpenShift CLI
List the available Red Hat Single Sign-On application templates:
Copy to Clipboard Copied! Toggle word wrap Toggle overflow Deploy the selected one:
Copy to Clipboard Copied! Toggle word wrap Toggle overflow
Alternatively, perform one of the following procedures to deploy the Red Hat Single Sign-On template by using the OpenShift 3.x or 4.x web console.
3.2.2.2. Deploying the Template using the OpenShift 3.x Web Console
- Log in to the OpenShift web console and select the sso-app-demo project space.
- Click Add to Project, then Browse Catalog to list the default image streams and templates.
- Use the Filter by Keyword search bar to limit the list to those that match sso. You may need to click Middleware, then Integration to show the desired application template.
- Select an Red Hat Single Sign-On application template. This example uses Red Hat Single Sign-On 7.4 (Ephemeral).
- Click Next in the Information step.
- From the Add to Project drop-down menu, select the sso-app-demo project space. Then click Next.
- Select Do not bind at this time radio button in the Binding step. Click Create to continue.
- In the Results step, click the Continue to the project overview link to verify the status of the deployment.
3.2.2.3. Deploying the Template using the OpenShift 4.x Web Console
Prerequisites
- Perform the steps described in Using the Red Hat Single Sign-On for OpenShift Image Streams and Application Templates.
Procedure
- Log in to the OpenShift web console and select the sso-app-demo project space.
On the left sidebar, click the
Administratortab and then click</> Developer.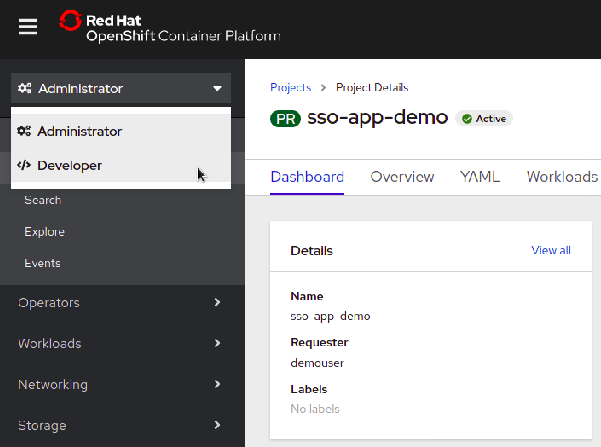
Click
From Catalog.
Search for
sso.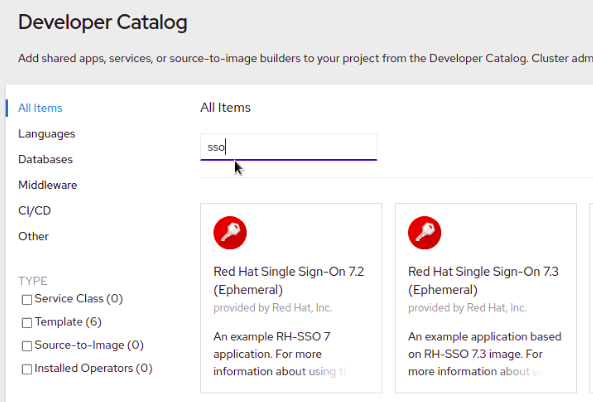
Choose a template such as
Red Hat Single Sign-On 7.4 on OpenJDK (Ephemeral).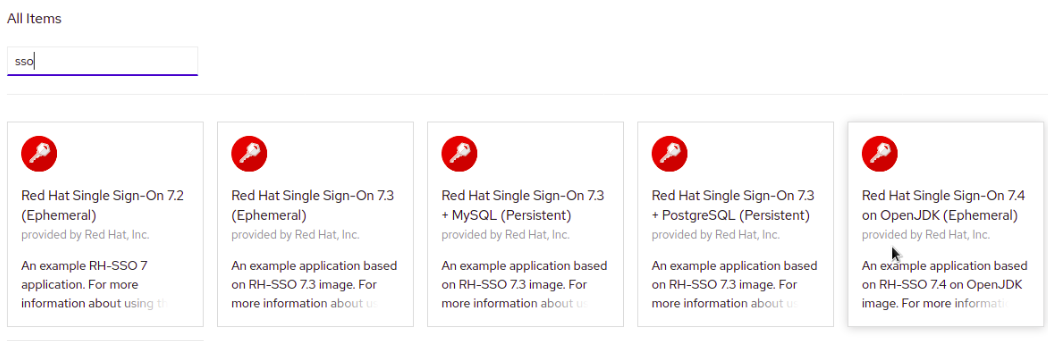
Click
Instantiate Template.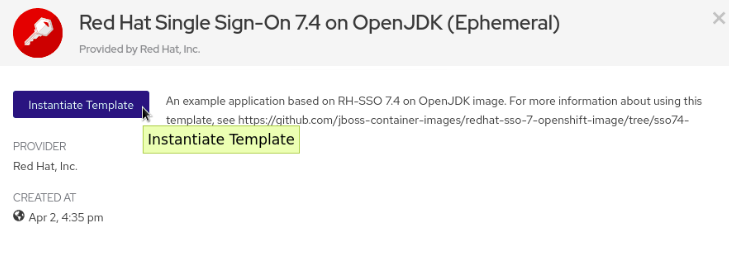
-
Adjust the template parameters if necessary and click
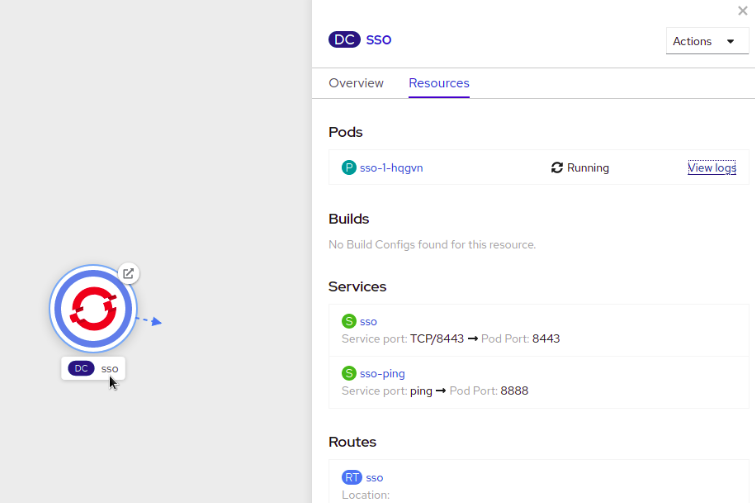
Create. Verify the Red Hat Single Sign-On for OpenShift image was deployed.
3.2.3. Accessing the Administrator Console of the Red Hat Single Sign-On Pod
After the template is deployed, identify the available routes:
oc get routes
$ oc get routes
NAME     HOST/PORT
sso sso-sso-app-demo.openshift.example.comand access the Red Hat Single Sign-On administrator console at:
- https://sso-sso-app-demo.openshift.example.com/auth/admin
using the administrator account.