Este contenido no está disponible en el idioma seleccionado.
4.13. Multi-Level Security (MLS)
The Multi-Level Security technology refers to a security scheme that enforces the Bell-La Padula Mandatory Access Model. Under MLS, users and processes are called subjects, and files, devices, and other passive components of the system are called objects. Both subjects and objects are labeled with a security level, which entails a subject's clearance or an object's classification. Each security level is composed of a sensitivity and a category, for example, an internal release schedule is filed under the internal documents category with a confidential sensitivity.
Figure 4.1, “Levels of clearance” shows levels of clearance as originally designed by the US defense community. Relating to our internal schedule example above, only users that have gained the confidential clearance are allowed to view documents in the confidential category. However, users who only have the confidential clearance are not allowed to view documents that require higher levels or clearance; they are allowed read access only to documents with lower levels of clearance, and write access to documents with higher levels of clearance.
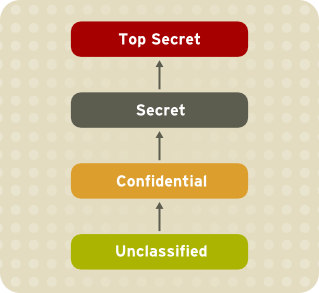
Figure 4.1. Levels of clearance
Figure 4.2, “Allowed data flows using MLS” shows all allowed data flows between a subject running under the "Secret" security level and various objects with different security levels. In simple terms, the Bell-LaPadula model enforces two properties: no read up and no write down.

Figure 4.2. Allowed data flows using MLS
4.13.1. MLS and System Privileges
Copiar enlaceEnlace copiado en el portapapeles!
MLS access rules are always combined with conventional access permissions (file permissions). For example, if a user with a security level of "Secret" uses Discretionary Access Control (DAC) to block access to a file by other users, this also blocks access by users with a security level of "Top Secret". It is important to remember that SELinux MLS policy rules are checked after DAC rules. A higher security clearance does not automatically give permission to arbitrarily browse a file system.
Users with top-level clearances do not automatically acquire administrative rights on multi-level systems. While they may have access to all information on the computer, this is different from having administrative rights.
4.13.2. Enabling MLS in SELinux
Copiar enlaceEnlace copiado en el portapapeles!
Note
It is not recommended to use the MLS policy on a system that is running the X Window System.
Follow these steps to enable the SELinux MLS policy on your system.
Procedure 4.19. Enabling SELinux MLS Policy
- Install the selinux-policy-mls package:
~]# yum install selinux-policy-mls - Before the MLS policy is enabled, each file on the file system must be relabeled with an MLS label. When the file system is relabeled, confined domains may be denied access, which may prevent your system from booting correctly. To prevent this from happening, configure
SELINUX=permissivein the/etc/selinux/configfile. Also, enable the MLS policy by configuringSELINUXTYPE=mls. Your configuration file should look like this:# This file controls the state of SELinux on the system. # SELINUX= can take one of these three values: # enforcing - SELinux security policy is enforced. # permissive - SELinux prints warnings instead of enforcing. # disabled - No SELinux policy is loaded. SELINUX=permissive # SELINUXTYPE= can take one of these two values: # targeted - Targeted processes are protected, # mls - Multi Level Security protection. SELINUXTYPE=mls - Make sure SELinux is running in permissive mode:
~]# setenforce 0~]$ getenforce Permissive - Use the
fixfilesscript to create the/.autorelabelfile containing the-Foption to ensure that files are relabeled upon next reboot:~]# fixfiles -F onboot - Reboot your system. During the next boot, all file systems will be relabeled according to the MLS policy. The label process labels all files with an appropriate SELinux context:
*** Warning -- SELinux mls policy relabel is required. *** Relabeling could take a very long time, depending on file *** system size and speed of hard drives. ***********Each*(asterisk) character on the bottom line represents 1000 files that have been labeled. In the above example, eleven*characters represent 11000 files which have been labeled. The time it takes to label all files depends upon the number of files on the system, and the speed of the hard disk drives. On modern systems, this process can take as little as 10 minutes. Once the labeling process finishes, the system will automatically reboot. - In permissive mode, SELinux policy is not enforced, but denials are still logged for actions that would have been denied if running in enforcing mode. Before changing to enforcing mode, as root, enter the following command to confirm that SELinux did not deny actions during the last boot. If SELinux did not deny actions during the last boot, this command does not return any output. See Chapter 11, Troubleshooting for troubleshooting information if SELinux denied access during boot.
~]# grep "SELinux is preventing" /var/log/messages - If there were no denial messages in the
/var/log/messagesfile, or you have resolved all existing denials, configureSELINUX=enforcingin the/etc/selinux/configfile:# This file controls the state of SELinux on the system. # SELINUX= can take one of these three values: # enforcing - SELinux security policy is enforced. # permissive - SELinux prints warnings instead of enforcing. # disabled - No SELinux policy is loaded. SELINUX=enforcing # SELINUXTYPE= can take one of these two values: # targeted - Targeted processes are protected, # mls - Multi Level Security protection. SELINUXTYPE=mls - Reboot your system and make sure SELinux is running in enforcing mode:
~]$ getenforce
Enforcing
and the MLS policy is enabled:~]# sestatus |grep mls Policy from config file: mls
4.13.3. Creating a User With a Specific MLS Range
Copiar enlaceEnlace copiado en el portapapeles!
Follow these steps to create a new Linux user with a specific MLS range:
Procedure 4.20. Creating a User With a Specific MLS Range
- Add a new Linux user using the
useraddcommand and map the new Linux user to an existing SELinux user (in this case,staff_u):~]# useradd -Z staff_u john - Assign the newly-created Linux user a password:
prompt~]# passwd john - Enter the following command as root to view the mapping between SELinux and Linux users. The output should be as follows:
~]# semanage login -l Login Name SELinux User MLS/MCS Range Service __default__ user_u s0-s0 * john staff_u s0-s15:c0.c1023 * root root s0-s15:c0.c1023 * staff staff_u s0-s15:c0.c1023 * sysadm staff_u s0-s15:c0.c1023 * system_u system_u s0-s15:c0.c1023 * - Define a specific range for user
john:~]# semanage login --modify --range s2:c100 john - View the mapping between SELinux and Linux users again. Note that the user
johnnow has a specific MLS range defined:~]# semanage login -l Login Name SELinux User MLS/MCS Range Service __default__ user_u s0-s0 * john staff_u s2:c100 * root root s0-s15:c0.c1023 * staff staff_u s0-s15:c0.c1023 * sysadm staff_u s0-s15:c0.c1023 * system_u system_u s0-s15:c0.c1023 * - To correct the label on john's home directory if needed, enter the following command:
~]# chcon -R -l s2:c100 /home/john
4.13.4. Setting Up Polyinstantiated Directories
Copiar enlaceEnlace copiado en el portapapeles!
The
/tmp and /var/tmp/ directories are normally used for temporary storage by all programs, services, and users. Such setup, however, makes these directories vulnerable to race condition attacks, or an information leak based on file names. SELinux offers a solution in the form of polyinstantiated directories. This effectively means that both /tmp and /var/tmp/ are instantiated, making them appear private for each user. When instantiation of directories is enabled, each user's /tmp and /var/tmp/ directory is automatically mounted under /tmp-inst and /var/tmp/tmp-inst.
Follow these steps to enable polyinstantiation of directories:
Procedure 4.21. Enabling Polyinstantiation Directories
- Uncomment the last three lines in the
/etc/security/namespace.conffile to enable instantiation of the/tmp,/var/tmp/, and users' home directories:~]$ tail -n 3 /etc/security/namespace.conf /tmp /tmp-inst/ level root,adm /var/tmp /var/tmp/tmp-inst/ level root,adm $HOME $HOME/$USER.inst/ level - Ensure that in the
/etc/pam.d/loginfile, thepam_namespace.somodule is configured for session:~]$ grep namespace /etc/pam.d/login session required pam_namespace.so - Reboot your system.