Este contenido no está disponible en el idioma seleccionado.
Chapter 18. Web Servers
HTTP (Hypertext Transfer Protocol) server, or a web server, is a network service that serves content to a client over the web. This typically means web pages, but any other documents can be served as well.
- Apache HTTP Server
- nginx
Important
18.1. The Apache HTTP Server
httpd service, and covers advanced topics such as adding server modules, setting up virtual hosts, or configuring the secure HTTP server.
httpd service configuration accordingly. This section reviews some of the newly added features, outlines important changes, and guides you through the update of older configuration files.
18.1.1. New Features
- Support for large files on 32-bit architectures, allowing the web server to handle files greater than 2GB.
- A new structure for authentication and authorization support, replacing the authentication modules provided in previous versions.
18.1.2. Notable Changes
httpd service configuration:
18.1.3. Updating the Configuration
- Make sure all module names are correct, since they may have changed. Adjust the
LoadModuledirective for each module that has been renamed. - Recompile all third party modules before attempting to load them. This typically means authentication and authorization modules.
- If you use the Apache HTTP Secure Server, see Section 18.1.9, “Enabling the mod_ssl Module” for important information on enabling the Secure Sockets Layer (SSL) protocol.
~]# service httpd configtest
Syntax OK18.1.4. Running the httpd Service
httpd service, make sure you have the httpd installed. You can do so by using the following command:
~]# yum install httpd18.1.4.1. Starting the Service
httpd service, type the following at a shell prompt as root:
~]# service httpd start
Starting httpd: [ OK ]~]# chkconfig httpd onNote
18.1.4.2. Stopping the Service
httpd service, type the following at a shell prompt as root:
~]# service httpd stop
Stopping httpd: [ OK ]~]# chkconfig httpd off18.1.4.3. Restarting the Service
httpd service:
- To restart the service completely, enter the following command as
root:~]# service httpd restart Stopping httpd: [ OK ] Starting httpd: [ OK ]This stops the runninghttpdservice and immediately starts it again. Use this command after installing or removing a dynamically loaded module such as PHP. - To only reload the configuration, as
root, type:~]# service httpd reloadThis causes the runninghttpdservice to reload its configuration file. Any requests being currently processed will be interrupted, which may cause a client browser to display an error message or render a partial page. - To reload the configuration without affecting active requests, enter the following command as
root:~]# service httpd gracefulThis causes the runninghttpdservice to reload its configuration file. Any requests being currently processed will use the old configuration.
18.1.4.4. Verifying the Service Status
httpd service is running, type the following at a shell prompt:
~]# service httpd status
httpd (pid 19014) is running...18.1.5. Editing the Configuration Files
httpd service is started, by default, it reads the configuration from locations that are listed in Table 18.1, “The httpd service configuration files”.
httpd service.
~]# service httpd configtest
Syntax OK18.1.5.1. Common httpd.conf Directives
/etc/httpd/conf/httpd.conf configuration file:
-
<Directory> - The
<Directory>directive allows you to apply certain directives to a particular directory only. It takes the following form:<Directory directory> directive … </Directory>The directory can be either a full path to an existing directory in the local file system, or a wildcard expression.This directive can be used to configure additionalcgi-bindirectories for server-side scripts located outside the directory that is specified byScriptAlias. In this case, theExecCGIandAddHandlerdirectives must be supplied, and the permissions on the target directory must be set correctly (that is,0755).Example 18.1. Using the <Directory> directive
<Directory /var/www/html> Options Indexes FollowSymLinks AllowOverride None Order allow,deny Allow from all </Directory> -
<IfDefine> - The
IfDefinedirective allows you to use certain directives only when a particular parameter is supplied on the command line. It takes the following form:<IfDefine [!]parameter> directive … </IfDefine>The parameter can be supplied at a shell prompt using the-Dparameter command-line option (for example,httpd -DEnableHome). If the optional exclamation mark (that is,!) is present, the enclosed directives are used only when the parameter is not specified.Example 18.2. Using the <IfDefine> directive
<IfDefine EnableHome> UserDir public_html </IfDefine> -
<IfModule> - The
<IfModule>directive allows you to use certain directive only when a particular module is loaded. It takes the following form:<IfModule [!]module> directive … </IfModule>The module can be identified either by its name, or by the file name. If the optional exclamation mark (that is,!) is present, the enclosed directives are used only when the module is not loaded.Example 18.3. Using the <IfModule> directive
<IfModule mod_disk_cache.c> CacheEnable disk / CacheRoot /var/cache/mod_proxy </IfModule> -
<Location> - The
<Location>directive allows you to apply certain directives to a particular URL only. It takes the following form:<Location url> directive … </Location>The url can be either a path relative to the directory specified by theDocumentRootdirective (for example,/server-info), or an external URL such ashttp://example.com/server-info.Example 18.4. Using the <Location> directive
<Location /server-info> SetHandler server-info Order deny,allow Deny from all Allow from .example.com </Location> -
<Proxy> - The
<Proxy>directive allows you to apply certain directives to the proxy server only. It takes the following form:<Proxy pattern> directive … </Proxy>The pattern can be an external URL, or a wildcard expression (for example,http://example.com/*).Example 18.5. Using the <Proxy> directive
<Proxy *> Order deny,allow Deny from all Allow from .example.com </Proxy> -
<VirtualHost> - The
<VirtualHost>directive allows you apply certain directives to particular virtual hosts only. It takes the following form:<VirtualHost address[:port]…> directive … </VirtualHost>The address can be an IP address, a fully qualified domain name, or a special form as described in Table 18.2, “Available <VirtualHost> options”.Expand Table 18.2. Available <VirtualHost> options Option Description *Represents all IP addresses. _default_Represents unmatched IP addresses. Example 18.6. Using the <VirtualHost> directive
<VirtualHost *:80> ServerAdmin webmaster@penguin.example.com DocumentRoot /www/docs/penguin.example.com ServerName penguin.example.com ErrorLog logs/penguin.example.com-error_log CustomLog logs/penguin.example.com-access_log common </VirtualHost> -
AccessFileName - The
AccessFileNamedirective allows you to specify the file to be used to customize access control information for each directory. It takes the following form:AccessFileName filename…The filename is a name of the file to look for in the requested directory. By default, the server looks for.htaccess.For security reasons, the directive is typically followed by theFilestag to prevent the files beginning with.htfrom being accessed by web clients. This includes the.htaccessand.htpasswdfiles.Example 18.7. Using the AccessFileName directive
AccessFileName .htaccess <Files ~ "^\.ht"> Order allow,deny Deny from all Satisfy All </Files> -
Action - The
Actiondirective allows you to specify a CGI script to be executed when a certain media type is requested. It takes the following form:Action content-type pathThe content-type has to be a valid MIME type such astext/html,image/png, orapplication/pdf. The path refers to an existing CGI script, and must be relative to the directory specified by theDocumentRootdirective (for example,/cgi-bin/process-image.cgi).Example 18.8. Using the Action directive
Action image/png /cgi-bin/process-image.cgi -
AddDescription - The
AddDescriptiondirective allows you to specify a short description to be displayed in server-generated directory listings for a given file. It takes the following form:AddDescription "description" filename…The description should be a short text enclosed in double quotes (that is,"). The filename can be a full file name, a file extension, or a wildcard expression.Example 18.9. Using the AddDescription directive
AddDescription "GZIP compressed tar archive" .tgz -
AddEncoding - The
AddEncodingdirective allows you to specify an encoding type for a particular file extension. It takes the following form:AddEncoding encoding extension…The encoding has to be a valid MIME encoding such asx-compress,x-gzip, etc. The extension is a case sensitive file extension, and is conventionally written with a leading dot (for example,.gz).This directive is typically used to instruct web browsers to decompress certain file types as they are downloaded.Example 18.10. Using the AddEncoding directive
AddEncoding x-gzip .gz .tgz -
AddHandler - The
AddHandlerdirective allows you to map certain file extensions to a selected handler. It takes the following form:AddHandler handler extension…The handler has to be a name of a previously defined handler. The extension is a case sensitive file extension, and is conventionally written with a leading dot (for example,.cgi).This directive is typically used to treat files with the.cgiextension as CGI scripts regardless of the directory they are in. Additionally, it is also commonly used to process server-parsed HTML and image-map files.Example 18.11. Using the AddHandler option
AddHandler cgi-script .cgi -
AddIcon - The
AddIcondirective allows you to specify an icon to be displayed for a particular file in server-generated directory listings. It takes the following form:AddIcon path pattern…The path refers to an existing icon file, and must be relative to the directory specified by theDocumentRootdirective (for example,/icons/folder.png). The pattern can be a file name, a file extension, a wildcard expression, or a special form as described in the following table:Expand Table 18.3. Available AddIcon options Option Description ^^DIRECTORY^^Represents a directory. ^^BLANKICON^^Represents a blank line. Example 18.12. Using the AddIcon directive
AddIcon /icons/text.png .txt README -
AddIconByEncoding - The
AddIconByEncodingdirective allows you to specify an icon to be displayed for a particular encoding type in server-generated directory listings. It takes the following form:AddIconByEncoding path encoding…The path refers to an existing icon file, and must be relative to the directory specified by theDocumentRootdirective (for example,/icons/compressed.png). The encoding has to be a valid MIME encoding such asx-compress,x-gzip, etc.Example 18.13. Using the AddIconByEncoding directive
AddIconByEncoding /icons/compressed.png x-compress x-gzip -
AddIconByType - The
AddIconByTypedirective allows you to specify an icon to be displayed for a particular media type in server-generated directory listings. It takes the following form:AddIconByType path content-type…The path refers to an existing icon file, and must be relative to the directory specified by theDocumentRootdirective (for example,/icons/text.png). The content-type has to be either a valid MIME type (for example,text/htmlorimage/png), or a wildcard expression such astext/*,image/*, etc.Example 18.14. Using the AddIconByType directive
AddIconByType /icons/video.png video/* -
AddLanguage - The
AddLanguagedirective allows you to associate a file extension with a specific language. It takes the following form:AddLanguage language extension…The language has to be a valid MIME language such ascs,en, orfr. The extension is a case sensitive file extension, and is conventionally written with a leading dot (for example,.cs).This directive is especially useful for web servers that serve content in multiple languages based on the client's language settings.Example 18.15. Using the AddLanguage directive
AddLanguage cs .cs .cz -
AddType - The
AddTypedirective allows you to define or override the media type for a particular file extension. It takes the following form:AddType content-type extension…The content-type has to be a valid MIME type such astext/html,image/png, etc. The extension is a case sensitive file extension, and is conventionally written with a leading dot (for example,.cs).Example 18.16. Using the AddType directive
AddType application/x-gzip .gz .tgz -
Alias - The
Aliasdirective allows you to refer to files and directories outside the default directory specified by theDocumentRootdirective. It takes the following form:Alias url-path real-pathThe url-path must be relative to the directory specified by theDocumentRootdirective (for example,/images/). The real-path is a full path to a file or directory in the local file system.This directive is typically followed by theDirectorytag with additional permissions to access the target directory. By default, the/icons/alias is created so that the icons from/var/www/icons/are displayed in server-generated directory listings.Example 18.17. Using the Alias directive
Alias /icons/ /var/www/icons/ <Directory "/var/www/icons"> Options Indexes MultiViews FollowSymLinks AllowOverride None Order allow,deny Allow from all <Directory> -
Allow - The
Allowdirective allows you to specify which clients have permission to access a given directory. It takes the following form:Allow from client…The client can be a domain name, an IP address (both full and partial), a network/netmask pair, orallfor all clients.Example 18.18. Using the Allow directive
Allow from 192.168.1.0/255.255.255.0 -
AllowOverride - The
AllowOverridedirective allows you to specify which directives in a.htaccessfile can override the default configuration. It takes the following form:AllowOverride type…The type has to be one of the available grouping options as described in Table 18.4, “Available AllowOverride options”.Expand Table 18.4. Available AllowOverride options Option Description AllAll directives in .htaccessare allowed to override earlier configuration settings.NoneNo directive in .htaccessis allowed to override earlier configuration settings.AuthConfigAllows the use of authorization directives such as AuthName,AuthType, orRequire.FileInfoAllows the use of file type, metadata, and mod_rewritedirectives such asDefaultType,RequestHeader, orRewriteEngine, as well as theActiondirective.IndexesAllows the use of directory indexing directives such as AddDescription,AddIcon, orFancyIndexing.LimitAllows the use of host access directives, that is, Allow,Deny, andOrder.Options[=option,…]Allows the use of the Optionsdirective. Additionally, you can provide a comma-separated list of options to customize which options can be set using this directive.Example 18.19. Using the AllowOverride directive
AllowOverride FileInfo AuthConfig Limit -
BrowserMatch - The
BrowserMatchdirective allows you to modify the server behavior based on the client's web browser type. It takes the following form:BrowserMatch pattern variable…The pattern is a regular expression to match the User-Agent HTTP header field. The variable is an environment variable that is set when the header field matches the pattern.By default, this directive is used to deny connections to specific browsers with known issues, and to disable keepalives and HTTP header flushes for browsers that are known to have problems with these actions.Example 18.20. Using the BrowserMatch directive
BrowserMatch "Mozilla/2" nokeepalive -
CacheDefaultExpire - The
CacheDefaultExpireoption allows you to set how long to cache a document that does not have any expiration date or the date of its last modification specified. It takes the following form:CacheDefaultExpire timeThe time is specified in seconds. The default option is3600(that is, one hour).Example 18.21. Using the CacheDefaultExpire directive
CacheDefaultExpire 3600 -
CacheDisable - The
CacheDisabledirective allows you to disable caching of certain URLs. It takes the following form:CacheDisable pathThe path must be relative to the directory specified by theDocumentRootdirective (for example,/files/).Example 18.22. Using the CacheDisable directive
CacheDisable /temporary -
CacheEnable - The
CacheEnabledirective allows you to specify a cache type to be used for certain URLs. It takes the following form:CacheEnable type urlThe type has to be a valid cache type as described in Table 18.5, “Available cache types”. The url can be a path relative to the directory specified by theDocumentRootdirective (for example,/images/), a protocol (for example,ftp://), or an external URL such ashttp://example.com/.Expand Table 18.5. Available cache types Type Description memThe memory-based storage manager. diskThe disk-based storage manager. fdThe file descriptor cache. Example 18.23. Using the CacheEnable directive
CacheEnable disk / -
CacheLastModifiedFactor - The
CacheLastModifiedFactordirective allows you to customize how long to cache a document that does not have any expiration date specified, but that provides information about the date of its last modification. It takes the following form:CacheLastModifiedFactor numberThe number is a coefficient to be used to multiply the time that passed since the last modification of the document. The default option is0.1(that is, one tenth).Example 18.24. Using the CacheLastModifiedFactor directive
CacheLastModifiedFactor 0.1 -
CacheMaxExpire - The
CacheMaxExpiredirective allows you to specify the maximum amount of time to cache a document. It takes the following form:CacheMaxExpire timeThe time is specified in seconds. The default option is86400(that is, one day).Example 18.25. Using the CacheMaxExpire directive
CacheMaxExpire 86400 -
CacheNegotiatedDocs - The
CacheNegotiatedDocsdirective allows you to enable caching of the documents that were negotiated on the basis of content. It takes the following form:CacheNegotiatedDocs optionThe option has to be a valid keyword as described in Table 18.6, “Available CacheNegotiatedDocs options”. Since the content-negotiated documents may change over time or because of the input from the requester, the default option isOff.Expand Table 18.6. Available CacheNegotiatedDocs options Option Description OnEnables caching the content-negotiated documents. OffDisables caching the content-negotiated documents. Example 18.26. Using the CacheNegotiatedDocs directive
CacheNegotiatedDocs On -
CacheRoot - The
CacheRootdirective allows you to specify the directory to store cache files in. It takes the following form:CacheRoot directoryThe directory must be a full path to an existing directory in the local file system. The default option is/var/cache/mod_proxy/.Example 18.27. Using the CacheRoot directive
CacheRoot /var/cache/mod_proxy -
CustomLog - The
CustomLogdirective allows you to specify the log file name and the log file format. It takes the following form:CustomLog path formatThe path refers to a log file, and must be relative to the directory that is specified by theServerRootdirective (that is,/etc/httpd/by default). The format has to be either an explicit format string, or a format name that was previously defined using theLogFormatdirective.Example 18.28. Using the CustomLog directive
CustomLog logs/access_log combined -
DefaultIcon - The
DefaultIcondirective allows you to specify an icon to be displayed for a file in server-generated directory listings when no other icon is associated with it. It takes the following form:DefaultIcon pathThe path refers to an existing icon file, and must be relative to the directory specified by theDocumentRootdirective (for example,/icons/unknown.png).Example 18.29. Using the DefaultIcon directive
DefaultIcon /icons/unknown.png -
DefaultType - The
DefaultTypedirective allows you to specify a media type to be used in case the proper MIME type cannot be determined by the server. It takes the following form:DefaultType content-typeThe content-type has to be a valid MIME type such astext/html,image/png,application/pdf, etc.Example 18.30. Using the DefaultType directive
DefaultType text/plain -
Deny - The
Denydirective allows you to specify which clients are denied access to a given directory. It takes the following form:Deny from client…The client can be a domain name, an IP address (both full and partial), a network/netmask pair, orallfor all clients.Example 18.31. Using the Deny directive
Deny from 192.168.1.1 -
DirectoryIndex - The
DirectoryIndexdirective allows you to specify a document to be served to a client when a directory is requested (that is, when the URL ends with the/character). It takes the following form:DirectoryIndex filename…The filename is a name of the file to look for in the requested directory. By default, the server looks forindex.html, andindex.html.var.Example 18.32. Using the DirectoryIndex directive
DirectoryIndex index.html index.html.var -
DocumentRoot - The
DocumentRootdirective allows you to specify the main directory from which the content is served. It takes the following form:DocumentRoot directoryThe directory must be a full path to an existing directory in the local file system. The default option is/var/www/html/.Example 18.33. Using the DocumentRoot directive
DocumentRoot /var/www/html -
ErrorDocument - The
ErrorDocumentdirective allows you to specify a document or a message to be displayed as a response to a particular error. It takes the following form:ErrorDocument error-code actionThe error-code has to be a valid code such as403(Forbidden),404(Not Found), or500(Internal Server Error). The action can be either a URL (both local and external), or a message string enclosed in double quotes (that is,").Example 18.34. Using the ErrorDocument directive
ErrorDocument 403 "Access Denied" ErrorDocument 404 /404-not_found.html -
ErrorLog - The
ErrorLogdirective allows you to specify a file to which the server errors are logged. It takes the following form:ErrorLog pathThe path refers to a log file, and can be either absolute, or relative to the directory that is specified by theServerRootdirective (that is,/etc/httpd/by default). The default option islogs/error_logExample 18.35. Using the ErrorLog directive
ErrorLog logs/error_log -
ExtendedStatus - The
ExtendedStatusdirective allows you to enable detailed server status information. It takes the following form:ExtendedStatus optionThe option has to be a valid keyword as described in Table 18.7, “Available ExtendedStatus options”. The default option isOff.Expand Table 18.7. Available ExtendedStatus options Option Description OnEnables generating the detailed server status. OffDisables generating the detailed server status. Example 18.36. Using the ExtendedStatus directive
ExtendedStatus On -
Group - The
Groupdirective allows you to specify the group under which thehttpdservice will run. It takes the following form:Group groupThe group has to be an existing UNIX group. The default option isapache.Note thatGroupis no longer supported inside<VirtualHost>, and has been replaced by theSuexecUserGroupdirective.Example 18.37. Using the Group directive
Group apache -
HeaderName - The
HeaderNamedirective allows you to specify a file to be prepended to the beginning of the server-generated directory listing. It takes the following form:HeaderName filenameThe filename is a name of the file to look for in the requested directory. By default, the server looks forHEADER.html.Example 18.38. Using the HeaderName directive
HeaderName HEADER.html -
HostnameLookups - The
HostnameLookupsdirective allows you to enable automatic resolving of IP addresses. It takes the following form:HostnameLookups optionThe option has to be a valid keyword as described in Table 18.8, “Available HostnameLookups options”. To conserve resources on the server, the default option isOff.Expand Table 18.8. Available HostnameLookups options Option Description OnEnables resolving the IP address for each connection so that the host name can be logged. However, this also adds a significant processing overhead. DoubleEnables performing the double-reverse DNS lookup. In comparison to the above option, this adds even more processing overhead. OffDisables resolving the IP address for each connection. Note that when the presence of host names is required in server log files, it is often possible to use one of the many log analyzer tools that perform the DNS lookups more efficiently.Example 18.39. Using the HostnameLookups directive
HostnameLookups Off -
Include - The
Includedirective allows you to include other configuration files. It takes the following form:Include filenameThefilenamecan be an absolute path, a path relative to the directory specified by theServerRootdirective, or a wildcard expression. All configuration files from the/etc/httpd/conf.d/directory are loaded by default.Example 18.40. Using the Include directive
Include conf.d/*.conf -
IndexIgnore - The
IndexIgnoredirective allows you to specify a list of file names to be omitted from the server-generated directory listings. It takes the following form:IndexIgnore filename…The filename option can be either a full file name, or a wildcard expression.Example 18.41. Using the IndexIgnore directive
IndexIgnore .??* *~ *# HEADER* README* RCS CVS *,v *,t -
IndexOptions - The
IndexOptionsdirective allows you to customize the behavior of server-generated directory listings. It takes the following form:IndexOptions option…The option has to be a valid keyword as described in Table 18.9, “Available directory listing options”. The default options areCharset=UTF-8,FancyIndexing,HTMLTable,NameWidth=*, andVersionSort.Expand Table 18.9. Available directory listing options Option Description Charset=encodingSpecifies the character set of a generated web page. The encoding has to be a valid character set such as UTF-8orISO-8859-2.Type=content-typeSpecifies the media type of a generated web page. The content-type has to be a valid MIME type such as text/htmlortext/plain.DescriptionWidth=valueSpecifies the width of the description column. The value can be either a number of characters, or an asterisk (that is, *) to adjust the width automatically.FancyIndexingEnables advanced features such as different icons for certain files or possibility to re-sort a directory listing by clicking on a column header. FolderFirstEnables listing directories first, always placing them above files. HTMLTableEnables the use of HTML tables for directory listings. IconsAreLinksEnables using the icons as links. IconHeight=valueSpecifies an icon height. The value is a number of pixels. IconWidth=valueSpecifies an icon width. The value is a number of pixels. IgnoreCaseEnables sorting files and directories in a case-sensitive manner. IgnoreClientDisables accepting query variables from a client. NameWidth=valueSpecifies the width of the file name column. The value can be either a number of characters, or an asterisk (that is, *) to adjust the width automatically.ScanHTMLTitlesEnables parsing the file for a description (that is, the titleelement) in case it is not provided by theAddDescriptiondirective.ShowForbiddenEnables listing the files with otherwise restricted access. SuppressColumnSortingDisables re-sorting a directory listing by clicking on a column header. SuppressDescriptionDisables reserving a space for file descriptions. SuppressHTMLPreambleDisables the use of standard HTML preamble when a file specified by the HeaderNamedirective is present.SuppressIconDisables the use of icons in directory listings. SuppressLastModifiedDisables displaying the date of the last modification field in directory listings. SuppressRulesDisables the use of horizontal lines in directory listings. SuppressSizeDisables displaying the file size field in directory listings. TrackModifiedEnables returning the Last-ModifiedandETagvalues in the HTTP header.VersionSortEnables sorting files that contain a version number in the expected manner. XHTMLEnables the use of XHTML 1.0 instead of the default HTML 3.2. Example 18.42. Using the IndexOptions directive
IndexOptions FancyIndexing VersionSort NameWidth=* HTMLTable Charset=UTF-8 -
KeepAlive - The
KeepAlivedirective allows you to enable persistent connections. It takes the following form:KeepAlive optionThe option has to be a valid keyword as described in Table 18.10, “Available KeepAlive options”. The default option isOff.Expand Table 18.10. Available KeepAlive options Option Description OnEnables the persistent connections. In this case, the server will accept more than one request per connection. OffDisables the keep-alive connections. Note that when the persistent connections are enabled, on a busy server, the number of child processes can increase rapidly and eventually reach the maximum limit, slowing down the server significantly. To reduce the risk, it is recommended that you setKeepAliveTimeoutto a low number, and monitor the/var/log/httpd/logs/error_loglog file carefully.Example 18.43. Using the KeepAlive directive
KeepAlive Off -
KeepAliveTimeout - The
KeepAliveTimeoutdirective allows you to specify the amount of time to wait for another request before closing the connection. It takes the following form:KeepAliveTimeout timeThe time is specified in seconds. The default option is15.Example 18.44. Using the KeepAliveTimeout directive
KeepAliveTimeout 15 -
LanguagePriority - The
LanguagePrioritydirective allows you to customize the precedence of languages. It takes the following form:LanguagePriority language…The language has to be a valid MIME language such ascs,en, orfr.This directive is especially useful for web servers that serve content in multiple languages based on the client's language settings.Example 18.45. Using the LanguagePriority directive
LanguagePriority sk cs en -
Listen - The Listen directive allows you to specify IP addresses or ports to listen to. It takes the following form:
Listen [ip-address:]port [protocol]The ip-address is optional and unless supplied, the server will accept incoming requests on a given port from all IP addresses. Since the protocol is determined automatically from the port number, it can be usually omitted. The default option is to listen to port80.Note that if the server is configured to listen to a port under 1024, only superuser will be able to start thehttpdservice.Example 18.46. Using the Listen directive
Listen 80 -
LoadModule - The
LoadModuledirective allows you to load a Dynamic Shared Object (DSO) module. It takes the following form:LoadModule name pathThe name has to be a valid identifier of the required module. The path refers to an existing module file, and must be relative to the directory in which the libraries are placed (that is,/usr/lib/httpd/on 32-bit and/usr/lib64/httpd/on 64-bit systems by default).See Section 18.1.6, “Working with Modules” for more information on the Apache HTTP Server's DSO support.Example 18.47. Using the LoadModule directive
LoadModule php5_module modules/libphp5.so -
LogFormat - The LogFormat directive allows you to specify a log file format. It takes the following form:
LogFormat format nameThe format is a string consisting of options as described in Table 18.11, “Common LogFormat options”. The name can be used instead of the format string in theCustomLogdirective.Expand Table 18.11. Common LogFormat options Option Description %bRepresents the size of the response in bytes. %hRepresents the IP address or host name of a remote client. %lRepresents the remote log name if supplied. If not, a hyphen (that is, -) is used instead.%rRepresents the first line of the request string as it came from the browser or client. %sRepresents the status code. %tRepresents the date and time of the request. %uIf the authentication is required, it represents the remote user. If not, a hyphen (that is, -) is used instead.%{field}Represents the content of the HTTP header field. The common options include %{Referer}(the URL of the web page that referred the client to the server) and%{User-Agent}(the type of the web browser making the request).Example 18.48. Using the LogFormat directive
LogFormat "%h %l %u %t \"%r\" %>s %b" common -
LogLevel - The
LogLeveldirective allows you to customize the verbosity level of the error log. It takes the following form:LogLevel optionThe option has to be a valid keyword as described in Table 18.12, “Available LogLevel options”. The default option iswarn.Expand Table 18.12. Available LogLevel options Option Description emergOnly the emergency situations when the server cannot perform its work are logged. alertAll situations when an immediate action is required are logged. critAll critical conditions are logged. errorAll error messages are logged. warnAll warning messages are logged. noticeEven normal, but still significant situations are logged. infoVarious informational messages are logged. debugVarious debugging messages are logged. Example 18.49. Using the LogLevel directive
LogLevel warn -
MaxKeepAliveRequests - The
MaxKeepAliveRequestsdirective allows you to specify the maximum number of requests for a persistent connection. It takes the following form:MaxKeepAliveRequests numberA high number can improve the performance of the server. Note that using0allows unlimited number of requests. The default option is100.Example 18.50. Using the MaxKeepAliveRequests option
MaxKeepAliveRequests 100 -
NameVirtualHost - The
NameVirtualHostdirective allows you to specify the IP address and port number for a name-based virtual host. It takes the following form:NameVirtualHost ip-address[:port]The ip-address can be either a full IP address, or an asterisk (that is,*) representing all interfaces. Note that IPv6 addresses have to be enclosed in square brackets (that is,[and]). The port is optional.Name-based virtual hosting allows one Apache HTTP Server to serve different domains without using multiple IP addresses.Important
Name-based virtual hosts only work with non-secure HTTP connections. If using virtual hosts with a secure server, use IP address-based virtual hosts instead.Example 18.51. Using the NameVirtualHost directive
NameVirtualHost *:80 -
Options - The
Optionsdirective allows you to specify which server features are available in a particular directory. It takes the following form:Options option…The option has to be a valid keyword as described in Table 18.13, “Available server features”.Expand Table 18.13. Available server features Option Description ExecCGIEnables the execution of CGI scripts. FollowSymLinksEnables following symbolic links in the directory. IncludesEnables server-side includes. IncludesNOEXECEnables server-side includes, but does not allow the execution of commands. IndexesEnables server-generated directory listings. MultiViewsEnables content-negotiated “MultiViews”. SymLinksIfOwnerMatchEnables following symbolic links in the directory when both the link and the target file have the same owner. AllEnables all of the features above with the exception of MultiViews.NoneDisables all of the features above. Important
TheSymLinksIfOwnerMatchoption is not a security feature as it can be bypassed by an attacker.Example 18.52. Using the Options directive
Options Indexes FollowSymLinks -
Order - The
Orderdirective allows you to specify the order in which theAllowandDenydirectives are evaluated. It takes the following form:Order optionThe option has to be a valid keyword as described in Table 18.14, “Available Order options”. The default option isallow,deny.Expand Table 18.14. Available Order options Option Description allow,denyAllowdirectives are evaluated first.deny,allowDenydirectives are evaluated first.Example 18.53. Using the Order directive
Order allow,deny -
PidFile - The
PidFiledirective allows you to specify a file to which the process ID (PID) of the server is stored. It takes the following form:PidFile pathThe path refers to a pid file, and can be either absolute, or relative to the directory that is specified by theServerRootdirective (that is,/etc/httpd/by default). The default option isrun/httpd.pid.Example 18.54. Using the PidFile directive
PidFile run/httpd.pid -
ProxyRequests - The
ProxyRequestsdirective allows you to enable forward proxy requests. It takes the following form:ProxyRequests optionThe option has to be a valid keyword as described in Table 18.15, “Available ProxyRequests options”. The default option isOff.Expand Table 18.15. Available ProxyRequests options Option Description OnEnables forward proxy requests. OffDisables forward proxy requests. Example 18.55. Using the ProxyRequests directive
ProxyRequests On -
ReadmeName - The
ReadmeNamedirective allows you to specify a file to be appended to the end of the server-generated directory listing. It takes the following form:ReadmeName filenameThe filename is a name of the file to look for in the requested directory. By default, the server looks forREADME.html.Example 18.56. Using the ReadmeName directive
ReadmeName README.html -
Redirect - The
Redirectdirective allows you to redirect a client to another URL. It takes the following form:Redirect [status] path urlThe status is optional, and if provided, it has to be a valid keyword as described in Table 18.16, “Available status options”. The path refers to the old location, and must be relative to the directory specified by theDocumentRootdirective (for example,/docs). The url refers to the current location of the content (for example,http://docs.example.com).Expand Table 18.16. Available status options Status Description permanentIndicates that the requested resource has been moved permanently. The 301(Moved Permanently) status code is returned to a client.tempIndicates that the requested resource has been moved only temporarily. The 302(Found) status code is returned to a client.seeotherIndicates that the requested resource has been replaced. The 303(See Other) status code is returned to a client.goneIndicates that the requested resource has been removed permanently. The 410(Gone) status is returned to a client.Note that for more advanced redirection techniques, you can use themod_rewritemodule that is part of the Apache HTTP Server installation.Example 18.57. Using the Redirect directive
Redirect permanent /docs http://docs.example.com -
ScriptAlias - The
ScriptAliasdirective allows you to specify the location of CGI scripts. It takes the following form:ScriptAlias url-path real-pathThe url-path must be relative to the directory specified by theDocumentRootdirective (for example,/cgi-bin/). The real-path is a full path to a file or directory in the local file system.This directive is typically followed by theDirectorytag with additional permissions to access the target directory. By default, the/cgi-bin/alias is created so that the scripts located in the/var/www/cgi-bin/are accessible.TheScriptAliasdirective is used for security reasons to prevent CGI scripts from being viewed as ordinary text documents.Example 18.58. Using the ScriptAlias directive
ScriptAlias /cgi-bin/ /var/www/cgi-bin/ <Directory "/var/www/cgi-bin"> AllowOverride None Options None Order allow,deny Allow from all </Directory> -
ServerAdmin - The
ServerAdmindirective allows you to specify the email address of the server administrator to be displayed in server-generated web pages. It takes the following form:ServerAdmin emailThe default option isroot@localhost.This directive is commonly set towebmaster@hostname, where hostname is the address of the server. Once set, aliaswebmasterto the person responsible for the web server in/etc/aliases, and as superuser, run thenewaliasescommand.Example 18.59. Using the ServerAdmin directive
ServerAdmin webmaster@penguin.example.com -
ServerName - The
ServerNamedirective allows you to specify the host name and the port number of a web server. It takes the following form:ServerName hostname[:port]The hostname has to be a fully qualified domain name (FQDN) of the server. The port is optional, but when supplied, it has to match the number specified by theListendirective.When using this directive, make sure that the IP address and server name pair are included in the/etc/hostsfile.Example 18.60. Using the ServerName directive
ServerName penguin.example.com:80 -
ServerRoot - The
ServerRootdirective allows you to specify the directory in which the server operates. It takes the following form:ServerRoot directoryThe directory must be a full path to an existing directory in the local file system. The default option is/etc/httpd/.Example 18.61. Using the ServerRoot directive
ServerRoot /etc/httpd -
ServerSignature - The
ServerSignaturedirective allows you to enable displaying information about the server on server-generated documents. It takes the following form:ServerSignature optionThe option has to be a valid keyword as described in Table 18.17, “Available ServerSignature options”. The default option isOn.Expand Table 18.17. Available ServerSignature options Option Description OnEnables appending the server name and version to server-generated pages. OffDisables appending the server name and version to server-generated pages. EMailEnables appending the server name, version, and the email address of the system administrator as specified by the ServerAdmindirective to server-generated pages.Example 18.62. Using the ServerSignature directive
ServerSignature On -
ServerTokens - The
ServerTokensdirective allows you to customize what information is included in the Server response header. It takes the following form:ServerTokens optionThe option has to be a valid keyword as described in Table 18.18, “Available ServerTokens options”. The default option isOS.Expand Table 18.18. Available ServerTokens options Option Description ProdIncludes the product name only (that is, Apache).MajorIncludes the product name and the major version of the server (for example, 2).MinorIncludes the product name and the minor version of the server (for example, 2.2).MinIncludes the product name and the minimal version of the server (for example, 2.2.15).OSIncludes the product name, the minimal version of the server, and the type of the operating system it is running on (for example, Red Hat).FullIncludes all the information above along with the list of loaded modules. Note that for security reasons, it is recommended to reveal as little information about the server as possible.Example 18.63. Using the ServerTokens directive
ServerTokens Prod -
SuexecUserGroup - The
SuexecUserGroupdirective allows you to specify the user and group under which the CGI scripts will be run. It takes the following form:SuexecUserGroup user groupThe user has to be an existing user, and the group must be a valid UNIX group.For security reasons, the CGI scripts should not be run with root privileges. Note that in<VirtualHost>,SuexecUserGroupreplaces theUserandGroupdirectives.Example 18.64. Using the SuexecUserGroup directive
SuexecUserGroup apache apache -
Timeout - The
Timeoutdirective allows you to specify the amount of time to wait for an event before closing a connection. It takes the following form:Timeout timeThe time is specified in seconds. The default option is60.Example 18.65. Using the Timeout directive
Timeout 60 -
TypesConfig - The
TypesConfigallows you to specify the location of the MIME types configuration file. It takes the following form:TypesConfig pathThe path refers to an existing MIME types configuration file, and can be either absolute, or relative to the directory that is specified by theServerRootdirective (that is,/etc/httpd/by default). The default option is/etc/mime.types.Note that instead of editing/etc/mime.types, the recommended way to add MIME type mapping to the Apache HTTP Server is to use theAddTypedirective.Example 18.66. Using the TypesConfig directive
TypesConfig /etc/mime.types -
UseCanonicalName - The
UseCanonicalNameallows you to specify the way the server refers to itself. It takes the following form:UseCanonicalName optionThe option has to be a valid keyword as described in Table 18.19, “Available UseCanonicalName options”. The default option isOff.Expand Table 18.19. Available UseCanonicalName options Option Description OnEnables the use of the name that is specified by the ServerNamedirective.OffDisables the use of the name that is specified by the ServerNamedirective. The host name and port number provided by the requesting client are used instead.DNSDisables the use of the name that is specified by the ServerNamedirective. The host name determined by a reverse DNS lookup is used instead.Example 18.67. Using the UseCanonicalName directive
UseCanonicalName Off -
User - The
Userdirective allows you to specify the user under which thehttpdservice will run. It takes the following form:User userThe user has to be an existing UNIX user. The default option isapache.For security reasons, thehttpdservice should not be run with root privileges. Note thatUseris no longer supported inside<VirtualHost>, and has been replaced by theSuexecUserGroupdirective.Example 18.68. Using the User directive
User apache -
UserDir - The
UserDirdirective allows you to enable serving content from users' home directories. It takes the following form:UserDir optionThe option can be either a name of the directory to look for in user's home directory (typicallypublic_html), or a valid keyword as described in Table 18.20, “Available UserDir options”. The default option isdisabled.Expand Table 18.20. Available UserDir options Option Description enableduser…Enables serving content from home directories of given users. disabled[user…]Disables serving content from home directories, either for all users, or, if a space separated list of users is supplied, for given users only. Note
In order for the web server to access the content, the permissions on relevant directories and files must be set correctly. Make sure that all users are able to access the home directories, and that they can access and read the content of the directory specified by theUserDirdirective. For example:~]# chmod a+x /home/username/ ~]# chmod a+rx /home/username/public_html/All files in this directory must be set accordingly.Example 18.69. Using the UserDir directive
UserDir public_html
18.1.5.2. Common ssl.conf Directives
/etc/httpd/conf.d/ssl.conf:
-
SetEnvIf - The
SetEnvIfdirective allows you to set environment variables based on the headers of incoming connections. It takes the following form:SetEnvIf option pattern [!]variable[=value]…The option can be either a HTTP header field, a previously defined environment variable name, or a valid keyword as described in Table 18.21, “Available SetEnvIf options”. The pattern is a regular expression. The variable is an environment variable that is set when the option matches the pattern. If the optional exclamation mark (that is,!) is present, the variable is removed instead of being set.Expand Table 18.21. Available SetEnvIf options Option Description Remote_HostRefers to the client's host name. Remote_AddrRefers to the client's IP address. Server_AddrRefers to the server's IP address. Request_MethodRefers to the request method (for example, GET).Request_ProtocolRefers to the protocol name and version (for example, HTTP/1.1).Request_URIRefers to the requested resource. TheSetEnvIfdirective is used to disable HTTP keepalives, and to allow SSL to close the connection without a closing notification from the client browser. This is necessary for certain web browsers that do not reliably shut down the SSL connection.Example 18.70. Using the SetEnvIf directive
SetEnvIf User-Agent ".*MSIE.*" \
         nokeepalive ssl-unclean-shutdown \
         downgrade-1.0 force-response-1.0
/etc/httpd/conf.d/ssl.conf file to be present, the mod_ssl needs to be installed. See Section 18.1.8, “Setting Up an SSL Server” for more information on how to install and configure an SSL server.
18.1.5.3. Common Multi-Processing Module Directives
IfModule. By default, the server-pool is defined for both the prefork and worker MPMs.
/etc/httpd/conf/httpd.conf:
-
MaxClients - The
MaxClientsdirective allows you to specify the maximum number of simultaneously connected clients to process at one time. It takes the following form:MaxClients numberA high number can improve the performance of the server, although it is not recommended to exceed256when using thepreforkMPM.Example 18.71. Using the MaxClients directive
MaxClients 256 -
MaxRequestsPerChild - The
MaxRequestsPerChilddirective allows you to specify the maximum number of request a child process can serve before it dies. It takes the following form:MaxRequestsPerChild numberSetting the number to0allows unlimited number of requests.TheMaxRequestsPerChilddirective is used to prevent long-lived processes from causing memory leaks.Example 18.72. Using the MaxRequestsPerChild directive
MaxRequestsPerChild 4000 -
MaxSpareServers - The
MaxSpareServersdirective allows you to specify the maximum number of spare child processes. It takes the following form:MaxSpareServers numberThis directive is used by thepreforkMPM only.Example 18.73. Using the MaxSpareServers directive
MaxSpareServers 20 -
MaxSpareThreads - The
MaxSpareThreadsdirective allows you to specify the maximum number of spare server threads. It takes the following form:MaxSpareThreads numberThe number must be greater than or equal to the sum ofMinSpareThreadsandThreadsPerChild. This directive is used by theworkerMPM only.Example 18.74. Using the MaxSpareThreads directive
MaxSpareThreads 75 -
MinSpareServers - The
MinSpareServersdirective allows you to specify the minimum number of spare child processes. It takes the following form:MinSpareServers numberNote that a high number can create a heavy processing load on the server. This directive is used by thepreforkMPM only.Example 18.75. Using the MinSpareServers directive
MinSpareServers 5 -
MinSpareThreads - The
MinSpareThreadsdirective allows you to specify the minimum number of spare server threads. It takes the following form:MinSpareThreads numberThis directive is used by theworkerMPM only.Example 18.76. Using the MinSpareThreads directive
MinSpareThreads 75 -
StartServers - The
StartServersdirective allows you to specify the number of child processes to create when the service is started. It takes the following form:StartServers numberSince the child processes are dynamically created and terminated according to the current traffic load, it is usually not necessary to change this value.Example 18.77. Using the StartServers directive
StartServers 8 -
ThreadsPerChild - The
ThreadsPerChilddirective allows you to specify the number of threads a child process can create. It takes the following form:ThreadsPerChild numberThis directive is used by theworkerMPM only.Example 18.78. Using the ThreadsPerChild directive
ThreadsPerChild 25
18.1.6. Working with Modules
httpd service is distributed along with a number of Dynamic Shared Objects (DSOs), which can be dynamically loaded or unloaded at runtime as necessary. By default, these modules are located in /usr/lib/httpd/modules/ on 32-bit and in /usr/lib64/httpd/modules/ on 64-bit systems.
18.1.6.1. Loading a Module
LoadModule directive as described in Section 18.1.5.1, “Common httpd.conf Directives”. Note that modules provided by a separate package often have their own configuration file in the /etc/httpd/conf.d/ directory.
Example 18.79. Loading the mod_ssl DSO
LoadModule ssl_module modules/mod_ssl.sohttpd service.
18.1.6.2. Writing a Module
root:
~]# yum install httpd-develapxs) utility required to compile a module.
~]# apxs -i -a -c module_name.c18.1.7. Setting Up Virtual Hosts
/etc/httpd/conf/httpd.conf as an example, remove the hash sign (that is, #) from the beginning of each line, and customize the options according to your requirements as shown in Example 18.80, “Example virtual host configuration”.
Example 18.80. Example virtual host configuration
NameVirtualHost *:80

<VirtualHost *:80>
    ServerAdmin webmaster@penguin.example.com
    DocumentRoot /www/docs/penguin.example.com
    ServerName penguin.example.com
    ServerAlias www.penguin.example.com
    ErrorLog logs/penguin.example.com-error_log
    CustomLog logs/penguin.example.com-access_log common
</VirtualHost>ServerName must be a valid DNS name assigned to the machine. The <VirtualHost> container is highly customizable, and accepts most of the directives available within the main server configuration. Directives that are not supported within this container include User and Group, which were replaced by SuexecUserGroup.
Note
Listen directive in the global settings section of the /etc/httpd/conf/httpd.conf file accordingly.
httpd service.
18.1.8. Setting Up an SSL Server
mod_ssl, a module that uses the OpenSSL toolkit to provide the SSL/TLS support, is commonly referred to as the SSL server. Red Hat Enterprise Linux also supports the use of Mozilla NSS as the TLS implementation. Support for Mozilla NSS is provided by the mod_nss module.
18.1.8.1. An Overview of Certificates and Security
| Web Browser | Link |
|---|---|
| Mozilla Firefox | Mozilla root CA list. |
| Opera | Information on root certificates used by Opera. |
| Internet Explorer | Information on root certificates used by Microsoft Windows. |
| Chromium | Information on root certificates used by the Chromium project. |
18.1.9. Enabling the mod_ssl Module
mod_ssl, you cannot have another application or module, such as mod_nss configured to use the same port. Port 443 is the default port for HTTPS.
mod_ssl module and the OpenSSL toolkit, install the mod_ssl and openssl packages. Enter the following command as root:
~]# yum install mod_ssl opensslmod_ssl configuration file at /etc/httpd/conf.d/ssl.conf, which is included in the main Apache HTTP Server configuration file by default. For the module to be loaded, restart the httpd service as described in Section 18.1.4.3, “Restarting the Service”.
Important
SSL, if it is enabled, and using only TLSv1.1 or TLSv1.2. Backwards compatibility can be achieved using TLSv1.0. Many products Red Hat supports have the ability to use SSLv2 or SSLv3 protocols. However, the use of SSLv2 or SSLv3 is now strongly recommended against.
18.1.9.1. Enabling and Disabling SSL and TLS in mod_ssl
SSLProtocol directive in the “## SSL Global Context” section of the configuration file and removing it everywhere else, or edit the default entry under “# SSL Protocol support” in all “VirtualHost” sections. If you do not specify it in the per-domain VirtualHost section then it will inherit the settings from the global section. To make sure that a protocol version is being disabled the administrator should either only specify SSLProtocol in the “SSL Global Context” section, or specify it in all per-domain VirtualHost sections.
Procedure 18.1. Disable SSLv2 and SSLv3
- As
root, open the/etc/httpd/conf.d/ssl.conffile and search for all instances of theSSLProtocoldirective. By default, the configuration file contains one section that looks as follows:This section is within the VirtualHost section.~]# vi /etc/httpd/conf.d/ssl.conf # SSL Protocol support: # List the enable protocol levels with which clients will be able to # connect. Disable SSLv2 access by default: SSLProtocol all -SSLv2 - Edit the
SSLProtocolline as follows:Repeat this action for all VirtualHost sections. Save and close the file.# SSL Protocol support: # List the enable protocol levels with which clients will be able to # connect. Disable SSLv2 access by default: SSLProtocol all -SSLv2 -SSLv3 - Verify that all occurrences of the
SSLProtocoldirective have been changed as follows:This step is particularly important if you have more than the one default VirtualHost section.~]# grep SSLProtocol /etc/httpd/conf.d/ssl.conf SSLProtocol all -SSLv2 -SSLv3 - Restart the Apache daemon as follows:Note that any sessions will be interrupted.
~]# service httpd restart
Procedure 18.2. Disable All SSL and TLS Protocols Except TLS 1 and Up
- As
root, open the/etc/httpd/conf.d/ssl.conffile and search for all instances ofSSLProtocoldirective. By default the file contains one section that looks as follows:~]# vi /etc/httpd/conf.d/ssl.conf # SSL Protocol support: # List the enable protocol levels with which clients will be able to # connect. Disable SSLv2 access by default: SSLProtocol all -SSLv2 - Edit the
SSLProtocolline as follows:Save and close the file.# SSL Protocol support: # List the enable protocol levels with which clients will be able to # connect. Disable SSLv2 access by default: SSLProtocol -all +TLSv1 +TLSv1.1 +TLSv1.2 - Verify the change as follows:
~]# grep SSLProtocol /etc/httpd/conf.d/ssl.conf SSLProtocol -all +TLSv1 +TLSv1.1 +TLSv1.2 - Restart the Apache daemon as follows:Note that any sessions will be interrupted.
~]# service httpd restart
Procedure 18.3. Testing the Status of SSL and TLS Protocols
openssl s_client -connect command. The command has the following form: openssl s_client -connect hostname:port -protocollocalhost as the host name. For example, to test the default port for secure HTTPS connections, port 443 to see if SSLv3 is enabled, issue a command as follows:
- The above output indicates that the handshake failed and therefore no cipher was negotiated.
~]# openssl s_client -connect localhost:443 -ssl3 CONNECTED(00000003) 139809943877536:error:14094410:SSL routines:SSL3_READ_BYTES:sslv3 alert handshake failure:s3_pkt.c:1257:SSL alert number 40 139809943877536:error:1409E0E5:SSL routines:SSL3_WRITE_BYTES:ssl handshake failure:s3_pkt.c:596: output omitted New, (NONE), Cipher is (NONE) Secure Renegotiation IS NOT supported Compression: NONE Expansion: NONE SSL-Session: Protocol : SSLv3 output truncated - The above output indicates that no failure of the handshake occurred and a set of ciphers was negotiated.
~]$ openssl s_client -connect localhost:443 -tls1_2
CONNECTED(00000003)
depth=0 C = --, ST = SomeState, L = SomeCity, O = SomeOrganization, OU = SomeOrganizationalUnit, CN = localhost.localdomain, emailAddress = root@localhost.localdomain
output omitted
New, TLSv1/SSLv3, Cipher is ECDHE-RSA-AES256-GCM-SHA384
Server public key is 2048 bit
Secure Renegotiation IS supported
Compression: NONE
Expansion: NONE
SSL-Session:
    Protocol  : TLSv1.2
output truncated
openssl s_client command options are documented in the s_client(1) manual page.
18.1.10. Enabling the mod_nss Module
mod_nss, the HTTPS server cannot simultaneously use mod_ssl with its default settings as mod_ssl will use port 443 by default, however this is the default HTTPS port. If is recommend to remove the package if it is not required.
root:
~]# yum remove mod_sslNote
mod_ssl is required for other purposes, modify the /etc/httpd/conf.d/ssl.conf file to use a port other than 443 to prevent mod_ssl conflicting with mod_nss when its port to listen on is changed to 443.
mod_nss and mod_ssl can only co-exist at the same time if they use unique ports. For this reason mod_nss by default uses 8443, but the default port for HTTPS is port 443. The port is specified by the Listen directive as well as in the VirtualHost name or address.
Procedure 18.4. Configuring mod_nss
- Install mod_nss as
root:~]# yum install mod_nssThis will create themod_nssconfiguration file at/etc/httpd/conf.d/nss.conf. The/etc/httpd/conf.d/directory is included in the main Apache HTTP Server configuration file by default. For the module to be loaded, restart thehttpdservice as described in Section 18.1.4.3, “Restarting the Service”. - As
root, open the/etc/httpd/conf.d/nss.conffile and search for all instances of theListendirective.Edit theListen 8443line as follows:PortListen 443443is the default port forHTTPS. - Edit the default
VirtualHost _default_:8443line as follows:Edit any other non-default virtual host sections if they exist. Save and close the file.VirtualHost _default_:443 - Mozilla NSS stores certificates in a server certificate database indicated by the
NSSCertificateDatabasedirective in the/etc/httpd/conf.d/nss.conffile. By default the path is set to/etc/httpd/alias, the NSS database created during installation.To view the default NSS database, issue a command as follows:In the above command output,~]# certutil -L -d /etc/httpd/alias Certificate Nickname Trust Attributes SSL,S/MIME,JAR/XPI cacert CTu,Cu,Cu Server-Cert u,u,u alpha u,pu,uServer-Certis the defaultNSSNickname. The-Loption lists all the certificates, or displays information about a named certificate, in a certificate database. The-doption specifies the database directory containing the certificate and key database files. See thecertutil(1)man page for more command line options. - To configure mod_nss to use another database, edit the
NSSCertificateDatabaseline in the/etc/httpd/conf.d/nss.conffile. The default file has the following lines within the VirtualHost section.In the above command output,# Server Certificate Database: # The NSS security database directory that holds the certificates and # keys. The database consists of 3 files: cert8.db, key3.db and secmod.db. # Provide the directory that these files exist. NSSCertificateDatabase /etc/httpd/aliasaliasis the default NSS database directory,/etc/httpd/alias/. - To apply a password to the default NSS certificate database, use the following command as
root:~]# certutil -W -d /etc/httpd/alias Enter Password or Pin for "NSS Certificate DB": Enter a password which will be used to encrypt your keys. The password should be at least 8 characters long, and should contain at least one non-alphabetic character. Enter new password: Re-enter password: Password changed successfully. - Before deploying the HTTPS server, create a new certificate database using a certificate signed by a certificate authority (CA).
Example 18.81. Adding a Certificate to the Mozilla NSS database
Thecertutilcommand is used to add a CA certificate to the NSS database files:certutil -d /etc/httpd/nss-db-directory/ -A -n "CA_certificate" -t CT,, -a -i certificate.pemThe above command adds a CA certificate stored in a PEM-formatted file named certificate.pem. The-doption specifies the NSS database directory containing the certificate and key database files, the-noption sets a name for the certificate,-tCT,,means that the certificate is trusted to be used in TLS clients and servers. The-Aoption adds an existing certificate to a certificate database. If the database does not exist it will be created. The-aoption allows the use of ASCII format for input or output, and the-ioption passes thecertificate.peminput file to the command.See thecertutil(1)man page for more command line options. - The NSS database should be password protected to safeguard the private key.
Example 18.82. Setting_a_Password_for_a_Mozilla_NSS_database
Thecertutiltool can be used to set a password for an NSS database as follows:certutil -W -d /etc/httpd/nss-db-directory/For example, for the default database, issue a command asrootas follows:~]# certutil -W -d /etc/httpd/alias Enter Password or Pin for "NSS Certificate DB": Enter a password which will be used to encrypt your keys. The password should be at least 8 characters long, and should contain at least one non-alphabetic character. Enter new password: Re-enter password: Password changed successfully. - Configure
mod_nssto use the NSS internal software token by changing the line with theNSSPassPhraseDialogdirective as follows:This is to avoid manual password entry on system start. The software token exists in the NSS database but you can also have a physical token containing your certificates.~]# vi /etc/httpd/conf.d/nss.conf NSSPassPhraseDialog file:/etc/httpd/password.conf - If the SSL Server Certificate contained in the NSS database is an RSA certificate, make certain that the
NSSNicknameparameter is uncommented and matches the nickname displayed in step 4 above:~]# vi /etc/httpd/conf.d/nss.conf NSSNickname Server-CertIf the SSL Server Certificate contained in the NSS database is an ECC certificate, make certain that theNSSECCNicknameparameter is uncommented and matches the nickname displayed in step 4 above:~]# vi /etc/httpd/conf.d/nss.conf NSSECCNickname Server-CertMake certain that theNSSCertificateDatabaseparameter is uncommented and points to the NSS database directory displayed in step 4 or configured in step 5 above:Replace~]# vi /etc/httpd/conf.d/nss.conf NSSCertificateDatabase /etc/httpd/alias/etc/httpd/aliaswith the path to the certificate database to be used. - Create the
/etc/httpd/password.conffile asroot:Add a line with the following form:~]# vi /etc/httpd/password.confReplacing password with the password that was applied to the NSS security databases in step 6 above.internal:password - Apply the appropriate ownership and permissions to the
/etc/httpd/password.conffile:~]# chgrp apache /etc/httpd/password.conf ~]# chmod 640 /etc/httpd/password.conf ~]# ls -l /etc/httpd/password.conf -rw-r-----. 1 root apache 10 Dec 4 17:13 /etc/httpd/password.conf - To configure
mod_nssto use the NSS the software token in/etc/httpd/password.conf, edit/etc/httpd/conf.d/nss.confas follows:~]# vi /etc/httpd/conf.d/nss.conf - Restart the Apache server for the changes to take effect as described in Section 18.1.4.3, “Restarting the Service”
Important
SSL, if it is enabled, and using only TLSv1.1 or TLSv1.2. Backwards compatibility can be achieved using TLSv1.0. Many products Red Hat supports have the ability to use SSLv2 or SSLv3 protocols. However, the use of SSLv2 or SSLv3 is now strongly recommended against.
18.1.10.1. Enabling and Disabling SSL and TLS in mod_nss
NSSProtocol directive in the “## SSL Global Context” section of the configuration file and removing it everywhere else, or edit the default entry under “# SSL Protocol” in all “VirtualHost” sections. If you do not specify it in the per-domain VirtualHost section then it will inherit the settings from the global section. To make sure that a protocol version is being disabled the administrator should either only specify NSSProtocol in the “SSL Global Context” section, or specify it in all per-domain VirtualHost sections.
Procedure 18.5. Disable All SSL and TLS Protocols Except TLS 1 and Up in mod_nss
- As
root, open the/etc/httpd/conf.d/nss.conffile and search for all instances of theNSSProtocoldirective. By default, the configuration file contains one section that looks as follows:This section is within the VirtualHost section.~]# vi /etc/httpd/conf.d/nss.conf # SSL Protocol: output omitted # Since all protocol ranges are completely inclusive, and no protocol in the # middle of a range may be excluded, the entry "NSSProtocol SSLv3,TLSv1.1" # is identical to the entry "NSSProtocol SSLv3,TLSv1.0,TLSv1.1". NSSProtocol TLSv1.0,TLSv1.1,TLSv1.2 - Edit the
NSSProtocolline as follows:Repeat this action for all VirtualHost sections.# SSL Protocol: NSSProtocol TLSv1.0,TLSv1.1,TLSv1.2 - Edit the
Listen 8443line as follows:Listen 443 - Edit the default
VirtualHost _default_:8443line as follows:Edit any other non-default virtual host sections if they exist. Save and close the file.VirtualHost _default_:443 - Verify that all occurrences of the
NSSProtocoldirective have been changed as follows:This step is particularly important if you have more than one VirtualHost section.~]# grep NSSProtocol /etc/httpd/conf.d/nss.conf # middle of a range may be excluded, the entry "NSSProtocol SSLv3,TLSv1.1" # is identical to the entry "NSSProtocol SSLv3,TLSv1.0,TLSv1.1". NSSProtocol TLSv1.0,TLSv1.1,TLSv1.2 - Restart the Apache daemon as follows:Note that any sessions will be interrupted.
~]# service httpd restart
Procedure 18.6. Testing the Status of SSL and TLS Protocols in mod_nss
openssl s_client -connect command. Install the openssl package as root:
~]# yum install opensslopenssl s_client -connect command has the following form: openssl s_client -connect hostname:port -protocollocalhost as the host name. For example, to test the default port for secure HTTPS connections, port 443 to see if SSLv3 is enabled, issue a command as follows:
- The above output indicates that the handshake failed and therefore no cipher was negotiated.
~]# openssl s_client -connect localhost:443 -ssl3 CONNECTED(00000003) 3077773036:error:1408F10B:SSL routines:SSL3_GET_RECORD:wrong version number:s3_pkt.c:337: output omitted New, (NONE), Cipher is (NONE) Secure Renegotiation IS NOT supported Compression: NONE Expansion: NONE SSL-Session: Protocol : SSLv3 output truncated - The above output indicates that no failure of the handshake occurred and a set of ciphers was negotiated.
~]$ openssl s_client -connect localhost:443 -tls1_2
CONNECTED(00000003)
depth=1 C = US, O = example.com, CN = Certificate Shack
output omitted
New, TLSv1/SSLv3, Cipher is AES256-SHA
Server public key is 1024 bit
Secure Renegotiation IS supported
Compression: NONE
Expansion: NONE
SSL-Session:
    Protocol  : TLSv1.2
    Cipher    : AES256-SHA
output truncated
openssl s_client command options are documented in the s_client(1) manual page.
18.1.11. Using an Existing Key and Certificate
- You are changing the IP address or domain name.Certificates are issued for a particular IP address and domain name pair. If one of these values changes, the certificate becomes invalid.
- You have a certificate from VeriSign, and you are changing the server software.VeriSign, a widely used certificate authority, issues certificates for a particular software product, IP address, and domain name. Changing the software product renders the certificate invalid.
/etc/pki/tls/private/ and /etc/pki/tls/certs/ directories respectively. You can do so by issuing the following commands as root:
~]# mv key_file.key /etc/pki/tls/private/hostname.key
~]# mv certificate.crt /etc/pki/tls/certs/hostname.crt/etc/httpd/conf.d/ssl.conf configuration file:
SSLCertificateFile /etc/pki/tls/certs/hostname.crt
SSLCertificateKeyFile /etc/pki/tls/private/hostname.keyhttpd service as described in Section 18.1.4.3, “Restarting the Service”.
Example 18.83. Using a key and certificate from the Red Hat Secure Web Server
~]# mv /etc/httpd/conf/httpsd.key /etc/pki/tls/private/penguin.example.com.key
~]# mv /etc/httpd/conf/httpsd.crt /etc/pki/tls/certs/penguin.example.com.crt
18.1.12. Generating a New Key and Certificate
root:
~]# yum install crypto-utils mod_sslImportant
~]# openssl req -x509 -new -set_serial number -key hostname.key -out hostname.crtNote
root:
~]# rm /etc/pki/tls/private/hostname.keygenkey command as root, followed by the appropriate host name (for example, penguin.example.com):
~]# genkey hostname- Review the target locations in which the key and certificate will be stored.
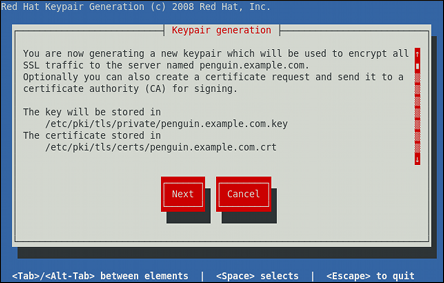
Figure 18.1. Running the genkey utility
Use the Tab key to select the button, and press Enter to proceed to the next screen. - Using the up and down arrow keys, select a suitable key size. Note that while a larger key increases the security, it also increases the response time of your server. The NIST recommends using
2048 bits. See NIST Special Publication 800-131A.
Figure 18.2. Selecting the key size
Once finished, use the Tab key to select the button, and press Enter to initiate the random bits generation process. Depending on the selected key size, this may take some time. - Decide whether you want to send a certificate request to a certificate authority.

Figure 18.3. Generating a certificate request
Use the Tab key to select to compose a certificate request, or to generate a self-signed certificate. Then press Enter to confirm your choice. - Using the Spacebar key, enable (
[*]) or disable ([ ]) the encryption of the private key.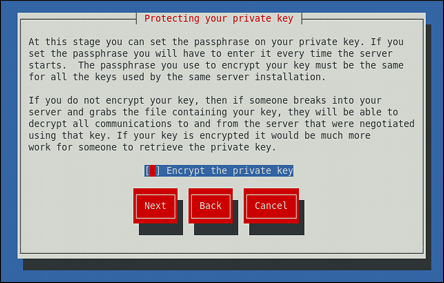
Figure 18.4. Encrypting the private key
Use the Tab key to select the button, and press Enter to proceed to the next screen. - If you have enabled the private key encryption, enter an adequate passphrase. Note that for security reasons, it is not displayed as you type, and it must be at least five characters long.

Figure 18.5. Entering a passphrase
Use the Tab key to select the button, and press Enter to proceed to the next screen.Important
Entering the correct passphrase is required in order for the server to start. If you lose it, you will need to generate a new key and certificate. - Customize the certificate details.

Figure 18.6. Specifying certificate information
Use the Tab key to select the button, and press Enter to finish the key generation. - If you have previously enabled the certificate request generation, you will be prompted to send it to a certificate authority.

Figure 18.7. Instructions on how to send a certificate request
Press Enter to return to a shell prompt.
/etc/httpd/conf.d/ssl.conf configuration file:
SSLCertificateFile /etc/pki/tls/certs/hostname.crt
SSLCertificateKeyFile /etc/pki/tls/private/hostname.keyhttpd service as described in Section 18.1.4.3, “Restarting the Service”, so that the updated configuration is loaded.
18.1.13. Configure the Firewall for HTTP and HTTPS Using the Command Line
HTTP and HTTPS traffic by default. To enable the system to act as a web server, enable ports and protocols as required. The default port for HTTP is 80 and the default port for HTTPS is 443. In both cases the TCP should be allowed to pass through the firewall.
80 for HTTP using the command line, issue the following command as root:
~]# lokkit --port=80:tcp --update--disabled option. Active connections will be terminated and time out on the initiating machine. Use the lokkit --help command to view the built in help.
443 for HTTPS using the command line, issue the following command as root:
~]# lokkit --port=443:tcp --update--disabled option. Active connections will be terminated and time out on the initiating machine. See the /etc/services file for list of services and their associated ports.
/etc/sysconfig/system-config-firewall file thoroughly after editing. To apply the settings in /etc/sysconfig/system-config-firewall, issue the following command as root:
~]# lokkit --updateHTTPS to pass through the firewall, by editing the configuration file, become the root user and add the following line to /etc/sysconfig/system-config-firewall:
--port=443:tcp/etc/sysconfig/system-config-firewall, issue the following command as root:
~]# lokkit --update18.1.13.1. Checking Network Access for Incoming HTTPS and HTTPS Using the Command Line
root:
~]# less /etc/sysconfig/system-config-firewall
# Configuration file for system-config-firewall

--enabled
--service=sshHTTP and HTTPS have not been allowed to pass through.
HTTP is enabled, the following line appears as output in addition to the lines shown above:
--port=80:tcpHTTP traffic for clients, issue the following command as root:
~]# iptables -L -n | grep 'tcp.*80'
ACCEPT tcp -- 0.0.0.0/0 0.0.0.0/0 state NEW tcp dpt:80HTTPS is enabled, the following line appears as output in addition to the lines shown above:
--port=443:tcpHTTPS traffic for clients, issue the following command as root:
~]# iptables -L -n | grep 'tcp.*443'
ACCEPT     tcp  --  0.0.0.0/0            0.0.0.0/0           state NEW tcp dpt:443
18.1.14. Additional Resources
Installed Documentation
httpd(8)— The manual page for thehttpdservice containing the complete list of its command-line options.genkey(1)— The manual page forgenkeyutility, provided by the crypto-utils package.
Installable Documentation
- http://localhost/manual/ — The official documentation for the Apache HTTP Server with the full description of its directives and available modules. Note that in order to access this documentation, you must have the httpd-manual package installed, and the web server must be running.Before accessing the documentation, issue the following commands as
root:~]# yum install httpd-manual ~]# service httpd graceful
Online Documentation
- http://httpd.apache.org/ — The official website for the Apache HTTP Server with documentation on all the directives and default modules.
- http://www.openssl.org/ — The OpenSSL home page containing further documentation, frequently asked questions, links to the mailing lists, and other useful resources.