Este contenido no está disponible en el idioma seleccionado.
8.3. Add User Entries to the Directory Server
Overview
Copiar enlaceEnlace copiado en el portapapeles!
The basic prerequisite for using LDAP authentication with the OSGi container is to have an X.500 directory server running and configured with a collection of user entries. For many use cases, you will also want to configure a number of groups to manage user roles.
Alternative to adding user entries
Copiar enlaceEnlace copiado en el portapapeles!
If you already have user entries and groups defined in your LDAP server, you might prefer to map the existing LDAP groups to JAAS roles using the
role.mapping property in the LDAPLoginModule configuration, instead of creating new entries. For details, see Section 2.1.7, “JAAS LDAP Login Module”.
Goals
Copiar enlaceEnlace copiado en el portapapeles!
In this portion of the tutorial you will
Adding user entries
Copiar enlaceEnlace copiado en el portapapeles!
Perform the following steps to add user entries to the directory server:
- Ensure that the LDAP server and console are running. See Section 8.2, “Set-up a Directory Server and Console”.
- In the Directory Server Console, click on the Directory tab, and drill down to the People node, under the
YourDomainnode (whereYourDomainis shown aslocaldomainin the following screenshots).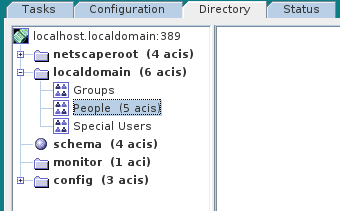
- Right-click the People node, and select
from the context menu, to open the Create New User dialog. - Select the tab in the left-hand pane of the Create New User dialog.
- Fill in the fields of the User tab, as follows:
- Set the First Name field to
John. - Set the Last Name field to
Doe. - Set the User ID field to
jdoe. - Enter the password,
secret, in the Password field. - Enter the password,
secret, in the Confirm Password field.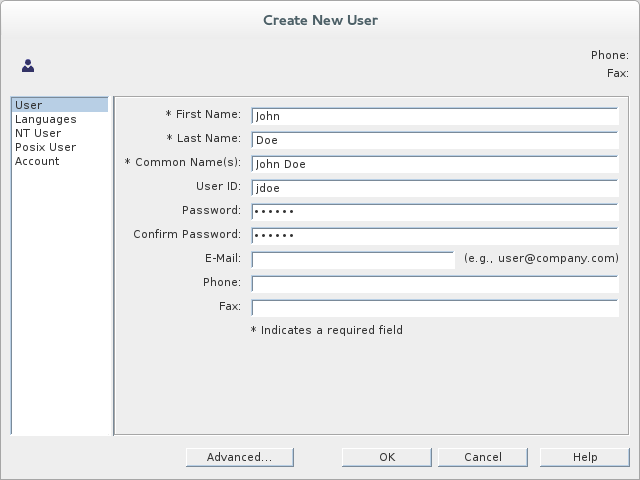
- Click .
- In Step 5.e, use
janedoefor the new user's User ID and use the password,secret, for the password fields. - In Step 5.e, use
criderfor the new user's User ID and use the password,secret, for the password fields.
Adding groups for the roles
Copiar enlaceEnlace copiado en el portapapeles!
To add the groups that define the roles:
- In the Directory tab of the Directory Server Console, drill down to the Groups node, under the
YourDomainnode. - Right-click the Groups node, and select
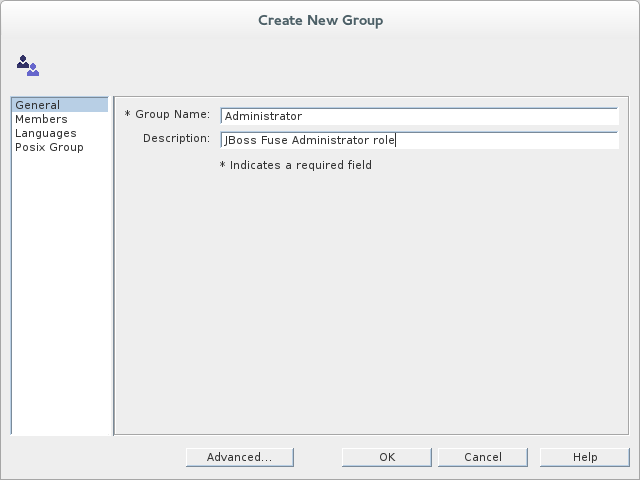
from the context menu, to open the Create New Group dialog. - Select the tab in the left-hand pane of the Create New Group dialog.
- Fill in the fields of the General tab, as follows:
- Set the Group Name field to
Administrator. - Optionally, enter a description in the Description field.
- Select the tab in the left-hand pane of the Create New Group dialog.
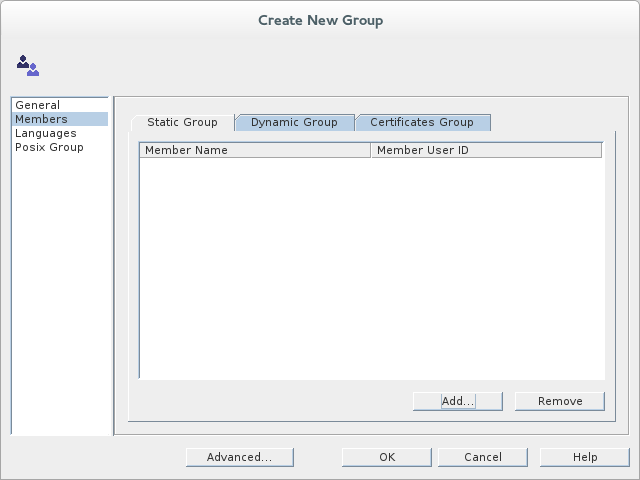
- Click Add to open the Search users and groups dialog.
- In the Search field, select
Usersfrom the drop-down menu, and click the Search button.
- From the list of users that is now displayed, select
John Doe. - Click , to close the Search users and groups dialog.
- Click , to close the Create New Group dialog.
- In Step 8, select
Jane Doe. - In Step 8, select
Camel Rider.