Este contenido no está disponible en el idioma seleccionado.
5.10. Creating Distributed Dispersed Volumes
Distributed dispersed volumes support the same configurations of erasure coding as dispersed volumes. The number of bricks in a distributed dispersed volume must be a multiple of (K+M). With this release, the following configurations are supported:
- Multiple disperse sets containing 6 bricks with redundancy level 2
- Multiple disperse sets containing 10 bricks with redundancy level 2
- Multiple disperse sets containing 11 bricks with redundancy level 3
- Multiple disperse sets containing 12 bricks with redundancy level 4
- Multiple disperse sets containing 20 bricks with redundancy level 4
Important
Distributed dispersed volume configuration is supported only on JBOD storage. For more information, see Section 20.1.2, “JBOD”.
Use
gluster volume create to create different types of volumes, and gluster volume info to verify successful volume creation.
Prerequisites
- A trusted storage pool has been created, as described in Section 4.1, “Adding Servers to the Trusted Storage Pool”.
- Understand how to start and stop volumes, as described in Section 5.11, “Starting Volumes”.
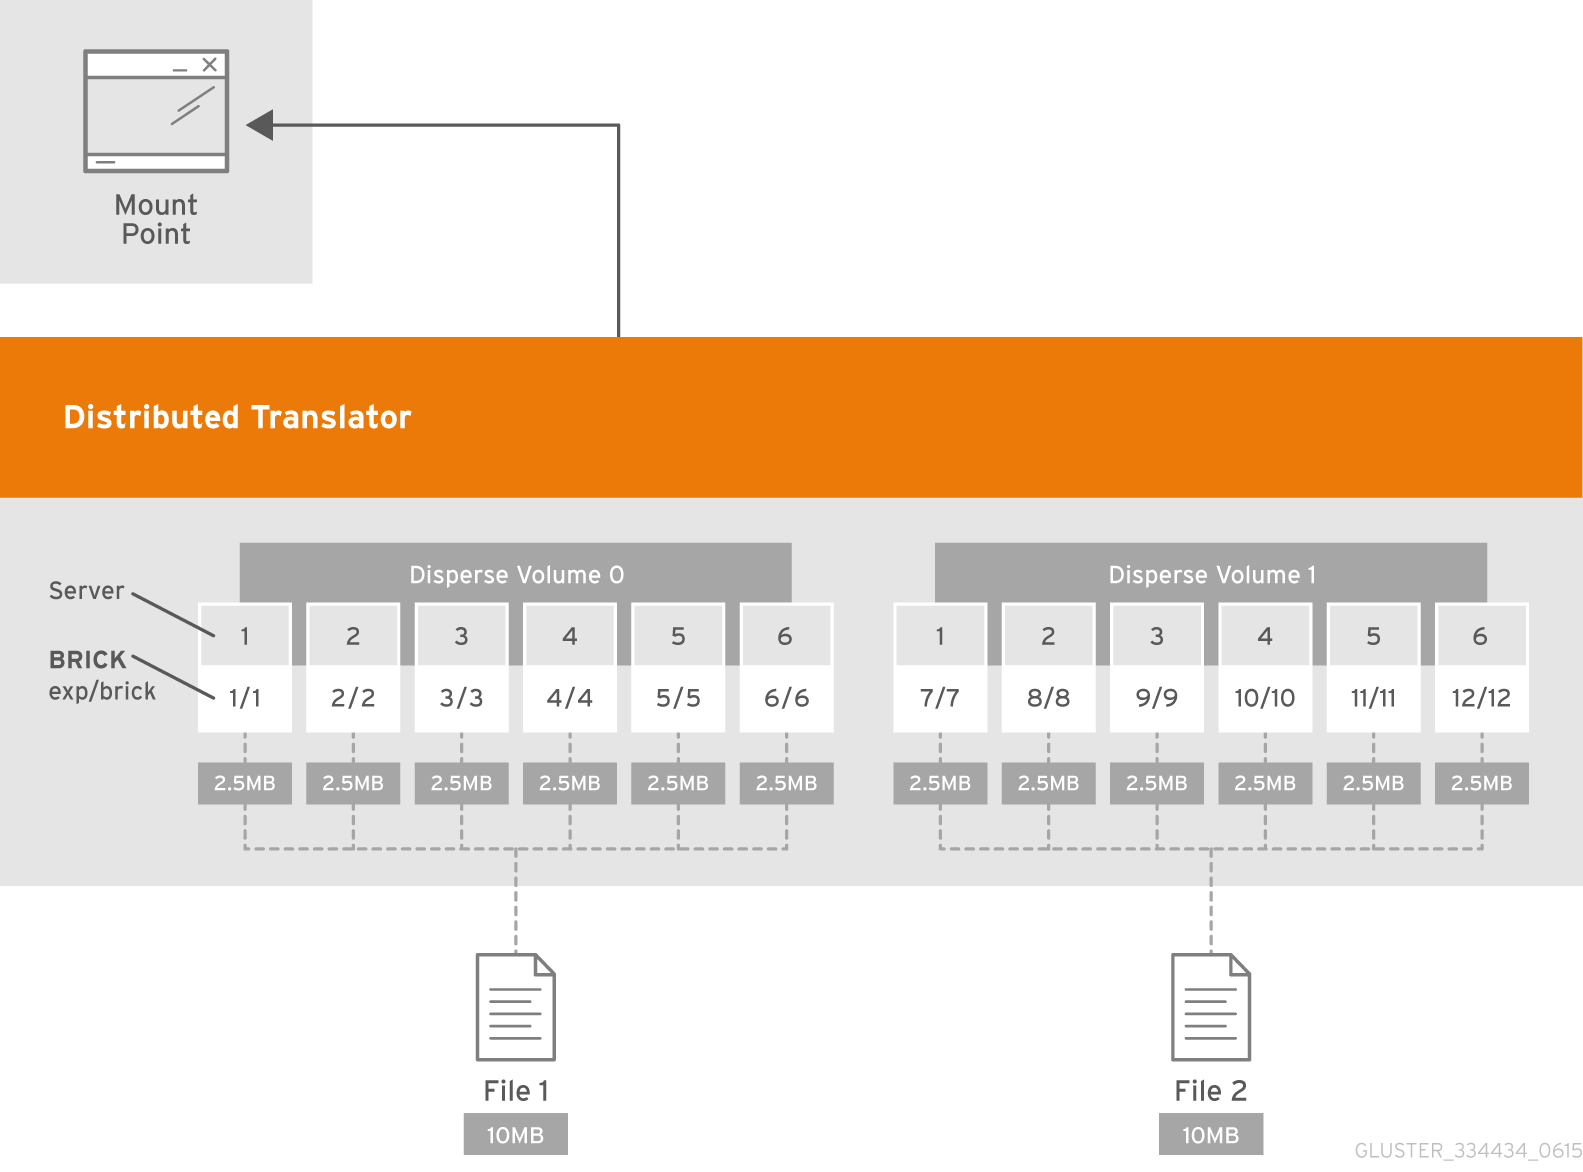
Figure 5.8. Illustration of a Distributed Dispersed Volume
Creating distributed dispersed volumes
Important
Red Hat recommends you to review the Distributed Dispersed Volume configuration recommendations explained in Section 11.16, “Recommended Configurations - Dispersed Volume” before creating the Distributed Dispersed volume.
- Run the
gluster volume createcommand to create the dispersed volume.The syntax is# gluster volume create NEW-VOLNAME disperse-data COUNT [redundancy COUNT] [transport tcp | rdma | tcp,rdma] NEW-BRICK...The default value for transport istcp. Other options can be passed such asauth.alloworauth.reject. See Section 11.1, “Configuring Volume Options” for a full list of parameters.Example 5.12. Distributed Dispersed Volume with Six Storage Servers
# gluster volume create test-volume disperse-data 4 redundancy 2 transport tcp server1:/rhgs1/brick1 server2:/rhgs2/brick2 server3:/rhgs3/brick3 server4:/rhgs4/brick4 server5:/rhgs5/brick5 server6:/rhgs6/brick6 server1:/rhgs7/brick7 server2:/rhgs8/brick8 server3:/rhgs9/brick9 server4:/rhgs10/brick10 server5:/rhgs11/brick11 server6:/rhgs12/brick12
Creation of test-volume has been successful
Please start the volume to access data.
The above example is illustrated in Figure 5.7, “Illustration of a Dispersed Volume” . In the illustration and example, you are creating 12 bricks from 6 servers. - Run
# gluster volume start VOLNAMEto start the volume.# gluster volume start test-volume Starting test-volume has been successfulImportant
Theopen-behindvolume option is enabled by default. If you are accessing the distributed dispersed volume using the SMB protocol, you must disable theopen-behindvolume option to avoid performance bottleneck on large file workload. Run the following command to disableopen-behindvolume option:# gluster volume set VOLNAME open-behind offFor information onopen-behindvolume option, see Section 11.1, “Configuring Volume Options” - Run
gluster volume infocommand to optionally display the volume information.