Este contenido no está disponible en el idioma seleccionado.
8.5. Importing Projects from Git Repository into Red Hat JBoss Developer Studio
You can configure Red Hat JBoss Developer Studio to connect to a central Git asset repository. The repository stores rules, models, functions, and processes.
You can either clone a remote Git repository or import a local Git repository.
Procedure: Cloning Remote Git Repository
- Start the Red Hat JBoss BPM Suite server by selecting the server from the Servers tab and click the start icon.
Simultaneously, start the Secure Shell server, if not running already, by using the following command. The command is Linux and Mac specific only. On these platforms, if
sshdhas already been started, this command fails. In that case, you may safely ignore this step./sbin/service sshd start-
In Red Hat JBoss Developer Studio, select File
Import… and navigate to the Git folder. Open the Git folder to select Projects from Git and click Next. - Select the repository source as Clone URI and click Next.
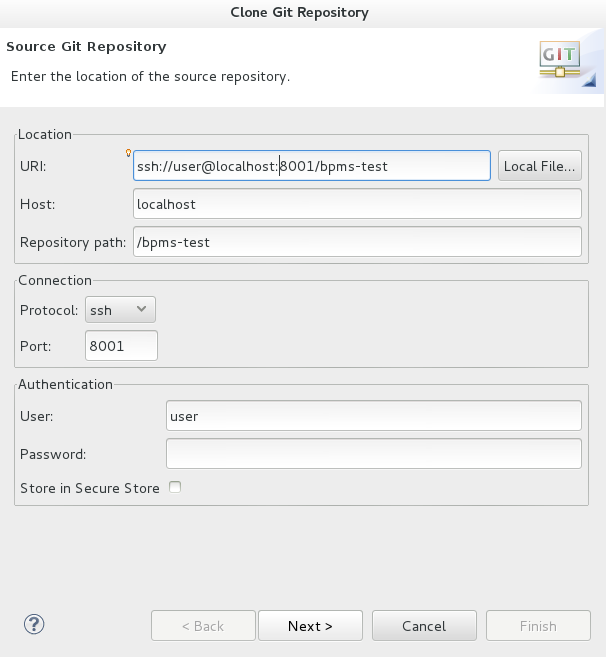
Enter the details of the Git repository in the next window and click Next.
Figure 8.1. Git Repository Details
- Select the branch you wish to import in the following window and click Next.
- To define the local storage for this project, enter (or select) a non-empty directory, make any configuration changes and click Next.
- Import the project as a general project in the following window and click Next. Name the project and click Finish.
Procedure: Importing Local Git Repository
- Start the Red Hat JBoss BPM Suite server by selecting the server from the Servers tab and click the start icon.
-
In Red Hat JBoss Developer Studio, select File
Import… and navigate to the Git folder. Open the Git folder to select Projects from Git and click Next. Select the repository source as Existing local repository and click Next.
Figure 8.2. Git Repository Details
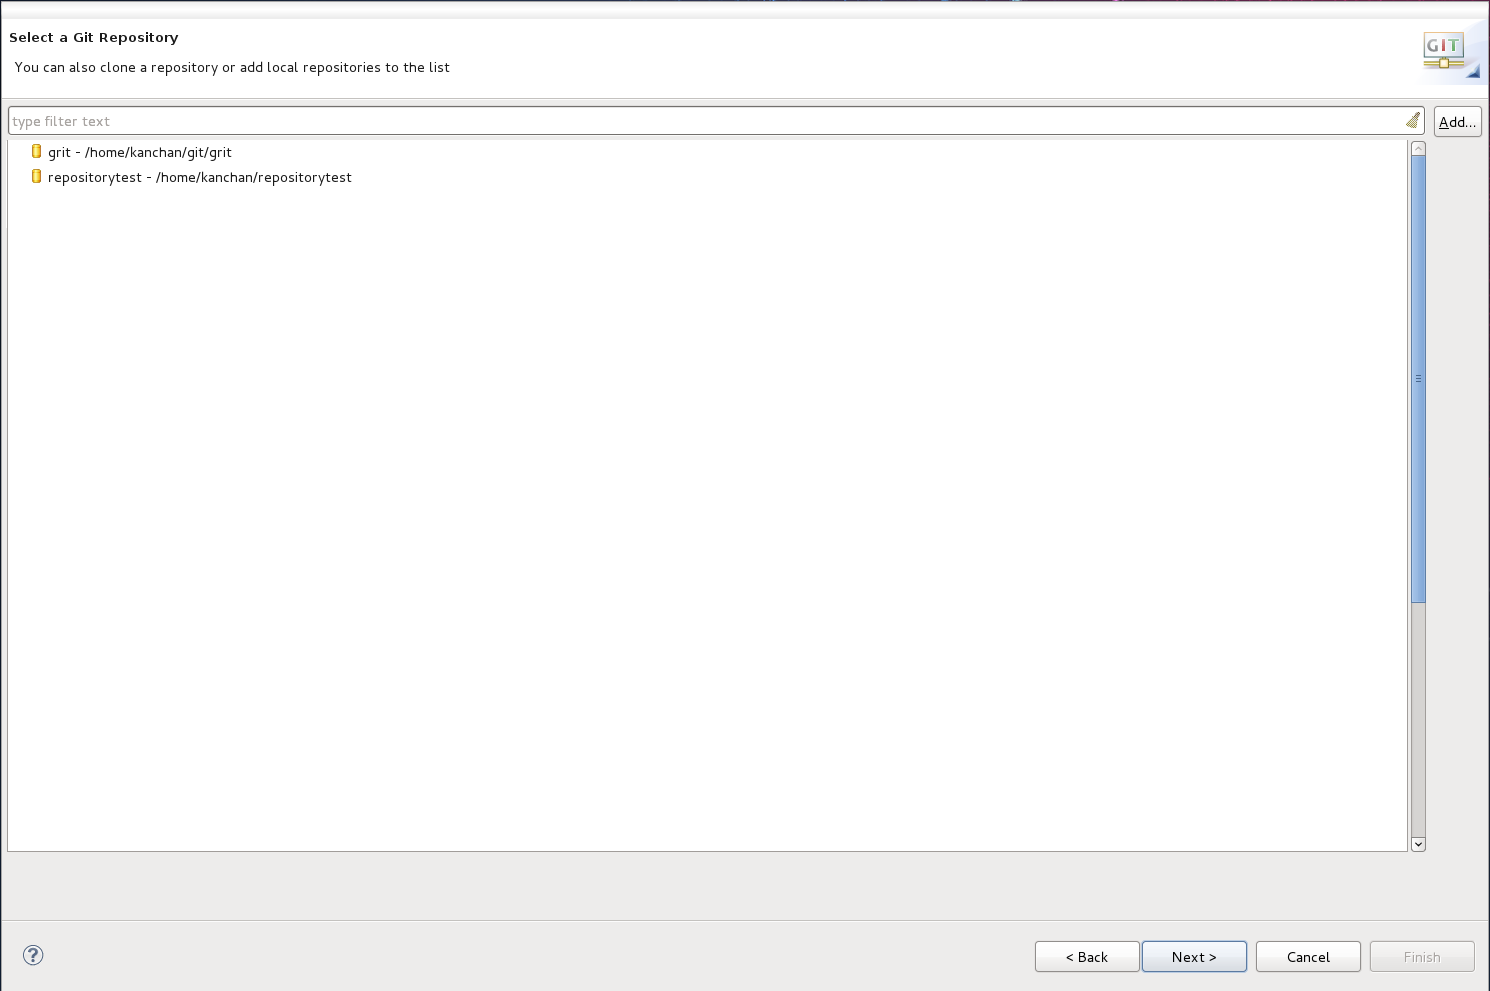
- Select the repository that is to be configured from the list of available repositories and click Next.
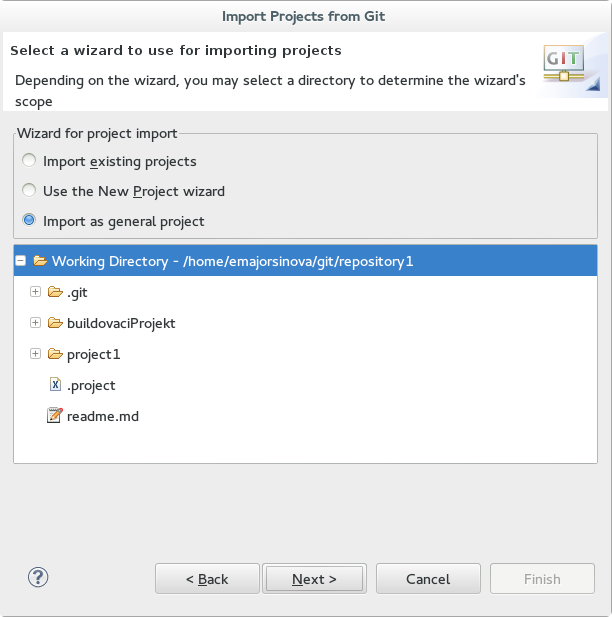
In the dialog that opens, select the radio button Import as general project from the Wizard for project import and click Next. Name the project and click Finish.
Figure 8.3. Wizard for Project Import