Este contenido no está disponible en el idioma seleccionado.
Chapter 2. Using Dev Spaces in team workflow
Learn about the benefits of using OpenShift Dev Spaces in your organization in the following articles:
2.1. Badge for first-time contributors
To enable a first-time contributor to start a workspace with a project, add a badge with a link to your OpenShift Dev Spaces instance.
Figure 2.1. Factory badge
Procedure
Substitute your OpenShift Dev Spaces URL (
https://<openshift_dev_spaces_fqdn>) and repository URL (<your_repository_url>), and add the link to your repository in the projectREADME.mdfile.[](https://<openshift_dev_spaces_fqdn>/#https://<your_repository_url>)
-
The
README.mdfile in your Git provider web interface displays the factory badge. Click the badge to open a workspace with your project in your OpenShift Dev Spaces instance.
2.2. Reviewing pull and merge requests
Red Hat OpenShift Dev Spaces workspace contains all tools you need to review pull and merge requests from start to finish. By clicking a OpenShift Dev Spaces link, you get access to Red Hat OpenShift Dev Spaces-supported web IDE with a ready-to-use workspace where you can run a linter, unit tests, the build and more.
Prerequisites
- You have access to the repository hosted by your Git provider.
- You have access to a OpenShift Dev Spaces instance.
Procedure
- Open the feature branch to review in OpenShift Dev Spaces. A clone of the branch opens in a workspace with tools for debugging and testing.
- Check the pull or merge request changes.
Run your desired debugging and testing tools:
- Run a linter.
- Run unit tests.
- Run the build.
- Run the application to check for problems.
- Navigate to UI of your Git provider to leave comment and pull or merge your assigned request.
Verification
- (optional) Open a second workspace using the main branch of the repository to reproduce a problem.
2.3. Try in Web IDE GitHub action
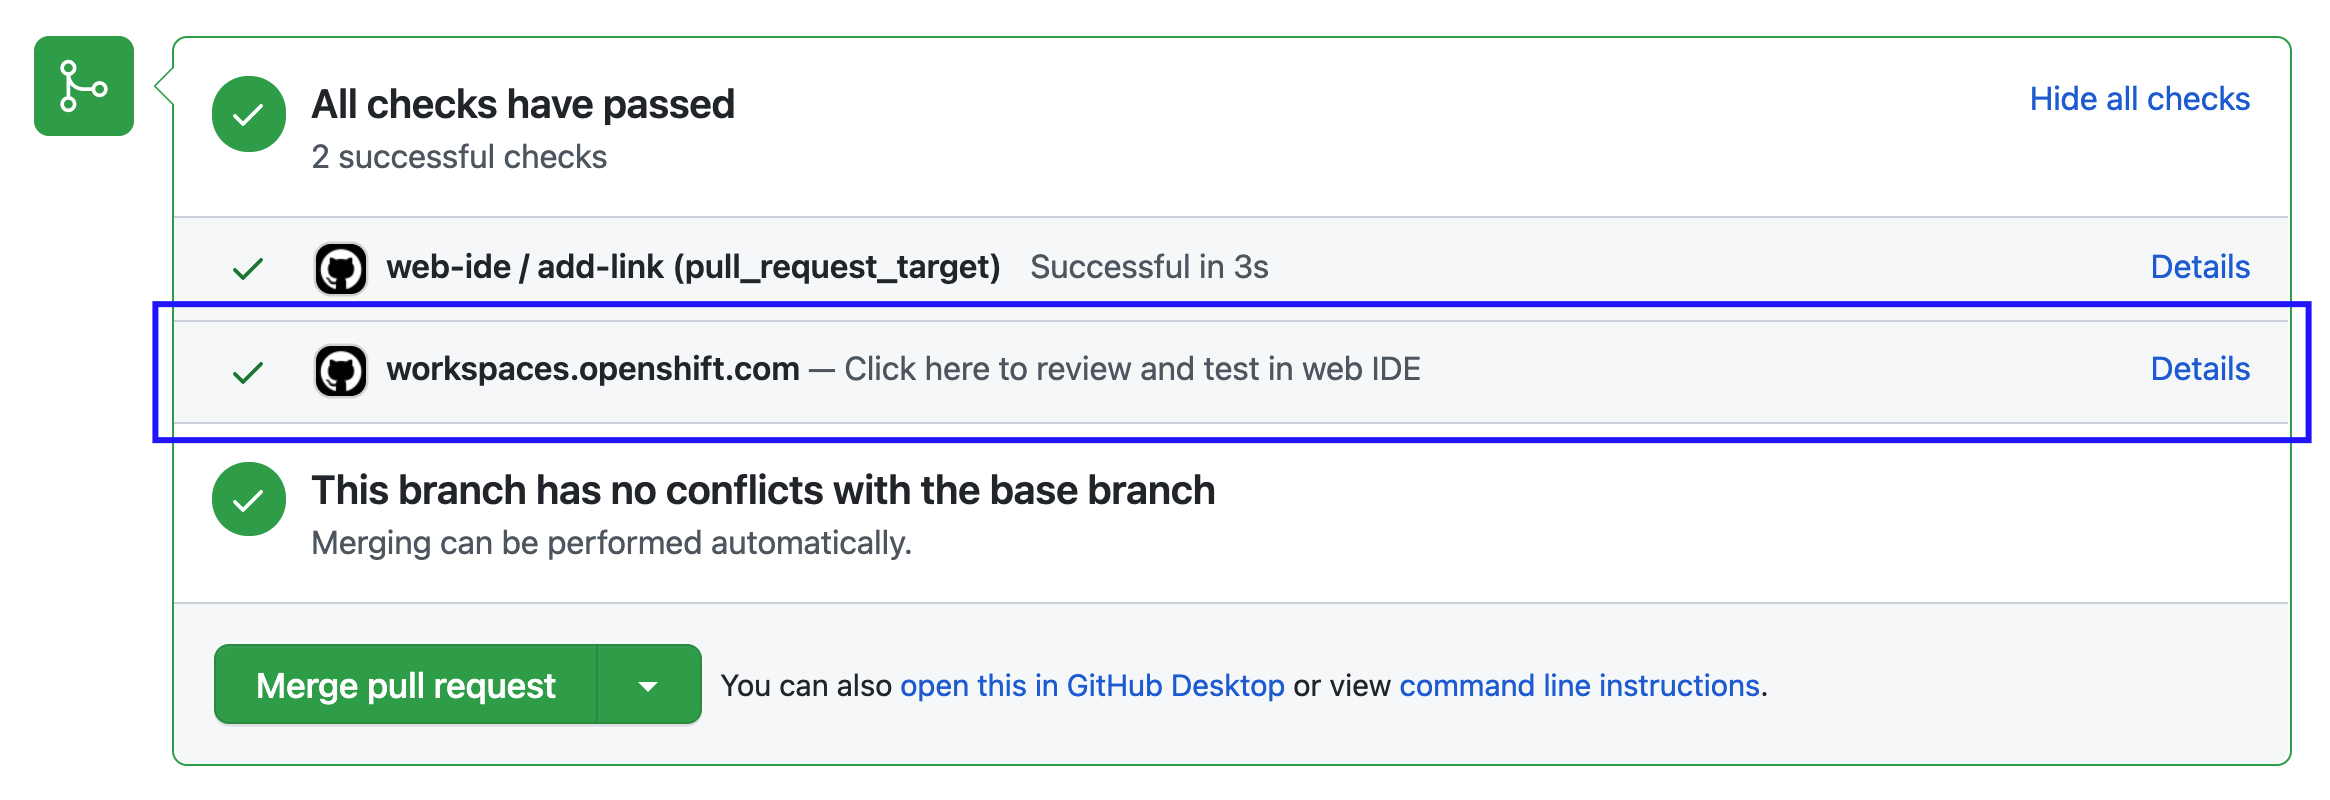
The Try in Web IDE GitHub action can be added to a GitHub repository workflow to help reviewers quickly test pull requests on Eclipse Che hosted by Red Hat. The action achieves this by listening to pull request events and providing a factory URL by creating a comment, a status check, or both. This factory URL creates a new workspace from the pull request branch on Eclipse Che hosted by Red Hat.
The Che documentation repository (https://github.com/eclipse/che-docs) is a real-life example where the Try in Web IDE GitHub action helps reviewers quickly test pull requests. Experience the workflow by navigating to a recent pull request and opening a factory URL.
Figure 2.2. Pull request comment created by the Try in Web IDE GitHub action. Clicking the badge opens a new workspace for reviewers to test the pull request.

Figure 2.3. Pull request status check created by the Try in Web IDE GitHub action. Clicking the "Details" link opens a new workspace for reviewers to test the pull request.

2.3.1. Adding the action to a GitHub repository workflow
This section describes how to integrate the Try in Web IDE GitHub action to a GitHub repository workflow.
Prerequisites
- A GitHub repository
- A devfile in the root of the GitHub repository.
Procedure
-
In the GitHub repository, create a
.github/workflowsdirectory if it does not exist already. Create an
example.ymlfile in the.github/workflowsdirectory with the following content:Example 2.1. example.yml
name: Try in Web IDE example

on:
  pull_request_target:
    types: [opened]

jobs:
  add-link:
    runs-on: ubuntu-20.04
    steps:
      - name: Web IDE Pull Request Check
        id: try-in-web-ide
        uses: redhat-actions/try-in-web-ide@v1
        with:
          # GitHub action inputs

          # required
          github_token: ${{ secrets.GITHUB_TOKEN }}

          # optional - defaults to true
          add_comment: true

          # optional - defaults to true
          add_status: true
This code snippet creates a workflow named
Try in Web IDE example, with a job that runs thev1version of theredhat-actions/try-in-web-idecommunity action. The workflow is triggered on thepull_request_targetevent, on theopenedactivity type.Optionally configure the activity types from the
on.pull_request_target.typesfield to customize when workflow trigger. Activity types such asreopenedandsynchronizecan be useful.Example 2.2. Triggering the workflow on both
openedandsynchronizeactivity typeson: pull_request_target: types: [opened, synchronize]-
Optionally configure the
add_commentandadd_statusGitHub action inputs withinexample.yml. These inputs are sent to the Try in Web IDE GitHub action to customize whether comments and status checks are to be made.
2.3.2. Providing a devfile
Providing a devfile in the root directory of the repository is recommended to define the development environment of the workspace created by the factory URL. In this way, the workspace contains everything users need to review pull requests, such as plugins, development commands, and other environment setup.
The Che documentation repository devfile is an example of a well-defined and effective devfile.