Este contenido no está disponible en el idioma seleccionado.
Chapter 3. Using Pipelines as Code with a Git repository hosting service provider
After installing Pipelines as Code, cluster administrators can configure a Git repository hosting service provider. Currently, the following services are supported:
- GitHub App
- GitHub Webhook
- GitLab
- Bitbucket Server
- Bitbucket Cloud
GitHub App is the recommended service for using with Pipelines as Code.
3.1. Using Pipelines as Code with a GitHub App
GitHub Apps act as a point of integration with Red Hat OpenShift Pipelines and bring the advantage of Git-based workflows to OpenShift Pipelines. Cluster administrators can configure a single GitHub App for all cluster users. For GitHub Apps to work with Pipelines as Code, ensure that the webhook of the GitHub App points to the Pipelines as Code event listener route (or ingress endpoint) that listens for GitHub events.
When importing an application using Import from Git and the Git repository has a .tekton directory, you can configure pipelines-as-code for your application.
3.1.1. Configuring a GitHub App
Cluster administrators can create a GitHub App by running the following command:
tkn pac bootstrap github-app
$ tkn pac bootstrap github-app
If the tkn pac CLI plugin is not installed, you can create the GitHub App manually.
Procedure
To create and configure a GitHub App manually for Pipelines as Code, perform the following steps:
- Sign in to your GitHub account.
-
Go to Settings
Developer settings GitHub Apps, and click New GitHub App. Provide the following information in the GitHub App form:
-
GitHub Application Name:
OpenShift Pipelines - Homepage URL: OpenShift Console URL
Webhook URL: The Pipelines as Code route or ingress URL. You can find it by running the following command:
echo https://$(oc get route -n openshift-pipelines pipelines-as-code-controller -o jsonpath='{.spec.host}')$ echo https://$(oc get route -n openshift-pipelines pipelines-as-code-controller -o jsonpath='{.spec.host}')Copy to Clipboard Copied! Toggle word wrap Toggle overflow Webhook secret: An arbitrary secret. You can generate a secret by running the following command:
openssl rand -hex 20
$ openssl rand -hex 20Copy to Clipboard Copied! Toggle word wrap Toggle overflow
-
GitHub Application Name:
Select the following Repository permissions:
-
Checks:
Read & Write -
Contents:
Read & Write -
Issues:
Read & Write -
Metadata:
Read-only -
Pull request:
Read & Write
-
Checks:
Select the following Organization permissions:
-
Members:
Readonly -
Plan:
Readonly
-
Members:
Select the following User permissions:
- Check run
- Issue comment
- Pull request
- Push
- Click Create GitHub App.
- On the Details page of the newly created GitHub App, note the App ID displayed at the top.
- In the Private keys section, click Generate Private key to automatically generate and download a private key for the GitHub app. Securely store the private key for future reference and usage.
- Install the created App on a repository that you want to use with Pipelines as Code.
3.1.2. Configuring Pipelines as Code to access a GitHub App
To configure Pipelines as Code to access the newly created GitHub App, execute the following command:
oc -n openshift-pipelines create secret generic pipelines-as-code-secret \
        --from-literal github-private-key="$(cat <PATH_PRIVATE_KEY>)" \
        --from-literal github-application-id="<APP_ID>" \
        --from-literal webhook.secret="<WEBHOOK_SECRET>"
$ oc -n openshift-pipelines create secret generic pipelines-as-code-secret \
        --from-literal github-private-key="$(cat <PATH_PRIVATE_KEY>)" \
--from-literal github-application-id="<APP_ID>" \
--from-literal webhook.secret="<WEBHOOK_SECRET>" Pipelines as Code works automatically with GitHub Enterprise by detecting the header set from GitHub Enterprise and using it for the GitHub Enterprise API authorization URL.
3.1.3. Creating a GitHub App in administrator perspective
As a cluster administrator, you can configure your GitHub App with the OpenShift Container Platform cluster to use Pipelines as Code. This configuration allows you to execute a set of tasks required for build deployment.
Prerequisites
You have installed the Red Hat OpenShift Pipelines pipelines-1.13 operator from the Operator Hub.
Procedure
- In the administrator perspective, navigate to Pipelines using the navigation pane.
- Click Setup GitHub App on the Pipelines page.
-
Enter your GitHub App name. For example,
pipelines-ci-clustername-testui. - Click Setup.
- Enter your Git password when prompted in the browser.
-
Click Create GitHub App for <username>, where
<username>is your GitHub user name.
Verification
After successful creation of the GitHub App, the OpenShift Container Platform web console opens and displays the details about the application.
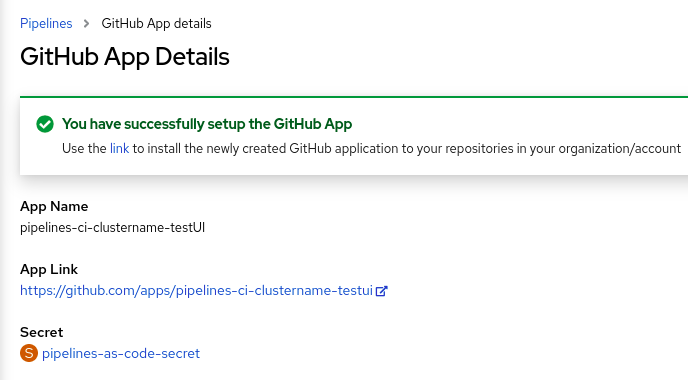
The details of the GitHub App are saved as a secret in the openShift-pipelines namespace.
To view details such as name, link, and secret associated with the GitHub applications, navigate to Pipelines and click View GitHub App.
3.1.4. Scoping the GitHub token to additional repositories
Pipelines as Code uses the GitHub app to generate a GitHub access token. Pipelines as Code uses this token to retrieve the pipeline payload from the repository and to enable the CI/CD processes to interact with GitHub repositories.
By default, the access token is scoped only to the repository from which Pipelines as Code retrieves the pipeline definition. In some cases, you might want the token to have access to additional repositories. For example, there might be a CI repository where the .tekton/pr.yaml file and source payload are located, but the build process defined in pr.yaml fetches tasks from a separate private CD repository.
You can extend the scope of the GitHub token in two ways:
- Global configuration: You can extend the GitHub token to a list of repositories in different namespaces. You must have administrative permissions to set this configuration.
- Repository level configuration: You can extend the GitHub token to a list of repositories that exist in the same namespace as the original repository. You do not need administrative permissions to set this configuration.
Procedure
-
In the
TektonConfigcustom resource (CR), in thepipelinesAsCode.settingsspec, set thesecret-github-app-token-scopedparameter tofalse. This setting enables scoping the GitHub token to private and public repositories listed in the global and repository level configuration. To set global configuration for scoping the GitHub token, in the
TektonConfigCR, in thepipelinesAsCode.settingsspec, specify the additional repositories in thesecret-github-app-scope-extra-reposparameter, as in the following example:Copy to Clipboard Copied! Toggle word wrap Toggle overflow To set repository level configuration for scoping the GitHub token, specify the additional repositories in the
github_app_token_scope_reposparameter of theRepositoryCR, as in the following example:Copy to Clipboard Copied! Toggle word wrap Toggle overflow In this example, the
Repositorycustom resource is associated with thelinda/projectrepository in thetest-reponamespace. The scope of the generated GitHub token is extended to theowner/projectandowner1/project1repositories, as well as thelinda/projectrepository. These repositories must exist under thetest-reponamespace.NoteThe additional repositories can be public or private, but must reside in the same namespace as the repository with which the
Repositoryresource is associated.If any of the repositories do not exist in the namespace, the scoping of the GitHub token fails with an error message:
failed to scope GitHub token as repo owner1/project1 does not exist in namespace test-repo
failed to scope GitHub token as repo owner1/project1 does not exist in namespace test-repoCopy to Clipboard Copied! Toggle word wrap Toggle overflow
Result
The generated GitHub token enables access to the additional repositories that you configured in the global and repository level configuration, as well as the original repository where the Pipelines as Code payload files are located.
If you provide both global configuration and repository level configuration, the token is scoped to all the repositories from both configurations, as in the following example.
TektonConfig custom resource
Repository custom resource
The GitHub token is scoped to the owner/project, owner1/project1, owner2/project2, owner3/project3, and linda/project respositories.
3.2. Using Pipelines as Code with GitHub Webhook
Use Pipelines as Code with GitHub Webhook on your repository if you cannot create a GitHub App. However, using Pipelines as Code with GitHub Webhook does not give you access to the GitHub Check Runs API. The status of the tasks is added as comments on the pull request and is unavailable under the Checks tab.
Pipelines as Code with GitHub Webhook does not support GitOps comments such as /retest and /ok-to-test. To restart the continuous integration (CI), create a new commit to the repository. For example, to create a new commit without any changes, you can use the following command:
git --amend -a --no-edit && git push --force-with-lease <origin> <branchname>
$ git --amend -a --no-edit && git push --force-with-lease <origin> <branchname>Prerequisites
- Ensure that Pipelines as Code is installed on the cluster.
For authorization, create a personal access token on GitHub.
To generate a secure and fine-grained token, restrict its scope to a specific repository and grant the following permissions:
Expand Table 3.1. Permissions for fine-grained tokens Name Access Administration
Read-only
Metadata
Read-only
Content
Read-only
Commit statuses
Read and Write
Pull request
Read and Write
Webhooks
Read and Write
To use classic tokens, set the scope as
public_repofor public repositories andrepofor private repositories. In addition, provide a short token expiration period and note the token in an alternate location.NoteIf you want to configure the webhook using the
tkn pacCLI, add theadmin:repo_hookscope.
Procedure
Configure the webhook and create a
Repositorycustom resource (CR).To configure a webhook and create a
RepositoryCR automatically using thetkn pacCLI tool, use the following command:tkn pac create repo
$ tkn pac create repoCopy to Clipboard Copied! Toggle word wrap Toggle overflow Sample interactive output
Copy to Clipboard Copied! Toggle word wrap Toggle overflow To configure a webhook and create a
RepositoryCR manually, perform the following steps:On your OpenShift cluster, extract the public URL of the Pipelines as Code controller.
echo https://$(oc get route -n openshift-pipelines pipelines-as-code-controller -o jsonpath='{.spec.host}')$ echo https://$(oc get route -n openshift-pipelines pipelines-as-code-controller -o jsonpath='{.spec.host}')Copy to Clipboard Copied! Toggle word wrap Toggle overflow On your GitHub repository or organization, perform the following steps:
- Go to Settings –> Webhooks and click Add webhook.
- Set the Payload URL to the Pipelines as Code controller public URL.
- Select the content type as application/json.
Add a webhook secret and note it in an alternate location. With
opensslinstalled on your local machine, generate a random secret.openssl rand -hex 20
$ openssl rand -hex 20Copy to Clipboard Copied! Toggle word wrap Toggle overflow - Click Let me select individual events and select these events: Commit comments, Issue comments, Pull request, and Pushes.
- Click Add webhook.
On your OpenShift cluster, create a
Secretobject with the personal access token and webhook secret.oc -n target-namespace create secret generic github-webhook-config \ --from-literal provider.token="<GITHUB_PERSONAL_ACCESS_TOKEN>" \ --from-literal webhook.secret="<WEBHOOK_SECRET>"
$ oc -n target-namespace create secret generic github-webhook-config \
  --from-literal provider.token="<GITHUB_PERSONAL_ACCESS_TOKEN>" \
  --from-literal webhook.secret="<WEBHOOK_SECRET>"
Copy to Clipboard Copied! Toggle word wrap Toggle overflow Create a
RepositoryCR.Example:
RepositoryCRCopy to Clipboard Copied! Toggle word wrap Toggle overflow NotePipelines as Code assumes that the OpenShift
Secretobject and theRepositoryCR are in the same namespace.
Optional: For an existing
RepositoryCR, add multiple GitHub Webhook secrets or provide a substitute for a deleted secret.Add a webhook using the
tkn pacCLI tool.Example: Additional webhook using the
tkn pacCLItkn pac webhook add -n repo-pipelines
$ tkn pac webhook add -n repo-pipelinesCopy to Clipboard Copied! Toggle word wrap Toggle overflow Sample interactive output
Copy to Clipboard Copied! Toggle word wrap Toggle overflow -
Update the
webhook.secretkey in the existing OpenShiftSecretobject.
Optional: For an existing
RepositoryCR, update the personal access token.Update the personal access token using the
tkn pacCLI tool.Example: Updating personal access token using the
tkn pacCLItkn pac webhook update-token -n repo-pipelines
$ tkn pac webhook update-token -n repo-pipelinesCopy to Clipboard Copied! Toggle word wrap Toggle overflow Sample interactive output
? Please enter your personal access token:  ****************************************
🔑 Secret owner-repo has been updated with new personal access token in the repo-pipelines namespace.
? Please enter your personal access token:  ****************************************
🔑 Secret owner-repo has been updated with new personal access token in the repo-pipelines namespace.
Copy to Clipboard Copied! Toggle word wrap Toggle overflow Alternatively, update the personal access token by modifying the
RepositoryCR.Find the name of the secret in the
RepositoryCR.Copy to Clipboard Copied! Toggle word wrap Toggle overflow Use the
oc patchcommand to update the values of the$NEW_TOKENin the$target_namespacenamespace.oc -n $target_namespace patch secret github-webhook-config -p "{\"data\": {\"provider.token\": \"$(echo -n $NEW_TOKEN|base64 -w0)\"}}"$ oc -n $target_namespace patch secret github-webhook-config -p "{\"data\": {\"provider.token\": \"$(echo -n $NEW_TOKEN|base64 -w0)\"}}"Copy to Clipboard Copied! Toggle word wrap Toggle overflow
3.3. Using Pipelines as Code with GitLab
If your organization or project uses GitLab as the preferred platform, you can use Pipelines as Code for your repository with a webhook on GitLab.
Prerequisites
- Ensure that Pipelines as Code is installed on the cluster.
For authorization, generate a personal access token as the manager of the project or organization on GitLab.
Note-
If you want to configure the webhook using the
tkn pacCLI, add theadmin:repo_hookscope to the token. - Using a token scoped for a specific project cannot provide API access to a merge request (MR) sent from a forked repository. In such cases, Pipelines as Code displays the result of a pipeline as a comment on the MR.
-
If you want to configure the webhook using the
Procedure
Configure the webhook and create a
Repositorycustom resource (CR).To configure a webhook and create a
RepositoryCR automatically using thetkn pacCLI tool, use the following command:tkn pac create repo
$ tkn pac create repoCopy to Clipboard Copied! Toggle word wrap Toggle overflow Sample interactive output
Copy to Clipboard Copied! Toggle word wrap Toggle overflow To configure a webhook and create a
RepositoryCR manually, perform the following steps:On your OpenShift cluster, extract the public URL of the Pipelines as Code controller.
echo https://$(oc get route -n openshift-pipelines pipelines-as-code-controller -o jsonpath='{.spec.host}')$ echo https://$(oc get route -n openshift-pipelines pipelines-as-code-controller -o jsonpath='{.spec.host}')Copy to Clipboard Copied! Toggle word wrap Toggle overflow On your GitLab project, perform the following steps:
- Use the left sidebar to go to Settings –> Webhooks.
- Set the URL to the Pipelines as Code controller public URL.
Add a webhook secret and note it in an alternate location. With
opensslinstalled on your local machine, generate a random secret.openssl rand -hex 20
$ openssl rand -hex 20Copy to Clipboard Copied! Toggle word wrap Toggle overflow - Click Let me select individual events and select these events: Commit comments, Issue comments, Pull request, and Pushes.
- Click Save changes.
On your OpenShift cluster, create a
Secretobject with the personal access token and webhook secret.oc -n target-namespace create secret generic gitlab-webhook-config \ --from-literal provider.token="<GITLAB_PERSONAL_ACCESS_TOKEN>" \ --from-literal webhook.secret="<WEBHOOK_SECRET>"
$ oc -n target-namespace create secret generic gitlab-webhook-config \
  --from-literal provider.token="<GITLAB_PERSONAL_ACCESS_TOKEN>" \
  --from-literal webhook.secret="<WEBHOOK_SECRET>"
Copy to Clipboard Copied! Toggle word wrap Toggle overflow Create a
RepositoryCR.Example:
RepositoryCRCopy to Clipboard Copied! Toggle word wrap Toggle overflow - 1
- If you are using a private instance of GitLab and not GitLab.com, uncomment this field and set it to the URL of your GitLab API. The GitLab API is the same host as the repository. For example, if the repository is
https://gitlab.example.com/owner/repo, the API URL ishttps://gitlab.example.com/.
Note-
Pipelines as Code assumes that the OpenShift
Secretobject and theRepositoryCR are in the same namespace.
Optional: For an existing
RepositoryCR, add multiple GitLab Webhook secrets or provide a substitute for a deleted secret.Add a webhook using the
tkn pacCLI tool.Example: Adding additional webhook using the
tkn pacCLItkn pac webhook add -n repo-pipelines
$ tkn pac webhook add -n repo-pipelinesCopy to Clipboard Copied! Toggle word wrap Toggle overflow Sample interactive output
Copy to Clipboard Copied! Toggle word wrap Toggle overflow -
Update the
webhook.secretkey in the existing OpenShiftSecretobject.
Optional: For an existing
RepositoryCR, update the personal access token.Update the personal access token using the
tkn pacCLI tool.Example: Updating personal access token using the
tkn pacCLItkn pac webhook update-token -n repo-pipelines
$ tkn pac webhook update-token -n repo-pipelinesCopy to Clipboard Copied! Toggle word wrap Toggle overflow Sample interactive output
? Please enter your personal access token:  ****************************************
🔑 Secret owner-repo has been updated with new personal access token in the repo-pipelines namespace.
? Please enter your personal access token:  ****************************************
🔑 Secret owner-repo has been updated with new personal access token in the repo-pipelines namespace.
Copy to Clipboard Copied! Toggle word wrap Toggle overflow Alternatively, update the personal access token by modifying the
RepositoryCR.Find the name of the secret in the
RepositoryCR.Copy to Clipboard Copied! Toggle word wrap Toggle overflow Use the
oc patchcommand to update the values of the$NEW_TOKENin the$target_namespacenamespace.oc -n $target_namespace patch secret gitlab-webhook-config -p "{\"data\": {\"provider.token\": \"$(echo -n $NEW_TOKEN|base64 -w0)\"}}"$ oc -n $target_namespace patch secret gitlab-webhook-config -p "{\"data\": {\"provider.token\": \"$(echo -n $NEW_TOKEN|base64 -w0)\"}}"Copy to Clipboard Copied! Toggle word wrap Toggle overflow
Additional resources
3.4. Using Pipelines as Code with Bitbucket Cloud
If your organization or project uses Bitbucket Cloud as the preferred platform, you can use Pipelines as Code for your repository with a webhook on Bitbucket Cloud.
Prerequisites
- Ensure that Pipelines as Code is installed on the cluster.
Create an app password on Bitbucket Cloud.
Check the following boxes to add appropriate permissions to the token:
-
Account:
Email,Read -
Workspace membership:
Read,Write -
Projects:
Read,Write -
Issues:
Read,Write Pull requests:
Read,WriteNote-
If you want to configure the webhook using the
tkn pacCLI, add theWebhooks:ReadandWritepermission to the token. - Once generated, save a copy of the password or token in an alternate location.
-
If you want to configure the webhook using the
-
Account:
Procedure
Configure the webhook and create a
RepositoryCR.To configure a webhook and create a
RepositoryCR automatically using thetkn pacCLI tool, use the following command:tkn pac create repo
$ tkn pac create repoCopy to Clipboard Copied! Toggle word wrap Toggle overflow Sample interactive output
Copy to Clipboard Copied! Toggle word wrap Toggle overflow To configure a webhook and create a
RepositoryCR manually, perform the following steps:On your OpenShift cluster, extract the public URL of the Pipelines as Code controller.
echo https://$(oc get route -n openshift-pipelines pipelines-as-code-controller -o jsonpath='{.spec.host}')$ echo https://$(oc get route -n openshift-pipelines pipelines-as-code-controller -o jsonpath='{.spec.host}')Copy to Clipboard Copied! Toggle word wrap Toggle overflow On Bitbucket Cloud, perform the following steps:
- Use the left navigation pane of your Bitbucket Cloud repository to go to Repository settings –> Webhooks and click Add webhook.
- Set a Title. For example, "Pipelines as Code".
- Set the URL to the Pipelines as Code controller public URL.
- Select these events: Repository: Push, Pull Request: Created, Pull Request: Updated, and Pull Request: Comment created.
- Click Save.
On your OpenShift cluster, create a
Secretobject with the app password in the target namespace.oc -n target-namespace create secret generic bitbucket-cloud-token \ --from-literal provider.token="<BITBUCKET_APP_PASSWORD>"
$ oc -n target-namespace create secret generic bitbucket-cloud-token \
  --from-literal provider.token="<BITBUCKET_APP_PASSWORD>"
Copy to Clipboard Copied! Toggle word wrap Toggle overflow Create a
RepositoryCR.Example:
RepositoryCRCopy to Clipboard Copied! Toggle word wrap Toggle overflow
Note-
The
tkn pac createandtkn pac bootstrapcommands are not supported on Bitbucket Cloud. Bitbucket Cloud does not support webhook secrets. To secure the payload and prevent hijacking of the CI, Pipelines as Code fetches the list of Bitbucket Cloud IP addresses and ensures that the webhook receptions come only from those IP addresses.
-
To disable the default behavior, set the
bitbucket-cloud-check-source-ipparameter tofalsein theTektonConfigcustom resource, in thepipelinesAsCode.settingsspec. -
To allow additional safe IP addresses or networks, add them as comma separated values to the
bitbucket-cloud-additional-source-ipparameter in theTektonConfigcustom resource, in thepipelinesAsCode.settingsspec.
-
To disable the default behavior, set the
Optional: For an existing
RepositoryCR, add multiple Bitbucket Cloud Webhook secrets or provide a substitute for a deleted secret.Add a webhook using the
tkn pacCLI tool.Example: Adding additional webhook using the
tkn pacCLItkn pac webhook add -n repo-pipelines
$ tkn pac webhook add -n repo-pipelinesCopy to Clipboard Copied! Toggle word wrap Toggle overflow Sample interactive output
Copy to Clipboard Copied! Toggle word wrap Toggle overflow NoteUse the
[-n <namespace>]option with thetkn pac webhook addcommand only when theRepositoryCR exists in a namespace other than the default namespace.-
Update the
webhook.secretkey in the existing OpenShiftSecretobject.
Optional: For an existing
RepositoryCR, update the personal access token.Update the personal access token using the
tkn pacCLI tool.Example: Updating personal access token using the
tkn pacCLItkn pac webhook update-token -n repo-pipelines
$ tkn pac webhook update-token -n repo-pipelinesCopy to Clipboard Copied! Toggle word wrap Toggle overflow Sample interactive output
? Please enter your personal access token:  ****************************************
🔑 Secret owner-repo has been updated with new personal access token in the repo-pipelines namespace.
? Please enter your personal access token:  ****************************************
🔑 Secret owner-repo has been updated with new personal access token in the repo-pipelines namespace.
Copy to Clipboard Copied! Toggle word wrap Toggle overflow NoteUse the
[-n <namespace>]option with thetkn pac webhook update-tokencommand only when theRepositoryCR exists in a namespace other than the default namespace.Alternatively, update the personal access token by modifying the
RepositoryCR.Find the name of the secret in the
RepositoryCR.Copy to Clipboard Copied! Toggle word wrap Toggle overflow Use the
oc patchcommand to update the values of the$passwordin the$target_namespacenamespace.oc -n $target_namespace patch secret bitbucket-cloud-token -p "{\"data\": {\"provider.token\": \"$(echo -n $NEW_TOKEN|base64 -w0)\"}}"$ oc -n $target_namespace patch secret bitbucket-cloud-token -p "{\"data\": {\"provider.token\": \"$(echo -n $NEW_TOKEN|base64 -w0)\"}}"Copy to Clipboard Copied! Toggle word wrap Toggle overflow
Additional resources
3.5. Using Pipelines as Code with Bitbucket Server
If your organization or project uses Bitbucket Server as the preferred platform, you can use Pipelines as Code for your repository with a webhook on Bitbucket Server.
Prerequisites
- Ensure that Pipelines as Code is installed on the cluster.
Generate a personal access token as the manager of the project on Bitbucket Server, and save a copy of it in an alternate location.
Note-
The token must have the
PROJECT_ADMINandREPOSITORY_ADMINpermissions. - The token must have access to forked repositories in pull requests.
-
The token must have the
Procedure
On your OpenShift cluster, extract the public URL of the Pipelines as Code controller.
echo https://$(oc get route -n openshift-pipelines pipelines-as-code-controller -o jsonpath='{.spec.host}')$ echo https://$(oc get route -n openshift-pipelines pipelines-as-code-controller -o jsonpath='{.spec.host}')Copy to Clipboard Copied! Toggle word wrap Toggle overflow On Bitbucket Server, perform the following steps:
- Use the left navigation pane of your Bitbucket Data Center repository to go to Repository settings –> Webhooks and click Add webhook.
- Set a Title. For example, "Pipelines as Code".
- Set the URL to the Pipelines as Code controller public URL.
Add a webhook secret and save a copy of it in an alternate location. If you have
opensslinstalled on your local machine, generate a random secret using the following command:openssl rand -hex 20
$ openssl rand -hex 20Copy to Clipboard Copied! Toggle word wrap Toggle overflow Select the following events:
- Repository: Push
- Repository: Modified
- Pull Request: Opened
- Pull Request: Source branch updated
- Pull Request: Comment added
- Click Save.
On your OpenShift cluster, create a
Secretobject with the app password in the target namespace.oc -n target-namespace create secret generic bitbucket-server-webhook-config \ --from-literal provider.token="<PERSONAL_TOKEN>" \ --from-literal webhook.secret="<WEBHOOK_SECRET>"
$ oc -n target-namespace create secret generic bitbucket-server-webhook-config \
  --from-literal provider.token="<PERSONAL_TOKEN>" \
  --from-literal webhook.secret="<WEBHOOK_SECRET>"
Copy to Clipboard Copied! Toggle word wrap Toggle overflow Create a
RepositoryCR.Example:
RepositoryCRCopy to Clipboard Copied! Toggle word wrap Toggle overflow - 1
- Ensure that you have the right Bitbucket Server API URL without the
/api/v1.0suffix. Usually, the default install has a/restsuffix. - 2
- Specify the username of the BitBucket Server.
- 3
- Pipelines as Code assumes that the secret referred in the
git_provider.secretspec and theRepositoryCR is in the same namespace.
NoteThe
tkn pac createandtkn pac bootstrapcommands are not supported on Bitbucket Server.
Additional resources
3.6. Interfacing Pipelines as Code with custom certificates
To configure Pipelines as Code with a Git repository that is accessible with a privately signed or custom certificate, you can expose the certificate to Pipelines as Code.
Procedure
-
If you have installed Pipelines as Code using the Red Hat OpenShift Pipelines Operator, you can add your custom certificate to the cluster using the
Proxyobject. The Operator exposes the certificate in all Red Hat OpenShift Pipelines components and workloads, including Pipelines as Code.
Additional resources
3.7. Using private repositories with Pipelines as Code
Pipelines as Code supports private repositories by creating or updating a secret in the target namespace with the user token. The git-clone task from Tekton Hub uses the user token to clone private repositories.
Whenever Pipelines as Code creates a new pipeline run in the target namespace, it creates or updates a secret with the pac-gitauth-<REPOSITORY_OWNER>-<REPOSITORY_NAME>-<RANDOM_STRING> format.
You must reference the secret with the basic-auth workspace in your pipeline run and pipeline definitions, which is then passed on to the git-clone task.
In the pipeline, you can reference the basic-auth workspace for the git-clone task to reuse:
- 1
- The
git-clonetask picks up thebasic-authworkspace and uses it to clone the private repository.
You can modify this configuration by setting the secret-auto-create parameter to either a false or true value, as required, in the TektonConfig custom resource, in the pipelinesAsCode.settings spec.