Este contenido no está disponible en el idioma seleccionado.
Chapter 3. Creating a Business Process
A business process is a graph that describes the order in which a series of steps must be executed using a flow chart. A business process consists of a collection of nodes that are linked to each other using connections. Each of the nodes represents one step in the overall process while the connections specify how to transition from one node to the other. Red Hat Process Automation Manager contains a predefined selection of node types to simplify business process creation.
Prerequisites
- Created the pizzaPlace project. For more information, see Chapter 1, Creating the Pizza Place project.
- Created the required users. For more information, see Chapter 2, Creating users.
3.1. Creating the pizza orders business process
The pizza orders business process determines whether or not the new order contains the required data before proceeding. If all of the specified data requirements are met, the order will be processed.
Procedure
-
In Business Central, go to Menu
Design Projects pizzaPlace. -
Click Add Asset
Business Process. In the Create new Business Process wizard, enter the following values:
-
Business Process:
pizzaOrders. -
Package: select
com.myspace.pizzaplace.
-
Business Process:
- Click Ok. The process designer opens.
-
In the upper-right corner, click the Diagram properties
 icon.
icon.
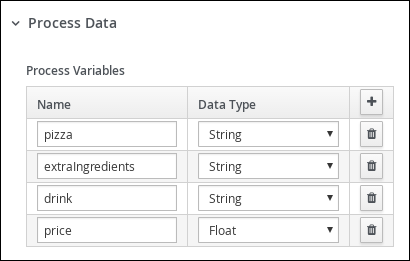
- Scroll down and expand Process Data.
Click
 four times next to Process Variables, and define the following variables:
Figure 3.1. Defining variables in the Process Data window
- In the process designer, click Save, then Save, to confirm your changes.
3.2. Creating the Process Order user task
Create a process order and add variables, such as the pizza ingredients and drink selection.
Procedure
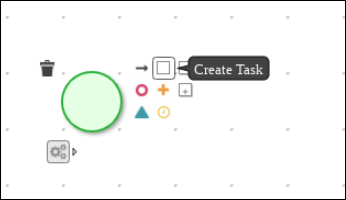
Click the start event to create an outgoing connection to a new task.
Figure 3.2. Outgoing connection from the start event to a user task
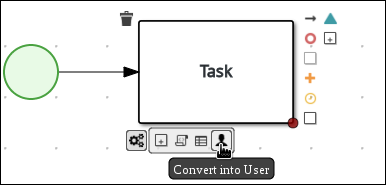
Convert the new task to a user task.
Figure 3.3. Convert into a User task
-
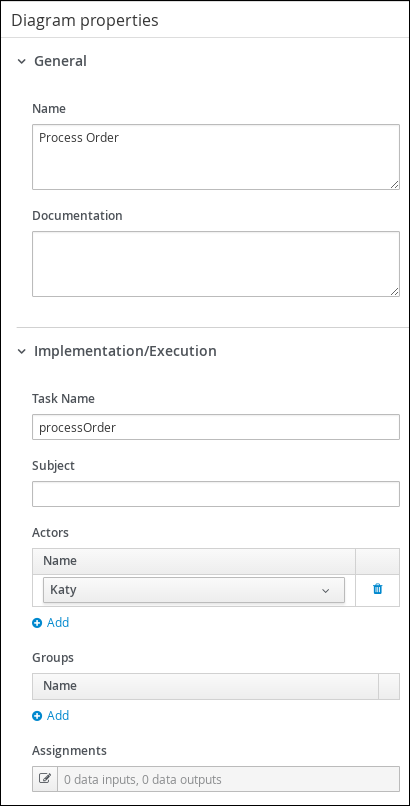
Click the user task and enter
Process Orderin the Name field. Expand Implementation/Execution and enter the following values:
-
Task Name:
processOrder Actor:
KatyFigure 3.4. The Diagram properties window
-
Task Name:
-
Click
 next to Assignments.
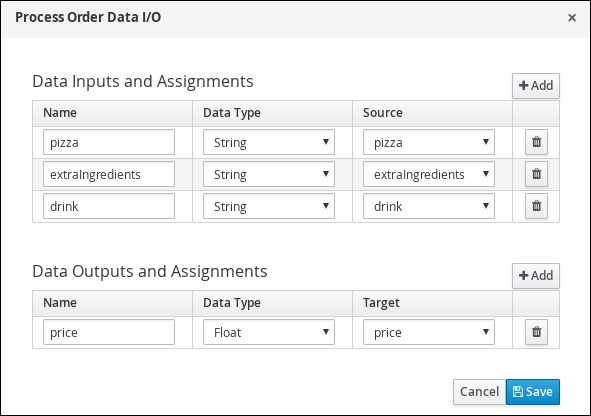
In the Process Order Data I/O window, create the following input assignments:
Figure 3.5. The Process Order Data input and output assignments
- Click Save.
- In the process designer, click Save, then Save, to confirm your changes.
3.3. Creating the Confirmation user task
Create an order confirmation user task, which will return the order details to the customer for confirmation before the final order is placed.
Procedure
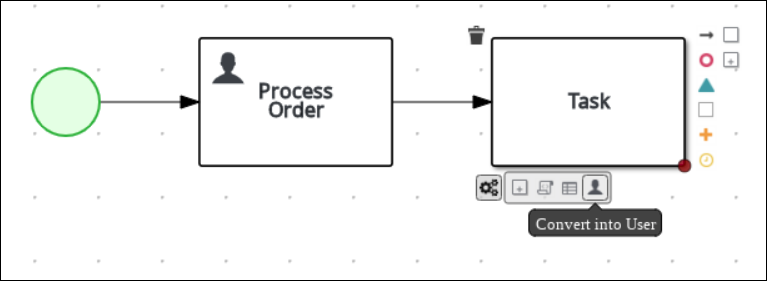
Click the Process Order task to create an outgoing connection to a new task.
Figure 3.6. Outgoing connection from the Process Order task to a user task

Convert the new task to a user task.
Figure 3.7. Convert into a User task
-
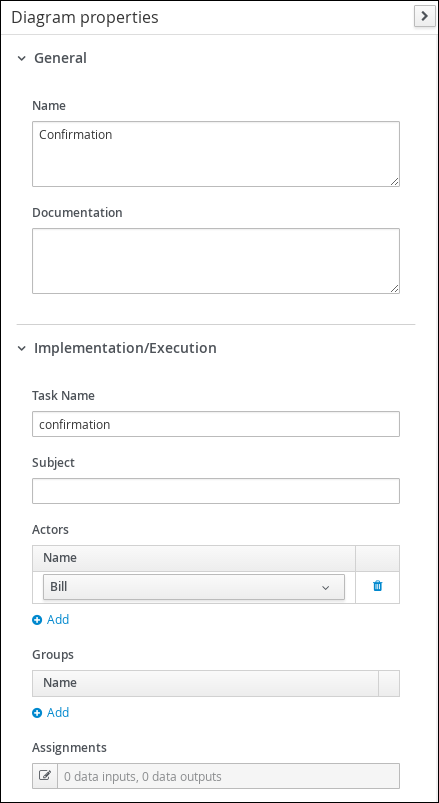
Click the user task and enter
Confirmationin the Name field. Expand Implementation/Execution and enter the following values:
-
Task Name:
confirmation Actor:
BillFigure 3.8. The Diagram properties window
-
Task Name:
-
Click
next to Assignments.
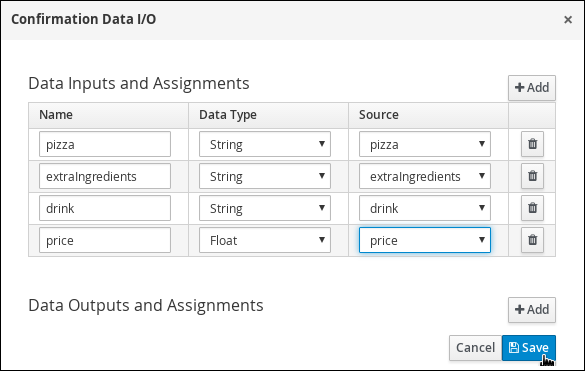
In the Confirmation Data I/O window, create the following input assignments:
Figure 3.9. The Confirmation Data input and output assignments
- Click Save.
- In the process designer, click Save, then Save, to confirm your changes.
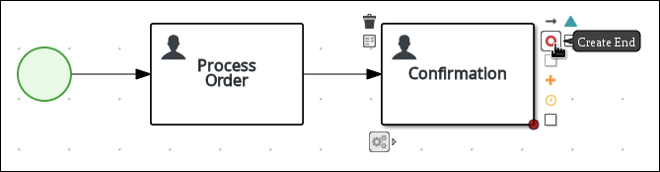
3.4. Adding an end node
Add an end node to signify the end of the pizza order process.
Procedure
Click the Confirmation user task and connect it to an end event.
Figure 3.10. Outgoing connection from the Confirmation user task
- In the process designer, click Save, then Save, to confirm your changes.